Hi guys, as part of an exercise I was involved with, I had to use the factory pattern to create a series of different objects, however I'd like to keep a list or map for what it matters of these objects and I'm getting a bit into troubles here.
So basically, I have a CSV file containing some data which I'd like to use to construct my objects: the data in the spreadsheet is arranged in the following cols:
name, surname, date_of_birth, type
and I'm essentially reading from the spreadsheet and using the factory pattern I'm building a series of Employee objects, either full time or part time (that's stored inside the type column in the spreadsheet).
This has been done but I'd like to keep a list of all the employees, regardless of whether they are full time or part time and I'm not sure how and where to populate that list, that's why I got a bit stack.
Here is what I've done (in a nutshell)
I have an abstract Employee class which is my model
a FulltimeEmployee and ParttimeEmployee concrete classes implementing the EMployee class
an EmployeeFactory class which determines whether the employee is part time or full time and builds the objects accordingly
a ReadData class which reads the spreadsheet and calls the factory class with the data needed to build the objects
a EmployeeTestingMain with main which creates a ReadData object and kicks off everything.
Ideally I'd like to keep a list of all these objects in my main class, but considering the above that's not entirely possible. So my question is, where do I create this list and where do I populate it from?
I feel that the list should be populated from the factory class because this is where I'm creating the full time/part time objects but then for me to access it form the main class I'd have to create this list as a static, and I'm not convinced. What are your thoughts?
I'm including the code below, just so you have an idea of what I've done.
Employee
package com.factoryPattern.model;

public abstract class Employee {

    private String name;
    private String surname;
    private String dob;
    private String type;

    public Employee(String name, String surname, String dob, String type) {
        this.name = name;
        this.surname = surname;
        this.dob = dob;
        if(type != null) {
            this.type = type;
        }
        else {
            this.type = "unspecified";
        }

    }

    public String getName() {
        return name;
    }

    public String getSurname() {
        return surname;
    }

    public String getDob() {
        return dob;
    }

    public String getType() {
        return type;
    }

    @Override
    public String toString() {
        return "Employee [name=" + name + ", surname=" + surname + ", dob=" + dob + ", type=" + type + "]";
    }

    public abstract void printDetails();

}
FullTimeEmployee
package com.factoryPattern.impl;

import com.factoryPattern.model.Employee;

public class FulltimeEmployee extends Employee{

    public FulltimeEmployee(String name, String surname, String dob, String type) {
        super(name, surname, dob, type);
    }
    @Override
    public void printDetails() {
        System.out.println("This is a full time employer");
        System.out.println(super.toString());
    }

}
PartTimeEmployee
package com.factoryPattern.impl;

import com.factoryPattern.model.Employee;

public class PartimeEmployee extends Employee {

    public PartimeEmployee(String name, String surname, String dob, String type) {
        super(name, surname, dob, type);
    }

    @Override
    public void printDetails() {
        System.out.println("This is a part time employer");
        System.out.println(super.toString());
    }

}
EmployeeFactory
package com.factoryPattern.factory;

import com.factoryPattern.impl.FulltimeEmployee;
import com.factoryPattern.impl.PartimeEmployee;
import com.factoryPattern.model.Employee;

public class EmployeeFactory {
    public static void buildEmployee(String name, String surname, String dob, String type) {
        Employee employee = null;
        switch(type) {
        case "part_time":
            employee = new PartimeEmployee(name, surname, dob, type);
            employee.printDetails();
            break;
        case "full_time":
            employee = new FulltimeEmployee(name, surname, dob, type);
            employee.printDetails();
            break;
        }

    }
}
Do you want to set up your dropshipping store with WooCommerce?
By default, WooCommerce doesn’t offer the features you will need to run a dropshipping business efficiently.
Luckily, there are excellent WooCommerce dropshipping plugins to fill that gap. These plugins allow you to run a dropshipping store while offering a seamless user experience to your customers.
In this article, we will compare some of the best WooCommerce dropshipping plugins to help you find the right solution for your business.
What Is Dropshipping?
Dropshipping is an online business where an eCommerce store doesn’t keep its products in stock. Instead, it fulfills the order by purchasing products from vendors and shipping them directly to the customers.
Due to low overhead, dropshipping has become a popular way to make money online. There are many places where you can find products offered by third-party vendors willing to ship them directly to your customers.
You can even get those products shipped with your branding and packaging. This allows you to build brand recognition to further expand your eCommerce business in the future.
How to Start a Dropshipping Business
Starting your own drop shipping eCommerce business is easy and requires a small investment.
You will need the following things to start a drop shipping business.
A domain name (This will be your store’s address, e.g., wpbeginner.com).
Dropshipping extension for WooCommerce (the platform to build an online store).
Website hosting prices start from $11.99 per month (usually paid annually), and a domain name will cost you around $14.99 per year.
Now, this is a significant amount if you are just starting out.
Luckily, Bluehost, one of the largest hosting companies in the world, has agreed to offer WPBeginner users a big discount on web hosting and a free domain name. They are also an officially recommended WooCommerce hosting provider.
You will be able to get started for $2.75 per month.
After you have signed up, Bluehost will automatically install WordPress for you.
You will receive an email with login details to enter your hosting dashboard.
From here, you need to log in to your WordPress site’s admin dashboard.
Now that your WordPress site is ready, the next step is to install and activate the WooCommerce plugin. For more details, see our step-by-step guide on how to install a WordPress plugin.
After you have installed WooCommerce, the next step is to choose a dropshipping plugin. This will help you convert your eCommerce store into a drop shipping platform.
Best WooCommerce Dropshipping Plugins
There are several WordPress dropshipping plugins, and each of them comes with a different set of features. You need to find the one that works best with your chosen marketplace.
Our #1 criterion for the best WooCommerce dropshipping plugin is that it must make it easy to import products.
The following are our top picks for the best WooCommerce dropshipping plugins.
AliDropship is an excellent WooCommerce dropshipping plugin made specifically to sell with AliExpress suppliers. It makes it super easy to import products directly from AliExpress into your WooCommerce store.
It lets you adjust pricing and inventory for dropshipping products. You can set pricing variables to automatically adjust pricing based on your profit settings.
The plugin automates order fulfillment with just the click of a button. It also tracks your orders and sends notification emails to customers about their order status.
It costs $89 (one-time payment) with free updates, lifetime usage, and unlimited orders and products.
WooDripship helps you easily import products from AliExpress into your WooCommerce store. It comes with a Google Chrome extension, which allows you to quickly add products to your store while browsing AliExpress.
The plugin automatically syncs product inventory to ensure your users don’t end up ordering an out-of-stock product. It also automatically syncs pricing, and you can even set rules to add pricing with your desired profit margin.
WooDropship also helps you import product images and edit them to remove the AliExpress watermark.
It has a lifetime membership with all features that costs $89.
DropshipMe is another WordPress dropshipping plugin that allows you to import products from a curated list of best-selling dropshipping items. This enables you to easily build a fully functional store with detailed product data.
All product titles, descriptions, and images are optimized for the best conversions. It also imports real customer reviews to add social proof to your product pages.
DropshipMe also picks the best suppliers with a proven track record to ensure that your orders are delivered on time and match customer expectations.
Pricing starts from $29 as a one-time payment based on the number of products you import. You can pay once to import those products and then buy another package to import more products if needed.
WP Amazon Shop is an Amazon affiliate and dropshipping plugin. As the name suggests, the plugin works with Amazon and allows you to easily search millions of products from your WordPress dashboard.
You can select and import Amazon products into your WooCommerce store with a few clicks. It automatically adds your affiliate ID to the product URLs.
It also allows you to add automatic percentage base pricing for dropshipping. This way, you don’t need to adjust pricing for each product you import. The plugin also allows you to import product images to your website. You can then crop and edit images in WordPress to your liking.
Pricing for the plugin starts from $59 for a single site license.
The WooCommerce Dropshipping extension allows you to import products using a CSV file. You can also manually add suppliers to your WooCommerce store.
It automatically sends order notification emails to the supplier for order fulfillment. It also generates a PDF packaging slip for the vendor to place on the shipment.
Unlike the other plugins on our list, WooCommerce Dropshipping doesn’t allow you to search for products and import them on the fly. It also does not have dynamic pricing, product availability sync, or some other features offered by popular plugins on this list.
Pricing for the plugin starts from $79 for a single site license with 1 year of support and updates.
Bonus Plugins for WooCommerce Dropshipping Stores
Apart from your dropshipping extension, you’ll need other plugins to grow your website. Here are a few plugins to help you run and grow your dropshipping business.
MonsterInsights is the best Google Analytics plugin for WordPress. It lets you track your best-selling products in WooCommerce. It also helps you make data-driven decisions when choosing products for your dropshipping store.
WP All Import is a free WordPress plugin that allows you to easily import products into your existing dropshipping store from any XML or CSV file.
It comes with an intuitive drag-and-drop importer that allows you to select or exclude any products on the fly. You can import external products, product images, variable products, and more.
We hope this article helped you find the best WooCommerce dropshipping plugins for your eCommerce store. You may also want to check out our WordPress and WooCommerce guides to set up and grow your dropshipping business.
Can you afford to gamble on an idea for an app or on an assumption about how consumers will respond to it? I bet your clients aren’t too comfortable doing that either, especially when it’s their money and reputation on the line.
An app can be a risky investment for a business if it’s not approached with care. Even then, the most well-researched of app concepts can lead to disappointing user download and retention rates.
Whether you’re in the business of building mobile apps or SaaS products, have you thought about using minimum viable products (MVPs) to safeguard your clients’ investments?
Not only do MVPs allow you to get projects through your pipeline more quickly, but they enable developers to create stronger products overall for their clients.
Here’s what you need to know.
The Value Of MVPs In App Development
Frank Robinson was the first to define what an MVP was back in 2001. At its root, an MVP is a scaled-back version of a product that’s released to the public for the purposes of testing and validating the product’s concept and viability on the market.
Eric Ries, the author of The Lean Startup, was one of the early advocates of MVPs and he had some interesting things to say about why and how we should use them back in 2013:
The point isn’t to create leaner products. It’s to get the most basic version or concept of an app into the hands of adopters and evangelists. That way, the developer collects user feedback early on that, in turn, is used to properly shape the product into its final version.
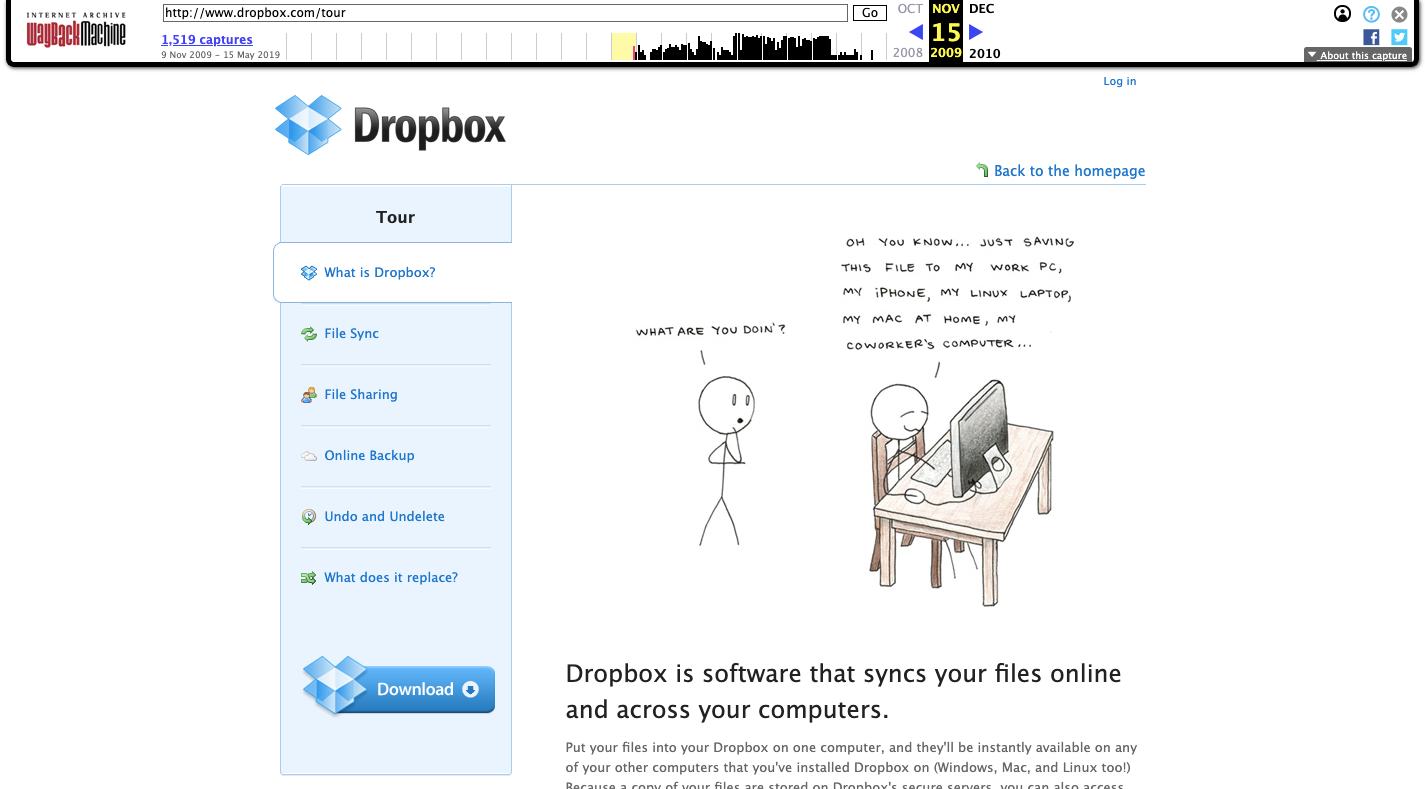
Take Dropbox, for example. This is what the product’s landing page looked like back in 2009:
It’s a simple page that includes the company name, an explanation of the software and a link to download the desktop or mobile app. For users that want to know more about what they’re getting, the “tour” took them to a mini-site with more information:
Dropbox’s MVP provides basic details on its software. (Source: Dropbox) (Large preview)
That’s a far cry from the powerhouse storage, content creation and collaboration service that both consumers and businesses use today:
But that’s the beauty of the MVP. Essentially, it forces developers to build products with only the minimum — but absolutely essential — set of features.
Dropbox didn’t need to foresee the power of cloud storage services or to create something that wasn’t right for the market at the time. All it needed to do was launch a simple solution that users needed then and there. Users could then validate the product and provide the company with the direction it needed to take its product.
There are other benefits to creating an MVP:
You can get the product on the market much more quickly than if you were to wait for the full app to be developed.
You get a chance to test the viability of the concept before you commit too many man-hours to the job.
You give yourself more room (and maybe even a little forgiveness, too) to work out the kinks in your final product.
You save money with an MVP. First, because you only spend time building features that are absolutely needed. Second, because you might find that users are content with the scaled-back version and you won’t need to do much more work to finalize the product.
With a tested idea that’s been embraced by users, you have something to bring to investors which could make the rest of the development process go much more smoothly.
As Eric says in the video, an MVP is the best way to maximize your chances of success and to do so in a much shorter timeframe than complete product development allows for.
How To Build A Valuable MVP That Users Want to Test
Your MVP’s success rides on its ability to leverage insights and feedback provided by early adopters — the ones who are 100% on your side, believe in the product and want to help you fill in the gaps. So, don’t lose sight of that.
An MVP is not some half-assed app thrown together. It still needs to be valuable.
Here are some things you must do before you build and launch your MVP:
1. Decide the Product’s Purpose
If you want your app to succeed, it needs to uniquely solve a problem for a large segment of the consumer base. That means your MVP needs to clearly break down what the product does and why users need it.
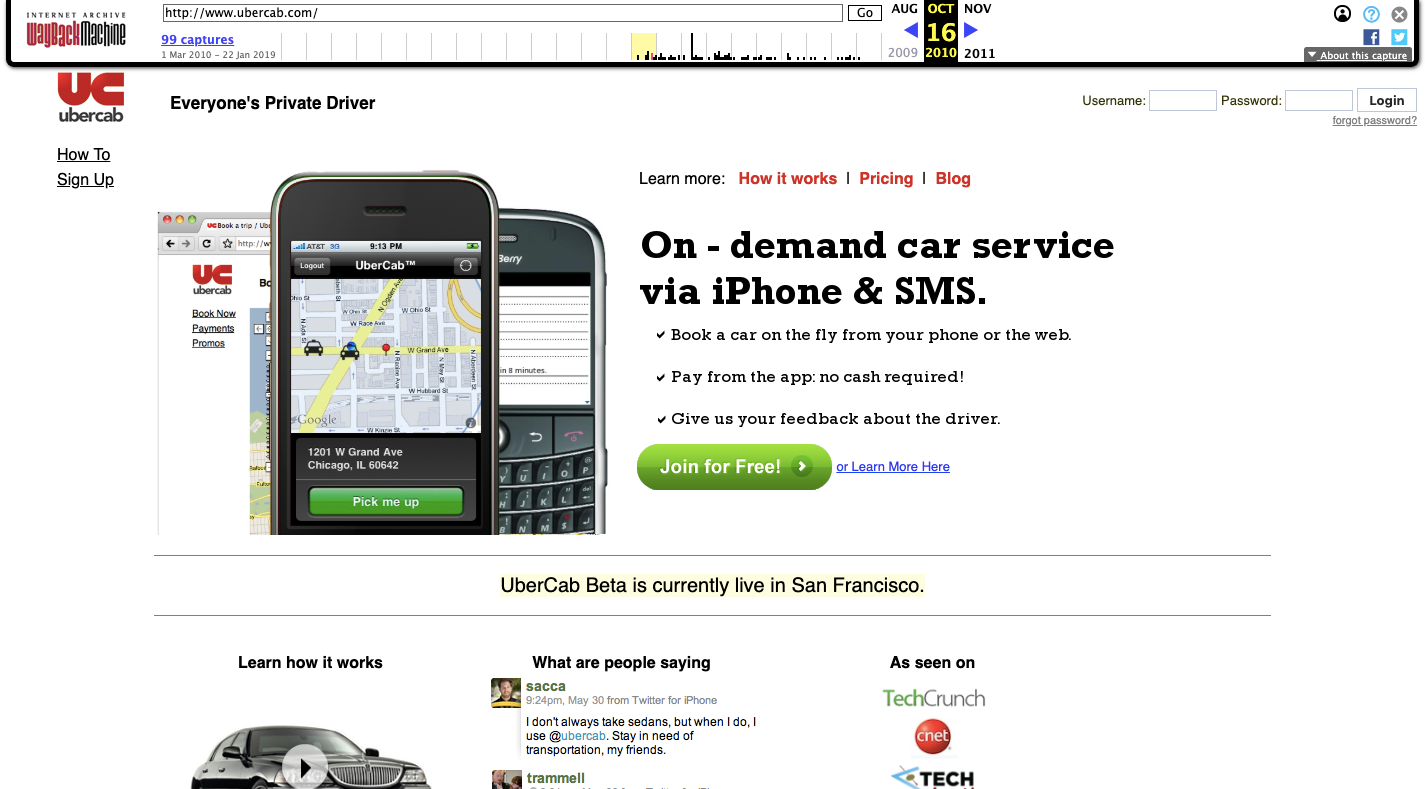
For example, this is how Uber (then UberCab) sold itself during its beta in 2010:
The website for Uber’s predecessor, UberCab, in 2010. (Source: Uber) (Large preview)
Like the Dropbox example earlier, it’s extremely simple in concept and no-frills in terms of explaining what it is or why it’s so valuable. But you still get the idea. It’s an app that lets people order and pay for a car from their phone. Essentially, it’s a convenient substitution for cabs.
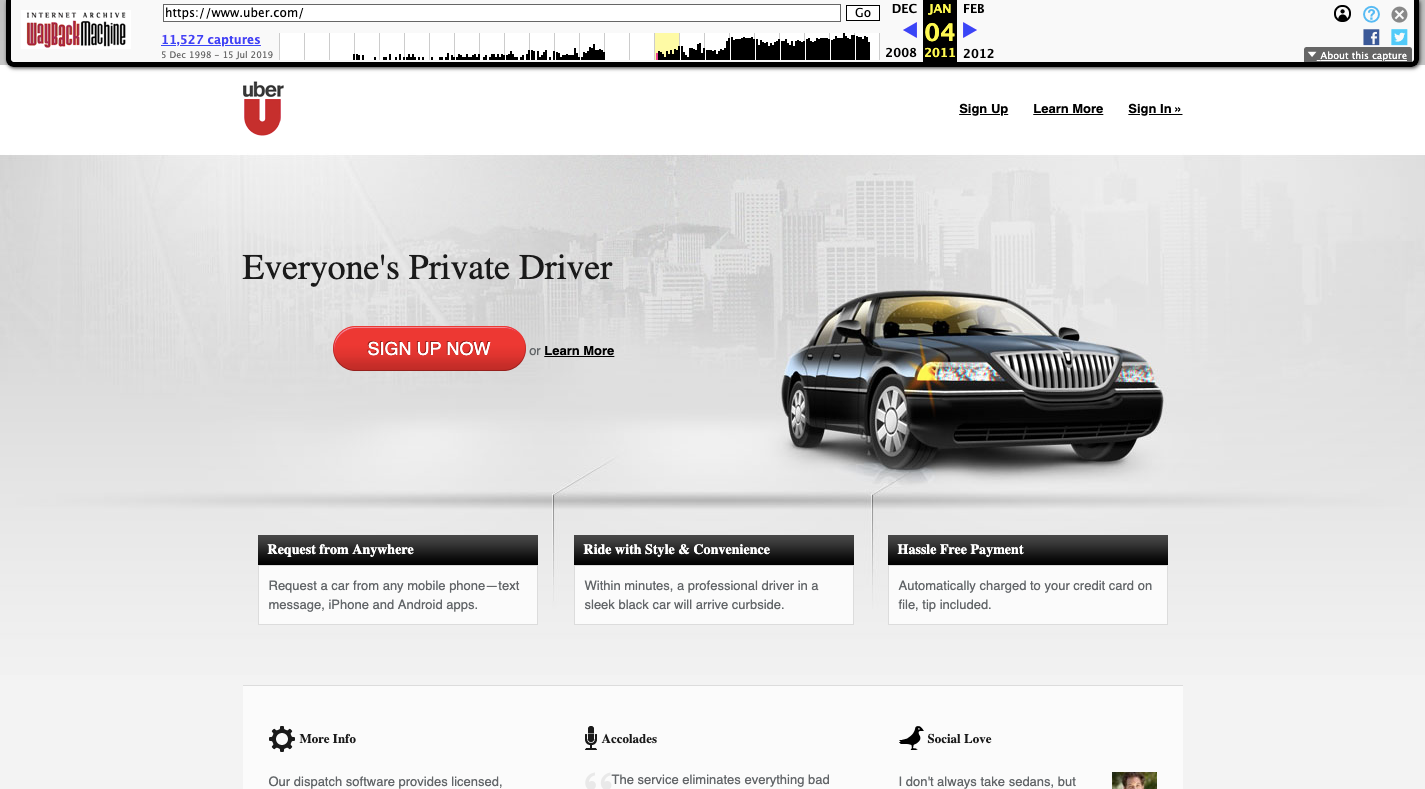
Jump ahead a year, you’ll see that Uber started to firm up its identity and value proposition with its official product launch:
Uber starts to refine its image in 2011 after beta testing completes. (Source: Uber) (Large preview)
This was back in 2011 when Uber dropped the “Cab” and labeled itself an on-call private driving service. It was a way to let consumers experience certain luxurious privileges they might not otherwise have been able to afford.
Although that’s not the final form Uber ended up taking, you can see how early user feedback helped the product developers decide which parts of the platform were really worth highlighting and building upon.
This is exactly the kind of thing that will happen when you build an MVP and start to gather valuable insights from users about what they want and which features they need. But, first, you have to start by getting clear on its general purpose and value. You can refine it later on.
2. Locate Your Ideal Users
You have your concept. Now, it’s time to figure out if consumers are going to want it. Even though an MVP is cheaper and faster to build doesn’t mean it won’t end up a complete waste of your time and resources. You have to at least confirm that the interest is there and then define, in clear terms, who your target user is.
Specifically, you need to think about location.
In the Uber example above, you can see that the beta product was only tested in San Francisco.
The initial version of Airbnb did something similar. Joe Gebbia, the co-founder of Airbnb, tells the story of his MVP on a 2017 episode of How I Built This.
Basically, he was low on cash and decided to rent out air mattresses in his San Francisco apartment for an upcoming conference. Knowing that hotels would be short on rooms, he figured he could make money off of it. But it wasn’t just rent money he made. He got an idea for a new business after a lot of people showed interest in renting space in his apartment.
So, he and his partner created a website called “AirBed & Breakfast”. Once it went live, though, it spread far beyond the original San Francisco test area.
An early version of the AirBnB concept from 2009. (Source: Airbnb) (Large preview)
In 2009, there were AirBnB rentals in 72 countries. Today, you practically have your pick of the litter in any town around the world. But it all started with San Francisco.
So, as you set about building your product, think about where the best places will be to test and get feedback on your app before you do a full release of it. You want the area to be a good representation of the population and demographics you aim to target. You also have to make sure there’s a demand for the product and that your target users can afford to use it (once you start monetizing).
3. Choose an MVP Format
The format of your MVP is another important thing to think about before you do any building.
In some cases, you’re going to have to build a workable product. For example, let’s say your goal is to build a new dating app. There are tons of dating apps on the market; with two apps, in particular, that continually dominate the pack. You know that building any sort of mobile dating app would be a huge and costly gamble, no matter how much you cut back on features. So, what do you do?
You could build a PWA dating app instead. The costs would be lower, the time-to-market significantly faster and it would be much easier to get your MVP in front of users than if you were to put something on the app store. You might even find that the PWA suffices in terms of product format in the end.
In other cases, the MVP won’t even need to be an actual product. It can just be a website announcing the product or providing a wireframe/prototype of the concept.
In 2018, Rand Fishkin announced that he was leaving Moz, the company he co-founded in 2004. Simultaneously, he announced a new product called SparkToro.
The SparkToro MVP landing page describes the upcoming product, but doesn’t provide access. (Source: SparkToro) (Large preview)
Now, Rand is someone who can launch a concept as an MVP and for it to still be successful. He has a long-standing history and solid reputation in this space, so, of course, users are going to gravitate to this new product despite it being unavailable for consumption.
For those of you building an MVP for a new brand, you probably won’t get so lucky. However, it’s really going to depend on what type of product you’re planning to build.
If there’s absolutely no way to create the product in a scaled-back version, then this could be an option worth exploring. It would also be a good idea if you or your client have absolutely no funds and need validated feedback to prove the viability of your concept to investors. That’s really the only way I see Joe Schmoes getting away with this.
If you do go this route, you’re going to need a really good explainer section, too. This is what SparkToro has on its What We’re Building page:
SparkToro’s website explains what it’s working on building. (Source: SparkToro) (Large preview)
I think for the kinds of users that would gravitate to a product like this — namely, advanced marketers that actually need this kind of solution — this way of testing the concept and viability of the features is good. It’s written in their language and with visuals they understand.
However, for users that aren’t familiar with your brand or aren’t as well-trained as Rand’s audience, a wireframe or prototype of the product’s dashboard would be a better idea. Even an explainer video from the founder would work well. It just needs to be something that convinces users to sign up and start providing feedback as early as possible.
4. Find Your Actual Minimum
If you watch the video of Eric Ries, you’ll see that he provides a formula for defining the minimum features of your MVP. It goes like this:
# of minimum features you think you need / 8 = The True Minimum
It makes sense if that formula makes you feel apprehensive. But think about it like this:
You build an MVP that is as simple as it can possibly be without it becoming useless. You ship it out to users and give them a chance to provide feedback.
A few things might happen as a result:
They absolutely hate it.
They complain to you about how Feature A sucks and how they wish it did something else or how Feature B was almost there, but then fell short of expectations. That’s perfect! Your test users will tell you exactly what they want from your product. Get enough consistent feedback and you’ll have a list of must-have features that need to appear in the next version of the app.
They’re okay with it, but don’t love it… yet.
Again, it’s okay if users aren’t 100% happy with it. You’ve given them an opportunity to try out a product that’s going to be awesome and they see the promise in it. Give them a chance to speak their mind and let you know what they loved and what they didn’t. Then, focus on strengthening those weak points and including the features that will make it a real game-changer.
They’ll love it as is.
Let’s be honest, this isn’t likely to happen. But wouldn’t it be great if feedback was so scarce that you could roll with the MVP as is? Plus, think of all that time you saved yourself and money you saved your client by cutting the product back so much. Sometimes simpler is better.
Don’t forget to thank these users for their feedback and support of the product. There’s no way you could create the solution they need without their insights and so it would be in your best interest to recognize the role they play in this. In return, they’ll continue to be your product’s evangelists long after launch.
5. Design Your Landing Page Early
Although I’m not too keen on a landing page or mini-website serving solely as the MVP (for the aforementioned reason), I do think it’s a good idea to get a mobile-first landing page up while the MVP is in the works.
Gaming apps and SaaS would be especially good choices to launch a beta signup page early. Here’s an example from Hytale:
Gaming app Hytale uses its landing page to educate users on the game and get beta users before launch. (Source: Hytale) (Large preview)
If you want your MVP to succeed, you should put some of that extra time you now have towards building out a strong landing page. Start by researching the early websites from the companies featured in this post. They all successfully explained their concepts, soft-marketed their products and convinced early users to sign up for testing.
While you’re at it, you should set up your blog, social media accounts and community features (with an active newsletter), too. You never know. Someone might find the announcement of your MVP somewhere other than Google search and decide they want to bookmark the site or sign up early to be a beta tester.
It’s never too soon to start getting buy-in from your user set!
6. Define Your Success Criteria
Last but not least, you have to decide how you’re going to measure the success of your MVP. Because it’s not just about the quality of feedback.
Consider the following:
How many visitors visited your landing page?
How many of those people signed up for the beta?
How many users did you retain over a set period (1 month, 3 months, etc.)?
How many people provided feedback and was it a substantial enough set to make solid decisions about the product design and features going forward?
Did the demographics of your user set match the audience you designed the app for? Why do you think that was?
How much time, on average, did users spend inside the app?
Which features did they spend the most time with? The least?
Which features received the most favorable feedback? The least?
Were there certain users who had a positive experience with the product? What made them different?
Take all of the information you gathered — from the original landing page, the beta testers, the usage data and so on — and really look over it all. What is it telling you about the MVP you’ve designed? And, now, what are you going to do with it?
Will you leave it as is or build it out to the full product it’s meant to be and that users want?
Will it be easy to attract and acquire customers based on the usage data you’ve collected? What’s more, will you be able to retain those users or is it more cost-effective to keep your app browser-side instead of in native app form?
And, finally, how much can and should you charge for access to the product? Will it ultimately make the company profitable or is there just not enough interest (at least in the monetization side of things) to make this a worthwhile venture?
I know I’m leaving you with a lot of questions, but there’s a lot you’re going to need to sort out once the tests begin. Plus, it’s the whole reason you created an MVP in the first place. This user feedback is invaluable to the process and is the only way you’re going to know if it’s a product worth pushing out to the market or taking back to the drawing board.
If you need to build a website for a fitness club, gym, or personal trainer then this post will give you all the information you need to complete the project with ease. When it comes to choosing a fitness theme for WordPress to enhance your website and service offerings, just read this post. Then you […]


 If you need to build a website for a fitness club, gym, or personal trainer then this post will give you all the information you need to complete the project with ease. When it comes to choosing a fitness theme for WordPress to enhance your website and service offerings, just read this post. Then you […]