In this week's roundup, WebKit's method for truncating multi-line text gets some love, a note on calculations using custom properties, and a new OpenType feature that prevents typographic logjams.
Truncating mutli-line text
The CSS -webkit-line-clamp property for truncating multi-line text is now widely supported (see my usage guide). If you use Autoprefixer, update it to the latest version (9.6.1). Previous versions would remove -webkit-box-orient: vertical, which caused this CSS feature to stop working.
Note that Autoprefixer doesn't generate any prefixes for you in this case. You need to use the following four declarations exactly (all are required):
.line-clamp {
  overflow: hidden;
  display: -webkit-box;
  -webkit-box-orient: vertical;
  -webkit-line-clamp: 3; /* or any other integer */
}
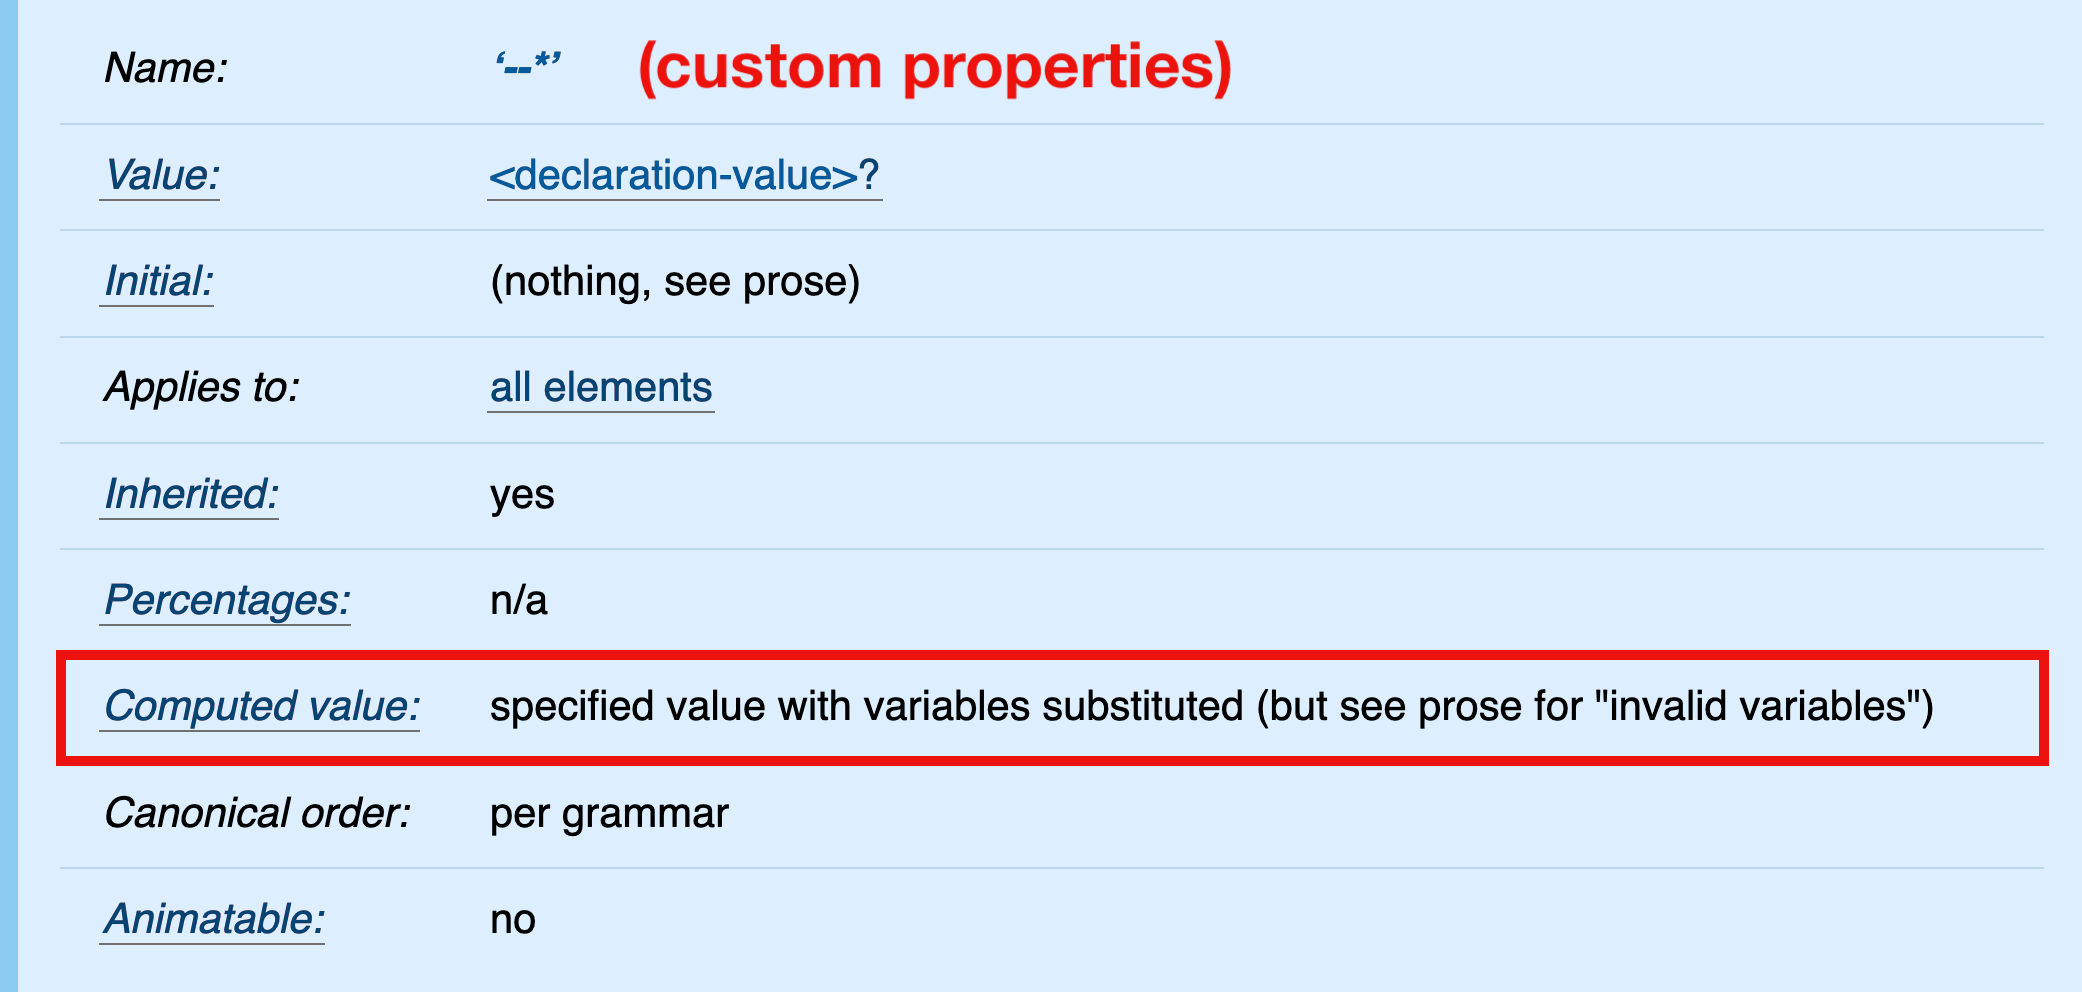
In CSS, it is currently not possible to pre-calculate custom property values (spec). The computed value of a custom property is its specified value (with variables substituted); therefore, relative values in calc() expressions are not "absolutized" (e.g., em values are not computed to pixel values).
It may appear that the calculation in the above example is performed on the root element, specifically that the relative value 1em is computed and added to the absolute value 10px. Under default conditions (where 1em equals 16px on the root element), the computed value of --large would be 26px.
But that's not what's happening here. The computed value of --large is its specified value, calc(1em + 10px). This value is inherited and substituted into the value of the font-size property on the <blockquote> element.
blockquote {
  /* the declaration after variable substitution */
  font-size: calc(1em + 10px);
}
Finally, the calculation is performed and the relative 1em value absolute-ized in the scope of the <blockquote> element — not the root element where the calc() expression is declared.
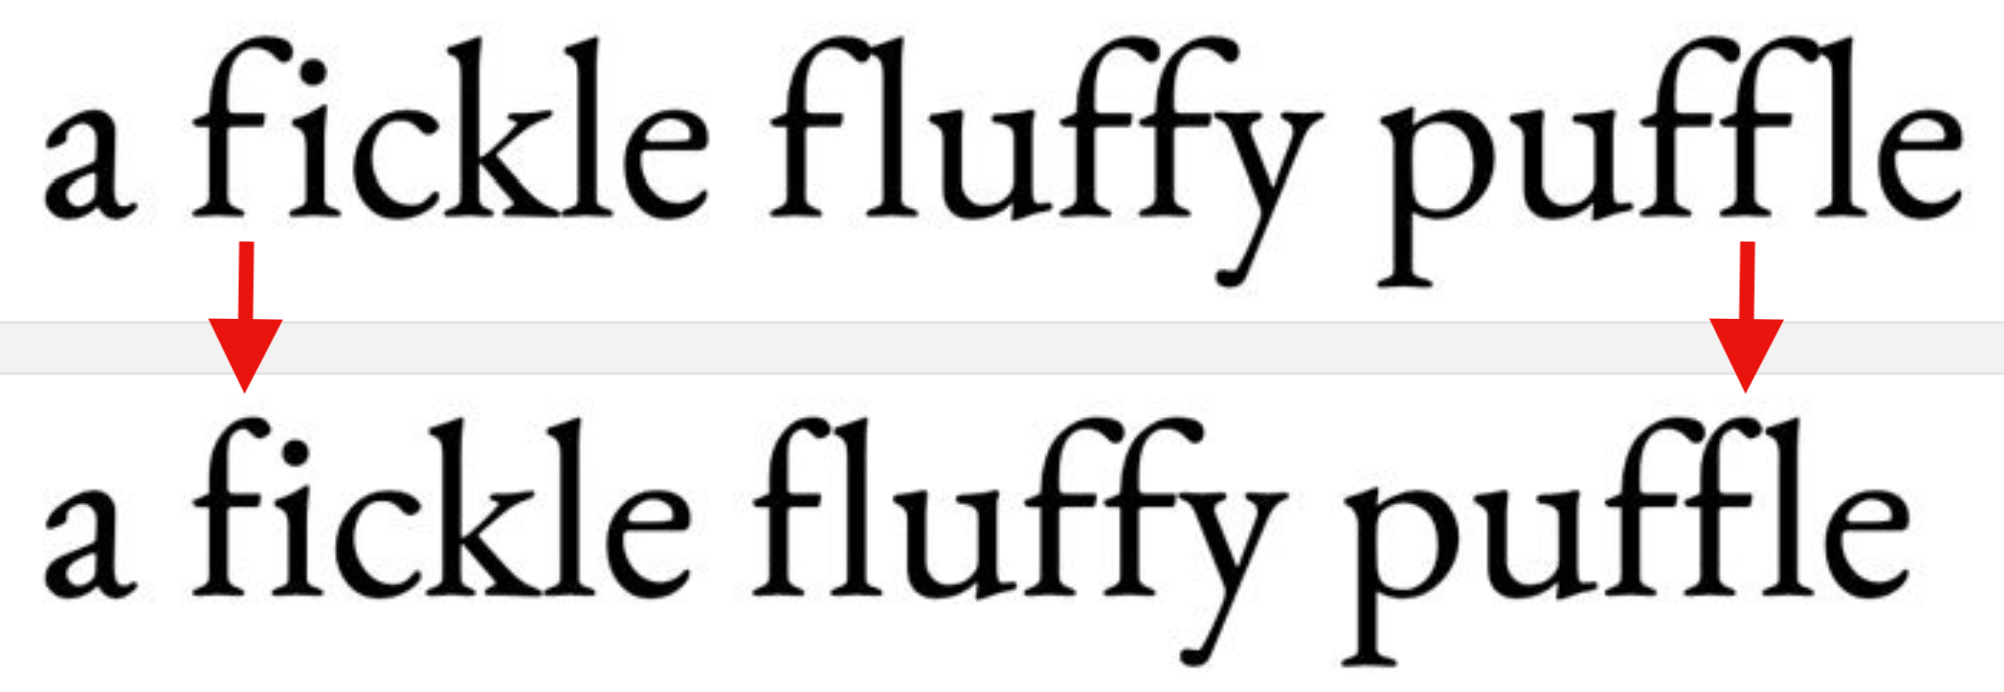
The "Contextual Alternates" OpenType feature ensures that characters don't overlap or collide when ligatures are turned off. You can check if your font supports this feature on wakamaifondue.com and enable it (if necessary) via the CSS font-variant-ligatures: contextual declaration.
It’s highly recommended that all users upgrade to 1.6.9 to patch the security issue. Details of the vulnerability will be published after users have had time to upgrade. In addition to patching the security issue, this version also improves the debug log by hiding data such as the ABSPATH directory of the WordPress install and login cookies.
“Unfortunately in the past users have copied the log file data into forum posts. A warning message has been added asking the site owner not to publish the debug log,” Donncha Ó Caoimh said.
Also worth noting is that after updating to 1.6.9, existing debug logs will be deleted.
Firstly a little overview - my site uses Wordfence (this is not the issue - just the reason for this to begin with)
-- Even if Wordfence is disabled this should still work. its just what brought this to light.
And... I have been getting numerous login attempts from different places and IP's using the hidden password recovery, or simply force loading names into the admin page.
I have seen a pattern emerging, whereas the popular name tries are: administrator, wpadmin, admin, wpadministrator, and a few others. Sometimes in the range of 150+ an hour, quite amazing, and annoying at the same time.
Wordfence does an abmirable job of blocking the attempts, however, I've noticed the same naming structure is applied repeatedly. And...Wordfence does its job, blocks the attempt, and themn proceeds to notify me about it - this has led to an inordinate amount of the exact same mail with the exact same login pattern.
Whew....!
So I figured I would add some kind of filtering to the login page by adding this ( part of the larger project - but its where it hanging up ) Not hanging up really, just only recognizes ONE name structure.....
public static function gtfo_admin_login( $login = '' ) {
    if ( 'administrator' != $login ) {
        return false;
    }

    wp_redirect( 'http://www.french-bukkake.com' ); // This is an example.
    exit;
}
So if some uses the name administrator, it forwards them to the (sorry-france) xxxx.page
I would like this to use some kind of array, where it uses -
It would read the contents of the text file, regard it as an array and if it finds a match - BOOM - off goes the perpetrator ( I don't think bots can handle a return redirect, to try it again ). So presumably the login pattern should go down somewhat...
Netlify, the powerful and awesome web host we all know and love, now is offering AWS Lambda functions built right in. You make a folder for all your functions, and they become relative paths you can hit to execute those functions. One reason you might wanna do that? Keeping your third-party API keys safe! Just another ingredient that make your fast static sites... not so static.
Atlassian has recently announced a set of new Jira Cloud workflow APIs that expand the ways that developers can interact with the company’s issue tracking platform. The new APIs provide users with the ability to create new custom workflow rules, retrieve workflows, and find workflows associated with a set of projects.
👋 Hey folks! Silvestar pitched this post to us because he is genuinely enthusiastic about JAMstack and all of the opportunities it opens up for front-end development. We wanted to call that out because, although some of the points in here might come across as sponsored content and Netlify is indeed a CSS-Tricks sponsor, it’s completely independent of Netlify.
Being a JAMstack developer in 2019 makes me feel like I am living in a wonderland. All these modern frameworks, tools, and services make our lives as JAMstack developers quite enjoyable. In fact, Chris would say they give us superpowers.
Yet, there is one particular platform that stands out with its formidable products and features — Netlify. You’re probably pretty well familiar with Netlify if you read CSS-Tricks regularly. There’s a slew of articles on it. There are even two CSS-Tricks microsites that use it.
This article is more of a love letter to Netlify and all of the great things it does. I decided to sit down and list my most favorite things about it. So that’s what I’d like to share with you here. Hopefully, this gives you a good idea not only what Netlify is capable of doing, but helps you get the most out of it as well.
You can customize your site’s Netlify subdomain.
When creating a new project on Netlify, you start by either:
choosing a repository from a Git provider, or
uploading a folder.
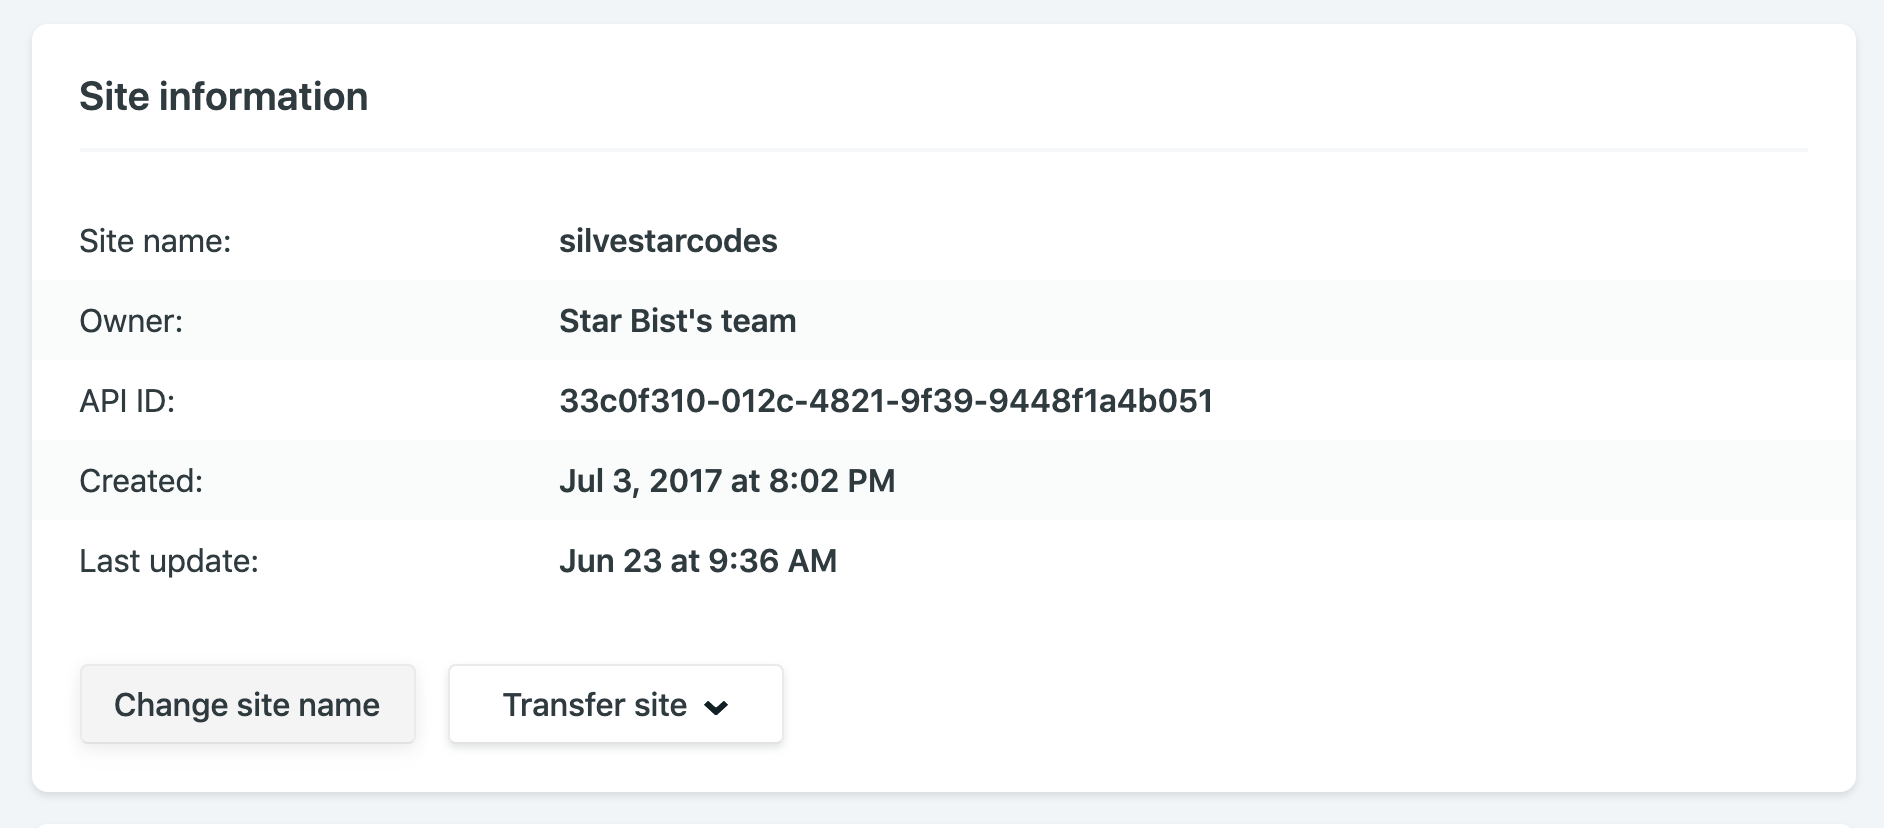
The project should be ready in a matter of minutes, and you could start configuring it for your needs right away. Start by choosing the site name.
The site name determines the default URL for your site. Only alphanumeric characters and hyphens are allowed.
Netlify randomly creates a default name for a new project. If you don’t like the name, choose your own and make it one that would be much easier for you to remember.
The "Site information" section of the Netlify dashboard.
For example, my site name is silvestarcodes, and I could access my site by visiting silvestarcodes.netlify.com.
You can manage all your DNS on Netlify.
If you are setting up an actual site, you would want to add a custom domain. From the domain management panel, go to the custom domains section, click on the "Add custom domain" button, enter your domain, and click the "Verify" button.
Now you have two options:
Point your DNS records to Netlify load balancer IP address
For the second option, you should add or update the nameservers on your domain registrar. If you didn’t buy the domain already, you could register it right from the dashboard.
Netlify has a service for provisioning DNS records called Netlify DNS.
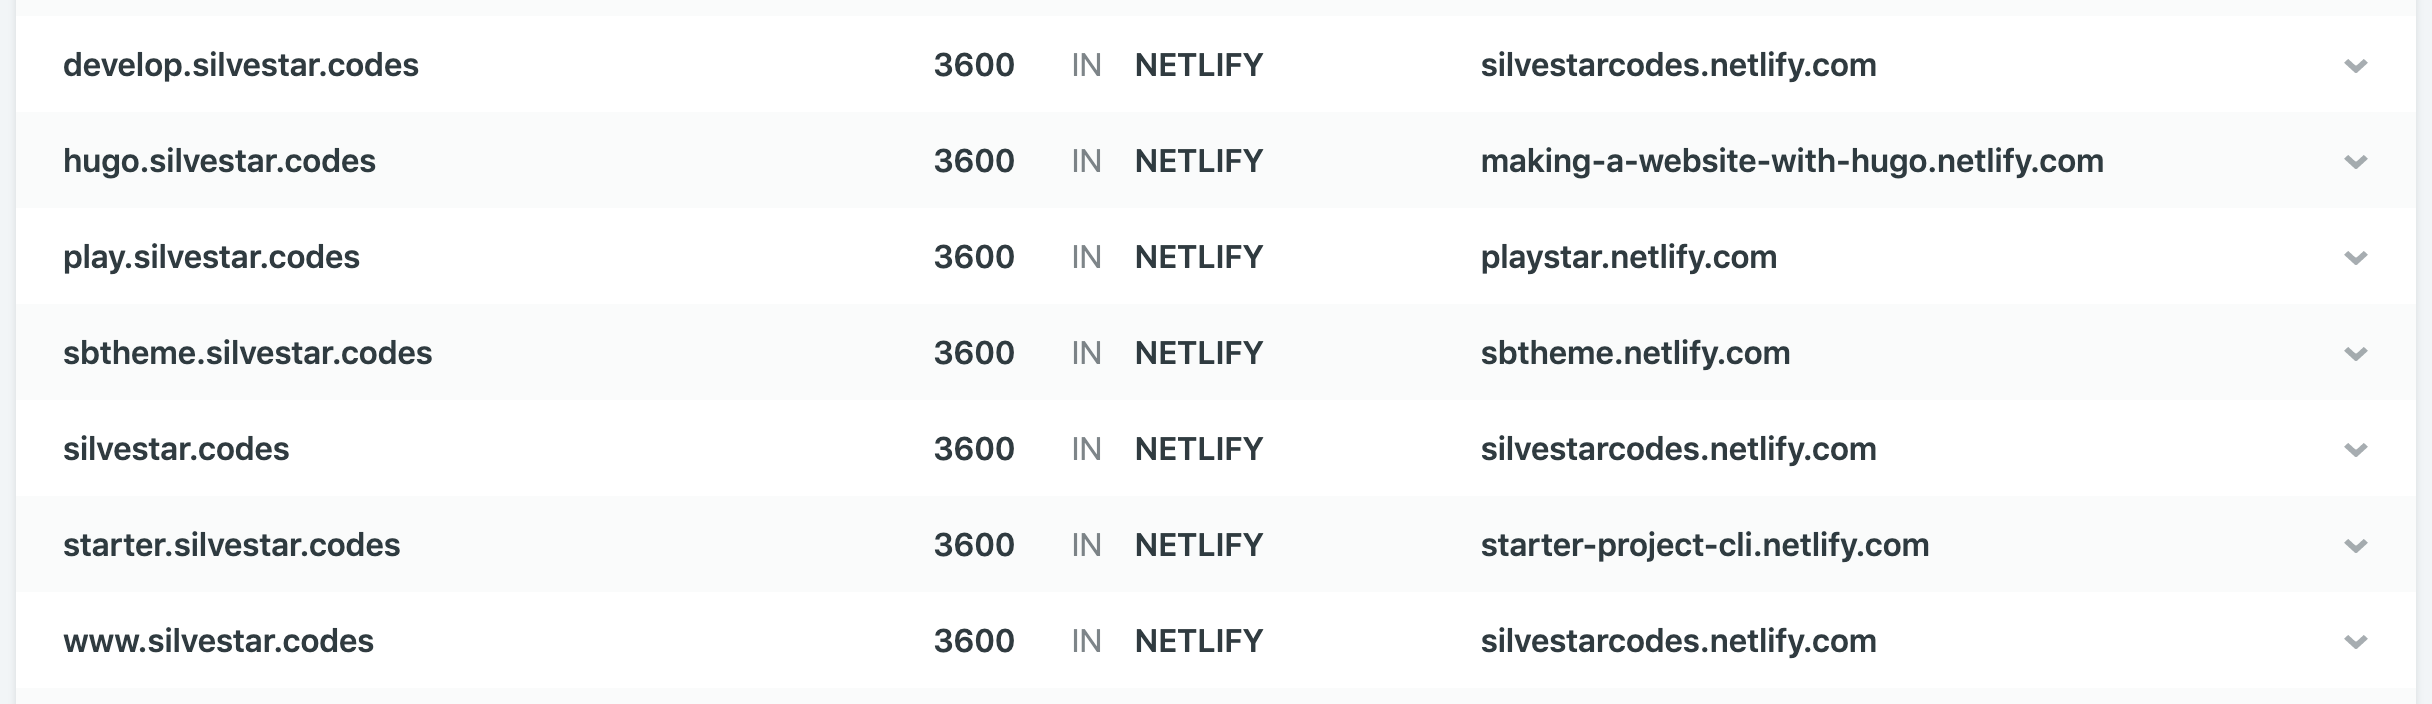
Once you have configured the custom domain, you could handle your DNS records from the Netlify dashboard.
The "DNS" section of the Netlify dashboard.
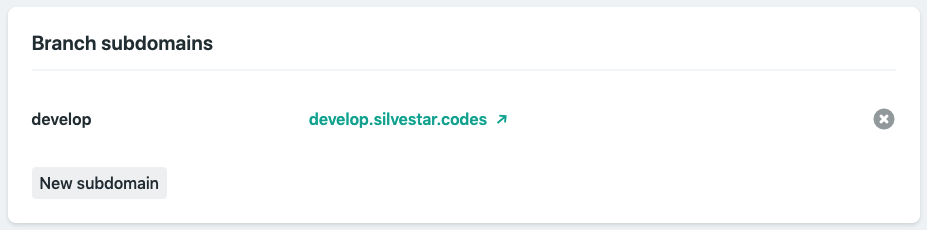
If you want to set up a dev subdomain for your dev branch to preview development changes for your site, you could do it automatically. From the Domain Management section in the Settings section of your site, select the dev branch and Netlify would add a new subdomain dev for you automagically. Now you could see the previews by visiting dev subdomain.
The "Subdomains" section of the Netlify dashboard.
You could configure a subdomain for a different website. To achieve this, create a new Netlify site, enter a new subdomain as a custom domain, and Netlify would automatically add the records for you.
As an icing on the DNS management cake, Netlify lets you create Let’s Encrypt certificates for your domain automatically... for free.
You can inject snippets into pages, which is sort of like a Tag Manager.
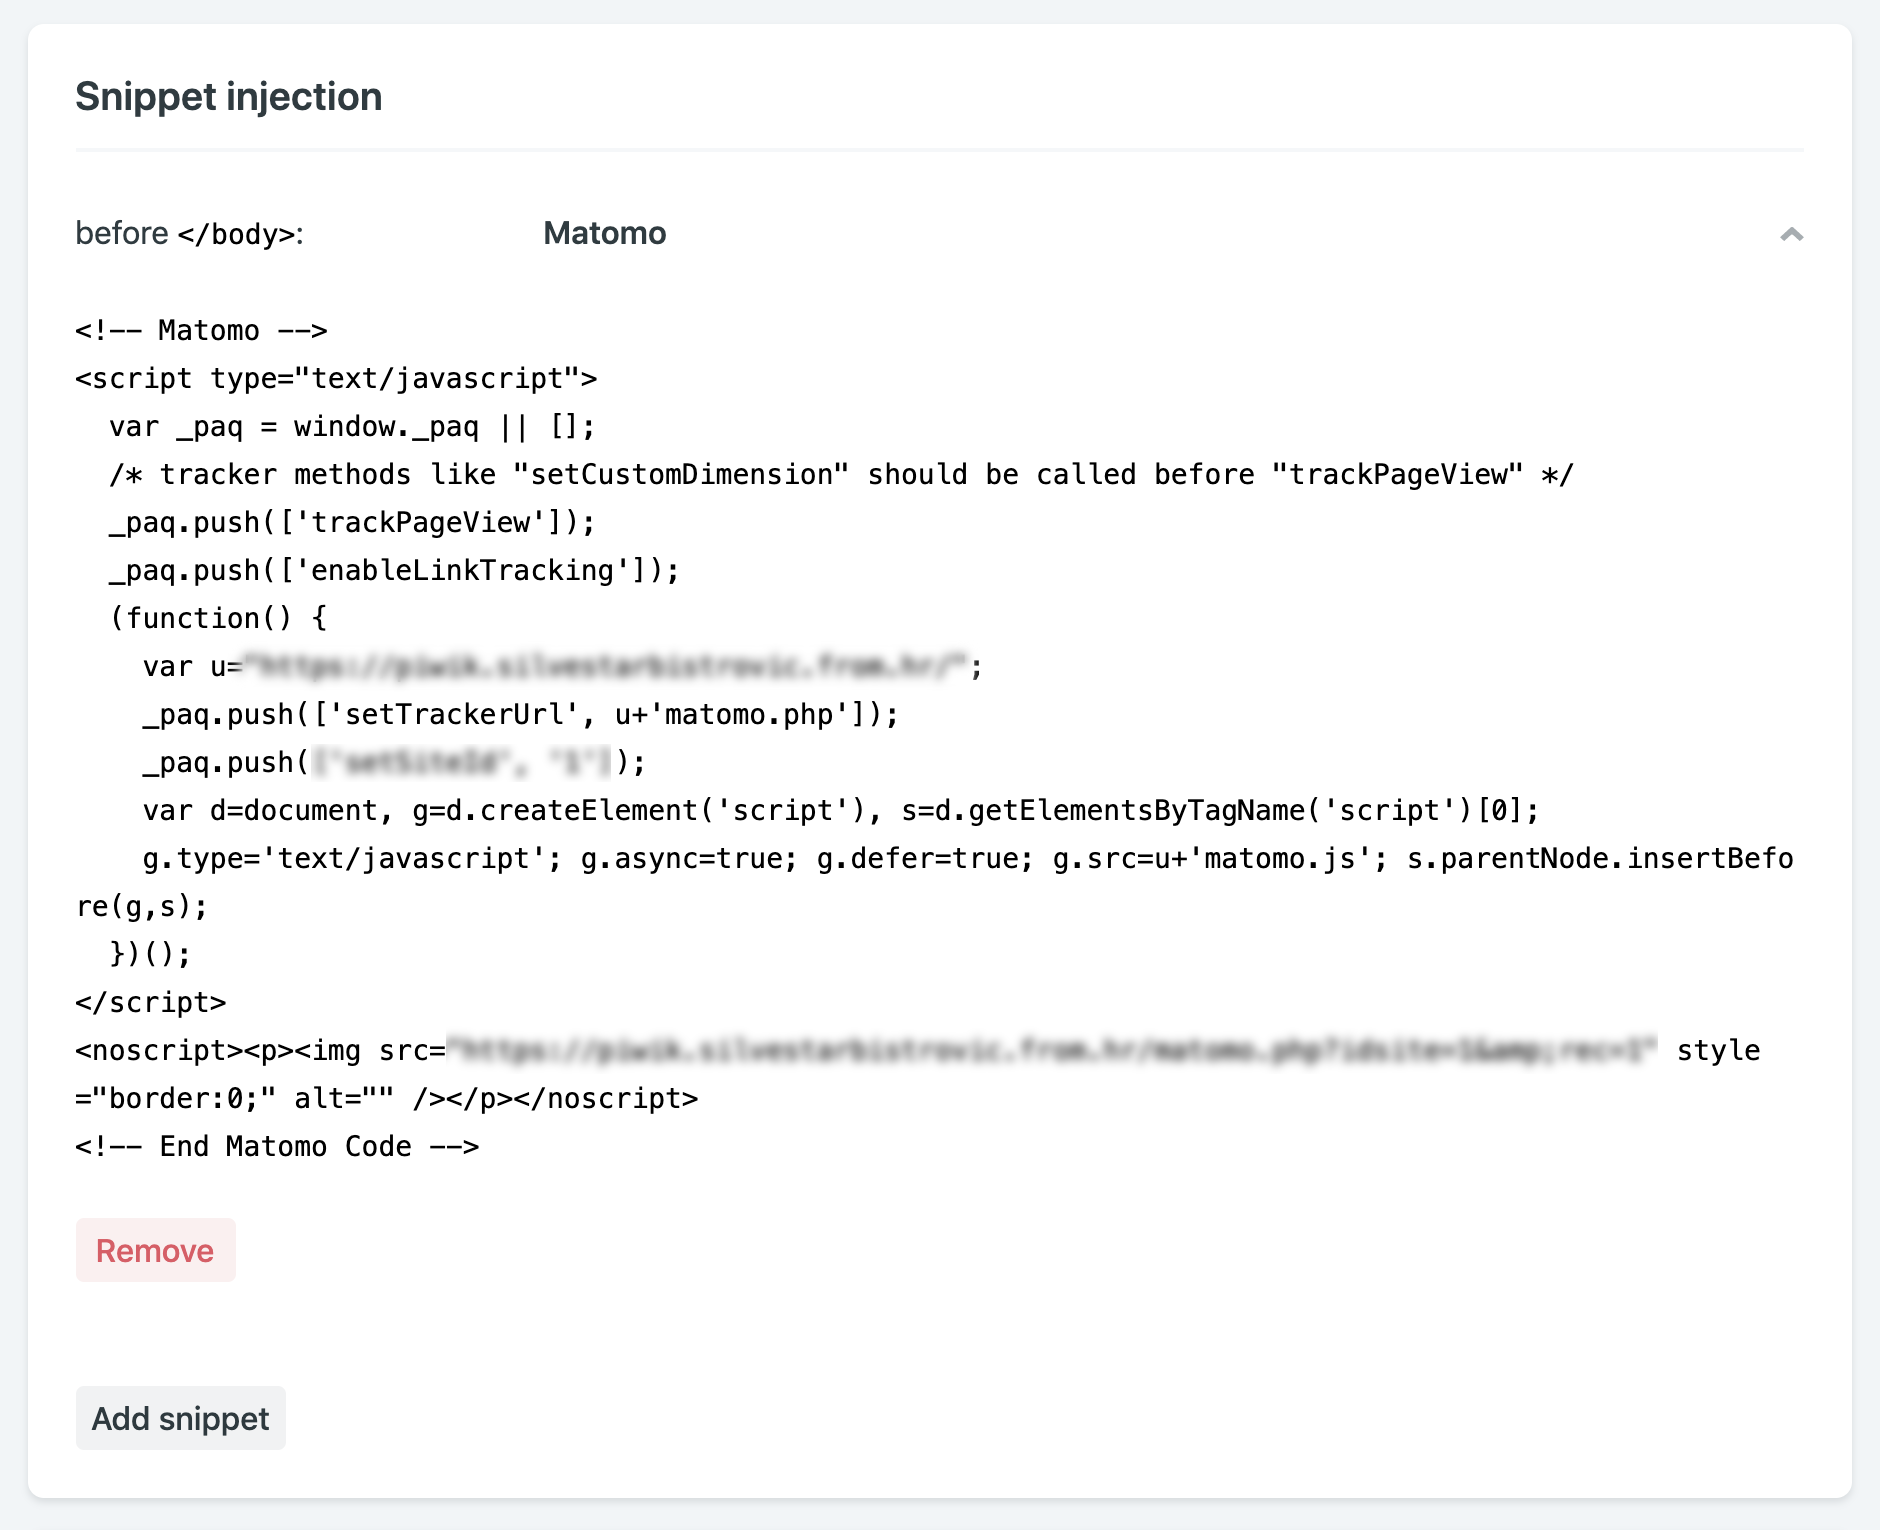
Snippet injection is another excellent feature. I am using it mostly for inserting analytics, but you could use it for adding meta tags for responsive behavior, favicon tags, or Webmention.io tags.
The "Snippet injection" section of the Netlify dashboard.
When inserting snippets, you could choose to append the code fragment at the end of the <head> block, or at the end of the <body> block.
They are immutable deployments that live on forever.
— Phil Hawksworth
I found this feature useful when completing tasks and sending the preview links to the clients. If there is a person in charge of handling Git-related tasks, like publishing to production, these preview links could be convenient to understand what to expect during the merge. You could even set up the preview builds for every pull request.
Netlify allows for the cleanest and most responsible A/B testing you can do.
If you ever wanted to run A/B tests on your site, you would find that Netlify makes running A/B tests quite straightforward. Split testing on Netlify allows you to display different versions of your website from different Git branches without any hackery.
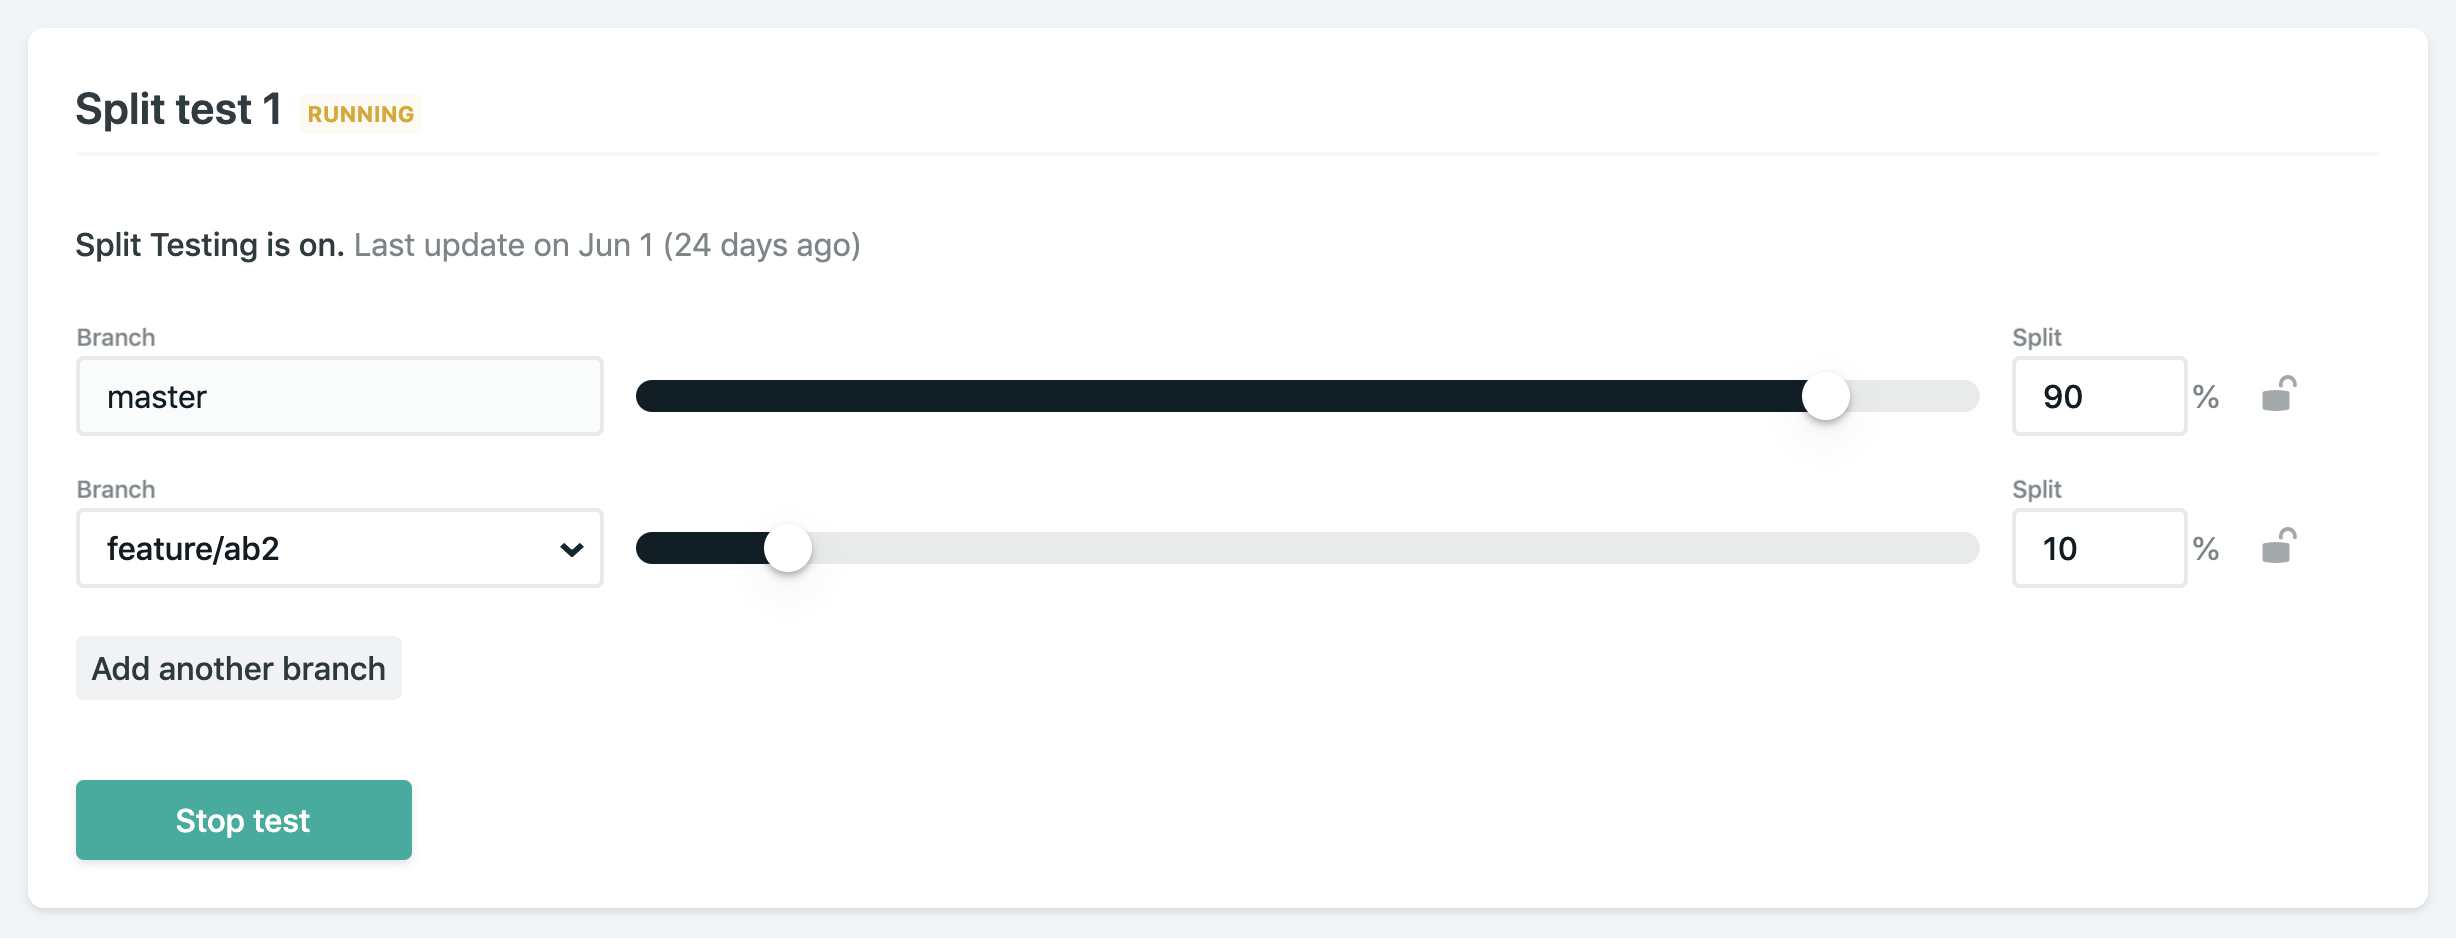
The "Split testing" section of the Netlify dashboard.
Start by adding and publishing a separate branch with desired changes. From “Split testing” panel, select which branches to test, set a split percentage, and start the test. You could even set a variable in analytics code to track which branch is currently displayed. You might need to active branch deploys if you didn't do this already.
Netlify’s Split Testing lets you divide traffic to your site between different deploys, straight from our CDN network, without losing any download performance, and without installing any third party JavaScript library.
— Netlify documentation
I have been using A/B testing on my site for a few different features so far:
Testing different versions of contact forms
Displaying different versions of banners
Tracking user behavior, like heatmaps
If you want to track split testing information, you could set up the process environment variable for this purpose. You could learn more about it in the official documentation. The best part? Most A/B testing services use client-side JavaScript to do it, which is unreliable and not great for performance. Doing it at the load balancer level like this is so much better.
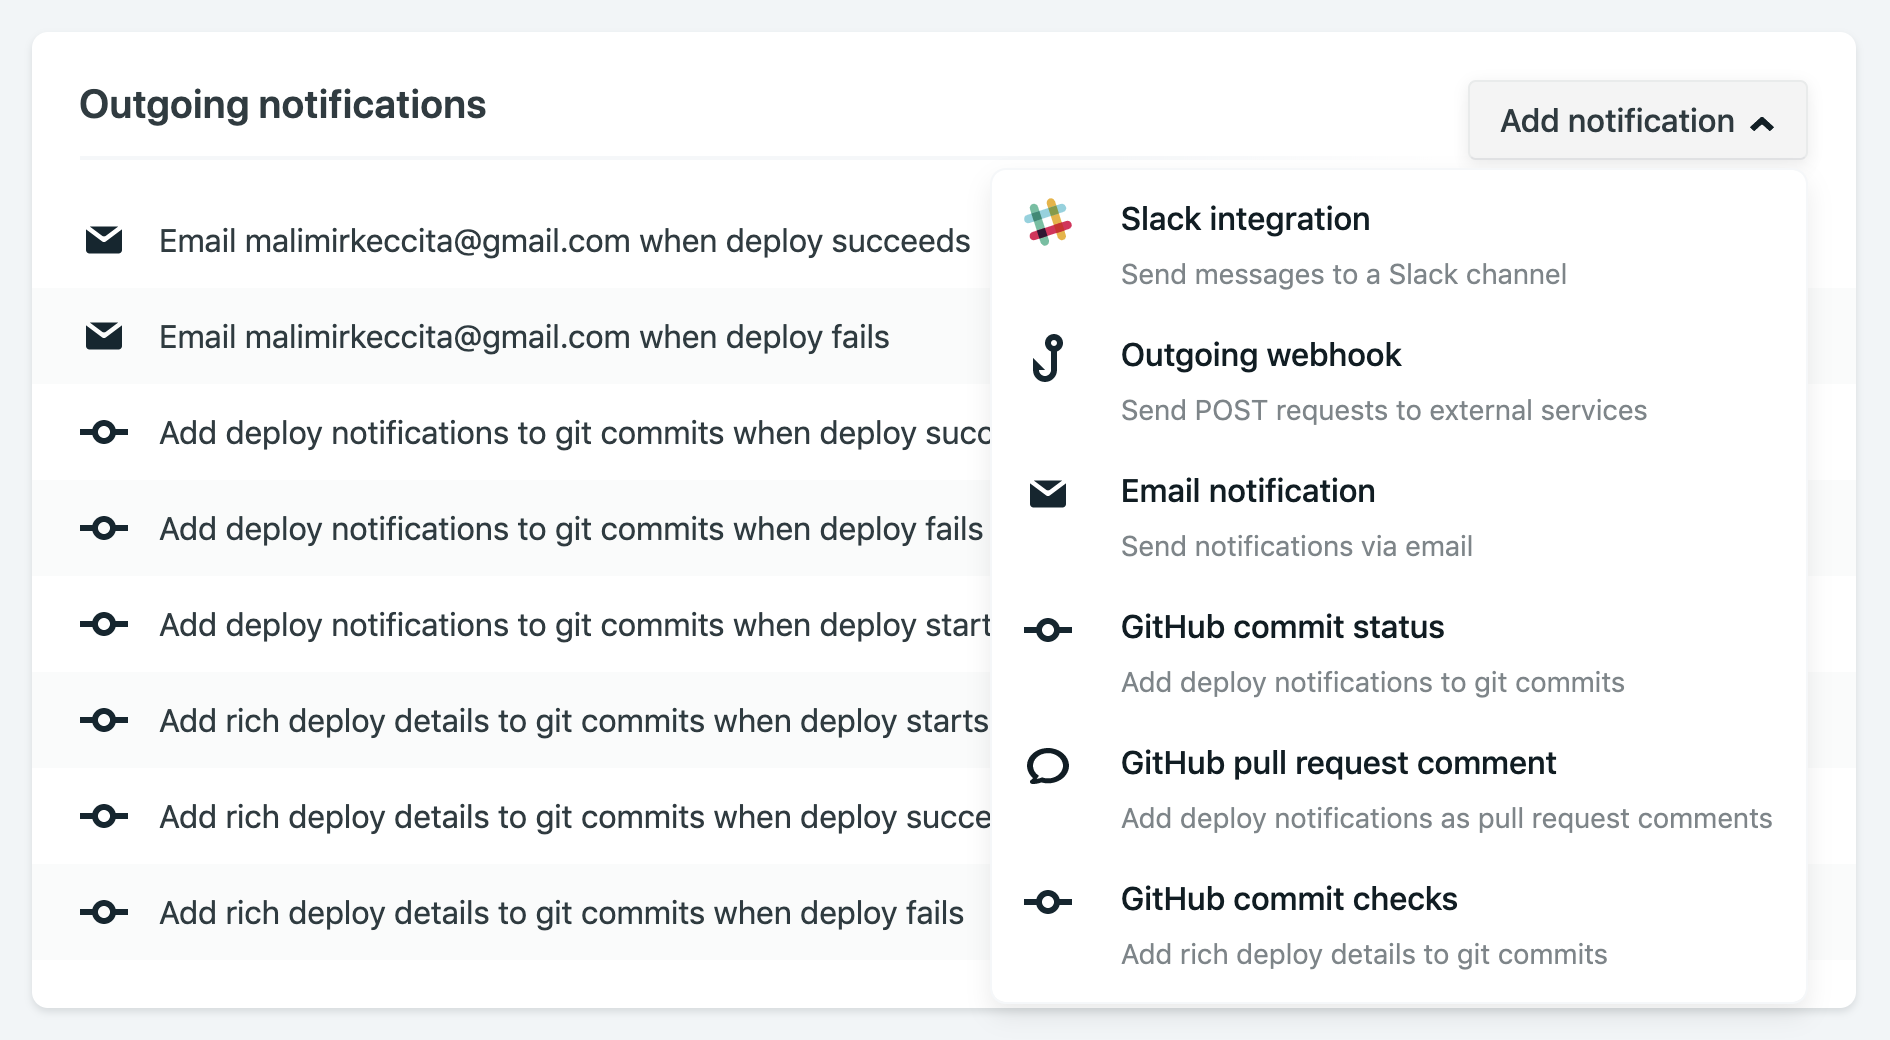
There are lots of options for notifications, like email and Slack.
If you want to receive a notification when something happens with your Netlify project, you could choose from a wide variety of notification options. I prefer getting an email for every successful or failed build.
The "Notifications" section of the Netlify dashboard.
If you are using Gmail, you could notice "See the changes live" link for every successful build when hovering your message in Gmail inbox. That means you could open a preview link without opening the email. There are other links like "See full deploy logs" when your build have any issues or "Check usage details" when your plan is near its limits. How awesome is that?
Netlify email notifications include a preview link.
If you want to set up a hook for third-party services, all you need is a URL (JWS secret token is optional). Slack hooks are built-in with Netlify and could be set up within seconds if you know your Slack incoming webhook URL.
Conclusion
All of the features mentioned above are part of the free Netlify plan. I cannot even imagine the effort invested in providing a seamless experience as it is now. But Netlify doesn’t stop there. They are introducing more and more new and shiny features, like Netlify Dev CLI for local development and deploy cancelations. Netlify has established as an undoubtedly game-changing platform in modern web development of static websites, and it is a big part of the growth and popularity of static sites.
Hi,
I need advice on how to implement a Review Management System.
Something like realized on mypresences.com or brightlocal.com
Not all services allow you to interact with their API.
Review services are productreviews, trustpilot, tripadvisor, whirlpool, wordifmouth, seek, indeed, glassdoor.
Maybe you now a script or have an offer how it can be realize. Help me, please.
Lisk, a blockchain tool and community provider, has released the Alpha version of its SDK (version 2.0.0). The SDK allows developers to build blockchain applications that are compatible with the Lisk Protocol. The SDK is written entirely in JavaScript for ease of access for most developers.
Machine learning is now a big part of every single one of our lives. When you use Netflix, recommended shows are presented based on an AI algorithm. Your order history on Amazon is run through a program to create a list of potential products that are uniquely suited to your tastes. Marketers use automation as a way to reach potential prospects and keep current customers engaged with their company. Believe it or not, 79 percent of the top businesses are currently using AI in their business model in some way.
At a glance, it seems like everything related to machine learning involves relatively new products and technology. A new study by the Journal of Field Robotics at the University of Cambridge is challenging our preconceptions about AI and how it ought to impact our lives. Their research and experiments resulted in a tremendous breakthrough in agriculture. We are going to take a look at the challenge, their new robot, and what this means for the future.
Alex Young, creator of the WPCasts video tutorials site, has published a free crash course that offers a brief introduction to using WordPress as a headless CMS. The 28-minute tutorial covers the basics of setting up a bare bones React application that uses WPGraphQL to query ACF data.
Young begins by installing four plugins: WPGraphQL, WPGraphiQL, Advanced Custom Fields, and WPGraphQL for ACF. He demonstrates how to use WPGraphiQL, which provides a GraphiQL IDE inside the WordPress admin, to test GraphQL queries before adding them to the app and check to ensure ACF data is being queried.
Young gave a walkthrough of installing Create React App to quickly get a simple app up and running. When asked on Reddit why he didn’t use Next.js or Gatsby, he said he just wanted to present the concept with something that might already be familiar to developers.
“If I were going to launch this into production I would use Gatsby,” he said. “In this tutorial I used CRA since it’s a very simple install and I figured most people have used it before. I’ll eventually do a more in-depth and real-world example in the future. But I hope this video helps people understand the basic concept of using WP as a Headless CMS.”
Young has produced 18 videos since launching WPCasts on YouTube in March 2019. Although the channel has a corresponding website with more videos available for monthly and yearly subscribers, Young said he thinks it is important to release some introductory content for free.
“I am a self-taught developer who relied heavily on YouTube, blogs, and individual developers creating free learning material (Chris Coyier, Wes Bos, etc.),” he said. “So by creating free content, I feel like I can help developers who are just starting out and need those resources just like I did.”
Young’s day job at Clearlink involves managing about approximately 20 WordPress sites with different purposes and features. He said he hopes to move these sites to a headless setup over the next few years.
His WPCasts project is still very new but Young said he has received helpful feedback from the community that he is incorporating into future videos. The headless WordPress crash course tutorial seemed to hit at the right time when these setups are gaining popularity. His tutorial has been enthusiastically received, passing 600 views on YouTube in less than 24 hours.
“I feel like Headless WordPress is the future of WP development,” Young said. “With powerful frameworks like Gatsby and Next, we have the best of both worlds – a fast and extendible frontend, and a CMS that has proven itself year after year.
“With tools like WPGraphQL, ACF, and others, WordPress will be my tool of choice for the foreseeable future. I hope that the tutorials I’ve made and future tutorials will help others see the power of WordPress and break the misconception that WordPress is ‘just a blogging platform.'”
In this episode, John James Jacoby and I are joined by David Shanske. David introduces us to a set of philosophies known as the IndieWeb, explains how it’s different from the Open Web, and how he’s been involved in the community. We discuss tools that help people own their data while still being able to take advantage of the benefits that social networks offer. We also talk about WordPress’ role and how capable it is out-of-the-box for participating in the IndieWeb.
Stories Discussed:
Bridgy connects individual sites with social networks
Those DBAs who are experts in one database system look for other database systems to have "similar features." It is a human tendency to look at any new technology and compare it with a world they are familiar with.
Most of the time, I keep addressing Oracle DBAs who are looking for similar features or setup in PostgreSQL, but this time it is for MySQL DBA. MySQL historically ships mysqld_multi to manage multiple instances of MySQL on a server. Even though this is not a core feature in MySQL, but rather a wrapper, I understand that it is something widely used and my colleague Fernando blogged about it.
Are you trying to figure out the best way to access Db2 data from within your Jupyter Notebook? Or perhaps you are already using a technique and are looking for ways to simplify things? If so, did you know that there are three ways of connecting to your existing Db2 data?
Use native Python Db2 API calls to connect and manipulate the data
Take advantage of Pandas built-in support of databases
Install extensions to Jupyter notebooks (Magic commands)
Getting access to Db2 data from within a notebook requires that you use the following command to install the appropriate Db2 drivers either from your notebook or from a shell prompt.
Say you wanted to put the CSS-Tricks website in an <iframe>. You'd do that like this:
<iframe src="https://css-tricks.com"></iframe>
Without any other styling, you'd get a rectangle that is 300x150 pixels in size. That's not even in the User Agent stylesheet, it's just some magical thing about iframes (and objects). That's almost certainly not what you want, so you'll often see width and height attributes right on the iframe itself (YouTube does this).
Those attributes are good to have. It's a start toward reserving some space for the iframe that is a lot closer to how it's going to end up. Remember, layout jank is bad. But we've got more work to do since those are fixed numbers, rather than a responsive-friendly setup.
The best trick for responsive iframes, for now, is making an aspect ratio box. First you need a parent element with relative positioning. The iframe is the child element inside it, which you apply absolute positioning to in order to fill the area. The tricky part is that the parent element becomes the perfect height by creating a pseudo-element to push it to that height based on the aspect ratio. The whole point of it is that pushing the element to the correct size is a nicer system than forcing a certain height. In the scenario where the content inside is taller than what the aspect ratio accounts for, it can still grow rather than overflow.
I'll just put a complete demo right here (that works for images too):
Anypoint Enterprise Security is a collection of security features that enforce secure access to information in Mule applications.
Anypoint Enterprise Security suite helps application developers develop security solutions as per security requirements, prevent security breaches, and facilitate authorized access to data.
The industrial systems found in factories often have nothing to do with the systems that are known in IT. No REST API, no database (or few), and obviously no default message bus. However, it is necessary to be able to connect this small world together in order to collect data that will be used for analysis on Big Data or to do machine learning. However, this dream of solutions such as Microsoft Azure's IoT suites and AWS GreenGrass to connect your plant is totally unrealistic if you don't simply connect to industrial systems to recover data.
What are these industrial systems?
Forget about REST API, JDBC, BAPI, File, and all the other known means of exchange in a classic IT. Our new friends are called:
One of the most important elements of any website is a way for customers or clients to be able to contact you quickly and easily. The most common way of doing this is via a contact form located on a dedicated contact page or placed in a sidebar or footer visible from all pages. This […]


 One of the most important elements of any website is a way for customers or clients to be able to contact you quickly and easily. The most common way of doing this is via a contact form located on a dedicated contact page or placed in a sidebar or footer visible from all pages. This […]