FIME, a provider of Host Card Emulation (HCE) and cloud-based payments consultancy and testing services, has announced a new testing tool for open banking APIs. The company’s new solution, which has been named TrustAPI, allows partners to test APIs based on their specific needs.
Šime posts regular content for web developers on webplatform.news.
In this week's roundup: datepickers are giving keyboard users headaches, a new web component compiler that helps fight FOUC, we finally get our hands on styling list item markers, and four steps to getting webmentions on your site.
Using plain text fields for date input
Keyboard users prefer regular text fields over complex date pickers, and voice users are frustrated by the native control (<input type="date">).
Previously, I have relied on plain text inputs as date fields with custom validation for the site, typically using the same logic on the client and the server. For known dates — birthdays, holidays, anniversaries, etc. — it has tested well.
Stencil is a “web component compiler” that can be used to pre-render web components (including Shadow DOM) or hide them until they are fully styled to avoid the flash of unstyled content (FOUC).
This tool also makes sure that polyfills are only loaded when needed, and its Component API includes useful decorators and hooks that make writing web components easier (e.g., the Prop decorator handles changes to attributes).
import { Component, Prop, h } from "@stencil/core";

@Component({
  tag: "my-component"
})
export class MyComponent {
  @Prop() age: number = 0;

  render() {
    return <div>I am {this.age} years old</div>;
  }
}
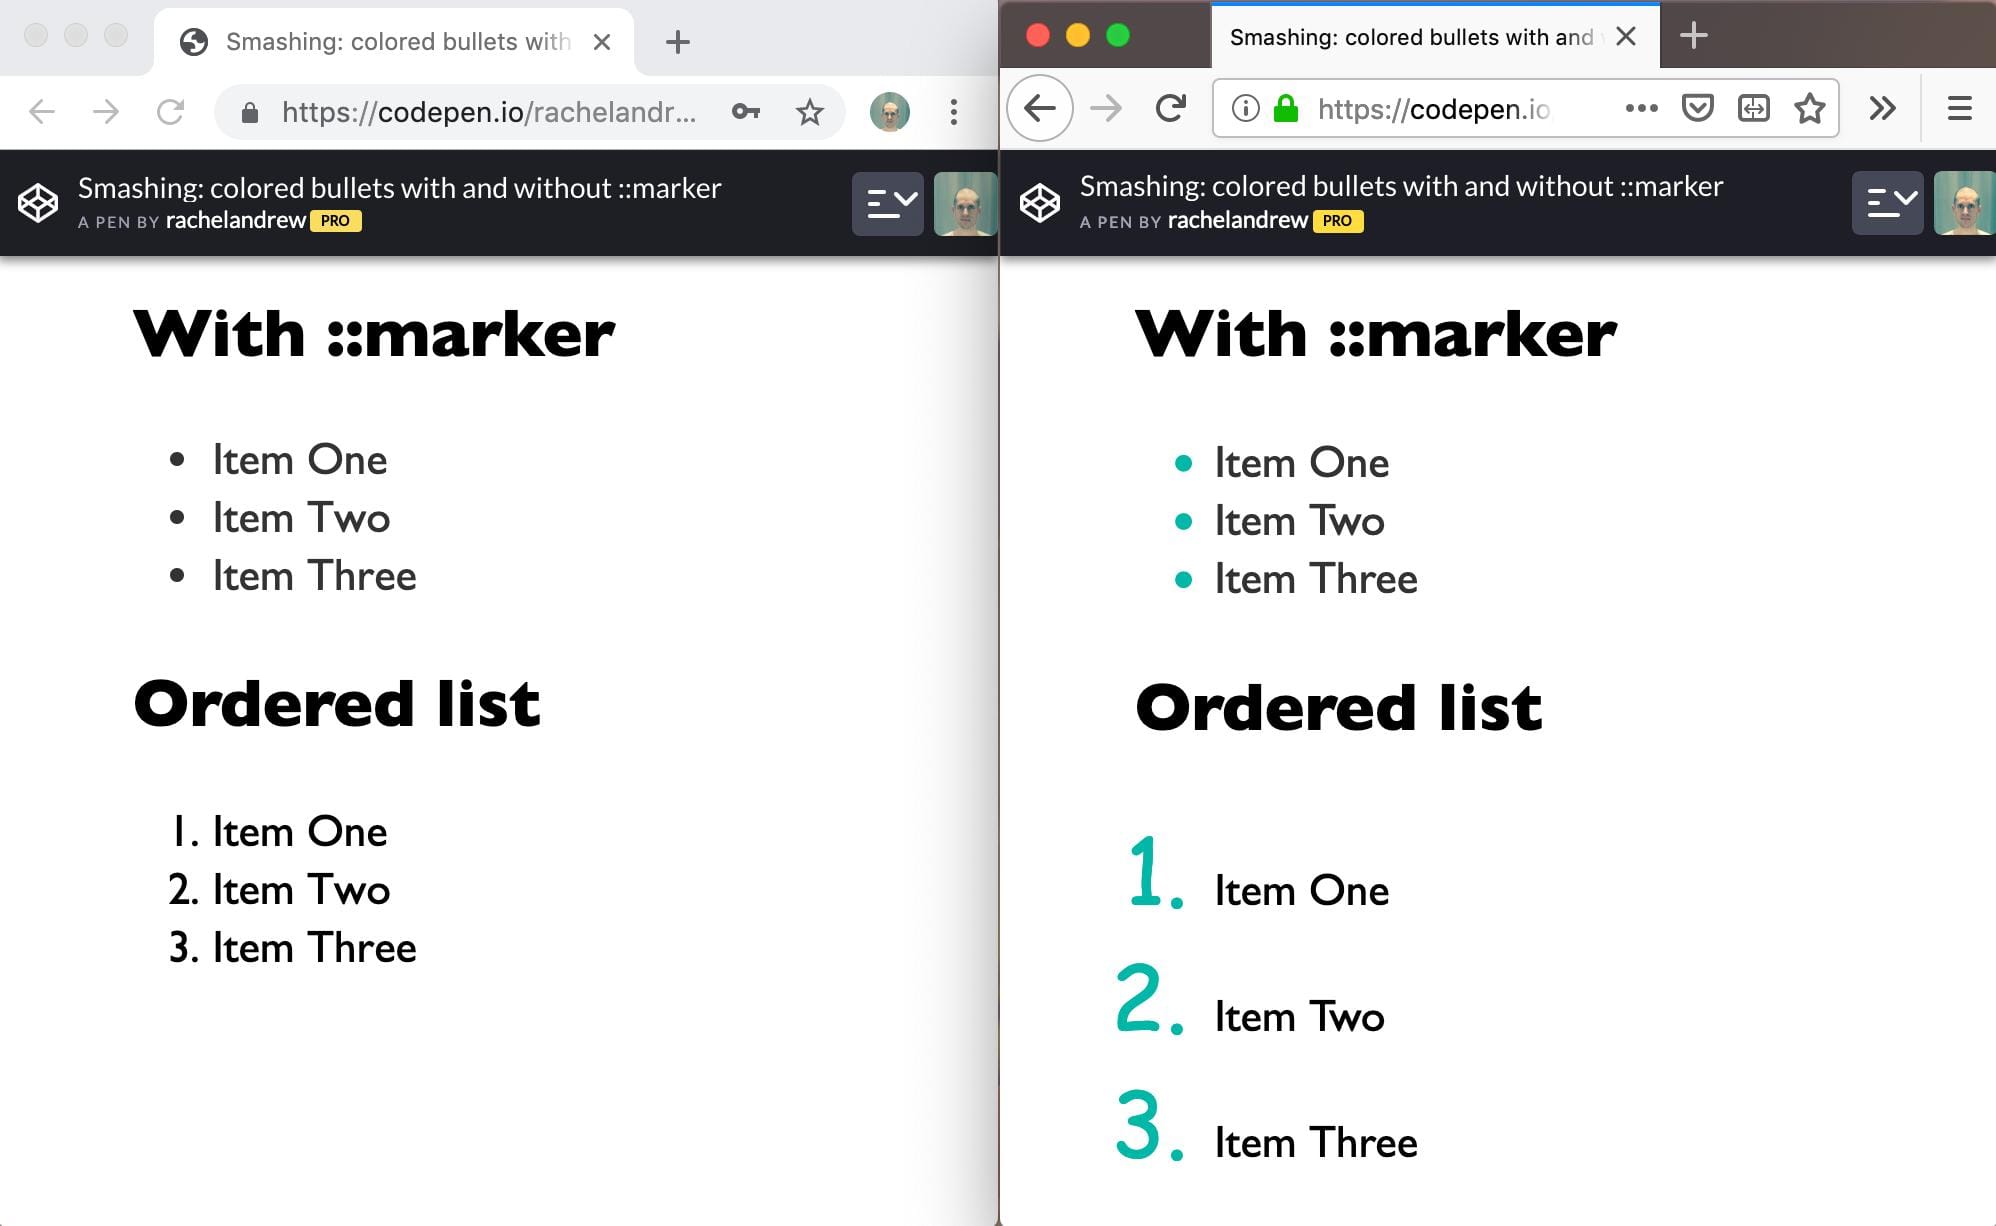
When the CSS display: list-item declaration is applied to an element, the element generates a marker box containing a marker, e.g., a list bullet (the <li> and <summary> elements have markers by default).
Markers can be styled via the ::marker pseudo-element (useful for changing the color or font of the marker), but this CSS feature is currently only supported in Firefox.
Those who use the All-in-One WP Migration plugin are encouraged to update to version 7.0 as soon as possible as 6.97 contains an admin backend cross-site-scripting vulnerability.
An attacker would already have to be able to either compromise the database or gain access to a user account with high enough privileges to view the backup history, so some damage has already been done, but such an attacker could then also insert some XSS in order to compromise other admin users.
When double-clicking the backup description on the backup history overview page, in order to edit the description text, the text is not sanitized/escaped via html entities when generating the input field.
Version 7.0 was released on the plugin directory about a day ago and patches the vulnerability. According to the stats on the WordPress plugin directory, All-in-One WP Migration is actively installed on more than two million sites.
A proof of concept will be published on July 24th which gives site owners about a week to update. Unfortunately, users who view the changelog prior to updating will not be able to determine it patches a security issue due to the patch being labeled as a general fix.
I need to redirect users to two (2) different pages based on the roles given to them in the database. Only the email and password is submitted on the login page. I have to fetch the role from the database which looks like this:
       Email    |   Password   |   UserType
  aa@me.com       xxxxxx       System User
  bb@me.com       xxxxxx       Administrator
What is Apollo and how does CodePen use it? Cassidy just returned from Apollo Day and is here to help educate us all about Apollo and how/why CodePen chose to use it.
WooCommerce is a WordPress plugin that brings eCommerce to your WordPress sites. It's unique in its customizability and flexibility. You can use it to sell physical products, digital downloads, memberships, services, and tickets, plus offer customers lots of different ways to pay, including things like Apple Pay and Bitcoin powered by Stripe.
Uber now has an artificial intelligence platform for developers. The company just announced its Plato Research Dialogue System. The system is a platform for developing, training and deploying AI-driven conversational agents.
A case study of the wonderful The Frontier Within which is an immersive installation and web experience that captures the participant’s circulatory, respiratory and nervous system data, and transforms it into a living, breathing, interactive portrait of the body.
Scott O’Hara shows how to use the reduced motion media query to implement video components in a way that will respect user preferences from an OS level.
An online magazine made for developers, coders, hackers, makers, tinkers and everything else in between. Repo Lovers sets out to build an archive of interviews featuring talented folks building software.
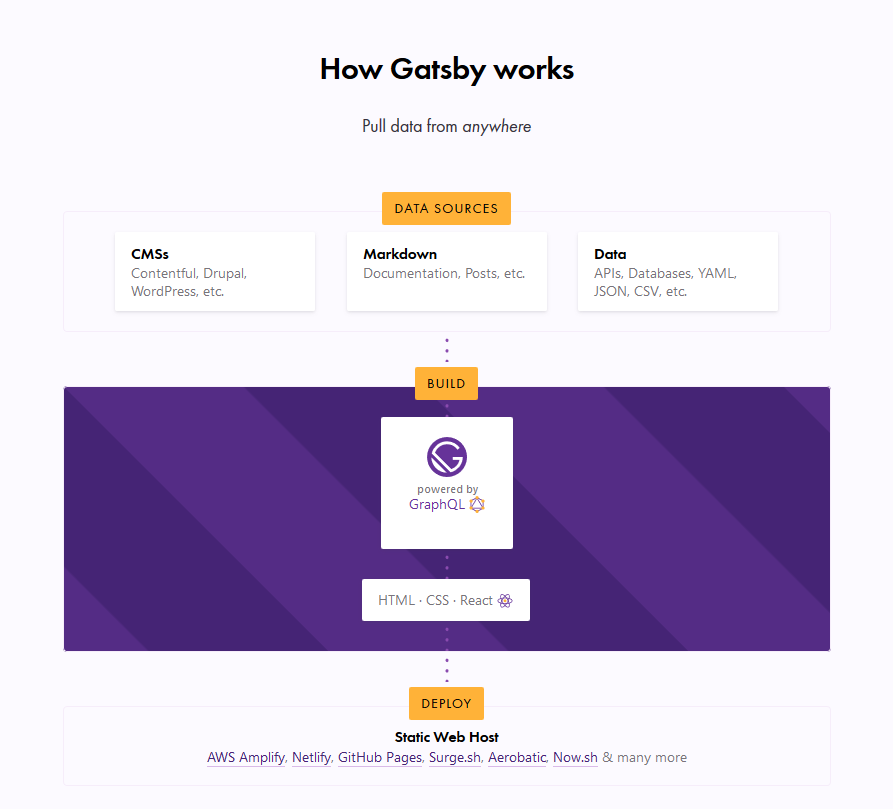
I’m assuming most of you have already heard about Gatsby, and at least loosely know that it’s basically a static site generator for React sites. It generally runs like this:
Data Sources → Pull data from anywhere.
Build → Generate your website with React and GraphQL.
Deploy → Send the site to any static site host.
What this typically means is that you can get your data from any recognizable data source — CMS, markdown, file systems and databases, to name a few — manage the data through GraphQL to build your website, and finally deploy your website to any static web host (such as Netlify or Zeit).
The Gatsby homepage illustration of the Gatsby workflow.
In this article, we are concerned with the build process, which is powered by GraphQL. This is the part where your data is managed. Unlike traditional REST APIs where you often need to send anonymous data to test your endpoints, GraphQL consolidates your APIs into a self-documenting IDE. Using this IDE, you can perform GraphQL operations such as queries, mutations, and subscriptions, as well as view your GraphQL schema, and documentation.
GraphQL has an IDE built right into it, but what if we want something a little more powerful? That’s where GraphQL Playground comes in and we’re going to walk through the steps to switch from the default over to GraphQL Playground so that it works with Gatsby.
GraphiQL and GraphQL Playground
GraphiQL is GraphQL’s default IDE for exploring GraphQL operations, but you could switch to something else, like GraphQL Playground. Both have their advantages. For example, GraphQL Playground is essentially a wrapper over GraphiQL but includes additional features such as:
Interactive, multi-column schema documentation
Automatic schema reloading
Support for GraphQL Subscriptions
Query history
Configuration of HTTP headers
Tabs
Extensibility (themes, etc.)
Choosing either GraphQL Playground or GraphiQL most likely depends on whether you need to use those additional features. There’s no strict rule that will make you write better GraphQL operations, or build a better website or app.
This post isn't meant to sway you toward one versus the other. We're looking at GraphQL Playground in this post specifically because it’s not the default IDE and there may be use cases where you need the additional features it provides and needs to set things up to work with Gatsby. So, let’s dig in and set up a new Gatsby project from scratch. We’ll integrate GraphQL Playground and configure it for the project.
Setting up a Gatsby Project
To set up a new Gatsby project, we first need to install the gatsby-cli. This will give us Gatsby-specific commands we can use in the Terminal.
npm install -g gatsby-cli
Now, let’s set up a new site. I’ve decided to call this example "gatsby-playground" but you can name it whatever you’d like.
gatsby new gatsby-playground
Let’s navigate to the directory where it was installed.
cd gatsby-playground
And, finally, flip on our development server.
gatsby develop
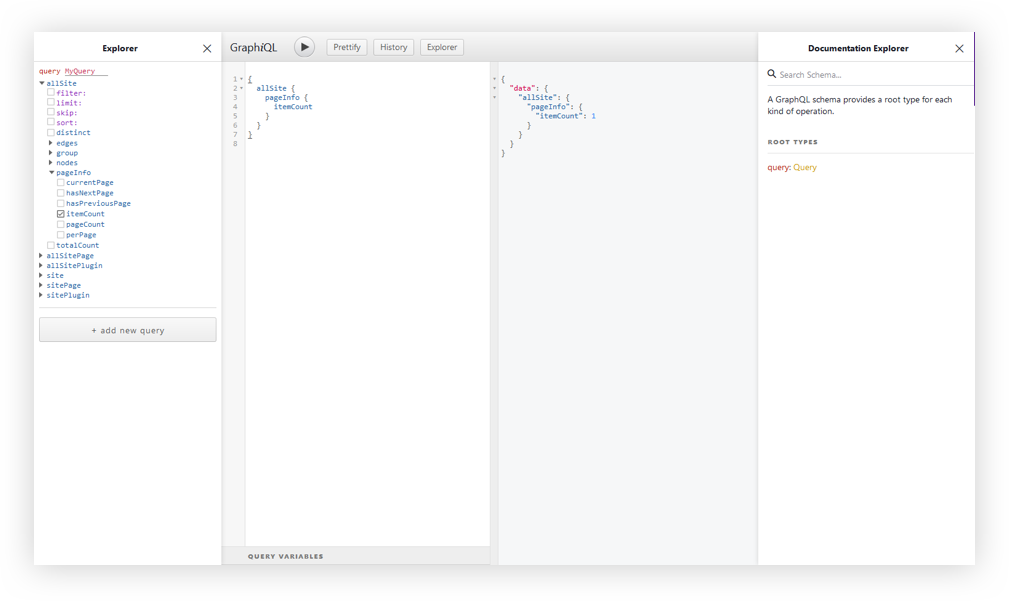
Head over to http://localhost:8000 in the browser for the opening page of the project. Your Gatsby GraphQL operations are going to be located at http://localhost:8000/___graphql.
The GraphiQL interface.
At this point, I think it’s worth calling out that there is a desktop app for GraphQL Playground. You could just access your Gatsby GraphQL operations with the URL Endpoint localhost:8000/___graphql without going any further with this article. But, we want to get our hands dirty and have some fun under the hood!
Since we’re not going to be relying on the desktop app, we’ll need to do a little bit of Environmental Variable setup.
Environmental Variables are variables used specifically to customize the behavior of a website in different environments. These environments could be when the website is in active development, or perhaps when it is live in production and available for the world to see. We can have as many environments as we want, and define different Environmental Variables for each of the environments.
Gatsby supports two environments: development and production. To set a development environmental variable, we need to have a .env.development file at the root of the project. Same sort of deal for production, but it’s .env.production.
To swap out both environments, we’ll need to set an environment variable in a cross-platform compatible way. Let’s create a .env.development file at the root of the project. Here, we set a key/value pair for our variables. The key will be GATSBY_GRAPHQL_IDE, and the value will be playground, like so:
GATSBY_GRAPHQL_IDE=playground
Accessing Environment Variables in JavaScript
In Gatsby, our Environmental Variables are only available at build time, or when Node.JS is running (what we’ll call run time). Since the variables are loaded client-side at build time, we need to use them dynamically at run time. It is important that we restart our server or rebuild our website every time we modify any of these variables.
To load our environmental variables into our project, we need to install a package:
And that’s it! But, hey, remember to restart the server since we change the variable.
yarn start // npm run develop
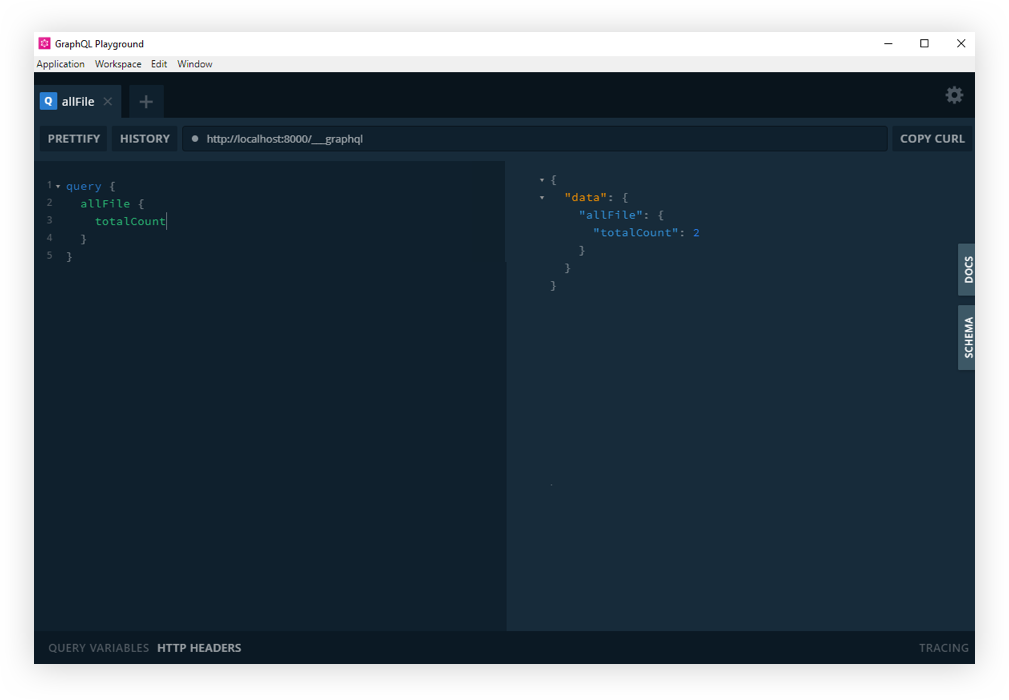
If you refresh the http://localhost:8000/___graphql in the browser, you should now see GraphQL playground. Cool? Cool!
GraphQL Playground with Gatsby.
And that’s how we get GraphQL Playground to work with Gatsby!
So that’s how we get from GraphQL’s default GraphiQL IDE to GraphQL Playground. Like we covered earlier, the decision of whether or not to make the switch at all comes down to whether the additional features offered in GraphQL Playground are required for your project. Again, we’re basically working with a GraphiQL wrapper that piles on more features.
Resources
Here are some additional articles around the web to get you started with Gatsby and more familiar with GraphiQL, GraphQL Playground, and Environment Variables.
The irony of web performance is that the average page weight of a site continues to go up year after year, despite us being more aware of the problem and having more tools at our disposal to fight it than ever.
To paraphrase Seinfeld, "we know how to fight page weight issues; we just don't use the tools we have to fight page weight issues."
That's why Jetpack provides powerful features for all users at any plan level. They made it so that performance is integrated right into managing content on a WordPress site.
One of those things is lazy loading images. Lazy loading is an excellent technique to defer loading images until they are actually needed. So, an image never loads until the user actually scrolls to where it comes into display. That could potentially save a ton of server requests and precious bytes when waiting for a page to load. Jetpack includes lazy loading, even on free plans, so everyone has access to this performance boost.
And what's the point of lazy loading anything if you don't have somewhere to host the files? Well, Jetpack also offers unlimited static file and image hosting for every plan level. No more wondering how much storage is left on your server! You get an unlimited amount of space to store anything you need. That's pretty awesome!
It gets even more awesome. That's because the unlimited storage is part of a CDN that is designed to serve images from high-speed dedicated data centers that make downloads as fast and smooth as possible. Again, that's free to everyone!
That makes Jetpack a super resource for combatting performance issues on a WordPress site. Hey, we use Jetpack here at CSS-Tricks and it's a linchpin for so much of how this site works and operates. The performance benefits are a nice perk but it's worth checking out everything it has to offer because there's likely so much more you can leverage.
Whether you prefer serif or sans serif, new fonts are coming out all the time. And they’re going in and out of style all the time, as well. 2019 is a year of bold designs that make a statement, so each of our featured fonts in this post will focus on the emotional response they can create, as well their artistic statement.
Helios is a sans-serif font with a futuristic touch. On first glance (and thanks to the accompanying sample image) it makes one think of space. Really, this font could find a home on a video game cover, a tech company’s homepage, or as a trendy sticker. Helios feels simultaneously as clean and sterile as a spaceship’s airlock and as packed with personality as any other decorative font.
Handwritten fonts have been popular for a long time. There are a lot of situations that call for this style. But in 2019, authenticity is valued higher than ever, and nothing looks more authentic in design that a handwritten typeface. The Summer Loving font looks painted – some variants are hastily scribbled, and others look stenciled. Either way, it is full of bubbly personality.
While the name would suggest using this for summer designs, it could work during any season. It does lend itself to bright color palettes, but can definitely be used as a legible graffiti.
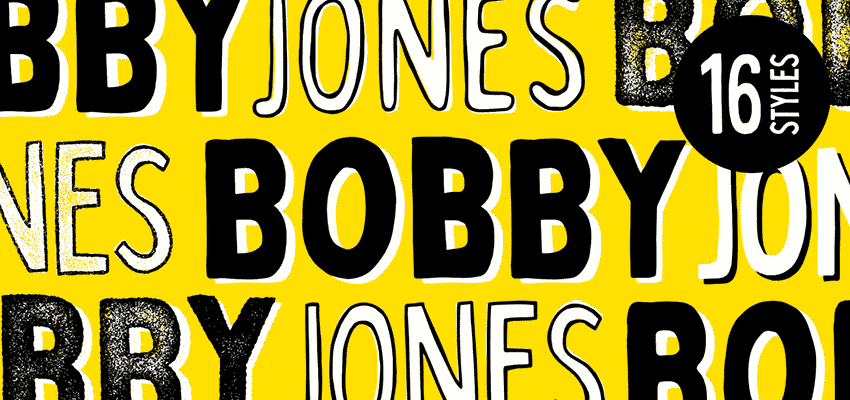
The Bobby Jones font checks a couple of the boxes for font trends in 2019. Namely, it has a certain sense of nostalgia and whimsy, which is in style. It can also easily be used in a brutalist-style piece, given the somewhat gritty styles available. It’s a little bit quirky, a little bit bold, and definitely versatile. If 2019 is about standing out and being different, then this is a great font to try out.
Another trend in 2019 is a smaller font size within hero images. With this decrease in font size, it’s important to find an easy-to-read type. A sans serif font is a great place to start, because they tend to look great on various backgrounds.
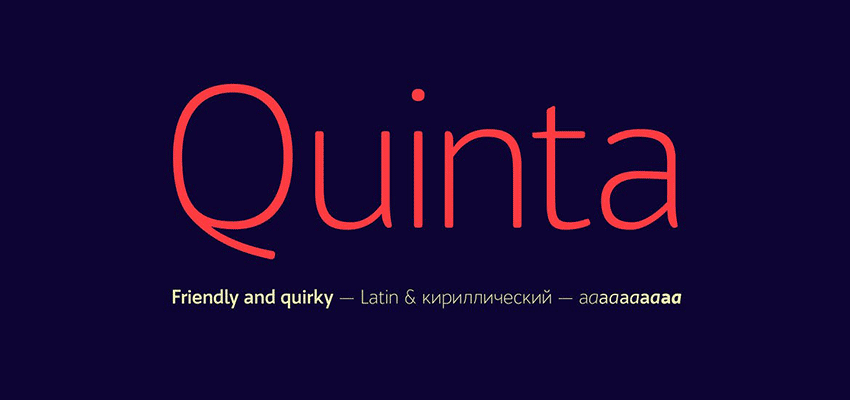
Self-described as “friendly and quirky”, Quinta is very readable. It has subtle rounded corners, which does make it inviting and lighthearted. A perfect choice for a corporate website header that wants to be a little more friendly and less cold.
Looking for something even more simple and clean? Whether you’re looking for a font to read on screen or in print, this easy-to-read font is great for any need. Its versatility and ubiquity will make it perfect for any modern design or logo. In fact, the designer shows off various corporate logos using the font and they all look great. They’re easily recognizable and of course very legible!
Tiempos is a serif font that looks great as a headline or as body text. The fine version was actually designed for National Geographic! The upper-case characters are the same height as the tallest lower-case characters, and it’s compact without losing any legibility.
Morganite is a tall and thin font that is great for titles and headlines. It feels like something right out of a magazine cover or movie poster. It’s bold and big, which is just what some designs need in 2019.
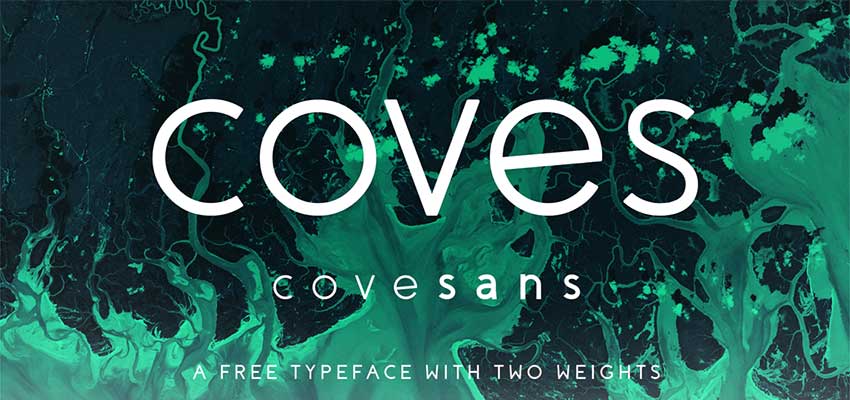
Coves is a sans serif font with a unique twist. For the most part, it is a pretty standard looking sans serif font, but it has some nice surprises, like the slight angle of the lower case ‘e’. It’s a little quirky, but also clean, simple, and great for businesses. It’s legible with plenty of space between elements, whether you go with the light or bold version.
Fixer features a lot of variations, including regular, inline, and 3D. This can be a bold font for a large sign, a clean and modern font for a web graphic, or a vintage font to bring out some nostalgia. The versatility means this font can be utilized for so many different projects. The options are limitless!
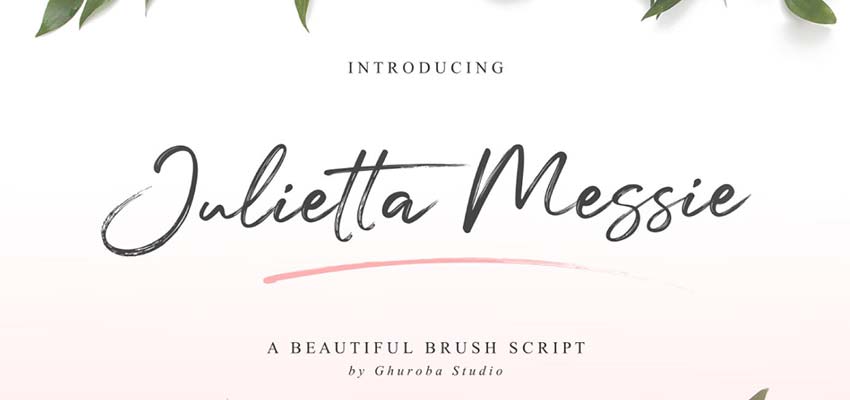
On to something more script-based. The Julietta Messie brush script looks like a handwritten cursive font, which would look great in a light floral setting like the example above. Whether it’s a wedding invitation, an Instagram photo, or a signature. Fonts like this are always necessary, and timeless in a way. 2019 is no different.
This unique font gives off some serious outdoor feelings, and would look great on things like maps, nature photos, or pamphlets. It has some heavy serifs, but a good designer can make the most of this.
While in some cases it could be hard to read, it has its place. Its particular look makes it a great font for 2019. Expect to see fonts like this used in unexpected ways this year.
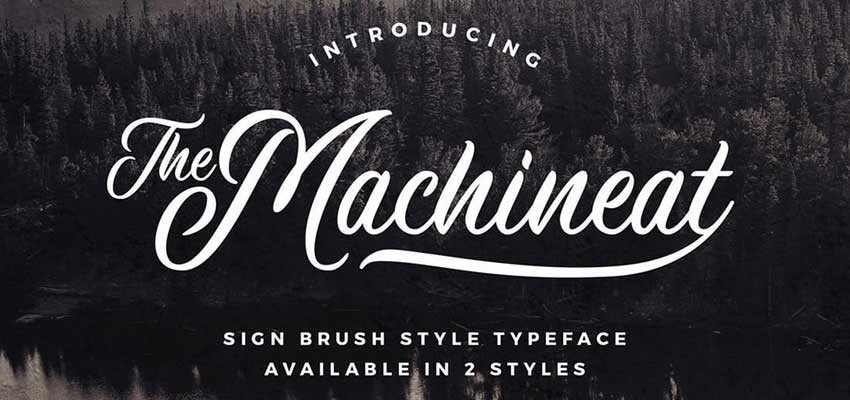
This clean script font looks like it belongs on a vintage sign, or burned into a piece of wood. It is in fact inspired by traditional signs, and mimics the natural flow of letters that handwritten signage often has. Machineat is a great traditional font, but feels simultaneously modern and relevant for this year.
As humans get more and more technological, the more we want to get back to nature in any way possible. That is exactly the reason why fonts like Nature Spirit are going to be big in 2019. We’re still stuck on the internet, but we can at least see a more natural-looking font when we visit websites.
This font offers a rough and a smooth version, as well as plenty of alternative characters that can give your design a customized look. Customized fonts are going to be big this year, and this looks the part pretty well.
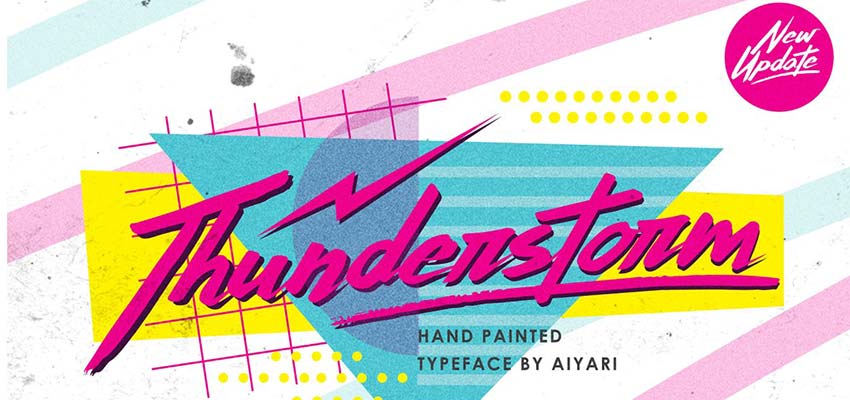
Thunderstorm harkens back to a retro 80’s or 90’s style. Nostalgia is cool (did you hear about the vaporwave trend?) and that is also reflected in the fonts we use. Expect a lot of brands to leverage “rad” fonts like Thunderstorm in order to connect with the 90’s kids of the internet (or perhaps because they are the 90’s kids).
Moving on to something a little different, let’s take a look at the Quantum font. Despite the need for retro fonts in 2019, there is also a need to look toward the future. Futuristic fonts aren’t quite as popular as they used to be, but there are still some very appropriate places for them.
Quantum would be fantastic on a futuristic video game logo, a sci-fi movie poster, or a technology company. This font is full of angular lines with bold accents.
Playfair is a serif font with some classic details. This is an elegant choice that would be perfect for a website or graphic that calls for a bit of sophistication. That still certainly exists in 2019, so you will be seeing Playfair and typefaces like it pretty frequently, where they are appropriate.
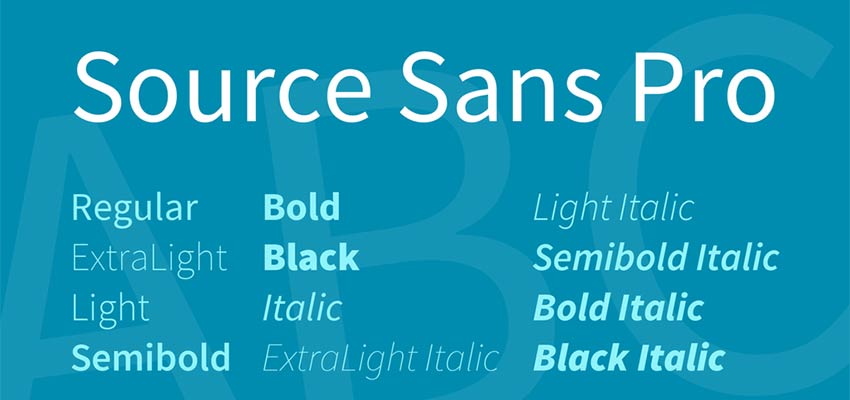
Let’s end this one with another basic sans serif font. When it comes to web design, a classic sans serif font is something that every designer should have in their back pocket. Source Sans Pro is a fantastic, simple font. There’s nothing showy here, which makes it the best font for clean webpage headings or body text.
Top Fonts for the Modern Web
Fonts are often subjective. Some people like it clean and simple, some people like it gaudy. But 2019 will have some defining font trends. Having these fonts at your disposal will enable you to be versatile and creative this year!
Let's keep it straight! Being a web developer is one of the best jobs you can have! Asides the huge pay you can earn per project once you become a professional, there are lots of other benefits of being a web developer.
Do you want to change the author url slug and base in WordPress?
WordPress comes with built-in support for SEO friendly URL structure, also known as pretty permalinks. This feature allows you to choose URLs for your posts, pages, and categories by editing their slugs.
This feature also creates pretty links for author pages. However, there is no option for you to customize the author URL.
In this article, we will show you how to easily change the author URL slug and base in WordPress.
What is a URL Slug and URL Base?
In WordPress terminology, a slug is a title of a publicly viewable page in WordPress formatted to be used in URLs.
It looks like this:
https://example.com/author/syed-balkhi/
In the example above, syed-balkhi is the slug and author is the base.
While users can change the slug and base for posts, pages, categories, and tags, its not possible to change the author URL in WordPress.
If you wanted to use ‘contributor’ instead of ‘author’ or if you wanted to change the author slug altogether, then you’re in the right place.
Let’s see how you can easily change author URL slug and base in WordPress.
Upon activation, this plugin will add a group of options to each user profile page.
If you want to edit the slug of a user on your site, then you need to go to Users » All Users page. Next, click on the ‘Edit’ link below a username.
This will take you to the Edit User screen. Simply scroll down to ‘Edit Author Slug’ section, and you will see a number of choices that you can use as author slug. You can even enter a custom slug.
Once you have made the changes, click on the ‘Update User’ button and preview your site.
Now when you click on the author name in a post to view the author page, you will see that it is using the author slug you choose for them.
Changing Author Base
If you’re building a site where you want to change the author base from /author/ to something else, then you can do that as well with this plugin.
Simply head over to the Settings » Edit Author Slug page. Here you will see an option to change the author base and even choose different author base for users with different user roles.
Once you are finished, click on the save changes button to store your settings. You can now preview your site and click on the author link to see the changes in action.
Setting up Redirects for SEO Purposes
Changing author slugs and base on an established website can have negative SEO ramifications especially if your author archives are indexed.
People coming to author pages from search engines will see a 404 error message. To avoid this, you need to set up redirects from old URLs to new author slug and base.
First, you need to install and activate the Redirection plugin.
Upon activation, head over to Tools » Redirection page. You’ll be greeted by the plugin’s set up wizard. You can follow the on-screen instructions to continue set up or click on the ‘Manual Install’ link to skip it.
Next, you will reach the Redirection page. From here, scroll down to the ‘Add new redirect’ section. You need to add the old author page URL as the source and the new author URL page as the target.
Click on the ‘Add redirect’ button to save your changes.
The plugin will now automatically redirect visitors coming to the old author page to the new URL.
Now if you have also changed the author base, then you will need to dynamically detect those URLs and redirect them.
Let’s suppose you changed the author URL base to ‘contributor’. This is how you will set up the redirect.
If you selected the author URL base to be created using the user role, then you will need to do this for every user role, except when the user role itself is ‘author’.
Yarn Workspaces: Organize Your Project’s Codebase Like A Pro
Yarn Workspaces: Organize Your Project’s Codebase Like A Pro
Jorge Ferreiro
Any time I start working on a new project, I ask myself, “Should I use separate git repositories for my back-end server and my front-end client(s)? What’s the best way to organize the codebase?”
I had this same question after a few months working on my personal website. I originally had all the code in the same repository: the back end used Node.js and the front end used ES6 with Pug. I adopted this organization for convenience, since having both projects in the same repo made it easy to search for functions and classes, and facilitated refactors. However, I found some downsides:
No independent deployments.
Both apps were using the same package.json, and there was no clear separation on both projects.
Unclear boundaries.
Since I rely on a global package.json, I didn’t have a mechanism to set specific versions for the back end and front end.
Shared utilities and code without versioning.
After some research, I found that Yarn workspaces was a great tool to solve those cons, and it was a helpful tool to create a monorepo project (more to come later!).
In this article, I share an intro to Yarn workspaces. We’ll run through a tutorial together on how to create your first project with it, and we’ll finish with a recap and next steps.
What Are Yarn Workspaces?
Yarn is a package manager by the folks at Facebook, and it has a great feature called Yarn workspaces. Yarn workspaces let you organize your project codebase using a monolithic repository (monorepo). The idea is that a single repository would contain multiple packages. Packages are isolated and could live independent of the larger project.
As an alternative, we could place all of these packages into separate repositories. Unfortunately, this approach affects the shareability, efficiency, and developer experience when developing on the packages and their dependent projects. Furthermore, when we work in a single repository we can move more swiftly and build more specific tooling to improve processes for the entire development life cycle.
React is a good example of an open-source project that is monorepo. Also, React uses Yarn workspaces to achieve that purpose. In the next section we will learn how to create our first monorepo project with Yarn.
Creating A Monorepo Project With React And Express Using Yarn Workspaces In Six Steps
So far, we have learned what Yarn is, what a monorepo is, and why Yarn is a great tool to create a monorepo. Now let’s learn from scratch how to set up a new project using Yarn workspaces. To follow along, you’ll need a working environment with an up-to-date npm install. Download the source code.
Prerequisites
To fully complete this tutorial, you will need to have Yarn installed on your machine. If you haven’t installed Yarn before, please follow these instructions.
These are the steps we’ll be following in this tutorial:
In your local machine terminal, create a new folder called example-monorepo:
$ mkdir example-monorepo
Inside the folder, create a new package.json with our root workspace.
$ cd example-monorepo
$ touch package.json
This package should be private in order to prevent accidentally publishing the root workspace. Add the following code to your new package.json file to make the package private:
2. Create A React Project And Add It To The Workspace List
In this step, we will create a new React project and add it to the list of packages inside the root workspace.
First, let’s create a folder called packages where we will add the different projects we will create in the tutorial:
$ mkdir packages
Facebook has a command to create new React projects: create-react-app. We’ll use it to create a new React app with all the required configuration and scripts. We are creating this new project with the name “client” inside the packages folder that we created in step 1.
$ yarn create react-app packages/client
Once we have created our new React project, we need to tell Yarn to treat that project as a workspace. To do that, we simply need to add “client” (the name we used earlier) inside the “workspaces” list in the root package.json. Be sure to use the same name you used when running the create-react-app command.
Note: This tutorial is simplified with only two packages (server and client). In a project, you might typically have as many packages as you need, and by convention the open-source community use this naming pattern:@your-project-name/package-name. For example: I use@ferreiro/serveron my website.
4. Install All The Dependencies And Say Hello To yarn.lock
Once we have added our React app, as well as our Express server, we need to install all the dependencies. Yarn workspaces simplifies this process and we no longer need to go to every single application and install their dependencies manually. Instead, we execute one command — yarn install — and Yarn does the magic to install all the dependencies for every package, and optimize and cache them.
Run the following command:
$ yarn install
This command generates a yarn.lock file (similar to this example). It contains all the dependencies for your project, as well as the version numbers for each dependency. Yarn generates this file automatically, and you should not modify it.
5. Using A Wildcard (*) To Import All Your Packages
Until now, for every new package we have added, we were forced to also update the root package.json to include the new package to the workspaces:[] list.
We can avoid this manual step using a wildcard (*) that tells Yarn to include all the packages inside the packages folder.
Inside the root package.json, update the file content with the following line: "workspaces": ["packages/*"]
Last step! We need to have a way to run both packages — the React client and the Express client — simultaneously. For this example, we will use concurrently. This package let us run multiple commands in parallel.
Add concurrently to the root package.json:
$ yarn add -W concurrently
Add three new scripts inside the root workspace package.json. Two scripts initialize the React and Express clients independently; the other one uses concurrently to run both scripts in parallel. See this code for reference.
Note: We will not need to write ourstartscripts into the “server” and “client” packages because the tools we used to generate those packages (create-react-appandexpress-generator) already add those scripts for us. So we are good to go!
Finally, make sure you update the Express boot-up script to run the Express server on port 4000. Otherwise, the client and server will try to use the same port (3000).
var port = normalizePort(process.env.PORT || '4000');
Now we are ready to run our packages!
$ yarn start
Where To Go From Here
Let’s recap what we’ve covered. First, we learned about Yarn workspaces and why it’s a great tool to create a monorepo project. Then, we created our first JavaScript monorepo project using Yarn, and we divided the logic of our app into multiple packages: client and server. Also, we created our first basic npm scripts and added the required dependencies for each app.
From this point, I’d suggest you review open-source projects in detail to see how they use Yarn workspaces to split the project logic into many packages. React is a good one.
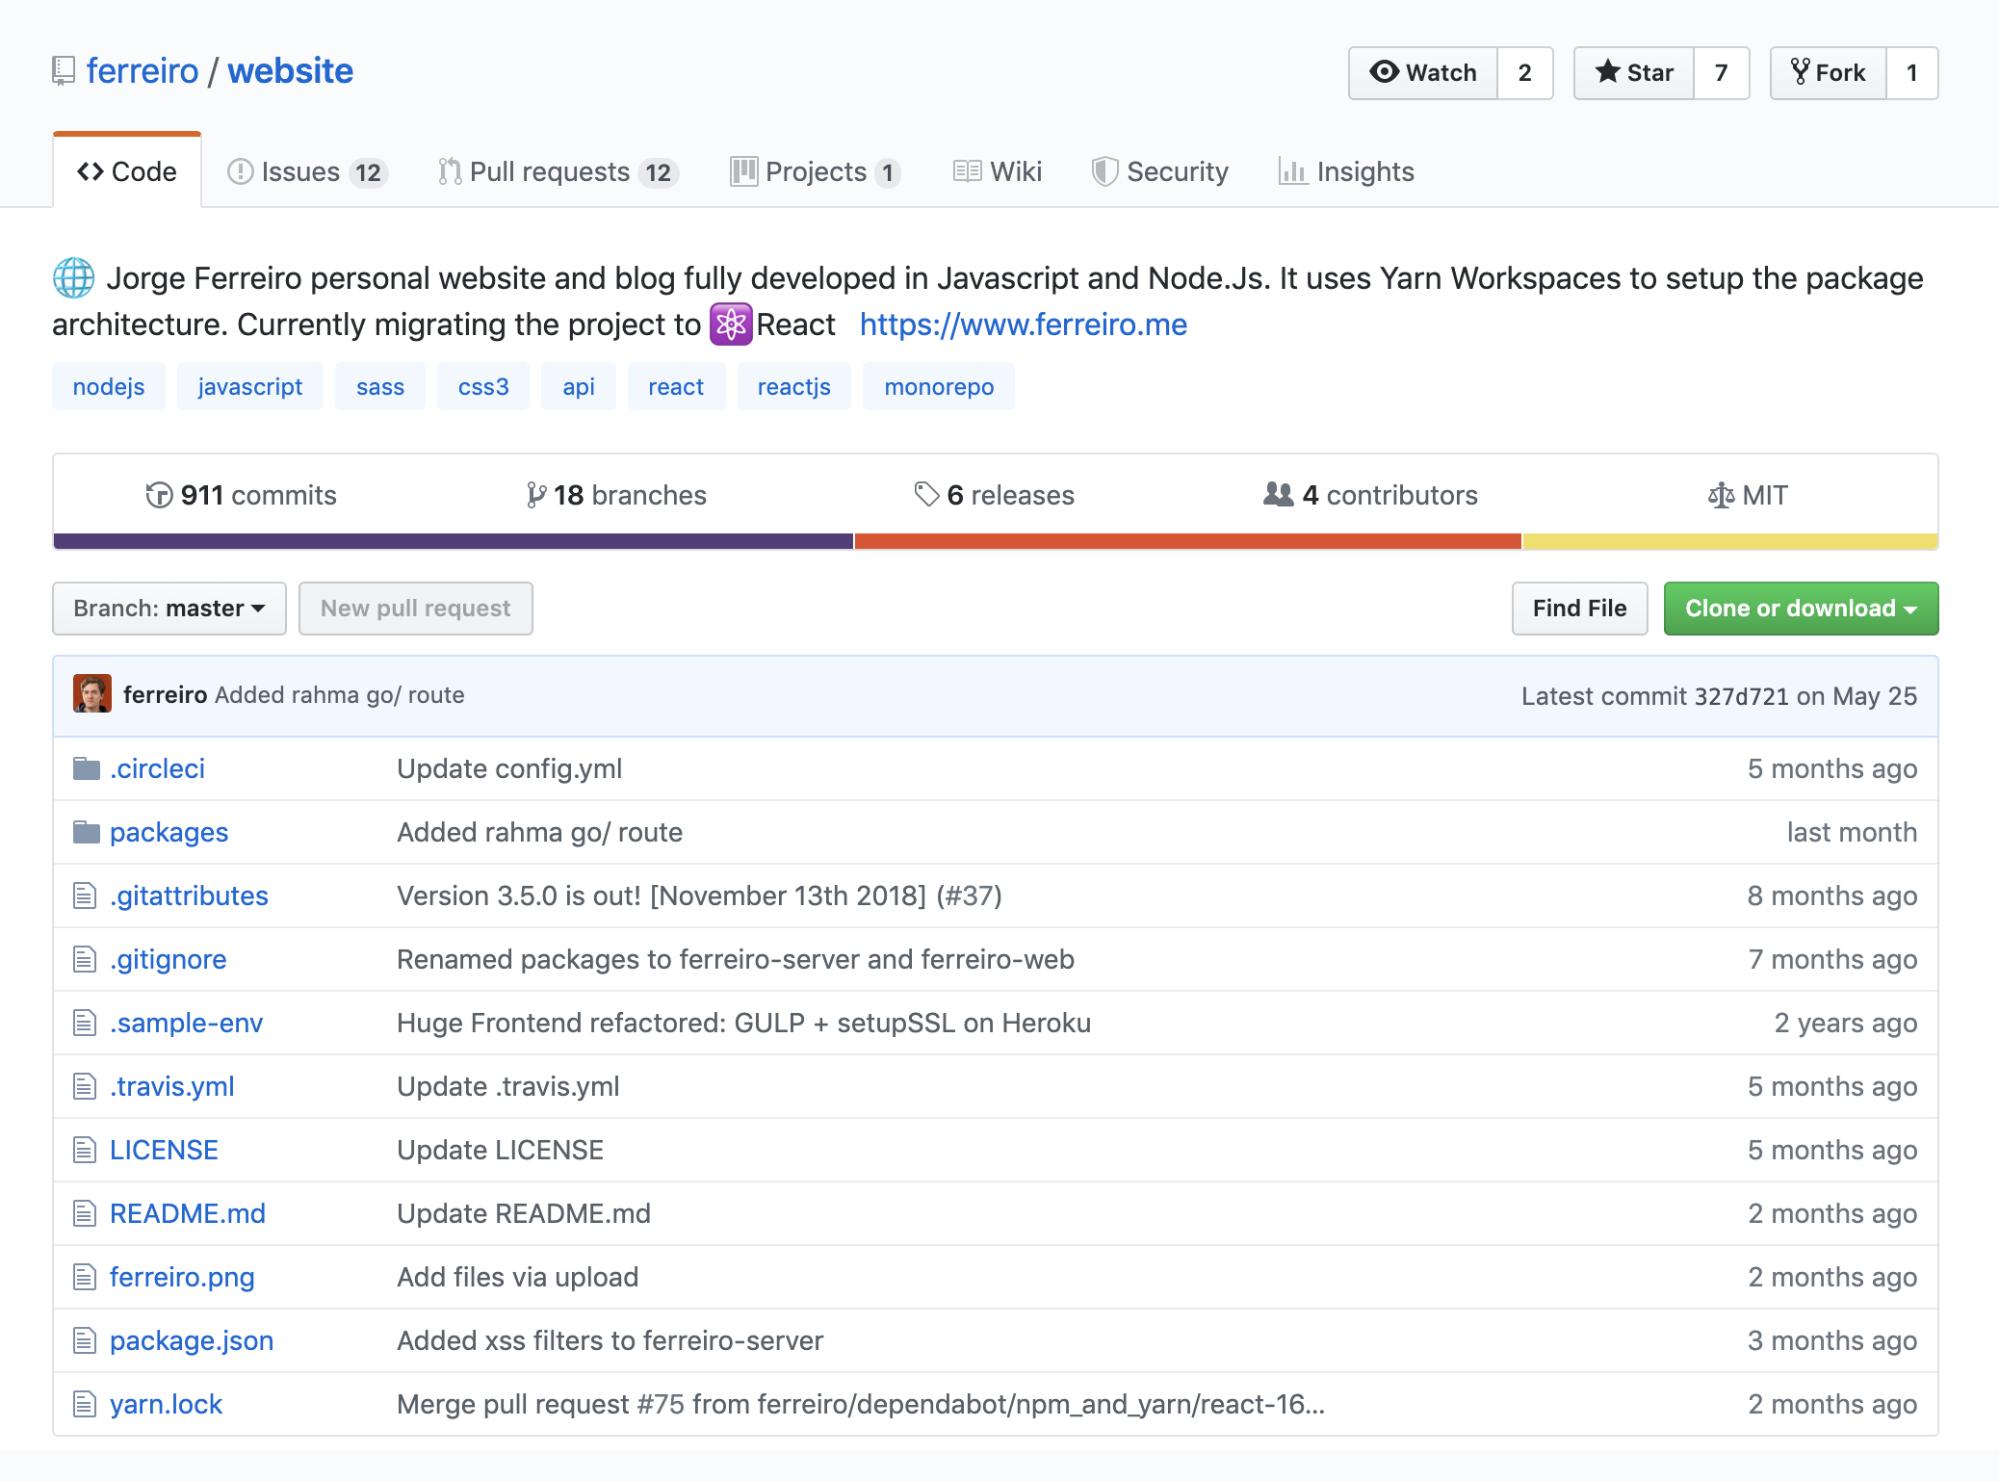
Jorge Ferreiro’s website using yarn workspaces and packages with a back-end and frontend apps (Large preview)
Also, if you want to see a production website using this approach to separate back-end and front-end apps into independent packages, you can check the source of my website, that also includes a blog admin. When I migrated the codebase to use Yarn workspaces, I created a pull request with Kyle Wetch.
Moreover, I set up the infrastructure for a hackathon project that uses React, webpack, Node.js, and Yarn workspaces, and you can check the source code over here.
Finally, it would be really interesting for you to learn how to publish your independent packages to become familiar with the development life cycle. There are a couple of tutorials that are interesting to check: yarn publish or npm publish.
For any comments or questions, don’t hesitate to reach out to me on Twitter. Also, in the following months, I’ll publish more content about this in my blog, so you can subscribe there as well. Happy coding!
In recent times, yoga has been gaining in popularity as a means to fitness and wholesome living. If you wish to capture your fair share of the yoga market with your WordPress website, you’ve got to make sure that you have a theme that works for you. In this post, we’ve put together 15 of the best yoga WordPress themes to help you get started.
The Fashion WordPress Themes mentioned here below are the best options available in the market that comprises all the required features, elegance and style to meet the demands of a niche fashion blogger. These templates have...