What Is The MEAN Stack and Why Is it Better Than LAMP?

The MEAN software stack is a popular set of technologies for creating websites. It consists of MongoDB, Express.js, AngularJS, and Node.js. Each of these items provides vital features and time-saving tools for website development. Although another popular set of technologies known as the LAMP stack may be some developers’ preferred stack, this article will outline precisely why you will find more success with MEAN stack development.

MongoDB

The first letter in MEAN stands for MongoDB. You will use this for your website’s databases. You may store anything in the database from basic user credentials to shared information like the comments on a forum. MongoDB uses the file format JSON, which will be familiar and intuitive to you if you have ever used a JavasScript object. With helpful learning resources and solid documentation, MongoDB is an excellent choice for today’s web developers. In contrast, the relational database system in the LAMP stack is considered outdated by some and also much stricter, making MongoDB the ideal choice.

How to Use GraphQL in React Using Hooks

What are Hooks?

React Hooks, introduced in version 16.8.0, are reusable stateful logic functions. They aim to simplify the development of complex components by splitting them into small functional blocks that are easier to manage, test, and reuse.

Using hooks removes the need for many abstractions like Higher Order Components (HOC) and render props. They allow you to add functionality to the application without having to change the component hierarchy and or encapsulate components.

A Beginner’s Journey to Launching a Website

In September 2018, I was just a few months into my journey of learning web development. As I'm sure is the case with many new developers, it was a big task for me to learn not only the basic skills required, but also keeping current with the fast-moving industry. Just as I was getting to the level where it felt as though I could build a simple website, I started to realize that it was only the first step.

Opening up a few HTML pages stored locally on my laptop felt like a million miles away from being able to say to someone, "Hey, check out my website, live on the actual internet!"

But I did it! And the best part is that it wasn't as scary, difficult or expensive as it first felt like it'd be.

It all started with me sending Chris an email, which he used to write an awesome article explaining everything in plain English.

At this point, I didn't have a fully coded website — just an idea for a basic site that I was using to teach myself as I went along. I used the ongoing progress of my site as a push to learn how to get a live website quicker. But I'm sure you could do the whole thing with an HTML document that just says "Hello, world!"

I built my site using Gatsby, a static site generator powered by React. Building a website with these tools in a modular way felt really natural to me. The concept of reusable parts is something I’m familiar with in my career as a physical product designer and mechanical design engineer. It means that you can build in stages, like Lego, brick-by-brick, until you eventually have a life-sized castle you can invite your friends to visit!

This isn't a guide. It's my personal experience in the process of getting a website from my laptop to being live on the internet. Hopefully it'll give you some hope that it's possible and achievable, even by someone who has no formal training in web development and who has only been doing it for 12 months!

Domain registrars

Before I ever bought a domain, it seemed like a pretty serious thing to do. Owning a domain means being responsible for it. People will go to that address and eventually see content that you've put there.

I don’t know if everyone has the same experience, but I spent weeks deciding on a domain name before going for it. It almost became an obsession of mine for a while, searching online for acronym generators to try and be clever, spending hours on dictionary.com trying to find synonyms that were cool. In the end, I settled for my name and what I do: joshlong.design. I still smile a little when I see my name in the address bar.

Since reading Chris' article, I've actually bought two domains from two different providers: a .com and a .design. I realize that I went against Chris' advice of consolidating domain names at a single registrar, but I needed to shop around a bit to get a good deal on my .design domain. I only own two domain names — and one of them I don't actually have any plans for just yet — so keeping on top of where I bought them isn't a task. In fact, I don't remember the last time I needed to login and manage the domain I use on a daily basis!

Buying a domain name was as simple as any other online shopping transaction. Nothing really huge or scary about it. I bought my .com through Namecheap, and my .design through Google Domains, and the process was pretty similar for both. All they needed was my name, address and payment details. Pretty standard stuff!

I don't remember Google trying to sell me a load of extra packages. They seemed happy with me just buying a domain, though they did offer me free WHOIS protection which I snapped up because I didn’t want my contact details freely available for anyone who’s feeling nosey. However, as Chris warned might happen, the other registrar I went through tried really hard to sell me some extras like hosting, email, a VPN (whatever that is!) and SSL certificates.

Google Domains checkout is happy just to sell the domain name.
Namecheap tries to sell you all the additional services they offer before getting to the checkout.

I didn't go for any of those extras. I already had a hosting plan, and you can use an alias through Gmail to "fake" having a me@mycoolsite.com email address. I honestly have no idea why I'd need a VPN, and the hosting I was going to go for gave me a free SSL certificate through Let's Encrypt. So just the domain name, please!

Hosting

As Chris suggested it would be, choosing a host was a tad trickier than choosing and buying a domain name. But in the end, the web technology I used to build my site kind of guided me in a particular direction.

My site is built with Gatsby, which means it outputs straight-up static assets, basically as HTML and JavaScript files. That means that I didn't need a host that offered a server (in my most super smart authoritative voice), especially for WordPress with a MySQL database and Apache server, 6 cores @ 3.6 Ghz, 4GB RAM, 5TB bandwidth, 5 IP Addresses and 500GB SSD Storage, etc.

All that jargon goes straight over my head. All I wanted to do was upload my files to the internet and go to my domain to see them all compiled and shiny. Should be easy, right?

Well it turns out that it actually was that easy. As there's been so much hype around it recently, I thought I'd take a look at Netlify.

Netlify is recommended by Gatsby. They have really good documentation, and for my uses I felt as though I could comfortably stay within the free tier that they offer. In fact, at the moment I'm using 0.08% a month of the total bandwidth the free tier offers. Winning! Although maybe that means I’m not doing enough to get people to my site...

A quick aside about GitHub: I'm no expert at it and I don't really know any of the etiquette it entails. All I did was sign up, create a new repository and follow the instructions that they give you. After that, every time I made a change to my site, I used the buttons in my code editor (VS Code) to commit and push my changes. It works, but I have no idea if it's the correct or best practice way of doing it! I'm starting now, though, to understand how to use Git through the command line. I had no idea at all how to do it when I started, but I still muddled through it — and you can too!

Back to Netlify.

I signed up for an account (no credit card details required) and added a new site to Netlify by telling it about the GitHub repository where it was stored. When you’ve connected your repository, you can watch Netlify doing its thing deploying your site.

Part of the Netlify’s deploy process is that it shows your website going live in real time. That’s useful for debugging if something goes wrong, or just to watch and get excited like an impatient puppy waiting for a biscuit.
You also get a deploy summary to quickly see what files were uploaded during deployment.

After my site was deployed to the randomly generated URL Netlify gives you, I followed their instructions for adding a domain I had registered elsewhere. They make it so easy!

I assume the instructions will be different for different hosts, but basically, Netlify gave me some server addresses which I then had to go back to my domain registrar to enter them in. These addresses are referred to as nameservers, so look out for that word!

Netlify gives you your nameserver addresses and super easy to understand documentation to set them up with your domain registrar

Once I entered my Netlify nameservers into Google Domains, Google knew where to look to send people who type my domain name into their browser’s address bar. All I had to do after that was wait for some internet magics to happen in the background. That took around three hours for me but can take anywhere from 10 minutes to 24 hours from what I hear.

After that was done, I could type my shiny new domain name into the address bar and — just like that — I'm looking at my own site, hosted live on the internet!

Content Management Systems

The world of Content Management Systems (CMS) is vast, and confusing, but it can also be completely irrelevant to you if you want it to be. I felt so liberated when I realized you don't have to worry about it. It was one less thing in my list of things to do.

My Gatsby site posts and pages (my content) was just a directory of markdown files and my CMS was my text editor. Chris and Dave talked about the idea of this in a recent episode of ShopTalk Show.

My website content is managed right in my text editor, VS Code.

Because I wanted to have a standard structure for different types of posts and pages, I eventually started using NetlifyCMS which is an open-source CMS which can be included in your site real fast. (Chris also did a video recently about NetlifyCMS for his confer-reference site... see what I did there?!) Now I can create blog posts and drafts from anywhere in the world, straight from my website, as long as I have an internet connection!

The same content managed through NetlifyCMS, which offers a great UI and GitHub integration

Asset Hosting (CDNs)

A Content Delivery Network (CDN), as Chris explained in his article, is basically somewhere on the internet where you store the files you need for your website to run, HTML, CSS, images, etc. When your website needs them, it goes to the CDN and grabs the files for your site to use.

From what I've read, it's good practice to use a CDN, and because of the hosting decision I made, it's not something I have to worry about - it's included by Netlify as standard, for free!

Netlify has it's own CDN where all of the files for your website are stored. When someone goes to your website, Netlify goes to its CDN and grabs the files. It's amazingly quick, and makes your site feel so much smoother to navigate.

It's a long journey, but you can do it!

There was a point, before I set off on the journey of getting my website live, where I tried to convince myself that it's fine to just have local websites, as my career isn’t in web development. The reason for that was because the path felt like it would be difficult, long and expensive.

In fact, it was none of those things! You could get a website live on the internet for £0.99 (~$1.25 for you Americans) or less if you find a deal on a domain name. The domain name was my only expense because for the path I took for hosting, asset management and content management.

At a super basic level, the path looks like this..

Code > Buy Domain > Find/Buy Hosting > Update Nameservers > Upload Code > Live!

If you happen to use the same vendor to buy your domain name and your hosting, you can skip the nameserver step. (Netlify sells domains too!)

It's definitely possible for anyone to get their website live on the internet. There's a process that you need to follow, but if you take your time, it can be relatively straightforward. It's a really wonderful feeling, getting a thing you built in front of people, and it's honestly something that I thought I'd never be able to do. But it's certainly within everyone's reach!

Something I've come to really admire over this process (and thousands of Google searches) is the willingness of everyone in the web community to collaborate and help, accepting me and my questions as I tried to learn what I was doing. It's something that I wish was more common in my own industry.

I'd love to hear other people's experiences getting their first website live. What were your pitfalls and triumphs? Was it as scary as it first seemed?

The post A Beginner’s Journey to Launching a Website appeared first on CSS-Tricks.

CSS Animation Libraries

There are an awful lot of libraries that want to help you animate things on the web. These aren't really libraries that help you with the syntax or the technology of animations, but rather are grab-and-use as-is libraries. Want to apply a class like "animate-flip-up" and watch an element, uhhh, flip up? These are the kind of libraries to look at.

I wholeheartedly think you should both 1) learn how to animate things in CSS by learning the syntax yourself and 2) customize animations to tailor the feel to your site. Still, poking around libraries like this helps foster ideas, gets you started with code examples, and might form a foundation for your own projects.

Let's take a look at the landscape of them. Some libraries have different approaches: only take what you need classes, Sass mixins, light JavaScript libraries for adding/removing classes, etc. But they are all essentially "CSS animation libraries." (Some of them are kinda funny having "CSS3" in the title, which kinda dates them. People just don't say that anymore.)

While animations can both be fun and create useful interactions, it's worth remembering that not all users want them when browsing the web. See Eric Bailey's "Revisiting prefers-reduced-motion, the reduced motion media query" for information on how to accommodate users who prefer little or no motion.

Animista

You pick an animation you like and it gives you a class name you can use that calls a keyframe animation (you copy and paste both). The point is you just take what you need.

See the Pen
Animista Example
by Chris Coyier (@chriscoyier)
on CodePen.

Animate.css

One of the big original classic CSS animation libraries from Dan Eden.

See the Pen
Animate.css (Part 3)
by Hudson Taylor (@Hudson_Taylor11)
on CodePen.

tachyons-animate

Tachyons itself is an atomic CSS library with a ton of utility classes for essentially designing anything by adding classes to what you need. tachyons-animate extends those by adding "Single purpose classes to help you orchestrate CSS animations." It can be used alone, but even the docs suggest it can be used in combination with other animation libraries since helper classes are generically useful.

See the Pen
tachyons-animate
by Chris Coyier (@chriscoyier)
on CodePen.

Infinite

These animations, like rotations and pulses, that are specifically designed to run and repeat forever.

See the Pen
BgrYZo
by Chris Coyier (@chriscoyier)
on CodePen.

Motion UI

A Sass library for creating flexible CSS transitions and animations.

See the Pen
Motion UI
by Chris Coyier (@chriscoyier)
on CodePen.

micron

a [μ] microInteraction library built with CSS Animations and controlled by JavaScript Power

See the Pen
Micron
by Chris Coyier (@chriscoyier)
on CodePen.

Vivify

Vivify is sort of like Animate.css in the sense that it contains a lot of the same types of animations. It does offer plenty of its own as well.

See the Pen
Vivify
by Chris Coyier (@chriscoyier)
on CodePen.

Hover.css

A collection of CSS3 powered hover effects to be applied to links, buttons, logos, SVG, featured images and so on. Easily apply to your own elements, modify or just use for inspiration. Available in CSS, Sass, and LESS.

See the Pen
Hover.css
by Chris Coyier (@chriscoyier)
on CodePen.

AllAnimationCss3

See the Pen
All Animation
by Chris Coyier (@chriscoyier)
on CodePen.

Magic Animations CSS3

See the Pen
Magic Animations
by Chris Coyier (@chriscoyier)
on CodePen.

It's Tuesday.

A quirky CSS Animation Library.

See the Pen
Tuesday
by Chris Coyier (@chriscoyier)
on CodePen.

vhs

See the Pen
vhs
by Chris Coyier (@chriscoyier)
on CodePen.

ReboundGen

See the Pen
ReboundGen
by Chris Coyier (@chriscoyier)
on CodePen.

CSShake

See the Pen
CSSShake
by Chris Coyier (@chriscoyier)
on CodePen.

Motion CSS

cssanimation.io

See the Pen
cssanimation.io
by Chris Coyier (@chriscoyier)
on CodePen.

WickedCSS

See the Pen
WickedCSS animations
by Chris Coyier (@chriscoyier)
on CodePen.

Woah.css

See the Pen
Woah.css
by Chris Coyier (@chriscoyier)
on CodePen.

Obnoxious

See the Pen
Obnoxious.css
by Chris Coyier (@chriscoyier)
on CodePen.

Hexa

Mimic.css

See the Pen
mimic.css
by Eric Treacy (@etreacy)
on CodePen.

The post CSS Animation Libraries appeared first on CSS-Tricks.

Free Website Templates for Online Stores

Online CMSes like WordPress, Shopify, and Joomla have popularized the use of templates and themes. With them, you can choose a look for your website and configure it without any knowledge of coding.

But did you know that you can also find HTML and Bootstrap templates that can be used on any website? What’s more, many of these templates are free. If you’re looking to start an online store and need a base to work off of, try one of these free eCommerce templates.

UNLIMITED DOWNLOADS: Email, admin, landing page & website templates


Fashion Hub

Example of Fashion Hub

Looking to make an elegant fashion boutique? Fashion Hub has everything you’ll need in this Bootstrap template. The homepage comes with a slider, service list, Instagram hub, and plenty of links pointing to your store. There’s also plenty of product pages, a blog, and even checkout/order screens.

eShopper

Example of eShopper


Made for all types of eCommerce websites, eShopper is a simple and clean design that comes with 11 pages. These include product listings, checkout pages, and a blog. This one’s a great all-purpose template with plenty of functionality and pages.

Sell Anything

Example of Sell Anything

With all the pages you’ll need to start building an online store, Sell Anything allows you to do just that. There’s a clean homepage with various product sliders, plenty of other pages you’ll need, and a topology page that shows you the various elements this template uses and explains how to use them to build your own pages.

Shop

Example of Shop

If you love elegant animations, you should try this HTML5 template. There’s plenty of scrolling animations, beautiful hover effects, and more in this stylish design. You get a few pages from this one, including a product, about, and services page. This one is perfect for a small shop that sells a few products.

Boighor

Example of Boighor

Light design and beautiful animations define this eCommerce design made just for online bookstores. But with such a nice design, you might want to repurpose this for any type of shop. The free version comes with twelve pages, while the pro version gives you a few extra pages and some variations on the available ones.

Toys Shop

Example of Toys Shop

With a bright and colorful design, this template is perfect for anyone selling toys or products for children. You get a product view and store page among many others, and the footer includes a Google Map and subscription form.

Darklook

Example of Darklook

Looking for something a little darker than all these bright, light designs? Darklook is great for technology and fashion shops. You’ll find cart, checkout, product detail, and blog post pages. The wide, large design puts a big emphasis on photography, so make sure you have high-res photos of your products to show off.

Shopper

Example of Shopper

This small template is great for medium to large shops of any kind. The simple three-color look is universally appealing, and it comes with a homepage, product list, product detail, contact, register, and cart page. This is enough to let you get your shop set up quickly.

Prezzie

Example of Prezzie

Last but not least is Prezzie, an extremely stylish and well-made template. With a built-in video slider header, gorgeous parallax effects, and a design that looks like it was custom made for you, you’ll quickly fall in love with this template.

Get Your Shop Running Quicker

HTML templates are so helpful because they save time, and they’re fairly easy to edit – even when you have limited knowledge of code. Often, it’s just a matter of replacing images and placeholder text, and you have a functioning website.

Of course, you’ll still need to add a payment gateway to your website, include product pages, and otherwise make your online store functional. But with one of these templates, you can skip the lengthy step of having to design and code a unique website, and start selling sooner.

Migrating to MRTK2: Manipulating Holograms by Grabbing

To be honest, the title of this blog post is a bit weird, because in the Mixed Reality Toolkit 1, the concept of grabbing was unknown, as HoloLens 1 does not support this kind of gestures. But nevertheless, as I am on this quest of documenting all the gems I discover while migrating an existing app to Mixed Reality Toolkit 2, this is one of the things I came across. So, I am shoehorning it in this blog post series — the 8th installment of it already. And the fun thing about this one is that although there is a demo project available, I will be writing no code at all. The whole concept of manipulation by grabbing can be done by simply dragging MRTK2 components on top of a game object. Let's get started.

'Far Manipulation'

This is really extremely simple. If I want to make a cube draggable in the 'classic' sense — that is, point a cursor to it, pinch, and move my hand, and then the cube follows, all you have to do is add a ManipulationHandler to the cube, with default settings:

Components of Effective Software Monitoring: App Logs, Infrastructure Telemetry, Health-Check Reports

At Logicify, we are proud to be software monitoring geeks. We love to monitor both the apps we develop and the ones we use internally. Not because they are sloppy. Not because we don’t trust our code. But because we love to keep abreast of events, control performance and eliminate the risks of an error. Monitoring helps us be proactive and avert issues before real users are affected.

In our double-sided system of user behavior and app condition monitoring, we use Graylog as a single data storage for logs and other data about the web app, and Grafana, a powerful data visualization tool. Combined and wisely configured, these two tools give an objective picture of the app’s performance at all times. For comprehensive snapshots of system behavior and, what is more important for apps in production, for proactive moves to iron troubles out, we collect monitoring data from a multiple layers. App-specific metrics are complemented by other analytics to give a broader picture of system state and performance.

Does the 32-Bit JVM or 64-Bit JVM Decision Matter Anymore?

There are a few distinct differences and subtle nuances between 32-bit JVM and 64-bit JVM. We thought we will try to clarify them through this question-and-answer article

Do I need to understand the difference between 32-bit JVM and 64-bit JVM?

If you aren’t building a performance-critical application, you don’t have to understand the difference. The subtle difference between 32-bit JVM and 64-bit JVM wouldn’t make much difference to your application. You can skip reading further.

Collective #534


C534_flawwwless

Flawwwless

Flawwwless is a coding education platform with easy to follow interactive tutorials.

Check it out


C534_docs

ImportDoc

With ImportDoc you can create a web page that updates dynamically with the content of a Google document.

Check it out


C534_gatsbythemes

Gatsby Themes

Exciting news for Gatsby users: With a Gatsby theme, all of your default configuration (shared functionality, data sourcing, design) is abstracted out of your site, and into an installable package.

Check it out


C534_fwa

The Cool Club FWA

The web presentation of The Cool Club FWA, a deck of cards displaying the 54 coolest websites in history, as featured in “Web Design, The evolution of the Digital World 1990-today”.

Check it out


C534_spreadsheets

Stein

With Stein you can use Google Sheets as your no-setup data store.

Check it out


Collective #534 was written by Pedro Botelho and published on Codrops.

PCF 2.6 Feature – App Revisions

Overview

Developers, who have been using Pivotal Cloud Foundry (PCF) have been asking the question of how they know which version of Application PCF is running. We used to check this in on-premise by going to that VM and checking the jar version. Also, performing a rollback smoothly for PCF deployments at the SCM (Github) or CI/CD level is painful and risk-prone. It involves verification, approval and other deployment processes.

With PCF 2.6, Pivotal has come up with a feature called App Revisions. Using this feature, we can rollback the deployment for an application very easily. In this article, we will try to understand this feature and walk through the steps for rollback.

Microsoft Azure vs. Amazon Web Services: A Cloud Platform Comparison

According to Gartner, “Cloud computing is projected to grow as a $300 billion business by 2021 and will account for nearly a quarter of all IT budgets.” Companies, regardless of their domain or size, are flocking towards cloud services in order to improve their operational efficiency, increase data security and generate new streams of revenue. Adopting cloud computing gives businesses a great option to access their data from anywhere anytime.

Making a transition to the cloud is an expensive and crucial decision which requires thorough research and planning. Enterprises often feel enormous pressure while choosing a cloud service provider (CSP) to meet their business needs. There are two players that have emerged as the most popular choices in the aggressive cloud platform wars — Amazon Web Services (AWS) and Microsoft Azure. Even though these two cloud service providers have much in common and offer a similar set of services, they do differ in several aspects. So, let’s explore the basic features of both the computing platforms and the key differences between them.

Getting Started With Kubernetes Clusters

Kubernetes is rapidly turning into the new standard for sending and overseeing programming in the cloud. With all the power Kubernetes gives, be that as it may, comes a precarious expectation to absorb information. As a newcomer, attempting to parse the official documentation can be overpowering. There is a wide range of pieces that make up the framework. It tends to be difficult to tell which ones are important for your utilization case. This blog entry will give a disentangled perspective on Kubernetes, however, it will endeavor to give an abnormal state outline of the most significant segments and how they fit together.

Equipment

Node

A node is the smallest unit of registering equipment in Kubernetes. It is a portrayal of a solitary machine in your cluster. In most creation frameworks, a node will probably be either a physical machine in a data center or virtual machine facilitated on cloud supplier like Google Cloud Platform. Try not to give shows a chance to restrict you, in any case; in principle, you can make a node out of nearly anything.

Git Strategies for Software Development: Part 2

Please go through the earlier article before reading this article. I will assume the strategy defined in first article is clear before reading ahead. This article will focus on multiple releases in parallel. A software team working on two or more releases at a time may refer to this strategy.

Let’s consider two releases starting in parallel from today.

What You Need to Know About DevTestOps

What is DevTestOps?

The DevOps movement or culture celebrated its tenth anniversary in 2018. It is now critical to the success of many organizations.

The original definition of DevOps by practitioners Len Bass, Ingo Weber and LIming Zhu is interesting. “It is a set of practices that helps reduce the time between committing a change to a system and committing the change into normal production – all the while ensuring high quality.”

What Is NoOps?

Automation has been driving the entire IT industry forward this past couple of years. By automating certain tasks, development teams can increase their capacity without feeling the budget stress of hiring new team members. Automation also promises higher effectiveness, especially in operations and maintenance.

The traditional software development workflow involves the dev team moving an iteration along a predefined pipeline. Once the development and initial—isolated—testing stages are completed, Devs then hand the code over to the Operations team.

The Beginner’s Guide to CSS

If you currently have a website or plan to build a website, CSS is definitely a term that you’ve come across. But for those of you who don’t know how to code and don’t have any development experience, it can be a little confusing.

Let me start with the basics.

CSS stands for cascading style sheets. It’s a stylesheet language that describes the appearance or presentation of a website. Essentially, CSS tells web browsers how each element in an HTML document should be displayed.

Along with JavaScript and HTML, CSS is a crucial component to every web page on the Internet.

The main benefit of CSS is the ability to separate website content from the design elements, simply by changing rules in a CSS file.

Before CSS was used, nearly every attribute related to how HTML documents were displayed was written in HTML markup. This means that so many rules had to be repeated throughout the HTML code.

But CSS makes it possible for developers to move that information into a style sheet, which simplifies the HTML.

As a result, the HTML is shorter, lighter, and less prone to errors. It also makes your HTML much easier to maintain.

In this guide, I’ll give you some common use cases for CSS and show you my favorite ways to learn CSS online.

CSS common uses

There are lots of different ways to use CSS on your website. But I want to show you some of the more basic and common applications so you can get familiar with how CSS works.

Once you’re able to master these common principles and use cases, you’ll be able to tackle more complex CSS elements in the future.

Font styling

You can use CSS to create a font style. Write properties for elements like:

  • Font type
  • Color
  • Weight
  • Size
  • Alignment
  • Case
  • Line height

CSS can also be used to add effects like underlining and strikethroughs. Let me give you an example to show you how this works.

CSS Font Style

Take a look at the three rules I wrote in the style of this CSS. Property A is a normal font style, Property B is an italic font style, and all H1s are red.

Now when you look at the body, you can see that I wrote the HTML to correspond with those properties. Based on this information, you can see how it would appear on the web page, by looking at the right side of the split screen.

With a simple example like this, you may not immediately see the benefits of CSS.

But now try to imagine a document with 30 or 40 H1s. Based on the properties in this example, all of the H1s would automatically be red, without having to add any additional code in the HTML. If I wanted to change them to blue, all I’d have to do is change the CSS, as opposed to individually going through 40 H1s in the document.

Position properties

Website layouts can be defined with CSS position properties. You can write rules to specifically indicate the position of certain elements within an HTML document.

Common property values include:

  • Static — Elements in order, based on how they appear in the document.
  • Fixed — Elements are located in a position that’s relative the browsing window.
  • Absolute — Elements are positioned relative to its first position.
  • Sticky — Elements are positioned relative to a website user’s scrolling location.

If you use the position property to create website layouts, there will be instances where elements on the page overlap with other items. So there could be potential issues with this approach.

There are other ways to define the position of elements on a page, which we’ll get to next.

Float properties

The main usage of the float property is to send an element in HTML to the right or left of another element without changing the flow of the document. This is one of the best approaches to creating layouts for a website.

You’ve definitely seen floats used before when you’re browsing on the web, even if you didn’t know that you were looking at a float.

It’s most commonly used for images. An image can be positioned within a block of text, in a way that doesn’t create separation between the flowing text.

Here’s an example of the float property used for an image.

Float Properties

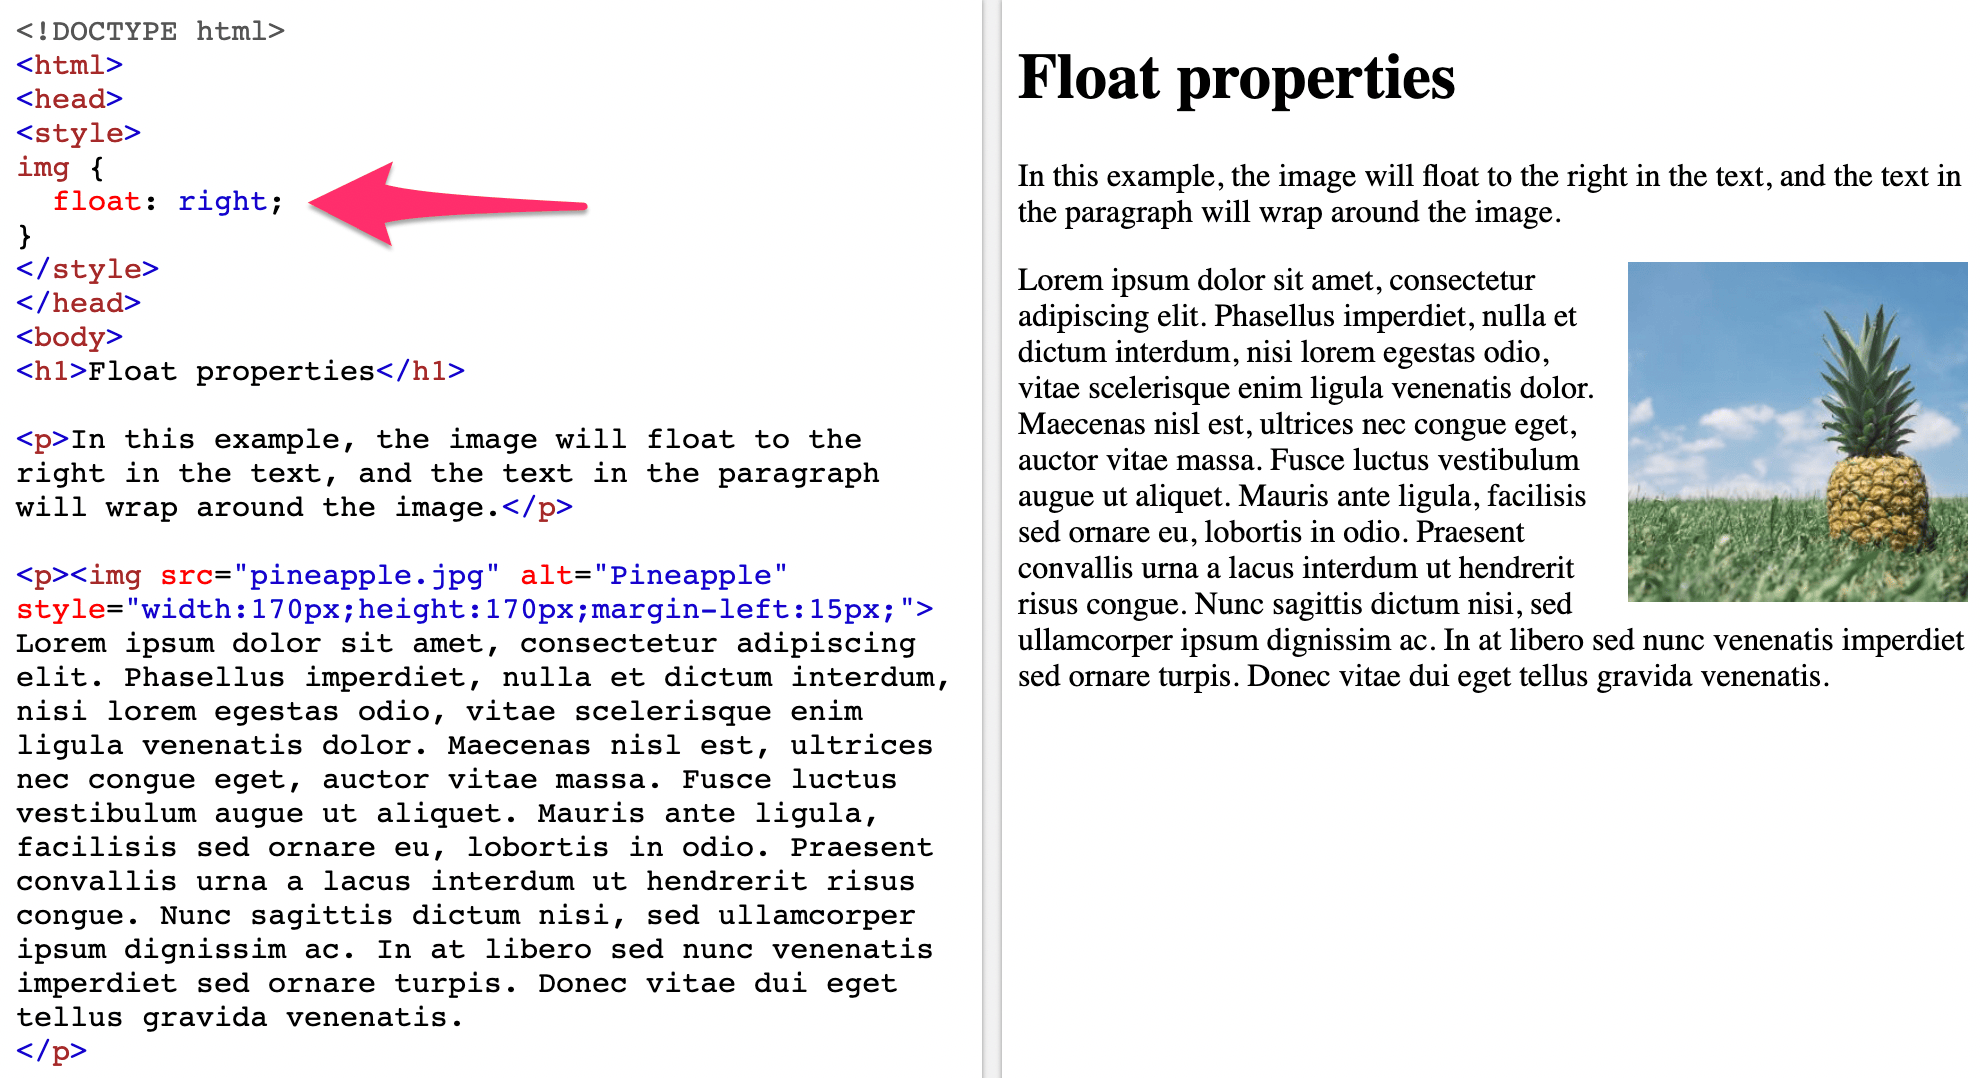
As you can see, the CSS property says that images will float right. So in the body of the HTML when an image is entered, the float property is automatically applied.

Floats are also commonly used for creating website menus. Items in the menu are floated in a way so they can appear in a horizontal line, as opposed to a bulleted list.

Clear properties

The clear property of CSS is often used to clear the float. As you just learned, when an element gets floated, all of the subsequent elements are adjusted so that they align properly based on the float property.

If you want those subsequent elements to begin below a floated element, as opposed to alongside of it, then you would apply the clear property to start the element on a new line.

Here’s a visual representation to show you what this would look like for images.

Clear

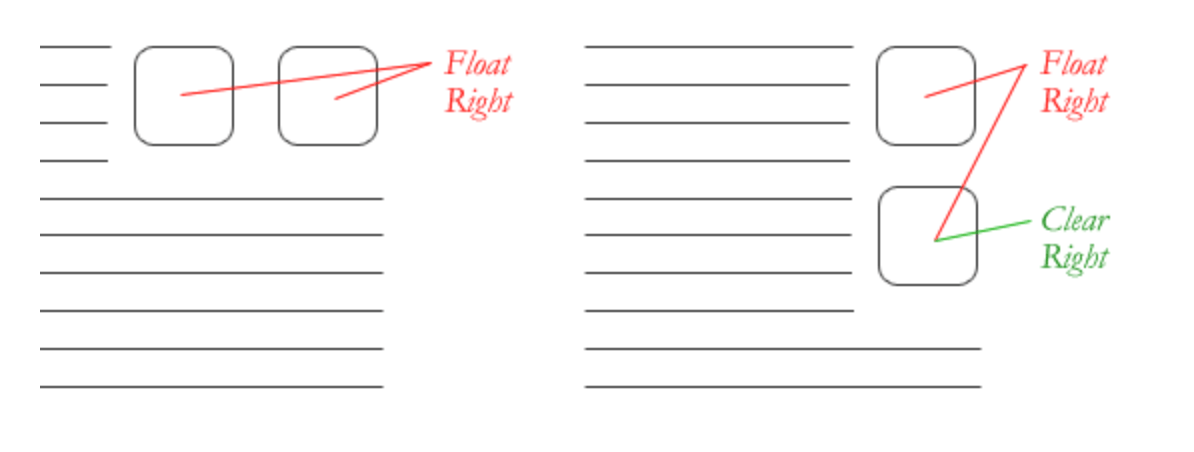
The clear property can be applied to other elements as well, but an image like you can see above is definitely one of the more common practices.

Box model

Every HTML element can be considered a box. When using CSS, the box model refers to the design and layout of a page.

The best way to describe this model is that there is a box wrapping around every element of HTML. There are three main components to the box model.

  • Margin
  • Border
  • Padding

Here’s an example of how you could write a CSS rule for the box model.

P {

padding: 10px;

border: 20px solid blue;

margin: 20px;

}

These CSS properties would translate to 10 pixels of padding on each side of the text. This will be empty space around the paragraph. There would also be a 20 pixel border of solid blue surrounding the padding. Lastly, there would be 20 pixels of margins between the border and any other surrounding element.

Responsive web design with CSS

Today, we have hundreds, if not thousands, of different screens available on the market. This means that people who visit your website can be doing so from countless variations of devices, screen sizes, display sizes, and resolutions.

Having a full-size website with just one additional design for a smaller device is no longer an option. So you need to use CSS to create a responsive design.

In order for this to happen, there are certain principles that you need to follow to ensure that your CSS is responsive on any screen from any device.

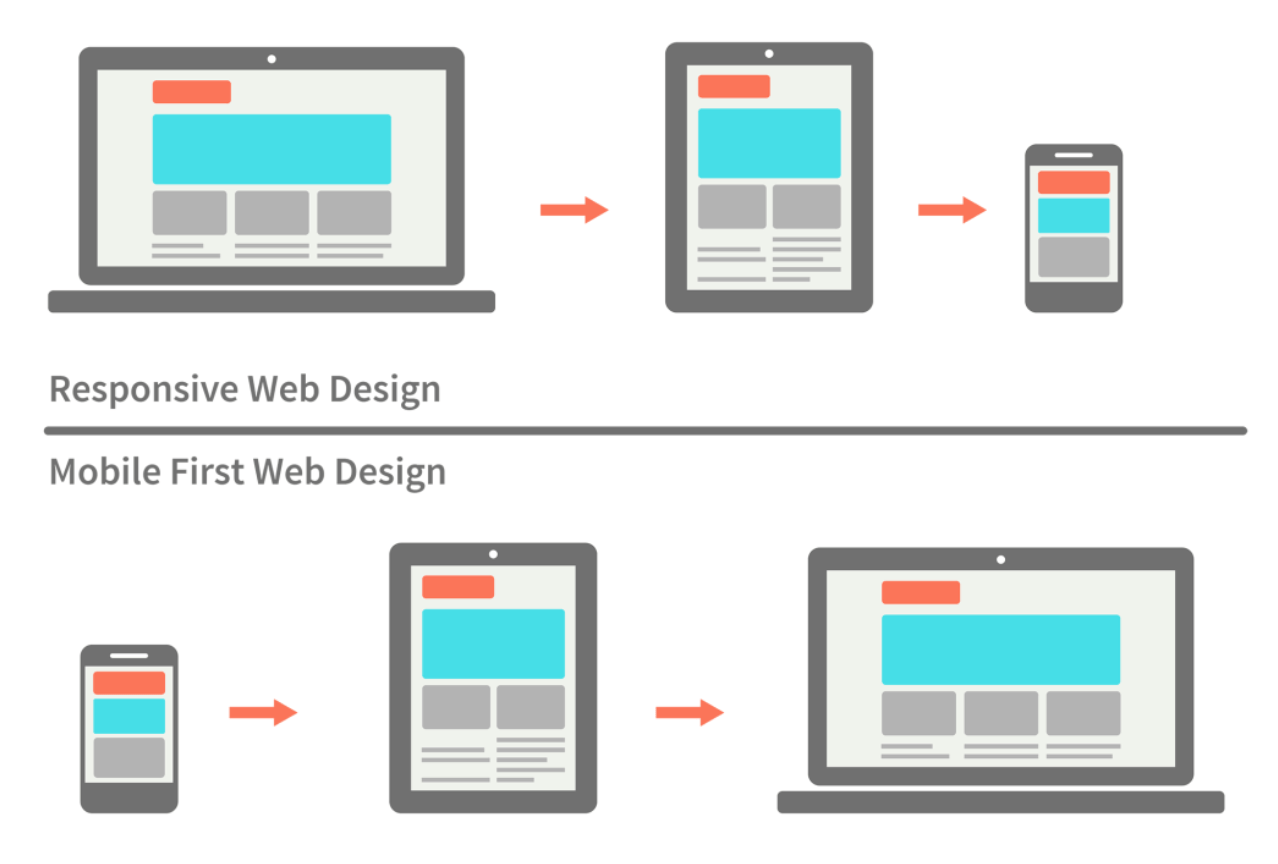
Your entire layout and grid needs to be fluid. You need to make sure that images automatically resize to render aesthetically from any screen.

One of the most popular ways to tackle a responsive web design is with a mobile-first approach. This means that the design is made with the smallest screens in mind first, and then styles are added as the size gets larger.

Responsive CSS

There are lots of great benefits to this approach.

A mobile first design forces you to determine the most essential functions of your website. Once those have been identified, you’ll use them as the foundation and building blocks for the site’s design.

More often than not, a full-sized website has additional elements that aren’t viewed on mobile versions of the site. But a mobile-first approach ensures that all of the primary purposes and functions will be at the forefront of the design.

It’s also worth noting that this approach means mobile users won’t have download as many site resources and CSS rules when accessing a website from a mobile device. This will save data usage for the user, create faster loading times, and an overall better user experience.

CSS learning resources

Everything I’ve covered so far just barely scratches the surface with CSS. I just wanted to give you an introduction so that you’d have a better understanding of how it works.

But for those of you who want to learn CSS beyond a beginner level, there are some great tools and resources online for you take advantage of. I’ve narrowed down a couple of my favorite options.

Codecademy

Codecademy

Codecademy is one of the top platforms for learning to code online. Over the last seven years, more than 45 million people have learned to code with their system.

Nearly 500,000 of those people have taken the CSS course. It takes about 15 hours to complete, and you’ll need to take their introduction to HTML course as a prerequisite. So altogether you’re looking at roughly 22 hours of your time to learn CSS.

Codecademy will teach you how to style web pages with file structures, text edits, colors, and various layouts. You can use these skills to customize your web pages.

The class also covers:

  • CSS selectors
  • Visual rules
  • The box model
  • Displays
  • Positioning
  • Typography
  • CSS grids

As you can see from this list, some of these subjects we discussed in this guide. So you’ll already have a basic understanding of some principles, which will give you a head start.

You’ll have access to some of these courses for free, but to get the full experience I’d recommend upgrading to the pro version of Codecademy.

Pricing is $19.99 per month for an annual contract, which is the best deal they have. Otherwise, you’d pay $29.99 or $39.99 for a six-month or month-to-month contract, respectively.

W3Schools

W3Schools

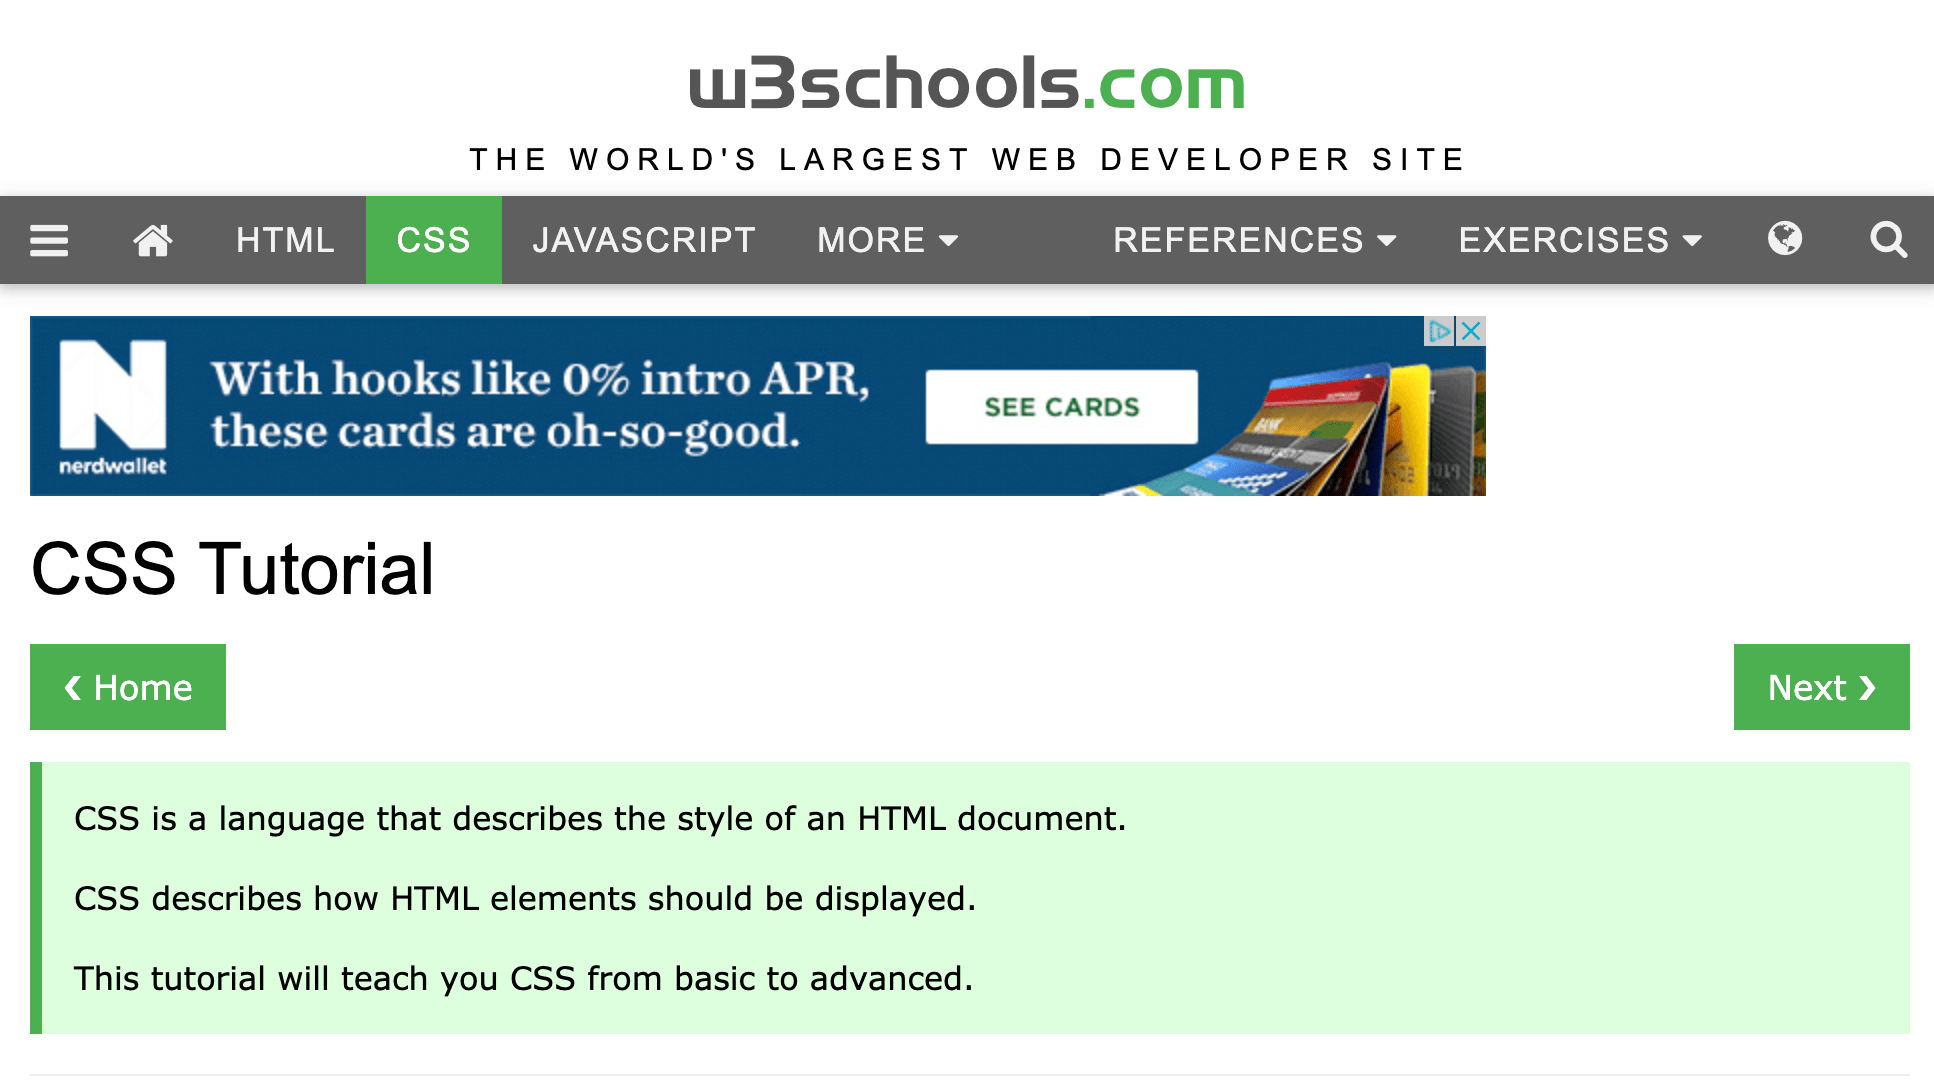
W3Schools has tons of free coding resources. In fact, I used their free editor twice for examples in this guide. The font styling and the float CSS that I showed you earlier were both written on the W3Schools platform.

I like this resource because it’s very simple and hands on.

First, they explain how a certain function or property works, then they show you an example. After that, they make it easy for you to practice with those examples by making changes to the CSS on your own.

There are more than 300 different CSS examples on the W3Schools site. You can test all of these with their editor.

Take advantage of their CSS templates, CSS exercises, and CSS quizzes as well.

For those of you who have an interest in pursuing web development or web design, you can also get a CSS certificate from W3Schools. Although this is something that you’ll have to pay for.

After you complete the training, you can take a 70 question exam, which you’ll have 70 minutes to complete. If you get 75% of those questions correct, you’ll pass and get a certification. If you get 95% of your answers correct, you’ll have a notation of excellency added to the certificate as well.

The CSS certificate program from W3Schools costs $95.

Conclusion

CSS is a crucial component of every website. You can use it to simplify your HTML, and ultimately reduce the complexity of your HTML files.

There are tons of different ways that CSS can be used. But as a beginner, I didn’t want to overwhelm you with too much at once.

With that said, the information in this guide is still very useful for anyone who is interested in learning more about CSS, so keep it as a reference for the future.

For those of you who want to take your CSS knowledge to the next level, try out one of the online resources that I mentioned above.

My Consultant Is Not My Enemy

Monkey, Application, Training, Business, PortraitFirst Concern: Yes, We Want to Work!

That's all we ask for; however, we are human beings, not a purchase order, not a slave, and not a claimant. Our work and motivation are to be of service to you because we find this noble and we want to bring you something.

Second Concern: Clients Are Not Very Aware of the Real Need to Use a Consultant

There are two good and two bad reasons for hiring a consultant.