In this post, we will discuss what are “map” and “mapAsync” when used in the Akka stream and how to use them.
The difference is highlighted in their signatures:-

Tips, Expertise, Articles and Advice from the Pro's for Your Website or Blog to Succeed

In this post, we will discuss what are “map” and “mapAsync” when used in the Akka stream and how to use them.
The difference is highlighted in their signatures:-
Web scraping is something developers encounter on a daily basis.
There could be different needs as far as each scraping task is concerned. It could be a product or stock pricing.
Pure components were introduced in React 15.3. React.Component and React.PureComponent differ in implementing the shouldComponentUpdate() lifecycle method. The shouldComponentUpdate() method decides the re-rendering of the component by returning a boolean. In React.Component, it returns true by default. But in pure components, shouldComponentUpdate() compares if there are any changes in state or props to re-render the component.
Here I am sharing my observations about how unnecessary renders are reduced by the pure component.
One of the requirements of using Appium for mobile test automation is to start the Appium server in the background so that it can listen to the requests from the mobile app under test. And there are multiple ways that we can install and start the Appium server in the background.
While running Appium tests from a local machine, we have to launch the Appium server on a specific port and update the desired capabilities to point to the server running locally. But there should be a better way to handle these and avoid extra work on desired capabilities. Fortunately, cloud-based app testing platforms like Bitbar provide the ways to run Appium client-side as well as cloud-side. In this post, we will compare the client-side and cloud-side Appium and see both sides of the coin.
Since news first broke that Facebook might be used as a platform for election meddling, the pressure on Facebook (and other social media giants) to take proactive measures to prevent such abuse has ceaselessly continued. Facebook addresses the issue from time to time, and has promised various features.
Photo credit by Unsplash/Owen Beard
Automation may be on the verge of making quite a few jobs obsolete, but if you write creatively for a living, trust me, you have nothing to worry about.
You scroll down to a certain point, now you want to style things in a certain way. A header becomes fixed. An animation triggers. A table of contents appears. To do anything based on scroll position, JavaScript is required right now. You watch the scroll position via a DOM event and alter an element's styling based on that position. Or, probably better if you can, use IntersectionObserver. We just blogged about all this.
Now there is a new (unofficial) spec trying to bring these possibilities to CSS. I love it when web standards get involved because it sees authors like us trying to pull off certain design effects and wants to (presumably) help make it easier and more performant. I also like how this spec lists editors from Mozilla and Google and Apple.
I wonder how they'll handle the infinite-loop stuff here. Like you scroll to a point, it triggers some animation, which moves some element such that it changes the scroll position, which stops the animation, which moves the scroll position again... etc. I also wonder why it's all specific to animation. "Scroll-position styling" seems like it would have the widest appeal and use level of usefulness.
Direct Link to Article — Permalink
The post Scroll-Linked Animations appeared first on CSS-Tricks.

The organizers of WordCamp Asia, a brand new regional WordCamp, have published a proposal for making Bangkok, Thailand, the host city for a 2-3 day event in early 2020. They are currently planning for February or March to avoid clashing with other regional WordCamps (WCEU, WCUS). The camp has been informally discussed since 2015 while organizers focused on growing new city-based WordCamps across the region.
“WordCamps in Asia have reached a critical mass that will enable a successful regional WordCamp,” Jon Ang said in the introduction to the proposal. “We believe that running this WordCamp will contribute directly to long term efforts in fostering WordPress interest in countries that lack it.”
WordCamp Asia organizers are being mentored by lead organizers of WordCamp Europe and have created an official proposal based heavily on the one submitted by WordCamp Nordic organizers. They have submitted it to the broader WordCamp community leaders for review before submitting and official application to WordCamp Central.
Asia has many vibrant and diverse WordPress communities across distant geographical areas. It technically includes Middle Eastern countries such as Turkey, Israel, and Iran, as well as all of Russia and India and everything in between.
Hugh Lashbrooke commented on the proposal, asking if it is actually a “WordCamp South-East Asia,” given all the currently listed organizers are from this region, or if they intend to include other countries beyond this area. Ang said that the event will certainly include leaders from India and Pakistan and they have discussed forming a global team with two representatives from each country. The leaders currently listed in the proposal are those who were specifically involved in drafting it.
Bangkok is proposed for the first host city due to its relatively affordable location, the ease of obtaining a visa on arrival for attendees from many Asian counties, and the availability of inexpensive flights to most major cities in Asia. The local WordPress community is also experienced at running large WordCamps (500+ attendees) and Bangkok’s local meetup group has more than 1,500 members. WordCamp Asia organizers are planning for 750-1,000 attendees.
The Quebec government will be introducing legislation that prohibits public employees from displaying religious symbols while at work. This would include items such as crucifixes, kirpans, turbans, hijabs, yarmulkes, etc. Even though there is majority public support for this legislation ther has been a strong backlash with the claim that this impinges on religious freedom. If anyone is interested, I'd like to start a discussion on this. I'm on the "public service positions should at least have the appearance of neutrality" side of the debate. I hear interviews where I wish the interviewer would ask certain qquestions, or respond to answers with specific follow up questions. That's why I'd like a discussion. I am open to dissenting opinions. Any posts that descend into name calling will be deleted. Let's keep it civil, reasonable and logical.
Any takers?
 I will show you how we built an iMessage extension by writing a bridge for our React Native-based mobile app. This approach took our team around two weeks to explore and might save you significant time if you have a similar intention. This is part one out of two of the walkthrough.
When we set out to build an iMessage extension for Lisk Mobile using React Native, we immediately hit an exciting challenge. As it turns out, when it comes to third-party applications, Apple likes developers to play by their own rules. If a company wants to benefit from the tech giant's operational systems and rich user base, it needs to be built using Apple's own tools and programming language. iPhone's iMessage is definitely worth this hassle. It has proven to be a big hit since its release in 2016. Within the first six months, iMessage has generated thousands of innovative in-messenger extensions, including those created by Airbnb and Dropbox. Late in 2018, Mark Zuckerberg admitted this feature is one of Facebook's 'biggest competitor by far.' Since the release of Lisk Mobile during Lisk's Berlin meetup in October 2018, our team has been busy implementing features such as Face ID Authentication, as well as developing blockchain-specific solutions. Identifying the opportunity to extend the iMessage option for our users, we got to work on our own integration.
The iMessage extension was included in Lisk Mobile 0.10.0, which was released in February 2019. Our users can now request and send LSK tokens straight from the iOS-based messenger without opening our app. However, the journey to implement this feature wasn't straightforward. Lisk Mobile is written in JavaScript using React Native, while iMessage requires development in native iOS. During our research, we have found there is just a handful of resources available to help with using React Native to build iOS extensions available out there. There was no clear way to proceed. After thorough deliberation, we have decided to try a different approach by building our own bridge implementation. We found it a very educational and motivational journey for our team to develop the feature in this way. We will show you how, by breaking the solution down into native and React Native parts, and describing how to bind these separated parts together.
Fan of Apache Spark? I am too. The reason is simple. Interesting APIs to work with, fast and distributed processing, and, unlike MapReduce, there's no I/O overhead, it's fault tolerance, and much more. With this, you can do a lot in the world of big data and fast data. From "processing huge chunks of data" to "working on streaming data," Spark works flawlessly. In this post, we will be talking about the streaming power we get from Spark.
Spark provides us with two ways of working with streaming data:
There has been much buzz about micro front-ends as of late, but have you been wondering what it is? Well, allow us to explain. Simply put, a micro front-end is akin to the concept of microservices, just applied to a web app's front-end. With micro front-ends, web apps are integrated into modules to achieve a specific business-related need that is owned by various teams. Also, every team develops the feature end-to-end, from the UI, all the way to the database and backend. As you can see, the concept remains the same as with microservices — you make smaller independent services work in unison to serve a more significant application.
More often than not, when organizations take on a microservice architecture on the backend, the front-end apps are left as monoliths. What is that, you ask? Well, unified architecture refers to when you use a single team to build web apps with unique technology, and all of the development is completed altogether. Here the backend is organized following the business's needs, but the front-end continues to be jammed into just one app. It can throw up various issues over time. Thankfully, micro front-end architectures allow the entire application to be divided up across the complete stack according to the business domain. It provides the front-end development teams with similar levels of speed, testability, and flexibility as the ones available to the backend team via microservices.

The best writers, speakers, trainers, leaders, teachers tell stories.
A brand that is engaging is easier to remember and easier to process than others in the same category. Over time, it manages to establish a connection with potential customers, which directly contributes to a relevance in the market.
An emerging brand can evolve into a strong brand.
The most accessible tools for brands to become strong are words. Words create a story, and the story is what manages to capture the attention of any user. Stories portray emotion, and emotion attaches us to everything.

To build your brand’s story, you have to answer two questions:
An excellent example of storytelling that can easily answer this question is represented by non-profit organizations (non-governmental organizations). In NGOs, we choose to invest our money and time without receiving a specific product or service in return.
They promote a cause, we become attached to that cause through emotion, and we choose to give them money.
If brands would address the communication process from an NGO perspective, helping the consumer first and selling second, they would all be more successful.

The importance of a brand’s offer, whether it be a product or service, has diminished over time. On a constantly growing market, competition is unavoidable, and what makes the biggest difference is how a brand promotes the offer. Why does the brand choose to do what it does? What drives us to do what we do regarding the brand?
To turn a story into an effective tool for your brand, it must be narrated in a transparent and authentic way. It must have a core belief (the moral of the story) and help the target audience reach the happy ending they hoped for.
The stronger the moral of the story is, the more significant of an impact it makes, the stronger the relationship between brand and consumer. However, the moral of the story can not be the same for all audiences. Brands need to understand this and create different approaches if they want to identify themselves with a larger audience of individuals.

Every brand tries to create a connection with the audience to which it addresses, but this goal is not always met as expected. Most brands create user personas to help them better understand the kinds of people that usually buy from them. By doing this, you can also understand who isn’t buying from you, and develop strategies to reach those people.
Over 75% of emails received from companies are not open and over 99% of banners end up being ignored. The main objective of advertising is to attract long term attention. Another objective is to engage customers on a personal level. Make them feel at home with your brand, and develop a relationship that fortifies their decision in choosing you.
In advertising, the story is not just an entertainment tool, but the basis for changing a decision, attitude, or behavior. That’s why brands need to invest time building relationships to help them integrate the target audience into the brand story.
Storytelling is a key element in advertising. It’s not enough anymore to simply sell a product. You have to sell your story. You have to make these potential customers believe in what you believe. They have to understand why you do what you do, and the journey you took to get there. A story is more than a tool for a brand, but the brand itself.
The evolution of a brand involves all these elements, based on two fundamental concepts: creating a story and transmitting the narrative. They aim to establish a long-term connection with the target audience in order to build relationships, and generate not just customers, but loyal and happy customers.
Read More at The Power of Storytelling in Branding
Photo credit by Unsplash/Good Free Photos
HackerRank is known for its invaluable research into the lives of those who make the tech world go round, and this year’s Women in Tech Report is no exception. Filled with numerous important insights into the skills and motivations of the youngest female developers entering the workforce, it is an absolute must-read for any hiring manager looking to bring on the best and brightest of this uniquely savvy generation.
So you’ve been listening to podcasts, and realized how popular they have become. Now, you are toying with the idea of starting a podcast. The problem is that, there is a reluctant voice inside your head asking, “Can I really do this? Where do I start? Would someone even listen to my podcast?” Don’t fret. […]
The post 92% Off: Get the How to Start a Podcast Bundle for Only $19 appeared first on designrfix.com.
I had the opportunity to meet with Ronell Hugh, Head of Product Strategy and Marketing for the Adobe Experience Platform during Adobe Summit 2019 to discuss the results of research they conducted with 1,000 U.S, IT decision makers.
Here are the key findings of the survey:
The idea behind most of web applications is to fetch data from the database and present it to the user in the best possible way. When we deal with data there are cases when the best possible way of presentation means creating a list.
Depending on the amount of data and its content, we may decide to show all content at once (very rarely), or show only a specific part of a bigger data set (more likely). The main reason behind showing only part of the existing data is that we want to keep our applications as performant as possible and avoid loading or showing unnecessary data.
If we decide to show our data in "chunks" then we need a way to navigate through that collection. The two most common ways of navigating through set of data are:
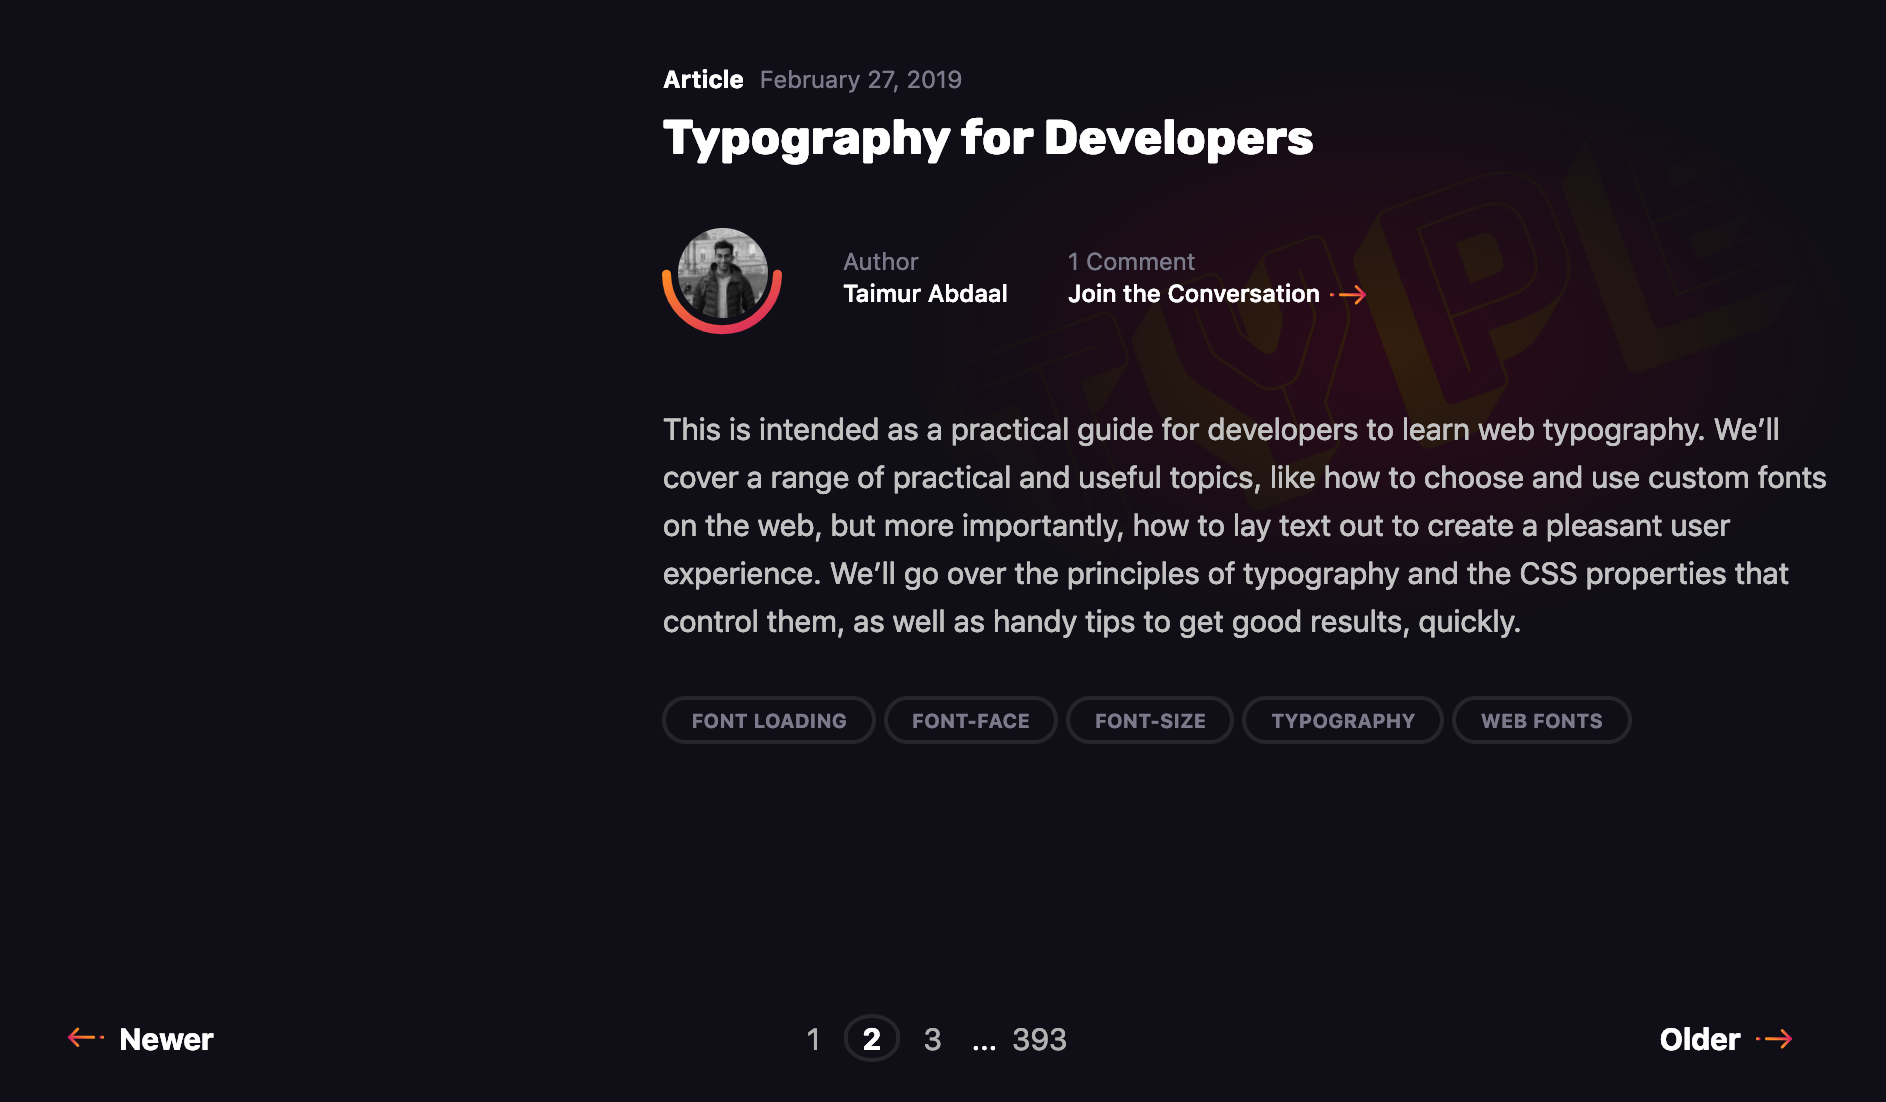
The first is pagination, a technique that splits the set of data into a specific number of pages, saving users from being overwhelmed by the amount of data on one page and allowing them to view one set of results at a time. Take this very blog you're reading, for example. The homepage lists the latest 10 posts. Viewing the next set of latest posts requires clicking a button.
The second common technique is infinite scrolling, something you're likely familiar with if you've ever scrolled through a timeline on either Facebook or Twitter.
We're going to take a deeper look at the first type in this post. Pagination is something we encounter on a near-daily basis, yet making it is not exactly trivial. It's a great use case for a component, so that's exactly what we're going to do. We will go through the process of creating a component that is in charge of displaying that list, and triggering the action that fetches additional articles when we click on a specific page to be displayed. In other words, we’re making a pagination component in Vue.js like this:
Let's go through the steps together.
Let’s start by creating a component that will show a list of articles (but without pagination just yet). We’ll call it ArticlesList. In the component template, we’ll iterate through the set of articles and pass a single article item to each ArticleItem component.
// ArticlesList.vue
<template>
  <div>
    <ArticleItem
      v-for="article in articles"
      :key="article.publishedAt"
      :article="article"
    />
  </div>
</template>
In the script section of the component, we set initial data:
articles: This is an empty array filled with data fetched from the API on mounted hook.currentPage: This is used to manipulate the pagination.pageCount : This is the total number of pages, calculated on mounted hook based on the API response.visibleItemsPerPageCount: This is how many articles we want to see on a single page.At this stage, we fetch only first page of the article list. This will give us a list two articles:
// ArticlesList.vue
import ArticleItem from "./ArticleItem"
import axios from "axios"
export default {
  name: "ArticlesList",
  static: {
    visibleItemsPerPageCount: 2
  },
  data() {
    return {
      articles: [],
      currentPage: 1,
      pageCount: 0
    }
  },
  components: {
    ArticleItem,
  },
  async mounted() {
    try {
      const { data } = await axios.get(
        `?country=us&page=1&pageSize=${
          this.$options.static.visibleItemsPerPageCount
        }&category=business&apiKey=065703927c66462286554ada16a686a1`
      )
      this.articles = data.articles
      this.pageCount = Math.ceil(
        data.totalResults / this.$options.static.visibleItemsPerPageCount
      )
    } catch (error) {
      throw error
    }
  }
}Now we need to create a method that will load the next page, the previous page or a selected page.
In the pageChangeHandle method, before loading new articles, we change the currentPage value depending on a property passed to the method and fetch the data respective to a specific page from the API. Upon receiving new data, we replace the existing articles array with the fresh data containing a new page of articles.
// ArticlesList.vue
...
export default {
...
  methods: {
    async pageChangeHandle(value) {
      switch (value) {
        case 'next':
          this.currentPage += 1
          break
        case 'previous':
          this.currentPage -= 1
          break
        default:
          this.currentPage = value
      }
      const { data } = await axios.get(
        `?country=us&page=${this.currentPage}&pageSize=${
          this.$options.static.visibleItemsPerPageCount
        }&category=business&apiKey=065703927c66462286554ada16a686a1`
      )
      this.articles = data.articles
    }
  }
}We have the pageChangeHandle method, but we do not fire it anywhere. We need to create a component that will be responsible for that.
This component should do the following things:
If we were to sketch that out, it would look something like this:
Let’s proceed!
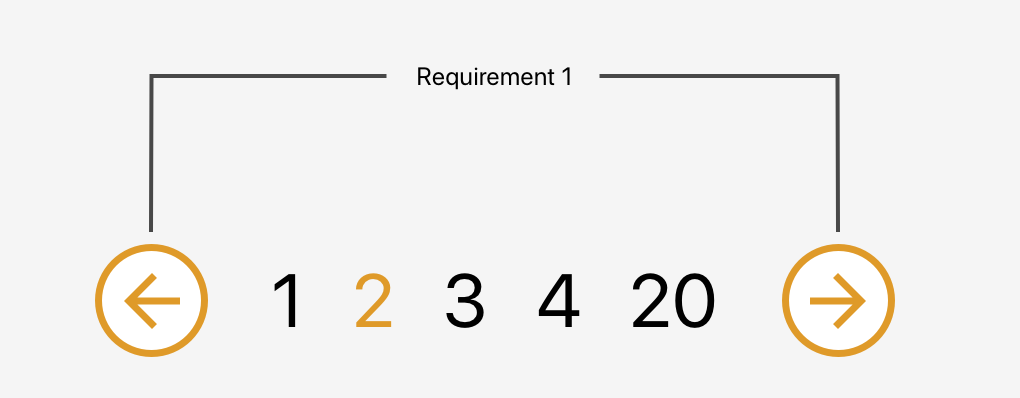
Our BasePagination will contain two buttons responsible for going to the next and previous page.
// BasePagination.vue
<template>
  <div class="base-pagination">
    <BaseButton
      :disabled="isPreviousButtonDisabled"
      @click.native="previousPage"
    >
      ←
    </BaseButton>
    <BaseButton
      :disabled="isNextButtonDisabled"
      @click.native="nextPage"
    >
      →
    </BaseButton>
  </div>
</template>
The component will accept currentPage and pageCount properties from the parent component and emit proper actions back to the parent when the next or previous button is clicked. It will also be responsible for disabling buttons when we are on the first or last page to prevent moving out of the existing collection.
// BasePagination.vue
import BaseButton from "./BaseButton.vue";
export default {
  components: {
    BaseButton
  },
  props: {
    currentPage: {
      type: Number,
      required: true
    },
    pageCount: {
      type: Number,
      required: true
    }
  },
  computed: {
    isPreviousButtonDisabled() {
      return this.currentPage === 1
    },
    isNextButtonDisabled() {
      return this.currentPage === this.pageCount
    }
  },
  methods: {
    nextPage() {
      this.$emit('nextPage')
    },
    previousPage() {
      this.$emit('previousPage')
    }
  }
We will render that component just below our ArticleItems in ArticlesList component.
// ArticlesList.vue
<template>
  <div>
    <ArticleItem
      v-for="article in articles"
      :key="article.publishedAt"
      :article="article"
    />
    <BasePagination
      :current-page="currentPage"
      :page-count="pageCount"
      class="articles-list__pagination"
      @nextPage="pageChangeHandle('next')"
      @previousPage="pageChangeHandle('previous')"
    />
  </div>
</template>
That was the easy part. Now we need to create a list of page numbers, each allowing us to select a specific page. The number of pages should be customizable and we also need to make sure not to show any pages that may lead us beyond the collection range.

Let's start by creating a component that will be used as a single page number. I called it BasePaginationTrigger. It will do two things: show the page number passed from the BasePagination component and emit an event when the user clicks on a specific number.
// BasePaginationTrigger.vue
<template>
  <span class="base-pagination-trigger" @click="onClick">
    {{ pageNumber }}
  </span>
</template>
<script>
export default {
  props: {
    pageNumber: {
      type: Number,
      required: true
    }
  },
  methods: {
    onClick() {
      this.$emit("loadPage", this.pageNumber)
    }
  }
}
</script>
This component will then be rendered in the BasePagination component between the next and previous buttons.
// BasePagination.vue
<template>
  <div class="base-pagination">
    <BaseButton />
    ...
    <BasePaginationTrigger
      class="base-pagination__description"
      :pageNumber="currentPage"
      @loadPage="onLoadPage"
    />
    ...
    <BaseButton />
  </div>
</template>
In the script section, we need to add one more method (onLoadPage) that will be fired when the loadPage event is emitted from the trigger component. This method will receive a page number that was clicked and emit the event up to the ArticlesList component.
// BasePagination.vue
export default {
  ...
    methods: {
    ...
    onLoadPage(value) {
      this.$emit("loadPage", value)
    }
  }
}
Then, in the ArticlesList, we will listen for that event and trigger the pageChangeHandle method that will fetch the data for our new page.
// ArticlesList
<template>
  ...
    <BasePagination
      :current-page="currentPage"
      :page-count="pageCount"
      class="articles-list__pagination"
      @nextPage="pageChangeHandle('next')"
      @previousPage="pageChangeHandle('previous')"
      @loadPage="pageChangeHandle"
    />
  ...
</template>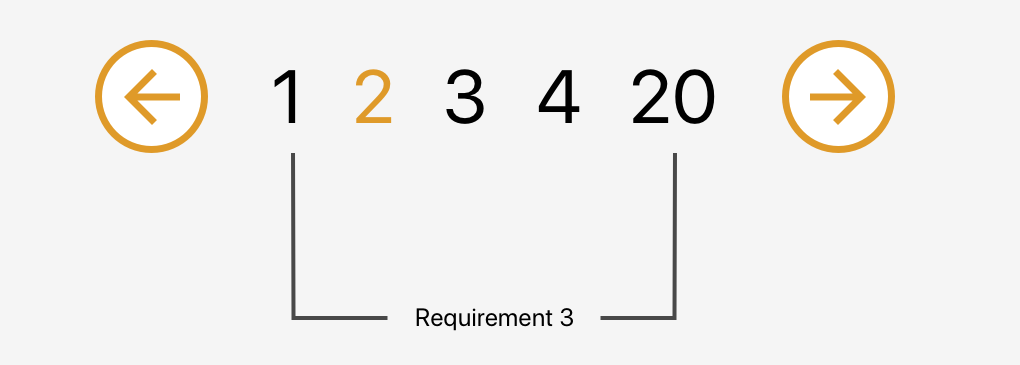
OK, now we have a single trigger that shows us the current page and allows us to fetch the same page again. Pretty useless, don't you think? Let's make some use of that newly created trigger component. We need a list of pages that will allow us to jump from one page to another without needing to go through the pages in between.
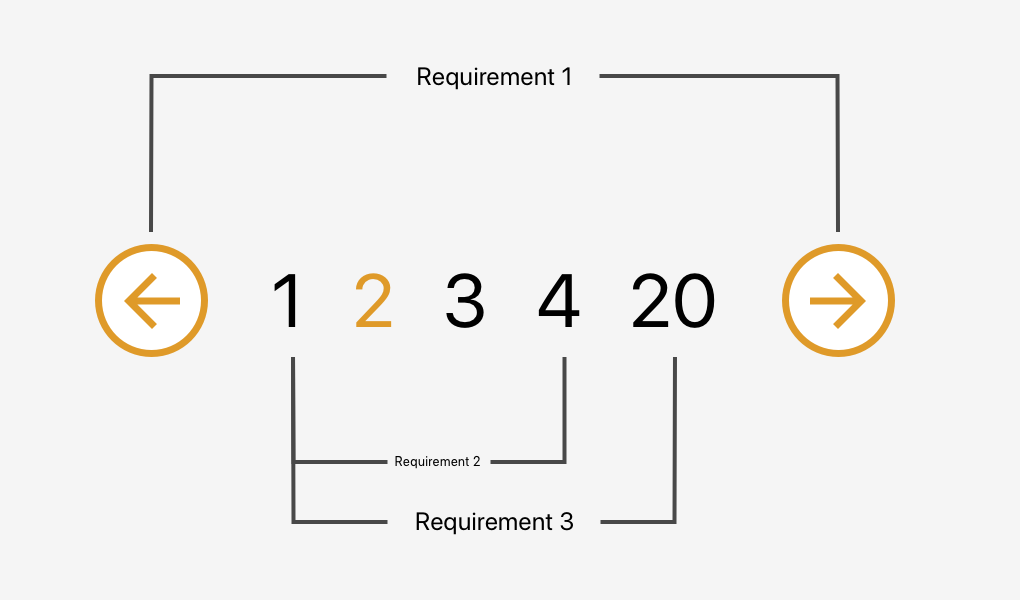
We also need to make sure to display the pages in a nice manner. We always want to display the first page (on the far left) and the last page (on the far right) on the pagination list and then the remaining pages between them.
We have three possible scenarios:
To handle these cases, we will create a computed property that will return an array of numbers that should be shown between the next and previous buttons. To make the component more reusable we will accept a property visiblePagesCount that will specify how many pages should be visible in the pagination component.
Before going to the cases one by one we create few variables:
visiblePagesThreshold:- Tells us how many pages from the centre (selected page should be shown)paginationTriggersArray: Array that will be filled with page numbersvisiblePagesCount: Creates an array with the required length// BasePagination.vue
export default {
props: {
visiblePagesCount: {
type: Number,
default: 5
}
}
...
computed: {
...
paginationTriggers() {
const currentPage = this.currentPage
const pageCount = this.pageCount
const visiblePagesCount = this.visiblePagesCount
const visiblePagesThreshold = (visiblePagesCount - 1) / 2
const pagintationTriggersArray = Array(this.visiblePagesCount - 1).fill(0)
}
...
}
...
}Now let's go through each scenario.
We set the first element to always be equal to 1. Then we iterate through the list, adding an index to each element. At the end, we add the last value and set it to be equal to the last page number — we want to be able to go straight to the last page if we need to.
if (currentPage <= visiblePagesThreshold + 1) {
  pagintationTriggersArray[0] = 1
  const pagintationTriggers = pagintationTriggersArray.map(
    (paginationTrigger, index) => {
      return pagintationTriggersArray[0] + index
    }
  )
  pagintationTriggers.push(pageCount)
  return pagintationTriggers
}Similar to the previous scenario, we start with the last page and iterate through the list, this time subtracting the index from each element. Then we reverse the array to get the proper order and push 1 into the first place in our array.
if (currentPage >= pageCount - visiblePagesThreshold + 1) {
  const pagintationTriggers = pagintationTriggersArray.map(
    (paginationTrigger, index) => {
      return pageCount - index
    }
  )
  pagintationTriggers.reverse().unshift(1)
  return pagintationTriggers
}We know what number should be in the center of our list: the current page. We also know how long the list should be. This allows us to get the first number in our array. Then we populate the list by adding an index to each element. At the end, we push 1 into the first place in our array and replace the last number with our last page number.
pagintationTriggersArray[0] = currentPage - visiblePagesThreshold + 1
const pagintationTriggers = pagintationTriggersArray.map(
  (paginationTrigger, index) => {
    return pagintationTriggersArray[0] + index
  }
)
pagintationTriggers.unshift(1);
pagintationTriggers[pagintationTriggers.length - 1] = pageCount
return pagintationTriggers
That covers all of our scenarios! We only have one more step to go.
Now that we know exactly what number we want to show in our pagination, we need to render a trigger component for each one of them.
We do that using a v-for directive. Let's also add a conditional class that will handle selecting our current page.
// BasePagination.vue
<template>
  ...
  <BasePaginationTrigger
    v-for="paginationTrigger in paginationTriggers"
    :class="{
      'base-pagination__description--current':
        paginationTrigger === currentPage
    }"
    :key="paginationTrigger"
    :pageNumber="paginationTrigger"
    class="base-pagination__description"
    @loadPage="onLoadPage"
  />
  ...
</template>
And we are done! We just built a nice and reusable pagination component in Vue.
Although this component is pretty sweet, it’s not a silver bullet for all use cases involving pagination.
For example, it’s probably a good idea to avoid this pattern for content that streams constantly and has a relatively flat structure, like each item is at the same level of hierarchy and has a similar chance of being interesting to the user. In other words, something less like an article with multiple pages and something more like main navigation.
Another example would be browsing news rather than looking for a specific news article. We do not need to know where exactly the news is and how much we scrolled to get to a specific article.
Hopefully this is a pattern you will be able to find useful in a project, whether it’s for a simple blog, a complex e-commerce site, or something in between. Pagination can be a pain, but having a modular pattern that not only can be re-used, but considers a slew of scenarios, can make it much easier to handle.
The post Creating a Reusable Pagination Component in Vue appeared first on CSS-Tricks.
Brad Frost wrote about a recent experience with a website that used <input type="number">:
Last week I got a call from my bank regarding a wire transfer I had just scheduled. The customer support guy had me repeat everything back to him because there seemed to be a problem with the information. “Hmmmm, everything you said is right right except the last 3 digits of the account number.”
He had me resubmit the wire transfer form. When I exited the account number field, the corner of my eye noticed the account number change ever so slightly. I quickly refocused into the field and slightly moved my index finger up on my Magic Mouse. It started looking more like a slot machine than an input field!
Brad argues that we then shouldn’t be using <input type="number"> for “account numbers, social security numbers, credit card numbers, confirmation numbers” which makes a bunch of sense to me! Instead we can use the pattern attribute that Chris Ferdinandi looked at a while back in a post all about constraint validation in HTML.
It's worth mentioning that numeric inputs can be more complex than they appear and that their appearance and behavior vary between browsers. All good things to consider along alongside Brad's advice when evaluating user experience.
Also:
<input inputmode="numeric"> is the way forward for mobile numeric keyboards (paired with `pattern="[0-9]*"` on iOS pending inputmode support).
Note: positive integers only!https://t.co/R9WuwXy106 https://t.co/2HiSq4ZXK0
— Zach Leatherman (@zachleat) March 25, 2019
Direct Link to Article — Permalink
The post You probably don’t need input type=“number” appeared first on CSS-Tricks.