How To Set Up A Simple Membership-Only WordPress Site For Free

Learn how to set up a membership area on your website using built-in features of WordPress in this nifty step-by-step tutorial!

Let’s say that you (or your client) want to set up a membership area on a WordPress site with little to no money to spend on web development (sounds familiar?)

Whenever I hear someone mention that they want to set up a members-only area on their site (it happens a lot when you mingle with businesses who want to go ‘fully digital’, trust me!), the first thing I want to do is find out what they need and want to achieve.

Do they really need a fully automated membership site hosted on a dedicated server with all the bells and whistles, or just a basic way to protect access to some content for a specific user group?

Continue reading, or jump ahead using these links:

The first step is to understand exactly what is required when the word “membership site” comes up. And the best way to do this is to make sure that you (or your client) have completed all the steps in the checklist below.

Running A Membership Site – Checklist

Membership Site Planning

Do you (or your client) know what a membership site is?
Why do you (or your client) need a membership site?
Do you (or your client) understand how a membership site works and the benefits of using membership sites?
Are you (or your client) aware of the different types of membership sites and membership models that can be set up?
What kind of membership site do you (or your client) want to run?
Will the membership site offer free and/or paid membership options?
Will the membership site incorporate other types of monetization besides member registration?
Do you (or your client) plan to sell or give away download links, or member-only access to information/physical products or services?
Do you need to restrict all of your content to members-only access, or just some of it?
Where will the member content be stored, accessed, or downloaded from?
Will you (or your client) require members to make single or recurring payments?
How will payments be processed and collected from new and/or existing members?
Will free/trial periods be offered to new members?
Do you (or your client) plan to deliver information or access to information about single or multiple products or services?
Will members get access to information all at once, or drip-fed over time?
Will new members have access to information that was made available to previously existing members?
Will your (or your client’s) membership site need different levels of membership or price points to be set up?
Will restricted access to certain types of users or member groups be required?
Are there any special features that your (or your client’s) membership site will require to run?
Who (and how many people) will administer and manage the membership site?

Membership Site Building

Will your membership site run on WordPress or a different platform?
Will your membership site be installed and set up under a different domain, or will it integrate with other areas of an existing site?
Are you (or your client) aware of all the components and processes required to make a membership site effective?
Do you (or your client) understand what plugins are and how plugins work in WordPress?
Do you (or your client) understand the main benefits and differences between using free, freemium, and paid plugins?

Have you ticked all the boxes in the checklist above?

Great! Then you should have a better understanding of things like how membership sites work and why you need one, what type of membership site you want to build, and the main features your site will need to manage and grow a membership effectively.

Preferably, you also have WordPress already installed on your domain with a reliable hosting provider.

Ideally, all you would have to do now is decide on the membership software that will be used to set up a member’s area on your or your client’s WordPress site.

But, with little to no money to spend on web development, what choices do you really have?

Well, you can use free WordPress membership plugins, or you can use the “cheaper than free” method to build a simple members-only area on your WordPress site using the humble WordPress password-protect feature, which I’ll show you in just a moment.

Or … you can just watch the video below and jump right in!

Before we look at this method in more depth, let’s do a quick recap of some of the most important things to consider before setting up a membership site or members-only access area.

Why Do You Need A Membership Site?

Someone once said that there are two types of people: those who buy tickets to go to events, and those who create or run events and sell tickets.

Every time I pay my electricity bill or watch a movie on Netflix, I think about this. Although I enjoy being able to switch the light on, make popcorn in the microwave, and watch a movie on my laptop, I would also love to be the one collecting recurring dollars every month from millions of ‘switched on’ customers.

A membership site can be a ticket to ‘selling tickets’, but it doesn’t have to be something so big and it doesn’t have to generate income.

At its most basic, a membership site allows you to restrict specific content that you only want certain people to access. This can be premium information like news articles or niche content, tutorials, videos, e-books, digital downloads, or even special discount codes, wholesaler pricing lists, or access to a cloud-based service.

A membership site should fit your business model, not the other way round. For example, if you plan to sell t-shirts online, there are eCommerce solutions available with built-in membership functions that you can use to sell your t-shirts and restrict access to purchase information to customers (i.e. members) only.

Most eCommerce solutions include a member's area for customer orders and account details.
Most eCommerce solutions include a member’s area for customer orders and account details.

Alternatively, your business model could be to grow a membership site based around a specific product or service and make t-shirts with your site’s logo available for sale to members. Both types of business models sell t-shirts online, but the way you would build your site and integrate a membership component into your business would require a different approach and different solutions.

Selling items to members inside a membership site.

Additionally, you may or may not even want or need to monetize your membership site. This could be more about giving access to information to members of a local club or organization, instead of a way to generate recurring subscriptions and passive income.

The same thinking applies if all your business needs is a way to build a list of subscribers. You don’t need a membership site to build an email list, you can do this with just an autoresponder service.

Why Add A WordPress Membership Site?

If your business model does suit having a membership site, then you will need a platform that can support building and growing your membership community on.

This is where WordPress comes in.

WordPress is the ideal platform to build and run a membership site.

WordPress is the ideal platform to build and run a membership site.

Let me save you weeks of research comparing different platforms for building your membership website or member’s area … use WordPress!

However you plan to structure your membership site, whether you need partial or full content protection, intend to sell just one or multiple membership levels, allow members to join for free, for a one-time fee, or charge a regular subscription, deliver content all at once or through a sequential drip-feed, WordPress is the ideal platform for setting up your membership site.

WordPress already comes with built-in functionality like user roles, user registration, mySQL databases for storing data, and privacy features and options that allow developers to extend, build and offer advanced membership features through easy-to-install, easy-to-use, and easy-to-customize plugins.

A WordPress membership site plugin builds on the native functionality and built-in features of the WordPress platform using hooks and filters to restrict access to content published in posts, pages, custom posts, RSS feeds, etc.

What Membership Plugin Features Does Your Site Need?

Many advanced features of WordPress membership plugins are only found in Freemium, Paid, or Pro versions and different WordPress membership plugins offer different features.

When planning your membership site and researching plugins, therefore, it’s important to know what you need and why, what you plan to offer and how it will be delivered, and how to take things to the next level if you want your membership site to grow.

There are three essential elements that all membership sites must have:

Membership Levels

The first essential element of a membership site is the ability to offer membership levels. Membership software or plugins should allow you to create at least one membership level. The best membership plugins allow you to create unlimited membership levels, but these are typically only available for premium (paid) plugins.

Membership Registration

The next essential element of a membership site is the ability to register new members. This is usually done through a registration form. If you are offering a free membership, you may want the registration page to be visible to all users. If offering a paid membership, you may want the registration page to be hidden from view or hard to access, especially if newly registered members are redirected or taken straight through to the content download section.

Content Protection

Having the ability to protect or restrict access to content so that only certain groups of users can have exclusive access is another essential feature that separates membership sites from other types of websites.

Different plugins will offer different content protection options and additional features such as partial content display, protected RSS feeds, etc.

Additional Features

When it comes to additional membership site plugin features, WordPress is only limited by the developer’s imagination.

Some of the features typically found in WordPress membership plugins, include:

  • Fully Automated Membership System
  • Easy Member Management
  • Approve Members Manually
  • Automatic Membership Upgrade
  • Login Redirection
  • Custom Registration Fields
  • Download Folder Protection
  • Integration With Payment Processors, Autoresponders & eCommerce
  • Multi-Site License
  • And so much more!

Basic membership site features.

The ‘Cheaper Than Free’ WordPress Membership Site Option

If all you need is a simple way to protect or restrict access to content like an ebook, PDF report, a video or a downloadable file like a price or contact list that you would like to provide to a select group of users like clients, customers, subscribers, friends, or even just your Mom, then you don’t need to install a WordPress membership plugin … just lock your content behind a password-protected page and send users the password via email.

Here are just some examples where setting up a simple members-only access area on your website can be useful:

  • A business has a trade or wholesale price list for agents or distributors that gets regularly updated.
  • An office or department wants to share a PDF with an updated list of passwords, codes, credit card numbers, etc. for internal use only.
  • An organization, community group, church, etc. wants to distribute information for staff or members only.
  • A school or sports team wants to give parents access to a contact list with details of other parents.
  • You want a really simple way to sell access to an information productor keep content on a download page hidden from site visitors.

Let me show you just how easy this is to set up:

First, create a new post or page …

Create a new post ...
Create a new post …

Note: If you choose to protect your content using a ‘page’, you can nest it inside other pages to create an additional layer of protection …

Or create a new page and hide it under Parent Page layers.
… or create a new page and hide it under Parent Page layers.

Next, add your content to your post or page …

Add content to your member's only post or page.
Add content to your member’s only post or page.

Set the visibility of your post or page to ‘Password Protected’ …

Password-protect your post or page.

And ‘Publish’ or ‘Update’ your post or page …

Publish your post or page.

This is what non-members (i.e. users without the password) will see when they visit the post or page containing your restricted content …

Password protected page.

To access the content, users will need to unlock the post or page using the password you’ve sent them.

Benefits Of Using This Method

The above method is useful if you plan to restrict content access to a specific group of users (e.g. clients, distributors, office or sports team, school class or their parents, etc.) and don’t mind them using a shared password.

Depending on what kind of information you provide in the protected content area, you can also change the password on a regular basis (e.g. monthly), and if you need to exclude access to individual users at some point, just change the password of the post or page and make sure only users who should have access to the content receive the new password.

You can also use the above setup to sell (or give away) one-time or sequential access to single or multiple information items.

Here is how to do this:

If you plan to sell access to your content, set up a landing page on your WordPress site with payment processing using an ecommerce plugin or a payment button (e.g. a PayPal button) and an email capture form to build a list. You can use a plugin like Forminator Pro Form Builder to capture contact details and collect payment.

A simple WordPress membership site using password-protected content.

With the above setup you can easily sell access to restricted content … even a subscription to sequential content!

For example, let’s say you want to sell monthly access to a year’s worth of content.

Here is how you would do it using the same basic membership structure:

  1. Choose an ecommerce solution or plugin that offers subscriptions.
  2. Create a landing page to charge users a monthly recurring payment and capture their contact details.
  3. Create 12 separate password-protected posts or pages (for Month #1, Month #2, Month #3, etc.) and set a unique password for each of these posts or pages.
  4. Add content to each of your password-protected posts or pages (add Month #1 content to Month#1 page, Month #2 content to Month #2 page, etc.)
  5. Create an autoresponder sequence for each monthly instalment, so if you are selling a 12 month subscription worth of content, create 12 autoresponders set to fire off at monthly intervals and include the unique password that will unlock each month’s content in your email sequence (Month #1 = Password #1, Month #2 = Password #2, etc.).
  6. Set up your autoresponder to send an email containing password #1 to new members as soon as they confirm their subscription (make sure they are only added to your email list after their initial payment has been successfully processed).  Subscribers should receive password #2 a month later, then password #3 in Month #3, etc.
  7. If a subscriber cancels their payment or subscription, remove them from your email list. You may need to do this manually, unless you use a plugin that integrates and automates ecommerce with list-building.

Basic membership with sequential content.

Obviously, the solution presented here has many limitations as it is designed for users with little to no budget, a single membership level, and no automation or advanced features. If all you need is a simple way to protect some content and provide access to a group of users and you don’t mind doing a bit of manual administration to manage things, then this tutorial will help you set up a simple members-only access area using the built-in password protection feature of WordPress.

If you do want something more advanced on a low budget, however, then WordPress membership plugins are the way to go, and we’ll cover these in other tutorials (for example, check out our post on using free WordPress membership plugins).

Can you see other uses for the setup shown above, or an even better or smarter way? Does your site need to restrict access to certain content? Do you use the password-protection feature in WordPress? Are you currently using any WordPress membership plugins?  Post your comments below and let us know what you think!

I hope you have found the above tutorial useful. To learn more about setting up a membership site with WordPress and ways to grow your business online using membership sites, make sure to subscribe at the bottom of this page for fresh WP updates sent directly to your inbox.

Is This Folder Empty?

Here's something I've wondered about for years and never got around to asking. A recent example:

I reinstalled Win 10. I transfered all data from Windows old to the new OS. When I highlight the Windows Old folder, it says it is empty. but when I start to delete the folder, the progression bar shows several hundred files being deleted. If the folder is empty, where do these figures come from?

Thanks

WordPress Poised to Begin Implementing Proposal to Auto-Update Older Sites to 4.7

photo credit: Ryan McGuire

WordPress contributors from around the world joined in a lively meeting yesterday to continue the discussion regarding the proposal to auto-update old sites to version 4.7 in a controlled rollout. The idea is that sites would gradually update from one major version to the next (not all at once). The discussion was led by WordPress 3.7 release lead Andrew Nacin with help from Ian Dunn and security team lead Jake Spurlock.

Based on the participants’ responses during the meeting, there were a handful of dissenters who are not comfortable with updating old sites without the site owner’s explicit consent, which is difficult to acquire when emails and admin notices will not reach everyone affected.

The majority of contributors are leaning towards finding the best implementation for moving forward with the proposal, which essentially makes a bold decision for regular users who may not know that they are not on the latest version of WordPress and those who have abandoned their sites. Site owners who are actively choosing to hang back on older versions have most likely already opted out of auto-updates, and those decisions will be respected by the update system.

Dunn said his goal for the discussion was to “listen for ideas, and hopefully move closer to some kind of decision.” At the beginning, it kicked off with more of a focus on marketing and implementation details, rather than the matter of whether or not WordPress should auto-update sites to major versions.

“I think that a major marketing push is needed around this,” Spurlock said. “We want to be ahead of any news about WordPress breaking sites, and in a position to frame this update as a major benefit for the millions of sites that are being updated.” After encouragement from WordPress Executive Director Josepha Haden, those eager to discuss the rollout process pulled back to engage the more central matter of the auto updates themselves. Spurlock summarized the three options the security team has for older sites:

1. Abandon security updates for older sites
2. Continue security updates, at great cost
3. Manually update sites, leaving older sites without updates.

“It’s worth pointing out that these site owners have already had up to six years of admin notices,” Nacin said. “The oldest sites likely received north of 30 emails. The way we might communicate a new feature (in say 5.3 or 5.4) to add support for major release auto updates might be drastically different than how we might handle an old site running 3.7 that we’d like to move to 3.8 and higher.”

Contributors Weigh the Consequences of Leaving Older Sites Without Updates

Core contributor Zebulan Stanphill was one of the more vocal opponents of auto-updating to major versions without consent.

“The auto-update feature in 3.7 was not advertised as including major updates, so it seems deceptive in my opinion to suddenly change it to include that,” Stanphill said. “It feels like assuming more control over a website than the owner had originally given to WordPress. I’m fine with auto-major-updates becoming the default in new versions of WordPress, but retroactively applying that to old versions seems wrong to me.”

Gary Pendergast, a full-time sponsored contributor to core, countered that the problem is potentially millions of site owners will not see the notice and will be stuck on old versions that will eventually become insecure. Stanphill argued that it’s not WordPress’ responsibility to update people’s sites for them if they did not give permission.

“It is our responsibility to not lay the groundwork for a botnet of a sizeable portion of the internet,” Pendergast said.

WordPress has a much larger footprint on the web than it did in 2013 when the auto-update system was put in place in 3.7. The platform’s marketshare has grown to 34.5% of the the top 10 million websites as of August 2019. Sites running 3.7 have been informally estimated at around 2 million but a definitive count has not been confirmed.

“If we unwittingly give someone a platform to do real evil, we’re big enough that could have consequences,” Core contributor Mary Baum said.

Lack of explicit consent and the possibility for breakage were the top two concerns for those opposed to the plan. Those in favor believe it can be done without breaking millions of websites. Former security team lead Aaron Campbell highlighted the advantages of a tiered update rollout:

Speaking of starting at 3.7 users as a test base (which is part of the plan Ian proposed), one of the great things we can offer users that they have a hard time doing themselves, is a slow update from version to version. The button in the dashboard of a 3.7 site will update the site to 5.2, which is understandably scary. We’d be updating 3.7->3.8, then 3.8->3.9, etc etc until 4.6->4.7. It’ll offer a smoother path from 3.7 to 4.7 AND give us plenty of places to improve on the process along the way if it’s needed.

I think there are some benefits to rolling up. One of those is the DB changes, which would be rolled out in chunks the same as they happened over the last 6 years rather than batched all in one update. It seems like it would cause fewer memory and time limit errors as well.

As he has stated in previous P2 discussions, Nacin reiterated that the core team’s plan has always been to bring auto updates for major versions:

I want to share a bit of history and context: Only the latest version of WordPress is, of course, officially supported. Automatic background updates in 3.7 (October 2013) completely changed the calculus—for the first time, we were able to ship security releases to older branches. But we didn’t announce or document these older versions, offer them for regular download, or expose them to the Dashboard → Updates screen. There was no intention—and still isn’t—to change our often stated policy that only the latest version of WordPress is officially supported. What we realized, though, if we are building the ability to quickly push security fixes to older unsupported sites, we’d be out of our mind to not use that feature.

We expected to make quicker progress on automatic updates for major releases, improving the safety and resiliency of those updates. That would have then enabled us to update these older sites, all the way back to 3.7, to more recent versions of WordPress. That was always the plan. We just didn’t expect it’d take us six years to get there.

Eventually, the long term goal is to change the default for major updates to “opt-out,” once they have proven stability. The proposal for auto-updating older versions to 4.7 would be the next step towards gradually moving in that direction. Nacin contends older sites “are already opted-in by virtue of being on an install of WordPress 3.7+.”

At a certain point in the meeting, the discussion surrounding the ethics of auto-updating older sites to 4.7, broke down into analogies involving car maintenance, vaccinations, rotting corpses, and anything contributors could pull from the real world to make their opinions more relatable to the topic at hand.

“It’s hard to talk about ‘autonomy’ for sites that have effectively been abandoned,” Mark Jaquith said. “Like, if you drop dead on the street, society doesn’t just let you rot there because you haven’t consented to burial.”

Core contributor John James Jacoby said he is not entirely comfortable with the implied consent of opt-out vs. opt-in but ultimately agreed that it is “something that needs to happen.”

“But to paraphrase Mark from earlier, I guess I feel like WordPress shouldn’t be cleaning it’s own carcasses from the web unless it includes a big’ol meta-box in the Dashboard that says ‘Hey we had to do this for you and here is why,'” Jacoby said.

Others are more strongly opposed to WordPress changing files on users’ servers, after having originally communicated that 3.7 would only perform automatic security updates unless they decided to opt into major updates.

“I am very much against pushing an unattended major update to any software,” Gabor Javorszky said. “WordPress Core does not have the authority to change code on my server without my explicit ask. I’m okay with it updating itself for minor versions, because that’s what I signed up for, and that’s how the current auto updater works by default. I can change it to allow major updates, and I can change it to not allow any updates at all, but WP overriding that choice is wrong.”

Michael Panaga contended that users would be more willing to understand that their old websites have been hacked, rather than find out that their sites have broken because of an unauthorized automatic update. Opponents of the proposal do not believe that it is WordPress’ responsibility to keep people’s sites from being compromised, even if millions of sites get hacked. They see this as the user’s problem or something hosting companies should handle.

“Reasonable people can and will disagree on this, but our philosophy is that we do not think it is solely the user’s responsibility if their site is hacked,” Nacin said. “We feel that responsibility too, and we’re going to do absolutely everything we can to make sure their site stays updated and they are running the latest and greatest version of WordPress.”

No official decision has been announced but those who have the power to implement the plan are firmly decided and seem to have gained a consensus through yesterday’s meeting.

“At the end of the day there’s only a few people who have the ability to push the change to the auto-update server to make this opt-out instead of opt-in and sounds like their minds are made up, so no point in continuing P2 [discussions], might as well move into the implementation phase and try to minimize the destruction,” WordPress developer Earle Davies said.

Nacin thanked contributors for lending their voices to the discussion and said there will be some follow-up posts and possibly a roadmap published to make/core in the coming days, documenting previous decisions back to 2007.

“I’m really glad you all showed up to talk about this topic,” Nacin said. “Even after 10 years, I remain deeply impressed with the WordPress community and how much it cares about its users. The web deserves it.”

How Will the Off-Facebook Activity Feature Impact Developers?

Yesterday, In an effort to promote "more transparency and [user] control," Facebook introduced its Off-Facebook Activity feature. The feature allows users to view a summary of third party apps and websites that share information with Facebook and allows users to clear such information if they don't want it shared. The user-controlled feature will affect apps and websites that use various Facebook developer tools, SDKs, and APIs.

#234: React Grids

Show Description

Cassidy is on to talk about powering the grids on CodePen with React to make them faster and future feature friendly!

Time Jumps

  • 02:05 Updating the Instagram page
  • 07:51 Moving to a new stack as a team
  • 10:18 Speed improvements
  • 18:12 Sponsor: WooCommerce
  • 19:35 Future feature in the works

Sponsor: WooCommerce

WooCommerce is a WordPress plugin that brings eCommerce to your WordPress sites. It's unique in its customizability and flexibility. You can use it to sell physical products, digital downloads, memberships, services, and tickets, plus offer customers lots of different ways to pay, including things like Apple Pay and Bitcoin powered by Stripe.

Show Links

CodePen Links

Proven Strategies for Building Creative Websites That Get Results

Good news, not so good news, fabulous news, and a bonus.

The global market is getting bigger and bigger. That’s good news.

Clients, meanwhile, are getting more selective and demanding in their drive to share their messages with the world through the use of highly creative websites – that may not be such good news if it means a heavy dose of arduous work for you.

The fabulous news? Be Theme’s size and versatility make it the perfect web design tool for meeting the challenges brought on by the need to design creative, eye-catching websites that will pass muster with the most selective and eagle-eyed client. This is your opportunity to cash in by showing these clients what you can do for them.

The bonus is 5 simple steps to create a website your client will love and a website that converts.

5 Steps to Building Amazingly Creative Websites

Step 1: Choose a Mesmerizing Color Palette

There are 3 simple rules you need to follow when choosing your color palette.

  • It needs to immediately attract attention;
  • It needs to be on brand, and;
  • It needs to be compatible with and supportive of your messages;

Artist’s BOLD color touches immediately attract attention.

Artist WordPress Theme

This Be Theme pre-built website offers an excellent example of an attractive, eye-catching color palette.

BeCreative WordPress Theme

Carbon8, with its shades of green and contrasting colors perfectly aligns the color palette with the brand to produce a visually remarkable website.

Carbon8 WordPress Theme

The BeInsurance color palette is crisp, yet subtle; just the right combination of factors to reinforce a message and attract more clients.

BeInsurance WordPress Theme

The BeFestival color palette is a perfect example of an approach you can take to appeal to a larger audience.

BeFestival WordPress Theme

Step 2: Display Crystal-Clear Pictures

Presenting crystal clear images should be a no brainer. It’s the best way to let people know precisely what your business offers; as opposed to artsy, somewhat out of focus images that keep them guessing.

Flair and clarity always triumph over mystery and ambiguity when it comes to marketing a product – or a service for that matter.

BeStylist makes excellent use of both flair and clarity in its images. Color schemes are easier to figure out when images are sharp.

BeStylist WordPress Theme

See if you can come up with a website design similar to RansomLTD.  This website was built from scratch to display sharp, pixel-perfect digital images.  Check this one out against what’s currently out there.

RansomLTD WordPress Theme

Or, you can go with a more conventional website like Zajno.

Zajno WordPress Theme

The Design Shop offers a no-nonsense approach to displaying your products with flair, dignity, and creativity. Compelling and crisp would be a good summary description.

The Design Shop WordPress Theme

Step 3: Show Visitors How Your Creativity Benefits Them

Showing people what’s in it for them is always a powerful marketing tactic, and one way to do that is to help them imagine themselves as being actual customers.

BeMarketing’s video on the homepage shows visitors how they can expect to benefit from using your product.

BeMarketing WordPress Theme

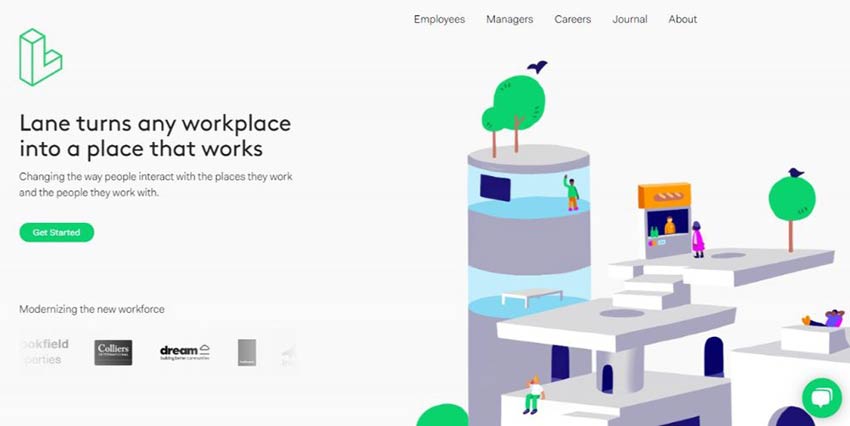
Lane, on the other hand, expresses a structural design perspective with its example of flexibility and functionality in workplace design.

Lane WordPress Theme

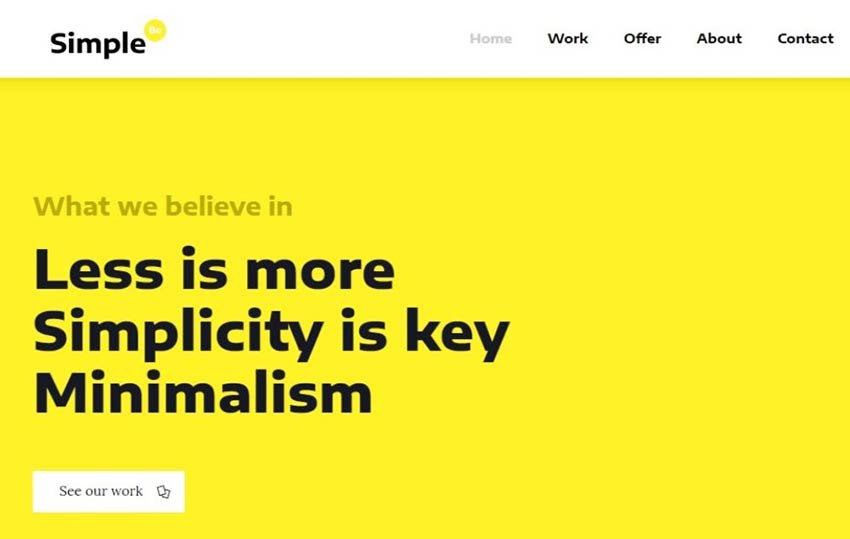
BeSimple demonstrates the power of a minimalist view; attractive, yet to the point.

BeSimple WordPress Theme

If you’re a travel blogger this one’s for you. BeTravelBlogger’s graphics layout makes it a travel blogger’s dream.

BeTravelBlogger WordPress Theme

Step 4: (Over)Use “White” Space in Even in Creative Websites

“Overusing” white space is actually difficult to do. After all, it’s the #1 visual element found in many, if not most, successful websites. Don’t be hesitant about using it to highlight your creativity.

Makespace has a clean design that makes it oh-so-easy for the eye to focus on what’s most important.

Makespace WordPress Theme

You can accomplish the same with either BeSketch or The Drive New York (or both). White space is used in these two websites to enhance the overall visual experience in addition to highlighting the page’s key elements.

BeSketch WordPress Theme

The Drive New York WordPress Theme

BeIceCream might well be THE most extreme example of effective use of white space. Its use definitely supports the brand while effectively driving the message home.

BeIceCream WordPress Theme

Step 5: Make Your CTAs Grab Visitors by the Eyeballs

If a CTA button doesn’t command immediate attention, why use one at all? Why not just let the visitor try to figure out what to do next?

Not a good idea. You want big, bold, bright buttons that are impossible to ignore, buttons that compel visitors to click.

Look at BeDrawing. It has a CTA button that clearly stands out. It’s centered nicely right below the sub-headline, where it acts like a welcoming invitation to step forward.

BeDrawing WordPress Theme

Stuart has the same idea; two CTA buttons, with the main one at the bottom.

Stuart WordPress Theme

Here’s a great example of having the CTA match other elements on the page. Even though BeKids uses blue to match other blue elements, the CTA button still stands out.

BeKids WordPress Theme

Surefire Ways to Build Creative Websites

These 5 surefire tactics will take you a long way in your quest to building eye-catching websites that will convert. You should find the examples helpful in selecting your color combinations, positioning key elements, understanding the power of the generous use (or overuse) of white space, designing and placing CTA buttons that practically demand to be clicked, and of course showing your visitors, through your creativity, how they will benefit.

You’ll find the web’s most comprehensive and visually impressive gallery of fully-functional, professionally-designed creative websites on Be Theme. There are currently more than 450, and counting, pre-built websites to choose from and customize to your needs and to your liking.

Using requestAnimationFrame with React Hooks

Animating with requestAnimationFrame should be easy, but if you haven’t read React’s documentation thoroughly then you will probably run into a few things that might cause you a headache. Here are three gotcha moments I learned the hard way.

TLDR: Pass an empty array as a second parameter for useEffect to avoid it running more than once and pass a function to your state’s setter function to make sure you always have the correct state. Also, use useRef for storing things like the timestamp and the request’s ID.

useRef is not only for DOM references

There are three ways to store variables within functional components:

  1. We can define a simple const or let whose value will always be reinitialized with every component re-rendering.
  2. We can use useState whose value persists across re-renderings, and if you change it, it will also trigger re-rendering.
  3. We can use useRef.

The useRef hook is primarily used to access the DOM, but it’s more than that. It is a mutable object that persists a value across multiple re-renderings. It is really similar to the useState hook except you read and write its value through its .current property, and changing its value won’t re-render the component.

For instance, the example below will always show 5 even if the component is re-rendered by its parent.

function Component() {
  let variable = 5;

  setTimeout(() => {
    variable = variable + 3;
  }, 100)

  return <div>{variable}</div>
}

...whereas this one will keep increasing the number by three and keeps re-rendering even if the parent does not change.

function Component() {
  const [variable, setVariable] = React.useState(5);

  setTimeout(() => {
    setVariable(variable + 3);
  }, 100)

  return <div>{variable}</div>
}

And finally, this one returns five and won’t re-render. However, if the parent triggers a re-render then it will have an increased value every time (assuming the re-render happened after 100 milliseconds).

function Component() {
  const variable = React.useRef(5);

  setTimeout(() => {
    variable.current = variable.current + 3;
  }, 100)

  return <div>{variable.current}</div>
}

If we have mutable values that we want to remember at the next or later renders and we don’t want them to trigger a re-render when they change, then we should use useRef. In our case, we will need the ever-changing request animation frame ID at cleanup, and if we animate based on the the time passed between cycles, then we need to remember the previous animation’s timestamp. These two variables should be stored as refs.

The side effects of useEffect

We can use the useEffect hook to initialize and cleanup our requests, though we want to make sure it only runs once; otherwise it’s really easy to end up doubling the amount of the animation frame requests with every animation cycle. Here’s a bad example:

function App() {
  const [state, setState] = React.useState(0)

  const requestRef = React.useRef()
  
  const animate = time => {
    // Change the state according to the animation
    requestRef.current = requestAnimationFrame(animate);
  }
    
  // DON’T DO THIS
  React.useEffect(() => {
    requestRef.current = requestAnimationFrame(animate);
    return () => cancelAnimationFrame(requestRef.current);
  });
  
  return <div>{state}</div>;
}

Why is it bad? If you run this, the useEffect will trigger the animate function that will both change the state and request a new animation frame. It sounds good, except that the state change will re-render the component by running the whole function again including the useEffect hook that will spin up a new request in parallel with the one that was already requested by the animate function in the previous cycle. This will ultimately end up in doubling our animation frame requests each cycle. Ideally, we only have 1 at a time. In the case above, if we assume 60 frame per second then we’ll have 1,152,921,504,606,847,000 animation frame requests in parallel after only one second.

To make sure the useEffect hook runs only once, we can pass an empty array as a second argument to it. Passing an empty array has a side-effect though, which avoids us from having the correct state during animation. The second argument is a list of changing values that the effect needs to react to. We don’t want to react to anything — we only want to initialize the animation — hence we have the empty array. But React will interpret this in a way that means this effect doesn’t have to be up to date with the state. And that includes the animate function because it was originally called from the effect. As a result, if we try to get the value of the state in the animate function, it will always be the initial value. If we want to change the state based on its previous value and the time passed, then it probably won’t work.

function App() {
  const [state, setState] = React.useState(0)

  const requestRef = React.useRef()
  
  const animate = time => {
    // The 'state' will always be the initial value here
    requestRef.current = requestAnimationFrame(animate);
  }
    
  React.useEffect(() => {
    requestRef.current = requestAnimationFrame(animate);
    return () => cancelAnimationFrame(requestRef.current);
  }, []); // Make sure the effect runs only once
  
  return <div>{state}</div>;
}

The state’s setter function also accepts a function

There’s a way to use our latest state even if the useEffect hook locked our state to its initial value. The setter function of the useState hook can also accept a function. So instead of passing a value based on the current state as you probably would do most of the time:

setState(state + delta)

... you can also pass on a function that receives the previous value as a parameter. And, yes, that’s going to return the correct value even in our situation:

setState(prevState => prevState + delta)

Putting it all together

Here’s a simple example to wrap things up. We’re going to put all of the above together to create a counter that counts up to 100 then restarts from the beginning. Technical variables that we want to persist and mutate without re-rendering the whole component are stored with useRef. We made sure useEffect only runs once by passing an empty array as its second parameter. And we mutate the state by passing on a function to the setter of useState to make sure we always have the correct state.

See the Pen
Using requestAnimationFrame with React hooks
by Hunor Marton Borbely (@HunorMarton)
on CodePen.

The post Using requestAnimationFrame with React Hooks appeared first on CSS-Tricks.

Other Ways to SPAs

That rhymed lolz.

I mentioned on a podcast the other day that I sorta think WordPress should ship with Turbolinks. It's a rather simple premise:

  1. Build a server-rendered site.
  2. Turbolinks intercepts clicks on same-origin links.
  3. It uses AJAX for the HTML of the new page and replaces the current page with the new one.

In other words, turning a server-rendered app into "Single Page App" (SPA) by way of adding this library.

Why bother? It can be a little quicker. Full page refreshes can feel slow compared to an SPA. Turbolinks is kinda "old" technology, but it's still perfectly useful. In fact, Starr Horne recently wrote a great blog post about migrating to it at Honeybadger:

Honeybadger isn't a single page app, and it probably won't ever be. SPAs just don't make sense for our technical requirements. Take a look:

  • Our app is mostly about displaying pages of static information.
  • We crunch a lot of data to generate a single error report page.
  • We have a very small team of four developers, and so we want to keep our codebase as small and simple as possible.

... There's an approach we've been using for years that lets us have our cake and eat it too ... and its big idea is that you can get SPA-like speed without all the JavaScript.

That's what I mean about WordPress. It's very good that it's server-rendered by default, but it could also benefit from SPA stuff with a simple approach like Turbolinks. You could always add it on your own though.

Just leaving your server-rendered site isn't a terrible thing. If you keep the pages light and resources cached, you're probably fine.

Chrome has started some new ideas:

I don't doubt this server-rendered but enhance-into-SPA is what has helped popularize approaches like Next and Gatsby.

I don't want to discount the power of a "real" SPA approach. The network is the main offender for slow websites, so if an app is architected to shoot across relatively tiny bits of data (rather relatively heavy huge chunks of HTML) and then calculate the smallest amount of the DOM it can re-render and do that, then that's pretty awesome. Well, that is, until the bottleneck becomes JavaScript itself.

It's just unfortunate that an SPA approach is often done at the cost of doing no server-side rendering at all. And similarly unfortunate is that the cost of "hydrating" a server-rendered app to become an SPA comes at the cost of tying up the main thread in JavaScript.

Damned if you do. Damned if you don't.

Fortunately, there is a spectrum of rendering choices for choosing an appropriate architecture.

The post Other Ways to SPAs appeared first on CSS-Tricks.

9 Websites with Mesmerizing Background Animations

Looking for some animation inspiration for your next design project? Some of the most stunning websites on the internet are the ones that use motion to great effect. There’s nothing quite as memorable as a site with jaw-droppingly beautiful animations.

If you want to see some of the best examples of JavaScript, WebGL, and CSS3 backgrounds, you’ve come to the right place. Here are 9 absolutely mesmerizing animated websites, collected here for your inspiration.

Prior Holdings

Example of Prior Holdings

This website starts with a calm, muted background. But as you progress through the screens and learn more about this bridal services company, you’ll see strips of white cloth begin gently moving across the screen, then a whole bolt elegantly unwinds across it.

HAUS

Example of HAUS

The first thing you’re greeted with here is an entrancing kaleidoscope animation that slowly moves and shifts between colors, even responding to your mouse. Click to see more work and the ball expands to take up the screen, switching its patterns and designs to match the portfolio piece you’re hovering.

The Frontier Within

Example of The Frontier Within

Thorne’s website experience immediately greets you with hundreds of intricately rendered particles, all responding to your mouse movements with fluidity. Watching the particles flow along and scattering them with your mouse is strangely fun. And that’s just the first screen!

Turn on your webcam and experience a shockingly accurate rendition of your respiratory, circulatory, and nervous system, all represented by these little particles.

KIKK Festival 2019

Example of KIKK Festival 2019

Nothing sets the scene quite like a great aesthetic animation, and KIKK nails it with a pretty pastel background layered with whirling snow. Even the logo appears to be dissolving into the blizzard. There are quite a few nice scrolling animations as well.

Yuen Ye

Example of Yuen Ye

When you visit this beautiful portfolio, you’ll find the best examples of photography and design fluttering in the background like flags. These flags are dynamic and swing or buffer on their own or in response to you scrolling and hovering. Explore further to find more beautiful background animations, everywhere from the about page to the portfolios themselves.

The View From Above

Example of The View From Above

These dynamic 3D birds look like something out of a movie. It’s simply stunning. As you scroll, you’ll be presented with more gorgeous forest environments and beautifully animated creatures. Plus, you can learn a little about the environment and how to help the birds in your area.

Create/Disrupt

Example of Create/Disrupt

In one page, this portfolio manages to show off a vast array of unique background animations. This is a UI/UX design company after all, so you wouldn’t expect any less. Scroll through this short piece and explore the variety of compelling animations presented to you.

Digital Present

Example of Digital Present

Upon opening Digital Present’s portfolio, you’re immediately hit with a barrage of beautiful animation. Move your mouse around, scroll, and hover each element as you browse this beautiful site to discover everything.

Creative Cruise

Example of Creative Cruise

Bright and cheerful, Creative Cruise’s homepage greets you with a fun backdrop. Try clicking and dragging the road to see it spin infinitely. Or click any link to make the clouds in the background change. It’s a simple, but super-fun site to play with.

Inspiring Background Animations

Developers and designers have done amazing things with WebGL and other browser animation APIs. The days of flat, static web design are far behind us; now any website can become an inspiring experience, or a gorgeous art exhibit.

If you want to try making your own 3D animation, one of these websites are a great place to start for getting inspired. Now that you know how the best sites pull off creating enthralling animations, it’s your turn to start designing a beautiful site of your own.

How to return parameters from different table rows

I have three tables(table, table2,table3). From table1 i want to return three rows: Title, Desc,time,'products' AS type

From table2 i want to return three rows: group_title, group_desc, created,'groups' AS type

From table3 i want to return three rows: name, occupation,birth,'users' AS type

  $sql = "SELECT DISTINCT * 
    FROM
        (SELECT table1.title, table1.desc, table1.time,'products' AS type
        FROM table1 ORDER BY rand() LIMIT 5) AS T
     UNION ALL
        (SELECT table2.group_name,table2.group_desc,table2.created,'groups' AS type
        FROM tabl2 
        JOIN table1 ON table2.id = table1.id 
         ORDER BY rand() LIMIT 5)
    UNION ALL
        (SELECT table3.name,table3.occupation,table3.birth,'users' AS type
        FROM table3
        JOIN  table1 ON table3.id = table1.id
        ORDER BY rand() LIMIT 5)";

am using Ionic to push those three parameters of an Array to the next page so if i use AS and put the same name. I set a parameter AS type that i need so i can work different types. it has to be 'products' AS type for table1, 'groups' AS type for table2, users as type for table3 i want to separate the objects from each table.

It cant use AS the for the rest of the columns because i want to push the original columns
e.g.

 (SELECT table1.title AS title, table1.desc AS desc, table1.time AS time
    FROM table1 ORDER BY rand() LIMIT 5) AS T
 UNION ALL
    (SELECT table2.group_name AS title,table2.group_desc AS desc,table2.created AS time.....

If i do that it displays the object parameters ok e.g. {{item.title}}

but i can not push or navctrl the parameter as title it has to be group_name. I hope i made myself clear.

How to Add a Mortgage Calculator in WordPress (Step by Step)

Do you want to add a mortgage calculator in WordPress?

If you have a real estate or finance website, then a mortgage calculator can help visitors see whether they can afford the properties you are promoting. This can keep people on your website for longer and help you sell more properties.

In this article, we will show you how to easily add a mortgage calculator in WordPress.

How to Add a Mortgage Calculator in WordPress

Why Add a Mortgage Calculator in WordPress?

A mortgage calculator allows users to get estimates for their mortgage payments, with the interest rate and amortization period.

Visitors can simply insert information like their home value, down payment, interest rates, and so on. After that, the mortgage payment calculator will figure out how much they have to pay per month based on the given details.

If you are making a real estate website with IDX property listings, then a mortgage calculator will also help with lead generation. Visitors can use the calculator, but they will have to enter their email address to save their results.

An example of a mortgage calculator in the Zillow website

It can also reduce your bounce rate because visitors don’t have to visit a different site to get a mortgage calculation.

Other people who may benefit from a mortgage calculator on their sites are financial advisors, mortgage brokers or banks, and personal finance educators.

That being said, let’s take a look at how to easily create a mortgage calculator in WordPress. This tutorial will show you two beginner-friendly methods with two different mortgage calculator plugins: WPForms and Formidable Forms.

You can use these quick links to skip to a specific plugin:

Method 1: Add a Simple WordPress Mortgage Calculator With WPForms

The first method is to use WPForms. With its 1700+ form templates, this drag-and-drop form plugin is perfect for creating various forms, including a mortgage calculator, for different types of websites.

This method is recommended for people who just want to create a simple yet responsive mortgage calculator without added calculations for taxes or insurance.

WPForms' mortgage calculator form template

Note: While there is a free version of WPForms, this tutorial will use the Pro plan as that’s where the Calculations addon is available. Here’s a WPForms discount you can use to save 50% off of your purchase!

First things first, go ahead and install the plugin in WordPress.

Once done, go to WPForms » Settings and insert your Pro plan’s license key from your WPForms account page. Then, simply click ‘Verify Key.’

Verifying a WPForms license key

Choose and Customize a Mortgage Calculator Form Template

Now that the license key is active, you need to navigate to WPForms » Add New.

Clicking Add New in WPForms inside the WordPress admin panel

On the next screen, you can give your new form a name. It can be something as simple as ‘Mortgage Calculator Form.’

Scrolling down, use the search bar to find a mortgage calculator form template.

Finding the Mortgage Calculator Form template in WPForms

You will see that WPForms has two templates: Mortgage Calculator Form and Simple Mortgage Calculator Form. Both templates provide similar functionality but differ in the specific fields they include.

The Simple Mortgage Calculator Form Template is best for real estate sites that want to help potential buyers quickly estimate their monthly mortgage amount.

On the other hand, the Mortgage Calculator Form Template provides a comprehensive breakdown of the mortgage details, including total interest paid, total mortgage payment, and annual payment amount. This level of detail can be useful for customers who want to fully understand their financial obligations.

It’s up to you which calculator you’d like to use, but for demonstration purposes, we will use the Mortgage Calculator Form Template.

You can click ‘View Demo’ to see what each form looks like in action.

Once you’ve made your choice, just click ‘Use Template.’

Clicking the Use Template button in WPForms

At this stage, a popup will appear saying that the form requires the Calculations addon.

Just click ‘Yes, install and activate’ to continue.

Installing and activating the WPForms Calculations addon

You will now arrive at the drag-and-drop form builder. As you can see, the template already has the calculator fields added for you.

This particular template has fields for users to enter their home value (total cost of the house) and their down payment amount (how much the buyer pays upfront when purchasing a property).

Customizing the mortgage calculator form template in the WPForms builder

Users can also use the sliders to enter information about their home loan interest rate and mortgage term.

Once the form has all of the mortgage details, the bottom section will automatically calculate the user’s mortgage monthly and annual payment amount, total interest paid, and total mortgage payment.

The mortgage calculation section in the WPForms mortgage calculator form template

You can find the calculation formula for this bottom section by going to ‘Field Options’ and navigating to the ‘Advanced’ tab in the left-hand panel. At the bottom, you will find the ‘Formula’ box.

We recommend not making changes to this section unless you are confident in doing so. That said, WPForms has a Calculations cheat sheet you can use if you need help.

The mortgage calculation formula in the WPForms mortgage calculator form template

Let’s go ahead and customize the form. To add a new field, go to the ‘Add Fields’ section in the left-hand panel. Then, just drag and drop any field to the form builder.

Here, we have added a ‘Name’ field to the form to capture the user’s name.

Dragging and dropping the Name field to the form in WPForms

To customize a field, just click on it, and the left-hand panel will bring you to the ‘Field Options’ tab. There are three tabs that you can further configure: General, Advanced, and Smart Logic.

What you can customize varies by the field type. If you want to change the field label, insert descriptive text, or make the field required, then you will go to ‘General.’

Here, we’ve changed the ‘Home Value’ field label to ‘Property Price’ and added descriptive text for additional instructions. We’ve also made the field required so that users must insert this field to get their mortgage payment calculation.

Configuring the WPForms' General field options

The ‘Advanced’ tab is where you can add placeholder text, specify the field’s CSS class if you want to use custom CSS, opt to hide the field label, and enable a calculation function if needed.

By default, the form has a ‘$’ sign as a placeholder to let users know that values should be in American dollars.

Alternatively, you can insert an example in the field label, like ‘e.g. 500,000,’ so the user knows how to insert the price correctly.

Customizing a field placeholder text in WPForms

The ‘Smart Logic’ tab lets you enable conditional logic in the field. It’s optional, but it’s a good feature for making your mortgage calculator form more engaging.

To use it, just toggle on the ‘Enable conditional logic’ button.

Then, you can choose to show or hide the field based on certain criteria. In the example below, we have chosen to show the ‘Property Price’ field if the user has entered their email address.

Once you are done customizing the form, just click ‘Save’ at the top right corner.

Configure the Form’s Settings

Now, let’s go ahead and switch to the ‘Settings’ tab on the furthest left side of the menu.

In the ‘General’ tab, you can change the form’s name and insert a description at the top of the form. You can type in some instructions and call-to-action text to encourage users to fill out the form.

Additionally, you can customize the submit button’s text and button processing text.

Configuring the WPForms General settings in the Settings tab

You also want to switch to the ‘Spam Protection and Security’ tab.

WPForms already comes with anti-spam protection that’s enabled by default. But you can also activate Akismet for further protective measures.

Additionally, feel free to set a minimum number of seconds a user must spend before they can submit the form. This gives users enough time to fill out the form but not enough time for a spam bot to submit the form rapidly.

Configuring the Spam Protection and Security Settings in WPForms

Scrolling down, you can also enable a country filter to allow users from certain countries to fill out the form. We recommend doing this if your real estate website only sells in a certain country.

Once you’ve toggled on the ‘Enable country filter’ button, just click ‘Allow’ below the Country Filter and select the country you sell to.

You can also customize the Country Filter Message if needed.

WPForms' Country Filter settings

If you move down the page, you can also enable a CAPTCHA functionality to prevent spammy form submissions.

WPForms allows custom CAPTCHA, reCAPTCHA, and hCAPTCHA.

WPForms' CAPTCHA options

Let’s go ahead and move to the ‘Notifications’ tab. This is where you can send yourself an email every time there is a new form submission.

To enable this function, simply click ‘Enable Notifications.’ We also recommend using WP Mail SMTP to make sure you always receive these email notifications, as emails sent from WordPress are likely to get lost.

For more information on this, check out our guide on how to fix WordPress not sending email issue.

Feel free to edit the email content as needed.

Enabling email notifications in WPForms

You can also create a custom confirmation email to the user in these settings, too. To do this, you can follow our tutorial on how to send confirmation emails after WordPress form submission.

Like before, don’t forget to click ‘Save’ once you are done with the settings.

Embed the Mortgage Cost Calculator on Your WordPress Site

You are now ready to display the mortgage calculator form on your WordPress blog or website. What you need to do is click the ‘Embed’ button in the top menu.

Clicking the Embed button in WPForms

Now, an embed popup will appear, asking you to select an existing page or create a new one to add the form to.

Alternatively, you can also use a shortcode.

The embed options in WPForms

The process for adding the form to an existing or new page is pretty similar.

If you choose the ‘Select Existing Page’ option, then the next screen will ask you to choose a page to add the form to. After that, click ‘Let’s Go!’

Choosing an existing page to embed WPForms in

If you choose the new page option, then the next screen will ask you to name this new page so that WPForms can create it for you.

Similar to the previous method, click ‘Let’s Go!’ to proceed.

Creating a new page to embed the WPForms form in

Both options will bring you to the Gutenberg block editor.

Now, go ahead and click the ‘+’ add block button anywhere on the page and select the WPForms block.

Adding the WPForms block in the Gutenberg editor

Once the block is there, open the ‘Select a Form’ dropdown menu.

After that, simply choose the form you created earlier.

Selecting a WPForms form to add in the block editor

You will now see your newly created form displayed in the block editor.

In the Block settings sidebar, you can customize the form’s design further, like the background color and the field border. You can also click ‘Edit Form’ to go back to the WPForms builder if needed.

The WPForms block settings sidebar in the block editor

Once you are happy with how the form looks, just click ‘Update’ or ‘Publish’ to make the changes official.

Here’s what our mortgage calculator form looks like:

An example of what a mortgage calculator form created with WPForms looks like

If you use a classic, non-block WordPress theme and want to display the form in a widget-ready area, like headers, footers, or sidebars, you can also do that.

Just go to Appearance » Widgets and click the ‘+’ add block button in any widget-ready area. Like before, add the WPForms block there and select the form you just created.

Adding a WPForms widget in the WordPress widget editor

In the widget editor, you can also edit the block settings of the mortgage calculator widget, just like you would on the block editor.

Once you are satisfied with the form, simply click ‘Update.’

Updating a widget-ready area after adding the WPForms block as a widget

Alternatively, if the methods above don’t work, then you can use the shortcode method to insert the forms in pages, posts, and other template parts. Simply click the ‘use a shortcode’ link on the embed popup from earlier.

Then go ahead and copy the shortcode and paste it wherever you like.

For more information, read how to add a shortcode in WordPress.

Copying the WPForms form's shortcode

Method 2: Add an Advanced WordPress Mortgage Calculator With Formidable Forms

This next method is excellent if you want to create an advanced WordPress mortgage calculator that takes into account your annual property taxes, insurance, and PMI (private mortgage insurance).

Once the form has that data, along with the user’s home price, loan amount, loan term, and interest rate, it can preview the user’s payment breakdown, which is also called the amortization schedule.

For this method, we will use the Formidable Forms plugin. This user-friendly WordPress contact form plugin comes with an advanced mortgage calculator template that you can add to your site.

The first thing you need to do is to install and activate both the Formidable Forms Lite and Formidable Forms premium (Business plan) plugins.

The free plugin has limited features, but Formidable Forms Pro uses it as the base for its more advanced features.

For detailed instructions, see our step-by-step guide on how to install a WordPress plugin.

Upon activation, go to Formidable » Global Settings in the WordPress dashboard. Here, you can click on ‘Connect an Account.’

Activating the Formidable Forms premium license key

On the next screen, simply log in to your Formidable Forms account.

You should have your account information after you purchase a plan.

Logging in to Formidable Forms

You will now arrive at a page that asks for your permission to install Formidable Forms Pro.

Click ‘Connect and Install Formidable Forms Pro’ to activate your license key.

Connecting and installing Formidable Forms Pro on WordPress

Now that you’ve successfully set up Formidable Forms, you are ready to add a mortgage calculator form to WordPress.

Use the Advanced Mortgage Calculator Form Template

To start, simply go to Formidable » Forms and then click on ‘Add New.’

Creating a new Formidable Forms form in WordPress

A popup will now appear, showing all the ready-made templates that you can use on your WordPress website.

To find the mortgage calculation form template, just type in ‘Advanced Mortgage Calculator’ in the search bar. Then, hover your cursor over the template and click ‘Use Template.’

Finding the advance mortgage calculator template in Formidable Forms

You will now arrive at the Formidable Forms builder. At this point, you can customize the form to match your needs.

To start, click on the field that you want to customize and then select the ‘Field Options’ tab.

Editing an existing field in WPForms

From there, you can change the field label, choose whether the field is mandatory or optional, add placeholder text, and many other things.

The cool thing about Formidable Forms is you can insert a default value in the calculator, allowing users to see what the calculation may look like later.

Editing the default value of a form field in Formidable Forms

If you click on any of the fields in the ‘Financial Analysis’ section, then try to avoid changing any of the ‘Advanced Options.’

This area contains the calculation formulas, so changing them can completely break the mortgage calculator.

The Financial Analysis section in a Formidable Forms mortgage calculator

When you are happy with how the form looks, just click on ‘Save’ in the top right corner to save your changes.

After that, type in a name for your form so that you can easily identify it later. Then, click ‘Save.’

Saving a form created with Formidable Forms

Customize the Style of the Mortgage Calculator Form

Let’s now switch to the ‘Style’ tab at the top menu. This is where you can choose a design for the form.

Editing the style of a Formidable Forms form

If you don’t like any of the styles, just click the ‘+ New Style’ button.

After that, a popup will appear. Simply write a name for this new style and click ‘Create new style.’

Creating a new Formidable Forms form style

You will now be directed to a page where you can customize the design of the form style.

Feel free to modify the typography, color scheme, button styles, checkboxes, and so on.

Configuring a custom form style in Formidable Forms

Once you are satisfied with the design, just click the ‘Update’ button at the top right corner.

Configure the Formidable Forms Settings

At this stage, you can navigate to the ‘Settings’ menu at the top.

First, in the ‘General’ tab, you can customize the form title and description, as well as choose to display them on the website later. This may be a good place to insert some instructions on how to use the form.

Note that if you want to style the text, you need to use HTML.

Configuring the General settings in Formidable Forms

Scrolling down, you will find a setting to enable Honeypot and JavaScript for spam prevention.

We recommend enabling them both to prevent fake and malicious spam entries.

Enabling spam protection in Formidable Forms

The ‘Actions & Notifications’ tab is where you can customize the confirmation email for the user.

You can either show a custom thank you message, redirect users to a specific URL, or send them to a different page.

Configuring the Actions and Notifications settings in Formidable Forms

Another tab we recommend checking out is ‘Buttons.’

This is where you can customize the submit button text and position and even enable a ‘Start Over’ button in case the user wants to empty the form and start over.

Configuring the Buttons settings in Formidable Forms

After you have configured the form settings, just click the ‘Update’ button.

Embed the Advanced Mortgage Calculator Form on Your Website

Now that your advanced mortgage calculator form is ready, you can add it to any post, page, or widget-ready area of your WordPress theme.

To start, click the ‘Embed’ button in the top right corner.

Clicking the Embed button in Formidable Forms

You will now see a popup that says you can add the form in three ways.

You can embed the form to an existing page, insert it into a new page, or use a shortcode.

Choosing a method to embed a Formidable Forms form

If you choose the existing page option, then you will select a page in the next screen.

Then, click ‘Insert form.’

Selecting a page to insert the Formidable Forms form in

On the other hand, choosing the new page option will make you create and name a new page.

Once you do that, go ahead and click ‘Create page.’

Creating a new page to insert a Formidable Forms form into

With both options, Formidable Forms will automatically insert the form block in the page’s block editor. All you need to do is rearrange it.

If you need to edit the form right from the block editor, just open the block’s settings sidebar and click ‘Go to form.’

Adding and editing the Formidable Forms block in the block editor

When you are ready, either click on ‘Publish’ or ‘Update.’

Here’s what our Formidable Forms mortgage calculator form looks like:

Example of the mortgage calculator form made with Formidable Forms

Alternatively, you can add the mortgage calculator using a shortcode or PHP code.

In the embed popup from earlier, click ‘Insert manually.’

The Embed form shortcode and PHP code options to display the Formidable Forms form

Then, you can copy either the shortcode or the PHP code. Again, for the first option, you can read our article on how to add a shortcode in WordPress.

As for the PHP code, we only recommend using it if you are comfortable with working with code snippets. We recommend using WPCode for this, as this plugin makes it safe and easy to insert code in WordPress.

WPCode - Best WordPress Code Snippets Plugin

For more information, you can read our guide on how to insert code snippets in WordPress.

We hope this article helped you learn how to add a mortgage calculator in WordPress. You may also want to see our article on how to create an auto loan or car payment calculator in WordPress and our expert pick of the best email marketing services for small businesses.

If you liked this article, then please subscribe to our YouTube Channel for WordPress video tutorials. You can also find us on Twitter and Facebook.

The post How to Add a Mortgage Calculator in WordPress (Step by Step) first appeared on WPBeginner.