FFmpeg is a multiplatform, open-source library to record, convert and stream video and audio files. Created in 2000, it is a powerful command-line tool that runs on Linux, Windows and Mac operating systems. FFmpeg is currently used by many websites and programs, including YouTube and VLC Media Player, and is published under the GNU Lesser […]
In this week's week roundup of browser news, a trick for loading images conditionally using the picture element, your chance to tell bowser vendors about the web you want, and the styles applied to inline SVG elements are, well, not scoped only to that SVG.
Let's turn to the headlines...
Preventing image loads with the picture element
You can use the <picture> element to prevent an image from loading if a specific media query matches the user’s environment (e.g., if the viewport width is larger or smaller than a certain length value). [Try out the demo:
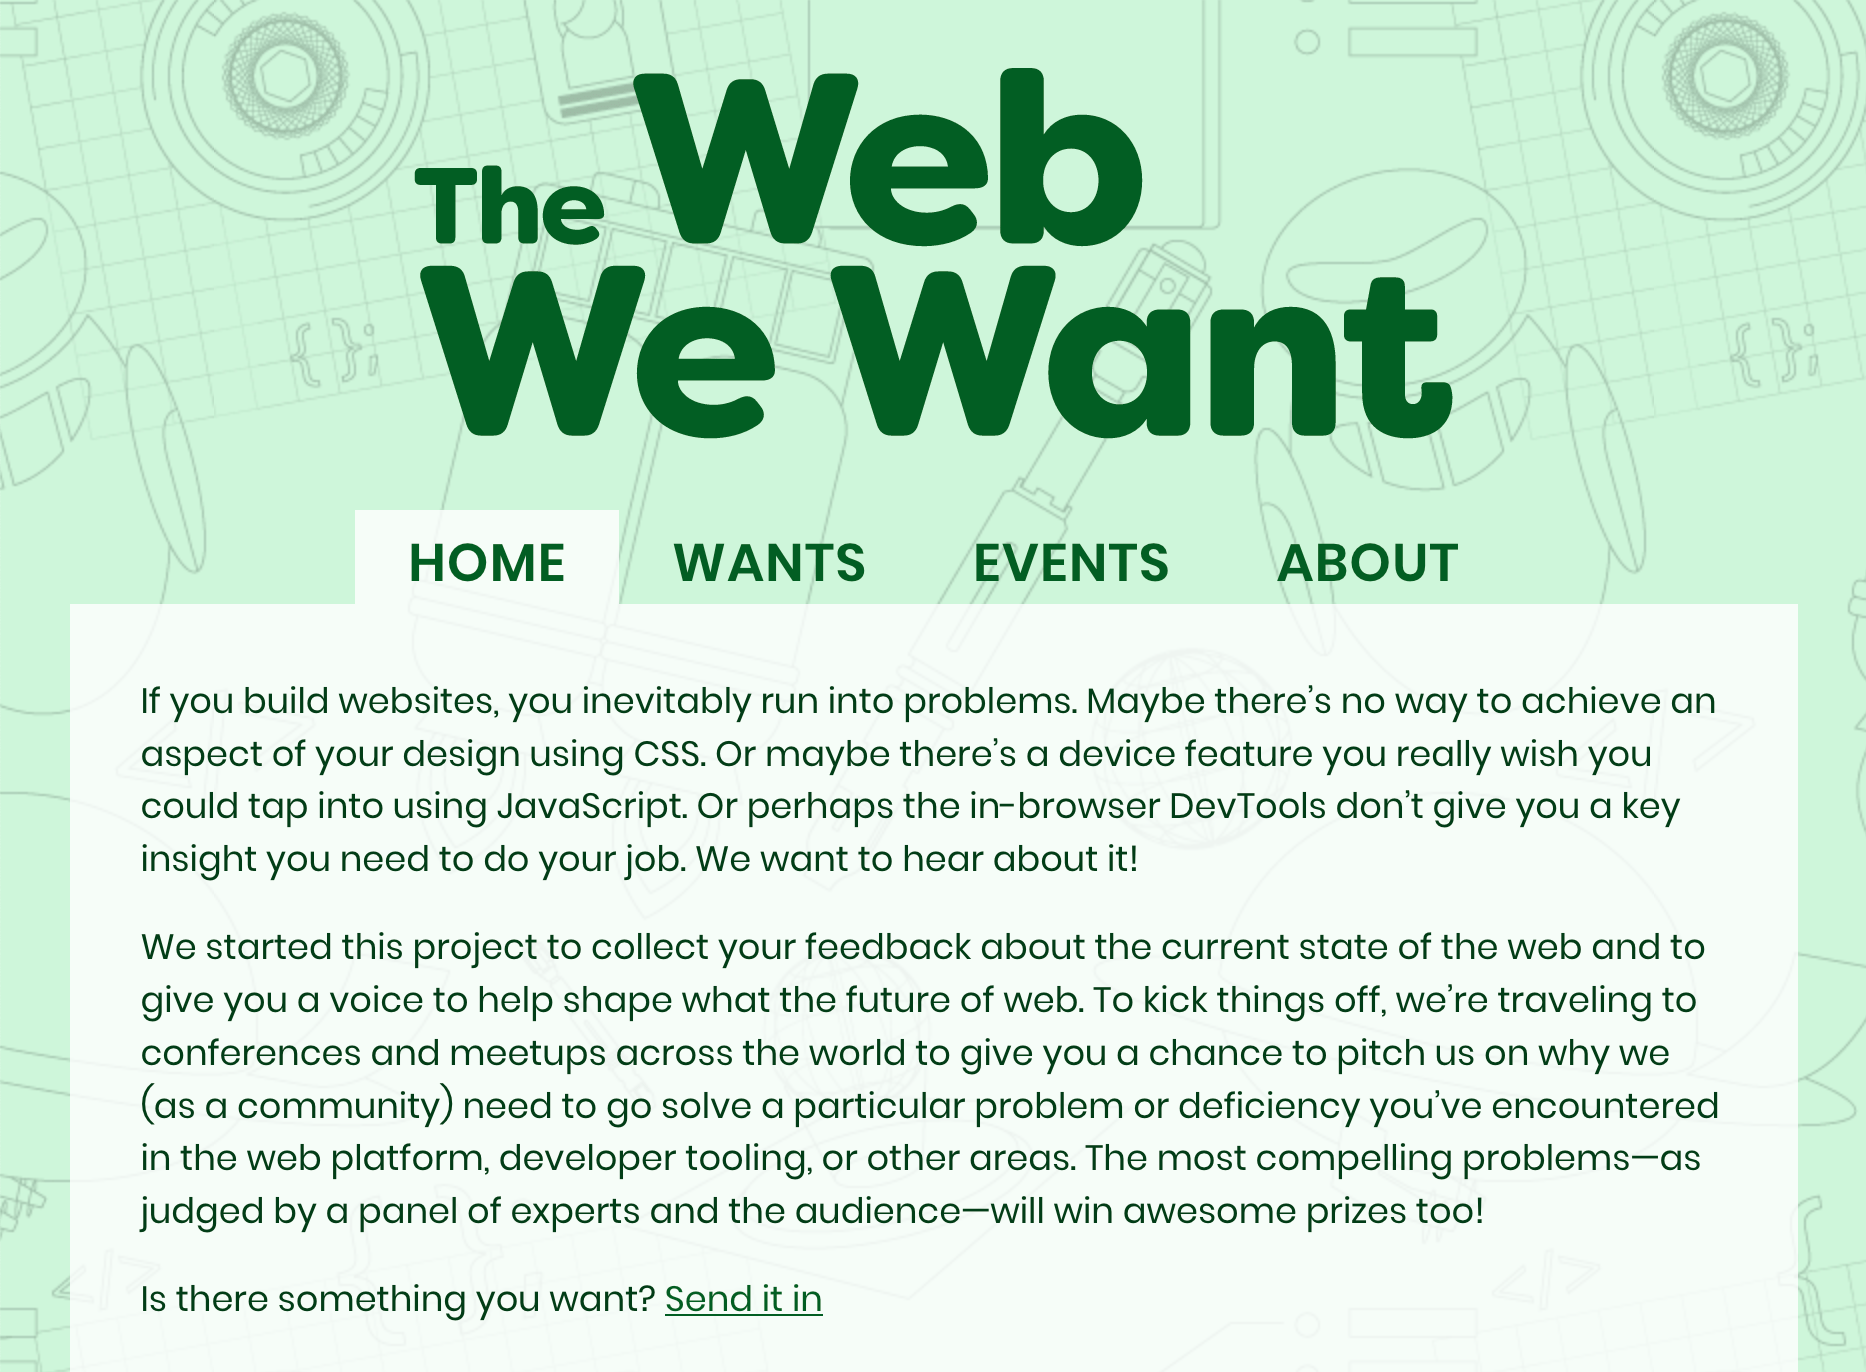
The Web We Want (webwewant.fyi) is a new collaboration between browser vendors that aims to collect feedback from web developers about the current state of the web. You can submit a feature request on the website ("What do you want?"") and get a chance to present it at an event (An Event Apart, Smashing Conference, etc.).
Firefox supports a non-standard Boolean parameter for the location.reload method that can be used to hard-reload the page (bypassing the browser’s HTTP cache) [via Wilson Page]
If you use inline <svg> elements that itself have inline CSS code (in <style> elements), be aware that those styles are not scoped to the SVG element but global, so they affect other SVG elements as well [via Sara Soueidan]
XSS Auditor, a Chrome feature that detects cross-site scripting vulnerabilities, has been deemed ineffective and will be removed from Chrome in a future version. You may still want to set the HTTP X-Xss-Protection: 1; mode=block header for legacy browsers [via Scott Helme]
Read more news in my new, weekly Sunday issue. Visit webplatform.news for more information.
Every day, the ProgrammableWeb team is busy, updating its three primary directories for APIs, clients (language-specific libraries or SDKs for consuming or providing APIs), and source code samples.
Cassidy and Marie are on this week to talk about side projects and how they can help you personally as well as professionally. Let us know what kind of side projects you're working on!
Jetpack brings a wealth of features to your self-hosted WordPress site as one of the best no-brainer plugins for WordPress there is. One feature I just recently used for the first time was the video hosting and video player. I had a video clip that I just wanted to drag and drop into a blog post like I would an image, but it was a little too big. Fortunately I just uploaded it through WordPress.com, it was magically available in the Media dialog on my self-hosted site, and it worked perfectly.
Saturday Drive, makers of Ninja Forms, Ninja Shop, and SendWP, has acquired Caldera Forms, a React-based, drag-and-drop forms builder plugin. In addition to the free plugin on WordPress.org, which has more than 200,000 active installs, CalderaWP’s product line includes a Pro version and more than 30 free and commercial add-ons for things like payment processors and marketing integrations.
Josh Pollock, who co-founded CalderaWP in 2015 with Christie Chirinos, will be joining Saturday Drive as VP of Engineer Experience, along with three other employees from the company, bringing Saturday Drive’s total crew number to 25. Chirinos began working as a product manager at Liquid Web earlier this year.
Caldera Forms will still operate under the Saturday Drive umbrella and continue to be developed with more resources.
“If it ever felt to you like Caldera Forms was a part time thing, that was true,” Pollock said. “It’s not true anymore.” Saturday Drive is aiming to speed up development and decrease support times.
“Caldera Forms is not going anywhere,” Pollock said. “It’s going to get a lot more focus and attention now. I didn’t contribute any code to the last release, it was all Nico and community contributors. I reviewed the changes. Kevin (CTO at Saturday Drive) and I helped manage him, but he’s ready to take over Caldera Forms from me and has all of the support he needs.”
Pollock will be focusing on improving the engineering process at Saturday Drive and working on some products, starting with SendWP. He also plans to continue writing tutorials about PHP and JavaScript development.
James Laws, Saturday Drive co-founder and co-creator of Ninja Forms, said the attraction to CalderaWP was “a combination of acquiring the team and the profit potential.” With more resources at their disposal, he anticipates that Caldera will become even more profitable. Laws declined to share more specific details on the financial aspects of the arrangement but shared a few factors involved in considering what it costs to acquire a forms builder plugin in the WordPress space these days.
“It really depends on the form builder,” he said. “It’s similar to any WordPress plugin – number of customers, active users, growth trend, support load, team makeup, and so much more all goes into the conversation. Some form builders might not be worth anything. Others are worth millions. Much of it depends on the objectives of the buyer.”
How Saturday Drive Plans to Market Two Different WordPress Forms Plugins Under one Umbrella
One of the more intriguing aspects of this acquisition is that Saturday Drive already has one of the most successful WordPress forms plugins in its arsenal. Ninja Forms has more than a million active installs but is knee deep in competition with alternatives such as Contact Form 7 (5 million+ installs), WPForms (2 million+), and Gravity Forms. Although Caldera Forms is technically a competitor to Ninja Forms, both Laws and Pollock seem to be confident marketing them separately under the same company umbrella.
“We’ve been really friendly competitors for years,” Pollock said. “Caldera Forms had always been a developer tool with a goal of being intuitive enough for everyone. I think this will allow us to focus Ninja Forms and Caldera Forms on serving different needs. Neither plugin can make everyone happy.”
Laws said the plan is to keep Caldera Forms as a unique brand, since it has a different user base and primary message focused on developers.
“We will focus on this difference in messaging,” Laws said. “Ninja Forms for a long time has been moving towards being more user centric with a focus towards simplicity and specific ways of accomplishing particular tasks. This direction has certainly alienated developers who want to do deeper customizations because that just isn’t our primary goals any longer.”
For Saturday Drive’s co-founders, the decision to acquire CalderaWP seems to have been just as much about gaining Pollock’s leadership and his team as it was about gaining the product line.
“Caldera Forms has always been the WordPress developers form builder,” Laws said. “Josh is, at his core, an extremely talented developer who loves helping developers. Caldera Forms is the product of this passion. We saw a great opportunity to have a tool under our umbrella that now focused on this exciting space of developers, agencies, and freelancers that needed a tool that could be truly modified to their hearts content.”
Laws said Saturday Drive plans to take slow down for a bit to ensure all four of the company’s products are where they want them to be. “I’m confident that all the products will be seeing some very cool updates over the next 6 months,” he said.
Pollock, who has a strong interest in headless WordPress setups, said he has been experimenting with new ways to use the newer React-driven parts of Caldera Forms anywhere. He has a Gatsby + WordPress test site (futurecapable.dev) where he set up a first pass at this prior to getting distracted by acquisition negotiations and daily life.
“Part of the new job is finding new ways to fill the same needs that Caldera Forms, Ninja Forms, and Ninja Shop fulfill today,” he said. “If the future is headless and static sites, which I think so, then contact forms, eCommerce, list building, etc. we need to make that easy. That’s the challenge I’m most interested in.”
APIs sit at the center of organizations’ digital transformation initiatives, empowering employees, partners, customers, and other stakeholders to access applications, data, and business functionality across their digital ecosystems. Hackers treasure these critical APIs, and holding off their growing waves of attacks can resemble the little Dutch boy trying to plug the dam with his finger.
PayPal has announced the release of a new PayPal Invoicing API, which aims to provide small businesses with the tools necessary to easily create, send, and process invoices. Although targeting small businesses, the company has noted that the API has a global reach, supporting 25 currencies and over 200 markets.
I am making a program, and I don't know why my program becomes unresponsive, when I click the button ):
I have a feeling its because of this:
"connection = server.accept();"
I don't know how to fix it.
Did you know that 53% of all Americans use the internet to read the news each and everyday? And that television and print news are on the decline? That means that there’s never been a better time to start your own online resource for the latest and greatest in news, gossip, fashion, DIY or anything else! […]
You’ve never built a WordPress website like this before. Divi is more than just a WordPress theme, it’s a completely new website building platform that replaces the standard WordPress post editor with a vastly superior visual editor.
An experimental platform for exploring generative design systems. You can cycle through generated designs one or many at a time until you find something inspiring.
Nadieh Bremer shares a magnificent project that visualizes how Planet’s satellites create a full image of Earth’s landmass in one single day. Read more about it in this tweet.
Technology surrounds us. We carry some of the most advanced and compact electronic devices with us in our pockets! We watch movies and television shows while we commute or wait in line. Indeed, we live in an age where media and technology exist in nearly perfect synchronicity, with people at its harmonious center.But the phones, […]
I’m in love with SVG. Sure, the code can look dense and difficult at first, but you’ll see the beauty in the results when you get to know it. The bonus is that those results are in code, so it can be hooked up to a CMS. Your designers can rest easy knowing they don't have to reproduce an effect for every article or product on your site.
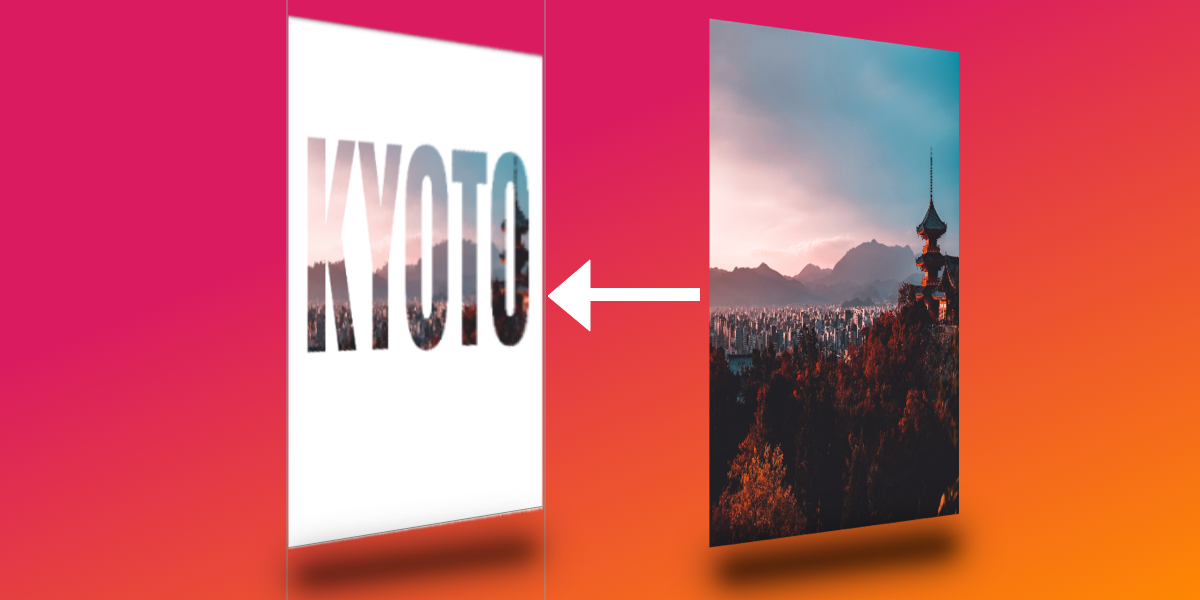
Today I would like to show you how I came up with this glass text effect.
Step 0: Patience and space
SVG can be a lot to take on, especially when you’re just starting to learn it (and if you are, Chris’ book is a good place to start). It’s practically a whole new language and, especially for people who lack design chops, there are lots of new techniques and considerations to know about. Like HTML, though, you’ll find there are a handful of tools that we can reach for to help make SVG much easier to grasp., so be patient and keep trying!
Also, give yourself space. Literally. SVG code is dense so I like to use two or three new lines to space things out. It makes the code easier to read and helps me see how different pieces are separated with less visual distraction. Oh, and use comments to mark where you are in the document, too. That can help organize your thoughts and document your findings.
I’ve made demos for each step we’re going to cover in the process of learning this glass effect as a way to help solidify the things we’re covering as we go.
OK, now that we’re mentally prepared, let’s get into the meat of it!
Step 1: Get the basic image in place
First things first: we need an image as the backdrop for our glass effect. Here we have an <svg> element and an <image> within it. This is similar to adding an <img> in HTML. You’ll notice the dimensions of the viewBox attribute and <image> element in the SVG element are the same. This ensures that the <image> is exactly the same size as the actual picture we’re linking to.
That’s a key distinction to note: we’re linking to an image. The SVG file itself does not draw a raster image, but we can reference one in the SVG code and make sure that asset is in the location we point to. If you’ve worked with Adobe InDesign before, it’s a lot like linking to an image asset in a layout — the image is in the InDesign layout, but the asset itself actually lives somewhere else.
Straightforward so far, but this is where things get complicated because we’re going to add a filter to the image we just inserted. This filter is going to distort the image. If you look closely at the difference between the demo in the last step and the one in this step, you’ll see that the edges of objects in the image are a little rough and wavy. That’s the filter at work!
First, we create another <svg> to hold filter. This means that if we ever want to reuse our filter — for example on multiple elements on the page — then we totally can!
Our first filter (#displacement) is going to distort our image. We’re going to use feTurbulence and feDisplacementMap, each explained by Sara Soueidan much better than I can in this post. Beau Jackson also wrote up a nice piece that shows how they can be used to make a cloud effect. Suffice to say, these two filters tend to go together and I like to think of them as when something needs to appear "wobbly."
With our filter container in place, we just need to apply that filter to our image with a filter attribute on the <image>, magic!
We don’t want the entire image to be distorted though. We’re going to clip the shape of our distorted <image> to the shape of some text. This will essentially be the portion of the picture seen "through" the glass.
To do this, we need to add a <text> element in a <clip-path> and give it an id. Calling this id in the clip-path of our <image> now restricts its shape to that of our <text>. Wonderful!
OK, so it’s bueno that we have the distorted <image> clipped to the <text>, but now the rest of the image is gone. No bueno.
We can counteract this by adding a copy of the same <image> but without the clip-path or filter attributes before our existing <image>. This is where I like to add some nice comments to keep things neat. The idea is like placing a transparent layer over what we have so far.
I know, I know, this isn’t very neat, and we’re repeating ourselves. Ideally, we would set our filter straight on the <text> element and use the in="BackgroundImage property for feDisplacementMap to warp what’s behind the text, without the need for extra elements. Unfortunately, this has poor browser support, so we’re going to go with multiple images.
Next, we’re going to duplicate our text just as we did for the image in the last step. Unfortunately, because the text is in a clip-path, it’s now not available for rendering. This is the last time we’re going to duplicate content like this, I promise!
Now we should have something that looks like a normal image with black text over it. If the distortion filter on the <image> we’ve already made is what we can see "through" the glass, then our new <text> is going to be the glass itself.
<svg>

  <!-- more stuff -->

  <!-- TEXT - clipped -->
  <clipPath id="clip">
    <text x="50%" y ="50%" dominant-baseline="middle" text-anchor="middle">KYOTO</text>
  </clipPath>

  <!-- TEXT - visible -->
  <text x="50%" y ="50%" dominant-baseline="middle" text-anchor="middle">KYOTO</text>

<!-- more stuff -->

</svg>
This is where things start to get exciting, at least for me! 🤓
We want to create a dark edge along the text element which, when paired with a light edge (we’ll look at that next), will add depth to the appearance of the text against the image.
We want a new filter for our <text>, so let’s create one in our filter's SVG element and give it an id="textFilter and link it to the filter attribute of the <text> element.
SVG works from the background to the foreground, so the first thing we’re going put in our filter is the shadow that the glass would have, as that is furthest back. I’m gonna level with you, this one is pretty complex, but we’re going to go through it one step at a time.
For this effect, we’re using four filter primitives: feMorphology, feOffset, feFlood and feComposite.
feMorphology is first. We’re using this to make the text fatter. In the demo below, comment out the next three primitives ( feOffset, feFlood, feComposite ) and play with it. I have the value radius="4" to achieve the glass effect, but see what happens if you set it to 1... or 100!
feOffset is used to move all the "pixels" in the previous primitive ( feMorphology ) across the x- or y-axis. The values dx="5" and dy="5" move the "pixels" right on the x-axis and y-axis, respectively. The higher the number, the further they move. Put in negative numbers for dx and the "pixels" will move left. Negative dy and they’ll move up! Again, the is the sort of thing you start to learn as you play around with them.
The reason I have quotes around "pixels" is because they’re not screen pixels like you might expect in CSS. Rather, they refer to the dimensions we set on the parent <svg>. I think of them as percentages. We have used these settings viewBox="0 0 1890 1260" in our example. This means our <svg> is 1890 "pixels" wide. If we set dx="189" it means we’ll move our element 10% of the way across the SVG (1890 divided by 189).
feFlood is great. If you want to fill the screen with color, this is the primitive you need! You might wonder why we can’t read our text now when we apply it. That’s because you can only see the result of the last filter primitive that was created. The result of each of the previous primitives was related to our <text> element. The result of feFlood is just like its name: a flood of color. It doesn't know what you did before and it doesn't care — it’s merely going to fill an area with color.
This is where some people start getting frustrated with SVG. It’s hard to work on something when you can’t see it! Trust me, as you work with SVG more you’ll get used to this. In fact, the next few steps will need us to rely on this and trust that everything is still in place.
feComposite is going to solve this issue for us. What does it do? MDN describes it as:
The SVG filter primitive performs the combination of two input images pixel-wise in image space using one of the Porter-Duff compositing operations: over, in, atop, out, xor, and lighter.
That to me is jibba-jabba. I think of it as affecting the alpha layer of in with the color/alpha of in2.
With this in place we can once again see our text spelled out and, because the color we used is slightly transparent, we can even see the distorted "glass" effect coming through. Great!
This is essentially the same as what we literally just did, but we’re going to shift the shape up and to the left using negative dx/dy values. We’re also setting a slightly white color this time. We’re aiming for a nice depth effect.
We’re again in a position where what we can see is the most recent result from a filter primitive, but we can’t see our dark edge! feComposite isn't what we want to use to bring them together because we don't want the alpha of the dark edge colored by the light edge… we want to see both! Which leads us to…
feMerge! It’s a hero. It lets us take any number of primitive results and merge them, making a new image. Woohoo, we can now see both dark and light edges together!
However, we do want them to be edges rather than both filling up the entire text, so we need to remove the space that the original <text> takes up. What we need next is another feComposite to chop out the original SourceGraphic. Because we used feMorphology to fatten the letters for our edges, we can now chop the original letter shapes out of the result of our feMerge.
Now we’re starting to look like glass, with just one piece missing.
Step 9: Yes, a bevel
We have a pretty good 3D-looking glass effect. However, the letters look flat. Let’s add one more effect and make them look more rounded.
To achieve this we’re going to create a bevelled effect.
First we’re going to use feGaussianBlur. This will blur our existing filters slightly. We’re going to use this blurred result as basis to add some feSpecularLighting. As usual, feel free to play with the numbers here and see what effects you can get! The main one you might want to change is the lighting-color attribute. The image that we’re using here is slightly dark, so we’re using a bright lighting-color. If your image was very bright, this would make the letters hard to read, so you might use a darker lighting-color in that case.
An Event Apart juuuuust wrapped up its Washington D.C. event yesterday. We hope we got to see you at the event but if not, perhaps we'll see you at the next one happening Aug. 28-28 in Chicago.
Why would you go, you might ask? It's three days of experts imparting their knowledge on topics ranging from CSS Houdini to intrinsic layouts — and that's just the first day!
Seriously, there are lot of reasons why you'd want to go. The speakers are top-notch, the opportunities to network with others will be aplenty and you'll be upping your front-end development chops the entire time. Not a bad collection of perks, for sure.
The time to register is now and, when you do, use coupon code AEACP at checkout and get $100 off the price!
Standard Java Maps needs to be initialized upon startup. Learn how to leverage ChronicleMaps in a way that is initializable from a file as well as reduces microservice startup time significantly and how to share Maps between JVMs.
The built-in Map implementations, such as HashMap and ConcurrentHashMap, are fast but they must be initialized with mappings before they can be used for looking up values. Also, they are limited in size by practical means such as heap and RAM size. Lastly, they are local to the JVM it runs in.
Synopsis: Git is the best we have right now for a "History-retaining Merkle tree" (when force-push is turned off), and stands to be utilized more outside of software development - in business at least.
A £200m "Garden Bridge" project was canceled when it had accrued £50m in costs and before construction started. It is difficult to pick it apart. See this Tortoise Media article and Reddit discussion.
Raw materials and energy have been the foundations of every manufactured product since the industrial revolution. With Industry 4.0, data is becoming more important than ever before, not only to minimize operational costs and increase efficiencies but to wring every bit of product and profit from raw materials and energy.
Decades ago, factories pioneered the Internet of Things (IoT) with the use of technologies such as supervisory control and data acquisition (SCADA) and programmable logic controllers (PLC). Valuable as they were, and still are, those traditional IoT applications are mainly about controlling robots and other equipment, monitoring production, and identifying problems such as overheating pumps.
Hi, Spring fans! Welcome to another installment of This Week in Spring. This week, I’m in sweet San Francisco, soaking up the sun and enjoying the fun of summer. Sure, I’ve got a few meetings, and appearances, etc., but it is very nice to be home. By the way, I’ll be speaking at the upcoming San Francisco Java User Group — come hang out and say hi!
Anyway, lots of good stuff (as usual), so let’s get to it.


 Did you know that 53% of all Americans use the internet to read the news each and everyday? And that television and print news are on the decline? That means that there’s never been a better time to start your own online resource for the latest and greatest in news, gossip, fashion, DIY or anything else! […]