Every day, the ProgrammableWeb team is busy, updating its three primary directories for APIs, clients (language-specific libraries or SDKs for consuming or providing APIs), and source code samples.
The Differing Perspectives on CSS-in-JS
Some people outright hate the idea of CSS-in-JS. Just that name is offensive. Hard no. Styling doesn't belong in JavaScript, it belongs in CSS, a thing that already exists and that browsers are optimized to use. Separation of concerns. Anything else is a laughable misstep, a sign of not learning from the mistakes of the past (like the <font> tag and such.)
Some people outright love the idea of CSS-in-JS. The co-location of templates and functionality, à la most JavaScript frameworks, has proven successful to them, so wrapping in styles seems like a natural fit. Vue's single file components are an archetype here.
(Here's a video on CSS-in-JS I did with Dustin Schau if you need a primer.)
Brent Jackson thinks you should definitely learn it, but also offers some pragmatic points on what it does and doesn't do:
What does CSS-in-JS do?
- Let you author CSS in JavaScript syntax
- Colocate styles with components
- Take advantage of native JS syntax features
- Take advantage of anything from the JS ecosystem
What does CSS-in-JS not rid you of needing to understand:
- How styles are applied to the DOM
- How inheritance works
- How CSS properties work
- How CSS layout works
CSS-in-JS doesn't absolve you of learning CSS. Mostly, anyway.
I've heard lots of pushback on CSS-in-JS in the vein of "you people are reaching for CSS-in-JS because you don't understand CSS" or "You're doing this because you're afraid of the cascade. I already know how to scope CSS." I find that stuff to be more poking across the isles that isn't particularly helpful.
Laura buns has a wonderfully two-sided article titled "The web without the web" part of which is about React and CSS-in-JS:
I hate React because CSS-in-JS approaches by default encourage you to write completely self-contained one off components rather than trying to build a website UI up as a whole.
You don't need to use CSS-in-JS just because you use React, but it is popular, and that's a very interesting and fair criticism. If you scope everything, aren't you putting yourself at higher risk of inconsistency?
I've been, so far, a fan of CSS modules in that it's about as light as you get when it comes to CSS-in-JS, only handling scoping and co-location and that's about it. I use it with Sass so we have access to mixins and variables that help consistency, but I could see how it could allow a slide into dangerous too-many-one-offs territory.
And yet, they would be disposable one-offs. Code-splittable one-offs. Everything exists in balance.
Laura goes on to say she likes CSS-in-JS approaches for some of the power and flexibility it offers:
I like the way CSS-in-JS gives you enough abstraction to still use tricks like blind owl selectors while also giving you the full power of using JS to do stuff like container queries.
Martin Hofmann created a site comparing BEM vs. Emotion that looks at one little "alert" component. I like how it's an emotionless (literally, not referencing the library) comparison that looks at syntax. BEM has some advantages, notably, requiring no tooling and is easily sharable to any web project. But the Emotion approach is cleaner in many ways and looks easier to handle.

I'd like to see more emotionless comparisons of the technologies. Choice A does these three things well but is painful here and here, while choice B does these other things well and solves a few other pain points.
We recently linked up Scott Jehl's post that looks into loading CSS asynchronously. Scott's opening line:
One of the most impactful things we can do to improve page performance and resilience is to load CSS in a way that does not delay page rendering.
It's notable that an all-in CSS-in-JS approach gets this ability naturally, as styling is bundled into JavaScript. It's bundled at a cost. A cost to performance. But we get some of that cost back if we're eliminating other render-blocking things. That's interesting stuff worthy of more data, at least.
I might get my butt kicked for this, but I'm a bit less interested in conversations that try to blame CSS-in-JS for raising the barrier to entry in the industry. That's a massive thing to consider, but we aren't talking about shutting down CSS here and forcing everyone to some other language. We're talking about niche libraries for certain types of projects at certain scales.
I think it's worth taking a look at CSS-in-JS ideas if...
- You're working on a component-heavy JavaScript project anyway.
- You're already co-locating templates, functionality, and data queries.
- You think you can leverage it without harming user experience, like gaining speed back elsewhere.
- Your team is comfortable with the required tech, as in, you aren't pushing away talent.
Max Stoiber is an unabashed fan. His post on the topic talks about the confidence this style brings him and the time he saves in finding what he needs, both things I've found to be true. But he also thinks the approach is specifically for JavaScript framework apps.
If you are using a JavaScript framework to build a web app with components, CSS-in-JS is probably a good fit. Especially if you are part of a team where everybody understands basic JavaScript.
I'd love to hear y'all thoughts on this in the comments. Have you worked out your feelings on all this? Madly in love? Seething with dislike? I'd be most interested in hearing success stories or failure stories on real projects.
The post The Differing Perspectives on CSS-in-JS appeared first on CSS-Tricks.
New mycamp.rocks Newsletter Launches with Tips for Conference Organizers, Speakers, and Attendees
David Bisset launched mycamp.rocks today, a newsletter targeted at conference organizers, speakers, and attendees. The WordPress newsletter landscape is currently dominated by general industry and developer news digests, such as Master WP, WpMail.me, Post Status, and The WP Daily. mycamp.rocks is the first newsletter to drill down into community event topics and will be sending out new tips every Tuesday.
Bisset has helped organize WordCamp Miami, meetups, and other events for more than a decade. He has accumulated a large store of knowledge, resources, and experience managing all the minutiae of conference organization. The first edition of the newsletter includes tips on badge design, lanyards, dealing with rejection as a speaker applicant, communicating special diet requests, and other miscellaneous topics. He is intentionally keeping the focus broad and not limiting it to WordPress events.
Bisset said he decided to go the newsletter route, as opposed to creating a blog, because he was inspired by some developers experimenting with the same format. Newsletters tend to get mixed into an inbox management routine and are more likely to receive attention than websites that broadcast their posts to social media.
“Perhaps with busy lives people are appreciating small emails,” Bisset said. “For some it’s hard to keep checking a website and I think people are avoiding social media (or filtering it down). So email once again is becoming a good solution for delivering tips, especially if the emails are short and happen once a week.”
Bisset said the email format is an experiment, since the website is updated with the newsletter information anyway. He plans to evaluate after a month to see if more people are visiting the website versus opening the emails.
The newsletter has already received some feedback that Bisset plans to implement, such as separating the tips that work best for small events, like meetups, and larger conference-type events.
WordCamp US announced last week that it will host a dedicated track for community-related topics, such as meetups, diversity, inclusion, and kids camps. Bisset said he sees this as a significant development in support of community members and event leaders.
“Community is the biggest strength of WordPress itself,” Bisset said. “Many people have asked for and needed some direction, tips, or general knowledge on how to better run meetups, contributor days, WordCamps, and kid’s events. I think we’ve also seen over the past year or two some communication problems in the community itself, and I think addressing all of these things on a national stage like WCUS leads us down the road of educating people on how to improve our interactions with fellow community members. Those members could be fellow organizers, fellow contributors, or just anyone that we interact with – regardless of their gender, background, or age.”
Twitter Vows Policy and Technology Changes Following Data Breach
Last week, Twitter revealed that it may have shared certain user data with third-party advertisers against what certain users selected in their settings. While the company continues to investigate exactly which users were impacted, Twitter claims to have fixed the problem on August 5, 2019. Twitter indicated two potential cases they may have led to unauthorized sharing:
A Guide to Selling Digital Products with WordPress
Looking for a highly-customizable way to sell your digital goods online? Chances are you can do it with WordPress.
The jack-of-all-trades CMS offers a number of different plugins that will help you distribute software, eBooks, music, stock photos and just about anything else that can be downloaded. And you can build a simple configuration with free tools.
But because there are a number of options available, it can be difficult to figure out which path to take. You’ll want to adopt a strategy that allows you the flexibility you need without adding a whole lot of unexpected costs and/or roadblocks.
Sound daunting? No need to worry! Today, we’ll show you a few different possibilities for selling digital products. While they won’t cover every possible need, they should at least help you determine the path that’s right for you.

Scenario #1: Single Product Sales
If you want to sell digital products on a one-off basis, a shopping cart is the way to go. A free plugin such as WooCommerce or Easy Digital Downloads can do all of the heavy lifting for you. Configure your products, set pricing and you’ll have a basic store up and running rather quickly.
What’s more, each of these shopping cart plugins have a wide variety of free and paid add-on components. They provide extra functionality such as the ability to tie in with specific payment gateways, offer product bundles and allow for affiliate sales – to name just a few.
The biggest decision here may be which cart to use. Each has its own strengths when it comes to digital products.
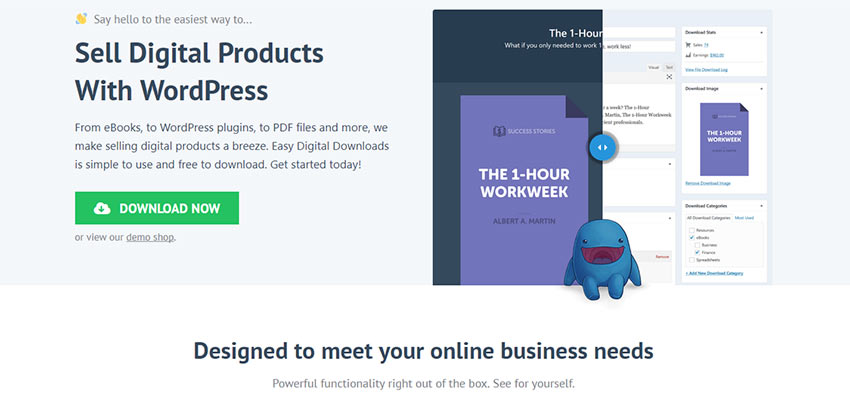
Easy Digital Downloads
As its name suggests, Easy Digital Downloads (EDD) was built specifically for selling downloadable goods. Thus, it offers a whole lot of features dedicated to this purpose.
You can, for example, use the built-in function to limit access to downloadable files by download attempts or expiration date. And if you’re selling software that requires a license key, you can add this functionality through an available paid add-on. If you’re distributing large files, there is even an add-on for storing them on Dropbox.
Or, start a community site by allowing users to post and sell their own items. Need a way to provide users with sales commissions? It’s just another plugin away.
However, at its core, EDD is also a shopping cart. Out of the box, the plugin includes things like discount codes and customer management (including front-end account profiles). About the only feature missing is the ability to ship physical goods – but again, there’s an extra piece that can allow for this as well.
WooCommerce
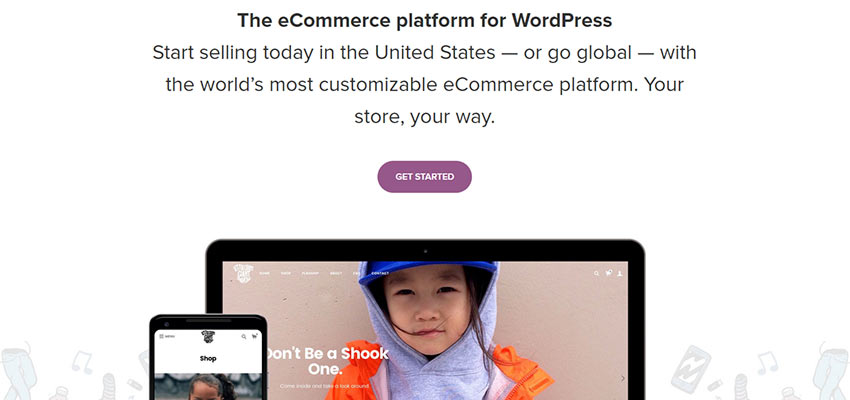
By now, just about everyone knows WooCommerce. It’s the dominant shopping cart in the WordPress sphere. It’s feature-packed, highly-customizable and you can use it to sell just about anything – including digital products.
This functionality is built right into the core plugin, so you can start selling right away. Like Easy Digital Downloads, the ability to limit downloads based on attempts or an expiration date is included.
Downloads also work with variable products. For example, if you’re selling images, you can allow users to pick from a number of different sizes or formats. This also enables you to price them accordingly.
Of course, WooCommerce is also famous for its large number of extensions. You’ll find a few that are specifically geared towards digital goods, including one aimed at professional photographers and another that enables you to offer downloads on subscription-based sites (we’ll get to that in a moment).
But since the plugin is used to sell so many different types of products, those who have very specific needs when it comes to digital goods may be a bit disappointed. There aren’t a lot of extra bells and whistles in this category.
That being said, if you don’t need some of the extras that EDD offers, or you’re selling a variety of physical and digital products, WooCommerce is still a great choice.
Scenario #2: Subscription-Based Service
Another typical scenario is in offering digital downloads to customers via a subscription. This is frequently becoming the preferred method for sites that sell stock photography, illustrations, icons and other types of assets. Customers pay monthly, yearly or even a single lifetime fee in exchange for access to files.
The good news is that both Easy Digital Downloads and WooCommerce have add-ons that enable subscriptions and recurring payments. Just note that you’ll need to work with a payment gateway that supports this functionality.
Making Your Site Members Only
Beyond the ability to sign up subscribers, you’ll also want to think about how you’ll protect your files from unauthorized users. This functionality is available for either of the aforementioned shopping cart plugins. But again, it will require a combination of commercial add-ons if you want to stay within their respective plugin ecosystems.
Alternatively, you could also work with a full-on membership suite. Plugins such as Paid Memberships Pro or S2Member Framework, among others, could be a good fit if you are just looking to sell access to restricted content. This may limit you quite a bit when it comes to features like download limits and licensing, however.
There may be some cases where combining both a cart and membership suite makes sense. This is a piecemeal approach, though, and could make implementing features a little more difficult. Therefore, you’ll want to weigh your options carefully.

Dealing in Downloads
Setting up a basic store to sell digital products is well within reach. With the help of a free shopping cart plugin, you can go from installation to selling online in a few short hours.
If you’re looking for something a little more robust, that’s also possible through the plugins mentioned above. But it will most likely take some commercially available add-ons to bring the desired functionality to your website.
Either way, you’ll have a solid foundation for your store that can grow along with you over time.
Top Tools and Services for Developers in 2019
Looking to change your software development practices for the better? You already have the know-how and experience, and you always strive to improve your skills? But, if you feel you’ve hit a plateau, the tools you’re using could easily be the source of the problem.
Choosing the right tools and services is always a challenge, especially when more and more come on the market every year. Bridging the gap between development and operations has always been a challenge. That is one place where having the right tools can make your efforts much easier.
There are certain factors you need to consider when looking for a certain development tool. They are based on the type of the project involved. The products and services recommended in this article consider these factors.
Elementor
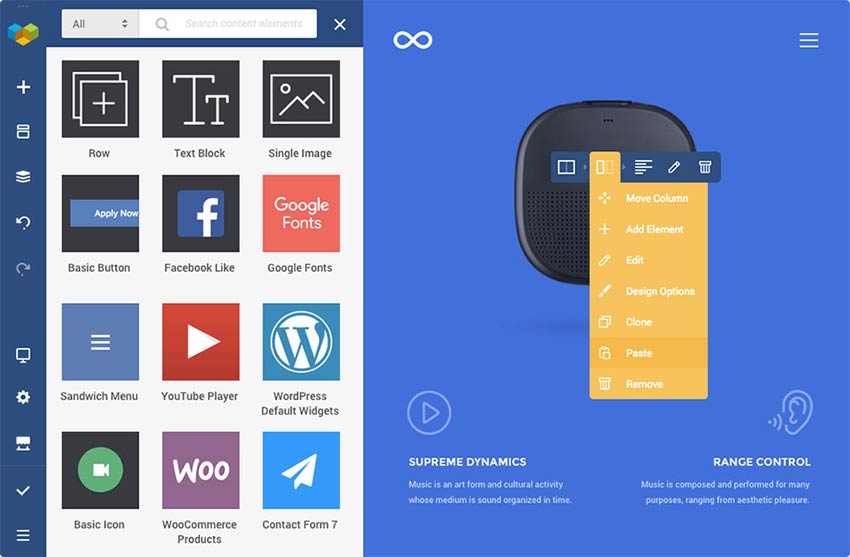
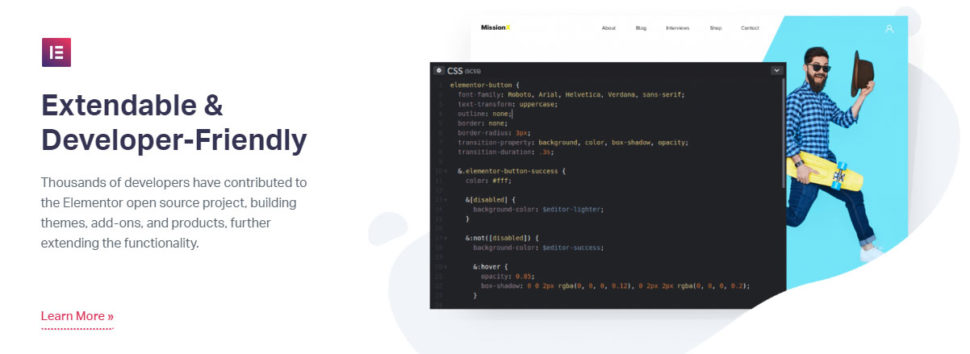
Elementor has proven to be an extremely popular web design tool. So popular in fact that some of its users might not be aware that it this open source project was created with developers in mind. While it’s has most features designers love, it’s literally packed with features you’ll love if you’re a developer.
As is the case with many open-source solutions, great ideas come from a range of contributors that, along with the Elementor team, work tirelessly to build on its already full stack of solutions you can use to address your own problems and create your own solutions.
Elementor’s development solutions include CLI Integration, Custom CSS, CSS Optimization, Version Rollback Capabilities, and Request Parameters for data tracking across multiple pages. Elementor is also RTL ready.
The developer’s documents offer a great place to learn how to extend this extremely extensible development tool and get the most from its editor, live preview, its frontend features, and the extensive library of useful widgets.
And Co
If you’re spending lots of time invoicing it’s probably because your business is doing well, but it stops being good news when it takes too much time away from your core development work. AND.CO is a smart development app that tracks time, creates your invoices for you, and alerts you when they’ve been viewed or paid.
This nifty invoicing app syncs across all your devices, so you can stay on top of your cash flow and billings and even manage your invoicing while on the go. There’s no need to spend time manually inputting billable hours either, AND.CO does it for you. You can even use AND.CO to create proposals and use the information contained in them as the basis for invoicing.
One more thing: when you receive a payment, AND.CO automatically deposits it in your bank account.
Atom
As a developer, you naturally lean toward or rely entirely on flexible and extensible open source tools to get your work done. Atom is precisely such a tool. This open source desktop application runs on Electron, which enables it to help you build cross platform apps and use it on Windows, OS X, and Linux.
Atom also works with JavaScript, CSS, HTML, and Node.js integration, and the ability to choose among thousands of open source packages to work with makes it a super-extensible application. If you choose, you can build your own package from scratch, publish it, and share it with others.
Atom also promotes collaboration among developers. When developers work together and share knowledge as they do so, great things can happen. Collaborating with others on coding becomes no more difficult than coding on your own since Atom allows you to compare and edit code across files and view an entire project or multiple projects in a single window.
Testim
Is having to perform multiple tests on multiple applications starting to drag you down? Testim was developed to enable Agile teams author more tests while spending less time managing and maintaining them. This development tool allows you to run multiple tests on multiple browsers and receive the results in a matter of minutes.
With Testim, you can conduct testing in their cloud or your private cloud. Testim is a straightforward solution to the problem of being swamped by large-scale testing.
TMS Outsource
Whether outsourcing web development is an option or a necessity, doing so has many advantages. Outsourcing can save money, teams like TMS Outsource are experts at what they do, you can rely on on-time delivery, and you can focus on your core business activities.
TMS Outsource also relieves you of the challenge of having to search for a development team you can rely on; a team that adheres to SCRUM development methodologies in their work.
InvoiceBerry
Sending out invoices with InvoiceBerry is as easy as it gets. Select a professionally designed Microsoft Word, Microsoft Excel, or Open Source template, add your logo, content, and the customer’s email address, and InvoiceBerry will do the rest.
Customers can pay via Stripe, PayPal, or WePay. Since unpaid invoices appear on your dashboard, you’ll always know who’s paid and who hasn’t. Try InvoiceBerry for free for 30 days.
What makes a good developer tool?
Problem talented, hard-working developers often face to determine which of the many tools on the market would make good choices.
The tools come in many shapes and flavors. Making the right choices often depends on the nature of the project being worked on.
There are tools for:
- Skill Development and Data Science
- Project Management and Issue Tracking
- Frameworks and Cloud Management and Storage
- An Integrated Development Environment
- DevOps, Prototyping, and Notifications and
- Unified Modeling Language
These tools should be useful, integrable, and appropriate to the project environment and have a reasonable learning curve.
To choose a “best” tool it’s important to look for one that’s extensible, has a large user base, and is easy to use. A good choice can contribute to improved workflows and more productive project outcomes.
Conclusion
5 development tools and services might not seem like a lot to choose from. But if you look carefully there are probably one or two that could significantly improve your project workflows as well as the end results.
Each of these tools and services is designed to make you more productive, add to your skillset, remove a burden from your shoulders, or all the above.
Read More at Top Tools and Services for Developers in 2019
How to Add Videos to WordPress (And Why)
 Do you find it easy to add videos to your WordPress site? If you shouted YES, you wouldn’t be here, now would you? Another related question: Is creating or finding the best videos for your WordPress site easy? That’s right, I didn’t think so. You probably don’t even know where to start, but don’t sweat […]
The post How to Add Videos to WordPress (And Why) appeared first on WPExplorer.
All the New ES2019 Tips and Tricks
The ECMAScript standard has been updated yet again with the addition of new features in ES2019. Now officially available in node, Chrome, Firefox, and Safari you can also use Babel to compile these features to a different version of JavaScript if you need to support an older browser.
Let’s look at what’s new!
Object.fromEntries
In ES2017, we were introduced to Object.entries. This was a function that translated an object into its array representation. Something like this:
let students = {
  amelia: 20,
  beatrice: 22,
  cece: 20,
  deirdre: 19,
  eloise: 21
}

Object.entries(students)
// [
//  [ 'amelia', 20 ],
//  [ 'beatrice', 22 ],
//  [ 'cece', 20 ],
//  [ 'deirdre', 19 ],
//  [ 'eloise', 21 ]
// ]
This was a wonderful addition because it allowed objects to make use of the numerous functions built into the Array prototype. Things like map, filter, reduce, etc. Unfortunately, it required a somewhat manual process to turn that result back into an object.
let students = {
  amelia: 20,
  beatrice: 22,
  cece: 20,
  deirdre: 19,
  eloise: 21
}

// convert to array in order to make use of .filter() function
let overTwentyOne = Object.entries(students).filter(([name, age]) => {
  return age >= 21
}) // [ [ 'beatrice', 22 ], [ 'eloise', 21 ] ]

// turn multidimensional array back into an object
let DrinkingAgeStudents = {}
for (let [name, age] of DrinkingAgeStudents) {
    DrinkingAgeStudents[name] = age;
}
// { beatrice: 22, eloise: 21 }
Object.fromEntries is designed to remove that loop! It gives you much more concise code that invites you to make use of array prototype methods on objects.
let students = {
  amelia: 20,
  beatrice: 22,
  cece: 20,
  deirdre: 19,
  eloise: 21
}

// convert to array in order to make use of .filter() function
let overTwentyOne = Object.entries(students).filter(([name, age]) => {
  return age >= 21
}) // [ [ 'beatrice', 22 ], [ 'eloise', 21 ] ]

// turn multidimensional array back into an object
let DrinkingAgeStudents = Object.fromEntries(overTwentyOne);
// { beatrice: 22, eloise: 21 }
It is important to note that arrays and objects are different data structures for a reason. There are certain cases in which switching between the two will cause data loss. The example below of array elements that become duplicate object keys is one of them.
let students = [
  [ 'amelia', 22 ],
  [ 'beatrice', 22 ],
  [ 'eloise', 21],
  [ 'beatrice', 20 ]
]

let studentObj = Object.fromEntries(students);
// { amelia: 22, beatrice: 20, eloise: 21 }
// dropped first beatrice!
When using these functions make sure to be aware of the potential side effects.
Support for Object.fromEntries
| Chrome | Firefox | Safari | Edge |
|---|---|---|---|
| 75 | 67 | 12.1 | No |
🔍 We can use your help. Do you have access to testing these and other features in mobile browsers? Leave a comment with your results — we'll check them out and include them in the article.
Array.prototype.flat
Multi-dimensional arrays are a pretty common data structure to come across, especially when retrieving data. The ability to flatten it is necessary. It was always possible, but not exactly pretty.
Let’s take the following example where our map leaves us with a multi-dimensional array that we want to flatten.
let courses = [
  {
    subject: "math",
    numberOfStudents: 3,
    waitlistStudents: 2,
    students: ['Janet', 'Martha', 'Bob', ['Phil', 'Candace']]
  },
  {
    subject: "english",
    numberOfStudents: 2,
    students: ['Wilson', 'Taylor']
  },
  {
    subject: "history",
    numberOfStudents: 4,
    students: ['Edith', 'Jacob', 'Peter', 'Betty']
  }
]

let courseStudents = courses.map(course => course.students)
// [
//   [ 'Janet', 'Martha', 'Bob', [ 'Phil', 'Candace' ] ],
//   [ 'Wilson', 'Taylor' ],
//   [ 'Edith', 'Jacob', 'Peter', 'Betty' ]
// ]

[].concat.apply([], courseStudents) // we're stuck doing something like this
In comes Array.prototype.flat. It takes an optional argument of depth.
let courseStudents = [
  [ 'Janet', 'Martha', 'Bob', [ 'Phil', 'Candace' ] ],
  [ 'Wilson', 'Taylor' ],
  [ 'Edith', 'Jacob', 'Peter', 'Betty' ]
]

let flattenOneLevel = courseStudents.flat(1)
console.log(flattenOneLevel)
// [
//   'Janet',
//   'Martha',
//   'Bob',
//   [ 'Phil', 'Candace' ],
//   'Wilson',
//   'Taylor',
//   'Edith',
//   'Jacob',
//   'Peter',
//   'Betty'
// ]

let flattenTwoLevels = courseStudents.flat(2)
console.log(flattenTwoLevels)
// [
//   'Janet',   'Martha',
//   'Bob',     'Phil',
//   'Candace', 'Wilson',
//   'Taylor',  'Edith',
//   'Jacob',   'Peter',
//   'Betty'
// ]
Note that if no argument is given, the default depth is one. This is incredibly important because in our example that would not fully flatten the array.
let courseStudents = [
  [ 'Janet', 'Martha', 'Bob', [ 'Phil', 'Candace' ] ],
  [ 'Wilson', 'Taylor' ],
  [ 'Edith', 'Jacob', 'Peter', 'Betty' ]
]

let defaultFlattened = courseStudents.flat()
console.log(defaultFlattened)
// [
//   'Janet',
//   'Martha',
//   'Bob',
//   [ 'Phil', 'Candace' ],
//   'Wilson',
//   'Taylor',
//   'Edith',
//   'Jacob',
//   'Peter',
//   'Betty'
// ]
The justification for this decision is that the function is not greedy by default and requires explicit instructions to operate as such. For an unknown depth with the intention of fully flattening the array the argument of Infinity can be used.
let courseStudents = [
  [ 'Janet', 'Martha', 'Bob', [ 'Phil', 'Candace' ] ],
  [ 'Wilson', 'Taylor' ],
  [ 'Edith', 'Jacob', 'Peter', 'Betty' ]
]

let alwaysFlattened = courseStudents.flat(Infinity)
console.log(alwaysFlattened)
// [
//   'Janet',   'Martha',
//   'Bob',     'Phil',
//   'Candace', 'Wilson',
//   'Taylor',  'Edith',
//   'Jacob',   'Peter',
//   'Betty'
// ]
As always, greedy operations should be used judiciously and are likely not a good choice if the depth of the array is truly unknown.
Support for Array.prototype.flat
| Chrome | Firefox | Safari | Edge |
|---|---|---|---|
| 75 | 67 | 12 | No |
| Chrome Android | Firefox Android | iOS Safari | IE Mobile | Samsung Internet | Android Webview |
|---|---|---|---|---|---|
| 75 | 67 | 12.1 | No | No | 67 |
Array.prototype.flatMap
With the addition of flat we also got the combined function of Array.prototype.flatMap. We've actually already seen an example of where this would be useful above, but let's look at another one.
What about a situation where we want to insert elements into an array. Prior to the additions of ES2019, what would that look like?
let grades = [78, 62, 80, 64]

let curved = grades.map(grade => [grade, grade + 7])
// [ [ 78, 85 ], [ 62, 69 ], [ 80, 87 ], [ 64, 71 ] ]

let flatMapped = [].concat.apply([], curved) // now flatten, could use flat but that didn't exist before either
// [
//  78, 85, 62, 69,
//  80, 87, 64, 71
// ]
Now that we have Array.prototype.flat we can improve this example slightly.
let grades = [78, 62, 80, 64]

let flatMapped = grades.map(grade => [grade, grade + 7]).flat()
// [
//  78, 85, 62, 69,
//  80, 87, 64, 71
// ]
But still, this is a relatively popular pattern, especially in functional programming. So having it built into the array prototype is great. With flatMap we can do this:
let grades = [78, 62, 80, 64]

let flatMapped = grades.flatMap(grade => [grade, grade + 7]);
// [
//  78, 85, 62, 69,
//  80, 87, 64, 71
// ]
Now, remember that the default argument for Array.prototype.flat is one. And flatMap is the equivalent of combing map and flat with no argument. So flatMap will only flatten one level.
let grades = [78, 62, 80, 64]

let flatMapped = grades.flatMap(grade => [grade, [grade + 7]]);
// [
//   78, [ 85 ],
//   62, [ 69 ],
//   80, [ 87 ],
//   64, [ 71 ]
// ]
Support for Array.prototype.flatMap
| Chrome | Firefox | Safari | Edge |
|---|---|---|---|
| 75 | 67 | 12 | No |
| Chrome Android | Firefox Android | iOS Safari | IE Mobile | Samsung Internet | Android Webview |
|---|---|---|---|---|---|
| 75 | 67 | 12.1 | No | No | 67 |
String.trimStart and String.trimEnd
Another nice addition in ES2019 is an alias that makes some string function names more explicit. Previously, String.trimRight and String.trimLeft were available.
let message = "   Welcome to CS 101    "
message.trimRight()
// '   Welcome to CS 101'
message.trimLeft()
// 'Welcome to CS 101   '
message.trimRight().trimLeft()
// 'Welcome to CS 101'
These are great functions, but it was also beneficial to give them names that more aligned with their purpose. Removing starting space and ending space.
let message = "   Welcome to CS 101    "
message.trimEnd()
// '   Welcome to CS 101'
message.trimStart()
// 'Welcome to CS 101   '
message.trimEnd().trimStart()
// 'Welcome to CS 101'
Support for String.trimStart and String.trimEnd
| Chrome | Firefox | Safari | Edge |
|---|---|---|---|
| 75 | 67 | 12 | No |
Optional catch binding
Another nice feature in ES2019 is making an argument in try-catch blocks optional. Previously, all catch blocks passed in the exception as a parameter. That meant that it was there even when the code inside the catch block ignored it.
try {
  let parsed = JSON.parse(obj)
} catch(e) {
  // ignore e, or use
  console.log(obj)
}
This is no longer the case. If the exception is not used in the catch block, then nothing needs to be passed in at all.
try {
  let parsed = JSON.parse(obj)
} catch {
  console.log(obj)
}
This is a great option if you already know what the error is and are looking for what data triggered it.
Support for Optional Catch Binding
| Chrome | Firefox | Safari | Edge |
|---|---|---|---|
| 75 | 67 | 12 | No |
Function.toString() changes
ES2019 also brought changes to the way Function.toString() operates. Previously, it stripped white space entirely.
function greeting() {
  const name = 'CSS Tricks'
  console.log(`hello from ${name}`)
}

greeting.toString()
//'function greeting() {\nconst name = \'CSS Tricks\'\nconsole.log(`hello from ${name} //`)\n}'
Now it reflects the true representation of the function in source code.
function greeting() {
  const name = 'CSS Tricks'
  console.log(`hello from ${name}`)
}

greeting.toString()
// 'function greeting() {\n' +
//  "  const name = 'CSS Tricks'\n" +
//  '  console.log(`hello from ${name}`)\n' +
//  '}'
This is mostly an internal change, but I can’t help but think this might also make the life easier of a blogger or two down the line.
Support for Function.toString
| Chrome | Firefox | Safari | Edge |
|---|---|---|---|
| 75 | 60 | 12 - Partial | 17 - Partial |
And there you have it! The main feature additions to ES2019.
There are also a handful of other additions that you may want to explore. Those include:
Happy JavaScript coding!
The post All the New ES2019 Tips and Tricks appeared first on CSS-Tricks.
Thoughts (Plus a Eureka Moment) from a WordPress Website Builder User
I’m not usually the one to write reviews about products or services I’ve used unless they prove to be very good or very bad.
Writing about something that’s “OK” seems hardly worth the effort.
The past few WordPress builders I’ve been using have been “OK”, with at least one of them rating 3+ stars in my mind, but still nothing to write home about.
Two of the three didn’t have all the features I wanted in a WordPress builder. The best of the bunch did, but it could be difficult to use at times and product support wasn’t the best.
I should add that I work as a freelancer and mostly in a lone wolf capacity. Although, I do correspond and sometimes collaborate with several of my peers on social media.
One of them suggested I share my experience with others; hence this article.
The suggestion was made when I told him about my new WordPress builder and why it was not only far greater than “OK” but has proven to be a game changer.
I’m sure most of my peers are in the same boat, making do with tools that range from OK to very good indeed, and occasionally coming upon a game changer.
Like the Eureka moment that happened to me.

What I Always Wanted in a WordPress Builder – Even When I Wasn’t Always Aware of It
I look for several key things in a WordPress builder. The first ones I used appeared to be satisfactory until I found something missing or less than ideal. What I looked for and wasn’t always there generally involved one of three things:
Ease of Use
I like a learning curve that’s flat, or at worst has a very gentle slope. A steep learning curve can make it difficult to complete a project fast.
Responsive Preview
I like to see what I’ve done as soon as I’ve done it, and I like to see how it will appear on any device.
Free Templates and Elements
The more the better. But at least enough of them so I don’t have to code anything from scratch. The templates need to be easy to customize and I need to be able to place the elements (buttons, video players etc.) with ease wherever I want.

The Other Builders
I won’t name the 3 others I’ve used since they may work well for others.
After all, it’s not uncommon to find a product that receives both a 1- and 5-star rating and everything in between. What’s been OK for me could be a real game-changer or a terrible choice for someone else.
Like I said earlier. None of my choices made it much past a 3.
All three were easy to use, although one of them could not be described as “intuitive” and lacked helpful documentation.
One of them lacked a true WYSIWYG feature and neither of the others provided what you would consider to be a genuinely responsive live preview.
Only one of the three, the one I liked best, had templates and elements to work with. The customizable templates were fine, but the elements weren’t all that helpful.
My Deal Breaker – the Visual Composer Website Builder Free Version
I’ve heard about Visual Composer – the Page Builder used by so many WordPress themes and now known as WPBakery.
Yet, I knew nothing about the Visual Composer Website Builder – the reason being that it was only released a year ago.
Looking for something better I gave the VC Website Builder a try.
And that was my Eureka, Aha, Game-Changing moment.
I can build a website top-to-bottom (header and footer included), and since it doesn’t use shortcodes it allows me to generate clean code.
This helps avoid crashing or other nuisance problems when I disable the plugin.
I started by downloading the free version and it surprised me how intuitive and easy this website builder is to work with. The learning curve isn’t flat, but it’s not steep either. I’m sure almost any beginner could pick up on how to use this tool rather easily.
It also seemed to me that VC’s free version has more features than any other free website builder.
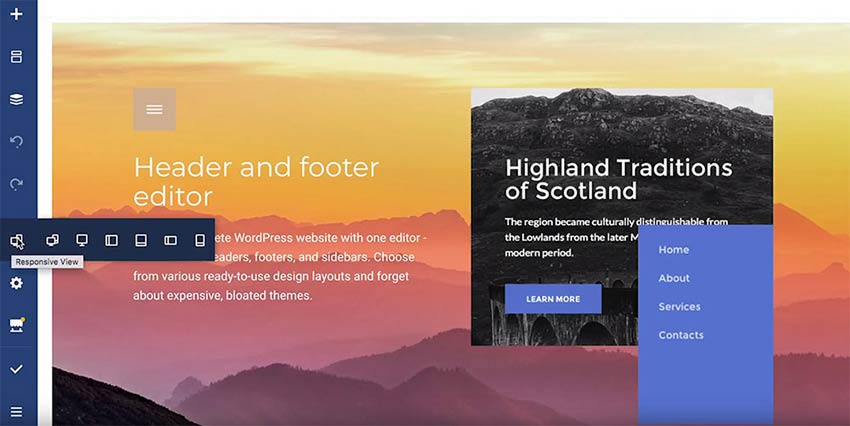
For example, I don’t need a third-party tool to test the responsiveness of my designs. Nor do I have to resize my browser window or check the design on my phone and waste precious time.
Everything can be done in Visual Composer, with a mouse click.
The Visual Composer Website Builder isn’t perfect.
Although it seems nearly so when a project consists of building a simple, basic page or website. For more complex projects, the 10 free customizable templates and 50 free design elements that you will find in their Hub are not enough. But heck, it’s free after all.
The Visual Composer Hub does set it apart from other website builders. It’s a cloud-based marketplace of web design assets that makes unnecessary the need for extra plugins or custom coding. And it’s the place where you can search for the design templates and elements you need.
Oh, and the stunning parallax effects I could achieve were pretty cool too.
Give It a Shot
Maybe someday something even better will come around. In the meantime, give the Visual Composer Website Builder a try. There’s a free version you can download.
Here’s the download link. Let me know what you think.
Movie Poster Designs To Inspire Your PWA Hero Images
Movie Poster Designs To Inspire Your PWA Hero Images
Suzanne ScaccaI visited the Fandango website last weekend, hoping to find something that would give me an excuse to spend a couple of hours inside an air-conditioned movie theater. This is what first caught my eye when I got there:

To be honest, most of these movie posters did absolutely nothing to motivate me to leave the house. Except for The Lion King, which has such a striking color palette, and Once Upon a Time in Hollywood, which does some cool stuff with typography.
Has anyone else ever experienced this before? You’re in the mood to watch a movie and either:
- Catch a glimpse of the movie poster you were interested in, only to question whether or not it’s even worth watching?
- Catch a glimpse of a movie poster you hadn’t given much thought to, but then changed your plan and saw that one instead?
And we’re not even talking about movie trailers here. We’re talking about what a single poster designed to promote a movie and entice people to watch it can do to your perception of it.
If you think about it, the hero image on a PWA has just as much sway over a first-time visitor.
“
Do your visitors proceed through the PWA with excitement over what they’re about to find? Or do they do so with apprehension due to disappointment or confusion caused by the first image?
Let’s look at some examples of good and bad movie posters and see what sort of lessons we can use to help you with your PWA hero design:
1. Avoid Stock Photos When You Can
In other parts of a PWA, high-quality stock photos purchased from sites like Getty or iStock may suffice. But your hero image?
I’d say you should be very careful with this, especially if using a stock photo that’s easily recognizable. Even if it’s an attractive photo and aligns perfectly well with the brand’s story, do you really think someone else’s imagery belongs at the top of the PWA?
When Aquaman came out in 2018, they released a series of movie posters to promote it. However, it was this particular poster that caused a huge uproar online:

Essentially, the complaints on Twitter boiled down to the usage of this stock photo from Getty:

Now, you can expect there to be arguments whenever any major criticism is made of a superhero movie. With camps clearly divided between Marvel and DC movies, it’s kind of hard not to want to defend your superheroes tooth and nail when someone insults them. Even if it’s because of a stock photo of a shark.
The people against the criticism have a point though. It’s not like the real stars of the movie could be submerged in a body of water with live sharks. Aside from stock photography or CGI, what choice did the poster designers really have?
That said, I think what the real issue is, is that this is a huge movie with a huge studio budget, and the inclusion of a stock photo makes you wonder if they cut corners anywhere else in the film.
The usage of recognizable stock photos in a hero image may send the same sort of signal to visitors if they’re expecting an end-to-end premium experience from the brand behind it.
2. Make It Unique
If you watch as many movies as I do, you’re bound to notice certain trends when it comes to movie posters. This is especially so in the rom-com genre where it almost feels like designers don’t bother to be original or creative.
While this lookalike quality of movie posters can help fans of certain genres instantly identify the kinds of movies they want to watch, it sends another signal to them as well.
If you don’t know who Nicholas Sparks is, he’s the author of over twenty books, most of which have similar plots.
I’m going to let this Vanity Fair movie poster compilation demonstrate my point:

If you were to talk to someone about one of these movies, it could be summed up as:
“You know the movie… The one with the boy and the girl who don’t really like each other at first, but then they fall madly in love and can’t stand to be apart? Oh yeah and there’s that person who dies in the end.”
That describes about 80% of these stories, which is why it’s not all that surprising that the movie posters for each look so darn similar.
Like I said, a similarly designed poster could work in their favor if they were trying to appeal to a very specific subset of moviegoers. But it doesn’t work that way with PWAs.
Unless you’re building a PWA to directly complement another brand, there’s no reason to design your hero image to look similar to anyone else’s. It’ll only cause confusion when visitors pick up on the similarities. Or they’ll wonder why they’re bothering to look at the PWA, assuming that it’s not just the images that look the same, but the services and products within, too.
If you want your PWA to stand out from the crowd, your hero image should be unique.
3. Zero In On One Thing
One of the problems with making a movie with an all-star cast is that’s it’s impossible to focus on just one person — not just within the plot, but in the movie poster as well.
Case in point: What to Expect When You’re Expecting:

If I were just stumbling upon this poster for the first time, I wouldn’t know where to start with it.
The title being in the middle helps, but the competing photos are overwhelming. Plus, if you look closely at the top photo, you’ll see that each of the women was individually layered into the picture. Why use a poorly compiled photo beside an actual shot from the movie? It creates a very disjointed experience.
To show you what a difference a singular focus can make, let’s look at the movie poster for E.T. the Extra-Terrestrial:

It’s not as though this film is without a great cast of stars. It’s just that the team who designed this recognized that there’s one real focus at the heart of the movie and it’s the relationship between Elliott (the boy) and E.T. (the alien).
I’d urge you to look for something similar when designing your hero image — even if your clients come to you and say that all of their services are equally important and they want the PWA to demonstrate that they can do all things for everyone. If you try to translate that sort of message into an image, it’s going to fail. So, find your focus.
4. Give The City A Subtle Nod
Movies can take place in any number of settings. Depending on what kind of movie it is, you may even find that the setting almost becomes a character within the story. Let me explain.
Richard Linklater filmed a trilogy of movies with Julie Delpy and Ethan Hawke.
The first movie is called Before Sunrise and takes place when Delpy and Hawke decide to get off a train and walk around the city of Vienna before parting the next morning:

The second movie is called Before Sunset and it takes place around the city of Paris:

The final movie is called Before Midnight and it takes place in Greece:

In each of these posters, you can see that the backdrop of the story plays heavily into the design. And that’s because there really is no story without their geographic surroundings.
They’re not just movies about two people talking to one another. It’s about two people getting to know one another as they explore a new city — a city which almost becomes like a third character that the viewer becomes acquainted with throughout the films.
If the company for whom you’re designing has a strong tie to a specific geographic region, see if you can find a way to incorporate it into the hero image somehow. It doesn’t have to be this explicit with the actual cityscape in the background. But there may be other ways to add a special touch that has local visitors thinking, “Hey, that’s where I’m from!” or “I’ve been there!”
5. Be Creative With White Space
You already know that white space is an important part of design, especially when you’re trying to convey a big message above-the-fold on a PWA. So as not to overwhelm visitors, you want to keep things simple. But that doesn’t mean you can’t be creative with how you fill that white space.
Take, for instance, the poster for Independence Day:

Although the space ship does convey a sense of dread, it’s also a really creative way to fill up all of the white space that would otherwise occupy the top of this photo.
Another fun example of playing with white space can be seen in the poster for Scarface:

At first glance, you might just take this for the striking image that it is. However, knowing that Tony Montana is the head of a drug cartel and has an obscene penchant for snorting coke, the white that consumes him takes on another meaning here.
This one is a bit difficult to give you strict guidance on since this is all about being creative with the space that you have. What I would suggest if you want to go this route, though, is to think of ways to play with symbolism without having to explicitly present them within the photo. If you can play with shadows and light and space to do so, that would have a much greater impact.
6. Be Playful With Typography
For the most part, designers of movie posters tend to be very conservative when it comes to typography. They choose a single color for the font and it’s almost always a big blocky sans serif font.
But why not have a little fun with it? Just as you can imbue the image with creative flourishes, it wouldn’t be such a bad idea to do the same with text so long as the two complement one another.
You’ll find a beautiful example of this in the John Wick poster:

If you were to quickly glance at the image, you might not pick up on the subtleties of the design. But they’re there.
For starters, the barrel of the gun takes the place of the letter “o”. But notice how the rim is tinged in the same color as the rest of the letters? This is what helps it blend so well at first glance.
Then, you have the unhinged look of the letters themselves, where they’re split and slanted through the middle.
For those of you who haven’t seen the film, this is essentially what’s happening to Keanu Reeves’s character. He was once an assassin, but gave it up for love. When his wife dies and the last remnants of her are taken from him, he’s torn. Does he continue the life of a normal man? Or does he give it all up and go on a murderous rampage?
I know that the smart thing to do when designing a hero image is to let the image tell the story, but I think subtle touches to the text can really take it up a notch.
Wrapping Up
So, what have we learned here? Well, there’s certainly a right and wrong way to go about designing a movie poster and PWA. But, more than that, the most important thing to do is to put some real thought into what you want those first few seconds to convey to your viewers.
If you fail to capture what the PWA is about or you do so in a manner that’s boring, unoriginal, vague or cheesy, you’re going to lose their interest almost immediately.
But…
If you can perfectly capture what a brand is all about along with the subtle nuances that make it special, you’ll encourage more visitors to scroll and click with a single image.
Recommended Reading on SmashingMag:
- An Extensive Guide To Progressive Web Applications
- Will PWAs Replace Native Mobile Apps?
- Can You Make More Money With A Mobile App Or A PWA?
- Native And PWA: Choices, Not Challengers!
 (ra, il)
13 Timeless Lessons from the Father of Advertising
In 1962, Time magazine called David Ogilvy: “The most sought-after wizard in today’s advertising industry.” During his years as an...
The post 13 Timeless Lessons from the Father of Advertising appeared first on Copyblogger.
How to Get WordPress.com Features on Self-Hosted WordPress Blogs
If you recently switched from WordPress.com to your own self-hosted WordPress.org website, then you may not see all the widgets, stats, and other WordPress.com features in the new user interface.
But don’t worry, there’s an easy way to get those features back. Actually, you can have even more powerful features with your self-hosted WordPress blog.
In this article, we will show you how to get WordPress.com features on self-hosted WordPress blogs.

Adding WordPress.com Features to Your Self-Hosted WordPress Blog
When choosing a blogging platform, many users start with WordPress.com before they make the switch to the self-hosted WordPress.org platform. Often this happens due to name confusion because despite the similar name, they are two different platforms. To learn more see our comparison of WordPress.com vs WordPress.org.
The problem is that after using WordPress.com, you can get used to certain features and the way they look. Naturally, after switching you would want to have the same features in self-hosted WordPress.
While WordPress.org doesn’t offer built-in features like WordPress.com, it gives you the full flexibility to add any feature that you want on your website using WordPress plugins. In fact, this flexibility is one of the major reasons why people convert their WordPress.com blogs to WordPress.org.
The company behind WordPress.com offers a plugin that brings WordPress.com features on any WordPress.org website. This plugin is called JetPack.
Jetpack offers many of the same features used by WordPress.com to WordPress.org users.
Unlike standard WordPress plugins, Jetpack is a plugin suite which combines several useful features into a single plugin.

Here are the main Jetpack (WordPress.com) features:
- WordPress Security: Downtime monitoring, brute force attack protection, backups, etc.
- Performance: Speed up image and static file load times, lazy loading for images, etc.
- Writing and content: Options to create galleries, testimonials, portfolios, Infinite scroll, etc.
- Social sharing: Auto social sharing posts, share buttons, and like buttons.
- Website traffic: Related posts, website stats, etc.
Jetpack is available as a free plugin with certain features being premium upgrades. You can simply install the plugin like any other plugin on your self-hosted WordPress site to access the same basic features that you had on WordPress.com.
However, one of the reasons why people is to get away from the limited features on WordPress.com and access the more powerful features offered on self-hosted WordPress.org.
In that case, here’s how you can unlock more powerful features with WordPress.org.
1. Unlock Powerful Analytics with MonsterInsights
Website stats is one of the most loved WordPress.com features. Jetpack provides this feature with the built-in site stats module.
However, it’s nowhere near as powerful as Google Analytics, the de-facto market leader for analytics. If you want to integrate Google Analytics with Jetpack, then you need to subscribe to their professional plan that costs $299 / year.
But luckily, you can use the most powerful website stats tool Google Analytics on your self-hosted blog with MonsterInsights Lite plugin which is 100% free.
MonsterInsights also offers a Pro version which is the best Google Analytics WordPress plugin in the market. It lets you easily connect your site with Google Analytics and helps to track advanced metrics with ease.
2. Create Smart WordPress Forms with WPForms
You can create contact forms and polls in WordPress.com with Jetpack’s feedback form feature. But it lacks the advanced options to customize the forms or add smart marketing features.
WPForms plugin solves that problem for self-hosted WordPress blogs by allowing you to create any type of form with just a few clicks. The free version, WPForms Lite, comes with all the essentials, and the Pro version is packed with more powerful features.
Using WPForms, you can create contact forms, surveys, user registration forms, order forms, etc. quickly and easily.
3. Get More Robust WordPress Security with Sucuri
Jetpack free version offers basic WordPress security features like brute force attack protection. If you upgrade to their premium plans, then you will get malware scanning option as well.
However you can get more robust security features for your self-hosted website with plugins like Sucuri.
Sucuri’s free WordPress plugin has advanced security options like remote malware scanning, blacklist monitoring, file integrity monitoring, security activity auditing, and more.
4. Get Advanced SEO Features with Yoast SEO plugin
Jetpack offers basic SEO features like XML sitemaps and site verification for WordPress.com websites. You need to buy at least the Jetpack Premium plan to access all of its SEO features.
You can get all those features and more in your self-hosted WordPress blog with free Yoast SEO plugin.
Yoast SEO offers features like site verification, XML sitemaps, SEO preview, Facebook and Twitter preview images, title, meta descriptions, and more.
If you buy the paid version of the plugin, you can get more powerful SEO capabilities.
5. Create Automatic Backups with UpdraftPlus
You can create daily automatic backups for your WordPress site with Jetpack; however, it’s only available for the paid users.
But thankfully UpdraftPlus plugin lets you set up automatic backups for your website free.
It also allows you to store your WordPress backups in remote locations such as Google Drive, and Dropbox.
6. Enable Spam Filtering Free with Akismet
Jetpack paid plan users can enjoy spam filtering feature on their website. It is enabled by Akismet plugin integration.
But you can get this feature for free in your self-hosted WordPress website by installing the Akismet plugin.
Akismet automatically checks all your WordPress comments and filters out the ones which look like spam. It helps to reduce spam comments significantly on your site and allows you peace of mind.
7. Add Stylish Social Share Buttons with Shared Counts
Social sharing buttons are also a default WordPress.com feature. You can enable social share buttons on your posts, pages, media, etc. however, it has limited styling options.
You can use Shared Counts plugin on your self-hosted WordPress website to get the social sharing buttons.
Shared Counts offers many display styles, social share count, and total share count feature.
Another great advantage of using Shared Counts is that it doesn’t slow your website speed.
8. Auto Post to Your Social Networks with WP to Buffer
You can enable auto-sharing your posts on your social media networks in WordPress.com using Jetpack’s Publicize feature.
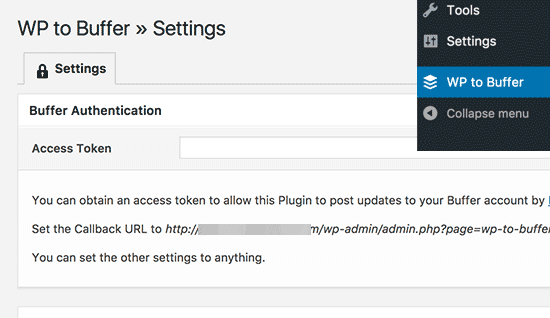
You can add the same functionality to your self-hosted WordPress blog by using WP to Buffer plugin.
Buffer is a popular social media management tool you can use to schedule posts on social media.
With WP to Buffer free plugin, you can connect your WordPress.org website with your Buffer account and set up automatic posting on your social media profiles.
9. Show Related Content with Yet Another Related Posts
WordPress.com has a built-in option to show related content after posts.
You can add this feature on your WordPress.org website using the free plugin Yet Another Related Posts.
The plugin allows you to display posts, pages, and custom post types as related content after posts. You can choose thumbnail or list view of related content.
Get Yet Another Related Posts now!
10. Improve Comment Interaction with De:comments
You can enable Like option for your WordPress.com comments. This feature is useful to improve user-interaction in your comment area.
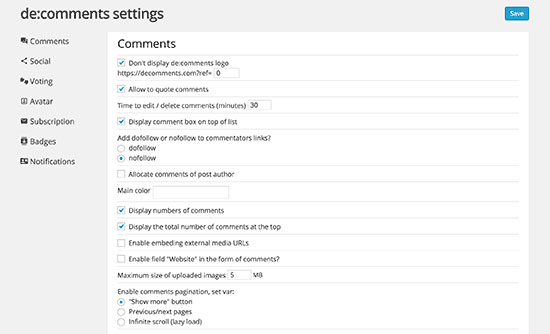
De:comments plugin lets you add more elements of user interaction to your WordPress.org comment area.
The plugin allows users to rate comments, share comments on social media, earn badges, and more.
11. Grow Your Email List and Send Emails with Constant Contact
Jetpack offers basic email marketing features for WordPress.com websites. You can add a simple subscription form on your site, and send emails when you publish a new post.
You can use more powerful email marketing features on your self-hosted WordPress blog with Constant Contact.
Constant Contact is one of the best email marketing service provider on the market. It allows you to easily collect email addresses, convert visitors into subscribers, and bring them back to your website.
For detailed instructions, see our article on how to create an email newsletter in WordPress.
12. Get CDN Services with Cloudflare
WordPress.com has built-in CDN for images and static files.
You can get a similar feature on your self-hosted blog with Cloudflare.
Cloudflare is one of the best CDN services available in the market.
Using this service helps to improve your website speed and performance. Also, it protects your site against brute force attacks.
13. Enable Infinite Scrolling with WordPress Infinite Scroll
One of the popular WordPress.com features is infinite scrolling. Many websites use this feature to improve user engagement.
You can add the same feature to your WordPress.org website using the free WordPress Infinite Scroll plugin.
It is an excellent tool for lazy loading posts, pages, comments, and more.
Get WordPress Infinite Scroll now!
14. Create Stunning Galleries with Envira Gallery
In WordPress.com, you can create responsive galleries with Jetpack. It is also a built-in WordPress.com feature. However, it has limited customization options.
You can add more stunning image galleries on your self-hosted WordPress blog with Envira Gallery plugin.
Get Envira Gallery plugin now!
We hope this article helped you to learn how to get WordPress.com features on self-hosted WordPress blogs. You may also want to see our guide on the must have WordPress plugins for business websites.
If you liked this article, then please subscribe to our YouTube Channel for WordPress video tutorials. You can also find us on Twitter and Facebook.
The post How to Get WordPress.com Features on Self-Hosted WordPress Blogs appeared first on WPBeginner.
New Guide for Using AI in the Public Sector
Recently, Liberal Democrat leadership hopeful Jo Swinson urged parliament to ensure that any development of AI is done with ethics front and center. A new guide for the UK government has been created to help ensure that AI deployments in the public sector do follow such a path.
The guidance was created by the Office for Artificial Intelligence (OAI) and the Government Digital Service (GDS), with contributions from the likes of The Alan Turing Institute.


