Slack has recently announced several upgrades to it’s messaging platform, these upgrades aim to improve communication inside larger organizations. These new enhancements include a new API for creating templated workspaces and a new announcement channel for communicating key information on high-level issues.
This week, we look at API vulnerabilities in Kubernetes and 3Fun, upcoming API Specification Conference, and slides from EIN 2019 conference presentation.
In this week's roundup of platform news, Chrome introduces a new attribute for loading, accessibility specifications for web developers, and the BBC moves visualizations to the Shadow DOM.
Chrome ships the loading attribute
The HTML loading attribute for lazy-loading images and iframes is now supported in Chrome. You can add loading="lazy" to defer the loading of images and iframes that are below the viewport until the user scrolls near them.
Google suggests either treating this feature as a progressive enhancement or using it on top of your existing JavaScript-based lazy-loading solution.
This feature has not yet been added to the HTML Standard (but there is an open pull request), and multiple links to Google’s documentation are listed on its Chrome Status page.
Provides practical advice on how to use ARIA in HTML, with an emphasis on dynamic content and advanced UI controls (the “five rules of ARIA use” are defined here)
The BBC has moved from <iframe> to Shadow DOM for the embedded interactive visualizations on its website. This has resulted in significant improvements in load performance (“more than 25% faster”).
The available Shadow DOM polyfills didn’t reliably prevent styles from leaking across the Shadow DOM boundary, so they decided to instead fall back to <iframe> in browsers that don’t support Shadow DOM.
Shadow DOM [...] can deliver content in a similar way to iframes in terms of encapsulation but without the negative overheads [...] We want encapsulation of an element whose content will appear seamlessly as part of the page. Shadow DOM gives us that without any need for a custom element.
One major drawback of this new approach is that CSS media queries can no longer be used to conditionally apply styles based on the content’s width (since the content no longer loads in a separate, embedded document).
With iframes, media queries would give us the width of our content; with Shadow DOM, media queries give us the width of the device itself. This is a huge challenge for us. We now have no way of knowing how big our content is when it’s served.
The next version of Chrome will introduce the Largest Contentful Paint performance metric; this new metric is a more accurate replacement for First Meaningful Paint, and it measures when the largest element is rendered in the viewport (usually, the largest image or paragraph of text) (via Phil Walton)
Microsoft has created a prototype of a new tool for viewing a web page’s DOM in 3D; this tool is now experimentally available in the preview version of Edge (via Edge DevTools)
Tracking prevention has been enabled by default in the preview versions of Edge; it is set to balanced by default, which “blocks malicious trackers and some third-party trackers” (via Techdows)
Read more news in my new, weekly Sunday issue. Visit webplatform.news for more information.
Major accessibility improvements are the headline feature of this week’s Gutenberg plugin release. Version 6.3 introduces new Navigation and Editor modes to address long-standing problems navigating the block UI with a screen reader. The editor is now loaded in Navigation mode by default. Riad Benguella described it as “an important milestone in terms of accessibility of the editor” and explained how it works:
It allows you to move from block to block using a single Tab press. You can also use the arrow keys to navigate between blocks. Once you reach the block you want to edit, you can enter the Edit Mode by hitting the Enter key. The Escape key allows you to move back to the Navigation Mode.
These modes are still early in their development and will require more testing.
At WordCamp US 2018 in Nashville, Accessibility Team contributor Amanda Rush gave me a demonstration of what it is like to navigate Gutenberg with a screen reader. Using the editor was painfully difficult for even the simplest tasks, such as setting a title and writing paragraph content.
Since that time, the Gutenberg and Accessibility teams have made great strides towards improving this experience. The new interaction flow in the Navigation mode is one example of their progress. The teams have also worked together to tackle a collection of 84 issues that Tenon created on GitHub in May, based on the findings in WPCampus’ Gutenberg Accessibility Audit. To date, 54 of those issues, many of which were related to screen reader accessibility, have been resolved and marked as closed.
Other notable updates in Gutenberg 6.3 include support for text alignments in table block columns, border color support for the separator block, and improvements to the BlockPreview component, which allow developers to preview blocks in any context. Check out the release post for the full list of all the changes in 6.3.
Today, Square announced its new Orders API. With the API, developers can build solutions that allow buyers to place orders online, in-person and in-app. Orders can be sent to Square sellers using a Square POS product or to a custom central POS point.
School and university websites are about as challenging of a web design and development project as you could ever take on. A university website not only has to attract and recruit new students, it also needs to serve the individual needs of existing students, facilitate the distribution and exchange of information for faculty and staff, and promote fundraising and donation campaigns to alumni and the community at large.
As you can imagine, creating, managing, tracking and providing up-to-date content about courses, job openings, events, admissions, accommodation, research and development, social activities, discussions, and so much more across different segments of what ultimately must operate as a unified digital presence, can become very complex and extremely time-consuming.
Fortunately, universities and colleges, large and small, can manage all this quite easily if their web presence is built using the WordPress open-source platform.
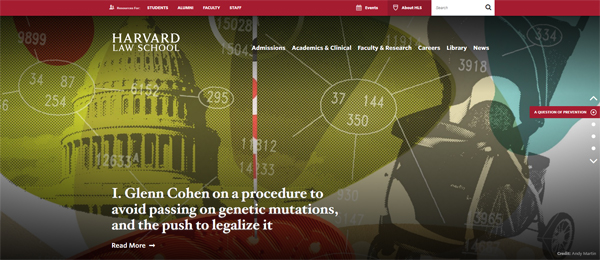
WordPress powers over 30% of all websites worldwide. In fact, more websites today run on WordPress than any other platform. According to WordPress.org, almost 3.5 million schools, universities, colleges, and educational or learning institution sites worldwide are powered by WordPress. This includes sites at many prestigious universities like Harvard Law School, Cornell University, MIT, Duke, Vanderbilt University, the University of Berlin, Georgetown University, the University of Texas, and almost 50,000 other institutions for higher education worldwide.
(Just like Harvard Law School, many university websites are now powered by WordPress!)
To learn more about some of the top universities that use WordPress for their websites, see this article:
WordPress provides many features that make it the ideal platform for running a large university or college website, including a built-in content management system (CMS) and the ability to allow faculty and students to run separate websites for unique purposes such as discussion boards, college news, magazine websites, and learning management solutions to deliver courses online on their own servers using a multisite network.
As we will see in a moment, WordPress is not only an ideal platform for web developers to build amazing-looking, functional and sophisticated enterprise-scale websites, WordPress also makes it incredibly easy for university administrators, faculty members, and students to add media-rich content, collaborate on projects and assignments, and keep their information updated.
It is no wonder, then, that more educational, academic and learning institutions are turning to WordPress to power websites for schools, colleges, and universities.
Having said all this, however, there are a number of challenges that all large universities, colleges, and educational or higher learning institutes face when it comes to setting up and running an effective web presence. We address these challenges below and provide cost-effective solutions and links to useful resources and additional information that will help you understand and navigate through these challenges, and even provide you with a sound blueprint and strategy for building, growing, and managing a web presence for a large university, college, or educational organization.
And if you prefer, watch a video overview of this post here!
Challenge #1: Flexibility & Cost
One of the main challenges of choosing a platform and planning a website for a large university is flexibility.
(A university website is a complex digital ecosystem.)
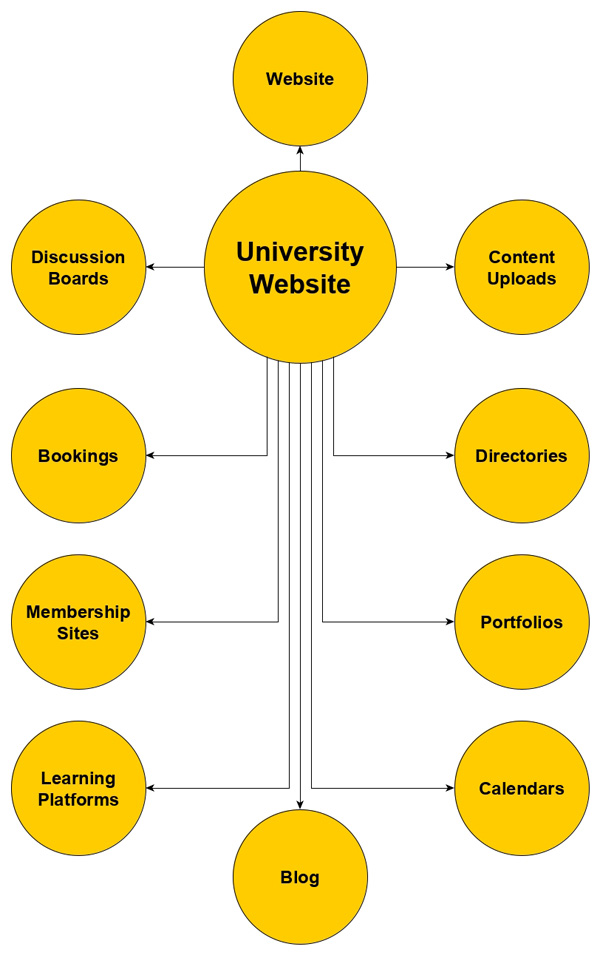
A university website is a complex digital ecosystem. It is an interconnected amalgamation of different platforms that need to communicate and share information organically with different user groups (e.g. staff, faculty, alumni, and students), with different sections serving different purposes and performing different functions. And each of these sections and functions needs administration, management, and special access privileges.
For example, a university website may comprise of the following subsections:
Fixed Content vs. Dynamic Content Sections
Sections like an ‘About Us’ page tend to mostly contain ‘fixed’ information that is unlikely to change – perhaps with updates only every so often. In contrast, most university departments need to regularly publish and update ‘dynamic’ content in areas like news, research findings, program deadlines, etc.
Typically, traditional ‘websites’ are used to deliver information via fixed content pages, whereas ‘blogs’ are used to deliver dynamic or changing content. WordPress lets you set up sections under the same installation and domain name that can perform as a website, or as a blog.
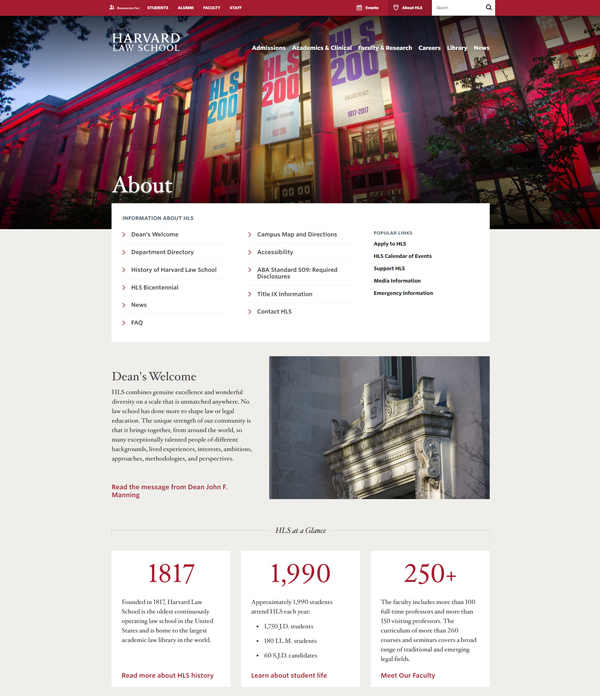
Using the Harvard Law School website as an example, the site’s ‘About Us’ page comprises of a web page that has mostly fixed content…
(Most of the information on this page is not going to change that often!)
In comparison, the ‘Harvard Law Today’ section displays dynamic news articles, which are published on a regular basis and administered separately by different university faculties, departments, or individual lecturers, functioning, therefore, more like a ‘blog’ …
(This section of the university website displays dynamic content, like a blog!)
Information Delivery vs User Engagement Sites
Although most popular content publishing platforms allow you to set up both fixed websites and dynamic blogs under the same domain, no other platform can help you create a website that is as flexible and cost-effective as WordPress when it comes to delivering different types of information and allowing users to engage and interact directly with this information.
For example, consider what it would take to code and add a ‘Calendar of Events’ section to an existing university website …
(https://hls.harvard.edu/calendar)
Or develop and incorporate a separate program to add, update, and display current information about a curriculum or a catalog of courses and academic programs…
Now, multiply the time and development costs to build and integrate additional sections like:
Faculty or student directories
Student discussion boards and news bulletins
Private access to forms, services, and members
Online courses and online course content delivery platform
Content uploading/delivery/messaging/support
Career and job boards,
Handbooks and documentation sections for university policies, admissions, submissions,
etc.
Developing each of the above sections and then integrating these seamlessly with an existing website would be a very complex and expensive undertaking…unless you start with a platform designed to be modular and dynamic from the outset.
(Setting up a network of modular and customizable sections = the smart, effective & dynamic way to build and manage a university website!)
WordPress is that platform. WordPress is built to be modular, dynamic, and completely customizable. Because WordPress is an open-source software platform, it allows developers like WPMU DEV to create new functional extensions and ‘plug and play’ add-ons (called ‘plugins’) that behave like apps on a mobile phone, making the entire WordPress ecosystem versatile, flexible, scalable, and cost-effective.
The flexibility and cost-effectiveness of WordPress also extend to areas like template design and website navigation.
WordPress uses a unique ‘theme-based’ approach to web design, which allows users to change the entire look and feel of a website without affecting the underlying content and while preserving all of its functionality, like enhancements, menus, navigation sections, internal and external links, etc.
Planning and designing a website for a university using WordPress, then, is kind of like having shapeshifting abilities. WordPress gives you the freedom to start wherever you are and build whatever you need within your budget, add new sections whenever you need these as things grow and evolve, and then modify and customize anything and everything, anytime you need to, without losing any of the internal content, linking, or navigational architecture.
The best way to understand what a WordPress theme is and how it behaves is to imagine a ‘skin’ covering every element of the website that is visible to users. You can change a WordPress theme in a couple of clicks and the entire website’s appearance and layout will be completely transformed without affecting the organs, muscles, and bones of the organism within.
WordPress, however, lets you take things even further by allowing you to fully configure and customize both the exterior (web design) and the interior (functionality) of your web presence.
This flexibility and versatility makes WordPress the most powerful and cost-effective web platform available for building a large university website. You can start with ‘off-the-shelf’ themes and plugins and then add, remove, modify, enhance, and expand any and every aspect of the site as your organization’s needs grow and evolve.
For example, if we compare different university websites built using WordPress, you will quickly realize after looking at just a few sites how flexible and cost-effective the WordPress platform really is.
As you can see, no two websites powered by WordPress need to look alike using the same template, or behave in the same way using the same limited applications or functional elements.
One of the benefits of being an open-source program is that thousands of highly skilled professional developers (like the team here at WPMU DEV) have helped to build WordPress into what it is today.
But the power and flexibility of WordPress doesn’t even end here!
If you go back and study the above sites in more detail, you will see that some of the sections of these university websites were not built using WordPress. WordPress is so flexible that it can be installed separately under the same domain and then customized to display a seamlessly integrated web design that will match an existing section built using a different web platform (e.g. Drupal), while retaining its unique functionality.
To learn more about why WordPress is the obvious platform of choice when it comes to website flexibility and cost considerations, see the articles below:
As we’ve just seen, a university website is a complex digital ecosystem. WordPress makes it easier to plan, build, host, manage and maintain a website for a large university, college or school of higher education.
Here are just some of the reasons why:
Planning A University Website
Ideally, you want to fully plan out your website before you begin to build it. This includes all the website sections, web pages, web design (including color schemes, page layout, site navigation, typography, etc.) and other important areas such as digital administration (i.e. who is ultimately responsible for looking after all aspects of the web presence, including domain names, software licenses, etc.), digital management (web hosting, website and content management), and digital marketing (content, promotion, SEO, traffic, etc.).
(WordPress lets you change anything on your website … at any time!)
The open nature and scalability of WordPress means that you don’t have to be so rigorous and meticulous with your website planning, as you can easily add, change and reconfigure just about anything and everything on your web presence at any time. This allows you to build an effective web presence that is responsive to the needs of your users, instead of building a fixed website that will require spending additional time and money later to redesign, fix, or improve.
Building A University Website
Building a website for a large university with WordPress can also be a flexible, scalable, and modular experience. WordPress allows for multiple installations of the platform under your domain using subfolders or addon domains (such as “yourdomain.com/site1”, “yourdomain.com/site2”, or “library.yourdomain.com”, etc. ), a ‘multisite’ installation (one installation with multiple self-administered sites and a super administrator to rule them all!), or a combination of both.
For example, the illustration below shows how four separate installations of WordPress under the same domain (YourUniversity.com) can be set up for different uses (e.g. main website, news site, private access/membership site, and a multisite installation for separate faculty websites):
(A university website can comprise of multiple WordPress installations for different purposes)
Each of the WordPress installations shown in the example above can support sites that can expand with unlimited subsections, including WordPress Multisite.
What is WordPress Multisite?
Multisite is a core WordPress feature that allows you to create and run a network of sites on a single WordPress installation. With Multisite installed and activated, each site can have its own separate users and content editors and can be run for their own purpose (e.g. as a website or blog for each university faculty, school, or division), and everything is controlled by a ‘Super Admin,’ who can create new sites and set up accounts for individual users, and install, manage, and control which themes and plugins are made available to all other sites on the network (note: site administrators cannot install or make changes to themes or plugins on their sites, only the ‘Super Admin’ can do this).
Running a WordPress Multisite installation, however, has special requirements, which is why we recommend using our Enterprise Hosting services if you are thinking of setting up a university website with WordPress Multisite.
To learn more about WordPress Multisite and why nobody does multisite better than WPMU DEV, see the articles below:
When it comes to planning, building, and running a large university website, hosting is one of the most important technical considerations, especially if a network of sites and multiple WordPress installations will be used in your configuration.
In addition to fast, reliable, and secure hosting, large enterprises like universities, colleges and schools of higher education or other large learning institutions need to look at cost-effective enterprise-level dedicated servers and 24/7 technical support.
As WordPress is the world’s most popular and widely used platform for running CMS (Content Management System) websites and blogs, many hosting companies now offer enterprise-level dedicated WordPress hosting support and services.
In addition to having technical WordPress hosting expertise, the dedicated WordPress hosting team you choose to look after your site or network of sites also needs to have expertise in areas like WordPress security, development, and design.
Traffic can spike around the first day of classes or special events, and your website will be critical for your community should the unforeseen emergency or natural disaster occur. For these reasons, wherever you host your websites, you will want to ensure load balancing, auto-scaling, redundancy and more. You will want to ensure that at least some of your web presence is hosted ‘in the cloud’ or off-campus as well.
(CampusPress – A complete hosting solution for universities, colleges, and schools!)
CampusPress has been used since 2005 to power WordPress Multisite networks, websites, learning platforms, course blogs, ePortfolios, student projects and more for educational institutions, faculties, departments, schools, districts, and student organization sites around the world.
To learn more about the benefits of hosting your university site with our expert WordPress hosting services and solutions, visit the sections below:
Dedicated WordPress Hosting – Learn about our unique WordPress hosting services, including support, features, plans & pricing, enterprise-level hosting, security, optimization and backup automation solutions, site migration, access to our all-inclusive membership plugins, and more!
Managing & Maintaining A University Website
Managing a large university website can seem like a complex and overwhelming undertaking, but with WordPress, it doesn’t have to be.
WordPress comes with many built-in features that allow even non-technical users to easily manage and maintain a network of sites. Some of these features include:
A central administration area (called the ‘WordPress Dashboard’) with easy-to-navigate menus, admin toolbar, and help sections.
One-click and/or automated software, plugin, and theme installation and updates.
User roles and privileges (see next section) with individual user logins.
Customizable and configurable menus.
Customizable and configurable sidebar, header, and footer layouts.
A new modular architecture called ‘blocks’.
And many other automation features.
Speaking of automation, when it comes to managing WordPress sites, we recommend using The Hub, our streamlined site management solution.
(The Hub – Complete WordPress Site Management Solution)
The Hub makes managing every aspect of running multiple (unlimited, actually!) WordPress sites incredibly easy, including 24/7 access to support and exclusive members-only community, plus access to a central dashboard where you can generate reports, update core software, plugins, and themes, monitor site uptime and performance, run security scans and audits, perform backups and even improve your sites…all from one place!
Challenge #3: Site Administration, Content Management & User Training
Imagine your university website is all set up. Your network of sites is now up and running on a reliable, fast, secure, and optimized hosting environment and you have the peace of mind of knowing that, should anything go wrong, an entire dedicated team of WordPress experts is available 24/7 to help things keep running smoothly.
All that would be left to do now is:
Administer your sites,
Manage your content, and
Train users responsible for looking after the above areas in how to use WordPress effectively.
WordPress Site Administration
In the previous section, we touched on some of the requirements and built-in features of WordPress for managing just one or a network of sites.
To administer a WordPress website, however, also requires having access to specific privileges and permissions that other users shouldn’t have, like the ability to change login passwords, install or delete software, make global changes that affect page layouts, navigation menus, web design, etc.
WordPress addresses this challenge with a built-in system of User Roles & Permissions. Every WordPress installation includes a fundamental set of ‘out-of-the-box’ user roles with special privileges and permissions. These include:
Administrator – These users have access to all administration features and privileges on the site and can perform all the necessary functions associated with running the site.
Editor – Users assigned this role can review, edit, approve, schedule, publish, and manage their own and other users’ posts and pages.
Author – Authors can publish and manage their own posts and pages.
Contributor – Can write and manage their own posts, but not publish them.
Subscriber – Subscribers can only manage their profile and access specific areas of the site (assigned by an administrator) when logged in, that is not accessible to general site visitors and non-registered users. Typically, this role is used for customers or registered members of a membership or directory site. In the case of a university or college website, this role would be assigned to users like students, staff, or alumni for accessing or editing private/personal details, but not contributing content to the site.
Note that in WordPress multisite installations, the additional user role of ‘Super Admin’ is created. Super Admins have access to all sites on the network (administrators can only access their own site), including access to all backend features and can perform all functions.
WordPress Content Management
Some of the challenges of managing content on a WordPress site can be easily solved using the Roles & Permissions feature described above.
Every role below ‘Admin’ except for ‘Subscriber’ is essentially involved in managing content published on a WordPress site. This makes it easy to run a digital publishing department of any size, including an enterprise-level network of sites, such as the one that would be required by a large university or college.
For example, sites set up to publish information specifically related to all the various faculties, schools, departments and even student organizations, can assign roles and privileges to individual staff members, lecturers, students, alumni, or even third-party users like outsourced publishing departments, digital marketing service providers, professional or freelance content writers, etc.
This not only allows subject experts to author or contribute content to one or more sites providing university sites and blogs with user-generated content, it also allows groups of users like editors to edit, format and style the content, add links to other related articles, internal pages, or external sites, and other sections of the university’s digital ecosystem.
WordPress is made for creating, editing, and publishing media-rich content. Users can type or paste in text and compose, edit, or format content of any length, insert headings, images, videos, audio files, tables and other content elements using a visual editor or ‘blocks’, retrieve older auto-saved revisions, organize the content into nested pages, assign categories and tags, add excerpts, allow or disallow comments and replies, password-protect posts or pages or make these private, save the content as a draft or schedule to publish these at a later date, and so much more.
Additionally, WordPress makes available many plugins that are specifically made for advanced-level content publishing, including plugins that allow publishing departments, content calendars, content schedules, and content collaboration to be set up and run remotely, third-party integrations with various content services and service providers, and plugins that allow administrators to modify or customize user roles and permissions.
When it comes to creating, publishing, and managing content, therefore, WordPress provides universities, colleges, and large educational institutions with unlimited possibilities and configurations at every level of the content creation and publishing process.
WordPress User Training
The last challenge of running a large university website is training users to effectively manage and use the site. Fortunately, WordPress is easy to use and, thanks to a large community of enthusiastic WordPress developers and end-users, there is a whole lot of information available online on how to use WordPress and all its features, including detailed step-by-step written and video tutorials, podcasts, training manuals, guides, tips, and documentation.
Get Your University Website Running On WordPress
If you have been tasked with setting up a website for a university, college, school, learning institution, or even a large organization with a network of sites and a seemingly complex content publishing structure, then hopefully this article will have helped you understand just some of the many reasons why your site(s) should be running on the WordPress platform.
To recap:
Over one-third of all websites around the world are built with and powered by WordPress. This includes millions of websites and blogs worldwide, and over 3.5 million schools, prestigious universities, colleges, and educational or learning institution sites. Top universities host their sites on WordPress and we host thousands of CMS websites and blogs and learning platforms for schools, districts, and universities on CampusPress.
WordPress is built using open source software, which makes it completely scalable, flexible, and customizable. You can build just about anything you can imagine with WordPress, and once you have built it, you can then easily add new functionality, or change anything and everything at any time. We provide many award-winning premium plugins that are currently enhancing the functionality of hundreds of thousands of WordPress sites around the world.
Some of the main challenges of running a university website include flexibility and cost, web hosting and site management, site administration, content management, and user training. Fortunately, WordPress comes with many built-in features that can help you address these challenges. Additionally, hundreds of thousands of WordPress site owners choose our services and solutions (like dedicated WordPress hosting, site management, optimization, security, marketing, plugins, and support) to manage and grow their WordPress sites more effectively.
We hope that you have found this information useful. If you are new to WordPress and don’t know where to start, we recommend setting up a WPMU DEV account and trying all our services for FREE for the next 30 days, 100% risk-free! Click here to get started now…
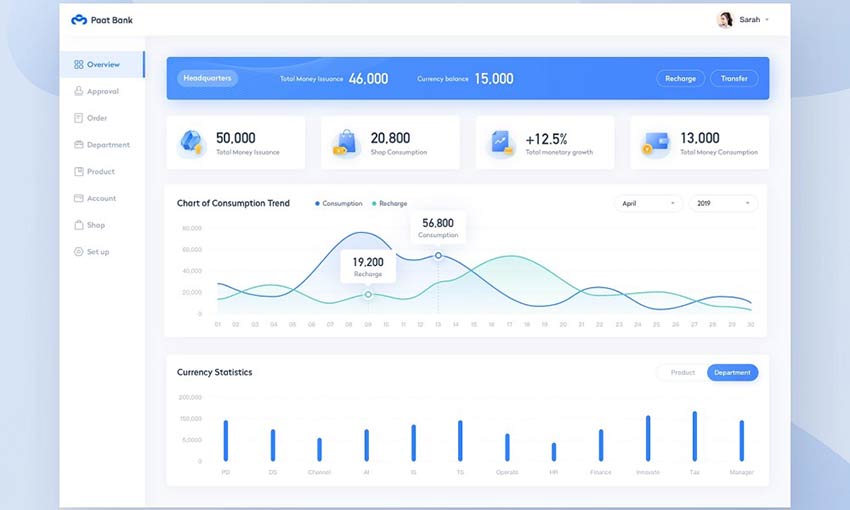
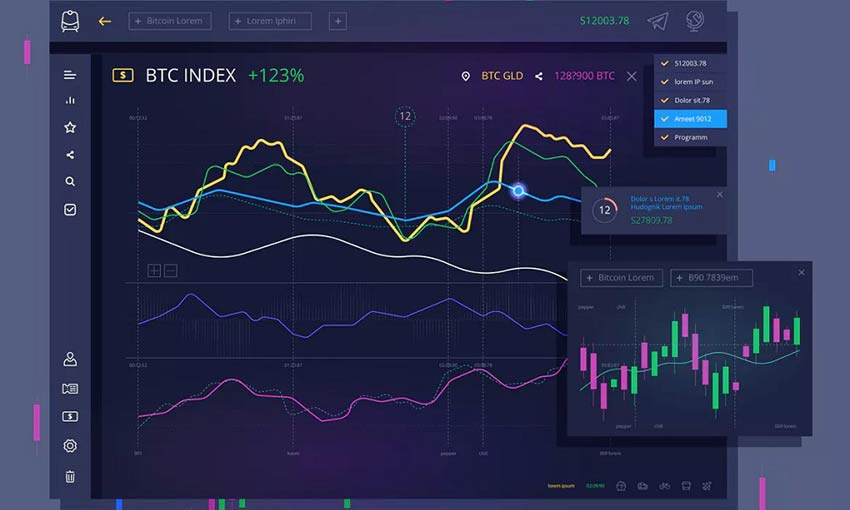
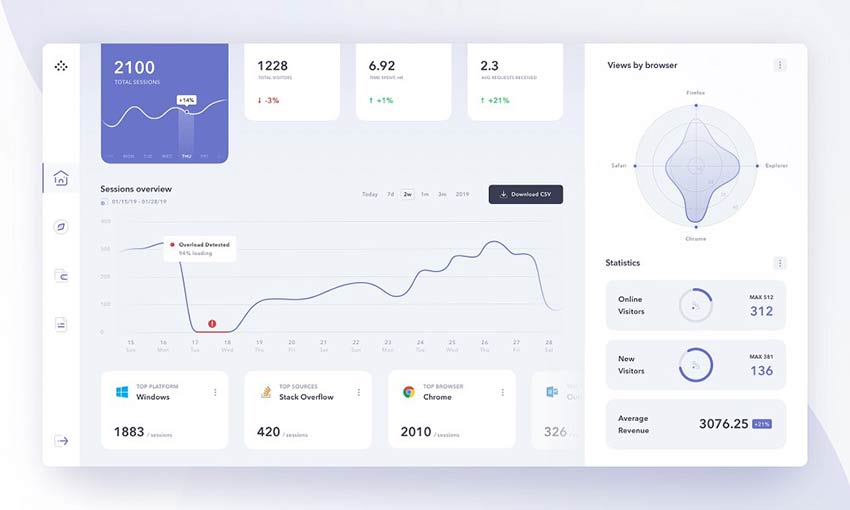
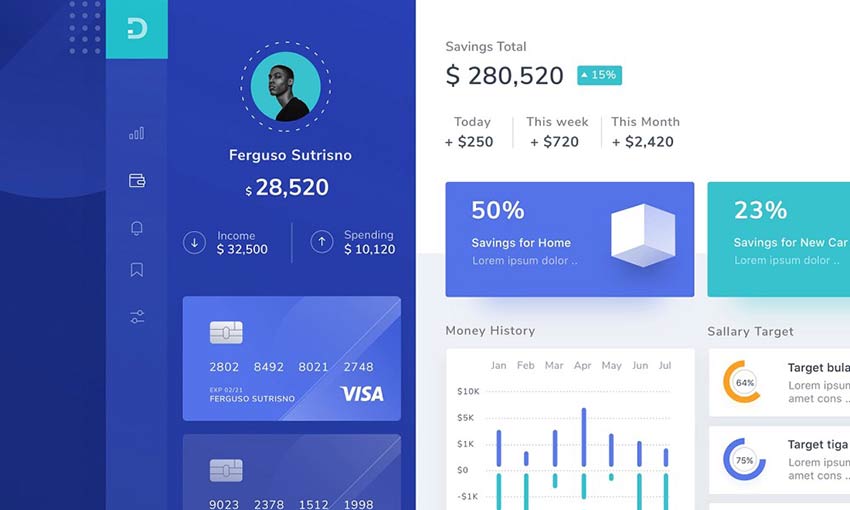
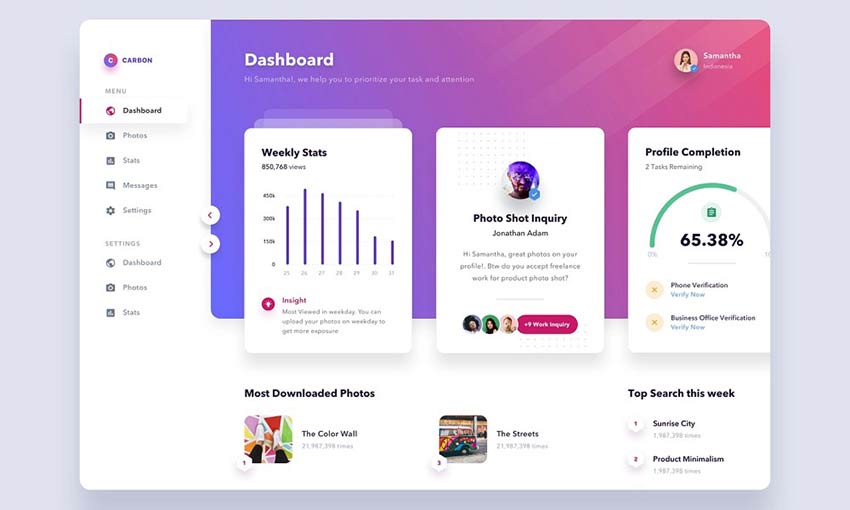
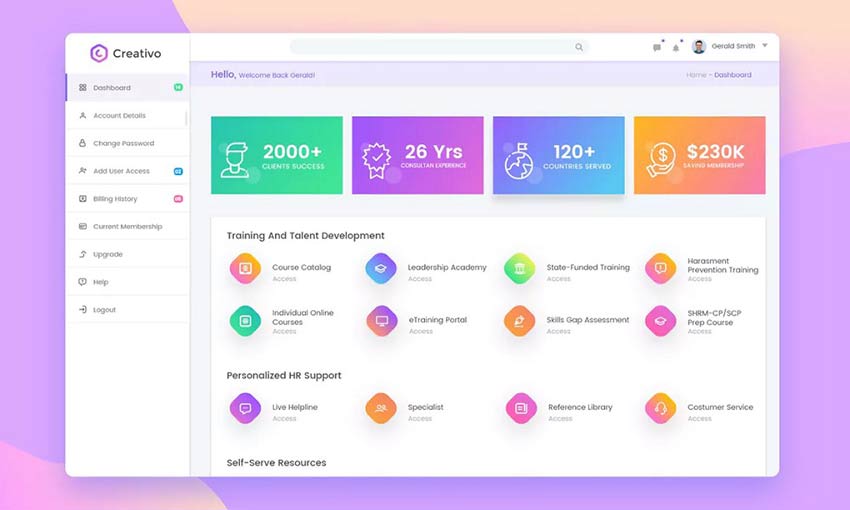
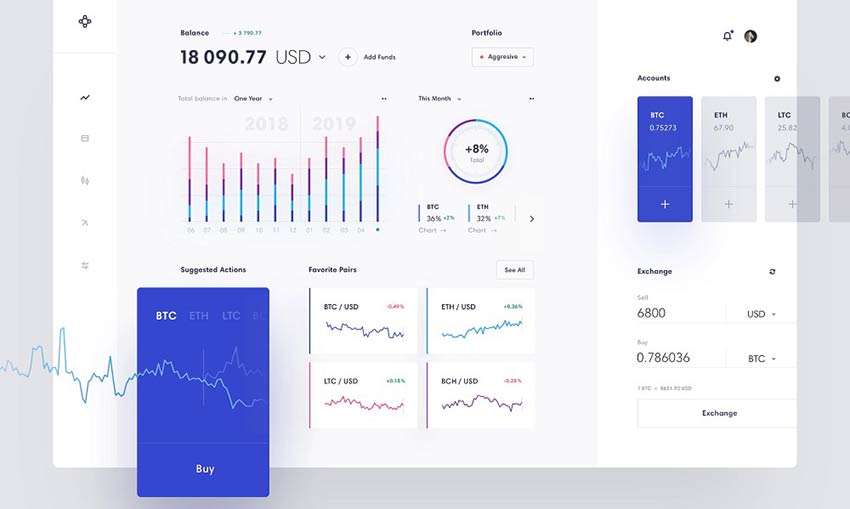
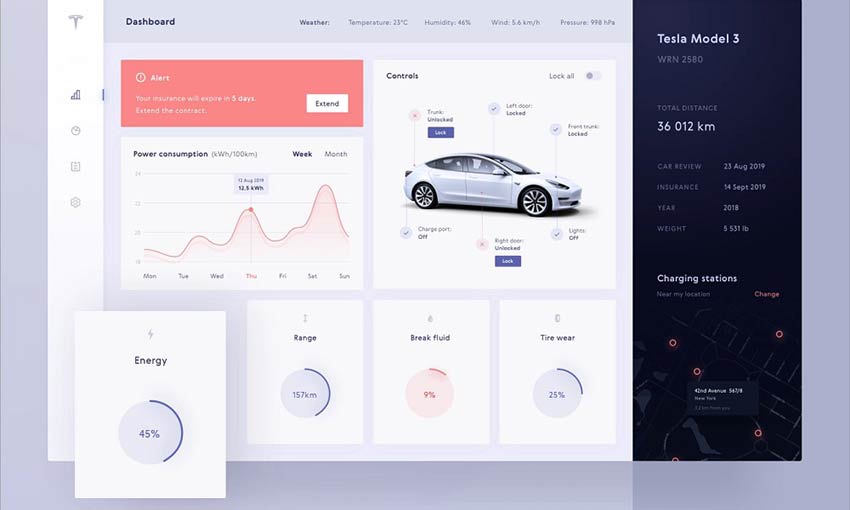
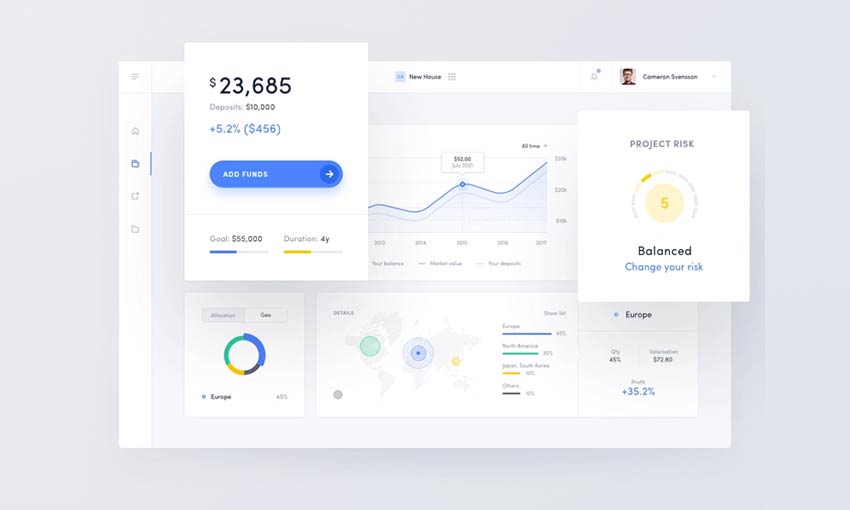
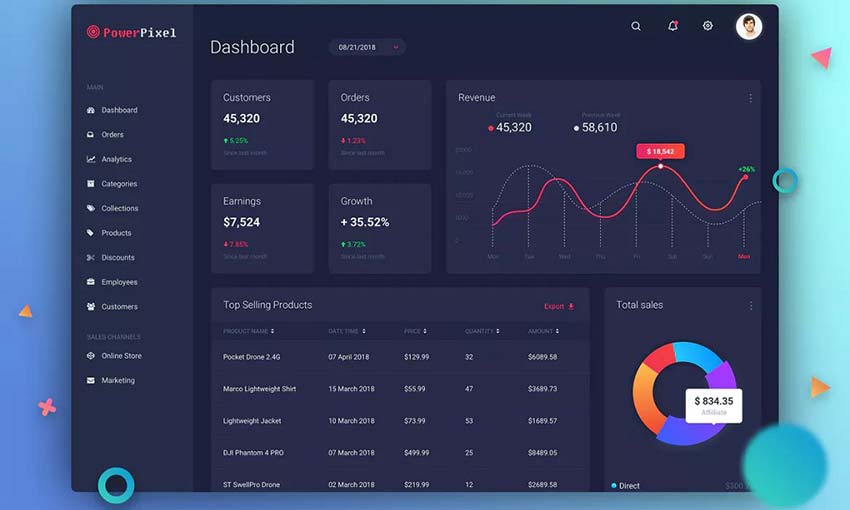
UI design is a delicate, and often overlooked, art. A beautiful user interface is half of what makes a website great. The best UI combines amazing design and useful functionality to make an app or website simple and fun to navigate.
But if you’re a designer making your own website, finding examples to draw inspiration from can be difficult. You might stumble upon an amazing creation as you browse the web, but if you need some great dashboard UI inspiration right now, we’ve got something for you.
These 13 awesome examples showcase a variety of different dashboards. From simplistic user backends to info-packed analytics reports, striking dark design to elegant light UI, those creating menus and dashboards will find some beautiful inspiration in this collection.
Finding great sources of inspiration is a crucial step for any designer. Unless you’ve been making interfaces and outlines for many years, it’s a good idea to draw inspiration from other sources. That way you can see what works well in action and expand on it with your own unique style.
This list was compiled with variety in mind, so no matter what kind of dashboard UI you’re creating, you can find something to base your design off of. There are user backends, helpful interfaces, graphs and analytics, and everything in between.
We hope this compilation gave you the inspiration you needed to create a beautiful dashboard of your own.
SiteGround has one of the top reputations in the web hosting industry. Over 2 million domains are hosted on the platform.
That’s one of the many reasons why SiteGround made my list of the top web hosting services on the market today.
For those of you who are new to hosting your website with SiteGround, you might be wondering how to navigate your dashboard. Fortunately, if you read any SiteGround web hosting reviews, you’ll quickly learn that the platform is very user-friendly.
SiteGround uses cPanel, which is a highly responsive web-based control panel that’s used for managing your settings and account.
cPanel runs on Linux and is extremely versatile. It’s where you’ll customize your site and web hosting needs. SiteGround cPanel is well designed so anyone can use it, regardless of their technical skill level.
With cPanel, you’ll be able to do things like:
Install WordPress (or another CMS)
Back up your site
Review resource usage
Make changes to your server
Set up emails
Connect domains to your hosting plan
Manage databases
Manage security
As you can see from this list, the web-based control panel from SiteGround is very flexible.
I’ll show how to perform certain tasks with cPanel, to optimize your experience using SiteGround for web hosting.
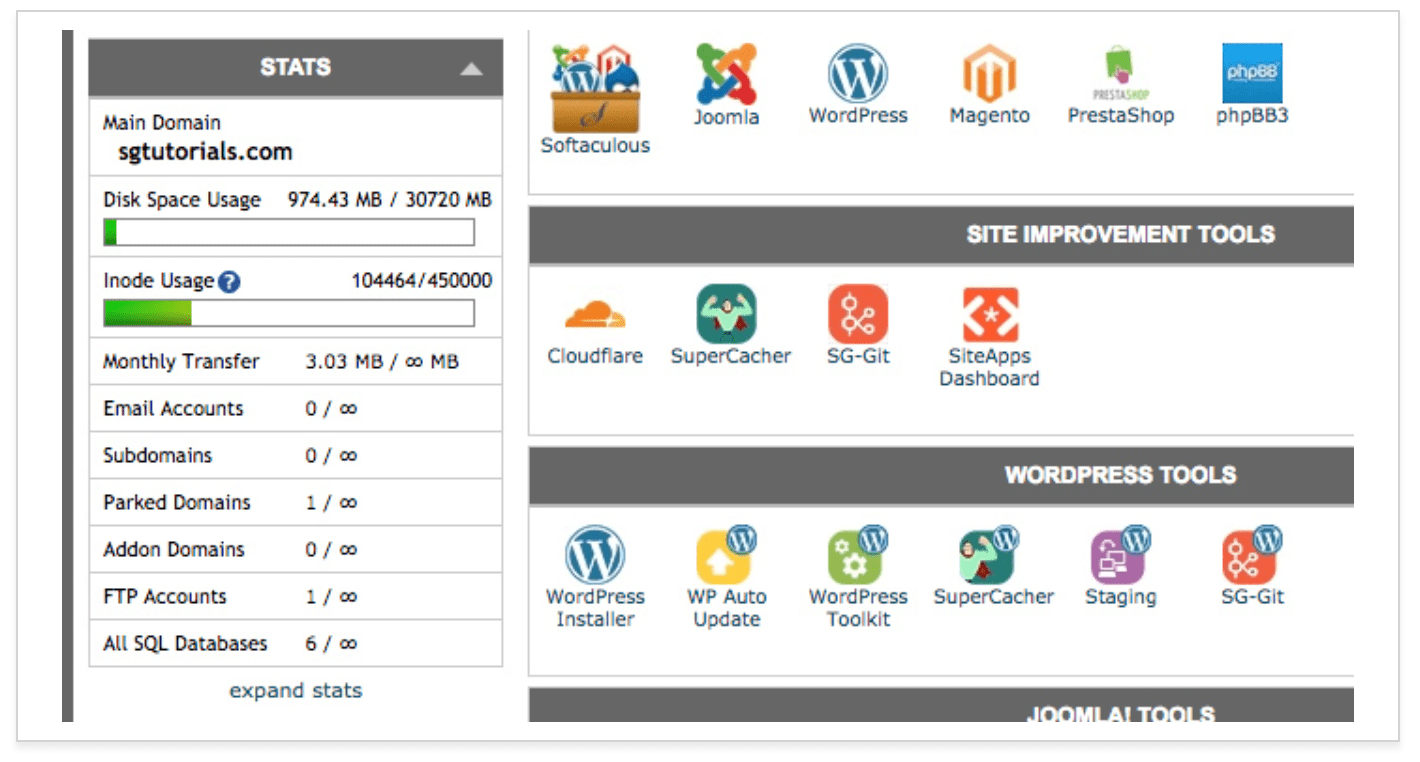
Account Usage Statistics
If you want to know how much web hosting resources you’re using, you’ll need to navigate to the “statistics” section of your cPanel menu.
On this page, you’ll be able to see if you’re coming close to exceeding your plan limits.
In the screenshot above, you can see that disk space and inode usage are nowhere near capacity, so the plan is suitable from those standpoints. But if those bars were full, you’d want to upgrade to a higher plan to ensure that your site performance isn’t compromised.
This is just a quick overview. But if you want to see even more information, click on “expand stats” at the bottom left side of the page.
Now you’ll be able to see CPU time usage over the last two hours and 24 hours, as well as account executions over those same periods of time. The detailed stats will also show you all of the processes that are currently running on your account.
You can even view detailed graphs about your account executions and scripts.
Seeing this information on a chart is a great visual tool for analyzing your data. You can view the information for the day or for the week to gauge when you’re using the most resources.
This page will also show the top executed scripts, as well as the top IP addresses that access your site. You can use this data to protect against brute force attacks.
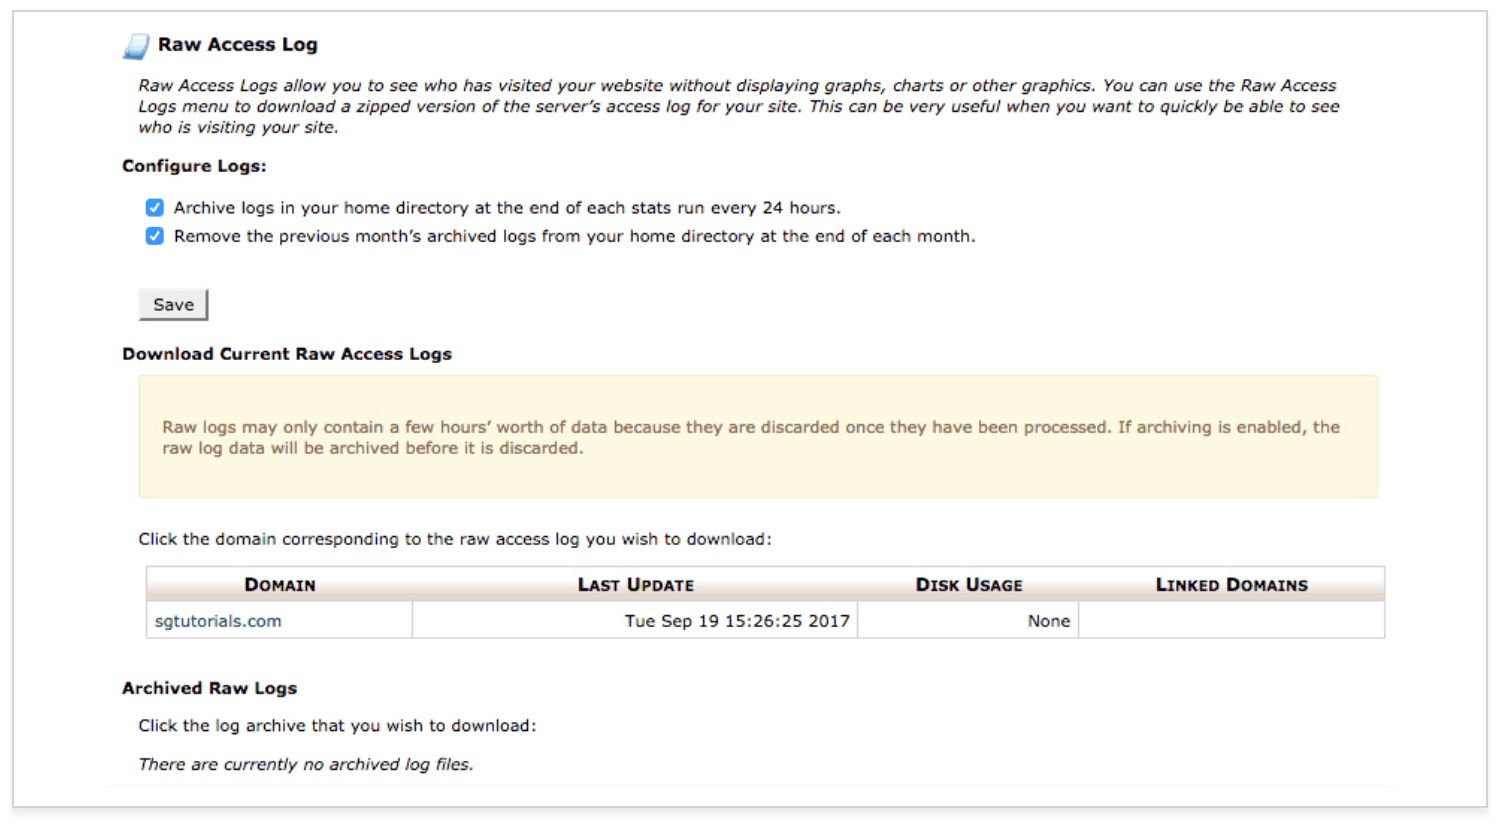
Visitor Logs
The cPanel visitor statistics has three main sections related to who is navigating to your website.
Raw access logs
Error logs
Awstats
Here’s a look at an example of the raw access log.
If you want a quick way to see who has been visiting your website, the access log is the best place to find that information.
This tool shows you who visits your site, but without displaying any visuals or graphics. You have the ability to download a zip file of your access log as well.
As a webmaster, you always want to make sure that your site is running as smooth as possible.
Any problems with your website will impact the user experience, which is why the error log is located in the visitor logs area.
Your error log will show you any recent errors on your website, such as broken links or issues with files. I’d recommend checking this log often, so you can identify and address any errors as soon as possible.
The Awstats menu gives you an in-depth analysis of your website visitors. Some of the top statistics included here are:
Unique visitors
Number of visits
Pages opened
Hits
Bandwidth
Top 25 countries
Top robots and spiders
Duration of visits
Top files accessed
Top pages
Top operating systems
Top browsers
HTTP error codes
You’ll also have access to a quick summary of this information on a table. SiteGround cPanel will let you know the last time this information was updated. You can always click “update now” to view the data in real-time.
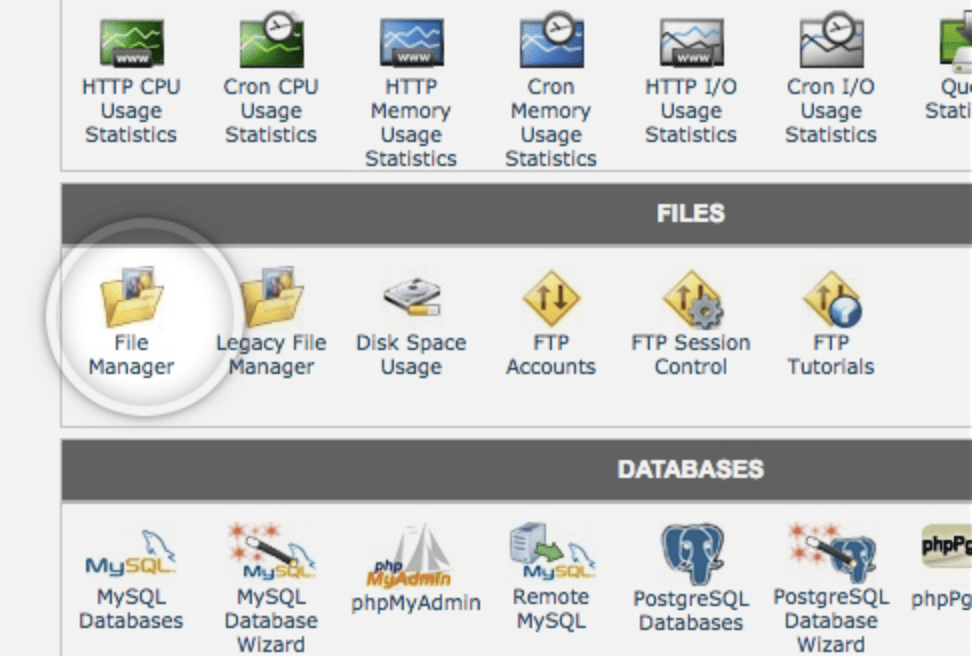
File Manager
With the cPanel file manager, you can manage your website using HTTP as opposed to a third-party app or FTP tools. The file manager isn’t advanced as other tools, but it’s perfect for managing basic functions.
You can access the file manager by navigating to the files menu of cPanel.
The best way to keep your files organized is by adding new folders. Keeping your folders neat will make it easier for you to perform site maintenance down the road.
Adding new files to folders is as simple as clicking the “upload” button at the top of the page. All you have to do is choose the file location of your upload, and edit any permissions for the file.
If you’d rather create a file directly on cPanel, as opposed to your computer, just click on the “new file” button. Although I’d only recommend this for smaller file sizes.
Once files have been uploaded, you may want to edit them in the future. That’s no problem.
Just find the file name and click on the “edit” button on the main toolbar. This will let you make changes to your site without being forced to upload an updated version of that file. However, this is not recommended for big changes.
The file manager also allows you to extract files, compress files, and move files to another location.
Backup Management
SiteGround has automatic daily backups for things files, folders, and email accounts. You can also create manual backups on your own.
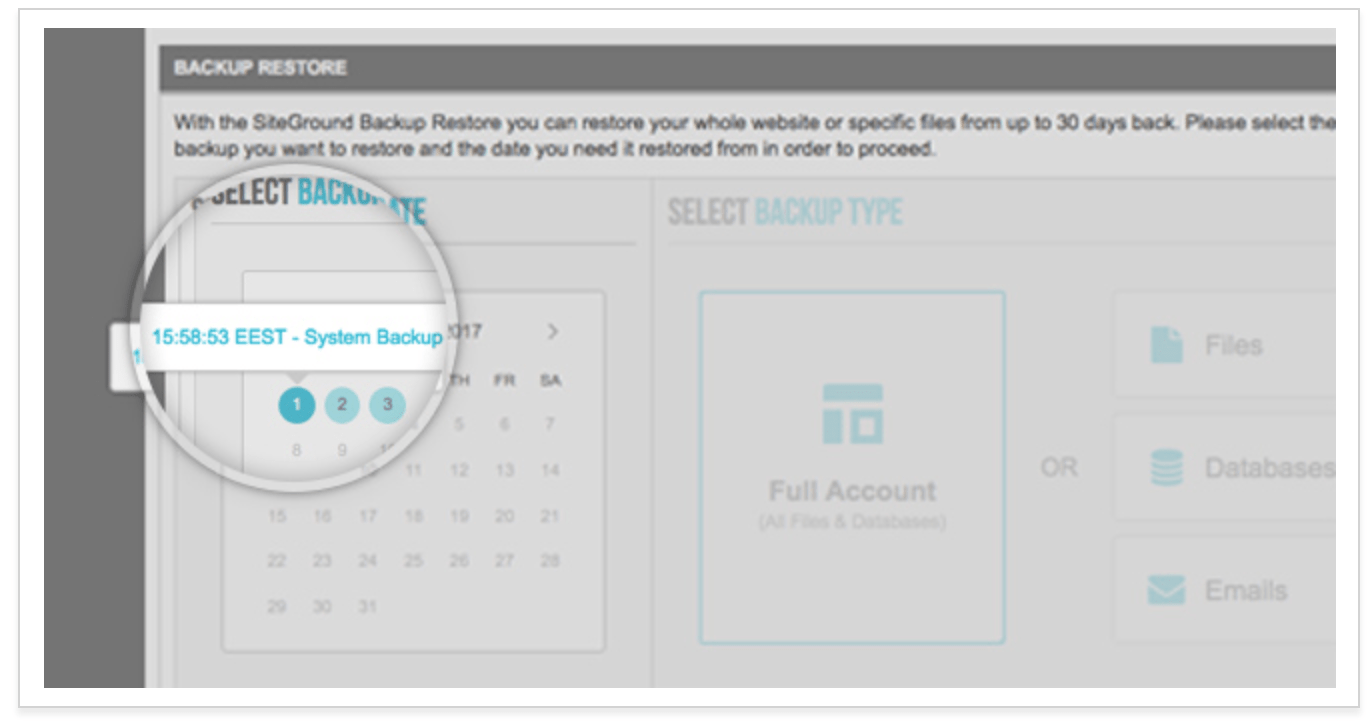
If something happens and you need to perform a file restoration, you can do this from the cPanel backups manager. Just click on the “backup tool” button.
From here, you’ll have access to a calendar showing all of your backups. If you click on one of the dates marked with a circle, you’ll see potential backups that you can use for restoration.
Once you click on that date, you can decide what files need to be restored. These are your options:
Files
Databases
Emails
For files, you’ll be able to manually choose which folders need to be restored. Just scroll through and check off any boxes that were compromised and then click on the “restore” button.
SiteGround gives you the option to restore your files without replacing the ones that are currently being used.
Both databases and emails can be restored in the same way as other files. You simply navigate to the calendar, choose the date, and select the files that need to be restored.
Additionally, you can restore your entire account with SiteGround cPanel. This is the best option for those of you who aren’t sure exactly what files need to be restored. Choosing this function does not restore emails. So you’d still need to do the emails separately.
It’s also worth noting that the full account restoration impacts all domains on your hosting plan.
So for those of you who have more than one website, they’ll all be restored to the date of your selected backup.
Security
Website security needs to be a priority for all sites. SiteGround makes this easier for its customers by supporting Let’s Encrypt. All SiteGround plans come with a free SSL certificate.
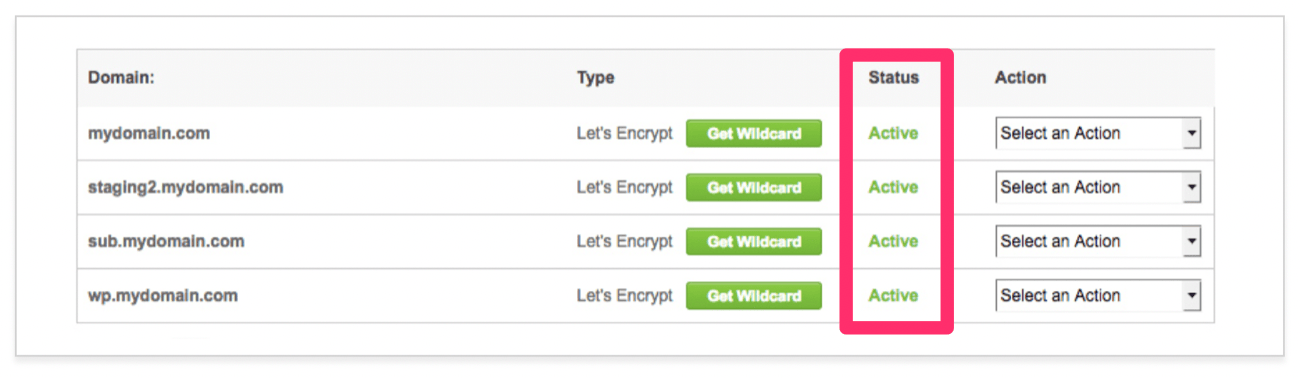
If you navigate to the security section of cPanel, you’ll see an icon for Let’s Encrypt.
After you click on that icon, you’ll see an active list of your SSL certificates.
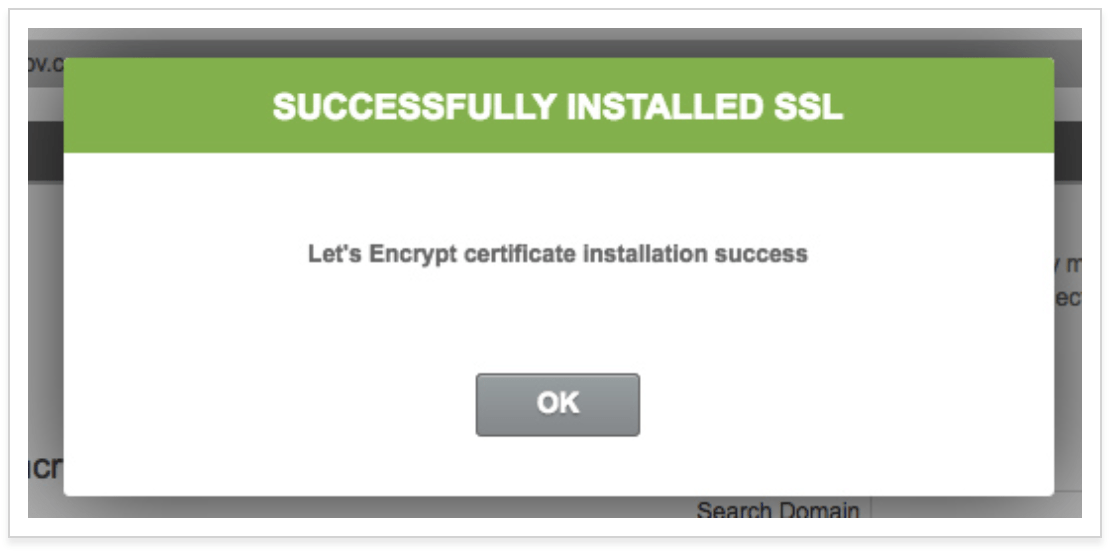
You can manually install any SSL certificates that aren’t active. Just click on the domain choose the type of certificate that you want to install.
Once that’s complete, you’ll see this pop-up verifying that the installation was a success.
After the certificate has been issued, it still needs to be configured on your site. Otherwise, your domain could have duplicate content running simultaneously over HTTP and HTTPS.
You might have to rewrite links so that mixed content warnings and errors don’t appear.
To configure your certificate, just choose “HTTPS settings” from the action menu. Then turn on HTTPS enforce, which will force your site to work on HTTPS.
All HTTP redirects will be performed at the server level. This is a great shortcut, so you won’t have to do hire a developer to do it for you.
In order for your SSL certificate to work, it needs to meet the following prerequisites:
Your domain and subdomain need to be pointed to the IP address of your cPanel account.
The hosting server needs to control the DNS zone for domain names with a wildcard SSL.
Temporary redirects need to be removed until the SSL has successfully been installed.
It’s also worth noting that any parked domains not pointed to your cPanel IP address would cause the SSL installation to fail. To work around this, just temporarily unpark them or point them to the cPanel account until the installation is complete.
Advanced Settings
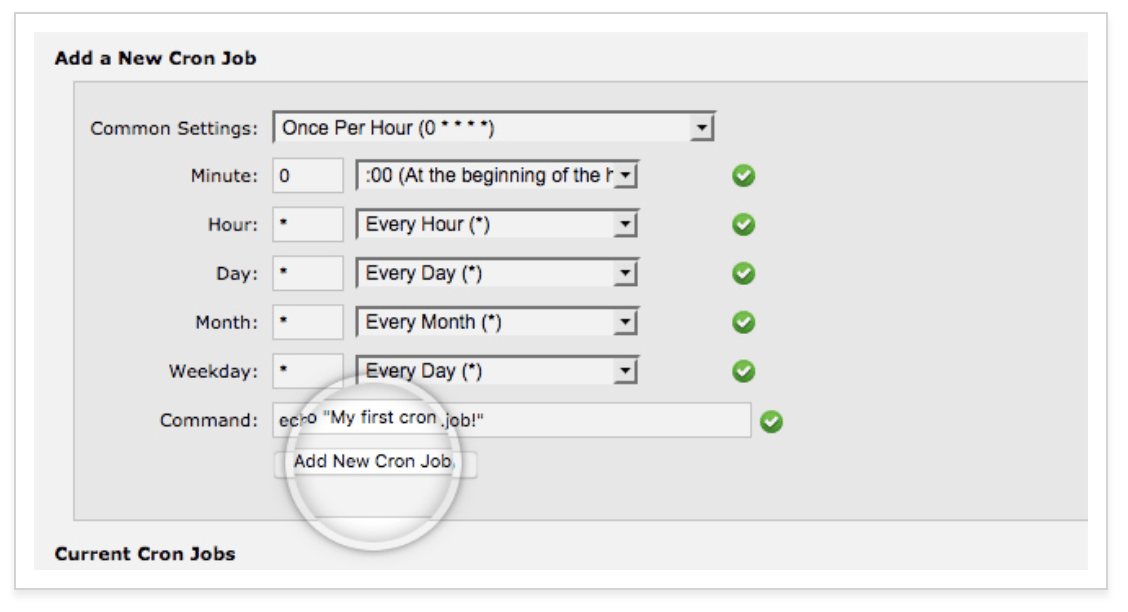
You can also manage some more advanced options with SiteGround cPanel. “Chron Jobs” is something that you might want to consider setting up in the advanced menu.
This will let you run specific commands based on times set by the cron job. For example, you can set this up to delete temporary files each week so that you don’t waste disk space.
cPanel will email you every time a command is run with a cron job.
To add a new cron job, just adjust the settings for a specific command. Here’s an example of what that menu will look like in cPanel.
If you don’t need a cron job anymore, just click on the “delete” button to remove it.
Changing the PHP version is another advanced cPanel task that you might want to use. The PHP version manager icon can be found in the “1H Software” section of your cPanel dashboard.
Click on the folders and choose the directory that you want to change. Keep in mind, any subdirectory will be changed as well.
You’ll also be able to change the entire website. Just choose your new PHP version from the list of options and save your changes.
I’d suggest running your site on the “managed PHP version.” This will automatically run your site on the recommended PHP whenever it becomes available. So you won’t have to do anything manually, and your site will always be running a stable and secure PHP.
Conclusion
There’s a reason why SiteGround is so popular. cPanel makes it easy for its web hosting clients to manage all of their hosting and website settings in one place.
As you can see from what I’ve covered in this guide, the options are extremely versatile.
So if you’re new to SiteGround and don’t know how to navigate the cPanel, use this tutorial as a reference.
For those of you who are considering SiteGround for web hosting, but haven’t signed up yet, this information should make your decision that much easier.
If you review my resource on the best web hosting for small business, you’ll see that I named SiteGround as the choice for the best technology. cPanel was a big factor in that decision.
So many awesome work has been done over the past month! There’s lots of demos and experiments that will make your jaw drop, that’s for sure. From procedurally generated CSS numbers to amazing CSS animations, there’s much to explore and wonder about.
When you’re trying to choose a CMS, there’s a lot to keep in mind. Features, price, and overall quality are all things to pay attention to. But there might be one factor you’re not considering for your CMS: The free templates it has available.
Design is everything in a website. With premium themes being so expensive, you might not initially be able to afford one, so you’ll have to rely on the default templates provided to you.
Let’s go over some top CMS options with great free themes, so you can have a beautiful website without having to pay exorbitant amounts of money.
WordPress
If you’re looking for sheer variety, WordPress is definitely the way to go. It comes with a handful of customizable light themes right on its website. These simple, photography-focused templates more than get the job done.
If you’re willing to pay for premium themes, you’ll discover WordPress’s true diversity. There are thousands of user-made themes out there. Sites like Envato Elements offer plenty of choices so do some searching to find what you need.
Shopify
Shopify is an e-commerce CMS aimed primarily at larger businesses, so many of its premium themes can come out to almost $200. Luckily, there are also 10 free themes made by Shopify itself, all offering the elegance you’ll need to show off your new online store. They even come in multiple styles.
The CMS is also fairly popular, so you can expect to find free third-party Shopify themes online.
Webflow
Webflow is a code-free CMS made for designers, so you’d expect their themes to be great – and you would be right. Their free themes are very distinctive from one another. Don’t expect the same bland template over and over again.
There’s quite a few more of them than other CMS competitors tend to offer as well, available in a range of categories. And since this platform focuses on design, you’ll be able to customize them as much as you want.
Squarespace
If your website makes use of plenty of beautiful photography, any Squarespace template would work well for you. There are over twenty themes, all available on any Squarespace plan, and each one a great example of elegant design.
The one downside to Squarespace is that there are few third-party themes available, and a majority are premium. So, if you don’t like any of the free default themes, it may be best to pick a different CMS.
Drupal
This free and open source CMS was created by a dedicated community of developers, and they haven’t neglected to fill out the theme project with nearly 3,000 free templates.
The problem is that it isn’t very friendly to navigate. Many themes lack demos or even screenshots, so your only option is to download each one to see if you like it.
Luckily, Drupal Free Themes was created to fix this issue. This site has a clean layout and is much less confusing to navigate, and every theme comes with a demo and a list of dependencies. If you love Drupal for its features but struggle to find a good theme, you can now have the best of both worlds.
The Best CMS Templates
There are many CMS options with awesome free templates out there, and this is just a handful of them. Which should you choose?
Shopify and Squarespace offer elegant templates with no fuss. They’re good choices if you just want a beautiful theme right out the gate. Webflow also has great themes, and has a high degree of customization available as well with its design-focused CMS.
Drupal and WordPress both share a large community that’s made thousands of themes. Drupal hosts them right on its website, though its themes tend to be simpler and made with functionality in mind. WordPress themes often have a larger focus on beauty and design.
Whatever you choose, remember that you’ll be rewarded if you’re willing to do some digging. Almost every CMS has a community creating third-party themes that are entirely free to download. You just have to be able to find them.
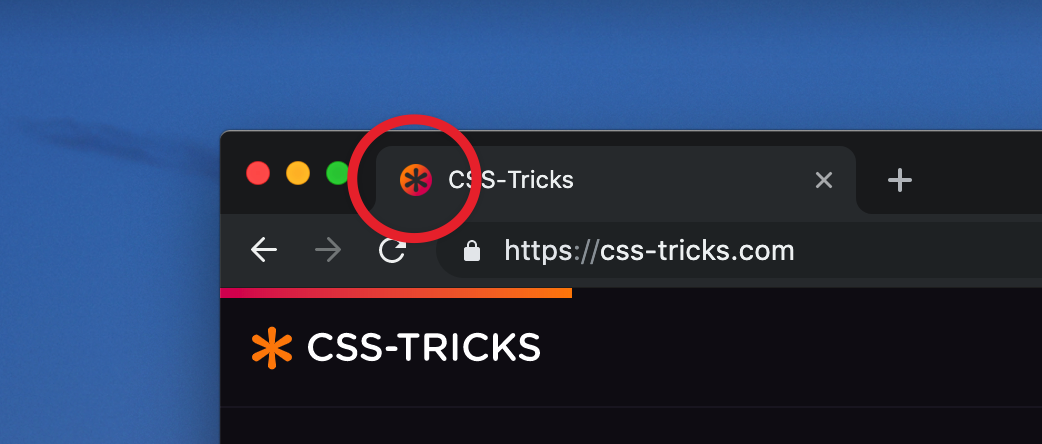
It’s the first thing your eyes look for when you’re switching tabs.
That’s one way of explaining what a favicon is. The tab area is a much more precious screen real-estate than what most assume. If done right, besides being a label with icon, it can be the perfect billboard to represent what’s in or what’s happening on a web page.
The CSS-Tricks Favicon
Favicons are actually at their most useful when you’re not active on a tab. Here’s an example:
Imagine you’re backing up photos from your recent summer vacation to a cloud service. While they are uploading, you’ve opened a new tab to gather details about the places you went on vacation to later annotate those photos. One thing led to the other, and now you’re watching Casey Neistat on the seventh tab. But you can’t continue your YouTube marathon without the anxious intervals of checking back on the cloud service page to see if the photos have been uploaded.
It’s this type of situation where we can get creative! What if we could dynamically change the pixels in that favicon and display the upload progress? That’s exactly what we’ll do in this article.
In supported browsers, we can display a loading/progress animation as a favicon with the help of JavaScript, HTML <canvas> and some centuries-old geometry.
Jumping straight in, we’ll start with the easiest part: adding the icon and canvas elements to the HTML.
In practical use, you would want to hide the <canvas> on the page, and one way of doing that is with the HTML hidden attribute.
<canvas hidden width=32 height=32></canvas>
I’m going to leave the <canvas> visible on the page for you to see both the favicon and canvas images animate together.
Both the favicon and the canvas are given a standard favicon size: 32 square pixels.
For demo purposes, in order to trigger the loading animation, I’m adding a button to the page which will start the animation when clicked. This also goes in the HTML:
<button>Load</button>
Now let’s set up the JavaScript. First, a check for canvas support:
onload = ()=> {
  canvas = document.querySelector('canvas'),
  context = canvas.getContext('2d');
  if (!!context) {
      /* if canvas is supported */
  }
};
Next, adding the button click event handler that will prompt the animation in the canvas.
button = document.querySelector('button');
button.addEventListener('click', function() {
    /* A variable to track the drawing intervals */
    n = 0,
    /* Interval speed for the animation */
    loadingInterval = setInterval(drawLoader, 60);
});
drawLoader will be the function doing the drawing at intervals of 60 milliseconds each, but before we code it, I want to define the style of the lines of the square to be drawn. Let’s do a gradient.
/* Style of the lines of the square that'll be drawn */
let gradient = context.createLinearGradient(0, 0, 32, 32);
gradient.addColorStop(0, '#c7f0fe');
gradient.addColorStop(1, '#56d3c9');
context.strokeStyle = gradient;
context.lineWidth = 8;
In drawLoader, we’ll draw the lines percent-wise: during the first 25 intervals, the top line will be incrementally drawn; in second quarter, the right line will be drawn; and so forth.
The animation effect is achieved by erasing the <canvas> in each interval before redrawing the line(s) from previous interval a little longer.
During each interval, once the drawing is done in the canvas, it’s quickly translated to a PNG image to be assigned as the favicon.
function drawLoader() {
  with(context) {
    clearRect(0, 0, 32, 32);
    beginPath();
    /* Up to 25% */
    if (n<=25){
      /*
        (0,0)-----(32,0)
      */
      // code to draw the top line, incrementally
    }
    /* Between 25 to 50 percent */
    else if(n>25 && n<=50){
      /*
        (0,0)-----(32,0)
                  |
                  |
                  (32,32)
      */
      // code to draw the top and right lines.
    }
    /* Between 50 to 75 percent */
    else if(n>50 && n<= 75){
      /*
        (0,0)-----(32,0)
                  |
                  |
        (0,32)----(32,32)
      */
      // code to draw the top, right and bottom lines.
    }
      /* Between 75 to 100 percent */
    else if(n>75 && n<=100){
      /*
        (0,0)-----(32,0)
            |      |
            |      |
        (0,32)----(32,32)
      */
      // code to draw all four lines of the square.
    }
    stroke();
  }
  // Convert the Canvas drawing to PNG and assign it to the favicon
  favicon.href = canvas.toDataURL('image/png');
  /* When finished drawing */
  if (n === 100) {
    clearInterval(loadingInterval);
    return;
  }
  // Increment the variable used to keep track of the drawing intervals
  n++;
}
Now to the math and the code for drawing the lines.
Here’s how we incrementally draw the top line at each interval during the first 25 intervals:
n = current interval,
x = x-coordinate of the line’s end point at a given interval.
(y-coordinate of the end point is 0 and start point of the line is 0,0)
At the completion of all 25 intervals, the value of x is 32 (the size of the favicon and canvas.)
So...
x/n = 32/25
x = (32/25) * n
The code to apply this math and draw the line is:
moveTo(0, 0); lineTo((32/25)*n, 0);
For the next 25 intervals (right line), we target the y coordinate similarly.
I'm so excited to be heading to Zürich, Switzerland for Front Conference (Love that name and URL!). I've never been to Switzerland before, so I'm excited about that, but of course, the web nerd in me is excited to be at the conference with lots of fellow webfolk. Some old friends, but mostly new people I've never met before but admire their work. Yessssss.
I cracked open DevTools on their speaker page and re-arranged the layout so I could take some screenshots of the incredible lineup:
If you're able to make it, come! As you know I'm bullish on conferences and their ability to get you thinking and feeling more connected to the web design and development community.
I'll be there
I'll be opening the conference as the first talk on the first day (after the workshops on Wednesday). I've been thinking a lot about what has been happening to front-end development and what it is to be a front-end developer so I'll be talking about all that. I hope it's a nice broad start to a whole conference dedicated to the topic.
Can't go but want to watch it live?
Good idea! Perhaps you could schedule a bit of a brown bag at work?
Follow @frontzurich on Twitter and they'll be announcing how to watch the livestream the days of the conference (Thursday August 29th and Friday August 30th).
It has been 8 months since Gutenberg was launched as the default content editor in WordPress. Depending who you ask, you may hear that Gutenberg is the worst or the best thing that has happened to WordPress (or anything in between). But something that most people seem to agree with, is that Gutenberg has been steadily improving. At the current pace of development, it’s only a matter of time until its most outstanding issues have been dealt with and the user experience becomes truly pleasant.
Gutenberg is an ongoing work in progress. While using it, I experience maddening nuisances, such as floating options that I can’t click on because the block placed below gets selected instead, unintuitive grouping of blocks, columns with so much gap that make them useless, and the “+” element calling for my attention all over the page. However, the problems I encounter are still relatively manageable (which is an improvement from the previous versions) and, moreover, Gutenberg has started making its potential benefits become a reality: Many of its most pressing bugs have been ironed out, its accessibility issues are being solved, and new and exciting features are continuously being made available. What we have so far is pretty decent, and it will only get better and better.
Let’s review the new developments which have taken place since Gutenberg’s launch, and where it is heading to.
Gutenberg arrived just in time to kick-start the rejuvenation of WordPress, to attempt to make WordPress appealing to developers once again (and reverse its current status of being the most dreaded platform). WordPress had stopped looking attractive because of its focus on not breaking backwards compatibility, which prevented WordPress from incorporating modern code, making it look pale in comparison with newer, shinier frameworks.
Many people argue that WordPress was in no peril of dying (after all, it powers more than 1/3rd of the web), so that Gutenberg was not really needed, and they may be right. However, even if WordPress was in no immediate danger, by being disconnected from modern development trends it was headed towards obsolescence, possibly not in the short-term but certainly in the mid to long-term. Let’s review how Gutenberg improves the experience for different WordPress stakeholders: developers, website admins, and website users.
Developers have recently embraced building websites through JavaScript libraries Vue and React because (among other reasons) of the power and convenience of components, which translates into a satisfying developer-experience. By jumping into the bandwagon and adopting this technique, Gutenberg enables WordPress to attract developers once again, allowing them to code in a manner they find gratifying.
Website admins can manage their content more easily, improve their productivity, and achieve things that couldn’t be done before. For instance, placing a Youtube video through a block is easier than through the TinyMCE Textarea, blocks can serve optimal images (compressed, resized according to the device, converted to a different format, and so on) removing the need to do it manually, and the WYSIWYG (What You See Is What You Get) capabilities are decent enough to provide a real-time preview of how the content will look like in the website.
By giving them access to powerful functionality, website users will have a higher satisfaction when browsing our sites, as experienced when using highly-dynamic, user-friendly web applications such as Facebook or Twitter.
In addition, Gutenberg is slowly but surely modernizing the whole process of creating the website. While currently it can be used only as the content editor, some time in the future it will become a full-fledged site builder, allowing to place components (called blocks) anywhere on a page, including the header, footer, sidebar, etc. (Automattic, the company behind WordPress.com, has already started work on a plugin adding full site editing capabilities for its commercial site, from which it could be adapted for the open-source WordPress software.) Through the site-building feature, non-techy users will be able to add very powerful functionality to their sites very easily, so WordPress will keep welcoming the greater community of people working on the web (and not just developers).
Fast Pace Of Development
One of the reasons why Gutenberg has seen such a fast pace of development is because it is hosted on GitHub, which simplifies the management of code, issues and communication as compared to Trac (which handles WordPress core), and which makes it easy for first-time contributors to become involved since they may already have experience working with Git.
Being decoupled from WordPress core, Gutenberg can benefit from rapid iteration. Even though a new version of WordPress is released every 3 months or so, Gutenberg is also available as a standalone plugin, which sees a new release every two weeks (while the latest release of WordPress contains Gutenberg version 5.5, the latest plugin version is 6.2). Having access to powerful new functionality for our sites every two weeks is very impressive indeed, and it enables to unlock further functionality from the broader ecosystem (for instance, the AMP plugin requires Gutenberg 5.8+ for several features).
Headless WordPress To Power Multiple Stacks
One of the side effects of Gutenberg is that WordPress has increasingly become “headless”, further decoupling the rendering of the application from the management of the content. This is because Gutenberg is a front-end client that interacts with the WordPress back-end through APIs (the WP REST API), and the development of Gutenberg has demanded a consistent expansion of the available APIs. These APIs are not restricted to Gutenberg; they can be used together with any client-side framework, to render the site using any stack.
An example of a stack we can leverage for our WordPress application is the JAMstack, which champions an architecture based on static sites augmented through 3rd party services (APIs) to become dynamic (indeed, Smashing Magazine is a JAMstack site!). This way, we can host our content in WordPress (leveraging it as a Content Management System, which is what it is truly good at), build an application that accesses the content through APIs, generate a static site, and deploy it on a Content Delivery Network, providing for lower costs and greater access speed.
New Functionality
Let’s play with Gutenberg (the plugin, not the one included in WordPress core, which is available here) and see what functionality has been added in the last few months.
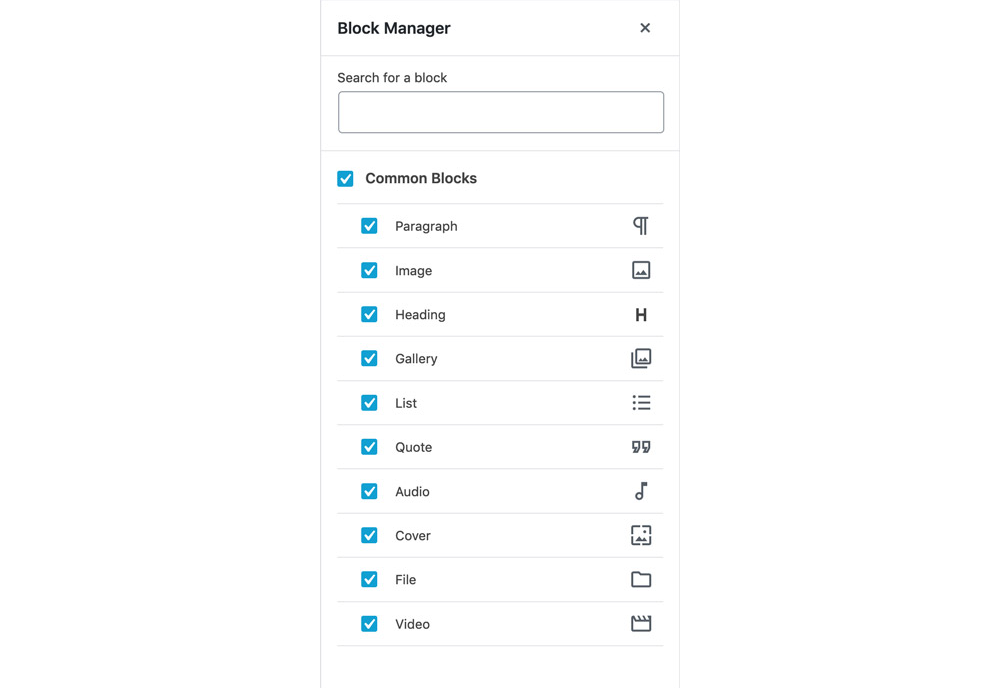
Block Manager
Through the block manager, we can decide what blocks will be available on the content editor; all others will be disabled. Removing access to unwanted blocks can be useful in several situations, such as:
Many plugins are bundles of blocks; when installing such a plugin, all their blocks will be added to the content editor, even if we need only one
As many as 40 embed providers are implemented in WordPress core, yet we may need just a few of them for the application, such as Vimeo and Youtube
Having a large amount of blocks available can overwhelm us, impairing our workflow by adding extra layers that the user needs to navigate, leading to suboptimal use of the time; hence, temporarily disabling unneeded blocks can help us be more effective
Similarly, having only the blocks we need avoids potential errors caused by using the wrong blocks; in particular, establishing which blocks are needed can be done in a top-down manner, with the website admin analyzing all available blocks and deciding which ones to use, and imposing the decision on the content managers, who are then relieved from this task and can concentrate on their own duties.
Enabling/disabling blocks through the manager (Large preview)
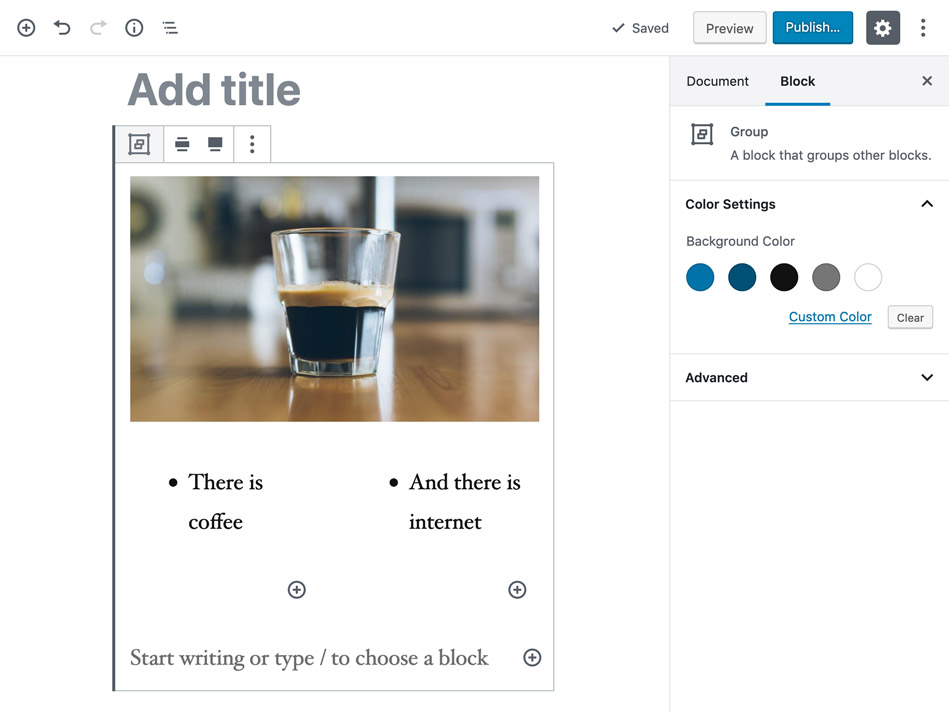
Cover Block With Nesting Elements
The cover block (which allows us to add a title over a background image, generally useful for creating hero headers) now defines its inner elements (i.e. the heading and buttons, which can be added for creating a call to action) as nested elements, allowing us to modify its properties in a uniform way across blocks (for instance, we can make the heading bold and add a link to it, place one or more buttons and change their background color, and others).
The cover block accepts nested elements (Large preview)
Block Grouping And Nesting
Please beware: These features are still buggy! However, plenty of time and energy is being devoted to them, so we can expect them to work smoothly soon.
Block grouping allows to group several blocks together, so when moving them up or down on the page, all of them move together. Block nesting means placing a block inside of a block, and there is no limit to the nesting depth, so we can have blocks inside of blocks inside of blocks inside of… (you’ve got me by now). Block nesting is especially useful for adding columns on the layout, through a column block, and then each column can contain inside any kind of block, such as images, text, videos, etc.
Blocks can be grouped together, and nested inside each other (Large preview)
Migration Of Pre-Existing Widgets
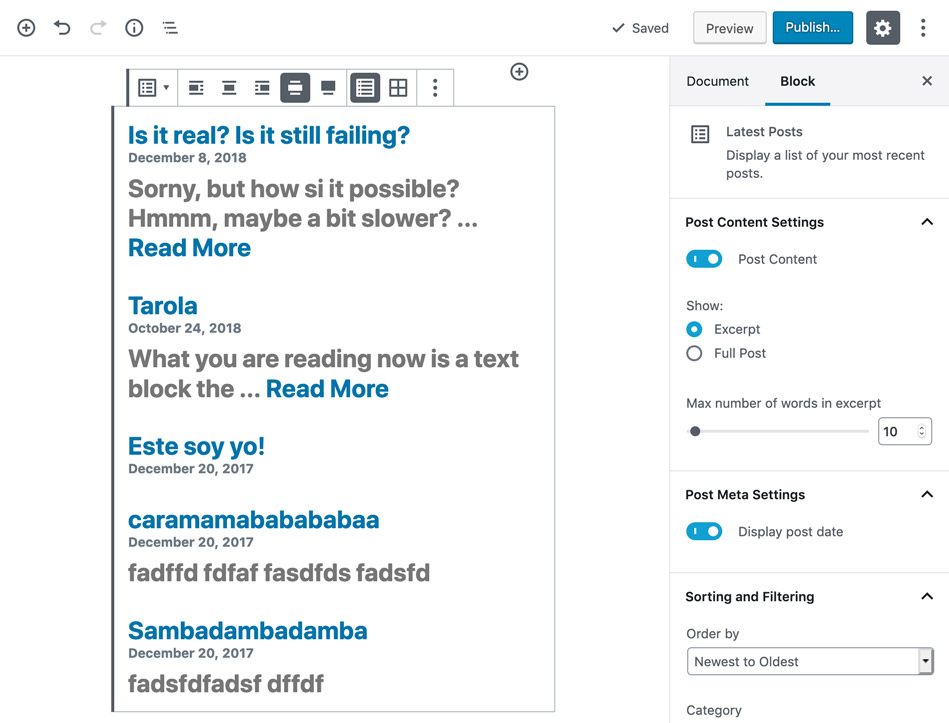
Whereas in the past there were several methods for adding content on the page (TinyMCE content, shortcodes, widgets, menus, etc.), the blocks attempt to unify all of them into a single method. Currently, newly-considered legacy code, such as widgets, is being migrated to the block format.
Recently, the “Latest Posts” widget has been re-implemented as a block, supporting real-time preview of how the layout looks when configuring it (changing the number of words to display, showing an excerpt or the full post, displaying the date or not, etc).
The “Latest posts” widget includes several options to customize its appearance (Large preview)
Motion Animation
Moving blocks up or down the page used to involve an abrupt transition, sometimes making it difficult to understand how blocks were re-ordered. Since Gutenberg 6.1, a new feature of motion animation solves this problem by adding a realistic movement to block changes, such as when creating, removing or reordering a block, giving a greatly improved visual cue of the actions taken to re-order blocks. In addition, the overall concept of motion animation can be applied throughout Gutenberg to express change and thus improve the user experience and provide better accessibility support.
Blocks have a smooth effect when being re-ordered. (Large preview)
Functionality (Hopefully) Coming Soon
According to WordPress founder Matt Mullenweg, only 10% of Gutenberg’s complete roadmap has been implemented by now, so there is plenty of exciting new stuff in store for us. Work on the new features listed below has either already started, or the team is currently experimenting with them.
Block directory
A new top-level item in wp-admin which will provide block discovery. This way, blocks can be independently installed, without having to ship them through a plugin.
Navigation blocks
Currently, navigation menus must be created through their own interface. However, soon we will be able to create these through blocks and place them anywhere on the page.
Inline installation of blocks
Being able to discover blocks, the next logical step is to be able to install a new block on-the-fly, where is needed the most: On the post editor. We will be able to install a block while writing a post, use the new block to generate its HTML, save its output on the post, and remove the block, all without ever browsing to a different admin page.
Snap to grid when resizing images
When we place several images on our post, resizing them to the same width or height can prove to be a painful process of trying and failing repeatedly until getting it right, which is far from ideal. Soon, it will be possible to snap the image to a virtual grid layer which appears on the background as the image is being resized.
WordPress Is Becoming Attractive (Once Again)
Several reasons support the idea that WordPress will soon become an attractive platform to code for, as it used to be once upon a time. Let’s see a couple of them.
PHP Modernization
WordPress’s quest to modernize does not end with incorporating modern JavaScript libraries and tooling (React, webpack, Babel): It also extends to the server-side language: PHP. WordPress’s minimum version of PHP was recently bumped up to 5.6, and should be bumped to version 7.0 as early as December 2019. PHP 7 offers remarkable advantages over PHP 5, most notably it more than doubles its speed, and later versions of PHP (7.1, 7.2 and 7.3) have each become even faster.
Even though there seems to be no official plans to further upgrade from PHP 7.0 to its later versions, once the momentum is there it is easier to keep it going. And PHP is itself being improved relentlessly too. The upcoming PHP 7.4, to be released in November 2019, will include plenty of new improvements, including arrow functions and the spread operator inside of arrays (as used for modern JavaScript), and a mechanism to preload libraries and frameworks into the OPCache to further boost performance, among several other exciting features.
Reusability Of Code Across Platforms
A great side effect of Gutenberg being decoupled from WordPress is that it can be integrated with other frameworks too. And that is exactly what has happened! Gutenberg is now available for Drupal, and Laraberg (for Laravel) will soon be officially released (currently testing the release candidate). The beauty of this phenomenon is that, through Gutenberg, all these different frameworks can now share/reuse code!
Conclusion
There has never been a better time to be a web developer. The pace of development for all concerned languages and technologies (JavaScript, CSS, image optimization, variable fonts, cloud services, etc) is staggering. Until recently, WordPress was looking at this development trend from the outside, and developers may have felt that they were missing the modernization train. But now, through Gutenberg, WordPress is riding the train too, and keeping up with its history of steering the web in a positive direction.
Gutenberg may not be fully functional yet, since it has plenty of issues to resolve, and it may still be some time until it truly delivers on its promises. However, so far it is looking good, and it looks better and better with each new release: Gutenberg is steadily bringing new possibilities to WordPress. As such, this is a great time to reconsider giving Gutenberg a try (that is, if you haven’t done so yet). Anyone somehow dealing with WordPress (website admins, developers, content managers, website users) can benefit from this new normal. I’d say this is something to be excited about, wouldn’t you?
WordPress plugin and theme developers often use transients API to store timely information in your WordPress database.
This allows them to reuse this information and make their plugins function faster. While this is an incredible performance technique, sometimes it may affect your website during testing or development.
For example, you may realize that certain elements like popular posts or Twitter widgets are not changing despite emptying WordPress cache.
That’s usually because the transient for that particular feature is not working as expected. To fix the issue, your options are to wait until transients expire or manually fix it.
In this article, we will show you how to easily manage and delete transients in WordPress.
What is Transients?
The Transients API in WordPress allows developers to store information in your WordPress database with an expiration time. This helps improve WordPress performance and speed up your website while reducing overall server load.
If they didn’t use transients, then your server will need to connect with all social networks on each page load which will slow down your site significantly.
That’s why transients are awesome.
Now you may be wondering, why would you ever want to manage or delete transients?
Well, things can go wrong sometimes. Let’s say a connection between Facebook and your site didn’t go so well, and now it’s showing a count of 0. You can wait 30 minutes or sometimes longer for a transient to expire, or you can clear out the transient cache and get the most accurate count.
It also helps when testing a plugin to make sure that it’s really working like it is supposed to.
WordPress transients are like cookies but only in the sense that they both allow developers to store temporary information. However, transients are much more powerful.
For example, cookies are stored in the user’s browser and have several limitations. They are also less secure and not as programable.
Transients, on the other hand, are stored in the WordPress database, can store different types of data, more secure, and easily programmable with the transients API.
That being said, let’s take a look at how to easily manage transients in WordPress and delete them when needed.
Upon activation, you need to visit Tools » Transients page to view and manage transients used by your WordPress site.
From here you will see a list of transients stored in your WordPress database.
This page lets you perform the following bulk actions:
Delete expired transients
Delete all transients with an expiry date
Delete all transients
You can also look at transients listed below to edit or delete individual transients as needed. You can identify a transient by looking at its name.
Most trusted WordPress theme and plugin developers will use the product name in the transient to make it easily identifiable.
Right next to the name column, you’ll see the value for each particular transient. The transients value could be an object, array, number or alphanumeric string as the value.
You’ll also see an expiration time for each transient. Some of them may not have an expiration time set and will be displayed as ‘Does not expire’.
You can delete any of these transients or click on the Edit button to change their value.
This feature comes in handy when you are testing a theme or plugin and want to check it with different transient values.
We hope this article helped you learn how to easily manage and delete transients in WordPress. You may also want to see our list of most useful WordPress tips, tricks, and hacks for more neat ideas to use WordPress like a pro.
If you liked this article, then please subscribe to our YouTube Channel for WordPress video tutorials. You can also find us on Twitter and Facebook.
UC Browser is not a new application, and many Android users are familiar with this browser. Chinese developers managed to surprise many people around the world by creating a browser that features many possibilities and...