30 Essential WordPress Plugins You Should Install If You Haven’t Already

While WordPress offers a ton of features and flexibility, there is still a lot of functionality missing from the core software. The best way to fill in the missing pieces, of course, is to get yourself the right plugins.

WordPress plugins offer all kinds of customization for site admins; however, with over 55,000 options to choose from in the WordPress Plugin Directory, not to mention all the premium products available, it can be difficult sorting the good from the, well, not so good.

So here’s a collection of free and premium must-haves, the WordPress plugins that can help take your site from good to great. I’ve included options for everything from caching the image optimization to security and more.

  • Hummingbird

    Lightweight and fast, Hummingbird caches, minifies, combines, defers and compresses, making optimizations in line with Google PageSpeed, and turning your site into a lean, mean, speed machine.

    The average visitor to your site won’t wait even eight seconds for your site to load and Google recommends that your site loads within about two seconds.

    If your site takes longer than that, then your visitors are likely going to leave before they even have a chance to check out one element on your site. Plus, Google won’t be keen on ranking you higher in search results.

    Caching is one of the best ways you can speed up your site since it saves a fast-loading version that gets served up in browsers lickety-split. This is where Hummingbird swoops in for the rescue to take care of this for you. Plus, it’s easy to use.

    Hummingbird scans your site, then gives you an analysis of your site. You can see the overall score for your site’s speed, then fix any issues in a couple clicks.

    This plugin also goes above and beyond the clouds because it doesn’t just do page caching. Hummingbird also minifies, compresses and merges.

    This plugin is like the little birdie that tells your site how to fly as fast as a hummingbird. It’s also included in a WPMU DEV membership and you can try Hummingbird for free with a 30-day trial.

  • W3 Total Cache

    W3 Total Cache is designed to increase the page load speed for WordPress sites, which will improve your visitors’ overall experience.

    The plugin helps to increase server performance by reducing download times. By reducing page load times, overall site performance improves which helps your site’s rank in search engines.

    W3 Total Cache can also help to improve web server performance during high traffic periods, which is crucial for larger websites.

    We tested the top caching plugins to find out which was best at improving pagespeed.

    Interested in W3 Total Cache?

  • Defender

    Defender protects you against evil bots and hackers with automated security scans, vulnerability reports, safety recommendations, blacklist monitoring and customized hardening in just a few clicks.

    WordPress is a popular choice for creating websites and this makes it a perfect target for hackers because they can create a bot to infect millions of sites without lifting a finger. It’s not a matter of if your site may be targeted, but when.

    That’s why staying on top of your security game is so important. If you can set up a good defense, you can protect your site from hackers and the Defender plugin helps you do this and more.

    Defender searches your site for vulnerabilities and lets you know if any were found so you can patch them up in a single click. This means installing it can also help you clean up your site if you have been hacked. It also works to harden your site’s security to save you from future disasters in one click. Now that’s a superhero.

    The best part is, you can set it and forget it when you enable scheduled scans. On second thought, the best part may actually be that this plugin is included in a WPMU DEV membership and you can also try Defender for free with a 30-day trial.

  • Jetpack

    Jetpack offers a suite of powerful features for your WordPress site. Enhanced security, improved site performance, plenty of content tools, and visitor engagement features are all part of this plugin.

    Additional features include spam-free Comments, Social Sharing, Related Posts, Post by Email, and much more.

    Jetpack even offers a mobile theme option that is lightweight and responsive, designed for phones and tablets.

  • Akismet

    Akismet helps to filter out any comments on your blog that look like spam. The plugin automatically checks comments against the Akismet Web service.

    All comments will have a history for users to view that shows which comments were flagged or cleared by Akismet. In addition, those comments that were marked as spam or unmarked by a moderator will be highlighted in the history.

  • Google Analytics +

    Tracking how and when users visit your site is important if you want your site to gain popularity since it gives you the opportunity to see where you can make improvements to your site. Google Analytics is an excellent tool for this purpose and the Google Analytics + plugin brings this information right to your admin dashboard.

    Not only can you track visits, page views, bounce rate, average visit duration and referrers, but you can also enable advanced settings to track your site’s demographic and interest for advertising as well as analyze shopping behaviors to boost your products’ performance.

    Also, you can easily track statistics for your entire site or network with the quick setup and easy to understand display.

    Interested in Google Analytics +?

  • Google XML Sitemaps

    This must-have plugin will automatically generate an XML sitemap for your site. Having an XML sitemap is crucial in helping search engines better index your blog.

    With a sitemap, web crawlers can see the structure of your site and retrieve the results more efficiently.

    Search engines like Google, Bing, and Yahoo will be notified every time you create a post about your new content.

    Interested in Google XML Sitemaps?

  • iThemes Security (formerly Better WP Security)

    iThemes Security helps to fix common holes in your WordPress site from potential automated attacks. Many WordPress administrators generally don’t know they have these holes or vulnerabilities, but iThemes Security can help.

    Because of unknown vulnerabilities from other installed plugins, your site can be an easy target for attacks. iThemes Security works to identify and protect these holes in your site.

    Interested in iThemes Security (formerly Better WP Security)?

  • Contact Form 7

    Multiple contact forms can be created and managed through this plugin. No need for extra coding with the Contact Form 7 plugin, as the form and mail contents can be easily customized through the settings.

    The Contact Form 7 also supports Ajax-powered submitting, CAPTCHA, and Akismet filtering to help with spam.

    Check out our post where we compared the top form plugins to each other.

    Interested in Contact Form 7?

  • Snapshot

    Backing up your site can save you from a lot of future grief. Did your site just go down? Was your site just hacked? No problem – just restore your site from a backup and it’s as good as new.

    But what if your backup was lost, compromised, corrupted or accidentally deleted? Do you have a backup of your backup? Most people don’t, but you don’t have to worry about that with Snapshot Pro.

    This plugin can backup your site, but you can also save your backups to multiple locations such as Dropbox, Amazon S3, Google Drive, your computer and more. Backups can also be scheduled so you don’t have to lift a finger to help save your site the next time disaster strikes.

    Try out Snapshot Pro free for 30 days.

  • Branda (the plugin formerly known as Ultimate Branding)

    When you’re running a WordPress site and a business at the same time, you know looking professional is important and just as crucial as your content and products. That’s why being able to turn WordPress into a white labeling machine is a great idea.

    You could replace the WordPress logo for your own, customize the admin bar and add your own company name to achieve consistent branding across your site. This plugin can do all this and more.

    You can completely customize the admin bar, login page, footer, dashboard and everywhere else WordPress logos and branding appears. You can even add your branding to even more places than that. Plus, you don’t have to touch any code.

    It’s easy to set up and use and it works across your entire Multisite network or your single install of WordPress.

    Branda is the only branding plugin you need to turn a WordPress site into your company’s site.

    Interested in Branda (the plugin formerly known as Ultimate Branding)?

  • SmartCrawl

    You work hard creating phenomenal content to draw visitors to your site, but are you really drawing in all the users you could be? Good SEO practices can help, but you can go much further with SmartCrawl.

    This plugin makes your site more visible to search engines by informing web crawlers when your site has important content that needs registering instead of waiting for web crawlers to find you.

    On top of that, SmartCrawl can create a sitemap, customize how your titles and descriptions appear on search engines, add automated keyword linking and you can also view industry leading reports by Moz.

    On top of all that, setting up and using SmartCrawl is quick and easy with the setup wizard. If you want to check it out for yourself, you can do it for free with a 30-day trial or with a WPMU DEV membership.

  • Yet Another Related Posts Plugin

    The Yet Another Related Posts Plugin (YARPP) can display a list of posts or pages that relate to the current post. This feature provides a great opportunity for your readers to see other relevant content from your site.

    Users have the option of displaying only content found on their site or can make extra money by displaying sponsored content.

    Interested in Yet Another Related Posts Plugin?

  • Smush Pro

    Uploading images to use on your site and in posts is an excellent way to grab your visitors’ attention, but they do weigh down your site. They take up a lot of storage space, but most importantly, they slow down your site. Fortunately, you can compress your images to take care of that problem.

    Smush Pro has been benchmarked as the best image compression and image optimization plugin. Not only that, but it works in a way that saves storage space and helps your site load faster without reducing the quality of your images.

    You can compress and optimize images automatically, manually or in bulk and also Super Smush for 10 times the compression power while still not losing out on image quality. It also integrates with NextGEN and WP Retina 2x so photographers need not worry about displaying crisp, stunning images. We’ve also recently added lazy loading to Smush.

    You can try the free version of WP Smush on WordPress.org or try out the premium version for free with a 30-day trial. If you’re already a WPMU DEV member, you already have access to WP Smush Pro so you can check it out and see how easy it is to use and maybe even boast that your site has superpowers.

  • Forminator

    Forminator gives away valuable time-saving and money-making features for nothing. Nada.

    • Integrations with other apps, such as Zapier, Google Sheets and a bunch of email marketing apps.
    • Integrations with popular payment portals for a simple eCommerce solution. In fact, with if you’re using Stripe, you’re really going to love how someone can make a payment without leaving the page.
    • Codeless styling so you can create the look you want without tinkering with CSS.
    • Conditional Logic so you can create dynamic forms.
    • Calculations so your forms can “do the math” for you.

    You get full access to 24 advanced fields so you can get your data validation on. With Forminator’s form preview button, you can view your form as you’re building it and designing it, without having to embed it on a page first to see if it looks right.

    Forminator is also the only free form plugin that allows you to create forms AND polls, submissions, quizzes, and submit blog posts from a form. And it has a powerful API that you can access for free and use to build your own custom extensions.

    Something that’s really important for our European friends is advanced features to help you stay compliant with GDPR. You can adjust how long data is retained, set how long to keep an IP before it is anonymized and there’s even a field for a GDPR checkbox. You’re welcome.

  • Duplicator

    Have you ever needed to backup or move an entire WordPress site from one location to another? The Duplicator plugin can duplicate, backup, move, and transfer a site.

    The plugin can also serve as an easy utility for those administrators looking to backup their sites.

    Need to make a clone of your production site for testing purposes? Yep, the Duplicator plugin is perfect for making a backup of a WordPress site for testing and validation.

  • Relevanssi

    Relevanssi can replace the default search option on your site where results are sorted in order of relevance, instead of by date.

    The plugin is customizable so that it can be setup to do fuzzy matching on partial words. Content can be found by matching on just one search term or it can be required that all words be found.

    There is a free version of Relevanssi that supports a single site, while the premium version offers multi-site support along with other features.

  • Broken Link Checker

    Broken Link Checker monitors the links found in your posts, pages, comments, blogroll, and more. The plugin identifies any broken links that no longer work, missing images, or any redirects.

    Once broken links are identified on your site, links can be edited directly from the plugin page to avoid manually updating each post.

    Interested in Broken Link Checker?

  • Disable Comments

    The Disable Comments plugin enables administrators to globally control comments on their site. Comments can be disabled according to post type, on pages, attachments, etc.

    This plugin works well if you want to disable comments on certain post types or on your entire site. However, if you plan to selectively disable comments on individual posts, then this function is better handled directly through WordPress.

    Interested in Disable Comments?

  • Regenerate Thumbnails

    The Regenerate Thumbnails plugin enables you to regenerate thumbnails for image attachments. You have the option to regenerate the thumbnails for all image uploads, individual images, or specific multiple image uploads.

    This plugin is very helpful if you have altered any of your thumbnail dimensions or have changed to a new theme that features different image dimensions.

    See Default WordPress Image Sizes and How to add Custom Sizes for more.

    Interested in Regenerate Thumbnails?

  • Easy Updates Manager

    Easy Updates Manager enables you to manage all of your WordPress updates for a single site or Multisite install. There are tons of settings included within the plugin making it highly customizable.

    Features include options to automatically update WordPress major and minor releases. Site administrators can also opt to automatically update plugins, themes, and much more.

    Interested in Easy Updates Manager?

  • Redirection

    Redirection can help manage 301 redirects and keep track of 404 errors without digging into .htaccess files. This plugin can be very useful if you are migrating pages from a different website and changing the directory structures of your WordPress installation.

    A redirection can be setup to pass a URL through to another page, file, or website. Any URL can be redirected, not just those that no longer exist.

  • TablePress

    With TablePress, you can easily create tables that can be embedded into posts, pages, or text widgets by using a Shortcode. No special coding is necessary as table data can be entered directly into a spreadsheet interface.

    Tables can contain any type of data, including formulas. Sorting, pagination, and filtering add additional functionality for TablePress. Tables can also be imported and/or exported from/to Excel, CSV, HTML, and JSON formats.

  • Edit Flow

    Edit Flow makes it easy to communicate with your team members directly within WordPress. It can be customized to fit your specific workflow needs.

    Features include a calendar that offers a view of your scheduled content. Custom statuses can be created to define specific stages of your editorial workflow. Writers and editors can have private discussions through editorial comments all from within WordPress.

  • Advanced Custom Fields

    The Advanced Custom Fields plugin gives WordPress users the flexibility to visually create custom fields for their site.

    Custom field input types include: text, textarea, wysiwyg, image, file, page link, post object, relationship, select, checkbox, radio buttons, date picker, true/false, repeater, flexible content, and gallery.

    Interested in Advanced Custom Fields?

  • WP Mail SMTP

    The WP Mail SMTP plugin reconfigures the WordPress delivered mail function to use SMTP. It offers a setup page that enables you to configure various email options. These options include specifying an SMTP host and SMTP port, specifying the from name and email address for outgoing mail, setting SMTP username and password, and more.

    For more on how to use WP Mail SMTP to send emails, see our guide How to Use Gmail to Send WordPress Emails

  • Photo Gallery

    Gallery offers tools that will assist in adding and editing images for different views on your site that are 100% responsive. Photo galleries and albums can be easily added to posts and pages within WordPress as well as to multiple widgets.

    The plugin can also make it easy to rename, upload, remove, and copy images in just a few steps. Image descriptions and tags can also be added through this tool.

    Interested in Photo Gallery?

  • All In One Schema.org Rich Snippets

    The All In One Schema.org Rich Snippets plugin can help give search engines a useful summary of your content to display. These useful snippets of information for your content can help you stand out from your competition.

    The plugin supports the following content types: review, event, people, product, recipe, software application, video, and articles.

    Our ultimate guide to image SEO can tell you more about image schema.

    Interested in All In One Schema.org Rich Snippets?

  • Black Studio TinyMCE Widget

    Black Studio TinyMCE Widget enables you to insert rich text and/or media objects directly into your sidebars without any HTML coding through a visual editor.

    As a default, WordPress text widgets lack the editor capabilities that are offered in posts and pages. The Black Studio TinyMCE Widget overcomes these limitations by providing a clean visual interface to add media and text.

    Those that prefer to switch from a visual editor to HTML (like posts and pages) also have that option.

    Interested in Black Studio TinyMCE Widget?

  • Optimize Database

    By default, WordPress keeps all your deleted posts, pages, comments and all your post revisions, spam comments, unused tags and the like. Until you manually flush your site from all of these excess items, they stick around, bloating and slowing down your site.

    The free Optimize Database plugin purges your database from all the extra table data you don’t need including other stray data such as orphan postmeta items and expired transients. You can choose exactly what you want removed so you don’t accidentally delete items you want to keep.

    Once your database is all cleaned up, it gets to work optimizing your database for an even smoother running site.

    It’s Multisite compatible so you can network activate the plugin and lets you clean and optimize your database in one click each. You can even schedule your database to be automatically optimized on a regular basis so you can keep your database running like a well-oiled machine without having to worry about it.

    Interested in Optimize Database?

20+ Essential and Free Plugins for WordPress

While WordPress offers a ton of features and flexibility, there is still a lot of functionality missing from the core software. The best way to fill in the missing pieces, of course, is to get yourself the right plugins.

WordPress plugins offer all kinds of customization for site admins; however, with over 59,000 free plugins to choose from in the WordPress Plugin Directory, not to mention all the premium products available, it can be difficult sorting the good from the, well, not so good.

So here’s a collection of free and premium must-haves, the WordPress plugins that can help take your site from good to great. I’ve included options for everything from caching, to image optimization, to security, and more.

20+ Essential and Free WordPress Plugins

  1. Hummingbird
  2. Smush
  3. Defender
  4. SmartCrawl
  5. Forminator
  6. Snapshot
  7. Branda
  8. Beehive
  9. HubSpot
  10. Akismet
  11. Yet Another Related Posts Plugin
  12. Relevanssi
  13. Broken Link Checker
  14. Disable Comments
  15. Regenerate Thumbnails
  16. Easy Updates Manager
  17. TablePress
  18. Advanced Custom Fields
  19. WP Mail SMTP
  20. Photo Gallery
  21. Black Studio TinyMCE Widget
  22. Optimize Database

1. Hummingbird

Hummingbird is a lightweight, fast WordPress plugin that optimizes your site’s speed through caching, compressing, and more.
Lightweight and fast, Hummingbird caches, minifies, combines, defers and compresses, making optimizations in line with Google PageSpeed, and turning your site into a lean, mean, speed machine.

The average visitor to your site won’t wait even eight seconds for your site to load and Google recommends that your site loads within about two seconds.

If your site takes longer than that, then your visitors are likely going to leave before they even have a chance to check out one element on your site. Plus, Google won’t be keen on ranking you higher in search results.

Caching is one of the best ways you can speed up your site since it saves a fast-loading version that gets served up in browsers lickety-split. This is where Hummingbird swoops in for the rescue to take care of this for you. Plus, it’s easy to use.

Hummingbird scans your site, then gives you an analysis of your site. You can see the overall score for your site’s speed, then fix any issues in a couple of clicks.

This plugin also goes above and beyond the clouds because it doesn’t just do page caching. Hummingbird also minifies, compresses and merges.

Note: We tested the top caching plugins to find out which was best at improving pagespeed.

This plugin is like the little birdie that tells your site how to fly as fast as a hummingbird. It’s also included in a WPMU DEV membership and you can try Hummingbird Pro at no cost with a free trial.

Details: Hummingbird

2. Smush

Smush - Image compression plugin for WordPress.
Smush is the award-winning plugin that reduces image file size without reducing quality.

Uploading images to use on your site and in posts is an excellent way to grab your visitors’ attention, but they do weigh down your site. They take up a lot of storage space, but most importantly, they slow down your site. Fortunately, you can compress your images to take care of that problem.

Smush has been benchmarked as the best image compression and image optimization plugin. Not only that, but it works in a way that saves storage space and helps your site load faster without reducing the quality of your images.

You can compress and optimize images automatically, manually or in bulk and also Super Smush for 10 times the compression power while still not losing out on image quality. It also integrates with NextGEN and WP Retina 2x so photographers need not worry about displaying crisp, stunning images. We’ve also recently added lazy loading to Smush.

You can try the free version of WP Smush on WordPress.org or try out the premium version on its own for free, or experience the whole suite of premium plugins with a WPMU DEV membership free trial.

If you’re already a WPMU DEV member, you already have access to WP Smush Pro so you can check it out and see how easy it is to use and maybe even boast that your site has superpowers.

Details: Smush

3. Defender

Defender - WordPress security plugin
Defender – The WordPress plugin that protects your site from hackers and malicious bot attacks.

WordPress is a popular choice for creating websites and this makes it a perfect target for hackers because they can create a bot to infect millions of sites without lifting a finger. It’s not a matter of if your site may be targeted, but when.

That’s why staying on top of your security game is so important. If you can set up a good defense, you can protect your site from hackers and the Defender plugin helps you do this and more.

Defender searches your site for vulnerabilities and lets you know if any were found so you can patch them up in a single click. This means installing it can also help you clean up your site if you have been hacked. It also works to harden your site’s security to save you from future disasters in one click. Now that’s a superhero.

The best part is, you can set it and forget it when you enable scheduled scans. On second thought, the best part may actually be that this plugin is included in a WPMU DEV membership and you can try Defender Pro at no cost with a free trial.

Details: Defender

4. SmartCrawl

SmartCrawl - WordPress SEO plugin.
Use SmartCrawl to improve your WordPress site’s SEO.

You work hard creating phenomenal content to draw visitors to your site, but are you really drawing in all the users you could be? Good SEO practices can help, but you can go much further with SmartCrawl.

This plugin makes your site more visible to search engines by informing web crawlers when your site has important content that needs registering instead of waiting for web crawlers to find you.

SmartCrawl is like your SEO Swiss knife. It lets you create sitemaps for your site, add schema markup, customize how your titles and descriptions appear on search engines, set up redirections with regex pattern support, add automated keyword linking,  and view industry-leading reports by Moz.

On top of all that, setting up and using SmartCrawl is quick and easy with the setup wizard.

If you want to check it out for yourself, you can download the plugin for free, or try the Pro version with automated scanning, reports, automatic linking for specific keywords, broken URL checking, 404s, and multiple redirections, plus 24/7 premium support with a WPMU DEV membership free trial.

Details: SmartCrawl

5. Forminator

Forminator - Free form, polls, and quizzes plugin for WordPress.
Forminator is a free WordPress plugin that lets you create professional forms, polls, and quizzes for your site.

Forminator gives away valuable time-saving and money-making features for nothing. Nada.

  • Integrations with other apps, such as Zapier, Google Sheets and a bunch of email marketing apps.
  • Integrations with popular payment portals for a simple eCommerce solution. In fact, if you’re using Stripe, you’re really going to love how someone can make a payment without leaving the page.
  • Codeless styling so you can create the look you want without tinkering with CSS.
  • Conditional Logic so you can create dynamic forms.
  • Calculations so your forms can “do the math” for you.

You get full access to 24 advanced fields so you can get your data validation on. With Forminator’s form preview button, you can view your form as you’re building it and designing it, without having to embed it on a page first to see if it looks right.

Forminator is also the only free form plugin that allows you to create forms AND polls, submissions, quizzes, and submit blog posts from a form. And it has a powerful API that you can access for free and use to build your own custom extensions.

Something that’s really important for our European friends is advanced features to help you stay compliant with GDPR. You can adjust how long data is retained, set how long to keep an IP before it is anonymized and there’s even a field for a GDPR checkbox. You’re welcome.

Check out our post where we compared the top form plugins to each other.

Details: Forminator

6. Snapshot

Snapshot - WordPress backup plugin.
Backup and restore your WordPress sites easily with Snapshot.

Backing up your site can save you from a lot of future grief. Did your site just go down? Was your site just hacked? No problem – just restore your site from a backup and it’s as good as new.

But what if your backup was lost, compromised, corrupted, or accidentally deleted? Do you have a backup of your backup? Most people don’t, but you don’t have to worry about that with Snapshot Pro.

This plugin can backup your site, but you can also save your backups to multiple locations such as Dropbox, Amazon S3, Google Drive, your computer and more. Backups can also be scheduled so you don’t have to lift a finger to help save your site the next time disaster strikes.

Try Snapshot Pro at no cost with a free trial.

Details: Snapshot

7. Branda

Branda - White Label WordPress Plugin
Branda lets you easily customize and brand your WordPress site with powerful white labeling features.

When you’re running a WordPress site and a business at the same time, you know looking professional is important and just as crucial as your content and products. That’s why being able to turn WordPress into a white labeling machine is a great idea.

You could replace the WordPress logo for your own, customize the admin bar, and add your own company name to achieve consistent branding across your site. This plugin can do all this and more.

You can completely customize the admin bar, login page, footer, dashboard, and everywhere else WordPress logos and branding appear. You can even add your branding to even more places than that. Plus, you don’t have to touch any code.

It’s easy to set up and use and it works across your entire Multisite network or your single install of WordPress.

Branda is the only branding plugin you need to turn a WordPress site into your company’s site.

Details: Branda

8. Beehive

Beehive - Google Analytics dashboard for WordPress
Beehive lets you access powerful data insight from Google Analytics reports inside your WordPress dashboard.

Tracking how and when users visit your site is important if you want your site to gain popularity since it gives you the opportunity to see where you can make improvements to your site. Google Analytics is an excellent tool for this purpose and the Beehive plugin brings this information right to your admin dashboard.

Not only can you track visits, page views, bounce rate, average visit duration, and referrers, but you can also enable advanced settings to track your site’s demographic and interest for advertising as well as analyze shopping behaviors to boost your products’ performance.

Also, you can easily track statistics for your entire site or network with the quick setup and easy to understand display.

Details: Beehive

9. HubSpot

Screenshot of HubSpot, a free CRM that lets WordPress users manage all their contacts in one place.
HubSpot’s All-in-One Marketing plugin lets you connect your WordPress website to the free HubSpot CRM so you can organize, track, and nurture your leads and customers.

HubSpot’s WordPress plugin offers a form and pop-up builder with an intuitive drag-and-drop interface so you can capture your visitors’ information, but it does so much more than that.

HubSpot will collect submissions off any form you have on your WordPress website (even if you’ve built them with our free Forminator or Hustle plugins) and automatically add those new leads into your CRM. You can segment your contact database into lists and personalize your emails using any CRM property. And all of this for free! You can report on your email’s overall success and see how each contact interacted with your email campaigns thanks to the built-in analytics.

The plugin also includes a live chat and bot builder so you can begin engaging with visitors and generate leads. You can set up chatbots to answer simple questions that your site visitors have so you can continue engaging your visitors even when you are offline.

Once someone submits their information via a form, popup, or the live chat, you can automate a kickback email to get in touch with that lead and share your content with them.

Details: HubSpot

10. Akismet

Akismet - a comment spam prevention plugin for WordPress.
Akismet protects your WordPress site from comment spam.

Akismet helps to filter out any comments on your blog that look like spam. The plugin automatically checks comments against the Akismet Web service.

All comments will have a history for users to view that shows which comments were flagged or cleared by Akismet. In addition, those comments that were marked as spam or unmarked by a moderator will be highlighted in the history.

Details: Akismet

11. Yet Another Related Posts Plugin

Yet Another Related Posts Plugin for WordPress
YARPP improves visitor engagement and user retention by displaying related posts on your WordPress site.

The Yet Another Related Posts Plugin (YARPP) can display a list of posts or pages that relate to the current post. This feature provides a great opportunity for your readers to see other relevant content from your site.

Users have the option of displaying only content found on their site or can make extra money by displaying sponsored content.

Details: Yet Another Related Posts Plugin

12. Relevanssi

Relevanssi - WordPress search plugin.
Relevanssi replaces the standard WordPress search with a more configurable search feature.

Relevanssi can replace the default search option on your site where results are sorted in order of relevance, instead of by date.

The plugin is customizable so that it can be set up to do fuzzy matching on partial words. Content can be found by matching on just one search term or it can be required that all words be found.

There is a free version of Relevanssi that supports a single site, while the premium version offers multi-site support along with other features.

Details: Relevanssi

13. Broken Link Checker

Broken Link Checker - A plugin for identifying broken links on WordPress sites.
Broken Link Checker scans your website to help you fix broken links and missing images.

Broken Link Checker monitors the links found in your posts, pages, comments, blogroll, and more. The plugin identifies any broken links that no longer work, missing images, or any redirects.

Once broken links are identified on your site, links can be edited directly from the plugin page to avoid manually updating each post.

Details: Broken Link Checker

14. Disable Comments

Disable Comments - A plugin for disabling comments site-wide in WordPress.
Don’t want others commenting on your posts? Use the Disable Comments plugin to prevent site-wide comments in WordPress.

The Disable Comments plugin enables administrators to globally control comments on their site. Comments can be disabled according to post type, on pages, attachments, etc.

This plugin works well if you want to disable comments on certain post types or on your entire site. However, if you plan to selectively disable comments on individual posts, then this function is better handled directly through WordPress.

Details: Disable Comments

15. Regenerate Thumbnails

Regenerate Thumbnails - A WordPress plugin that automatically regenerate all your image thumbnails.
Automatically regenerate image thumbnails in WordPress with the Regenerate Thumbnails plugin.

The Regenerate Thumbnails plugin enables you to regenerate thumbnails for image attachments. You have the option to regenerate the thumbnails for all image uploads, individual images, or specific multiple image uploads.

This plugin is very helpful if you have altered any of your thumbnail dimensions or have changed to a new theme that features different image dimensions.

See Default WordPress Image Sizes and How to add Custom Sizes for more.

Details: Regenerate Thumbnails

16. Easy Updates Manager

Easy Updates Manager - WordPress update management plugin.
Easy Updates Manager lets you manage updates on single-site and WordPress Multisite installations.

If you’re not using WPMU DEV’s The Hub to manage all your WordPress sites, then Easy Updates Manager is a plugin that enables you to manage all of your WordPress updates for a single site or Multisite install. There are tons of settings included within the plugin making it highly customizable.

Features include options to automatically update WordPress major and minor releases. Site administrators can also opt to automatically update plugins, themes, and much more.

Details: Easy Updates Manager

17. TablePress

TablePress - Table creation plugin for WordPress.
Create sortable and scrollable tables in WordPress with TablePress.

With TablePress, you can easily create tables that can be embedded into posts, pages, or text widgets by using a Shortcode. No special coding is necessary as table data can be entered directly into a spreadsheet interface.

Tables can contain any type of data, including formulas. Sorting, pagination, and filtering add additional functionality for TablePress. Tables can also be imported and/or exported from/to Excel, CSV, HTML, and JSON formats.

Details: TablePress

18. Advanced Custom Fields

Advanced Custom Fields - A powerful WordPress customization plugin.
ACF is a powerful and flexible custom fields plugin that lets WordPress users easily customize and expand the functionality of their site.

The Advanced Custom Fields plugin gives WordPress users the flexibility to visually create custom fields for their site.

Custom field input types include: text, textarea, wysiwyg, image, file, page link, post object, relationship, select, checkbox, radio buttons, date picker, true/false, repeater, flexible content, and gallery.

Details: Advanced Custom Fields

19. WP Mail SMTP

WP Mail SMTP - An SMTP and PHP Mailer plugin for WordPress.
WP Mail SMTP makes email deliverability easier for WordPress.

The WP Mail SMTP plugin reconfigures the WordPress delivered mail function to use SMTP. It offers a setup page that enables you to configure various email options. These options include specifying an SMTP host and SMTP port, specifying the from name and email address for outgoing mail, setting SMTP username and password, and more.

For more on how to use WP Mail SMTP to send emails, see our guide How to Use Gmail to Send WordPress Emails

Details: WP Mail SMTP

20. Photo Gallery

Photo Gallery - A WordPress plugin for creating beautiful and mobile-friendly galleries in minutes.
Use Photo Gallery to create beautiful and mobile-friendly galleries quickly and easily.

Gallery offers tools that will assist in adding and editing images for different views on your site that are 100% responsive. Photo galleries and albums can be easily added to posts and pages within WordPress as well as to multiple widgets.

The plugin can also make it easy to rename, upload, remove, and copy images in just a few steps. Image descriptions and tags can also be added through this tool.

Details: Photo Gallery

21. Black Studio TinyMCE Widget

Black Studio TinyMCE Widget - Rich Text and Media plugin for WordPress sidebars.
Black Studio TinyMCE Widget lets you add rich text and media to your sidebars without coding.

Black Studio TinyMCE Widget enables you to insert rich text and/or media objects directly into your sidebars without any HTML coding through a visual editor.

As a default, WordPress text widgets lack the editor capabilities that are offered in posts and pages. The Black Studio TinyMCE Widget overcomes these limitations by providing a clean visual interface to add media and text.

Those that prefer to switch from a visual editor to HTML (like posts and pages) also have that option.

Details: Black Studio TinyMCE Widget

22. Optimize Database

Optimize Database after Deleting Revisions - WordPress database optimization plugin.
Optimize Database after Deleting Revisions keeps your WordPress database optimized.

By default, WordPress keeps all your deleted posts, pages, comments and all your post revisions, spam comments, unused tags and the like. Until you manually flush your site from all of these excess items, they stick around, bloating and slowing down your site.

The free Optimize Database plugin purges your database from all the extra table data you don’t need including other stray data such as orphan postmeta items and expired transients. You can choose exactly what you want removed so you don’t accidentally delete items you want to keep.

Once your database is all cleaned up, it gets to work optimizing your database for an even smoother running site.

It’s Multisite compatible so you can network activate the plugin and lets you clean and optimize your database in one click each. You can even schedule your database to be automatically optimized on a regular basis so you can keep your database running like a well-oiled machine without having to worry about it.

Details: Optimize Database

30 Essential WordPress Plugins You Should Install (2020)

While WordPress offers a ton of features and flexibility, there is still a lot of functionality missing from the core software. The best way to fill in the missing pieces, of course, is to get yourself the right plugins.

WordPress plugins offer all kinds of customization for site admins; however, with over 55,000 options to choose from in the WordPress Plugin Directory, not to mention all the premium products available, it can be difficult sorting the good from the, well, not so good.

So here’s a collection of free and premium must-haves, the WordPress plugins that can help take your site from good to great. I’ve included options for everything from caching the image optimization to security and more.

The 30 Best WordPress Plugins

  1. Hummingbird
  2. HubSpot
  3. W3 Total Cache
  4. Defender
  5. Jetpack
  6. Akismet
  7. Beehive
  8. Google XML Sitemaps
  9. iThemes Security (formerly Better WP Security)
  10. Forminator
  11. Snapshot
  12. Branda (the plugin formerly known as Ultimate Branding)
  13. SmartCrawl
  14. Yet Another Related Posts Plugin
  15. Smush Pro
  16. Contact Form 7
  17. Duplicator
  18. Relevanssi
  19. Broken Link Checker
  20. Disable Comments
  21. Regenerate Thumbnails
  22. Easy Updates Manager
  23. Redirection
  24. TablePress
  25. Advanced Custom Fields
  26. WP Mail SMTP
  27. Photo Gallery
  28. All In One Schema.org Rich Snippets
  29. Black Studio TinyMCE Widget
  30. Optimize Database

1. Hummingbird

Hummingbird is a lightweight, fast WordPress plugin that optimizes your site’s speed through caching, compressing, and more.
Lightweight and fast, Hummingbird caches, minifies, combines, defers and compresses, making optimizations in line with Google PageSpeed, and turning your site into a lean, mean, speed machine.

The average visitor to your site won’t wait even eight seconds for your site to load and Google recommends that your site loads within about two seconds.

If your site takes longer than that, then your visitors are likely going to leave before they even have a chance to check out one element on your site. Plus, Google won’t be keen on ranking you higher in search results.

Caching is one of the best ways you can speed up your site since it saves a fast-loading version that gets served up in browsers lickety-split. This is where Hummingbird swoops in for the rescue to take care of this for you. Plus, it’s easy to use.

Hummingbird scans your site, then gives you an analysis of your site. You can see the overall score for your site’s speed, then fix any issues in a couple of clicks.

This plugin also goes above and beyond the clouds because it doesn’t just do page caching. Hummingbird also minifies, compresses and merges.

This plugin is like the little birdie that tells your site how to fly as fast as a hummingbird. It’s also included in a WPMU DEV membership and you can try Hummingbird for free with a 30-day trial.

Details: Hummingbird

2. HubSpot

Screenshot of HubSpot, a free CRM that lets WordPress users manage all their contacts in one place.
HubSpot’s All-in-One Marketing plugin lets you connect your WordPress website to the free HubSpot CRM so you can organize, track, and nurture your leads and customers.

HubSpot’s WordPress plugin offers a form and pop-up builder with an intuitive drag-and-drop interface so you can capture your visitors’ information, but it does so much more than that.

HubSpot will collect submissions off any form you have on your WordPress website (even if you’ve built them with our free Forminator or Hustle plugins) and automatically add those new leads into your CRM. You can segment your contact database into lists and personalize your emails using any CRM property. And all of this for free! You can report on your email’s overall success and see how each contact interacted with your email campaigns thanks to the built-in analytics.

The plugin also includes a live chat and bot builder so you can begin engaging with visitors and generate leads. You can set up chatbots to answer simple questions that your site visitors have so you can continue engaging your visitors even when you are offline.

Once someone submits their information via a form, popup, or the live chat, you can automate a kickback email to get in touch with that lead and share your content with them.

Details: HubSpot

3. W3 Total Cache

W3 Total Cache - web performance optimization plugin for WordPress.
W3 Total Cache is a WordPress plugin that improves user experience by improving server performance.

W3 Total Cache is designed to increase the page load speed for WordPress sites, which will improve your visitors’ overall experience.

The plugin helps to increase server performance by reducing download times. By reducing page load times, overall site performance improves which helps your site’s rank in search engines.

W3 Total Cache can also help to improve web server performance during high traffic periods, which is crucial for larger websites.

We tested the top caching plugins to find out which was best at improving pagespeed.

Details: W3 Total Cache

4. Defender

Defender - WordPress security plugin
Defender – The WordPress plugin that protects your site from hackers and malicious bot attacks.

WordPress is a popular choice for creating websites and this makes it a perfect target for hackers because they can create a bot to infect millions of sites without lifting a finger. It’s not a matter of if your site may be targeted, but when.

That’s why staying on top of your security game is so important. If you can set up a good defense, you can protect your site from hackers and the Defender plugin helps you do this and more.

Defender searches your site for vulnerabilities and lets you know if any were found so you can patch them up in a single click. This means installing it can also help you clean up your site if you have been hacked. It also works to harden your site’s security to save you from future disasters in one click. Now that’s a superhero.

The best part is, you can set it and forget it when you enable scheduled scans. On second thought, the best part may actually be that this plugin is included in a WPMU DEV membership and you can also try Defender for free with a 30-day trial.

Details: Defender

5. Jetpack

Jetpack by WordPress.com - a multi-purpose WordPress plugin.
Jetpack provides security, performance, and site management for WordPress.

Jetpack offers a suite of powerful features for your WordPress site. Enhanced security, improved site performance, plenty of content tools, and visitor engagement features are all part of this plugin.

Additional features include spam-free Comments, Social Sharing, Related Posts, Post by Email, and much more.

Jetpack even offers a mobile theme option that is lightweight and responsive, designed for phones and tablets.

Details: Jetpack

6. Akismet

Akismet - a comment spam prevention plugin for WordPress.
Akismet protects your WordPress site from comment spam.

Akismet helps to filter out any comments on your blog that look like spam. The plugin automatically checks comments against the Akismet Web service.

All comments will have a history for users to view that shows which comments were flagged or cleared by Akismet. In addition, those comments that were marked as spam or unmarked by a moderator will be highlighted in the history.

Details: Akismet

7. Beehive

Beehive - Google Analytics dashboard for WordPress
Beehive lets you access powerful data insight from Google Analytics reports inside your WordPress dashboard.

Tracking how and when users visit your site is important if you want your site to gain popularity since it gives you the opportunity to see where you can make improvements to your site. Google Analytics is an excellent tool for this purpose and the Beehive plugin brings this information right to your admin dashboard.

Not only can you track visits, page views, bounce rate, average visit duration, and referrers, but you can also enable advanced settings to track your site’s demographic and interest for advertising as well as analyze shopping behaviors to boost your products’ performance.

Also, you can easily track statistics for your entire site or network with the quick setup and easy to understand display.

Details: Beehive

8. Google XML Sitemaps

Google XML Sitemaps - WordPress sitemap generator plugin.
Google XML Sitemaps automatically generates an XML sitemap for your site.

This must-have plugin will automatically generate an XML sitemap for your site. Having an XML sitemap is crucial in helping search engines better index your blog.

With a sitemap, web crawlers can see the structure of your site and retrieve the results more efficiently.

Search engines like Google, Bing, and Yahoo will be notified every time you create a post about your new content.

Details: Google XML Sitemaps

9. iThemes Security

iThemes Security - A security plugin for WordPress.
iThemes Security provides many different security fixes for your WordPress site.

iThemes Security helps to fix common holes in your WordPress site from potential automated attacks. Many WordPress administrators generally don’t know they have these holes or vulnerabilities, but iThemes Security can help.

Because of unknown vulnerabilities from other installed plugins, your site can be an easy target for attacks. iThemes Security works to identify and protect these holes in your site.

Details: iThemes Security

10. Forminator

Forminator - Free form, polls, and quizzes plugin for WordPress.
Forminator is a free WordPress plugin that lets you create professional forms, polls, and quizzes for your site.

Forminator gives away valuable time-saving and money-making features for nothing. Nada.

  • Integrations with other apps, such as Zapier, Google Sheets and a bunch of email marketing apps.
  • Integrations with popular payment portals for a simple eCommerce solution. In fact, if you’re using Stripe, you’re really going to love how someone can make a payment without leaving the page.
  • Codeless styling so you can create the look you want without tinkering with CSS.
  • Conditional Logic so you can create dynamic forms.
  • Calculations so your forms can “do the math” for you.

You get full access to 24 advanced fields so you can get your data validation on. With Forminator’s form preview button, you can view your form as you’re building it and designing it, without having to embed it on a page first to see if it looks right.

Forminator is also the only free form plugin that allows you to create forms AND polls, submissions, quizzes, and submit blog posts from a form. And it has a powerful API that you can access for free and use to build your own custom extensions.

Something that’s really important for our European friends is advanced features to help you stay compliant with GDPR. You can adjust how long data is retained, set how long to keep an IP before it is anonymized and there’s even a field for a GDPR checkbox. You’re welcome.

Details: Forminator

11. Snapshot

Snapshot - WordPress backup plugin.
Backup and restore your WordPress sites easily with Snapshot.

Backing up your site can save you from a lot of future grief. Did your site just go down? Was your site just hacked? No problem – just restore your site from a backup and it’s as good as new.

But what if your backup was lost, compromised, corrupted or accidentally deleted? Do you have a backup of your backup? Most people don’t, but you don’t have to worry about that with Snapshot Pro.

This plugin can backup your site, but you can also save your backups to multiple locations such as Dropbox, Amazon S3, Google Drive, your computer and more. Backups can also be scheduled so you don’t have to lift a finger to help save your site the next time disaster strikes.

Try out Snapshot Pro free for 30 days.

Details: Snapshot

12. Branda

Branda - White Label WordPress Plugin
Branda lets you easily customize and brand your WordPress site with powerful white labeling features.

When you’re running a WordPress site and a business at the same time, you know looking professional is important and just as crucial as your content and products. That’s why being able to turn WordPress into a white labeling machine is a great idea.

You could replace the WordPress logo for your own, customize the admin bar and add your own company name to achieve consistent branding across your site. This plugin can do all this and more.

You can completely customize the admin bar, login page, footer, dashboard and everywhere else WordPress logos and branding appear. You can even add your branding to even more places than that. Plus, you don’t have to touch any code.

It’s easy to set up and use and it works across your entire Multisite network or your single install of WordPress.

Branda is the only branding plugin you need to turn a WordPress site into your company’s site.

Details: Branda

13. SmartCrawl

SmartCrawl - WordPress SEO plugin.
Use SmartCrawl to improve your WordPress site’s SEO.

You work hard creating phenomenal content to draw visitors to your site, but are you really drawing in all the users you could be? Good SEO practices can help, but you can go much further with SmartCrawl.

This plugin makes your site more visible to search engines by informing web crawlers when your site has important content that needs registering instead of waiting for web crawlers to find you.

On top of that, SmartCrawl can create a sitemap, customize how your titles and descriptions appear on search engines, add automated keyword linking and you can also view industry-leading reports by Moz.

On top of all that, setting up and using SmartCrawl is quick and easy with the setup wizard. If you want to check it out for yourself, you can do it for free with a 30-day trial or with a WPMU DEV membership.

Details: SmartCrawl

14. Yet Another Related Posts Plugin

Yet Another Related Posts Plugin for WordPress
YARPP improves visitor engagement and user retention by displaying related posts on your WordPress site.

The Yet Another Related Posts Plugin (YARPP) can display a list of posts or pages that relate to the current post. This feature provides a great opportunity for your readers to see other relevant content from your site.

Users have the option of displaying only content found on their site or can make extra money by displaying sponsored content.

Details: Yet Another Related Posts Plugin

15. Smush Pro

Smush - Image compression plugin for WordPress.
Smush is the award-winning plugin that reduces image file size without reducing quality.

Uploading images to use on your site and in posts is an excellent way to grab your visitors’ attention, but they do weigh down your site. They take up a lot of storage space, but most importantly, they slow down your site. Fortunately, you can compress your images to take care of that problem.

Smush Pro has been benchmarked as the best image compression and image optimization plugin. Not only that, but it works in a way that saves storage space and helps your site load faster without reducing the quality of your images.

You can compress and optimize images automatically, manually or in bulk and also Super Smush for 10 times the compression power while still not losing out on image quality. It also integrates with NextGEN and WP Retina 2x so photographers need not worry about displaying crisp, stunning images. We’ve also recently added lazy loading to Smush.

You can try the free version of WP Smush on WordPress.org or try out the premium version for free with a 30-day trial. If you’re already a WPMU DEV member, you already have access to WP Smush Pro so you can check it out and see how easy it is to use and maybe even boast that your site has superpowers.

Details: Smush Pro

16. Contact Form 7

Contact Form 7 - WordPress Contact Form Plugin
Contact Form 7 lets you easily add contact forms to your WordPress site using shortcodes.

Multiple contact forms can be created and managed through this plugin. No need for extra coding with the Contact Form 7 plugin, as the form and mail contents can be easily customized through the settings.

The Contact Form 7 also supports Ajax-powered submitting, CAPTCHA, and Akismet filtering to help with spam.

Check out our post where we compared the top form plugins to each other.

Details: Contact Form 7

17. Duplicator

Duplicator - Migrations and backups plugin for WordPress.
Need to migrate or back up your WordPress site? Then install and run the Duplicator plugin.

Have you ever needed to backup or move an entire WordPress site from one location to another? The Duplicator plugin can duplicate, backup, move, and transfer a site.

The plugin can also serve as an easy utility for those administrators looking to back up their sites.

Need to make a clone of your production site for testing purposes? Yep, the Duplicator plugin is perfect for making a backup of a WordPress site for testing and validation.

Details: Duplicator

18. Relevanssi

Relevanssi - WordPress search plugin.
Relevanssi replaces the standard WordPress search with a more configurable search feature.

Relevanssi can replace the default search option on your site where results are sorted in order of relevance, instead of by date.

The plugin is customizable so that it can be set up to do fuzzy matching on partial words. Content can be found by matching on just one search term or it can be required that all words be found.

There is a free version of Relevanssi that supports a single site, while the premium version offers multi-site support along with other features.

Details: Relevanssi

19. Broken Link Checker

Broken Link Checker - A plugin for identifying broken links on WordPress sites.
Broken Link Checker scans your website to help you fix broken links and missing images.

Broken Link Checker monitors the links found in your posts, pages, comments, blogroll, and more. The plugin identifies any broken links that no longer work, missing images, or any redirects.

Once broken links are identified on your site, links can be edited directly from the plugin page to avoid manually updating each post.

Details: Broken Link Checker

20. Disable Comments

Disable Comments - A plugin for disabling comments site-wide in WordPress.
Don’t want others commenting on your posts? Use the Disable Comments plugin to prevent site-wide comments in WordPress.

The Disable Comments plugin enables administrators to globally control comments on their site. Comments can be disabled according to post type, on pages, attachments, etc.

This plugin works well if you want to disable comments on certain post types or on your entire site. However, if you plan to selectively disable comments on individual posts, then this function is better handled directly through WordPress.

Details: Disable Comments

21. Regenerate Thumbnails

Regenerate Thumbnails - A WordPress plugin that automatically regenerate all your image thumbnails.
Automatically regenerate image thumbnails in WordPress with the Regenerate Thumbnails plugin.

The Regenerate Thumbnails plugin enables you to regenerate thumbnails for image attachments. You have the option to regenerate the thumbnails for all image uploads, individual images, or specific multiple image uploads.

This plugin is very helpful if you have altered any of your thumbnail dimensions or have changed to a new theme that features different image dimensions.

See Default WordPress Image Sizes and How to add Custom Sizes for more.

Details: Regenerate Thumbnails

22. Easy Updates Manager

Easy Updates Manager - WordPress update management plugin.
Easy Updates Manager lets you manage updates on single-site and WordPress Multisite installations.

Easy Updates Manager enables you to manage all of your WordPress updates for a single site or Multisite install. There are tons of settings included within the plugin making it highly customizable.

Features include options to automatically update WordPress major and minor releases. Site administrators can also opt to automatically update plugins, themes, and much more.

Details: Easy Updates Manager

23. Redirection

Redirection - Link redirection manager for WordPress.
Install the Redirection plugin to help reduce visitors landing on error pages and improve the ranking of your WordPress site.

Redirection can help manage 301 redirects and keep track of 404 errors without digging into .htaccess files. This plugin can be very useful if you are migrating pages from a different website and changing the directory structures of your WordPress installation.

A redirection can be set up to pass a URL through to another page, file, or website. Any URL can be redirected, not just those that no longer exist.

Details: Redirection

24. TablePress

TablePress - Table creation plugin for WordPress.
Create sortable and scrollable tables in WordPress with TablePress.

With TablePress, you can easily create tables that can be embedded into posts, pages, or text widgets by using a Shortcode. No special coding is necessary as table data can be entered directly into a spreadsheet interface.

Tables can contain any type of data, including formulas. Sorting, pagination, and filtering add additional functionality for TablePress. Tables can also be imported and/or exported from/to Excel, CSV, HTML, and JSON formats.

Details: TablePress

25. Advanced Custom Fields

Advanced Custom Fields - A powerful WordPress customization plugin.
ACF is a powerful and flexible custom fields plugin that lets WordPress users easily customize and expand the functionality of their site.

The Advanced Custom Fields plugin gives WordPress users the flexibility to visually create custom fields for their site.

Custom field input types include: text, textarea, wysiwyg, image, file, page link, post object, relationship, select, checkbox, radio buttons, date picker, true/false, repeater, flexible content, and gallery.

Details: Advanced Custom Fields

26. WP Mail SMTP

WP Mail SMTP - An SMTP and PHP Mailer plugin for WordPress.
WP Mail SMTP makes email deliverability easier for WordPress.

The WP Mail SMTP plugin reconfigures the WordPress delivered mail function to use SMTP. It offers a setup page that enables you to configure various email options. These options include specifying an SMTP host and SMTP port, specifying the from name and email address for outgoing mail, setting SMTP username and password, and more.

For more on how to use WP Mail SMTP to send emails, see our guide How to Use Gmail to Send WordPress Emails

Details: WP Mail SMTP

27. Photo Gallery

Photo Gallery - A WordPress plugin for creating beautiful and mobile-friendly galleries in minutes.
Use Photo Gallery to create beautiful and mobile-friendly galleries quickly and easily.

Gallery offers tools that will assist in adding and editing images for different views on your site that are 100% responsive. Photo galleries and albums can be easily added to posts and pages within WordPress as well as to multiple widgets.

The plugin can also make it easy to rename, upload, remove, and copy images in just a few steps. Image descriptions and tags can also be added through this tool.

Details: Photo Gallery

28. All In One Schema.org Rich Snippets

All In One Schema.org Rich Snippets - A WordPress plugin for adding search indexable rich snippets.
Create CTR-boosting rich snippets for your WordPress site with the All In One Schema.org Rich Snippets plugin.

The All In One Schema.org Rich Snippets plugin can help give search engines a useful summary of your content to display. These useful snippets of information for your content can help you stand out from your competition.

The plugin supports the following content types: review, event, people, product, recipe, software application, video, and articles.

Our ultimate guide to image SEO can tell you more about image schema.

Details: All In One Schema.org Rich Snippets

29. Black Studio TinyMCE Widget

Black Studio TinyMCE Widget - Rich Text and Media plugin for WordPress sidebars.
Black Studio TinyMCE Widget lets you add rich text and media to your sidebars without coding.

Black Studio TinyMCE Widget enables you to insert rich text and/or media objects directly into your sidebars without any HTML coding through a visual editor.

As a default, WordPress text widgets lack the editor capabilities that are offered in posts and pages. The Black Studio TinyMCE Widget overcomes these limitations by providing a clean visual interface to add media and text.

Those that prefer to switch from a visual editor to HTML (like posts and pages) also have that option.

Details: Black Studio TinyMCE Widget

30. Optimize Database

Optimize Database after Deleting Revisions - WordPress database optimization plugin.
Optimize Database after Deleting Revisions keeps your WordPress database optimized.

By default, WordPress keeps all your deleted posts, pages, comments and all your post revisions, spam comments, unused tags and the like. Until you manually flush your site from all of these excess items, they stick around, bloating and slowing down your site.

The free Optimize Database plugin purges your database from all the extra table data you don’t need including other stray data such as orphan postmeta items and expired transients. You can choose exactly what you want removed so you don’t accidentally delete items you want to keep.

Once your database is all cleaned up, it gets to work optimizing your database for an even smoother running site.

It’s Multisite compatible so you can network activate the plugin and lets you clean and optimize your database in one click each. You can even schedule your database to be automatically optimized on a regular basis so you can keep your database running like a well-oiled machine without having to worry about it.

Details: Optimize Database

Render Snarky Comments in Comic Sans

Hilarious idea by Zach Leatherman. To test if a comment is "snarky" or not, there is an npm package up to the task.

On this site, we generally just delete snarky comments, but I still run a WordPress plugin that allows me to "feature" or "bury" comments. It's old but it still works fine in the latest WordPress. We use the bury functionality for comments that aren't rude, snarky, or spam, but also don't add much to the post. We try to downplay those so they aren't wasting people's time scrolling through the threads.

I dig the Comic Sans idea, so I'm gonna give it a shot. 😉

Direct Link to ArticlePermalink

The post Render Snarky Comments in Comic Sans appeared first on CSS-Tricks.

Paid Member Subscriptions Pro Review

Paid Member Subscriptions Pro Review
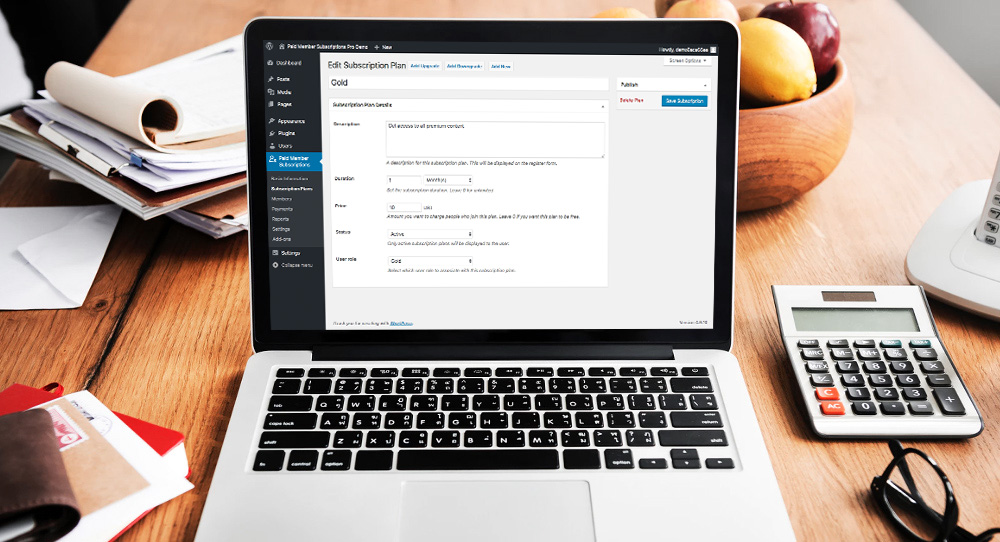
If you’re looking to create a WordPress membership website, you’re in luck. Today we’ll be taking a look at the powerful features of Paid Member Subscriptions Pro. Creating a profitable WordPress membership website is no easy task especially as a beginner. You need a solid plan, and a powerful system to register members and manage […]

The post Paid Member Subscriptions Pro Review appeared first on WPExplorer.

WordCamp Europe 2020 to be Held in Porto, June 4-6

Another successful edition of WordCamp Europe concluded this weekend in Berlin. The event was the largest WordCamp in history, with 3,260 tickets sold and 2,734 attendees present on the ground. WCEU sold 800 more tickets than the previous year in Belgrade. Contributor Day gathered 611 attendees into 25 teams, and approximately 28% of them (169 attendees) were new WordPress contributors.

To cap off the conference, attendees enjoyed a lively celebration Saturday night, donning vintage outfits for an 80’s themed after party at the venue. The party included a controversial show that some attendees found offensive and unwelcoming. WCEU organizers have addressed this issue in a post. According to WordPress community organizer Andrea Middleton, “that part of the show did not match the expectations that they had set with the venue, and was a disappointing surprise.”

Despite the controversial after party show, the event received mostly positive feedback and many attendees reported that it was “best WCEU” they had ever attended.

In addition to breaking records as the largest WordCamp in history, organizers report that the majority of ticket holders (56%) were first time WCEU attendees.

“Berlin is an amazing city and by far one of the most popular locations for remote work in Europe,” 2019 global lead Milan Ivanovic said. “When we add on top the strong German community, with WordCamps across the country and four monthly WordPress meetups in Berlin alone, it was a no brainer that we would have a sold-out event. We also had an amazing line-up of speakers with 3 tracks and 3 workshops, along with on-time information shared to our attendees.”

WordCamp Europe 2020 to be Held in Porto, Portugal

At the conclusion of the event, organizers announced that next year WCEU is coming to Porto, June 4-6. Porto is Portugal’s second largest city, known for its beautiful beaches, port wine exports, bridges, vineyards, charming cobblestone streets, and affordability. It also has a vibrant and growing WordPress community. Portugal is home to Zé Fontainhas, one of the original creators of WordCamp Europe.

Jose Freitas, who will be heading up the local team in Portugal, has been working with WordPress since 2008 and has been involved with the community since 2013. He said the Portuguese WordPress community has been working on its application to host WCEU for three years.

“We are thrilled to have WCEU in Porto next year,” Freitas said. “Portugal is indeed a small country but we have a good WordPress community. At Porto we have had a monthly WordPress Meetup since January 2014, without failing a month. WordPress is growing quickly in Portugal and every day we have people joining our community.”

The greater community is connected on Facebook through the WordPress Portugal group, which has more than 4,400 members.

“We found that for some people, mostly beginners, it’s difficult to start using the support forums,” Freitas said. “So we made a Facebook group and people can ask questions and receive help or feedback related to their projects. Most of the users are people that made their own websites and websites for non profit organizations.”

Up until now, Portugal has hosted one WordCamp per year, alternating between Porto and Lisbon locations. Following 2020, local organizers plan to host two camps per year, and WC Lisboa is expected to be scheduled for October 2020.

The Porto community had formidable competition in its journey to securing the opportunity to host WCEU 2020, beating out Athens, Granada, Manchester, and Torino. Freitas attributes his team’s success to its dedication to improving Porto’s application for the past three years, following a disappointing attempt in 2016.

“First it was only a dream,” Freitas said. “After, it was what if… We applied the first time in 2016 to WCEU 2017. We were in the final decision but the event went to Paris, as we all know. So we started right then the application to 2020.

“We made it better, stronger, complete with all the new requirements. Each WCEU was getting something new and in each one we added the new thing to our documentation. We made a strict budget, with realistic numbers in all parameters. I think that was important for the people who made the selection.”

WCEU 2020 sessions will be held in English. Freitas said the majority of Portuguese people have a good understanding of English and most in the WordPress community are fluent in both languages.

The maximum capacity for the venue is 8,000 people. WCEU’s arrangement for 2020 allows attendance to go up to 4,000, in case the event has another record-breaking year.

“We have a wonderful venue in the city center and surrounded by a garden and a balcony with amazing views of the river and part of the city,” Freitas said.

WCEU 2019 local lead Bernhard Kau will be joining the 2020 team as one of the global leads to provide a smooth transition from one year to the next. Attendees can expect some of the successful aspects of the 2019 event to make a return at next year’s WCEU.

“The additions of WP Cafe and Wellness at WCEU were a big success and I would love to have more space for them at WordCamp Europe 2020 in Porto,” Kau said. “There are also some other ideas helping attendees staying healthy, both physically and mentally.

“As I have never been to Portugal, I am very excited to visit another country. I have met some members of the Portuguese Community on WordCamps throughout Europe and they are some of the most friendly people you can find.”

For those who are considering adding WCEU 2020 in Porto to their calendars, Freitas offered a preview of what attendees can expect:

Imagine yourself… it is June, 3, 2020. There’s one day to go before WCEU.

You go to the city center to know a little of the city. You walk in small and narrow streets and find that some of those have a history of more that a thousand years. You ask some directions, because you don’t want to use smartphone maps, and people are nice and even offer to take you to the place that is only 500 meters way.

You go to the very old part of the city and realize that it wasn’t changed for many, many years. It was not changed because people didn’t want to and because now it’s a UNESCO World Heritage site.

You sit near the river and look at the bridge designed and build by a student of Eiffel (yep, that Eiffel). The sun has made the Douro river look like silver and you finally get why the Romans gave the name of Porto (port) to the place.

It’s time to lunch some tasty and delightful Portuguese food. Don’t skip the dessert. To burn some calories you’ll go to the check the venue.

You pass the old Reitoria building (the place were the university principal used to work) – Porto has the biggest Portuguese university – and see a garden with trees, flowers and even some peacocks.

You enter there and find the way to the venue: it looks like the top of a spaceship, like the ones in the movies. There’s a banner: “WordCamp Europe 2020.”

Now you feel that you’re only a few hours away from the moment you have been waiting for. But, let’s go because you have to see other parts of the city.

The next day, you join hundreds of WordPress people who are helping the community in Contributor Day. There is a lot to do before the two conference days and workshops, before visiting the sponsors area, before meeting some of the nice folks that you didn’t see since last year, before making new friends.

After all, it’s possible to make new friends in an event of thousands of people.

WordCamp Europe is made possible every year by a massive team of organizers and volunteers who help keep costs low, in addition to sponsors.

The 2020 team put out the call for organizers after announcing the host city. In the first 24 hours, the team has already received 30 applications. The deadline to apply is July 15, 2019. Calls for sponsors, volunteers, and speakers will come after organizers are selected, as the year-round work of organizing WCEU continues again for 2020.

How to read the attributes of an XML file with VB.Net

Hello friends
I would love to have your help with a blocking for hours.
In summary, I have to read an XML file and retrieve information with the VB.Net language.
I would like to recover the "name", the "checkvalue" and the "compositekey"
That's the structure of my xml file:
<supercollection name="BF000000.hks"> <collections> <collection maxdukptkeyindex="17" maxmskeyindex="13" merchantid="" applicationcertificate="Only Collection Certificate" applicationname="Only Collection Application" name="Only Collection"> <mskeys> <key index="1" checkvalue="E8F71A" variantindex="0" verifycheckvalue="yes" keylength="32" compositekey="BA03BDBDF091092C26B9D22A2922F504" usage="1" encryptionmode="TECB" name="Key"> <type>Master</type> </key> </mskeys> <dukptkeys></dukptkeys> </collection> </collections> </supercollection>

Building a Conference Schedule with CSS Grid

It’s hard to beat the feeling of finding a perfect use for a new technology. You can read every handy primer under the sun and ooh-and-ahh at flashy demos, but the first time you use it on your own project… that’s when things really click.

I gained a new appreciation for CSS Grid when building a flexible layout for a conference schedule. The needs of the project aligned perfectly with grid’s strengths: a two-dimensional (vertical and horizontal) layout with complex placement of child elements. In the process of building a proof of concept, I found a few techniques that made the code highly readable and outright fun to work with.

The resulting demo included some interesting uses of CSS Grid features and forced me to grapple with some details of grid you don’t run into in every day.

Before we get started, it might be a good idea to keep another tab open with the CSS-Tricks guide to CSS Grid to reference the concepts we cover throughout the post.

Defining our layout requirements

I set out to create the following layout thanks to WordCamp, the hundreds of WordPress-focused conferences that happen around the world each year. These varied events range in size and format, yet all use the same schedule layout tool.

A schedule with 4 tracks of presentations (columns) and 6 times slots. The length of sessions vary, and some talks span multiple tracks.
The final layout we’ll build.

I helped schedule a couple WordCamps and styled a WordCamp website, so I knew the shortcomings of the existing HTML table layout. If your schedule didn’t fit in a uniform grid, well…¯\_(ツ)_/¯

Setting out to find a better way, I started by listing the layout requirements:

  • Sessions of variable length (limited to set time increments)
    Imagine back-to-back one-hour talks in three rooms alongside a two-hour workshop in another.
  • Sessions spanning one or more "Tracks"
    Tracks are usually associated with a specific room in the venue. In the case of my local WordCamp in Seattle, the venue can literally remove a wall to combine two rooms!
  • Schedule can include empty space
    A last-minute cancellation or extra-short session creates gaps in a schedule.
  • Design is easy to customize with CSS
    WordCamp websites allow theming only via CSS.
  • Layout can be automatically generated from CMS content
    Since we’re building a layout from structured session data on thousands of websites, we can’t rely on any HTML or CSS that’s too clever or bespoke.

Getting started: Solid HTML

Before I write any CSS, I always start with rock-solid HTML.

The top-level <div> will have a class of .schedule and serve as the grid parent. Each unique start time gets its own heading followed by all sessions starting at that time. The markup for each session isn’t very important, but make sure that seeing the layout isn’t required to understand when and where a session happens. (You’ll see why in a moment.)

<h2>Conference Schedule</h2>
<div class="schedule">

  <h3 class="time-slot">8:00am</h3>
  <div class="session session-1 track-1">
    <h4 class="session-title"><a href="#">Session Title</a></h4>
    <span class="session-time">8:00am - 9:00am</span>
    <span class="session-track">Track 1</span>
    <span class="session-presenter">Presenter Name</span>
  </div>
  <!-- Sessions 2, 3, 4 -->

  <h3 class="time-slot">9:00am</h3>
  <div class="session session-5 track-1">
    <h4 class="session-title"><a href="#">Session Title</a></h4>
    <span class="session-time">9:00am - 10:00am</span>
    <span class="session-track">Track 1</span>
    <span class="session-presenter">Presenter Name</span>
  </div>
  <!-- Sessions 6, 7, 8 -->

  <!-- etc... -->

</div> <!-- end .schedule -->

Mobile layout and grid fallback complete!

Adding in a bit of up-to-you CSS to make things pretty, our mobile layout and fallback for browsers that don’t support CSS Grid is already complete!

Here’s how mine looks with the colors I used:

People on phones, zooming in their browsers, or even using Internet Explorer will have no problem finding their favorite sessions at this conference!

Adding the grid layout

Now for the actual CSS Grid part!

My ah-ha moment when building this came from reading Robin’s article here on CSS-Tricks, "Making a Bar Chart with CSS Grid." TL;DR: One grid row represents 1% of the chart's height, so a bar spans the same number of rows as the percentage it represents.

.chart {
  display: grid;
  grid-template-rows: repeat(100, 1fr); /* 1 row = 1%! */
}

.fifty-percent-bar {
  grid-row: 51 / 101; /* 101 - 51 = 50 => 50% */
}

That helped me realize that grid is perfect for any layout tied to some regular incremental unit. In the case of a schedule, that unit is time! For this demo, we’ll use increments of 30 minutes, but do whatever makes sense for you. (Just watch out for the Chrome bug that limits Grid layouts to 1000 rows.)

The first version I tried used similar syntax to the bar chart in Robin’s and some basic math to place the sessions. We’re using eight rows because there are eight 30-minute increments between 8 a.m. and 12 p.m. Remember that implicit grid line numbers start at one (not zero), so the grid rows are numbered one through nine.

A 5 row grid with numbered lines, 1-6.
A rudimentary version of a single column schedule with numbered grid lines. (View Demo: Numbered Gridlines vs. Named Gridlines)
.schedule {
  display: grid;
  grid-template-rows: repeat(8, 1fr);
}

.session-1 {
  grid-row: 1 / 3; /* 8am - 9am, 3 - 1 = 2 30-minute increment */
}

.session-2 {
  grid-row: 3 / 6; /* 9am - 10:30am, 6-3 = 3 30-minute increments */
}

The problem with this technique is that placing items on a grid with a lot of rows is very abstract and confusing. (This issue added a ton of complexity to Robin’s bar chart demo, too.)

This is where named grid lines come to the rescue! Instead of relying on grid line numbers, we can give each line a predictable name based on the corresponding time of day.

A 5 row grid with rows named for the time. Example: time-0800
By using named grid lines for the schedule, it becomes much easier to place a session. (View Demo: Numbered Gridlines vs. Named Gridlines)
.schedule {
  display: grid;
  grid-template-rows:
    [time-0800] 1fr
    [time-0830] 1fr
    [time-0900] 1fr
    [time-0930] 1fr;
    /* etc...
        Note: Use 24-hour time for line names */
}

.session-1 {
  grid-row: time-0800 / time-0900;
}

.session-2 {
  grid-row: time-0900 / time-1030;
}

That is gloriously easy to understand. There is no complicated math to figure out how many rows there are before and after a session starts or ends. Even better, we can generate grid line names and session layout styles with information stored in WordPress. Throw a start and end time at the grid, and you’re good to go!

Since the schedule has multiple tracks, we’ll need a column for each one. The tracks work in a similar way to the times, using named track lines for each grid column line. There’s also an extra first column for the start time headings.

.schedule { /* continued */
  grid-template-columns:
    [times] 4em
    [track-1-start] 1fr
    [track-1-end track-2-start] 1fr
    [track-2-end track-3-start] 1fr
    [track-3-end track-4-start] 1fr
    [track-4-end];
}

Here though, we take named grid lines one step further. Each line gets two names: one for the track it starts and one for the track it ends. This isn’t strictly necessary, but it makes the code much clearer, especially when a session spans more than one column.

With the time- and track-based grid lines defined, we can now place any session we want just from knowing it’s time and track!

.session-8 {
  grid-row: time-1030 / time-1100;
  grid-column: track-2-start / track-3-end; /* spanning two tracks! */
}

Putting that all together, we get some lengthy but extremely readable code that is a real joy to work with.

@media screen and (min-width: 700px) {
  .schedule {
    display: grid;
    grid-gap: 1em;
    grid-template-rows:
      [tracks] auto /* Foreshadowing! */
      [time-0800] 1fr
      [time-0830] 1fr
      [time-0900] 1fr
      [time-0930] 1fr
      [time-1000] 1fr
      [time-1030] 1fr
      [time-1100] 1fr
      [time-1130] 1fr
      [time-1200] 1fr;
    grid-template-columns:
      [times] 4em
      [track-1-start] 1fr
      [track-1-end track-2-start] 1fr
      [track-2-end track-3-start] 1fr
      [track-3-end track-4-start] 1fr
      [track-4-end];
  }

  .time-slot {
    grid-column: times;
  }
}
<div class="session session-1 track-1" style="grid-column: track-1; grid-row: time-0800 / time-0900;">
  <!-- details -->
</div>
<div class="session session-2 track-2" style="grid-column: track-2; grid-row: time-0800 / time-0900">
  <!-- details -->
</div>
<!-- etc... -->

The final code uses inline styles for session placement which feels right to me. If you don’t like this and are working with more modern browsers, you could pass the line names to CSS via CSS variables.

Quick note: using fr units versus the auto value for row heights

One detail worth noting is the use of the fr unit for defining row heights.

When using 1fr to determine row heights, all rows have the same height. That height is determined by the content of the tallest row in the schedule. (I had to read the W3C spec for fr to figure this out!) That produces a beautiful schedule where height is proportional to time, but can also lead to a very tall layout.

A grid with 5 rows of equal height. The height matches the tallest row containing 3 lines of text.
Using 1fr produces equal-height rows determined by the tallest row in the grid. (View Demo: Grid row heights 1fr vs auto)

For example, if your schedule grid has 15-minute increments from 7 a.m. to 6 p.m., that’s a total of 48 grid rows. In that case, you probably want to use auto for your row height because the schedule is much more compact with each grid row's height determined by its content.

A grid with 5 rows of unequal height. Each row contains its content.
Using auto makes each row the height of its content. (View Demo: Grid row heights 1fr vs auto)

A word about accessibility

There are real concerns about the accessibility of certain CSS Grid techniques. Specifically, the ability to change the order of information visually in ways that don’t match the source order causes problems for people using keyboard navigation.

This layout uses that ability to arbitrarily place items on a grid, so some caution is warranted. However, because the heading and source order align with the visualization of start times, this seems like a safe use to me.

If you’re inspired to do something similar, carefully consider accessibility. It makes sense to order information by time in this case, but I can imagine a legitimate case for TAB order to go down columns rather than across rows. (Modifying this demo to do that shouldn’t be too hard!)

Whatever you do, always consider accessibility.

Adding sticky track names

Finally, it’s time to add in the track names that look like table headers at the top of each column. Since a session’s track is already visible, I chose to hide the "headers" from assistive technology with aria-hidden="true".

The track names go in the first grid row, conveniently named "tracks." As long as you don’t have any weird overflow issues, position: sticky keeps those in view while you scroll.

<span class="track-slot" aria-hidden="true" style="grid-column: track-1;">Track 1</span>
<span class="track-slot" aria-hidden="true" style="grid-column: track-2;">Track 2</span>
<span class="track-slot" aria-hidden="true" style="grid-column: track-3;">Track 3</span>
<span class="track-slot" aria-hidden="true" style="grid-column: track-4;">Track 4</span>
.track-slot {
  display: none; /* only visible with Grid layout */
}

@supports( display:grid ) {
  @media screen and (min-width:700px) {    
    .track-slot {
      grid-row: tracks;
      display: block;
      position: sticky;
      top: 0;
      z-index: 1000;
      background-color: rgba(255,255,255,.9);
    }
  }
}

It’s a slick little finishing touch to the final demo. ✨

The result

Here’s how things look with everything we’ve covered put together!

See the Pen
Conference Schedule with CSS Grid
by Mark Root-Wiley (@mrwweb)
on CodePen.

We’re just getting started

This schedule is definitely the most satisfying use of CSS Grid I’ve ever made. I love how "data-driven" and semantic the line naming is, and the accessibility and CMS requirements fit in perfectly without any inconvenience.

The only question left for me is what other types of "data-driven" grids are out there to build? I’ve seen some great calendar layouts and here’s a Monopoly board layout. What about a football field, a timeline, restaurant tables, or theater seats? What else?

The post Building a Conference Schedule with CSS Grid appeared first on CSS-Tricks.

How to Open External Links in a New Window or Tab with WordPress

Do you want to open external links from your blog posts in a new browser window or tab?

Opening external links in a new window allows your users to visit the link without leaving your website. This leads to higher user engagement because they spend more time on your site.

In this beginner’s guide, we will show how to easily open external links in a new window or tab on your WordPress site.

How to Open External Links in a New Window or Tab With WordPress

Why Open External Links in a New Window or Tab?

External links are links to websites that you don’t own or control. Normally, if you add a link to an external website, your visitors will simply leave your site by clicking on the link.

While some user experience experts say that you shouldn’t open external links in a new window or tab, we don’t agree.

You see, most users easily forget the last website they were visiting. If clicking a link takes them away from your WordPress website to a new site, then they may never return.

For a better user experience, we recommend opening external links in a new window (in older browsers) or a new tab (in modern browsers). This way, the original web page is not lost, and users can resume browsing your website by switching back.

Another benefit of opening external links in a new tab is increased page views and user engagement on your site. Users who spend more time on your site are more likely to sign up for your email newsletter, follow you on social media, leave a comment, and buy your products.

That being said, let’s take a look at how to easily open external links in a new window or tab in WordPress. We’ll cover different methods so that you can choose the one that best suits you.

The WordPress block editor has a built-in feature that lets you open external links in a new tab. In recent versions of WordPress, this option is visible when adding a link.

Simply edit the blog post or page where you want to add an external link. Next, select the text you want to link and then click on the ‘Link’ button. You can also press the shortcut key CTRL+K on Windows or Command+K on Mac.

Adding a Link in the Block Editor

This will bring up the insert link popup. Simply enter the link and press Enter. After that, you need to toggle the ‘Open in new tab’ option to the On position.

The Open in New Tab Option in the Block Editor

The link will now open in a new tab.

If you are still using the classic editor, then we recommend you start using the new editor. It’s modern, faster, and includes many new features that you are missing out on.

However, if you still want to use the classic editor, then this is how you add a link that opens in a new tab.

First, you need to edit the post or page where you want to add the link. Next, select the text that you want to link (also known as the anchor text) and then click the ‘Insert/edit link’ button.

Add new link in classic editor

A popup will appear where you can add your external link.

After that, click on the gear icon next to it. This will bring up the advanced insert link popup.

Open link in new tab using the classic editor

From here, you need to check the ‘Open link in a new tab’ option. After that, you should click the ‘Update’ button at the bottom to add your link.

Sometimes you may need to write HTML to add a link in WordPress. For example, you will need to do this when using the HTML mode in the new block editor or adding a link in a WordPress theme template file.

You can add the link using HTML code like this:

 <a href="http://example.com" target="_blank" rel="noopener">Link Text</a>

The target="_blank" parameter in this code tells browsers to open the link in a new window or tab. Simply replace ‘example.com’ with the external link URL and ‘Link Text’ with the anchor text you wish to use.

On your WordPress website, you can add external links in your site’s navigational menu. How you do this depends on whether you are using a traditional theme or a block theme.

Opening Nav Menu Links in a New Tab for Traditional Themes

To open your outbound menu links in a new tab, head over to Appearance » Menu from your WordPress admin area.

Next, click the ‘Screen Options’ button at the top right corner of your screen.

Open screen options

When you click the button, you’ll now see more options.

Go ahead and check the option for ‘Link Target’ under ‘Show advanced menu properties.’

Select Link Target option

After that, you can add a Custom Link to your navigational menu by entering the URL, Link Text, and clicking the ‘Add to Menu’ button.

Your Custom Link will now appear in the Menu Structure column. You can now select the option for ‘Open link in a new tab’ to open your external link in a different tab.

Open external link in a new tab in menu

Once you’re done, click the ‘Save Menu’ button at the bottom.

Opening Nav Menu Links in a New Tab for Block Themes

If you are using a new block theme, then you will need to navigate to Appearance » Themes and use the Full Site Editor to open your outbound menu links in a new tab.

You need to click on the header area at the top of the page, and the header will be selected. Next, click on the navigation area just to the left of the menu. The menu will be selected, and you should see a ‘+’ sign at the end of the menu where you can add a new link.

Select the Navigation Block and Click the + Icon

Tip: Selecting blocks in the Full Screen Editor can be tricky, so many users find it easier to use List View. Simply click the icon at the top of the screen, then find and select the Navigation block. It may be nested inside other blocks, such as Header and Group.

Now you need to click the ‘+’ icon to open a popup where you can add a link. Type the URL in the field at the top, and make sure you toggle ‘Open in new tab’ to the On position. Next, click the ‘Submit’ icon next to the URL to store your settings.

Toggle the 'Open In New Tab' Option On

Once you’ve done that, don’t forget to click the ‘Save’ button at the top of the screen.

It may sound like extra work to manually check the option for every external link that you add. However, over time you will get used to it.

If you run a multi-author blog or often forget to make external links open in a new tab, then you can use a plugin for that.

First, you need to install and activate the Open External Links in a New Window plugin. For more details, see our step-by-step guide on how to install a WordPress plugin.

The plugin works out of the box, and it will automatically open external links in a new window.

It does not actually change the external links in your blog posts. Instead, it uses JavaScript to open external links in a new window.

Note: Deactivating the plugin will stop external links from opening in a new window.

We hope this article helped you learn how to easily open external links in a new window in WordPress. You may also want to see our guide on how to create a free business address, or check out our expert picks of the most useful WordPress tips, tricks, and hacks that you can use on your website.

If you liked this article, then please subscribe to our YouTube Channel for WordPress video tutorials. You can also find us on Twitter and Facebook.

The post How to Open External Links in a New Window or Tab with WordPress first appeared on WPBeginner.

The Top 5 Myths About Being a Freelance Web Designer

Starting a business is one of the biggest leaps of faith you’ll ever take. And it seems like more people in the web design and development fields make this move every day.

Why? Well, it’s an attractive proposition. Web design isn’t a particularly expensive business to get into. While you can use brand-name tools, there are plenty of free and low-cost alternatives. Server space is relatively cheap. And, so long as you have a decent broadband connection, you can work from home.

With such a low barrier for entry, working as a freelancer has become quite a mainstream thing to do. However, when I started my business back in 1999, I got used to seeing stunned reactions from people when they learned that I worked for myself in my own home office. My, how times have changed.

Yet, one thing that hasn’t quite evolved are the myths associated with freelancing. When speaking with folks who are thinking of taking the plunge or just starting their journey, I often hear many of the same assumptions that I myself put forth many years earlier.

As many of these notions are still prevalent, I thought it would be worthwhile to examine a few of the most common ones a little more closely and set the record straight.

Myth #1: You Can Work Whenever You Want

One of the most common misconceptions about being a freelance web designer is that you can simply set any type of work schedule you like. For instance, you might want to set your regular business hours in the evening, because that’s when you feel most productive. However, depending on the type of clients you hope to attract, this isn’t always realistic.

As my business got off the ground, I assumed that I could go missing for several hours during the day and just make up for the time later on. But it didn’t take long to realize that my clients worked a normal business day, and they expected me to be available throughout that time.

Taking care of clients is one of the biggest keys to finding success. Therefore, it’s important to consider their needs when determining your work schedule. It may be possible to keep those evening hours, but then again it may not.

A man working on a laptop, while sitting on a park bench at night.

Myth #2: You’ll Make Lots of Money Right Away

Earnings potential is a big reason why you may decide to go freelance. But the key word here is potential. Certainly, it’s possible to make a good living. However, it usually doesn’t happen overnight.

There are so many factors that go into a freelancer’s income. Your skill/experience level, specialties and the type of projects you book all play a role. If you tend to work with locally-based clients, your market can also affect how much you make.

And even if you have talent and desirable skills, it can still take several years of very steady work to raise your income to a comfortable level. It is very much an attainable goal – just don’t expect to get there instantly (without a million-dollar idea, anyway).

Instead of trying to get rich quickly, focus on building a roster of clients who can provide you with recurring work and revenue. This approach may be slower, but it also provides the foundation you need in order to grow.

A man holding a piggy bank.

Myth #3: There’ll Be No More ‘Boss’

Freelancers love to say that we are our “own boss”. That’s true, in the sense that ultimately, it’s up to us to make all of the hard decisions. And sure, nobody is necessarily standing over our shoulder, watching us work.

But in my experience, it became evident early on that I no longer had a single boss – but several. I’ve found that each client fills a similar role in their own way. Instead of having to please perhaps just one or two people, I now have to consistently please dozens different entities.

This can be quite difficult to pull off. You need good organization and communication skills, along with a solid work ethic. Otherwise, you may just have several bosses yelling at you – as opposed to that single figure with the corner office.

A security camera.

Myth #4: You Can Fully Focus on Doing What You Love

When you work for someone else, it can be frustrating when you’re stuck performing tasks that you don’t enjoy. If you love being creative or solving problems through code, then you probably loathe engaging in “grunt work”.

Freelancing can be seen as an escape from that – only it’s not. In fact, you are not only responsible for the menial tasks related to your actual job, but the ones related to running a business as well. Bookkeeping, marketing and customer service may not be your cup of tea – but they’re most likely going to find their way into your daily agenda.

The only way to avoid some of these tasks is to hire someone else to take care of them. It just takes the financial resources to do so – something not everyone has. This is especially true early on.

Therefore, it’s best to create processes to do these no-fun tasks in the most efficient way possible. That will at least save you some extra time to tackle the fun stuff.

Financial documents on a desk.

Myth #5: You Know Exactly What You’re Getting Into

When starting my business, I did so without so much as a plan. Whether it was hubris or just plain ignorance, I believed that I knew what I was doing. But I was in for some important lessons.

The fact is, I didn’t know nearly as much as I’d thought. And, more than 20 years on, I can now sit back and laugh at how sure of myself I was back then. There have been so many highs and lows, along with truly valuable experiences. Not to mention some amazing relationships that have come along the way. In all, it’s been very humbling.

The point being that, no matter what we think will happen, running a business tends to take a lot of unexpected twists and turns. And it can actually be a very positive thing. It can take you outside of your comfort zone and make you even better at what you do.

A woman reviewing business strategy.

Fact: You Can Do It!

Maybe some of the myths mentioned above sound scary – and they are. Starting off on your own isn’t exactly the easiest thing. It’s full of risks and things don’t always work out the way you hope.

But, as they say, nothing worth doing is easy. Just keep in mind that it takes patience, commitment and talent to succeed over the long haul. An open mind helps, too.

So, don’t let those challenges stop you from taking a chance. Instead, use them as motivation to achieve your goals.

PayPal vs. Stripe For Ecommerce

As I’m sure you’ve figured out by now, building a website takes lots of hard work. This is even more so the case for those of you who are creating an ecommerce site.

In addition to your website design, architecture, and all of the standard website elements, you also need to figure out how you’re going to accept payments online.

If you’ve never done this before and you’re just starting some preliminary research, there’s a good chance that you’ll come across two names; PayPal and Stripe. These are both industry leaders in the online payment processing industry.

Both platforms will essentially let your customers buy products or services from your ecommerce shop, but the way that these services are provided are different from platform to platform.

So what’s the difference between PayPal and Stripe? Is PayPal or Stripe better for accepting payments online? These are questions that I hear all of the time when I’m consulting with ecommerce companies.

Truthfully, you probably can’t go wrong with either one. But with that said, I want to give you as much information as possible about each platform so you can decide which one is right for your ecommerce business.

Basics of payment gateways

Before we continue, I want to make sure you understand exactly how PayPal and Stripe work. There are two terms you need to know:

  • Payment gateway
  • Payment service provider

Payment gateways give ecommerce sites the capability to accept payments online. These gateways are like a middleman between a business payment processor and credit card network. PayPal and Stripe both have payment gateways, which you’ll need if you’re planning to authorize online payments.

A payment service provider (or PSP for short) on the other hand is a bit more involved. PayPal and Stripe are both PSPs as well. They link businesses with merchant accounts by providing the technology required to process online payments, as well as other forms of payment.

PayPal and Stripe group all of their merchants into one account, as opposed to each business having a dedicated account.

Basically, both of these platforms have everything you need to authorize payments as an ecommerce website.

PayPal for ecommerce

Paypal for Ecommerce

Even if you have no prior experience with running an ecommerce website, PayPal is definitely a name that you’ve heard before.

The company has always been known for payment processing. They have the reputation for being a safe and secure way for PayPal users to buy from merchants using a PayPal balance as well as a debit or credit account linked to their PayPal profile.

But PayPal offers much more features and services to accommodate ecommerce shops. So the days of PayPal only being suitable for things like eBay or other P2P payment situations are long behind us. Now they have a variety of plans for launching a business, whether you want to sell online, in person, or both.

You’ll be able to accept payments from credit cards, debit cards, PayPal credits, PayPal accounts, and Venmo as well.

With PayPal, you can design your own shopping cart. They have customizable solutions that are fully scalable for growing businesses.

PayPal offers three main plans for you to choose from. I’ll cover each one in greater detail below.

PayPal Checkout

Paypal Checkout

For those of you who already have an existing payment processor that you’re using to accept credit cards on your ecommerce site, PayPal Checkout might be a good option for you to consider.

Basically, you can just add the PayPal button to your current payments page with this supplemental plan. It’s easy to integrate with your existing ecommerce platform. Once the button is added, your customers will be able to use PayPal, PayPal credits, or Venmo to buy from your online store.

Conversion rates are up to 82% higher when PayPal Checkout is added to ecommerce sites. That’s because shoppers can complete the purchase in just a click or two, if they have PayPal on their phones or if they’re already logged into PayPal on their computers.

There is no setup fee or monthly fee for this plan. PayPal charges merchants 2.9% + $0.30 per transaction in the United States.

PayPal Payments Standard

The PayPal Payments Standard plan is made for merchants who don’t have an existing payment processor or want to switch providers.

In addition to the PayPal payment options, you’ll also be able to accept Visa, Mastercard, American Express, and Discover cards. Adding the button to your website is as simple as copying and pasting some code. The checkout pages will be hosted by PayPal.

This plan will cost you 2.9% + $0.30 per US transaction. There are no monthly fees or setup fees for the Payments Standard plan.

PayPal Payments Pro

Payments Pro is the top-tier plan offered by PayPal. It allows you to create a fully customizable checkout experience on your ecommerce site.

Unlike the Payments Standard plan, website visitors won’t have to leave your site to complete the checkout process. It also has a mobile-optimized checkout process and easy shopping cart integration. Payments Pro gives you a virtual terminal, which makes it possible to accept payments over the phone as well.

With the added features, this plan costs $30 per month, plus the standard 2.9% + $0.30 per transaction.

Stripe for ecommerce

Stripe for Ecommerce

Unlike PayPal, Stripe doesn’t have their services segmented into tiered plans. Stripe’s payment processing will be the same, regardless of what features you’re taking advantage of.

With that said, depending on which tools you want to use, it will cost more. But the nice part about this is that you’re only going to be charged for the features that you actually want, as opposed to paying for a plan that includes tools you don’t need.

You can easily add Stripe to your ecommerce site with just one simple integration.

Once that happens, the platform makes it easy for you to accept payments, process them, settle, and reconcile. You’ll be able to process credit cards and ACH transfers both online and via mobile app payments. In fact, big mobile app brands like Lyft are already using Stripe.

Stripe lets you build a checkout process from scratch, or select one of their pre-built templates.

The platform has features for invoicing and setting up recurring payments for subscriptions as well. Let’s take a look at some of those add-on features I was talking about earlier.

Connect

Stripe Connect is made so that marketplaces and platforms can accept money and pay it out to third parties. It supports ecommerce sites, crowdfunding, on-demand businesses, and travel or event platforms.

Take advantage of Stripe’s UI components that are pre-built, or use their tools to create and customize everything on your own.

Sigma

Sigma helps businesses analyze data from stripe using SQL. It can help improve the efficiency of business operations, finance departments, data teams, and product management.

It’s a great way for you to get to know your business better with data. Then you can make necessary adjustments based on your findings. Pricing for Stripe Sigma varies based on the volume of monthly charges.

Atlas

Stripe Atlas is made for those of you who are starting an online business from scratch. The startup toolkit guides you through the process of forming a company, establishing IP ownership, filling out the right documents, and getting a tax ID number from the IRS.

Stripe Atlas

Atlas also sets you up with a new bank account and debit card for your business.

There is a $500 one-time fee for using this service. Services like bank account maintenance, tax filing, and registered agents are not included in the setup fee. These are all billed individually at an annual rate.

Radar

Radar is Stripe’s fraud detection, prevention, and management tool. It’s designed to analyze your data and stop potential fraud cases before they are processed.

They take data from your checkout flows, payments, and financial partners to determine irregularities. Stripe’s partnership with major credit card companies and banks make it possible for them to identify fraudulent charges before you need to make a dispute.

Issuing

Stripe Issuing is made for ecommerce businesses that want to create, distribute, and manage both physical and virtual cards for in-house purposes.

You can use these cards for things like employee expense accounts. It’s supported by Google Pay and Apple Pay as well. It’s also worth noting that Stripe Issuing is a beta program that’s only being offered in the United States.

Terminal

For years, Stripe was better known for its online payment processing. But now they offer Stripe Terminal, which is a POS system for in-person payments.

This is a great option for those of you who have physical store locations in addition to your ecommerce shop. You can get everything you need both online and in-store from the same provider.

PayPal and Stripe compared

As you can see from everything that we’ve covered so far, these two payment service providers are very different from each other. But with that said, they have some things in common as well.

Deciding between PayPal and Stripe will mostly come down to personal preference and exactly what you’re looking for. Let’s take a look at some specific features to see how each platform stacks up against the other.

Price

The pricing for PayPal is very straightforward. Only the Payments Pro plan has a monthly fee, while all three plans charge 2.9% + $0.30 per transaction.

Stripe also charges 2.9% + $0.30 per transaction. But they do have custom pricing packages for things like volume discounts and multi-product discounts, which can be useful for those of you who want to take advantage of the products we looked at earlier.

According to research Value Penguin, Stripe is more expensive than PayPal.

Stripe vs Paypal cost

It can be argued that Stripe has more to offer, which might justify that higher amount. But when you compare the cost per transaction rates head to head, both services are even.

Support

Both PayPal and Stripe offer excellent customer service and technical support options. They each have their own variation of a help center, with different tools, guides, FAQ, and resources needed to troubleshoot on your own.

You can also get help using:

  • Email
  • Live chat
  • Phone
  • Social media

Based on all of this, I don’t think that I can definitively say that one platform has better support than the other, so this category is a tie.

Ease of use

Stripe and PayPal are both easy to use. But with that said, Stripe is definitely more developer-friendly, meaning it could present more of a challenge to ecommerce store owners who don’t have that type of technical knowledge.

PayPal is as simple as copying and pasting some code to get set up, which is about as straightforward as it gets. So I’d say PayPal is better for beginners, while Stripe has more customizable options for developers.

Contracts

Both PayPal and Stripe offer pay as you go contracts. So you won’t get locked into anything long term and can cancel at any time. You also won’t be charged a cancellation fee by either service if you decide to do so.

This category is another tie.

Reputation

PayPal always had a reputation for its P2P payments through third-party platforms like eBay. Although now they’re taking aim at providing more services for ecommerce sites. Stripe has always been known for ecommerce solutions, but not offers POS solutions as well.

Both of these companies have the tools, services, and resources you need to run an ecommerce shop. They both have exceptional online reviews as well.

PayPal is the most popular digital wallet in the United States and is the most popular mobile payment method in North America. There are more than 277 million PayPal users worldwide.

Based on these numbers, I’d have to give the edge to PayPal in terms of reputation. But by no means am I saying that Stripe doesn’t have an excellent reputation as well.

Conclusion

If you have an ecommerce shop and you’re trying to figure out the best payment service provider, both PayPal and Stripe are top options to consider.

At the end of the day, it’s going to come down to personal preference. Based on the information I gave you above, you can decide which plan meets your needs the most.

I can’t definitively give an edge to one platform over the other. I’d strongly recommend both options.

For those of you who still aren’t sold on PayPal or Stripe, you can review my guide on the best payment methods for your ecommerce site to find some alternative solutions.

Collective #527


C527_extension

Exthouse

Exthouse is a tool powered by Lighthouse that provides a report about a web extension’s impact on web performance.

Check it out


Divi

Our Sponsor

Divi: The Powerful Visual Page Builder

Divi is a revolutionary WordPress theme and visual page builder for WordPress. With Divi, you can build your website visually. Add, arrange and design content and watch everything happen instantly right before your eyes.

Try it


C527_html

Writing HTML in HTML

John Ankarström explains why he rewrote his website in pure HTML, without using a static site generator.

Read it


C527_gif

Freezeframe.js

This library pauses animated GIFs and enables them to animate on hover, click, touch or using a trigger function. A former jQuery plugin that is now built with modern JavaScript.

Check it out


C527_flappy

Flappy Bird

Charlie Gerard created this fun experiment where you can play the Flappy Bird game with browser windows. Remove the pop-up block to make it work.

Check it out


C527_photo

Photo Creator 2.0

With the new Photo Creator of Icons8 you can create diverse photos with thousands of masked models, AI-powered face swap, and background removal.

Check it out


C527_shape

Shape (Beta)

Shape is an icon and illustration tool where you can export creations as React components. By Meng To.

Check it out


Collective #527 was written by Pedro Botelho and published on Codrops.

What I Learned From Designing AR Apps

What I Learned From Designing AR Apps

What I Learned From Designing AR Apps

Gleb Kuznetsov

The digital and technological landscape is constantly changing — new products and technologies are popping up every day. Designers have to keep track of what is trending and where creative opportunities are. A great designer has the vision to analyze new technology, identify its potential, and use it to design better products or services.

Among the various technologies that we have today, there’s one that gets a lot of attention: Augmented Reality. Companies like Apple and Google realize the potential of AR and invest significant amounts of resources into this technology. But when it comes to creating an AR experience, many designers find themselves in unfamiliar territory. Does AR require a different kind of UX and design process?

As for me, I’m a big fan of learning-by-doing, and I was lucky enough to work on the Airbus mobile app as well as the Rokid AR glasses OS product design. I’ve established a few practical rules that will help designers to get started creating compelling AR experiences. The rules work both for mobile augmented reality (MAR) and AR glasses experiences.

Rokid Glasses motion design exploration by Gleb Kuznetsov

Glossary

Let’s quickly define the key terms that we will use in the article:

  • Mobile Augmented Reality (MAR) is delivering augmented reality experienced on mobile devices (smartphones and tablets);
  • AR Glasses are a wearable smart display with a see-through viewing an augmented reality experience.

1. Get Buy-In From Stakeholders

Similar to any other project you work for, it is vital that you get support from stakeholders as early in the process as is possible. Despite being buzzed about for years, many stakeholders have never used AR products. As a result, they can question the technology just because they don’t understand the value it delivers. Our objective is to get an agreement from them.

“Why do we want to use AR? What problem does it solve?” are questions that stakeholders ask when they evaluate the design. It’s vital to connect your design decisions to the goals and objectives of the business. Before reaching stakeholders, you need to evaluate your product for AR potential. Here are three areas where AR can bring a lot of value:

  • Business Goals
    Understand the business goals you're trying to solve for using AR. Stakeholders always appreciate connecting design solutions to the goals of the business. A lot of time business will respond to quantifiable numbers. Thus, be ready to provide an explanation off how your design is intended to help the company make more money or save more money.
  • Helpfulness For Users
    AR will provide a better user experience and make the user journey a lot easier. Stakeholders appreciate technologies that improve the main use of the app. Think about the specific value that AR brings to users.
  • Creativity
    AR is excellent when it comes to creating a more memorable experience and improving the design language of a product. Businesses often have a specific image they are trying to portrait, and product design has to reflect this.

Only when you have a clear answer to the question “Why is this better with AR?”, you will need to share your thoughts with stakeholders. Invest your time in preparing a presentation. Seeing is believing, and you’ll have better chances of buy-in from management when you show a demo for them. The demo should make it clear what are you proposing.

2. Discovery And Ideation

Explore And Use Solutions From Other Fields

No matter what product you design, you have to spend enough time researching the subject. When it comes to designing for AR, look for innovations and successful examples with similar solutions from other industries. For example, when my team was designing audio output for AR glasses, we learned a lot from headphones and speakers on mobile phones.

Design User Journey Using “As A User I Want” Technique

One of the fundamental things you should remember when designing AR experiences is that AR exists outside of the phone or glasses. AR technology is just a medium that people use to receive information. The tasks that users want to accomplish using this technology are what is really important.

“How to define a key feature set and be sure it will be valuable for our users?” is a crucial question you need to answer before designing your product. Since the core idea of user-centered design is to keep the user in the center, your design must be based on the understanding of users, their goals and contexts of use. In other words, we need to embrace the user journey.

When I work on a new project, I use a simple technique “As a [type of user], I want [goal] because [reason].” I put myself in the user's shoes and think about what will be valuable for them. This technique is handy during brainstorming sessions. Used together with storyboarding, it allows you to explore various scenarios of interaction.

In the article “Designing Tomorrow Today: the Airbus iflyA380 App,” I’ve described in detail the process that my team followed when we created the app. The critical element of the design process was getting into the passenger’s mind, looking for insights into what the best user experience would be before, during and after their flight.

To understand what travelers like and dislike about the travel experience, we held a lot of brainstorming sessions together with Airbus. Those sessions revealed a lot of valuable insights. For example, we found that visiting the cabin (from home) before flying on the A380 was one of the common things users want to do. The app uses augmented reality so people can explore the cabin and virtually visit the upper deck, the cockpit, the lounges — wherever they want to go — even before boarding the plane.

IFLY A380 iOS app design by Gleb Kuznetsov
IFLY A380 iOS app design by Gleb Kuznetsov. (Large preview)

App also accompanies passengers from the beginning to the end of their journey — basically, everything a traveler wants to do with the trip is wrapped up in a single app. Finding your seat is one of the features we implemented. This feature uses AR to show your seat in a plane. As a frequent traveler, I love that feature; you don’t need to search for the place at the time when you enter the cabin, you can do it beforehand — from the comfort of your couch. Users can access this feature right from the boarding pass — by tapping on ‘glass’ icon.

IFLY A380 app users can access the AR feature by tapping on the ‘glass’ icon
IFLY A380 app users can access the AR feature by tapping on the ‘glass’ icon. (Large preview)

Narrow Down Use Cases

It might be tempting to use AR to solve a few different problems for users. But in many cases, it’s better to resist this temptation. Why? Because by adding too many features in your product, you make it not only more complex but also more expensive. This rule is even more critical for AR experience that generally requires more effort. It’s always better to start with simple but well-designed AR experience rather than multiple complex but loose designed AR experiences.

Here are two simple rules to follow:

  • Prioritize the problems and focus on the critical ones.
  • Use storyboarding to understand exactly how users will interact with your app.
  • Remember to be realistic. Being realistic means that you need to strike a balance between creativity and technical capabilities.

Use Prototypes To Assess Ideas

When we design traditional apps, we often use static sketches to assess ideas. But this approach won’t work for AR apps.

Understanding whether a particular idea is good or bad cannot be captured from a static sketch; quite often the ideas that look great on paper don’t work in a real-life context.

Thus, we need to interact with a prototype to get this understanding. That’s why it’s essential to get to prototyping state as soon as possible.

It’s important to mention that when I say ‘prototyping state’ I don’t mean a state when you create a polished high-fidelity prototype of your product that looks and work as a real product. What I mean is using a technique of rapid prototyping and building a prototype that helps you experience the interaction. You need to make prototypes really fast — remember that the goal of rapid prototyping is in evaluating your ideas, not in demonstrating your skills as a visual designer.

3. Design

Similar to any other product you design, when you work on AR product, your ultimate goal is to create intuitive, engaging, and clean interface. But it can be challenging since the interface in AR apps accounts both for input and output.

Physical Environment

AR is inherently an environmental medium. That’s why the first step in designing AR experience is defining where the user will be using your app. It’s vital to select the environment up front. And when I say ‘environment’, I mean a physical environment where the user will experience the app — it could be indoors or outdoors.

Here are three crucial moments that you should consider:

  1. How much space users need to experience AR? Users should have a clear understanding of the amount of space they’ll need for your app. Help users understand the ideal conditions for using the app before they start the experience.
  2. Anticipate that people will use your app in environments that aren’t optimal for AR. Most physical environments can have limitations. For example, your app is AR table tennis game but your users might not have a large horizontal surface. In this case, you might want to use a virtual table generated based on your device orientation.
  3. Light estimation is essential. Your app should analyze the environment automatically and provide contextual guidance if the environment is not good enough. If the environment is too dark or too bright for your app, tell the user that they should find a better place to use your app. ARCore and ARKit have a built-in system for light estimation.

When my team designed Airbus i380 mobile AR experience, we took the available physical space into account. Also, we’ve considered the other aspects of interaction, such as the speed at which the user should make decisions. For instance, the user who wants to find her seat during the boarding won’t have too much time.

We sketched the environment (in our case, it was a plane inside and outside) and put AR objects in our sketch. By making our ideas tangible, we got an understanding of how the user will want to interact with our app and how our app will adapt to the constraints of the environment.

AR Realism And AR Objects Aesthetics

After you define the environment and required properties, you will need to design AR objects. One of the goals behind creating AR experience is to blend virtual with real. The objects you design should fit into the environment — people should believe that AR objects are real. That’s why it’s important to render digital content in context with the highest levels of realism.

Here are a few rules to follow:

  • Focus on the level of details and design 3D assets with lifelike textures. I recommend using multi-layer texture model such as PBR (Physically Based Rendering model). Most AR development tools support it, and this is the most cost-effective solution to achieve an advanced degree of detail for your AR objects.
  • Get the lighting right. Lighting is a very crucial factor for creating realism — the wrong light instantly breaks the immersion. Use dynamic lighting, reflect environmental lighting conditions on virtual objects, cast object shadows, and reflections on real-world surfaces to create more realistic objects. Also, your app should react to real-world changing of lighting.
  • Minimize the size of textures. Mobile devices are generally less powerful than desktops. Thus, to let your scene load faster, don’t make textures too large. Strive to use 2k resolution at most.
  • Add visual noise to AR textures. Flat-colored surfaces will look fake to the user's eye. Textures will appear more lifelike when you introduce rips, pattern disruptions, and other forms of visual noise.
  • Prevent flickering. Update the scene 60 times per second to prevent flickering of AR objects.

Design For Safety And Comfort

AR usually accompanied by the word ‘immersive.’ Creating immersive experience is a great goal, but AR immersion can be dangerous — people can be so immersed in smartphones/glasses, so they forget what is happening around them, and this can cause problems. Users might not notice hazards around them and bump into objects. This phenomenon is known as cognitive tunneling. And it caused a lot of physical traumas.

  • Avoid users from doing anything uncomfortable — for example, physically demanding actions or rapid/expansive motion.
  • Keep the user safe. Avoid situations when users have to walk backward.
  • Avoid long play AR sessions. Users can get fatigued using AR for extended periods. Design stop points and in-app notifications that they should take a break. For instance, if you design an AR game, let users pause or save their progress.

Placement For Virtual Objects

There are two ways of placing virtual objects — on the screen or in the world. Depending on the needs of your project and device capabilities, you can follow either the first or second approach. Generally, virtual elements should be placed in world space if they suppose to act like real objects (e.g., a virtual statue in AR space), and should be placed as an on-screen overlay if they intended to be UI controls or information messages (e.g., notification).

Rokid Glasses
Rokid Glasses. (Large preview)

‘Should every object in AR space be 3D?’ is a common question among designers who work on AR experiences. The answer is no. Not everything in the AR space should be 3D. In fact, in some cases like in-app notifications, it's preferable to use flat 2D objects because they will be less visually distracting.

Rokid Glasses motion design exploration by Gleb Kuznetsov
Rokid Glasses motion design exploration by Gleb Kuznetsov. (Large preview)

Avoid Using Haptic Feedback

Phone vibrations are frequently used to send feedback in mobile apps. But using the same approach in AR can cause a lot of problems — haptic feedback introduces extra noise and makes the experience less enjoyable (especially for AR Glasses users). In most cases, it’s better to use sound effect for feedback.

Make A Clear Transition Into AR

Both for MAR and AR glass experiences, you should let users know they’re about to transition into AR. Design a transition state. For the ifly380 app, we used an animated transition — a simple animated effect that user sees when taps on the AR mode icon.

Trim all the fat.

Devote as much of the screen as possible to viewing the physical world and your app's virtual objects:

  • Reduce the total number of interactable elements on the screen available for the user at one moment of time.
  • Avoid placing visible UI controls and text messages in your viewport unless they are necessary for the interaction. A visually clean UI lends itself seamlessly to the immersive experience you’re building.
  • Prevent distractions. Limit the number of times when objects appear on the user screen out of the blue. Anything that appears out of the blue instantly kills realism and make the user focus on the object.

AR Object Manipulation And Delineating Boundaries Between The ‘Augment’ And The ‘Reality’

When it comes to designing a mechanism of interaction with virtual objects, favor direct manipulation for virtual objects — the user should be able to touch an object on the screen and interact with it using standard, familiar gestures, rather than interact with separate visible UI controls.

Also, users should have a clear understanding of what elements they can interact with and what elements are static. Make it easy for users to spot interactive objects and then interact with them by providing visual signifiers for interactive objects. Use glowing outlines or other visual highlights to let users know what’s interactive.

Scan object effect for outdoor MAR by Gleb Kuznetsov
Scan object effect for outdoor MAR by Gleb Kuznetsov. (Large preview)

When the user interacts with an object, you need to communicate that the object is selected visually. Design a selection state — use either highlight the entire object or space underneath it to give the user a clear indication that it’s selected.

Last but not least, follows the rules of physics for objects. Just like real objects, AR objects should react to the real-world environment.

Design For Freedom Of Camera

AR invites movement and motion from the user. One of the significant challenges when designing or AR is giving users the ability to control the camera. When you give users the ability to control the view, they will swing device around in an attempt to find the points of interest. And not all apps are designed to help the user to control the viewfinder.

Google identifies four different ways that a user can move in AR space:

  1. Seated, with hands fixed.
  2. Seated, with hands moving.
  3. Standing still, with hands fixed.
  4. Moving around in a real-world space.

The first three ways are common for mobile AR while the last one is common for AR glasses.

In some cases, MAR users want to rotate the device for ease of use. Don’t interrupt the camera with rotation animation.

Consider Accessibility When Designing AR

As with any other product we design, our goal is to make augmented reality technology accessible for people. Here are a few general recommendations on how to address real-world accessibility issues:

  • Blind users. Visual information is not accessible to blind users. To make AR accessible for blind users, you might want to use audio or haptic feedback to deliver navigation instructions and other important information.
  • Deaf or hard-hearing users. For AR experience that requires voice interaction, you can use visual signals as an input method (also known as speechreading). The app can learn to analyze lip movement and translate this data in commands.

If you're interested in learning more practical tips on how to create accessible AR apps, consider watching the video talk by Leah Findlater:

Encourage Users To Move

If your experience demands exploration, remind users they can move around. Many users have never experienced a 360-degree virtual environment before, and you need to motivate them to change the position of their device. You can use an interactive object to do that. For example, during I/0 2018, Google used an animated fox for Google Maps that guided users to the target destination.

This AR experience uses an animated bird to guide users
This AR experience uses an animated bird to guide users. (Large preview)

Remember That Animation Is A Designer’s Best Friend

Animation can be multipurpose. First, you can use a combination of visual cues and animation to teach users. For example, the animation of a moving phone around will make it clear what users have to do to initialize the app.

Second, you can use animation to create emotions.

One second of emotion can change the whole reality for people engaging with a product.

Well-designed animated effects help to create a connection between the user and the product — they make the object feel tangible. Even a simple object such as loading indicator can build a bridge of trust between users and the device.

Rokid Alien motion design by Gleb Kuznetsov
Rokid Alien motion design by Gleb Kuznetsov. (Large preview)

A critical moment about animation — after discovering the elements of design and finding design solutions for the animation base, it’s essential to spend enough time on creating a proper animated effect. It took lots of iterations to finish a loading animation that you see above. You have to test every animation to be sure it works for your design and be ready to adjust color, positioning, etc. to give the best effect.

Prototype On The Actual Device

In the interview for Rokid team, Jeshua Nanthakumar mentioned that the most effective AR prototypes are always physical. That’s because when you prototype on the actual device, from the beginning, you make design work well on hardware and software that people actually use. When it comes to unique displays like on the Rokid Glasses, this methodology is especially important. By doing that you’ll ensure your design is implementable.

Motion design language exploration for AR Glasses Rokid by Gleb Kuznetsov
Motion design language exploration for AR Glasses Rokid by Gleb Kuznetsov. (Large preview)

My team was responsible for designing the AR motion design language and loading animation for AR glasses. We decided to use a 3D sphere that will be rotated during the loading and will have nice reflections on its edges. The design of the animated effect took two weeks of hard work of motion designers and it looked gorgeous on high-res monitors of our design team, but the final result wasn’t good enough because the animation caused motion sickness.

Motion sickness often caused by the discrepancies between the motion perceived from the screen of AR Glasses and the actual movement of the user's head. But in our case, the root cause of the motion sickness was different — since we put a lot of attention in polishing details like shapes, reflections, etc. unintentionally we made users focus on those details while the sphere was moving.

As a result, the motion happened in the periphery, and since humans are more sensitive to the moving objects in the periphery this caused motion sickness. We solved this problem by simplifying the animation. But it’s critical to mention that we won’t be able to find this problem without testing on the actual device.

If we compare the actual procedure of testing of AR apps with traditional GUI apps, it will be evident that testing AR apps require more manual interactions. A person who conducts testing should determine whether the app provides the correct output based on the current context.

Here are a few tips that I have for conducting efficient usability testing sessions:

  • Prepare a physical environment to test in. Try to create real-world conditions for your app — test it with various physical objects, in different scenes with different lighting. But the environment might not be limited to scene and lighting.
  • Don’t try to test everything all at once. Use a technique of chunking. Breaking down a complex flow into smaller pieces and testing them separately is always beneficial.
  • Always record your testing session. Record everything that you see in the AR glass. A session record will be beneficial during discussions with your team.
  • Testing for motion sickness.
  • Share your testing results with developers. Try to mitigate the gap between design and development. Make sure your engineering team knows what problem you face.

Conclusion

Similar to any other new technology, AR comes with many unknowns. Designers who work on AR projects have a role of explorers — they experiment and try various approaches in order to find the one that works best for their product and delivers the value for people who will use it.

Personally, I believe that it’s always great to explore new mediums and find new original ways of solving old problems. We are still at the beginning stages of the new technological revolution — the exciting time when technologies like AR will be an expected part of our daily routines — and it’s our opportunity to create a solid foundation for the future generation of designers.

Smashing Editorial (cc, yk, il)