WooCommerce.com Clarifies Its Policy on Selling CBD Products

Last week, a member of the WooCommerce Help and Share Facebook group who sells Cannabidiol or CBD products submitted a post that included an email exchange with WooCommerce support.

In the exchange, the support rep explained to the store owner that when their WooCommerce.com account was connected to a WordPress.com login, it then fell under the WordPress.com store guidelines.

According to the guidelines, controlled substances (including marijuana, cannabidiol or CBD, and other cannabis-derived products) are not allowed to be sold.

The support rep goes on to say that this included but was not limited to sites using WordPress.com, the Jetpack plugin, and any extensions from WooCommerce.com.”

The store owner is then informed that their store will be disconnected from Automattic hosted services if they continue to sell CBD products.

Legal Document Becomes a Source of Confusion

The support rep provided the store owner with a link to the most frequently asked questions on selling CBD products using WooCommerce.

The wording of the document made it seem as though there was a difference between downloading the plugin from the WordPress plugin directory or WooCommerce.com. It also appeared to apply limits on how the GPL licensed software could be used. Here is a cached version of the original document.

Can WooCommerce be used to sell cannabis-derived products such as CBD oil?

Yes, if you download the WooCommerce plugin directly from WordPress.org or install the WooCommerce plugin via the Plugins page of your site from WordPress.org.

No, if you download and install the WooCommerce plugin directly from WooCommerce.com.

It is the same WooCommerce plugin, but the location of download makes a difference?
What’s the difference?

The difference is ownership.

WooCommerce from WordPress.org is open-source software and is hosted through a third-party company.

WooCommerce from WooCommerce.com and WordPress.com is hosted through Automattic. Sites cannot sell cannabis-derived products if they are connected to Automattic servers, which includes and is not limited to WordPress.com, the Jetpack plugin, and any plugin or extension downloaded directly from WooCommerce.com.

Can I use WooCommerce software from  (x company)  to sell cannabis-derived products?
If you use open-source WooCommerce software from a third-party company, note that there may be additional limitations and regulations imposed by shipping and payment companies.

Can I get support for a WooCommerce store selling CBD products?
No, not from us at WooCommerce.com or WordPress.com.

Many of our store owners and customers reside in countries where CBD products and other cannabis-derived products are fully legalized, but the production and sale of cannabis-derived products in the US – where our company is registered – is highly regulated.

As a result, we are currently unable to offer support for any WooCommerce site that sells CBD oil or other cannabis-derived products, whether the CBD oil is over or under 0.3% THC and whether it is derived from hemp or cannabis.

Original WooCommerce and CBD Products FAQ

Taking note of the confusion, Paul Maiorana, Acting General Manager of WooCommerce, responded to the discussion and admitted in the Facebook thread that the policy was not as clear as it could be.

Earlier this week, the WooCommerce team revised the policy and made it much clearer on what is and is not allowed.

Can WooCommerce be used to sell cannabis-derived products such as CBD oil?

Yes, you can use WooCommerce for your site. As our software is open source, we do not limit its use.

However, while you can use the code of our WooCommerce plugin to sell products derived from cannabis and hemp, you cannot use services offered directly by Automattic to support those stores. This is the case whether the products are over or under 0.3% THC, and whether they are derived from hemp or cannabis. Automattic’s direct services include, but are not limited to, WordPress.com, WooCommerce.com, and the Jetpack plugin.

This means that you can use the open source WooCommerce plugin to sell cannabis-derived products, but you cannot:

Connect your site to Automattic’s servers in WooCommerce > Extensions > WooCommerce.com Subscriptions for automatic extension updates or at WordPress.com.

Use WooCommerce services that depend on a Jetpack connection, such as WooCommerce Shipping or WooCommerce Tax.

Host your site on WordPress.com.

Can I get help for my WooCommerce store?
Yes. Our WooCommerce.com help desk can assist you with your site if you would normally qualify to receive support. You might also receive help from others in the WordPress.org forums or the WooCommerce community.

Revised WooCommerce and CBD Products FAQ

In the last two years, WooCommerce has increasingly relied on Jetpack and its connection to WordPress.com’s infrastructure to provide services. These include WooCommerce Shipping, the WooCommerce app, and Automated Tax Calculations. In 2017, Todd Wilkens made it clear that WooCommerce would continue to make extensive use of Jetpack to provide cloud services.

While the policy makes things clearer, CBD store owners will need to determine if they can live without the conveniences provided by Jetpack, WooCommerce.com, and WordPress.com. This situation is also a reminder to all store owners to double check a service’s policies before connecting any sites.

Watch the Free WordCamp Europe 2019 Live Stream June 21-22

WordCamp Europe 2019 kicks off tomorrow, June 20, with Contributor Day. If you have been following the event on Twitter, hundreds of WordPress enthusiasts and professionals have been descending upon Berlin this week in preparation for the world’s largest WordCamp. For those who cannot attend in person, WCEU will be live streaming the main conference on June 21-22 for free.

Unlike previous years, no tickets or registration will be required for live stream viewers. Removing this logistical hurdle makes the conference more accessible to viewers who may want to pop in for a session or two.

Matt Mullenweg will be giving an address at 2PM in Berlin on Friday, June 21, and his presentation usually includes some newsworthy announcements. Whether you’re interested in Gutenberg development, community relations, design, or business, there’s a session for a wide range of WordPress users. Those who are viewing from afar can check out the schedule and plan which sessions to watch online.

As it was last year, the WCEU website is a Progressive Web App (PWA) that allows users to favorite the talks they want to attend. Presentations last 30 minutes with 10 minutes added at the end for Q&A. There are 20 minutes scheduled in between sessions to allow attendees to change tracks or have conversations in the hallway.

WordCamp Europe plans to announce the live stream link on its Twitter account. Follow the #WCEU hashtag to join in the conversation online.

Google Announces Site Kit Plugin Now in Developer Beta

Google is churning out updates to its WordPress products ahead of WordCamp Europe in Berlin this weekend, with the AMP Plugin 1.2 release and Site Kit’s developer beta launch landing the same day.

Site Kit is a new addition to Google’s WordPress plugin lineup that was announced at WordCamp US 2018. It provides a dashboard that displays how well a site is doing with various Google tools, such as Search Console, Analytics, AdSense, and PageSpeed Insights, packaged as a one-stop solution.

Site Kit screenshot

The developer preview announced today includes the following features:

  • Seamless site verification with Search Console
  • Provisioning and configuration of Analytics, AdSense, Tag Manager and Optimize
  • Simple aggregate and per-page reporting from Search Console, Analytics, and AdSense, to help you understand the full acquisition and monetization funnel
  • Continuous site performance auditing and monitoring with PageSpeed Insights
  • Insights we derive from across the products you’ve connected and surface on your dashboard, to help you make sense of the stats

Site Kit will give WordPress users access to information and stats from Google tools directly inside the dashboard. Instead of having to log into multiple Google services to hunt down site performance and page traffic information, this plugin aggregates the most data and puts it at your fingertips inside the WordPress admin where it is most relevant.

The Site Kit plugin is still under active development on GitHub and beta testers will need to be familiar with the Google Cloud Platform and OAuth in order to get started.

The setup experience is not user-friendly but rather geared towards getting feedback on the plugin’s current features. Google isn’t planning on putting Site Kit on WordPress.org until the setup process has been improved to be a better experience for WordPress users who are not developers. The goals for the developer beta are to gather feedback on the plugin’s functionality and compatibility with other plugins.

A contingency of engineers from Google’s Developer Programs team will be available at the Google booth during WordCamp Europe to answer questions from the community on Site Kit and any of the company’s other products.

Copy-and-Paste CSS Animation Cheat Sheets

Animation is a staple of web and UI design. A perfectly still website devoid of even subtle hover states can feel incomplete, like something essential is missing.

Luckily, there are many ways to add animations to your website. WebGL, JavaScript, and even HTML5 all support or are dedicated to animation. But one of the easiest to learn and implement are CSS animations.

Flash was another source of lightweight, easy to create animations for websites. But with Flash being finally deprecated, many designers are turning to CSS to enhance their websites with beautiful motion graphics.

While CSS animation is easy to learn as far as web animation platforms go, it can still take a lot of time to master it. And it can really help to have some example code to learn from and use in the meantime.

Today we’ve collected for you some copy-and-paste cheat sheets for CSS animations. If you need some beautiful animations to include in your design, quick code for a test website, or want to learn from the code snippets provided, you’ll love this collection of animations.

CSSFX

Example from CSSFX

With dozens of beautifully clean animations, CSSFX offers a great start for those who need small and simple effects for their site. In particular you’ll find a lot of interesting loading animations and quite a few hover states as well. Just click the ones you like to copy their code and see for yourself how they did it.

Animista

Example from Animista

Need something with a little more customization? Animista has nearly 20 types of CSS animations to browse, each coming with tons of extra settings to change to your liking. Add animations you want to save to your favorites, then click the generate button to get the code.

Epic Spinners

Example from Epic Spinners

Everyone loves spinners. They’re cute, fun to look at, and they can keep people interested for the few seconds it takes a page to load. Or they just make great page decorations! Click a spinner to see its code, and use it with Vue.js too.

Easing Functions Cheat Sheet

Example from Easing Functions Cheat Sheet

An easing function explains how an animation accelerates and decelerates throughout the frames. Animations can move linearly, smoothly, or even bounce rapidly back and forth.

A linear animation with no easing of any kind is often boring. Use this easing function cheat sheet to easily create unique and smooth animations.

Transformicons

Example from Transformicons

Transformicons are icons that shift between states when clicked. A few extra icons like loading bars and scroll indicators are included as well. Just click to see a preview of the icon in action, and toggle to select the ones you want to build code for.

These CSS icons do use a little JavaScript, but it’s only a few extra lines. The clean animated buttons are more than worth it.

CSS Animation Made Easy

Every site could use a little movement. Too much animation can be jarring depending on the style of website you have, but subtle animations like parallax and CSS can add style without being distracting.

CSS animations work so universally well because they’re simple and subtle, while still adding a lot of personality. Other types of animation can also add bloat and cause a site to slow down for some users, but CSS is quick and light on users’ systems.

Cheat sheets are a big help to animators and web designers both. For UI designers, it’s useful to see clean code in action. Creating your own code becomes much easier with a reference. And for those unfamiliar with CSS animation, you can still get the benefit of beautiful motion graphics.

So, make sure to try out these beautiful animations for yourself. Add them to your website and see how they can enhance your design.

Postman Now Supports GraphQL

With the most recent release of Postman (v7.2), GraphQL is now supported. Postman reports that GraphQL has been its second most requested feature for quite some time. Postman has responded and GraphQL is now supported in multiple capacities.

#226: New Export

Show Description

Stephen talks with Marie about how we updated and improved our exporting function on CodePen and talks about a possible future Pro feature that could come from the changes we made.

Time Jumps

  • 01:35 What is exporting on CodePen?
  • 03:21 How did you improve the speed of export?
  • 09:27 Sponsor: Dot Tech
  • 10:17 Changing the structure of the export
  • 14:18 Export for talks and presentations
  • 17:51 What's next?
  • 20:42 Did you get to remove any jQuery?

Sponsor: .TECH

If you belong to the tech industry, it’s ideal for you to choose a .TECH domain name! Be it your tech startup, community, project, event or your personal brand, a .TECH domain will make a strong “tech” positioning for your tech website.

Get 90% OFF on .TECH Domains for a limited time!

Go to go.tech/codepen

Show Links

CodePen Links

The post #226: New Export appeared first on CodePen Blog.

Understanding ROC Curves From Scratch.

Intro

Receiver Operating Characteristic (ROC) plots are useful for visualizing a predictive model’s effectiveness. This tutorial explains how to code ROC plots in Python from scratch.

Data Preparation & Motivation

We’re going to use the breast cancer dataset from sklearn’s sample datasets. It is an accessible, binary classification dataset (malignant vs. benign) with 30 positive, real-valued features. To train a logistic regression model, the dataset is split into train-test pools, then the model is fit to the training data.

from sklearn.datasets import load_breast_cancer
from sklearn.linear_model import *
from sklearn.model_selection import train_test_split

# Load datasetd
dataset = load_breast_cancer()

# Split data into train-test pools 
train, test, train_labels, test_labels = train_test_split(dataset['data'],
                                                          dataset['target'],
                                                          test_size=0.33)

# Train model 
logregr = LogisticRegression().fit(train, train_labels)

Recall that the standard logistic regression model predicts the probability of a positive event in a binary situation. In this case, it predicts the probability [0,1] that a patient’s tumor is ‘benign’. But as you may have heard, logistic regression is considered a classification model. It turns out that it is a regression model until you apply a decision function, then it becomes a classifier. In logistic regression, the decision function is: if x > 0.5, then the positive event is true (where x is the predicted probability that the positive event occurs), else the other (negative) event is true.

With our newly-trained logistic regression model, we can predict the probabilities of the test examples.

# Rename, listify 
actuals = list(test_labels)

# Predict probablities of test data [0,1]
scores = list(logregr.predict_proba(test)[:,1])

# Equivalently
import math
def sigmoid(x): 
    return 1 / (1 + math.exp(-x))
scores = [sigmoid(logregr.coef_@test_i + logregr.intercept_) for test_i in test]

While the probabilities were continuous, we can discretize predictions by applying the decision function, the standard application of logistic regression.

# Predict binary outcomes (0,1)
predictions = list(logregr.predict(test))

# Equivalently 
predictions = [1 if s>0.5 else 0 for s in scores]

And measure the accuracy of those predictions.

print("Accuracy = %.3f" % (sum([p==a for p, a in zip(predictions, actuals)])/len(predictions)))

[Out] Accuracy = 0.957

To visualize these numbers, let's plot the predicted probabilities vs. array position. The higher an example's position on the vertical axis (closer to P=1.0), the more likely it belongs to the benign class (according to our trained model). On the other hand, there is no significance horizontal distribution since it's just the position in the array; it's only to separate the data points. Blue circles represent a benign example; red squares, malignant. The line at P=0.5 represents the decision boundary of the logistic regression model.
decision_boundary_logreger.png
Anything above the line is classified as benign, whereas on and below are classified as malignant. Under this visualization, we can describe accuracy as the proportion of points placed inside their correct color.
However, while statistical accuracy accounts for when the model is correct, it is not nuanced enough to be the panacea of binary classification assessment. If you want to know more about the problems with accuracy, you can find that here. For now, we can review the confusion matrix and some of its properties to dig deeper into assessing our model.

Confusion Matrix

When calculating the probabilities of our test data, the variable was deliberately named scores instead of probabilities not only because of brevity but also due to the generality of the term 'scores'. In the case of logistic regression, we've considered the predicted probabilities as the scores, but other models may not use probability.

The confusion matrix is a 2x2 table specifying the four types of correctness or error. There are articles on confusion matrices all over, so I will simply describe the table elements in terms of our model:

  1. True Positive: Model correctly predicts benign
  2. False Positive: Model incorrectly predicts benign instead of malignant
  3. True Negative: Model correctly predicts malignant
  4. False Negative: Model incorrectly predicts malignant instead of benign

We can easily represent the confusion matrix with the standard library's collections.namedtuple:

import collections
ConfusionMatrix = collections.namedtuple('conf', ['tp','fp','tn','fn']) 

To calculate the confusion matrix of a set of predictions, three items are required: the ground truth values (actuals), the predicted values (scores), and the decision boundary (threshold). In logistic regression, the threshold of 0.5 is the ideal optimal threshold for distinguishing between the two classes because of its probabilistic origins.

def calc_ConfusionMatrix(actuals, scores, threshold=0.5, positive_label=1):
    tp=fp=tn=fn=0
    bool_actuals = [act==positive_label for act in actuals]
    for truth, score in zip(bool_actuals, scores):
        if score > threshold:                      # predicted positive 
            if truth:                              # actually positive 
                tp += 1
            else:                                  # actually negative              
                fp += 1          
        else:                                      # predicted negative 
            if not truth:                          # actually negative 
                tn += 1                          
            else:                                  # actually positive 
                fn += 1

    return ConfusionMatrix(tp, fp, tn, fn)

With our current data, calc_ConfusionMatrix(actuals, scores) returns
[Out] conf(tp=120, fp=4, tn=60, fn=4)

Confusion Matrix Statistics

The four confusion matrix elements are the inputs to several statistical functions, most of which are listed/explained on Wikipedia. One of which we've already mentioned: Accuracy. Before, we directly calculated Accuracy by just checking whether predictions were equal to actuals. Instead, we can use the Confusion Matrix equation for finding Accuracy:
Screen_Shot_2019-06-17_at_5_03_41_PM.png

def ACC(conf_mtrx):
    return (conf_mtrx.tp + conf_mtrx.tn) / (conf_mtrx.fp + conf_mtrx.tn + conf_mtrx.tp + conf_mtrx.fn)

This equation makes sense; it's the proportion of correct predictions (TP's and TN's) out of all the predictions.

The functions we are interested in, however, are called the True Positive Rate (TPR) and the False Positive Rate (FPR).
Mathematically, they are also functions of the confusion matrix:
Screen_Shot_2019-06-17_at_5_11_01_PM.png
And in Python:

def FPR(conf_mtrx):
    return conf_mtrx.fp / (conf_mtrx.fp + conf_mtrx.tn) if (conf_mtrx.fp + conf_mtrx.tn)!=0 else 0
def TPR(conf_mtrx):
    return conf_mtrx.tp / (conf_mtrx.tp + conf_mtrx.fn) if (conf_mtrx.tp + conf_mtrx.fn)!=0 else 0

TPR is also called 'sensitivity' or 'recall' and corresponds to the ability to sense, or detect, a positive case. It's a more specific way of being correct than overall Accuracy since it only considers examples that are actually positive. Furthermore, TPR is the probability that the model predicts positive given that the example is actually positive. In our dataset, TPR is the probability that the model correctly predicts benign.
Note that if your model just predicts positive, no matter the input, it will have TPR = 1.0 because it correctly predicts all positive examples as being positive. Obviously, this is not a good model because it's too sensitive at detecting positives, since even negatives are predicted as positive (i.e., false positives).

FPR is also called 'fall-out' and is often defined as one minus specificity, or 1 - True Negative Rate (TNR). FPR is a more specific way of being wrong than 1 - Accuracy since it only considers examples that are actually negative. Furthermore, FPR is the probability that the model predicts positive given that the example is actually negative. In our dataset, FPR is the probability that the model incorrectly predicts benign instead of malignant.
Note that if your model just predicts positive, no matter the input, it will have FPR = 1.0 because it incorrectly predicts all negative examples as being positive, hence the name 'False Positive Rate'. Obviously, this is not a good model because it's not specific enough at distinguishing positives from negatives.

Sensitivity/Specificity Tradeoff
From the similarly-worded TPR and FPR sections, you may have noticed two things you want in a model: sensitivity and specificity. In other words, you want your model to be sensitive enough to correctly predict all positives, but specific enough to only predict truly positives as positive. The optimal model would have TPR = 1.0 while still having FPR = 0.0 (i.e., 1.0 - specificity = 0.0). Unfortunately, it's usually the case where the increasing sensitivity decreases specificity, vise versa. Look again at the decision boundary plot near P = 0.7 where some red and blue points are approximately equally-predicted as positive. If the decision boundary was moved to P = 0.7, it would include one positive example (increase sensitivity) at the cost of including some reds (decreasing specificity).

Thresholding

One of the major problems with using Accuracy is its discontinuity. Consider the fact that all false positives are considered as equally incorrect, no matter how confident the model is. Clearly, some wrongs are more wrong than others (as well as some rights), but a single Accuracy score ignores this fact. Is it possible to account for continuity by factoring in the distance of predictions from the ground truth?

Another potential problem we've encountered is the selection of the decision boundary. As said before, logistic regression's threshold for what is considered as positive starts at 0.5, and is technically the optimal threshold for separating classes. However, what if you weren't using logistic regression or something in which there isn't an understood optimal threshold?

Both of the above problems can be solved by what I've named thresholding. Before, we calculated confusion matrices and their statistics at a static threshold, namely 0.5. But what if we calculated confusion matrices for all possible threshold values?
The logic is simple: make the finite domain of your scoring system ([0,1] in steps of 0.001 in our case), calculate the confusion matrix at each threshold in the domain, then compute statistics on those confusion matrices.

def apply(actuals, scores, **fxns):
    # generate thresholds over score domain 
    low = min(scores)
    high = max(scores)
    step = (abs(low) + abs(high)) / 1000
    thresholds = np.arange(low-step, high+step, step)

    # calculate confusion matrices for all thresholds
    confusionMatrices = []
    for threshold in thresholds:
        confusionMatrices.append(calc_ConfusionMatrix(actuals, scores, threshold))

    # apply functions to confusion matrices 
    results = {fname:list(map(fxn, confusionMatrices)) for fname, fxn in fxns.items()}

    results["THR"] = thresholds
    return results

The most complicated aspect of the above code is populating the results dictionary. It loops through the **fxns parameter which is composed of confusion matrix functions, then maps the functions onto all of the recently-computed confusion matrices.

Now, there is no fixed threshold and we have statistics at every threshold so prediction-truth distances lie somewhere within the results dict. But how can we summarize, visualize, and interpret the huge array of numbers?

Receiver Operating Characteristic Plots and Beyond

Recall that the end goal is to assess how quality our model is. We know its Accuracy at threshold = 0.5, but let's try and visualize it for all thresholds. Using our previous construction:

acc = apply(actuals,  scores, ACC=ACC)

acc now holds Accuracies and thresholds and can be plotted in matplotlib easily.
acc_thr.jpg

The orange dot shows the Accuracy at threshold = 0.5, valued at 0.957; the blue dot is the best Accuracy at 0.973 when the threshold is at 0.8. Note that the 0.5 was not the best Accuracy threshold and that these values are subject to change if the model were retrained. Furthermore, see that at the edges of thresholds the Accuracy tapers off. Higher thresholds lower Accuracy because of increasing false negatives, whereas lower thresholds increase false positives. The problems of accuracy are still encountered, even at all thresholds. Therefore, it's time to introduce ROC plots.

ROC plots are simply TPR vs. FPR for all thresholds. In Python, we can use the same codes as before:

def ROC(actuals, scores):
    return apply(actuals, scores, FPR=FPR, TPR=TPR)

Plotting TPR vs. FPR produces a very simple-looking figure known as the ROC plot:
roc.png

The best scenario is TPR = 1.0 for all FPR over the threshold domain. One trick to looking at this plot is imagining the threshold as increasing from right to left along the curve, where it's maximal at the bottom left corner. This makes sense because, in general, at higher thresholds, there are less false positives and true positives because the criteria for being considered as positive are stricter. On the other end, lower thresholds loosen the criteria for being considered positive so much that everything is labeled as positive eventually (the upper right part of the curve).

The worst scenario for ROC plots is along the diagonal, which corresponds to a random classifier. If the curve dipped beneath the random line, then it's non-randomly predicting the opposite of the truth. In this case, just do the opposite of whatever the model predicts (or check your math) and you'll get better results.

The most important thing to look for is the curves proximity to (0, 1). It means that it is balancing between sensitivity and specificity. While the curve tells you a lot of useful information, it would be nice to have a single number that captures it. Conveniently, if you take the Area Under the ROC curve (AUC), you get a simple, interpretable number that is very often used to quickly describe a model's effectiveness.

The AUC corresponds to the probability that some positive example ranks above some negative example. You can go deep into this interpretation here. Nevertheless, the number gets straight to the point: the higher the better. It factors in specificity and sensitivity across all thresholds, so it does not suffer the same fate as Accuracy.

For our dataset, we computed an AUC of 0.995 which quite high. However useful, sometimes you want to get more specific than a generic number across all thresholds. What if you only care about thresholds above 0.9? Or, what if a false negative has severe consequences? Those kinds of questions can be addressed elsewhere.

Conclusion

This tutorial was a pedagogical approach to coding confusion matrix analyses and ROC plots. There is a lot more to model assessment, like Precision-Recall Curves (which you can now easily code). For further reading, I recommend going to read sklearn's implementation of roc_curve.

How to Increase Your Page Size by 1,500% with webpack and Vue

Disclaimer: This article is mostly satire. I do not think that I am better than you because I once wrote some TypeScript nor do I think that it’s a good thing for us to make web pages bigger. Feel free to misrepresent these views to maximize clicks.

You know, there are a lot of articles out there telling you how to make your page smaller: optimize your images, remove extraneous CSS rules, re-write the whole thing in Dreamweaver using framesets. Look,  Walmart just reduced their page size by some numbers, give or take.

What we don’t have are enough articles showing you how to increase your page size. In fact, the only article I could find was this one from the Geek Squad which ended up being about making the font size bigger. This is a good start, but I think we can do better.

Put on some weight

Now, why would you want to increase your page size? Isn’t that a not-very-nice thing for people on low bandwidth connections? Well, there are several excellent and in no-way-contrived reasons and here are three of them since things that come in threes are more satisfying.

  1. You have a gigabyte connection and you live in Tennessee so surely everyone else is in better shape than you are.
  2. Browsers do caching, silly. That means that you only have to download the site once. Stop complaining. First world problems.
  3. You don’t care whether or not people ever visit your site because you, "work to live, not live to work."

If any of those completely relatable reasons resonates with you, I’d like to show you how I increased the size of my CSS by 1,500% — and you can too, with one simple webpack trick.

One weird trick

It all started when I decided to refactor my retirement plan project called The Urlist over to the Bulma CSS framework.

The original incarnation of the site was all hand-rolled and my Sass looked like an episode of Hoarders.

"Burke, you don’t need 13 different .button styles. Why don’t you pick one and we can get rid of these other 12 so you have somewhere to sleep?"

Bulma also includes things like modals that I used third-party Vue components to make.

It also has a hamburger menu because it’s a well-known scientific fact that you cannot have a successful site without a hamburger.

Look, I don’t make the rules. This is just how business works.

I was quite happy with the result. Bulma styles are sharp, and the layout system is easy to learn. It’s almost as if someone somewhere understands CSS and also doesn’t hate me. That’s just a hard combination to find these days.

After a few weeks of refactoring (during which I would ask myself, "WHAT ARE YOU EVEN DOING MAN?!? THE SITE ALREADY WORKS!"), I finally finished. As a side note, the next time you think about refactoring something, don’t. Just leave it alone. If you don’t leave any technical debt for the next generation, they’re going to be extremely bored and that’s going to be on you.

When I built the project, I noticed something odd: the size of my CSS had gone up pretty significantly. My hand-crafted abomination was only 30KB gzipped and I was up to 260KB after the refactor.

And, to make matters worse, the Vue CLI was lecturing me about it...

Which, of course, I ignored. I don’t take instructions from robots.

What I did instead was deploy it. To production. On the internet. Because I did not spend all of this time refactoring to not deploy it. Yeah, sunk costs and all that, but excuse me if I’m more pragmatic than your poster of logical fallacies. All I’m saying is I came to party and I was not going home without a buzz.

Then I took to Twitter to announce my accomplishment to the ambivalent masses. As one does.

Shortly thereafter, Jeremy Thomas, who created Bulma (and clearly loves Dragon Ball) responded. It was quick, too. It’s like there is a bat signal that goes out whenever a moron tweets.

Duplicate styles? 13 times? What the heck is a namespace? Is that a π symbol or a custom Jeremy Thomas logo?

It’s at this moment that I realized that I have no idea what I’m doing.

Put the Sass down and back away slowly

I’ll be the first to admit that I don’t know a lot about CSS, and even Less about Sass. Get it? Less about Sass? Forget it. I don’t want your pity laugh.

When I setup my Vue CLI project to use Bulma, I created a src/styles folder and dropped in a bulma-but-not-all-of-bulma-only-some-of-it.scss file. They say naming things is hard, but I don’t see why.

That file imports the pieces of Bulma that I want to use. It’s Bulma, but not all of it. Only some of it.

@import "bulma/sass/utilities/_all.sass";
@import "bulma/sass/base/_all.sass";

@import "bulma/sass/form/shared.sass";
@import "bulma/sass/form/input-textarea.sass";

// etc...

Then I imported that file into a custom Sass file which I called... site.scss. I like to keep things simple.

@import "./bulma-but-not-all-of-bulma-only-some-of-it.scss";

html,
body {
  background-color: #f9fafc;
}

// etc...

I wanted to import these files into Vue globally so that I could use them in every component. And I wanted to do it the right way; the canonical way. I think it’s clear from my willingness to deploy 2+ MB of CSS into production that I like to do things the "right way".

I read this excellent blog post from Sarah Drasner called, "How to import a Sass file into every component in your Vue app." She shows how to do it by modifying the webpack build process via the vue.config.js file.

module.exports = {
  css: {
    loaderOptions: {
      sass: {
        data: `@import "@/styles/site.scss";`
      }
    }
  }
}

What I did not understand is that this imports Sass into every component in a Vue app. You know, like the title of the blog post literally says. This is also how I ended up with a bunch of duplicate styles that had a data-v- attribute selector on them. I have scoped styles to thank for that.

How Vue handles `scoped`

Vue allows you to "scope" styles to a component. This means that a style only affects the component that it’s in, and not the rest of the page. There is no magic browser API that does this. Vue pulls it off by dynamically inserting a data- attribute in both the element and the selector. For example, this:

<template>
  <button class="submit">Submit</button>
<template>

<style lang="scss" scoped>
.submit {
  background-color: #20ae96;
}
</style>

...becomes this:

<button class="submit" data-v-2929>Submit</button>

<style>
.submit[data-v-2929] {
  background-color: #20ae96;
}
</style>

That dynamic data tag gets added to every child element in the component as well. So every element and every style for this component will have a data-v-2929 on them at runtime.

If you import a Sass file into your component that has actual styles in it, Vue (via webpack) will pull in those styles and "namespace" them with that dynamic data- attribute. The result is that is you include Bulma in your app 13 damn times with a bunch of data-v weirdness in front of it.

But this begs the question: if webpack renders the CSS in every single component, why would you ever want to use the vue.config.js approach? In a word: variables.

The variable sharing problem

You can’t define a Sass variable in one component and reference it from another. That would also be kind of hard to manage since you would be defining and using variables all over the place. Only I would write code like that.

You, on the other hand, would probably put all your variables in a variables.scss file. Each component would then reference that central store of variables. Importing a variables file into every single component is redundant. It’s also excessive. And unnecessary. And long-winded.

This is precisely the problem that Sarah’s article is solving: importing a Sass file into every component in your project.

It’s OK to import something like variables into every component because variables aren’t rendered. If you import 200 variables and only reference one of them, who cares? Those variables don’t exist in the rendered CSS anyway.

For example, this:

<style lang="scss" scoped>
$primary: #20ae96;
$secondary: #336699;

.submit {
  background-color: $primary
}
</style>

...becomes this:

<style>
.submit[data-v-2929] {
  background-color: #20ae96;
}
</style>

So, there are really two problems here:

  1. Bulma needs to be global.
  2. Bulma’s variables should be accessible from the components.

What we need is a clever combination of Sarah’s technique, along with a little proprietary knowledge about how Bulma is structured.

Using Bulma with the Vue

We’re going to accomplish this with the least amount of duplication by having three files in the src/styles directory:

variables.scss: This file will be where you pull in Bulma’s variables and override/define your own. Note that you have to include the following three files to get all of Bulma’s variables. And they have to be in this order...

// Your variables customizations go up here

// Include Bulma's variables
@import "bulma/sass/utilities/initial-variables.sass";
@import "bulma/sass/utilities/functions.sass";
@import "bulma/sass/utilities/derived-variables.sass";

bulma-custom.scss: This file is where you pull in the pieces of Bulma that you want. It should reference the variables.scss file.

@import "./variables.scss";

/* UTILTIES */
@import "bulma/sass/utilities/animations.sass";
@import "bulma/sass/utilities/controls.sass";
@import "bulma/sass/utilities/mixins.sass";

// etc...

site.scss: This pulls in the bulma-custom.scss file and is also where you define global styles that are used across the whole project.

@import url("https://use.fontawesome.com/releases/v5.6.3/css/all.css");
@import "./bulma-custom.scss";

html,
body {
  height: 100%;
  background-color: #f9fafc;
}

// etc...

Import the site.scss file into your main.js file. Or in my case, main.ts. Does it make me better than you that I use TypeScript? Yes. Yes it does.

import Vue from "vue";
import App from "./App.vue";
import router from "./router";

// import styles
import "@/styles/site.scss";

This makes all of the Bulma pieces we are using available in every component. They are global, but only included once.

Per Sarah’s article, add the variables.scss file to the vue.config.js file.

module.exports = {
  css: {
    loaderOptions: {
      sass: {
        data: `@import "@/styles/variables.scss";`
      }
    }
  }
}

This makes it so that you can reference any of the Bulma variables or your own from any .vue component.

Now you have the best of both worlds: Bulma is available globally and you still have access to all Bulma variables in every component.

Total size of CSS now? About 1,500% smaller...

Take that, Walmart.

Redemption via PR

In an effort to redeem myself, I’ve submitted a PR to the Bulma docs that walks through how to customize Bulma in a Vue CLI project. It’s an act of contrition for taking to Twitter and making Bulma seem like the problem when really Burke is the problem.

And you would think that by now I would have this figured out: Burke is always the problem.

The post How to Increase Your Page Size by 1,500% with webpack and Vue appeared first on CSS-Tricks.

Drop caps & design systems

Ethan Marcotte has written up his process for how to make drop caps accessible for screen readers and browsers alike. All of that is very interesting and I’m sure I’ll use a technique like this in the near future, but the part that made me hop out of my seat is where Ethan notes his experience with design systems at Vox:

Since rolling out our new and improved drop caps, we’ve continued to iterate on them. (Including fixing a number of bugs that I, a professional web designer, introduced.) We’ve also discussed potential changes to the custom styles feature, in order to make it sustainable. But for my money, the real benefit of the work wasn’t the drop caps themselves, but the process that emerged from it.

This is something I’ve been thinking about a lot. The tricky thing to understanding design systems is that the process of creating and maintaining them is just as important than the code it uses. Sure, yes, fixing small things is very important, but the long-lasting improvements to a design system will always be around process. Why is this thing breaking? How long has it been broken for? How do we setup a way to make sure that this problem never pops up again?

Questions about process will always be the most useful questions to ask. The system will reward you for asking.

Direct Link to ArticlePermalink

The post Drop caps & design systems appeared first on CSS-Tricks.

Benefits of Cloud Hosting

Everyone’s heard of “the cloud.”

Broadly speaking, the cloud refers to remote storage. For example, you can store pictures from your smartphone or documents on your computer to a cloud storage space like Google Drive.

This is different than storing files locally on something like an external hard drive. I’m sure you’re familiar with both of these scenarios, and you probably even use cloud storage for something in your digital life.

Now when it comes to web hosting, the cloud is a little bit more in depth, but the same principles still apply.

Let’s start with the basics. There are four main types of web hosting:

  • Shared hosting
  • VPS (virtual private server) hosting
  • Dedicated server hosting
  • Cloud hosting

To fully understand the differences between all of these options, refer to my guide on everything you need to know about web hosting.

But right now I want to put the primary focus on cloud hosting. Although it’s the newest way to host websites, the method has been growing in popularity over the years.

Cloud Hosting Popularity Chart

This graph shows the cloud computing and cloud hosting market on a global scale in billions of dollars.

While cloud hosting has been around for years, not many people know exactly how it is and how it works. So what is cloud hosting?

Basically, your web host isn’t connected to one physical location. That’s not the case with shared hosting, VPS, and dedicated servers.

Now that you have a basic understanding of cloud hosting, I’ll cover the benefits. You can use this guide as a resource to determine if cloud hosting is the best option for your website.

Easy to scale

Traditionally, when you’re picking a web host you need to have some idea of the type of website traffic you’re planning to get. This makes it easier for you to pick a plan to fit your needs.

It’s crucial that you get a web hosting plan with enough bandwidth, storage, and disc space.

But there is a common dilemma that new websites are faced with all of the time. They have to decide if they want to get the highest possible bandwidth, even if they probably won’t come close to exceeding those limits. Or should they start with a lower bandwidth plan and upgrade as their traffic starts to increase?

There are pros and cons to each approach.

One the one hand, a top-tier plan will come at a premium price. You’ll end up paying for a service that you won’t need until your site grows. But the second option will cause slower page loading times as your website scales until you upgrade.

Cloud hosting solves those problems.

Since your website is hosted on multiple remote servers, you won’t have to worry about exceeding bandwidth. If one server is maxed out, you can always pull resources from another.

All of this can be easily managed and configured in-real time. Here’s what that looks like if you’re using HostGator for cloud storage.

Hostgator Cloud Hosting

Cloud hosting allows you to scale your server without having to get approval from the hosting provider, which you’d need with VPS, shared, or dedicated hosting.

Flexible pricing

If you use a traditional web hosting server, you’re going to a pay a fixed monthly rate based on the plan that you sign up for. You’ll be charged this amount even if you don’t actually use all of the resources on that server.

But cloud hosting is priced based on what you actually use.

Here’s an analogy. Let’s say you go to an all you can eat buffet, where the food options can also be purchased à la carte. The buffet price is $20 per person. So that’s the most you’ll have to pay, regardless of how much food you eat.

But if you only eat $10 worth of food, then you’ll only be charged $10 for that meal.

That’s how pricing is structured for cloud hosting.

The pricing also relates back to our previous point about being able to scale your resources on demand. For example, let’s say you just built a bunch of new backlinks and you’re expecting a particular blog post on your site to go viral.

Rather than upgrading your entire plan (which you’d have to do with another hosting option), you can just increase the resources needed during that traffic spike. Then you can put everything back to normal when your traffic levels out.

In this case, you’d only pay for the server usage that was actually being used during the surge.

Here’s a look at the pricing page for DreamHost cloud hosting plans.

DreamHost Cloud Hosting

As you can see, pricing is based on usage. Each plan has a maximum monthly rate. Even the fine print at the bottom of the page states that you’ll only be billed for what you use.

This type of pricing structure is standard for most cloud hosting services across the board.

Reliable servers

As I’ve previously explained, other types of web hosting options rely on a singular server.

So if something happens to the server that your site is hosted on, then your site would be offline until the server was back up and running. You’re essentially putting all of your eggs in one basket. This can be a huge risk when you’re talking about something as important as your website.

But cloud hosting uses multiple remote servers and resources.

If something happens to one, the others will still be able to host your site. This means that your website will have high uptime and availability rates.

In addition to potential problems with one server, cloud hosting will keep your site stable, even as traffic increases. We discussed this before when we covered the ability for you to pull resources from multiple servers to manage your site.

Cloud hosting is also extremely easy to set up.

For those of you who want to start hosting on the cloud right away, it can be a faster deployment option than something like a dedicated server or shared server.

Speed and performance

The majority of cloud hosting servers will provide lightning fast speed. They also increase the capacity of your website, which boosts your page loading speed.

That’s because all of your content will get loaded from multiple server environments.

This approach doesn’t put as much strain on a singular server, the way it would if you had a dedicated, shared, or VPS plan. If your website has lots of resource-intensive data such as videos, images, sound, and other media content, this is something that you need to prioritize.

Another benefit of cloud hosting is that content can be delivered from the nearest remote server, which is another reason why loading times are so fast.

At the end of the day, your website visitors don’t care what type of web hosting you’re using. They just want your site to be responsive and load quickly. That’s why your loading times will have such a major impact on conversion rates.

Loding Time Conversion Rates

By prioritizing page loading speed with cloud hosting, your website will ultimately perform better from the user end.

Security

Cloud hosting is very safe from a security standpoint. Here’s why.

Your website is isolated from any potential problems with a physical server. That’s because everything is handled remotely. This won’t be the case if you’re relying on a singular dedicated server that’s hosted locally.

If a local server was compromised, then your website would be at risk. You won’t need to worry about that happening with cloud hosting.

For example, let’s say something went wrong with one of the servers in your cloud hosting network. Maybe it was hacked, had a system overload, or hardware failure.

Your site would be fine because it could just continue using one of the many other remote servers in the network. Everything would stay up and running without any downtime or delays.

Best cloud hosting services

Now that you know the top benefits of cloud hosting, I want to show some of the best cloud hosting services available on the market today.

SiteGround

Siteground

SiteGround is second to none in terms of reliability for cloud hosting. Their team fully manages your cloud, so you won’t have to worry about any maintenance for your hosting.

SiteGround guarantees that you’ll have enough resources on the cloud to power your site. It will be fully optimized in terms of speed and efficiency based on your traffic and usage.

Their platform makes it easy for you to add RAM or CPU on-demand with just one click. SiteGround also has an auto-scale feature, which adds sufficient resources to your site in times of where traffic spikes. I would definitely take advantage of this. That way you won’t have to manually add resources and track your traffic.

Your cloud service with SiteGround also comes with powerful tools like a dedicated IP, free Cloudflare CDN, free SSL, private DNS, and daily backups.

SiteGround cloud hosting plans start at $60, $120, and $160 per month.

HostGator

Hostgator

HostGator has unmetered bandwidth and storage for all of their cloud hosting plans.

They offer automatic daily backups as well as daily scans to protect your site from hackers, viruses, and malware. Their cloud system has integrated caching to ensure that your pages always load as fast as possible.

HostGator’s intuitive dashboard makes it easy for anyone, regardless of their tech background, to manage the performance of a website. You’ll also be able to appropriately allocate any additional resources that your site requires based on usage and traffic.

HostGator cloud hosting plans start at $4.95, $6.57, and $9.95 per month.

DreamHost

Dreamhost

DreamHost is a great option for those of you who are price-sensitive. They offer plans that are are charged strictly based on usage. The maximum you’d pay each month is either $4.50, $12, or $48, depending on the plan you choose.

You’ll have full root access and control over your cloud servers, so there are no restrictions for software or operating systems.

The only downside of DreamHost is that they don’t offer live chat and phone support. But since their platform is so straightforward and easy to use, I’m willing to look past that for the bargain rates.

Conclusion

Cloud hosting is growing in popularity. It’s become a reliable and flexible way to host websites in the modern digital era.

There are lots of great benefits to cloud hosting. I highlighted the top ones in this guide.

Overall, cloud hosting should be taken into consideration if you have a website that’s growing. The flexibility of the resources and pricing structures ensure that your site will have high uptime rates and fast loading speeds, even during unexpected traffic surges.

But with that said, cloud hosting isn’t necessarily for everyone. If you have an ecommerce website that always has high traffic and want to make changes to your server based on the software you’re using, you might be better off with a dedicated server.

For those of you who think cloud hosting is right for your website, I’d recommend using one of the three options that I covered in this guide.

How To Create A PDF From Your Web Application

How To Create A PDF From Your Web Application

How To Create A PDF From Your Web Application

Rachel Andrew

Many web applications have the requirement of giving the user the ability to download something in PDF format. In the case of applications (such as e-commerce stores), those PDFs have to be created using dynamic data, and be available immediately to the user.

In this article, I’ll explore ways in which we can generate a PDF directly from a web application on the fly. It isn’t a comprehensive list of tools, but instead I am aiming to demonstrate the different approaches. If you have a favorite tool or any experiences of your own to share, please add them to the comments below.

Starting With HTML And CSS

Our web application is likely to be already creating an HTML document using the information that will be added to our PDF. In the case of an invoice, the user might be able to view the information online, then click to download a PDF for their records. You might be creating packing slips; once again, the information is already held within the system. You want to format that in a nice way for download and printing. Therefore, a good place to start would be to consider if it is possible to use that HTML and CSS to generate a PDF version.

CSS does have a specification which deals with CSS for print, and this is the Paged Media module. I have an overview of this specification in my article “Designing For Print With CSS”, and CSS is used by many book publishers for all of their print output. Therefore, as CSS itself has specifications for printed materials, surely we should be able to use it?

The simplest way a user can generate a PDF is via their browser. By choosing to print to PDF rather than a printer, a PDF will be generated. Sadly, this PDF is usually not altogether satisfactory! To start with, it will have the headers and footers which are automatically added when you print something from a webpage. It will also be formatted according to your print stylesheet — assuming you have one.

The problem we run into here is the poor support of the fragmentation specification in browsers; this may mean that the content of your pages breaks in unusual ways. Support for fragmentation is patchy, as I discovered when I researched my article, “Breaking Boxes With CSS Fragmentation”. This means that you may be unable to prevent suboptimal breaking of content, with headers being left as the last item on the page, and so on.

In addition, we have no ability to control the content in the page margin boxes, e.g. adding a header of our choosing to each page or page numbering to show how many pages a complex invoice has. These things are part of the Paged Media spec, but have not been implemented in any browser.

My article “A Guide To The State Of Print Stylesheets In 2018” is still accurate in terms of the type of support that browsers have for printing directly from the browser, using a print stylesheet.

Printing Using Browser Rendering Engines

There are ways to print to PDF using browser rendering engines, without going through the print menu in the browser, and ending up with headers and footers as if you had printed the document. The most popular options in response to my tweet were wkhtmltopdf, and printing using headless Chrome and Puppeteer.

wkhtmltopdf

A solution that was mentioned a number of times on Twitter is a commandline tool called wkhtmltopdf. This tool takes an HTML file or multiple files, along with a stylesheet and turns them into a PDF. It does this by using the WebKit rendering engine.

Essentially, therefore, this tool does the same thing as printing from the browser, however, you will not get the automatically added headers and footers. On this positive side, if you have a working print stylesheet for your content then it should also nicely output to PDF using this tool, and so a simple layout may well print very nicely.

Unfortunately, however, you will still run into the same problems as when printing directly from the web browser in terms of lack of support for the Paged Media specification and fragmentation properties, as you are still printing using a browser rendering engine. There are some flags that you can pass into wkhtmltopdf in order to add back some of the missing features that you would have by default using the Paged Media specification. However, this does require some extra work on top of writing good HTML and CSS.

Headless Chrome

Another interesting possibility is that of using Headless Chrome and Puppeteer to print to PDF.

However once again you are limited by browser support for Paged Media and fragmentation. There are some options which can be passed into the page.pdf() function. As with wkhtmltopdf, these add in some of the functionality that would be possible from CSS should there be browser support.

It may well be that one of these solutions will do all that you need, however, if you find that you are fighting something of a battle, it is probable that you are hitting the limits of what is possible with current browser rendering engines, and will need to look for a better solution.

JavaScript Polyfills For Paged Media

There are a few attempts to essentially reproduce the Paged Media specification in the browser using JavaScript — essentially creating a Paged Media Polyfill. This could give you Paged Media support when using Puppeteer. Take a look at paged.js and Vivliostyle.

Using A Print User Agent

If you want to stay with an HTML and CSS solution then you need to look to a User Agent (UA) designed for printing from HTML and CSS, which has an API for generating the PDF from your files. These User Agents implement the Paged Media specification and have far better support for the CSS Fragmentation properties; this will give you greater control over the output. Leading choices include:

A print UA will format documents using CSS — just as a web browser does. As with browser support for CSS, you need to check the documentation of these UAs to find out what they support. For example, Prince (which I am most familiar with) supports Flexbox but not CSS Grid Layout at the time of writing. When sending your pages to the tool that you are using, typically this would be with a specific stylesheet for print. As with a regular print stylesheet, the CSS you use on your site will not all be appropriate for the PDF version.

Creating a stylesheet for these tools is very similar to creating a regular print stylesheet, making the kind of decisions in terms of what to display or hide, perhaps using a different font size or colors. You would then be able to take advantage of the features in the Paged Media specification, adding footnotes, page numbers, and so on.

In terms of using these tools from your web application, you would need to install them on your server (having bought a license to do so, of course). The main problem with these tools is that they are expensive. That said, given the ease with which you can then produce printed documents with them, they may well pay for themselves in developer time saved.

It is possible to use Prince via an API, on a pay per document basis, via a service called DocRaptor. This would certainly be a good place for many applications to start as if it looked as if it would become more cost effective to host your own, the development cost of switching would be minimal.

A free alternative, which is not quite as comprehensive as the above tools but may well achieve the results you need, is WeasyPrint. It doesn’t fully implement all of Paged Media, however, it implements more than a browser engine does. Definitely, one to try!

Other tools which claim to support conversion from HTML and CSS include PDFCrowd, which boldly claims to support HTML5, CSS3 and JavaScript. I couldn’t, however, find any detail on exactly what was supported, and if any of the Paged Media specification was. Also receiving a mention in the responses to my tweet was mPDF.

Moving Away From HTML And CSS

There are a number of other solutions, which move away from using HTML and CSS and require you to create specific output for the tool. A couple of JavaScript contenders are as follows:

Recommendations

Other than the JavaScript-based approaches, which would require you to create a completely different representation of your content for print, the beauty of many of these solutions is that they are interchangeable. If your solution is based on calling a commandline tool, and passing that tool your HTML, CSS, and possibly some JavaScript, it is fairly straightforward to switch between tools.

In the course of writing this article, I also discovered a Python wrapper which can run a number of different tools. (Note that you need to already have the tools themselves installed, however, this could be a good way to test out the various tools on a sample document.)

For support of Paged Media and fragmentation, Prince, Antenna House, and PDFReactor are going to come out top. As commercial products, they also come with support. If you have a budget, complex pages to print to PDF, and your limitation is developer time, then you would most likely find these to be the quickest route to have your PDF creation working well.

However, in many cases, the free tools will work well for you. If your requirements are very straightforward then wkhtmltopdf, or a basic headless Chrome and Puppeteer solution may do the trick. It certainly seemed to work for many of the people who replied to my original tweet.

If you find yourself struggling to get the output you want, however, be aware that it may be a limitation of browser printing, and not anything you are doing wrong. In the case that you would like more Paged Media support, but are not in a position to go for a commercial product, perhaps take a look at WeasyPrint.

I hope this is a useful roundup of the tools available for creating PDFs from your web application. If nothing else, it demonstrates that there are a wide variety of choices, if your initial choice isn’t working well.

Please add your own experiences and suggestions in the comments, this is one of those things that a lot of us end up dealing with, and personal experience shared can be incredibly helpful.

Further Reading

A roundup of the various resources and tools mentioned in this article, along with some other useful resources for working with PDF files from web applications.

Specifications

Articles and Resources

Tools

Smashing Editorial (il)

How to Host a Website (Simple Guide for Beginners) in 2019

Do you want to learn how to host a website? Self-hosted website builders like WordPress offer you full freedom to build any kind of website.

The challenge is that most beginners don’t know the best way to host a website. Many even believe that it requires special technical skills to host their own websites.

That’s simply not true.

If you choose the right approach, then you can easily host your own website within just a few minutes. In most cases, it is just as easy as creating a facebook account.

In this beginner’s guide, we’ll show you the exact steps on how to host a website without learning any technical skills.

We will also explain how it all works behind the scenes. This would help you gain a basic understanding of different ways to host a website.

Ready? Let’s get started.

How to host a website

Here is what you’ll learn in this guide.

What Does it Mean to Host a Website?

Hosting a website means that you put your website files on a special computer called server. This computer makes your website files publicly accessible on the internet, so anyone can visit it.

In order for other people around the world to see the website, these special computers have a particular set of software installed. This software is called a web server.

A web server’s basic job is to receive incoming requests and respond by sending the requested page to the user’s browser.

Hosting a website

Now all of this may sound like bunch of technical jargon, and it is.

However, you don’t need to learn how to do all these things in order to host your website. Luckily, there are thousands of companies that offer this as a service (at very low cost).

All websites on the internet use a web hosting company to host their websites. Even tech giants like Netflix (hosted on Amazon) and PayPal (hosted by Google Cloud hosting) use third-party service providers for their hosting.

There are only a handful of companies like Google, Microsoft, and Amazon that completely host all their services on their own platforms.

They can do this because they have the technical and financial resources to take on such a huge task. All other businesses (including us) use a web hosting company to host their website.

What Do You Need to Host a Website

You will need the following two things to host a website.

  • Web hosting service provider
  • Domain name

Web hosting service providers offer you ready-to-use web servers to host your website. They take care of all the technical stuff and provide website owners with easy to use tools to manage their hosting.

Now, how do users reach your self-hosted website? This is where domain names come in.

A domain name is the address of your website that people type in the browser to visit your website. For example, wpbeginner.com will bring you to this website.

Basically, a domain name is a human-friendly way to connect user’s browsers to the website server associated with that domain name. To learn more, see our guide on what is a domain name and how do domains work.

how domain names work

You can purchase a domain name from one of these top domain registrars. These are companies licensed to sell domain name registrations.

To understand the relationship between hosting and domains, see our guide on the difference between web hosting and domain name.

Note: later in this article, we will show you how to get a domain name for free.

But first, let’s take a look at different types of web hosting plans and evaluate which one would be the right fit to host your website.

Types of Website Hosting Services

Not all websites are the same. Some are smaller and have low traffic while others are larger with more content and visitors.

A smaller website requires fewer resources. On the other hand, a larger and more popular website will need more resources to run efficiently.

Website hosting companies provide different types of hosting offers designed to address specific website needs. Here are some of the most common hosting services.

1. Shared Hosting

A shared hosting service is suitable for small websites, blogs, and small businesses who are just starting out.

They are able to keep their costs down by allowing multiple websites to share the same server resources. This makes hosting your website affordable.

Pricing: Starting from 2.75 per month to $7.99 per month

Suitable for: Starting a new blog, small business website

Our recommended shared hosting provider: Bluehost

To learn more see our guide on the truth about best shared web hosting.

2. VPS Hosting

VPS hosting (Virtual Private Server hosting) is still a shared hosting environment. However, it offers a flexible set of resources to handle large traffic spikes.

You get a partitioned of private server for your website that you can manage from your hosting control panel. This gives you the best of both worlds, the low cost of shared hosting with the flexibility of dedicated resources.

Pricing: Starting from $29.99 / month

Suitable for: Medium-sized businesses, popular blogs, and eCommerce stores.

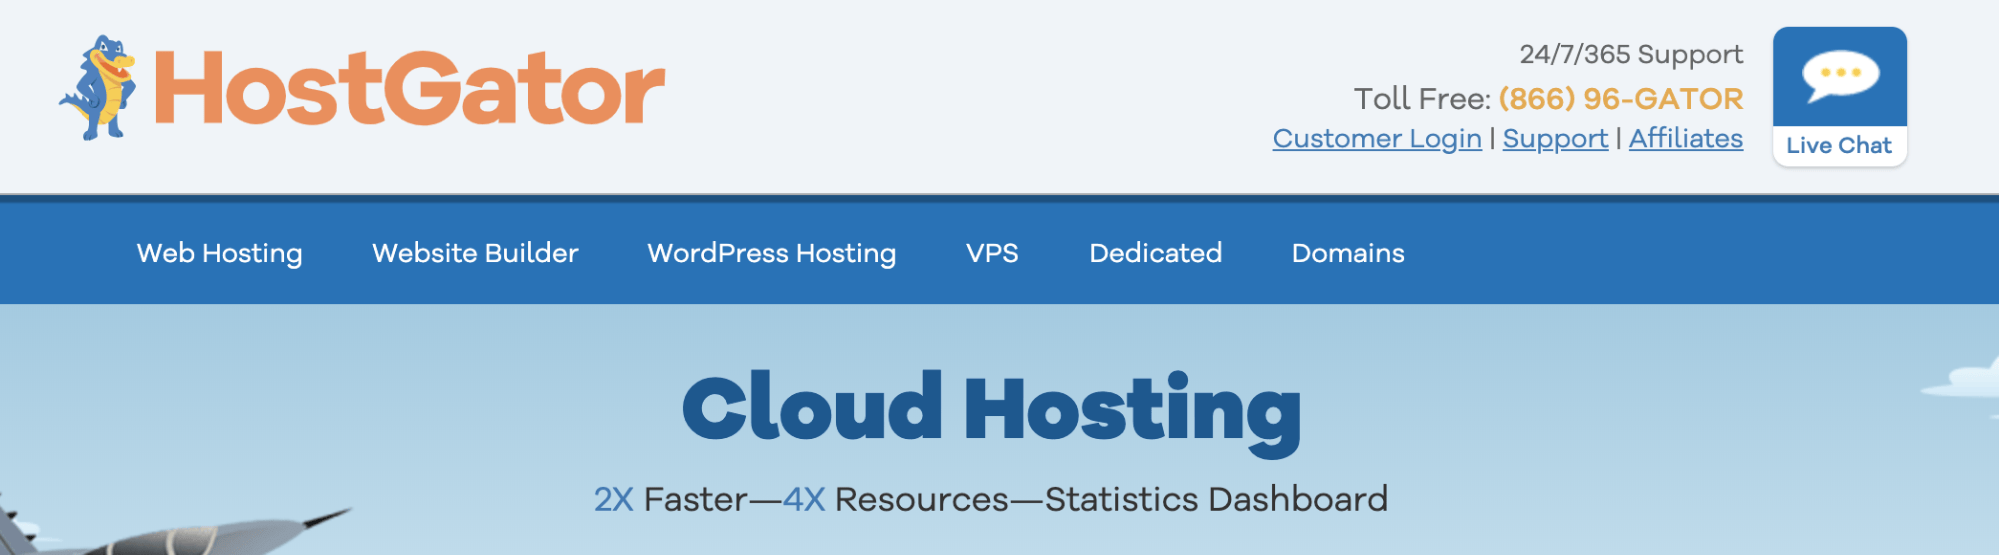
Our recommended VPS hosting company: HostGator

To learn more, see our article about when you need VPS hosting for your site.

3. Managed WordPress Hosting

Managed WordPress hosting is a specialized hosting service made specifically for WordPress. It is like a concierge service for your WordPress website.

On a managed hosting platform, the hosting company takes care of updates, backups, and caching of your website. This allows you to focus on creating content and growing your business.

Pricing: Starting from $35.00 per month

Suitable for: Popular blogs, business websites, membership websites

Our recommended managed WordPress hosting company: WP Engine

For more details, see our article explaining when do you really need a managed WordPress hosting.

4. Dedicated Hosting

A dedicated server hosting gives you the entire server dedicated to your own website. You get all the resources of the server, advanced tools for server management, ability to install your own software and even your own operating system.

You’ll be managing your own server which may require some technical skills. It is an advanced option for larger websites that need high-performance to tackle higher traffic volume.

Pricing: Starting from $79.99 month

Suitable for: Enterprise level businesses, hugely popular websites, eCommerce stores

Our recommended Dedicated hosting company: SiteGround or HostGator

Note: We use HostGator custom dedicated servers to host the WPBeginner website.

Choosing The Right Plan to Host a Website

As you can see, all different hosting plans come with different server configuration and pricing. You’ll need to choose a plan that suits your needs and budget.

At WPBeginner, we recommend users to start with a low cost shared hosting plan and then upgrade as their business grows. This allows you to save money and only pay for the services that you actually need.

Shared hosting plans start from $7.99 per month (paid annually) and $14.99 for a domain name.

Now if you are just starting out, then this is still a significant investment.

Luckily, Bluehost has agreed to offer our users a discount on hosting and free domain name. Basically, you’ll be able to get started for $2.75 per month.

They are one of the largest hosting companies in the world and an officially recommended WordPress hosting provider.

→ Click Here to Claim This Exclusive Bluehost Offer ←

For other shared hosting plans, see our comparison of the best hosting companies.

Once you have signed up for a hosting account, the next step is to create your website. For detailed instructions, see our guide on how to make a website.

How Much It Cost to Host a Website

So far we have covered the costs of web hosting companies. However, your costs of hosting a website may vary depending on several factors.

The first thing is the hosting plan you choose. We recommend starting with smaller shared hosting plans and then upgrade as your business and website grows.

Once you start building a website, you may need to spend money on other things as well such as website templates, software extensions, and other services.

Your goal would be to only buy what you actually need and use free tools whenever you can.

We have an excellent guide on the cost of building a WordPress website and how to avoid overspending.

How to Host a Website on Your Computer

We are often asked by our users if they can host a website on their own computer.

Yes, you can.

However, the only reason you should host a website on your computer is when you want to test a site locally before putting it on the internet.

A lot of beginners find it useful to learn web development, WordPress, and coding by installing a local server on their computer.

See our tutorials on how to set up local server on Windows and Mac.

This will allow you to install a local server without making it publicly available.

We don’t recommend using a local server to host a website and make it publicly available. However, we will show you how to do that for users who are feeling adventurous.

Putting Your Local Host Server Online

Once you host a website on your local server, it will only be available to you. You’ll need to change its settings to put your website on the internet.

First, locate your web server software’s configuration file called httpd.conf.

If you are using WAMP on Windows, then you’ll find it under C:\wamp\bin\apache\apache[version#]\conf] folder.

MAMP users on Mac will find it inside /Applications/MAMP/conf/apache/ folder.

You can open this file using a plain text editor like Notepad or TextEdit. After that, you need to find the line that begins with

Listen 80

You need to replace it with your IP address and port number. You can find your IP address by simply Googling ‘what is my ip address’ it will show you a numeric string separated by dots. Here’s an example of what that code should look like with your IP:

Listen 64.233.160.1:80

Next, you need to find the following line:

ServerName localhost:80

Go ahead and change it by replacing localhost:80 with your IP address.

ServerName 64.233.160.1

Next, you need to find the following line for WAMP:

<Directory "c:/wamp/www/">

If you are using MAMP, then look for the following line:

<Directory "/Applications/MAMP/htdocs">

Below this line you’ll see the access permissions, which you need to replace with the following:

Order Allow,Deny
Allow from all

You can now save your configuration file and restart your local server with the new permissions.

Now anyone can use your IP address to access your website instead of localhost. This is not an ideal situation as it would be hard for your users to remember the IP address.

That’s where domain names come in handy.

Pointing Your Domain Name to a Locally Hosted Website

Pointing your domain name to a website that you are hosting on your own computer will allow users to access it as they would do with any other site.

First, you need to edit your domain name’s DNS settings. We’re using Domain.com in our screenshots below:

Editing DNS settings for your domain name

After that, you need to edit the A name record with @ sign as the Name. If you don’t have one, then click on Add new record button to proceed.

Adding A record for your domain

In the value field, you need to enter your computer’s IP address and click on the Update DNS button to save your changes.

If the computer with your local server is connected to the internet directly, then you are all done.

However, if your computer is connected to the internet via router then you need to forward ports. To do that, you need to login to your router’s admin interface by entering the router’s IP address in your browser address bar.

Depending on the manufacturer, your router interface may look slightly different. You will need to find the option labeled port forwarding, virtual server, or NAT.

Port forwarding

Next, you need to forward web or HTTP traffic to port 80. In the IP address field, you need to enter the IP address of your computer on the local network. This IP address is the internal address that identifies your computer on the local network.

After that, you need to apply the changes and restart your router.

Disadvantages of Hosting a Website by Yourself

Hosting your website on a local computer is a bad idea. This is why even the tech giants with enough resources, skills, and know-how prefer to go with a hosting service provider.

Following are just a few disadvantages of hosting a website on local computer.

  • In order to run a web server, you need to put it on a computer connected to a high-speed internet connection 24 hours a day.
  • You also need to install updates for the web server software, keep backups, plan on a backup server, and more.
  • The computer hosting your website will also be open to hacking attempts, malware injection, and DDOS attacks. This could also affect the security of all other computers on your network.
  • You will need to purchase a static IP address from your internet service provider, which will cost you extra.

Doing all this will require a lot of time, effort, and technical skills. This is why it is a bad idea to host your website on a local computer by yourself.

FAQs about Website Hosting

Having helped thousands of beginners start their own websites, we have heard every possible question. Following are some of the most commonly asked questions from people who want to host a website.

1. Why do I need a hosting provider to host a website?

Hosting service providers specialize in maintaining a platform to serve websites. They have engineers and system administrators in their staff that monitor their servers 24/7.

This allows you to focus on building your website and growing your business instead of managing server software.

2. Can I buy a domain name and hosting from two companies?

Yes, you can. However, buying them from the same company allows you to manage both of them under the same dashboard. Also some providers like Bluehost even offer a free domain as an incentive to use their service.

3. Can I buy a domain name and host my website later?

Yes, you can buy a domain name alone. However, it will not be pointing to your website until you choose a hosting provider.

We recommend Domain.com for registering a domain name. They offer beginner friendly domain management tools, which will make it easy to connect your domain to any hosting provider later.

4. Can I host my website on my local computer and later move it to a hosting provider?

Yes, you can do that. However, if you are serious about making a website, then it is better to start with a hosting provider.

5. Can I host a website with one provider and then change it to another provider?

Yes, you can move your website to any other hosting company at any time. See our article on how to move your website to a new host for detailed instructions.

6. Where do I host my website?

There are so many hosting companies out there, that it becomes difficult for beginners to make the right choice.

Over the years, we have worked with all the top hosting companies on the market. This has given us insights into what makes a good hosting platform.

For starter websites, we recommend Bluehost. They automatically install WordPress, and they offer a beginner friendly dashboard, built-in caching, security, and more. On top of it, they are offering WPBeginner readers discount on hosting + free domain name.

For more recommendations, see our complete list of the best hosting companies with their pros and cons.

There are few companies offering free web hosting, but we recommend that you be very careful about those.

We hope this article helped you learn how to host your website. You may also want to see our guide on how to get a free business email address for your website.

If you liked this article, then please subscribe to our YouTube Channel for WordPress video tutorials. You can also find us on Twitter and Facebook.

The post How to Host a Website (Simple Guide for Beginners) in 2019 appeared first on WPBeginner.

Draggable Menu with Image Grid Previews

After our little draggable image strip experiment, we wanted to explore using the dragging functionality on a menu. The idea is to show a large inline menu with some scattered thumbnails. The menu can be dragged and while doing so, the thumbnails get moved with an animation. Each menu item also changes the letters to show an outlined version. When clicking on the “explore” link under a menu item, the thumbnails move and enlarge to form a grid.

The animations are powered by TweenMax and we use Dave DeSandro’s Draggabilly.

Attention: Note that the demo is experimental and that we use modern CSS properties that might not be supported in older browsers.

The initial view looks as follows:

DraggableMenu_01

When clicking on the explore link, we animate all thumbnails to their place in a custom grid.

DraggableMenu_02

You can see it in action here:

DraggableMenu.2019-06-19 10_45_16_optimized

We hope you enjoy this menu and find it useful!

References and Credits

Draggable Menu with Image Grid Previews was written by Mary Lou and published on Codrops.