Who here has seen a noticable increase/decrease in traffic since Google BERT launched on Friday? Unfortunately it hasn't been too kind to us.
The Current State of Styling Selects in 2019
Best I could tell from the last time I compiled the most wished-for features of CSS, styling form controls was a major ask. Top 5, I'd say. And of the native form elements that people want to style, Greg Whitworth has some data that the <select> element is more requested than any other element — more than double the next element — and it's the one developers most often customize in some way.
Developers clearly want to style select dropdowns.
You actually do a little. Perhaps more than you realize.
The best crack at this out there comes from Scott Jehl over on the Filament Group blog. I'll embed a copy here so it's easy to see:
See the Pen
select-css by Scott/Filament Group by Chris Coyier (@chriscoyier)
on CodePen.
Notably, this is an entirely cross-browser solution. It's not something limited to only the most progressive desktop browsers. There are some visual differences across browsers and platforms, but overall it's pretty consistent and gives you a baseline from which to further customize it.
That's just the "outside"
Open the select. Hmm, it looks and behaves like you did nothing to it at all.
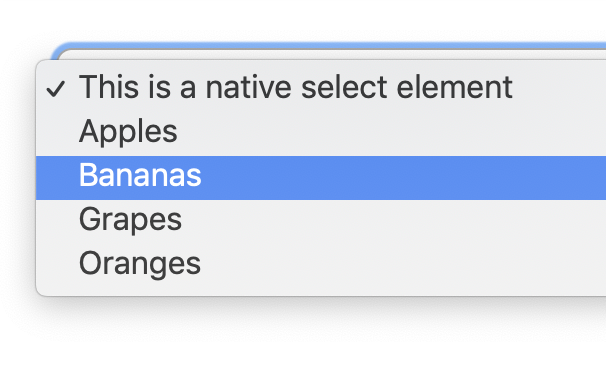
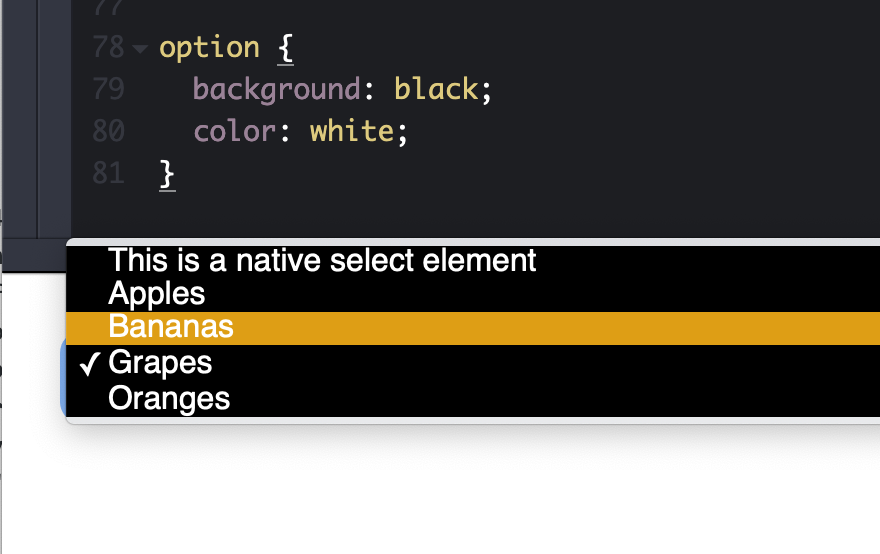
<select> doesn't do anything to the opened dropdown of items. (Screenshot from macOS Chrome)Some browsers do let you style the inside, but it's very limited. Any time I've gone down this road, I've had a bad time getting things cross-browser compliant.
Greg's data shows that only 14% (third place) of developers found styling the outside to be the most painful part of select elements. I'm gonna steal his chart because it's absolutely fascinating:
| Frustration | % | Count |
|---|---|---|
| Not being able to create a good user experience for searching within the list | 27.43% | 186 |
| Not being able to style the <option> element to the extent that you needed to | 17.85% | 121 |
| Not being able to style the default state (dropdown arrow, etc.) | 14.01% | 95 |
| Not being able to style the pop-up window on desktop (e.g. the border, drop shadows, etc.) | 11.36% | 77 |
| Insertion of content beyond simple text in the <select> control or its <option>s | 11.21% | 76 |
| Insertion of arbitrary HTML content in an <option> element | 7.82% | 53 |
| Not being able to create distinctive unselected/placeholder style and behavior | 3.39% | 23 |
| Being able to generate new options from a large dataset while the popup is open | 3.10% | 21 |
| Not being able to style the currently selected <option>(s) to the extent you needed to | 1.77% | 12 |
| Not being able to style the pop-up window on mobile | 1.03% | 7 |
| Being able to have the options automatically repeat on scroll (i.e., if you have an list of options 1 – 100, as you reach 100 rather than having the user scroll back to the top, have 1 show up below 100) | 1.03% | 7 |
Boiled down, the most painful parts of styling selects are:
- Search
- Styling the open dropdown, including the individual options, including more than just text
- Updating the element without closing it
- Styling for cases where "nothing" is selected and when an item is selected
I'm surprised multi-select didn't make the cut. Maybe it's not on the table for <select> since it wouldn't be backwards-compatible?
Browser evolution
Edge recently announced they are improving the look of form controls, but no word just yet on standards or how to customize them.
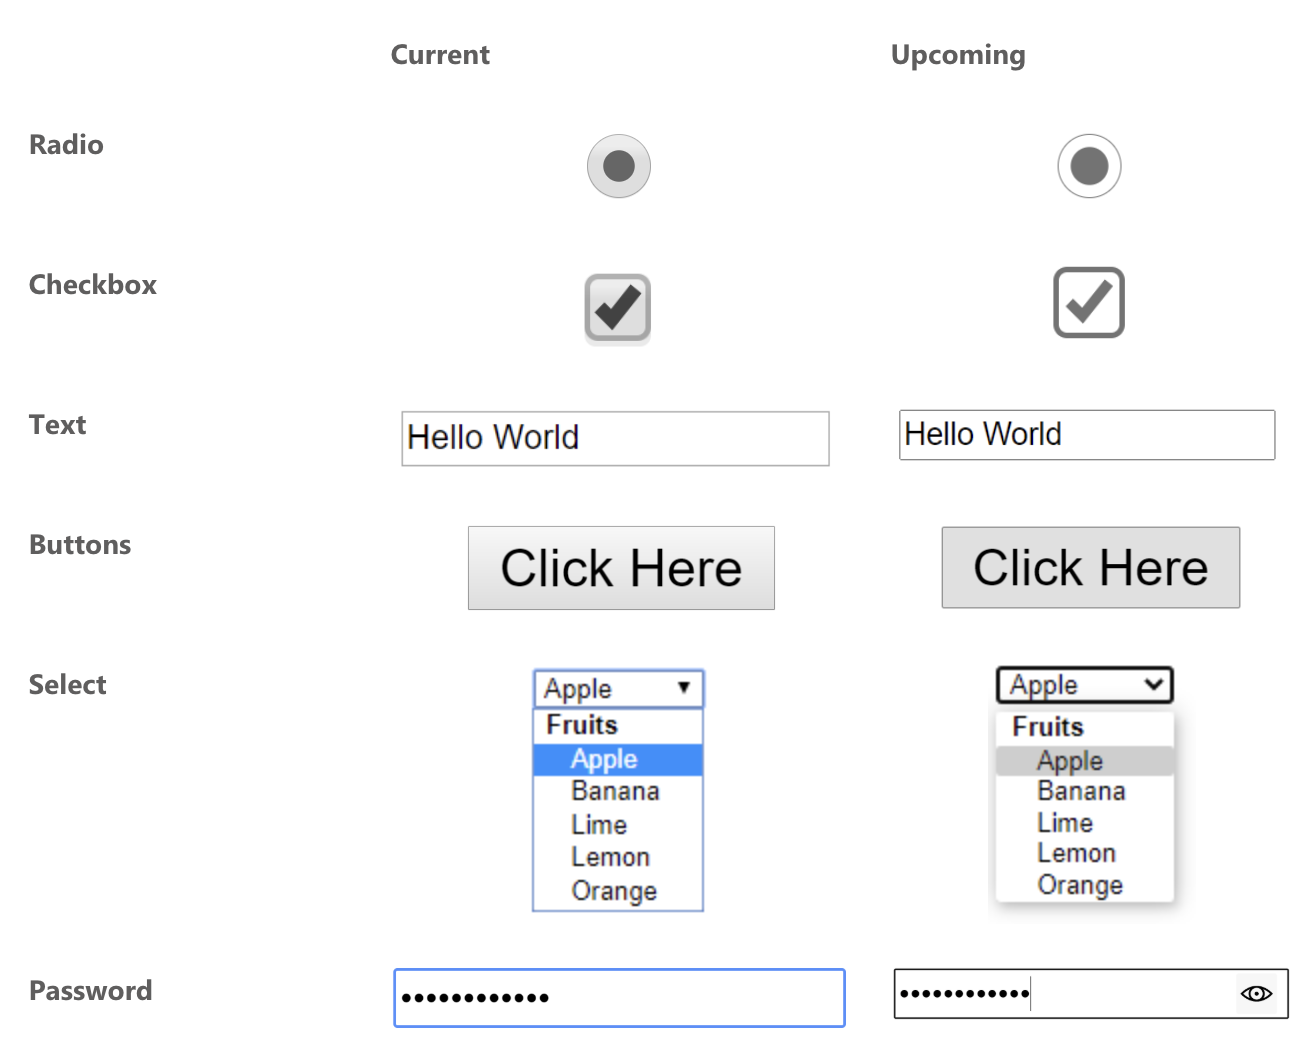
It seems like there is good momentum, though. If you want more information and to follow along with all this progress (I know I will!):
- Listen to Nicole Sullivan talk about it (starts at about the 16 minute mark).
- Read Greg Whitworth's "Can we please style the
<select>control?!" It goes deep into all this.
The post The Current State of Styling Selects in 2019 appeared first on CSS-Tricks.
Creating multiple sessions using Codeigniter sessions
Hi All,
I am trying to create multiple codeigniter sessons for multiple users. I will explain my scenario.
I have developed an application using codeigniter and launched in an ecommerce platfomr so that many shop owners installed my application.
Now from my admin front, I have access to check for each particular user's app interface using the session and redirect method.
I want to make the sessions for all users open in different tabs, when I click on one button.
I have used a for loop.
The iteration works perfect and data are for each user are retrieved perfectly.
But the redirect method opens the session for the first user alone and stops there.
I am just breaking my head on this issue.
I need your help in this issue. I would be very grateful since this is eating my time.
Thanks in advance.
This is the piece of code which I am using.
    /***  Code starts here ***/

    public function login_as_update() {

    $customer = $this->customers_model->read_allshops();
    if(count($customer) != 0) {
        for($i=0;$i<count($customer);$i++){

            $cust_array = get_object_vars($customer[$i]);

            $newdata = array(
           'shop'  => $cust_array['shop'],
           'token'     => $cust_array['token'],
           'plan' => $cust_array['plan'],
            'status'  => 'active',
            'adminaccess'  => true,
            'id'  => $cust_array['id']
                );

            $this->session->set_userdata($newdata);

            ob_start();

            redirect(Settings::get('shopify_main_page_redirect'));

        }

    }
}
/*** Code ends here ***/Translate Your Shop & Website to Increase Sales
 We all want to read websites in our native language. I know this is not exactly a groundbreaking statement but you would be surprised at how many websites assume they can just add their content in English and the whole world will want to read it. In fact, out of the approximately 7.5 billion people […]
The post Translate Your Shop & Website to Increase Sales appeared first on WPExplorer.
Free Realistic Logo Mockup Templates
When you’re designing a company’s logo, you need a way to test out how it will look once it’s off the computer screen. Applying a logo to real-world scenarios, such as engraved on a sign, stamped on paper, or etched into leather, can help you accurately visualize how it will look once printed and in use.
But many business mockups are quite expensive, especially highly-realistic ones that come with extra effects. Luckily, there are several free templates available online with all the professional look and customization of premium graphics.
If you want to see how your logo is going to look in real life, try out one of these beautiful free mockups. That way you or your clients can be sure that it will look great not just online, but printed on merchandise or even on their office wall.
The Logo Designer's Toolbox
Unlimited Downloads: 500,000+ Logo Templates, Print Templates, PSD Templates and Design Assets.
Shop Facade Logo MockUp #2

Natural Paper Printed Logo MockUp

Carved Stone Logo Mockup PSD

Embroidered Logo MockUp

30 Free Realistic Logo Mockups by Pixel Surplus and Asylab Design

Hanging Wall Sign MockUp #3

Painted Wood Logo MockUp

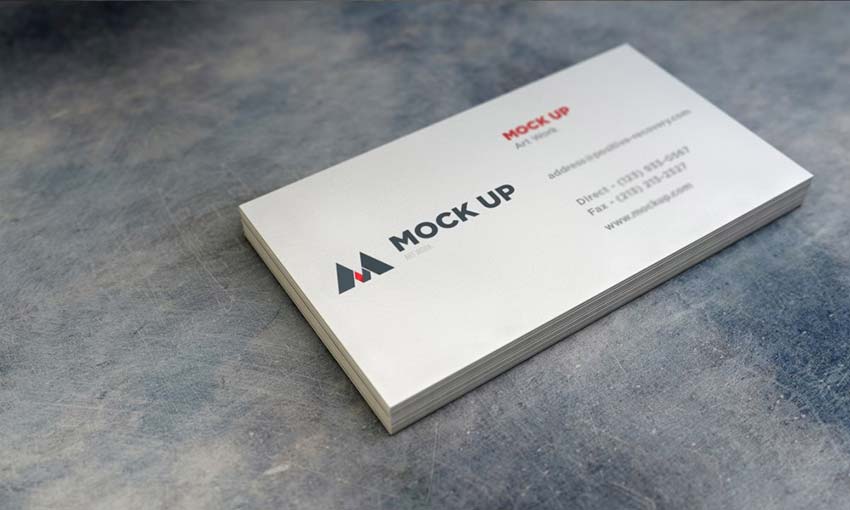
Realistic Business Card MockUp #2
Wood Engraved Logo MockUp #2

Window Signage MockUp #2

Free Garment Logo Mockup Set by The Designest Blog and Asylab Design

Leather Stamping Logo MockUp #2

Architecture Logo (10 Free Logo Mockup) by Shahanuz Zaman

Paper Logo Mockup

Hanging Wall Sign MockUp #5

Photorealistic Logo Mockups
Whether you’re designing a logo for your own company or for a client, a mockup can really help you refine your logo. Sometimes a design looks fine on the computer screen, but ends up being not quite right once it makes it through print. Maybe it’s just not suitable for the medium you’re printing or engraving it on.
Realistic mockups help you visualize your design in various scenarios. And clients will love seeing their company’s logo in these mockups. Try a few of these great free templates to help your design process and please your clients.
Make a given number odd or even
There are times when you need to make sure your counter starts at an odd or even number.
Even is pretty simple - counter = counter + modulus(counter). If counter is even it stays, if it's odd it gets incremented by 1.
Odd is a bit more complicated - counter = counter + modulus(counter + 1), If counter is odd it stays, if it's even it gets incremented by 1.
if you're in danger of counter being the max value you can always subtract instead.
These basic algorithms should work for any language that has a modulus operator/function.
I've included a simple example in C#.
Not Attending WordCamp US 2019? How to Watch From Home
For those of you unable to attend WordCamp US at St. Louis, Missouri, this weekend, the event will be available for live streaming. The conference runs from Friday, November 1, through Sunday, November 3. Friday and Saturday’s regular sessions, which do not include workshops, will be streamed.
While previous events like WordCamp US 2018 have always been available to watch for free, they required you to sign up before viewing. This year’s event is open with no such restriction. You can simply pick a streaming video and watch.
There will be multiple livestreams running simultaneously based on the room the parallel sessions are happening in. The WordCamp organizers have already set up the livestream videos with YouTube. By going to the Friday livestream or Saturday livestream page, you can set a reminder for any particular room you want to watch via the YouTube embed.
There are many sessions planned for the camp schedule. The tough problem is going to be figuring out what to watch with overlapping streams from three rooms. All times on the schedule are in Central Time US (CST).
If you have a question for a particular speaker, WordCamp US will have a volunteer social media team keeping an eye on the following hashtags on Twitter. The volunteers may ask your question if time permits for the session.
- #AskWCUS220 (Room 220)
- #AskWCUS230 (Room 230)
- #AskWCUS240 (Room 240)
- #AskSOTW (State of the Word)
Watch Previous WordCamp US Speakers
If you can’t wait for this year’s sessions, you can view the 2018 sessions from WordPress TV. It is a good way to get yourself in the mood for this year’s event and to look at how much WordPress has changed in the past year.
One of the most interesting WordCamp videos is always the “State of the Word” presented by Matt Mullenweg, co-founder of WordPress. You can watch last year’s video below. What do you expect to see in this year’s talk?
How Will You Attend WordPress US 2019?
Are you planning on attending in person this year? Or, will you be among the many who are watching from home, the office, or elsewhere?
Unfortunately, WP Tavern will not be able to cover the event in person this year. However, we will be watching from home like many of you. Feel free to drop your recommended must-watch sessions in the comments.
If you are unable to attend or watch via livestream, the videos will be available on WordPress TV and YouTube to watch at your leisure.
Ghost 3.0 Combines Publishing and Subscriptions in the Same Platform
Ghost, a headless CMS provider that is growingly popular for online publishing, just announced the release of Ghost 3.0. Ghost 3.0 is marked by two categories of major changes. The first is a keen focus on integrating subscription/membership directly within the publishing platform. Second, the technical approach has shifted to the JAMstack movement.
7 Reasons Why Video Improves Content Engagement and SEO Rankings
Thanks to the internet, anyone can create an effective personal brand with the help of tools like social media and blogs. It’s also important to note that as time progresses, video content continues to dominate as one of the most effective ways to achieve engagement with followers and rank in the search engines. This is...
The post 7 Reasons Why Video Improves Content Engagement and SEO Rankings appeared first on DesignrFix.
A Business Case for Dropping Internet Explorer
The distance between Internet Explorer (IE) 11 and every other major browser is an increasingly gaping chasm. Adding support for a technologically obsolete browser adds an inordinate amount of time and frustration to development. Testing becomes onerous. Bug-fixing looms large. Developers have wanted to abandon IE for years, but is it now financially prudent to do so?
First off, we’re talking about a dead browser
Development of IE came to an end in 2015. Microsoft Edge was released as its replacement, with Microsoft announcing that “the latest features and platform updates will only be available in Microsoft Edge”.
Edge was a massive improvement over IE in every respect. Even so, Edge was itself so far behind in implementing web standards that Microsoft recently revealed that they were rebuilding Edge from the ground up using the same technology that powers Google Chrome.
Yet here we are, discussing whether to support Edge’s obsolete ancient relative. Internet Explorer is so bad that a Principal Program Manager at the company published a piece entitled The perils of using Internet Explorer as your default browser on the official Microsoft blog. It’s a browser frozen in time; the web has moved on.

Browsers are moving faster than ever before. Consider everything that has happened since 2015. CSS Grid. Custom properties. IE11 will never implement any new features. It’s a browser frozen in time; the web has moved on.
It blocks opportunities and encourages inefficiency
The landscape of browsers has also changed dramatically since Microsoft deprecated IE in 2015. Google developer advocate Sam Thorogood has compiled a list of all the features that are supported by every browser other than IE. Once the new Chromium version of Edge is released, this list will further increase. Taken together, it’s a gargantuan feature set, comprising new HTML elements, new CSS properties and new JavaScript features. Many modern JavaScript features can be made compatible with legacy browsers through the use of polyfills and transpilation. Any CSS feature added to the web over the last four years, however, will fail to work in IE altogether.
Let’s dig a little deeper into the features we have today and how they are affected by IE11. Perhaps most notable of all, after decades of hacking layouts on the web, we finally have CSS grid, which massively simplifies responsive layout. Together with CSS custom properties, object-fit, display: contents and intrinsic sizing, they’re all examples of useful CSS features that are likely to leave a website looking broken if they’re not supported. We’ve had some major additions to CSS over the last five years. It’s the cumulative weight of so many things that undermines IE as much as one killer feature.
While many additions to the web over the last five years have been related to layout and styling, we’ve also had huge steps forwards in functionality, such as Progressive Web Apps. Not every modern API is unusable for websites that need to stay backwards compatible. Most can be wrapped in an if statement.
if ('serviceWorker' in navigator) {
// do some stuff with a service worker
} else {
  // ???
}
You will, however, be delivering a very different experience to IE users. Increasingly, support for IE will limit the choice of tools that are available as library and frameworks utilize modern features.
Take this announcement from Evan You about the release of Vue 3, for example:
The new codebase currently targets evergreen browsers only and assumes baseline native ES2015 support.
The Vue 3 codebase makes use of proxies — a JavaScript feature that cannot be transpiled. MobX is another popular framework that also relies on proxies. Both projects will continue to maintain backwards-compatible versions, but they’ll lack the performance improvements and API niceties gained from dropping IE. Pika, a great new approach to package management, requires support for JavaScript modules, which are not supported in IE. Then there is shadow DOM — a standardized part of the modern web platform that is unlikely to degrade gracefully.
Supporting it takes tremendous effort
When assessing how much extra work is required to provide backwards compatibility for a deprecated browser like IE11, the long list of unimplemented features is only part of the problem. Browsers are incredibly complex pieces of software and, despite web standards, browsers are inconsistent. IE has long been the most bug-ridden browser that is most at odds with web standards. Flexbox (a technology that developers have been using since 2013), for example, is listed on caniuse.com as having partial support on IE due to the "large amount of bugs present."
IE also offers by far the worst debugging experience — with only a primitive version of DevTools. This makes fixing bugs in IE undoubtedly the most frustrating part of being a developer, and it can be massively time-consuming — taking time away from organizations trying to ship features.
There’s a difference between support — making sure something is functional and looks good enough — versus optimization, where you aim to provide the best experience possible. This does, however, create a potentially confusing grey area. There could be differences of opinion on what constitutes good enough for IE. This comment about IE9 from Dave Rupert is still relevant:
The line for what is considered "broken" is fuzzy. How visually broken does it have to be in order to be functionally broken? I look for cheap fixes, but this is compounded by the fact the offshore QA team doesn’t abide in that nuance, a defect is a defect, which gets logged and assigned to my inbox and pollutes the backlog…Whether it’s polyfills, rogue if-statements, phantom styles, or QA kickbacks; there are costs and technical debt associated with rendering this site on an ever-dwindling sliver of browsers.
If you’re going to take the approach of supporting IE functionally, even if it’s not to the nth degree, still confines you to polyfill, transpile, prefix and test on top of everything else.
It’s already been abandoned by many top websites

Popular websites to officially drop support for IE include Youtube, GitHub, Meetup, Slack, Zendesk, Trello, Atlassian, Discord, Spotify, Behance, Wix, Huddle, WhatsApp, Google Earth and Yahoo. Even some of Microsoft’s own product’s, like Teams, have severely reduced support for IE.
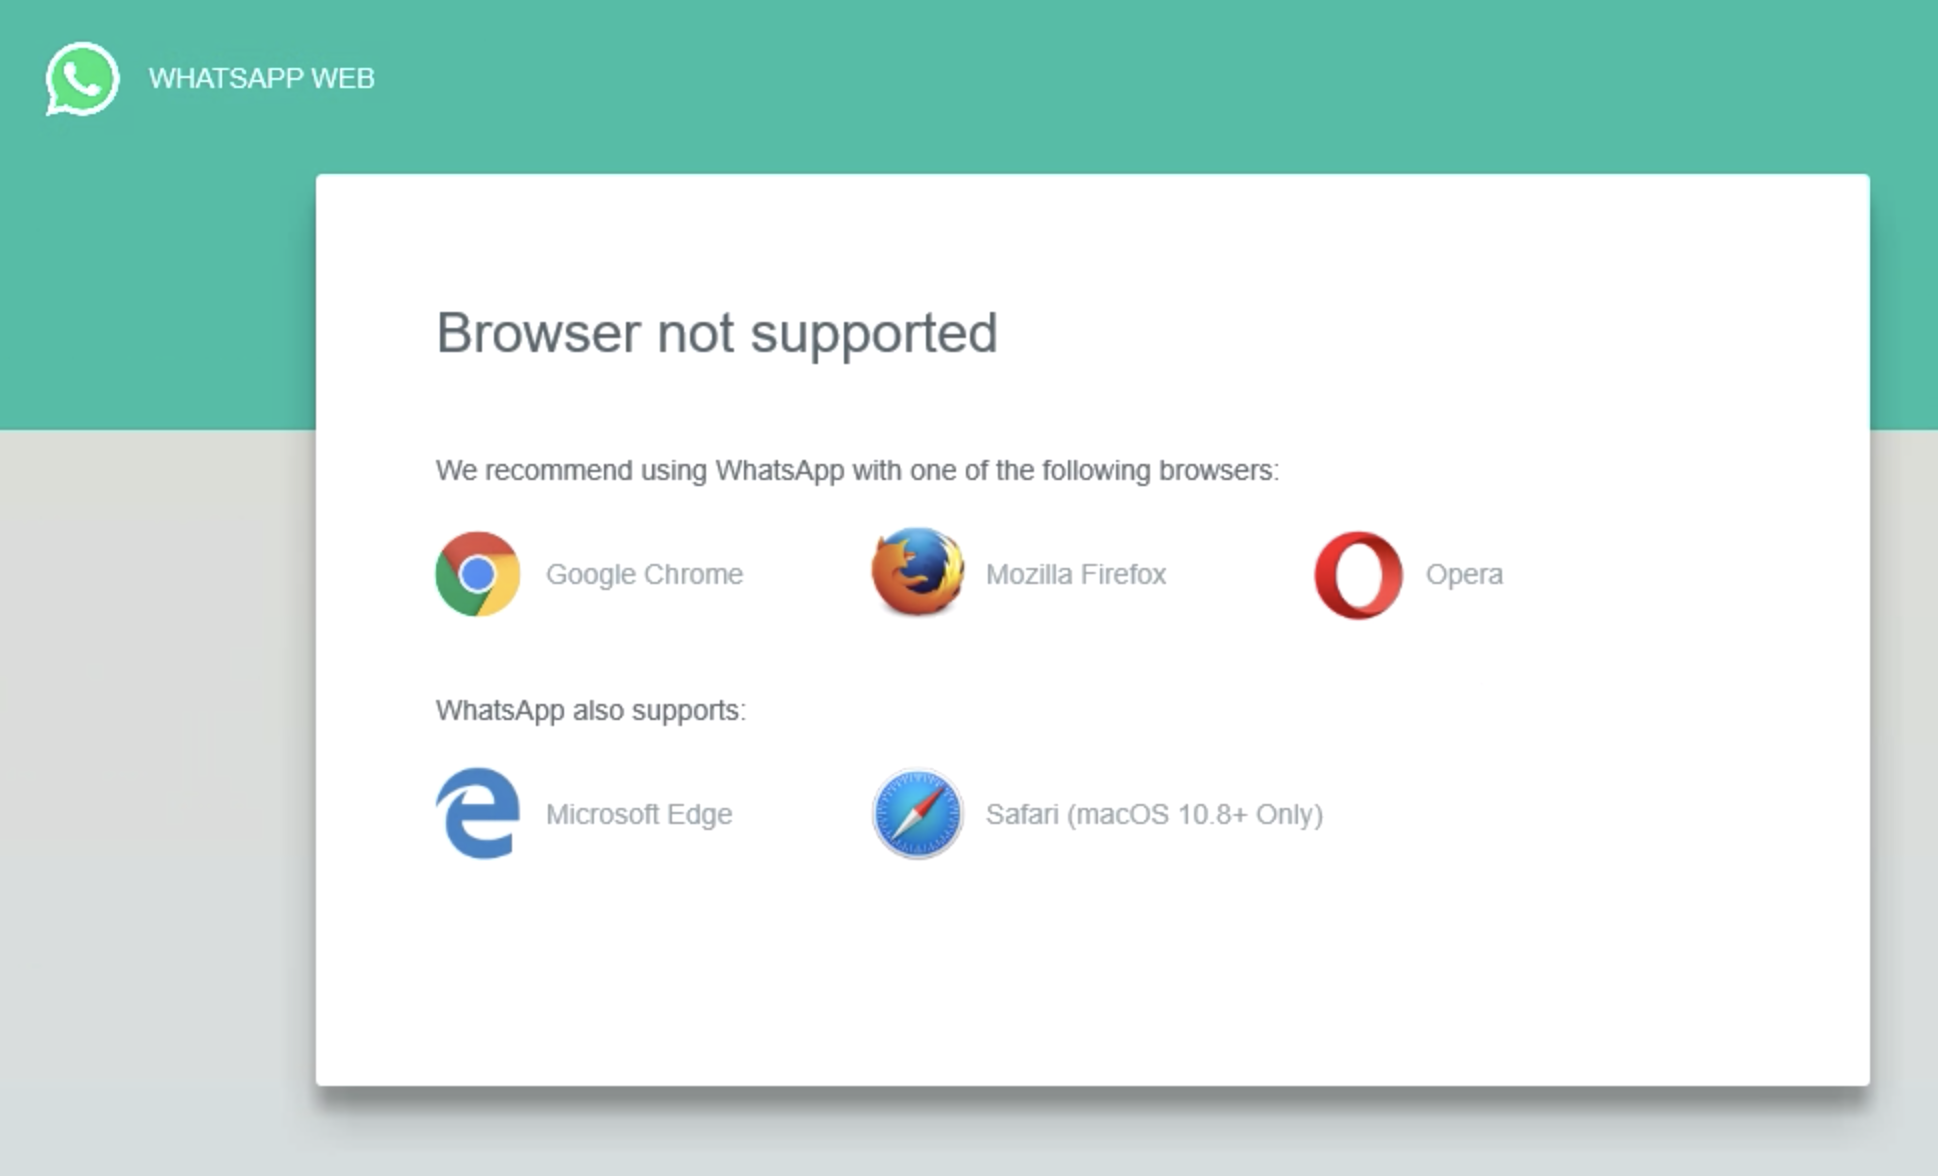
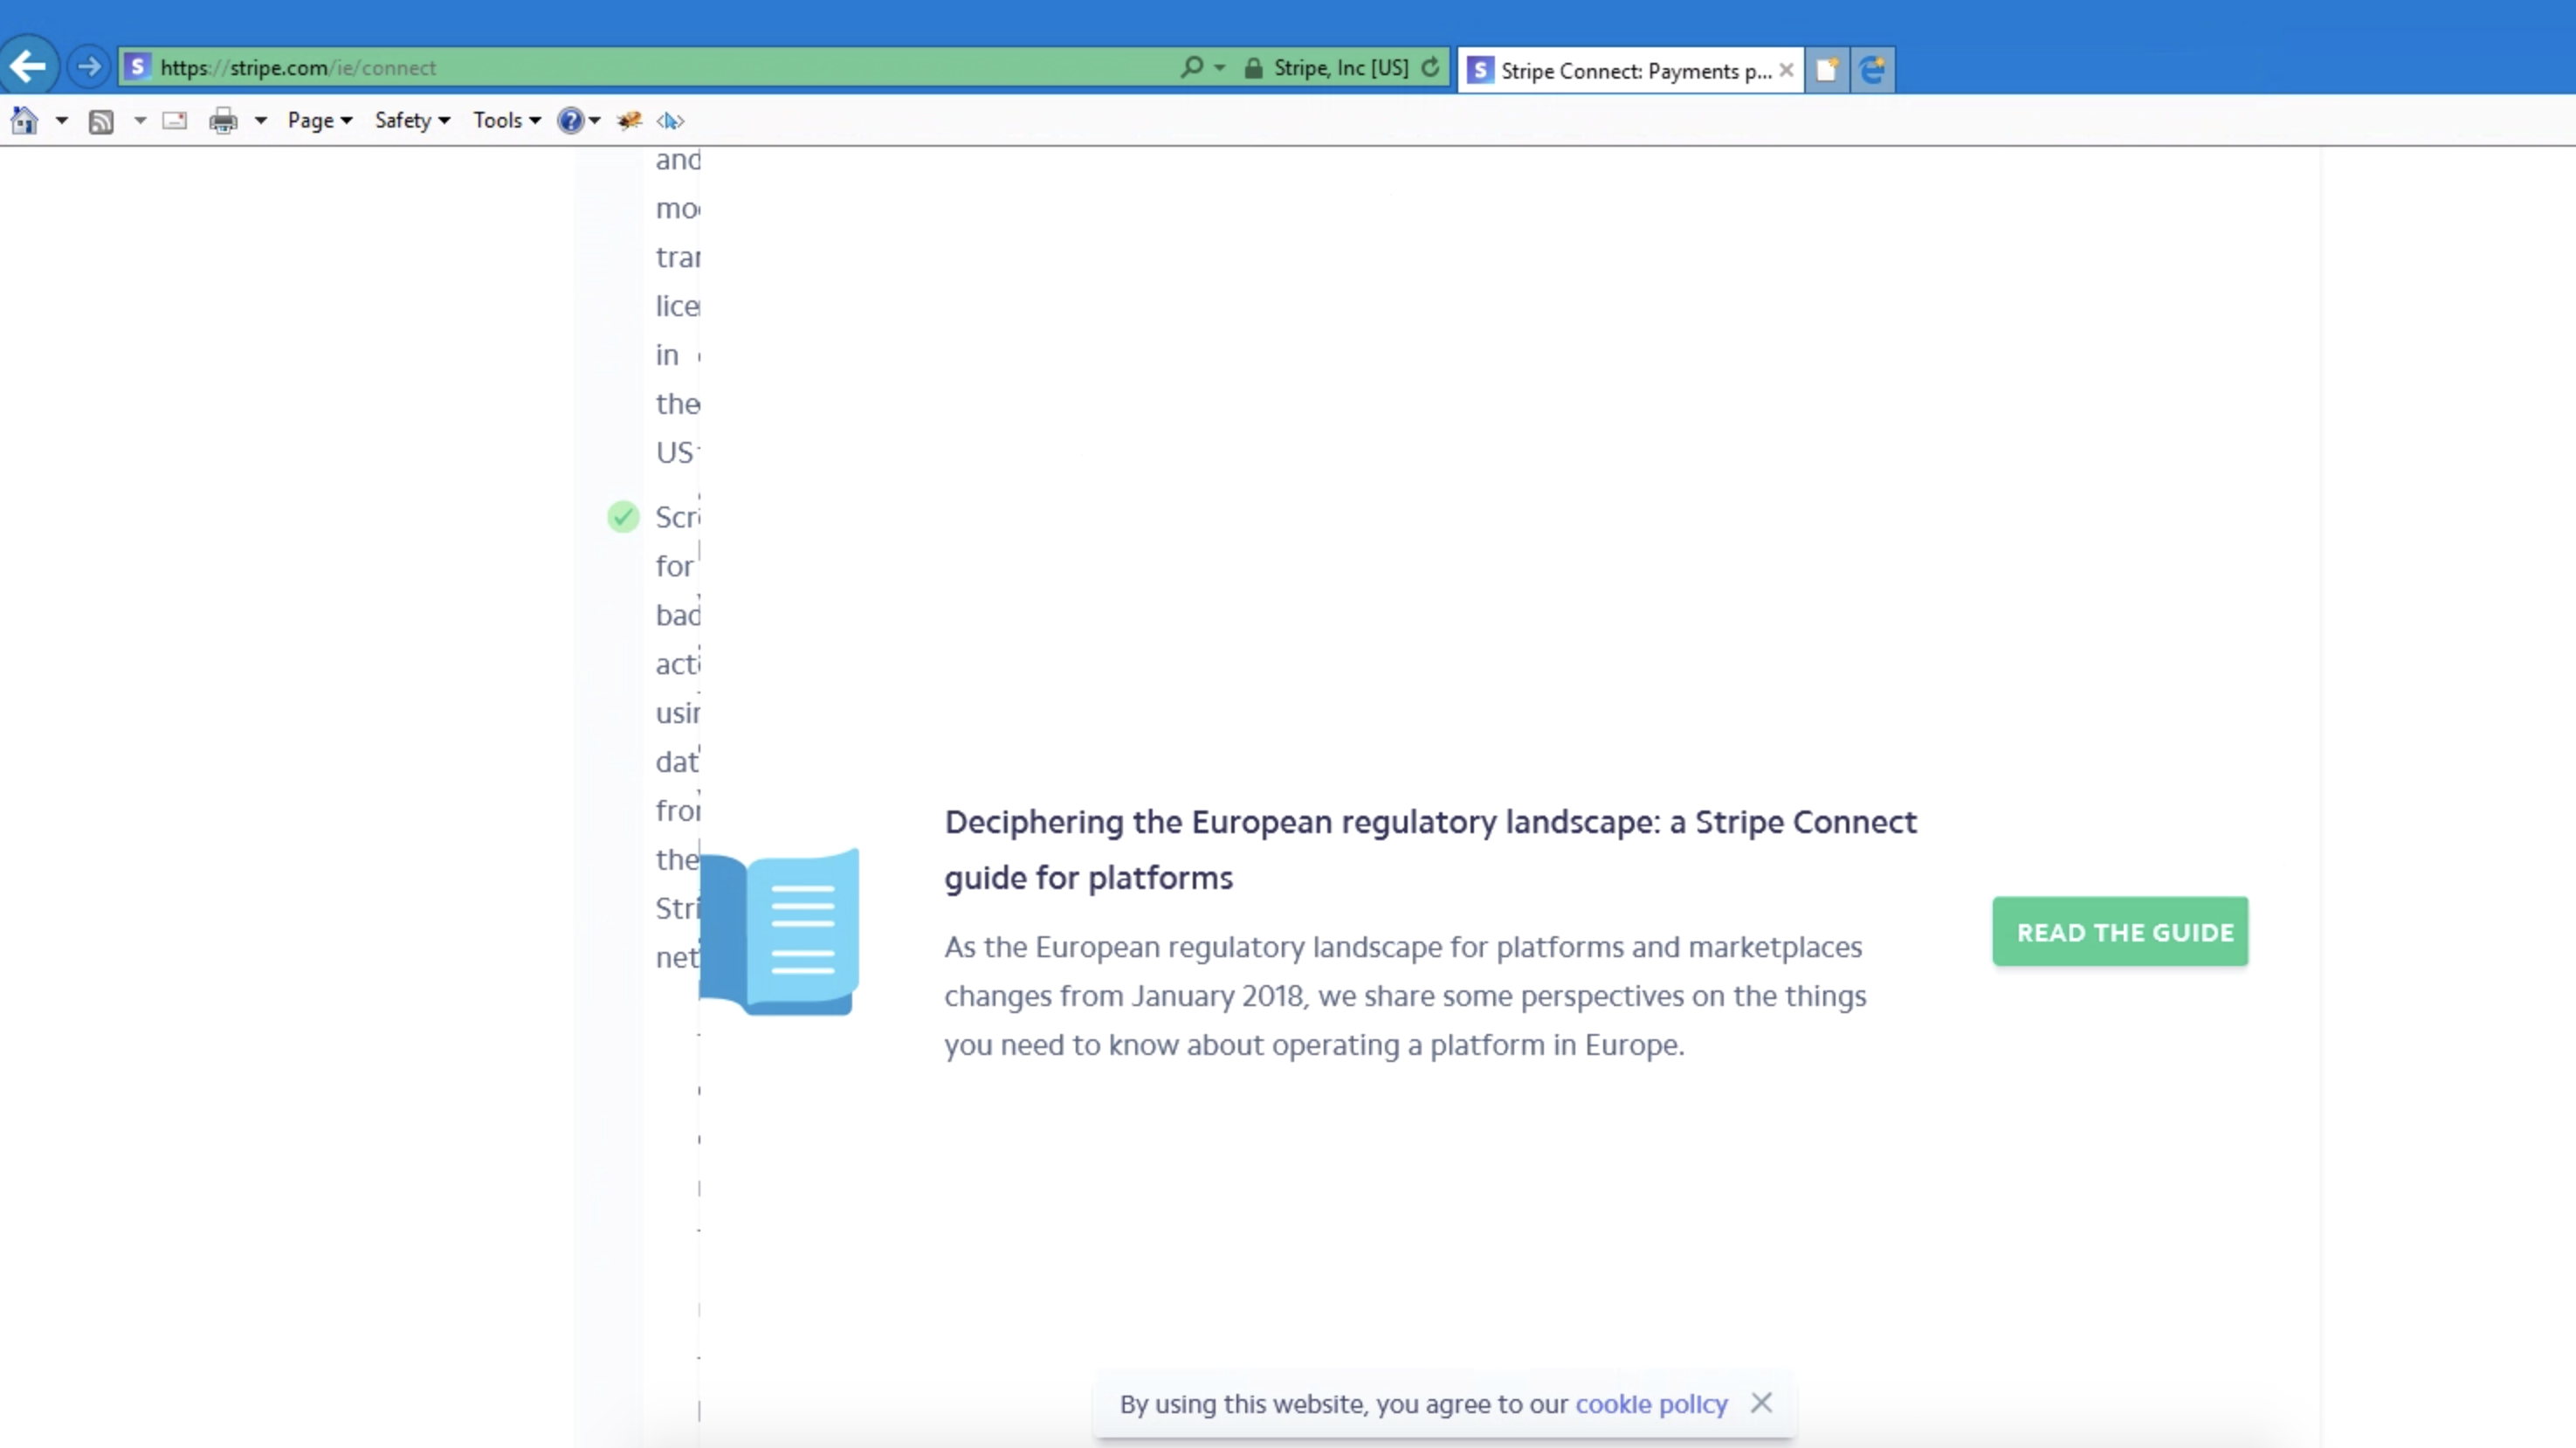
Twitter displays a banner informing IE users that they will not receive the best experience and redirects users to a much older version of the Twitter website. When we think of disruptive companies that are pushing the best in web design, Monzo, Apple Music and Stripe break horribly in IE, while foregoing a warning banner.
Why the new Chromium-powered Edge browser matters
IE usage has been on a slower downward trend following an initial dramatic fall. There’s one primary reason the browser continues to hang on: ancient business applications that don’t work in anything else. Plenty of large companies still use applications that rely on APIs that were never standardized and are now obsolete. Thankfully, the new Edge looks set to solve this issue. In a recent post, the Microsoft Edge Team explained how these companies will finally be able to abandon IE:
The team designed Internet Explorer mode with a goal of 100% compatibility with sites that work today in IE11. Internet Explorer mode appears visually like it’s just a part of the next Microsoft Edge...By leveraging the Enterprise mode site list, IT professionals can enable users of the next Microsoft Edge to simply navigate to IE11-dependent sites and they will just work.
.@MicrosoftEdge: one browser for all web experiences. IE mode will allow you to view and access legacy sites directly in the same window. #MSBuild https://t.co/NXcDjDB5B4 pic.twitter.com/x7BtCtASNs
— Microsoft Edge Dev (@MSEdgeDev) May 6, 2019
After using the beta version for several months, I can say it’s a genuinely great browser. Dare I say, better than Google Chrome? Microsoft are already pushing it hard. Edge is the default browser for Windows 10. Hundreds of millions of devices still run earlier versions of the operating system, on which Edge has not been available. The new Chromium-powered version will bring support to both Windows 7 and 8. For users stuck on old devices with old operating systems, there is no excuse for using IE anymore. Windows 7, still one of the world’s most popular operating systems, is itself due for end-of-life in January 2020, which should also help drive adoption of Edge when individuals and businesses upgrade to Windows 10.
In other words, it's the perfect time to drop support.
Performance costs
All current browsers support ECMAScript 2015 (the latest version of JavaScript) — and have done so for quite some time. Transpiling JavaScript down to an older (and slower) version is still common across the industry, but at this point in time is needed only for Internet Explorer. This process, allowing developers to write modern syntax that still works in IE negatively impacts performance. Philip Walton, an engineer at Google, had this to say on the subject:
Larger files take longer to download, but they also take longer to parse and evaluate. When comparing the two versions from my site, the parse/eval times were also consistently about twice as long for the legacy version. [...] The cost of shipping lots of unneeded JavaScript to low-end mobile browsers can be significant! We (on the Chrome team) have seen numerous occurrences of polyfill bloat adding seconds to the total startup time of websites on low-end mobile devices.
It’s possible to take a differential serving approach to get around this issue, but it does add a small amount of complexity to build tooling. I’m not sure it’s worth bothering when looking at the entire picture of what it already takes to support IE.
Yet another example: IE requires a massive amount of polyfills if you’re going to utilize modern APIs. This normally involves sending additional, unnecessary code to other browsers in the process. An alternative approach, polyfill.io, costs an additional, blocking HTTP request — even for modern browsers that have no need for polyfills. Both of these approaches are bad for performance.
As for CSS, modern features like CSS grid decrease the need for bulky frameworks like Bootstrap. That's lots of extra bites we’re unable to shave off if we have to support IE. Other modern CSS properties can replace what’s traditionally done with JavaScript in a way that’s less fragile and more performant. It would be a boon for both performance and cost to take advantage of them.
Let’s talk money
One (overly simplistic) calculation would be to compare the cost of developer time spent on fixing IE bugs and the amount lost productivity working around IE issues versus the revenue from IE users. Unless you’re a large company generating significant revenue from IE, it’s an easy decision. For big corporations, the stakes are much higher. Websites at the scale of Amazon, for example, may generate tens of millions of dollars from IE users, even if they represent less than 1% of total traffic.
I’d argue that any site at such scale would benefit more by dropping support, thanks to reducing load times and bounce rates which are both even more important to revenue. For large companies, the question isn’t whether it’s worth spending a bit of extra development time to assure backwards compatibility. The question is whether you risk degrading the experience for the vast majority of users by compromising performance and opportunities offered by modern features. By providing no incentive for developers to care about new browser features, they're being held back from innovating and building the best product they can.
It’s a massively valuable asset to have developers who are so curious and inquisitive that they explore and keep up with new technology. By supporting IE, you’re effectively disengaging developers from what’s new. It’s dispiriting to attempt to keep up with what’s new only to learn about features we can’t use. But this isn’t about putting developer experience before user experience. When you improve developer experience, developers are enabled to increase their productivity and ship features — features that users want.
Web development is hard
It was reported earlier this year that the car rental company Hertz was suing Accenture for tens of millions of dollars. Accenture is a Fortune Global 500 company worth billions of dollars. Yet Hertz alleged that, despite an eye-watering price tag, they "never delivered a functional site or mobile app."
According to The Register:
Among the most mind-boggling allegations in Hertz's filed complaint is that Accenture didn't incorporate a responsive design… Despite having missed the deadline by five months, with no completed elements and weighed down by buggy code, Accenture told Hertz it would cost an additional $10m – on top of the $32m it had already been paid – to finish the project.
The Accenture/Hertz affair is an example of stunning ineptitude but it was also a glaring reminder of the fact that web development is hard. Yet, most companies are failing to take advantage of things that make it easier. Microsoft, Google, Mozilla and Apple are investing massive amounts of money into developing new browser features for a reason. Improvements and innovations that have come to browsers in recent years have expanded what is possible to deliver on the web platform while making developers’ lives easier.
Move fast and ship things
The development industry loves terms — like agile and disruptive — that imply light-footed innovation. Yet rather than focusing on shipping features and creating a great experience for the vast bulk of users, we’re catering to a single outdated legacy browser. All the companies I’ve worked for have constantly talked about technical debt. The weight of legacy code is accurately perceived as something that slows down developers. By failing to take advantage of what modern browsers have to offer, the code we write today is legacy code the moment it is written. By writing for the modern web, you don’t only increase productivity today but also create code that’s easier to maintain in the future. From a long-term perspective, it’s the right decision.
Recruitment and retainment
Developer happiness won’t be viewed as important to the bottom line by some business stakeholders. However, recruiting good engineers is notoriously difficult. Average tenure is low compared to other industries. Nothing can harm developer morale more than a day of IE debugging. In a survey of 76,118 developers conducted by Mozilla "Having to support specific browsers (e.g. IE11)" was ranked as the most frustrating thing in web development. "Avoiding or removing a feature that doesn't work across browsers" came third while testing across different browsers reached fourth place. By minimising these frustrations, deciding to end support for IE can help with engineer recruitment and retainment.
IE users can still access your website
We live in a multi-device world. Some users will be lucky enough to have a computer provided by their employer, a personal laptop and a tablet. Smartphones are ubiquitous. If an IE user runs into problems using your site, they can complete the transaction on another device. Or they could open a different browser, as Microsoft Edge comes preinstalled on Windows 10.
The reality of cross-browser testing
If you have a thorough and rigorous cross-browser testing process that always gets followed, congratulations! This is rare in my experience. Plenty of companies only test in Chrome. By making cross-browser testing less onerous, it can be made more likely that developers and stakeholders will actually do it. Eliminating all bugs in browsers that are popular is far more worthwhile monetarily than catering to IE.
When do you plan to drop IE support?
Inevitably, your own analytics will be the determining factor in whether dropping IE support is sensible for you. Browser usage varies massively around the world — from almost 10% in South Korea to well below one percent in many parts of the world. Even if you deem today as being too soon for your particular site, be sure to reassess your analytics after the new Microsoft Edge lands.
The post A Business Case for Dropping Internet Explorer appeared first on CSS-Tricks.
“Create Once, Publish Everywhere” With WordPress
“Create Once, Publish Everywhere” With WordPress
Leonardo LosovizCOPE is a strategy for reducing the amount of work needed to publish our content into different mediums, such as website, email, apps, and others. First pioneered by NPR, it accomplishes its goal by establishing a single source of truth for content which can be used for all of the different mediums.
Having content that works everywhere is not a trivial task since each medium will have its own requirements. For instance, whereas HTML is valid for printing content for the web, this language is not valid for an iOS/Android app. Similarly, we can add classes to our HTML for the web, but these must be converted to styles for email.
The solution to this conundrum is to separate form from content: The presentation and the meaning of the content must be decoupled, and only the meaning is used as the single source of truth. The presentation can then be added in another layer (specific to the selected medium).
For example, given the following piece of HTML code, the <p> is an HTML tag which applies mostly for the web, and attribute class="align-center" is presentation (placing an element “on the center” makes sense for a screen-based medium, but not for an audio-based one such as Amazon Alexa):
<p class="align-center">Hello world!</p>
Hence, this piece of content cannot be used as a single source of truth, and it must be converted into a format which separates the meaning from the presentation, such as the following piece of JSON code:
{
  content: "Hello world!",
  placement: "center",
  type: "paragraph"
}
This piece of code can be used as a single source of truth for content since from it we can recreate once again the HTML code to use for the web, and procure an appropriate format for other mediums.
Why WordPress
WordPress is ideal to implement the COPE strategy due of several reasons:
- It is versatile.
The WordPress database model does not define a fixed, rigid content model; on the contrary, it was created for versatility, enabling to create varied content models through the use of meta field, which allow the storing of additional pieces of data for four different entities: posts and custom post types, users, comments, and taxonomies (tags and categories). - It is powerful.
WordPress shines as a CMS (Content Management System), and its plugin ecosystem enables to easily add new functionalities. - It is widespread.
It is estimated that 1/3rd of websites run on WordPress. Then, a sizable amount of people working on the web know about and are able to use, i.e. WordPress. Not just developers but also bloggers, salesmen, marketing staff, and so on. Then, many different stakeholders, no matter their technical background, will be able to produce the content which acts as the single source of truth. - It is headless.
Headlessness is the ability to decouple the content from the presentation layer, and it is a fundamental feature for implementing COPE (as to be able to feed data to dissimilar mediums).
Since incorporating the WP REST API into core starting from version 4.7, and more markedly since the launch of Gutenberg in version 5.0 (for which plenty of REST API endpoints had to be implemented), WordPress can be considered a headless CMS, since most WordPress content can be accessed through a REST API by any application built on any stack.
In addition, the recently-created WPGraphQL integrates WordPress and GraphQL, enabling to feed content from WordPress into any application using this increasingly popular API. Finally, my own project PoP has recently added an implementation of an API for WordPress which allows to export the WordPress data as either REST, GraphQL or PoP native formats. - It has Gutenberg, a block-based editor that greatly aids the implementation of COPE because it is based on the concept of blocks (as explained in the sections below).
Blobs Versus Blocks To Represent Information
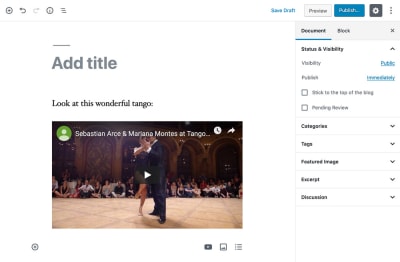
A blob is a single unit of information stored all together in the database. For instance, writing the blog post below on a CMS that relies on blobs to store information will store the blog post content on a single database entry — containing that same content:
<p>Look at this wonderful tango:</p>
<figure>
  <iframe width="951" height="535" src="https://www.youtube.com/embed/sxm3Xyutc1s" frameborder="0" allow="accelerometer; autoplay; encrypted-media; gyroscope; picture-in-picture" allowfullscreen></iframe>
  <figcaption>An exquisite tango performance</figcaption>
</figure>
As it can be appreciated, the important bits of information from this blog post (such as the content in the paragraph, and the URL, the dimensions and attributes of the Youtube video) are not easily accessible: If we want to retrieve any of them on their own, we need to parse the HTML code to extract them — which is far from an ideal solution.
Blocks act differently. By representing the information as a list of blocks, we can store the content in a more semantic and accessible way. Each block conveys its own content and its own properties which can depend on its type (e.g. is it perhaps a paragraph or a video?).
For example, the HTML code above could be represented as a list of blocks like this:
{
  [
    type: "paragraph",
    content: "Look at this wonderful tango:"
  ],
  [
    type: "embed",
    provider: "Youtube",
    url: "https://www.youtube.com/embed/sxm3Xyutc1s",
    width: 951,
    height: 535,
    frameborder: 0,
    allowfullscreen: true,
    allow: "accelerometer; autoplay; encrypted-media; gyroscope; picture-in-picture",
    caption: "An exquisite tango performance"
  ]
}
Through this way of representing information, we can easily use any piece of data on its own, and adapt it for the specific medium where it must be displayed. For instance, if we want to extract all the videos from the blog post to show on a car entertainment system, we can simply iterate all blocks of information, select those with type="embed" and provider="Youtube", and extract the URL from them. Similarly, if we want to show the video on an Apple Watch, we need not care about the dimensions of the video, so we can ignore attributes width and height in a straightforward manner.
How Gutenberg Implements Blocks
Before WordPress version 5.0, WordPress used blobs to store post content in the database. Starting from version 5.0, WordPress ships with Gutenberg, a block-based editor, enabling the enhanced way to process content mentioned above, which represents a breakthrough towards the implementation of COPE. Unfortunately, Gutenberg has not been designed for this specific use case, and its representation of the information is different to the one just described for blocks, resulting in several inconveniences that we will need to deal with.
Let’s first have a glimpse on how the blog post described above is saved through Gutenberg:
<!-- wp:paragraph -->
<p>Look at this wonderful tango:</p>
<!-- /wp:paragraph -->

<!-- wp:core-embed/youtube {"url":"https://www.youtube.com/embed/sxm3Xyutc1s","type":"rich","providerNameSlug":"embed-handler","className":"wp-embed-aspect-16-9 wp-has-aspect-ratio"} -->
<figure class="wp-block-embed-youtube wp-block-embed is-type-rich is-provider-embed-handler wp-embed-aspect-16-9 wp-has-aspect-ratio">
  <div class="wp-block-embed__wrapper"> https://www.youtube.com/embed/sxm3Xyutc1s </div>
  <figcaption>An exquisite tango performance</figcaption>
</figure>
<!-- /wp:core-embed/youtube -->
From this piece of code, we can make the following observations:
Blocks Are Saved All Together In The Same Database Entry
There are two blocks in the code above:
<!-- wp:paragraph -->
<p>Look at this wonderful tango:</p>
<!-- /wp:paragraph -->
<!-- wp:core-embed/youtube {"url":"https://www.youtube.com/embed/sxm3Xyutc1s","type":"rich","providerNameSlug":"embed-handler","className":"wp-embed-aspect-16-9 wp-has-aspect-ratio"} -->
<figure class="wp-block-embed-youtube wp-block-embed is-type-rich is-provider-embed-handler wp-embed-aspect-16-9 wp-has-aspect-ratio">
  <div class="wp-block-embed__wrapper"> https://www.youtube.com/embed/sxm3Xyutc1s </div>
  <figcaption>An exquisite tango performance</figcaption>
</figure>
<!-- /wp:core-embed/youtube -->
With the exception of global (also called “reusable”) blocks, which have an entry of their own in the database and can be referenced directly through their IDs, all blocks are saved together in the blog post’s entry in table wp_posts.
Hence, to retrieve the information for a specific block, we will first need to parse the content and isolate all blocks from each other. Conveniently, WordPress provides function parse_blocks($content) to do just this. This function receives a string containing the blog post content (in HTML format), and returns a JSON object containing the data for all contained blocks.
Block Type And Attributes Are Conveyed Through HTML Comments
Each block is delimited with a starting tag <!-- wp:{block-type} {block-attributes-encoded-as-JSON} --> and an ending tag <!-- /wp:{block-type} --> which (being HTML comments) ensure that this information will not be visible when displaying it on a website. However, we can’t display the blog post directly on another medium, since the HTML comment may be visible, appearing as garbled content. This is not a big deal though, since after parsing the content through function parse_blocks($content), the HTML comments are removed and we can operate directly with the block data as a JSON object.
Blocks Contain HTML
The paragraph block has "<p>Look at this wonderful tango:</p>" as its content, instead of "Look at this wonderful tango:". Hence, it contains HTML code (tags <p> and </p>) which is not useful for other mediums, and as such must be removed, for instance through PHP function strip_tags($content).
When stripping tags, we can keep those HTML tags which explicitly convey semantic information, such as tags <strong> and <em> (instead of their counterparts <b> and <i> which apply only to a screen-based medium), and remove all other tags. This is because there is a great chance that semantic tags can be properly interpreted for other mediums too (e.g. Amazon Alexa can recognize tags <strong> and <em>, and change its voice and intonation accordingly when reading a piece of text). To do this, we invoke the strip_tags function with a 2nd parameter containing the allowed tags, and place it within a wrapping function for convenience:
function strip_html_tags($content)
{
  return strip_tags($content, '<strong><em>');
}
The Video’s Caption Is Saved Within The HTML And Not As An Attribute
As can be seen in the Youtube video block, the caption "An exquisite tango performance" is stored inside the HTML code (enclosed by tag <figcaption />) but not inside the JSON-encoded attributes object. As a consequence, to extract the caption, we will need to parse the block content, for instance through a regular expression:
function extract_caption($content)
{
  $matches = [];
  preg_match('/<figcaption>(.*?)<\/figcaption>/', $content, $matches);
  if ($caption = $matches[1]) {
    return strip_html_tags($caption);
  }
  return null;
}
This is a hurdle we must overcome in order to extract all metadata from a Gutenberg block. This happens on several blocks; since not all pieces of metadata are saved as attributes, we must then first identify which are these pieces of metadata, and then parse the HTML content to extract them on a block-by-block and piece-by-piece basis.
Concerning COPE, this represents a wasted chance to have a really optimal solution. It could be argued that the alternative option is not ideal either, since it would duplicate information, storing it both within the HTML and as an attribute, which violates the DRY (Don’t Repeat Yourself) principle. However, this violation does already take place: For instance, attribute className contains value "wp-embed-aspect-16-9 wp-has-aspect-ratio", which is printed inside the content too, under HTML attribute class.
Implementing COPE
Note: I have released this functionality, including all the code described below, as WordPress plugin Block Metadata. You’re welcome to install it and play with it so you can get a taste of the power of COPE. The source code is available in this GitHub repo.
Now that we know what the inner representation of a block looks like, let’s proceed to implement COPE through Gutenberg. The procedure will involve the following steps:
- Because function
parse_blocks($content)returns a JSON object with nested levels, we must first simplify this structure. - We iterate all blocks and, for each, identify their pieces of metadata and extract them, transforming them into a medium-agnostic format in the process. Which attributes are added to the response can vary depending on the block type.
- We finally make the data available through an API (REST/GraphQL/PoP).
Let’s implement these steps one by one.
1. Simplifying The Structure Of The JSON Object
The returned JSON object from function parse_blocks($content) has a nested architecture, in which the data for normal blocks appear at the first level, but the data for a referenced reusable block are missing (only data for the referencing block are added), and the data for nested blocks (which are added within other blocks) and for grouped blocks (where several blocks can be grouped together) appear under 1 or more sublevels. This architecture makes it difficult to process the block data from all blocks in the post content, since on one side some data are missing, and on the other we don’t know a priori under how many levels data are located. In addition, there is a block divider placed every pair of blocks, containing no content, which can be safely ignored.
For instance, the response obtained from a post containing a simple block, a global block, a nested block containing a simple block, and a group of simple blocks, in that order, is the following:
[
  // Simple block
  {
    "blockName": "core/image",
    "attrs": {
      "id": 70,
      "sizeSlug": "large"
    },
    "innerBlocks": [],
    "innerHTML": "\n<figure class=\"wp-block-image size-large\"><img src=\"http://localhost/wp-content/uploads/2017/12/sandwich-1024x614.jpg\" alt=\"\" class=\"wp-image-70\"/><figcaption>This is a normal block</figcaption></figure>\n",
    "innerContent": [
      "\n<figure class=\"wp-block-image size-large\"><img src=\"http://localhost/wp-content/uploads/2017/12/sandwich-1024x614.jpg\" alt=\"\" class=\"wp-image-70\"/><figcaption>This is a normal block</figcaption></figure>\n"
    ]
  },
  // Empty block divider
  {
    "blockName": null,
    "attrs": [],
    "innerBlocks": [],
    "innerHTML": "\n\n",
    "innerContent": [
      "\n\n"
    ]
  },
  // Reference to reusable block
  {
    "blockName": "core/block",
    "attrs": {
      "ref": 218
    },
    "innerBlocks": [],
    "innerHTML": "",
    "innerContent": []
  },
  // Empty block divider
  {
    "blockName": null,
    "attrs": [],
    "innerBlocks": [],
    "innerHTML": "\n\n",
    "innerContent": [
      "\n\n"
    ]
  },
  // Nested block
  {
    "blockName": "core/columns",
    "attrs": [],
    // Contained nested blocks
    "innerBlocks": [
      {
        "blockName": "core/column",
        "attrs": [],
        // Contained nested blocks
        "innerBlocks": [
          {
            "blockName": "core/image",
            "attrs": {
              "id": 69,
              "sizeSlug": "large"
            },
            "innerBlocks": [],
            "innerHTML": "\n<figure class=\"wp-block-image size-large\"><img src=\"http://localhost/wp-content/uploads/2017/12/espresso-1024x614.jpg\" alt=\"\" class=\"wp-image-69\"/></figure>\n",
            "innerContent": [
              "\n<figure class=\"wp-block-image size-large\"><img src=\"http://localhost/wp-content/uploads/2017/12/espresso-1024x614.jpg\" alt=\"\" class=\"wp-image-69\"/></figure>\n"
            ]
          }
        ],
        "innerHTML": "\n<div class=\"wp-block-column\"></div>\n",
        "innerContent": [
          "\n<div class=\"wp-block-column\">",
          null,
          "</div>\n"
        ]
      },
      {
        "blockName": "core/column",
        "attrs": [],
        // Contained nested blocks
        "innerBlocks": [
          {
            "blockName": "core/paragraph",
            "attrs": [],
            "innerBlocks": [],
            "innerHTML": "\n<p>This is how I wake up every morning</p>\n",
            "innerContent": [
              "\n<p>This is how I wake up every morning</p>\n"
            ]
          }
        ],
        "innerHTML": "\n<div class=\"wp-block-column\"></div>\n",
        "innerContent": [
          "\n<div class=\"wp-block-column\">",
          null,
          "</div>\n"
        ]
      }
    ],
    "innerHTML": "\n<div class=\"wp-block-columns\">\n\n</div>\n",
    "innerContent": [
      "\n<div class=\"wp-block-columns\">",
      null,
      "\n\n",
      null,
      "</div>\n"
    ]
  },
  // Empty block divider
  {
    "blockName": null,
    "attrs": [],
    "innerBlocks": [],
    "innerHTML": "\n\n",
    "innerContent": [
      "\n\n"
    ]
  },
  // Block group
  {
    "blockName": "core/group",
    "attrs": [],
    // Contained grouped blocks
    "innerBlocks": [
      {
        "blockName": "core/image",
        "attrs": {
          "id": 71,
          "sizeSlug": "large"
        },
        "innerBlocks": [],
        "innerHTML": "\n<figure class=\"wp-block-image size-large\"><img src=\"http://localhost/wp-content/uploads/2017/12/coffee-1024x614.jpg\" alt=\"\" class=\"wp-image-71\"/><figcaption>First element of the group</figcaption></figure>\n",
        "innerContent": [
          "\n<figure class=\"wp-block-image size-large\"><img src=\"http://localhost/wp-content/uploads/2017/12/coffee-1024x614.jpg\" alt=\"\" class=\"wp-image-71\"/><figcaption>First element of the group</figcaption></figure>\n"
        ]
      },
      {
        "blockName": "core/paragraph",
        "attrs": [],
        "innerBlocks": [],
        "innerHTML": "\n<p>Second element of the group</p>\n",
        "innerContent": [
          "\n<p>Second element of the group</p>\n"
        ]
      }
    ],
    "innerHTML": "\n<div class=\"wp-block-group\"><div class=\"wp-block-group__inner-container\">\n\n</div></div>\n",
    "innerContent": [
      "\n<div class=\"wp-block-group\"><div class=\"wp-block-group__inner-container\">",
      null,
      "\n\n",
      null,
      "</div></div>\n"
    ]
  }
]
A better solution is to have all data at the first level, so the logic to iterate through all block data is greatly simplified. Hence, we must fetch the data for these reusable/nested/grouped blocks, and have it added on the first level too. As it can be seen in the JSON code above:
- The empty divider block has attribute
"blockName"with valueNULL - The reference to a reusable block is defined through
$block["attrs"]["ref"] - Nested and group blocks define their contained blocks under
$block["innerBlocks"]
Hence, the following PHP code removes the empty divider blocks, identifies the reusable/nested/grouped blocks and adds their data to the first level, and removes all data from all sublevels:
/**
 * Export all (Gutenberg) blocks' data from a WordPress post
 */
function get_block_data($content, $remove_divider_block = true)
{
  // Parse the blocks, and convert them into a single-level array
  $ret = [];
  $blocks = parse_blocks($content);
  recursively_add_blocks($ret, $blocks);

  // Maybe remove blocks without name
  if ($remove_divider_block) {
    $ret = remove_blocks_without_name($ret);
  }

  // Remove 'innerBlocks' property if it exists (since that code was copied to the first level, it is currently duplicated)
  foreach ($ret as &$block) {
    unset($block['innerBlocks']);
  }

  return $ret;
}

/**
 * Remove the blocks without name, such as the empty block divider
 */
function remove_blocks_without_name($blocks)
{
  return array_values(array_filter(
    $blocks,
    function($block) {
      return $block['blockName'];
    }
  ));
}

/**
 * Add block data (including global and nested blocks) into the first level of the array
 */
function recursively_add_blocks(&$ret, $blocks)
{
  foreach ($blocks as $block) {
    // Global block: add the referenced block instead of this one
    if ($block['attrs']['ref']) {
      $ret = array_merge(
        $ret,
        recursively_render_block_core_block($block['attrs'])
      );
    }
    // Normal block: add it directly
    else {
      $ret[] = $block;
    }
    // If it contains nested or grouped blocks, add them too
    if ($block['innerBlocks']) {
      recursively_add_blocks($ret, $block['innerBlocks']);
    }
  }
}

/**
 * Function based on `render_block_core_block`
 */
function recursively_render_block_core_block($attributes)
{
  if (empty($attributes['ref'])) {
    return [];
  }

  $reusable_block = get_post($attributes['ref']);
  if (!$reusable_block || 'wp_block' !== $reusable_block->post_type) {
    return [];
  }

  if ('publish' !== $reusable_block->post_status || ! empty($reusable_block->post_password)) {
    return [];
  }

  return get_block_data($reusable_block->post_content);
}
Calling function get_block_data($content) passing the post content ($post->post_content) as parameter, we now obtain the following response:
[[
  {
    "blockName": "core/image",
    "attrs": {
      "id": 70,
      "sizeSlug": "large"
    },
    "innerHTML": "\n<figure class=\"wp-block-image size-large\"><img src=\"http://localhost/wp-content/uploads/2017/12/sandwich-1024x614.jpg\" alt=\"\" class=\"wp-image-70\"/><figcaption>This is a normal block</figcaption></figure>\n",
    "innerContent": [
      "\n<figure class=\"wp-block-image size-large\"><img src=\"http://localhost/wp-content/uploads/2017/12/sandwich-1024x614.jpg\" alt=\"\" class=\"wp-image-70\"/><figcaption>This is a normal block</figcaption></figure>\n"
    ]
  },
  {
    "blockName": "core/paragraph",
    "attrs": [],
    "innerHTML": "\n<p>Lorem ipsum dolor sit amet, consectetur adipiscing elit, sed do eiusmod tempor incididunt ut labore et dolore magna aliqua.</p>\n",
    "innerContent": [
      "\n<p>Lorem ipsum dolor sit amet, consectetur adipiscing elit, sed do eiusmod tempor incididunt ut labore et dolore magna aliqua.</p>\n"
    ]
  },
  {
    "blockName": "core/columns",
    "attrs": [],
    "innerHTML": "\n<div class=\"wp-block-columns\">\n\n</div>\n",
    "innerContent": [
      "\n<div class=\"wp-block-columns\">",
      null,
      "\n\n",
      null,
      "</div>\n"
    ]
  },
  {
    "blockName": "core/column",
    "attrs": [],
    "innerHTML": "\n<div class=\"wp-block-column\"></div>\n",
    "innerContent": [
      "\n<div class=\"wp-block-column\">",
      null,
      "</div>\n"
    ]
  },
  {
    "blockName": "core/image",
    "attrs": {
      "id": 69,
      "sizeSlug": "large"
    },
    "innerHTML": "\n<figure class=\"wp-block-image size-large\"><img src=\"http://localhost/wp-content/uploads/2017/12/espresso-1024x614.jpg\" alt=\"\" class=\"wp-image-69\"/></figure>\n",
    "innerContent": [
      "\n<figure class=\"wp-block-image size-large\"><img src=\"http://localhost/wp-content/uploads/2017/12/espresso-1024x614.jpg\" alt=\"\" class=\"wp-image-69\"/></figure>\n"
    ]
  },
  {
    "blockName": "core/column",
    "attrs": [],
    "innerHTML": "\n<div class=\"wp-block-column\"></div>\n",
    "innerContent": [
      "\n<div class=\"wp-block-column\">",
      null,
      "</div>\n"
    ]
  },
  {
    "blockName": "core/paragraph",
    "attrs": [],
    "innerHTML": "\n<p>This is how I wake up every morning</p>\n",
    "innerContent": [
      "\n<p>This is how I wake up every morning</p>\n"
    ]
  },
  {
    "blockName": "core/group",
    "attrs": [],
    "innerHTML": "\n<div class=\"wp-block-group\"><div class=\"wp-block-group__inner-container\">\n\n</div></div>\n",
    "innerContent": [
      "\n<div class=\"wp-block-group\"><div class=\"wp-block-group__inner-container\">",
      null,
      "\n\n",
      null,
      "</div></div>\n"
    ]
  },
  {
    "blockName": "core/image",
    "attrs": {
      "id": 71,
      "sizeSlug": "large"
    },
    "innerHTML": "\n<figure class=\"wp-block-image size-large\"><img src=\"http://localhost/wp-content/uploads/2017/12/coffee-1024x614.jpg\" alt=\"\" class=\"wp-image-71\"/><figcaption>First element of the group</figcaption></figure>\n",
    "innerContent": [
      "\n<figure class=\"wp-block-image size-large\"><img src=\"http://localhost/wp-content/uploads/2017/12/coffee-1024x614.jpg\" alt=\"\" class=\"wp-image-71\"/><figcaption>First element of the group</figcaption></figure>\n"
    ]
  },
  {
    "blockName": "core/paragraph",
    "attrs": [],
    "innerHTML": "\n<p>Second element of the group</p>\n",
    "innerContent": [
      "\n<p>Second element of the group</p>\n"
    ]
  }
]
Even though not strictly necessary, it is very helpful to create a REST API endpoint to output the result of our new function get_block_data($content), which will allow us to easily understand what blocks are contained in a specific post, and how they are structured. The code below adds such endpoint under /wp-json/block-metadata/v1/data/{POST_ID}:
/**
 * Define REST endpoint to visualize a post’s block data
 */
add_action('rest_api_init', function () {
  register_rest_route('block-metadata/v1', 'data/(?P\d+)', [
    'methods'  => 'GET',
    'callback' => 'get_post_blocks'
  ]);
});
function get_post_blocks($request)
{
  $post = get_post($request['post_id']);
  if (!$post) {
    return new WP_Error('empty_post', 'There is no post with this ID', array('status' => 404));
  }

  $block_data = get_block_data($post->post_content);
  $response = new WP_REST_Response($block_data);
  $response->set_status(200);
  return $response;
}
To see it in action, check out this link which exports the data for this post.
2. Extracting All Block Metadata Into A Medium-Agnostic Format
At this stage, we have block data containing HTML code which is not appropriate for COPE. Hence, we must strip the non-semantic HTML tags for each block as to convert it into a medium-agnostic format.
We can decide which are the attributes that must be extracted on a block type by block type basis (for instance, extract the text alignment property for "paragraph" blocks, the video URL property for the "youtube embed" block, and so on).
As we saw earlier on, not all attributes are actually saved as block attributes but within the block’s inner content, hence, for these situations, we will need to parse the HTML content using regular expressions in order to extract those pieces of metadata.
After inspecting all blocks shipped through WordPress core, I decided not to extract metadata for the following ones:
"core/columns""core/column""core/cover" |
These apply only to screen-based mediums and (being nested blocks) are difficult to deal with. |
"core/html" |
This one only makes sense for web. |
"core/table""core/button""core/media-text" |
I had no clue how to represent their data on a medium-agnostic fashion or if it even makes sense. |
This leaves me with the following blocks, for which I’ll proceed to extract their metadata:
'core/paragraph''core/image''core-embed/youtube'(as a representative of all the'core-embed'blocks)'core/heading''core/gallery''core/list''core/audio''core/file''core/video''core/code''core/preformatted''core/quote'&'core/pullquote''core/verse'
To extract the metadata, we create function get_block_metadata($block_data) which receives an array with the block data for each block (i.e. the output from our previously-implemented function get_block_data) and, depending on the block type (provided under property "blockName"), decides what attributes are required and how to extract them:
/**
 * Process all (Gutenberg) blocks' metadata into a medium-agnostic format from a WordPress post
 */
function get_block_metadata($block_data)
{
  $ret = [];
  foreach ($block_data as $block) {
    $blockMeta = null;
    switch ($block['blockName']) {
      case ...:
        $blockMeta = ...
        break;
      case ...:
        $blockMeta = ...
        break;
      ...
    }

    if ($blockMeta) {
      $ret[] = [
        'blockName' => $block['blockName'],
        'meta' => $blockMeta,
      ];
    }
  }

  return $ret;
}
Let’s proceed to extract the metadata for each block type, one by one:
"core/paragraph"
Simply remove the HTML tags from the content, and remove the trailing breaklines.
case 'core/paragraph':
  $blockMeta = [
    'content' => trim(strip_html_tags($block['innerHTML'])),
  ];
  break;
'core/image'
The block either has an ID referring to an uploaded media file or, if not, the image source must be extracted from under <img src="...">. Several attributes (caption, linkDestination, link, alignment) are optional.
case 'core/image':
  $blockMeta = [];
  // If inserting the image from the Media Manager, it has an ID
  if ($block['attrs']['id'] && $img = wp_get_attachment_image_src($block['attrs']['id'], $block['attrs']['sizeSlug'])) {
    $blockMeta['img'] = [
      'src' => $img[0],
      'width' => $img[1],
      'height' => $img[2],
    ];
  }
  elseif ($src = extract_image_src($block['innerHTML'])) {
    $blockMeta['src'] = $src;
  }
  if ($caption = extract_caption($block['innerHTML'])) {
    $blockMeta['caption'] = $caption;
  }
  if ($linkDestination = $block['attrs']['linkDestination']) {
    $blockMeta['linkDestination'] = $linkDestination;
    if ($link = extract_link($block['innerHTML'])) {
      $blockMeta['link'] = $link;
    }
  }
  if ($align = $block['attrs']['align']) {
    $blockMeta['align'] = $align;
  }
  break;
It makes sense to create functions extract_image_src, extract_caption and extract_link since their regular expressions will be used time and again for several blocks. Please notice that a caption in Gutenberg can contain links (<a href="...">), however, when calling strip_html_tags, these are removed from the caption.
Even though regrettable, I find this practice unavoidable, since we can’t guarantee a link to work in non-web platforms. Hence, even though the content is gaining universality since it can be used for different mediums, it is also losing specificity, so its quality is poorer compared to content that was created and customized for the particular platform.
function extract_caption($innerHTML)
{
  $matches = [];
  preg_match('/<figcaption>(.*?)<\/figcaption>/', $innerHTML, $matches);
  if ($caption = $matches[1]) {
    return strip_html_tags($caption);
  }
  return null;
}

function extract_link($innerHTML)
{
  $matches = [];
  preg_match('/<a href="(.*?)">(.*?)<\/a>>', $innerHTML, $matches);
  if ($link = $matches[1]) {
    return $link;
  }
  return null;
}

function extract_image_src($innerHTML)
{
  $matches = [];
  preg_match('/<img src="(.*?)"/', $innerHTML, $matches);
  if ($src = $matches[1]) {
    return $src;
  }
  return null;
}
'core-embed/youtube'
Simply retrieve the video URL from the block attributes, and extract its caption from the HTML content, if it exists.
case 'core-embed/youtube':
  $blockMeta = [
    'url' => $block['attrs']['url'],
  ];
  if ($caption = extract_caption($block['innerHTML'])) {
    $blockMeta['caption'] = $caption;
  }
  break;
'core/heading'
Both the header size (h1, h2, …, h6) and the heading text are not attributes, so these must be obtained from the HTML content. Please notice that, instead of returning the HTML tag for the header, the size attribute is simply an equivalent representation, which is more agnostic and makes better sense for non-web platforms.
case 'core/heading':
  $matches = [];
  preg_match('/<h[1-6])>(.*?)<\/h([1-6])>/', $block['innerHTML'], $matches);
  $sizes = [
    null,
    'xxl',
    'xl',
    'l',
    'm',
    'sm',
    'xs',
  ];
  $blockMeta = [
    'size' => $sizes[$matches[1]],
    'heading' => $matches[2],
  ];
  break;
'core/gallery'
Unfortunately, for the image gallery I have been unable to extract the captions from each image, since these are not attributes, and extracting them through a simple regular expression can fail: If there is a caption for the first and third elements, but none for the second one, then I wouldn’t know which caption corresponds to which image (and I haven’t devoted the time to create a complex regex). Likewise, in the logic below I’m always retrieving the "full" image size, however, this doesn’t have to be the case, and I’m unaware of how the more appropriate size can be inferred.
case 'core/gallery':
  $imgs = [];
  foreach ($block['attrs']['ids'] as $img_id) {
    $img = wp_get_attachment_image_src($img_id, 'full');
    $imgs[] = [
      'src' => $img[0],
      'width' => $img[1],
      'height' => $img[2],
    ];
  }
  $blockMeta = [
    'imgs' => $imgs,
  ];
  break;
'core/list'
Simply transform the <li> elements into an array of items.
case 'core/list':
  $matches = [];
  preg_match_all('/<li>(.*?)<\/li>/', $block['innerHTML'], $matches);
  if ($items = $matches[1]) {
    $blockMeta = [
      'items' => array_map('strip_html_tags', $items),
    ];
  }
  break;
'core/audio'
Obtain the URL of the corresponding uploaded media file.
case 'core/audio':
  $blockMeta = [
    'src' => wp_get_attachment_url($block['attrs']['id']),
  ];
  break;
'core/file'
Whereas the URL of the file is an attribute, its text must be extracted from the inner content.
case 'core/file':
  $href = $block['attrs']['href'];
  $matches = [];
  preg_match('/<a href="'.str_replace('/', '\/', $href).'">(.*?)<\/a>/', $block['innerHTML'], $matches);
  $blockMeta = [
    'href' => $href,
    'text' => strip_html_tags($matches[1]),
  ];
  break;
'core/video'
Obtain the video URL and all properties to configure how the video is played through a regular expression. If Gutenberg ever changes the order in which these properties are printed in the code, then this regex will stop working, evidencing one of the problems of not adding metadata directly through the block attributes.
case 'core/video':
$matches = [];
preg_match('/'core/code'
Simply extract the code from within <code />.
case 'core/code':
  $matches = [];
  preg_match('/<code>(.*?)<\/code>/is', $block['innerHTML'], $matches);
  $blockMeta = [
    'code' => $matches[1],
  ];
  break;
'core/preformatted'
Similar to <code />, but we must watch out that Gutenberg hardcodes a class too.
case 'core/preformatted':
  $matches = [];
  preg_match('/<pre class="wp-block-preformatted">(.*?)<\/pre>/is', $block['innerHTML'], $matches);
  $blockMeta = [
    'text' => strip_html_tags($matches[1]),
  ];
  break;
'core/quote' and 'core/pullquote'
We must convert all inner <p /> tags to their equivalent generic "\n" character.
case 'core/quote':
case 'core/pullquote':
  $matches = [];
  $regexes = [
    'core/quote' => '/<blockquote class=\"wp-block-quote\">(.*?)<\/blockquote>/',
    'core/pullquote' => '/<figure class=\"wp-block-pullquote\"><blockquote>(.*?)<\/blockquote><\/figure>/',
  ];
  preg_match($regexes[$block['blockName']], $block['innerHTML'], $matches);
  if ($quoteHTML = $matches[1]) {
    preg_match_all('/<p>(.*?)<\/p>/', $quoteHTML, $matches);
    $blockMeta = [
      'quote' => strip_html_tags(implode('\n', $matches[1])),
    ];
    preg_match('/<cite>(.*?)<\/cite>/', $quoteHTML, $matches);
    if ($cite = $matches[1]) {
      $blockMeta['cite'] = strip_html_tags($cite);
    }
  }
  break;
'core/verse'
Similar situation to <pre />.
case 'core/verse':
  $matches = [];
  preg_match('/<pre class="wp-block-verse">(.*?)<\/pre>/is', $block['innerHTML'], $matches);
  $blockMeta = [
    'text' => strip_html_tags($matches[1]),
  ];
  break;
3. Exporting Data Through An API
Now that we have extracted all block metadata, we need to make it available to our different mediums, through an API. WordPress has access to the following APIs:
- REST, through the WP REST API (integrated in WordPress core)
- GraphQL, through WPGraphQL
- PoP, through its implementation for WordPress
Let’s see how to export the data through each of them.
REST
The following code creates endpoint /wp-json/block-metadata/v1/metadata/{POST_ID} which exports all block metadata for a specific post:
/**
 * Define REST endpoints to export the blocks' metadata for a specific post
 */
add_action('rest_api_init', function () {
  register_rest_route('block-metadata/v1', 'metadata/(?P\d+)', [
    'methods'  => 'GET',
    'callback' => 'get_post_block_meta'
  ]);
});
function get_post_block_meta($request)
{
  $post = get_post($request['post_id']);
  if (!$post) {
    return new WP_Error('empty_post', 'There is no post with this ID', array('status' => 404));
  }

  $block_data = get_block_data($post->post_content);
  $block_metadata = get_block_metadata($block_data);
  $response = new WP_REST_Response($block_metadata);
  $response->set_status(200);
  return $response;
}
To see it working, this link (corresponding to this blog post) displays the metadata for blocks of all the types analyzed earlier on.
GraphQL (Through WPGraphQL)
GraphQL works by setting-up schemas and types which define the structure of the content, from which arises this API’s power to fetch exactly the required data and nothing else. Setting-up schemas works very well when the structure of the object has a unique representation.
In our case, however, the metadata returned by a new field "block_metadata" (which calls our newly-created function get_block_metadata) depends on the specific block type, so the structure of the response can vary wildly; GraphQL provides a solution to this issue through a Union type, allowing to return one among a set of different types. However, its implementation for all different variations of the metadata structure has proved to be a lot of work, and I quit along the way 😢.
As an alternative (not ideal) solution, I decided to provide the response by simply encoding the JSON object through a new field "jsonencoded_block_metadata":
/**
 * Define WPGraphQL field "jsonencoded_block_metadata"
 */
add_action('graphql_register_types', function() {
  register_graphql_field(
    'Post',
    'jsonencoded_block_metadata',
    [
      'type'        => 'String',
      'description' => __('Post blocks encoded as JSON', 'wp-graphql'),
      'resolve'     => function($post) {
        $post = get_post($post->ID);
        $block_data = get_block_data($post->post_content);
        $block_metadata = get_block_metadata($block_data);
        return json_encode($block_metadata);
      }
    ]
  );
});
PoP
Note: This functionality is available on its own GitHub repo.
The final API is called PoP, which is a little-known project I’ve been working on for several years now. I have recently converted it into a full-fledged API, with the capacity to produce a response compatible with both REST and GraphQL, and which even benefits from the advantages from these 2 APIs, at the same time: no under/over-fetching of data, like in GraphQL, while being cacheable on the server-side and not susceptible to DoS attacks, like REST. It offers a mix between the two of them: REST-like endpoints with GraphQL-like queries.
The block metadata is made available through the API through the following code:
class PostFieldValueResolver extends AbstractDBDataFieldValueResolver
{
  public static function getClassesToAttachTo(): array
  {
    return array(\PoP\Posts\FieldResolver::class);
  }

  public function resolveValue(FieldResolverInterface $fieldResolver, $resultItem, string $fieldName, array $fieldArgs = [])
  {
    $post = $resultItem;
    switch ($fieldName) {
      case 'block-metadata':
        $block_data = \Leoloso\BlockMetadata\Data::get_block_data($post->post_content);
        $block_metadata = \Leoloso\BlockMetadata\Metadata::get_block_metadata($block_data);

        // Filter by blockName
        if ($blockName = $fieldArgs['blockname']) {
          $block_metadata = array_filter(
            $block_metadata,
            function($block) use($blockName) {
              return $block['blockName'] == $blockName;
            }
          );
        }
        return $block_metadata;
    }

    return parent::resolveValue($fieldResolver, $resultItem, $fieldName, $fieldArgs);
  }
}
To see it in action, this link displays the block metadata (+ ID, title and URL of the post, and the ID and name of its author, à la GraphQL) for a list of posts.
In addition, similar to GraphQL arguments, our query can be customized through field arguments, enabling to obtain only the data that makes sense for a specific platform. For instance, if we desire to extract all Youtube videos added to all posts, we can add modifier (blockname:core-embed/youtube) to field block-metadata in the endpoint URL, like in this link. Or if we want to extract all images from a specific post, we can add modifier (blockname:core/image) like in this other link|id|title).
Conclusion
The COPE (“Create Once, Publish Everywhere”) strategy helps us lower the amount of work needed to create several applications which must run on different mediums (web, email, apps, home assistants, virtual reality, etc) by creating a single source of truth for our content. Concerning WordPress, even though it has always shined as a Content Management System, implementing the COPE strategy has historically proved to be a challenge.
However, a couple of recent developments have made it increasingly feasible to implement this strategy for WordPress. On one side, since the integration into core of the WP REST API, and more markedly since the launch of Gutenberg, most WordPress content is accessible through APIs, making it a genuine headless system. On the other side, Gutenberg (which is the new default content editor) is block-based, making all metadata inside a blog post readily accessible to the APIs.
As a consequence, implementing COPE for WordPress is straightforward. In this article, we have seen how to do it, and all the relevant code has been made available through several repositories. Even though the solution is not optimal (since it involves plenty of parsing HTML code), it still works fairly well, with the consequence that the effort needed to release our applications to multiple platforms can be greatly reduced. Kudos to that!
 (dm, il)
The Best Time to Send Email Newsletters for Black Friday and Cyber Monday
This post is originally published on Designmodo: The Best Time to Send Email Newsletters for Black Friday and Cyber Monday

Black Friday and Cyber Monday are marked with red ink on every retailer’s calendar. Combined, these dates offer an excellent opportunity to increase revenue. They are peak volume days when potential clients are eager to wander around digital stores. Let’s …
For more information please contact Designmodo
Collective #561

Interactive web animation with SVG
Cassie Evan’s inspiring talk on interactive web animations with SVG at CSSCAMP 2019.

Writing Asynchronous Tasks In Modern JavaScript
In this article, Jeremias Menichelli explores the evolution of JavaScript around asynchronous execution in the past era and how it changed the way we write and read code.

Fully-featured website templating system with Divi 4.0
Divi 4.0 has arrived and the new fully-featured website templating system allows you to use the Divi Builder to structure your website and edit any part of the Divi Theme including headers, footers, post templates, category templates and more.

Mobile-first animation
A repo that contains the source code of the demos for Alex Holachek’s talk about mobile animation in React.

Automatically lazy-loading offscreen images & iframes for Lite mode users
Read how the first automatic lazy-loading experiments for the Data Saver mode in Chrome went.

An Illustrated Guide to Some Useful Command Line Tools
A short description and screenshot of some useful command line tools by Wesley Moore.

Overview
A beautiful project: Overview uses satellite and aerial imagery to demonstrate how human activity and natural forces shape our Earth.

History of grids: from the printing press to modern web design
Discover the history of grids — from ancient Egypt to modern web design — in this article by Jeff Cardello.

Variable Color Fonts, how do they work?
Learn what you can do with Variable Color Fonts in this visual guide by Typearture.

Visual Dividers in User Interfaces: Types and Design Tips
An interesting article on visual dividers that help with the organization of content.

Spectrum
Adobe’s essential design system, Spectrum, is now public.

The problems of shared mutable state and how to avoid them
Axel Rauschmayer answers some interesting questions around the problems of shared mutable state.

pack-spheres
Brute force circle/sphere packing in 2D or 3D by Matt DesLauriers.

The Most Frequent Emoji
Find out the ranking of the most used emojis based on the median frequency of use of each emoji across multiple sources.

Understanding searches better than ever before
Read how new advances in the science of language understanding will help you find more useful information in Google Search.

Better Markdown in Visual Studio Code
Sam Solomon shows how to turn VS Code into an excellent tool for writing Markdown.

Monster Mashup
A playful monster demo made by Adam Kuhn.

Pure CSS Range Rover Truck
An awesome monster truck demo by Jhey Tompkins.

Responsive Pagoda
Watch the pagoda gain or lose layers as you vertically resize your window in this cool demo by Jon Kantner.

ESNext: Proposals to look forward to
Bram Van Damme’s slides from his talk at Full Stack Europe.

CLARO
A minimal to-do app without distractions, just your workweek with things to do at a glance. Free for one year if you invite friends.

Tartanify
A ready-to use collection of seamless tartan patterns in SVG and PNG format.
Collective #561 was written by Pedro Botelho and published on Codrops.
This Common Belief Could Be Blocking Your Creative Potential
A woman once brought her two Pomeranians to a barbecue I attended. I had never met her before, but after...
The post This Common Belief Could Be Blocking Your Creative Potential appeared first on Copyblogger.
17 Tested and Easy Ways to Grow Your Email List Faster
Are you looking for proven ways to grow your email list subscribers?
Often beginners simply install a sidebar optin form on their website and wait for users to subscribe. This results in slow subscriber growth.
For faster growth, you need to clearly communicate the value and offer your users multiple opportunities to join your email newsletter before they leave your site.
In this article, we will share our tested and proven ways to grow your email list that are easy to implement and drives huge results, fast.

Getting Started
First, you need is to make sure that you are using a professional email marketing service.
Using the best email marketing company ensures that your emails don’t end up in the spam folder. It also provides you with the right set of tools to build and grow your email list.
We recommend using Constant Contact. It is one of the largest and most popular email marketing service provider in the world.
For complete step by step instructions, see our guide on how to start an email newsletter the right way.
Next, you will need OptinMonster. It is the best lead generation software in the world. It helps you convert abandoning website visitors into email subscribers.
Now that you have the best tools, let’s take a look at some of the most effective ways to grow your email list.
1. Use Multiple Sign up Forms
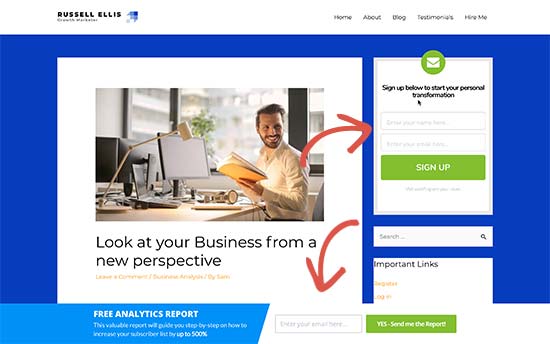
As we mentioned earlier that many beginners start with a simple newsletter signup form in their sidebar.
If you want to get more email subscribers, then you need multiple signup forms. This gives your users more opportunities to join your email list.
We recommend combining your sidebar sign up form with a sticky floating bar or a lightbox popup. These highly effective campaign types make your signup forms more noticeable.
Using OptinMonster’s Display Rules, you can set time and action based triggers, so your users don’t see all the optins at once.
For example, you can set a display rule to only show floating footer bar optin when the user has scrolled past the sidebar optin, and show a lightbox popup only when they’re about to leave.
2. Use an Exit-Intent Popup
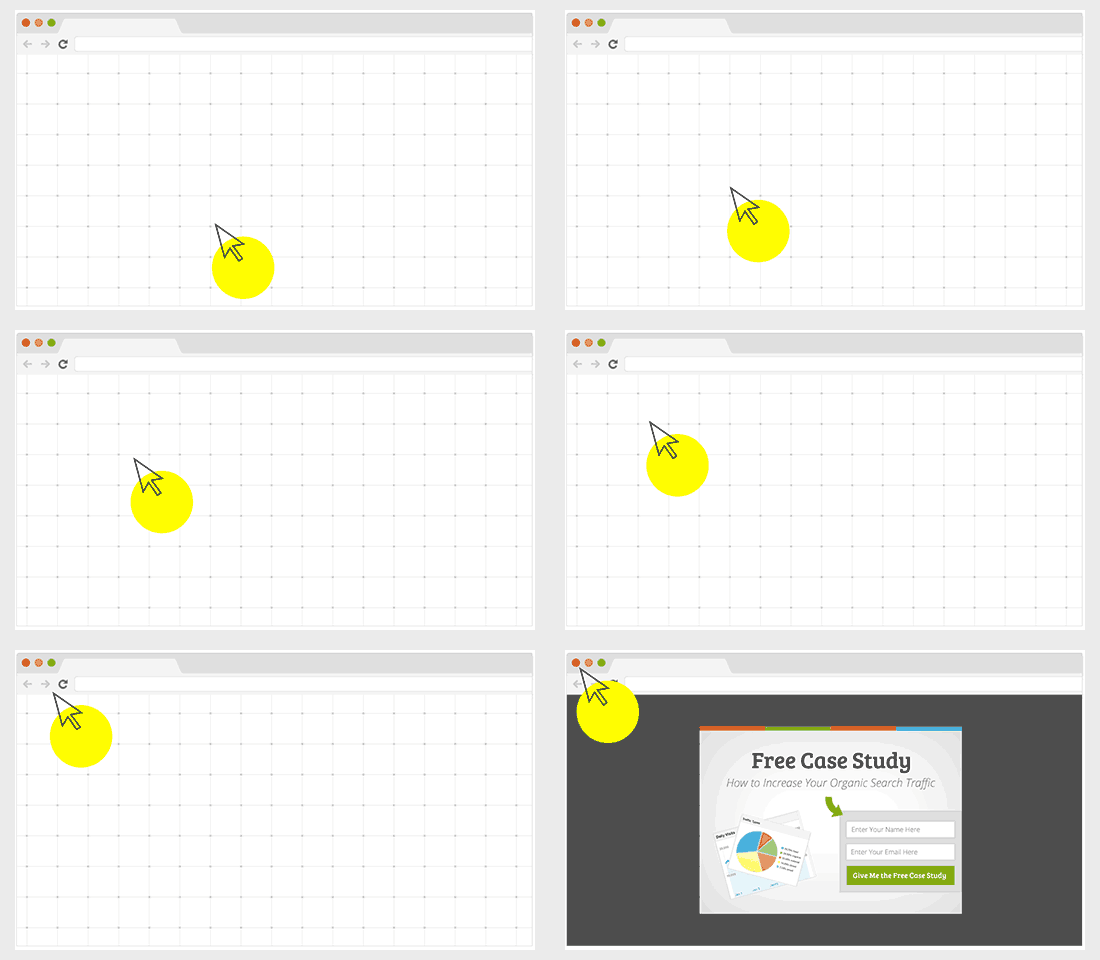
Exit-Intent® is an advanced technology built by OptinMonster that tracks your user’s mouse behavior and show them a targeted email signup form at the precise moment they are about to leave your website.
Think of it as On-site Retargeting.
You can use this technology in combination with full-screen welcome gates, lightbox popups, or other optin types to convert abandoning visitors into subscribers.
We use an exit-intent popup on WPBeginner, and it has helped increase our subscribers by 600%.
Michael Stelzner from Social Media Examiner used it to add over 250,000 new email subscribers.
3. Offer Content Upgrades

Content Upgrade is a marketing technique where you offer users a chance to get exclusive bonus content by signing up to your email list.
For example:
- If you run a podcast, then you can offer show notes + transcription as a content upgrade.
- If you have a long form blog post, then you can offer a PDF downloadable version as a content upgrade
- You can turn your blog posts into a checklist or cheat sheet and offer it as a content upgrade
Here are 30 other content upgrade ideas that you can use.
Human psychology plays an important role in the effectiveness of content upgrades. The psychology principle known as Zeigarnik Effect states that people are most likely to complete a task if they initiate it themselves.
Because when the user initiates (click to download the content upgrade), they are more likely to complete the task (subscribe to your list).
See our step by step guide on how to add content upgrades in WordPress to grow your email list.
4. Add Full or Partially Gated Content in WordPress
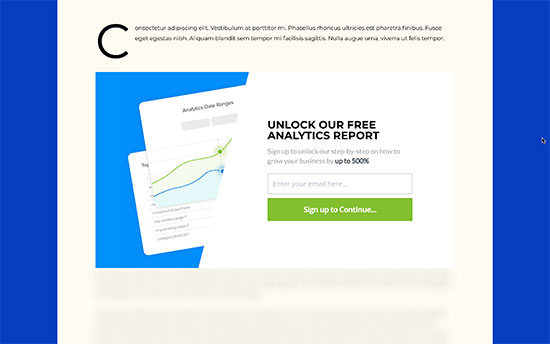
Gated Content is the content on your website that can’t be accessed until the visitor enters their email address. You can use plugins to hide some of your content or hide the entire blog post until the user enters their email address.
In the old days, this used to have a negative impact on your SEO rankings. However with modern JavaScript based technology, this does not impact your SEO rankings.
Here’s a step by step guide on how to add content locking in WordPress.
5. Run Giveaway and Contests
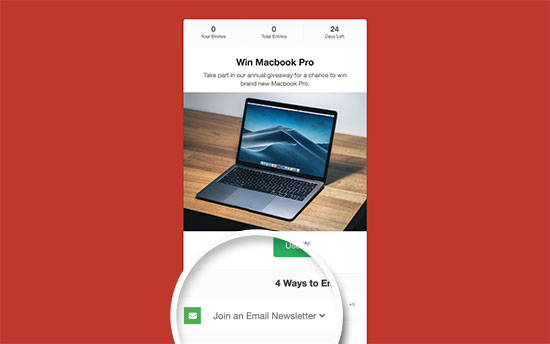
An easy way to quickly get a lot of new followers and subscribers is by running viral giveaway or contest. You don’t need an expensive prize to launch a successful giveaway campaign.
Users can join your contest by providing their email address, social sharing, or following you on social media. This creates a snowball effect and helps you reach many new users.
We recommend using RafflePress, which is the best WordPress giveaway plugin on the market. It comes with a drag and drop giveaway builder with tons of social actions to make your campaign a success.
For details, see our guide on how to run a successful giveaway / contest in WordPress.
6. Create Multiple Lead Magnet Pages
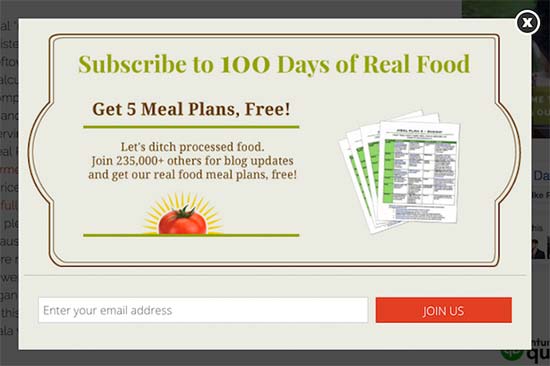
Lead magnet (also known as opt-in bribe) is an incentive you offer to potential buyers in exchange for their contact information such as name, email, phone number, etc.
Your blog posts with locked content, content upgrades, and premium content all fall into the lead magnet category.
Lead magnets must offer additional value to your users. This could be an ebook, a resources newsletter, checklists, workbooks, etc. See these 69 highly effective lead magnet ideas for inspiration.
7. Use Discounts and Deals

Sometimes a discount or exclusive coupon is what encourages a customer to finally make a decision. However, why not use this opportunity to nudge them into joining your email list?
If you are using WooCommerce, then you can simply go to WooCommerce » Coupons page to create a coupon. After that, you can use OptinMonster’s ‘Success’ view to reveal the code after users enter their email address.
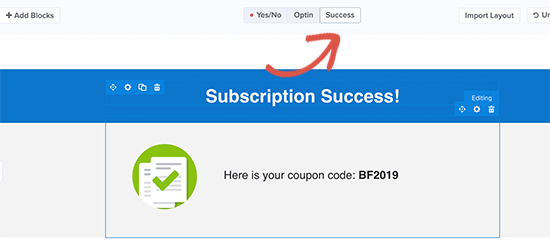
8. Use Contact Form to Grow Your Email List
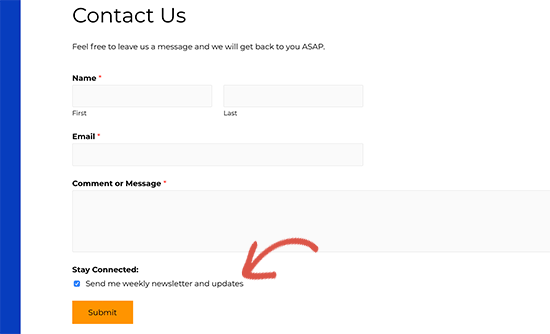
Contact forms offer another great opportunity to ask for a user’s email address. Users already enter their email address and a tiny checkbox can allow them to subscribe without entering it again.
We recommend using WPForms, which is the best WordPress form builder on the market. It allows you to connect your forms with top email marketing services and helps you easily build forms with simple drag and drop tool.
For detailed instructions, see our article on how to use the contact form to grow your email list in WordPress.
9. Add Sign up Call to Action on Your Facebook Page
Facebook has introduced call to action buttons for business pages. These buttons are prominently displayed on top of your cover image and are visible without scrolling.

Here is how to add a signup button as a call to action on your Facebook page.
You need to visit your Facebook page, and you will notice a blue ‘Add a button’ button.

This will bring up a popup with multiple choices. You need to click on ‘Get in touch with us’ tab and then select ‘Sign up’.
Next, you need to provide a link to your website where users will be taken when they click signup.
Don’t forget to click on add button to save your changes.
10. Use Twitter Lead Generation Cards
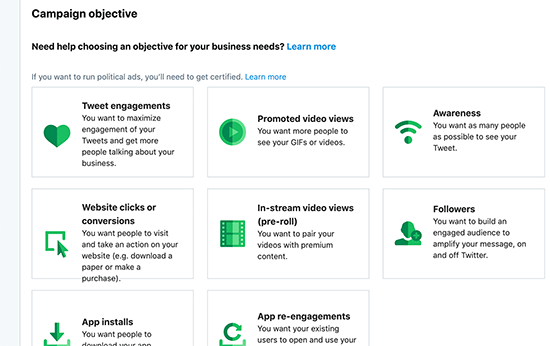
Twitter Ads offers another social platform that you can use to boost your lead generation efforts.
In fact, Twitter even allows you to run lead generation directly from Twitter. This way users can sign up for your email list without leaving Twitter.
You can also drive traffic to your website and use the email signup forms as a conversion. You can create special offers for Twitter users and tweet the links to your followers.
11. Use YouTube Call to Action Cards

YouTube is one of the largest social media platforms and the second most popular search engine in the world. If you are using YouTube videos as part of your marketing strategy, then you can utilize your YouTube channel to grow your email list.
YouTube action cards allow you to add interactive information cards to your videos. You can use them to add call to actions and link them to lead magnets on your website.
Here is how to add YouTube action cards to your videos.
YouTube gives you plenty of opportunities to promote your email list. For more ideas see this guide on how to build your email list using YouTube videos.
Bonus: Check out WPBeginner’s YouTube channel to see how we use Cards.
12. Use After Post and In-Line Optin Forms
After post optin forms appear when a user has already scrolled down an entire article. This means that they are already interested in your content and are much more likely to sign up.
You can also use in-line optin forms within your blog posts. The middle of a long read is the point where users are most engaged with the content. Reminding them to sign up at that point, works like a charm.
13. Add Polite Slide-in Scroll Box Forms
As we mentioned earlier that users simply ignore most static signup forms. The goal is to divert the user’s attention to your offer and sign up form.
Slide-in scroll box forms do that beautifully. They stay out of the way so that users can look at the content while diverting user attention to the sign up form with slide in animation.
14. Prominent Headers with Call to Action
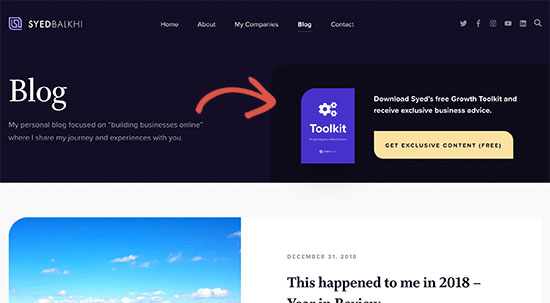
Header area of your website is most prominently visible to visitors when they first arrive. This makes it the most effective spot to place your call to action.
You will need a WordPress theme that comes with large or full screen header. You can also use a page builder plugin like Beaver Builder to create custom pages with your own layout.
15. Use Social Proof to Encourage More Sign ups
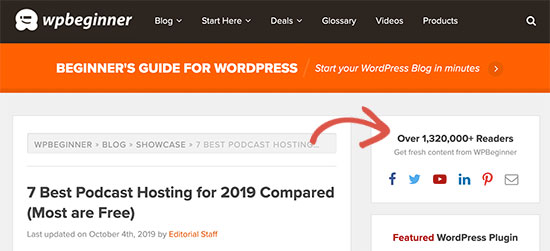
Social Proof is a psychological effect used to describe a social behavior where people feel more comfortable following other people. Marketers use social proof as a tactic for easing the minds of worried customers and increasing conversions.
There are many ways you can use social proof to get more subscribers. You can use testimonials on your landing pages, add reviews, show number of registered users, etc.
You can also use bubble notifications like TrustPulse to increase newsletter signups and eCommerce conversions.

16. Use Gamified Campaigns

Experts agree that gamification helps boost user engagement. Did you know that you can use gamified campaigns to boost newsletter conversions as well?
We use Spin a Wheel gamified campaign on our MonsterInsights blog to grow our email list as well as boost eCommerce conversions.
To create a similar campaign, simply follow the coupon wheel guide on OptinMonster website.
17. A/B Test Your Optin Forms
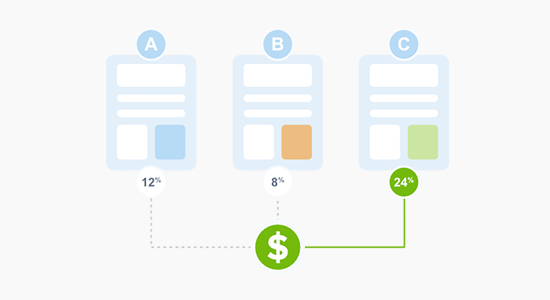
Many beginners continue to rely on guesswork to understand what works on their website. You need to understand how your audience react to different call to actions, optin placements, colors, design, and copy.
With A/B testing, you can find out which optins work better on your website. You can use these A/B testing tips to continuously test and improve your optins.
We hope this article helped you find the best ways to grow your email list. You may also want to see our list of the best SEO tools & plugins as well as proven tips on how to increase your website traffic.
If you liked this article, then please subscribe to our YouTube Channel for WordPress video tutorials. You can also find us on Twitter and Facebook.
The post 17 Tested and Easy Ways to Grow Your Email List Faster appeared first on WPBeginner.


