There are lots of different definitions you can find for distributed systems. For example, Wikipedia defines distributed systems as:
"A distributed system is a system whose components are located on different networked computers, which communicate and coordinate their actions by passing messages to one another. The components interact with one another in order to achieve a common goal."
Similarly, Technopedia defines distributed systems as
In this article, I want to give you an overview of how well the latest technologies can be integrated seamlessly into a test automation framework. Test automation is also an integral part of the software development lifecycle, and we want our test automation framework to contain all the latest features with minimal effect.
In this article, we build a sample test automation framework that consists of tools like Spring Boot, Cucumber, Java 8, and Serenity to test a sample Calculator application.
As people are shifting to automation from manual testing, they prefer to go with the best-suited testing framework for them. When we talk about a popular automation testing framework, most people immediately think about Selenium. Selenium is one of the most reliable, portable software testing frameworks for web applications. It comes with one test domain-specific programming language Selenese for writing automation scripts, but it also supports other programming languages like Java, Python, Ruby, Javascript, PHP, and C#, which makes it a good choice.
While moving to automation testing with Selenium, everyone who tests has to face a question: Which programming language should you use for writing test automation suits?
Sometime in Q4 of 2019, ProgrammableWeb will be launching an overhaul of the data model that drives our world-famous API directory. Now, more than two years in the making, this update to the foundation of our site will be one of the most ambitious technical undertakings in ProgrammableWeb’s history.
A monochromatic world would appear utterly indistinguishable and dull. Graphic design has brought much color, life, and artistry in our society that it’s hard to dismiss its importance. Quick Navigation What Is the Meaning of Graphic Design?What Is the Importance of Graphic Design for Your Business?What Role Does Graphic Design Play in International Development?Why Is […]
The prices of products listed on various Amazon shopping websites may vary every day and a simple Google Spreadsheet can help you monitor these price fluctuations via email. Just add the Amazon items in a spreadsheet and you’ll automatically get email alerts when their prices change on Amazon. You’ll thus never miss the deal again.
Track Amazon Prices with Google Sheets
The Amazon Price Tracker is easy to configure. All you have to do is add the links (URLs) of Amazon product pages inside a Google Spreadsheet. You can add monitor products across all Amazon.* websites. Here are the steps involved:
Step 1: Generate Amazon Access Keys
Open the Amazon Associates website and sign-in with your Amazon account. Next, click the Tools menu, choose Product Advertising API from the dropdown (link) and choose Manage Your Credentials under the Add Credentials section. Amazon will create an Access Key ID and a Secret Key that you’ll need in the next step.
Step 2: Copy the Google Spreadsheet
Click here to copy the Price Tracker Google Sheet in your Google Account. DO NOT change the layout of the Google Sheet as it may break the tracker.
Now all you have to do is enter Amazon product URLs in column A of the Google Sheet, one per line. For instance, here’s the Amazon URL for iPad
The URL contains the 10 digit ASIN code which is used by the Google Sheet to identify the specific Amazon product you are looking to monitor for price fluctuations.
In addition to prices, the Google Sheet lists several other useful attributes of Amazon Products including merchant’s name, sales rank, overall savings, Prime eligibility and whether the product qualifies for free shipping.
Step 3: Set Price Thresholds (optional)
With the Price Tracker, you can also set price thresholds for specific products and get automatic email alerts when the target price is reached. For instance, you can choose to receive alerts when the iPad price drops by 20% of the initial value. Or you can set a target price (alert when iPad drops to $399) and get automatic alerts when the price drops on Amazon.
To specify a threshold for any product, go to column B of the product row and enter the amount or percentage values as shown in the screenshot above.
Step 4: Configure Price Tracker inside Google Sheet
Inside the Google Sheets, go to the Amazon Price Tracker menu (near the Help menu) and choose Configure. You may have to authorize the Pricer Tracker script once to connect to Amazon API and send email alerts.
Next enter your access keys, your email address and the time when you wish to receive the email alerts. Click Save to initialize the Amazon Price Tracker.
That’s it. You’ll receive a daily email digest with the price fluctuations as shown below.
Monitor Amazon Products for Price Drops
Amazon Price Tracker can monitor prices of all products (including Kindle ebooks) listed on Amazon.com and the country-specific websites including amazon.fr, amazon.de, amazon.es, amazon.ca, amazon.it, amazon.in, amazon.co.jp and amazon.co.uk.
Also, you can add more Amazon URLs, or delete existing products, from the Google sheet and the script will automatically pick the changes in the next run. And if you ever wish to stop receiving those email alerts, just choose the Stop Tracking option from the Price Tracker menu in the same Google sheet.
The tracker is written in Google Scripts and uses Amazon’s Product Advertising API to fetch the latest prices at fixed intervals. The Price Tracker is completely free but if you chose to upgrade to premium, you get technical support and get to use your own Amazon Associate tags.
DevOps practices are helping companies build software that will function properly in a more automated world and this is what building cloud-native software is all about. While the cloud-native approach is becoming more critical and making life easier for everyone involved in software development, there are still industries that are laggards and kind of scared to move out of their legacy practices. Yes, we are talking about the highly regulated industries like Healthcare, Financial corporations, government agencies, etc. When it comes to adopting new technologies of building software, these industries have always remained slow because of the limitations they carry with them. But recently we have seen so many traditional banks and hospitals moving towards DevOps and cloud-native practices.
You cannot be a cloud laggard these days, dragging traditional systems into the cloud. It is not just software companies that are innovating these days; every company is becoming a software company now.
In DevOps, everyone needs to trust that everyone else is doing their best for the business. This can happen only when there is trust between the teams, shared goals, and standard practices. For example, Devs need to talk to Ops about the impact of their code, risks involved, challenges so that the Ops can be well aware and prepared to handle and maintain the stability of the system if any unexpected incidents occur.
While embracing DevOps initially, failures are inevitable, but that doesn't mean you stop innovating.
Welcome to today's tutorial on scrapestack, a powerful, real-time web scraping API service used by more than 2,000 companies. And, it's free to scrape up to 10,000 pages per month before a paid plan is required.
If you're not familiar with the term web scraping, it means to download a web page associated with a URL as a browser would, except you are capturing the HTML source code from the page.
Social media has played a big role in the success of small businesses for the past few years. Not only do social media platforms like Facebook and Instagram allow business owners to introduce their brand and their products to the world, but also help build a loyal clientele and ensure a steady flow of sales. […]
Photoshop is one of the most popular photo editing software for designers all over the world. Like the rest of the Adobe suite, sometimes the native actions and functionalities can be a little cumbersome and time consuming. Whether it’s handing off to web developers, or tinkering with a freelance design concept, these free plugins and […]
On October 9, Juliette Reinders Folmer announced on the core WordPress blog that WordPress 5.3 will use the spread operator. The spread operator was one of the new features made available in PHP 5.6, a version released in 2014.
WordPress abandoned PHP 5.2 – 5.5 with the release of WordPress 5.2. This means the core team can start taking advantage of relatively new features, or at least 5-year-old features. For plugin and theme developers who maintain the same minimum version support as WordPress, they can also start exploring this feature.
PHP 5.6 introduced two new methods of using the spread operator:
A Parameter in variadic functions.
Function argument unpacking of arrays and traversable objects.
This feature shouldn’t be confused with unpacking inside of arrays, which is only available in PHP 7.4.
The change in WordPress 5.3 is not expected to affect themes and plugins except in the rare case that a developer is overloading the wpdb::prepare() method. Developers should read the announcement post to dive into what code has changed in core WordPress.
Developers should check their plugins and themes with debugging enabled in a test environment to check for any notices. There may be cases where the function signature doesn’t match.
The spread operator is a tool, and like any tool, it should be used when it makes sense. Because it is a language construct, it does offer speed improvements over traditional methods of using a PHP function.
The remainder of this post will dive into the using the spread operator to help teach WordPress developers how it works.
Creating a Variadic Function with the Spread Operator
Variadic functions are PHP functions that accept a variable number of arguments passed in. They have existed for years. However, they can be confusing without solid inline documentation from the developer who wrote the code.
In the past, developers would need to use the func_get_args(), func_get_arg(), or func_num_args() functions to work with variadic functions. In PHP 5.6, developers can use a parameter such as ...$var_name to represent a variable number of parameters.
Take a look at the following multiplication function. It will accept one, two, three, or even more numbers and multiply each.
If we use that function as shown below, it will display 1024:
echo tavern_multiply( 2, 4, 8, 16 );
This is simple to do with the spread operator.
Unpacking Arrays as Function Arguments
PHP 5.6 allows developers to unpack arrays and traversable objects as function arguments. To explain how this works, look at the following multiplication function for multiplying three numbers together.
Generally, you would need to manually pass the $x, $y, and $z parameters directly. However, there are cases in real-world projects where the data (numbers in this case) would already exist within an array such as:
$numbers = [ 3, 6, 9 ];
Prior to PHP 5.6, you would need to split that array and pass each value to the function as shown in the following snippet.
With PHP 5.6, you can simply pass in ...$numbers like so:
echo tavern_multiply_three( ...$numbers );
Both methods work and will output 162. However, the second method is easier to read and is less prone to typos because it uses fewer characters.
Comparing Code Changes in WordPress
For a more practical example, let’s compare a real-world code change in WordPress and how using the spread operator improves the code over other methods. We can do this by looking at the core current_user_can() function.
First, see how the code is written in WordPress 5.2 and earlier.
Without looking at the full function, most developers would assume that $capability is the only accepted parameter for this function. However, the function accepts a variable number of parameters. Previously, WordPress had to use func_get_args() to get all the parameters, slice the array, and merge everything back together.
It is inelegant coding, but it got the job done for old versions of PHP.
Now compare what the same function looks like in WordPress 5.3. First, you can see the ...$args parameter clearly in the function statement. You can also see there is no need for the clever coding to pass along a variable number of arguments.
The change in WordPress 5.3 is a massive improvement in readability in comparison to earlier versions. It is nice to see these types of improvements to the core code.
MindFusion is a charting library that enables you to create and customize the most popular chart types in pure JavaScript. The library is free for commercial use. No attribution is required.
Here, we will take a brief look at the steps you need to take to build this beautiful combo chart from scratch.
This article is not about the beautiful music of the Beatles, but how Vagrant can make all stages of software development easier (including testing).
This paper will show how to create and provision one environment to a demo application in a localhost and another in the cloud. We could run the application on Docker, but the idea behind this tutorial is not to use containers on the production environment, so why use Docker in the localhost?
Be Theme just added a NEW lot of pre-built websites and dares you to pick just 1. If you like your themes like your coffee: strong, fast, and helps you finish your work in half the time… then you’re going to love Be Theme’s 450+ gallery.
Adrian Roselli explains why you do not need to add instructions for screen readers on how to use standard HTML controls and standard ARIA patterns (widgets).
In this article you will learn about the current status of image orientation on the web, how to correct orientation of images using Node.js, and how browsers will handle this in the future.
Zero is a small graphics app that uses JavaScript to replicate the functionality of a GPU and uses the terminal to display its rendered output via nodejs’ stdout.
Today we’re gonna talk about application bundlers — tools that simplify our lives as developers. At their core, bundlers pick your code from multiple files and put everything all together in one or more files in a logical order that are compiled and ready for use in a browser. Moreover, through different plugins and loaders, you can uglify the code, bundle up other kinds of assets (like CSS and images), use preprocessors, code-splitting, etc. They manage the development workflow.
There are lots of bundlers out there, like Browserify and webpack. While those are great options, I personally find them difficult to set up. Where do you start? This is especially true for beginners, where a "configuration file" might be a little scary.
That’s why I tend to reach for Parcel. I stumbled upon it accidentally while watching a tutorial on YouTube. The speaker was talking about tips for faster development and he heavily relied on Parcel as part of his workflow. I decided to give it a try myself.
What makes Parcel special
The thing I love the most about this bundler: it doesn’t need any configuration. Literally, none at all! Compare that to webpack where configuration can be strewn across several files all containing tons of code… that you may have picked up from other people’s configurations or inherited from other projects. Sure, configuration is only as complex as you make it, but even a modest workflow requires a set of plugins and options.
We all use different tools to simplify our job. There are things like preprocessors, post-processors, compilers, transpilers, etc. It takes time to set these up, and often a pretty decent amount of it. Wouldn’t you rather spend that time developing?
That’s why Parcel seems a good solution. Want to write your styles in SCSS or LESS? Do it! Want to use the latest JavaScript syntax? Included. Need a server for development? You got it. That’s barely scratching the surface of the large list of other features it supports.
Parcel allows you to simply start developing. That’s the biggest advantage of using it as a bundler — alongside its blazing fast compiling that utilizes multicore processing where other bundlers, including webpack, work off of complex and heavy transforms.
Where using Parcel makes sense
Parcel, like any tool, is not a golden pill that’s designed as a one-size-fits-all solution for everything. It has use cases where it shines most.
I’ve already mentioned how fast it is to get a project up and running. That makes it ideal when working with tight deadlines and prototypes, where time is precious and the goal is to get in the browser as quickly as possible.
That’s not to say it isn’t up to the task of handling complex applications or projects where lots of developers might be touching code. It’s very capable of that. However, I realize that those projects may very well benefit from a hand-rolled workflow.
It’s sort of like the difference between driving a car with an automatic transmission versus a stick shift. Sometimes you need the additional control and sometimes you don’t.
I’ve been working on a commercial multi-page website with a bunch of JavaScript under the hood, and Parcel is working out very well for me. It’s providing my server, it compiles my Sass to CSS, it adds vendor prefixes when needed, and it allows me to use import and export in my JavaScript files out of the box without any configuration. All of this allowed me to get my project up and running with ease.
Let’s create a simple site together using Parcel
Let’s take Parcel for a test drive to see how relatively simple it is to make something with it.
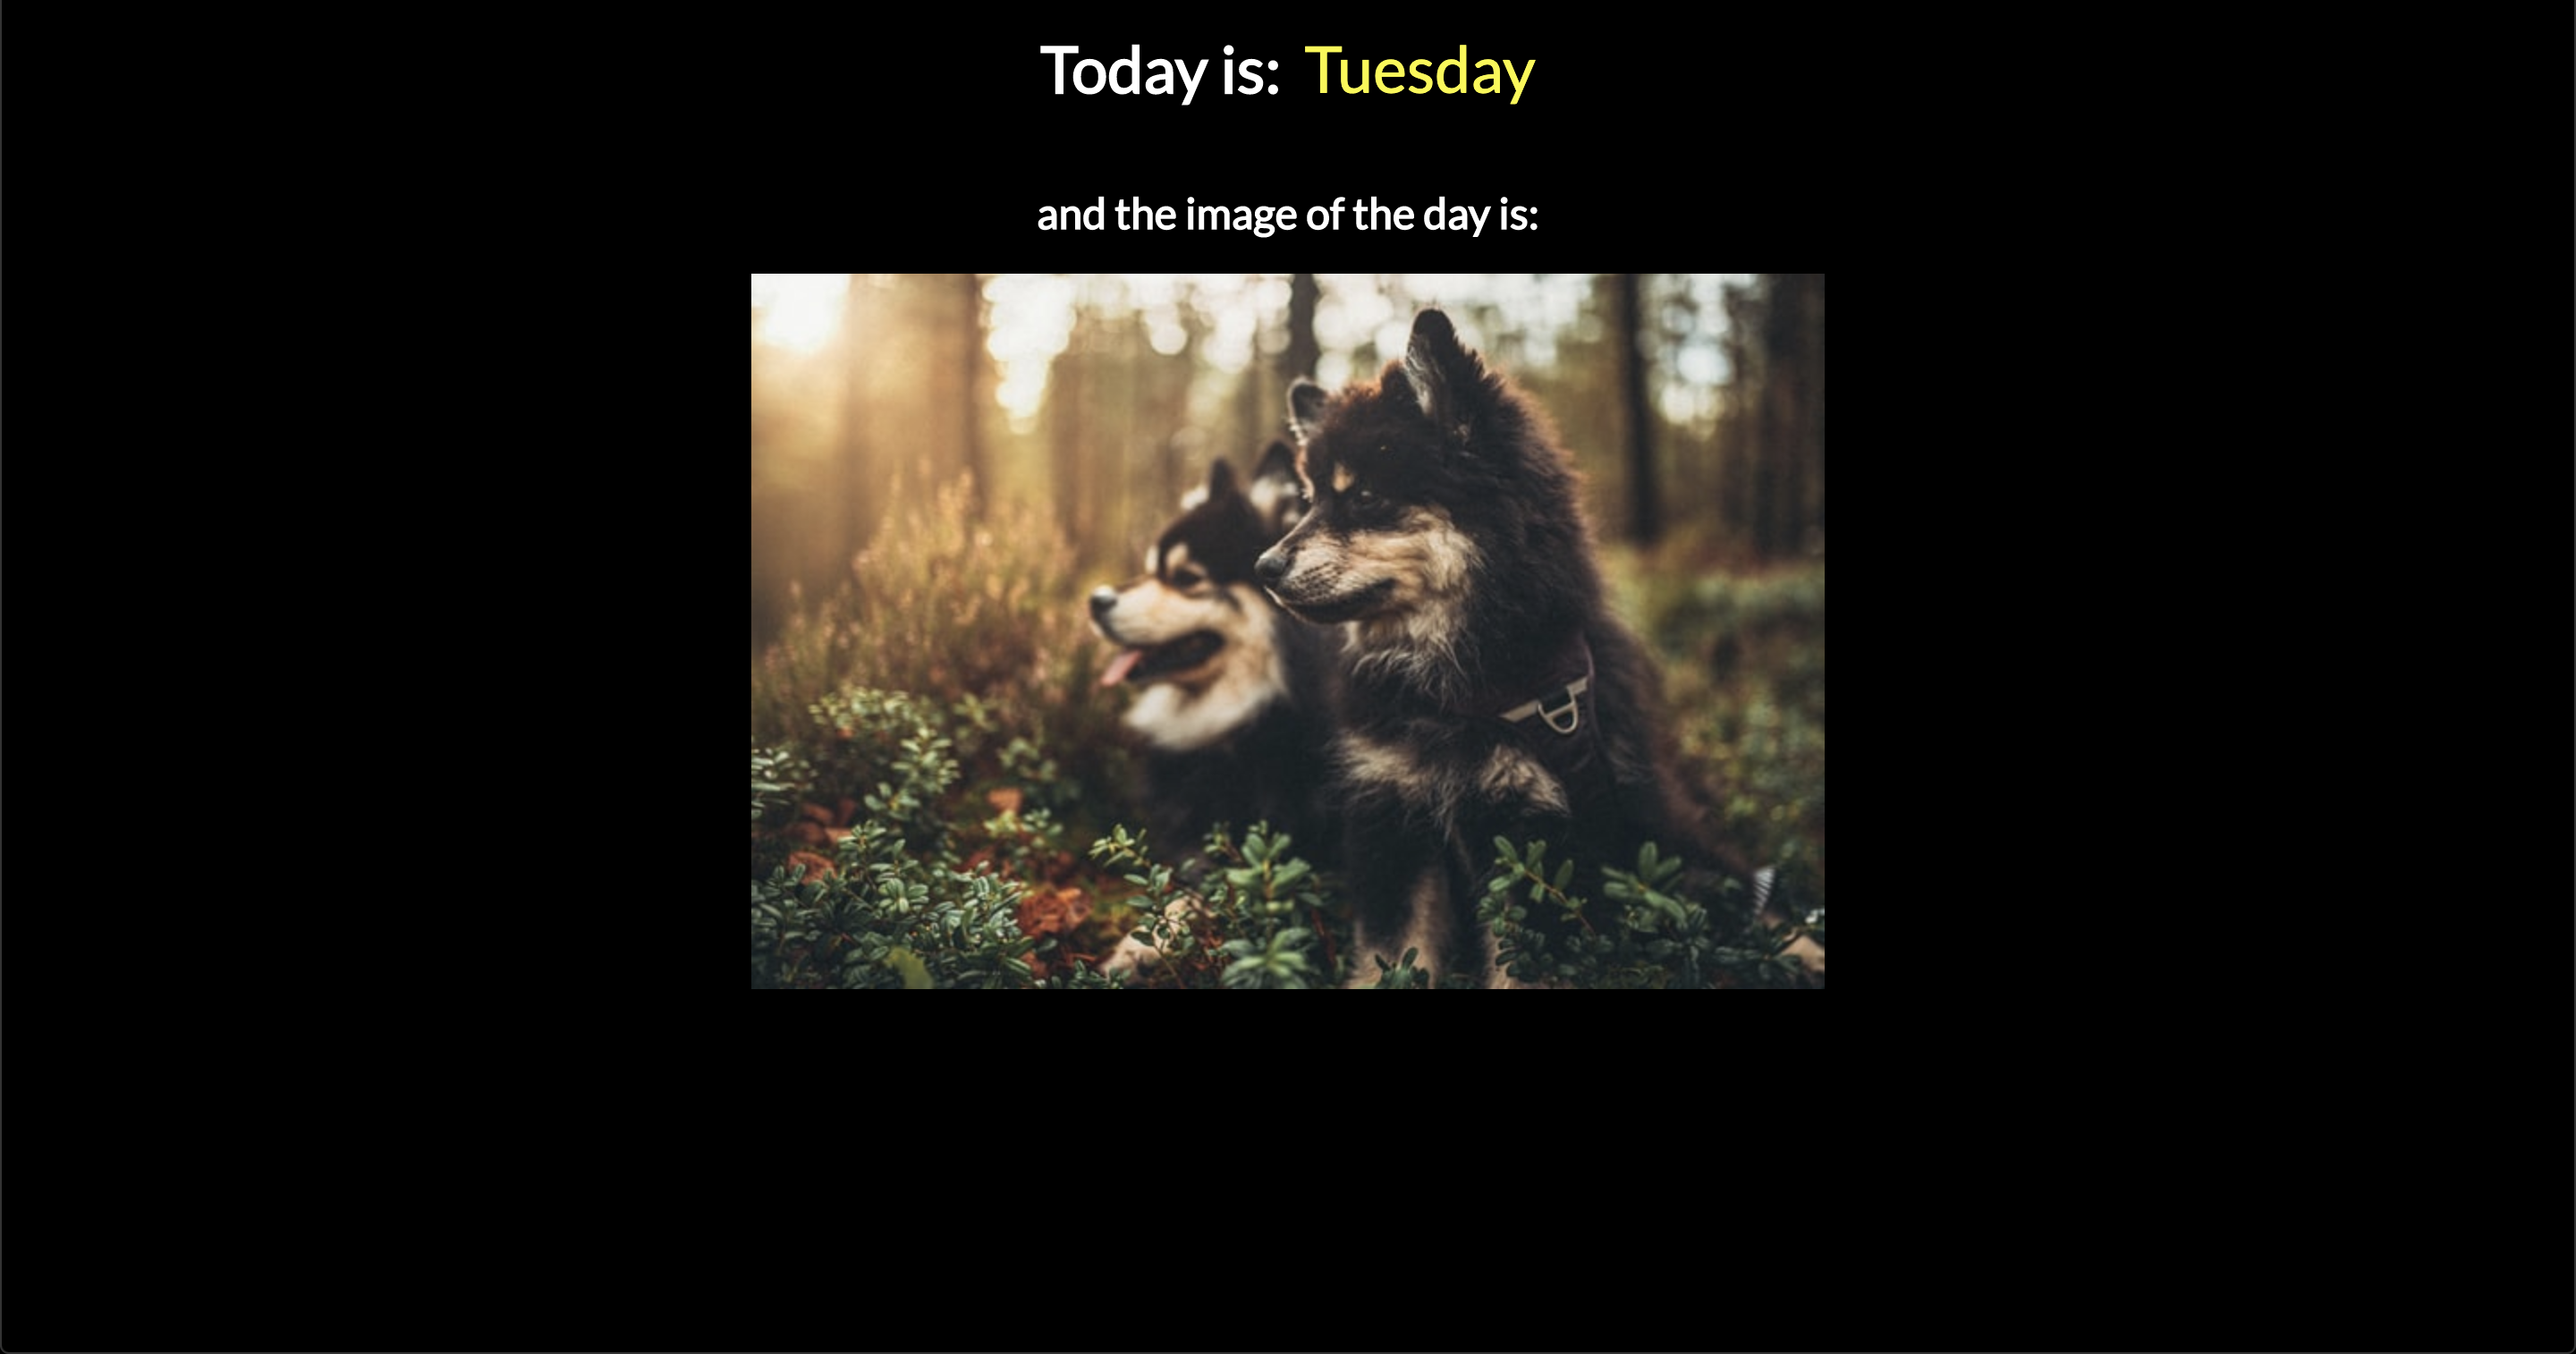
We’re going to build a simple page that uses Sass and a bit of JavaScript. We’ll fetch the current day of the week and a random image from Unsplash Source.
The basic structure
There's no scaffolding we’re required to use or framework needed to initialize our project. Instead, we’re going to make three files that ought to look super familiar: index.html, style.scss and index.js. You can set that up manually or in Terminal:
You may have noticed that I’m pulling in a web font (Lato) from Google, which is totally optional. Otherwise, all we’re doing is linking up the CSS and JavaScript files and dropping in the basic HTML that will display the day of the week and a link from Unsplash that will serve a random image. This is all we really need for our baseline.
Marvel at Parcel’s quick set up!
Let’s run the application using with Parcel as the bundler before we get into styling and scripts. Installing Parcel is like any thing:
npm install -g parcel-bundler
# or
yarn global add parcel-bundler
Let’s also create a package.json file should we need any development dependencies. This is also where Parcel will include anything it needs to work out of the box.
npm init -y
# or
yarn init -y
That’s it! No more configuration! We only need to tell Parcel which file is the entry point for the project so it knows where to point its server. That’s going to be our HTML file:
parcel index.html
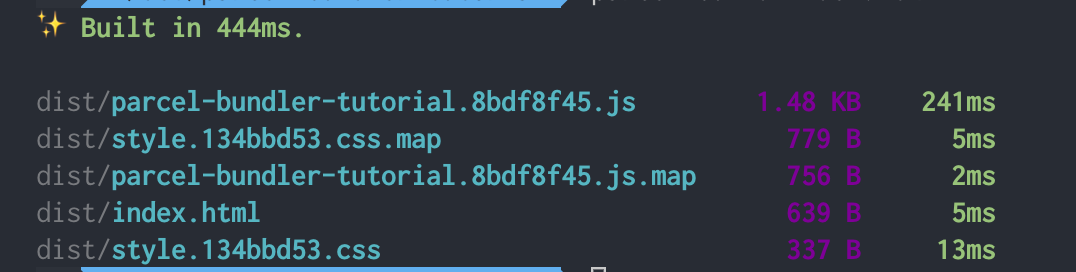
If we open the console we’ll see something like this indicating that the server is already running:
Server running at http://localhost:1234
Parcel’s server supports hot reloading and rebuilds the app as change are saved.
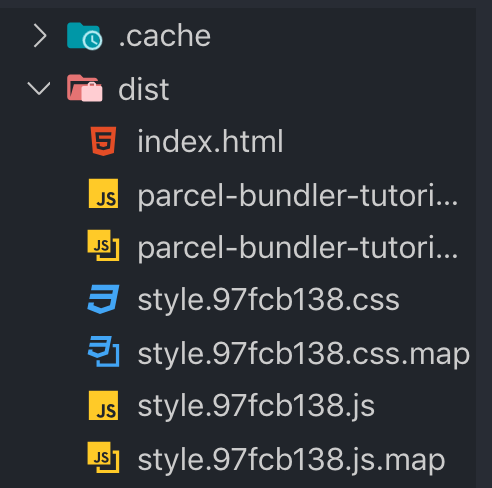
Now, heading back to our project folder, we’ll see additional stuff,that Parcel created for us:
What’s important for us here is the dist folder, which contains all our compiled code, including source maps for CSS and JavaScript.
Now all we do is build!
Let’s go to style.scss and see how Parcel handles Sass. I’ve created variables to store some colors and a width for the container that holds our content:
Once we save, Parcel’s magic is triggered and everything compiles and reloads in the browser for us. No command needed because it’s already watching the files for changes.
This is what we’ve got so far:
The only thing left is to show the current day of the week. We’re going to use imports and exports so we get to see how Parcel allows us to use modern JavaScript.
Let’s create a file called today.js and include a function that reports the current day of the week from an array of days:
💡 It’s worth a note to remember that the getDay function returns Sunday as the first day of the week.
Notice we’re exporting the getDay function. Let’s go into our index.js file and import it there so it gets included when compiling happens:
import { getDay } from './today';
We can import/export files, because Parcelsupports ES6 module syntax right out of the box — again, no configuration needed!
The only thing left is to select the <span> element and pass the value of the getDay function to it:
const day = document.querySelector('.today');
day.innerHTML = getDay();
Let’s see the final result:
Last thing is to build for production
We’ve created the app, but we want to serve it somewhere — whether it’s your personal server or some zero-configuration deployment like Surge or Now — and we want to serve compiled and minified code.
Here’s the one and only command we need:
parcel build index.js
This gives us all of the production-ready assets for the app. You can read more aboutParcel’s product mode for some tips and tricks to get the most from your environment.
I’ve said it several times and I’ll say it again: Parcel is a great tool. It bundles, it compiles, it serves, it pre- and post-processes, it minifies and uglifies, and more. We may have looked at a pretty simple example, but hopefully you now have a decent feel for what Parcel offers and how you might start to use it in your own projects.
I’m interested if you’re already using Parcel and, if so, how you’ve been using it. Have you found it works better for some things more than others? Did you discover some neat trick that makes it even more powerful? Let me know in the comments!
The team at Stripe explores how they’re refining their color palette to make it more accessible and legible for users across all their products and interfaces. Not only that but the team built a wonderful and yet entirely bonkers app for figuring out the ideal range of colors that they needed.
We built a web interface to allow us to visualize and manipulate our color system using perceptually uniform color models. The tool gave us an immediate feedback loop while we were iterating on our colors—we could see the effect of every change.
This tool is...whoa! I would love to learn a bit more about why they built this though as it looks like it wouldn’t have been a particularly quick and easy thing to put together. I wonder if that team has to support a wide-range of colors for their charts or data-visualization UI (as complex charts can often require a much larger range of colors for comparing bits of data effectively). Either way, this is pretty inspiring work.
This somewhat harkens to a couple of techniques for enforcing accessible colors, including one that uses custom properties with calc() and rgb by Josh Bader, and another by Facundo Corradini that also uses custom properties but with hsl with conditional statements.