This is the list of student records stored in an ArrayList.
I have to make sure that I identify the duplicates and store the duplicates in another arrayList, duplicateRecords for the sake of argument.
Now, the first thing I tried was to do something like this
public void findDuplicates() {
        if(!studentRecords.isEmpty()) {
            duplicateRecords = new ArrayList<Student>();
            for(int i = 0; i < studentRecords.size(); i++) {
                for(int j = 1; j < studentRecords.size(); j++) {
                    if(studentRecords.get(i).equals(studentRecords.get(j)) && i != j) {
                        duplicateRecords.add(studentRecords.get(i));
                    }
                }
            }
        }
        printDetails(studentRecords);
        System.out.println("############");
        printDetails(duplicateRecords);

    }
Which is buggy because, of course, it adds the record for Anna twice. I guess the complexity comes in if there are multiple duplicates, for example what happens if there are 3 records for Anna Clarke? In theory I'd want that to be twice in the duplicateRecords because it is a double duplicate
I can't really think of another approach though, any ideas?
Last month has been a very productive and creative one! So many wonderful web experiences were born and we are very happy to show you our latest picks. Some designs really stand out with their bold concept while others maintain a classic elegance with a twist. Either way we hope you enjoy this collection and get inspired!
I’ve seen a lot of questions about whether or not breadcrumbs are necessary for PWAs. It makes sense why the question is raised. After all, PWAs have an app shell and sticky menu, so shouldn’t it be easy for users to move around it without a secondary navigation?
It’s not as simple as that.
Because PWAs often straddle the line between website and native app, navigation isn’t always minimized — especially if you’re building large e-commerce stores or blogs. Plus, don’t forget that breadcrumbs aren’t just for navigation. They’re often used to show progress.
So, today, we’re going to look at how to design breadcrumbs for PWAs and some interesting use cases where they come in handy.
Will PWAs Replace Native Mobile Apps?
When it comes to the mobile user experience, are mobile websites all that bad? You hear so much about the benefits of building a dedicated native app, but that can become an incredibly costly gamble if users don’t take to it. Read related article →
One of the reasons we build PWAs instead of websites is because they offer a better mobile experience. But that doesn’t mean you can strictly rely on your visitors to use the navigation to get around. In some cases, they’re going to need a bit of hand-holding.
Breadcrumbs are a great way to step in and say:
Did you go too far? Let us help you backtrack a step or two.
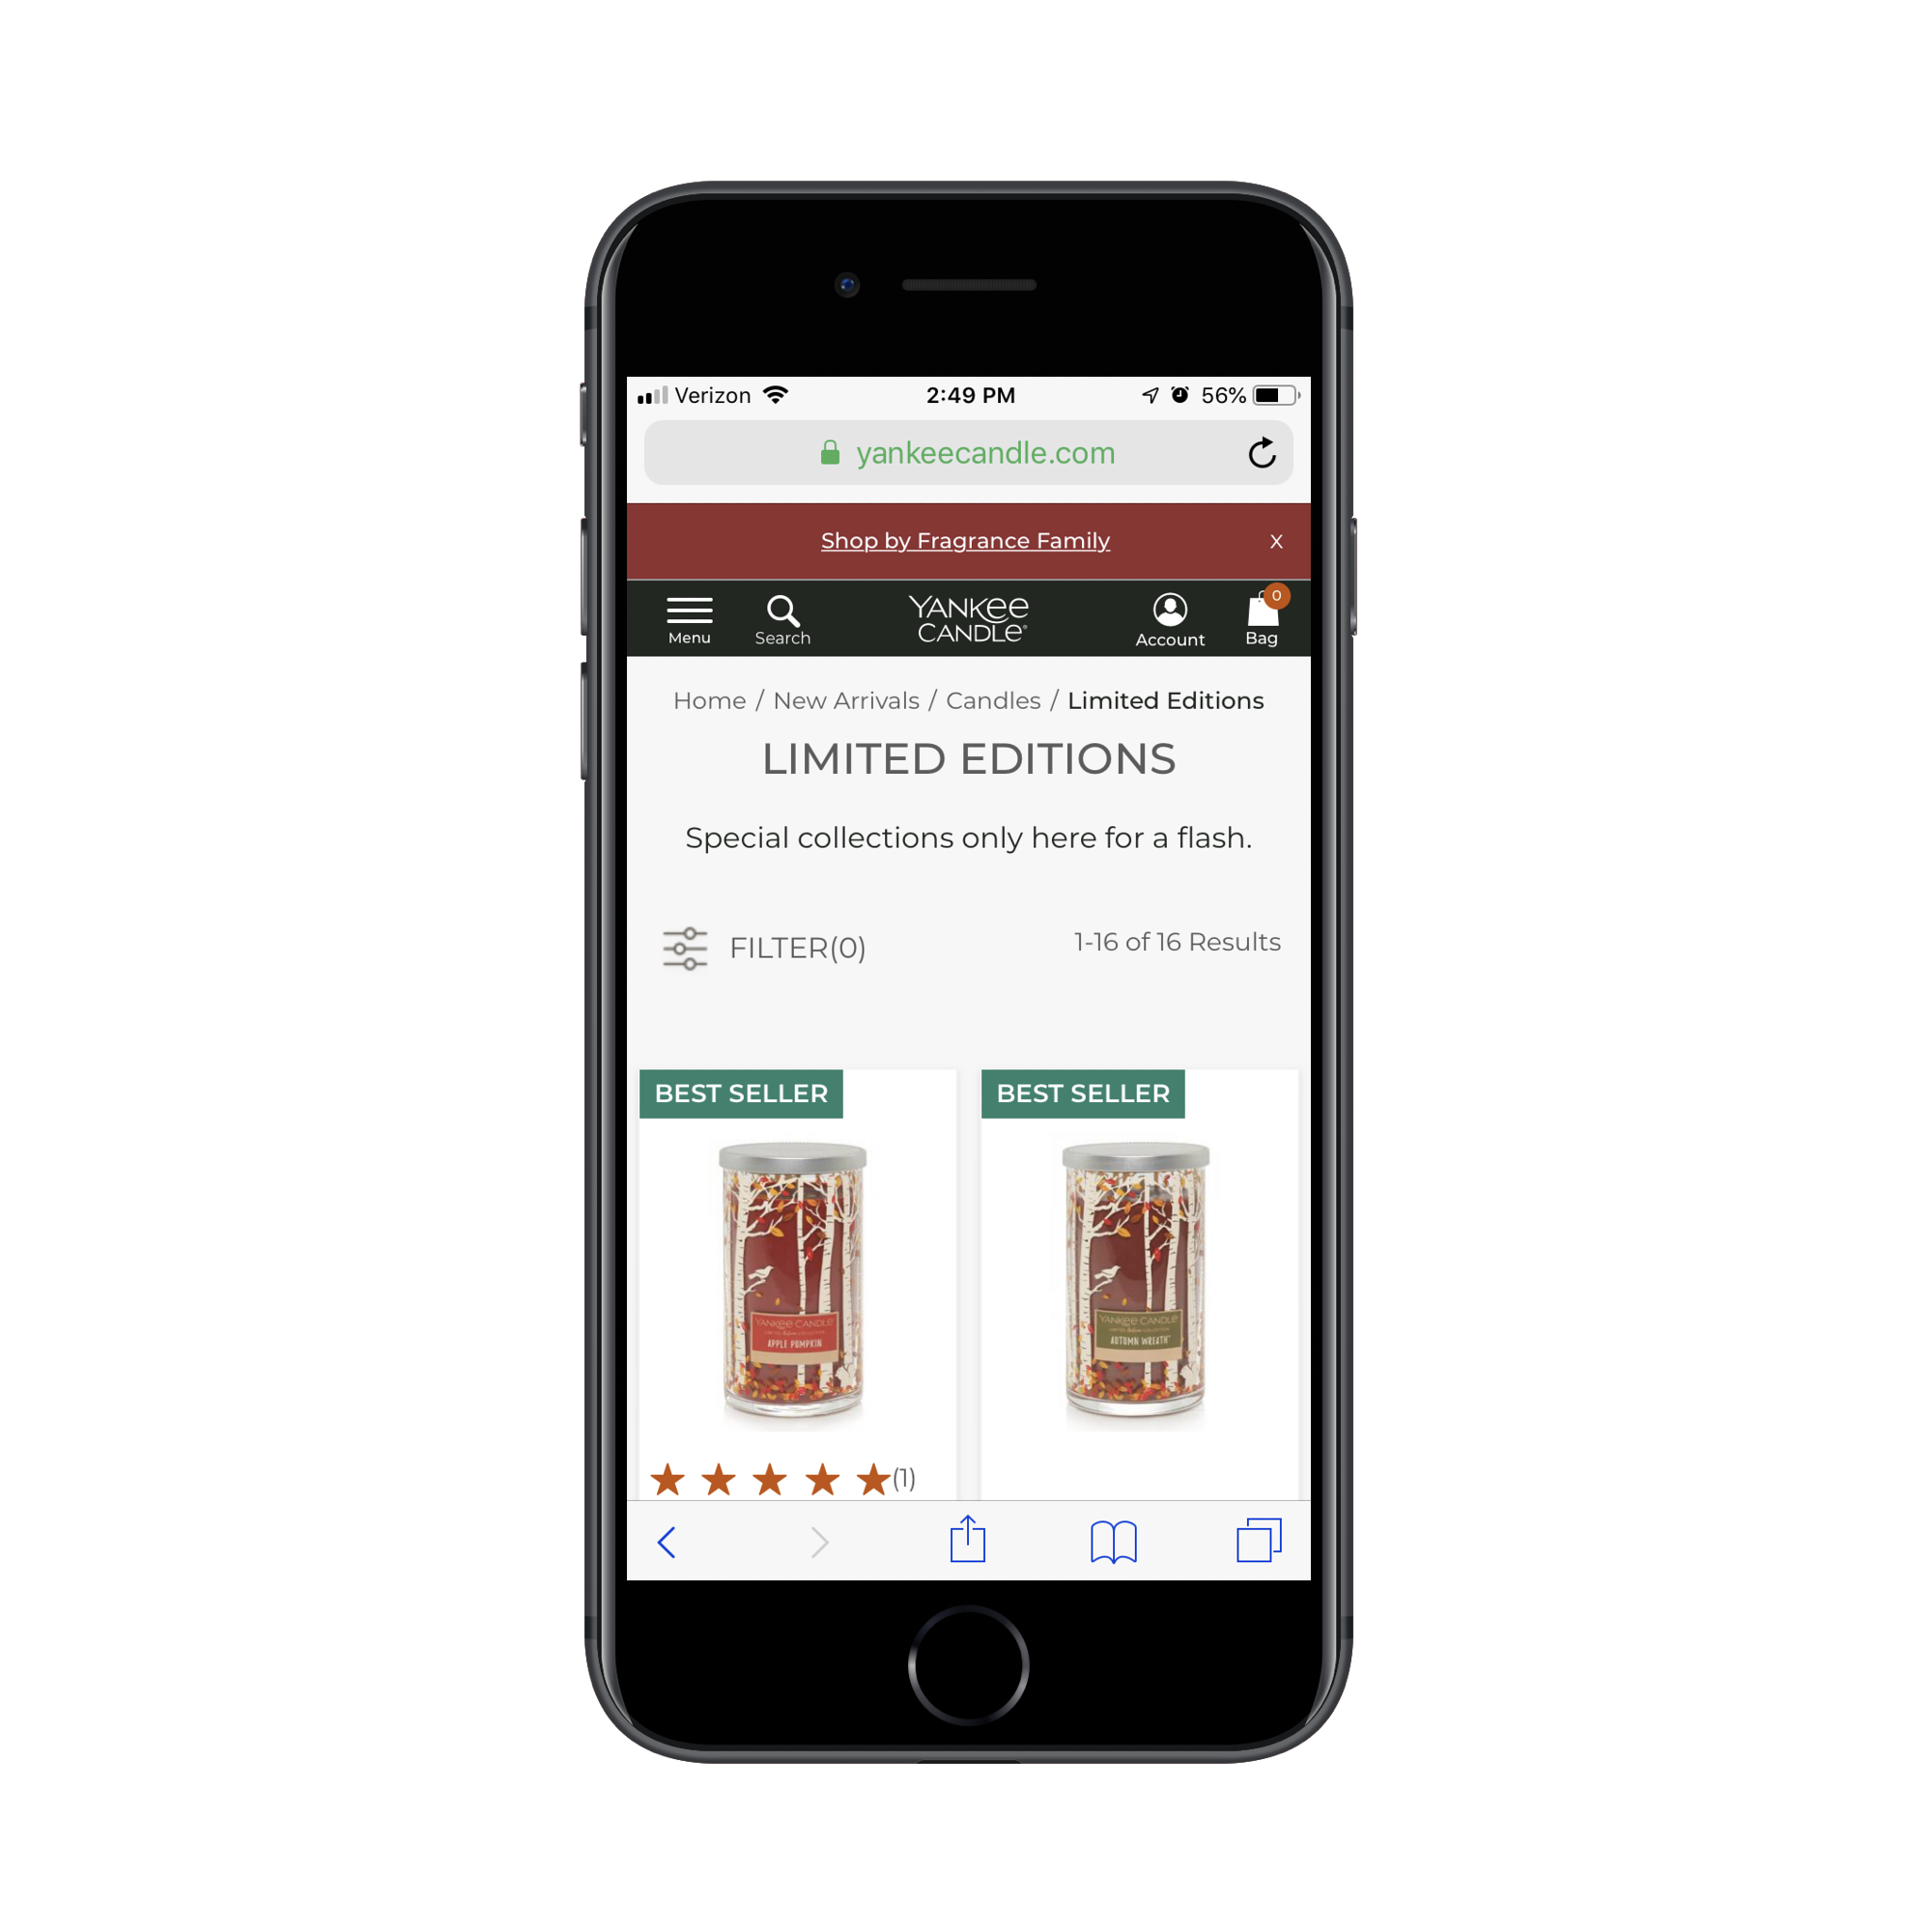
Yankee Candle displays a breadcrumbs navigation as visitors move deeper through its candle inventory and categories. (Source: Yankee Candle) (Large preview)
Or your breadcrumbs might be saying:
Not sure how much further you have to go (or how much more you can take)? Here are your remaining steps.
The checkout process can certainly get tiresome on mobile when it’s broken into multiple steps. That’s why breadcrumbs progress bars like the one Cort uses are so helpful.
Customers looking to rent furniture from Cort are taking through a multi-step checkout process with breadcrumb dots indicating progress. (Source: Cort) (Large preview)
These aren’t the only ways you can use breadcrumbs to improve the visitor experience with a PWA. Here are some other use cases you can take advantage of:
1. Enhance e-Commerce Search
If you’re building a large e-commerce PWA with multiple hierarchies or categories of products, breadcrumbs are 100% necessary.
Breadcrumbs also make it easier for shoppers to see the steps they’ve taken, so they can determine how far back they need to skip.
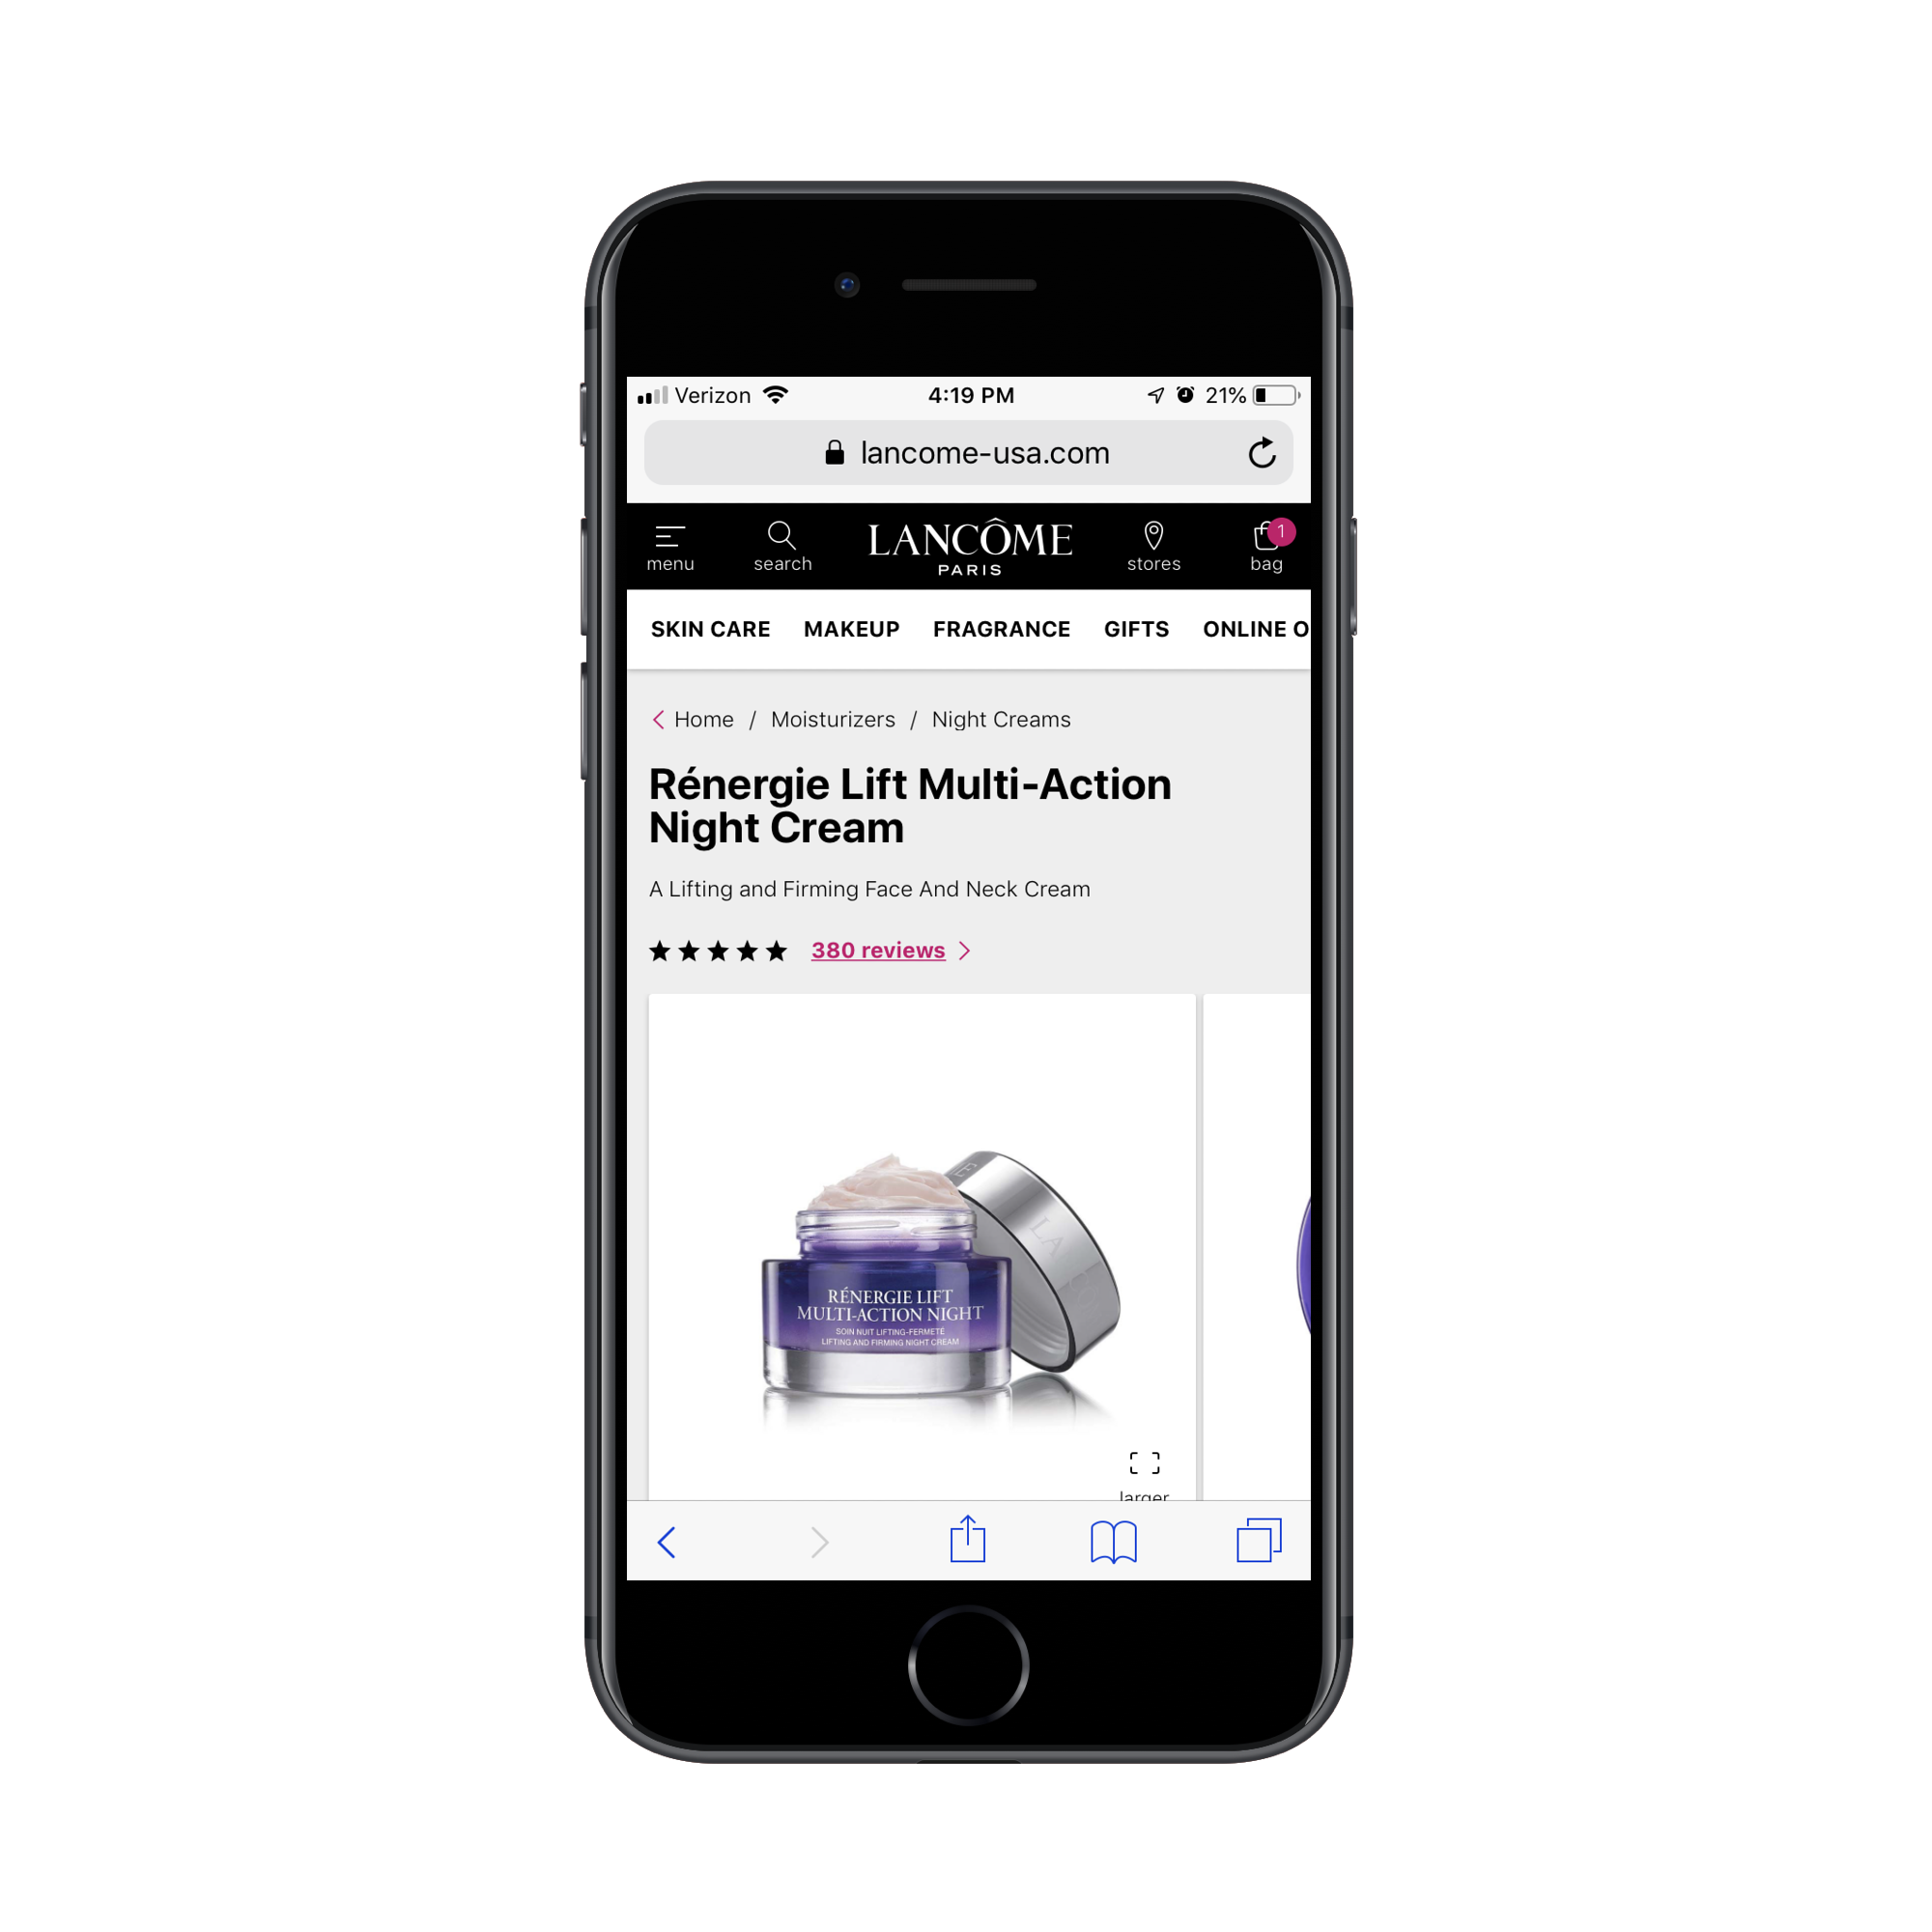
For example, let’s say someone were shopping for a new moisturizer on the Lancôme PWA:
The Lancôme PWA uses breadcrumbs to help shoppers backtrack more easily. (Source: Lancôme) (Large preview)
But let’s say they were looking for something they could wear during the day and hadn’t paid enough attention to the name of the product before clicking on it. Breadcrumbs, then, allow them to go to the exact spot they need to be (i.e. “Moisturizers”) to find the right category (“Day Creams”).
This type of breadcrumbs navigation becomes especially important the deeper the navigation goes.
Just be careful.
Although Yankee Candle has an example of what to do above, if you pry deeper into its inventory, you’ll find that it’s breadcrumbing is somewhat compromised:
As visitors go deeper into Yankee Candle’s store, the breadcrumbs go offscreen. (Source: Yankee Candle) (Large preview)
You might not be able to tell from the screenshot above, but the breadcrumbs go offscreen. And if you can’t tell that, then the visitors of the PWA aren’t going to be able to tell that either.
The extra breadcrumbs do exist. They just require visitors to scroll to the right to find them:
Realistically, this could cause problems for visitors who are familiar with scrolling, but not with having to scroll individual elements like a breadcrumbs navigation.
One thing that Yankee Candle has done well in this example is that it’s preserved the size of its breadcrumbs so that they remain readable and clickable. That’s something that doesn’t always happen if you add a wrap function to the navigation.
I’ll show you why the matter of size might come up when you’re designing this element.
Bed Bath & Beyond’s breadcrumbs take up about a quarter of the mobile web page. (Source: Bed Bath & Beyond) (Large preview)
This is certainly a neat way to design your breadcrumbs, especially since the last crumb enables users to dig even deeper to categories like:
Casual Dinnerware,
Fine China,
Charger Plates.
Once the visitor selects one of the products, they’re shown a standard plain-text breadcrumbs along the top of the page. That said, this in-between “Dining | Dinnerware | Dinnerware Sets” breadcrumbs trail takes up nearly a quarter of the page. It doesn’t totally compromise the shopping experience, but it might cause undue irritation since visitors have to do a lot of scrolling to see each of the available dinnerware sets now.
Your best bet? Visitors know to look for breadcrumbs in e-commerce, whether it’s on desktop, mobile or PWA. So, don’t try and get creative with it. Place them where they belong (i.e. just under the header) and use uniform typography. If your breadcrumbs have a tendency to run on the long side, you can wrap them or, better yet, reduce how many are displayed at once.
In the Yankee Candle example above, this is what visitors see when they scroll the full width of the breadcrumb:
Home / Seasonal Candles / Fall Candles / Fall Jar Candles / Sweet Maple Chai Large Fall Jar Candles
This is what it could be instead:
Seasonal Candles / Fall Candles / Fall Jar Candles
There’s really no need to include the “Home” attribute as everyone knows the logo points there. And there’s no need to spell out the name of the product since it’s right below the breadcrumb. When you do this for your PWA, just remember to trim it back so that only the essentials appear.
2. Improve the Browsability of Blogs
When someone reads a blog from the comfort of their desktop or laptop, they usually have the convenience of a sidebar that shows them other recent or relevant articles. On mobile, though, that’s impossible. Instead, they have to:
Scroll to the bottom of the post and see if related links are available there,
Use the blog’s search function (if there is one),
Or go to a relevant category or date using breadcrumbs.
Scrolling isn’t ideal, especially if your readers don’t always get through the full post. Search would be fine, but it requires them to have a very clear idea of what they’re looking for. Breadcrumbs, on the other hand, provides some context about what they’re reading as well as guidance for what else they can find.
The Cooking Light blog uses a simplified breadcrumbs to help users find related content. (Source: Cooking Light) (Large preview)
Let’s say a visitor lands on the Cooking Light home page and sees this article about measuring how much pumpkin comes in a can. They click on it and find it a worthwhile read.
Now, someone who clicks on an article like this is likely to be a novice cook, so they’d most definitely be interested in picking up other beginner tips and insights. That’s why Cooking Light’s breadcrumb is so useful. This could’ve ended up being something like this:
Home > Cooking > Thanksgiving > Pies > Pumpkin Pie
Instead, the article was properly and simply categorized so that the kinds of readers it attracts can find other useful and relevant content.
While you might be tempted to categorize blog posts a different way, it can over-complicate the breadcrumbs. Case in point, this is how the Transportation Security Administration (TSA) does theirs:
The TSA designs its blog breadcrumbs using dates (years and months). (Source: TSA) (Large preview)
In the example above, you can see that the breadcrumbs are nothing more than a breakdown of the publication date. Unless you have visitors constantly searching for time-sensitive information instead of valuable guides, this type of breadcrumb isn’t going to work very well.
Another thing I want to mention is that the inclusion of the title in the breadcrumbs is unnecessary. It’s nothing more than a duplication of the blog post title that appears directly below it. What’s more, the length of the title forces the breadcrumbs to wrap and take up more space than it needs to.
Simpler is always better, especially if the goal of the breadcrumbs is to help visitors read more of your blog content. You can use my tip from #1 about shortening your breadcrumbs to fix this issue.
3. Make It Easier to Get Help
One of the cool things about building products for the web is that it allows us to sell exponentially more than we could if we had to constantly stock a physical inventory. But that doesn’t release us from the responsibility of supporting our products. When you build a piece of software, you better be there to help customers with it.
That said, a lot of the problems SaaS users run into are commonplace and can easily be answered with a support portal. That way, you empower users to look up answers to their own problems and avoid clogging up your support queue. It’s a win-win for both sides.
Now, support portals are a lot like blogs in that they can be tough to get around if you don’t have the convenience of a sidebar or search bar to show you the way. Even if those elements are present, it’s still nice to have additional context as you go deeper and deeper into the support archives.
For instance, this is FreshWorks’ Freshsales CRM support portal:
The Freshsales support portal always keeps breadcrumbs at the top of the page for reference. (Source: FreshWorks) (Large preview)
There is a ton of documentation in this support portal. It would be silly not to have a breadcrumbs navigation available at the top of the page. And like the blog breadcrumbs examples, this one helps users in two ways.
It’s useful for backtracking, for one. It’s also helpful for users that are trying to learn a lot more about the same subject. By providing this level of support, your users will learn how to master your product more easily and be more likely to renew their subscriptions at the end of the term.
Another software that uses breadcrumbs in its support section is Calendly:
Calendly includes too many attributes in its support breadcrumbs navigation. (Source: Calendly) (Large preview)
Notice how the name of the page and category of support topics is present just below the search bar. Now, look at the attributes included in the breadcrumbs:
Help Center > Calendly > Getting Started > Getting Started
None of these belong here except “Help Center”. Anyone who’s landed on this page knows that the support topic pertains to the product (Calendly). And they’re also going to see the page title is “Getting Started”, so the duplication of it here is of no help.
Really, the breadcrumbs shouldn’t even come into play until they dig deeper in the navigation. Even then, I don’t know if it’s necessary since the title is always present at the top of the page.
When building out your own SaaS support portal, really think about what belongs in the breadcrumbs and what doesn’t. If it’s a simple enough self-support system, you might not need it at all.
4. Improve Conversions with Progress Bars
When you give your PWA visitors a multi-step process to work through — be it an e-commerce checkout, quiz, questionnaire and so on — don’t leave them wondering whether it’s worth it to finish.
Now, that doesn’t mean you need to overwhelm them with a long form that appears all at once — that could just as well hurt your conversion rate. It’s completely fine to break longer processes into multiple steps. Just remember to use progress bar breadcrumbs to split them up.
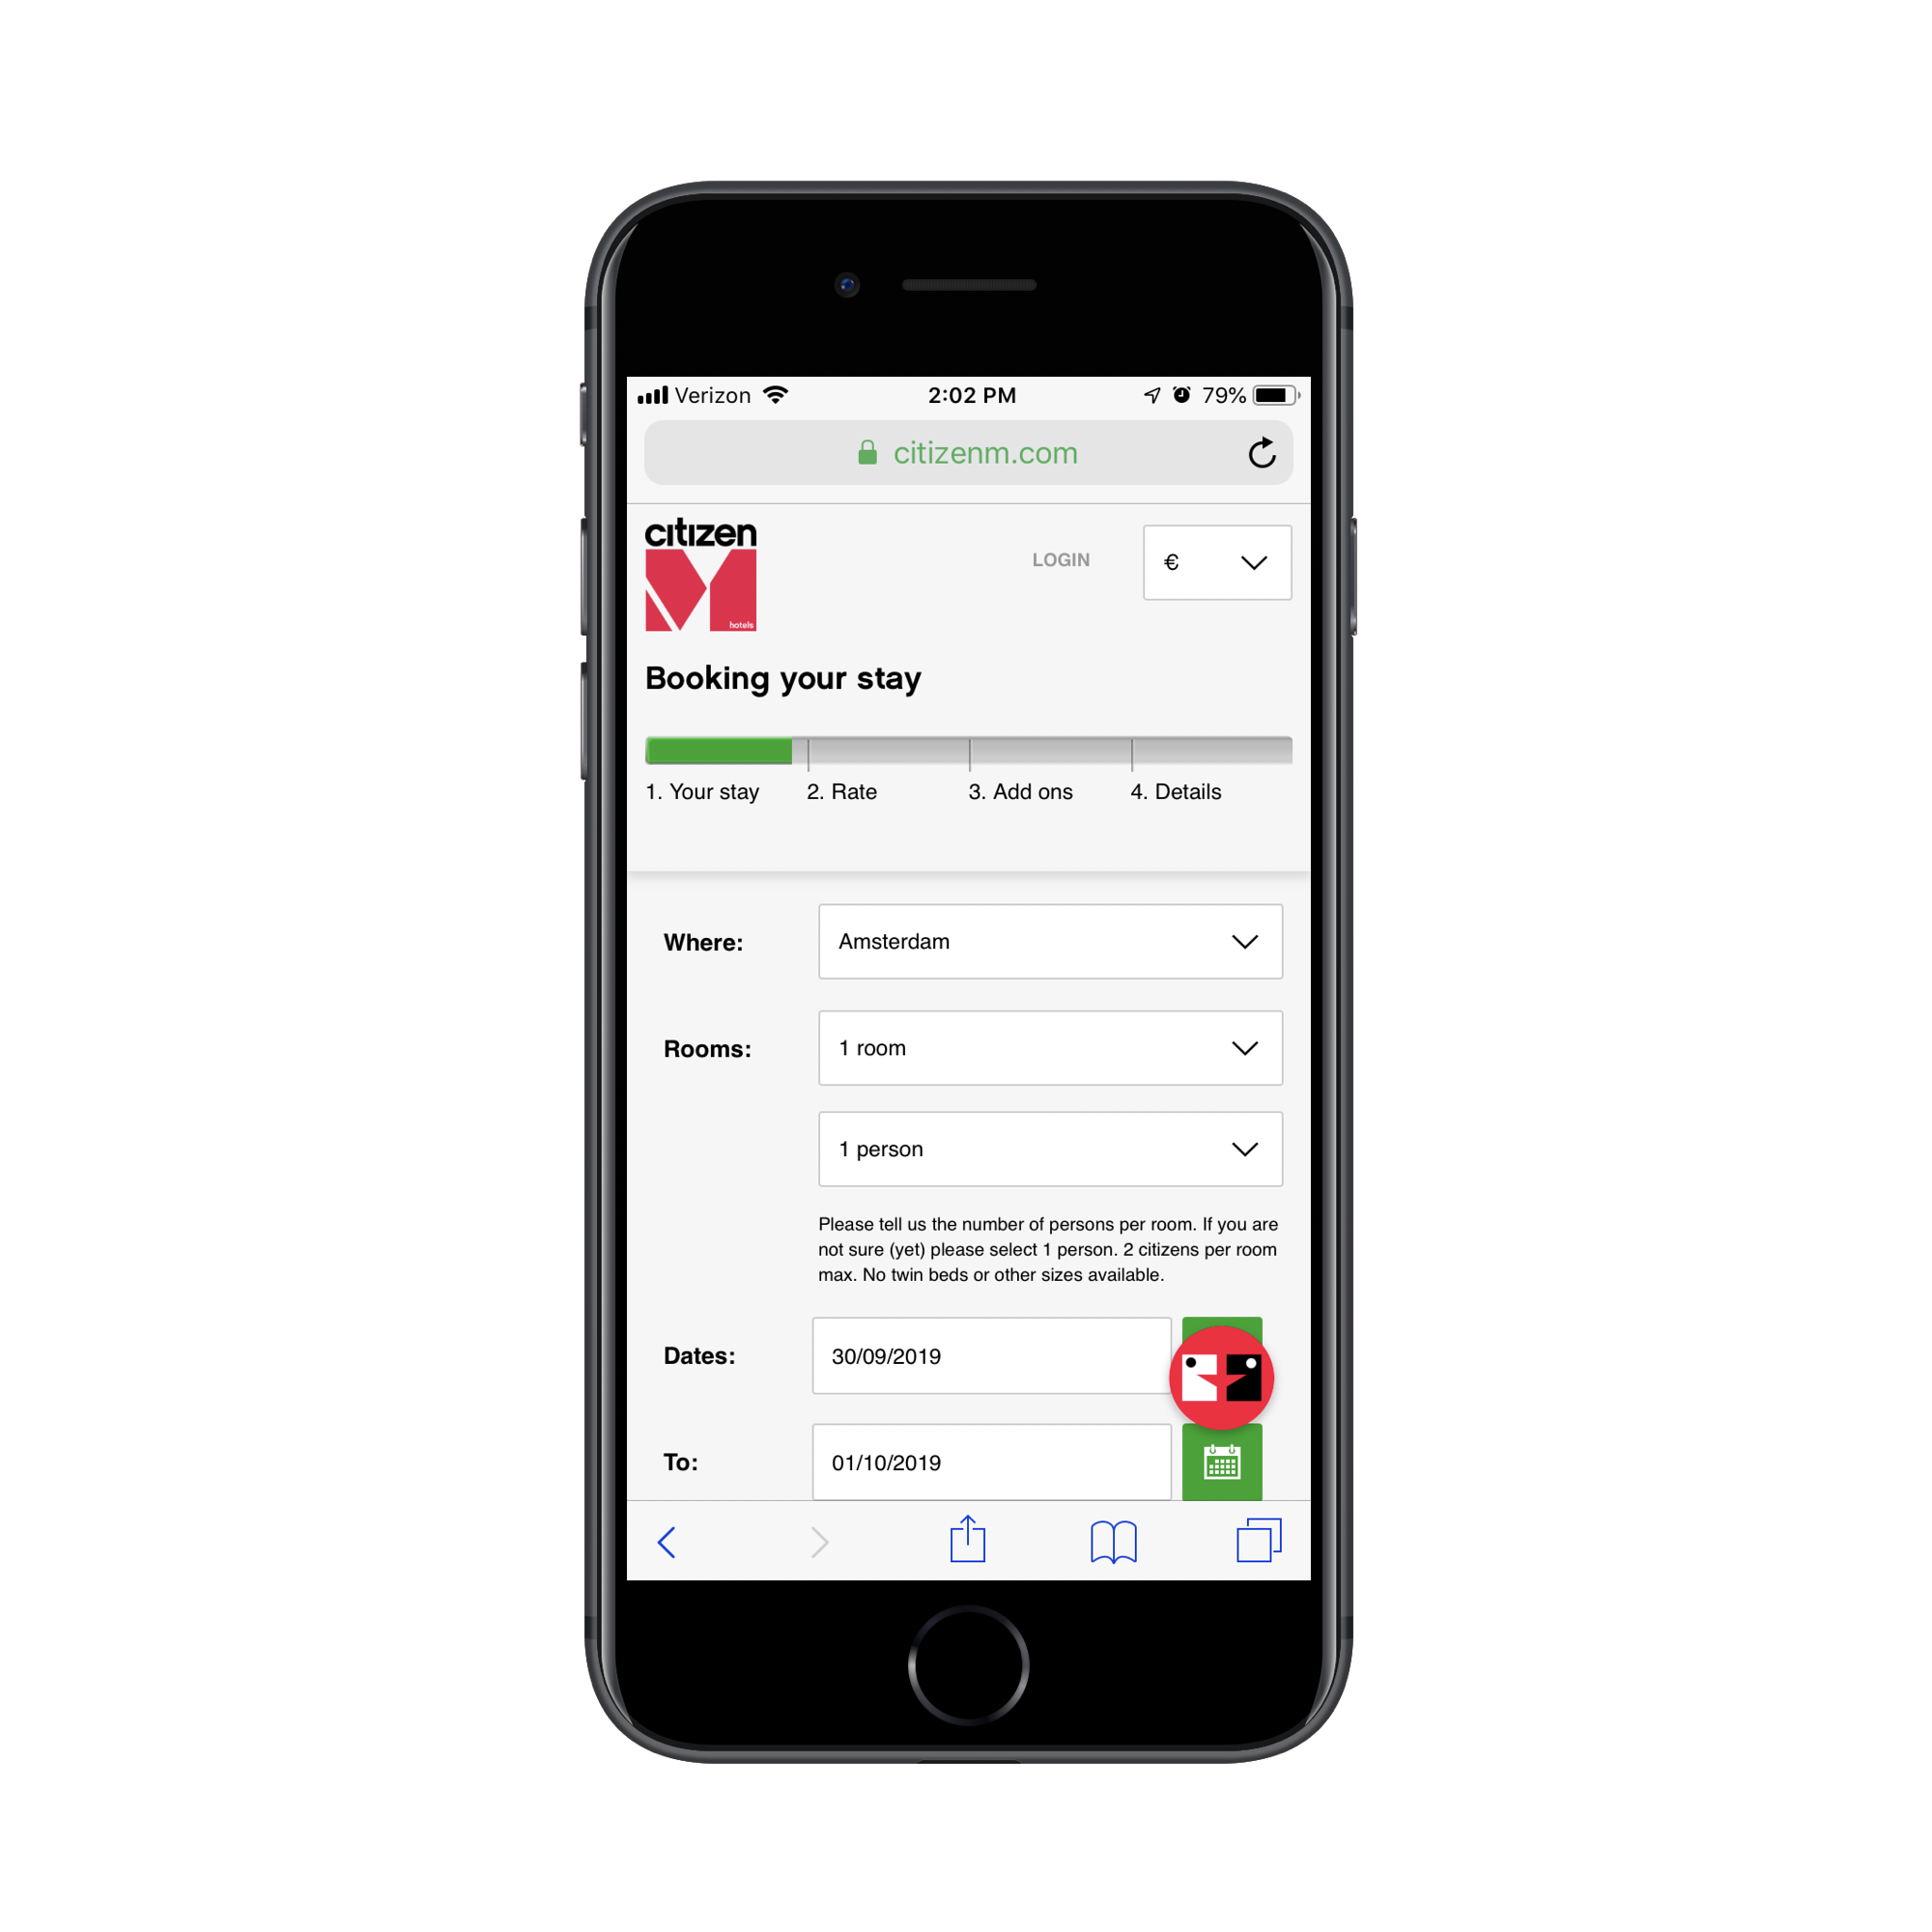
This is something that’ll be especially useful in hospitality as the CitizenM reservation form demonstrates:
When booking a reservation at the CitizenM hotel, visitors see exactly how much more work is ahead of them with breadcrumbs. (Source: CitizenM) (Large preview)
These breadcrumbs serve two purposes:
Visitors can see how much work is actually involved in the process.
They can use them to backtrack if they need to change a response.
This can make what might otherwise seem like a never-ending booking process more manageable. But that doesn’t mean that breadcrumbs, as a whole, always contribute to higher conversions.
Part of the reason the breadcrumbs example above works so well is because it’s well-labeled and simplified. When you remove the transparency and logic from breadcrumbs progress bars, though, they can end up harming your conversion rates.
For example, Ipsy is a monthly makeup subscription service. In order to get started, visitors to the PWA must fill out this quiz:
Ipsy requires new users to fill out a beauty quiz before they can subscribe. (Source: Ipsy) (Large preview)
While the design of the quiz is certainly attractive, is it necessary to have built it this way, especially since there are 12 pages that require two clicks or more on each page? That comes to at least 24 clicks in total (one or more for the answer and one for the “Next” button).
That doesn’t even include filling out the subscription form!
That said, the breadcrumbs progress bar is there to show potential customers how much more work is to be done. However, there’s no transparency over what each of those pages involves. In fact, most of them are much longer than this first one, asking for things like favorite name brands, types of makeup they like, how frequently they wear it, etc.
In the end, it’ll probably take five minutes or more to complete the quiz and I don’t think the progress bar does any good in demonstrating that fact.
Bottom line: If you want to get visitors to the point of conversion more quickly, design it that way. And if it does require some work on their part, be honest about how much work there is. Don’t mask it with breadcrumbs.
5. Make Directories Easier to Explore
Thankfully, directories no longer live inside of massive phone books or travel guides. We now digitize those directories for quicker and more convenient consumption.
That said, online directories are a lot like big data. Now that they’re on the web, there’s almost too much information to sift through. And while most PWAs give visitors the ability to filter and sort their results, that doesn’t necessarily help with moving around the PWA itself.
What you need for that is breadcrumbs.
You’ll find a nice example of this on the OpenTable PWA:
OpenTable displays location breadcrumbs to users as they search for and book reservations. (Source: OpenTable) (Large preview)
There are hundreds of thousands of restaurants using OpenTable as their reservation system — and from locations all over the world.
While it might not be totally necessary to show breadcrumbs, especially if users know exactly which city they want to dine in, it’s a nice touch. It serves as a quick reminder to users that this is the location they’re searching in. If they change their mind and want to try the next town over, all it takes is a click back to the state or province to change their response.
TripAdvisor is another massive directory site, this one storing massive amounts of data on locations, places to stay, things to do, etc. There’s just so much going on inside this PWA that there’s no way to get by without breadcrumbs:
The TripAdvisor travel directory PWA uses breadcrumbs to break down the attributes of a search. (Source: TripAdvisor) (Large preview)
In this example, you can see how deep and specific the breadcrumbs attributes get:
Things to Do > Tickets & Tours > Water Sports > Hanauma Bay Snorkeling Service
This is useful for visitors that may have stumbled upon a particular activity or location, but, upon inspecting the breadcrumbs, realize there’s a different way to go.
For instance, let’s say someone gets to this page and starts wondering what other kinds of tours they can do in Hawaii. So, rather than restart their search (which they’d have to do if they landed on the page from the home page), they can use the breadcrumbs to backtrack.
That said, this is another one of those examples of putting too much into the breadcrumbs. There’s no need to include the name of the activity or location unless there are sub-categories beneath it. It only makes the breadcrumbs run past the width of the page, which can be distracting (and annoying).
Again, it’s a good idea to keep breadcrumbs as simple as possible when you can.
6. Convert Anchor Tags into Breadcrumbs
Earlier, I talked about how breadcrumbs can be used as progress bars on PWAs. What if we were to use them for a similar purpose, but this time to represent the anchor tags on a page?
It’s really no different than what developers do when they build a navigation into the top of a single-page website. The only difference is that the anchor tags from your page will be represented by breadcrumbs as a secondary navigation.
And if you’re publishing lengthy articles or guides on your PWA, this is something to seriously think about.
WebMD turns its anchor tags into a sort of breadcrumbs navigation. (Source: WebMD) (Large preview)
The WebMD PWA allows visitors to check their symptoms or look up medications they’re taking. As you might imagine, these pages can go on and on for a while.
Rather than force visitors to scroll through them, WebMD attaches this secondary navigation to the bottom of its header. As visitors scroll past the corresponding anchor tag and section, it gets highlighted in the breadcrumbs. Users can also use the breadcrumbs to quickly move around the page without having to scroll.
Airbnb creates a breadcrumbs navigation from its anchor tags. (Source: Airbnb) (Large preview)
Airbnb could easily just leave its visitors to scroll through the page to try to pull out the details most relevant to them. Instead, it’s chosen to display a breadcrumbs navigation (built from the page’s anchor tags).
This makes it easy for them to see which section they’re in and then bounce around as they like to pick up the details they need to make their decision.
I know it’s not necessarily a common use of breadcrumbs, but I expect this one to appear more and more as the web shifts over to PWAs.
Wrapping Up
We’ve seen a lot of examples of PWAs now to know what good and bad breadcrumbs look like. Let’s sum up the basic rules:
Always place the breadcrumbs as close to the top of the page as possible. If the header is present, it goes directly below. If it’s not, it should take the top spot.
Use unique separators. The most common ones are the Guillemet (>), slash (/) and the pipe (|).
Build enough padding around the separators so it’s clear where the attributes start and end.
Be careful with color. You don’t want breadcrumbs to distract from the content of the page. That said, they should at least change color or become underlined upon hover.
Simplify the attribute labels as much as possible.
Don’t include the name of the post, page, product, etc. in the breadcrumbs if it’s clearly visible on the page. “Home” probably doesn’t need to be there either.
If the breadcrumbs tend to run past the width of the page, wrap the text only if it doesn’t compromise clickability. It’s really best to display only the last few attributes/links.
There’s a lot you can do with breadcrumbs on PWAs and, if handled well, can help you increase your conversion rate. Just be careful with them. If they’re included without just cause or they present more work to your visitors, it’s best to just do without them.
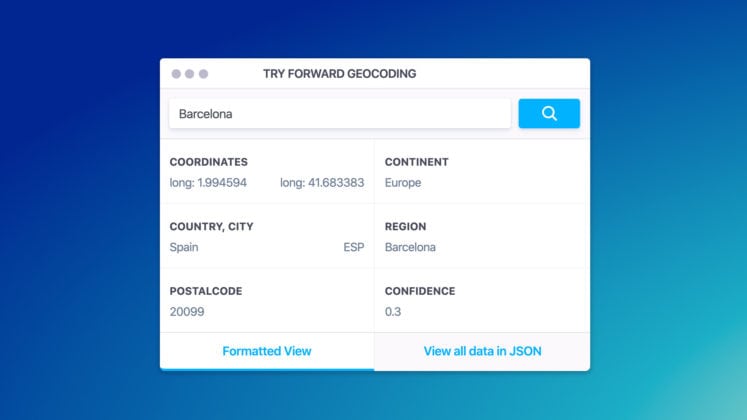
Geocoding refers to the process of converting addresses into geographic coordinates. On the other hand, reverse geocoding refers to converting geographic coordinates into human-readable addresses. For a layman, the whole process would not make sense, however, geocoding hold a lot …
Do you want to add CAPTCHA to your WordPress site’s login and registration forms?
WordPress login and user registration pages are often prime targets for hackers, spammers, and brute force attacks. One way to avoid these attacks is by using CAPTCHA, which effectively blocks spambots and protects your site from being hacked.
In this article, we will show you how to add CAPTCHA to WordPress login and registration forms.
What Is CAPTCHA?
A CAPTCHA is a computer program that can tell whether someone is a human or an automated user. It does that by showing a test that would be quite easy for a human user to pass but almost impossible for automated scripts or bots to get right.
In the earlier days of CAPTCHA, users were asked to enter the text they saw in an image. This image displayed random letters, words, or numbers in a distorted style.
Later, a newer technology called reCAPTCHA was introduced.
It showed random words as a challenge and used user input to help digitalize books.
This technology was acquired by Google in 2009. Since then, it has helped digitalize thousands of books and complete New York Times archives.
However, these new CAPTCHAs were still annoying and often ruined the user experience on websites.
To fix this, Google introduced ‘No CAPTCHA reCAPTCHA’, which uses artificial intelligence (AI) and user interactions to catch spambots.
It shows an easier checkbox for human users to click on. For other suspicious traffic, it will show a more difficult CAPTCHA, like identifying objects in images.
That being said, let’s take a look at how WordPress websites can improve security with CAPTCHA.
Why Use CAPTCHA for WordPress Login and Registration?
WordPress login and registration pages are an easy target for spammers, wannabe hackers, and brute force attacks.
That’s because WordPress is the most popular website builder in the world, which makes it a common target for malicious attempts.
The attacker’s motivation is often to get unauthorized access to your WordPress admin area to distribute malware. In other cases, the attacker can crash the entire network of websites hosted with a specific web hosting company to collect a ransom.
The easiest solution to protect your WordPress site is using a WordPress firewall plugin like Sucuri. It will block bad traffic from reaching your website and prevent unauthorized access.
Another solution is to add a secondary layer of password protection on WordPress login and registration pages. However, the problem with this method is that you will have to share that second password with each user, and this simply doesn’t scale for large multi-author blogs or membership sites.
CAPTCHA provides an easier alternative to those solutions. It uses Google’s AI technologies to detect genuine visitors and present CAPTCHA challenges to suspicious users.
Default vs. Custom WordPress Login and Registration Form
The default WordPress login and registration form provides a basic set of features.
The login page allows users to access the back end of your website according to their respective user roles and permissions.
The default WordPress registration form lets visitors create an account on your site. Once they are registered, they can also log in to your website’s back end and perform specific tasks allowed by their user role.
A lot of website owners want to customize the default WordPress login and registration page with their own logos, styles, and more. They use one of the many plugins to create their own custom login and registration page to replace the default ones.
Whether you are using the default pages or custom ones, we have got you covered.
In this guide, we will show you how to set up reCAPTCHA for both default and custom login and registration pages in WordPress. You can click the links below to jump ahead to any section:
Once the plugin is activated, you need to visit theCAPTCHA 4WP » CAPTCHA Configuration page from your admin panel.
You will then see a setup wizard. Simply click the ‘Next’ button to continue.
After that, you will need to select the type of reCAPTCHA you’d like to use.
There are 3 options to choose from, including Version 2, where users can check the ‘I am not a robot’ checkbox, or Version 2, where no user interaction is needed, but a CAPTCHA will appear for suspicious traffic. Finally, Version 3 verifies requests with a score without user interaction.
For this tutorial, we will select the ‘Version 2 (Users have to check the “I’m not a robot” checkbox)’ type.
Once that’s done, click the ‘Next’ button.
On the next screen, you will need to enter the Google reCAPTCHA site and secret key.
To get these Google reCAPTCHA API keys, you need to visit the reCAPTCHA website.
Then, click on the ‘v3 Admin Console’ option at the top.
On the next screen, Google will ask you to sign in to your account. Once you are logged in, you will see the Register a new site page.
First, you need to enter your website name in the ‘Label’ field. After that, you must select a reCAPTCHA type. For example, we will choose the reCAPTCHA v2 ‘I’m not a robot’ checkbox.
Next, you need to enter your domain name in the ‘Domains’ section.
Make sure to enter your domain name without the ‘https://www’ part.
Once done, just click on the ‘Submit’ button.
Next, you will see a success message along with the site key and secret key that you can use on your WordPress website.
You can copy the site and secret keys.
Next, you will need to return to the browser tab or window where the CAPTCHA 4WP setup wizard is open. From here, you can enter the Google CAPTCHA site key and secret key.
Once you are done, you will need to check the ‘I’m not a robot’ checkbox and click the ‘Next’ button.
Then, you will see a success message. Simply click the ‘Finish’ button.
After that, you can configure additional CAPTCHA 4WP settings.
For instance, there are options to change the language, edit the error message, select a theme, and more.
When you are done, simply click the ‘Save Changes’ button.
That’s it! You have successfully added reCAPTCHA in the default WordPress login and registration form.
To preview it, you can open your WordPress login URL in your browser. For example, www.example.com/wp-login.php.
If you want to check the reCAPTCHA in the registration form, then just click on the ‘Register’ link below the login form. After that, the WordPress registration form will open, and you can see how reCAPTCHA works.
reCAPTCHA in Custom WordPress Login and Registration Forms
As we mentioned earlier, custom WordPress login and registration forms offer more user-friendly membership options to your website’s members and visitors.
First, these forms allow users to register or log in to your website from the front end. This improves the user experience and lets you keep the same overall design experience across your website.
Next, you can add your website logo and customize the login and registration pages in your style.
Plus, creating a custom WordPress login form and user registration form is easy with the most user-friendly WordPress form plugin, WPForms. It is the best contact form plugin for WordPress.
For this tutorial, we will use the WPForms Pro version because it includes the User Registration addon and more customization options. However, there is also a free WPForms Lite version you can use to get started.
To get started, you need to install and activate the WPForms plugin on your WordPress site. For more details, see our step-by-step guide on how to install a WordPress plugin.
Upon activation, head over to the WPForms » Settings page to enter your WPForms license key. You can get this key from your account area on the WPForms website.
After that, click on the ‘CAPTCHA’ tab at the top to configure reCAPTCHA for your custom-made WordPress forms.
First, you need to choose a CAPTCHA type. Go ahead and click on the ‘reCAPTCHA’ option.
Since we chose v2 earlier, we will choose reCAPTCHA v3 in this example so that you can see the different options.
However, our recommendation is still v2.
After that, you will see the site key and secret key fields. To get these keys, you need to register your site on the Google reCAPTCHA website.
Just go to the Google reCAPTCHA website and then click on the ‘v3 Admin Console’ button in the top right corner.
After that, Google will ask you to sign in to your account. Once done, you will see the ‘Register a new site’ page.
Next, you can enter your website name and then select ‘Score based (v3)’ from the reCAPTCHA types.
Next, you need to enter your domain name (without https://www.), as shown in the screenshot below.
Once done, simply click on the ‘Submit’ button.
After that, Google will show a success message along with the site key and the secret key to add reCAPTCHA to your site.
Go ahead and copy these keys.
Now that you have the Google reCAPTCHA API keys, you need to return to the browser tab or window where the WPForms reCAPTCHA settings are open.
Next, simply go to the reCAPTCHA tab and enter the site key and secret key. Once that’s done, you can save your settings.
Now that you have successfully added reCAPTCHA to WPForms, you can easily enable reCAPTCHA in your custom login form, user registration form, or any form built with WPForms.
Now let’s go ahead and create a custom WordPress registration form.
First, you must visit the WPForms » Addons page and find the User Registration Addon. From here, click the ‘Install Addon’ button.
After that, WPForms will download and install the addon. Once you see the User Registration Addon’s status is ‘Active,’ you are ready to add a new user registration form.
Now you need to go to WPForms » Add New to launch the WPForms Builder. On the WPForms setup page, select the ‘User Registration Form’ template and enter a name for your form.
Once you select a template, it will launch the WPForms drag-and-drop form builder.
After that, WPForms will automatically build a custom user registration form and open the form setup page.
Now, you can customize your form by adding new fields or editing the field options. If you like the default form, then you can use it without making any changes.
Next, you need to go to the ‘Settings’ tab in the left menu to configure your form settings. Then switch to the ‘Spam Protection and Security’ settings and enable Google v3 reCAPTCHA.
Once that’s done, just click the ‘Save’ button in the top right corner.
That’s it! You have created a custom WordPress user registration form and also added reCAPTCHA to it.
The next thing you need to do is add the custom user registration form on your website. You can do that by clicking the ‘Embed’ button in the form builder.
Next, you will need to select an existing page or create a new one to embed your form.
For this tutorial, we will use the ‘Create New Page’ option.
After that, you can enter a name for your new page.
Once that’s done, simply click the ‘Let’s Go’ button.
Next, you will see a preview of your registration form in the content editor.
Alternatively, you can also use the WPForms block to add your form.
Now, you can publish the page and visit it in your web browser to see the custom user registration form with Google reCAPTCHA in action.
Since we chose reCAPTCHA v3 in this example, you won’t see a Google reCAPTCHA checkbox like ‘I’m not a robot.’ This is because reCAPTCHA v3 works in the background, but you will still see a small badge in the bottom right corner.
The process of creating a custom login form is almost the same.
The only difference is that you need to choose the User Login Form template from the WPForms setup page.
Over time, data has become the core of business strategies and market research. It is being termed as the ‘differentiator’ since, whether you want to start a new project or take your existing business up a notch, you will need …