Reaction-Diffusion Compute Shader in WebGPU

Learn how to use WebGPU compute shaders to create reaction-diffusion patterns.

Tips, Expertise, Articles and Advice from the Pro's for Your Website or Blog to Succeed
Do you want to limit comment length in WordPress?
WordPress comments encourage discussions around your blog post content. However, you may find that comments that are very brief or overly long are not very helpful.
In this article, we will show you how to easily limit comment length in WordPress.

An active comment area is a great way to build a community around your WordPress blog. Visitors can give feedback, ask questions, and offer their own points of view on the topic.
However, not all comments are helpful.
We’ve been moderating WordPress comments for well over a decade. In our experience, we’ve found that the most helpful comments are above 60 characters and below 5000 characters in length.
One-word comments are usually not very helpful. In most cases, they are spam comments where the author just wants a backlink from your site.
On the other hand, long comments above 5,000 characters are often rants or complaints. Sometimes, they are not even relevant to the article.
Setting comment length limits in WordPress can improve the overall quality of your comments and discourage spam comments. However, there is no built-in way of doing this in WordPress.
That being said, let’s take a look at how to control comment length in WordPress by setting minimum and maximum limits.
You can limit comment length in WordPress by adding code to your functions.php file. However, keep in mind that the smallest error while entering the code can break your site and make it inaccessible.
That’s why we recommend always using WPCode to insert code snippets into your WordPress site. It is the best WordPress code snippets plugin on the market that makes it safe and easy to add custom code.
First, you need to install and activate the WPCode plugin. For detailed instructions, see our step-by-step guide on how to install a WordPress plugin.
Note: WPCode also has a free version that you can use for this tutorial. However, upgrading to the paid plan will give you access to more features like a larger code snippets library, conditional logic, and more.
Upon activation, visit the Code Snippets » + Add Snippet page from the WordPress admin sidebar.
Here, click the ‘Use Snippet’ button under the ‘Add Your Custom Code (New Snippet)’ option.

This will take you to the ‘Create Custom Snippet’ page, where you can start by adding a title for your code snippet. This name won’t be displayed on the website front end and can be anything you like.
Next, choose the ‘PHP Snippet’ option as the Code Type from the dropdown menu in the right corner of the screen.

Once you have done that, simply copy and paste the following code snippet into the ‘Code Preview’ box:
add_filter( 'preprocess_comment', 'wpb_preprocess_comment' );

function wpb_preprocess_comment($comment) {
    if ( strlen( $comment['comment_content'] ) > 5000 ) {
        wp_die('Comment is too long. Please keep your comment under 5000 characters.');
    }
if ( strlen( $comment['comment_content'] ) < 60 ) {
        wp_die('Comment is too short. Please use at least 60 characters.');
    }
    return $comment;
}
This code snippet works by adding a filter hook to preprocess_comment. This filter is run before WordPress saves any comments to the database or performs any pre-processing on submitted comments.
It checks the comment length and displays an error message if it is too short or too long. By default, the comment limit is set to a minimum of 60 characters and a maximum of 5,000 characters in this snippet.
However, to set your own comment limit, just replace the number 5,000 in the code with your maximum limit number.
Similarly, you can replace the number 60 in the code to set a different minimum comment limit on your WordPress website.
You can also change the message that will be displayed on your website when a user exceeds or falls short of the comment limit. Simply type the sentence you want to display after the wp_die lines in the code.

After that, scroll down to the ‘Insertion’ section and choose the ‘Auto Insert’ mode.
The custom code will be automatically executed on your website upon activation.

If you only want to limit comment length on specific website pages, then you can also do that.
Simply scroll down to the ‘Conditional Logic’ section and toggle the ‘Enable Logic’ switch.
After that, choose the ‘Show’ option from the ‘Conditions’ dropdown menu and click the ‘+ Add new group’ button.

This will open a new tab where you must select the ‘Page URL’ option from the dropdown menu on the left.
Next, type the URL of the page where you want to limit the comment length in the field on the right.
Now, the code snippet will only be activated on the page with the URL you have just entered.

Scroll back to the top of the page and toggle the ‘Inactive’ switch to ‘Active’.
Finally, click the ‘Save Snippet’ button to store your settings.

Now, when a user types a comment that falls short of your minimum comment length, this message will be displayed on their screens.
Users won’t be able to post a comment until it is at least the minimum length you chose.

Similarly, when a user types a comment that exceeds your maximum limit, this message will be show on their screens.
This will help reduce rants and spam comments on your website.

Controlling comment length is just one way to increase engagement in your WordPress comments section. This is great for keeping visitors on your site for longer and can even benefit your site’s SEO when users’ comments contain relevant keywords and add context to your content.
You can also easily further improve the comments section on your website using Thrive Comments.

It is the best WordPress comments plugin that comes with a dedicated moderation board, lets you lazy load comments, allows users to leave comments with their social media profiles, and more.
Plus, the tool enables you to add an upvote/downvote functionality to reduce spam and encourage interesting comments on your website.
Thrive Comments even lets you feature encouraging comments at the top and bury offensive or irrelevant comments at the bottom of the discussion section.

This allows you to reward users who are adding the most value to the discussion while politely discouraging other users from leaving unhelpful comments.
For detailed instructions, you may want to see our tutorial on how to feature or bury comments in WordPress.
We hope this tutorial helped you learn how to limit comment length in WordPress. You may also want to learn how to increase your blog traffic or check out our list of the best WordPress plugins to grow your site.
If you liked this article, then please subscribe to our YouTube Channel for WordPress video tutorials. You can also find us on Twitter and Facebook.
The post How to Limit Comment Length in WordPress (Easy Tutorial) first appeared on WPBeginner.
Are you looking for a way to create a sticky floating footer bar in WordPress?
A sticky floating footer bar stays visible on your website even when users scroll down on your page. It can help you promote discount offers or social media handles, which can reduce the bounce rate and get more conversions.
In this article, we will show you how to easily create a sticky floating footer bar in WordPress, step by step.

A sticky floating footer bar allows you to prominently display important content and news to users.
This bar remains visible to visitors at all times, so they are more likely to click on it and discover more useful content.

You can use the floating footer bar to:
Having said that, let’s see how to easily create a sticky floating footer bar in WordPress. We will show you two methods in this tutorial, and you can use the links below to jump to the method of your choice:
You can easily create a sticky floating footer bar with OptinMonster. It is the best lead generation and conversion optimization tool on the market that makes it super easy to convert your website visitors into subscribers.
OptinMonster comes with a drag-and-drop builder and premade templates that allow you to create a floating footer bar, slide-in popups, and banners without using any code.
We recommend this method because OptinMonster is super easy to use and offers more customization options than the free plugin method.
Step 1: Install OptinMonster on Your Website
First, you will need to sign up on the OptinMonster website by clicking on the ‘Get OptinMonster Now’ button.

Next, you must install and activate the free OptinMonster connector plugin on your website. For more instructions, see our beginner’s guide on how to install a WordPress plugin.
Upon activation, the OptinMonster setup wizard will open up on your screen, where you have to click the ‘Connect Your Existing Account’ button. This will connect your WordPress site with your OptinMonster account.

Once you do that, a new window will open up on your screen.
Here, click the ‘Connect to WordPress’ button to move ahead.

Step 2: Create And Customize the Floating Sticky Footer Bar
Now that you have connected OptinMonster with your website, it’s time to create a sticky floating footer bar.
To do this, you need to visit the OptinMonster » Templates page from the WordPress admin sidebar and select ‘Floating Bar’ as the campaign type.
Once you do that, all the premade templates for the floating bar will load on the screen. From here, you can click the ‘Use Template’ button on the one you want to use.

This will open the ‘Create Campaign’ prompt on the screen, where you can add a name for the floating footer bar that you are about to create. It can be anything you like, as the name won’t be displayed to your visitors.
After that, just click the ‘Start Building’ button.

OptinMonster’s drag-and-drop builder will now be launched on your screen, where you can start customizing your floating footer bar. Here, you will notice a floating bar preview on the right with blocks in the left column.
For example, you can use a countdown timer block if your floating footer bar is promoting a discount offer. This will help create a sense of urgency among users and encourage them to take action.
You can also add a CTA, video, or social media block to the footer bar. For detailed instructions, you can see our tutorial on how to create an alert bar in WordPress.

You can also edit text on the footer bar by clicking on it. This will open the block settings in the left column, where you can adjust them according to your liking.
For example, if you want to change the discount offer in the template, then you can change the button text. After that, you can select the ‘Redirect to a URL’ option and add the page link that you want users to be directed to upon clicking on the button.

Step 3: Configure The Display Rules For Your Floating Footer Bar
Once you are satisfied with your footer bar’s customization, just switch to the ‘Display Rules’ tab from the top.
Here, you can configure when to display the bar on your page. If you want to display the floating footer bar at all times, then you must select the ‘time on page’ option from the left dropdown menu.
After that, choose the ‘is immediate’ option from the dropdown menu on the right.

However, to display the floating footer bar on a specific page, you must select the ‘Page Targeting’ option from the right dropdown menu.
After that, choose the ‘exactly matches’ option from the dropdown menu in the middle and then add a page URL. Once you do that, the floating footer bar will only displayed on the page you chose.

Additionally, you can select the ‘Exit Intent’ option to show the sticky floating footer bar when the user is about to leave your site. You can then configure the exit intent sensitivity and choose the devices where the footer bar will be displayed. This can be handy if you want to reduce your bounce rate.
You can even select the ‘Visitor’s Device’ option if you only want to display the floating footer bar to desktop visitors.

You can also configure the display rules according to the date, time, or scroll distance by selecting the ‘When’ option from the left column.
For an explanation of more display rule options, you can see our complete OptinMonster review.
Step 4: Publish Your Floating Footer Bar
Once you have defined the display conditions for your footer bar, switch to the ‘Publish’ tab from the top.
Here, simply click the ‘Publish’ button.

After that, don’t forget to click on ‘Save’ to make your changes live.
Now, you can visit your WordPress blog to see the sticky floating footer bar in action.

Alternative: You can also use Thrive Ultimatum to show a countdown timer floating footer bar on your website. For more details, see our Thrive Themes Suite review.
If you are looking for a free way to create a sticky floating footer bar, then this method is for you. However, keep in mind that you will have limited customization options compared to OptinMonster.
First, you need to install and activate the Firebox Popup Builder plugin. For detailed instructions, see our tutorial on how to install a WordPress plugin.
Upon activation, visit the Firebox » Campaigns page from the WordPress dashboard and click the ‘+ New Campaign’ button.

This will open the Firebox campaign library, where you can search for sticky floating bar premade templates.
Next, simply click the ‘Insert’ link under the floating footer bar that you like. Keep in mind that if you select a header bar, then you won’t be able to change its position. You must ensure the template you select is for a footer bar.

The block editor will now open up on your screen, where you can start by adding a name for your floating bar.
After that, you can edit the text in the footer by clicking on it and add new blocks by clicking the ‘+’ button. This will open the block menu, where you can add images, headings, paragraphs, videos, quotes, or list blocks.
For instance, if you want to add social media handles, then you can choose the Social Icons block. After that, you can add social media accounts and links using the block panel.
For more details, you can see our tutorial on how to add social media icons in WordPress menus.

You can also change the text in the button block and add a link to the page where you want to direct users by clicking on the link icon in the block toolbar.
After that, type in the URL of your choice and press ‘Enter’.

Next, you can scroll down to the ‘Firebox Settings’ section.
Here, you can change the background color, text color, alignment, size, padding, and margin for the floating footer bar.

After that, switch to the ‘Behaviour’ tab from the left column and select ‘Page Load’ as the floating bar trigger point.
Then, use the ‘Delay’ slider to choose a delay timing for the floating bar. For example, if you drag the slider to 15 seconds, then the floating footer bar will be displayed once the user has spent 15 seconds on your site.
If you want the sticky floating footer bar to be displayed immediately, then you can keep the slider at 0.

Next, you can leave other settings as they are or configure them according to your liking.
Once you are done, don’t forget to click the ‘Publish’ button at the top.

Now visit your WordPress site to view the sticky floating footer bar in action.
This is what it looked like on our demo site.

Apart from adding a sticky footer bar, you might also like to create a sticky floating navigation menu on your WordPress site.
A navigation menu contains links to the most important pages on your WordPress blog and acts as an organizational structure for your website.
If you make this menu sticky, then it will remain visible on your page at all times, even as the user scrolls down on your screen. This can increase engagement and make your website easier to navigate.

To create a sticky floating navigation menu, simply install and activate the Sticky Menu & Sticky Header plugin. For details, see our tutorial on how to install a WordPress plugin.
Upon activation, visit the Settings » Sticky Menu page from the WordPress dashboard and type #main-navigation next to the ‘Sticky Element (required)’ option.

After that, click the ‘Save Changes’ button to store your settings. You have now successfully created a sticky floating navigation menu.
For detailed instructions, please see our tutorial on how to create a sticky floating navigation menu in WordPress.
We hope this article helped you learn how to easily create a floating sticky footer bar in WordPress. You may also want to see our beginner’s guide on how to add header and footer code in WordPress and our checklist of things to add to the footer on your WordPress site.
If you liked this article, then please subscribe to our YouTube Channel for WordPress video tutorials. You can also find us on Twitter and Facebook.
The post How to Create a “Sticky” Floating Footer Bar in WordPress first appeared on WPBeginner.

Do you want to add a Facebook Like Box to your WordPress website?
Adding a Facebook Like Box to your website makes it easy for your audience to like and follow your Facebook page. The more likes you get, the more reputable and trustworthy your brand will look to new users.
In this article, we will show you how to add a Facebook Like Box in WordPress.

Adding a Facebook Like Box to your WordPress website has some great perks.
First, it helps engage people by letting them easily like your Facebook fan page or business page. This means your posts will show up in their Facebook feed, so you can keep reaching people beyond your website.
Also, the Facebook page Like Box shows how many people have liked your Facebook page. This can work as social proof and encourage more visitors to click ‘Like.’
This tutorial will show you two ways to add a Facebook Like Box: one using a social plugin and the other with code. You can use the quick links below to navigate through our article:
Note: A Facebook Like Box is different from a Like Button. If you want to display that on your website instead, then you can check out our step-by-step guide on how to add a Facebook Like Button in WordPress.
This first method is the easiest and recommended way for beginners to add a Facebook Like Box to their sites. It will also allow you to display your Facebook feed on your website if you wish.
This method uses Smash Balloon, which is a user-friendly WordPress plugin that allows you to embed various social media feeds in WordPress, along with a Like Box.
For this tutorial, you can use the free Smash Balloon Social Post feed plugin. But if you want more features beyond the Like Box (like displaying videos, photos, and events), then we recommend upgrading to the Pro version.
Set Up the Smash Balloon Facebook Feed Plugin
First, you need to install the WordPress plugin in the admin area. After that, go to Facebook Feed » All Feeds and click ‘Add New.’

Now, select the ‘Timeline’ feed type.
Then, simply click the ‘Next’ button.

At this stage, you will need to connect your Facebook page to your WordPress website.
What you need to do is click the ‘Add New’ button.

Smash Balloon will direct you to a new screen.
Here, just select ‘Page’ for the source type and then click ‘Connect to Facebook.’

Now, you need to log in to your Facebook account.
After that, choose which page(s) for which you want to display the Like Box on your WordPress blog or website. Then, click ‘Next.’

You will now see the Smash Balloon’s permission settings. We recommend enabling them all to make sure everything works well.
Now, go ahead and click ‘Done.’

The last popup will simply confirm that you’ve successfully linked Smash Balloon with Facebook.
Simply click ‘OK’ to continue.

Smash Balloon will now redirect you to the admin area, where you have to select a Facebook page to use in your timeline feed.
Just pick a page and click ‘Add.’

You will now see the Facebook page you’ve just connected to as a source in the Smash Balloon plugin page.
Simply pick that and click ‘Next.’

Customize the Facebook Like Box
At this stage, Smash Balloon will bring you to the Facebook feed editor.
The first step is to click ‘Feed Layout’ above the Color Scheme option.

Simply scroll down to the ‘Number of Posts’ section.
After that, set the number for both Desktop and Mobile to 0. This will remove the display of all your recent posts and have the feed display the Like Box only.
Alternatively, if you also want to show your Facebook feed along with the Like Box, then you can follow our tutorial on how to create a custom Facebook feed in WordPress.

Now, go back up.
Then, click ‘Customize’ to go back to the feed editor page.

At this stage, you can remove the header of your Facebook feed.
What you need to do is move down to the ‘Sections’ part and select ‘Header.’

This Header setting determines what your Facebook feed’s header will look like.
But in this case, you need to hide it, so just turn off the ‘Enable’ toggle.

Let’s now go back to the main feed editor page and open the ‘Like Box’ setting. After that, simply turn on the ‘Like Box’ feature.
On this page, you can also adjust the Like Box’s size, position, cover photo display, custom width, custom call-to-action text, and so on.

Once that’s done, just hit the ‘Save’ button in the top right corner.
Embed the Facebook Like Box on Your WordPress Page or Post
At this stage, you can display the Facebook Like Box on a page or a widget-ready area like a sidebar.
To do this, click ‘Embed’ at the top right corner. Now, the Embed Feed popup will appear, giving you two options to display the Like Box.
One is to use a shortcode, and the other is to directly add it to a page or a widget-ready area. The second option is much easier, so we will show you that method first.

If you want to add the Like Box to a specific page, click the ‘Add to a Page’ button.
Now, just select a page to add the feature to and click ‘Add.’

You will now arrive at the Gutenberg block editor.
Go ahead and click the ‘+ Add a Block’ button, as instructed by Smash Balloon.

Once the block inserter library is open, you need to find the Facebook Feed block.
Then, simply drag and drop it wherever it looks best on the page.

In the block, select the Facebook feed with the Like Box you just created earlier.
The block will then display the Like Box.

But what if you have multiple Facebook pages and have set up a Like Box for each one using Smash Balloon?
You can also switch between them in the block settings sidebar by picking a feed from the ‘Select a Feed’ dropdown menu.

All you need to do now is click the ‘Update’ button to make the changes official.
Here’s what our Like Box looks like on our demo site:

If you use a block WordPress theme, then you can also use the Full Site Editor to add the Facebook Like Box block to your theme’s page templates.
For more information about the Full Site Editor, just read our beginner’s guide to Full Site Editing.
Embed the Facebook Like Box Widget in WordPress
If you use a classic WordPress theme, then you may want to display the Facebook Like Box in a widget-ready area, like a sidebar, header, or footer. It’s a great way to show the Like Box without distracting users from the main content on the page.
In the Embed Feed popup, select ‘Add to a Widget’ to go to the block-based widget editor.
Now, like in the previous method, just click the ‘+ Add Block’ button, find the Facebook Feed block, and drag it onto your desired area.
On our demo site, we want to use the Like Box as a WordPress sidebar widget.

In the block, select the Facebook Feed with the Like Box you created earlier.
Then, click ‘Update’ to make the changes live.

And you are done!
Here’s what the sidebar on our test site looks like with the Like Box widget:

Embed the Facebook Like Box Widget With a Shortcode
If the two previous methods don’t work, then we recommend adding the Facebook Like Box or Fan Box using a shortcode.
Simply copy the shortcode from the Embed Feed popup earlier and add it anywhere on your website.

For more information on using shortcodes, you can read our guide on how to add shortcodes in WordPress.
If you are only interested in displaying a Like Box without adding any other types of Facebook feeds, then using a Facebook page plugin may seem like overkill. In this case, you can add the Like Box using code instead.
This method may seem intimidating for beginners, but we will show you a foolproof way to insert code using WPCode. It’s a WordPress plugin that makes it easy to add custom code snippets to WordPress without breaking your site.
For this guide, the free WPCode version is enough, although you can upgrade to the Pro version for advanced features like testing mode and a cloud-based code snippets library.
First, let’s install the plugin in WordPress. Once it’s active, go to Code Snippets » + Add Snippet. Then, select ‘Add Your Custom Code (New Snippet)’ and click ‘Use snippet.’

You will now arrive at the code editor. Let’s give your custom code snippet a name first so that you can easily identify it later. For this one, we will name it ‘Facebook JavaScript SDK’ because that’s what we will add here.
Now, keep this tab open and create a new tab on your browser to go to the Facebook Developers page.
In the menu, click ‘Log In’ to sign in to your Facebook account.

If this is your first time accessing the page, then complete the onboarding wizard to create a free account.
You will then be directed to the Facebook Developers dashboard. Let’s click on the ‘Create App’ button.

On the next page, just select ‘Other’ for the use case.
After that, click on the ‘Next’ button.

Now, you will see all the different apps that you can create for your Facebook page.
To create a Like Box, you can just select ‘Business’ and then click on ‘Next.’

Let’s now give your app a name. It can be anything you like since this is just for reference. You can also enter your email address and select an optional Business Account.
Finally, just click ‘Create app.’

Let’s now go to the Facebook Developers page for social plugins.
Then, scroll down until you find a section like in the screenshot below:

Here, make sure to fill out your Facebook page URL, empty the ‘Tabs’ field, and specify the width and height of the Like Box if needed.
You can also choose to use a smaller header, disable the cover photo, and more. We’ve also chosen to adapt the Like Box to fit the container width so that the size will adjust responsively to where it’s placed on the website.
Once done, click the ‘Get Code’ button. You will then see a popup that shows you two types of code snippets: JavaScript SDK and iFrame. Both will display your Like Box, but in general, JavaScript SDK is a much better option.

JavaScript SDKs are usually faster because they are directly embedded into the webpage, allowing them to load as part of the main document. iFrames require loading an entire HTML document, which can slow down the page load time.
In the JavaScript SDK tab, make sure the app name you created earlier has been selected.
Then, go ahead and copy the JavaScript SDK API code from Step 2. Now, keep this tab open, but switch to the WPCode tab and paste the code there.
You can leave the Code Type as ‘HTML Snippet.’

Now, scroll down to the ‘Insertion’ section.
The Insert Method can be left as ‘Auto Insert,’ while the Location should be changed to ‘Site Wide Body.’
Finally, just make the code active and click ‘Save Snippet.’

Next, you will create a second code snippet. You can follow the same steps as before and call it something like ‘Facebook Like Box.’
After that, switch to the Facebook Developers page for social plugins from earlier and copy the code from Step 3.
Navigate to the WPCode tab again and paste the Step 3 code in the Code Preview box. The Code Type can be ‘HTML Snippet.’

Let’s scroll down to the ‘Insertion’ section.
If you use ‘Auto Insert,’ then you can make the Like Box appear automatically in multiple places that fit the Location category.
In our example, we have decided to choose the ‘Site Wide Footer’ location, which means the Like Box will appear in the footer.
There are other options, too, like Insert Before Post, to display the Like Box before all of your WordPress blog posts.

On the other hand, the ‘Shortcode’ method allows you to create a custom shortcode.
You can then add it to specific parts of your website using the shortcode block.

Once you’ve configured the Insertion settings, just make the code active and click ‘Save Snippet.’
That’s it! You can then visit your website to see what Like Box looks like:

For more guides on displaying social feeds on your WordPress site, check out our article on adding social media feeds in WordPress.
We hope this article has helped you learn how to add a Facebook Like Box or Fan Box in WordPress. You may also want to check out our ultimate social media cheat sheet and list of the best social media plugins for WordPress.
If you liked this article, then please subscribe to our YouTube Channel for WordPress video tutorials. You can also find us on Twitter and Facebook.
The post How to Add a Facebook Like Box / Fan Box in WordPress first appeared on WPBeginner.
Do you want to create a recurring donation form in WordPress?
The right WordPress plugins allow you to easily accept recurring donations on your website. That way, your organization can gain consistent funding to help with budget planning and executing long-term projects.
In this article, we’ll show you how to create a recurring donation form in WordPress.

Recurring donations are contributions made by donors on a regular basis to support a non-profit or cause.
Instead of a one-time donation, supporters opt to set up automatic payments at specific intervals, like weekly, monthly, quarterly, or annually.
When running a non-profit organization, your donors are the heart and soul of your cause. One-time contributions are great, but they might not give you the predictable funding source you need.
Recurring payments provide a reliable income stream so that you can better budget and allocate financial resources. For example, you can better plan where your marketing efforts will go or how you could use that money to help those in need.
Plus, it also adds convenience. Donors can make automatic payments without manually initiating each payment. Most contributors may forget to submit a donation, so a recurring form lets them opt-in, and the payment processor will charge their card automatically.
It’s a good way to gamify contributions as well. For example, you could create a membership site using a plugin like MemberPress. The more donors contribute, the better rewards they can earn. You could add a leaderboard, and the top contributors become your VIP guests at events and receive extra recognition or other perks.
With all that said, we’ll dive into three different ways to create a recurring donation form in WordPress. Feel free to use the links below to jump to each method.
The best way to start accepting recurring donations is with Charitable. It is one of the most trusted plugins for non-profits to grow through online fundraising.

Besides building your donation form, they offer a wide range of features. For example, they include addons like Newsletter Connect so you can keep donors up to date using your email marketing service.
You can also leverage peer-to-peer fundraising, which is great if you have multiple projects or causes to support. This will allow users to choose which opportunities they want to donate to.
Plus, they offer $0 in transaction fees, meaning all of your donor’s generous donations won’t be taxed by the software.
To get started, you’ll need to download the Charitable plugin. For more details, check out our tutorial on how to install a WordPress plugin.
Once activated, you’ll need to go to the Charitable » Addons page. Then go ahead and click on ‘Install’ or ‘Activate’ next to the ‘Charitable Recurring Donations Addon.’

In addition, you’ll need to go to the Charitable » Settings page.
Under the Payment Gateways tab, click on ‘Connect with Stripe.’

Here, you’ll be taken to a setup wizard. Simply follow the walkthrough process by entering the email that is connected to your Stripe Account.
If you don’t have one, you’ll need to create one to start accepting donations.

Once you’ve connected your Stripe account to Charitable, you’ll be redirected back to the settings page.
Under Connection Status, it should say that your Stripe is ‘Connect In live mode.’

Next, we can move on to creating your donation form. Go to Charitable » Add New.
Then, a pop-up will appear, asking you to name your campaign. Give it a name and then hit ‘Create Campaign.’

Next, you’ll be taken to a window that shows you all of the available templates you can use so that you don’t have to start from scratch.
That said, they also have blank, simple 1- or 2-column layouts you can use if you don’t see something that fits your use case.
For this example, we’ll use the ‘Club / Organization’ template. Hover over the template and click ‘Create Campaign.’

You’re now ready to start editing the look and feel of your form. You can add additional form fields, edit texts, add buttons, images, and videos, or tinker with the layout.
Everything is drag and drop, so to add a form field, just drag it from the left-side panel to the right-hand editor in the position you’d like it to be.

If you want to edit an existing field, just click on the element in the editor.
Then, you can make adjustments as to what appears on the form, like the text, colors, alignment, etc. All customizations will show up in the ‘Layout Options’ tab.

Next, you’ll head over to Settings » Donation Options. Here is where you can toggle all of the options when it comes to defining the donation parameters.
Scroll to ‘Recurring Donations.’ Then turn on the option ‘Allow Recurring Donations. In addition, it’s a good idea to turn on the ‘Allow Recurring Custom Donations’ as well. That way, donors can set a custom amount that they’re comfortable with.
You may want to choose the ‘Recurring Donation Amounts’ under the Default Tab to encourage repeat contributions. If you’d like to give donors complete freedom, you can allow donors to choose their donation period.

If you continue to scroll down the page, there are also options to customize the default period and select how often donors should be billed.
This will depend on your specific cause, but in many cases, it’s good to set donation periods to at least a month or longer.

If you’re happy with how the recurring donations form looks, you’re ready to publish. Just hit the ‘Save’ button first.
Then, select the dropdown menu under draft and click on ‘Publish.’

Once you’ve published your fundraising campaign, you can now embed the form onto any page or post.
Click the ‘Embed’ button at the top.

Then, choose ‘Select Existing Page’ to add it to a page on your website. Or if you don’t have one set up yet, hit ‘Create New Page.
From here, just choose the page to which you’d like to add the form.

Once you’ve landed on your WordPress page’s edit screen, click on the ‘+’ icon.
Then, find and add the ‘Charitable Campaign’ block to your page.

Select the campaign that you’ve just created.
Finally, hit the ‘Publish’ or ‘Update’ button to add the recurring donations form to your page.

Make sure to preview the form live to ensure that everything is working.
You might want to submit a test payment as well so that you can check that all donations go through to your Stripe account.

That’s all for creating a recurring donation form using Charitable!
WP Simple Pay is another good choice for accepting recurring payments. With over 13+ payment methods and 135+ currencies in 45+ countries, they offer the most flexibility.

That’s because you’re not just limited to credit card payments. For example, you can accept mobile payments such as Apple Pay, Google Pay, or even Venmo payments. In addition, they support ACH Direct Debits, Afterpay, Klarna, and others.
Step 1: Install the WP Simple Pay Plugin and Connect Your Stripe Account
To begin, you’ll need to download the WP Simple Pay plugin. Once activated, you’ll need to go through the WP Simple Pay Setup Wizard, which will walk you through the process step by step.

It’ll also lead you to connect WP Simple Pay with Stripe. All you’ll need to do is enter the email address that’s linked to your Stripe account.
But if you don’t have an existing Stripe account, then you can just set one up.

Now, you’re ready to create a donation form. Navigate to the WP Simple Pay » Add New page.
Step 2: Create Your Recurring Donations Form
You’ll be directed to select a template. Choose a template that fits your needs. For this tutorial, we’ll select the Mission Trip Fundraising Form. Simply hover over the option and select ‘Use Template.’

Once you’ve chosen the template, you’ll be sent to the form builder to configure the options inside.
You can feel free to customize the title and the description of the form. As for the ‘Type,’ you can leave it as an on-site payment form.
Also, you can choose to add a CAPTCHA to the form to avoid spam from bots.

From here, you can navigate to the ‘Payment’ tab to ensure you charge recurring donations.
Under the ‘Price Options,’ expand the dropdown options for each donation amount. Or if there’s a different payment amount you’d like to add, click ‘Add Price.’
Once you’ve expanded the dropdown, feel free to give it a label if necessary or leave it blank. Then click on the ‘Subscription’ button instead of one-time, so that all donors will charged on a recurring basis.
In addition, make sure to check the box “Allow amount to be determined by user” if you want to give them the flexibility to choose their contribution amount.
Setting a minimum amount is a good idea, too, since that ensures you at least get a contribution that is meaningful to your cause while still allowing donors the freedom to pay an amount they’re comfortable with.

Then, scroll to the ‘Billing Period’ and select the frequency of each payment. You can choose to charge the donor daily, weekly, monthly, or yearly.
For the invoice limit, you can set a limit on how many times they will be charged. This is good if you’d like to send an end date for recurring payments. For instance, if a mission trip has a defined deadline, you can choose to charge donors monthly payments up to 12 times. You can also leave this option blank.
Additionally, you can give users a free trial option or add a setup fee.

At the bottom of the screen, you can also select the various payments you’d like to accept.
More payment options can improve your conversion rates and allow more contributors to choose their preferred payment method.

If you head over to the Form Fields tab, you can also customize the field options in your donation form. Just expand each field to make adjustments.
If you want to add a field to the existing form template, just select the dropdown menu next to the ‘Add Field’ button.
For instance, if you wanted to contact all donors via the phone, you could ask for their phone number. Or, if you want to send all donors a gift package for large contributions, you can ask for a shipping address.

It’s a good idea to also add a thank you message once donors have made their contribution. It gives them confidence that their funds have been received.
Just go to the Confirmation Page tab and type the message you want to appear after they’ve made their donation.

Step 3: Publish the Recurring Donation Form.
Once you’re happy with the recurring donations form, you’re ready to publish it.
On the right side of the screen, hit ‘Publish.’

Next, go to your donations page or any existing post or page to which you’d like to add this form.
Click on the ‘+’ icon and select the WP Simple Pay block.

From there, you can choose the form you’ve just created.
And then click on ‘Publish’ or ‘Update.’

Make sure to preview the form to see if everything looks right and that donation payments are going through to your Stripe account.
There you have it for this method!

You can also use WPForms to accept recurring donations. WPForms is the best WordPress form builder with 1,500+ templates, including a variety of donation forms.

It’s a good method if you need to also create other forms, such as contact forms, opt-in forms, multi-page forms, user registration forms, surveys and polls, etc.
Step 1: Connect WPForms to Stripe
To begin, download the WPForms plugin. Upon activation, go ahead and WPForms » Settings. Then, head over to the Payments tab.
The default currency is configured to US dollars; however, you can change it to any currency if you’d like. Then scroll down and click the ‘Connect with Stripe’ button. This allows you to connect WPForms to your Stripe account to collect credit card payments.

From here, you’ll need to enter your email address or create a new Stripe account.
Make sure to follow the instructions laid out in the Stripe Connect setup wizard to finish the process.

After you’ve gone through the process, you’ll be sent back to the WPForms setting page in your WordPress dashboard.
In the Payments tab, you’ll see a green checkmark indicating that Stripe is connected to WPForms.

Once connected, you’re ready to start building your recurring donations form.
Step 2: Create a Recurring Donations Form
Next, go to WPForms » Add New. This takes you over to the drag-and-drop editor to build your new form.
Go ahead and enter a name for your form so that you can keep track of it should you have to make edits in the future.

Then, search and select the Variable Donation Form template. There are other donation form templates you can also use, so you might want to experiment with them to see which is right for you.
Click on ‘Use Template.’

Now, you can customize the form and add any additional fields that make sense for your donations page.
You can edit any existing field by clicking on the element and then making the changes under the ‘Field Options’ tab.

Since you’re automatically charging donors credit cards, you probably want to make it crystal clear that you’ll be taking recurring payments.
You can make a note in the description tab as a disclaimer.

You can also go to the ‘Add Fields’ tab to add any additional fields that aren’t already on the form template.
For example, there’s a wide range of options you may want to consider, like adding a reCAPTCHA for security measures or a phone number if you plan on contacting your donors individually.
Simply drag the buttons to the editor to add the desired field option.

Step 3: Enable Recurring Payments
Next, head over to the Payments » Stripe tab. Then, turn on the option to ‘Enable recurring subscription payments.’

Once activated, you’ll have more options appear. You’ll be able to edit the Plan Name, which is a title that appears in your Stripe transactions.
Also, you can edit the Recurring Period. This is how often the credit card will be charged for recurring donations. In the dropdown menu, select the time periods available, such as daily, weekly, monthly, quarterly, semi-annually, or annually.

Once that is done, all you have to do is add the form to any WordPress page. Click ‘Save’ at the top to save all the changes you’ve made.
Then, click on the ‘Embed’ button.

Assuming you already have a donations page, you can choose ‘Select Existing Page’ and pick the page you want to add the form to.
But if you don’t have one, hit the ‘Create New Page’ button.

Now that you’re on the page, click on the ‘+’ icon.
Then, add the WPForms block to the page.

From here, select the recurring donations form you’ve just created.
Then hit ‘Publish.’

Lastly, go ahead and preview the page to make sure that everything looks good.
Also, check that you can accept payments to your Stripe account.

On the WPForms Payments page, you’ll be able to see all of the total payments, sales, and subscriptions you’ve received.
That way, you can track the performance of your donation form.

We hope this article helped you learn how to create a recurring donation form in WordPress. You may also want to see our detailed guide on how to speed up your WordPress site or our tutorial on how to start an online store.
If you liked this article, then please subscribe to our YouTube Channel for WordPress video tutorials. You can also find us on Twitter and Facebook.
The post How to Create a Recurring Donation Form in WordPress (Step by Step) first appeared on WPBeginner.
Do you want to restrict some of your WordPress content to registered or paid users?
Often, bloggers use subscriptions or one-time payment models to monetize content on their websites. This is easy to set up if you have the right WordPress plugin.
In this article, we will show you how to restrict content to registered users in WordPress.

If you are running a membership site or want to monetize your WordPress blog, then restricting content access is a great way to make money online.
You can lock specific pages and encourage users to subscribe to a premium plan to access the exclusive content.
For example, let’s say you have multiple guides on your site. You can turn them into an eBook and restrict that content to paying members only. Similarly, if you have a video section or online courses, then you can lock them for your paid subscribers.
Restricting content to registered users also helps build a community. You can set up a forum, a Facebook group, or a Discord server exclusively for members. This way, you can add more value for registered users.
That said, let’s look at how you can easily restrict content in WordPress for registered users. We will share 2 methods using a premium and a free plugin. You can click the links below to jump to your preferred method:
The easiest way to lock content access is by creating memberships using the MemberPress plugin. It is the best membership plugin for WordPress and helps you make money by charging a one-time or recurring fee for exclusive content.

MemberPress is a premium plugin, and you will need at least the Basic plan to get started. WPBeginner users can enjoy up to 60% off by using our MemberPress coupon.
To learn more, see our detailed MemberPress review.
Step 1: Setting Up the MemberPress Plugin
First, you will need to download and install the MemberPress plugin. If you need help, then please see our guide on how to install a WordPress plugin.
Upon activation, you will need to head to MemberPress » Settings from the WordPress dashboard and head to the ‘License’ tab.

From here, simply enter the license key and click the ‘Activate License Key’ button. You can find the key in your MemberPress account area.
After that, you will need to switch to the ‘Payments’ tab and add a payment gateway. Go ahead and click the ‘+ Add Payment Method’ button.

MemberPress works with many top payment providers like PayPal, Stripe, and Authorize.net.
Simply enter a name for your payment option and click the ‘Gateway’ dropdown menu to select a service.

Step 2: Create Membership Levels
Once you’ve connected a payment provider to MemberPress, the next step is to create different membership levels. With each membership, you can specify the level of access a user has for viewing restricted content.
To start, simply go to MemberPress » Memberships from the WordPress admin panel and click the ‘Add New’ button.

Next, you can enter a title for your new membership and add a description if you want.
In the right panel, you will see options for setting the price and expiration of your membership plan. For instance, you can select the billing type as recurring or one-time and choose the interval to be yearly, monthly, weekly, or custom.

After that, you can scroll down to the Membership Options meta box.
Here, you will see different options for editing the registration button text, customizing permissions, and other membership options.

Once you are satisfied with the membership level, simply click the ‘Publish’ button.
Now, go ahead and repeat these steps to create as many membership plans as you want.
Step 3: Restricting Content in WordPress for Registered Users
After setting up membership plans, the next step is to lock content on your site for registered users.
To start, you can head to the MemberPress » Rules page and then click the ‘Add New’ button.

On the next screen, you select the content to protect and set up conditions for accessing it.
First, you can click the dropdown menu under ‘Protected Content’ and pick the piece of content you want to restrict.
MemberPress offers multiple conditions to choose from. There is an option to protect all content, pages under certain categories or tags, a single post or page, and more.

If you want to restrict multiple pages, then you can create a category on your site, pick the ‘All Content with Category’ option, and choose multiple pieces of content to restrict.
Similarly, you can also add tags to specific pages and use the ‘All Content with Tag’ option in MemberPress to restrict access.

For the sake of this tutorial, we choose to protect a ‘A Single Page’ and then enter the title of the page.
Next, you will need to click the dropdown menu under ‘Access Conditions’ and select the ‘Membership’ option.

From here, MemberPress will ask you to select a membership level to allow access to the content.
You can also add multiple membership levels by clicking the ‘+’ icon under Access Content and selecting the memberships that can view your content.

Next, you can scroll down to the ‘MemberPress Unauthorized Access’ metabox.
Here, you will find options to show what logged-out or unregistered users will see when trying to view the content.

When you are done, you can simply scroll to the top.
From here, click the ‘Save Rule’ button.

You’ve now successfully restricted content for registered users on your WordPress website.
MemberPress also allows you to create a pricing page, redirect unregistered users to the pricing page, set up a login form, and much more.

To learn more, please see our ultimate guide to creating a WordPress membership site.
If you are looking for a free way to restrict content to registered users, then you can use the free plan of the Restrict Content Pro plugin.
To start, you will need to visit the Restrict Content Pro website and click the ‘Get Started’ button.

After that, you can sign up for a free account.
Simply click the ‘Get started’ button under the Free plan.

Next, you will see a popup window.
Go ahead and enter your email address and click the ‘Get Your Free Plugin’ button.

Once you click the button, you will receive an email from Restrict Content Pro with the download link for the free plugin.
From here, you can download the plugin and then install and activate it. If you need help, then please see our guide on how to install a WordPress plugin.
Step 1: Set Up the Restrict Content Plugin
Upon activation, you can head to Restrict » Settings from the WordPress admin panel and go to the ‘General’ tab.

Next, you need to select your registration, success, account management, edit profile page, and billing update pages.
After that, you must click on the ‘Payments’ tab to configure your payment gateway. You will be asked to choose a currency and then select your payment gateways.

For instance, you can click the ‘Connect with Stripe’ button and follow the onscreen instructions to configure the payment service.
Next, you can switch to the ‘Misc’ tab.
There are some important options available in this tab. You can set up login page redirects, disable account sharing, control form CSS, send IPN emails, and set up reCAPTCHA for registration forms to prevent spam registrations.

Step 2: Create Subscription Levels for Restricted Content
Now, we are ready to create subscription levels for your restricted content.
For example, you can create a subscription level ‘Premium‘ and set a price for it. When you are restricting content on your website, you will be able to choose the subscription level a user must have in order to access that content.
To get started, you can head to Restrict » Memberships Levels from the WordPress dashboard.

Creating a subscription level in Restrict Content Pro is simple. Simply give your subscription level a title, a description, and a price. You can set the price to zero if you want to create a subscription level for registered non-paying users.
You can choose the duration of a subscription level or set it to 0 to make the duration unlimited.
Lastly, you need to set the status to ‘Active’ and choose the ‘User Role‘ that will be assigned to people after signing up.

Once you are done, simply click the ‘Add Membership Level’ button.
You can now repeat this step to add as many membership levels as you want on your website.
Step 3: Lock Content for Registered Users
Now, you are ready to lock content for registered users. Go ahead and edit any post or page on your website.
In the content editor, scroll down to the ‘Restrict this content’ meta box. From here, click the dropdown menu under ‘Member access options’ and pick the ‘Members of membership level(s)’ option.

After that, you will see multiple options.
Go ahead and choose the ‘Members of specific membership levels’ option and pick the membership level that can access this content.

The plugin also lets you restrict content based on user roles. When you are done, go ahead and update your page or post.
That’s it. You’ve successfully locked content for registered users using the Restrict Content Pro plugin.
Content locking is a technique where users must take an action to view content. For instance, you can lock specific pages or guides and encourage people to sign up for your email newsletter or pay a fee to view the content.
The easiest way of setting up content locking in WordPress is by using OptinMonster. It is the best lead generation and conversion optimization software that helps you boost sales, grow your email list, and get more conversions.

OptinMonster offers prebuilt campaign templates and a drag-and-drop builder, making it super easy to customize your campaigns. It also has powerful display rules, which let you choose when and where the campaign will be displayed.
You can enable the Lock Content option from the Display Rules settings and choose whether to blur or remove the locked content.

Then, OptinMonster will restrict access to the blog post or landing page until a user performs the desired action, like entering their email address.
For more details, please see our guide on how to add content locking in WordPress.
We hope this article helped you restrict content to registered users in WordPress with MemberPress. You may also want to see our comparison of the best drag-and-drop page builders for WordPress and proven ways to make money online.
If you liked this article, then please subscribe to our YouTube Channel for WordPress video tutorials. You can also find us on Twitter and Facebook.
The post How to Restrict Content to Registered Users in WordPress (2 Ways) first appeared on WPBeginner.
Do you want to list your upcoming scheduled posts in WordPress?
Showing a list of future scheduled posts to your users can generate a buzz around your content and encourage visitors to return to your website. This can help you improve user interaction and engagement on your blog posts.
In this article, we will show you how to easily display future upcoming posts in WordPress, step by step.

If you have been running a WordPress blog for a while, then you will know that publishing posts at a certain time can get more people to read them.
However, you can’t just sit around and wait for the right time to hit the publish button. That’s why WordPress has a built-in scheduling feature that lets you schedule posts to be published later.
This can help you focus on creating content and managing your editorial calendar like a pro.
Once you have scheduled the posts on your site, it is also a good idea to show a list of these upcoming articles to create hype around them and increase engagement on your blog.
Displaying future scheduled posts can be especially effective for content like serialized stories, product launches, or event announcements.
It may encourage users to discuss upcoming topics in the comments section, sign up for your newsletter, or even pre-register for events.
Having said that, let’s see how to easily list upcoming scheduled posts in WordPress.
You can easily show a list of scheduled upcoming posts on your WordPress site by adding custom code to your theme’s functions.php file. However, making even the smallest error while typing the code can break your site and make it inaccessible.
That is why we recommend always adding custom code using WPCode. It is the best WordPress code snippets plugin on the market that makes it safe and easy to add code to your website.
First, you need to install and activate the WPCode plugin. For detailed instructions, you can see our beginner’s guide on how to install a WordPress plugin.
Note: WPCode has a free plan that you can use for this tutorial. However, upgrading to the pro plan will give you access to more features like a cloud library for code snippets, a CSS snippet option, advanced conditional logic, and more.
Upon activation, visit the Code Snippets » + Add Snippet page from the WordPress dashboard and click the ‘Use Snippet’ button under the ‘Add Your Custom Code (New Snippet)’ option.

This will take you to the ‘Create Custom Snippet’ page, where you can start by adding a name for your code snippet. The name is only for your identification and can be anything you like.
After that, choose ‘PHP Snippet’ as the Code Type from the dropdown menu on the right.

Next, you need to copy and paste the following custom code into the ‘Code Preview’ box:
function wpb_upcoming_posts() {
    // The query to fetch future posts
    $the_query = new WP_Query(array(
        'post_status' => 'future',
        'posts_per_page' => 3,
        'orderby' => 'date',
        'order' => 'ASC'
    ));

// The loop to display posts
if ( $the_query->have_posts() ) {
    echo '<ul>';
    while ( $the_query->have_posts() ) {
        $the_query->the_post();
        $output .= '<li>' . get_the_title() .' ('.  get_the_time('d-M-Y') . ')</li>';
    }
    echo '</ul>';

} else {
    // Show this when no future posts are found
    $output .= '<p>No posts planned yet.</p>';
}

// Reset post data
wp_reset_postdata();

// Return output

return $output;
}
// Add shortcode
add_shortcode('upcoming_posts', 'wpb_upcoming_posts');
// Enable shortcode execution inside text widgets
add_filter('widget_text', 'do_shortcode');
After that, scroll down to the ‘Insertion’ section and choose the ‘Auto Insert’ mode.
Keep in mind that you will still have to add a shortcode to show a list of upcoming posts on your WordPress website.

Finally, scroll back to the top of the page to toggle the ‘Inactive’ switch to ‘Active’.
Once you do that, simply click the ‘Save Snippet’ button to store your settings.

Display a List of Scheduled Upcoming Posts in the Sidebar of a Classic Theme
To display a list of upcoming posts in the WordPress sidebar, visit the Appearance » Widgets page from the WordPress dashboard. Keep in mind that this option will only be available if you are using a classic (non-block) theme.
Here, you need to click the add block ‘+’ button in the top left corner of the screen to open the block menu.
From here, drag and drop the Shortcode block into the sidebar section. After that, add the following shortcode into the block:
[upcoming_posts]

Next, click the ‘Update’ button at the top to store your settings.
Now, you can visit your WordPress site to view the list of upcoming scheduled posts in action.

Display a List of Scheduled Upcoming Posts in the Full Site Editor
If you are using a block-based theme, then the Widgets menu tab won’t be available for you. In that case, you need to visit the Appearance » Editor page from the WordPress dashboard.
Once the editor opens up, click on ‘Pages’ and then simply choose a page where you want to add the shortcode from the options on the left.

The page of your choice will now be launched in the full site editor. Here, you must click the add block ‘+’ button to open the block menu and add the Shortcode block to the page.
After that, just add the following shortcode into the block:
[upcoming_posts]

Finally, click the ‘Save’ button at the top to store your settings.
Now, simply visit your WordPress site to view the list of scheduled upcoming posts.

Apart from displaying upcoming posts, you may also want to show a list of recently published posts on your WordPress site.
Doing this can help introduce visitors to new content and encourage them to explore your website more.
You can easily display a list of recent posts in WordPress using the Latest Posts block in the Gutenberg editor.

After that, you can further customize this block by adding post excerpts, author name, publication date, or featured image.
For more information, you can see our tutorial on how to display recent posts in WordPress.
We hope this article helped you learn how to list future upcoming scheduled posts in WordPress. You may also be interested in our tutorial on how to bulk schedule posts in WordPress and our top picks for the best WordPress popular posts plugins.
If you liked this article, then please subscribe to our YouTube Channel for WordPress video tutorials. You can also find us on Twitter and Facebook.
The post How to List Future Upcoming Scheduled Posts in WordPress first appeared on WPBeginner.
At WPBeginner, we have been on both sides of affiliate marketing as affiliate marketers and as businesses running affiliate programs.
With over a decade of expertise, we have encountered all types of affiliate marketing scams and frauds.
While most folks in the affiliate business are honest, hardworking people, there are always people trying to make a quick buck at the expense of others.
Here, we’ll discuss some of the top affiliate marketing scams and how to avoid them. We’ll talk about it from both perspectives as a business owner and as an affiliate marketer.

Affiliate marketing scams try to steal from businesses by pretending to be affiliate marketers. Similarly, they may also defraud unsuspecting affiliate marketers by pretending to be a legitimate business.
Thousands of people make money online with affiliate marketing. It is a lucrative industry worth over $17 billion (Source).
Due to the low barrier of entry, good payouts, and higher returns on invested time and resources, it attracts many businesses and marketers.

However, this success also attracts many bad actors who want to profit by scamming and defrauding affiliate marketers and businesses running affiliate programs.
For these reasons, affiliate marketers and businesses may struggle to distinguish between legitimate opportunities and scams:
However, this can be mitigated by carefully researching an affiliate program’s terms and conditions. Before signing up, you can also look for the common shady tactics scammers use.
Here are some of the most common affiliate marketing scams you should avoid.
Scammers often target affiliate marketers to promote illegal or dubious products with little to no payout in return.
Here are some of the most common scams targeted at affiliate marketers.

Get-rich-quick schemes are perhaps the industry’s most common and longest-running affiliate marketing scam.
They promise affiliate marketers a much higher commission for promoting their products with dubious promises and big claims about earning potential.
These scams can be harder to identify. Many niches in the affiliate industry offer higher incentives, and it is not uncommon to make big claims even by legitimate businesses.
These scams differ because they often sell questionable products with little to no value. These programs have their terms and conditions set up so that they end up paying nothing to the affiliate marketers.
How to Identify This Scam:
These businesses often make big promises of incredibly high earning potential. They are often selling dubious products with little to no value. Their affiliate program is not transparent, and terms and conditions are often vague or have hidden clauses to avoid any payment.
Another common scam targeting affiliate marketers is fake products. These scammers would sell a cheap (and often illegally obtained) copy of a legitimate product by a recognized brand.
However, often, they don’t even deliver the cheap copy and just steal money from the customers.
Another variation of this scam involves digital products. After customers have paid up, there is no product to download or access, and the company’s customer support is non-existent.
On the other end of things, these scammers will also simply refuse to issue any payment to the affiliate marketers, meaning they get money for nothing.
How to Identify This Scam:
Fake products are often shown by copying an existing brand or business. Their pricing would be lower than the actual products to lure customers into believing they are getting a cheaper deal. Do your research about the product, search for real reviews, or dig into background information of the business.
Pyramid schemes or they’re modern name, multi-level marketing (MLM) are scams dating back to pre-internet days. It is still effectively used to target innocent people.
They target affiliate marketers by asking them to recruit investors into often imaginary, fake, or shoddy products. Marketers are promised a commission on each new sign-up that their recruits or people they bring in make.
Eventually, it becomes impossible to find new recruits, and the whole scheme fails. These scammers then go ahead and launch the scheme with different names.
Even if there is a real product being sold, a MLM company floods the market with affiliates, meaning no one makes any meaningful money and saturates the market.
How to Identify This Scam:
These scams often ask you to promote a fake business or product like a get-rich-quick scheme, dietary supplements, or cheaply made fake products. You will be promised higher payouts when people you bring in recruit more people. You may also be asked to deposit a joining fee, which they may label as an investment.
Another common scam is to ask for you to pay a fee to join an affiliate program. These pay-to-join programs will claim that they run an exclusive affiliate partnership program, and in order to ensure that only serious marketers join their program, they need you to make a small payment.
Such programs will pretend to sell high-value items and promise to offer unrealistically high commissions.
All genuine affiliate programs are free to join. It is possible that some affiliate programs may require you to demonstrate product knowledge or industry expertise, but they would never ask you to pay them in order to promote their products.
How to Identify This Scam:
The most obvious sign of this scam is that they will ask you to make a payment. Some may even want you to pay with Bitcoin so the transaction can’t be reversed or traced back. If you are asked to make any payment just to join an affiliate program, then it is most likely a scam.

Another popular scam is when you are asked to promote a fake guru or social media influencer. These fake influencers or self-claimed gurus often pretend to be experts in something and typically sell courses and 1-on-1 training sessions.
You may be asked to bring in unsuspecting customers and will be promised a lucrative commission when they sign up for the course, follow the influencer on social media, or join an email list.
These scammers would then sell customers useless courses with little to no value. They would refuse to pay affiliate marketers by not recognizing any leads or conversions they bring.
On the other hand, there are legitimate experts in various industries selling online courses and mentorship programs. This makes it harder for affiliate marketers to distinguish between legitimate businesses and scammers.
How to Identify This Scam:
These scammers usually have no track record of their supposed expertise. Their testimonials would sound phony and unverifiable. They would use pushy tactics to make sales, and most of their followers on social media profiles would be bot accounts.

Another way scammers target affiliate marketers is by using phishing tactics to steal sensitive information.
They create fake websites or emails that appear to be from legitimate affiliate programs, tricking affiliates into providing login credentials or personal information.
Besides fake websites and emails, scammers may also target affiliate marketers on social media websites and messaging apps. They may use brand images of popular affiliate platforms to deceive victims into believing that they are talking to an official account.
How to Identify This Scam:
Ensure that you are visiting a legitimate website. If you are unsure, then close your browser window and try to reach the actual website manually. Any email account asking you to visit a website should be sifted through. Don’t provide any login information to any fake website.
If you are a business running an affiliate program to generate more sales, then you may be targeted by scammers in a number of ways.
Here are some of those common scams to look out for:

Scammers may target a business by generating fake sales using stolen credit cards, dummy payment accounts, and other fraudulent techniques.
Once a sale is generated, they are qualified for commission. However, your business may pay a refund or chargeback on the fake transaction.
More sophisticated scammers may even attempt to manipulate your conversion tracking data to credit them for more sales.
How to Identify This Scam:
The easiest way to detect this scam is by monitoring your refund and chargeback requests. However, this could be due to customers being genuinely unsatisfied with their purchase.
You can look for patterns to detect fraudulent activities causing higher refunds. Compare the refund rates of suspected affiliates with other affiliates to detect suspicious activity.
This is a sophisticated affiliate marketing scam targeting businesses that run an affiliate program.
Here is how it works, the scammers use phishing tactics, malware, and popups to install cookies with their affiliate tracking IDs on unsuspecting users. After that, when users visit the website and make a purchase, these marketers earn a commission.
These cookies are often set never to expire unless a user deletes all cookies in their browser. The user would have never interacted with the affiliates’ content and wouldn’t even be referred by their URL.
How to Identify This Scam:
This sort of scam is harder to identify. However, depending on your affiliate management program, it may automatically detect fraudulent activities. You also need to monitor your conversions in Google Analytics to find suspicious URLs and activities.
Many affiliate programs only allow marketers to send traffic from a pre-approved list of websites, and any conversions not originating from their approved websites are discredited.

Another problematic affiliate scam that affects businesses is Google Ad Keyword Hijacking.
Basically, the scammers sign up for an affiliate program and run Google ads on brand keywords or keywords where your business may already be advertising.
This increases your cost to bid on those keywords, and you end up paying additional commission to a source of traffic that you could have acquired yourself by running the ads.
An even more problematic situation arises when these scammers first redirect the users to their websites before sending them to yours. This makes it harder for you to detect fraudulent activity for a longer period of time.
How to Identify This Scam:
Monitor your top keywords for PPC ads on Google. The easiest way to do this is by using a search marketing tool like Semrush.
Another way to identify this scam is to monitor your website traffic and look for unusually high-traffic sources. You can also carefully monitor affiliate activity to look out for unusually high conversions, sudden jumps in referral traffic, and other signs of suspicious activity.
Fake leads can be a problematic affiliate scam for businesses paying affiliate marketers to bring in leads.
Scammers can generate fake leads using sophisticated techniques like stolen user data, unverified leads bought from third-party sources, or simply paying someone to create fake user accounts.
More sophisticated scammers may even send bot traffic from their legitimate-looking websites. These bots then fill in forms with fake user data to submit a lead.
How to Identify This Scam:
One way to thwart fake leads is by requiring customers to double opt-in. Another way to detect quality leads is by reaching out to customers.
If more leads appear to be non-existent, you can dig deeper and find the affiliate accounts sending those leads.
Look for your affiliate reports to find patterns like a website sending a specific number of leads per day could be a sign of fake leads.
Businesses running pay-per-click affiliate programs are vulnerable to click fraud. Scammers can use a wide variety of techniques to generate fake clicks and traffic.
Some of these techniques use automated bots to click on links. These bots may use IP spoofing and appear as legitimate traffic in your analytics or affiliate marketing reports.
Other scammers may use click farms, where scammers pay pennies to click farms where actual humans click on links as part of their job. These click farms may use hacked computers worldwide to generate those clicks.
How to Identify This Scam:
Monitoring your Google Analytics reports can help you look for signs of click fraud. You can look for suspicious traffic sources, traffic coming from random places, low conversion rates than the industry average.
Keep track of IP addresses to look for signs of click fraud. Your affiliate management software may also provide tools to detect and prevent click fraud.
Another common scam targeting businesses is when an affiliate partner registers similar domain names or misspelled URLs.
For instance, if a business’s website is a stargardeningtools.com, the scammers may register stargardiningtools.com or similar domains.
This scam is also called domain squatting. It can be easily tracked by looking at referral domains in Google Analytics. However, some of these affiliates may set up dubious redirects to ensure that the squatted domain doesn’t appear as a referral domain.
How to Identify This Scam:
You can track most such tactics by regularly monitoring the referral domains in Google Analytics. Also looking for traffic sources that look suspicious can be helpful. Sometimes, these traffic sources may not have any content promoting your products and services.
Following are some handy tips that will help you avoid common affiliate marketing scams both as a marketer and as a business.
1. Join Reputable Affiliate Platforms
Join the top affiliate networks and platforms to work with top businesses, best products, and legitimate affiliate marketers.
Platforms like ShareASale, Impact, and Amazon offer a large number of products and businesses to promote. They also help businesses partner up with the best marketers, handle payouts, and prevent fraud.
However, these programs cost money and may reduce the profitability of your business.
Luckily, there are platforms like AffiliateWP. It is the best affiliate tracking and management software that runs on top of WordPress.
AffiliateWP comes with easy affiliate management, advanced fraud detection, easy payouts, and no middleman fees.
Another excellent alternative is EasyAffiliate. Similar to AffiliateWP, it runs on top of WordPress and allows you to manage and run your own affiliate program.
2. Monitor Your Website Traffic
Whether you are an affiliate marketer or an affiliate manager, monitoring your website traffic regularly helps you detect and prevent fraud and scams.
The easiest way to do this is by installing MonsterInsights. It is the best Google Analytics plugin for WordPress and helps you easily track your website traffic.

MonsterInsights has features like eCommerce tracking, conversion tracking, outbound link tracking, and more. Plus, it helps you easily see where your traffic is coming from and what those users do while visiting your site.
3. Use Better Link Management Tools
As an affiliate marketer, you will need tools to manage all your affiliate links easily. This helps you insert links easily and increase your earnings, but it will also help you track link performance and detect your clicks.
This is where ThirstyAffiliates comes in. It is the best affiliate link management tool for WordPress and allows you to easily manage and track all your affiliate links.

ThristyAffiliates helps you detect broken affiliate links, track link clicks, set up redirects, and cloak affiliate links.
Another excellent alternative is PrettyLinks. It is a link management tool for WordPress. It allows you to shorten affiliate links, cloak links, manage all your links, and easily insert them in your website.

For more on this topic, see our complete affiliate marketing guide for beginners.
The following are some of the most commonly asked questions about affiliate marketing scams by our users.
1. Is affiliate marketing risky?
Affiliate marketing is just as risky as other type of marketing strategies. Due to the increasing number of fraudulent activities and scams, it may give an impression of being risky. However, most of these affiliate marketing scams can be easily avoided. Affiliate marketing still provides excellent opportunities for publishers to make money online and businesses to promote their products and services.
2. Is affiliate marketing similar to pyramid schemes?
No, affiliate marketing is not similar to pyramid schemes. Unlike pyramid schemes, affiliate programs are free to join, and affiliate marketers are paid to bring in customers. However, some pyramid schemes may present themselves as an affiliate program in order to appear legitimate.
3. Is it possible to avoid affiliate marketing scams altogether?
Yes, it is possible to avoid affiliate marketing scams by joining reputable affiliate platforms and carefully selecting affiliate marketers, products, and businesses that you work with.
We hope this article helps you avoid common affiliate marketing scams. You may also want to explore these low online business ideas or take a look at these additional ways to make money online.
If you liked this article, then please subscribe to our YouTube Channel for WordPress video tutorials. You can also find us on Twitter and Facebook.
The post Common Affiliate Marketing Scams and How to Avoid Them first appeared on WPBeginner.
Do you want to run A/B split tests on your WordPress site to improve conversions?
Split testing helps you understand how small changes in content and design affect user behavior. You can create different versions of a landing page and see which one converts the best.
In this article, we will show you how to easily do A/B split testing in WordPress.

A/B split testing is a technique that allows you to compare two versions of the same web page against each other so that you can determine which one performs better and produces the best results.
Marketers often use A/B split testing for their landing pages to find out which one gets them more conversions and sales.
Split testing can be used to test any element on the page, including call-to-action buttons, color schemes, layout changes, marketing text, images, and more.
Basically, you show different variations of a page to your audience. After that, you track user engagement and conversions to find out which variation gives you the best results.

Before we move forward, there are a few things you will need for this tutorial.
Previously, Google Optimize was a free tool that many people used for split testing. However, Google Optimize sunsetted on September 30, 2023. Google announced that it would be investing in A/B testing in Google Analytics 4, which is the latest version of the famous analytics platform.
This means that if you were using Google Optimize before, then you can no longer access your experiments, personalizations, and historical data. When you open your account, you will see a message at the top showing that the tool is now sunset.
Fortunately, there are some other simple ways of A/B testing in WordPress. These are great Google Optimize alternatives, as they are easier to use and help you conduct experiments in WordPress. Simply click the links below to jump ahead to your preferred method:
Thrive Optimize is part of the Thrive Theme suite and lets you run experiments and split tests in WordPress.
Since Google Optimize is no longer available, Thrive Optimize is a great alternative to conduct A/B tests. It offers more features, and you don’t need to enter a code to run a split test. Plus, it will keep your experiment data safe.
Just keep in mind that you will only be able to use Thrive Optimize if you are also using the Thrive Architect page builder plugin.
First, you’ll need to visit the Thrive Themes website and sign up for an account.

After creating an account, you can download the Thrive Product Manager plugin from your account area.
Next, you’ll need to install and activate the Thrive Product Manager plugin. For more details, please see our guide on how to install a WordPress plugin.
From here, you can go to the Product Manager page from your WordPress dashboard and click the ‘Log into my account’ button.

On the next screen, you’ll see different Thrive Theme products.
From here, you’ll need to install Thrive Optimize and Thrive Architect. Simply check the ‘Install Product’ options and click the ‘Install selected products’ button at the bottom.

If the products don’t automatically activate, then you will need to head back to the Product Manager page from your WordPress dashboard and activate Thrive Architect and Thrive Optimize.
You should now see a success message once the plugin is installed.

Next, you’ll need to head to Thrive Dashboard » Thrive Optimize from your WordPress admin panel.
After that, you can add a new page by going to Pages » Add New from your WordPress admin panel. Once you are in the content editor, simply click the ‘Launch Thrive Architect’ button.

Next, Thrive Architect will ask you what type of page you would like to create.
You can create a normal page, a blank page with a header and footer, a completely blank page, or select a pre-built landing page. For this tutorial, we will select the ‘Pre-built Landing Page’ option.

There are many pre-built landing page templates to choose from. Simply select one and edit your page.
For more details on how to edit your page with Thrive Architect, you can see our guide on how to design landing pages in WordPress.

In the Thrive Architect page builder, you will see an A/B testing option in the right panel.
Go ahead and click the ‘A/B’ icon.
Next, you can create different variants for your page for split testing.
We recommend clicking the ‘Duplicate this variation’ button for your control page. This will create a clone of your main page so you won’t have to create the landing page all over again from scratch.

You will now see a duplicate variant of your landing page.
Go ahead and click the ‘Edit Variation’ button to make changes.

Next, you can edit the landing page to split-test different elements.
For example, we will change the color of the call to action (CTA) button. Once you are done, just click the ‘Save Work’ button at the bottom.

Now, you can click the ‘A/B’ button from the panel on the left to go back to the A/B testing dashboard.
Next, Thrive Architect also lets you split traffic for each variation. Simply use the toggles at the bottom to allocate the amount of traffic to each page.
Once you are done, go ahead and click the ‘Set Up & Start A/B Test’ option.

A popup window will now open.
Go ahead and enter a name for your split test and a short description. You can also toggle on the ‘Enable Automatic Winner Settings’ option and set conditions to pick a clear winner, as well as the duration that Thrive Optimize will run the A/B test.

After that, simply click the ‘Next’ button.
Now, you can select a goal for your test. There are 3 options, which include revenue, visit goal page, and subscription. After picking a goal, you can click the ‘Start A/B Test’ button.

For this tutorial, we will select the ‘Subscription’ goal for our test.
Next, you’ll be redirected to the WordPress content editor. You can scroll down to the ‘Thrive Optimize – A/B Test Overview’ meta box and see the 2 variations.
You don’t have to do anything else. The plugin will now test both variations and show the winner.

To view how the variations are performing, you can click the ‘View Test Details’ option in the meta box.
Here, you can see the conversions over time for each variant and also see which is the control variant. There is also an option to stop the test and choose a winner.

If you are looking for a free solution for running A/B tests on your WordPress site, then you can use Nelio AB Testing.
While the free version isn’t as powerful as Thrive Optimize, you will get basic features to conduct experiments on your website. For example, you can test headlines, create two different versions of a page to test them, and more.
However, if you are looking for a visual builder and additional options like assigning weights to each variant in the experiment, then we recommend using the first method instead.
To start, you’ll need to install and activate the Nelio AB Testing plugin. If you need help, then please see our guide on how to install a WordPress plugin.
Upon activation, you can head to Nelio A/B Testing from your WordPress dashboard. From here, click the checkbox to accept the terms of service and privacy policy of the plugin, and then click the ‘Continue’ button.

After that, you’ll be taken to the Neilo A/B Testing » Tests page in the WordPress admin panel.
Go ahead and click the ‘Add Test’ button.

Next, you’ll see options to test on your website. For example, the plugin lets you split test pages, posts, headlines, widgets, menus, themes, JavaScript, CSS, and more.
For the sake of this tutorial, we will select the ‘Headline’ option and split-test some titles for a blog post.

After that, you can enter a title for your test at the top.
From here, you will see the Control Version and Variants section. First, you can click the dropdown menu and choose a post title. This will be the control version (labeled A).

Next, you can scroll down and enter details of a variant (labeled B).
This will be the new headline you will be testing against the one that’s already live.

After that, you can scroll down to the Conversion Goals and Actions section. You will notice that the plugin will use the default goal for this experiment type. In this case, it will measure views for your page with a new headline.
However, you can define your own goals for other experiment types. For example, if you want to test a page, then you can select whether you’d like to measure page views, clicks, clicks on external links, YouTube video playback, or choose a custom event.

The plugin also lets you create segmentation and narrow your test audience. However, this feature is only available for premium users, and you’d need to subscribe to a paid plan.
After setting your conversion goals, you can click the ‘Start’ button at the top to start A/B testing.

Nelio A/B Testing plugin will now conduct the experiment.
To stop the experiment, you can go to the Nelio A/B Testing » Tests page and then click the ‘Stop’ link under the test.

You can also click the ‘View Results’ option to see which variant is performing the best.
The plugin will help you select a winner and show conversions for each variant.

When it comes to doing split tests on your website, here are some tips for running your experiments the right way:
We hope this article helped you learn how to do A/B split testing in WordPress. You may also want to see our guide to WordPress conversion tracking made simple and how to create an email newsletter the right way.
The post How to Do A/B Split Testing in WordPress (Step by Step) first appeared on WPBeginner.
Do you need to set up a shared Gmail inbox for your WordPress website?
If you want to make it easier for your team to handle emails for your WordPress site, then creating a shared inbox is the way to go. It lets everyone on your team see and reply to emails from one place, making sure nothing slips through the cracks.
In this guide, we will show you 3 ways to set up a shared Gmail inbox in WordPress.

If you are launching a business website, then you will soon need a shared business email inbox to support your operations.
At WPBeginner, we use a shared professional email inbox for hundreds of daily messages, like partnership requests and affiliates. This keeps our team on the same page and helps us respond efficiently to every email.
Other Awesome Motive brands like WPForms and OptinMonster use shared business email inboxes, too. They use them to gather all customer questions and support requests, making it easier to respond quickly.
Gmail itself doesn’t offer a shared inbox feature. While you can technically create a new Gmail address and share the password, we strongly advise against doing this.
Password sharing poses security risks like unauthorized access and difficulty tracking who’s accessing the account. Plus, everyone on the team would have access to all emails, potentially exposing them to sensitive information.
Another option is using Google Groups for a shared inbox.
From our experience, this feature is quick and free, but it’s not the most efficient way to receive and send emails as a team. Furthermore, it doesn’t come with the features needed for streamlining communication and improving email response times.
For that reason, this tutorial will show you 3 solutions to create a shared Gmail inbox for your WordPress website. You can use the quick links below to skip to your desired method:
The first method is to use GrooveHQ, which is one of the best help desk software on the market. This is what we use at WPBeginner to gather all of our marketing and partnership emails, and it has been a smooth experience throughout.
Step 1: Connect Groove With Your Gmail Account
To use Groove, you will need to go to their website and click the ‘Buy Now & Save’ button.

Next, simply sign up for a Groove account using Gmail or another email address.
All GrooveHQ plans include a free 7-day trial after you sign up, and you can select a subscription before or once the trial ends. For more information, check out our full GrooveHQ review.

Once you have created an account, Groove will show you a checklist of tasks to finish your setup.
To set up your shared Gmail inbox, simply click ‘Connect Gmail’ in the ‘Create an Inbox’ step.

You will then choose a Gmail account that will be connected to Groove.
Simply pick an account and go through the consent screen to complete the connection.

Once done, you will go back to the Groove website to name your inbox. You can think of what you will use the inbox for. If it’s for customer support, then just name it ‘Customer Support.’
After you do that, go ahead and click ‘Connect your Gmail account.’

Next, you need to select how much email history Groove should import. The furthest you can choose is 1 year.
You can also choose if the emails they can import should be in the state of Open or Closed, and if the email tags need to be imported, too.

Once you have configured these settings, click ‘Start import & take me to my Inbox.’
The import will then run in the background as you explore your inbox interface.
Step 2: Invite Your Team Members to Groove
Now that you have connected your Gmail email account with Groove, let’s invite some team members so that you can start assigning tasks to them.
On the top right side of your Groove email inbox, click on your profile avatar and select ‘Invite team members’ in the dropdown menu.

Next, you need to insert the email addresses of your team members. Each one needs to be in a separate line or separated by a comma.
Below, choose the type of access for these users. You have three options: Admin, Agent (for support staff), or Lite (for team members who don’t need to talk directly to the email recipients but want to add notes to conversations).
Each time you add new team members, you can only select one access type. If some team members require different types of access, then you’ll need to repeat this step.
Once you are done, just click ‘Next.’

At this stage, go ahead and select which inboxes these team members should have access to. For example, if you are adding support agents, then most likely they only need to access the customer service inbox.
After that, click ‘Invite.’

Now, Groove will send your team members an email invitation to your inbox.
They can simply click on the button there to access Groove. Here’s what the email looks like:

Step 3: Add a GrooveHQ Widget to Your WordPress Site
Groove does not have an official WordPress plugin, but you can connect your WordPress website with Groove using its widget code. We will use the free WPCode plugin to do this, as it makes adding custom code snippets safe, easy, and manageable.
We recommend installing this WordPress plugin first before continuing with the rest of the steps.
Once you have done that, go back to the Groove page and click on your profile avatar to open the dropdown menu. Then, click ‘Settings.’

In the Settings page, select ‘Widget’ in the left sidebar.
After that, click the ‘Create your widget’ button.

On the next screen, go ahead and give your widget a name.
It can be something simple, like ‘Support Widget.’

Then, select what kind of Groove features you want the widget to have. Besides a contact form to receive customer or partnership emails, you can also use the widget to enable a live chat feature.
You can also opt to create a knowledge base for frequently asked questions.
Once you are done, click ‘Next step’ at the bottom.

The next step is to customize the widget itself. Here, you can add your company logo, change the default widget color, and modify the icon style of the widget.
The handy preview will show you what the widget looks like with your customizations.

If you scroll to the bottom, you need to select what feature should be the first screen users see when they open the widget.
The Home Screen means all of the Groove features you have enabled will be shown here. So, if you enable the live chat and contact form features, then the user will see them both, and they can choose the best one for their needs.
Alternatively, you can select Contact Form First if you only use Groove for your shared email inbox.
Once you’ve made your choice, you can click ‘Install and finish.’

At this stage, Groove will generate an installation code for you to insert before the </head> tag on your website.
Here, just click ‘Copy Code.’

Now, open your WordPress admin area and go to Code Snippets » Header & Footer.
Then, just paste the code from earlier in the ‘Header’ section and click ‘Save Changes.’

That’s it. All you need to do next is visit your website and see if the widget works properly. You can also give the widget a try by using it to send a test email to your shared email inbox.
Here’s what our widget looks like on our demo website:

GrooveHQ makes it easy for beginners to set up a shared Gmail inbox with little technical setup.
However, this means you will need to use a separate software from WordPress to view and manage your shared emails. This might be inconvenient for some people, as you have to switch between different platforms.
If you prefer using a WordPress plugin instead, then we recommend Heroic Inbox. This help desk plugin lets you connect your WordPress website with Gmail, create a shared email inbox, and invite other team members to collaborate within the inbox.
That said, do note that Heroic Inbox does not have a widget like GrooveHQ. It only sets up a shared email inbox in the WordPress dashboard for the business email accounts you use.
Also, the setup takes slightly longer than the first method, so be sure to read each step carefully.
Step 1: Set Up the Heroic Inbox Plugin
First things first, you need to purchase a Heroic Inbox plan on the HeroThemes website, as the plugin doesn’t come with a free version. You can learn more about the pricing in our full HeroThemes review.

Once you have purchased a plan, you should have your account details, download link, and license key sent to your email. You can download the plugin using the link in the email.
Then, open your WordPress admin area to install the plugin. For step-by-step instructions, you can read our beginner’s guide on how to install a WordPress plugin.
Once the plugin is installed and active, you will be asked to insert your license key. Go ahead and do that, and then click the ‘Activate’ button when you are done.

Now, you will see two options to add an email inbox to Heroic Inbox: generic or Gmail.
Simply select the ‘Gmail’ option to continue.

Next, you will see a screen that asks you to enter your Google Workspace app credentials.
Heroic Inbox will provide you with an Authorized Redirect URI that you need to enter when you create your Google Workspace app. It’s a specific URL that an application registers with an authorization server (like Google or Facebook) to receive authentication responses securely.
In the next step, we will show you how to create a Google app to get your credentials for Heroic Inbox.

Step 2: Create a Google Workspace App for Heroic Inbox
First, go to the Google Cloud console website. If you haven’t signed in to your Google Workspace account already, then you can do that now.
After that, click the ‘Select a project’ menu on the top-left side of the page.

A popup will appear asking you to select a project.
Since we are creating a new Google Workspace app for Heroic Inbox, simply select ‘New Project’ in the top right corner of the window.

At this stage, you need to fill in your project name. It can be something that you can easily identify later on, like ‘Heroic Inbox Project.’
You will also need to select a location to store the project in Google Cloud. You can just choose ‘No organization’ and then click the ‘Create’ button.

The next step is to navigate to the search bar and look for the ‘Gmail API.’
Go ahead and select that Google API once you’ve found it.

On the next page, click ‘Enable.’
This will let Gmail receive and send emails on behalf of the plugin.

You have now enabled the Gmail API, but you still need to connect it with Heroic Inbox.
Now, click the ‘Create Credentials’ button.

At this point, you can select what type of API you are using. Simply click ‘Gmail API’ for this one.
As for the data, select ‘User data.’ Once done, click ‘Next.’

Next, you can upload a logo to use in your Google consent screen (which is optional) and insert your developer contact information. You can use your own email for this.
After that, click ‘Save and Continue.’

This next step is about permission scopes, which are optional to configure.
Heroic Inbox recommends leaving it be, so you can scroll down to the step after this one.

In the OAuth Client ID step, you need to select an application type, which should be ‘Web application.’
Then, you can fill out the application name. It can be as simple as ‘Heroic Inbox Integration.’

Now, you can go back to your Heroic Inbox plugin settings page from earlier where it provides you with the Authorized Redirect URI. Go ahead and copy it.
After that, go back to Google Cloud and paste it into the appropriate field.
Once that’s done, click ‘Create.’

Google Cloud will then generate your OAuth 2 Client ID and Client Secret.
You can find your Client ID on that page. Then, click ‘Download’ to download the Client Secret file onto your computer.

At this stage, navigate to the ‘OAuth consent screen’ menu in Google Cloud.
Then, click ‘Publish App’ so that the API is no longer in testing mode.

At last, you can open your Heroic Inbox plugin page again from earlier. You can paste the Client ID and Client Screen in the appropriate fields.
Note: You will need to open the Client Secret file in a text editor like Notepad. Make sure to copy only the part after "client_secret":" and ".

Once you do that, click ‘Validate.’
On the next screen, click the ‘Select Mailbox’ button.

You will then be redirected to select a Gmail account to link to WordPress.
You can always repeat this step to add more Gmail inboxes.

After you choose an account, check all of the boxes on the consent screen. This is to ensure that Heroic Inbox works properly.
Then, click ‘Continue.’

If the connection is successful, then you will return to the Heroic Inbox plugin page and see a text that says ‘Heroix Inbox is Ready!’
You can also click the ‘Test Mailbox Configuration’ button to send yourself a test email made with the Heroic Inbox plugin.

You can look at the screenshot below to see what a successful test email looks like.
That’s it!

Step 3: Add WordPress Users to Your Mailbox
Now that you’ve connected Heroic Inbox with Gmail, you can start adding users to access the inbox.
All you need to do is go to Heroic Inbox » Dashboard in the WordPress admin panel. Then, you will find your mailbox there. Simply click the three-dot menu and select ‘Mailbox Settings.’

Here, switch to the ‘Users’ tab.
Then, you must click ‘Add User’ to add new WordPress users to the inbox.

Now, go ahead and select a user from the dropdown menu and select the right role for them. You can either assign them a Mailbox User or an Administrator role.
Once you are done, click ‘Add User.’

That’s it. You have successfully set up a shared Gmail inbox for your WordPress blog or website.
If you are looking for a free and quick solution to set up a shared Gmail inbox, then you can do that with Google Groups. The downside of this method is that the interface is not as user-friendly as the other two, and you may get a limit for the amount of emails you can send daily.
That said, if you have a small team and you are in the early stages of your small business, then Google Groups can be a good temporary solution.
First, log in to your Gmail account. Then, go to the Google Groups website and click ‘Create group.’

Then, you need to give your group a name and create a new group email.
If you are using a personal Gmail account, then your domain name will be @googlegroups.com. But if you have a custom domain name, then the group account will use that instead.
Once done, click ‘Next.’

After that, you can configure your privacy settings.
Here, you can make your Google group publicly searchable, allow only invited members to join, and decide what group members and group managers can do.
If you are done with this page, click ‘Next.’

The next step is adding members. Here, simply type your team members’ email addresses into the Group members, Group managers, or Group owners fields.
You can also choose ‘Each email’ for the subscription. This means every group user will get a notification as new emails are received, rather than in batches.
When that’s finished, click ‘Create group.’

Once you have created a group, navigate to ‘Group settings’ in the sidebar and select ‘General.’
Then, find the Enable additional Google Groups features section and select ‘Collaborative Inbox.’ Once done, simply click the ‘Save changes’ button.

Now, you can go ahead and use this email as your WordPress admin email address and/or for WordPress contact forms, popups, and so on. This way, you will get notified whenever you get a message from a website visitor.
While WordPress is an excellent website builder platform, it isn’t a great option for sending emails. This is because many WordPress web hosting services are not set up to use the PHP mail() function, which is responsible for sending emails.
As a result, emails sent directly by WordPress websites often don’t get delivered.
That’s why Gmail and other email service providers don’t use the PHP mail() function. Instead, they use the SMTP setup over SSL/TLS for sending and receiving emails.
Thankfully, you can use the WP Mail SMTP plugin on your website. This plugin will configure your WordPress site to send emails using SMTP settings, including Gmail’s SMTP server, instead of the PHP function. That way, your emails will be delivered instead of ending up in the spam folder.

You can learn more in our ultimate guide on how to set up WP Mail SMTP with any host.
We hope this article helped you learn how to set up a shared Gmail inbox for your WordPress site. You may also want to check out our WordPress tutorials on how to create an email newsletter and our expert pick of the best contact form plugins.
If you liked this article, then please subscribe to our YouTube Channel for WordPress video tutorials. You can also find us on Twitter and Facebook.
The post How to Setup a Shared Gmail Inbox for Your WordPress Site first appeared on WPBeginner.
Are you looking to add title attributes to your WordPress navigation menu items?
The title attribute allows you to provide extra information about a menu item. It often appears as tooltip text when a user’s mouse moves over the link.
In this article, we will show you how to add title attributes in WordPress navigation menus for both classic themes and block themes.

In WordPress, you can add a title attribute to better describe any HTML element. This is often used with links and images to provide extra information that appears as a tooltip when the user hovers their mouse over the element.
Here’s an example of an image title attribute displayed in a tooltip. The user can learn more information about the image by moving their mouse over it.

You can learn more in our guide on the difference between image alt text vs. title.
We also recommend you use the title attribute when adding links to your post. This allows users to see where the link will take them before they click it.
Some SEO experts believe that the link attribute is useful for search engine optimization (SEO) because it allows you to provide more context.
The title attribute may also be read out loud by screen readers that are used by visually impaired users. However, it is often ignored, and the anchor text is read instead.
With that being said, let’s take a look at how to add the title attribute in WordPress navigation menus. You can use the links below to jump to the method that works with your theme:
If you are using a classic WordPress theme, then you can customize your navigation menu by visiting Appearance » Menus in your dashboard.
However, you are not able to add a title attribute to menu entries by default.
To add this capability, you will need to click the ‘Screen Options‘ tab in the top right corner of the screen. This will bring down a menu, where you need to click on the check box next to the ‘Title Attribute’ option.

This will add a title attribute field for when you create or edit a menu entry.
Now, you can scroll down and click on any menu item in your existing menu to expand it. You will see the title attribute field.

You can now add the text you want to use as a title. You can also expand other menu items and add title attributes to them.
Don’t forget to click on the ‘Save Menu’ button at the bottom of the page to store your changes.
You can now visit your WordPress website and take your mouse over a link in the navigation menu. You will see the title attribute displayed as a tooltip.

If you are using a block theme, then you can customize your navigation menu using the Full Site Editor. This editor allows you to add title attributes to your menu entries by default.
First, you need to navigate to Appearance » Editor in your WordPress admin area and then click on the ‘Navigation’ option to find your menus.

You will need to select the menu you wish to edit from the list.
Now, you can click the preview pane on the left to open the editor full screen. Make sure you can see the settings pane on the left. If not, then you can display it by clicking the ‘Settings’ button at the top of the screen.

Next, click the menu item in the settings pane that you wish to edit. This will display the options for that entry, including the title attribute.
Simply type your title into the ‘Title Attribute’ field.

Make sure you click the ‘Save’ button at the top of the screen to store the new settings. You will need to click a second ‘Save’ button to confirm.
Now, you can visit your website to see the menu title attribute in action.

Now that you know how to add a title attribute in your navigation menu, you may like to see some other articles related to customizing the WordPress navigation menu:
We hope this tutorial helped you learn how to add a title attribute in WordPress navigation menus. You may also want to see our guide on how to increase your blog traffic or our expert pick of the best contact form plugins for WordPress.
If you liked this article, then please subscribe to our YouTube Channel for WordPress video tutorials. You can also find us on Twitter and Facebook.
The post How to Add Title Attribute in WordPress Navigation Menus first appeared on WPBeginner.
Do you want to stop storing IP addresses in your WordPress comments?
By default, WordPress logs and stores the IP addresses of commenters to protect you against spammers. That said, with the rise of data privacy laws, you may want to stop this functionality to protect your website visitor data.
In this article, we will show you how to stop storing IP addresses in WordPress comments.

Unless your commenters use a VPN, WordPress will store their IP addresses on your website.
This is mainly used to combat spam comments from suspicious IP addresses. Some security plugins may also use IP addresses to put users in a comment blacklist or block malicious IP addresses to prevent threats like brute force attacks and DDoS attacks.
That said, some users may feel uncomfortable knowing that their IP address is logged after they leave a comment. They may think that this information can be used against them, which can make them hesitant to engage with your WordPress website.
If your website caters to a global audience, then storing IP addresses without user consent can also make your site less compliant with the General Data Protection Regulation (GDPR). This is because the GDPR classifies IP addresses as personal data.
Most WordPress web hosting providers keep raw access logs of all visitors to your website for a limited period of time. Plus, you can view these IP addresses when viewing the Comments page in the WordPress dashboard.
Now, let’s look at how to stop storing IP addresses and improve your WordPress security. Here is an overview of what we will cover:
This first method uses the WPCode plugin. We will use this plugin to insert a custom code snippet that stops your website from storing IP addresses from the comments section.
If this is your first time using code, don’t worry. WPCode’s user-friendly interface makes it easy to insert and manage custom code, even for a beginner.
To use WPCode, you need to install the plugin first. For more guidance, check out our article on how to install a WordPress plugin.
Note: This article will use the WPCode free version, but feel free to upgrade to a Pro plan for more advanced features like conditional logic and scheduled snippets.
Now, you need to go to Code Snippets » + Add Snippet from your WordPress admin panel. After that, click the ‘Use snippet’ button under ‘Add Your Custom Code Snippet’.

You will now see the Create Custom Snippet screen.
First things first, you have to add a title for your code snippet. It can be something like ‘Disable IP Address in Comments.’
In the Code Type dropdown, choose ‘PHP Snippet.’ Then, in the Code Preview box, you can insert the following code:
function wpb_remove_commentsip( $comment_author_ip ) { return ''; } add_filter( 'pre_comment_user_ip', 'wpb_remove_commentsip' );
After that, make sure the toggle in the top right corner says ‘Active’ and click ‘Save Snippet.’
It should look like this.

Now, the next time someone leaves a comment, you won’t see their IP address on the WordPress Comments page.
However, you will notice that previous comments still have this information stored. We will talk more about how to remove this data in the next part of the tutorial.

To remove IP addresses from your older WordPress comments, you will need to use phpMyAdmin. It’s a database management platform that usually comes with your WordPress hosting control panel.
Note: Before you do anything, we strongly recommend you back up your WordPress database first. That way, you can restore the database if you make a critical error.
Once you do that, you need to log in to your WordPress hosting account and look for the phpMyAdmin menu.
For Bluehost users, you will find phpMyAdmin by going to ‘Websites’ and selecting the website you want to configure in your dashboard. It should be under ‘Quick Links’.

Inside phpMyAdmin, you can navigate to the ‘SQL’ tab.
After that, enter this query below:
UPDATE wp_comments SET comment_author_IP = '';
Note that if you have a custom WordPress database prefix, then please change wp_comments to your custom table prefix.
Once that’s done, simply click the ‘Go’ button below the text area to run your query.

At this stage, just go back to your WordPress Comments page to see if the query worked properly. That’s it!
We hope this article has helped you learn how to stop storing IP addresses in WordPress comments. You may also want to see our expert picks for the best WordPress security plugins and our guide to the tell-tale signs hackers have hijacked your WordPress site.
If you liked this article, then please subscribe to our YouTube Channel for WordPress video tutorials. You can also find us on Twitter and Facebook.
The post How to Stop Storing IP Address in WordPress Comments first appeared on WPBeginner.
Are you looking for a way to convert your Figma design into a WordPress theme or page?
Figma is a cloud-based design tool that allows you to create an attractive user interface for your website. It lets you quickly test ideas through prototyping and also supports real-time collaboration. By converting these designs to WordPress, you can make your website more visually appealing for users.
In this article, we will show you how to easily convert Figma to WordPress, step by step.

Figma lets you create beautiful layouts for your website and offers amazing tools like animation effects, prototyping, vector editing, and more.
If you have a WordPress website, then using this tool to create a layout for your site will allow multiple designers and developers to work on the same Figma file. This can improve collaboration and reduce the need for back-and-forth emails.
Plus, you can create interactive mockups of your blog to test user flows and get feedback before your site goes into development.
You can also use Figma’s advanced tools like grids, guides, layers, and auto layouts to create visually appealing pages and templates including:
However, keep in mind that Figma does not integrate with WordPress by default, so you will need to use a conversion tool. That being said, let’s see how to easily create a Figma design and convert it to WordPress, step by step:
To design a page with Figma, you will first need to create an account on the website.
To do that, visit the Figma website and click the ‘Get started for free’ button in the top right corner of the screen.

This will open a new tab in your window, where you must provide your email address and password.
After that, click the ‘Create Account’ button.

Once you do that, you will be sent a verification email.
Simply open this email from your inbox and click the ‘Verify email’ button.

You will now be taken to the Figma website, where you will be asked for your name.
After that, you must provide some details on how you plan to use the tool and then click the ‘Continue’ button at the bottom.
You will then be asked to choose a pricing plan. You can select the ‘Starter’ plan, which is free, and click the ‘Continue’ button.

You will now be directed to your Figma dashboard
Once you are there, go ahead and click the ‘Design File’ button at the top right corner to create a Figma page.

The Figma builder will now open up on your screen. Here, you have to select the ‘Frame’ option from the top.
This will open a list of design frames in the right column, where you must select the ‘Desktop’ option. This is because the plugin we will use to convert Figma to WordPress currently only supports the desktop canvas.

Next, you can add images to the canvas by clicking on the square icon at the top and choosing the ‘Place image/video’ option.
This will open your computer folder, where you can upload an image or video of your choice.

You can also add text to your page by clicking on the ‘T’ icon at the top of the screen.
Once you do that, you can adjust the text size, alignment, font, and spacing from the settings in the right column.

You can also use free style tools like ‘Pen’ and ‘Pencil’ from the top, add feedback questions, create more layers and pages, change the background color, and much more.
If you are a developer and want to add CSS code to the page, then you can also do that by switching to ‘Dev Mode’ using the toggle in the top right corner of the screen.

Once you are satisfied with your Figma page’s customization, it is time to get its API key. This key will allow the plugin to embed the Figma page in WordPress.
To do this, click on the ‘Figma’ icon in the top left corner of the screen. This will open a menu prompt, where you must select the Help and account » Account Settings option.

A new prompt will now open up on the screen.
From here, scroll down to the ‘Personal access tokens’ section and click the ‘Generate new token’ link.

This will open some new settings, where you must provide a name and expiration date for the token that you are creating. We recommend selecting the ‘No Expiration’ option for the token if you don’t want the Figma page to disappear from your website after a specific time period.
After that, you can set all the scopes except for File Content to ‘Write’ and then click the ‘Generate token’ button.

You will now be taken back to the ‘Personal access tokens’ section.
From here, you can copy the newly generated token and paste it into Notepad or another plain text editor.

Once you have gotten the API key, it is now time to convert your Figma page to WordPress.
To do this, you must install and activate the Animation and Design Converter for Gutenberg Block plugin. For detailed instructions, see our beginner’s guide on how to install a WordPress plugin.
Upon activation, open up the page or post where you want to add the Figma page. Once you are there, simply click the ‘Import From Figma’ button at the top of the screen.
This will open a prompt, where you must paste the Figma page access token that you copied earlier.

After that, you have to add the Figma page URL into the ‘FIGMA FILE URL’ field.
To get this URL, open your Figma file and copy the link in the browser tab. Keep in mind that the desktop frame should be selected before you copy the URL.

Upon pasting the link in WordPress, click the ‘Start Import’ button.
The plugin will then convert your Figma page into the Group block. You can now customize the block’s alignment, position, typography, and color from the block panel.

After that, click the ‘Publish’ or ‘Update’ button to store your settings.
This is how the converted Figma file looked on our demo website.

If you have created your entire website using Figma, then the above method will not be suitable because the plugin only works with the desktop frame.
Plus, the plugin may have trouble transferring complex designs accurately because Figma focuses on design only while WordPress requires coding for dynamic content and functionality. This means that some of the elements that you have added in Figma may not work in WordPress.
That’s why we recommend using Seahawk Media services to convert Figma to WordPress because they consider all these factors during the conversion.
Seahawk Media is a premier WordPress services company that offers numerous services, including development, design, maintenance, migration, support, and more.
They are trusted by over 1000+ businesses and will perform a fully responsive, cleanly coded, SEO-ready, and pixel-perfect Figma to WordPress conversion for you.

All you will have to do is send your Figma files to the business.
After understanding your requirements, Seahawk will set an approximate timeline and convert your Figma files to a WordPress site in just a few days.

You can also use the company’s services for an SEO audit, content writing services, white label services, support, and hacked site repair.
If you feel like it’s too much to work to build pages with Figma and then convert them to WordPress, then you can use SeedProd instead.
It is the best WordPress theme builder and page builder on the market that it super easy to build custom themes and landing pages for your website using drag and drop.

SeedProd comes with a user-friendly drag-and-drop builder, 300+ premade templates, advanced WooCommerce blocks, and integrations with email marketing services.
You can easily drag and drop images, headings, videos, CTA, optin forms, giveaways, or paragraph blocks from the left column in the builder to create an attractive page.
Once you’ve done that, simply click on the block you added to open its settings in the left column. From here, you can insert dynamic text and change the font size, alignment, color, and more.

Finally, click the ‘Save’ and ‘Publish’ buttons at the top to store your settings and make your changes live. For detailed instructions, you can see our tutorial on how to create a landing page in WordPress.
For more information about the plugin in general, see our SeedProd review.
Here are some questions frequently asked by our readers about Figma and WordPress.
Do Figma and WordPress work together?
By default, Figma and WordPress cannot directly integrate. However, you can use tools and plugins like UiChemy, pxCode, or Animation and Design Converter for Gutenberg Block to convert a Figma design to WordPress.
If this method is too complex for you, then you can simply hire a developer or dedicated company like Seahawk Media for this conversion.
Do I need to know coding to convert Figma to WordPress?
You don’t need to know coding to create and convert Figma designs to WordPress because you can easily do it with a plugin or hire a developer.
However, if you want to do it yourself without a plugin, then you must know HTML, CSS, and possibly PHP to hand-code your website. This is because some of the Figma design elements will need to be coded to provide functionality in WordPress.
For more details, see our guide on how to code a website.
Does converting from Figma to WordPress hurt SEO (Search Engine Optimization)?
If you convert a Figma design to WordPress, then your content or backlinks won’t be affected. However, Figma designs can negatively affect your website structure, page speed, and images.
That is why we recommend using Seahawk Media services for a Figma to WordPress conversion because they will make sure that your website is fully responsive, cleanly coded, and SEO-ready after the conversion.
We hope this article helped you learn how to convert Figma to WordPress. You may also want to see our beginner’s guide on how to outsource WordPress development and our top picks for the best places to get a custom logo for your website.
If you liked this article, then please subscribe to our YouTube Channel for WordPress video tutorials. You can also find us on Twitter and Facebook.
The post How to Convert Figma to WordPress (Beginner’s Guide) first appeared on WPBeginner.
Are you looking to add a chatbot in WordPress?
A chatbot is software that can start talking with your website visitors. Adding a chatbot to your website can help you provide instant customer support, generate leads, and improve the user experience.
In this article, we will show you how to easily add a chatbot in WordPress, step by step.

A chatbot is a computer program that uses a chat interface to talk with your website visitors. It acts just like your customer support team does when they use a live chat plugin.
However, while live chat is a real-time conversation between a customer and your support staff, chatbots are automated.
This means that they can only provide answers that you have programmed them for.
For example, a customer service chatbot can answer questions about products or services, troubleshoot problems, and make recommendations.
Similarly, a healthcare chatbot might answer questions about health conditions, provide reminders for appointments, and connect patients with doctors.
Adding a chatbot to your WordPress website will allow you to provide 24/7 customer support to your visitors, even when your support team isn’t available.
This will reduce the number of support tickets on your website and improve user experience.
Chatbots can also be used to automate other customer support tasks like answering frequently asked questions, providing product support, and fixing smaller issues.
This will save a lot of time and let your team focus on more complex issues.
If you have an online store, then you can also use a chatbot to find out about a customer’s interests and ask them about their needs. The chatbot can then answer the customer’s queries and close the deal.
Having said that, let’s see how to easily add a chatbot in WordPress, step by step. We’ll cover three different methods, and you can use the quick links below to jump to the one you want to use:
If you want to create a custom chatbot to automate customer support inquiries, then this method is perfect for you.
Heroic KB is the best WordPress knowledge base plugin that adds a searchable knowledge base to your existing site.
It also comes with a powerful Heroic AI Assistant that lets you easily add a chatbot to your knowledge base page. The AI chatbot is trained directly from your knowledge base articles so it can provide accurate responses to visitor questions.
To get started, you need to install and activate the Heroic KB plugin. If you need help, see our tutorial on how to install a WordPress plugin.
Note: You’ll need the Heroic KB Pro plan to access the Heroic AI Assistant.
Once the plugin is activated, you need to create a knowledge base so that you can train your AI chatbot on it. Make sure that your knowledge base includes detailed, high-quality articles that will help your audience learn how to use your products/services.
For step by step instructions, you can follow our tutorial on how to add knowledge base documentation in WordPress.
After you’ve created your knowledge base, you can set up the Heroic AI Assistant.
To do that, go to Heroic KB » Settings from the WordPress dashboard and click on the ‘Help Assistant’ tab.
From there, you need to place a checkmark next to the Enable Help Assistant, Show Help Assistant on this Site, and AI Help Assistant options.
You can also select the main color of your Help Assistant chatbot on this page.
When you’re done, click on the ‘Save Changes’ button.
Next, you need to click on the ‘AI Help Assistant’ tab from the Heroic KB Settings page. Here, you need to add API keys for OpenAI and Pinecone.
You can generate an OpenAI API key on the OpenAI website by visiting the API Keys page from your paid account.
Simply generate a new secret key and copy and paste it into the Heroic KB AI Help Assistant Configuration settings.
You can generate a Pinecone API key on the Pinecone website with a free or paid account.
Just go to the ‘API Keys’ page and click on the ‘Create API Key’ button. Then, copy and paste it into the Heroic KB settings.
After copying and pasting your API keys, you also need to fill out the ‘Pinecone Environment’ field.
For free Pinecone accounts, you can use gcp-starter as the Pinecone Environment. For paid accounts, you can use any GCP Region supported by Pinecone like eu-west4-gcp or us-central1-gcp, for example.
Don’t forget to hit the ‘Save Settings’ button.
Next, click on the ‘Create Pinecone Index’ button to automatically create a new Pinecone index.
You can check the ‘Status’ box to see if your API keys have been validated and the Pinecone index has been created.
Once those are ready, you can start to train the AI assistant chatbot on your knowledge base.
To do that, simply click on the ‘Train on this site’s Heroic Knowledge Base’ button.
The AI assistant will then begin training, this may take a few minutes depending on the size of your knowledge base. The progress will be displayed in the Training panel.
When the training is complete, you can visit your Knowledge Base page to see your Heroic AI Assistant chatbot in action.
Visitors can ask a question and the chatbot will provide an accurate response based on your knowledge base documentation.
If you are looking for an all-in-one chatbot for lead generation, sales, customer service, and more, then this method is for you.
You can easily add a chatbot to your WordPress site using ChatBot. It is the best AI chatbot software that allows you to make chatbots using a drag-and-drop builder. It also offers more chatbot customization options and multilingual features.
First, you will need to install and activate the free ChatBot plugin. For detailed instructions, please see our step-by-step guide on how to install a WordPress plugin.
Upon activation, visit the ChatBot menu tab from the WordPress admin sidebar and click the ‘Connect Account’ button.
This will open the ChatBot website in a new window, where you have to enter your login credentials and click the ‘Login’ button.
However, if you don’t have an account on ChatBot yet, then just click the ‘Sign up free’ link at the top.
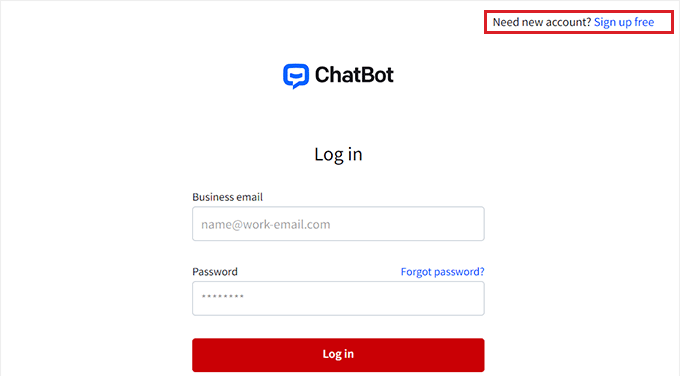
This will take you to a new page where you will need to provide your email address and enter an account name and password.
Once you are done, just click the ‘Create account’ button.

Upon account creation, you will be redirected to your WordPress dashboard. You have now successfully connected your WordPress site with ChatBot.com.
Now, to start creating a chatbot, just click the ‘Go to dashboard’ button.
You will then be directed to your ChatBot account dashboard.
From here, click the ‘Create bot’ button at the top to start the process.
This will take you to the ‘Create new story’ page, where you need to choose the type of chatbot that you want to make.
By default, ChatBot allows you to create a customer service bot, job application bot, lead generation bot, FAQ bot, sales bot, and more.
However, you can also pick the ‘Build from Scratch’ option to make a bot yourself. For this tutorial, we will be creating a customer service bot.
This will open the premade customer service bot template on your screen.
From here, you can easily create a conversation flow for your chatbot by clicking on the ‘Bot Response’ tabs in the chatflow.
This will open a prompt on the screen, where you can add chat responses and quick replies like text, images, and buttons by dragging and dropping the blocks into the prompt.
Once you have done that, just add the bot response and click the ‘Save and Close’ button at the top.
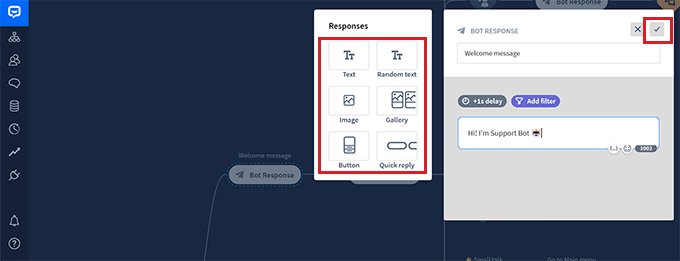
If you want, you can also add custom filters with the chatbot response by clicking on the ‘Add Filter’ button in the prompt.
This will open a dropdown menu where you can pick a filter that will be added to your chatbot’s response, including:
Additionally, you can create specific messages for users in different regions and countries. This can be helpful if you have a large international audience.

After that, you can also select conditional logic for the now-filtered response. The response that you are creating will only be used by the chatbot if the customer that it is interacting with fits the filter.
For example, if you have a multilingual website and want to create a chatbot for different languages, then you can use the ‘Language’ filter.
Once you do that, select the ‘= equals’ option as the condition and then type in the language name.
After that, you can add the response in the language that you chose. In our example, when a user types a query in the chatbot in Italian, the chatbot will show them the Italian response that we created with this filter.
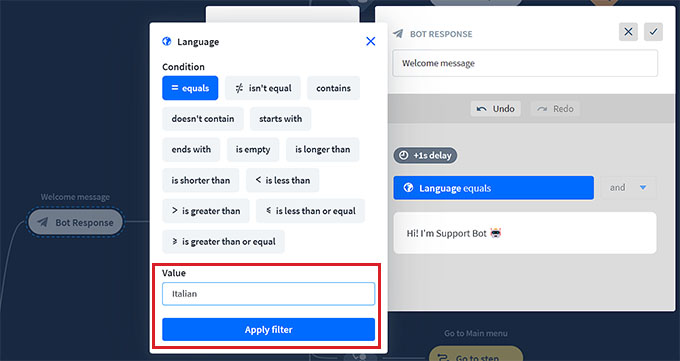
When you have finished adding your filter, just click on ‘Apply filter’.
After that, you can also use the ‘+’ button to add different blocks to your chat flow. This will open a prompt where you can select any block of your choice, including:
You also have the option to send a transcript of a conversation to an email address or tag different chatbot conversations with keywords and phrases.

For example, if you choose the FAQ block, it will open on your screen, where you can now add common customer support questions and their answers.
Your chatbot will then use these responses to answer customer queries on your website.
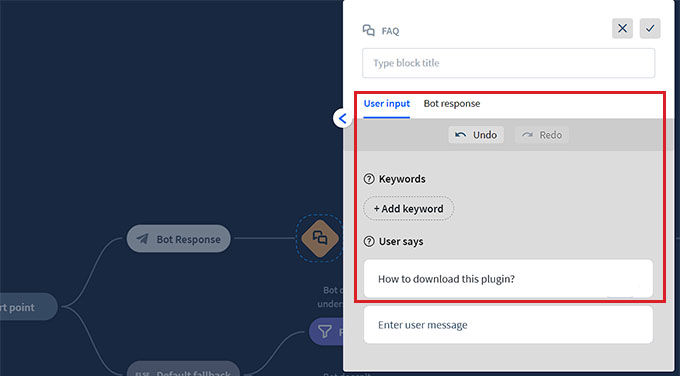
Next, click on the ‘Main Menu’ bot response tab to open the block prompt. Here, you can add buttons for all the services that your chatbot can offer using the Button block.
After that, click on each Button block to open its settings and configure where you want the button to direct the users.
For example, you can allow users to be directed to the FAQs chatbot response that you created by selecting the button type as ‘Go to block’.
Next, select the ‘FAQ’ block from the ‘Go to’ dropdown menu and click the ‘Save Settings’ button.
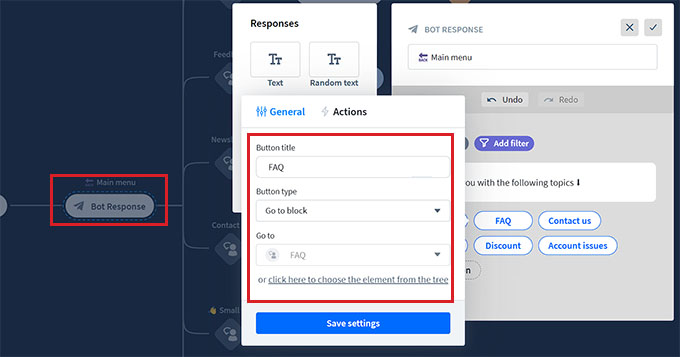
Other than FAQs, you can also create buttons for directing users to your newsletter signup, contact us page, discount offers, and more.
Once you are done, don’t forget to click the ‘Publish’ button at the top to store your settings.
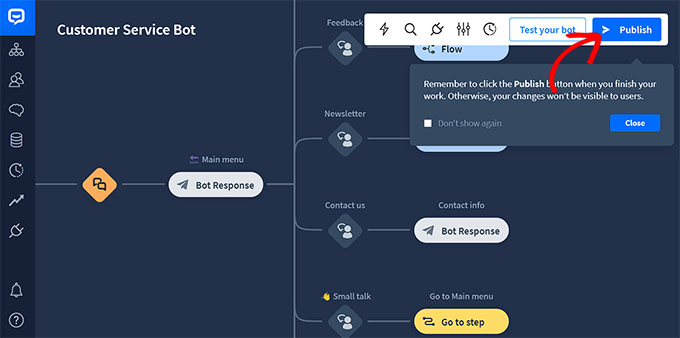
A prompt will now open on your screen, asking you to provide a name for your chatbot.
After entering the details, simply click the ‘Confirm’ button to publish your chatbot.
Next, visit your WordPress dashboard and head over to the ChatBot tab, where you will now notice that the ‘Choose your bot’ section will be visible on the screen.
Note: Keep in mind that it might take 3-4 hours between creating your chatbot and it being visible in your WordPress dashboard.
Now, simply choose the bot that you just created from the dropdown menu.
After that, toggle the ‘Hide chat on mobile’ switch to ‘On’ if you don’t want people visiting your website from their phones to be able to see the chatbot.
You can also toggle the ‘Hide chat for Guest visitors’ to ‘On’ if you want the chatbot to be exclusive for your members only.
Finally, click the ‘Add to Site’ button. Now, you can visit your website to view the chatbot in action.

If you are looking for a free and easy way to build a chatbot, then you can use this method.
HubSpot is an amazing customer relationship management (CRM) system that comes with a suite of tools for sales, customer service, marketing, and content management.
It even lets you create automated conversations with your website visitors with its free chatbot builder.
First, you will need to install and activate the HubSpot plugin on your website. For detailed instructions, you may want to see our beginner’s guide on how to install a WordPress plugin.
Upon activation, you need to visit the HubSpot menu tab from the WordPress admin sidebar and enter your email address to create a HubSpot account.
If you already have one, then just click the ‘Sign In’ link at the bottom.
Once you’ve provided your details and set a password for your new account, HubSpot will ask you about the industry that you work in.
Simply select an industry of your choice from the dropdown menu and click the ‘Next’ button.
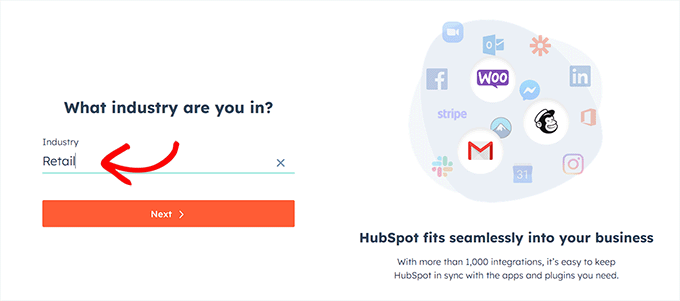
After that, HubSpot will create a new account for you and then ask you to connect it with your WordPress site.
From here, simply click the ‘Connect Website’ button.
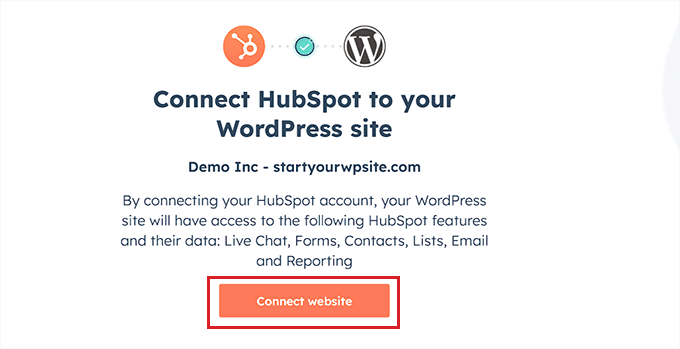
Now, it’s time for you to start creating your chatbot.
To do this, visit the HubSpot » Live Chat page from the WordPress dashboard and click the ‘Create chatflow’ button.
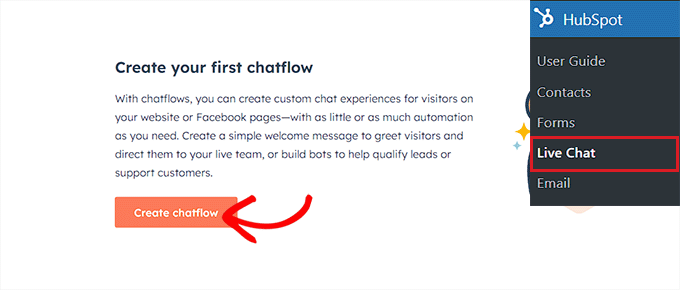
This will take you to the next page, where you can select any of the premade chatbot templates.
By default, HubSpot allows you to create a concierge bot, qualify leads bot, meetings bot, ticket bot, offline bot, or even a chatbot from scratch.
For this tutorial, we will be creating a ‘Tickets bot’.
Just select the chatflow you want to use and then click the ‘Continue in HubSpot’ button to move forward.
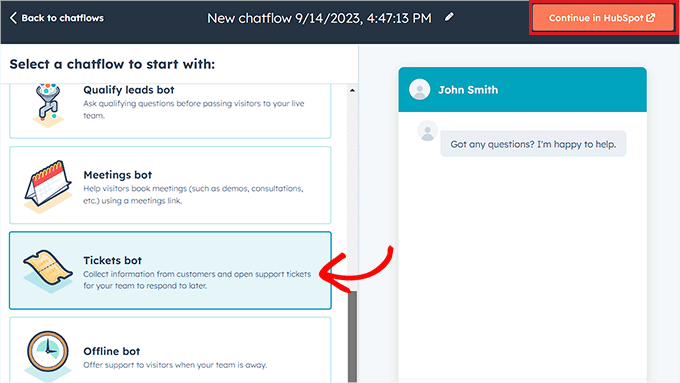
You will then be directed to your HubSpot account, where you will be creating the rest of your chatbot.
From here, click the ‘Next’ button to move ahead.
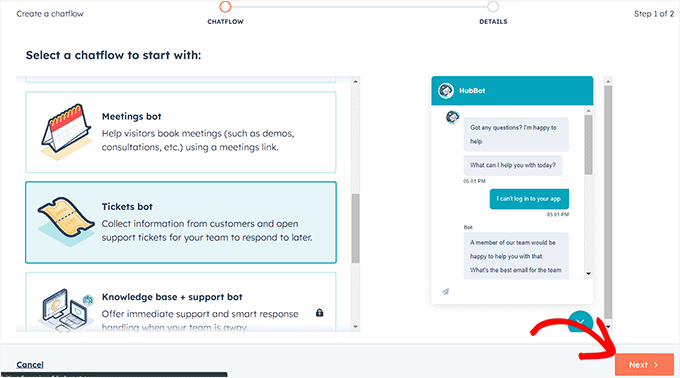
In the next step, you need to select the language for your chatbot from the dropdown menu.
You can leave the other settings as they are and click the ‘Create’ button.
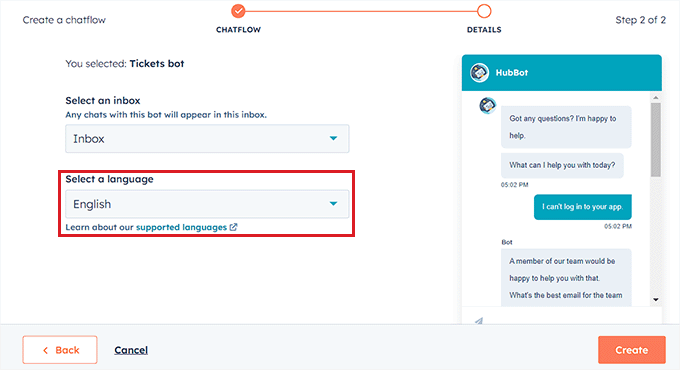
Your template will now open in the chatbot builder, where you can edit the chatflow.
Simply click on the ‘Options’ tab in the bot response and select the ‘Edit’ link.
This will open the action settings in the left column, where you can change the action name and text.
In HubSpot, an action is a step in the chatbot conversation that performs a specific task, like asking questions or sending responses. The first action for your chatbot will be the first question that is sent to the website visitor.
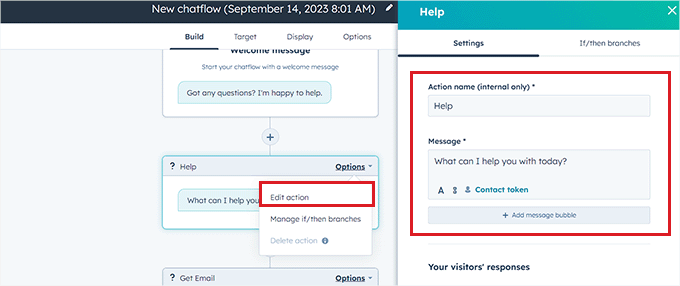
After that, scroll down to the ‘Your visitors’ responses’ section and type all the quick replies that a visitor may potentially give to this question.
For example, a visitor may ask you how to purchase your product, or they might want to report an error that they are facing on your website.
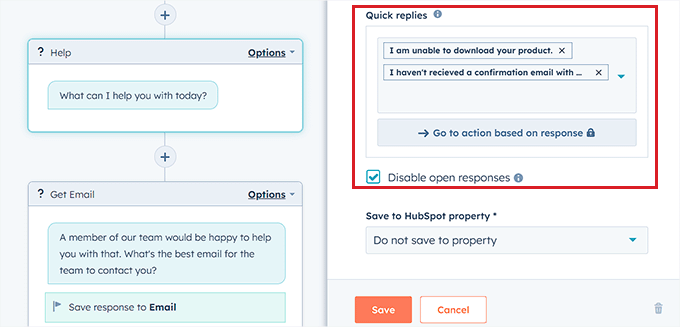
After that, scroll back to the top and switch to the ‘If/then branches’ tab.
From here, you have to select the action the chatbot will take if the customer replies with one of the quick responses that you just added.
For example, if you want the chatbot to open support tickets every time a user is unable to receive a confirmation email with credentials, then select the ‘Create Ticket’ option from the dropdown menu.
After that, just click the ‘Save’ button to store the action settings.
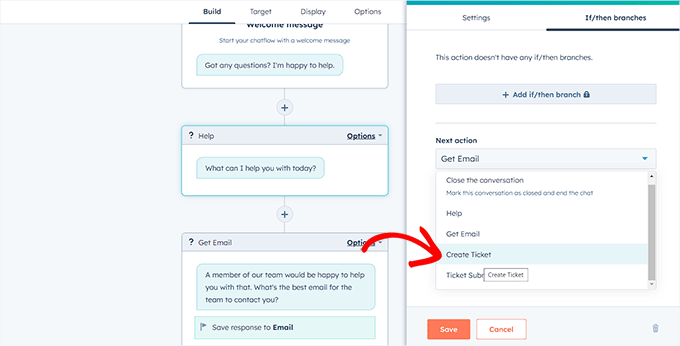
After that, you can leave the rest of the chatflow settings as they are or keep editing the different actions for your chatbot.
Chatbot will now create a support ticket for all the quick responses that you’ve added to the action prompt.
Next, switch to the ‘Target’ tab from the top. Here, you have to choose where the chatbot widget will appear on your website.
You can leave these settings as they are if you want the chatbot to appear on every page of your website.
However, if you want to hide the chatbot on specific pages, then you will have to click the ‘Add exclusion rule’ link. This will open another rule where you can simply add the URL of the page where you want to hide the chatbot in the field on the right.
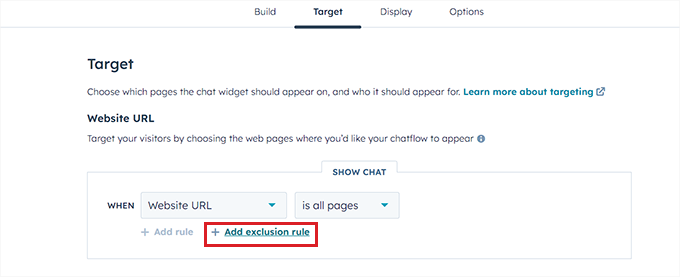
Once you are done, scroll down to the ‘Visitor information and behavior’ section. Here, you can choose the visitors that you want the chatbot to be shown to.
For example, if you only want visitors who are part of your contact list to be able to see the chatbot, then you can choose the ‘Visitor’ option from the left dropdown menu and the ‘Is a contact’ option in the right field.
After that, click the ‘Save’ button and switch to the ‘Display’ tab.

From here, you can upload an avatar image for your chatbot and change its name.
Next, expand the ‘Chat display behavior’ section and choose the chatbot’s default state when the triggers are met.
For example, if you want the bot’s welcome message to appear immediately once someone visits your website, then you can choose the ‘Pop open the welcome message as a prompt’ option.
If you pick ‘Only show the chat launcher’, then visitors will have to click on your chatbot to see its prompts.
However, if you want the chatbot to appear only when a trigger is met, then you can select the third option.
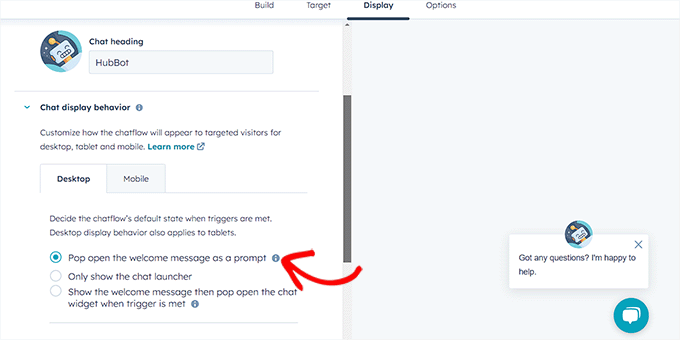
After that, scroll down and choose the trigger for the chatbot appearance.
For instance, if you want the chatbot to be displayed once the visitor is leaving your site, then select the ‘On exit intent’ option.
However, you can also choose the percentage of pages scrolled or minutes spent on your website as triggers.
Next, you can also switch to the ‘Mobile’ tab to configure chat display settings for mobile phones.
Once you have done that, simply click the ‘Save’ button to store your changes.
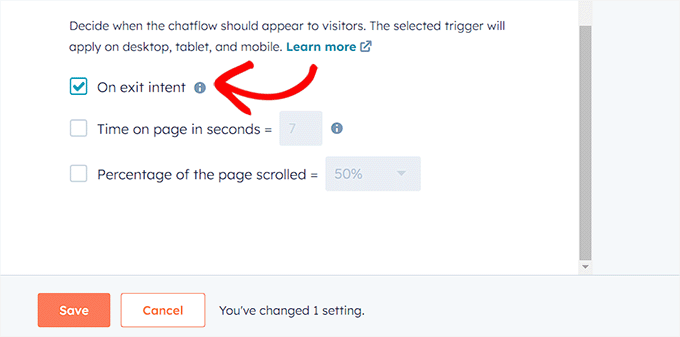
Now, switch to the ‘Options’ tab from the top to configure general settings like delay message text, session timeout, generic error message, bot language, availability, and more.
After that, click the ‘Save’ button to store your settings. Finally, toggle the switch at the top to activate your chatbot on your website.
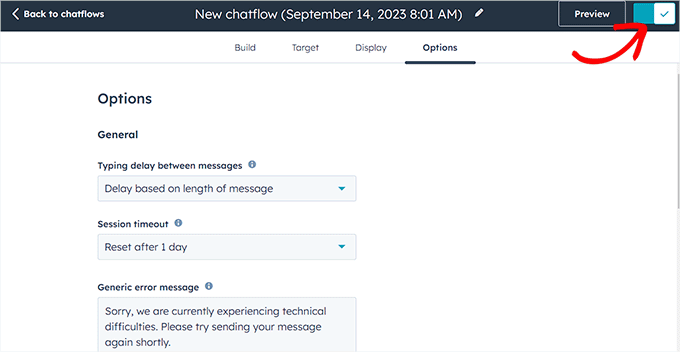
Now, you can visit your WordPress site to see your chatbot in action.
This is what it looked like on our demo website.
Live chat is a communication tool that allows visitors to chat with a member of your customer support team through a chat window on your website.
It is a super popular way to connect with customers and has a satisfaction level of 73%, which is much higher than email, phone, and SMS support.
Adding live chat to your WooCommerce store will allow customers to get help quickly and easily without having to wait on hold or send an email.
This reduces the bounce rate, increases sales, and even gives you a chance to collect feedback from users.
You can easily add this feature to your website using LiveChat, which is the best live chat support software for WordPress.

It comes with pre-made live chat templates, real-time chat, multiple support channels, canned responses, chat transcripts, chat analytics, and so much more.
Plus, it integrates with tools like WooCommerce, HubSpot, ChatBot, Constant Contact, and Mailchimp.
For detailed instructions, you can see our step-by-step tutorial on how to add free live chat in WordPress.
We hope this article helped you learn how to easily add a chatbot in WordPress. You may also want to see our guide on how to optimize the customer journey in WooCommerce and our top picks of the best video chat software for small businesses.
If you liked this article, then please subscribe to our YouTube Channel for WordPress video tutorials. You can also find us on Twitter and Facebook.
The post How to Add a Chatbot in WordPress (Step by Step) first appeared on WPBeginner.
Recently, one of our readers asked us how they can pass payment processing fees to customers in WordPress.
Most payment processors charge additional fees to facilitate a secure transaction process for the buyer and seller. Asking customers to pay the payment processing fees helps you increase your earning by around 3%.
In this article, we will show you how to easily pass payment processing fees to customers in WordPress, step by step.

If you have an online store, then you may have noticed that most payment processors charge you additional per-transaction fees, percentage-based fees, and gateway fees.
For instance, if a user buys a chair from your furniture store for $50 and uses Stripe as a payment method, then you will only get $48.55 in your account. This is because Stripe collects 2.9% + $0.30 per transaction.
Passing this processing fee to customers allows you to receive the entire amount ($50) for your product/service without having to worry about absorbing this fee as a business expense.
Plus, it gives you more control over your product pricing strategy.
It also helps build transparency with customers by adding a separate line for the fees on the checkout page, which can act as a competitive advantage. It will allow you to set lower base prices for your products and attract more customers who are looking for the lowest total cost.
Having said that, let’s see how to easily pass the payment processing fees to customers in WordPress. In this tutorial, we will cover three methods, and you can use the links below to jump to the one of your choice:
WP Simple Pay is the best WordPress Stripe plugin on the market that allows you to accept payments from customers without adding a shopping cart. It comes with premade templates, has a form builder, and lets you add payment processing fees directly to the customer’s bill.
Plus, WP Simple Pay is a great choice if you have a membership site, sell courses online, or sell a single product in your online store.
First, you will need to install and activate the WP Simple Pay plugin. For detailed instructions, see our step-by-step guide on how to install a WordPress plugin.
Note: WP Simple Pay has a free plan. However, you will need to upgrade to the pro version to unlock the fee recovery feature.
Upon activation, a setup wizard will open up on your screen. Here, you must click the ‘Let’s Get Started’ button.

This will take you to the first step, where you have to add your plugin’s license key and click the ‘Activate and Continue’ button.
You will get this information from your account on the WP Simple Pay website.

After that, you will need to connect your Stripe account with WordPress.
Go ahead and click the ‘Connect with Stripe’ button to continue.

Once you do that, you must log in to your Stripe account to connect it with WP Simple Pay and then configure the other setup wizard steps.
For detailed instructions, you can see our tutorial on how to create WordPress forms with payment options.
Now, you can start by visiting the WP Simple Pay » Add New page from the WordPress admin sidebar. This will direct you to the ‘Select a Template’ page where you can choose any template you like.
For this tutorial, we will be creating a simple payment form.

The form builder will now open up on your screen. Here, you have to provide a name and description for the form that you are about to create.
Then, select ‘On-site payment form’ as the form type and switch to the ‘Payment’ tab.

Once you are there, scroll down to the ‘Price Options’ section and simply add an amount for your product or service. You can also pick if you want it to be a one-time or recurring payment.
If you want to add multiple prices, then you can click the ‘Add Price’ button at the top.

After that, scroll down to the ‘Payment Method’ section and check the boxes next to the gateways that you want to add to your payment form.
With WP Simple Pay, you can add KIarna, Affirm, AliPay, debit card, credit card, SEPA Debit, and many more methods.
Once you do that, click the ‘Configure’ link next to the payment option of your choice.

This will open a prompt on the screen, where you have to check the ‘Add an additional fee to payments made with this payment method’ option. Once you do that, you can set a transaction fee percentage for the product that you are selling.
If you don’t configure this setting, then Stripe will automatically add 2.9% of the product price as the fee. Then, click the ‘Update’ button to store your settings.

Now, the payment processing fee will automatically be added to the customer’s bill on the checkout page.
However, if you think that adding a recovery fee without customer consent can damage your reputation, then you can also provide a choice to your customer.
To do this, switch to the ‘Form Fields’ tab. Here, you can add, rearrange, or delete fields in the form according to your liking. For more information, you can see our tutorial on how to accept payments with Stripe in WordPress.
Once you do that, open the ‘Form Fields’ dropdown menu and select the ‘Fee Recovery Toggle’ option. Then, click the ‘Add’ button.
Now, users on your site will have to toggle this switch if they want to pay the payment processing fee themselves.

Next, switch to the ‘Payment Page’ tab and check the ‘Enable a dedicated payment page’ option.
After that, you can now customize your payment form page by adding a permalink, color scheme, image, and footer text.

Once you are done, don’t forget to click the ‘Publish’ button at the top.
Now, simply visit your payment form page to view the fee recovery feature in action.

If you sell digital products like eBooks, PDFs, music, or spreadsheets, then this method is for you.
Easy Digital Downloads is the best WordPress plugin for selling digital products that makes it super easy to pass processing fees to customers using an addon.
First, you will need to install and activate the Easy Digital Downloads plugin. For detailed instructions, see our beginner’s guide on how to install a WordPress plugin.
Note: EDD has a free plan. However, you need the pro version to unlock the ‘Gateway Fees’ extension.
Upon activation, head over to the Downloads » Settings page from the WordPress dashboard to enter your license key.
You can get this information from your account on the Easy Digital Downloads website.

After that, you must set up your store to start selling products. For detailed instructions, you can check out our beginner’s guide on how to sell digital downloads in WordPress.
Once you have done that, visit the Downloads » Extensions page from the WordPress admin sidebar and locate the ‘Gateway Fees’ extension.
Then, click the ‘Install’ button under it.

Upon addon activation, visit the Downloads » Settings » Payments page and switch to the ‘Gateway Fees’ tab.
Here, you can add the payment processing fee that you want to charge your customers next to the ‘Percent fee for Stripe’ or ‘Flat fee for Stripe’ options.
Once you do that, you can add a label that will be displayed on the checkout page to explain the additional fee being charged to the user.
You can configure the gateway for all the payment methods that you have added to your site from this page.

After that, don’t forget to click the ‘Save Changes’ button to store your settings.
You can now visit your WordPress site to view the additional payment processing fee on the checkout page.

If you accept donations or do crowdfunding through your website, then this method is for you.
WP Charitable is a popular WordPress donation plugin that lets you create unlimited fundraising campaigns and comes with a Fee Relief extension to allow users to cover payment processing fees.
For this tutorial, you will need the WP Charitable Plus license to unlock this extension.
First, you will need to install and activate the core Charitable plugin, which is completely free. For detailed instructions, you can see our tutorial on how to install a WordPress plugin.
Next, visit the Charitable » Settings page from the WordPress dashboard to enter your pro plan’s license key and click the ‘Verify Key’ button.
You can find this information in your account on the WP Charitable website.

After that, head over to the Charitable » Addons page from the WordPress admin sidebar and find the ‘Charitable Fee Relief’ extension.
Then, click the ‘Install Addon’ button.

Upon addon activation, you need to go to the Charitable » Settings page and switch to the ‘Extensions’ tab.
Here, you can check the ‘Opt-in checkbox, checked by default’ option as a fee relief mode. This will add a checked box to the donation form for fee recovery. If the user does not want to pay the processing fee, then they will have to uncheck this box.
However, if you don’t want to provide users with an option and automatically add the recovery fee along with the donation amount, then you can check the ‘Automatic opt-in’ option.
After that, you must click the ‘Enable Fee Relief’ button next to the payment gateways to activate fee recovery for payment processing.

Once you do that, you can set a payment processing fee as a combination of a percentage and a fixed amount per donation.
For instance, if PayPal charges 2.9% and $0.30 per transaction, then these are the amounts that you will have to add in the fields.
Once you are done, don’t forget to click the ‘Save Changes’ button to store your settings.

Now, you must start building your website’s fundraising campaign. To do this, visit the Charitable » Add New page from the WordPress dashboard.
Here, you will have to enter a campaign name, after which you will be taken to the ‘Select a Template’ page.
From here, click the ‘Create Campaign’ button under a template of your choice.

This will open the drag-and-drop builder, where you can drag, rearrange, and delete form fields according to your liking.
For example, you can add the ‘Donation Amount’ field and then add some custom amounts that users can choose from in the left column.

Once you do that, you can also add a progress bar, social links, a campaign title, and more from the left sidebar. You can also configure payment gateways by switching to the ‘Payment’ tab.
For more information, you can see our tutorial on how to raise money with crowdfunding in WordPress.

Once you are done, simply change the form status to ‘Publish’ from the dropdown menu in the top right corner of the screen. Then, click the ‘Save’ button at the top to store your settings.
Now, just visit your WordPress site to view the donation form with the fee recovery option.

If you do not want to pass payment processing fees to customers in WordPress, then you should consider accepting ACH payments on your website.
ACH is an electronic bank-to-bank payment made through the Automated Clearing House (ACH) network in the United States. Keep in mind that this method will only work if your business is based in the USA.
Accepting ACH payments can lower your transaction fees a lot as Stripe’s fee for ACH is just 0.8% per transaction compared to its usual 2.9%.
For example, if you have a WooCommerce store and a customer buys some products for $100, then the transaction fee with ACH payments will be only $0.80. On the other hand, payment processing fees using other methods will be $3.20.
You can easily start accepting ACH payments on your website using WP Simple Pay.
Simply install and activate the plugin and then visit the WP Simple Pay » Add New page from your WordPress dashboard. Here, you must choose the ‘ACH Direct Debit Form’ template and create a payment form in the builder.

Once you add the form to your website, you will have to pay a lower transaction fee for users choosing this option as a payment gateway.
For more detailed instructions, you can see our tutorial on how to accept ACH payments in WordPress.
We hope this article helped you learn how to easily pass payment processing fees to customers in WordPress. You may also want to see our beginner’s guide on how to easily accept credit card payments on your WordPress site and our top picks for the best WordPress credit card processing plugins.
If you liked this article, then please subscribe to our YouTube Channel for WordPress video tutorials. You can also find us on Twitter and Facebook.
The post How to Pass Payment Processing Fees to Customers in WordPress first appeared on WPBeginner.
Do you want to use Google search on your WordPress site?
By default, WordPress comes with a built-in search feature, but it is not very good. By adding Google Search in its place, you can display more accurate and relevant search results to visitors.
In this article, we will show you how to easily add Google Search to a WordPress site.

The default WordPress search feature is not very useful and often fails to find relevant results to user queries. This forces many site owners to look for alternatives.
You can use a popular WordPress search plugin. However, the problem is that you still have to manage that plugin, and it will have an impact on your server resources.
On the other hand, you can use Google’s reliable and powerful search feature instead. It is free, allows you to limit the search to your sites only, and can be run from your WordPress site.
Plus, the Google search is fast, users already trust the brand, and you will not have to maintain or update it. You can even allow users to search external websites on Google if needed.
Having said that, let’s see how you can easily add a Google site search to your WordPress site.
You can easily add Google Search to your WordPress site by visiting the Google Programmable Search Engine website.
From here, click the ‘Get Started’ button.

This will direct you to the ‘Create a new search engine’ page, where you must add a name for the search form you are about to create.
Next, select the ‘Search specific sites or pages’ option in the ‘What to search?’ section and add your WordPress site’s URL.
Now, the Googe Site Search will only index the content available on your website. However, if you want Google to show search results from other websites as well, then you can choose the ‘Search the entire web’ option.

Next, scroll down and toggle on the ‘Image Search’ option to allow your Google Search form to index images on your website. We recommend this option if you sell photos online, have a photography website, or run a travel blog.
After that, you can also toggle on the ‘Safe Search’ switch so that users won’t be shown inappropriate results for their queries.
Once you are done, click the ‘Create’ button.

Google will now generate your search engine ID code for you.
From here, simply copy the code and paste it into a notepad app or plain text editor.

Now, you must visit your WordPress dashboard and edit your theme files to add the search to your site’s <body>. However, this can be risky, and the smallest error can break your website.
That is why we recommend using WPCode instead. It is the best WordPress code snippets plugin on the market that makes it safe and easy to add custom code.
First, you need to install and activate the WPCode plugin. For detailed instructions, see our beginner’s guide on how to install a WordPress plugin.
Note: WPCode has a free plan that you can use for this tutorial. However, upgrading to the pro version will give you access to more features like smart conditional logic, a cloud library of code snippets, and more.
Upon activation, visit the Code Snippets » + Add Snippet page from the WordPress admin sidebar. Here, click the ‘Use Snippet’ button under the ‘Add Your Custom Code (New Snippet)’ option.
This will take you to the ‘Create Custom Snippet’ page, where you can type any name you like for the snippet. Then, select ‘Universal Snippet’ as the code type from the dropdown menu on the right.
Once you do that, simply paste the Google Search Engine ID into the ‘Code Preview’ box.

Then, scroll down to the ‘Insertion’ section and select the ‘Auto Insert’ mode. The Google Search form will be automatically added to your site upon activation.
After that, you can expand the ‘Location’ dropdown menu to choose where you want to display your search box.
For example, if you want to display the search form at the top of all your pages and posts, then you can select the ‘Insert Before Post’ option.

Next, scroll back to the top and toggle the ‘Inactive’ switch to ‘Active’.
Finally, click the ‘Save Snippet’ button to store your settings.

You have successfully added a Google Site search form manually.
You can now visit your WordPress blog to see it in action.

If you find it difficult to add Google Site Search to your website or you are looking for an alternative, then you can use SearchWP for internal search.
It is the best WordPress search plugin on the market that automatically replaces the default search form and allows users to find anything they need on your site.

SearchWP is used by over 30,000 websites and lets you create a custom relevance scale to adjust the search algorithm.
You can also make any part of your site searchable including PDFs, custom post types, media, comments, custom fields, WooCommerce products, and more.
If you have a multilingual site, then you can also create a multilingual search with the plugin.

However, you must keep in mind that, unlike Google Search, the plugin can only index and show results for content available on your website.
For more details, you can see our tutorial on how to improve WordPress search with SearchWP.
We hope this article helped you learn how to easily add Google Search to a WordPress site. You may also want to see our beginner’s guide on how to get my WordPress site listed on Google and our tips for using Google Search Console to grow website traffic.
If you liked this article, then please subscribe to our YouTube Channel for WordPress video tutorials. You can also find us on Twitter and Facebook.
The post How to Add Google Search in a WordPress Site (The Easy Way) first appeared on WPBeginner.