Using Composer With WordPress

Using Composer With WordPress

Using Composer With WordPress

Leonardo Losoviz

WordPress is getting modernized. The recent inclusion of JavaScript-based Gutenberg as part of the core has added modern capabilities for building sites on the frontend, and the upcoming bump of PHP’s minimum version, from the current 5.2.4 to 5.6 in April 2019 and 7.0 in December 2019, will make available a myriad of new features to build powerful sites.

In my previous article on Smashing in which I identified the PHP features newly available to WordPress, I argued that the time is ripe to make components the basic unit for building functionalities in WordPress. On one side, Gutenberg already makes the block (which is a high-level component) the basic unit to build the webpage on the frontend; on the other side, by bumping up the required minimum version of PHP, the WordPress backend has access to the whole collection of PHP’s Object-Oriented Programming features (such as classes and objects, interfaces, traits and namespaces), which are all part of the toolset to think/code in components.

So, why components? What’s so great about them? A “component” is not an implementation (such as a React component), but instead, it’s a concept: It represents the act of encapsulating properties inside objects, and grouping objects together into a package which solves a specific problem. Components can be implemented for both the frontend (like those coded through JavaScript libraries such as React or Vue, or CSS component libraries such as Bootstrap) and the backend.

We can use already-created components and customize them for our projects, so we will boost our productivity by not having to reinvent the wheel each single time, and because of their focus on solving a specific issue and being naturally decoupled from the application, they can be tested and bug-fixed very easily, thus making the application more maintainable in the long term.

The concept of components can be employed for different uses, so we need to make sure we are talking about the same use case. In a previous article, I described how to componentize a website; the goal was to transform the webpage into a series of components, wrapping each other from a single topmost component all the way down to the most basic components (to render the layout). In that case, the use case for the component is for rendering — similar to a React component but coded in the backend. In this article, though, the use case for components is importing and managing functionality into the application.

Introduction To Composer And Packagist

To import and manage own and third-party components into our PHP projects, we can rely on the PHP-dependency manager Composer which by default retrieves packages from the PHP package repository Packagist (where a package is essentially a directory containing PHP code). With their ease of use and exceptional features, Composer + Packagist have become key tools for establishing the foundations of PHP-based applications.

Composer allows to declare the libraries the project depends on and it will manage (install/update) them. It works recursively: libraries depended-upon by dependencies will be imported to the project and managed too. Composer has a mechanism to resolve conflicts: If two different libraries depend on a different version of a same library, Composer will try to find a version that is compatible with both requirements, or raise an error if not possible.

To use Composer, the project simply needs a composer.json file in its root folder. This file defines the dependencies of the project (each for a specific version constraint based on semantic versioning) and may contain other metadata as well. For instance, the following composer.json file makes a project require nesbot/carbon, a library providing an extension for DateTime, for the latest patch of its version 2.12:

{
    "require": {
        "nesbot/carbon": "2.12.*"
    }
}

We can edit this file manually, or it can be created/updated through commands. For the case above, we simply open a terminal window, head to the project’s root directory, and type:

composer require "nesbot/carbon"

This command will search for the required library in Packagist (which is found here) and add its latest version as a dependency on the existing composer.json file. (If this file doesn’t yet exist, it will first create it.) Then, we can import the dependencies into the project, which are by default added under the vendor/ folder, by simply executing:

composer install

Whenever a dependency is updated, for instance nesbot/carbon released version 2.12.1 and the currently installed one is 2.12.0, then Composer will take care of importing the corresponding library by executing:

composer update

If we are using Git, we only have to specify the vendor/ folder on the .gitignore file to not commit the project dependencies under version control, making it a breeze to keep our project’s code thoroughly decoupled from external libraries.

Composer offers plenty of additional features, which are properly described in the documentation. However, already in its most basic use, Composer gives developers unlimited power for managing the project’s dependencies.

Introduction To WPackagist

Similar to Packagist, WPackagist is a PHP package repository. However, it comes with one particularity: It contains all the themes and plugins hosted on the WordPress plugin and theme directories, making them available to be managed through Composer.

To use WPackagist, our composer.json file must include the following information:

{
    "repositories":[
        {
            "type":"composer",
            "url":"https://wpackagist.org"
        }
    ]
}

Then, any theme and plugin can be imported to the project by using "wpackagist-theme" and "wpackagist-plugin" respectively as the vendor name, and the slug of the theme or plugin under the WordPress directory (such as "akismet" in https://wordpress.org/plugins/akismet/) as the package name. Because themes do not have a trunk version, then the theme’s version constraint is recommended to be “*”:

{
    "require": {
        "wpackagist-plugin/akismet":"^4.1",
        "wpackagist-plugin/bbpress":">=2.5.12",
        "wpackagist-theme/twentynineteen":"*"
    }
}

Packages available in WPackagist have been given the type “wordpress-plugin” or “wordpress-theme”. As a consequence, after running composer update, instead of installing the corresponding themes and plugins under the default folder vendor/, these will be installed where WordPress expects them: under folders wp-content/themes/ and wp-content/plugins/ respectively.

Possibilities And Limitations Of Using WordPress And Composer Together

So far, so good: Composer makes it a breeze to manage a PHP project’s dependencies. However, WordPress’ core hasn’t adopted it as its dependency management tool of choice, primarily because WordPress is a legacy application that was never designed to be used with Composer, and the community can’t agree if WordPress should be considered the site or a site’s dependency, and integrating these approaches requires hacks.

In this concern, WordPress is outperformed by newer frameworks which could incorporate Composer as part of their architecture. For instance, Laravel underwent a major rewriting in 2013 to establish Composer as an application-level package manager. As a consequence, WordPress’ core still does not include the composer.json file required to manage WordPress as a Composer dependency.

Knowing that WordPress can’t be natively managed through Composer, let’s explore the ways such support can be added, and what roadblocks we encounter in each case.

There are three basic ways in which WordPress and Composer can work together:

  1. Manage dependencies when developing a theme or a plugin;
  2. Manage themes and plugins on a site;
  3. Manage the site completely (including its themes, plugins and WordPress’ core).

And there are two basic situations concerning who will have access to the software (a theme or plugin, or the site):

  1. The developer can have absolute control of how the software will be updated, e.g. by managing the site for the client, or providing training on how to do it;
  2. The developer doesn’t have absolute control of the admin user experience, e.g. by releasing themes or plugins through the WordPress directory, which will be used by an unknown party.

From the combination of these variables, we will have more or less freedom in how deep we can integrate WordPress and Composer together.

From a philosophical aspect concerning the objective and target group of each tool, while Composer empowers developers, WordPress focuses primarily on the needs of the end users first, and only then on the needs of the developers. This situation is not self-contradictory: For instance, a developer can create and launch the website using Composer, and then hand the site over to the end user who (from that moment on) will use the standard procedures for installing themes and plugins — bypassing Composer. However, then the site and its composer.json file fall out of sync, and the project can’t be managed reliably through Composer any longer: Manually deleting all plugins from the wp-content/plugins/ folder and executing composer update will not re-download those plugins added by the end user.

The alternative to keeping the project in sync would be to ask the user to install themes and plugins through Composer. However, this approach goes against WordPress’ philosophy: Asking the end user to execute a command such as composer install to install the dependencies from a theme or plugin adds friction, and WordPress can’t expect every user to be able to execute this task, as simple as it may be. So this approach can’t be the default; instead, it can be used only if we have absolute control of the user experience under wp-admin/, such as when building a site for our own client and providing training on how to update the site.

The default approach, which handles the case when the party using the software is unknown, is to release themes and plugins with all of their dependencies bundled in. This implies that the dependencies must also be uploaded to WordPress’ plugin and theme subversion repositories, defeating the purpose of Composer. Following this approach, developers are still able to use Composer for development, however, not for releasing the software.

This approach is not failsafe either: If two different plugins bundle different versions of a same library which are incompatible with each other, and these two plugins are installed on the same site, it could cause the site to malfunction. A solution to this issue is to modify the dependencies’ namespace to some custom namespace, which ensures that different versions of the same library, by having different namespaces, are treated as different libraries. This can be achieved through a custom script or through Mozart, a library which composes all dependencies as a package inside a WordPress plugin.

For managing the site completely, Composer must install WordPress under a subdirectory as to be able to install and update WordPress’ core without affecting other libraries, hence the setup must consider WordPress as a site’s dependency and not the site itself. (Composer doesn’t take a stance: This decision is for the practical purpose of being able to use the tool; from a theoretical perspective, we can still consider WordPress to be the site.) Because WordPress can be installed in a subdirectory, this doesn’t represent a technical issue. However, WordPress is by default installed on the root folder, and installing it in a subdirectory involves a conscious decision taken by the user.

To make it easier to completely manage WordPress with Composer, several projects have taken the stance of installing WordPress in a subfolder and providing an opinionated composer.json file with a setup that works well: core contributor John P. Bloch provides a mirror of WordPress’ core, and Roots provides a WordPress boilerplate called Bedrock. I will describe how to use each of these two projects in the sections below.

Managing The Whole WordPress Site Through John P. Bloch’s Mirror Of WordPress Core

I have followed Andrey “Rarst” Savchenko’s recipe for creating the whole site’s Composer package, which makes use of John P. Bloch’s mirror of WordPress’ core. Following, I will reproduce his method, adding some extra information and mentioning the gotchas I found along the way.

First, create a composer.json file with the following content in the root folder of your project:

{
    "type": "project",
    "config": {
        "vendor-dir": "content/vendor"
    },
    "extra": {
        "wordpress-install-dir": "wp"
    },
    "require": {
        "johnpbloch/wordpress": ">=5.1"
    }
}

Through this configuration, Composer will install WordPress 5.1 under folder "wp", and dependencies will be installed under folder "content/vendor". Then head to the project’s root folder in terminal and execute the following command for Composer to do its magic and install all dependencies, including WordPress:

composer install --prefer-dist

Let’s next add a couple of plugins and the theme, for which we must also add WPackagist as a repository, and let’s configure these to be installed under "content/plugins" and "content/themes" respectively. Because these are not the default locations expected by WordPress, we will later on need to tell WordPress where to find them through constant WP_CONTENT_DIR.

Note: WordPress’ core includes by default a few themes and plugins under folders "wp/wp-content/themes" and "wp/wp-content/plugins", however, these will not be accessed.

Add the following content to composer.json, in addition to the previous one:

{
    "repositories": [
        {
            "type": "composer",
            "url" : "https://wpackagist.org"
        }
    ],
    "require": {
        "wpackagist-plugin/wp-super-cache": "1.6.*",
        "wpackagist-plugin/bbpress": "2.5.*",
        "wpackagist-theme/twentynineteen": "*"
    },
    "extra": {
        "installer-paths": {
            "content/plugins/{$name}/": ["type:wordpress-plugin"],
            "content/themes/{$name}/": ["type:wordpress-theme"]
        }
    }
}

And then execute in terminal:

composer update --prefer-dist

Hallelujah! The theme and plugins have been installed! Since all dependencies are distributed across folders wp, content/vendors, content/plugins and content/themes, we can easily ignore these when committing our project under version control through Git. For this, create a .gitignore file with this content:

wp/
content/vendor/
content/themes/
content/plugins/

Note: We could also directly ignore folder content/, which will already ignore all media files under content/uploads/ and files generated by plugins, which most likely must not go under version control.

There are a few things left to do before we can access the site. First, duplicate the wp/wp-config-sample.php file into wp-config.php (and add a line with wp-config.php to the .gitignore file to avoid committing it, since this file contains environment information), and edit it with the usual information required by WordPress (database information and secret keys and salts). Then, add the following lines at the top of wp-config.php, which will load Composer’s autoloader and will set constant WP_CONTENT_DIR to folder content/:

// Load Composer’s autoloader
require_once (__DIR__.'/content/vendor/autoload.php');

// Move the location of the content dir
define('WP_CONTENT_DIR', dirname(__FILE__).'/content');

By default, WordPress sets constant WP_CONSTANT_URL with value get_option('siteurl').'/wp-content'. Because we have changed the content directory from the default "wp-content" to "content", we must also set the new value for WP_CONSTANT_URL. To do this, we can’t reference function get_option since it hasn’t been defined yet, so we must either hardcode the domain or, possibly better, we can retrieve it from $_SERVER like this:

$s = empty($_SERVER["HTTPS"]) ? '' : ($_SERVER["HTTPS"] == "on") ? "s" : "";
$sp = strtolower($_SERVER["SERVER_PROTOCOL"]);
$protocol = substr($sp, 0, strpos($sp, "/")) . $s;
$port = ($_SERVER["SERVER_PORT"] == "80") ? "" : (":".$_SERVER["SERVER_PORT"]);
define('WP_CONTENT_URL', $protocol."://".$_SERVER[’SERVER_NAME'].$port.'/content');

We can now access the site on the browser under domain.com/wp/, and proceed to install WordPress. Once the installation is complete, we log into the Dashboard and activate the theme and plugins.

Finally, because WordPress was installed under subdirectory wp, the URL will contain path “/wp” when accessing the site. Let’s remove that (not for the admin side though, which by being accessed under /wp/wp-admin/ adds an extra level of security to the site).

The documentation proposes two methods to do this: with or without URL change. I followed both of them, and found the without URL change a bit unsatisfying because it requires specifying the domain in the .htaccess file, thus mixing application code and configuration information together. Hence, I’ll describe the method with URL change.

First, head to “General Settings” which you’ll find under domain.com/wp/wp-admin/options-general.php and remove the “/wp” bit from the “Site Address (URL)” value and save. After doing so, the site will be momentarily broken: browsing the homepage will list the contents of the directory, and browsing a blog post will return a 404. However, don’t panic, this will be fixed in the next step.

Next, we copy the index.php file to the root folder, and edit this new file, adding “wp/” to the path of the required file, like this:

/** Loads the WordPress Environment and Template */
require( dirname( __FILE__ ) . '/wp/wp-blog-header.php' );

We are done! We can now access our site in the browser under domain.com:
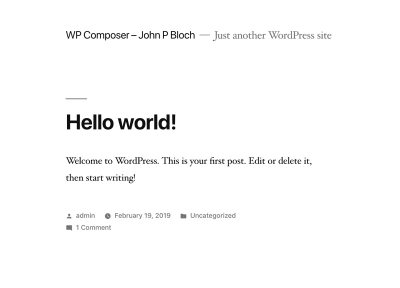
WordPress site
WordPress site successfully installed through Composer (Large preview)

Even though it has downloaded the whole WordPress core codebase and several libraries, our project itself involves only six files from which only five need to be committed to Git:

  1. .gitignore
  2. composer.json
  3. composer.lock
    This file is generated automatically by Composer, containing the versions of all installed dependencies.
  4. index.php
    This file is created manually.
  5. .htaccess
    This file is automatically created by WordPress, so we could avoid committing it, however, we may soon customize it for the application, in which case it requires committing.

The remaining sixth file is wp-config.php which must not be committed since it contains environment information.

Not bad!

The process went pretty smoothly, however, it could be improved if the following issues are dealt better:

  1. Some application code is not committed under version control.
    Since it contains environment information, the wp-config.php file must not be committed to Git, instead requiring to maintain a different version of this file for each environment. However, we also added a line of code to load Composer’s autoloader in this file, which will need to be replicated for all versions of this file across all environments.
  2. The installation process is not fully automated.
    After installing the dependencies through Composer, we must still install WordPress through its standard procedure, log-in to the Dashboard and change the site URL to not contain “wp/”. Hence, the installation process is slightly fragmented, involving both a script and a human operator.

Let’s see next how Bedrock fares for the same task.

Managing The Whole WordPress Site Through Bedrock

Bedrock is a WordPress boilerplate with an improved folder structure, which looks like this:

├── composer.json
├── config
│   ├── application.php
│   └── environments
│       ├── development.php
│       ├── staging.php
│       └── production.php
├── vendor
└── web
    ├── app
    │   ├── mu-plugins
    │   ├── plugins
    │   ├── themes
    │   └── uploads
    ├── wp-config.php
    ├── index.php
    └── wp

The people behind Roots chose this folder structure in order to make WordPress embrace the Twelve Factor App, and they elaborate how this is accomplished through a series of blog posts. This folder structure can be considered an improvement over the standard WordPress one on the following accounts:

  • It adds support for Composer by moving WordPress’ core out of the root folder and into folder web/wp;
  • It enhances security, because the configuration files containing the database information are not stored within folder web, which is set as the web server’s document root (the security threat is that, if the web server goes down, there would be no protection to block access to the configuration files);
  • The folder wp-content has been renamed as “app”, which is a more standard name since it is used by other frameworks such as Symfony and Rails, and to better reflect the contents of this folder.

Bedrock also introduces different config files for different environments (development, staging, production), and it cleanly decouples the configuration information from code through library PHP dotenv, which loads environment variables from a .env file which looks like this:

DB_NAME=database_name
DB_USER=database_user
DB_PASSWORD=database_password

# Optionally, you can use a data source name (DSN)
# When using a DSN, you can remove the DB_NAME, DB_USER, DB_PASSWORD, and DB_HOST variables
# DATABASE_URL=mysql://database_user:database_password@database_host:database_port/database_name

# Optional variables
# DB_HOST=localhost
# DB_PREFIX=wp_

WP_ENV=development
WP_HOME=http://example.com
WP_SITEURL=${WP_HOME}/wp

# Generate your keys here: https://roots.io/salts.html
AUTH_KEY='generateme'
SECURE_AUTH_KEY='generateme'
LOGGED_IN_KEY='generateme'
NONCE_KEY='generateme'
AUTH_SALT='generateme'
SECURE_AUTH_SALT='generateme'
LOGGED_IN_SALT='generateme'
NONCE_SALT='generateme'

Let’s proceed to install Bedrock, following their instructions. First create a project like this:

composer create-project "roots/bedrock"

This command will bootstrap the Bedrock project into a new folder “bedrock”, setting up the folder structure, installing all the initial dependencies, and creating an .env file in the root folder which must contain the site’s configuration. We must then edit the .env file to add the database configuration and secret keys and salts, as would normally be required in wp-config.php file, and also to indicate which is the environment (development, staging, production) and the site’s domain.

Next, we can already add themes and plugins. Bedrock comes with themes twentyten to twentynineteen shipped by default under folder web/wp/wp-content/themes, but when adding more themes through Composer these are installed under web/app/themes. This is not a problem, because WordPress can register more than one directory to store themes through function register_theme_directory.

Bedrock includes the WPackagist information in the composer.json file, so we can already install themes and plugins from this repository. To do so, simply step on the root folder of the project and execute the composer require command for each theme and plugin to install (this command already installs the dependency, so there is no need to execute composer update):

cd bedroot
composer require "wpackagist-theme/zakra"
composer require "wpackagist-plugin/akismet":"^4.1"
composer require "wpackagist-plugin/bbpress":">=2.5.12"

The last step is to configure the web server, setting the document root to the full path for the web folder. After this is done, heading to domain.com in the browser we are happily greeted by WordPress installation screen. Once the installation is complete, we can access the WordPress admin under domain.com/wp/wp-admin and activate the installed theme and plugins, and the site is accessible under domain.com. Success!

Installing Bedrock was pretty smooth. In addition, Bedrock does a better job at not mixing the application code with environment information in the same file, so the issue concerning application code not being committed under version control that we got with the previous method doesn’t happen here.

Conclusion

With the launch of Gutenberg and the upcoming bumping up of PHP’s minimum required version, WordPress has entered an era of modernization which provides a wonderful opportunity to rethink how we build WordPress sites to make the most out of newer tools and technologies. Composer, Packagist, and WPackagist are such tools which can help us produce better WordPress code, with an emphasis on reusable components to produce modular applications which are easy to test and bugfix.

First released in 2012, Composer is not precisely what we would call “new” software, however, it has not been incorporated to WordPress’ core due to a few incompatibilities between WordPress’ architecture and Composer’s requirements. This issue has been an ongoing source of frustration for many members of the WordPress development community, who assert that the integration of Composer into WordPress will enhance creating and releasing software for WordPress. Fortunately, we don’t need to wait until this issue is resolved since several actors took the matter into their own hands to provide a solution.

In this article, we reviewed two projects which provide an integration between WordPress and Composer: manually setting our composer.json file depending on John P. Bloch’s mirror of WordPress’ core, and Bedrock by Roots. We saw how these two alternatives, which offer a different amount of freedom to shape the project’s folder structure, and which are more or less smooth during the installation process, can succeed at fulfilling our requirement of completely managing a WordPress site, including the installation of the core, themes, and plugins.

If you have any experience using WordPress and Composer together, either through any of the described two projects or any other one, I would love to see your opinion in the comments below.

I would like to thank Andrey “Rarst” Savchenko, who reviewed this article and provided invaluable feedback.

Further Reading on SmashingMag:

Smashing Editorial (rb, ra, il)

Improving WordPress Code With Modern PHP

Improving WordPress Code With Modern PHP

Improving WordPress Code With Modern PHP

Leonardo Losoviz

WordPress was born fifteen years ago, and because it has historically preserved backwards compatibility, newer versions of its code couldn’t make full use of the latest capabilities offered by the newer versions of PHP. While the latest version of PHP is 7.3.2, WordPress still offers support up to PHP 5.2.4.

But those days will soon be over! WordPress will be upgrading its minimum PHP version support, bumping up to PHP 5.6 in April 2019, and PHP 7 in December 2019 (if everything goes according to plan). We can then finally start using PHP’s imperative programming capabilities without fear of breaking our clients’ sites. Hurray!

Because WordPress’ fifteen years of functional code have influenced how developers have built with WordPress, our sites, themes and plugins may be littered with less-than-optimal code that can gladly receive an upgrade.

This article is composed of two parts:

  1. Most relevant new features
    Further features have been added to PHP versions 5.3, 5.4, 5.5, 5.6 and 7.0 (notice that there is no PHP 6) and we’ll explore the most relevant ones.
  2. Building better software
    We’ll take a closer look through these features and how they are able to help us build better software.

Let’s start by exploring PHP’s “new” features.

Classes, OOP, SOLID And Design Patterns

Classes and objects were added to PHP 5, so WordPress already makes use of these features, however, not very extensively or comprehensively: The paradigm of coding in WordPress is mostly functional programming (performing computations by calling functions devoid of application state) instead of object-oriented programming (OOP) (performing computations by manipulating objects’ state). Hence I also describe classes and objects and how to use them through OOP.

OOP is ideal for producing modular applications: Classes allow the creation of components, each of which can implement a specific functionality and interact with other components, and can provide customization through its encapsulated properties and inheritance, enabling a high degree of code reusability. As a consequence, the application is cheaper to test and maintain, since individual features can be isolated from the application and dealt with on their own; there is also a boost of productivity since the developer can use already-developed components and avoid reinventing the wheel for each application.

A class has properties and functions, which can be given visibility by usingprivate (accessible only from within the defining class), protected (accessible from within the defining class and its ancestor and inheriting classes) and public (accessible from everywhere). From within a function, we can access the class’ properties by prepending their names with $this->:

class Person {

  protected $name;
  
  public function __construct($name) {
    $this->name = $name;
  }

  public function getIntroduction() {
    return sprintf(
      __('My name is %s'),
      $this->name
    );
  }
}

A class is instantiated into an object through the new keyword, after which we can access its properties and functions through ->:

$person = new Person('Pedro');
echo $person->getIntroduction(); 
// This prints "My name is Pedro"

An inheriting class can override the public and protected functions from its ancestor classes, and access the ancestor functions by prepending them with parent:::

class WorkerPerson extends Person {

  protected $occupation;
  
  public function __construct($name, $occupation) {

    parent::__construct($name);
    $this->occupation = $occupation;
  }

  public function getIntroduction() {
    return sprintf(
      __('%s and my occupation is %s'),
      parent::getIntroduction(),
      $this->occupation
    );
  }
}

$worker = new WorkerPerson('Pedro', 'web development');
echo $worker->getIntroduction();
// This prints "My name is Pedro and my occupation is web development"

A method can be made abstract, meaning that it must be implemented by an inheriting class. A class containing an abstract method must be made abstract itself, meaning that it cannot instantiated; only the class implementing the abstract method can be instantiated:

abstract class Person {
  
  abstract public function getName();

  public function getIntroduction() {
    return sprintf(
      __('My name is %s'),
      $this->getName()
    );
  }
}
// Person cannot be instantiated

class Manuel extends Person {
  
  public function getName() {
    return 'Manuel';
  }
}

// Manuel can be instantiated
$manuel = new Manuel();

Classes can also define static methods and properties, which live under the class itself and not under an instantiation of the class as an object. These are accessed through self:: from within the class, and through the name of the class + :: from outside it:

class Factory {

  protected static $instances = [];
  public static function registerInstance($handle, $instance) {
    self::$instances[$handle] = $instance;
  }
  public static function getInstance($handle) {
    return self::$instances[$handle];
  }
}

$engine = Factory::getInstance('Engine');

To make the most out of OOP, we can use the SOLID principles to establish a sound yet easily customizable foundation for the application, and design patterns to solve specific problems in a tried-and-tested way. Design patterns are standardized and well documented, enabling developers to understand how different components in the application relate to each other, and provide a way to structure the application in an orderly fashion which helps avoid the use of global variables (such as global $wpdb) that pollute the global environment.

Namespaces

Namespaces were added to PHP 5.3, hence they are currently missing altogether from the WordPress core.

Namespaces allow organizing the codebase structurally to avoid conflicts when different items have the same name — in a fashion similar to operating system directories which allow to have different files with the same name as long as they are stored in different directories. Namespaces do the same encapsulation trick for PHP items (such as classes, traits, and interfaces) avoiding collisions when different items have the same name by placing them on different namespaces.

Namespaces are a must when interacting with third-party libraries since we can’t control how their items will be named, leading to potential collisions when using standard names such as “File”, “Logger” or “Uploader” for our items. Moreover, even within a single project, namespaces prevent class names from becoming extremely long as to avoid clashes with other classes, which could result in names such as “MyProject_Controller_FileUpload”.

Namespaces are defined using the keyword namespace (placed on the line immediately after the opening <?php) and can span several levels or subnamespaces (similar to having several subdirectories where placing a file), which are separated using a \:

<?php
namespace CoolSoft\ImageResizer\Controllers;

class ImageUpload {

}

To access the above class, we need to fully qualify its name including its namespace (and starting with \):

$imageUpload = new \CoolSoft\ImageResizer\Controllers\ImageUpload();

Or we can also import the class into the current context, after which we can reference the class by its name directly:

use CoolSoft\ImageResizer\Controllers\ImageUpload;
$imageUpload = new ImageUpload();

By naming namespaces following established conventions, we can get additional benefits. For instance, by following the PHP Standards Recommendation PSR-4, the application can use Composer’s autoloading mechanism for loading files, thus decreasing complexity and adding frictionless interoperability among dependencies. This convention establishes to include the vendor name (e.g. the company’s name) as the top subnamespace, optionally followed by the package name, and only then followed by an internal structure in which each subnamespace corresponds to a directory with the same name. The result maps 1 to 1 the physical location of the file in the drive with the namespace of the element defined in the file.

Traits

Traits were added to PHP 5.4, hence they are currently missing altogether from the WordPress core.

PHP supports single inheritance, so a subclass is derived from a single parent class, and not from multiple ones. Hence, classes that do not extend from one another can’t reuse code through class inheritance. Traits is a mechanism that enables horizontal composition of behavior, making it possible to reuse code among classes which live in different class hierarchies.

A trait is similar to a class, however, it can’t be instantiated on its own. Instead, the code defined inside a trait can be thought of as being “copied and pasted” into the composing class on compilation time.

A trait is defined using the trait keyword, after which it can be imported to any class through the use keyword. In the example below, two completely unrelated classes Person and Shop can reuse the same code through a trait Addressable:

trait Addressable {

  protected $address;
  
  public function getAddress() {
    return $this->address;
  }
  
  public function setAddress($address) {
    $this->address = $address;
  }
}

class Person {

  use Addressable;
}

class Shop {

  use Addressable;
}

$person = new Person('Juan Carlos');
$person->setAddress('Obelisco, Buenos Aires');

A class can also compose more than one trait:

trait Exportable {
  
  public class exportToCSV($filename) {
    // Iterate all properties and export them to a CSV file
  }
}

class Person {

  use Addressable, Exportable;
}

Traits can also be composed of other traits, define abstract methods, and offer a conflict resolution mechanism when two or more composed traits have the same function name, among other features.

Interfaces

Interfaces were added to PHP 5, so WordPress already makes use of this feature, however, extremely sparingly: the core includes less than ten interfaces in total!

Interfaces allow creating code which specifies which methods must be implemented, yet without having to define how these methods are actually implemented. They are useful for defining contracts among components, which leads to better modularity and maintainability of the application: A class implementing an interface can be a black box of code, and as long as the signatures of the functions in the interface do not change, the code can be upgraded at will without producing breaking changes, which can help prevent the accumulation of technical debt. In addition, they can help reduce vendor lock-in, by allowing to swap the implementation of some interface to that of a different vendor. As a consequence, it is imperative to code the application against interfaces instead of implementations (and defining which are the actual implementations through dependency injection).

Interfaces are defined using the interface keyword, and must list down just the signature of its methods (i.e. without having their contents defined), which must have visibility public (by default, adding no visibility keyword also makes it public):

interface FileStorage {

  function save($filename, $contents);
  function readContents($filename);
}

A class defines that it implements the interface through the implements keyword:

class LocalDriveFileStorage implements FileStorage {

  function save($filename, $contents) {
    // Implement logic
  }
  function readContents($filename) {
    // Implement logic
  }
}

A class can implement more than one interface, separating them with ,:

interface AWSService {
  function getRegion();
}

class S3FileStorage implements FileStorage, AWSService {

  function save($filename, $contents) {
    // Implement logic
  }
  function readContents($filename) {
    // Implement logic
  }
  function getRegion() {
    return 'us-east-1';
  }
}

Since an interface declares the intent of what a component is supposed to do, it is extremely important to name interfaces appropriately.

Closures

Closures were added to PHP 5.3, hence they are currently missing altogether from the WordPress core.

Closures is a mechanism for implementing anonymous functions, which helps declutter the global namespace from single-use (or seldom-used) functions. Technically speaking, closures are instances of class Closure, however, in practice, we can most likely be blissfully unaware of this fact without any harm.

Before closures, whenever passing a function as an argument to another function, we had to define the function in advance and pass its name as the argument:

function duplicate($price) {
  return $price*2;
}
$touristPrices = array_map('duplicate', $localPrices);

With closures, an anonymous (i.e. without a name) function can already be passed directly as a parameter:

$touristPrices = array_map(function($price) {
  return $price*2;
}, $localPrices);

Closures can import variables to its context through the use keyword:

$factor = 2;
$touristPrices = array_map(function($price) use($factor) {
  return $price*$factor;
}, $localPrices);

Generators

Generators were added to PHP 5.5, hence they are currently missing altogether from the WordPress core.

Generators provide an easy way to implement simple iterators. A generator allows to write code that uses foreach to iterate over a set of data without needing to build an array in memory. A generator function is the same as a normal function, except that instead of returning once, it can yield as many times as it needs to in order to provide the values to be iterated over.

function xrange($start, $limit, $step = 1) {
    for ($i = $start; $i <= $limit; $i += $step) {
        yield $i;
    }
}
foreach (xrange(1, 9, 2) as $number) {
    echo "$number ";
}
// This prints: 1 3 5 7 9 

Argument And Return Type Declarations

Different argument type declarations were introduced in different versions of PHP: WordPress is already able to declare interfaces and arrays (which it does not: I barely found one instance of a function declaring an array as parameter in core, and no interfaces), and will soon be able to declare callables (added in PHP 5.4) and scalar types: bool, float, int and string (added in PHP 7.0). Return type declarations were added to PHP 7.0.

Argument type declarations allow functions to declare of what specific type must an argument be. The validation is executed at call time, throwing an exception if the type of the argument is not the declared one. Return type declarations are the same concept, however, they specify the type of value that will be returned from the function. Type declarations are useful to make the intent of the function easier to understand and to avoid runtime errors from receiving or returning an unexpected type.

The argument type is declared before the argument variable name, and the return type is declared after the arguments, preceded by ::

function foo(boolean $bar): int {

}

Scalar argument type declarations have two options: coercive and strict. In coercive mode, if the wrong type is passed as a parameter, it will be converted to the right type. For example, a function that is given an integer for a parameter that expects a string will get a variable of type string. In strict mode, only a variable of the exact type of declaration will be accepted.

Coercive mode is the default. To enable strict mode, we must add a declare statement used with the strict_types declaration:

declare(strict_types=1);
function foo(boolean $bar) {

}

New Syntax And Operators

WordPress can already identify variable-length argument lists through function func_num_args. Starting from PHP 5.6, we can use the ... token to denote that the function accepts a variable number of arguments, and these arguments will be passed into the given variable as an array:

function sum(...$numbers) {
  $sum = 0;
  foreach ($numbers as $number) {
    $sum += $number;
  }
  return $sum;
}

Starting from PHP 5.6, constants can involve scalar expressions involving numeric and string literals instead of just static values, and also arrays:

const SUM = 37 + 2; // A scalar expression
const LETTERS = ['a', 'b', 'c']; // An array

Starting from PHP 7.0, arrays can also be defined using define:

define('LETTERS', ['a', 'b', 'c']);

PHP 7.0 added a couple of new operators: the Null coalescing operator (??) and the Spaceship operator (<=>).

The Null coalescing operator ?? is syntactic sugar for the common case of needing to use a ternary in conjunction with isset(). It returns its first operand if it exists and is not NULL; otherwise, it returns its second operand.

$username = $_GET['user'] ?? 'nobody';
// This is equivalent to:
// $username = isset($_GET['user']) ? $_GET['user'] : 'nobody';

The Spaceship operator <=> is used for comparing two expressions, returning -1, 0 or 1 when the first operand is respectively less than, equal to, or greater than the second operand.

echo 1 <=> 2; // returns -1
echo 1 <=> 1; // returns 0
echo 2 <=> 1; // returns 1

These are the most important new features added to PHP spanning versions 5.3 to 7.0. The list of the additional new features, not listed in this article, can be obtained by browsing PHP’s documentation on migrating from version to version.

Next, we analyze how we can make the most out of all these new features, and from recent trends in web development, to produce better software.

PHP Standards Recommendations

The PHP Standards Recommendations was created by a group of PHP developers from popular frameworks and libraries, attempting to establish conventions so that different projects can be integrated more seamlessly and different teams can work better with each other. The recommendations are not static: existing recommendations may be deprecated and newer ones created to take their place, and new ones are released on an ongoing basis.

The current recommendations are the following:

GroupRecommendationDescription
Coding Styles
Standardized formatting reduces the cognitive friction when reading code from other authors
PSR-1Basic Coding Standard
PSR-2Coding Style Guide
Autoloading
Autoloaders remove the complexity of including files by mapping namespaces to file system paths
PSR-4Improved Autoloading
Interfaces
Interfaces simplify the sharing of code between projects by following expected contracts
PSR-3Logger Interface
PSR-6Caching Interface
PSR-11Container Interface
PSR-13Hypermedia Links
PSR-16Simple Cache
HTTP
Interoperable standards and interfaces to have an agnostic approach to handling HTTP requests and responses, both on client and server side
PSR-7HTTP Message Interfaces
PSR-15HTTP Handlers
PSR-17HTTP Factories
PSR-18HTTP Client

Think And Code In Components

Components make it possible to use the best features from a framework without being locked-in to the framework itself. For instance, Symfony has been released as a set of reusable PHP components that can be installed independently of the Symfony framework; Laravel, another PHP framework, makes use of several Symfony components, and released its own set of reusable components that can be used by any PHP project.

All of these components are published in Packagist, a repository of public PHP packages, and can be easily added to any PHP project through Composer, an extremely popular dependency manager for PHP.

WordPress should be part of such a virtuous development cycle. Unfortunately, the WordPress core itself is not built using components (as evidenced by the almost total absence of interfaces) and, moreover, it doesn’t even have the composer.json file required to enable installing WordPress through Composer. This is because the WordPress community hasn’t agreed whether WordPress is a site’s dependency (in which case installing it through Composer would be justified) or if it is the site itself (in which case Composer may not be the right tool for the job).

In my opinion, if we are to expect WordPress to stay relevant for the next fifteen years (at least WordPress as a backend CMS), then WordPress must be recognized as a site’s dependency and made available for installation through Composer. The reason is very simple: with barely a single command in the terminal, Composer enables to declare and install a project’s dependencies from the thousands of packages published in Packagist, making it possible to create extremely-powerful PHP applications in no time, and developers love working this way. If WordPress doesn’t adapt to this model, it may lose the support from the development community and fall into oblivion, as much as FTP fell out of favor after the introduction of Git-based deployments.

I would argue that the release of Gutenberg already demonstrates that WordPress is a site dependency and not the site itself: Gutenberg treats WordPress as a headless CMS, and can operate with other backend systems too, as Drupal Gutenberg exemplifies. Hence, Gutenberg makes it clear that the CMS powering a site can be swappable, hence it should be treated as a dependency. Moreover, Gutenberg itself is intended to be based on JavaScript components released through npm (as explained by core committer Adam Silverstein), so if the WordPress client is expected to manage its JavaScript packages through the npm package manager, then why not extend this logic to the backend in order to manage PHP dependencies through Composer?

Now the good news: There is no need to wait for this issue to be resolved since it is already possible to treat WordPress as a site’s dependency and install it through Composer. John P. Bloch has mirrored WordPress core in Git, added a composer.json file, and released it in Packagist, and Roots’ Bedrock provides a package to install WordPress with a customized folder structure with support for modern development tools and an enhanced security. And themes and plugins are covered too; as long as they have been listed on the WordPress theme and plugin directories, they are available under WordPress Packagist.

As a consequence, it is a sensible option to create WordPress code not thinking in terms of themes and plugins, but thinking in terms of components, making them available through Packagist to be used by any PHP project, and additionally packaged and released as themes and plugins for the specific use of WordPress. If the component needs to interact with WordPress APIs, then these APIs can be abstracted behind an interface which, if the need arises, can be implemented for other CMSs too.

Adding A Template Engine To Improve The View Layer

If we follow through the recommendation of thinking and coding in components, and treat WordPress as a site’s dependency other than the site itself, then our projects can break free from the boundaries imposed by WordPress and import ideas and tools taken from other frameworks.

Rendering HTML content on the server-side is a case in point, which is done through plain PHP templates. This view layer can be enhanced through template engines Twig (by Symfony) and Blade (by Laravel), which provide a very concise syntax and powerful features that give it an advantage over plain PHP templates. In particular, Gutenberg’s dynamic blocks can easily benefit from these template engines, since their process to render the block’s HTML on the server-side is decoupled from WordPress’ template hierarchy architecture.

Architect The Application For The General Use

Coding against interfaces, and thinking in terms of components, allows us to architect an application for general use and customize it for the specific use that we need to deliver, instead of coding just for the specific use for each project we have. Even though this approach is more costly in the short term (it involves extra work), it pays off in the long term when additional projects can be delivered with lower efforts from just customizing a general-use application.

For this approach to be effective, the following considerations must be taken into account:

Avoid Fixed Dependencies (As Much As Possible)

jQuery and Bootstrap (or Foundation, or <–insert your favorite library here–>) could’ve been considered must-haves a few years ago, however, they have been steadily losing ground against vanilla JS and newer native CSS features. Hence, a general-use project coded five years ago which depended on these libraries may not be suitable nowadays anymore. Hence, as a general rule of thumb, the lower the amount of fixed dependencies on third-party libraries, the more up-to-date it will prove to be for the long term.

Progressive Enhancement Of Functionalities

WordPress is a full-blown CMS system which includes user management, hence support for user management is included out of the box. However, not every WordPress site requires user management. Hence, our application should take this into account, and work optimally on each scenario: support user management whenever required, but do not load the corresponding assets whenever it is not. This approach can also work gradually: Say that a client requires to implement a Contact us form but has no budget, so we code it using a free plugin with limited features, and another client has the budget to buy the license from a commercial plugin offering better features. Then, we can code our functionality to default to a very basic functionality, and increasingly use the features from whichever is the most-capable plugin available in the system.

Continuous Code And Documentation Review

By periodically reviewing our previously-written code and its documentation, we can validate if it is either up-to-date concerning new conventions and technologies and, if it is not, take measures to upgrade it before the technical debt becomes too expensive to overcome and we need to code it all over again from scratch.

Recommended reading: Be Watchful: PHP And WordPress Functions That Can Make Your Site Insecure

Attempt To Minimize Problems But Be Prepared When They Happen

No software is ever 100% perfect: the bugs are always there, we just haven’t found them yet. As such, we need to make sure that, once the problems arise, they are easy to fix.

Make It Simple

Complex software cannot be maintained in the long term: Not just because other team members may not understand it, but also because the person who coded it may not understand his/her own complex code a few years down the road. So producing simple software must be a priority, more since only simple software can be correct and fast.

Failing On Compile Time Is Better Than On Runtime

If a piece of code can be validated against errors at either compile time or runtime time, then we should prioritize the compile time solution, so the error can arise and be dealt with in the development stage and before the application reaches production. For instance, both const and define are used for defining constants, however, whereas const is validated at compile time, define is validated at runtime. So, whenever possible, using const is preferable over define.

Following this recommendation, hooking WordPress functions contained in classes can be enhanced by passing the actual class as a parameter instead of a string with the class name. In the example below, if class Foo is renamed, whereas the second hook will produce a compilation error, the first hook will fail on runtime, hence the second hook is better:

class Foo {
  public static function bar() {

  }
}

add_action('init', ['Foo', 'bar']); // Not so good
add_action('init', [Foo::class, 'bar']); // Much better

For the same reason as above, we should avoid using global variables (such as global $wpdb): these not only pollute the global context and are not easy to track where they originate from, but also, if they get renamed, the error will be produced on runtime. As a solution, we can use a Dependency Injection Container to obtain an instance of the required object.

Dealing With Errors/Exceptions

We can create an architecture of Exception objects, so that the application can react appropriately according to each particular problem, to either recover from it whenever possible or show a helpful error message to the user whenever not, and in general to log the error for the admin to fix the problem. And always protect your users from the white screen of death: All uncaught Errors and Exceptions can be intercepted through function set_exception_handler to print a non-scary error message on screen.

Adopt Build Tools

Build tools can save a lot of time by automating tasks which are very tedious to execute manually. WordPress doesn’t offer integration with any specific build tool, so the task of incorporating these to the project will fall entirely on the developer.

There are different tools for accomplishing different purposes. For instance, there are build tools to execute tasks for compressing and resizing images, minifying JS and CSS files, and copying files to a directory for producing a release, such as Webpack, Grunt and Gulp; other tools help create the scaffolding of a project, which is helpful for producing the folder structure for our themes or plugins, such as Yeoman. Indeed, with so many tools around, browsing articles comparing the different available tools will help find the most suitable one for our needs.

In some cases, though, there are no build tools that can achieve exactly what our project needs, so we may need to code our own build tool as an extension to the project itself. For instance, I have done this to generate the service-worker.js file to add support for Service Workers in WordPress.

Conclusion

Due to its strong emphasis on keeping backwards compatibility, extended even up to PHP 5.2.4, WordPress has not been able to benefit from the latest features added to PHP, and this fact has made WordPress become a not-very-exciting platform to code for among many developers.

Fortunately, these gloomy days may soon be over, and WordPress may become a shiny and exciting platform to code for once again: The requirement of PHP 7.0+ starting in December 2019 will make plenty of PHP features available, enabling developers to produce more powerful and more performant software. In this article, we reviewed the most important newly-available PHP features and how to make the most out of them.

The recent release of Gutenberg could be a sign of the good times to come: even if Gutenberg itself has not been fully accepted by the community, at least it demonstrates a willingness to incorporate the latest technologies (such as React and Webpack) into the core. This turn of events makes me wonder: If the frontend can get such a makeover, why not extend it to the backend? Once WordPress requires at least PHP 7.0, the upgrade to modern tools and methodologies can accelerate: As much as npm became the JavaScript package manager of choice, why not making Composer become the official PHP dependency manager? If blocks are the new unit for building sites in the frontend, why not use PHP components as the unit for incorporating functionalities into the backend? And finally, if Gutenberg treats WordPress as a swappable backend CMS, why not already recognize that WordPress is a site dependency and not the site itself? I’ll leave these open questions for you to reflect upon and ponder about.

Smashing Editorial (rb, ra, il)

Introducing The Component-Based API

Introducing The Component-Based API

Introducing The Component-Based API

Leonardo Losoviz

An API is the communication channel for an application to load data from the server. In the world of APIs, REST has been the more established methodology, but has lately been overshadowed by GraphQL, which offers important advantages over REST. Whereas REST requires multiple HTTP requests to fetch a set of data to render a component, GraphQL can query and retrieve such data in a single request, and the response will be exactly what is required, without over or under-fetching data as typically happens in REST.

In this article, I will describe another way of fetching data which I have designed and called “PoP” (and open sourced here), which expands on the idea of fetching data for several entities in a single request introduced by GraphQL and takes it a step further, i.e. while REST fetches the data for one resource, and GraphQL fetches the data for all resources in one component, the component-based API can fetch the data for all resources from all components in one page.

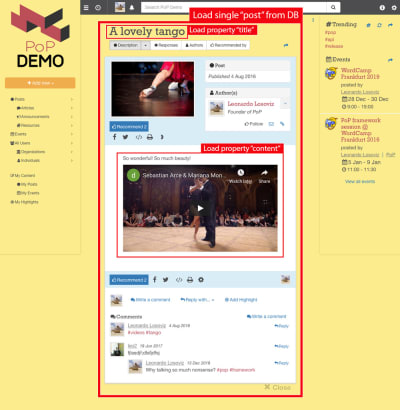
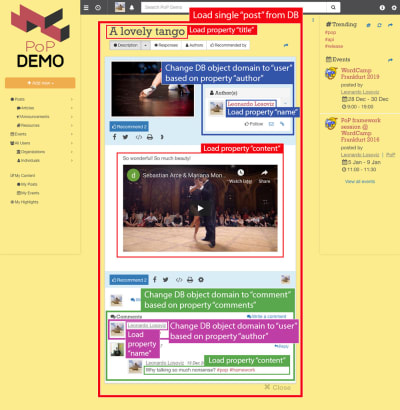
Using a component-based API makes most sense when the website is itself built using components, i.e. when the webpage is iteratively composed of components wrapping other components until, at the very top, we obtain a single component that represents the page. For instance, the webpage shown in the image below is built with components, which are outlined with squares:

Screenshot of a component-based webpage
The page is a component wrapping components wrapping components, as shown by the squares. (Large preview)

A component-based API is able to make a single request to the server by requesting the data for all of the resources in each component (as well as for all of the components in the page) which is accomplished by keeping the relationships among components in the API structure itself.

Among others, this structure offers the following several benefits:

  • A page with many components will trigger only one request instead of many;
  • Data shared across components can be fetched only once from the DB and printed only once in the response;
  • It can greatly reduce — even completely remove — the need for a data store.

We will explore these in details throughout the article, but first, let’s explore what components actually are and how we can build a site based on such components, and finally, explore how a component-based API works.

Recommended reading: A GraphQL Primer: Why We Need A New Kind Of API

Building A Site Through Components

A component is simply a set of pieces of HTML, JavaScript and CSS code put all together to create an autonomous entity. This can then wrap other components to create more complex structures, and be itself wrapped by other components, too. A component has a purpose, which can range from something very basic (such as a link or a button) to something very elaborate (such as a carousel or a drag-and-drop image uploader). Components are most useful when they are generic and enable customization through injected properties (or “props”), so that they can serve a wide array of use cases. In the utmost case, the site itself becomes a component.

The term “component” is often used to refer both to functionality and design. For instance, concerning functionality, JavaScript frameworks such as React or Vue allow to create client-side components, which are able to self-render (for instance, after the API fetches their required data), and use props to set configuration values on their wrapped components, enabling code reusability. Concerning design, Bootstrap has standardized how websites look and feel through its front-end component library, and it has become a healthy trend for teams to create design systems to maintain their websites, which allows the different team members (designers and developers, but also marketers and salesmen) to speak a unified language and express a consistent identity.

Componentizing a site then is a very sensible way to make the website become more maintainable. Sites using JavaScript frameworks such as React and Vue are already component-based (at least on the client-side). Using a component library like Bootstrap doesn’t necessarily make the site be component-based (it could be a big blob of HTML), however, it incorporates the concept of reusable elements for the user interface.

If the site is a big blob of HTML, for us to componentize it we must break the layout into a series of recurring patterns, for which we must identify and catalogue sections on the page based on their similarity of functionality and styles, and break these sections down into layers, as granular as possible, attempting to have each layer be focused on a single goal or action, and also trying to match common layers across different sections.

Note: Brad Frost’s “Atomic Design” is a great methodology for identifying these common patterns and building a reusable design system.

Identifying elements to componentize a webpage
Brad Frost identifies five distinct levels in atomic design for creating design systems. (Large preview)

Hence, building a site through components is akin to playing with LEGO. Each component is either an atomic functionality, a composition of other components, or a combination of the two.

As shown below, a basic component (an avatar) is iteratively composed by other components until obtaining the webpage at the top:

Sequence of components creating a webpage
Sequence of components produced, from an avatar all the way up to the webpage. (Large preview)

The Component-Based API Specification

For the component-based API I have designed, a component is called a “module”, so from now on the terms “component” and “module” are used interchangeably.

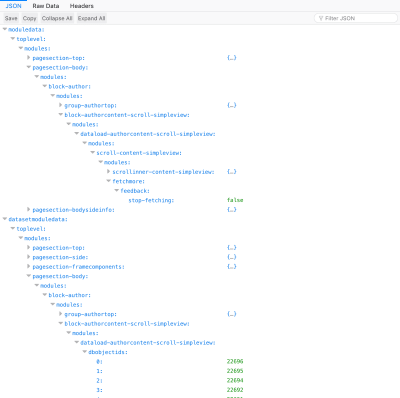
The relationship of all modules wrapping each other, from the top-most module all the way down to the last level, is called the “component hierarchy”. This relationship can be expressed through an associative array (an array of key => property) on the server-side, in which each module states its name as the key attribute and its inner modules under the property modules. The API then simply encodes this array as a JSON object for consumption:

// Component hierarchy on server-side, e.g. through PHP:
[
  "top-module" => [
    "modules" => [
      "module-level1" => [
        "modules" => [
          "module-level11" => [
            "modules" => [...]
          ],
          "module-level12" => [
            "modules" => [
              "module-level121" => [
                "modules" => [...]
              ]
            ]
          ]
        ]
      ],
      "module-level2" => [
        "modules" => [
          "module-level21" => [
            "modules" => [...]
          ]
        ]
      ]
    ]
  ]
]

// Component hierarchy encoded as JSON:
{
  "top-module": {
    modules: {
      "module-level1": {
        modules: {
          "module-level11": {
            ...
          },
          "module-level12": {
            modules: {
              "module-level121": {
                ...
              }
            }
          }
        }
      },
      "module-level2": {
        modules: {
          "module-level21": {
            ...
          }
        }
      }
    }
  }
}

The relationship among modules is defined on a strictly top-down fashion: a module wraps other modules and knows who they are, but it doesn’t know — and doesn’t care — which modules are wrapping him.

For instance, in the JSON code above, module module-level1 knows it wraps modules module-level11 and module-level12, and, transitively, it also knows it wraps module-level121; but module module-level11 doesn’t care who is wrapping it, consequently is unaware of module-level1.

Having the component-based structure, we can now add the actual information required by each module, which is categorized into either settings (such as configuration values and other properties) and data (such as the IDs of the queried database objects and other properties), and placed accordingly under entries modulesettings and moduledata:

{
  modulesettings: {
    "top-module": {
      configuration: {...},
      ...,
      modules: {
        "module-level1": {
          configuration: {...},
          ...,
          modules: {
            "module-level11": {
              repeat...
            },
            "module-level12": {
              configuration: {...},
              ...,
              modules: {
                "module-level121": {
                  repeat...
                }
              }
            }
          }
        },
        "module-level2": {
          configuration: {...},
          ...,
          modules: {
            "module-level21": {
              repeat...
            }
          }
        }
      }
    }
  },
  moduledata: {
    "top-module": {
      dbobjectids: [...],
      ...,
      modules: {
        "module-level1": {
          dbobjectids: [...],
          ...,
          modules: {
            "module-level11": {
              repeat...
            },
            "module-level12": {
              dbobjectids: [...],
              ...,
              modules: {
                "module-level121": {
                  repeat...
                }
              }
            }
          }
        },
        "module-level2": {
          dbobjectids: [...],
          ...,
          modules: {
            "module-level21": {
              repeat...
            }
          }
        }
      }
    }
  }
}

Following, the API will add the database object data. This information is not placed under each module, but under a shared section called databases, to avoid duplicating information when two or more different modules fetch the same objects from the database.

In addition, the API represents the database object data in a relational manner, to avoid duplicating information when two or more different database objects are related to a common object (such as two posts having the same author). In other words, database object data is normalized.

Recommended reading: Building A Serverless Contact Form For Your Static Site

The structure is a dictionary, organized under each object type first and object ID second, from which we can obtain the object properties:

{
  databases: {
    primary: {
      dbobject_type: {
        dbobject_id: {
          property: ...,
          ...
        },
        ...
      },
      ...
    }
  }
}

This JSON object is already the response from the component-based API. Its format is a specification all by itself: As long as the server returns the JSON response in its required format, the client can consume the API independently of how it is implemented. Hence, the API can be implemented on any language (which is one of the beauties of GraphQL: being a specification and not an actual implementation has enabled it to become available in a myriad of languages.)

Note: In an upcoming article, I will describe my implementation of the component-based API in PHP (which is the one available in the repo).

API response example

For instance, the API response below contains a component hierarchy with two modules, page => post-feed, where module post-feed fetches blog posts. Please notice the following:

  • Each module knows which are its queried objects from property dbobjectids (IDs 4 and 9 for the blog posts)
  • Each module knows the object type for its queried objects from property dbkeys (each post’s data is found under posts, and the post’s author data, corresponding to the author with the ID given under the post’s property author, is found under users)
  • Because the database object data is relational, property author contains the ID to the author object instead of printing the author data directly.
{
  moduledata: {
    "page": {
      modules: {
        "post-feed": {
          dbobjectids: [4, 9]
        }
      }
    }
  },
  modulesettings: {
    "page": {
      modules: {
        "post-feed": {
          dbkeys: {
            id: "posts",
            author: "users"
          }
        }
      }
    }
  },
  databases: {
    primary: {
      posts: {
        4: {
          title: "Hello World!",
          author: 7
        },
        9: {
          title: "Everything fine?",
          author: 7
        }
      },
      users: {
        7: {
          name: "Leo"
        }
      }
    }
  }
}

Differences Fetching Data From Resource-Based, Schema-Based And Component-Based APIs

Let’s see how a component-based API such as PoP compares, when fetching data, to a resource-based API such as REST, and to a schema-based API such as GraphQL.

Let’s say IMDB has a page with two components which need to fetch data: “Featured director” (showing a description of George Lucas and a list of his films) and “Films recommended for you” (showing films such as Star Wars: Episode I — The Phantom Menace and The Terminator). It could look like this:

Next-generation IMDB
Components 'Featured director' and 'Films recommended for you' for the next-generation IMDB site. (Large preview)

Let’s see how many requests are needed to fetch the data through each API method. For this example, the “Featured director” component brings one result (“George Lucas”), from which it retrieves two films (Star Wars: Episode I — The Phantom Menace and Star Wars: Episode II — Attack of the Clones), and for each film two actors (“Ewan McGregor” and “Natalie Portman” for the first film, and “Natalie Portman” and “Hayden Christensen” for the second film). The component “Films recommended for you” brings two results (Star Wars: Episode I — The Phantom Menace and The Terminator), and then fetches their directors (“George Lucas” and “James Cameron” respectively).

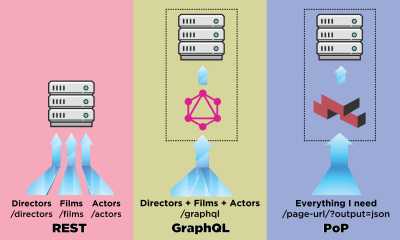
Using REST to render component featured-director, we may need the following 7 requests (this number can vary depending on how much data is provided by each endpoint, i.e. how much over-fetching has been implemented):

GET - /featured-director
GET - /directors/george-lucas
GET - /films/the-phantom-menace
GET - /films/attack-of-the-clones
GET - /actors/ewan-mcgregor
GET - /actors/natalie-portman
GET - /actors/hayden-christensen

GraphQL allows, through strongly typed schemas, to fetch all the required data in one single request per component. The query to fetch data through GraphQL for the component featuredDirector looks like this (after we have implemented the corresponding schema):

query {
  featuredDirector {
    name
    country
    avatar
    films {
      title
      thumbnail
      actors {
        name
        avatar
      }
    }
  }
}

And it produces the following response:

{
  data: {
    featuredDirector: {
      name: "George Lucas",
      country: "USA",
      avatar: "...",
      films: [
        { 
          title: "Star Wars: Episode I - The Phantom Menace",
          thumbnail: "...",
          actors: [
            {
              name: "Ewan McGregor",
              avatar: "...",
            },
            {
              name: "Natalie Portman",
              avatar: "...",
            }
          ]
        },
        { 
          title: "Star Wars: Episode II - Attack of the Clones",
          thumbnail: "...",
          actors: [
            {
              name: "Natalie Portman",
              avatar: "...",
            },
            {
              name: "Hayden Christensen",
              avatar: "...",
            }
          ]
        }
      ]
    }
  }
}

And querying for component “Films recommended for you” produces the following response:

{
  data: {
    films: [
      { 
        title: "Star Wars: Episode I - The Phantom Menace",
        thumbnail: "...",
        director: {
          name: "George Lucas",
          avatar: "...",
        }
      },
      { 
        title: "The Terminator",
        thumbnail: "...",
        director: {
          name: "James Cameron",
          avatar: "...",
        }
      }
    ]
  }
}

PoP will issue only one request to fetch all the data for all components in the page, and normalize the results. The endpoint to be called is simply the same as the URL for which we need to get the data, just adding an additional parameter output=json to indicate to bring the data in JSON format instead of printing it as HTML:

GET - /url-of-the-page/?output=json

Assuming that the module structure has a top module named page containing modules featured-director and films-recommended-for-you, and these also have submodules, like this:

"page"
  modules
    "featured-director"
      modules
        "director-films"
          modules
            "film-actors"
  "films-recommended-for-you"
    modules
      "film-director"

The single returned JSON response will look like this:

{
  modulesettings: {
    "page": {
      modules: {
        "featured-director": {
          dbkeys: {
            id: "people",
          },
          modules: {
            "director-films": {
              dbkeys: {
                films: "films"
              },
              modules: {
                "film-actors": {
                  dbkeys: {
                    actors: "people"
                  },
                }
              }
            }
          }
        },
        "films-recommended-for-you": {
          dbkeys: {
            id: "films",
          },
          modules: {
            "film-director": {
              dbkeys: {
                director: "people"
              },
            }
          }
        }
      }
    }
  },
  moduledata: {
    "page": {
      modules: {
        "featured-director": {
          dbobjectids: [1]
        },
        "films-recommended-for-you": {
          dbobjectids: [1, 3]
        }
      }
    }
  },
  databases: {
    primary: {
      people {
        1: {
          name: "George Lucas",
          country: "USA",
          avatar: "..."
          films: [1, 2]
        },
        2: {
          name: "Ewan McGregor",
          avatar: "..."
        },
        3: {
          name: "Natalie Portman",
          avatar: "..."
        },
        4: {
          name: "Hayden Christensen",
          avatar: "..."
        },
        5: {
          name: "James Cameron",
          avatar: "..."
        },
      },
      films: {
        1: { 
          title: "Star Wars: Episode I - The Phantom Menace",
          actors: [2, 3],
          director: 1,
          thumbnail: "..."
        },
        2: { 
          title: "Star Wars: Episode II - Attack of the Clones",
          actors: [3, 4],
          thumbnail: "..."
        },
        3: { 
          title: "The Terminator",
          director: 5,
          thumbnail: "..."
        },
      }
    }
  }
}

Let’s analyze how these three methods compare to each other, in terms of speed and the amount of data retrieved.

Speed

Through REST, having to fetch 7 requests just to render one component can be very slow, mostly on mobile and shaky data connections. Hence, the jump from REST to GraphQL represents a great deal for speed, because we are able to render a component with only one request.

PoP, because it can fetch all data for many components in one request, will be faster for rendering many components at once; however, most likely there is no need for this. Having components be rendered in order (as they appear in the page), is already a good practice, and for those components which appear under the fold there is certainly no rush to render them. Hence, both the schema-based and component-based APIs are already pretty good and clearly superior to a resource-based API.

Amount of Data

On each request, data in the GraphQL response may be duplicated: actress “Natalie Portman” is fetched twice in the response from the first component, and when considering the joint output for the two components, we can also find shared data, such as film Star Wars: Episode I — The Phantom Menace.

PoP, on the other hand, normalizes the database data and prints it only once, however, it carries the overhead of printing the module structure. Hence, depending on the particular request having duplicated data or not, either the schema-based API or the component-based API will have a smaller size.

In conclusion, a schema-based API such as GraphQL and a component-based API such as PoP are similarly good concerning performance, and superior to a resource-based API such as REST.

Recommended reading: Understanding And Using REST APIs

Particular Properties Of A Component-Based API

If a component-based API is not necessarily better in terms of performance than a schema-based API, you may be wondering, then what am I trying to achieve with this article?

In this section, I will attempt to convince you that such an API has incredible potential, providing several features which are very desirable, making it a serious contender in the world of APIs. I describe and demonstrate each of its unique great features below.

The Data To Be Retrieved From The Database Can Be Inferred From The Component Hierarchy

When a module displays a property from a DB object, the module may not know, or care, what object it is; all it cares about is defining what properties from the loaded object are required.

For instance, consider the image below. A module loads an object from the database (in this case, a single post), and then its descendant modules will show certain properties from the object, such as title and content:

Shown data is defined at different intervals
While some modules load the database object, others load properties. (Large preview)

Hence, along the component hierarchy, the “dataloading” modules will be in charge of loading the queried objects (the module loading the single post, in this case), and its descendant modules will define what properties from the DB object are required (title and content, in this case).

Fetching all the required properties for the DB object can be done automatically by traversing the component hierarchy: starting from the dataloading module, we iterate all its descendant modules all the way down until reaching a new dataloading module, or until the end of the tree; at each level we obtain all required properties, and then merge all properties together and query them from the database, all of them only once.

In the structure below, module single-post fetches the results from the DB (the post with ID 37), and submodules post-title and post-content define properties to be loaded for the queried DB object (title and content respectively); submodules post-layout and fetch-next-post-button do not require any data fields.

"single-post"
  => Load objects with object type "post" and ID 37
  modules
    "post-layout"
      modules
        "post-title"
          => Load property "title"
        "post-content"
          => Load property "content"
    "fetch-next-post-button"

The query to be executed is calculated automatically from the component hierarchy and their required data fields, containing all the properties needed by all the modules and their submodules:

SELECT 
  title, content 
FROM 
  posts 
WHERE
  id = 37

By fetching the properties to retrieve directly from the modules, the query will be automatically updated whenever the component hierarchy changes. If, for instance, we then add submodule post-thumbnail, which requires data field thumbnail:

"single-post"
  => Load objects with object type "post" and ID 37
  modules
    "post-layout"
      modules
        "post-title"
          => Load property "title"
        "post-content"
          => Load property "content"
        "post-thumbnail"
          => Load property "thumbnail"
    "fetch-next-post-button"

Then the query is automatically updated to fetch the additional property:

SELECT 
  title, content, thumbnail 
FROM 
  posts 
WHERE
  id = 37

Because we have established the database object data to be retrieved in a relational manner, we can also apply this strategy among the relationships between database objects themselves.

Consider the image below: Starting from the object type post and moving down the component hierarchy, we will need to shift the DB object type to user and comment, corresponding to the post’s author and each of the post’s comments respectively, and then, for each comment, it must change the object type once again to user corresponding to the comment’s author.

Moving from a database object to a relational object (possibly changing the object type, as in post => author going from post to user, or not, as in author => followers going from user to user) is what I call “switching domains”.

Showing data for relational objects
Changing the DB object from one domain to another. (Large preview)

After switching to a new domain, from that level at the component hierarchy downwards, all required properties will be subjected to the new domain:

  • name is fetched from the user object (representing the post’s author),
  • content is fetched from the comment object (representing each of the post’s comments),
  • name is fetched from the user object (representing the author of each comment).

Traversing the component hierarchy, the API knows when it is switching to a new domain and, appropriately, update the query to fetch the relational object.

For example, if we need to show data from the post’s author, stacking submodule post-author will change the domain at that level from post to the corresponding user, and from this level downwards the DB object loaded into the context passed to the module is the user. Then, submodules user-name and user-avatar under post-author will load properties name and avatar under the user object:

"single-post"
  => Load objects with object type "post" and ID 37
  modules
    "post-layout"
      modules
        "post-title"
          => Load property "title"
        "post-content"
          => Load property "content"
        "post-author"
          => Switch domain from "post" to "user", based on property "author"
          modules
            "user-layout"
              modules
                "user-name"
                  => Load property "name"
                "user-avatar"
                  => Load property "avatar"
    "fetch-next-post-button"

Resulting in the following query:

SELECT 
  p.title, p.content, p.author, u.name, u.avatar 
FROM 
  posts p 
INNER JOIN 
  users u 
WHERE 
  p.id = 37 AND p.author = u.id

In summary, by configuring each module appropriately, there is no need to write the query to fetch data for a component-based API. The query is automatically produced from the structure of the component hierarchy itself, obtaining what objects must be loaded by the dataloading modules, the fields to retrieve for each loaded object defined at each descendant module, and the domain switching defined at each descendant module.

Adding, removing, replacing or altering any module will automatically update the query. After executing the query, the retrieved data will be exactly what is required — nothing more or less.

Observing Data And Calculating Additional Properties

Starting from the dataloading module down the component hierarchy, any module can observe the returned results and calculate extra data items based on them, or feedback values, which are placed under entry moduledata.

For instance, module fetch-next-post-button can add a property indicating if there are more results to fetch or not (based on this feedback value, if there aren’t more results, the button will be disabled or hidden):

{
  moduledata: {
    "page": {
      modules: {
        "single-post": {
          modules: {
            "fetch-next-post-button": {
              feedback: {
                hasMoreResults: true
              }
            }
          }
        }
      }
    }
  }
}

Implicit Knowledge Of Required Data Decreases Complexity And Makes The Concept Of An “Endpoint” Become Obsolete

As shown above, the component-based API can fetch exactly the required data, because it has the model of all components on the server and what data fields are required by each component. Then, it can make the knowledge of the required data fields implicit.

The advantage is that defining what data is required by the component can be updated just on the server-side, without having to redeploy JavaScript files, and the client can be made dumb, just asking the server to provide whatever data it is that it needs, thus decreasing the complexity of the client-side application.

In addition, calling the API to retrieve the data for all components for a specific URL can be carried out simply by querying that URL plus adding the extra parameter output=json to indicate returning API data instead of printing the page. Hence, the URL becomes its own endpoint or, considered in a different way, the concept of an “endpoint” becomes obsolete.

Requests to fetch resources with different APIs
Requests to fetch resources with different APIs. (Large preview)

Retrieving Subsets Of Data: Data Can Be Fetched For Specific Modules, Found At Any Level Of The Component Hierarchy

What happens if we don’t need to fetch the data for all modules in a page, but simply the data for a specific module starting at any level of the component hierarchy? For instance, if a module implements an infinite-scroll, when scrolling down we must fetch only new data for this module, and not for the other modules on the page.

This can be accomplished by filtering the branches of the component hierarchy that will be included in the response, to include properties only starting from the specified module and ignore everything above this level. In my implementation (which I will describe in an upcoming article), the filtering is enabled by adding parameter modulefilter=modulepaths to the URL, and the selected module (or modules) is indicated through a modulepaths[] parameter, where a “module path” is the list of modules starting from the top-most module to the specific module (e.g. module1 => module2 => module3 has module path [module1, module2, module3] and is passed as a URL parameter as module1.module2.module3).

For instance, in the component hierarchy below every module has an entry dbobjectids:

"module1"
  dbobjectids: [...]
  modules
    "module2"
      dbobjectids: [...]
      modules
        "module3"
          dbobjectids: [...]
        "module4"
          dbobjectids: [...]
        "module5"
          dbobjectids: [...]
          modules
            "module6"
              dbobjectids: [...]

Then requesting the webpage URL adding parameters modulefilter=modulepaths and modulepaths[]=module1.module2.module5 will produce the following response:

"module1"
  modules
    "module2"
      modules
        "module5"
          dbobjectids: [...]
          modules
            "module6"
              dbobjectids: [...]

In essence, the API starts loading data starting from module1 => module2 => module5. That’s why module6, which comes under module5, also brings its data while module3 and module4 do not.

In addition, we can create custom module filters to include a pre-arranged set of modules. For instance, calling a page with modulefilter=userstate can print only those modules which require user state for rendering them in the client, such as modules module3 and module6:

"module1"
  modules
    "module2"
      modules
        "module3"
          dbobjectids: [...]
        "module5"
          modules
            "module6"
              dbobjectids: [...]

The information of which are the starting modules comes under section requestmeta, under entry filteredmodules, as an array of module paths:

requestmeta: {
  filteredmodules: [
    ["module1", "module2", "module3"],
    ["module1", "module2", "module5", "module6"]
  ]
}

This feature allows to implement an uncomplicated Single-Page Application, in which the frame of the site is loaded on the initial request:

"page"
  modules
    "navigation-top"
      dbobjectids: [...]
    "navigation-side"
      dbobjectids: [...]
    "page-content"
      dbobjectids: [...]

But, from them on, we can append parameter modulefilter=page to all requested URLs, filtering out the frame and bringing only the page content:

"page"
  modules
    "navigation-top"
    "navigation-side"
    "page-content"
      dbobjectids: [...]

Similar to module filters userstate and page described above, we can implement any custom module filter and create rich user experiences.

The Module Is Its Own API

As shown above, we can filter the API response to retrieve data starting from any module. As a consequence, every module can interact with itself from client to server just by adding its module path to the webpage URL in which it has been included.

I hope you will excuse my over-excitement, but I truly can’t emphasize enough how wonderful this feature is. When creating a component, we don’t need to create an API to go alongside with it to retrieve data (REST, GraphQL, or anything at all), because the component is already able to talk to itself in the server and load its own data — it is completely autonomous and self-serving.

Each dataloading module exports the URL to interact with it under entry dataloadsource from under section datasetmodulemeta:

{
  datasetmodulemeta: {
    "module1": {
      modules: {
        "module2": {
          modules: {
            "module5":  {
              meta: {
                dataloadsource: "https://page-url/?modulefilter=modulepaths&modulepaths[]=module1.module2.module5"
              },
              modules: {
                "module6": {
                  meta: {
                    dataloadsource: "https://page-url/?modulefilter=modulepaths&modulepaths[]=module1.module2.module5.module6"
                  }
                }
              }
            }
          }
        }
      }
    }
  }
}

Fetching Data Is Decoupled Across Modules And DRY

To make my point that fetching data in a component-based API is highly decoupled and DRY (Don’t Repeat Yourself), I will first need to show how in a schema-based API such as GraphQL it is less decoupled and not DRY.

In GraphQL, the query to fetch data must indicate the data fields for the component, which may include subcomponents, and these may also include subcomponents, and so on. Then, the topmost component needs to know what data is required by every one of its subcomponents too, as to fetch that data.

For instance, rendering the <FeaturedDirector> component might require the following subcomponents:

Render <FeaturedDirector>:
  <div>
    Country: {country}
    {foreach films as film}
      <Film film={film} />
    {/foreach}
  </div>

Render <Film>:
  <div>
    Title: {title}
    Pic: {thumbnail}
    {foreach actors as actor}
      <Actor actor={actor} />
    {/foreach}
  </div>

Render <Actor>:
  <div>
    Name: {name}
    Photo: {avatar}
  </div>

In this scenario, the GraphQL query is implemented at the <FeaturedDirector> level. Then, if subcomponent <Film> is updated, requesting the title through property filmTitle instead of title, the query from the <FeaturedDirector> component will need to be updated, too, to mirror this new information (GraphQL has a versioning mechanism which can deal with this problem, but sooner or later we should still update the information). This produces maintenance complexity, which could be difficult to handle when the inner components often change or are produced by third-party developers. Hence, components are not thoroughly decoupled from each other.

Similarly, we may want to render directly the <Film> component for some specific film, for which then we must also implement a GraphQL query at this level, to fetch the data for the film and its actors, which adds redundant code: portions of the same query will live at different levels of the component structure. So GraphQL is not DRY.

Because a component-based API already knows how its components wrap each other in its own structure, then these problems are completely avoided. For one, the client is able to simply request the required data it needs, whichever this data is; if a subcomponent data field changes, the overall model already knows and adapts immediately, without having to modify the query for the parent component in the client. Therefore, the modules are highly decoupled from each other.

For another, we can fetch data starting from any module path, and it will always return the exact required data starting from that level; there are no duplicated queries whatsoever, or even queries to start with. Hence, a component-based API is fully DRY. (This is another feature that really excites me and makes me get wet.)

(Yes, pun fully intended. Sorry about that.)

Retrieving Configuration Values In Addition To Database Data

Let’s revisit the example of the featured-director component for the IMDB site described above, which was created — you guessed it! — with Bootstrap. Instead of hardcoding the Bootstrap classnames or other properties such as the title’s HTML tag or the avatar max width inside of JavaScript files (whether they are fixed inside the component, or set through props by parent components), each module can set these as configuration values through the API, so that then these can be directly updated on the server and without the need to redeploy JavaScript files. Similarly, we can pass strings (such as the title Featured director) which can be already translated/internationalized on the server-side, avoiding the need to deploy locale configuration files to the front-end.

Similar to fetching data, by traversing the component hierarchy, the API is able to deliver the required configuration values for each module and nothing more or less.

The configuration values for the featured-director component might look like this:

{
  modulesettings: {
    "page": {
      modules: {
        "featured-director": {
          configuration: {
            class: "alert alert-info",
            title: "Featured director",
            titletag: "h3"
          },
          modules: {
            "director-films": {
              configuration: {
                classes: {
                  wrapper: "media",
                  avatar: "mr-3",
                  body: "media-body",
                  films: "row",
                  film: "col-sm-6"
                },
                avatarmaxsize: "100px"
              },
              modules: {
                "film-actors": {
                  configuration: {
                    classes: {
                      wrapper: "card",
                      image: "card-img-top",
                      body: "card-body",
                      title: "card-title",
                      avatar: "img-thumbnail"
                    }
                  }
                }
              }
            }
          }
        }
      }
    }
  }
}

Please notice how — because the configuration properties for different modules are nested under each module’s level — these will never collide with each other if having the same name (e.g. property classes from one module will not override property classes from another module), avoiding having to add namespaces for modules.

Higher Degree Of Modularity Achieved In The Application

According to Wikipedia, modularity means:

The degree to which a system’s components may be separated and recombined, often with the benefit of flexibility and variety in use. The concept of modularity is used primarily to reduce complexity by breaking a system into varying degrees of interdependence and independence across and ‘hide the complexity of each part behind an abstraction and interface’.

Being able to update a component just from the server-side, without the need to redeploy JavaScript files, has the consequence of better reusability and maintenance of components. I will demonstrate this by re-imagining how this example coded for React would fare in a component-based API.

Let’s say that we have a <ShareOnSocialMedia> component, currently with two items: <FacebookShare> and <TwitterShare>, like this:

Render <ShareOnSocialMedia>:
  <ul>
    <li>Share on Facebook: <FacebookShare url={window.location.href} /></li>
    <li>Share on Twitter: <TwitterShare url={window.location.href} /></li>
  </ul>

But then Instagram got kind of cool, so we need to add an item <InstagramShare> to our <ShareOnSocialMedia> component, too:

Render <ShareOnSocialMedia>:
  <ul>
    <li>Share on Facebook: <FacebookShare url={window.location.href} /></li>
    <li>Share on Twitter: <TwitterShare url={window.location.href} /></li>
    <li>Share on Instagram: <InstagramShare url={window.location.href} /></li>
  </ul>

In the React implementation, as it can be seen in the linked code, adding a new component <InstagramShare> under component <ShareOnSocialMedia> forces to redeploy the JavaScript file for the latter one, so then these two modules are not as decoupled as they could be.

In the component-based API, though, we can readily use the relationships among modules already described in the API to couple the modules together. While originally we will have this response:

{
  modulesettings: {
    "share-on-social-media": {
      modules: {
        "facebook-share": {
          configuration: {...}
        },
        "twitter-share": {
          configuration: {...}
        }
      }
    }
  }
}

After adding Instagram we will have the upgraded response:

{
  modulesettings: {
    "share-on-social-media": {
      modules: {
        "facebook-share": {
          configuration: {...}
        },
        "twitter-share": {
          configuration: {...}
        },
        "instagram-share": {
          configuration: {...}
        }
      }
    }
  }
}

And just by iterating all the values under modulesettings["share-on-social-media"].modules, component <ShareOnSocialMedia> can be upgraded to show the <InstagramShare> component without the need to redeploy any JavaScript file. Hence, the API supports the addition and removal of modules without compromising code from other modules, attaining a higher degree of modularity.

Native Client-Side Cache/Data Store

The retrieved database data is normalized in a dictionary structure, and standardized so that, starting from the value on dbobjectids, any piece of data under databases can be reached just by following the path to it as indicated through entries dbkeys, whichever way it was structured. Hence, the logic for organizing data is already native to the API itself.

We can benefit from this situation in several ways. For instance, the returned data for each request can be added into a client-side cache containing all data requested by the user throughout the session. Hence, it is possible to avoid adding an external data store such as Redux to the application (I mean concerning the handling of data, not concerning other features such as the Undo/Redo, the collaborative environment or the time-travel debugging).

Also, the component-based structure promotes caching: the component hierarchy depends not on the URL, but on what components are needed in that URL. This way, two events under /events/1/ and /events/2/ will share the same component hierarchy, and the information of what modules are required can be reutilized across them. As a consequence, all properties (other than database data) can be cached on the client after fetching the first event and reutilized from then on, so that only database data for each subsequent event must be fetched and nothing else.

Extensibility And Re-purposing

The databases section of the API can be extended, enabling to categorize its information into customized subsections. By default, all database object data is placed under entry primary, however, we can also create custom entries where to place specific DB object properties.

For instance, if the component “Films recommended for you” described earlier on shows a list of the logged-in user’s friends who have watched this film under property friendsWhoWatchedFilm on the film DB object, because this value will change depending on the logged-in user then we save this property under a userstate entry instead, so when the user logs out, we only delete this branch from the cached database on the client, but all the primary data still remains:

{
  databases: {
    userstate: {
      films: {
        5: { 
          friendsWhoWatchedFilm: [22, 45]
        },
      }
    },
    primary: {
      films: {
        5: { 
          title: "The Terminator"
        },
      }
      "people": {
        22: {
          name: "Peter",
        },
        45: {
          name: "John",
        },
      },
    }
  }
}

In addition, up to a certain point, the structure of the API response can be re-purposed. In particular, the database results can be printed in a different data structure, such as an array instead of the default dictionary.

For instance, if the object type is only one (e.g. films), it can be formatted as an array to be fed directly into a typeahead component:

[
  { 
    title: "Star Wars: Episode I - The Phantom Menace",
    thumbnail: "..."
  },
  { 
    title: "Star Wars: Episode II - Attack of the Clones",
    thumbnail: "..."
  },
  { 
    title: "The Terminator",
    thumbnail: "..."
  },
]

Support For Aspect-Oriented Programming

In addition to fetching data, the component-based API can also post data, such as for creating a post or adding a comment, and execute any kind of operation, such as logging the user in or out, sending emails, logging, analytics, and so on. There are no restrictions: any functionality provided by the underlying CMS can be invoked through a module — at any level.

Along the component hierarchy, we can add any number of modules, and each module can execute its own operation. Hence, not all operations must necessarily be related to the expected action of the request, as when doing a POST, PUT or DELETE operation in REST or sending a mutation in GraphQL, but can be added to provide extra functionalities, such as sending an email to the admin when a user creates a new post.

So, by defining the component hierarchy through dependency-injection or configuration files, the API can be said to support Aspect-oriented programming, “a programming paradigm that aims to increase modularity by allowing the separation of cross-cutting concerns.”

Recommended reading: Protecting Your Site With Feature Policy

Enhanced Security

The names of the modules are not necessarily fixed when printed in the output, but can be shortened, mangled, changed randomly or (in short) made variable any way intended. While originally thought for shortening the API output (so that module names carousel-featured-posts or drag-and-drop-user-images could be shortened to a base 64 notation, such as a1, a2 and so on, for the production environment), this feature allows to frequently change the module names in the response from the API for security reasons.

For instance, input names are by default named as their corresponding module; then, modules called username and password, which are to be rendered in the client as <input type="text" name="{input_name}"> and <input type="password" name="{input_name}"> respectively, can be set varying random values for their input names (such as zwH8DSeG and QBG7m6EF today, and c3oMLBjo and c46oVgN6 tomorrow) making it more difficult for spammers and bots to target the site.

Versatility Through Alternative Models

The nesting of modules allows to branch out to another module to add compatibility for a specific medium or technology, or change some styling or functionality, and then return to the original branch.

For instance, let’s say the webpage has the following structure:

"module1"
  modules
    "module2"
      modules
        "module3"
        "module4"
          modules
            "module5"
              modules
                "module6"

In this case, we’d like to make the website also work for AMP, however, modules module2, module4 and module5 are not AMP compatible. We can branch these modules out into similar, AMP-compatible modules module2AMP, module4AMP and module5AMP, after which we keep loading the original component hierarchy, so then only these three modules are substituted (and nothing else):

"module1"
  modules
    "module2AMP"
      modules
        "module3"
        "module4AMP"
          modules
            "module5AMP"
              modules
                "module6"

This makes it fairly easy to generate different outputs from a single codebase, adding forks only here and there as needed, and always scoped and restrained to individual modules.

Demonstration Time

The code implementing the API as explained in this article is available in this open-source repository.

I have deployed the PoP API under https://nextapi.getpop.org for demonstration purposes. The website runs on WordPress, so the URL permalinks are those typical to WordPress. As noted earlier, through adding parameter output=json to them, these URLs become their own API endpoints.

The site is backed by the same database from the PoP Demo website, so a visualization of the component hierarchy and retrieved data can be done querying the same URL in this other website (e.g. visiting the https://demo.getpop.org/u/leo/ explains the data from https://nextapi.getpop.org/u/leo/?output=json).

The links below demonstrate the API for cases described earlier on:

Example of JSON code returned by the API
Example of JSON code returned by the API. (Large preview)

Conclusion

A good API is a stepping stone for creating reliable, easily maintainable and powerful applications. In this article, I have described the concepts powering a component-based API which, I believe, is a pretty good API, and I hope I have convinced you too.

So far, the design and implementation of the API have involved several iterations and taken more than five years — and it’s not completely ready yet. However, it is in a pretty decent state, not ready for production but as a stable alpha. These days, I am still working on it; working on defining the open specification, implementing the additional layers (such as rendering) and writing documentation.

In an upcoming article, I will describe how my implementation of the API works. Until then, if you have any thoughts about it — regardless whether positive or negative — I would love to read your comments below.

Smashing Editorial (rb, ra, yk, il)