The Action Driver Class when it runs it just brings up a small box with java logo and close and minimize options thats all...... I have reviewd the code over and over and my instuctor said to just review my work... I am so lost....
I’ve been lucky enough to be a guest on some podcasts and at some events, so I thought I’d do a quick little round-up here! These Chronicle posts are just that: an opportunity to share some off-site stiff that I’ve been up to. This time, it’s all different podcasts.
Chris Coyier talks with John, Ward, Dan, and Craig about the modern web. What technology should we be paying attention to? What tech has Chris used that was worth getting into? Flexbox or CSS Grid? Is there anything better than HTML coming? And what tools should developers be aware of?
Craig talks to Chris about what it’s like being an online creator (podcaster, blogger, software and web designer, etc.). Chris talks about the lessons he has learned and what it’s like to have a weekly podcast for ten years. They also talk about podcasting trends in terms of marketing, topics, and the future outlook of the industry.
Watch our hosts Sam Brace and Becky Peltz, as well as our special guest host Eric Portis, interview Chris Coyier about his recent development project. With Eleventy, Netlify, Puppeteer and Cloudinary’s fetch capabilities, he was able to create a microsite for his famous CSS-Tricks.com site that showcases various coding fonts you can use. Find how he did it by watching this episode!
I need to develop a numerical computation software with a GUI interface like the attachment. I have tried tkinter package, but it seems that it can not resolve this mission.
Could you please give me some suggestions about which package should i use to obtain this goal.
Regards
Want to dive right in? Phone.com is a budget-friendly VoIP phone system provider that is great for small businesses and entrepreneurs.
As working remotely becomes more common and more popular, so do Voice over Internet Protocol (VoIP) phone systems. They allow businesses complete communication flexibility and the ability to stay in touch with employees and clients alike via phone calls, conference calls, and video meetings, all via the internet.
Phone.com is one of the top VoIP phone systems in the market today. In particular, they are a great solution for small or growing businesses and entrepreneurs. However, if you’re looking for a provider with wider-ranging capabilities or that is more suited to larger businesses, Phone.com may not be the one for you.
In any case, this review is going to break down the best and the worst of Phone.com and will show you how they measure up to other top providers in the market today.
Let’s dig in.
Phone.com Pros and Cons
Pros
Competitive pricing plan
Easy-to-use interface
24/7 customer support
Use existing hardware
Voicemail to email
Live receptionist
50+ standard features available
Cons
Limited advanced features on basic plan
Limited video conferencing
Additional fees for many features that other companies include
Phone.com is a solid choice for small businesses looking for a cost-effective and reliable VoIP phone system. It’s easy to set up, user-friendly, and compatible with all phones.
Its key draw as a standout in the list is definitely its price point. For just $9.99 per user, per month you’ll have access to a reliable VoIP service from any device. From where we are standing, this is pretty darn great for small or new businesses.
However, truth be told, Phone.com is somewhat limited when we compare it to some of the top VoIP providers out there such as RingCentral and Nextiva.
Simply put, RingCentral is the best for most. Although it’s priced higher than Phone.com, it offers a range of great features and also wins best video conferencing software in our books. With varying pricing solutions, RingCentral is suitable for just about any business size.
On the other hand, Nextiva is a great solution for businesses who want to tie in their VoIP phone services, with their sales software, and service CRM software too. They’re also renowned for their top-notch customer service. Although Nextiva is suitable for small businesses, their pricing plans really cater to enterprises and call centers.
It’s important to understand that not all VoIP phone services allow you to use your existing hardware. Some allow you to use an existing device so long as it is IP-Enabled, while some require you to use their hardware.
The best ones though, are the providers who allow you to use any existing device, regardless of whether it is IP-Enabled. These are the ones we like the most.
We’re happy to report that Phone.com is one of these likable providers that allows you to use your existing hardware. If you want to receive calls through a desktop phone that is not IP-Enabled, you’ll still need an adapter, but Phone.com provides one for free!
Phone.com Pricing
There are a few things to consider outside of the bottom line when it comes to choosing the most cost-effective VoIP provider.
Of course, we should consider the price of the plan. How much is it going to cost you per user, per month to run this service? But outside of this, we also need to consider any limitations on the plans and whether you’re signing up for a contract or can choose a month-to-month payment option.
Phone.com is one of the best out there for budget pricing. As we mentioned earlier, you can get started for as little as $9.99 per month. What is not to love about that? And although there may be cheaper plans out there, they aren’t ones that we’ve been able to recommend for various reasons.
Now, here is where we need to scrutinize Phone.com just a little. Although the base pricing is great, the limitation of the included call minutes (300 minutes per month) on the lead-in plan is likely going to cause some issues for most businesses. So, businesses who are expecting even a moderate call volume will need to look at the higher tiers to gain access to unlimited minutes.
The upside to this is that Phone.com does allow users some flexibility to discover how many minutes they’re going to need.
They provide options to either pay annually and thereby commit to an annual contract, or choose to pay slightly more for a month-to-month contract, meaning you can re-evaluate your requirements as each month rolls around.
Phone.com Setup and Ease of Use
The last thing anyone needs these days is a lengthy set-up process or a software tool that you simply cannot get your head around.
Thankfully, Phone.com stands up well against its competitors in both of these aspects.
Regardless of whether you’re using existing hardware or are switching to new hardware, the setup process is the same. In fact, there are three easy steps to be followed which are heavily detailed on the Phone.com website. If you get stuck, Phone.com can set it up remotely for you.
Once the setup is complete, you’ll be able to manage your new phone system from an easy-to-use web-based interface that allows users to customize voicemail greetings, set extensions, and set phone-operating schedules.
Phone.com Features
Now, it’s not that Phone.com doesn’t have extensive features to offer–they do. In fact, they have over 50+ standard features to provide.
But the thing that lets them down in this area is that many, more advanced features that are included by other providers’ base plans (such as unlimited minutes and unlimited video conferencing), are not included in Phone.com’s lead-in plan.
This won’t be a dealbreaker for everyone. You might be fine with this lack of included features because the price is right!
However, if you’re looking for a provider who takes the cake when it comes to features, you should have a further look into RingCentral. Yes, their plans are more expensive from the outset. But, they include a lot of features that other VoIP providers charge extra for (such as those mentioned above).
At the end of the day, there is no reason to pay for features you won’t use. Our recommendation to help you figure out which ones you can and can’t live without is to utilize as many free trials as you can, before making your final purchasing decision.
Product Offerings
Phone.com Business Phone System
The bread and butter of Phone.com’s product offerings is very obviously their phone system.
Let’s cut to the chase here. Although we’ve briefly discussed some of the limitations of the features of Phone.com’s standard package, when it comes to the best VoIP phone system for small businesses, they take the cake.
They offer all the important modern features of a larger phone system but are extremely affordable and easy-to-use for entrepreneurs and growing businesses. Some of the features you can expect to have access to include:
Business phone number
Voicemail to Email
SMS text messaging
Call routing
Call queuing
Hold music
Mobile applications
Audio conferencing
If you’ve already got a business phone number and don’t want to go through the hassle of changing it, Phone.com will help you transfer your existing number to their services. And if you don’t have a toll-free number, they’ll give you one of those too.
Furthermore, the implementation process is incredibly smooth so you’ll be up and running in no time. A key highlight of Phone.com is the ability to use existing hardware, mobile device, or PC. There are literally no barriers to getting started for new business owners which is a huge drawcard for those just getting started.
Finally, their VoIP pricing plans are not only affordable, but also scalable, so business owners can grow with Phone.com if they want to.
Are there providers out there with better VoIP services? Yes. But do those providers offer a cost-effective solution to even the newest of business owners, not quite.
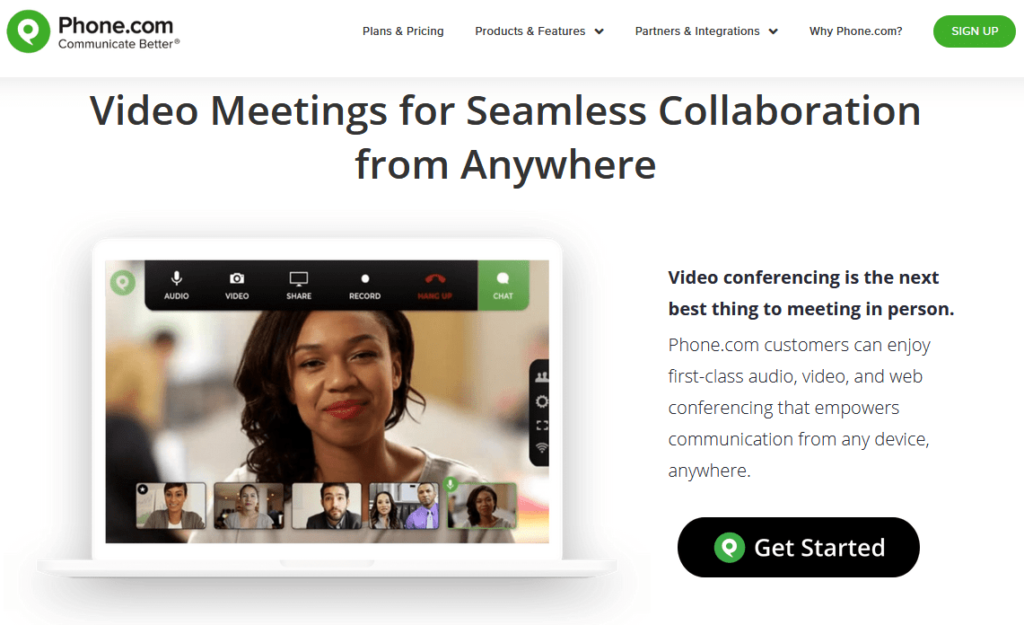
Phone.com Video Meetings
Having access to a great video conferencing service has become vital to most businesses’ success–especially in current times.
The good news is that most top VoIP phone providers do offer video conferencing or meetings as a part of their services, including Phone.com.
Although all of Phone.com’s plans include unlimited video conferencing, there are limits as to how many participants can attend the video meeting at one time. On the Basic plan, this is just 10 participants, compared to the Plus plan which allows 25, and the Pro which allows up to 100 participants.
Other features you can expect to find with Phone.com’s video meetings are:
Browser-based web conferencing for ease-of-use
Personalize your meeting environment with a custom URL
Screen and document sharing
Encryption and security codes to protect privacy
These features are pretty standard across the board for video conferencing. For some businesses, these video conferencing features and participant limitations will work fine.
However, let’s say you’re on a Basic plan and it suits the size of your business most of the time. But sometimes you need to hold a video conference with all of your clients at once. It’s most likely that the participant limit of 10 is not going to suit your needs, right?
In this instance, we have to once again recommend RingCentral as the contender with the better offering in this area. Although there is a 40-minute limit on group meetings, you can have up to 100 participants involved, and it will cost you $0 to do so.
Phone.com Mobile Applications
For those who prefer the mobility of using their mobile as a business phone, but may be sick of clients having their personal number to call at all hours of the day and night, this product offering is designed just for you.
Phone.com’s mobile application allows you to access and manage your account from your mobile phone. You’ll have access to all the same features with the added benefit of making calls over your carrier network or using Wi-Fi. This means you’ll be able to make international calls without fees and you won’t have to worry about going over your monthly call limits included in your plan.
Furthermore, you’ll also be able to send and receive SMS messages using your business phone numbers. The texts will filter through the Phone.com app, so you won’t need to worry about mixing business with personal texts either.
In a nutshell, the mobile application is a great offering from Phone.com. In our research, we’ve not seen this product offered by many other providers in the market, so it does lend Phone.com a decent advantage. It’s also a standard feature and is included even in the Basic plan.
Phone.com VoIP Phones
Even though Phone.com does enable users to utilize existing hardware, if you are looking to upgrade to a VoIP phone, they can help you with that too!
In fact, they claim to be able to offer competitive pricing on some of the top names in the industry such as Polycom, Cisco, and Yealink. All business phones are tested and certified to be compatible with Phone.com’s communication services.
In our research, we’ve not come across many VoIP phone service providers who do offer to provide you with an IP-Enabled phone. This may be because many of the top providers can work through many different hardware options or simply through a mobile phone or the internet.
However, if you like the reliability of an old-fashioned desktop phone instead of (or as well as) your mobile phone, Phone.com allows you to source both your phone and your VoIP service in one place.
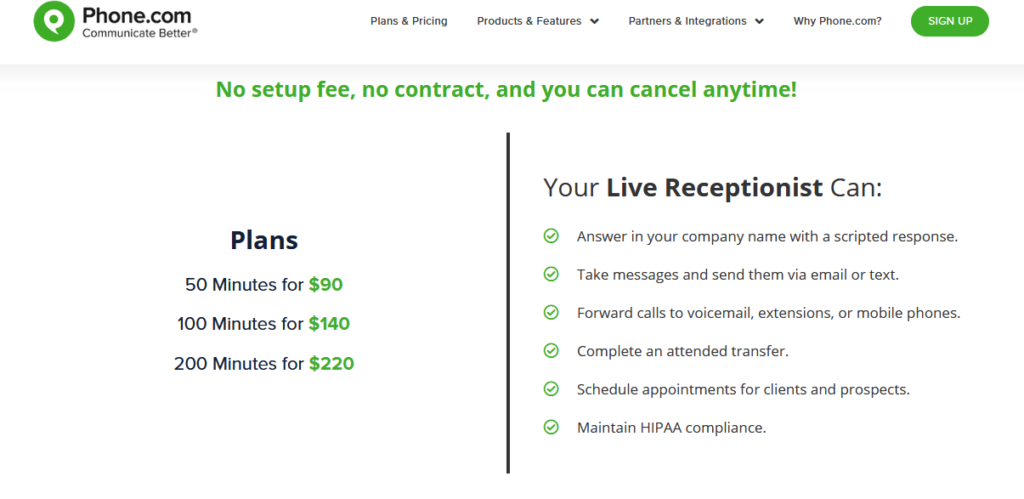
Phone.com Live Receptionist
If your business receives high call volume or you have multiple extensions to transfer to, the Live Receptionist product offering is for you. Phone.com has a team of US-based professional receptionists (real people) who will answer your calls and then transfer callers to wherever they need to go.
Your Live Receptionist can also schedule appointments for you, block spam calls, and take messages to be sent via email or text. In a nutshell, they are there to tend to your customers with professionalism, even when you’re closed or busy.
It’s important to note that this is an add-on feature, so it’s not included in any of Phone.com’s standard package offerings. As you can see in the screenshot above, the pricing is based on the number of minutes your Live Receptionist spends on the phone with your clients. The more minutes you require, the more cost-effective it becomes.
We think this is a pretty great offering from Phone.com. Sure, it won’t fit the budget of most of the smaller businesses who may be utilizing their service, but it gives businesses peace of mind knowing that someone can be there to pick up the workload, should they ever need them to.
So, would we recommend Phone.com for your next VoIP phone service provider? Yes.
It’s definitely a great option for entrepreneurs and no-fuss small businesses who want the flexibility and extra features of a VoIP service compared to a traditional landline phone. They’re cost-effective, easy to use, and provide great customer service.
However, if you’re a business owner who is looking for advanced features or extensive requirements, you are better off looking into a provider like RingCentral or Nextiva. If you’re still not sure what you’re after, check out our post on the best VoIP phone systems for your business to help you decide.
Living on the bleeding edge of Gutenberg’s development is not particularly easy for everyone. There is a ton of work and know-how involved with getting everything set up. You have to clone a Git repository, grab pull requests, and run a build process. Non-developers may find themselves facing an overwhelming learning curve. It can be rough for developers who like to keep things simple too.
There are times when it makes sense to simply download a ZIP file, upload it to a WordPress site, and test things out. The most straightforward way is to wait until the development team officially releases an update. You can snag a copy from its WordPress.org plugin page or via the plugins screen in the WordPress admin interface. However, how do you test features between releases?
Gutenberg Times has a page for grabbing a nightly-created ZIP of the plugin. This includes the latest features and bug fixes that have been merged into the project. For users who want to test the plugin and provide feedback to the development team, this is the easiest way to get started.
There are also times when you might want to test changes that are not yet available in the nightly build. Gutenberg currently has 589 pull requests (PRs) — this number changes daily. They are new enhancements and fixes with the potential to be merged into the codebase. Each of these PRs needs a review and feedback. Not all of them will make it in.
For the average user, PR testing is not a reasonable expectation. Even working through Git lingo can be a minefield. However, solutions exist for skipping the intricacies of a developer-only space and hopping into the fray.
One option is Gutenberg.run, a web-based install for testing PRs. The site runs the latest stable release of WordPress and activates a copy of the Gutenberg plugin with the changes from a user-entered PR number.
This is a quick way to test a potential change without spinning up a test install. However, checking out a PR related to Full Site Editing is a no-go. The site has no way to test the site editor, which requires a block-based theme like TT1 Blocks.
Core WordPress contributor Paal Joachim Romdahl outlined a method for testing PRs via a ZIP file. The process is simple, but it is not easy to find if you do not know what you are looking for.
Find a PR.
Click the Checks tab.
Build Gutenberg Plugin ZIP
After finding a PR that you want to try, you must click on the “Checks” tab for it on GitHub. Once on the new screen, you can scroll through the left sidebar until you find the “Build Gutenberg Plugin ZIP” link.
From that point, it is a matter of clicking it and downloading the ZIP file — note that it has a ZIP within a ZIP. This download will include the latest version of the plugin with the included PR code applied.
Romdahl has a thorough walkthrough in the following video:
He has also opened a ticket for helping others more easily access a testing ZIP for PRs. The discussion is ongoing. It is currently leaning toward adding an automated comment that outputs a link to the PR build’s ZIP file. This type of exposure should open testing to a wider group of people.
Not sure about you, but I often wonder how to build a carousel component in such a way that you can easily dump a bunch of items into the component and get a nice working carousel — one that allows you to scroll smoothly, navigate with the dynamic buttons, and is responsive. If that is the thing you’d like to build, follow along and we’ll work on it together!
This is what we’re aiming for:
We’re going to be working with quite a bit of JavaScript, React and the DOM API from here on out.
First, let’s spin up a fresh project
Let’s start by bootstrapping a simple React application with styled-components tossed in for styling:
Now let’s go to our App file, remove all unnecessary code, and build a basic structure for our carousel:
// App.js
import {Carousel} from './Carousel'

function App() {
  return (
    <Container>
      <H1>Easy Carousel</H1>
      <HorizontalCenter>
        <Carousel>
        {/* Put your items here */}
        </Carousel>
      </HorizontalCenter>
    </Container>
  )
}
export default App
I believe this structure is pretty straightforward. It’s the basic layout that centers the carousel directly in the middle of the page.
Now, let’s make the carousel component
Let’s talk about the structure of our component. We’re gonna need the main <div> container which as our base. Inside that, we’re going to take advantage of native scrolling and put another block that serves as the scrollable area.
You can specify width and height on the inner container, but I’d avoid strict dimensions in favor of some sized component on top of it to keep things flexible.
Scrolling, the CSS way
We want that scroll to be smooth so it’s clear there’s a transition between slides, so we’ll reach for CSS scroll snapping, set the scroll horizontally along the x-axis, and hide the actual scroll bar while we’re at it.
Wondering what’s up with scroll-snap-type and scroll-snap-align? That’s native CSS that allows us to control the scroll behavior in such a way that an element “snaps” into place during a scroll. So, in this case, we’ve set the snap type in the horizontal (x) direction and told the browser it has to stop at a snap position that is in the center of the element.
In other words: scroll to the next slide and make sure that slide is centered into view. Let’s break that down a bit to see how it fits into the bigger picture.
Our outer <div> is a flexible container that puts it’s children (the carousel slides) in a horizontal row. Those children will easily overflow the width of the container, so we’ve made it so we can scroll horizontally inside the container. That’s where scroll-snap-type comes into play. From Andy Adams in the CSS-Tricks Almanac:
Scroll snapping refers to “locking” the position of the viewport to specific elements on the page as the window (or a scrollable container) is scrolled. Think of it like putting a magnet on top of an element that sticks to the top of the viewport and forces the page to stop scrolling right there.
But, we still need another CSS property set on the container’s children (again, the carousel slides) that tells the browser where the scroll should stop. Andy likens this to a magnet, so let’s put that magnet directly on the center of our slides. That way, the scroll “locks” on the center of a slide, allowing to be full in view in the carousel container.
Let’s also add some spacing to our items so they won’t look too squeezed. You may also notice that we have unnecessary spacing on the left of the first item. We can add a negative margin to offset it.
Take a closer look at the cursor position while scrolling. It’s always centered. That’s the scroll-snap-align property at work!
And that’s it! We’ve made an awesome carousel where we can add any number of items, and it just plain works. Notice, too, that we did all of this in plain CSS, even if it was built as a React app. We didn’t really need React or styled-components to make this work.
Bonus: Navigation
We could end the article here and move on, but I want to take this a bit further. What I like about what we have so far is that it’s flexible and does the basic job of scrolling through a set of items.
But you may have noticed a key enhancement in the demo at the start of this article: buttons that navigate through slides. That’s where we’re going to put the CSS down and put our JavaScript hats on to make this work.
First, let’s define buttons on the left and right of the carousel container that, when clicked, scrolls to the previous or next slide, respectively. I’m using simple SVG arrows as components:
We’ll sprinkle in some styling that adds absolute positioning to the arrows so that the left arrow sits on the left edge of the carousel and the right arrow sits on the right edge. A few other things are thrown in to style the buttons themselves to look like buttons. Also, we’re playing with the carousel container’s :hover state so that the buttons only show when the user’s cursor hovers the container.
This is cool. Now we have buttons, but only when the user interacts with the carousel.
But do we always want to see both buttons? It’d be great if we hide the left arrow when we’re at the first slide, and hide the right arrow when we’re at the last slide. It’s like the user can navigate past those slides, so why set the illusion that they can?
I suggest creating a hook that’s responsible for all the scrolling functionality we need, as we’re gonna have a bunch of it. Plus, it’s just good practice to separate functional concerns from our visual component.
First, we need to get the reference to our component so we can get the position of the slides. Let’s do that with ref:
The ref property is on <CarouserContainerInner> as it contains all our items and will allow us to do proper calculations.
Now let’s implement the hook itself. We have two buttons. To make them work, we need to keep track of the next and previous items accordingly. The best way to do so is to have a state for each one:
The next step is to create a function that detects the position of the elements and updates the buttons to either hide or display depending on that position.
Let’s call it the update function. We’re gonna put it into React’s useEffect hook because, initially, we want to run this function when the DOM mounts the first time. We need access to our scrollable container which is available to use under the ref.current property. We’ll put it into a separate variable called element and start by getting the element’s position in the DOM.
We’re gonna use getBoundingClientRect() here as well. This is a very helpful function because it gives us an element’s position in the viewport (i.e. window) and allows us to proceed with our calculations.
We’ve done a heck of a lot positioning so far and getBoundingClientRect() can help us understand both the size of the element — rect in this case — and its position relative to the viewport.
The following step is a bit tricky as it requires a bit of math to calculate which elements are visible inside the container.
First, we need to filter each item by getting its position in the viewport and checking it against the container boundaries. Then, we check if the child’s left boundary is bigger than the container’s left boundary, and the same thing on the right side.
If one of these conditions is met means that our child is visible inside the container. Let’s convert it into the code step-by-step:
We need to loop and filter through all container children. We can use the children property available on each node. So, let’s convert it into an array and filter:
Once we’ve filtered out items, we need to check whether an item is the first or the last one so we know to hide the left or right button accordingly. We’ll create two helper functions that check that condition using previousElementSibling and nextElementSibling. This way, we can see if there is a sibling in the list and whether it’s an HTML instance and, if it is, we will return it.
To receive the first element and return it, we need to take the first item from our visible items list and check if it contains the previous node. We’ll do the same thing for the last element in the list, however, we need to get the last item in the list and check if it contains the next element after itself:
// usePosition.js
function getPrevElement(list) {
  const sibling = list[0].previousElementSibling

  if (sibling instanceof HTMLElement) {
    return sibling
  }

  return sibling
}

function getNextElement(list) {
  const sibling = list[list.length - 1].nextElementSibling
  if (sibling instanceof HTMLElement) {
    return sibling
  }
  return null
}
Once we have those functions, we can finally check if there are any visible elements in the list, and then set our left and right buttons into the state:
// usePosition.js
if (visibleElements.length > 0) {
  setPrevElement(getPrevElement(visibleElements))
  setNextElement(getNextElement(visibleElements))
}
Now we need to call our function. Moreover, we want to call this function each time we scroll through the list — that’s when we want to detect the position of the element.
So far, so good. As you’ll see, our arrows show up dynamically depending on our scroll location in the list of items.
We’ve got just one final step to go to make the buttons functional. We need to create a function that’s gonna accept the next or previous element it needs to scroll to.
Don’t forget to wrap functions into the useCallback hook in order to avoid unnecessary re-renders.
Next, we’ll implement the scrollToElement function. The idea is pretty simple. We need to take the left boundary of our previous or next element (depending on the button that’s clicked), sum it up with the width of the element, divided by two (center position), and offset this value by half of the container width. That will give us the exact scrollable distance to the center of the next/previous element.
Like a good citizen, we ought to clean up our code a bit. For one, we can be more in control of the passed items with a little trick that automatically sends the styles needed for each child. The Children API is pretty rad and worth checking out.
We care about our users, so we need to make our component not only functional, but also accessible so folks feel comfortable using it. Here are a couple things I’d suggest:
Adding role='region' to highlight the importance of this area.
Adding an area-label as an identifier.
Adding labels to our buttons so screen readers could easily identify them as “Previous” and “Next” and inform the user which direction a button goes.
Feel free to add additional carousels to see how it behaves with the different size items. For example, let’s drop in a second carousel that’s just an array of numbers.
And voilà, magic! Dump a bunch of items and you’ve got fully workable carousel right out of the box.
Feel free to modify this and use it in your projects. I sincerely hope that this is a good starting point to use as-is, or enhance it even further for a more complex carousel. Questions? Ideas? Contact me on Twitter, GitHub, or the comments below!
When I started in web design 27 years ago, testing with users was time-consuming and expensive, but a new generation of tools has changed all of that. Most of us have heard of some of the more popular tools such as Userzoom or Hotjar, but in this post, I want to explore some of the hidden gems I use to test the interfaces I am involved in creating.
Please note that I’m by no means affiliated with any tools mentioned here — I just use them all the time. Hopefully, they prove useful to you as well.
We begin at the very start of a project with user research.
Run Surveys With Survicate
User research is vital, especially when it comes to identifying problems with an existing website. As a result, I almost always survey users early on in a redesign process.
Although both Usability Hub and Maze allow me to create surveys, the functionality they offer is relatively limited for my taste, and it is a bit difficult to embed surveys on your website. That is a shame because exit-intent surveys can be a powerful way to gain insights into why users are abandoning a website or failing to act.
One solution to running user research surveys I found useful is Qualaroo which does an excellent job. Unfortunately, it can prove a bit expensive in some situations, so if you are looking for an alternative, you might want to check out Survicate instead.
Survicate offers both website surveys and the ability to send a survey via email or social media. It even allows you to add a permanent feedback button on your site if you want.
Testing visuals with Usability Hub
When it comes to testing, most of the testing I carry out is nearer the start of a project than the end. That is when it is easiest to make changes, so I often test with nothing more than a design concept. At that stage, I don’t even have a clickable prototype, so I use Usability Hub.
It is an excellent way of addressing stakeholder concerns about a design concept. I can get results from testing within an hour, and Usability Hub will even handle participants' recruitment if I want.
"Spell Check" Your Designs with Attention Insights
Once I start to design an interface, there is a lot to consider from messaging and aesthetics to visual hierarchy and calls to action. As a result, it can be all too easy to end up with the wrong focus on a page. If I am not careful, I lead the user’s attention in the wrong direction, and they miss critical content or calls to action.
Although the best way of checking this is usability testing, sometimes I want a quick sanity check that I am heading in the right direction. Attention Insights takes thousands of hours of eye-tracking studies and uses that data to predict where users might look on a design.
Although not as accurate as a real eye-tracking study, it can act slightly as a spelling or grammar checker does for your copy. It can help flag potential issues and help you make a judgment call.
Modernize Your Card Sorting with UXOps
When it comes time to work on a website's information architecture, I almost always turn to UXOps.
Like more well-established app OptimalSort, UXOps allows you to run card sorting exercises online to ensure your site reflects a user’s mental model. If I am being perfectly honest, I prefer UXOps because it is a bit more affordable and focuses on a single task. However, I also found it a very easy tool for participants to understand, and for me to interpret the data afterwards.
Remote and Unfaciliatated Testing with Lookback
When it comes to usability testing, we all are likely to explore remote testing these days. It is actually more convenient than in-person testing, not to mention I have been able to continue testing throughout the pandemic! Although this can be done using an app like Zoom, I personally prefer a tool called Lookback.
I love Lookback because it has been optimized for usability testing with features such as note-taking, in-app editing of video, and automatically recording the user’s screen and webcam. However, where Lookback really shines is that it allows unfacilitated usability testing.
Unfacilitated testing is a real boon when your time is tight, and you want to test with lots of people. With Lookback, I send participants a link, and the app will guide them through the process without the need for me to moderate the sessions.
Quantify Your Testing Using Maze
I like to test with more users the nearer a site gets to going live. While qualitative testing is great early on, I am more interested in understanding how the site will operate at scale as we near launch. Unfortunately, analyzing a large number of unfacilitated test sessions can prove time-consuming. That is where Maze can prove invaluable.
Maze has a wealth of tools that are useful for all kinds of usability testing. However, its real strength lies in its ability to aggregate data. This means that instead of having to watch each session; you can get quantitative data such as:
The number of users who gave up.
Those who went either via the most direct or indirect route to complete a task.
Heat maps of any misclicks users made.
How long it took people to complete the task.
Combined with its overall flexibility, Maze is an excellent all-round choice at a manageable price, no matter your budget.
Find Test Participants with Testing Time
As I am sure you know, one of the biggest pains with usability testing is recruitment. Although apps like Maze, Usability Hub and Lookback all offer the option to recruit participants for you, they come with some limits regarding the people you reach.
When I need to recruit a particular type of person, I tend to use a service like Testing Time, if I cannot recruit people myself. That is because Testing Time allows me a lot more control over the type of person I get.
Testing Time does not just help me with recruitment. It also provides tools for screening potential candidates, managing their tests, and paying them afterwards.
Gather Data with Microsoft Clarity
Once my new design is finally launched, my attention shifts to monitoring and improving those designs. I do this by watching how site visitors are behaving and identifying any issues they are encountering. The two tools I use to identify and diagnose problems with a site are heat map monitoring and session recorders.
The most well-known tool in this field is Hotjar, although Fullstory has superior tools in many ways. If you are looking for a slightly more affordable alternative, Microsoft has released a free competitor called Clarity which gives you the ability to watch individual sessions, see scroll heatmaps and see visualizations of where people are clicking on pages.
Visualize Your Research with Evolt
Of course, I rarely get to make arbitrary decisions about the direction of a site. There are almost always other stakeholders to win over. To do that I need to communicate the research and testing I have undertaken, and that is where Evolt comes in. Evolt helps me visualize my research, but it doesn’t stop there.
It is actually the ideal tool for working on user personas, journey maps and even moodboards with your stakeholders. Miro can be great for these kinds of tasks as well, and it’s often used for the same purpose, but in my personal experience Evolt seems to be optimized specifically for designers.
No Excuse
With so many great tools available, there really shouldn't be any excuse for not testing with users these days. It is fast, easy and cheap. But we don’t even need to limit ourselves to testing. These tools also make user research and visualization easier than ever before, making them ideal all the way from discovery through prototype to post-launch optimization.
But these are just the tools I make use of. There’s no doubt that you use tools that are not included in the list. If so, please post them in the comments below — I’d love to hear your stories, and the tools that you find useful in your work!
Email marketing is an incredibly diverse area. It is about not only touting goods and keeping users up-to-date but maintaining healthy relationships with customers. The digital world can be cold and misleading. Therefore, without a one-to-one connection with clients, your …
Are you looking for the best auction plugins for WordPress?
An auction plugin allows you to run online auctions on your website and create an eBay like store using WordPress.
In this article, we’ll show you our top pick of the best auction plugins for WordPress.
Before You Get Started
WordPress has many different auction plugins available. Some are available as standalone WordPress plugins whereas others are available as WooCommerce extensions.
Depending on the option you choose, your set up will be different.
For example, a WooCommerce plugin will require you to set up an online store. You’ll need a WooCommerce hosting provider like SiteGround.
Whereas for other plugins, you can simply create a WordPress website and install it like you would do for any other plugin.
If you’re expecting a lot of bidding in your auctions, then you may want to consider your website speed and performance issues by using a managed WordPress hosting provider. This ensures that your website does not go down during critical auction times.
With that said, let’s take a look at the best WordPress auction plugins that you can use.
YITH WooCommerce Auctions is the complete auctions plugin for WooCommerce and allows you to build an ebay-like website in minutes.
It is super easy to use and you can easily add any type of products that you want to auction. You can set up a minimum bid amount, minimum bid increment, reserve price, buy it now price, and more.
You can also choose to set a schedule for an auction, extend an auction, add a grace period, and have full control over the process.
It runs on top of WooCommerce, so you can easily set it up by setting up an online store first. After that, you can install the plugin and then add auction products like you would add any other WooCommerce product. This also makes it easier for you to accept payments and use all the powerful eCommerce features of WooCommerce.
The plugin can also be converted into a multi-vendor marketplace, which would allow other sellers to list their own products for auction on your site. Allowing you to make additional money by providing a platform to third-party sellers.
WP Auctions is another easy solution to run auctions on your WordPress website. It allows you to easily add auctions to your site, set starting price, date, and wait for bids to come in.
After that, you can send the winning bid to a page where they can pay via PayPal. Alternatively, you can accept payments manually or via wire transfer by emailing the user.
You can add the auction to a post, page or a sidebar widget on your website. You can also manually add it to your custom WordPress theme by adding a template tag.
The downside is that there are limited payment options, and it lacks many of the features you would get with some other plugins on the list. However, it is an excellent option if you don’t want to install an eCommerce plugin.
Ultimate WordPress Auction is another good way to add auctions to your WordPress website or WooCommerce store.
It allows you to add auction products, set bidding time, and manage your auctions using a simple dashboard. The free version allows you to accept payments via PayPal. The pro version allows you to accept payments via Stripe too.
Using it on WooCommerce also allows you to use a multi-vendor plugin. This enables other sellers to auction their own products on your platform.
WP Ebay Products Feed allows you to fetch and display your eBay auctions on your WordPress website. This is particularly useful for sellers that are already selling on eBay.
It also helps if you want to show your existing users that you are a reputable seller and have been an active seller.
The plugin is quite easy to use. Simply add the eBay ID and use a third-party service to convert it into a usable RSS feed. After that, you can set how you want products to be displayed in your feeds.
The plugin allows you to use your own Affiliate ID with eBay links. It also supports Gutenberg block editor, and you can display the auction feed anywhere on your website.
It can be used with other auction plugins for WordPress and WooCommerce, or as a standalone solution to simply send users to make the bid on your eBay profile.
The plugin supports normal, reverse auctions, sealed auctions, proxy auctions, and more. It allows customers to log in and view their own auction dashboard. Once they have won an auction, they will see a link to make the payment to complete the purchase.
Adding products to the auction works like any other product you add in WooCommerce. After you set up the product to be an auction product, you’ll see the options to set up the schedule, starting bid, and other settings.
It beautifully displays your auction products with a countdown timer to trigger the FOMO effect on the product page.
Being an extension of WooCommerce, it allows you to use multiple payment gateways and extend your site functionality using popular WooCommerce plugins and tools/
WP-Lister Lite for eBay is a WooCommerce plugin that allows you to easily add your WooCommerce products to your eBay store.
You can easily list products on your online store and your eBay store at the same time. It does not allow you to run an auction on your WooCommerce store.
However, you can use a different WooCommerce auction plugin or run the auction on eBay using the same product data without having to enter it again.
The plugin is a bit complicated to get used to as you need to set it up to work with an API. However, once it is set up the whole process runs quite smoothly.
Auction Nudge allows you to bring your eBay profile to your WordPress website or WooCommerce store.
It is particularly useful when you want to show that you are a well-reputed seller or just want to promote your eBay auctions. The plugin does a good job of bringing content from your eBay account to WordPress.
It is quite simple to use and comes with flexible options to display your eBay products, profile information, and your most recent feedbacks.
You can use it alongside any WordPress auctions plugin on the list and allow users to see your past activity on the platform.
We hope this article helped you find the best auction plugins for WordPress. You may also want to see our guide on best email marketing services to improve your auction bids and best live chat software to answer questions during live auctions.
If you liked this article, then please subscribe to our YouTube Channel for WordPress video tutorials. You can also find us on Twitter and Facebook.
I'm trying to convert a Java code into Python. I could adapt most of the code, however, it is difficult to me to link all the functions. The java code is used in Weka. I would like a stand-alone python code. The algorithm in the code is presented in this paper: https://www.cs.waikato.ac.nz/~eibe/pubs/alternating_model_trees_sac.pdf. Pseudocodes are Algorithm 3 and 4. I would like to predict m number of instances using this input data:
i have created messaging service, also created php file from this file i send push notification.
issue is in case user is offline and comes after some time , in this case my push notification not hold.
how to hold push notification.