How to Move Files Uploads from Google Forms to Specific Folders in Google Drive

The File Upload feature of Google Forms lets you receive files from form respondents directly in your Google Drive. You may add the File Upload question in your Google Form to receive PDF assignments from students, job applications, portfolio images from contestants, and more.

While the file upload feature in Google Forms is handy, it does have one big limitation. For instance, when a respondent uploads a file through Google Forms, the file is stored in a fixed folder within the form owner’s Google Drive. All uploaded files are are saved to the same folder, making it difficult to determine which respondent has uploaded which set of files.

Move Uploaded Files in Google Forms

This is where Document Studio can help you. The add-on can help you automatically organize uploaded files in custom folders as soon as they are received in your Google Drive through Google Forms. You can move uploaded to another folder, or rename the files based on the respondents’ answers in the Google Form. Additionally, you can organize the uploaded files into subfolders for convenient access.

Prepare Google Form

For this example, we’ve created a Google Form for collecting job applications for different positions in our company. The candidates have to provide their full name, the position they’re applying for, and then upload their resume in PDF format.

Move Google Forms File Uploads

By default, all uploaded files will be added in a new parent folder that is created by Google Forms in your Google Drive. However, you can organize the resume files in subfolders and move them to a specific folder based on the position the candidate has applied for. This will help you easily find the resumes of candidates who have applied for a specific position.

The uploaded files can also be renamed based on the candidate’s name or their email address. This will help you quickly identify the resumes of specific candidates.

Move Files to Custom Folders in Google Drive

Install the Document Studio and open the add-on in your Google Form. Create a new workflow and choose the File Uploads task from the list of available tasks.

Document Studio File Uploads

With Document Studio, you can move the uploaded files to another folder, copy the files to another folder, or rename the files based on the form responses. For our example, we’ll move and also rename the uploaded files based on the position the candidate has applied for.

Select the file upload question from the list of available questions. Next, choose the parent Google Drive folder where you wish to copy or move the uploaded files. You may also choose to save the uploaded files in a Shared Drive Folder, something that is not possible with the default Google Forms file upload feature.

For the subfolder path input field, provide the full path where you want the uploaded files to be saved. You can use placeholders like {{Country}} or {{Position}} to dynamically create subfolders based on the form responses.

Finally, provide a new name for the uploaded files. For our example, we have used the {{Name}} placeholder to rename the uploaded files based on the candidate’s name provided in the Google Form.

Rename file uploads in Google Forms

Save the workflow and your automation is ready. Now, whenever a candidate uploads their resume through your Google Form, the uploaded file will be moved to a custom folder in your Google Drive. The file will also be renamed based on the candidate’s name.

Move File Uploads with Google Apps Script

If you are comfortable with Google Apps Script, you can also write a custom script that will move the uploaded files to a specific folder in Google Drive. The script can be attached to your Google Form and will run automatically whenever a new form response is submitted.

To get started, go to your Google Drive and create a new folder (or use an existing folder). Open the folder and grab the ID of the folder from the browser’s address bar as shown in the screenshot.

Next, go to your Google Form that is accepting File Uploads and choose Script Editor from the 3-dot menu. Inside the script editor, remove all the existing code and copy-paste the following snippet. Remember to replace the Folder Id in line #1 with the Id of the folder that you’ve created in the previous step.

const PARENT_FOLDER_ID = '<<Folder ID here>>';

const initialize = () => {
  const form = FormApp.getActiveForm();
  ScriptApp.newTrigger('onFormSubmit').forForm(form).onFormSubmit().create();
};

const onFormSubmit = ({ response } = {}) => {
  try {
    // Get a list of all files uploaded with the response
    const files = response
      .getItemResponses()
      // We are only interested in File Upload type of questions
      .filter((itemResponse) => itemResponse.getItem().getType().toString() === 'FILE_UPLOAD')
      .map((itemResponse) => itemResponse.getResponse())
      // The response includes the file ids in an array that we can flatten
      .reduce((a, b) => [...a, ...b], []);

    if (files.length > 0) {
      // Each form response has a unique Id
      const subfolderName = response.getId();
      const parentFolder = DriveApp.getFolderById(PARENT_FOLDER_ID);
      const subfolder = parentFolder.createFolder(subfolderName);
      files.forEach((fileId) => {
        // Move each file into the custom folder
        DriveApp.getFileById(fileId).moveTo(subfolder);
      });
    }
  } catch (f) {
    Logger.log(f);
  }
};

Create OnFormSubmit Trigger

Inside the script editor, select initialize from the function drop-down and click the Run button to create the OnFormSubmit trigger for your current Google Form.

This will essentially run the Apps Script code whenever someone submits a new form entry and upload files to a specific folder in Google Drive.

OnFormSubmit Trigger

That’s it. Go to your Google Form and submit a new test entry. You should now see all the uploaded files neatly organized in a custom folder under the parent folder. The name of the custom folder is the unique Response Id that Google Forms automatically assigns to every form submission.

Also see:

  1. Change the Google Forms Upload Folder
  2. Move Google Forms Uploads to Shared Drive

Responsible, Conditional Loading

Over on the Polypane blog (there’s no byline but presumably it’s Kilian Valkhof (it is)), there is a great article, Creating websites with prefers-reduced-data, about the prefers-reduced-data media query. No browser support yet, but eventually you can use it in CSS to make choices that reduce data usage. From the article, here’s one example where you only load web fonts if the user hasn’t indicated a preference for low data usage:

@media (prefers-reduced-data: no-preference) {
  @font-face {
    font-family: 'Inter';
    font-weight: 100 900;
    font-display: swap;
    font-style: normal;
    font-named-instance: 'Regular';
    src: url('Inter-roman.var.woff2') format('woff2');
  }
}

body {
  font-family: Inter, system-ui, -apple-system, BlinkMacSystemFont,
               Segoe UI, Ubuntu, Roboto, Cantarell, Noto Sans, sans-serif,
               'Apple Color Emoji', 'Segoe UI Emoji', 'Segoe UI Symbol', 'Noto Color Emoji';
}

That’s a nice pattern. It’s the same spirit with accessibility and the prefers-reduced-motion media query. You could use both from JavaScript as well.

Also the same energy: Umar Hansa’s recent blog post JavaScript: Conditional JavaScript, only download when it is appropriate to do so. There are lots of examples in here, but the gist is that the navigator object has information in it about the device, internet connection, and user preferences, so you can combine that with ES Modules to conditionally load resources without too much code:

if (navigator.connection.saveData === false) {
    await import('./costly-module.js');
}

If you’re into the idea of all this, you might dig into Jeremy Wagner’s series starting here about Responsible JavaScript.


The post Responsible, Conditional Loading appeared first on CSS-Tricks.

You can support CSS-Tricks by being an MVP Supporter.

9 Best PDF Plugins for WordPress (Viewer, Embed, & Downloads)

Are you looking for the best PDF plugins for WordPress but don’t know where to get started?

By default, WordPress cannot generate or embed PDF files in posts or pages. This is where a PDF plugin comes in handy. You can create, edit, and embed documents with ease using a plugin.

In this article, we will show you the best PDF plugins for WordPress that you can use on your website.

Best WordPress PDF Plugins

Why Do You Need a PDF Plugin for WordPress?

WordPress does not support PDF embedding, or downloading blog posts as PDF by default.

If you have a PDF document and try to embed it in WordPress, then it will show your file as a downloadable link. This way if someone clicks on the link, they will leave your website.

A WordPress PDF plugin allows you to display your documents on your WordPress site. Your website visitors can then view them in a PDF viewer while staying on your site.

A PDF plugin also helps your users to download any blog post or page as a PDF document. It ensures that the page is neatly formatted, so people can save it or print it with ease.

With that said, let’s look at the best PDF plugins for WordPress.

1. EmbedPress

EmbedPress WordPress Plugin

EmbedPressis a complete plugin that allows you to add and display PDF files in your WordPress posts and pages. It’s easy to use and you can upload your PDF documents through the media library and place them anywhere on your site.

EmbedPress also lets you upload other types of media to your WordPress website. You can use it to add videos from YouTube, Vimeo, or Twitch.

Besides that, EmbedPress lets you upload Google Maps, docs, forms, sheets, Facebook posts, audio files, and much more.

2. E2Pdf

e2pdf-best-wordpress-pdf-plugin

E2Pdf is a clean and simple WordPress PDF plugin that lets you create, edit, and display PDF documents to your visitors.

You can show static or dynamic PDF files to your audience. It lets you create and edit PDF documents and forms without having to leave your WordPress site.

The plugin also lets you auto-generate PDF forms based on your WordPress posts, pages, or web forms.

3. WPForms

The WPForms website

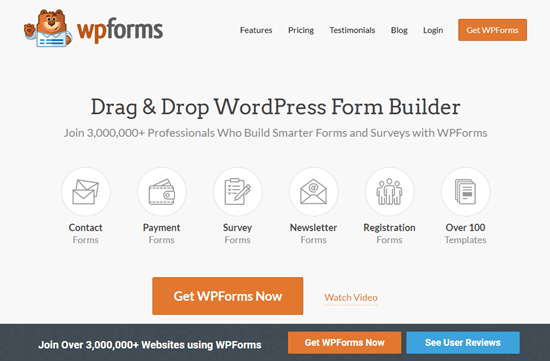
WPForms is the most beginner-friendly WordPress contact form plugin used by over 3 million website owners. With WPForms, you can allow users to submit PDF files to your website through a file upload form.

This way you don’t have to give access to your website’s backend to others in order to collect PDF files.

If you want to share your contact form submissions with someone else, then WPForms lets you download them as a PDF document as well.

You can check out our guide on how to create a file upload form in WordPress.

4. PDF & Print by BestWebSoft

PDF and Print by bestwebsoft

PDF & Print by BestWebSoft, as the name suggests, this plugin adds a PDF download and print button to your WordPress posts, pages, and custom post types.

You can add your website title, featured image, custom styles, and fonts. The plugin can also execute shortcodes when generating PDFs or creating a printer friendly version.

5. WooCommerce PDF Invoices & Packing Slips

WooCommerce PDF Invoices

WooCommerce PDF Invoices and Packing Slips is a PDF plugin for WordPress that allows you to generate, download, and send PDF invoices with order confirmation emails on your WooCommerce store.

You get basic templates with the ability to customize them according to your business needs. The plugin also helps you handle your packing slips and invoices from your WooCommerce admin area.

You can follow our step by step guide on how to start an online store to get started.

6. PDF Poster

PDF Poster plugin for WordPress

PDF Poster is another user-friendly WordPress plugin to embed PDF files on your website.

Using a shortcode, you can add PDF documents in your WordPress posts, pages, widget area, and theme files. Plus, you can add a download button, so people easily get hold of your PDF file.

And when you embed a file, it removes the black viewer frame, so visitors get a clean experience.

7. PDF.js Viewer

pdf js viewer

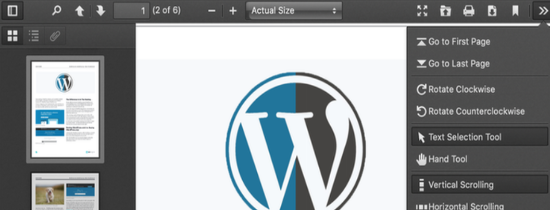
PDF.js Viewer lets you show PDF files inside your WordPress posts and pages through a simple shortcode or Gutenberg block.

It uses Mozilla’s PDF.js to display PDF documents in a browser. Users get all the functionality such as scrolling through the document, search, print and download PDF files.

Besides that, the plugin lets you password protect your PDF documents, setup advanced zoom settings, show a loading bar, and display partially loaded PDF documents.

8. PDF Embedder

PDF Embedder WordPress Plugin

PDF Embedder is a WordPress plugin that allows you to embed PDF files in WordPress posts and pages.

The plugin uses JavaScript to embed files with a fully functional toolbar allowing users to zoom, navigate, and even download the PDF file. This makes the plugin different from others on our list.

Javascript allows you to have more flexibility on how your PDF documents will appear. The plugin also automatically adjusts the size of your PDF files. You can also enter the width manually and the plugin will automatically calculate the height.

9. MonsterInsights

The MonsterInsights website

MonsterInsights is the best WordPress analytics plugin used by over 2 million website owners. It helps you see how people find and use your website.

It comes with a built-in download tracking feature that helps you monitor how many PDF downloads you get from your WordPress site.

Aside from download tracking, it also lets you see how many people are clicking on specific PDF files, links, buttons, or any other element on your site. You also get to see other important items such as real-time analytics, top referral sources, page level analytics, custom dimensions, and more.

The PDF tracking feature is also available in MonsterInsights Lite, which is the free version of the plugin.

Bonus WordPress PDF Plugins

These plugins do not offer a way to generate or embed PDF files. However, if you serve PDF files on your WordPress site, then you may find them helpful.

10. SearchWP

SearchWP

SearchWP is a paid WordPress plugin. It allows you to add a better search experience to your WordPress site.

One of the features of this plugin is the ability to search the text inside PDF files. However, it cannot search PDF files that are encrypted, stored outside the media library, or have images as text. See our guide on how to improve WordPress search with SearchWP

11. OptinMonster

The OptinMonster homepage

OptinMonster is the best lead generation and conversion optimization plugin for WordPress.

It is a powerful tool that helps you grow your email list. You can convert abandoning visitors into subscribers by using OptinMonster. You can ask users to signup for your email list in exchange for free download PDF resources.

You can also use it to offer content upgrades. See this list of content upgrade ideas to 10X your subscribers.

Which is The Best PDF Plugin for WordPress?

The best WordPress PDF plugin really depends on your needs. If you are looking for a plugin to embed PDF documents and other media files with ease, then we recommend EmbedPress.

If you want to allow users to submit PDF files to your website, then WPForms is the best plugin.

As for creating and editing PDF documents right inside WordPress, then we recommend E2Pdf.

If you want visitors to subscribe in exchange for PDF downloads, then use OptinMonster, and lastly for tracking all PDF analytics, we recommend MonsterInsights.

We hope this article helped you find the best PDF plugins for WordPress. You may also want to see our list of the best WordPress page builder plugins, and our comparison of the best email marketing services.

If you liked this article, then please subscribe to our YouTube Channel for WordPress video tutorials. You can also find us on Twitter and Facebook.

The post 9 Best PDF Plugins for WordPress (Viewer, Embed, & Downloads) appeared first on WPBeginner.

Dexis-js – Holistic Guide

Dexie.js is a minimalistic indexed DB wrapper that provides near-native performance and easy to use database.  Hard to believe the dexie DB package size is around 22KB and it works cross-browser and devices. It solves the error handling by promises rather than events. So it will result in less of coding which turns out to be maintainable code.

Let's start the how-to-use dexie database by creating an order electron app. Clone the electron typescript template and install dexie to it. 

How to Blend Antiques Into a Modern Home

Antiques are beautiful and unique furniture pieces that can add a vintage feel to a room, but incorporating them into a modern home without them looking out of place takes some work. The key to making them work, is to blend them with newer pieces. Ahead are five ways to make older furniture and décor […]