Google Search to Add Page Experience to Ranking Signals in May 2021

Six months ago, Google announced its plans to introduce a new ranking signal for Search, based on page experience as measured by Core Web Vitals metrics. At that time, Google promised to give site owners at least six months notice before rolling out the update so they can improve their scores on the metrics before the update. The company reports a 70% increase in users engaging with Lighthouse, PageSpeed Insights, and Search Console’s Core Web Vitals report in preparation for the update.

Today Google confirmed that it will roll out the new page experience signals in May 2021. The search engine also plans to introduce a new visual indicator for pages that fully comply with the page experience requirements:

On results, the snippet or image preview helps provide topical context for users to know what information a page can provide. Visual indicators on the results are another way to do the same, and we are working on one that identifies pages that have met all of the page experience criteria. We plan to test this soon and if the testing is successful, it will launch in May 2021 and we’ll share more details on the progress of this in the coming months.

There are no additional details on what that will look like but AMP’s lightning bolt is a good example of how small graphics can have a meaningful impact on users’ behavior when navigating through search results.

Are WordPress Websites Ready for Page Experience as a Ranking Signal?

The page experience signals Google plans to roll out will include Core Web Vitals (Loading, Interactivity, and Visual Stability metrics), combined with existing search signals for mobile-friendlinesssafe-browsingHTTPS-security, and intrusive interstitial guidelines. Based on where the web is now, in terms of delivering a good page experience (as defined by Google), site owners will undoubtedly need the next six months lead time to become aware of the new ranking signal and prepare.

Google’s Core Web Vitals assessment gives a pass or fail rating, with a “pass” requiring a good result in all three metrics. A cursory test using Page Speed Insights on a few of the websites for the largest companies, hosts, and agencies in the WordPress space shows most of them do not currently meet these requirements.

In August, Screaming Frog, a search marketing agency, published a lengthy report on tests that found only 12% of Mobile and 13% of Desktop results passed the Core Web Vitals assessment. Screaming Frog used the PageSpeed Insights API to test 20,000 websites, which were selected through scraping the first-page organic results from 2,500 keywords across 100 different topics. The report highlighted a few important findings:

  • First Input Delay (FID) on Desktop is negligible with 99% of URLs considered good. And 89% for Mobile.
  • 43% of Mobile and 44% of Desktop URLs had a good Largest Contentful Paint (LCP).
  • 46% of Mobile and 47% of Desktop URLs had a good Cumulative Layout Shift (CLS).
  • URLs in Position 1 were 10% more likely to pass the CWV assessment than URLs in Position 9.

These results suggest that most website owners still have a good deal of work ahead of them in meeting the requirements for passing the Core Web Vitals assessment. Unsurprisingly, Google suggests AMP as the preferred vehicle to get there, but even AMP is not a magic bullet.

At AMP Fest last month, the project reported that 60% of AMP domains pass the Core Web Vitals metrics (meaning 75% of pages on the domain passed), compared to 12% of non-AMP domains passing based on the same criteria.

“Looking ahead to Google Search’s upcoming rollout of using page experience signals in ranking, we challenged ourselves to consider how we could better support the AMP community and reach a point where we are able to guarantee that all AMP domains meet the criteria included in the page experience ranking signal,” AMP Product Manager Naina Raisinghani said.

Those who are already using AMP are encouraged to check out the AMP Page Experience Guide, a diagnostic tool that helps developers improve their page experience metrics with practical advice.

AMP is not required, however, if developers feel confident delivering the kind of performance metrics necessary to pass the Core Web Vitals assessment. Along with the new ranking signal, Google also plans to roll out another promised change that allows non-AMP content to become eligible for placement in the mobile Top Stories feature for Search. Starting in May 2021, sites that can deliver decent page experience metrics will be prioritized, regardless of whether they were built with AMP or through some other means.

Understanding flex-grow, flex-shrink, and flex-basis

When you apply a CSS property to an element, there’s lots of things going on under the hood. For example, let’s say we have some HTML like this:

<div class="parent">
  <div class="child">Child</div>
  <div class="child">Child</div>
  <div class="child">Child</div>
</div>

And then we write some CSS…

.parent {
  display: flex;
}

These are technically not the only styles we’re applying when we write that one line of CSS above. In fact, a whole bunch of properties will be applied to the .child elements here, as if we wrote these styles ourselves:

.child {
  flex: 0 1 auto; /* Default flex value */
}

That’s weird! Why do these elements have these extra styles applied to them even though we didn’t write that code? Well, that’s because some properties have defaults that are then intended to be overridden by us. And if we don’t happen to know these styles are being applied when we’re writing CSS, then our layouts can get pretty darn confusing and tough to manage.

That flex property above is what’s known as a shorthand CSS property. And really what this is doing is setting three separate CSS properties at the same time. So what we wrote above is the same as writing this:

.child {
  flex-grow: 0;
  flex-shrink: 1;
  flex-basis: auto;
}

So, a shorthand property bundles up a bunch of different CSS properties to make it easier to write multiple properties at once, precisely like the background property where we can write something like this:

body {
  background: url(sweettexture.jpg) top center no-repeat fixed padding-box content-box red;                   
}

I try to avoid shorthand properties because they can get pretty confusing and I often tend to write the long hand versions just because my brain fails to parse long lines of property values. But it’s recommended to use the shorthand when it comes to flexbox, which is…weird… that is, until you understand that the flex property is doing a lot of work and each of its sub-properties interact with the others.

Also, the default styles are a good thing because we don’t need to know what these flexbox properties are doing 90% of the time. For example, when I use flexbox, I tend to write something like this:

.parent {
  display: flex;
  justify-content: space-between;
}

I don’t even need to care about the child elements or what styles have been applied to them, and that’s great! In this case, we’re aligning the child items side-by-side and then spacing them equally between each other. Two lines of CSS gives you a lot of power here and that’s the neatest thing about flexbox and these inherited styles — you don’t have to understand all the complexity under the hood if you just want to do the same thing 90% of the time. It’s remarkably smart because all of that complexity is hidden out of view.

But what if we want to understand how flexbox — including the flex-grow, flex-shrink, and flex-basis properties — actually work? And what cool things can we do with them?

Just go to the CSS-Tricks Almanac. Done!

Just kidding. Let’s start with a quick overview that’s a little bit simplified, and return to the default flex properties that are applied to child elements:

.child {
  flex: 0 1 auto;
}

These default styles are telling that child element how to stretch and expand. But whenever I see it being used or overridden, I find it helpful to think of these shorthand properties like this:

/* This is just how I think about the rule above in my head */

.child {
  flex: [flex-grow] [flex-shrink] [flex-basis];
}

/* or... */

.child {
  flex: [max] [min] [ideal size];
}

That first value is flex-grow and it’s set to 0 because, by default, we don’t want our elements to expand at all (most of the time). Instead, we want every element to be dependent on the size of the content within it. Here’s an example:

.parent { 
  display: flex; 
}

I’ve added the contenteditable property to each .child element above so you can click into it and type even more content. See how it responds? That’s the default behavior of a flexbox item: flex-grow is set to 0 because we want the element to grow based on the content inside it.

But! If we were to change the default of the flex-grow property from 0 to 1, like this…

.child {
  flex: 1 1 auto;
}

Then all the elements will grow to take up an equal portion of the .parent element:

This is exactly the same as writing…

.child {
  flex-grow: 1;
}

…and ignoring the other values because those have been set by default anyway. I think this confused me for such a long time when I started working with flexible layouts. I would see code that would add just flex-grow and wonder where the other styles are coming from. It was like an infuriating murder mystery that I just couldn’t figure out.

Now, if we wanted to make just one of these elements grow more than the others we’d just need to do the following:

.child-three {
  flex: 3 1 auto;
}

/* or we could just write... */

.child-three {
  flex-grow: 3;
}

Is this weird code to look at even a decade after flexbox landed in browsers? It certainly is for me. I need extra brain power to say, “Ah, max, min, ideal size,” when I’m reading the shorthand, but it does get easier over time. Anyway, in the example above, the first two child elements will take up proportionally the same amount of space but that third element will try to grow up to three times the space as the others.

Now this is where things get weird because this is all dependent on the content of the child elements. Even if we set flex-grow to 3, like we did in the example above and then add more content, the layout will do something odd and peculiar like this:

That second column is now taking up too much darn space! We’ll come back to this later, but for now, it’s just important to remember that the content of a flex item has an impact on how flex-grow, flex-shrink, and flex-basis work together.

OK so now for flex-shrink. Remember that’s the second value in the shorthand:

.child {
  flex: 0 1 auto; /* flex-shrink = 1 */
}

flex-shrink tells the browser what the minimum size of an element should be. The default value is 1, which is saying, “Take up the same amount of space at all times.” However! If we were to set that value to 0 like this:

.child {
  flex: 0 0 auto;
}

…then we’re telling this element not to shrink at all now. Stay the same size, you blasted element! is essentially what this CSS says, and that’s precisely what it’ll do. We’ll come back to this property in a bit once we look at the final value in this shorthand.

flex-basis is the last value that’s added by default in the flex shorthand, and it’s how we tell an element to stick to an ideal size. By default, it’s set to auto which means, “Use my height or width.” So, when we set a parent element to display: flex

.parent {
  display: flex;
}

.child {
  flex: 0 1 auto;
}

We’ll get this by default in the browser:

Notice how all the elements are the width of their content by default? That’s because auto is saying that the ideal size of our element is defined by its content. To make all the elements take up the full space of the parent we can set the child elements to width: 100%, or we can set the flex-basis to 100%, or we can set flex-grow to 1.

Does that make sense? It’s weird, huh! It does when you think about it. Each of these shorthand values impact the other and that’s why it is recommended to write this shorthand in the first place rather than setting these values independently of one another.

OK, moving on. When we write something like this…

.child-three {
  flex: 0 1 1000px;
}

What we’re telling the browser here is to set the flex-basis to 1000px or, “please, please, please just try and take up 1000px of space.” If that’s not possible, then the element will take up that much space proportionally to the other elements.

You might notice that on smaller screens this third element is not actually a 1000px! That’s because it’s really a suggestion. We still have flex-shrink applied which is telling the element to shrink to the same size as the other elements.

Also, adding more content to the other children will still have an impact here:

Now, if we wanted to prevent this element from shrinking at all we could write something like this:

.child-three {
  flex: 0 0 1000px;
}

Remember, flex-shrink is the second value here and by setting it to 0 we’re saying, “Don’t shrink ever, you jerk.” And so it won’t. The element will even break out of the parent element because it’ll never get shorter than 1000px wide:

Now all of this changes if we set flex-wrap to the parent element:

.parent {
  display: flex;
  flex-wrap: wrap;
}

.child-three {
  flex: 0 0 1000px;
}

We’ll see something like this:

This is because, by default, flex items will try to fit into one line but flex-wrap: wrap will ignore that entirely. Now, if those flex items can’t fit in the same space, they’ll break onto a new line.


Anyway, this is just some of the ways in which flex properties bump into each other and why it’s so gosh darn valuable to understand how these properties work under the hood. Each of these properties can affect the other, and if you don’t understand how one property works, then you sort of don’t understand how any of it works at all — which certainly confused me before I started digging into this!

But to summarize:

  • Try to use the flex shorthand
  • Remember max, min and ideal size when doing so
  • Remember that the content of an element can impact how these values work together, too.

The post Understanding flex-grow, flex-shrink, and flex-basis appeared first on CSS-Tricks.

You can support CSS-Tricks by being an MVP Supporter.

WordPress 5.6 Beta 4 Delayed, Auto-Updates Implementation Changed

Earlier today, release lead Josepha Haden announced the team was pushing back the release of WordPress 5.6 Beta 4 to Thursday, November 12. The beta release was slated to go live today. Questions around the readiness of the auto-updates feature held the beta update back. However, those questions are now resolved.

Haden followed up the Beta 4 announcement with a more in-depth picture of how auto-updates will change for WordPress 5.6. She summarized the current concerns, laid out a path for version 5.6 and 5.7, and discussed plans for the future. The auto-updates feature is not something that will be complete overnight or in just one release. There are complex technical hurdles that must be jumped and a need for a dedicated focus in upcoming releases.

Much of her post focuses on the tactics going forward. However, she mentioned in our chat that she does not want the community to lose sight of the big-picture, vision-setting aspects of the project.

“The subject of auto-updates has resulted in many complicated discussions,” she wrote. “As I reminded the release squad, decisions like these require us to remember that we’re contributing to over 30% of the web, and we have to balance our immediate needs with long term planning.”

The short-term plan is to allow current WordPress users to opt-in to major updates while enabling auto-updates for both minor and major releases for new installations. Some changes to the auto-updates UI are also in the works along with a plan to revise based on feedback in WordPress 5.6.1.

In WordPress 5.7, which is several months away, the goal is to add a nudge on the Site Health screen for anyone opted out of major updates. We could also see a setting to opt-into updates as part of the WordPress installation flow for new sites.

The big picture that Haden is talking about? That is to make sure that all WordPress installations are receiving auto-updates, that these updates are seamless, and that users are running a secure version of WordPress.

Nearly two years ago, WordPress project lead Matt Mullenweg outlined nine goals for 2019. One of those goals was to provide users a method of opting into automatic updates of major releases. It has taken WordPress a while to get there, but it is on the cusp of launching this feature that many have looked forward to.

Haden also further clarified that goal. She said that the long-term plan for both Mullenweg and the other original feature contributors was to always have auto-updates for major releases enabled by default.

Apart from those who already prefer to opt-out of any sort of automatic updates, some users’ trust in the system eroded a couple of weeks ago. The WordPress auto-update system updated sites to version 5.5.3-alpha instead of 5.5.2 — WordPress currently automatically updates only minor releases. While there was no difference between the two versions and the core team quickly resolved the problem, the damage to user trust was already done.

This was not an ideal leadup to the December launch of auto-updates for major releases.

However, one hiccup — one that was effectively not an issue — seven years after WordPress 3.7 launched with security and maintenance updates is not too bad. The system has been a boon to making the web a more secure place. Ultimately, that is what auto-updates are all about. The big goal is to make sure that all WordPress sites are running on the most secure version available.

“It’s important that whatever we implement isn’t taking us further away from our long term goals of having seamless, auto-updates across the project,” wrote Haden. “Auto-updates can help us have a more secure WordPress ecosystem, and in turn can help change the public perception of WordPress being an unsecure choice for users of any skill level.”

Error Handling in SQL Server

In this article, we will learn how to handle exceptions in SQL Server and also see how to capture or log the exception in case of any DB Level Exception occurs so that the Developer can refer to that Error log, can check the severity of the Exception, and fix it without wasting too much time in finding the exception causing procedure or function or line which is causing the exception.

Let's Begin

In order to demonstrate how an exception is thrown in the procedure, I have created a Sample Procedure i.e. usp_SampleProcedure as shown below

Getting Started With PyTorch – Deep Learning in Python

Are you trying to design a model using machine learning? 

If yes, PyTorch will be the right choice in that case. This article will help you understand the basics of deep learning and the concept of PyTorch. In the beginning, we will explain what PyTorch is & the advantages of using it for your projects. The article will end with a quick comparison between PyTorch and NumPy using an example.

Microservice Performance That Saves You Money

For many years, the most important metric for application servers was throughput: how many transactions or requests can we squeeze out of this application?  The adoption of finer-grained architecture styles, such as microservices and functions, has led to a broadening in the performance characteristics we should care about, such as memory footprint and throughput.

Where you once deployed a small number of runtime instances for your server and application, now you may be deploying tens or hundreds of microservices or functions.  Each of those instances comes with its own server, even if it’s embedded in a runnable jar or pulled in as a container image there’s a server in there somewhere. While cold startup time is critically important for cloud functions (and Open Liberty’s time-to-first-response is approximately 1 second, so it’s no slouch), memory footprint and throughput are far more important for microservices architectures in which each running instance is likely to serve thousands of requests before it’s replaced.

Spring Boot – Unit Test your project architecture with ArchUnit

When building software, it's common for development teams to define a set of guidelines and code conventions that are considered best practices.

These are practices that are generally documented and communicated to the entire development team that has accepted them. However, during development, developers can violate these guidelines which are discovered during code reviews or with code quality checking tools.

Protecting Your React.js Source Code With Jscrambler

React.js is one of the most popular JavaScript libraries. The 2019 "State of JavaScript" survey puts React as the front-end framework of choice, with 72% of responders stating that they have used it and would use again.

With its elegant programming style, rich package ecosystem and good documentation, React has found its way into powering the applications of large enterprises. Specifically, the developer survey found that 18% of responders who are using React work for companies with over 1000 employees.

30 VS Code Keyboard Shortcuts for Windows

Developers who're working for a company will know the importance of every second. There're a lot of things that you can do to code faster.

Among all those, knowing some important keyboard shortcuts can help you save a lot of your development time.

Automating Your Project Processes with Github Actions

It’s common in both company and personal projects to use tools to deal with replicated tasks to improve efficiency.

This is especially true for the front-end development, because tackling with the repetitive tasks manually like building, deployment, unit testing is rather tedious and time-consuming.

MuleSoft for Beginners [Video Series] in Mule4.x

This video materials will help you to understand the fundamentals of Mulesoft. Most of these videos are having demo-based tutorials. Please go through each video to understand the MuleSoft related topics.

What is MuleSoft | What is Integration | What is Middleware


Git branch naming conventions

We use git branches at DeepSource to organize ongoing work to ensure that software delivery stays effective. If you use git today, there are high chances that you're either using the famed git-flow or the more recent GitHub flow. Both these workflows depend extensively on using branches effectively — and naming a new branch is something many developers struggle with.

A consistent branch naming convention is part of code review best practices, and can make life much more easier for anyone who’s collaborating and reviewing your code, in addition to using static analysis tools.

Working With ORMs Using Entity Developer

Entity Developer from Devart is a modeling and code generation tool that lets you design your data access layer visually - at the drop of a hat. You can take advantage of Entity Developer to generate data access layer code automatically using one unified interface – as a result, chances of error creeping into your Data Access code are minimal.

In this article we’ll take advantage of Entity Developer to connect to and work with various ORM tools such as, EF Core, NHibernate, Telerik Data Access and LinqConnect. This article starts with a brief discussion on what ORMs are, why Entity Developer is useful, and how you can leverage Entity Developer to connect to and work with all these ORMs.

Swyft Filings Review

Swyft Filings is a quick and easy way to form an LLC, C corporation, S corporation, or nonprofit.

The company was launched by a lawyer who recognized the need for automation in the business filing process. These services allow entrepreneurs and small business owners to follow their dreams without the high costs and traditional legal fees.

With Swyft Filings, anyone can get a business up and running quickly and efficiently at an affordable price. Regardless of the location or industry, tens of thousands of companies have trusted Swyft Filings’ business formation services.

Is Swyft Filings right for you?

This guide will help you answer that question. We’ve researched and reviewed the top business formation services offered by Swyft Filings. You’ll learn more about the pricing, plan options, support, and see what real customers are saying about their experience.

Ready to launch your business? Sign up for Swyft Filings today.

Swyft Filings Business Formation Services

Like many business formation services, Swyft Filings has an extensive offerings list. But the primary services can be broken down into three main categories—LLC services, incorporation services, and registered agent services.

Continue below for an in-depth review of each service.

Swyft Filings LLC Services

The LLC formation services from Swyft Filings are the company’s most popular offering. Small business owners throughout all 50 states rely on this service for launching a business.

The experts at Swyft Filings will help you save time, money and avoid costly errors during the filings process. They also help you maintain your business post-launch. Here’s a quick overview of how the LLC formation process works with Swyft Filings.

Once you land on the website and select the LLC option, you just need to complete a simple form to provide some information about your business. This can be completed in less than ten minutes. Based on the information you provide, Swyft Filings prepares and files all of the paperwork on your behalf.

After the documentation has been approved by the state, you’ll receive a completed LLC package in the mail.

It really doesn’t get more convenient than this. The online form is so straightforward. Compared to some of the other LLC formation services on the market today, the Swyft Filings form can be completed in just a fraction of the time.

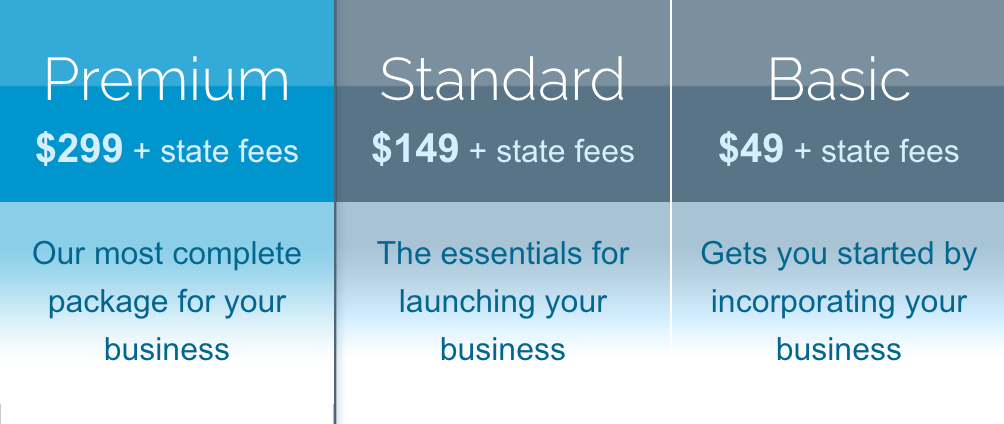
There are three plans for you to choose from:

  • Basic — $49 + state fees
  • Standard — $149 + state fees
  • Premium — $299 + state fees

All plans come with company name availability verification, articles of organization preparation, document filing, online document access, lifetime phone and email support, and a free 30-minute tax consultation.

You’ll also benefit from online status tracking and free shipping. The packages are all backed by a 100% money-back guarantee (more on this later on).

The Basic plan does not come with an EIN (employer identification number). This is definitely something that you need. You can add it to the package for $70 or just upgrade to the Standard plan to get an EIN included.

In addition to the EIN, the Standard plan also includes a custom LLC operating agreement and custom LLC banking resolution. This plan provides the best value.

The Premium plan includes some features you don’t really need from a business formation service (like a free website and web hosting). But it does offer express FedEx shipping of your documents.

Swyft Filings has tens of thousands of reviews across several third-party review platforms. What do their customers have to say about the LLC services? Let’s take a closer look.

One recent review from Trustpilot that stood out to me was from a customer who used Swyft Filings to set up an LLC in less than 20 minutes.

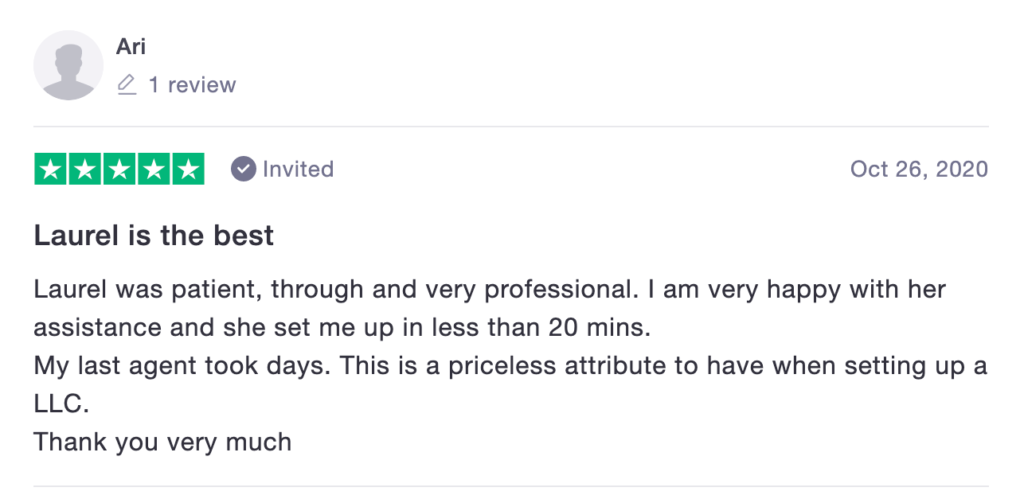
It sounds like this customer has been through this process before with another business formation company. When comparing the two side by side, Swyft Filings took minutes, while the other took days.

Other customers rave about the speed of the process as well. Lots of reviews point to the simple interface, affordable pricing, and great customer service.

If you want to file an LLC quickly and easily while keeping your costs low, Swyft Filings should definitely be a top consideration. The Standard package delivers the best bang for your buck.

Swyft Filings Incorporation Services

Swyft Filings is also a popular choice for anyone that needs to incorporate. They have services for C-corps, S-corps, and nonprofit corporations.

The incorporation process is nearly identical to the LLC formation process. Just head over to the Swyft Filings website and choose your entity type and state. From there, you can fill out a form that can be completed in less than 10 minutes.

Swyft Filings takes the info to prepare your incorporation documents and files them with the Secretary of State.

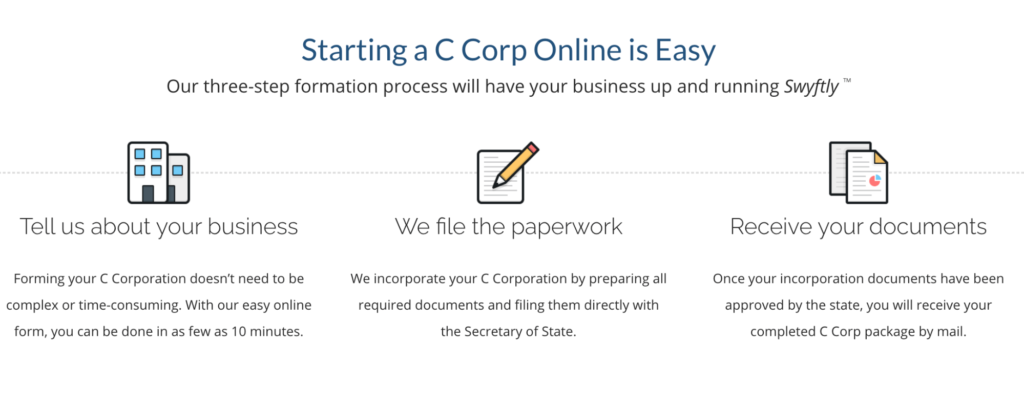
The information on the form will vary slightly based on the entity type. But it’s still really easy to answer all of those questions online. Once the process is complete and your documents are approved, you’ll receive a completed C-corp, S-corp, or nonprofit package by mail.

As for the plans and pricing, the package rates are identical for all entity types.

Choose from Basic ($49 + state fees), Standard ($149 + state fees), or Premium ($299 + state fees).

The Basic plan comes with the essentials like the ability to verify your company name, articles of incorporation preparation, articles of incorporation filing, and a free statement of the incorporator. You’ll also get a free business tax consultation session, lifetime support, and online access to your incorporation documents.

However, the entry-level plan doesn’t come with an EIN, custom corporate bylaws, a corporate banking resolution, or corporate meeting minutes. You’ll need to upgrade to the Standard plan to get all of these services, which is definitely something that I recommend.

The Premium plan offers some extras you probably won’t use. But you’ll benefit from faster shipping and online delivery of state documents.

Similar to the LLC services, customers seem genuinely happy with the incorporation services from Swyft Filings. There are some recent reviews highlighting how quickly the process was to incorporate a nonprofit. Others explained how easy it was to incorporate in multiple states.

Lots of the reviews point to the prompt and friendly service provided by the agents at Swyft Filings.

In addition to the incorporation services mentioned above, Swyft Filings also offers DBA (doing business as) names. You’ll also benefit from an extensive learning center and a free incorporation guide to help you figure out which entity type is right for you.

Swyft Filings Registered Agent Services

Whether you’re starting an LLC, S Corporation, C Corporation, or a nonprofit, you’ll need a registered agent.

Fortunately, Swyft Filings provides registered agent services. So if you’re using this platform to form your business, it makes sense to get a registered agent from them as well.

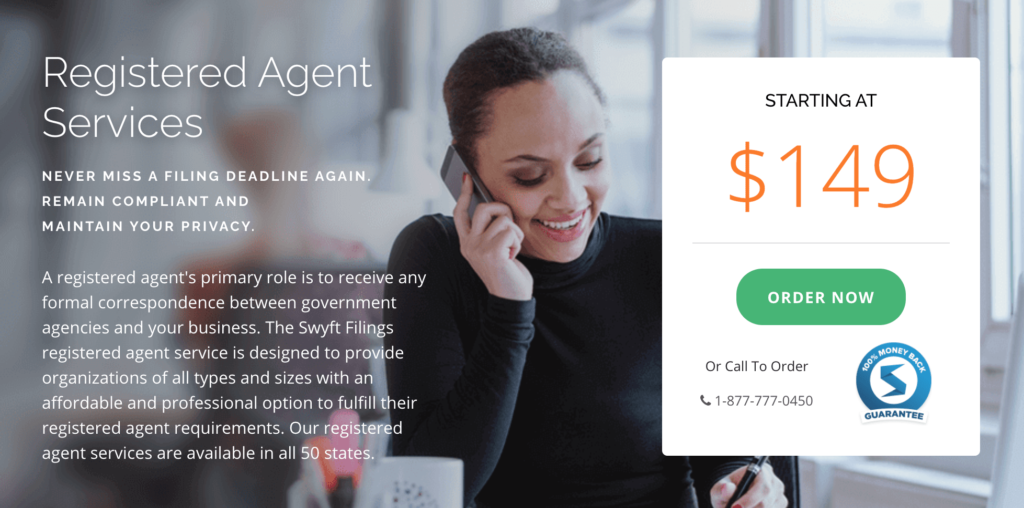
Your registered agent will handle all of the formal correspondence required between your business and government agencies. They’ll help you remain compliant, protect your privacy, and ensure you don’t miss any filing deadlines.

Signing up for the registered agent services from Swyft Filings is easy. All you have to do is complete a quick questionnaire online.

Once you’re signed up, you can manage everything from your online dashboard. Your registered agent will send you alerts and reminders for important deadlines and information, so there’s no reason for you to check in with them on a regular basis.

All of your information, mail, and digital documents are stored safely.

If your business is ever involved in a lawsuit, the registered public agent address is the location where you’ll be served. So you won’t have to worry about the negative perception of being served in front of your employees or customers.

For existing businesses that want to switch registered agents, Swyft Filings makes this process as easy as well.

The registered agent services from Swyft Filings start at $149. Your plan will renew automatically.

What are real customers saying about the registered agent services from Swyft Filings?

For the most part, reviews tend to be favorable. The only gripe I see is from people who wanted to cancel their registered agent service and struggled to do so. However, it seems like this is more of a state compliance issue, as opposed to a problem with Swyft Filings.

It appears as though those customers didn’t appoint a new registered agent before attempting to cancel (and they need to legally have a registered agent on record). But since this was brought up a few times in recent reviews, I thought it was worth mentioning.

If you’re using Swyft Filings to form your business, it makes sense to get a registered agent from them as well. Using a different provider for this just complicates things.

Overall Pricing and Value

We’ve mentioned the price points for Swyft Filings services throughout this guide. But I want to take a moment to clearly outline the exact plans, packages, and rates. Regardless of your entity type, these are the packages offered:

Basic — $49 + state fees

  • Verify company name availability
  • Prepare and file articles of organization
  • Prepare and file articles of incorporation (S corps, C corps, nonprofits)
  • Online document access
  • Lifetime phone and email support
  • Free 30 minute business tax consultation
  • ComplianceGuard company alerts
  • Free domain
  • Standard filing time
  • First class shipping

Standard — $149 + state fees

  • All Basic services
  • Federal tax ID (EIN)
  • Custom LLC operating agreement
  • Custom LLC banking resolution
  • Custom corporate bylaws (for incorporation services)
  • Custom corporation meeting minutes (for incorporation services)

Premium — $299 + state fees

  • All Standard services
  • Electronic delivery of state documents
  • Customized digital LLC kit
  • Customized digital corporate kit (for incorporation services)
  • Free business website and web hosting
  • Express shipping and tracking with FedEx

All plans also come with real-time status tracking, free shipping, and a 100% money-back guarantee (more on this shortly). Registered agent services start at $149.

Overall, the Standard plan is your best value. I ignore the perks like a business website, domain, and hosting. These aren’t something you should be using a business formation service for. So they don’t really add value to the plan.

It’s worth noting that lots of other business formation services on the market offer a free registered agent for the first year if you sign up. Swyft Filings does not. While this isn’t quite the industry standard, lots of formation services offer it. This isn’t a reason to avoid them by any means, but it’s still worth mentioning.

User Experience

In terms of customer experience, Swyft Filings is about as easy as it gets. Navigating the website and signing up is super simple.

After you select your entity type, state, and plan, the form you fill out is arguably the simplest in the industry. The entire process can be completed in less than ten minutes. From there, it’s just a matter of sitting back and waiting while the team at Swyft Filings handles the rest.

One recent review on the Swyft Filings website points to the modern UI.

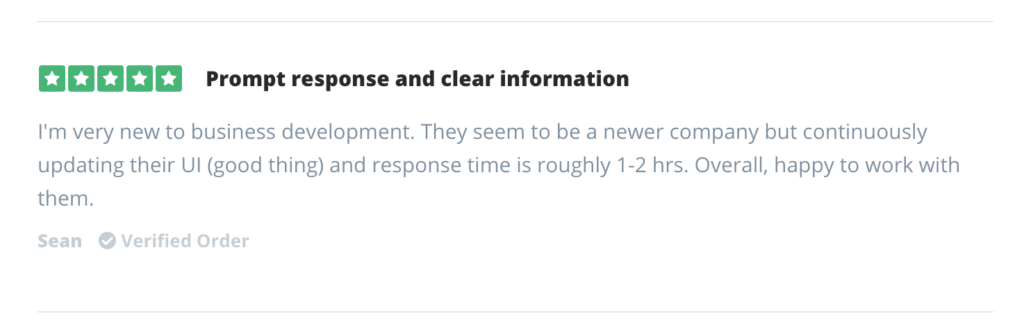
Most users seem to feel the same way. It’s really easy to navigate everything from your dashboard, especially for the registered agent services.

One potential drawback is that the electronic delivery of your state documents is only available on the Premium plan. If you’re on the Basic or Standard plan, you have to wait for those to arrive through the mail.

With that said, other documents will still be available online from your customer dashboard.

Customer Support

The Swyft Filings support team is available via phone and live chat Monday to Friday from 9 am to 6 pm CST. If you browse through reviews, you’ll see that the vast majority highlight the helpful and prompt responses by the Swift Filings customer care team.

Furthermore, Swyft Filings offers a 100% money-back guarantee when you sign up for their services. This is how they commit to providing exceptional customer service.

If you aren’t satisfied with the services you receive, you’re entitled to a refund of your Swyft Filings fees (state fees are not eligible).

While this promise is encouraging, there are some contingencies (which is usually the case when companies have a policy like this). After submitting the refund request, a representative will review your situation and make an effort to resolve the issue. If they find a filing error made by Swyft Filings, then you’ll be refunded with no questions asked. All refunds must be requested according to the terms of service.

Final Verdict

Swyft Filings is an industry leader in the business formation space in terms of filing speed. After you fill out a 10-minute form online, they’ll begin processing your information right away.

It’s a great option for anyone that needs to form an LLC, S corporation, C corporation, or nonprofit.

In addition to the business formation services, Swyft Filings also has registered agent services, DBA names, and more. If you’re looking for a fast and cost-effective way to form your business, look no further than Swyft Filings.

Synchronizing Model and Database in Entity Developer

Entity Developer from Devart is a very powerful modeling and code generation tool, an ORM tool to be more precise. Entity developer lets you design your data access layer visually — at the drop of a hat. Since the data access layer generated by Devart contains automated and generated code, chances of error are minimal.

The official website of Entity Developer states: "Entity Developer can help you design models for various .NET ORMs in one unified interface. You can get support for all ORMs in one tool, or you may purchase a separate edition, working with one of the supported ORMs."