Passkeys: A No-Frills Explainer On The Future Of Password-Less Authentication

Passkeys are a new way of authenticating applications and websites. Instead of having to remember a password, a third-party service provider (e.g., Google or Apple) generates and stores a cryptographic key pair that is bound to a website domain. Since you have access to the service provider, you have access to the keys, which you can then use to log in.

This cryptographic key pair contains both private and public keys that are used for authenticating messages. These key pairs are often known as asymmetric or public key cryptography.

Public and private key pair? Asymmetric cryptography? Like most modern technology, passkeys are described by esoteric verbiage and acronyms that make them difficult to discuss. That’s the point of this article. I want to put the complex terms aside and help illustrate how passkeys work, explain what they are effective at, and demonstrate what it looks like to work with them.

How Passkeys Work

Passkeys are cryptographic keys that rely on generating signatures. A signature is proof that a message is authentic. How so? It happens first by hashing (a fancy term for “obscuring”) the message and then creating a signature from that hash with your private key. The private key in the cryptographic key pair allows the signature to be generated, and the public key, which is shared with others, allows the service to verify that the message did, in fact, come from you.

In short, passkeys consist of two keys: a public and private. One verifies a signature while the other verifies you, and the communication between them is what grants you access to an account.

Here’s a quick way of generating a signing and verification key pair to authenticate a message using the SubtleCrypto API. While this is only part of how passkeys work, it does illustrate how the concept works cryptographically underneath the specification.

const message = new TextEncoder().encode("My message");

const keypair = await crypto.subtle.generateKey(
  { name: "ECDSA", namedCurve: "P-256" },
  true,
  [ 'sign', 'verify' ]
);

const signature = await crypto.subtle.sign(
  { name: "ECDSA", hash: "SHA-256" },
  keypair.privateKey,
  message
);

// Normally, someone else would be doing the verification using your public key
// but it's a bit easier to see it yourself this way
console.log(
  "Did my private key sign this message?",
  await crypto.subtle.verify(
    { name: "ECDSA", hash: "SHA-256" },
    keypair.publicKey,
    signature,
    message
  )
);

Notice the three parts pulling all of this together:

  1. Message: A message is constructed.
  2. Key pair: The public and private keys are generated. One key is used for the signature, and the other is set to do the verification.
  3. Signature: A signature is signed by the private key, verifying the message’s authenticity.

From there, a third party would authenticate the private key with the public key, verifying the correct pair of keys or key pair. We’ll get into the weeds of how the keys are generated and used in just a bit, but for now, this is some context as we continue to understand why passkeys can potentially erase the need for passwords.

Why Passkeys Can Replace Passwords

Since the responsibility of storing passkeys is removed and transferred to a third-party service provider, you only have to control the “parent” account in order to authenticate and gain access. This is a lot like requiring single sign-on (SSO) for an account via Google, Facebook, or LinkedIn, but instead, we use an account that has control of the passkey stored for each individual website.

For example, I can use my Google account to store passkeys for somerandomwebsite.com. That allows me to prove a challenge by using that passkey’s private key and thus authenticate and log into somerandomwebsite.com.

For the non-tech savvy, this typically looks like a prompt that the user can click to log in. Since the credentials (i.e., username and password) are tied to the domain name (somerandomwebsite.com), and passkeys created for a domain name are only accessible to the user at login, the user can select which passkey they wish to use for access. This is usually only one login, but in some cases, you can create multiple logins for a single domain and then select which one you wish to use from there.

So, what’s the downside? Having to store additional cryptographic keys for each login and every site for which you have a passkey often requires more space than storing a password. However, I would argue that the security gains, the user experience from not having to remember a password, and the prevention of common phishing techniques more than offset the increased storage space.

How Passkeys Protect Us

Passkeys prevent a couple of security issues that are quite common, specifically leaked database credentials and phishing attacks.

Database Leaks

Have you ever shared a password with a friend or colleague by copying and pasting it for them in an email or text? That could lead to a security leak. So would a hack on a system that stores customer information, like passwords, which is then sold on dark marketplaces or made public. In many cases, it’s a weak set of credentials — like an email and password combination — that can be stolen with a fair amount of ease.

Passkeys technology circumvents this because passkeys only store a public key to an account, and as you may have guessed by the name, this key is expected to be made accessible to anyone who wants to use it. The public key is only used for verification purposes and, for the intended use case of passkeys, is effectively useless without the private key to go with it, as the two are generated as a pair. Therefore, those previous juicy database leaks are no longer useful, as they can no longer be used for cracking the password for your account. Cracking a similar private key would take millions of years at this point in time.

Phishing

Passwords rely on knowing what the password is for a given login: anyone with that same information has the same level of access to the same account as you do. There are sophisticated phishing sites that look like they’re by Microsoft or Google and will redirect you to the real provider after you attempt to log into their fake site. The damage is already done at that point; your credentials are captured, and hopefully, the same credentials weren’t being used on other sites, as now you’re compromised there as well.

A passkey, by contrast, is tied to a domain. You gain a new element of security: the fact that only you have the private key. Since the private key is not feasible to remember nor computationally easy to guess, we can guarantee that you are who you say we are (at least as long as your passkey provider is not compromised). So, that fake phishing site? It will not even show the passkey prompt because the domain is different, and thus completely mitigates phishing attempts.

There are, of course, theoretical attacks that can make passkeys vulnerable, like someone compromising your DNS server to send you to a domain that now points to their fake site. That said, you probably have deeper issues to concern yourself with if it gets to that point.

Implementing Passkeys

At a high level, a few items are needed to start using passkeys, at least for the common sign-up and log-in process. You’ll need a temporary cache of some sort, such as redis or memcache, for storing temporary challenges that users can authenticate against, as well as a more permanent data store for storing user accounts and their public key information, which can be used to authenticate the user over the course of their account lifetime. These aren’t hard requirements but rather what’s typical of what would be developed for this kind of authentication process.

To understand passkeys properly, though, we want to work through a couple of concepts. The first concept is what is actually taking place when we generate a passkey. How are passkeys generated, and what are the underlying cryptographic primitives that are being used? The second concept is how passkeys are used to verify information and why that information can be trusted.

Generating Passkeys

A passkey involves an authenticator to generate the key pair. The authenticator can either be hardware or software. For example, it can be a hardware security key, the operating system’s Trusted Platform Module (TPM), or some other application. In the cases of Android or iOS, we can use the device’s secure enclave.

To connect to an authenticator, we use what’s called the Client to Authenticator Protocol (CTAP). CTAP allows us to connect to hardware over different connections through the browser. For example, we can connect via CTAP using an NFC, Bluetooth, or a USB connection. This is useful in cases where we want to log in on one device while another device contains our passkeys, as is the case on some operating systems that do not support passkeys at the time of writing.

A passkey is built off another web API called WebAuthn. While the APIs are very similar, the WebAuthn API differs in that passkeys allow for cloud syncing of the cryptographic keys and do not require knowledge of whom the user is to log in, as that information is stored in a passkey with its Relying Party (RP) information. The two APIs otherwise share the same flows and cryptographic operations.

Storing Passkeys

Let’s look at an extremely high-level overview of how I’ve stored and kept track of passkeys in my demo repo. This is how the database is structured.

Basically, a users table has public_keys, which, in turn, contains information about the public key, as well as the public key itself.

From there, I’m caching certain information, including challenges to verify authenticity and data about the sessions in which the challenges take place.

Again, this is only a high-level look to give you a clearer idea of what information is stored and how it is stored.

Verifying Passkeys

There are several entities involved in passkey:

  1. The authenticator, which we previously mentioned, generates our key material.
  2. The client that triggers the passkey generation process via the navigator.credentials.create call.
  3. The Relying Party takes the resulting public key from that call and stores it to be used for subsequent verification.

In our case, you are the client and the Relying Party is the website server you are trying to sign up and log into. The authenticator can either be your mobile phone, a hardware key, or some other device capable of generating your cryptographic keys.

Passkeys are used in two phases: the attestation phase and the assertion phase. The attestation phase is likened to a registration that you perform when first signing up for a service. Instead of an email and password, we generate a passkey.

Assertion is similar to logging in to a service after we are registered, and instead of verifying with a username and password, we use the generated passkey to access the service.

Each phase initially requires a random challenge generated by the Relying Party, which is then signed by the authenticator before the client sends the signature back to the Relying Party to prove account ownership.

Browser API Usage

We’ll be looking at how the browser constructs and supplies information for passkeys so that you can store and utilize it for your login process. First, we’ll start with the attestation phase and then the assertion phase.

Attest To It

The following shows how to create a new passkey using the navigator.credentials.create API. From it, we receive an AuthenticatorAttestationResponse, and we want to send portions of that response to the Relying Party for storage.

const { challenge } = await (await fetch("/attestation/generate")).json(); // Server call mock to get a random challenge

const options = {
 // Our challenge should be a base64-url encoded string
 challenge: new TextEncoder().encode(challenge),
 rp: {
  id: window.location.host,
  name: document.title,
 },
 user: {
  id: new TextEncoder().encode("my-user-id"),
  name: 'John',
  displayName: 'John Smith',
 },
 pubKeyCredParams: [ // See COSE algorithms for more: https://www.iana.org/assignments/cose/cose.xhtml#algorithms
  {
   type: 'public-key',
   alg: -7, // ES256
  },
  {
   type: 'public-key',
   alg: -256, // RS256
  },
  {
   type: 'public-key',
   alg: -37, // PS256
  },
 ],
 authenticatorSelection: {
  userVerification: 'preferred', // Do you want to use biometrics or a pin?
  residentKey: 'required', // Create a resident key e.g. passkey
 },
 attestation: 'indirect', // indirect, direct, or none
 timeout: 60_000,
};

// Create the credential through the Authenticator
const credential = await navigator.credentials.create({
 publicKey: options
});

// Our main attestation response. See: https://developer.mozilla.org/en-US/docs/Web/API/AuthenticatorAttestationResponse
const attestation = credential.response as AuthenticatorAttestationResponse;

// Now send this information off to the Relying Party
// An unencoded example payload with most of the useful information
const payload = {
 kid: credential.id,
 clientDataJSON: attestation.clientDataJSON,
 attestationObject: attestation.attestationObject,
 pubkey: attestation.getPublicKey(),
 coseAlg: attestation.getPublicKeyAlgorithm(),
};

The AuthenticatorAttestationResponse contains the clientDataJSON as well as the attestationObject. We also have a couple of useful methods that save us from trying to retrieve the public key from the attestationObject and retrieving the COSE algorithm of the public key: getPublicKey and getPublicKeyAlgorithm.

Let’s dig into these pieces a little further.

Parsing The Attestation clientDataJSON

The clientDataJSON object is composed of a few fields we need. We can convert it to a workable object by decoding it and then running it through JSON.parse.

type DecodedClientDataJSON = {
 challenge: string,
 origin: string,
 type: string
};

const decoded: DecodedClientDataJSON = JSON.parse(new TextDecoder().decode(attestation.clientDataJSON));
const {
 challenge,
 origin,
 type
} = decoded;

Now we have a few fields to check against: challenge, origin, type.

Our challenge is the Base64-url encoded string that was passed to the server. The origin is the host (e.g., https://my.passkeys.com) of the server we used to generate the passkey. Meanwhile, the type is webauthn.create. The server should verify that all the values are expected when parsing the clientDataJSON.

Decoding TheattestationObject

The attestationObject is a CBOR encoded object. We need to use a CBOR decoder to actually see what it contains. We can use a package like cbor-x for that.

import { decode } from 'cbor-x/decode';

enum DecodedAttestationObjectFormat {
  none = 'none',
  packed = 'packed',
}
type DecodedAttestationObjectAttStmt = {
  x5c?: Uint8Array[];
  sig?: Uint8Array;
};

type DecodedAttestationObject = {
  fmt: DecodedAttestationObjectFormat;
  authData: Uint8Array;
  attStmt: DecodedAttestationObjectAttStmt;
};

const decodedAttestationObject: DecodedAttestationObject = decode(
 new Uint8Array(attestation.attestationObject)
);

const {
 fmt,
 authData,
 attStmt,
} = decodedAttestationObject;

fmt will often be evaluated to "none" here for passkeys. Other types of fmt are generated through other types of authenticators.

Accessing authData

The authData is a buffer of values with the following structure:

Name Length (bytes) Description
rpIdHash 32 This is the SHA-256 hash of the origin, e.g., my.passkeys.com.
flags 1 Flags determine multiple pieces of information (specification).
signCount 4 This should always be 0000 for passkeys.
attestedCredentialData variable This will contain credential data if it’s available in a COSE key format.
extensions variable These are any optional extensions for authentication.

It is recommended to use the getPublicKey method here instead of manually retrieving the attestedCredentialData.

A Note About The attStmt Object

This is often an empty object for passkeys. However, in other cases of a packed format, which includes the sig, we will need to perform some authentication to verify the sig. This is out of the scope of this article, as it often requires a hardware key or some other type of device-based login.

Retrieving The Encoded Public Key

The getPublicKey method can retrieve the Subject Public Key Info (SPKI) encoded version of the public key, which is a different from the COSE key format (more on that next) within the attestedCredentialData that the decodedAttestationObject.attStmt has. The SPKI format has the benefit of being compatible with a Web Crypto importKey function to more easily verify assertion signatures in the next phase.

// Example of importing attestation public key directly into Web Crypto
const pubkey = await crypto.subtle.importKey(
  'spki',
  attestation.getPublicKey(),
  { name: "ECDSA", namedCurve: "P-256" },
  true,
  ['verify']
);

Generating Keys With COSE Algorithms

The algorithms that can be used to generate cryptographic material for a passkey are specified by their COSE Algorithm. For passkeys generated for the web, we want to be able to generate keys using the following algorithms, as they are supported natively in Web Crypto. Personally, I prefer ECDSA-based algorithms since the key sizes are quite a bit smaller than RSA keys.

The COSE algorithms are declared in the pubKeyCredParams array within the AuthenticatorAttestationResponse. We can retrieve the COSE algorithm from the attestationObject with the getPublicKeyAlgorithm method. For example, if getPublicKeyAlgorithm returned -7, we’d know that the key used the ES256 algorithm.

Name Value Description
ES512 -36 ECDSA w/ SHA-512
ES384 -35 ECDSA w/ SHA-384
ES256 -7 ECDSA w/ SHA-256
RS512 -259 RSASSA-PKCS1-v1_5 using SHA-512
RS384 -258 RSASSA-PKCS1-v1_5 using SHA-384
RS256 -257 RSASSA-PKCS1-v1_5 using SHA-256
PS512 -39 RSASSA-PSS w/ SHA-512
PS384 -38 RSASSA-PSS w/ SHA-384
PS256 -37 RSASSA-PSS w/ SHA-256

Responding To The Attestation Payload

I want to show you an example of a response we would send to the server for registration. In short, the safeByteEncode function is used to change the buffers into Base64-url encoded strings.

type AttestationCredentialPayload = {
  kid: string;
  clientDataJSON: string;
  attestationObject: string;
  pubkey: string;
  coseAlg: number;
};

const payload: AttestationCredentialPayload = {
  kid: credential.id,
  clientDataJSON: safeByteEncode(attestation.clientDataJSON),
  attestationObject: safeByteEncode(attestation.attestationObject),
  pubkey: safeByteEncode(attestation.getPublicKey() as ArrayBuffer),
  coseAlg: attestation.getPublicKeyAlgorithm(),
};

The credential id (kid) should always be captured to look up the user’s keys, as it will be the primary key in the public_keys table.

From there:

  1. The server would check the clientDataJSON to ensure the same challenge is used.
  2. The origin is checked, and the type is set to webauthn.create.
  3. We check the attestationObject to ensure it has an fmt of none, the rpIdHash of the authData, as well as any flags and the signCount.

Optionally, we could check to see if the attestationObject.attStmt has a sig and verify the public key against it, but that’s for other types of WebAuthn flows we won’t go into.

We should store the public key and the COSE algorithm in the database at the very least. It is also beneficial to store the attestationObject in case we require more information for verification. The signCount is always incremented on every login attempt if supporting other types of WebAuthn logins; otherwise, it should always be for 0000 for a passkey.

Asserting Yourself

Now we have to retrieve a stored passkey using the navigator.credentials.get API. From it, we receive the AuthenticatorAssertionResponse, which we want to send portions of to the Relying Party for verification.

const { challenge } = await (await fetch("/assertion/generate")).json(); // Server call mock to get a random challenge

const options = {
  challenge: new TextEncoder().encode(challenge),
  rpId: window.location.host,
  timeout: 60_000,
};

// Sign the challenge with our private key via the Authenticator
const credential = await navigator.credentials.get({
  publicKey: options,
  mediation: 'optional',
});

// Our main assertion response. See: <https://developer.mozilla.org/en-US/docs/Web/API/AuthenticatorAssertionResponse>
const assertion = credential.response as AuthenticatorAssertionResponse;

// Now send this information off to the Relying Party
// An example payload with most of the useful information
const payload = {
  kid: credential.id,
  clientDataJSON: safeByteEncode(assertion.clientDataJSON),
  authenticatorData: safeByteEncode(assertion.authenticatorData),
  signature: safeByteEncode(assertion.signature),
};

The AuthenticatorAssertionResponse again has the clientDataJSON, and now the authenticatorData. We also have the signature that needs to be verified with the stored public key we captured in the attestation phase.

Decoding The Assertion clientDataJSON

The assertion clientDataJSON is very similar to the attestation version. We again have the challenge, origin, and type. Everything is the same, except the type is now webauthn.get.

type DecodedClientDataJSON = {
  challenge: string,
  origin: string,
  type: string
};

const decoded: DecodedClientDataJSON = JSON.parse(new TextDecoder().decode(assertion.clientDataJSON));
const {
  challenge,
  origin,
  type
} = decoded;

Understanding The authenticatorData

The authenticatorData is similar to the previous attestationObject.authData, except we no longer have the public key included (e.g., the attestedCredentialData ), nor any extensions.

Name Length (bytes) Description
rpIdHash 32 This is a SHA-256 hash of the origin, e.g., my.passkeys.com.
flags 1 Flags that determine multiple pieces of information (specification).
signCount 4 This should always be 0000 for passkeys, just as it should be for authData.

Verifying The signature

The signature is what we need to verify that the user trying to log in has the private key. It is the result of the concatenation of the authenticatorData and clientDataHash (i.e., the SHA-256 version of clientDataJSON).

To verify with the public key, we need to also concatenate the authenticatorData and clientDataHash. If the verification returns true, we know that the user is who they say they are, and we can let them authenticate into the application.

Here’s an example of how this is calculated:

const clientDataHash = await crypto.subtle.digest(
  'SHA-256',
  assertion.clientDataJSON
);
// For concatBuffer see: <https://github.com/nealfennimore/passkeys/blob/main/src/utils.ts#L31>
const data = concatBuffer(
  assertion.authenticatorData,
  clientDataHash
);

// NOTE: the signature from the assertion is in ASN.1 DER encoding. To get it working with Web Crypto
//We need to transform it into r|s encoding, which is specific for ECDSA algorithms)
//
// For fromAsn1DERtoRSSignature see: <https://github.com/nealfennimore/passkeys/blob/main/src/crypto.ts#L60>'
const isVerified = await crypto.subtle.verify(
  { name: 'ECDSA', hash: 'SHA-256' },
  pubkey,
  fromAsn1DERtoRSSignature(signature, 256),
  data
);

Sending The Assertion Payload

Finally, we get to send a response to the server with the assertion for logging into the application.

type AssertionCredentialPayload = {
  kid: string;
  clientDataJSON: string;
  authenticatorData: string;
  signature: string;
};

const payload: AssertionCredentialPayload = {
  kid: credential.id,
  clientDataJSON: safeByteEncode(assertion.clientDataJSON),
  authenticatorData: safeByteEncode(assertion.authenticatorData),
  signature: safeByteEncode(assertion.signature),
};

To complete the assertion phase, we first look up the stored public key, kid.

Next, we verify the following:

  • clientDataJSON again to ensure the same challenge is used,
  • The origin is the same, and
  • That the type is webauthn.get.

The authenticatorData can be used to check the rpIdHash, flags, and the signCount one more time. Finally, we take the signature and ensure that the stored public key can be used to verify that the signature is valid.

At this point, if all went well, the server should have verified all the information and allowed you to access your account! Congrats — you logged in with passkeys!

No More Passwords?

Do passkeys mean the end of passwords? Probably not… at least for a while anyway. Passwords will live on. However, there’s hope that more and more of the industry will begin to use passkeys. You can already find it implemented in many of the applications you use every day.

Passkeys was not the only implementation to rely on cryptographic means of authentication. A notable example is SQRL (pronounced “squirrel”). The industry as a whole, however, has decided to move forth with passkeys.

Hopefully, this article demystified some of the internal workings of passkeys. The industry as a whole is going to be using passkeys more and more, so it’s important to at least get acclimated. With all the security gains that passkeys provide and the fact that it’s resistant to phishing attacks, we can at least be more at ease browsing the internet when using them.

The Ultimate Guide To Securing Your WordPress Login (For Free!) With Web Authentication

Defender had already implemented Two-Factor Authentication (2FA) in WordPress for hardened security… now we’ve added fingerprint/facial recognition, and external hardware security keys, too!

It has become increasingly apparent that relying strictly on usernames and passwords for logins no longer offers the highest levels of security.

WPMU DEV’s solution to addressing this is through the use of the WebAuthn standard, which bypasses vulnerabilities by providing a protocol of public key cryptography as a login authentication method.

Our newest Defender release—both Free and Pro versions—marks the start of our odyssey into the world of Web Authentication; providing the ability to verify the authenticity of a user login by way of biometrics (facial or fingerprint recognition), or a USB security key (e.g., YubiKey).

Usage of these new web authentication methods is similar to the 2FA methods already present in Defender, alongside the existing TOTP (Time-based One-Time Password), backup codes, and fallback email authentication methods.

In this article, we’re going to look at how to implement these new Web Authentication methods, as part of our 2FA WordPress plugin features in Defender.

Continue reading, or jump ahead using these links:

Let’s explore all that Defender has to offer in the form of login protection with the cool new 2FA WebAuth features.

The All-Encompassing Defender

Defender gives you the best in WordPress plugin security, stopping SQL injections, cross-site scripting XSS, brute force login attacks—and other vulnerabilities—with a list of one-click hardening techniques that will instantly add layers of protection to your site.

It also makes safety easier on and for you, taking advantage of the latest in WebAuth security measures.

By way of a quick overview, here’s how this works in Defender… the user will input their username & password to log in, and if Platform authentication has been configured for that device, said user can verify their identity through their fingerprint scanner or facial recognition software. Likewise, if the Roaming authentication has been configured for that device, the user can verify their identity through their USB security key.

Because we’re using the WebAuthn protocol, Defender does not at any point receive any biometric or security key data, only a confirmation or rejection from the user’s device.

I want to interject here with a quick point of interest, shared by one of our techs, Marcel Oudejans (and paraphrased by me)…

The convention of naming a dog “Fido” was popularized by Abraham Lincoln, though its use as a canine pet name dates back to the ancient Romans.

Fido” means “faithful”. FIDO stands for “Fast IDentity Online”. The new Biometric authentication feature uses WebAuthn protocol from FIDO.

So in a lovely, roundabout way, by using the FIDO protocol to implement this feature, one could say we are infusing ‘faithfulness’ into Defender.

Synonyms for faithfulness
Faithful FIDO.

For more technical information on FIDO, check out this article.

Ok, now let’s take an in depth look at these awesome new Web Authentication features.

Full Walkthrough on Web Authentication

First, make sure you have the Defender plugin installed and activated, and update it to the latest version (at the time of this writing, that’s 3.1.1). Defender versions 3.0 and higher are fully compatible with the recently released WordPress 6.0.

Two important things to note up front:

  1. Configuration of authorized devices is required on a per-user basis, since authentication is linked to individual user accounts.
  2. PHP 7.2 or above is required, as it improves performance and security, while also supporting the new biometric feature.

Enable Biometric or USB Security Key

Navigate to the WordPress Dashboard > Defender. If you’ve just now updated, you’ll get the popup modal. Give it a quick read, then click the Got It button.

defender splashscreen
WPMU DEV’s WebAuth features have expanded again!

You’ll be on Defender’s main page now. From the left sidebar, click on the 2FA menu header.

Another popup will appear; click on the Activate button.

Defender activate 2FA
One-click activation in Defender.

Now you’ll see all the section information for Two-Factor Authentication, and all the options we have available here.

From the same Defender 2FA page, under User Roles > Administrator, toggle the button On. Make sure to scroll to the bottom and click on Save Changes.

Toggle on Admin user roles.
Permission to enable 2FA is given through User Roles.

From the Dashboard’s side menu, go to the Users section, and click on your Admin User profile.

Scroll down to the Security section, and next to Web Authentication, toggle the button ON.

web auth toggle on
Selecting the WebAuth feature in Defender.

You’ll see a recommendation to choose an additional authentication method from these options: TOTP, Backup Codes, and Fallback Email.

In the example below, you’ll see I’ve selected Fallback Email, but you can choose whatever method(s) you prefer. Remember to click the Update Profile button at bottom.

Selecting additional authentication methods
The selection of additional authentication methods available in Defender.

Web Authentication does not replace your traditional WordPress login (i.e., username & password), instead adds an additional secure layer, like the other authentication options above.

While many browsers and operating systems are compatible with the WebAuthn protocol used to manage the authentication process, some are currently not. Check here to see WebAuthn’s browser and OS compatibility list.

Register Device

With WebAuth authentication enabled, the Registered Device table will appear, with options to Register Device or Authenticate Device.

Registered device identifiers
Defender keeps a list of Registered Device identifiers.

Clicking the Register Device button will start the prompt from your browser to configure the form of Web Authentication you wish to use, depending on what’s available on your device.

Select an Authenticator Type, enter any name in the Authenticator Identifier field, then click the Start Registration button.

webauth register device
Inputting info to authenticate a device; in this case, a USB Security Key.

Depending on the authenticator type and device you are using, the registration process will differ.

Example 1:

Registering a Windows desktop or laptop will prompt you to enter your Windows Hello PIN, or whatever other authentication method may be enabled on your device.

Windows hello PIN login
The Windows Hello sign in PIN entry.

Example 2:

Registering a mobile device will prompt you to touch the fingerprint sensor, or whatever other authentication method may be enabled on your device.

Verify fingerprint sensor
A sample fingerprint sensor authenticator window.

Example 3:

Registering a USB Security key will prompt you to go through a brief series of steps.

Back on your Users Profile page, if you scroll to the bottom under Security > Registered Device, you’ll see your device listed here, along with a message beneath it confirming it has indeed been registered.

webauth registered confirmation
Congrats! You’re registered. Next up… authentication.

The next step is to authenticate the device you just registered.

Authenticate Device

Once the device has been registered, click the Authenticate Device button.

The same authentication method used to register the device will prompt you to confirm the action.

authenticated device successfully
WebAuth device authentication confirmations for a Desktop PC, and a YubiKey.

Once done, you’ll see a success message appear. Now you’ll be able to use the registered WebAuth options as additional, secure ways to login to your site.

Rename or Delete Device

If desired, you can rename or delete any authenticated device.

Navigate to the WordPress Dashboard > Users, and click on your username.

To Rename:

From Profile > Security > Registered device, click on the Rename text in the Action column. Type the new name, and click Save.

Rename or delete registered device
Action options for registered devices.

To Delete:

Same process as above, but click on the Delete text in the Action column, then click OK from the next popup.

Confirm delete action
Confirming the delete of an authentication.

Be advised that the Delete action doesn’t save settings, so if you decide you want to use the Biometric feature from that device again, you will need to go through the full setup process.

Likewise, if you deactivate any WebAuth functionality on your device, the login will no longer work, and you would need to repeat the process on your device to restore the feature’s functionality.

GDPR Compliance

FIDO Alliance standards were created from the outset with a “privacy by design” approach and are a strong fit for GDPR compliance.

Because FIDO delivers authentication with no third-party involvement or tracking between accounts and services, biometric authentication with FIDO2 compatible devices is fully GDPR compliant.

With FIDO, no personally-identifying information ever leaves your device.

For more information, see the following article on the FIDO website: FIDO Authentication and GDPR.

Enabling Multiple 2FA Methods

If you enable more than one additional authentication method in your profile, each will display as alternate options beneath the method you have set as your default. In the example below, TOTP Authentication is my preferred method.

You can click on any available option in the list, and it will display the selected alternate authentication method.

TOTP authentication
Using a TOTP to authenticate, with alternate methods (per your selection) listed below.

A final note… Web Authentication requires that the following PHP extensions be enabled on your server: mbstring, GMP, and Sodium. These extensions are enabled by default on all sites hosted by WPMU DEV.

If you are hosting elsewhere and any of them are not enabled on your server, you’ll see an alert like the one below. Reach out to your hosting provider to have them enable the extensions for you so that you can use this feature.

Message alert, requirements not met
If you see this message, don’t panic–you’ll just need some PHP extensions enabled.

Click here for WPMU DEV’s full documentation on Defender’s Web Authentication feature.

The Complete Package

As protective measures go in WordPress, it’s hard to beat Defender.

Defender has powerful security protocols, including malware scanning, antivirus scans, IP blocking, firewall, activity log, security log, and two-factor authentication (2FA), including the two newly added Web Authentication methods–Biometric, and USB Safety Key.

The latest version of Defender also came with an additional, useful enhancement to Defender’s WP-CLI “scan” command. By using this WP-CLI command and option, if any issues are found, Defender will create a table with results.

Previously, you could only see the results of a malware scan from the back-end of the site (at WP Admin > Defender Pro > Malware scanning), but now you’ll be able to see the completed scan results right in the console.

Coming soon for Defender… we’ll expand on our use of WebAuthn, with our devs currently working on the ability to use hardware authentication devices. Plans are also underway to implement ‘password free’ logins in the best way possible, using the WebAuthn protocol.

You can read about upcoming features for any of our tools and services anytime in our product Roadmap.

If 2FA is the question, Defender is the answer. Handling security in your WordPress sites can be as simple—yet complete—as activating Defender.

Windows 10 and Android Cell Phone File Transfer

I just bought a Figo Nitro 4X cell phone (Android 8.1) phone for my son. When I connect my cell phone (Figo Android 6) to my Windows 10 laptop it displays in file manager with an icon that I can open to see all the folders on my phone. From there I can easily copy files back and forth with file manager.

When I plug in the new phone I still get the icon but when I open it I get a blank screen. No folders. The USB settings I have available on the phone are:

  1. Charge Only
  2. Media Device (MTP)
  3. Camera (PTP)
  4. USB virtual drive

The first three options get me a blank window. The last option shows the phone as a CD-ROM and opening it shows a readme file. The "drive" is read only.

Any suggestions? Online help is pretty much useless as they refer to USB options that are no longer valid in Android 8.

22 Amazing Gifts For Designers – 2019 Edition

We have collected 22 fantastic Christmas gifts for all your creative web designer and graphic designer friends out there. While not exhaustive, these are some of the best gifts for designers available right now, just in time for your holiday shopping.

Ready? Let’s get started with our 2019 gift guide!

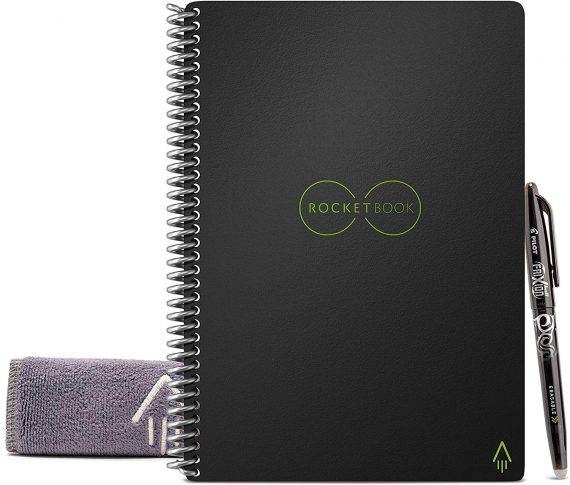
Rocketbook Smart Reusable Notebook

Rocketbook - Gifts For Designers - 1st Web Designer

The Rocketbook notebook provides a classic pen and paper experience, yet is built for the digital age. Although it feels like a traditional notebook, the Rocketbook is endlessly reusable and connected to all of your favorite designer’s relevant cloud services. When your designer friend writes using any pen from the Pilot Frixion line, their writing sticks to Rocketbook pages like regular paper. But add a drop of water… and the notebook erases like magic. Designed for those who want an endlessly reusable notebook to last for years, if not a lifetime, the Rocketbook has pages made with synthetic materials that provide an extremely smooth writing experience. Blast handwritten notes to popular cloud services like Google Drive, Dropbox, Evernote, box, OneNote, Slack, iCloud, email and more using the free Rocketbook application for iOS and Android.

CHECK PRICE ON AMAZON

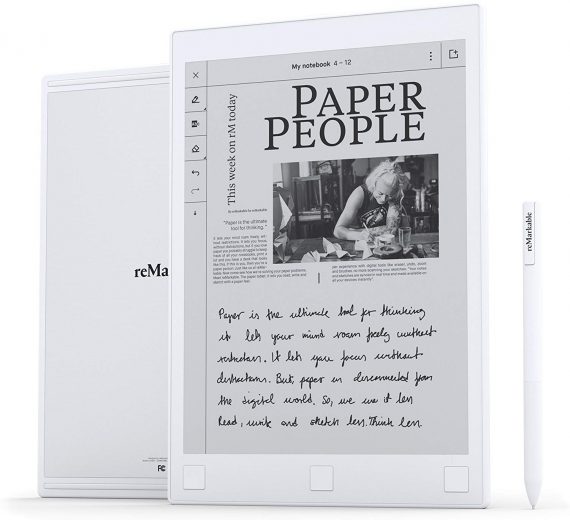
reMarkable – the Paper Tablet – 10.3″ Digital Notepad and E-reader

reMarkable - Gifts For Designers - 1st Web Designer

reMarkable is the first digital device that gives your favorite designer a pen-to-paper note-taking experience. reMarkable converts theirr hand-written notes to typed text, making them easy to refine, organize and share. With no backlight or glare, reMarkable offers a paper-like reading experience they won’t find on any LCD display. Annotate on their documents just like theywould on paper. Includes digital tools like undo, erase, move, and many more.

CHECK PRICE ON AMAZON

Wacom Intuos Pro Digital Graphic Drawing Tablet

Wacom Intuous Pro Drawing Tablet - Gifts For Designers - 1st Web Designer

The professional standard in creative pen tablets Wacom Intuos Pro sets a new standard for professional graphics tablets. The new Wacom Pro Pen 2 features impressive pressure sensitivity, tilt response and virtually lag free tracking. Your favorite designer will get natural creative control while they illustrate, edit or design digitally with Intuos Pro.

CHECK PRICE ON AMAZON

Wacom INTUOS4/CINTIQ21 Grip Pen

Wacom Intuous4 Grip Pen - Gifts For Designers - 1st Web Designer

Sketch and write on an Intuos tablet or Cintiq display comfortably with this Wacom Grip Pen stylus. It has a contoured body and ergonomic weight to help prevent wrist fatigue during extended use, and its tilt sensitivity provides a natural feel for accurate drawing. Maximize productivity with the programmable side switches and pressure-sensitive eraser.

CHECK PRICE ON AMAZON

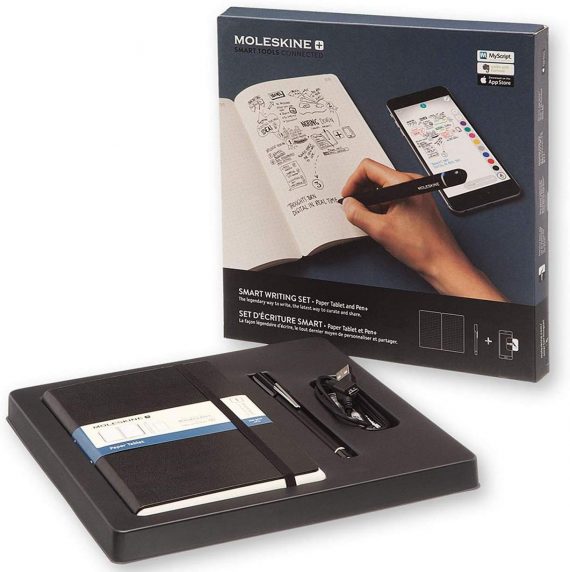
Moleskine Pen+ Smart Writing Set Pen & Dotted Smart Notebook

Moleskine Smart Writing Set - Gifts For Designers - 1st Web Designer

Your favorite designer will watch their ideas travel off the page and evolve on screen. Part of the Smart Writing System, the Smart Writing Set is an instant-access kit containing a dotted layout Paper Tablet, Pen+ smart pen and Moleskine Notes app: everything needed to bring all the advantages of digital creativity to freehand notes and sketches.

CHECK PRICE ON AMAZON

Adobe Stock – Try Risk Free For 30 Days!

Adobe Stock Subscription - Gifts For Designers - 1st Web Designer

Give the gift that keeps on giving, starting with a risk-free 30-day trial! Find the perfect high-res, royalty-free, stock image to enhance your favorite designer’s next creative project. Preview watermarked images inside designs first. Then license, access and manage them directly within Photoshop, InDesign, Illustrator, and other Adobe desktop apps.

GET THE FREE TRIAL

Vaydeer USB 3.0 Wireless Charging Aluminum Monitor Stand Riser

Vaydeer Monitor Stand - Gifts For Designers - 1st Web Designer

Your favorite designer can create additional space on their desktop while adding USB 3.0 ports, wireless charging for your devices, and keyboard and mouse storage, all in a sleek and affordable package!

CHECK PRICE ON AMAZON

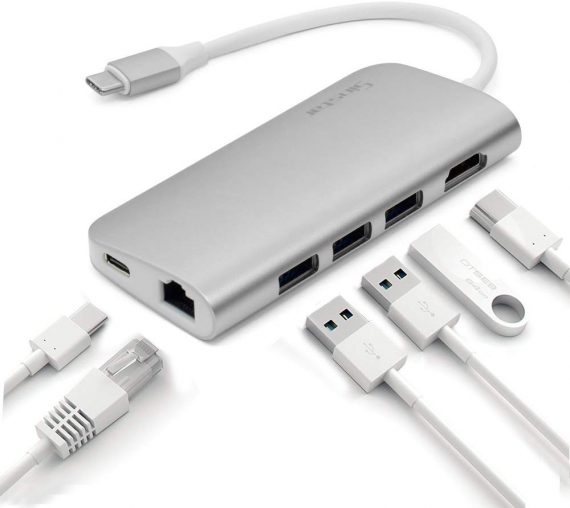
Sinstar 8 in 1 Aluminum Multi Port Adapter Type C Combo Hub

Sinstar Multi Port Adapter - Gifts For Designers - 1st Web Designer

This handy little device features three USB 3.0 ports, SD and Micro SD card slots, Ethernet, charging port, and 4K HDMI video output. The compact and easy-to-use design makes it simple to take the Type-C USB Hub with you anywhere you go. Your favorite designer won’t be far from the convenience of accessing their favorite USB devices.

CHECK PRICE ON AMAZON

Rhodia Webnotebook

Rhodia Webnotebook - Gifts For Designers - 1st Web Designer

The Rhodia Webnotebook has a leatherette cover with a glued spine. The Webnotebook is A5 in size and has 96 sheets with an elastic closure to keep the book closed. The Webnotebook has a coloured ribbon and expanding pocket.

CHECK PRICE ON AMAZON

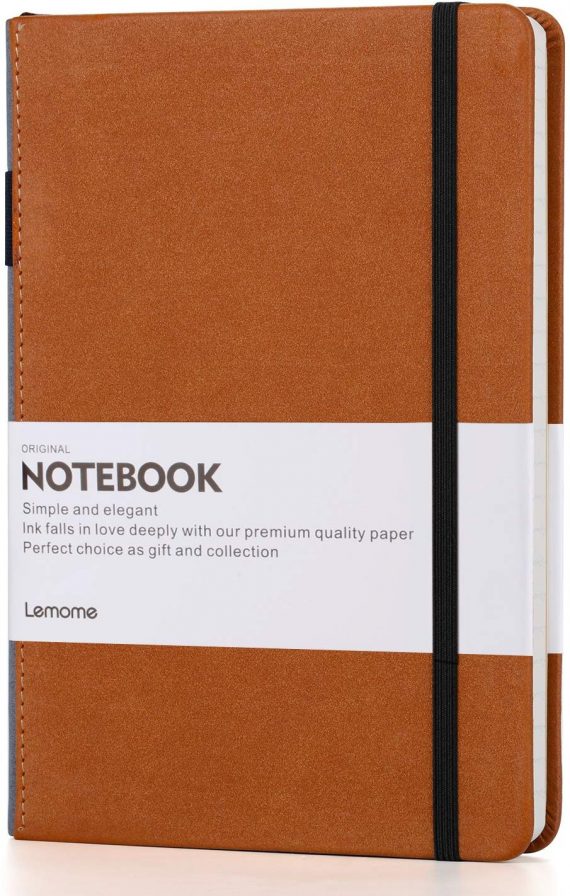
Lemome A5 Hardcover Dot Grid Notebook with Pen Loop

Lemome Notebook - Gifts For Designers - 1st Web Designer

A popular choice for everyday use, designers can use it to capture ideas, drafts, and drawings. Never lose your pen again, since the strap holds the pen and fits securely onto the side of the notebook. You’ll never have to rummage around again for something to write. Thick premium paper means it’s perfect to write and draw on.

CHECK PRICE ON AMAZON

Field Notes Signature Series Notebook 2-Pack

Field Notes - Gifts For Designers - 1st Web Designer

What designer doesn’t want Field Notes? Field Notes Signature Series Notebook 2-Packs are available in two versions: Cream covered books with plain ruled paper inside, or gray covered sketch books with plain paper inside. The covers are gently debossed with just a tint of ink. Inside you’ll find 72 pages of very high quality white Strathmore Premium Wove paper. The ruled pack has a fine application of gray lines on the pages.

CHECK PRICE ON AMAZON

Pantone: 10 Notebooks

Pantone Notebooks - Gifts For Designers - 1st Web Designer

Ten petite journals feature Pantone’s iconic color chip design in ten sumptuous shades. Grid-dot interior pages and a sturdy slipcase make these notebooks eminently practical and chic for on-the-go note-taking when used solo, and an eye-catching object for desktop display when grouped together.

CHECK PRICE ON AMAZON

Envato Elements

Envato Elements - Gifts For Designers - 1st Web Designer

Another gift that keeps on giving! One affordable subscription provides access to 1,800,000+ assets, including graphics, video, audio, presentation templates, photos, fonts, WordPress themes and plugins, and so much more. Sign up the designer you care about and they will forever be grateful!

SIGN UP NOW

Bellroy Classic Pouch

Bellroy Classic Pouch - Gifts For Designers - 1st Web Designer

The Classic Pouch is the humble sidekick that can make a big difference to your favorite designer’s day. They’ll never again leave behind their pen, charger, gum or lip balm, just because they can’t keep track of their essentials. And they won’t rummage around their bag looking for them, either. The Classic Pouch is the place to keep them in one place (and in the right place). An everyday pouch for keeping daily essentials in one spot — cables, cosmetics, toiletries, tools and more!

CHECK PRICE ON AMAZON

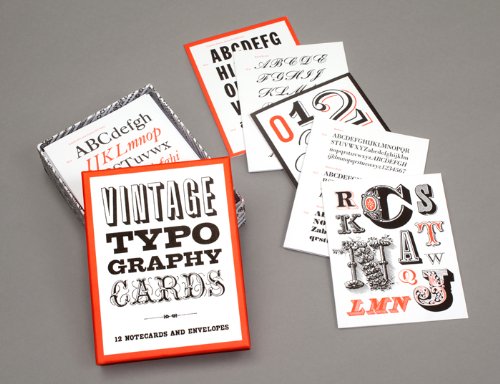
Vintage Typography Notecards

Vintage Typography Cards - Gifts For Designers - 1st Web Designer

Discovered in vintage typographic manuals, the specimens featured on these elegant cards range from one-of-a-kind hand-drawn samples to classic favorites used in the early decades of the twentieth century. The back of each card features a minihistory of the typeface’s origins and use.

CHECK PRICE ON AMAZON

Fifty Type Specimens: From the Collection of Tobias Frere-Jones

Fifty Type Specimens - Gifts For Designers - 1st Web Designer

Fifty Type Specimens is a collection of postcards with stunning images of typography, for inspiration, correspondence, or display. Cards feature classic letterforms, pages from specimen books, and crops of gorgeous letters presented in a box with the feel of an old specimen book. Historic typefaces, selected by renowned designer Tobias Frere-Jones, are organized into four geographic categories by thumb tabs: Germany, France, United States, and the United Kingdom.

CHECK PRICE ON AMAZON

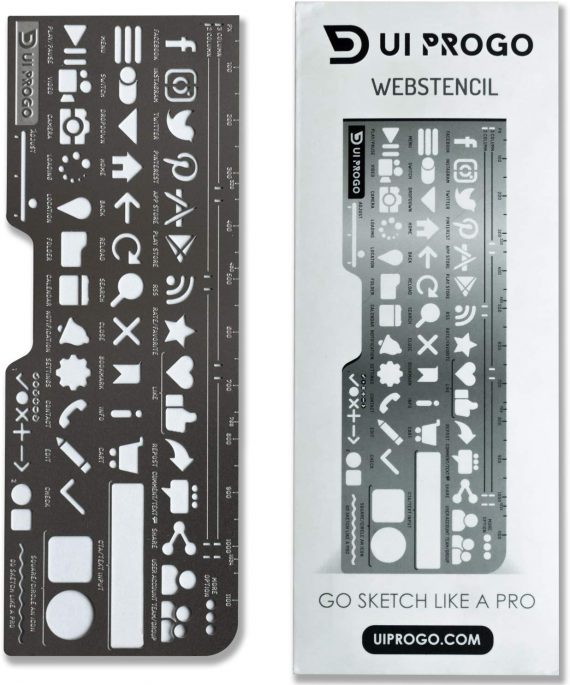
UI PROGO Stainless Steel Stencils

UI Progo Stencils - Gifts For Designers - 1st Web Designer

Premium quality materials with innovative design to create the ultimate tool for stenciling. With icons that are large enough to actually use, these stencils are a must-have for all designers, artists, students, and journaling enthusiasts. Complete with the latest social media icons, these stencils give you what you need to create the perfect design you have in mind. Made to be portable, you can take them with you to work, the office, or class.

CHECK PRICE ON AMAZON

2020 Stendig Wall, Office, and Home Calendar

Stendig Wall calendar - Gifts For Designers - 1st Web Designer

This calendar is special. It is much more than just a wall calendar: It is a masterpiece of art. This is the original, genuine and authentic work of the great Massimo Vignelli, designed in 1966. This modern calendar has withstood the test of time. Year after year designers, architects, doctors, lawyers, and many others purchase this calendar to let guests in their home or office know one thing: “I have style”.

CHECK PRICE ON AMAZON

Creative Workshop: 80 Challenges to Sharpen Your Design Skills

Creative Workshop - Gifts For Designers - 1st Web Designer

80 creative challenges that will help designers achieve a breadth of stronger design solutions, in various media, within any set time period. Exercises range from creating a typeface in an hour to designing a paper robot in an afternoon to designing web pages and other interactive experiences. Each exercise includes compelling visual solutions from other designers and background stories to help your favorite designer increase their capacity to innovate.

CHECK PRICE ON AMAZON

A Few Minutes of Design: 52 Activities to Spark Your Creativity

A Few Minutes of Design - Gifts For Designers - 1st Web Designer

This colorful, handy card deck presents fifty-two exercises and activities to jump-start your favorite designer’s creative juices, free them from creative block, start a new project, or finish an existing one. Each exercise offers insight into the innumerable small decisions involved in design: How to establish a pattern, continue a series, how to say it without words, how to name a project, what fits, and what doesn’t? These cards benefit established practicing designers or creatives in any field with activities that are sometimes playful, sometimes challenging, but always enlightening. Each activity is estimated to take 15 minutes.

CHECK PRICE ON AMAZON

Meggs’ History of Graphic Design

Meggs History of Graphic Design - Gifts For Designers - 1st Web Designer

Meggs’ History of Graphic Design is the industry’s unparalleled, award-winning reference. With over 1,400 high-quality images throughout, this visually stunning text will guide your favorite designer through a saga of artistic innovators, breakthrough technologies, and groundbreaking developments that define the graphic design field. The initial publication of this book was heralded as a publishing landmark, and author Philip B. Meggs is credited with significantly shaping the academic field of graphic design.

CHECK PRICE ON AMAZON

Pantone Postcard Box: 100 Postcards

Pantone Postcards - Gifts For Designers - 1st Web Designer

With a palette drawn from the systems of Pantone, each postcard in this set of 100 offers a different bold hue to brighten up your favorite designer’s mail.

CHECK PRICE ON AMAZON

Make a Wi-Fi Smart Switch for $5

Here's how you can make a Wi-Fi smart switch for a few bucks.

In this guide, you will learn how to control any 110-240V appliance for $5, using Itead's SONOFF device. Compared with the $30 Wi-Fi smart plugs out there, the SONOFF is a great alternative for making smart home and even industrial IoT projects at a larger scale. Moreover, it is based on the popular ESP8266 Wi-Fi chip, making it compatible with the Arduino environment and other resources like our ESP libraries at Ubidots.

You may also like: Home Automation Using IoT

The SONOFF comes with its own firmware and mobile app, but we think that its main value actually lies in its form-factor and low price. This is why we decided to do some hacking and unleash its full power!

Programming the ESP32 With an ARM Cortex-M USB CDC Gateway

The Espressif ESP32 devices are everywhere: They are inexpensive, readily available, and the Espressif IDF environment and build system actually is pretty good, working well for me, including Eclipse (see “Building and Flashing ESP32 Applications with Eclipse“). The default way to program an ESP32 is to a) enter UART bootloader by pressing some pushbuttons, and b) flash the application with ESP-IDF using a USB cable.

You may also like: The Ultimate IoT Hardware Comparison Guide

That works fine if the ESP32 is directly connected to the host PC. But in my case, it is behind an NXP Kinetis K22FX512 ARM Cortex-M4F microcontroller and not directly accessible by the host PC. So, I had to find a way how to allow boot loading the ESP32 through the ARM Cortex-M which is the topic of this article.

Can Software Developers Really Have Work Life Balance?

Even though this developer is working at home in the evening, who's to say he isn't happy with his work life balance? I mean, he looks pretty happy.

I have a rich annual tradition that I only just became aware of this year.

Every year, around this time, Apple has some kind of conference or announcement or something. It's the time of year when, for a day or two, an iThing getting smaller or losing a USB port makes everyone absolutely lose it and flood my news feed with opinions for a few days.

Apple AirPods At Half The Price? My Liberty Air Earbuds Review

liberty-air.jpg

Six months ago I was reviewing my experience with another Anker 'Soundcore' earbud product, the Liberty Lites. I liked these, and they quickly became my everyday audio companion while out on my long walks in the Yorkshire countryside. I did, however, have some issues with the volume never being quite loud enough and ultimately the three hour playtime ended up being just not enough for long train travel or flights. So, I started looking at the alternatives. Naturally I started looking at the likes of the Apple AirPods (once I had discovered you can use them with Android phones) and the new Samsung Galaxy Buds. Both look really cool and feature 'true-wireless' connectivity plus super battery life. Unfortunately, both also break my 'never gonna pay more than £100 for freakin' earbuds man' rule; and then some.

Then I stumbled across one of the best kept secrets out there: Anker also sell true-wireless AirPod look-a-like earbuds and they come in at well under the £100. In fact, they cost just £79.99 here in the UK. Actually, scrap the 'just' as in the US they are $79.99 which at the current exchange rate is about £61. At that price they would be an absolute bargain, but even at a shade under £80 they are still half the cost of AirPods with the standard charging case (AirPods with a wireless charging case cost 2.5 times as much!) and the pre-order price on the Galaxy Buds is £139 so not a great deal better. I took the plunge and grabbed a pair of Liberty Air earbuds, here's how that turned out.

Look and Feel

These look, erm, suspiciously similar to AirPods. Especially in white, and you'd have to be standing pretty close (and staring into my earhole) to notice the soundcore logo. The charging case is equally Apple-like. That's not a bad thing, the AirPods have set the bar for earbud design and have something of an iconic status attached to them. They don't feel the same though, perhaps understandably being a little less premium quality in the shiny plastic finish. In the ear they feel fine, light and once you've selected the right pair of tips from the four supplied you get a nice tight fit. The case is a small pebble-shaped one, the same glossy plastic, but small and I prefer this to the larger case supplied with my Liberty Lites.
Sound quality

Forget the looks, it's really all about the audio isn't it - otherwise you might just as well go for a coke can and string approach to listening to your music. Whereas I thought the Liberty Lites were a little underpowered on the volume front, I have no such reservations here. In fact, the sound quality pretty much blew me away. Hands up, I'm not audiophile, but these played everything I threw at them with a genuinely good reproduction and that's from heavy rock to acoustic vocals, opera and classical. The graphene-enhanced technology certainly seems to deliver on the marketing promise in my opinion. Equally important, the call quality was decent enough as well. Not that I take calls as I'm phone-phobic (fact!) but I do speak to my partner throughout the day and she had no difficulty hearing me, nor me her, under all conditions including a noisy train journey.

Battery life

This is one of the areas I was looking for improvement over the Liberty Lite buds, and I got it. While Galaxy Buds offer 6 hours playtime (unverified at this stage) the Liberty Air matches AirPods with 5 hours. In fact, over the course of a few weeks actually using the things every day I can confirm I get a real-world, high volume, 4.5 hours out of them before they need to go back into the case for a charge. The case will add a further three charging cycles, so I get a total of 18 hours without going near the USB cable. The micro-USB cable that is; c'mon Anker, get with the times and give us USB-C why don't you? I've long since moved over to USB-C so having to dig out a micro-USB cable is a pain in the ass. But maybe that's just me.

Touch controls

Ah, here's where I have a bit of a grumble. The touch controls are OK but not great. No volume control still, you have to control that from your smartphone and there's no companion app either. At least the volume is loud enough once you've set it. More of a problem for me and my stubby fat fingers is the fact that I found the touch controls to be a but temperamental and sometimes requiring a second, or even third, attempt to pause or skip. I've got used to it, but wish I didn't have to. I docked a star from the rating as a result of this one thing.

What else?

Well, there's the usual Anker 18 month warranty which is as good as you will get anywhere in my experience. Anker actually do honour these warranties and I've never had any fuss or faff on the very rare occasion I've needed to use their support people. There's also an IPX5 rating for water resistance, which means sweat and rain are not problematical, just don't wear them in the shower, m'kay. There's also Bluetooth 5.0 which has proven to be good on the battery life and equally good on keeping the connection no matter what. I have not experienced one single drop out in all my usage so far. Can't really ask for more than that. The auto-connect stuff all just works, the auto-charging ditto.

The Story of Open Standards and the Subsequent Evolution of IT Interoperability

In my previous blog, I discussed the importance of open standards while choosing a tech stack while developing your enterprise application. But the idea of open standards for IT is still a bit new to many people. So, here, I discuss how open standards evolved and why they are so important now.

“Open standards for information technology” seems to be a new term that everyone is talking about recently. But, as a matter of fact, open standards have been here for a long time. The socket and the plug that you use for charging your electronic devices, USB cables that fit perfectly into the given slots, or the WiFi signals that your devices connect to — all of these adhere to open standards. Standards are everywhere, whether you acknowledge them or not.