Using CodePen to Show Prototypes to Clients

One common use case for CodePen is creating prototypes of things for your clients or coworkers. Just recently we talked to Dave Rupert and Trent Walton about how they use it for that at Paravel!

When you're a web designer, nothing beats doing your job right in a web browser. Other design tools are fine, but the web is such a unique medium that getting into the browser as soon as possible is the way of all the best web designers I know. Think of the squishiness of the web — the clicks, the scrolls, hovers, and the swipes. The font rendering. The animations and transitions. The unique oddities like fixed and sticky positioning. You gotta get into a browser to be working on those things. Then, when you're done, you're so much closer to the final product.

Let's cover the possibilities here.

Use Private Pens/Projects

When you're PRO, you have unlimited content privacy. Any Pen, Project, Collection, or Post can be made private with the flip of a switch.

When you do, it won't show up on your profile, in search on or off CodePen, or anywhere else. The only way someone can see it is if you explicitly share the obscured URL with them.

This is the #1 Use Case for Private Collections

You see, Private Collections have a unique feature that makes them useful for this.

You can't share private Pens in a public Collection. Technically you can add your own private Pens to your own public Collection, but only you can see them (because they're private!)

Private Collections are different. Anyone with the link to your private Collection can see all of your Pens in the collection. That means you could make a private Collection of your private Pens and share it with your client.

You can fill a Collection with your private Pens, or a mixture of private and public Pens. Your client can see them all once you share the link to the Collection!

Keep in mind this only applies to Pens you own: you can't add someone else's private Pen to your Collection.

A Project with many .html files.

Say you have a bunch of individual deliverables that you want to group together. CodePen Projects can be helpful for that.

Check out this project that has a handful of .html files that are all self-contained designs that are meant to be used as error pages.

Have you use CodePen for client work?

Did you find it helpful to have your prototypes be in code? How did you handle back and forth and updated versions? Anything you want to share?

The post Using CodePen to Show Prototypes to Clients appeared first on CodePen Blog.

How to Add a New Post in WordPress and Utilize all the Features

Are you trying to create a new post in WordPress? Do you want to learn about all the WordPress post features you see on your screen?

While some may think that adding a new WordPress post is quite self-explanatory, many beginners find the interface a bit overwhelming.

Not to mention, sometimes even the more savvy users are surprised to find the hidden gems on the post edit screen.

In this beginner’s guide, we will walk you through all the features on the add new post screen, and how you can utilize them to create better content.

Adding a new blog post in WordPress using all the features

We have divided this guide into three sections to help you easily find what you’re looking for:

Ready, let’s get started.

Creating a New Post in WordPress Using The Default Editor

In December 2018, WordPress introduced a new modern block-based editor also known as Gutenberg. It is clean and simple, but don’t let the looks deceive you.

Behind its clean interface, there are tons of powerful features neatly tucked away. We’ll explain all of them and help you unlock its true potential.

Adding Title and Content Blocks

The WordPress block editor comes with a clean writing interface. At the top, you will enter your post’s title.

Add title for your post

To add content, you need to add a block. There are multiple add block buttons on the screen that you can click to select and add a block.

Add block buttons

If you don’t want to use a mouse to click on the button, then you can use a keyboard shortcut by typing / to search and add a block.

Select block while writing

All content elements are wrapped in a block. WordPress comes with blocks for all the common content items including paragraph, columns, images, gallery, embeds, shortcodes, widgets, and more.

Some WordPress plugins may also add their own blocks to add other features like contact forms, SEO, etc (more on this later in the article).

Adding Images, Videos, & Other Media

You can add images by simply adding the image block and then upload or select the image you want to add.

Adding an image block

If you want to text and image next to each other, then you can use the ‘Media & Text’ block. This block helps you wrap text around the image in WordPress.

Media and Text block

WordPress editor also comes with a Gallery block that you can use to display images in rows and columns with a grid layout.

Simply add the Gallery block and then upload or select the images from your WordPress media library.

Adding image gallery

While the gallery block is powerful, you may need other advanced gallery features like albums, image sorting, etc. In that case, we recommend using one of these WordPress gallery plugins.

Want to embed a video in your content? No problem.

The default WordPress editor comes with embed blocks for all popular providers.

Embed blocks

You can also just copy and paste the video URL to a paragraph block, and WordPress will automatically convert it into a video embed block.

Embedding a YouTube video in WordPress

While you use the video block to upload videos directly to your website, we recommend against that because it will slow down your website and can even crash your WordPress hosting server.

Instead, we recommend uploading your videos on a service like YouTube or Vimeo, and then embed it in your WordPress posts.

For more details, see our guide on why you should never upload videos to your WordPress site.

Adding Categories and Tags

WordPress allows you to sort your posts into categories and tags. These taxonomies help you organize your content into sections and topics.

They also help with SEO and make it easier for your users to find the content they are looking for.

The categories and tags meta boxes are located in the right-hand column, under the Document settings.

Adding Featured Image

A featured image (also known as post thumbnail) is the main article image which represents the content. They’re prominently displayed on your website on single posts, blog archive pages, as well as on the homepage of news, magazine, and blog websites.

Almost all WordPress themes support the featured image functionality. You will find the option to add a featured image to your post in the right column under the Document settings.

Adding a featured image to your WordPress post

Simply click on the ‘Set featured image’ button and then select or upload the image you want to be used as the featured image.

It’s important that you don’t confuse featured images with cover images which is a new feature. See our article on cover image vs featured image for more details.

Adding Excerpts (Article Summary)

Excerpts are the summary of a blog post or article. Most WordPress themes can automatically generate the excerpt from the first few lines of your post.

However, this automatic excerpt may not always be meaningful or catchy. In that case, you may want to manually add an excerpt.

You can do so by adding it in the excerpt box located under document settings column on the right.

Adding excerpt to your WordPress post

Changing Post URL Slug or Permalink

By default, WordPress uses SEO friendly URLs for your blog posts. It automatically uses your post’s title as the permalink.

However, some users may want to change it to be more SEO and user friendly. There are two ways to do that.

You can click on the post title, and you’ll notice the option to change the permalink above the title field. Alternatively, you can change it from the Permalink tab under the document settings column.

Changing a post's URL slug or Permalink

Changing Author

If you run a multi-author WordPress site, then you can also change a post’s author and assign it to a different author on your website.

You will find the option to change author under the ‘Status and Visibility’ tab in the right column.

Change post author

Turn Comments On / Off

WordPress comes with a built-in commenting system that allow users to leave comments on your post. You can turn off comments for individual posts from the Discussion tab under the Document tab.

Turn off comments for a post

You’ll also see the option to allow pingbacks and trackbacks. These allow you and other blogs to notify each other when they link to an article.

However, it is mostly used for spam, so we recommend completely disabling pingbacks and trackbacks.

Options Added by WordPress Plugins

Most popular WordPress plugins will also add their own options to the post edit screen. Some will be available as blocks while others will be available as meta boxes.

For example, WPForms, the best WordPress contact form plugin adds a block to insert contact forms in your posts and pages.

WPForms block in WordPress post

Another great example would be Yoast SEO. They add a meta box below the editor for SEO settings and another one in the top toolbar.

Yoast SEO metabox

Publishing Options

The default WordPress edit screen is divided into two columns. The left column is where you write content, and the right column has all post settings including publishing options.

Let’s take a look at publishing options in the right column.

Publish options

1. Save draft link allows you to quickly save changes you made to a WordPress post. The editor will also automatically save your changes as you write.

2. The preview button will open a live preview of your post or page in a new browser tab.

3. Once you are done editing your post, you can click on the Publish button to make your post go live.

4. WordPress gives you a few options to control the visibility of your post. The default option is ‘Public’ but clicking on it will show you options to make a post private or password protected.

Post visibility options

5. WordPress also allows you to control when a post is published. The default option is to publish immediately, but you can also schedule your posts to publish later or even select a past date.

Post publish date and time

6. Checking the box next to ‘Stick to front page’ will make a post sticky or featured. This makes the specific post appear on top of other posts. Learn more about sticky posts and what you can do with them.

7. Pending review option will add a custom status next to your post as ‘Pending review’. This feature is particularly helpful on multi-author blogs where contributors can just save posts and not publish them.

8. If you want to delete a post, then you can click on ‘Move to trash’ button. WordPress will send the post to trash. Deleted posts will remain in the trash folder for upto 30 days. After that, they will be deleted permanently.

Edit Screen Options

WordPress allows you to show and hide panels from the edit screen. You can do so by clicking on the three-dot menu at the top-right corner of the screen and then clicking on the ‘Options’ button.

Screen options

This will bring up a popup where you can check or uncheck the panels.

Show or hide panels from post edit screen

Other Post Edit Screen Options

There are many other options on the post edit screen. Most of them are related to the appearance of the post edit screen and the editor itself.

Let’s explore them.

When you click on the three-dot menu icon at the top right corner of the screen, you will see options to move block toolbar to the top, spotlight mode, fullscreen mode, switch between visual editor or code editor, manage reusable blocks, and keyboard shortcuts.

Editor settings

Next to it, you will see a button with the gear icon. Clicking on it will show/hide the right document and block settings column.

Hide settings column

On the top-left corner of the screen, there are a few more buttons. First, from the right, you will see the block navigation button which allows you to quickly jump to a block in your post.

Block navigation

Next, you will see the information icon. Clicking on it will show you post stats like the number of words, paragraphs, headings, and blocks.

Post stats

After that, you have Undo and Redo buttons which allow you to undo changes you made to your posts before saving or publishing them.

Undo and redo buttons

Finally, you have the add block button which allows you to insert blocks to the post editor.

The default WordPress editor is quite powerful.

We encourage you to explore it on your own when writing blog posts and pay attention to the individual block settings. Each block has different settings, and you’ll discover a lot of neat tricks there.

Creating a New Post in WordPress Using The Classic Editor

If you are still using the old classic WordPress editor, then this section is for you.

The classic editor will be supported until the end of 2021, and we strongly recommend all users to create a plan for switching to the new WordPress editor.

Title and Content Boxes

In the classic editor, title and content boxes are the most noticeable areas on the Add New Post screen (see the screenshot below).

Title and content boxes in the classic editor

Yours might look slightly different depending on whether you are using the visual or the text editor.

You can switch between visual and a text editor while writing a post, but we do not recommend switching as this could mess up your post’s formatting.

Visual Editor is a beginner friendly text editor with formatting buttons and a nice visual layout for the content area. On the other hand, the text editor is a plain text editor where you can actually see the HTML or write your own.

The first text area on the top is where you add the post title. If you are using SEO Friendly URL structure, then WordPress will auto generate the post URL based on your title. You can edit the URL by clicking on the edit button.

The content area is where you will write your post. You can use the formatting options from the toolbar or use one of the many keyboard shortcuts available which will speed up your writing process.

If you are using the visual editor, then you may want to take a look at these 14 tips for mastering the WordPress visual editor.

In the footer area of the content editor, WordPress will show you the word count for your post. If you want to get even more detailed word count stats, then check out our tutorial on how to get word count stats in WordPress with Word Stats.

As you write, WordPress will automatically save a draft of your post. This autosave is stored in your WordPress database temporarily.

As soon as you save your draft or write more content, WordPress cleans up your autosave temporary draft and replaces it with a new one. This process ensures that you do not lose your content due to internet connection or hardware failure. See our guide on how to undo changes in WordPress with post revisions.

The post editor shows your current draft and autosave status in the footer next to word count.

Add Images and Media

Between the title and content fields, there is a large Add Media button. You will need to click on it when you want to upload an image or any other media to your WordPress post. This will launch the media uploader in a popup window.

Media uploader popup in WordPress

Simply click on the select files button to upload images or any other media to your WordPress site. You can also create image galleries and audio playlists from uploaded files.

WordPress comes with some basic image editing tools. See our tutorial on how to edit, flip, rotate, and crop images in WordPress.

Publishing Options

The WordPress post edit screen is divided into two columns. The column on your left contains the post title and content editor. On your right-hand side, you have different meta boxes to configure post settings.

The top meta box in this column is labeled Publish. This is where all the publishing options for your posts are managed.

Post publish options in the classic editor

1. Save Draft button stores a draft of the post or page that you are working on. WordPress also auto-saves your posts as you write them.

2. Preview button shows a live preview of your post. You can use it to see how your post will look after publishing.

3. Status allows you to set a status for your post. WordPress automatically handles post status for drafts and published posts. Unless you are using a plugin to add custom statuses, you don’t need to worry about this option.

4. Click on the Edit link next to visibility to expand it. The first option under visibility will allow you to make your post sticky on front-page. Sticky posts in WordPress are like featured content that are displayed on top of all other posts.

5. The next option allows you to password protect a post in WordPress.

6. The third option under visibility is labeled private. This allows you to privately publish a post on your WordPress site. The private posts will be visible to users who have the editing privileges on your site.

7. Click on the edit link next to Publish, and WordPress will display the time and date options. You can use this option to schedule posts or create back dated post in WordPress.

8. Move to trash allows you to delete a WordPress post. Deleted posts live under trash, and you can restore them if you need to for up to 30 days.

9. Finally, the publish button makes your WordPress post public. Remember if you scheduled a post, then it will appear on your site on the scheduled date and time.

Adding Categories and Tags

You can sort your posts into categories and tags. The categories and tags meta boxes usually appear in the right-hand column below publish meta box.

Category and tags in classic editor

Categories and tags help you organize your content in a meaningful and browsable format.

Not only does it help users easily find your content, it also boosts your site’s SEO. See our guide on the difference between categories and tags and how to use them to sort your content.

Featured Image (Post Thumbnails)

Most WordPress themes support featured images or post thumbnails for articles. Usually, it is the last box in the right column on your post edit screen.

Featured image option in the classic editor

Simply click on set featured image link, and it will bring up the media uploader popup. You can select an image from your previous uploads or upload a new image from your computer. For more detailed instructions, see our guide on how to add featured image or post thumbnails in WordPress.

Screen Options

Some of the options on the post edit screen are hidden by default to present a cleaner and simpler editing experience. These options are not commonly used by beginners. However, you may need them later.

Simply click on the Screen Options button on the top right corner of the page. This will show a menu with checkboxes next to option names.

Screen options in the classic editor

As you can see some of the options will already be checked. For the others, you can display them by clicking on the checkbox next to an option name, and it will appear on your post edit page.

Let’s take a look at some of these options and what they do.

Excerpts

Checking this box adds a meta box below your content editor. You can use this box to add a short summary or excerpt for your post.

Adding post excerpt in classic editor

Ideally, you should display summary or excerpt for your posts on your site’s front-page and archives. Full content should only be displayed on the post’s single page. Learn more about this in our guide full post vs summary (excerpt) in your WordPress archive pages.

Send Trackbacks

Send Trackbacks option allows you to notify other blog owners that you have linked to their content. Take a look at our guide on trackbacks and pingbacks in WordPress to learn more.

Trackbacks in the classic editor

If the other blog owner is running WordPress, then you don’t need to send them trackbacks. Your WordPress site will automatically send them a ping when you publish the post.

Trackback feature is misused by spammers so much that many site owners simply disable them. We have an article on dealing with trackback spam in WordPress.

Custom Fields

This option will display a user interface for custom fields below your post editor. You can use it to manually enter custom information in your posts. See our WordPress custom fields 101 guide for beginners to learn more.

Custom fields in classic editor

Discussion

While comments are a great way to engage your audience, sometimes you may not want to have comments on a specific post or a page.

The discussion option displays a meta box below post editor to turn on/off comments and pingbacks for your post.

Post comments in classic editor

Since pages are supposed to be like static pages, most users want to turn off comments on them. You can do so by editing each page, or you can see this tutorial to turn off/disable comments on WordPress pages.

Once your WordPress site gets some reputation, you will start getting an increase of comment spam. Instead of turning off comments, you may want to try these tips and tools to combat comment spam in WordPress.

Slug

A slug is a cleaner title that can be used in URLs.

http://example.com/2015/07/this-is-post-slug

WordPress automatically generates a post slug and displays it as the post URL just below the post title. You can edit the URL slug by clicking on the edit link below the post title.

You can also enable the slug option from the Screen Options and edit your post slug there.

Editing post slug in classic editor

Author

WordPress will automatically assign you as the post author when you create a post. However, sometimes you may want to show another user on your WordPress site as the author. Enabling the author checkbox allows you to do that from the post edit screen.

Classic editor post author

Options Added by WordPress Plugins

So far we have only explained the default WordPress post edit settings. Many WordPress plugins will also add their own settings panels on the post edit screen.

For example, Yoast WordPress SEO plugin adds its own settings panel.

Yoast SEO settings

Bonus Tips for Creating Better Blog Posts

The reason why WordPress is the most popular blogging platform is because it comes with a great set of tools right out of the box to help you create new content.

However, there are many other tools and tips that you can use to improve your blog content.

The first tip we offer to everyone who’s just starting a blog is consistency. Make sure that you regularly publish blog posts. You can plan an editorial calendar and then stick to it.

We recommend starting with 1 – 2 posts a week and then gradually increase your pace.

Often new users struggle with finding post ideas for their blog. Here is a massive list of blog post ideas that you can use to get started.

You’ll also need to learn how to promote your posts and keep track of things. Our team has picked the best content marketing tools that will help you grow your blog.

We hope this article helped you learn how to add a new post in WordPress like a pro. You may also want to see our essential WordPress SEO guide for beginners to get more search traffic to your site.

If you liked this article, then please subscribe to our YouTube Channel for WordPress video tutorials. You can also find us on Twitter and Facebook.

The post How to Add a New Post in WordPress and Utilize all the Features appeared first on WPBeginner.

How to Properly Switch From Wix to WordPress (Step by Step)

Looking to switch from Wix to WordPress?

Wix is a popular website builder that lets you create a simple website, fast. However, many Wix users soon realize that their options are limited and adding extra features can become quite expensive.

If you want more features and flexibility without the high costs, then switching to self-hosted WordPress is the best choice. WordPress powers over 32% of all websites on the internet because it’s extremely powerful. In this article, we will show you how to properly move from Wix to WordPress and grow your website with complete freedom.

Move from Wix to WordPress

After reviewing various different ways to move from Wix to WordPress, we believe the easiest method is by importing your blog posts via RSS.

In this step by step guide, we will walk you through the process of transferring your Wix website to WordPress. Depending on how many pages you have on your Wix site, the migration can take upto an hour.

Here are the steps to migrate from Wix to WordPress:

  1. Sign up for WordPress web hosting
  2. Setup your new WordPress site
  3. Customize your site’s style and appearance
  4. Import your blog posts via RSS
  5. Convert your Wix pages to WordPress
  6. Create your main navigational menu
  7. Redirect Wix to WordPress

Ready to switch from Wix to WordPress? Let’s get started.

Step 1: Signup for WordPress Web Hosting

To start a WordPress blog, the first thing you’ll need is a web hosting account for your website.

Web hosting is your website’s home on the internet. This is where all of your files and data is stored.

You will also need a domain name (such as www.yoursite.com). This is your website’s address on the internet.

When you use Wix, they host your website for you which is also the reason why it’s quite limited. On the other hand, WordPress is a free software, so you’ll need a place to install it. That’s why you need to purchase web hosting and a domain name.

We highly recommend that you use Bluehost because they are an official WordPress.org recommended hosting provider.

They have agreed to give WPBeginner readers a free domain and over 60% off discount on web hosting when you use our special Bluehost coupon code.

→ Click here to Claim this Exclusive Bluehost offer ←

If you want to look at more options, then we have a list of the best WordPress hosting providers that you can choose from.

Some other companies that we recommend are SiteGround and HostGator.

In this tutorial, we’ll use Bluehost for screenshot and examples.

If you’ve already registered a domain name with Wix, that’s no problem. When signing up with Bluehost, you can enter your existing domain under the “I have a domain name” option.

Enter your existing Wix domain name on the right

Later on in this guide, we’ll walk you through how to transfer your domain when your new WordPress site is ready.

Step 2: Setup Your New WordPress Site

After purchasing your new hosting plan, you’ll need to install and setup WordPress.

If you signed up with Bluehost, then they automatically install WordPress for you, and you can simply login to your WordPress dashboard from your hosting account.

Upon login, you will see your WordPress admin dashboard:

WordPress admin dashboard

All other WordPress hosting companies also offer 1-click WordPress installers from their hosting dashboard. If you need help installing WordPress, then you can refer to our step by step guide on how to install WordPress for beginners.

Once you login to WordPress admin area, it’s a good idea to set your WordPress permalinks.

Your permalink settings will determine the address of each blog post. For example, instead of publishing a blog post to:

www.yourblog.com/2017/10/blog-post-title

You can publish it to:

www.yourblog.com/blog-post-title.

You can change your permalink settings by navigating to Settings » Permalinks in your WordPress dashboard. Once you have selected the structure you want, click on the Save Changes button at the bottom.

Change WordPress permalinks before importing Wix

For more details about permalinks, you can check out our post on SEO-friendly URL structures in WordPress.

Step 3: Customize Your Site’s Design

Next, you should customize the appearance of your website. It’s easy to do that using WordPress themes.

WordPress themes are similar to Wix templates, they control the appearance and display of your WordPress website.

There are thousands of free WordPress themes available for you to use. Some themes are very basic and minimalist, while others will add a lot of new features to your site.

WordPress themes

As a WordPress beginner, you may want to start with a simple theme that’s easy to use. We have a list of recommended simple WordPress themes you can take a look at to get started.

Wondering how to decide on a theme? You can check out our article on selecting the perfect WordPress theme for tips and advice.

Once you have found a theme you like, you can install it by following our guide on how to install a WordPress theme.

Remember, you can easily change your theme in the future, so it’s important that you don’t spend too much time on this step.

You can even use the default WordPress theme and start with the migration process. Because the most important part is moving all of your content from Wix to WordPress.

Step 4: Import Your Wix Blog Posts to WordPress

In this step, we’ll transfer your Wix blog posts over to your new WordPress site.

Wix is a closed platform, and they don’t provide an easy way for users to migrate their content away from Wix.

But we can still automate the process by importing your Wix RSS feed, instead of recreating each blog post manually.

To get started, you’ll need to download your Wix RSS file.

You can locate the file by adding /feed.xml to your Wix website URL.

If you don’t have a custom domain with Wix, then you can find your RSS feed at username.wixsite.com/blogname/feed.xml, where “username” is your Wix username and “blogname” is the name of your blog.

If you have a custom domain such as www.yourwixblog.com, then you can find your RSS feed at www.yourwixblog.com/feed.xml.

After navigating to the proper URL, you should see a page full of code.

Go ahead and right-click anywhere on the page and click Save As to save the file in your computer.

Save Wix RSS feed

Now that you have your RSS file, you can log in to your WordPress dashboard and click on Tools » Import.

Next, click the Install Now link under the RSS heading.

Wix to WordPress migration using RSS feed

After a few seconds, you’ll see a link at the top of the page to Run Importer. Go ahead and click the link.

Next, you need to click the Choose File button and select the feed.xml file that saved to your computer. Once selected, you can click the Upload file and import button.

Click the upload button to transfer Wix to WordPress

If you have a lot of blog posts to import, then it can take several minutes to import them all.

When it’s done, you’ll see a confirmation message.

Your Wix blog posts imported to WordPress

To check on your blog posts and make sure they were exported from Wix correctly, you can navigate to Posts » All Posts and click View underneath each post.

Blog posts imported

At this point, the content of your blog posts has been transferred, but there’s one problem: any images in your post are still hosted with Wix.

Luckily, there’s an easy way to fix this and move your images over to WordPress.

All you need to do is install and activate the Auto Upload Images plugin.

Plugins are like apps for WordPress that allow you to add new features. We have a step by step guide on how to install a WordPress plugin.

After installing and activating the plugin, you’ll need to re-save each post that contains images, and the plugin will import images inside it.

It would be time-consuming to edit each post one by one, but we have a handy trick that you can use to quickly re-save all WordPress posts at once.

Simply go to Posts » All Posts page and then click on the Screen Options button at the top.

Display more posts

You need to increase the number to 999 in the ‘Number of items per page field’ field and click on the Apply button.

WordPress will reload the page, and this time it will show 999 posts at a time.

Next, you need to select all your posts and then select Edit under the bulk actions menu.

Select all posts

After that, you need to click the Apply button. WordPress will show you a quick edit box with all selected posts. You just need to click on the Update button, and WordPress will update all your posts.

See our guide on importing external images in WordPress for more detailed instructions.

Step 5: Import Your Wix Pages to WordPress

After you have imported your blog post, next we’ll need to transfer your Wix pages over to your WordPress site.

Wix doesn’t provide any automated way to do this, so we’ll have to recreate each page in WordPress one by one.

First, you can navigate to the Wix page you want to transfer to WordPress. Highlight all the content (except for the page title). Then you can right click and click on Copy.

Copy Wix pages to WordPress

After that, you need to login to your WordPress dashboard and navigate to Pages » Add New to recreate the page. At the top of the page, you can type in the page title. Then you can right-click and and click on Paste to recreate the content.

Paste page content

For help with styling your pages, you can check out our article on add new post or page in WordPress.

When you’re finished styling your page, you can click the Publish button to publish your page on your new WordPress site.

Publish your page

While you can follow the above method for all text based pages, it won’t work for certain pages like your contact page.

You’ll need to install a contact form plugin like WPForms to create a contact page. We have a step by step guide on how to create a simple contact form.

Now that you’ve converted all your content, it’s a good idea to carefully review your posts and pages to make sure everything is working right and looks the way it’s supposed to.

Step 6: Create Your Main Navigational Menu

Next, you’ll want to make sure your visitors can easily navigate through your new website using your primary menu.

You can create a navigational menu by going to Appearance » Menus. Type in a name for your menu, and click one of the Create Menu buttons.

Creating new navigation menu

Next, you can select whichever pages you want to add to your main menu, and click the Add to Menu button. When you’ve added all the pages you want, select the menu position.

Finally, click the blue Save Menu button on the right.

Add pages to menu

Now your menu has been created and is live on your website.

Step 7: Redirect Wix to WordPress

Your new WordPress site is complete, and you’re ready to let your readers know about your move.

It’s important to not only announce your move to your readers but to setup proper redirection.

You want all visitors of your old site to land on exactly the same page on the new site. This will also let search engines know that your old site has moved to a new location.

Note: You can only redirect users to your new WordPress site if you had a custom domain on Wix. Unfortunately, if you were using a wixsite subdomain, then you cannot redirect users to your WordPress site.

First you need to open a plain text editor like Notepad and paste this code:

var hashesarr = { 
"#!about-us/c1it7":'/about/',
"#!contact/ce54":'/contact/',
"#!random-article/c1mz":'/random-article/'
 };

for (var hash in hashesarr) {
    var patt = new RegExp(hash);
    if (window.location.hash.match(patt) !== null) {
        window.location.href = hashesarr[hash];
    }
}

In this code we have added three example URLs in the following format:

"#!about-us/c1it7":'/about/',

The first part of the line looks for a string in the URL. This will be the URL your Wix users will be coming from. The second part in the line is the WordPress slug for the same page.

Unfortunately, you will have to manually add each URL in this format. Once you are finished, you need to save this file as redirects.js.

Next, you need to upload this file to your WordPress theme’s /js/ directory using an FTP client.

If your theme does not have a /js/ directory, then you need to create one.

Now you need to edit your theme’s functions.php file and add this code at the bottom of the file:

function wpb_wixjs () { 
wp_enqueue_script( 'wixredirect', get_stylesheet_directory_uri() . '/js/redirects.js', array(), '1.0.0', true);
} 
add_action('wp_enqueue_scripts', 'wpb_wixjs');

Don’t forget to save your changes.

That’s all, you can now try visiting a URL from your old Wix site to see the redirect in action.

Note: These redirects will not redirect search engines and are not very SEO friendly.

Lastly, don’t forget to inform your readers of your new address. You can do this by announcing your move on social media, writing a blog post about it, and sending out a notice to your email newsletter.

Step 8: Add Essential WordPress Plugins

WordPress plugins allow you to add more features to your site. Plugins work like Wix apps. There are hundreds of plugins available, free and paid. You can check out our archive of articles about the best WordPress plugins if you’re not sure where to start.

We also have a list of the must have WordPress plugins for all websites.

If you’re looking for a Wix style drag & drop page builder, then we recommend using one of these best drag & drop WordPress page builder plugins.

That’s it! We hope this tutorial helped you switch from Wix to WordPress without a lot of hassle.

We would like to welcome you to the WordPress community. To get started with WordPress, please take a look at our beginner’s guide section and our WordPress beginner videos.

If you have a friend still using Wix, then you can show them your new WordPress site and our comparison on WordPress vs Wix and convince them to switch over.

If you liked this article, then please subscribe to our YouTube Channel for WordPress video tutorials. You can also find us on Twitter and Facebook.

The post How to Properly Switch From Wix to WordPress (Step by Step) appeared first on WPBeginner.

How to Write a Blog Post: 22 Actionable Tips

How hard could it be to write a blog post? If a teenager can do it, you can too, right?

Well, writing a blog post isn’t hard at all, but writing a great blog post is very difficult. Below are 22 actionable tips on how to write a blog post that will help make your content stand out from the crowd.

Write a blog post

Blog On Your Passion

Blogging can be a chore, unless you are passionate about the topic. So, first and foremost, pick a topic you are passionate about.

Don’t just pick a topic that you “think” you are passionate about. Pick one that you definitely know you’ll love. It has to be a topic that you love so much that you want to constantly learn more about it.

Break With Your Old Ways

Do you remember writing term papers in high school or college? If you don’t, lucky you! If you do, writing blog posts is going to be a difficult task for you. You have to ignore all the things your professors taught you about writing.

You aren’t here to write a term paper—you are here to create a conversation!

If my blog posts sounded as if I was talking at you instead of to you, wouldn’t you get bored and irritated with me? Make sure you do the same: talk to your readers—not at them.

Know What You Want To Write About

Before you start writing the first word, you have to know what the last word is going to be. I don’t mean this in a literal sense, but you have to know how you are going to start off your blog post, the points you are going to convey, and how you are going to wrap everything up.

If you are one of those people who like to be spontaneous, that’s great. As one of those people, I have realized it doesn’t work well with blogging. It will only cause you to spend more time writing than you need to.

Plus, I am pretty sure you are already strapped for time. Right? So why waste more of it?

Find Popular Topics To Blog About

Find a topic that you are passionate about and create a list of all the popular blogs in that space. You can easily do this by searching Google. If there are not many popular blogs in your space, list all the blogs that are somewhat in your space and are popular.

Now that you have a list of all the popular blogs, make sure you browse them once a week. When browsing them, look for social buttons on each post that shows how many people either tweeted or liked the post. The higher the number, the better.

Take the posts that have over 50 or 100 social shares and list them in a spreadsheet as new ideas for future use. This can be your go to list for when you need a new topic to write about.

Create An Awesome Title

Until you can come up with an awesome title, you shouldn’t start writing your blog post. You could have the greatest content, but if your title sucks, most people won’t read it.

Let’s say that we were targeting the keyword, cake baking tips. Now, from an SEO standpoint you obviously want this keyword to appear in the title and somewhere early on in the title and from a blogging perspective. You need to make sure that the words surrounding your keyword are enticing enough for people to click through. I found that numbers tend to work really well for blog posts.

Instead of just saying cake baking tips, you’d want to put something like, 25 incredible cake baking tips. Okay? So, that’s something that’ll entice people to click through because they’re curious about the specific number of 25 and the word incredible also makes them a little more curious. That is what I would call an awesome title that should get some clicks!

Hook Your Readers

You have only a few seconds to grab people’s attention. If you can’t grab someone’s attention within the first few sentences you write, you have lost them.

Also, from a search engine optimization standpoint, you want your keyword to appear high up in the content preferably in the first or second or third sentence of your post.

Here is an example of how I might write a couple of sentences within a blog post intro that would hook most readers into reading more:

How hard could it be to write a blog post? If a teenager can do it, you can too, right? Well, writing a blog post isn’t hard at all, but writing a great blog post is very difficult.

If you look at the paragraph above, you’ll notice I have done a few things:

  1. I created a conversation with you.
  2. I showed you anyone could write a blog post, which makes you feel you can do it too (which you can).
  3. I enticed you to read further by alluding to the fact that not everyone writes great blog posts.

In the second paragraph, I use social proof to demonstrate I am not just an average Joe who is giving advice. If you are new to this blog, you might need that proof.

Over the past few years, I have started two blogs. Although my first blog was a Technorati 100 blog, the content was crap. Readers didn’t care to read the content or engage in the conversation (comment on the blog).

Seeing I was a top 100 blogger helps you take my advice a bit more seriously. At the same time, telling you I screwed up shows you I am not perfect and that you can always improve.

Everyone has different writing styles, so I don’t expect your introductory paragraphs to be like mine, and that’s fine. As long as you use some of the elements I used, your readers will be engaged.

Create A Conversation

Have you noticed that I use the words “you” and “I” a lot within my blog posts? I do this because I am trying to create a conversation with you. The last thing I want you to feel is that you are reading an essay because that would be boring. I know that because it would be boring for me.

I’ve been writing blog posts – trying to make them as personable and relatable as possible – for years, which is why I get so many comments on each of my blog posts.

I’ve never A/B-tested essay-style vs conversation-style posts because I would never want to publish a blog post that was written like an essay.

Even without the test, there is one thing I’m confident about when it comes to using a conversational style in blog posts: it helps with readability.

Evidently, you prefer this as well because I get emails like this one every week:

I just wanted to say thanks for all of the blog posts you have written. They are insightful and have helped me learn online marketing. Your blog is really easy to read and digest the information.

No need for a response.

Cheers!

By creating a conversation, you will see that your blog posts are read more and people are more likely to comment.

Just think of it this way: if you read a blog post that you loved and the author of the post asked you a question at the end… what would you do?

There is a good chance you would respond with a comment, right? I know I would.

By asking your readers a question, you will encourage more of them to leave comments. This will cause people to stay on your blog longer as it takes more than a few seconds to leave a comment. Plus, it gives you an opportunity to respond to the comments and get your readers to come back to your blog.

This is why I respond to every single comment on Quick Sprout. It’s the main reason why repeat visitors make up 40% of my traffic.

Open Up

When you read a blog, how much do you really know about the person behind the blog? Very little, right?

If you are lucky, the blogger may have a bio and a photo of herself in the sidebar… but that’s pretty much it.

You can’t expect your audience to connect with you if you don’t open up. You can accomplish this through an About page. Not one that is about your blog or your company, but about you… the person behind the blog.

If you have a corporate blog, you can create an About page for each author on your blog.

To create an effective About page, you should consider doing the following:

  1. Tell your complete story – from birth to today, give details of your life.
  2. Don’t hold back – from the moments you are ashamed of to the moments you are proud of, share them all. It will allow people to get to know all sides of you.
  3. Include a picture – people won’t be able to connect with you unless they can see you. You can place a photograph of yourself on your About page, or you can create a cartooned version like I have.
  4. Talk about your goals – just like you are helping your readers with your content, they too can help you. Discuss your future plans and goals within your About page. Mine is to start a non-profit one day.

Longer Content Is Usually Better

If you look at the data below, you will have to agree with me. Longer posts usually perform better on every level.

Let’s go through the reasons why this is true.

The first is the fact that a higher word count typically results in more search traffic. There are more than 200 factors that influence how your content ranks in the SERPs. Evidence suggests that the more content your page has, the better chance it has of a top position in Google results.

SerpIQ studied search results rank based on content length. Here’s what they found:

content length

The higher the Google SERP position, the more content the page has. Notice that every one of these first page results has content exceeding 2,000 words.

Google’s web crawler, Googlebot, is responsible for indexing your site. When it does so, it looks at every single word, tag, and particle of information (with a few exceptions like rich media files and dynamic pages).

There are different content types that get indexed — page title, headlines (H1, H2, H3, etc.), metadata, alt tags on images, etc.

The more content you have, the more of it gets indexed. The more that gets indexed, the better it will perform in searches and results. It’s just that simple.

Another reason for longer content is that the greater your word count, the more link-backs you’ll get usually.

I’ve mentioned before that long content garners more link-backs. Here’s the proof from a Moz test:

moz word count

The correlation couldn’t be clearer.

moz link count

From a sheer data perspective, you can’t argue against this. Longer content gets more link-backs. More link-backs means better SEO. Better SEO means more conversions and revenue.

Also, longer content gets shared more frequently too! A popular online journal ran the numbers on how shareable its content was from a length perspective. What the team discovered was that longer articles got shared more.

social shares

Once the word count exceeds 1,500 words, it’s in the golden share zone.

My own research on Quick Sprout confirms this. All of my posts that are more than 1,500 words receive 68% more tweets and 22% more Facebook likes than the articles with fewer than 1,500 words. For all the talk about making posts “shareable,” it turns out that the defining factor is content length.

However, when it comes to web content, length is only one of the factors to consider. You’ve got to consider a host of other issues. Take into account how all these other factors affect the length of your post.

  • Substance – this is the most basic consideration. What are you trying to say? What’s the substance? If you can say it in 100 words, then you may want to do so. If it requires 2,000 words, that’s fine too.
  • Style – some writing styles lend themselves to content that is short, brief, and to the point. Other times, the style is more conversational and interactive. Style will affect your content length.
  • Frequency – how often you post affects how long your posts are. Some bloggers may post only once a week, but when they do, it tends to be a very thorough blog post. Other sites pop out short ones every day. It’s just a matter of how much the content marketing team can manage. Good content takes time!
  • Format – the way an article is formatted has a massive impact upon its readability. I tend to use a lot of subheadings, a sprinkling of images, and short paragraphs. It’s important to break up your content into chunks so people can scan it.
  • Purpose – every good content marketing plan has a purpose…many purposes, actually. The ultimate goal is conversions, but within this broad goal, there are sub goals. Other goals may be to spread brand awareness, drive social engagement, grow email lists, provide education or improve SEO. Different purposes will naturally mean differing length requirements.
  • Audience – a huge part of content creation is knowing your audience: their needs, their interests, their passions, and their problems. Your goal is to create content your audience is going to read.
  • Medium – not all content is words. When I post an infographic, I typically use around 100 words to introduce the topic. The rest of the words are in the infographic, which don’t really translate into an accurate word count metric. If you post a video, meme or infographic, word count becomes irrelevant.

By no means am I saying that content length isn’t important. I’m saying that length isn’t the only thing you should be concerned about.

Make Sure What You Write Is Original

Anything you write for your blog or website must be 100% original. This means that the content can’t be redundant, duplicated or stolen.

By redundant I mean content that basically repeats itself. For example, let’s say one day you might write an article on 14 SEO copywriting tips, and another day you might write about SEO copywriting advice. Those two articles are redundant if they basically say the same thing, so you’ll want to either get rid of one of them or revise the other to make it unique.

Provide Practical Advice And Relevant Research

One of the best ways to create value for your readers and to earn great links is to think of problems or issues that your readers are dealing with and then provide how-to articles or tutorials on that topic.

Original research can serve the same purpose if it turns out to be something your audience wants or needs. Original research is content that has facts and ideas that have no known sources. You did the interview or dug up the story all by yourself and are providing not only the facts, but the analysis too.

You can also analyze or combine other analysis and facts to come up with original material. Search Quality Strategist Kaspar Szymanski at Google Dublin suggests:

Survey or original research results can serve the same purpose, if they turn out to be useful for the target audience. Both methods grow your credibility in the community and increase visibility. This can help you gain lasting, merit-based links and loyal followers who generate direct traffic and “spread the word.” Offering a number of solutions for different problems could evolve into a blog which can continuously affect the site’s reputation in a positive way.

Before you sit down and write an article, search the web for articles like your idea. One of the things that I do is take the headline I’m thinking about using and drop it into the Google search box. Then I look at what comes up.

Do I have a topic that is unique, or are there hundreds of titles similar to mine? If so, how can I make mine unique? Sometimes that means I have to narrow my focus. But after I narrow my focus, I have to make sure I’m providing information that goes deeper than the surface level.

For example, in my 7 Habits of Highly Successful SEOs post, I didn’t write about the obvious habits of SEOs like page optimization or managing PPC campaigns. I talked about the not-so-obvious intangibles like creativity, risk-taking and the unexpected: highly effective SEOs don’t just rely on SEO! I gave you something that was insightful and interesting – something you won’t find anywhere else.

Use The Proper URL Structure

You definitely want your keyword to appear in the URL. That’s important for SEO, but also from a user experience standpoint you want to have a very short URL. I recommend putting just your target keyword in the URL. For example if your post was about the best web hosting your URL would be https://www.quicksprout.com/best-web-hosting/

That’s important for SEO because Google wants to see that your keyword appears in the URL, but it’s also important for user experience because when people share this URL in social media if it’s too long they won’t be able to share on some platforms because it’ll go over the character count.

Use A Variety Of Related Keywords Within Your Post

The sheer variety of words is also an important factor that can improve your SEO.

For instance, let’s say you’re creating a short blog post on “writing great headlines.” You’re aiming for 200 words. In a post consisting of a couple hundred words, you’ll probably use the search term “writing great headlines” and maybe one or two variations on the theme. Good enough.

But what if you were writing an article that was 2,000 words long? You’ll get to use a variety of other keywords that are related:

  • “how to craft a killer headline”
  • “creating great headlines”
  • “writing better headlines”
  • “tips for a great opening line”
  • “an effective title”
  • “the title of your post is important”
  • “it’s a winning headline”
  • “because these words in the title…”
  • “those first words and their magnetic power”
  • “sizzling hot titles”
  • “some of the most popular headlines…”

You can use a lot more variety when you have a lot more content. The more variety you have, the better you’ll perform in search queries. Remember, Google isn’t just delivering results that have an exact match to the query. It delivers results that are semantically related.

I googled “creating a great headline” and got these results:

google search

The first result is about writing “magnetic headlines.” The second result has to do with “catchy headlines.” I didn’t use “catchy” or “magnetic” in my query, but Google is smart. It knows that I’ll like these results.

When you write longer posts, you’ll be able to leverage the power of long tail keywords and latent semantic indexing. The spread of keywords creates a more effective matrix for search engine ranking potential.

Use Headings, Bullets, Lists, And Block Quotes

Why are books easy to read? Because their content is broken down into bite-size bits through the use of chapters, headings, and bullets. Your blog posts will benefit from the same use of content guides and dividers.

I had my developer run A/B tests on a few of my Quick Sprout blog posts. The original used no headings, while the variation used headings, bullets, lists, and block quotes.

Can you guess what the difference was? By using headings, bullets, lists, and block quotes, I was able to increase the average time you spend reading each blog post by 31 seconds. That small tweak increased your time on site by 17.8%.

As you know, the more time people spend reading each of your blog posts, the higher the chance that they read through the whole post.

Headings are also important from a search engine standpoint because that helps tell Google what your article is thematically about. Always remember to include one H1 and one H2, and a few H3/H4 tags where it makes sense. The H1 is typically your blog post title and the H2 is your sub heading. H3, H4, etc. can be used through out your post where it makes logical sense. Be sure to use your keyword, or a variation of your keyword, in your headings.

Increase Your Font Size And Spacing

By increasing your font size and spacing, you can make your blog posts easier to read. I myself have access to over 13 blogs that I can run tests on and play around with. So I decided to run a quick test to see if I can increase the overall time on site by increasing font size.

What I learned was interesting. Assuming you are picking a readable font type like Arial, Times, or Georgia, you can increase the time your readers spend on your site by increasing your font size.

By increasing the font size from 8 to 9, I was able to increase my average time on site by 13 seconds. By increasing it from 9 to 10, I was able to increase the time on site by another 8 seconds. And by going from 10 to 11, I was able to add another 6 seconds.

Depending on your font type, increasing your font from 11 to 12 or higher won’t help increase your time on site, or that’s at least what I found. It’s probably due to the fact that your text at a font size of 11 is usually easy enough to read. Making it any bigger won’t help much.

Link to Your Other Related Posts

One thing that the search engines love, and that are very useful to your readers too, are internal links to other related posts. Let’s say, that you had another article on your site about cake decorating techniques. Well, this will be a perfect opportunity to add an internal link to that article which increases user experience because people see another resource on your site.

It’s also great from an SEO standpoint because it helps rank this particular page that you’re linking to.

Link To Valuable External Resources

Including a few links to other related sites and resources that you find useful can also be helpful for SEO, and your visitors.

Let’s say that you wanted to add information about dry measuring cup, but you didn’t have anything on your site about that, or there was another resource on the web that was just so good that you want to link to it and share it with your users. Well, all I like to do is search for that particular keyword and see what comes up. In this case, Wikipedia has a nice little article about measuring cups which included information about dry measuring cups.

Linking to this external page from within my post will help my readers find additional information and Google will take notice that I am linking out to another authority site in the niche which can help with rankings.

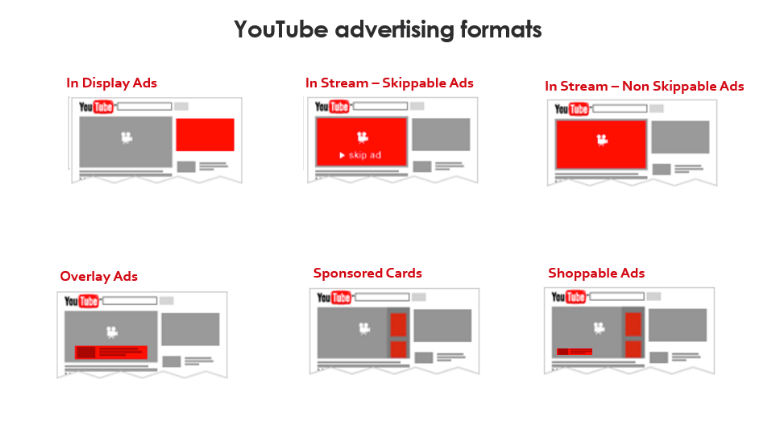
Use Images And Videos (but not to many)

Multimedia is really important from a user experience standpoint because when people go to your posts they don’t just want to see text. They want to see images and videos. That helps with SEO as well because it makes for a more engaging content and more media rich content which Google prefers.

Be sure to include well written alt tags for your images that describe the image. This will help with your SEO and is useful for readers with images disabled.

Do note though, that while including images and video is highly recommended, using too many pictures can actually hurt the readability of your blog posts. It can distract your readers from reading your content.

By running a few scrollmap tests on Crazy Egg, I found that posts containing more than three images tended to get read less by roughly 15% than those with fewer than three images. Interestingly enough, the time on site for posts with three or more images was also shorter by 26 seconds, which is roughly 15% of the average time you spend on my site.

Use images when it makes sense. Just make sure you don’t get carried away with using distracting ones because your goal should be to get people to read your content, not to stare at images, unless you are running an image blog.

Do Not Clutter Your Blog Post With Call To Actions Or Advertisements

A simple test to figuring out if your site is cluttered is to step back and look at your site. Where does it seem like your eyes should focus? Where do you want readers’ eyes to focus? Is it obvious what you want people to do?

For example, when I was writing this blog post, one site that I was on was WebProNews. When I landed on the site, this is what I saw:

web pro news

Do you notice all the ads? What about the headline? Where is it? It’s below the fold on my screen.

Unfortunately, a great article is buried by ads and other 3rd party stuff. This might not be confusing to search engines, but when it comes to readers, it’s confusing. So it’s best if you keep a simple, clean design on your website that readers love.

Correct Any Spelling, Grammar, Or Factual Errors

Did you know that your site could rank low because of bad spelling? Even way back in 2011, Matt Cutts posted a video explaining that he and his team saw a correlation between sites with a high rankings and better spelling and sites with a low rankings and poor spelling.

Always make sure to run your post through a spelling and grammar check before you publish it and double check your facts.

Get Someone Else To Read Your Post Before You Publish

Not only should you check and double-check for content and design issues yourself, but you should have someone else read through your blog post before you post it too.

If possible, get more than one person to read it to ensure nothing gets missed and that there is not room for improvement before you publish.

Write A Conclusion (Like This One)

Have you noticed that I have a conclusion at the bottom of each of my blog posts? I do this for one specific reason: if you don’t have the time to read my blog post, you can scroll down to the conclusion and get a quick synopsis of it.

I didn’t always write conclusions or clearly label them. What I learned from scroll tests is that by adding a conclusion and clearly labeling it, you can train your readers to scroll further down the page because that one section will explain what your blog post is all about.

By adding a conclusion section to my posts, I was able to get 10% of you to scroll further down the page. It has also created a pattern where a good portion of you scroll down to the end of the post first and then scroll back up to the top to begin reading the post.

Remember in school your professors told you to summarize what you wrote in your conclusion? That works great for an essay, but it doesn’t work well in a blog post.

I take a 3-prong approach to my conclusions:

  1. Keep it simple – good conclusions aren’t long: they are short and to the point.
  2. Add your final thoughts – don’t just regurgitate what you talked about within the blog post—say something new and meaningful.
  3. Leave things open – if you want to get more comments on your blog, you have to leave your conclusion open. The easiest way to do this is to ask your readers a question.

So with that in mind, were these tips on how to write a blog post helpful to you?


HTML5 Input Types: Where Are They Now?

HTML5 Input Types: Where Are They Now?

HTML5 Input Types: Where Are They Now?

Drew McLellan

One of the stand-out headline features of HTML5 for many designers and developers was the addition of a number of new types of form input that could be used. For years, we’d been confined to using single-line text inputs (type="text") and laying on JavaScript and user instructions to try an accurately capture valid data of different types through that one unsophisticated field.

HTML5 brought with it new values of the type attribute that enabled us to be much more specific about the types of data we needed to capture through the field, with the promise being that the browser would then provide the interface and validation required to coerce the user into completing the field accurately.

From URLs to emails, and from search fields to dates, the hope was that instead of needing to write cumbersome JavaScript to try and validate those fields, we could just leave it to the browser to do that hard work for us. What’s more, by adding what it knows about the user’s context (type of device, type of interaction, timezones, and so on) the browser would be able to do a much better job of tailoring the interface to meet the user’s needs that we ever could as page authors.

Recommended reading: UX And HTML5: Let’s Help Users Fill In Your Mobile Form

Having new items in a spec is one thing, but it doesn’t really mean too much unless the browsers our audience are using support those features. These new values of the type attribute had the big advantage of falling back to type="text" if the browser had no support, but this may have also come at the cost of removing the browsers makers’ imperative when it came to implementing those new types in their products.

It’s the start of 2019, and HTML5 has been the current version of HTML now for more than four years. Which of those new types have been implemented, which can we use, and are there any we should be avoiding?

  1. Search Fields
  2. Telephone Number Fields
  3. URL Fields
  4. Email Fields
  5. Number Fields
  6. Range Fields
  7. Color Fields
  8. Date Fields

1. Search Fields

The type="search" input is intended to be used for search fields. Functionally, these are very the same as basic text fields, but having a dedicated type enables the browser to apply different styling. This is particularly useful if the user’s operating system has a set style for search fields, as this enables the browser to style the search fields on web pages to match.

The specification states that the difference between search and text is purely stylistic, so it may be best to avoid this if you intend to restyle the field with CSS anyway. There appears to be no semantic advantage to its use.

Can I Use input-search? Data on support for the input-search feature across the major browsers from caniuse.com.

Recommendation

Use type="search" if you intend to leave the styling of the search field up to the browser.

2. Telephone Number Fields

The type="tel" input is used for entering telephone numbers. These are like the unique usernames used by Whatsapp. If you’re unsure, ask your grandparents.

Internationally, telephone numbers take on lots of different formats, for both technical and localization reasons. Due to this, the tel input doesn’t attempt to validate the format of a phone number. You can make use of the associated validation tools such as the pattern attribute on the tag, or the setCustomValidity() JavaScript method to enforce a format if required.

On desktop browsers, the use of telephone fields seems to have little impact. On devices with virtual keyboards, however, they can be really useful. For example, on iOS, focusing input on a telephone field brings up a numeric keypad ready for keying in a number. In addition, the device’s autocomplete mechanisms kick in and suggest phone numbers that can be autofilled with a single tap.

Can I Use input-email-tel-url? Data on support for the input-email-tel-url feature across the major browsers from caniuse.com.

Recommendation

Use type="tel" for any phone number fields. It’s very useful where implemented, and comes at no cost when it’s not.

3. URL Fields

The type="url" field can be used for capturing URLs. You might use this when asking a user to input their website address for a business directory, for example. The curious thing about the URL field is that it takes only full, absolute URLs. There’s no option to be able to capture just a domain name, or just a path, for example. This does restrict its usefulness in some respects, as I imagine CMS and web app developers would have found lots of uses for a field that accepts and validates relative paths.

While this would be a valid absolute URL:

https://twitter.com/drewm

Both of these would not pass the field’s validation:

smashingmagazine.com
/2019/01/css-multiple-column-layout-multicol/

It feels like a missed opportunity that different parts of a URL cannot be specified, but that’s what we have. Browser support is across the board pretty great, with virtual keyboard devices offering some customization for URL entry. iOS customizes its keyboard with ., / and an autocomplete button for common TLDs such as .com and for my locale, .co.uk. This is a good example of the browser being able to offer more intelligent choices than we can as web developers.

Can I Use input-email-tel-url? Data on support for the input-email-tel-url feature across the major browsers from caniuse.com.

Recommendation

Use type="url" whenever you need to collect a full, absolute URL. Browser support is great, but remember that it’s no good for individual URL components.

4. Email Fields

Possibly one of the most commonly used of the newer options is type="email" for email addresses. Much like we’ve seen with telephone numbers and URLs, devices with virtual keyboards customize the keys (to include things like @ buttons) and enable autofill from their contacts database.

Desktop browsers make use of this too, with Safari on macOS also enabling autofill for email fields, based on data in the system Contacts app.

Email addresses often seem like they follow a very simple format, but the variations actually make them quite complex. A naive attempt to validate email addresses can result in a perfectly good address being marked as invalid, so it’s great to be able to lean on the browser’s more sophisticated and well-tested validation methods to check the format.

Usefully, the multiple attribute can be added to email fields to collect a list of email addresses. In this case, each email address in the list is individually validated.

<input type="email" multiple>

Can I Use input-email-tel-url? Data on support for the input-email-tel-url feature across the major browsers from caniuse.com.

Recommendation

Use type="email" for email address fields whenever possible.

A combined screenshot showing the three custom keyboards offered by Safari on iOS for telephone, email and number field types.
Safari on iOS shows custom keyboards for telephone, email and number fields, amongst others. (Large preview)

5. Number Fields

The type="number" field is designed for numerical values, and has some very useful attributes along with it in the shape of min, max and step. A valid value for a number field must be a floating point number between any minimum and maximum value specified by the min and max attributes.

If step is set, then a valid value is divisible by the step value.

<input type="number" min="10" max="30" step="5">

Valid input for the above field would be 10, 15, 20, 25 and 30, with any other value being rejected.

Browser support is broad, again with virtual keyboards often defaulting to a numeric input mode for keying in values.

Some desktop browsers (including Chrome, Firefox and Safari, but not Edge) add toggle buttons for nudging the values up and down by the value of step, or if no step is specified, the default step appears to be 1 in each implementation.

Can I Use input-number? Data on support for the input-number feature across the major browsers from caniuse.com.

Recommendation

Use type="number" for any floating point numbers, as it’s widely supported and can help prevent accidental input.

6. Range Fields

Less obvious in use that some of the other types, type="range" can be thought of as being an alternative for type="number" where the user doesn’t care about the exact value.

Range fields take, and will often use, the same min, max and step attributes as number fields, and browsers almost universally display this as a graphical slider. The user doesn’t necessarily get to see the exact value they’re setting.

Range fields might be useful for those sorts of questions on forms like “How likely are you to recommend this to a friend?” with “Likely” at one end and “Unlikely” at the other. The user could slide the slider to wherever they think represents their opinion, and under the hood that gets submitted as a numerical value that you can store and process.

Browser support is good, although the appearance varies between implementations.

Can I Use input-range? Data on support for the input-range feature across the major browsers from caniuse.com.

Recommendation

The uses for type="range" might be a bit niche, but support is good and the slider provides a user-friendly input method where appropriate.

7. Color Fields

The type="color" field is design for capturing RGB colors in hexadecimal notation, such as #aabbcc. The HTML specification calls this a “color well control”, with the intention that the browser should provide a user-friendly color picker of some sort.

Some browsers do provide this, notably Chrome and Firefox both providing access to the system color picker through a small color swatch.

Neither IE nor Safari provide any support here, leaving the user to figure out that they’re supposed to enter a 7-digit hex number all by themselves.

Color fields might find use in theming for personalization and in CMS use, but unless the users are sufficiently technical to deal with hex color codes, it may be better not to rely on the browser providing a nice UI for these.

Can I Use input-color? Data on support for the input-color feature across the major browsers from caniuse.com.

Recommendation

Unless you know your users will be happy to fall back to entering hexadecimal color codes, it’s best not to rely on browsers supporting type="color".

A combined screenshot showing the different visual representations of range, color and date fields in three different browsers: Edge, Firefox and Chrome.
Range, color and date fields as displayed by Edge, Firefox and Chrome. (Large preview)

8. Date Fields

HTML5 introduced a number of different type values for creating inputs for dates and times. These included date, time, datetime-local, month and week.

At first glance, these appear to be heaven-sent, as collecting dates in a form is a difficult experience for both developer and user, and they’re needed pretty frequently.

The promise here is that the new field types enable the browser to provide a standardized, accessible and consistent user interface to capture dates and times from the user with ease. This is really important, as date and time formats vary world-over based on both language and locale, and so a friendly browser interface that translates an easy-to-use date selection into an unambiguous technical date format really does sound like the ideal solution.

As such, valid input for type="date" field is an unambiguous year-month-day value such as 2019-01-16. Developers like these, as they map pretty much to the ISO 8601 date format, which is used in most technical contexts. Unfortunately, few regular human beings use this date format and aren’t likely to reach for it when asked to provide a date in a single empty text field.

And, of course, a single empty text field is what the user is presented with if their browser does not provide a user interface for picking dates. In those cases, it then becomes very difficult for a user to enter a valid date value unless they happen to be familiar with the format required or the input is annotated with clear instructions.

Many browsers do provide a good user interface for picking dates, however. Firefox has a really excellent date picker, and Chrome and Edge also have pretty good interfaces. However, there’s no support in poor old IE and none in Safari, which could be an issue.

Can I Use input-datetime? Data on support for the input-datetime feature across the major browsers from caniuse.com.

Recommendation

While convenient where it works, the failure mode of type="date" and its associated date and time types is very poor. This makes it a risky choice that could leave users struggling to meet validation criteria.

Conclusion

A lot has changed in the browser landscape in the four years since the HTML5 specification became a recommendation. Support for the newer types of input is fairly strong — particularly in mobile devices with virtual keyboards such as tablets and phones. In most cases, these inputs are safe to use and provide some extra utility to the user.

There are a couple of notable exceptions, the worst of which being the date and time fields, which not only lack utility, but also have more patchy browsers support. When support isn’t available, the fallback mode of these fields is poor. In these cases, it might be best to stick to JavaScript-based solutions for progressively enhancing the basic type="text" input fields.

If you’d like to read more, I’d thoroughly recommend the MDN web docs on these field types, and as ever, the W3C specification.

Smashing Editorial (ra, il)

How to Deploy React Apps Using Webhooks and Integrate Slack on Ubuntu

React is a JS library that is used to build user interfaces. It is mostly used in making single-page and mobile applications.

Webhook is a very friendly and helpful way to get notified when something happens. In a web application, when something happens or an event occurs a message is posted via URL. Sometimes, you only need data when something happens, otherwise, you don't require any data. In conventional ways, a web application keeps fetching data from the database rather than waiting for any event that overwhelms the server by compromising more resources. Webhooks gives relaxation to the server and notifies when some event happens.

10 Tips and Tricks to Improve Your YouTube Content in 2019

Traditional marketing is slowly becoming obsolete. Brands need to prioritize digital marketing strategies to stay relevant and successful in 2019. To approach this properly, you’ll need to start producing more video content.

When it comes to video, YouTube is king. The platform has more than 1.9 billion monthly active users, and 180 million hours of video content is consumed there every day.

Furthermore, 48% of people named YouTube as their favorite online video provider.

It’s ranked first over Netflix, Facebook, and Hulu, which got 29%, 10%, and 7% of votes, respectively. YouTube isn’t just the favorite; it’s more popular than the other three networks combined.

If you think that’s impressive, wait until you hear this: YouTube is the number two ranked website in the world, second only to Google, according to Alexa rankings.

The reason why YouTube is great for marketers is because its content is easy to repurpose across multiple platformsOnce you add a video to your YouTube channel, it’s easy to share it on other social media sites, send it to your email subscribers, and add it to your website.

I’ve identified the top ten tips to enhance your YouTube videos in 2019. Use this list as a reference to help you produce better content.

1. Share links that start playback at a specific time

Once videos are uploaded to YouTube, you can share them on other platforms. But there are instances when you’ll want to share only a portion of your video.

For example, maybe you’re discussing a specific topic in a social media post. You realize that you’ve already covered this in a YouTube video. 

However, the video is five minutes long. The content that’s relevant to your post doesn’t get addressed until the three-minute mark.

No problem. Just click on the share link to get started. (This is how you would normally share any video on YouTube.) By default, the video will play from the beginning, as expected. You have the option to change this by using the options that pop up after you click on the share button. Here’s what it looks like:

YouTube start at timestamp

At the bottom of this menu, check the “Start at” box, and type the time mark at which you want the video to start playing. (Alternatively, you can pause the video before you click on the share button. The timer will automatically be set at that point. You still need to check the box for it to work.)

Once this feature is enabled, the URL’s share link changes. As you can see, the link in the image above ends with “t=158.” This link will start playing the video 158 seconds in, which is the 2:38 mark.

2. Add a transcript

Adding a transcript will make it easier for users to find your videos and your channel through YouTube as well as Google searches.

By default, YouTube will automatically generate a transcript for all your videos once they are uploaded. You just need to make sure you haven’t hidden this option from your audience. (You have the ability to edit your transcripts as well, so review them to catch any errors.)

YouTube also provides a feature for you to manually type your own transcripts as you play the video. Here’s an example of what a final transcript looks like once a video is uploaded:

YouTube Transcript

In some instances, you may want a video or audio file transcribed for other purposes. For example, maybe you have a recording of a seminar you recently spoke at or of an important conference call. Now, you want to refer to the video to help you write a blog post. It’s much easier to use a transcript instead of constantly having to pause, fast forward, and rewind a video to catch your speech.

Upload that content to YouTube, and get a free transcript of it. You don’t have to share or publish the video on your channel if you want to keep it private. You’ll still be able to get the content transcribed free.

3. Create a GIF with any YouTube URL

GIFs are one of the top visual elements you can use to improve your marketing strategy.

Rather than using GIFs from a library everyone has access to, you can create a GIF from a YouTube video. You have the option to use either your own videos or videos from other channels.

This is very easy to do.

First, find the YouTube video with the clip you want to use. Next, insert the word “gif” after the www. The URL will go from www.youtube.com/watch to www.gifyoutube.com/watch. After you change the URL, you’ll automatically get redirected to gifs.com.

The video will be ready to edit and turn into a GIF. Here’s what the screen will look like:

Making a gif from a video
You’ve got lots of options here to make your GIF unique. Start by determining what portion of the video you want to turn into a GIF. Next, you can determine the length of your GIF. Add captions. Crop the video. Play around with effects.

Once you create your GIF, download it, and share it on your other marketing channels.

4. Organize your videos with playlists

If you have lots of videos uploaded to your YouTube channel, playlists are the best way to keep them organized. When a user navigates to your channel, they will have the option to watch different playlists that have similar videos grouped together.

Here’s an example from the Food Wishes page:

Using playlists to organize YouTube topics

As you can see, the videos are organized by different types of recipes based on holidays and other events, e.g.:

  • Super Bowl
  • Christmas
  • New Year
  • July 4th
  • Memorial Day

It will be much easier for viewers to find what they’re looking for here.

YouTube also allows you to collaborate on your playlists with a friend. From your playlist settings, navigate to the “Collaborate” tab. Here’s what it looks like:How to collaborate on a YouTube playlist

Once you add a collaborator, this user will be able to add videos to the playlist. This can be a useful way to manage your relationships with social influencers—simply have an influencer upload content directly to your channel through a playlist.

5. Create a custom URL

You want to make sure your business has a custom URL on YouTube. You won’t get this by default.

If you have a new YouTube channel, you won’t be able to create a custom URL right away. These are the requirements:

  • account is 30 days old
  • photo set as channel icon
  • channel art uploaded
  • at least 100 subscribers

Once you hit these marks, you’ll be eligible to get a custom URL.

You can find this option within your account settings. Just navigate to the Advanced menu:

YouTube custom url

Before you claim your custom URL, make sure you think it through clearly: you won’t have the option to change it once it gets approved.

6. Add an actionable end screen

What do you want a viewer to do when they finish watching one of your videos? If you want the user to keep watching more videos or visit your website, you can add these CTAs to an end screen.

From your video manager page, click the “Edit” button for the video you want to change. Then find the “End screen & Annotations” link from the drop-down menu:

How to add CTA to YouTube videos

A pop up will appear. Depending on your marketing goals, you can add one or more of these elements to your end page:

Four CTA options in YouTube

7. Use enhancements to edit videos

You might already be using some third-party software to edit videos before you upload them to your channel. (Editing is a great way to create killer video promotions to increase engagement.) But if you don’t need to do anything elaborate, you can take advantage of the YouTube enhancements feature. This allows you to edit directly on the platform.

The enhancements feature lets you add or change music and audio, apply filters, trim sections out of your video, and blur portions of it.

You can even edit content after a video has already been uploaded to your channel. However, unless you are part of the YouTube partner program, you might not be able to make all the changes to videos with more than 100,000 views. 

You’ll always have the option to blur faces, even if your video has more than 100,000 views and you’re not part of the partner program. YouTube allows this to help protect the identity of people in your video.

8. Broadcast live streams

Has your business jumped on the live video bandwagon?

If not, it’s time for you to hop on board. That’s because 82% of people say they prefer live videos over social media posts from business profiles. Furthermore, 80% of people say they would rather watch live video content than read blog posts about a topic. 

Believe it or not, consumers actually prefer YouTube live streams over Facebook Live. 

YouTube more popular than Facebook Live

YouTube allows you to go live from your desktop computer or mobile device. You can keep an archive of your live streams that were added to your YouTube channel so people can watch the content even after the stream is over. But you can disable this feature if you want.

Want to grow your audience even more? Consider this: 87% of people said they would watch more live videos if they contained behind the scenes content.

8. Upload 360-degree videos

We now know that 360-degree videos increase engagement rates. These videos have a 14% higher ROI than regular videos. They also have a 46% higher completion rate than traditional videos.

This is the type of content people want to see with 360-degree videos.

When it comes to a 360-degree video, 98% of consumers living in the United States say they think it is more exciting than any other type of video.

And 90% of people believe content will be improved if it can be viewed as a 360-degree video instead of a traditional format.

Having a 360-degree video increases the chances that viewers will interact with it by 66%.

What’s even more impressive is that 70% of marketers believe that adding 360-degree video content has helped improve their businesses.

9. Use Google Trends to find popular search terms

How do you know what type of content you should upload to YouTube? Try searching for keywords related to your company on Google TrendsThis will show you the popularity of a search term over time and tell you whether you should be creating content on that subject.

Here’s what “content marketing” looks like on Google Trends:

Content Marketing searches

As you can see, this is the interest in the term over time in web searches. You can’t assume it’s the same on YouTube. Click on the menu, and select “YouTube Search.”

Content Marketing searches on YouTube

As you can see, the trends are different. 

This free Google tool will enhance your marketing strategyYou can also use it to help you create titles and descriptions that are search-friendly on YouTube.

10. Run ads on YouTube

YouTube is owned by Google. This means you can set up YouTube ads through your Google Ads account.

You’ll have the option to do the following:

  • select your audience
  • choose locations you want to target
  • set your budget

This is very easy to do, especially if you’re already using Google Ads for other purposes.

Here are the different formats you can choose from to advertise on YouTube:

YouTube advertising formats

The type of ad you select will impact the price you pay.

It’s worth noting that 51% of marketers in the United States advertise on YouTube and 52% of brands plan to increase their advertising budgets on the platform. (There is a good chance that at least half of your competitors are already advertising on YouTube. Get on it!)

Conclusion

By the year 2020, 80% of Internet traffic will come from videos. That means you need to keep up with the times and produce video content in 2019.

YouTube is the best place to upload your videos. From there, you’ll be able to distribute the content on other channels as well. 

But you have to be doing more than simply uploading videos and leaving them there with no further action. You need your videos to have an edge to be successful. 

These tips and tricks will definitely bring your content to the next level. 

What type of video content is your brand adding to your YouTube channel?

Official Resources for the Gutenberg Block Editor

Just a quick post to share some recommended useful resources for anyone working with the new Gutenberg Block Editor. Our book Digging Into WordPress now links to this post, so readers can learn more and dive deep into Gutenberg. Or just bookmark for future reference. What does that mean? It means that this page will be updated with any new useful and official resources. And by "official" just means the information is sourced/hosted at WordPress.org.

Learn more about Gutenberg

There are many official posts that are useful in specific contexts. This list focuses on just the main resources for learning more about Gutenberg Block Editor. Starting points for digging in and branching out.

Any one of these resources will open many doors for further learning and exploration of the Gutenberg Block Editor and related WordPress features.

Gutenberg Alternatives

The Gutenberg Block Editor has come a long way since it first began as a plugin. But not everyone is ready for the changes. Some folks like myself prefer the original "classic" editor. So for anyone looking for alternatives to Gutenberg, here are some resources that may be useful.

  • Classic Editor — official plugin by the WP team to restore the Classic Editor, already over 1 million active installations.
  • Disable Gutenberg — free WP plugin that completely disables all traces of Gutenberg and restores the Classic Editor. Includes robust options for custom configuration and selective enabling of the Block Editor.
  • ClassicPress — the new "Gutenberg-free" version of WordPress (forked at WP 4.9) that's focused on providing a reliable, consistent CMS.

Or if you are a developer and would like to know how to disable Gutenberg or selectively enable the Block Editor, check out these DigWP tutorials:

Plus there are lots of other plugins now available to help you configure, customize, and disable Gutenberg. Also lots of plugins to help you customize and extend the Block Editor, visit the WordPress.org Plugin Directory to explore the possibilities.

Bonus tip

Also useful if you want to look at the "Welcome" screen for WordPress 5.0 (or whichever version you are using), just enter the following URL while logged into your WordPress site:

https://example.com/wp-admin/about.php?updated

Or if you have WordPress installed in a subdirectory, say, /wordpress/, you would enter this URL instead:

https://example.com/wordpress/wp-admin/about.php?updated

Then you would replace "example.com" with your actual domain. That should get you to the "Welcome" screen for your current version of WordPress. So for awhile you can get a broad look at Gutenberg, how it works, features, etc.

WordPress 5.0 Welcome Screen

Send any suggestions for useful/official Gutenberg resources that should be added to this post, please comment or contact direct, thank you! :)


Securing the WP REST API

I think many WordPress users probably underestimate the amount of data that is made available via the REST API. Just about everything is available to anyone or anything that asks for it: posts, pages, categories, tags, comments, taxonomies, media, users, settings, and more. For most of these types of data, public access is useful. For example, if you have a JSON-powered news reader, it can basically replicate your entire site structure virtually anywhere. But that easy access invites potential abuse. Just like with RSS feeds, RESTfully delivered JSON content is easily scraped and used for spam, phishing, plagiarism, adsense, and other foul things.

User Data = Public Domain?

Beyond content theft, plagiarism, and such, the REST API opens the door to another potential security slash privacy concern over user data. By default every WordPress site delivers a significant amount of user data to anyone or anything that asks for it. For any user (of any role) that is the author of at least one post, their personal information is openly available to literally everyone.

So exactly which user data are exposed via the REST API? As explained in the documentation, the /users endpoint delivers basically everything except for user email addresses and passwords. Everything else — ID, Name, Website, Description, URL, Metadata and more — all public domain thanks to REST API.

To give you a more concrete example of the data that is shared publicly via the REST API, consider the following URL:

https://digwp.com/wp-json/wp/v2/users/3

Here we are invoking the REST API by calling a specific user endpoint (i.e., user ID = 3). Requesting that URL in a browser, the following data are returned:

{
	"id": 3,
	"name": "Jeff Starr",
	"url": "https:\/\/perishablepress.com",
	"description": "Jeff Starr is a professional web developer and book author with over 15 years of experience...",
	"link": "https:\/\/digwp.com\/author\/jeffstarr\/",
	"slug": "jeffstarr",
	"avatar_urls": {
		"24":"https:\/\/secure.gravatar.com\/avatar\/...",
		"48":"https:\/\/secure.gravatar.com\/avatar\/...",
		"96":"https:\/\/secure.gravatar.com\/avatar\/..."
	},
	"meta": [],
	"_links": {
		"self":       [{"href":"https:\/\/digwp.com\/wp-json\/wp\/v2\/users\/3"}],
		"collection": [{"href":"https:\/\/digwp.com\/wp-json\/wp\/v2\/users"}]
	}
},

This same information also is available at other endpoints, for example:

https://digwp.com/wp-json/wp/v2/users

There you will find the same amount of information provided for every qualified user. Note that you can try this on your own WordPress-powered site. Simply replace digwp.com with your own domain name, and remember to include the subdirectory path if WordPress is installed in a subdirectory.

What's the Risk?

So WP REST API and security. For everything except the user data, the main risks basically are the same as for RSS feeds. Scrapers and content thieves are savvy enough to steal your content regardless of format. If you make it easy for people to steal your content, they will. So whether they're grabbing the data via RSS or JSON format, content is content, and the REST API makes it easier than ever for anyone and anything to manipulate your site's content, categories, tags, meta, and much more. Is that acceptable? Totally your call.

Now for user data, we enter a whole new level of risk. With user data, the information is personal, so there is a potential privacy risk. Even worse, for every user, their "Name" by default is their "Display Name", which defaults to the registered Username unless otherwise specified. This means that your site's registered usernames are publicly available, so there is a potential security risk.

Privacy Risk

For the privacy risk, perhaps it is a non-issue for most WordPress sites. But for the percentage of sites that must abide by an official privacy policy or other company rules and regulations (GDPR, anyone?), publicly sharing information about every qualified user is gonna be a problem. Or maybe your site needs to keep all author information private for legal or political reasons (like at a news reporting or government site). In many such cases REST's default functionality may present serious privacy risk. As someone said somewhere on social media1:

A lot of institutions use WordPress for their staff or students or even patients/clients. They probably have no idea this is exposed and they also probably have some level of security policy that doesn't allow names to be listed publicly. I think it's a problem and should be opt-in.

Security Risk

For the security risk, the significance and extent of the issue is up for debate1,2,3. In general, bad actors require at least two things to gain access to your site4:

  1. Username
  2. Password

And thanks to the WP REST API, they now have half of what they need. So the REST API introduces a security vulnerability by making it easier for attackers to brute-force their way into your site5,6. Instead of having to guess the correct username AND password, now they just have to guess the password. Which unfortunately for many user accounts is just too ridiculously easy to do.

Another on-topic post from social media1:

Its one-half of the puzzle in acquiring unauthorized credentials. If you're trying to follow best practices, you don't expose sensitive data. If you've worked to remove all leakage of user names from your site, this just re-exposed all that data.

How to Secure the REST API

So at this point, you should have a pretty good understanding of how the WordPress REST API works and why it can be considered a privacy and/or security risk for probably a vast percentage of WordPress sites. Now you get to decide whether or not it is necessary to take action and secure your site against unsafe data exposure. Fortunately, there are a couple of easy ways to lock it down using a WordPress plugin. Here are a couple of free options:

Full disclosure, the first option listed here, Disable WP REST API, is one of my own plugins. It is designed to be super lightweight and effective. That in mind, either of these plugins is gonna do the job to protect against unwanted REST exposure. If you know of other/better techniques, share ’em in the comments.

WordPress Team On Point

The WordPress team is aware of this potential privacy/security risk and already has taken steps to lock it down. For example, before the WP 4.7.1 update, the REST API exposed sensitive data for ALL registered users, regardless of whether or not they are credited as Author for any post(s).

So thanks to improvements made in version 4.7.1, WordPress now displays user data ONLY for users (of any role) who are credited as author for registered post types. This important step helps to reduce user data exposure, and tells us that the WP team is actively working to keep WordPress as safe and secure as possible. Hopefully they will take further steps to eliminate unnecessary exposure of sensitive user information.

Closing Thoughts

As simple as it is to properly address the fundamental vulnerabilities inherent in the WP REST API, unfortunately most WordPress users will remain blissfully unaware and do nothing. This is why the REST API should disable the public view of most if not all user data.

Sensitive information should be exposed only to authenticated users. Disabling exposure of user data by default helps to protect the vast majority of WordPress users, and of course developers always will be savvy enough to enable the user data endpoints if/when needed. It's a win win! :)

Footnotes

Here are some related materials and resources FYI:


Mozilla Firefox Dumps Google in Favor of Yahoo! Search

Firefox users conduct over 100 billion searches per year & starting in December Yahoo! will be the default search choice in the US, under a new 5 year agreement.

Google has been the Firefox global search default since 2004. Our agreement came up for renewal this year, and we took this as an opportunity to review our competitive strategy and explore our options.

In evaluating our search partnerships, our primary consideration was to ensure our strategy aligned with our values of choice and independence, and positions us to innovate and advance our mission in ways that best serve our users and the Web. In the end, each of the partnership options available to us had strong, improved economic terms reflecting the significant value that Firefox brings to the ecosystem. But one strategy stood out from the rest.

In Russia they’ll default to Yandex & in China they’ll default to Baidu.

One weird thing about that announcement is there is no mention of Europe & Google’s dominance is far greater in Europe. I wonder if there was a quiet deal with Google in Europe, if they still don’t have their Europe strategy in place, or what their strategy is.

Added: Danny Sullivan confirmed Google remain the default search engine in Firefox in Europe.

Google paid Firefox roughly $300 million per year for the default search placement. Yahoo!’s annual search revenue is on the order of $1.8 billion per year, so if they came close to paying $300 million a year, then Yahoo! has to presume they are going to get at least a few percentage points of search marketshare lift for this to pay for itself.

It also makes sense that Yahoo! would be a more natural partner fit for Mozilla than Bing would. If Mozilla partnered with Bing they would risk developer blowback from pent up rage about anti-competitive Internet Explorer business practices from 10 or 15 years ago.

It is also worth mentioning our recent post about how Yahoo! boosts search RPM by doing about a half dozen different tricks to preference paid search results while blending in the organic results.

  Yahoo Ads Yahoo Organic Results
Placement top of the page below the ads
Background color none / totally blended none
Ad label small gray text to right of advertiser URL n/a
Sitelinks often 5 or 6 usually none, unless branded query
Extensions star ratings, etc. typically none
Keyword bolding on for title, description, URL & sitelinks off
Underlines ad title & sitelinks, URL on scroll over off
Click target entire background of ad area is clickable only the listing title is clickable


Though the revenue juicing stuff from above wasn’t present in the screenshot Mozilla shared about Yahoo!’s new clean search layout they will offer Firefox users.

It shows red ad labels to the left of the ads and bolding on both the ads & organics.

Here is Marissa Mayer’s take:

At Yahoo, we believe deeply in search – it’s an area of investment and opportunity for us. It’s also a key growth area for us – we’ve now seen 11 consecutive quarters of growth in our search revenue on an ex-TAC basis. This partnership helps to expand our reach in search and gives us an opportunity to work even more closely with Mozilla to find ways to innovate in search, communications, and digital content. I’m also excited about the long-term framework we developed with Mozilla for future product integrations and expansion into international markets.

Our teams worked closely with Mozilla to build a clean, modern, and immersive search experience that will launch first to Firefox’s U.S. users in December and then to all Yahoo users in early 2015.

Even if Microsoft is only getting a slice of the revenues, this makes the Bing organic & ad ecosystem stronger while hurting Google. (Unless of course this is a step 1 before Marissa finds a way to nix the Bing deal and partner back up with Google on search). Yahoo! already has a partnership to run Google contextual ads. A potential Yahoo! Google search partnership was blocked back in 2008. Yahoo! also syndicates Bing search ads in a contextual format to other sites through Media.net and has their Gemini Stream Ads product which powers some of their search ads on mobile devices and on content sites is a native ad alternative to Outbrain and Taboola. When they syndicate the native ads to other sites, the ads are called Yahoo! Recommends.

Both Amazon and eBay have recently defected (at least partially) from the Google ad ecosystem. Amazon has also been pushing to extend their ad network out to other sites.

Greg Sterling worries this might be a revenue risk for Firefox: “there may be some monetary risk for Firefox in leaving Google.” Missing from that perspective:

  • How much less Google paid Mozilla before the most recent contract lifted by a competitive bid from Microsoft
  • If Bing goes away, Google will drastically claw down on the revenue share offered to other search partners.
    • Google takes 45% from YouTube publishers
    • Google took over a half-decade (and a lawsuit) to even share what their AdSense revenue share was
    • look at eHow’s stock performance
    • While Google’s search ad revenue has grown about 20% per year their partner ad network revenues have stagnated as their traffic acquisition costs as a percent of revenue have dropped

The good thing about all the Google defections is the more networks there are the more opportunities there are to find one which works well / is a good fit for whatever you are selling, particularly as Google adds various force purchased junk to their ad network – be it mobile “Enhanced” campaigns or destroying exact match keyword targeting.

Categories: 

Powered by WPeMatico

Yahoo! Search Testing Google Search Results

Search PandaMonium

A couple days ago Microsoft announced a deal with AOL to have AOL sell Microsoft display ads & for Bing to power AOL’s organic search results and paid search ads for a decade starting in January.

The search landscape is still undergoing changes.

I am uncertain to what degree they are testing search results from Google, but on some web browsers I am seeing Yahoo! organics and ads powered by Bing & in other browsers I am seeing Yahoo! organics and ads powered by Google. Here are a couple screenshots.

Bing Version

Google Version

Comparing The SERPs

Notable differences between the versions:

search provider Bing Google
top ad color purple blue
top ad favicon yes no
clickable ad area all headline
ad label right of each ad near URL once in gray above all ads
ad URL redirect r.msn.com google.com
ad units above organics 5 4
ad sitelinks many fewer
ad star rating color blue yellow
Yahoo! verticals like Tumblr & Answers mixed into organic results not mixed in
footer “powered by Bing” message shown missing

When the Google ads run on the Yahoo! SERPs for many keywords I am seeing many of the search arbitrage players in the top ads. Typically these ads are more commonly relegated to Google.com’s right rail ad positions.

The Google Yahoo! Search Backstory

Back in 2008 when Yahoo! was fighting to not get acquired they signed an ad agreement with Google, but it was blocked by the DOJ due to antitrust concerns. Unless Google loses Apple as a search partner, they are arguably more dominant today in general web search than they were back in 2008. Some have argued apps drastically change the way people search, but Google has went to great lengths to depreciate the roll of apps & suck people back into their search ecosystem with features baked into Google Now on tap & in-app keyword highlighting that can push a user from an app into a Google search result.

In Q4 last year Yahoo! replaced Google as the default search provider in Firefox in the United States.

And Yahoo! recently signed a deal with Oracle to bundle default Yahoo! Search settings on Java updates. Almost all the Bing network gains of late have been driven by Yahoo!.

A little over a year ago Yahoo! launched Gemini to begin rebuilding their own search ad network, starting with mobile. In their Q1 report, RKG stated “Among advertisers adopting Gemini, 36% of combined Bing and Yahoo mobile traffic was served by Yahoo in March 2015.”

When Yahoo! recently renewed their search deal with Microsoft, Yahoo! was once again allowed to sell their own desktop search ads & they are only required to give 51% of the search volume to Bing. There has been significant speculation as to what Yahoo! would do with the carve out. Would they build their own search technology? Would they outsource to Google to increase search ad revenues? It appears they are doing a bit of everything – some Bing ads, some Yahoo! ads, some Google ads.

Bing reports the relative share of Yahoo! search ad volume they deliver on a rolling basis: “data covers all device-types. The relative volume (y-axis) is an index based on average traffic in April, therefore it is possible for the volume to go above 1.0. The chart is updated on a weekly basis.”

If Yahoo! gives Google significant share it could create issues where users who switch between the different algorithms might get frustrated by the results being significantly different. Or if users don’t care it could prove general web search is so highly commoditized the average searcher is totally unaware of the changes. The latter is more likely, given most searchers can’t even distinguish between search ads and organic search results.

The FTC was lenient toward Google in spite of Google’s clearly articulated intent to abuse their dominant market position. Google has until August 17th to respond to EU antitrust charges. I am a bit surprised Google would be willing to run this type of test while still undergoing antitrust scrutiny in Europe.

Choosing to Choose Choice

When Mozilla signed the deal with Yahoo! & dumped Google they pushed it as “promoting choice.”

A cynic might question how much actual choice there is if on many searches the logo is different but the underlying ads & organic results are powered by Google, and an ex-Google executive runs Yahoo!.

“Any customer can have a car painted any colour that he wants so long as it is black.” – Henry Ford

Categories: 

Powered by WPeMatico

How Does Yahoo! Increase Search Ad Clicks?

One wonders how Yahoo Search revenues keep growing even as Yahoo’s search marketshare is in perpetual decline.

Then one looks at a Yahoo SERP and quickly understands what is going on.

Here’s a Yahoo SERP test I saw this morning

I sometimes play a “spot the difference” game with my wife. She’s far better at it than I am, but even to a blind man like me there are about a half-dozen enhancements to the above search results to juice ad clicks. Some of them are hard to notice unless you interact with the page, but here’s a few of them I noticed…

  Yahoo Ads Yahoo Organic Results
Placement top of the page below the ads
Background color none / totally blended none
Ad label small gray text to right of advertiser URL n/a
Sitelinks often 5 or 6 usually none, unless branded query
Extensions star ratings, etc. typically none
Keyword bolding on for title, description, URL & sitelinks off
Underlines ad title & sitelinks, URL on scroll over off
Click target entire background of ad area is clickable only the listing title is clickable


What is even more telling about how Yahoo disadvantages the organic result set is when one of their verticals is included in the result set they include the bolding which is missing from other listings. Some of their organic result sets are crazy with the amount of vertical inclusions. On a single result set I’ve seen separate “organic” inclusions for

  • Yahoo News
  • stories on Yahoo
  • Yahoo Answers

They also have other inclusions like shopping search, local search, image search, Yahoo screen, video search, Tumblr and more.

Here are a couple examples.

This one includes an extended paid affiliate listing with SeatGeek & Tumblr.

This one includes rich formatting on Instructibles and Yahoo Answers.

This one includes product search blended into the middle of the organic result set.

Categories: 

Powered by WPeMatico

Premium Plugins That Web Designers Should Use In Their Projects

I think I speak for all of us when I say that digital creatives like to work with the finest tools and resources available to us. However, it’s only natural that our lists of favorites should mutate as new trends and better solutions emerge. A series of products and services that were really killing it last year, simply don’t make the grade in the autumn of 2014.

[m2leep]
So, what are the plugins that you turn to most often nowadays, to build websites? In this article, you will find a selection of over a dozen premium solutions that I believe rock the industry right now.


LayerSlider Premium Multi-Purpose Slider Plugin

layerslider2


It is common knowledge that websites using slideshows, image galleries, or content sliders, hold a certain appeal with the audience. I am aware that the ways of integrating this type of elements in your website are manifold, yet my vote goes to the best there is: the premium solution named LayerSlider. It helps create slides that are responsive across most devices, and SEO-ready. Plus, the plugin is engineered to tackle multiple website creation platforms.

Users begin by choosing a skin. Overall, LayerSlider is available in 13 skins that set the stage for your creative endeavors. Furthermore, you are greeted by a drag-and-drop builder, which has timeline view and lets you preview everything you do in real time. Your options include choosing from 200 preset slide transitions with 2D and 3D effect, and working with a transition builder to devise custom animations. In terms of content,you are free to add HTML, text, Google Fonts, videos, and images.


PrestaNitro Product Inline Editor

product-inline-editor_url_name=product-inline-editor


My second favorite premium solution concerns e-commerce websites based on the popular software PrestaShop. PrestaNitro is a great back-end module, which even has an Envato award to show off for that. You will find that it supports multiple languages, not to mention multiple purposes.

You can use PrestaNitro in order to work straight from front office when setting up products for your online shop. In other words, you get to see the results of every template modification, and manage catalogs much easier. Basically, you have a clear path to inserting fields like name, reference, short and long description, stock, and price.


Madhai – Responsive PrestashopMegamenu

madhai-responsive-prestashop-megamenu


How do you usually go about creating megamenus for your PrestaShop websites? You need an advanced solution for that purpose. My recommendation is Madhai, a module based on Bootstrap, just like the default PrestaShop theme. Why would you go for it? For aesthetic reasons, to begin with. ‘Madhai’ means ‘beautiful’ and its designs stand by that denomination. What is more, this plugin is calibrated for swipe on touch-screens, and completely responsive to popular browsers and common devices.

Here, you can expect to find plenty of customization options, a 12-columns grid, as well as 50 animation effects to choose from for your drop down. Finally, Madhai is coupled with fast and helpful customer support.


Shortcode Ultimate Plugin for Joomla

shortcode-ultimate-joomla


In the instance where you’re creating websites on a platform like Joomla, you could make do with a plugin for shortcodes. I would recommend a premium solution such as Shortcode Ultimate Plugin. There are 60 essential shortcodes on the table, and you can use its intuitive drag-and-drop interface in order to create any number of varieties. You get to preview your work in real time, and are able to choose between working on front office, or not.


CollageMaker

Collage-Maker---WPEka


If your website tells a good story, then the public will rush in to see what it’s all about. One of the best and most visual ways to grip your audience is by setting up an image collage. For WordPress, CollageMaker does the trick. Use it with confidence to integrate tiled, tiled mosaic, or randomly-styled collages, display them in a sidebar, and even allow visitors the interactive function of moving them around. Images open in a lightbox, and You can insert a custom URL link on each of them.


Magento CustomerAttributes Extension

Magento-Customer-Attributes-Extension


Any web designer and web developer can testify to the importance of knowing your website users. Collecting data is all the more crucial in the case of Magento stores, since in e-commerce it’s easier to sell products that people actually need. Thus, you should consider the customer account area or checkout registration as opportune venues to ask pertinent questions. Feel free to use this extension, and create as many customer attributes as you please.


Lizatom Shortcodes Plugin

lizatom-plugin3


WordPress projects can always use some shortcodes, especially if they entail the forging of blogs or virtual stores. Why not have a go with Lizatom Shortcodes Plugin, and see what you think? I believe its colossal selection of shortcodes is worthy of attention. No less than 5000 shortcodes are ready to respond to your every request. You get CSS3 buttons, tooltips, info boxes, and pricing tables, and can easily add a 3D shadow effect to your images, add pricing tables, reveal text in accordion style, not to mention customize order lists.


UserPro

UserPro4


One of the essential characteristics of a great website is high-level user experience. Enhancing the way people interact on your website is a sure ticket to boost user experience on the whole. Therefore, it makes sense to turn to a premium plugin like UserPro, an excellent profile management tool. With it, you get loads of display options to set up site member directories. Besides, you can use it to create registration forms, assign them various roles, and let users reach social networks fast.


Monarch

monarch-dashboard-sm


The only reason why social sharing and following are so important to your website, is that they have the power to increase incoming traffic. So, you stand much to gain by enlisting the help of a premium plugin for social sharing. Monarch allows you to choose from 40 networks, style up buttons for some of the most popular ones, and show them on your web page in 8 different locations. Apart from that, Monarch also monitors user engagement in time.


Chimpy MailChimp WordPress Plugin

Chimpy_3


MailChimp is such a wonderful tool for e-mail marketing, don’t you agree? If you hold this statement to be true, then good MailChimp WordPress integration is desirable. Chimpy can really help you with that. You can use this premium plugin to create registration forms, display them in engaging pop-ups, show comment forms, and synchronize all users across WordPress. Lastly, you can also try the effective marketing stunt that only makes certain website content available to confirmed members.


iMapper

i-mapper-3


Nothing comes close to visual elements when you want website visitors to pay heed to its content. The importance of that appeal is even greater for web stores, so you have to find a proper way to display product images. If you were to map out each product image with informative pins, then this would serve to keep potential clients on the same page while getting to know their product. iMapper can help you customize a pin styles, or you can choose preset designs, and place the pins anywhere on your image.


Subscriptio

Subscriptio_3


Want a straightforward yet proficient tool to help you sell woocommerce subscriptions through your website? Say no more. I can vouch for a premium plugin that helps you ace that area. Subscriptio is a fine tool for dealing with every single detail that concerns your subscriptions, and it’s complete with hooks and filters for professionals. Among other things, you can use Subscriptio to establish the length of suspension periods for subscribers, and often they get to receive reminders.


Content Timeline

content-timeline3


The layout of your website content weighs tons when visitors are trying to decide whether it’s worth their time or not. On average, it takes a few seconds to come to a conclusion in that sense. Content timelines turn that decision into an easy one to make, and a possitive one at that. Care to transfigure your website’s user experience? Use the Content Timeline plugin and its 11 customization options. Display any amount of groups and numbers in chronological (or otherwise) points that show text to the left and to the right.


FrontEnd Page Builder

FrontendBuilder-3


How well do you usually handle time pressure? Web developers and web designers are no strangers to it, as every project has to be completed before a certain deadline. You know what really cuts corners? Code-exempting solutions. For example, you can opt for a special WordPress plugin that allows you to work in front office, and so finish projects faster. You need not worry, as FrontEnd Page Builder offers sophisticated features,and comes with first-class support.


Joomla On Exit Popup Box

joomla-on-exit-popup-box


You might also want to accelerate the marketing force of your websites. If they happen to be based on Joomla, use this clever plugin to display a pop-up for your readers just as they show signs of heading towards the exit. The pop-up is certainly bound to get their attention.


WP Awesome Support – Responsive Ticket System

wp-awesome-support-responsive-ticket-system


I am going to end my list of competent premium plugins with a responsive plugin for WordPress themes. Check out this premium solution for Awesome Support. A Responsive Ticket System is just what your website needs to keep clients happy, and make sure they are spreading news of your professional services.


– – –

This concludes my compilation of astute plugins. Although this has been a subjective account through and through, I believe that each and every solution presented here follows the current industry standards to the letter. As such, these premium plugins are bound to satisfy the demands of any web developer or web designer. I hope you enjoyed my article, and found helpful information in it. If you have anything to say, then please leave a comment.