How to Repair WordPress Database (6 Easy Methods)

Over the years, many users have reached out to us and our partner companies to ask about fixing broken WordPress databases.

Keeping your WordPress website running smoothly requires a healthy database. If your database gets corrupted, then it can lead to many problems, including error messages, white screens, and even a complete loss of functionality.

We have experience with quickly repairing a WordPress database, and we will teach you how to get your site up and running in no time. For instance, you can check the login credentials or use different tools and plugins to fix WordPress databases.

In this article, we will show you how to repair a WordPress database in a few simple steps.

How to repair WordPress database in simple steps

Here’s a quick overview of everything we will cover in this guide. You can click the links below to jump ahead to any section:

How to Tell If Your WordPress Database Needs Repairs

A WordPress database is a collection of all the information needed to run your website properly. This includes all your blog posts, pages, registered users, media files, and settings.

If your database is corrupted and needs repairs, then here are some common signs to watch out for:

  • White Screen of Death (WSoDs): This is a general term for a situation where your website displays a blank white page instead of its usual content. A corrupted database can be one reason why you’re seeing a WSoD.
  • Error Messages: You might see error messages related to the database. For example, errors like ‘Error establishing a database connection‘ or ‘Unable to select database’ show that something is not right with the database.
Database connection error in WordPress
  • Missing Content or Formatting Issues: If your website’s content appears to be missing or the formatting is out of place, then it could be a sign of database corruption.
  • Plugin or Theme Malfunctions: Similarly, if plugins or themes suddenly stop working properly, then it’s possible that the underlying database is to blame.

That said, let’s see what could cause your WordPress database to corrupt.

What Causes Damage to WordPress Databases?

By understanding common causes that can damage your WordPress database, you can take steps to prevent them and keep your database healthy.

For instance, problems with your web server, such as a sudden power outage or hardware malfunction, can corrupt your database. Or a malicious attack on your website could target your database, potentially leading to corruption.

On the other hand, if the database credentials (username, password, etc.) stored in your wp-config.php file are incorrect, then it can lead to database connection problems.

Similarly, if your website is trying to use more memory than your web server allows (PHP memory limit), then it can also lead to database errors and potential corruption.

Now, let’s look at different ways you can easily repair a WordPress database.

Important Note: Before using any repair method, it’s essential that you back up your WordPress website and database. This way, if something goes wrong during the repair process, you can restore your website from the backup.

To learn more, please follow our guide on how to make a WordPress database backup.

1. Check and Edit WordPress Database Credentials

One of the most common and easy ways to repair your WordPress database is by checking the credentials. Usually, incorrect usernames and passwords lead to database connection errors, especially if you recently moved your site to a new host.

The WordPress database credentials are stored in the wp-config.php file. To edit the file, you’ll need to use an FTP client or File Manager tool. If you haven’t edited the file before, then please see our guide on how to edit the wp-config.php file.

Once you open the file, look for the following lines:

// ** MySQL settings - You can get this info from your web host ** //
/** The name of the database for WordPress */
define( 'DB_NAME', 'database_name_here' );
/** MySQL database username */
define( 'DB_USER', 'username_here' );
/** MySQL database password */
define( 'DB_PASSWORD', 'password_here' );
/** MySQL hostname */
define( 'DB_HOST', 'localhost' );

Next, you must ensure that the information for the database name, username, password, and database host is correct.

You can confirm this information from your WordPress hosting provider. For example, in Bluehost, you can head to your site’s settings.

Bluehost site settings

From here, switch to the ‘Advanced’ tab and scroll down the Database section.

Then click the ‘Manage’ button to continue.

Click the Manage button next to the Database section

This will open the MySQL Database page in the cPanel.

From here, you can find the username and password in the ‘Current Database’ section. If the credentials don’t match, copy and paste them into a Notepad (.txt) file so you can add them to the wp-config.php file.

Find your database name and username in the Current Databases section

2. Access phpMyAdmin to Repair WordPress Databases

If you’re comfortable with databases, then you can use phpMyAdmin to repair your WordPress database. phpMyAdmin is a web-based interface for managing MySQL databases.

First, you’ll need to log in to your WordPress hosting dashboard and head to the cPanel. In Bluehost, you can open website settings, go to the ‘Advanced’ tab, and then click the ‘Manage’ button in the cPanel section.

Bluehost advanced cPanel

Next, you will see the cPanel of your hosting provider.

Simply navigate to phpMyAdmin and click the link.

Selecting phpMyAdmin on cPanel

On the next screen, you should see the phpMyAdmin panel.

Now, you can select a database you want to repair from the left column or go to the ‘Databases’ section at the top.

Select database tables

Next, you’ll see different tables in the database. Simply scroll down and click the ‘Check All’ option.

You will also need to click the With selected dropdown menu and choose the ‘Repair table’ option.

Select tables to repair in database

phpMyAdmin will now attempt to repair the selected tables. If any errors are found, they will be fixed.

You should see a success message when the repair is done.

See repair table success message

You may also want to see our beginner’s guide to WordPress database management with phpMyAdmin.

3. Repair a WordPress Database Using a Plugin

Another way to repair WordPress databases is to use a plugin. This method is best if you’re not comfortable editing files or using phpMyAdmin.

There are many WordPress database plugins you can use. For this tutorial, we’ll use the WP-DBManager plugin. It is a free plugin and allows you to perform different actions on the database, like optimization, repair, backup, and more.

First, you’ll need to install and activate the WP-DBManager plugin on your site. If you need help, then please see our guide on how to install a WordPress plugin.

Upon activation, you can go to the Database » Repair DB page from the WordPress dashboard.

Select DB tables to repair

Next, you can select the tables you want to repair in the database. If you’re not sure which tables to repair, then simply select all of them and click the ‘Repair’ button at the bottom.

The plugin will then attempt to fix your WordPress database and resolve any problems.

4. Use the Built-in WordPress Database Repair Tool

WordPress also offers a built-in repair tool that you can use to fix minor database corruption issues. However, you’ll need to manually edit the wp-config.php file to access the repair tool.

First, you’ll need to open your website’s files using an FTP client or file manager. From here, locate the wp-config.php file, which is typically located in the root directory of your WordPress installation.

Go ahead and open the file using a text editor or notepad file. Next, you’ll need to add the following code snippet just before the /* That's all, stop editing! Happy publishing. */ line:

define ('WP_ALLOW_REPAIR', true);

Once that’s done, you can enter the following URL in the web browser to open the repair tool:

http://www.example.com/wp-admin/maint/repair.php

Just remember to replace ‘example.com’ with your own domain name.

Once the tool opens, simply click the ‘Repair Database’ button.

Repair WordPress database

After you’ve repaired the WordPress database, you can remove the code snippet from the wp-config.php file to prevent unauthorized access.

The repair tool doesn’t require users to log in to use it, so leaving the code can lead to security vulnerabilities.

5. Fix WordPress Database from Hosting Service cPanel

You can also access a pre-built repair tool from your web hosting provider’s cPanel to fix corrupted WordPress databases.

First, you’ll need to open the cPanel from the hosting service’s dashboard. For example, in Bluehost, you can open the website settings.

Bluehost site settings

After that, you will need to switch to the ‘Advanced’ tab.

From here, scroll down to the cPanel section and click the ‘Manage’ button.

Bluehost advanced cPanel

Once the cPanel opens, scroll down to the Database section.

Next, you can click the ‘MySQL Databases’ option.

MySQL database in cPanel

After that, you can click the dropdown menu under Repair Database and choose the database to fix.

Go ahead and click the ‘Repair Database’ button to continue.

Choose a database to repair

The hosting service will automatically repair your database.

Once the process is complete, you should see a success message.

Database repair success message

6. Using WP-CLI to Repair WordPress Database

For developers and advanced users, there’s a command-line option for repairing the WordPress database using WP-CLI (WordPress Command Line Interface).

WP-CLI is a powerful tool, but it’s also more technical than the other methods mentioned here. If you’re not comfortable with the command line, it’s best to stick with one of the other repair methods.

To start, you will need to access your website’s server using SSH. For this, you will need to know your SSH credentials to perform this step.

If you are using Mac or Linux, then SSH software comes preinstalled. However, Windows users will need third-party software like PuTTY to use SSH. To learn more, please see our guide on how to use PuTTY SSH in WordPress.

PuTTY Settings

Once the installation is complete and you’re connected to your site files, make sure you’re in the directory where your WordPress installation resides.

From here, simply run the following command in your terminal window:

wp db repair

This command will attempt to repair any corrupted tables in your WordPress database.

Bonus: Hire a WordPress Expert for Help

If you’re still having trouble fixing your WordPress databases or performing general maintenance, then it might be time to hire an expert.

With the WPBeginner WordPress Maintenance & Support plan, you will get our expert’s undivided attention. They’ll handle everything from updates to error fixes in the background and ensure your site continues to function without any issues.

WPBeginner Pro Maintenance Services

Plus, you get 24/7 support and around-the-clock uptime monitoring. Our experts can not only handle database repairs but also optimize your site for speed. This way, you get to deliver exceptional user experience while boosting SEO performance.

Besides maintenance, there are other services you can also use. For instance, we offer website design, repair hacked sites, optimize your site for SEO, and more. Check out all our Pro services for your website.

We hope this article helped you learn how to repair WordPress database in simple steps. You may also want to see our guide on how to preview your WordPress site before going live and the best website maintenance services for WordPress.

If you liked this article, then please subscribe to our YouTube Channel for WordPress video tutorials. You can also find us on Twitter and Facebook.

The post How to Repair WordPress Database (6 Easy Methods) first appeared on WPBeginner.

GitHub Exposed a Private SSH Key: What You Need to Know

Secrets leakage is a growing problem affecting companies of all sizes, including GitHub. They recently made an announcement on their blog regarding an SSH private key exposure:

[Last week, GitHub] discovered that GitHub.com’s RSA SSH private key was briefly exposed in a public GitHub repository.

The company reassured the public explaining that the key was only used to secure "Git operations over SSH using RSA," meaning that no internal systems, customer data, or secure TLS connections were at risk. They reacted immediately by detecting the incident and changing the key:

SSH vs X.509 Certificates

As a developer or systems administrator, you're probably used to SSHing into servers with key pairs. What if I told you there is a better and more secure way to manage SSH access? Think SSH certificates (And no, they’re not the same as TLS certificates)

For most people, their knowledge of certificates lies within the confines of the X.509 digital certificates format — also known as TLS/SSL certificates — used by browsers to enable HTTPS. However, the X.509 certificate is not the only digital certificate format that exists; there is also the less-popular SSH certificate format created by OpenSSH.

8 Easy Steps To Set Up Multiple Git Accounts (Cheat Sheet)

Disclaimer: Ok, Git "accounts" don't exist: we only have Git configurations. The title is an unorthodox shortcut to talk about accounts hosted by GitHub, GitLab, Bitbucket, and such. Not using these? Don't worry, you can still make great use of this cheat sheet to level up your .gitconfig game (look at step number 7).

Introduction

Let’s imagine a scenario: You’ve just joined a new company. It’s your first day and you need to set up your new machine. The first thing you do is to rush to get your own GitHub SSH key and install it so you can still work on your hobby project.

How SAML 2.0 Authentication Works and Why It Matters

What is SAML 2.0?

At its core, Security Assertion Markup Language (SAML) 2.0 is a means to exchange authorization and authentication information between services. SAML is frequently used to implement internal corporate single sign-on (SSO) solutions where the user logs into a service that acts as the single source of identity which then grants access to a subset of other internal services.

The advantage of adopting SAML/SSO from a security perspective is clear:

Your Hosting Backups Are Automatically Safe With WPMU DEV…100% Guaranteed!

Fire, flood, rain, or shine, WPMU DEV’s managed WordPress hosting keeps your backups safe and fine.

If you follow IT-related news, you may recall the March 2021 fire that destroyed one of Europe’s largest hosting provider’s data centres in Strasbourg, France, knocking out major websites around the world.

News report - fire burns down OVHcliud's data center in Strasbourg.
Does your website disaster recovery plan include total hosting backup redundancy? Source: ChannelDailyNews.com

In this post, we explain why this will not happen to sites hosted on WPMU DEV’s managed WordPress hosting and how we guarantee that if your site should ever fall down, you will instantly get it back up.

Automated Hosting Backups for Ultimate Peace of Mind

Every WPMU DEV hosting plan includes access to our world-beating automated (and manual) hosting backups system.

So, what exactly does this mean?

In a nutshell…whether you host one or one thousand sites with us (single installs or multisite) on any plan, your backups are completely and automatically safe, even if the worst data-center-burning-down circumstances were to happen.

Here is exactly how this works…

First, set up your site on any of our blazing-fast, easy, and best-supported managed WordPress hosting plans.

That’s it!

Your hosting will be instantly and automatically configured for nearly instantaneous and extremely space-efficient hosting backups using the latest in advanced server-based technology, giving you ultimate peace of mind in the form of:

  • Nightly incremental backups.
  • Automated incremental hosting backups prior to critical events like WordPress updates, pushing staging sites to production, selecting a new primary domain, and updates using our automated schedule plugin.
  • A full backup of your site created every 15 days (automatically, of course!)
  • Various options available to create manual and cloud back ups of your site at any time.
  • Fast, one-click restores and exports.
  • No additional fees for hosting backups or their storage.

So, if anything happens to your site, you can get it all back (everything up to the last backup) quickly and easily with just one click.

But…what if the data center burns down?

Ahh…this is where our hosting backup system really shines.

We give you…

30 Days Of Remote & Off-Site Backups

As stated in our hosting backups documentation

“A copy of the most recent backup is stored locally to speed up subsequent backups. All other backups are encrypted and stored in a remote datacenter in the same general region as your site (USA, EU, Canada, etc) and are redundantly stored on multiple devices across multiple facilities.”

Do your due diligence and research some of the top hosts and you’ll discover that while most provide site backup services, not all offer remote redundancy and automated backup storage on multiple devices across multiple facilities.

WPMU DEV does.

We give you unlimited backups stored for 30-days with no extra backup storage charges.

Our hosting backups are managed offsite by AWS so that in the unlikely case our data centers burn down or disappear beneath the waves your backups will still be safe.

Manual Backups for Extra Protection

In addition to our automated hosting backup methods, we also give you several options to manually backup your site(s) files and data, including:

The Hub - SFTP/SSH screen
Easily create SFTP or SSH accounts in The Hub and use these accounts to back up your sites manually at any time.

One-Click Backup Restores and Exports

Exporting and restoring your backups is just as easy as creating them.

Simply go to The Hub, select your site, and click on the Backups tab to bring up a list of all your backups, then click on the little arrow next to the backup you’d like to export (download) or restore.

The Hub - Backups list
Select the backup you’d like to restore from the list of backups…

This will bring up the Backup Details screen. Click on the Restore button to restore your backup or the vertical ellipsis to view your options.

Backup details screen
We’re just one click away from restoring or downloading our backup.

Select an option, click a button…and you’re done!

Restore backup
Click Restore and you’re done!

Your backup files and data will be automatically restored to your site or generated for export and sent to your email for downloading.

Alternatively, if you don’t want to use The Hub, you can restore your backup manually via WP CLI.

WP-CLI Restore Backup
Restore backups via WP-CLI.

See our documentation for step-by-step instructions on how to set up an SSH user, log into the server and use custom commands to restore your backups via WP-CLI.

All the Backup Protection You Need Upfront!

With WPMU DEV, your sites are safe, secure, and protected right from the “get-go”.

Most of our users choose to take advantage of our membership option. This includes access to:

  • World-class managed WordPress hosting and world-beating hosting backups for all your sites.
  • 24/7 expert technical support for everything WordPress related.
  • The Hub (our all-in-one unlimited site management tool).
  • A complete suite of Pro plugins, covering everything from security, optimization, and SEO, to site migration, marketing, and analytics.
  • And much more (hint: how about getting a complete WordPress business in a box).
Hub backups
Use The Hub to manage hosting backups for unlimited sites.

Our plugins include Snapshot Pro and Automate, which give you additional backup features and automation for complete peace of mind.

Snapshot Pro supports various third-party backup storage locations (Amazon S3, Google Drive), giving your hosting backups even greater protection.

Snapshot dashboard
Use Snapshot to backup and restore WordPress data to third-party storage destinations.

Automate lets you schedule and create a new backup before every theme, plugin, or core update…automatically!

Automate plugin from WPMU DEV.
Schedule automated backups before updating your site’s core WordPress software, plugins, and themes with Automate.

We Got Your Back(up)

Even the most die-hard fan of dystopian fiction would be hard-pressed to imagine a situation where our hosting backups system would not be able to immediately recover their site’s last backup. Unless of course, they are not hosted with WPMU DEV…and forget to make a backup!

Learn more about our hosting backups in our hosting documentation or contact our team if you have any questions. If you’re new, check out our unbeatable WordPress hosting service for yourself with a 7-day membership trial and discover what ultimate peace of mind really means today.

Useful VS Code Extensions For Front-End Developers

We spend so much time in our text editors, and every now and again we encounter those little frustrating issues that slow us down. Perhaps finding the right file takes too long, or finding a matching closing bracket becomes a long-winded adventure on its own.

Let’s fix all these annoyances for good. In this post, we look into useful VS Code extensions for front-end development, from fine productivity boosters to advanced debugging helpers.

Table of Contents

Below you’ll find quick jumps to specific extensions that you might need. Scroll down for a general overview. Or skip the table of contents.

Automating Log Messages

When it comes to log messages, the turbo-console-log extension has got your back. It automates the operation of writing meaningful log messages and inserts them automatically.

All you need to do is select the variable which you want to debug, press Ctrl + Alt + L, and the log message will be inserted in the next line. Keyboard shortcuts let you comment, uncomment, or delete all log messages from the current document.

Keeping Bundle Size Under Control

We all know that performance matters, but in practice, it can be quite a challenge not to lose it out of sight when you’re in the flow of writing code. To keep your bundle size under control, the Import Cost extension lets you immediately know if you’re importing a hefty package into your project.

Import Cost isn’t a bundle analysis tool but was built with the idea to help you find possible performance bottlenecks before you ship them to your users. To do so, it gives you instant feedback by displaying the size of an imported third-party library as you’re importing it, right next to your line of code. A handy little helper.

Code Formatting, Automated

When writing code, a lot of time goes into formatting. Prettier automates the task for you. It removes all original styling and ensures that the outputted code conforms to a consistent style.

Prettier parses your code and re-formats it with its own rules, taking the maximum line length into account and wrapping the code when necessary. You decide if you want to apply it to all languages or alternatively you can define the ones you prefer to format manually. Also a great solution for teams who struggle finding a common style guide.

Useful Code Snippets (React, Vue, TypeScript, jQuery)

Are you tired of typing the snippets you frequently need over and over again, always from scratch? Here are some handy little helpers to ease the job. For Vue, be sure to check out Sarah Drasner’s Vue.js VS Code Snippets extension. It was built for real-world use and focuses on developer ergonomics instead of cataloguing API definitions.

Burke Holland provides you with a collection of essential React snippets and commands that he selected from his day-to-day React use. And if you’re looking for Angular snippets, John Papa has got you covered. His extension adds snippets for Angular for TypeScript and HTML to your VS Code setup.

These two might also come in handy: The JavaScript code snippets extension by Charalampos Karypidis contains snippets in ES6 syntax and supports both JavaScript and TypeScript. And, last but not least, Don Jayamanne’s jQuery code snippets feature over 130 jQuery snippets. Once installed, just type jq to get a list of all of them.

Speaking of snippets: If you prefer a good snippets library over defining them yourself from scratch, these collections have got your back:

Write Your Own Code Snippets

There are a lot of code snippet plugins for different languages out there, but have you ever wondered how to define your own snippets in VS Code? Maurice Borgmeier summarized everything you need to know to get started.

Another great article on the topic comes from Rob O’Leary. He dives deeper into when and why to use snippets, takes a closer look at different types of snippets, how VS Code handles them, and, last but not least, how to write your own, of course.

Code Screenshots, The Fancy Way

Let’s be honest, taking good-looking screenshots of code can be a challenge. Polacode is here to change that.

Described as "Polaroid for your code", Polacode lets you take and edit screenshots of your code directly in VS Code. You can resize the code’s container by dragging the corner and use commands to control the image appearance. A great solution to make the code you’ve spent so many hours on shine in the best light — in blog posts or presentations, for example.

Human-Friendly Comments

How do you handle comments? If your code requires a lot of explanations, it might be a good idea to make those usually grayed-out comments more human-friendly, so that it’s easier to see at a glance if a comment alerts you of a deprecated method, for example, or if it’s a todo your teammate left for you.

The VS Code extension Better Comments helps you do just that, categorizing annotations into alerts, queries, todos, highlights, and more. Commented-out code can also be styled to make it clear it shouldn’t be there.

Chrome Debugging Inside VS Code

Do you use Chrome and find yourself switching back and forth between the browser and your editor when debugging? Then you might want to give the VS Code Chrome debugger a try. It helps you debug client-side JavaScript code that runs in Chrome directly from VS Code.

The debugger connects to Chrome over its Chrome Debugger protocol where it maps files loaded in the browser to the files you have open in VS Code. So without leaving the editor, you can set breakpoints in your source code, set up variables to watch, and see the full call stack when debugging. A little tool to make your debugging routine more straightforward.

DevTools For VSCode Extension

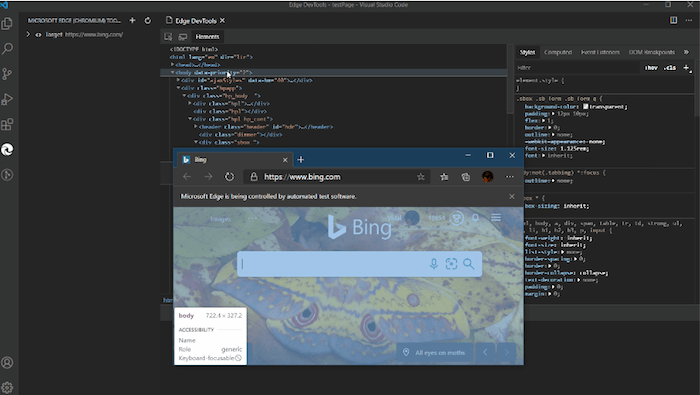
Wouldn’t it be cool to have DevTools integrated into your code editor so that you don’t need to switch back and forth between the two? If you’re using VSCode and Edge, a small extension makes it possible.

The extension shows the browser’s Elements and Network tool inside VSCode, giving you the ability to see the runtime HTML structure, alter styling and layout, perform diagnostics, and debug your project — without leaving the editor. By the way, Rachel Weil shared some handy DevTools tips for working with Chromium-based browsers like Edge and Chrome at SmashingConf San Francisco a few weeks ago. Be sure to tune into the recording to take your DevTools skills to the next level.

File Management Utils for VS Code

A lot of time is usually spent on organizing and managing files. File Utils makes the task more convenient.

The extension enables you to create, duplicate, move, rename, and delete files and directories with just a handful of commands. It also supports brace extension which automatically generates arbitrary strings strings to set up your document structure.

Adding Tags To Files In Your Editor

In large projects, finding one specific variant of a component, or just the right file requires you to know the file that you are actually looking for. But what if you could add bookmarks or labels to specific files, so you could find them faster?

File Ops VS Code Extension allows you to tag and alias files, and then quickly switch between them. You can also quickly list all tags just in case you lose track of them, view all files from the current directory and switch between .css and .js files in the same folder. You can also take a look at the video explaining how it all works. Now that will come in handy!

Folder Icons In VS Code

Custom file and folder icons in VS Code? Yes, please! To help you maneuver your workspace more easily, even if a lot of files and folder are involved, the VS Code Icons Team released an extension that brings icons to your editor. From “access” to “zip”, “Android” to “www”, the collection is sure to have the file and folder icons you need.

The project-specific icons toggle feature and project auto-detection will automatically detect the type of project you have opened in your workspace and prompt you to toggle the icons accordingly. It’s also possible to use custom icons, if you prefer.

Monospaced Fonts For Coding

Programming fonts are certainly the workhorses in typography. They need to offer great readability, enable quick text scanning, and prevent eye strain even when a developer looks at the code for hours. To help you find a programming font that meets your needs, Chris Coyier curates Coding Fonts, a selection of more than 30 (mostly free) monospaced fonts that all match this criteria.

To make the decision easier, each font comes with a short description, an overview of all characters, and HTML, CSS, and JavaScript code examples in both day and night mode. Mostafa Gaafar maintains a similar list of fonts for developers with the option to also view the code examples in different color schemes. To add custom fonts to VS Code, you’ll need to define the font in “Settings”.

Git Supercharged

A useful extension to supercharge the Git capabilities built into VS Code is GitLens. To better understand the code you’re working on, GitLens lets you glimpse into whom, why, and when a line or code block was changed.

The extension visualizes code authorships at a glance, helps you seamlessly navigate and explore Git repositories, gain valuable insights via comparison commands, and more. Everything you need to know about your codebase right at your fingertips, without leaving the editor.

Git History In VS Code

Viewing and searching git log along with the graph and details, viewing a previous copy of the file you’re working on, searching the history, comparing branches and commits — these are just a few of the features that the Git History extension offers to streamline your workflow.

Speaking of Git: Another VS Code extension worth taking a closer look at when working with Git is Git Graph: It lets you view a Git graph of your repository and easily perform Git actions from the graph.

Highlight Annotations In Your Code

Do you sometimes forget to review the to-dos you’ve added while coding? The TODO Highlight extension reminds you that there are notes or things that need your attention before you publish to production.

The keywords TODO and FIXME are preconfigured, but you can customize the configuration to your liking if you prefer. A command highlights the open comments for you right in your code or as a list of all annotations. A great little reminder.

Highlighting Matching Brackets And Tags

An intense coding session strains the eyes, so anything that helps cater for more visual clarity is a welcome helper. To take your syntax highlighting to the next level when working with VS Code, you might want to check out the Bracket Pair Colorizer. The extension identifies matching brackets — in colors you define.

Now that you’ve got full control over your brackets, another little detail to watch out for are matching opening and closing tags. VS Code does already come with a tag matching feature, but it is rather basic. The Highlight Matching Tag extension does the work more thoroughly, matching tags anywhere — from tag attributes to inside strings — and even highlighting the path from tag to tag in the status bar. Extensive styling options let you customize how tags are highlighted. HTML and JSX are officially supported.

Revealing Harmful Characters

Zero-width spaces and non-joiners, non-breaking spaces, left and right double quotation marks — when coding, some characters can be harmful because they are invisible or looking like legitimate ones. Gremlins Tracker finds them for you.

Gremlins Tracker uses a color scheme to alert you of harmful, potentially harmful, and less harmful characters. Lines that include such a character are marked with a Gremlins icon, and moving the cursor over the character gives you a hint of the potential issue. If you like, you can add new gremlins characters or override them for a specific language.

Highlighting Indentation

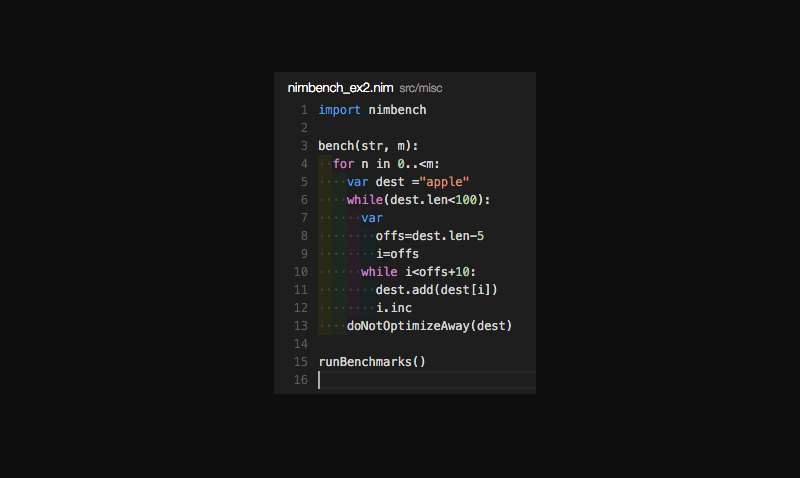
Indentation is key to ensure your code can be scanned quickly. A handy little plugin that makes indentations even more readable is Indent-Rainbow. It colorizes the indentation in front of your text alternating four different colors on each step and marking those lines where the indentation is not a multiple of the tab size.

While error highlighting is useful, there are instances where it might get in your way. When dealing with RegEx patterns, for example. Luckily, Indent-Rainbow lets you turn off error highlighting on those, just like on comment lines, and, if you like, you can even skip it for entire languages.

Visualizing Stacking Contexts

Do you have difficulties spotting stacking contexts when using z-index? You’re not alone! If you sometimes find yourself setting a z-index to a billion on an element and it’s not moving forward in your stacking order, CSS Stacking Contexts is for you.

The extension makes stacking contexts visible in CSS and SCSS so that you can confidently use small values when writing z-index declarations. Additionally, it will also tell you when a z-index declaration has no effect and offer quick fixes.

Custom Colors To Tell Workspaces Apart

If you frequently have multiple VS Code instances open and struggle to tell them apart, Peacock might be worth taking a closer look at: the extension subtly changes the color theme of your workspace.

But it’s not only when working on multiple projects at once where Peacock shines. It also comes in handy when using VS Live Share or VS Code’s Remote features and you quickly want to identify your editor.

IntelliSense: AI-Assisted Development Features

The IntelliCode extension provides AI-assisted development features for Python, TypeScript/JavaScript and Java developers in Visual Studio Code, with insights based on understanding your code context combined with machine learning.

Providing AI-assisted IntelliSense, the extension shows you recommended auto-completion items for your code context at the top of the completions list. When it comes to overloads, it doesn’t cycle through the alphabetical list of member but presents you the most relevant one first. No more hunting through the list yourself.

Recording Guided Onboarding For Your Codebase

A large codebase can feel intimidating. CodeTour attempts to change that. The extension allows you to record and play back guided walkthroughs of your codebases, directly within the editor. Think of it as a table of contents that makes it easier to onboard or re-board to new project or feature area, to visualize bug reports, or understand the context of a code review.

To create a code tour, you can annotate lines of code (Markdown is supported) and navigate as many files as you need, and the recorder captures the sequence. The tours can be checked into a repo or exported to a “tour” file so that anyone can replay it without having to clone any code. Handy!

From GitHub To VS Code, In One Second

Once you’ve discovered a snippet of code on GitHub, what if you want to start working with it in your project immediately? Instead of cloning the repo and finding that file that you need, you can use Github1s. Just add 1s after github in the URL, press Enter, and the repo, or a single file, will open straight in VS Code.

You can also use a bookmarklet to quickly switch between github.com and github1s.com, access private repositories and there are plenty of browser extensions that are listed on the project page as well. If you need an alternative, Gitpod is a slightly more advanced option, which also allows you to start an online development environment, run parallel workspaces and work on the codebase collaboratively.

Pets For Your VS Code

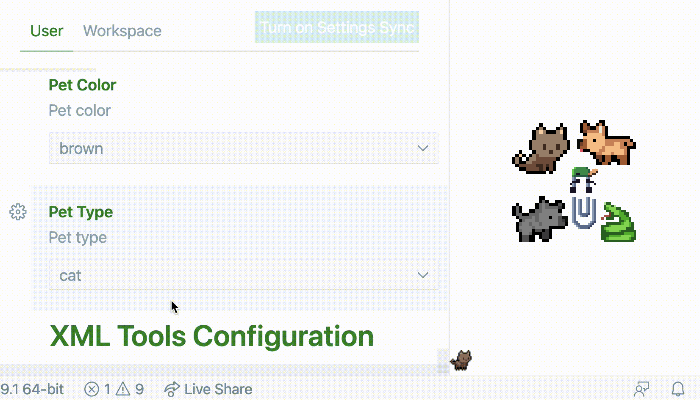
Ever wanted to pep up your VS code editor? Well, how about adding a cat, dog, snake, rubber duck or even good ol’ Clippy? All you need to do is install vscode-pets and run the vscode-pets.start command in order to see the panel. Once you’ve chosen a pet, its fur color and size, lean back and watch them interact with you!

From throwing a ball and playing catch with your pet (run vscode-pets.throw-ball) to adding additional pets (run vscode-pets.spawn-pet), you’re coding workflow is bound to be anything but boring! The creator, Anthony Shaw, is open for ideas and discussion and welcomes feedback anytime.

Speed Up JavaScript / TypeScript Prototyping

If you’re looking for a way to speed up your JavaScript prototyping process, Quokka is for you. The rapid prototyping playground lives in your editor and gives prototyping, learning, and testing JavaScript and TypeScript a speed boost.

Runtime values are updated and displayed in your IDE next to your code, as you type. To get you up and running right away, there’s no config required, all you need to do to start experimenting is opening a new Quokka file. Happy prototyping!

Use A Remote Machine As Your Dev Environment

There’s a variety of reasons why you might want to use a remote machine with an SSH server as a development environment. Because you need faster or more specialized hardware than your local machine, for example, or to debug an application running somewhere else, such as a customer site or an application in the cloud. To simplify development and troubleshooting, the Remote - SSH extension helps you do just that.

The extension runs commands and other extensions directly on the remote machine, so you won’t need any source code on your machine. Instead, you can open any folder on the remote machine and work with it just as you normally would, taking full advantage of VS Code’s full feature set. Handy!

Compile Sass In Real Time

A real-time Sass compiler with live browser reload? Live Sass extension has got you covered. It helps you compile/transpile your SASS/SCSS files to CSS files in real time.

Features include customizing the file location of the exported CSS as well as its style and extension name, there’s a quick status bar control, you can exclude specific folders in the settings, and autoprefix is supported, too.

Tips And Tricks Nobody Bothered To Tell You

Are you really making full use of the powerful features VS Code has to offer? Burke Holland and Sarah Drasner claim you don’t, so to change that, they share all the best things about VS Code that nobody ever bothered to tell you.

From automatically updating HTML img tags with the correct size of the image to using font ligatures for better readability when coding or log points to log information out from your application, “VS Code Can Do That?!” features 36 valuable tips that’ll make your workflow even more efficient.

Wrapping Up

There are literally hundreds of VS Code extensions out there, and we hope that some of the ones listed here will prove to be useful in your day-to-day work — and most importantly help you avoid some time-consuming, routine tasks. Happy coding, everyone!

Further Reading

A Quick Guide Through UFW: Uncomplicated Firewall

UFW, short for Uncomplicated Firewall, is basically a simplified firewall mechanism that is implemented upon IPtables itself, making it much easier to configure UFW than to configure IPtables. Therefore, it can be said that UFW is technically a program for managing a netfilter firewall which aims to provide an easy to use interface for the user.

The Need for UFW: Uncomplicated Firewall

Consider a situation where protocols like ssh, ftp, etc., which if left open for everyone and anyone to connect, might result in a massive security breach by the attackers or malicious users. Hence, this originated the need for a firewall. Firewall is useful to us in a way, that it allows us the remote access to the system but in a limited fashion. A simple example would be, firewall can allow certain ports to be left open to only a few IP addresses to limit security breach and also allowing connections to only a trusted device.

Have You Been Hacked? How to Clean Your Site and Get Off Google’s Blocklist

So, did it hurt? When you landed at the bottom of the SERPs, I mean, and Google slapped a scary red warning message on your site telling people to keep out.

If this happened due to an error on your part (bad SEO, shady linking tactics, etc) that’s one thing.

But if your site was hacked and now contains malicious code, that’s just adding insult to injury – and can really damage your reputation.

Unfortunately, that’s just one of the risks of being in charge of your own site maintenance. Stuff like this can happen.

Sure, it’s fantastic to build your own site in WordPress, but as Spiderman says, with great power comes great responsibility.

To put it plainly, you have control over how your site looks, but you’re also in control when/if your site runs into problems.

If you’re hacked, you will probably get blocklisted by Google. Period. Google isn’t going to take any chances with its reputation.

So, if your site smells even the slightest bit fishy, the search engine is going to blocklist you, knock you from your spot in the rankings that you’ve worked so hard for, send your site plummeting in the SERPs and tell anyone who lands on your site to stay away because it’s dangerous.

And that’s a real bummer. But the key is knowing what to do next.

Should you find yourself on Google’s Blocklist (or you’re a bit fuzzy on what the blocklist even is), we’ve put together a comprehensive step-by-step guide to getting it handled ASAP.

(Click here to go straight to the step-by-step-guide)

A malware notice shown to Firefox users.
A malware notice is shown to Firefox users.

Google Blocklist: A Definition

A website that has been blocklisted by Google will generally experience a dramatic drop in organic search traffic.

It’s sudden and huge, and when your Analytics graph inverts sharply, it’s usually the biggest clue to a webmaster that something bad has happened.

How Did I Get on the Blocklist?

There are several ways your site might’ve got on the blocklist. But generally speaking, when a search engine finds suspicious code or activity on your site that its internal algorithms determine to be malware, it will remove the site from search results immediately.

Instead of risking the integrity of the search results and their safety for users, removing the questionable site is the least resource-intensive action the search engine can take.

Now, what is malware exactly?

In this case, it can be anything that Google deems suspicious, including phishing schemes, hacks, information or email address scrapers, trojan horses, and more.

The sad thing here is that you won’t even know your site has been hacked the vast majority of the time until your organic search traffic falls off a cliff.

In some cases, however, there will be tell-tale signs that something is amiss.

This can either come in the form of suspicious things you come across yourself or through warnings, shutdowns, or other actions taken by external sources.

Of course, there are occasions where the webmaster is responsible for the blocklisting.

Things you should never do if you want to avoid the blocklist include:

  • Violating Copyright or DMCA Claims: Stealing content is frowned upon by the world. Don’t do it.
  • Keyword Masking: Hiding keywords by making the text the same color as the site’s background is so 1998. If Google finds out, you’ll be de-indexed quick.
  • Linking to Spammy Sites: Be mindful of where you link to. It should be a priority of yours to link only to high-quality sites.

However, a lot of the time, hackers will implement these link baiting and keyword spam schemes as a part of infecting your site with malware.

Regardless of whodunnit, however, Google will treat affected sites the same way: with a swift and thorough blocklisting.

What Does Blocklisting Look Like?

Blocklisting is fairly obvious when it happens.

Your analytics will take a nosedive, as I mentioned above. Or, if you do a simple Google search for “site:yoursitehere.com” and no results are found (assuming your site has already been indexed), chances are really good that your site has been blocklisted. This is one of the manual ways to check for blocklisting.

Another way to check for blocklisting is to regularly access and review data in Google Search Console.

This makes it easy for you to see what sites link to you, what search queries you’re ranked for, 404s, server errors, and overall site health.

Any funny business happening with your site is likely to show up here before your site is blocklisted, so keeping a watchful eye is really important when attempting to maintain the integrity of your site.

Security plugins can also be a great tool to help determine if your site has been hacked and/or blocklisted.

A Plugin to the Rescue

Defender plugin
Defender is here to help!

When it comes to a plugin, our very own answer to security, Defender, can stop brute force attacks, SQL injections, cross-site scripting XSS, and more vulnerabilities that will prevent you from getting hacked and blocklisted in the first place.

Defender can also scan your site and track down malicious code. If there’s malicious code detected, Defender shows you exactly what it is and the locations. You can then delete it in one click.

Be sure to read our article about stopping hackers in their tracks, so you don’t even have to worry about getting blocklisted by Google to begin with and try Defender out for yourself for free.

Security Warnings & Diagnostics: A Primer

So, we’ve already talked about preventative measures and the ways you can check to see if your site has been blocklisted, but I feel like it’s a good idea to spend additional time talking about what some refer to as the “symptoms” of being blocklisted.

Not every blocklisted site will exhibit these features, but this is a good rundown of what to look for:

  • There is sudden traffic to your site for keywords that have nothing to do with your site’s content—particularly related to pharmaceuticals.
  • Your site suddenly redirects to another site not in your possession.
  • New administrators or users appear in your site’s dashboard that wasn’t created by you or anyone with authorized admin access.
  • Your site is suddenly flagged as potentially containing malware in search engine results and by desktop or mobile anti-virus detection software.
  • Your web host shuts down your site.

It’s important to note the various security warnings Google can provide as well. While these aren’t technically blocklisting, they can sometimes indicate your site is well on its way to being blocklisted.

Should you be fortunate enough to catch suspicious activity thanks to a security warning, you may be able to sidestep the headache of being blocklisted altogether.

These warnings appear on the search engine result page where your site is listed. They can also take a couple of different forms. Here are two of the most common warnings you’ll come across:

This site may harm your computer

This warning occurs when Google believes your site contains a Trojan or other piece of code that triggers a download prompt that is malicious.

Those fake anti-virus pop-ups and automatic file downloads are the most common examples of what Google is referring to when it displays this warning.

Google has detected malicious code on your site.

This site may be hacked

This gets to the point, doesn’t it? This warning displays when Google has reason to believe your site has been completely hacked and taken over by someone other than you.

The sudden appearance of content that doesn’t belong with the rest of your site, bank directories, and other red flags trigger this warning.

Google has detected your site has been hacked.

Other Blocklists

While this article focuses on getting off Google’s blocklist, it’s worth noting there are other blocklists that may pick up on malicious content or security threats on your site.

These are some of the main blocklists:

  • Norton Safe Web
  • Phish Tank
  • Opera
  • SiteAdvisor McAfee
  • Yandex (via Sophos)
  • ESET

If Google reports your site as clean, it is still possible for Opera (the browser, that is) or even Yandex (the search engine) to blocklist your site.

So if you do notice a drop in SERPs or security warnings displaying in browsers other than Chrome, it’s a good idea to check these other blocklists to see if your site has been compromised.

A Step-by-Step Guide for Getting off the Google Blocklist

Now that you’re all clear on what blocklisting is, how to tell if it’s happened, and what the warning signs are that you might be headed for the blocklist, we can start discussing how to get your site off it for good.

Step 1: Check if you’re blocklisted

Should go without saying, but you need to be 100% sure if your site has been blocklisted before you move forward.

  • Check your site’s status to determine safe browsing. Just input your site’s URL and review the results.
  • Use Google Search Console’s URL inspection tool to see what Googlebot sees when accessing your site.

Step 2: Locate the Suspicious Code

There are many different places you can look on your site to find malware.

As mentioned before, the simplest way of finding malware is with a resource like our Defender plugin.

If you’re not using a plugin like Defender, it’s not always so easy and scanning through the code on each page, however, sometimes the culprit is embedded in your server somewhere.

Still, there are a few places that hackers target more than others. You will need FTP access to get to some of these areas to start cleaning up the mess.

If your site is suddenly redirecting to another site, you should check the following areas for suspicious code:

  • Core WordPress files
  • Your site’s index (check both .php and .html!)
  • .htaccess

If your site is now triggering downloads for visitors, check out the following spots:

  • Header
  • Footer
  • Index (check both .php and HTML)
  • Your theme’s files

If you’re suddenly seeing a bunch of Pharma information on your site and believe it’s been compromised by a phishing campaign, check:

  • Any HTML file
  • Index .php and .html
  • For the appearance of new directories you didn’t create

You can also leverage the Google Diagnostic Page to figure out specifically what part of your site has been compromised. Is it just one page? One directory? Or the whole site?

Keep reading through the results to see when Google last visited your site.

This is referred to as the “scan date.” Also, take note of when Google found malware or suspicious content. This is referred to as the “discovery date.”

Now, if you’ve tried to fix your site after the last “scan date,” Google doesn’t know about it yet. Patience is a requirement when getting your site off the blocklist, unfortunately.

You can bring Google’s attention to your attempts to fix the issues, but we’ll talk more about that later.

Note: Sometimes, Google Search Console will show that certain HTML pages of your site have been infected, but this isn’t necessarily the case. When dealing with WordPress, likely, the core file responsible for generating the HTML file in question is infected. 

Step 3: Dig Deeper: Pretend You’re a Bot or User Agent

Sometimes running tests to see if your site (or a client’s) is infected would put your own computer at risk.

You couldn’t just open up your web browser and load the site directly without putting your machine in danger.

So, to bypass this, you can use cURL in the command-line interface (CLI) to basically pretend you are a Google bot or a user agent.

For example, you would input the following to emulate a bot:

$ curl –location -D – -A “Googlebot” somesite.com

Once you input this, you’re going to want to look for anything that doesn’t make sense in the code.

So, bits that are in a different language than your own or content that looks like total gibberish.

Yes, you’ll need to understand HTML, at the very least, here. Anything in an iframe or script tag should get your careful attention, too.

You can also use this bit of code to emulate a user-agent:

$ curl -A “Mozilla/5.0 (compatible; MSIE 7.01; Windows NT 5.0)” http://www.somesite.com

You can swap out what browser is referenced here depending on your needs.

A few other commands you might want to get familiar with include Grep, Find, and SSH.

These will help you locate specifically where the hacking took place on your site, so you manually remove the code that put you on the blocklist.

If the CLI stuff is leaving you scratching your head, here’s a list of resources you can use to get up to speed on the terminal and the specific commands you’ll need to clean your site:

Once you locate the source of the problem, you can remove it.

Or, if you’re a WPMU DEV member and have any questions about specific code and whether it’s an issue, contact our 24/7 support, and we’ll help you out.

Step 4: Removing Bad Code 

If your site has been hacked, you’ll need to remove the malware that caused the blocklisting and/or security warnings.

If the hackers created new pages with malicious code, you could remove them from the SERPs altogether by going to the Search Console and using the Remove URLs feature.

You’ll also want to delete the pages in question from your server, but using Remove URLs can help expedite Google’s awareness of your cleanup attempt.

Again, I’ll refer back to Defender here as a simple solution. You can easily remove suspicious code in one-click with his help.

One thing to keep in mind is Defender does not scan the DB tables in cases where a Pharma hack has already happened. In this case, infected content on post pages needs to be cleared manually.

Remember, you shouldn’t use Remove URLs for pages you want to be indexed but have bad code. This is a feature you should only use when a page should disappear from search results for good.

To remove all evidence of your site’s hacking, you’ll need to backup from an older version of your site.

Regular backups are super important for this very reason, so hopefully, you have a clean version of your site on file to use. This is the first step in cleaning your site’s server.

Next, install any new core, theme, and plugin updates that are available. Make sure everything is as up to date as possible. This will reduce your site’s vulnerabilities.

Follow best practices for site security here (limit the number of plugins you use, delete outdated themes you no longer use, old user accounts, etc).

Finally, change all the passwords for your site. And I mean all of them. Not just the WordPress administrator and user passwords.

You also need to change the passwords for your FTP account, database(s), hosting, and anything else related to your site to ensure security.

If the version of the site you’re restoring from the backup is way out of date, you should make a disk image of your infected but current site before installing the clean outdated version.

Once you install updates and change passwords, you’ll need to restore the new content manually. Google offers some pointers on how to accomplish this.

Step 5: Resubmit Your Site

If your site has been blocklisted, it’s been removed from the search results. To get back in the SERPs, you’ll need to submit your site for review.

Otherwise, Google won’t know that you’ve taken steps to remedy the problem (or, at least, won’t crawl across your squeaky clean site for a long time).

And every day your site is out of the SERPs is money lost, right? So to speed things up, you have to go through a couple of official channels.

If your site was infected with malware or was involved in phishing, you’ll need to submit a reconsideration request via Google Search Console.

The steps required to submit a review depend on your specific security issue/situation, But luckily GSC has kindly outlined the full review and reconsideration process right here.

Once you’ve completed the review process, if Google finds your site is clean, warnings from browsers and search results should be removed within 72 hours.

You should also verify your site works as expected: pages load properly and links are clickable.

If your request is NOT approved, reassess your site for malware or spam, or for any modifications or new files created by the hacker.

Alternatively, you might consider requesting more help from specialists (WPMU DEV’s superhero support team is a great place to start!)

Have You Ever Been Hacked? 

The process of cleaning up after being hacked and getting on Google’s blocklist can be arduous at best, I’m not going to lie.

But if you lay out a plan or create a checklist for the steps to take, you can tick them off little by little until your site is clean, back online, and back in the SERPs.

Plus, you can prevent hacking in the first place. Check out our article on stopping Hackers in their tracks with Defender.

It’ll take some effect, but the important thing is you’ll restore your site’s reputation.

And if anything, it’ll allow you to prioritize security in a way that you might not have thought about before.

Small silver lining?

RBAC for SSH and Kubernetes Access With Teleport [Webinar Sign-up]

Enterprises are best served by leveraging an RBAC system to manage access to their SSH and Kubernetes resources. With Teleport, an open source software, employers are able to provide granular access controls to developers based on the access they need and when they need it. This makes it possible for employers to maintain secure access without getting in the way of their developers’ daily operations. 

Join Steven Martin, Solution Engineer at Gravitational, as he demonstrates how to assign access to developers and SRE’s across environments with Teleport through roles mapped from enterprises’ identity providers or SSOs.

How to Manage Ansible Secrets With Akeyless Vault

Ansible is an open-source automation tool that is used for configuration management; in addition to the open-source version, Red Hat also offers the enterprise version, Ansible Tower. 

There are lots of ways where Ansible requires secrets (credentials, passwords, ssh-keys). in order to operate. One example would be the way Ansible uses SSH keys in order to connect to different nodes, that are called within your playbooks, or API keys, to access resources that you need to configure.

An Introduction to SSH – Secure Shell

What Is SSH?

SSH is a network protocol that allows a secure connection between different computers. SSH protocol also referred to as Secure Shell, provides many functionalities like,

  • Strong connection and security
  • Strong authentication
  • Maintains connection integrity
  • Strong encryption.

In general, there are different ways of logging in to a remote machine,

SSH is Dead. Long Live SSH: One Million SSH Logins with Okta. Zero SSH Keys.

As the great Mark Twain once wrote in response to reading his own obituary in May of 1897 , "reports of my death have been greatly exaggerated." Fast forward nearly a hundred years to 1995, and a Finnish computer scientist named Tatu Ylönen created a secure transport protocol known simply as Secure Shell (SSH). What do these things have to do with each other? Nothing, aside from perception.

In its most practical terms, SSH enables users to establish a secure, remote connection with a Linux-based machine via a Command Line Interface (CLI). SSH is the de facto standard for secure server access, and has survived the test of time, despite a significant shift in how infrastructure is operated in the cloud.

SFTP vs FTPS – Secure File Transfer Protocols Explained

It’s been a while since concerns were raised about FTP due to its lack of security. Now that it’s more or less a thing of the past, it’s time we all got better acquainted with its successors, SFTP and FTPS…

With so many acronyms in the file-transfer world, it can be very easy to feel overwhelmed.

In order to choose the best method for your needs, you need to understand how each one works.

That’s why I’m here to give you a quick run-through of two of the game-changers: SFTP and FTPS…

File Transfer Protocol Secure

FTPS (File Transfer Protocol Secure) builds upon FTP by combining it with SSL/TLS.

If you’re not clued up on SSL/TLS, I would recommend reading our article, but long story short, the concept started as SSL (Secure Sockets Layer), which has now evolved into TLS (Transport Sockets Layer).

TLS not only encrypts your data so that if you fall victim to a man-in-the-middle attack, the attacker won’t be able to make use of any information they manage to get hold of, but it authenticates the connection between the browser and web server.

This is done with SSL/TLS certificates. A website with a certificate signed by a publicly trusted certificate authority (CA) will be trusted by client software such as web browsers and operating systems.

When the browser connects to the web server, it checks whether a valid certificate is present. If it is, the “handshake” process begins, where the browser and server negotiate how to proceed.

A valid certificate allows the browser and server to verify that each other is legitimate and therefore form a binding connection that is very difficult to penetrate.

Adding this layer of security to FTP turns a completely unsecure method of file transfer into one which is pretty hard to hack.

Secure File Transfer Protocol

So now we know how FTPS keeps your files safe, it’s time to take a quick look at SFTP (Secure File Transfer Protocol).

SFTP was developed as an extension to SSH (Secure Shell Protocol) – check out our article for the full lowdown.

SSH is a way to remotely log in to one computer from another over an unsecured network, via a secure channel.

When you combine SSH and FTP, you get SFTP – a method of transferring files over a secure connection. SFTP encrypts your files and data and then sends them over a secure shell data stream.

You initiate the connection by creating or obtaining credentials, which you will need to input into an SFTP client. This authenticates you as a user and allows you to begin the connection.

You can also connect via the command/line terminal but you will still need to log into the system to verify yourself as an approved user.

SFTP vs FTPS

If you’re a WordPress user looking to grab a copy of your files from your server, SFTP may be your best bet, as you might not always have the certificate required to form an FTPS connection.

The good news is that file-transfer clients such as FileZilla allow you to select which method you want to use, and since all the encryption and securing of the channel is done in the background, they all look and work the same at the user’s end.

Screenshot of FileZilla showing how to switch from SFTP to FTP.
In FileZilla, you can easily switch from FTP to SFTP by heading to Edit>Settings.

So, the bottom line is this … if you care about security with a capital ‘S’, then you should give a ‘S’ about FTP too!

What The SFTP? Transfer Your Files Secure-ly!

You’ve just installed a brand new theme for your new site. You load it up and begin to admire it – it’s perfect! Except…what’s that weird orange tint on all of your photos?! How do you get rid of it? It’s time you unlocked the world of SFTP…

It’s often said that you can build sites on WordPress without ever touching a line of code.

This is absolutely true – however, it’s like owning a Ferrari and never going past the third gear.

I’m not saying you need to start building your own themes and creating new plugins to be able to get the most out of WordPress, just that developing the skills to at least make minor aesthetic changes to your site should be on most people’s to-do list.

Trust me – the sense of accomplishment you get from fixing that annoying layout issue on your site all by yourself is second to none.

But if you want to meddle with the files in order to make these kinds of changes, you need to know how to access them.

There’s a couple of different ways you can do this, but in this article, we’re going to focus on SFTP (Secure File Transfer Protocol).

If you want to skip straight to the good stuff, here’s what we will be covering:

  1. What is Encryption?
  2. SFTP V FTP
  3. How Does SFTP Work?
  4. What is FTPS?
  5. How Do I Access My Files With SFTP?
  6. Which SFTP Client Should I Use?
  7. Accessing Files With FileZilla
  8. Accessing Files Through the Command Line
Cartoon of Devman putting chains and a padlock around a letter, about to post it.
If only Devman knew there was another way to securely send files…

One of the main benefits of using SFTP to transfer your files over other methods is that it encrypts your data.

Therefore, before we delve into how SFTP works, we must first understand the basics of encryption.

What is Encryption?

Encryption is a method of protecting data by converting it to code or ‘cipher’ that can only be solved by the people who have permission to view it.

Simple encryption could be in the form of the A1Z26 cipher, which assigns each letter a numeric value based on their position in the alphabet (A = 1, B = 2), so the word ‘PASSWORD’, for example, would be converted to 16;1;19;19;23;15;18;4.

This is a very simple cipher and wouldn’t take a rocket scientist to crack the code.

With the help of computers, files can be encrypted in virtually uncrackable ways, as machines are able to generate complex, random encryptions that no amount of guesswork would be able to solve.

The recipient possesses the ‘key’, which unscrambles the code and allows them to read it.

A hacker’s goal would be to gain access to plain text data, i.e. data that hasn’t been encrypted.

If a hacker manages to get their hands on ciphertext (encrypted data) the chances of them being able to decode it and view the information it contains are virtually zero, which is why encryption is so widely used.

Take Passwords For Example

Any website which stores user information should encrypt it in case of a breach.

When you log into WordPress, you input your password which could be something as simple as ‘Lilac12’ however WordPress would encrypt it before storing it on the database, so at their end, it could look as complex as ef9ded6169f538c36f9ad613806a7b99.

If a hacker breaches the WordPress database, they wouldn’t be able to access your account unless they were able to transfer the code back into Lilac12 in order to log in.

In theory, the only person who truly knows your password is you!

SFTP v FTP

So, back to SFTP – what is it, and how does it differ from FTP?

One of the main distinctions between SFTP and FTP (File Transfer Protocol), is that SFTP is secure whereas FTP is not (I know, who’d have guessed?!)

Let’s say I call you on the phone and we’re having a private conversation.

If someone manages to tap into the line, they hear us speaking English and they will know everything we discuss. This is FTP, as there is no encryption taking place.

If I call you on an encrypted line, all they hear is gibberish, so even if they managed to intercept the connection, it’s encrypted in a way that means they learn nothing from it and the content is useless to them. This is SFTP – the encryption of files protects your data in the event of an interception.

How Does SFTP Work?

You start the process by logging into an SFTP client to initiate the connection.

The details required include a username, password, host (your site’s URL), and port number, which can all be obtained through your hosting provider.

You can also generate keys that are swapped between the servers, but for the novice user, a username and password is definitely the right way to go.

Once you have authenticated your connection with either of these methods, the files are encrypted and sent to the recipient.

As the files can only be decrypted by the intended recipient, anyone who manages to intercept the connection will only have access to a bunch of jumbled, unreadable files.

So I Guess This Means No One Uses FTP Anymore?

Unfortunately, no, they still do.

FTP has been around a very long time – the specification for it was written before the internet was even invented!

Back then, it was assumed that internet activity wasn’t malicious, and therefore FTP wasn’t created with the need to protect files from various types of hacking methods.

The goal was simply to transfer files from one place to another.

These days, cybersecurity is a huge threat to companies and individuals everywhere, so protecting data should be on the forefront of everyone’s mind when transferring files.

Despite the fact that SFTP is now in existence, millions of people and businesses around the world still use FTP, although some sources suggest that it is dying a slow death.

If you’re not sending confidential or valuable data, it can be easy to think that FTP will be fine in this instance, as no harm would come from anyone having access to this particular set of files.

Whilst this may technically be true, businesses would always be advised to use a secure method when transferring files regardless of the content.

Luckily, there are tons of regulations in place which prevent businesses from taking risks like this, so the bottom line is SFTP over FTP every time!

What About FTPS – Where Does That Come Into It?

With so many acronyms all containing the same few letters, it’s extremely easy to get confused.

So, before we get any deeper, let’s clear up the difference between everything we’ve learnt thus far and the next arrival to the data transfer party – FTPS.

The FTP part of FTPS is indeed the same FTP that we’ve already met – a way to transfer files over the internet, but without the added security that SFTP offers via encryption.

FTPS however, is something slightly different.

Whilst SFTP pairs FTP with an SSH connection in order to securely transfer files, FTPS works with SSL to keep your files safe.

“What Is SSL?!” I Hear You Cry

SSL puts the S in HTTPS – it stands for Secure Sockets Layer and is what differentiates a secure site (HTTPS) from an unsecure one (HTTP).

To do this, your browser binds to the website forming a secure connection which is extremely difficult to penetrate.

This is done with the help of an SSL certificate. The browser connects to the website’s server, checks if it has an SSL certificate and if it does and the browser can authenticate it, it forms a binding connection which allows you to safely transfer information.

How Can I Access My Files Using SFTP?

So now that we’re better versed in the terminology, how do we put this into practice and access our WordPress files?

There are a couple of different ways you can do this.

Some hosting providers supply a platform for you to directly access your files such as C Panel, however, if you don’t have access to anything similar, you can either use a plugin, the command terminal, or an SFTP client.

A plugin File Manager allows you to copy and amend your files, however, we wouldn’t recommend this method.

This is because if you change something in your site’s files, one simple syntax error could mean your whole site crashes and you are unable to even get to the dashboard.

If this is a mistake you have made using a plugin, you won’t even be able to get back into the plugin to fix the issue – it’s so much safer to use an external source such as an SFTP client so that you can get straight back in and correct the issue.

So now we’ve settled on SFTP, which client should we use?

Choosing an SFTP Client

There are a number of SFTP clients that you can use to access your files, and most are free.

Popular choices are WinSCP, Cyberduck and FileZilla

For basic users, all that really differs are the interfaces, so we’ll take a quick look at these three below.

First up, Cyberduck!

Cyberduck

Not all SFTP clients are a great fit for Mac users, but Cyberduck is one of the exceptions.

Screenshot of Cyberduck showing the layout of the folders and files
Cyberduck seems to have its ducks in a row.

It has a Mac-like aesthetic which is very beginner-friendly and supports a wide range of servers, so is a good choice for anyone looking to venture into the world of SFTP.

WinSCP

With 132 million downloads in the bag, WinSCP is also a great choice for your SFTP needs.

Screenshot showing the folder and file layour of WinSCP.
Ahh the good ol’ yellow folders we all know and love.

It’s only available for Windows, so it’s designed in a way that makes it quick and simple for Windows users to navigate, i.e. with lots of well-organized, yellow folders.

Like Cyberduck, it’s also completely free to use and you can easily access your files and make changes to your WordPress files using this client.

FileZilla

One of the most popular by far is FileZilla – it’s completely cross-platform (even Linux) and again, free.

Screenshot showing the folder and file layout of Filezilla.
FileZilla has been a solid choice for SFTP since its creation in 2001.

Below I will take you through how to use FileZilla to download copies of your files from WPMU DEV’s servers.

Not a WPMU DEV Member?

This quick tutorial should give you a good idea of what you would need to do to access your files from any hosting provider.

Orrrrrr, you could just take a look at all the awesome goodness included with our membership, take the plunge and host a site or two on our servers.

Using FileZilla To Access Your Files

First of all, let’s download FileZilla – just head to their site and get it installed.

In order to start the connection, you’ll need to enter your credentials as mentioned above.

To create these, you need to go to our website and into the hosting section of the hub.

You will find your sites in a list – just choose the one you want and click on ‘manage’ which will take you to the back-end of your WordPress site.

The section of the hub where you can click to manage your site preferences.
Click on the black arrow to display the ‘Manage’ button.
The section of the hub where you can make various changes to your site.
From here, click SFTP/SSH.

This will take you to the account creation screen.

The screen where you can click to add either an SSH or SFTP user.
Click ‘Add User’ and then ‘Add SFTP User’.

Here you need to choose a username and password:

The screen from which you can create SFTP credentials by entering a username and password.
You’re provided with a randomly generated password, but feel free to change it.

Your password needs to be a series of letters and numbers – and a pretty long one at that!

If your password isn’t sufficiently long enough, you won’t be able to continue – what’s the point in using a secure method of file transfer if your password is simple enough to guess?!

Now you’ve created your credentials, it’s time to head back to Filezilla to set up the connection.

The host is your website address, so enter that along with your username and password that you’ve just created within your hosting hub, and the port number, which is 22.

Click ‘Quickconnect’ and voila! You now have access to all of your WordPress files.

The screen where you input your credentials to connect to the host server.
You can save your site information for quicker connection by heading to File>Site Manager.


The list of files within FileZilla when you first connect to the server.
Just make sure you do your research before you jump in and start editing!

All you need to do now is right-click on the file you want to open and select “View/Edit”.

This will then open the file in your text editor.

Showing the opened style.css file inside the Notepad ++ text editor application.
Your file will open in the text editor (I’m using Notepad ++).

You can make the changes you need and then reupload the file back to the host server.

The pop-up which asks if you want to upload the file back to the server.
Once you click ‘Yes’, the changes will appear live on your site.

And it’s as simple as that!

The hard part is knowing what to do once you have the files within your reach.

There are tons of CSS tutorials online – check out our handy guide packed full of links to awesome resources if you’re hoping to jump into the world of web development languages, or if you just need a refresher. Also, here is another handy dandy tutorial on setting file permissions that you may find useful when working with files on your server.

Ready To Step It Up A Notch?

Another way to access your files is through the command line/terminal.

Be warned – if you have no idea what you’re doing with the command line, then I would strongly advise that you go away, do a bit of research and come back when you’re confident you’re not going to break your site!

I am simply here to show you how to access it via our hosting – what you do with that power is entirely up to you!

Unlike many hosting companies, for an added layer of security, websites hosted on our servers have one set of credentials for SFTP and one for SSH.

If all you want to do is download, make changes to your files and then reupload them, you can do this through SFTP.

If you want to do the more admin-y things such as add users or change settings, you will need to access the server via SSH instead.

It is a very similar process, however, you would need to head back over to the hosting hub and create an SSH user in the same way you did an SFTP one.

As before with FileZilla, using SFTP through the command line opens up a secure connection that allows files to be transferred over the internet.

If you’re on a Windows machine, you simply open up the command line by hitting Win+R and then typing in “cmd”. If you’re on Mac, head to ‘Terminal’ in your applications.


The screen you are greeted with when you open up the command line in Windows.
This is the screen that will appear on a Windows operating system.

You then need to establish the connection to your site by typing in the following:

sftp (your sftp username)@(your website address)

So in this example, mine would be sftp kirstan@kirstan.wpmudev.host

This is telling the server that I want to log in via SFTP with the account name ‘kirstan’ into my kirstan.wpmudev.host website.

It will then ask for your password – once you have entered this, you will have remote access to your files.

Credentials entered into the command line.
If you need to paste your password in, just right-click and hit enter.

Right, so we’re in!!

Now we can download copies of our WordPress files by simply inputting a few commands and hitting enter each time.

First, we type in “ls” so that we’re navigating within the server rather than our local machine.

The command line with the command 'ls' typed in to display the current folder.
This will firstly display the “site” folder, which is the one that contains all of your WordPress files.

Then you can navigate around the folders by using the “ls” command which will show you the list of folders and documents inside the folder you’re currently in, and “cd” which will take you to the folder you specify.

Let’s take a quick look below:

The next screen of the command line where you can see all folders and files inside the public_html folder.
It looks more daunting than it is – promise!

I am now inside the public_html folder and as you can see from above, I navigated here by typing in “cd site”, using “ls” to check the names of the folders and then typing “cd public_html”.

Each time you input a command, remember to hit enter so that it can be processed!

Your WordPress files are always organized in the same series of folders and subfolders no matter which method you choose to access them.

If I wanted to download my theme’s stylesheet, I would head into wp content>themes>twentynineteen.

I navigated to the theme’s files by using the “ls” and “cd” commands, and now I’m ready to download the file I need.

INside the Twenty Ninteen themes folder showing the list of files.
If you want to retrieve a file, you type “get” followed by the name of the file, and to upload, just replace “get” with “put”.

I typed “get stylesheet.css” and was able to easily download a copy of the file directly to my downloads folder:

The screen from where I downloaded the style.css filee.
I can then edit it and use the “put” command to send it back to the server.

Once you’ve learned the list of commands, you’ll be able to navigate your way through your WordPress site this way like it’s second nature.

If this is something you fancy getting to grips with, you can check out this ‘cheat sheet’ of some of the most frequently used SFTP commands.

Congratulations – You’ve Just Unlocked The Next Level of WordPress!

Now that you know how to get your hands on your files, you can start to think about what you’ll do with this new power.

Whether you fancy unleashing your imagination and customizing your perfect theme or you just want to find out a bit more about how the PHP behind WordPress really works, our WordPress Academy has everything you need or there are tons of free tutorials online.

Or, if you’re the type of person that likes to ‘get stuck into it boots and all’ and try things out for yourself, sign up for our no-risk 7-day membership trial and check out our secure file transfer tools and more in the [humblebrag alert!] best managed WordPress hosting on the planet.

What is SSH? The Magic Of Remote WordPress Access

Did you know you can securely access your WordPress site remotely? But how is it done? By some magician’s trick? Actually, it’s called SSH — and now’s your chance to get to know it.

It’s possible with a dash of login credentials, a sprinkle of an interface, and a pinch of a good network connection.

Then, like a good WordPress potion, everything works together and you’ll have a secure way of getting it all accomplished.

In this getting started guide, we’ll be going over all things WordPress SSH to get you started and familiar with how it operates.

More specifically I’ll be discussing:

  • What is SSH and when you’d use it.
  • How to setup SSH.
  • Accessing SSH.
  • Setting up a user for it.
  • Commands to perform SSH functions.
  • Differences between SSH, SFTP, and FTP.
  • Our hosting and SSH.
  • And more!

Though it looks like I’m trying to keep this under wraps (SSH can easily become confused with shhh), it’s no secret that by the time you get through this, you’ll be so comfortable knowing SSH that you can set it up and securely log in to your computer remotely.

You’ll also discover how the process can be simplified with good hosting.

Once you get the hang of SSH, you’ll see why it’s so popular and how remote access can make life easier for you (unlike some other things that are remote).

Dev Man looking under couch cushions.
Luckily, we’re not dealing with a lost TV remote.

So, What is SSH?

SSH is a UNIX-based command interface and protocol. It stands for ‘Secure Shell’ and is defined as a protocol for secure remote login and other secure network services over an insecure network.

It functions by using public-key cryptography for connection and authentication.

What this means is that you can use it to gain access to your WordPress website remotely from any computer.

It doesn’t matter where your site is hosted, as long as you have credentials to log in.

SSH is here to provide a secure login, to ensure nobody has access to your connection while you’re on it.

When you want to connect your server by using SSH, you just need two things:

  1. An interface
  2. Login Credentials

Something to keep in mind is if you’re running Linux or macOS, there is already an interface built into your operating system, so installing an SSH client isn’t necessary.

However, if you’re running Windows, you’ll have to install a client. More on that coming up…

Let’s Talk Client and Server

To establish an SSH, there are two components: a client and the corresponding server.

A client is an application that you’ll install on your computer to connect with another computer (aka — server).

The client uses the remote host information to initiate a connection and, when the credentials are verified, establishes the encrypted connection.

Meanwhile, on the server-side, there’s a component defined as SSH daemon that is regularly listening to a specific TCP/IP port for potential client connection requests.

When a client initiates a connection, the SSH daemon will reply with the software and the protocol versions it supports.

Then, the two will exchange their identification data. If all is well and the credentials pan out, SSH creates a new session for the appropriate environment.

It’s almost as if the client and server were passing each other a briefcase. Any crook getting in between that wants to get into the briefcase can’t, because they don’t have a key.

This keeps the items in the briefcase secure until the client opens it up with a key, and is able to pass things back and forth securely.

When Do You Need To Use SSH?

With cloud servers becoming increasingly popular and affordable, more and more clients favor the use of a cloud server for their website.

That makes SSH the most commonly used tool to handle tasks of various degrees on cloud servers.

Some examples of when SSH might be used are when a developer sets up a web server for a website of a client, or to possibly deploy source code to a production server.

Prerequisites For SSH

Before you can establish a secure remote desktop protocol with a remote machine, there are some requirements.

Here is the checklist:

Ensure you have the necessary permissions to access the remote computer.
The Firewall settings have to allow a remote connection.
Have the IP address or the name of the remote machine you want to connect up to.
The remote computer has to be turned on and have a network connection.
Client and server applications need to be installed and enabled.

Of course, to check some of these items off, you’ll need to know how to get set up in the first place.

On that note, here are…

The Key(s) To Getting Started

You will have to set up SSH correctly to ensure you’re able to login to the cloud server from your local computer.

So, how do we go about doing that?

As I mentioned, if you have a Linux or macOS, a pair of public and private keys are already built into your operating system.

If you’re Windows-based, you’ll need to install a client to get started.

It’s free and easy to do. It’s just a matter of downloading a client to your system.

There are a lot of free open source software options out there for Windows, such as PuTTY, SuperPuTTY, and PuTTYtray. Download whichever option you prefer, and then you’re ready to move forward.

They’re all a bit different. For example, Absolute Telnet is designed strictly for Windows and not for Linux. Whereas, eSSH Client is designed for both.

Example of SSH clients.
Example of SSH clients. (Source: Wikipedia)

You can take a look at more comparisons and see what works best for you.

SSH Set Up

To get set up, we’ll need to generate the public and private keys pair.

In this example, I’m on a Mac OS, so I’ll be doing this from Terminal. The Terminal is located in Applications>Utilities>Terminal.

Once there, we will run this command:

ssh-keygen -t rsa

In this command, the -t option will allow you to specify what type of key to create. It’s typical to use RSA.

RSA is one of the earliest public-key cryptosystems and is widely used in secure data transmissions.

RSA is here by default, so there is nothing to change unless you specify something else.

Enter file in which to save the key (/Users/demo/.ssh/id_rsa):

Now you’ll enter the path where you’d like to store the public and private key pairs. On Mac OS X, typically they’re saved in the user’s home directory. However, save it anyplace you’d like.

Once you have it saved, next up is to enter a passphrase.

If you’re running this for the first time, keep it as the default value.

Enter passphrase (empty for no passphrase):

Type in a password to protect your private key. This is the password you’ll need to enter each time you access the private key.

If you don’t want a password, you can keep it empty.

Enter same passphrase again:

You’ll next confirm your password.

Once you do that, your identification is saved and you’ll get a confirmation and the key’s randomart image will appear on the line below.

Example of randomart
Example of the key’s randomart image that will appear after successfully creating a key.

It will also tell you where the public and private key is saved to above the image.

An example of the public key would be /Users/demo/.ssh/id_rsa.pub and /Users/demo/.ssh/id_rsa for the private key.

You’re moving right along now with SSH. You have your key, passcode, and the information stored in a location on your computer.

Note: If you’re on Windows, search online for “generate ssh keys windows” and you will get a list of tutorials showing you how to do this.

Here, for example, is one that came up for manually generating ssh keys in Windows using PuTTY.

Okay, What’s In Store Next?

Glad you asked. We need to ‘store’ the public key to the cloud server, so you can allow users access to your website.

Your hosting company should have an admin section for you to upload the public key. Every cloud service will be different, so you may have to reach out to yours for specific information on where to do this.

Since we offer hosting here at WPMU DEV, I’ll show you how to do this through our hosting service.

(P.S. We’ll be going over hosting later in this article.)

We make it simple and easy to store the public key and allow users access.

With our hosting, you’ll log in to your WPMU DEV account and go to The Hub 2.0, click on your website, and then click the Hosting tab.

The hub hosting tab.
My website’s hosting area in The Hub.

You’ll see a bunch of tabs appear beneath. Click on SFTP/SSH.

This will give you the option to add an SFTP or SSH user. Click Add User.

Add SSH user image.

Once you hit Add User, you’ll have a choice between SFTP or SSH.

SFTP User and SSH User options.

Tough choice, huh?

If you’re wondering what the difference between an SFTP user and SSH user is, here is some clarification.

SFTP (SSH File Transfer Protocol) is a file transfer protocol that is built upon the SSH transport layer. It’s used to securely move large amounts of data over any given internet connection.

Of course, we defined it earlier, but just to refresh, SSH is a protocol that allows you to connect securely to a remote computer or server by using a text-based interface.

Similarities Between SSH and SFTP

With SFTP, the protocol can’t exist without SSH, making SSH the binding agent that lets SFTP transfer files securely. Most SSH servers include SFTP capabilities, however, not all SFTP servers support SSH actions and commands.

Differences?

They’re both used to transfer information securely, but unlike SFTP, SSH can exist on its own.

Many applications for SSH are remote command-line, remote command execution, and log in.

SFTP provides secure file access, file management, and file transfer over a data stream.

Alright, now that you know the differences, you can choose accordingly what type of user you’d like to add.

We’re going to stick with SSH for this tutorial.

Once you click on SSH User, a screen pops up with additional information to add for a new SSH user.

Screen to add a new SSH User.

Here, you set up a Username, Password, Path Restriction (optional), and Environment.

In the Password section, you have the option of using a Public Key that we went over earlier (/Users/demo/.ssh/id_rsa.pub). Or, you can create your own password.

In the Path Restriction area, you can add restrictions for wp-content, Plugins, or Themes. By default, it’s on None.

Path restrictions dropdown.

In the Environment area, we’ll select Production.

After you get the information entered, your Users will appear on the SFTP/SSH dashboard.

It shows the Username, Environment, Type (e.g. SSH), Path Restrictions, and SSH Connection Info.

SSH users image.
Where your Users will appear.

From this point, your users will have SSH access.

You can change your password and edit the user however you’d like in this area.

When you’re ready to log in, the Connection Info is where you can copy and paste the user name for configuration.

Connection info for SSH.
Quick configuration screen.

You would then paste or type this into your Terminal. After that, it will prompt you to enter a password.

If the username and password are correct, you’ll have access and a screen similar to the one below will appear.

WPMU DEV login screen for SSH.
What a successful login looks like.

You can now use commands and perform functions.

Setting up an SFTP User is similar to SSH. Just follow the prompts and, like our above example, it will then appear in your dashboard once successfully set up.

Connecting Client and Server

Now that you’re set up, refer back to our checklist at the beginning of this article. If you have your remote machine and your own computer set up with SSH, you should be in business!

To operate a remote machine, SSH is performed by commands. There are numerous command capabilities that you can use. Here’s a rundown…

SSH Commands

You can run certain commands from one computer on a remote machine. This will enable you to copy files, list files in a certain directory, move files, and more.

This is more advanced and will require getting to know the commands and what ones do what.

However, once you know what each command does, you can then operate a system remotely with them.

Several examples of commands are:

ls will display the details of the files, such as the modified date and time, size, and permissions.

Cd is used to change directories. It will take you to the new directory and the command line indicates where you are.

Mkdir will create a new directory.

There are a lot of popular commands in SSH. A list of commands that are allowed with WPMU DEV hosting can be found on our SFTP & SSH information page.

It will be necessary for you to know commands if you’re going to be the one working with a computer remotely.

There are cheat sheets out there that can give you more insight and examples of what commands can do.

Something to keep in mind is SSH is a pretty powerful tool, so if you DO create commands, you have to be careful or you could break your site.

You can add and delete files, so if you enter a wrong command, you could lose content.

Be sure to backup your website before using commands and get familiar with how they function.

SSH and FTP

You may have heard about FTP as a method of transferring information remotely.

So, what’s the difference between SSH and FTP?

FTP (File Transfer Protocol) is a standard network protocol that is used to transfer files between a client and a server on a data network. File transfer connections are (typically) initiated by an FTP client and responded to by an FTP server.

Then, when authenticated, a connection occurs between the client and the server.

Any files and folders can be transferred to either direction between the connected computers.

How FTP works.
An example of how FTP works.

It’s different from SSH for several reasons.

SSH is vastly more secure. When FTP was designed, network security wasn’t as important as it is today.

It wasn’t created to be secure and offers no protection for the privacy or integrity of the files that are being transferred. So, information can easily be intercepted.

And if you’re great at using Unix commands, then SSH is probably going to be your best choice. That being said, with FTP, you can use any favorite editor for file editing.

Also, for speed, SSH is quicker.

With FTP, you need to download files to your PC and then upload it to the server using FTP.

With SSH, getting files from server to server with commands is fast, once you learn what commands do what. You can download a library within seconds.

So, for a secure transfer of information, speed, and reliability, SSH is typically the best option.

There’s Never Been a Better Time To Try Our Hosting

I told you we’d talk hosting, and here it is…

As I showed you earlier in this article, setting up SSH with our hosting, it’s an easy way of doing it in The Hub 2.0.

Plus, with our hosting, we offer 24/7 support, our award-winning premium plugins, advanced releases on updates, and much more!

I mention specifically our hosting because this April we’re celebrating Hosting Month!

Yes, it’s a thing. And you can try our hosting for 3-months for FREE.

BTW: We’re also giving away a total of $10K in WPMU DEV credits!

I could go on and on about this big event, so the best thing to do is read all about it here and enter our giveaway at the bottom of this article.

Be sure to join the fun on our social media, too. You can find us on Instagram, Facebook, and Twitter.

We’re having an amazing caption contest this month that’s part of our $10K giveaway and always have tons of other shenanigans socially.

We’ll Fini(SSH) With This…

Now that you’ve dabbled in SSH, you can securely set up your website remotely and have it worked on without being there.

As you can see, it IS like magic!

Okay, in this day and age, maybe I won’t go that far. However, it is a great option for working on your WordPress site remotely.

Add in a dusting of great hosting (waving hand) and you’ll be in good SSH-ape — and I’ll stop with the play on words.

Accessing Cache APIs From Command Line

In addition to a GUI, Python and REST APIs, it is now possible to access your Zato caches from command line. Learn from this article how to quickly check, set, and delete keys in this way. It's particularly useful for remote SSH connections to Zato environments.

Prerequisites

This functionality will be released in Zato 3.2 (June 2020). Right now, if you would like to use it, Zato needs to be installed from the source.

Integration Dotenv With NestJS and Type ORM

When you are using third-party sources for app development, there is a need for the involvement of SSH keys or API credentials. This goes on to become a problem when it is handled by a team of developers. Thus, the source code has to be pushed to Git repositories periodically. Once the code is pushed to a repository, anyone can see it with third-party keys.

A very prominent and widely used solution for this problem is using environment variables. These are the local variables containing some useful information like API keys and are made available to the application or project.