Here are the big categories of rendering websites:
Client: ship a <div id="root"></div> and let a JavaScript template render all of it.
Static: pre-render the HTML.
Server: let a live server process requests and generate the HTML response.
They are not mutually exclusive.
A website could statically pre-render 75% of it’s pages (say, blog posts), but the other 25% have a server respond to (say, forums).
A website could statically pre-render all the pages, but have a couple of empty <div>s in there that have client-side rendered content in them (e.g. a dynamically generated menu based on the logged-in user).
A website could be primarily server-rendered, but has caching in front of it such that it behaves statically.
A website could render statically, but then “hydrate” itself into an entirely client-rendered site.
A website could be a mix of server and static rendering, but have dynamic parts similar to client-side rendering, but actually happen in an edge function, so it ends up more like server-side rendering.
Next.js is interesting in that it can do all three. Here’s Tim Neutkens in a recent interview:
Next.js allows you to pre-render pages. It creates HTML on a server at build time with static site generation or uses run-time rendering on the server side. Next allows you to do a hybrid of those. Unlike most other frameworks, you are not bound by, oh, I’m going to build my app completely statically generated. Instead, you’re allowed to have some pages be server-side rendered and some pages be statically generated.
In the new release we make it possible to update these statically generated pages without having to run a new build, rebuilding your whole app.
Cool. Love to see that happening at the framework level. Seems like having to go all-in on one rendering style isn’t practical for a lot of sites.
Client rendering is the most flexible, but comes with all these serious downsides like worse performance, worse reliability, more strain on devices, bad SEO, etc. Static pre-rendering is the most robust, speedy, and secure, but is the most limited. Edge functions on top of static is starting to open doors, but server-rendering is the classic mix of flexibility and speed that has dominated the web for good reason.
Client rendering also opens the door for that “SPA” (Single Page App) feel. I still like that, personally. I like the no-page-refresh feel. It’s makes a site feel snappy and opens the door for page transitions. Gatsby is famous for popularizing hydration, where you get the pre-rendered static bonus, but then the upgrade into SPA as the JavaScript downloads.
I’d love to see the web get to the point where we get all that “good feel” bonus of an SPA without actually having to build an SPA. It’s notable when frameworks provide SPA feels without having to manage much of that yourself, but still, something is managing it and that something is a bunch of JavaScript.
Tom MacWright wrote about that recently in his “If not SPAs, What?” post. Some of today’s alternatives:
Turbolinks … what is the bare minimum you need to do to get the SPA experience without any cooperation from your application?
Turbolinks is like… click link, click is intercepted, Ajax request for new page is made, JavaScript flops out the content on the page with the new content. Super easy to implement, but it’s still JavaScript, and not particularly intelligent about sending less data across the wire.
barba.js and instant.page are alternative approaches to the same sort of problem.
Barba is all about getting page transitions going (more detail on that concept). instant.page is all about pre-loading/rendering pages right before you click then, so even though you get a page refresh, it feels less intrusive (particularly with paint holding). Both are cool, but not quite one-to-one replacements for an SPA. (Even with paint holding, pre-rendering, and lightweight pages, I still don’t think the experience is quite a smooth as an SPA. For example, you still get the page loading spinner.)
So… is the anything else cooking? Kinda. There is <portal>. Possibly too simplified, but here goes: portals are like iframes. They can even be visually displayed just like an iframe. That means the rendering of the URL in the portal is already done. Then you can “promote” the portal to be the active page, and even animate the portal itself while doing so.
I don’t hate it. I can imagine someone building a turbolinks-like library on portals so they are “easy to use” and make a site more SPA-like.
Still, animating a rectangle into position isn’t often what is desired from animated page transitions. Just look at Sarah’s “Native-Like Animations for Page Transitions on the Web” article. That’s what the people want (at least the possibility of it). That’s why Jeremy said not portals the other day when he cheekily said that “[m]ost single page apps are just giant carousels.” He also points to Jake’s navigation-transitions proposal from a few years back.
I love this proposal. It focuses on user needs. It also asks why people reach for JavaScript frameworks instead of using what browsers provide. People reach for JavaScript frameworks because browsers don’t yet provide some functionality: components like tabs or accordions; DOM diffing; control over styling complex form elements; navigation transitions. The problems that JavaScript frameworks are solving today should be seen as the R&D departments for web standards of tomorrow. (And conversely, I strongly believe that the aim of any good JavaScript framework should be to make itself redundant.)
So what’s the best rendering method? Whatever works best for you, but perhaps a hierarchy like this makes some general sense:
Static HTML as much as you can
Edge functions over static HTML so you can do whatever dynamic things
Server generated HTML what you have to after that
Client-side render only what you absolutely have to
Authentication (logging in!) is a crucial part of many websites. Let’s look at how to go about it on a site using Vue, in the same way it can be done with any custom back end. Vue can’t actually do authentication all by itself, —we’ll need another service for that, so we’ll be using another service (Firebase) for that, but then integrating the whole experience in Vue.
Authentication works quite differently on Single Page Applications (SPAs) than it works on sites that reload every page. You don’t have to make an SPA with Vue, but we will in this tutorial.
Here’s the plan. We’ll build a UI for users to log in and the submitted data will be sent to a server to check if the user exists. If yes, we’ll be sent a token. That’s very useful, because it’s going to be used throughout our site tocheck if the user is still signed in. If no, the user can always sign up. In other words, it can be used in lots of conditional contexts. Beyond that, if we need any information from the server that requires been logged in, the token is sent to the server through the URL so that information can be only sent to logged in users.
The complete demo of this tutorial is posted on GitHub for those that who are comfortable reading through the code. The rest of us can follow through with the article. The starter file is also on GitHub so you can follow through as we code together.
After downloading the repo, you’ll run npm install in your terminal. If you’re going to build this application completely on your own, you’ll have to install Vuex, Vue Router, and axios. We’ll also use Firebase for this project, so take a moment to set up a free account and create a new project in there.
After adding the project to Firebase, go to the authentication section, and set up a sign in method where we would be using the traditional email/password provider, that’ll be stored on our Firebase servers.
After that we’ll then go to the Firebase Auth REST API documentation to get our sign up and sign in API endpoints. We’ll need an API key to use those endpoints in our app and it can be found in the Firebase project settings.
Firebase offers authentication over the SDK, but we’re using the Auth API to demonstrate authentication over any custom back end server.
In our stater file, we have the sign up form below. We’re keeping things pretty simple here since we’re focusing on learning the concepts.
Working with an SPA (using Vue in this case) is very different from the above approach. Instead, we’ll be sending our authorization requests using Vuex in our actions in the store.js file. We’re doing it this way because we want the entire app to be aware of any change to the user’s authentication status.
We can use pretty much the same thing for the sign in method, but using the sign in API endpoint instead. We then dispatch both the sign up and log in from the components, to their respective actions in the store.
We’re taking the authentication data (i.e. the token and the user’s ID) that was received from the sign up/log in form, and using them as state with Vuex. It’ll initially result as null.
We now create a new method called authUser in the mutations that’ll store the data that’s collected from the response. We need to import the router into the store as we’ll need that later.
Inside the .then block in the signup/login methods in our actions, we’ll commit our response to the authUser mutation just created and save to local storage.
Now that we have our token stored within the application, we’re going touse this token while setting up our Auth guard. What’s an Auth guard? It protects the dashboard from unauthenticated users access it without tokens.
First, we’ll go into our route file and import the store. The store is imported because of the token that’ll determine the logged in state of the user.
import store from './store.js'
Then within our routes array, go to the dashboard path and add the method beforeEnter which takes three parameters: to, from and next. Within this method, we’re simply saying that if the tokens are stored (which is automatically done if authenticated), then next, meaning it continues with the designated route. Otherwise, we’re leading the unauthenticated user back to the sign up page.
At this point, we can still see the dashboard in the navigation whether we’re logged in or not, and that’s not what we want. We have to add another method under the getters called ifAuthenticated which checks if the token within our state is null, then update the navigation items accordingly.
Next, let’s open up the header component and create a method called auth inside the computed property. That will dispatch to the ifAuthenticated getters we just created in the store. ifAuthenticated will return false if there’s no token, which automatically means auth would also be null, and vice versa. After that, we add a v-if to check if auth is null or not, determining whether the dashboard option would show in the navigation.
Then, in our logout action , we commit to clearAuth, delete local storage and add router.replace('/') to properly redirect the user following logout.
Back to the header component. We have an onLogout method that dispatches our logout action in the store. We then add a @click to the button which calls the to the onLogout method as we can see below:
We’re almost done with our app. We can sign up, log in, and log out with all the UI changes we just made. But, when we refresh our app, we lose the data and are signed out, having to start all over again because we stored our token and Id in Vuex, which is JavaScript. This means everything in the app gets reloaded in the browser when refreshed.
What we’ll do is to retrieve the token within our local storage. By doing that, we can have the user’s token in the browser regardless of when we refresh the window, and even auto-login the user as long as the token is still valid.
Create a new actions method called AutoLogin, where we’ll get the token and userId from the local storage, only if the user has one. Then we commit our data to the authUser method in the mutations.
We then go to our App.vue and make a created method where we’ll dispatch the autoLogin from our store when the app is loaded.
created () {
  this.$store.dispatch('AutoLogin')
}
Yay! With that, we’ve successfully implemented authentication within our app and can now deploy using npm run build. Check out the live demo to see it in action.
The example site is purely for demonstration purposes. Please do not share real data, like your real email and password, while testing the demo app.
In this tutorial, we will learn how to upload files, images or videos using ASP.NET Web API and React.js. React.js is an open-source JavaScript library used for creating user interfaces, particularly for SPA. It is also used for controlling the view layer for web and mobile applications.
From time to time it is necessary to distribute SPA applications using war files as containers. In my experience this is necessary when:
You don't have control over deployment infrastructure.
You're dealing with rigid deployment standards.
IT people is reluctant to publish a plain old web server.
Anyway, and as described in Oracle's documentation one of the benefits of using war files is the possibility to include static (HTML/JS/CSS) files in the deployment. Thus, it is safe to assume that you could distribute any SPA using a war file as wrapper (with special considerations).
I mentioned on a podcast the other day that I sorta think WordPress should ship with Turbolinks. It's a rather simple premise:
Build a server-rendered site.
Turbolinks intercepts clicks on same-origin links.
It uses AJAX for the HTML of the new page and replaces the current page with the new one.
In other words, turning a server-rendered app into "Single Page App" (SPA) by way of adding this library.
Why bother? It can be a little quicker. Full page refreshes can feel slow compared to an SPA. Turbolinks is kinda "old" technology, but it's still perfectly useful. In fact, Starr Horne recently wrote a great blog post about migrating to it at Honeybadger:
Honeybadger isn't a single page app, and it probably won't ever be. SPAs just don't make sense for our technical requirements. Take a look:
Our app is mostly about displaying pages of static information.
We crunch a lot of data to generate a single error report page.
We have a very small team of four developers, and so we want to keep our codebase as small and simple as possible.
... There's an approach we've been using for years that lets us have our cake and eat it too ... and its big idea is that you can get SPA-like speed without all the JavaScript.
That's what I mean about WordPress. It's very good that it's server-rendered by default, but it could also benefit from SPA stuff with a simple approach like Turbolinks. You could always add it on your own though.
Just leaving your server-rendered site isn't a terrible thing. If you keep the pages light and resources cached, you're probably fine.
I don't doubt this server-rendered but enhance-into-SPA is what has helped popularize approaches like Next and Gatsby.
I don't want to discount the power of a "real" SPA approach. The network is the main offender for slow websites, so if an app is architected to shoot across relatively tiny bits of data (rather relatively heavy huge chunks of HTML) and then calculate the smallest amount of the DOM it can re-render and do that, then that's pretty awesome. Well, that is, until the bottleneck becomes JavaScript itself.
It's just unfortunate that an SPA approach is often done at the cost of doing no server-side rendering at all. And similarly unfortunate is that the cost of "hydrating" a server-rendered app to become an SPA comes at the cost of tying up the main thread in JavaScript.
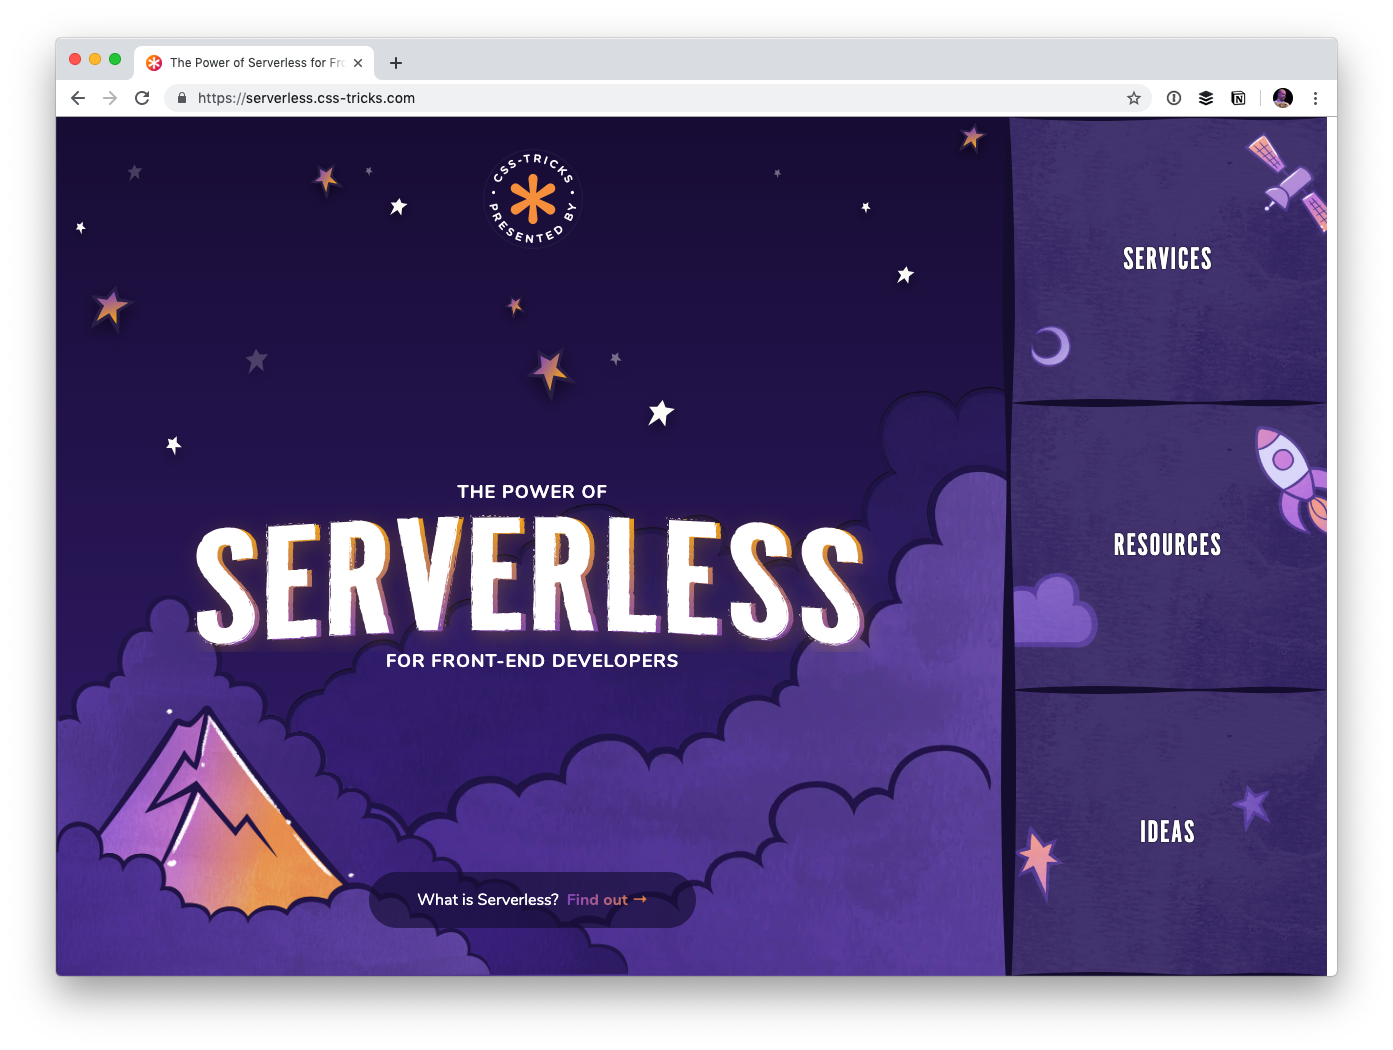
I created a website called The Power of Serverless for Front-End Developers over at thepowerofserverless.info a little while back while I was learning about that whole idea. I know a little more now but still have an endless amount to learn. Still, I felt like it was time to revamp that site a bit.
For one thing, just like our little conferences website, the new site is a subdomain of this very site:
The whole idea behind the serverless buzzword is a pretty big deal. Rather than maintaining your own servers, which you already buy from some other company, you architect your app such that everything is run on commoditized servers you access on-demand instead.
Hosting becomes static, which is rife with advantages. Just look at Netlify who offer blazing-fast static hosting and innovate around the developer experience. The bits you still need back-end services for run in cloud functions that are cheap and efficient.
But you still need to know how to string it all together. Who do you use to process forms? Where do you store the data? What can I use for user authentication? What content management systems are available in this world? That's what this site is all about! I'd like the site to be able to explain the concept and offer resources, but more importantly, be a directory to the slew of services out there that make up this new serverless world.
The site also features a section containing ideas that might help you figure out how you might use serverless technology. Perhaps you'll even take a spin making a serverless site.
Design by Kylie Timpani and illustration by Geri Coady
Kylie Timpani (yes, the same Kylie who worked on the v17 design of this site!) did all the visual design for this project.
If anything looks off or weird, blame my poor implementation of their work. I'm still making my way through checklists of improvements as we speak. Sometimes you just gotta launch things and improve as you go.
Everything is on GitHub and contributions are welcome
I'd appreciate any help cleaning up copy, adding services, making it more accessible... really anything you think would improve the site. Feel free to link up your own work, although I tend to find that contributions are stronger when you are propping up someone else rather than yourself. It's ultimately my call whether your pull request is accepted. That might be subjective sometimes.
Before doing anything dramatic, probably best to talk it out by emailing me or opening an issue. There's already a handful of issues in there.
I suspect companies that exist in this space will be interested in being represented in here somewhere, and I'm cool with that. Go for it. Perhaps we can open up some kind of sponsorship opportunities as well.
Creating with components: A good idea
I went with Gatsby for this project. A little site like this (a couple of pages of static content) deserves to be rendered entirely server-side. Gatsby does that, even though you work entirely in React, which is generally thought of as a client-side technology. Next.js and react-static are similar in spirit.
I purposely wanted to work in JavaScript because I feel like JavaScript has been doing the best job around the idea of architecting sites in components. Sure, you could sling some partials and pass local variables in Rails partials or Nunjucks includes, but it's a far cry from the versatility you get in a framework like React, Vue or Angular that are designing entirely to help build components for the front end.
The fact that these JavaScript frameworks are getting first-class server-side rendering stories is big. Plus, after the site's initial render, the site "hydrates" and you end up getting that SPA feel anyway... fantastic. Yet another thing that shows how a JavaScript-focused front-end developer is getting more and more powerful.
As an aside: I don't have much experience with more complicated content data structures and JAMstack sites. I suspect once you've gone past this "little simple cards of data" structure, you might be beyond what front-matter Markdown files are best suited toward and need to get into a more full-fledged CMS situation, hopefully with a GraphQL endpoint to get whatever you need. Ripe space, for sure.
Internet shopping is about more than just Amazon. It's become a daily activity for most Americans, and e-commerce is a required feature for many projects a developer may encounter. In this tutorial, you'll learn how to build an e-commerce site to sell tickets using an Angular 6 single page app (SPA) and an ASP.NET Core 2.1 backend API. You’ll build both the Angular and ASP.NET Core applications and run them from within VS Code. Let’s get to it!
Upgrade to Angular 6
I love to use the latest and greatest when starting a new project. But when you use a project generator (like Angular-CLI, or the DotNetCLI), you may be at the mercy of the latest version the authors of those libraries have added. Right now, the DotNet CLI generates an Angular application with dotnet new angular gives you an Angular app at about version 4.5, which is about two versions behind the latest. Let me show you how to upgrade the templates and the generated application so that you’re using Angular 6, which is the latest as of the time of this article.
Single Page Apps (SPA) have grown in popularity due to their ability to deliver dynamic user experiences, like those you would expect from a mobile or desktop application, quickly and easily. While SPAs are great from a user perspective, they can be a bit more challenging for your editors to make content changes and updates.
Power your WordPress application with Vue.js – the progressive JavaScript framework that now shares the stage with the likes of React and Angular.
In this article, I’ll show you how to integrate a Single Page Search App within your existing WordPress application with Vue.js – an extremely popular JavaScript framework for developing rich user interfaces. I’ll walk you through the entire process of building a Vue app from the ground up, interacting with the WordPress REST API and creating a search app with Vue’s reusable components.
Continue reading, or jump ahead using these links:
If you’ve never worked with Vue or other modern JavaScript frameworks/libraries, it’s a great time to jump in. While the sheer number of frameworks urging you to up your JavaScript game can be quite overwhelming, Vue makes the journey nothing less than enjoyable.
Note: This article is intended for intermediate-advanced WordPress developers and assumes that you have a working knowledge of PHP, JavaScript, Vue.js and the WordPress REST API. If you’d like a refresher, I recommend that you read through the following:
Familiarity with Vue.js (2.x) is also essential. The Single Page App (SPA) uses many of Vue’s features such as single-file components, custom events, computed properties, lifecycle hooks, as well as Axios to interact with the WordPress REST API. If you’re new to Vue, it’s really easy to pick up, and you can get started in just a couple of hours with these tutorials:
Although Vue apps can be written in pure ES5 syntax, I will be using some new features of JavaScript introduced in versions ES6 and ES7. If you need to get up to speed with ES6, take a look at the following:
Whether you need to use modern JavaScript or Vue.js will completely depend on your requirements and preferences. My goal is to help you explore the possibilities of integrating Single Page Applications in WordPress with a practical Search app. So let’s get started!
Overview of the Vue SPA in WordPress
For this article, I’ve built a Single Page Search app in WordPress with Vue.js using a child theme of the Twenty Seventeen WordPress theme. You can download the child theme from here to follow along with the article.
The Search app can be rendered on any WordPress page using Custom Page Templates. The Page Template basically provides the Vue instance with an existing DOM element to mount on.
Integrating a Vue.js App in WordPress with Custom Page Templates
The app thus adopts a hybrid or a mixed approach, where a server-side application (WordPress) also serves the frontend, but portions of it are rendered with a client-side application like Vue. This is different from a pure SPA that may use a headless or a decoupled CMS, where the server-side engine is only responsible for providing the content (through an API) and does not generate the HTML for rendering it.
Enhancing Search Experience with Vue.js
In a traditional search scenario, each request to the server causes the page to reload. However, with Vue.js or an SPA approach, the page is dynamically updated as the user interacts with the search but without the constant reloads. This makes for a very pleasing user experience. In fact, you can try it out right here in this pen that I’ve created:
My Vue Search app builds on the example from the pen above. So, let’s get a sense of the inner workings of the Search app before diving into the code.
Anatomy of the Vue Single Page Search App
The following infographic explains how the Search App is composed using several reusable components that interact with each other.
Internals of the Vue Single Page Search App
At a high-level, here’s what the various components do:
AppNavigation provides the router links for Vue Router to render the AppQuickSearch and AppCustomSearch components.
AppQuickSearch and AppCustomSearch work as parent components to AppFilterSwitches and AppGetPosts. However, they result in two completely independent Search applications, each equipped with its own of data, methods and properties.
AppFilterSwitches renders input toggle switches that may either be checkboxes or radio buttons depending on the parameters passed to it.
AppGetPosts fetches data from the WordPress REST API and filters it using the search key and toggle inputs. It then calls the AppDisplayPost component for each post in the filtered result.
AppDisplayPost renders the markup for an individual post item and displays it in the search results.
All of this takes place inside a Custom Page Template assigned to a specific page(s) in WordPress.
Using Vue Single-File Components
You may have seen many examples of Vue components created with the Vue.component syntax that use in-DOM templates or JavaScript template strings. However, to build the Search app in WordPress, I’ve made use of Vue’s powerful single-file components instead.
Single-file components have many inherent advantages – the ability to provide pre-compiled JavaScript (render functions) to the browser, syntax highlighting, case-insensitive component selectors, and component-scoped CSS to name a few. They also allow me to write modular and manageable code by splitting the codebase into multiple (.Vue) files.
Now that you have a fair idea of how things work, let’s start building the app.
Using Vue-CLI to Set Up a Local Development Workflow
Splitting the code into multiple (.Vue) files with single-file components will require the use of development tools like Vue Loader, Webpack, Babel etc. However, don’t let this throw you off as I’m going to keep things very simple and not deal with configuration files.
With the Vue-CLI you can quickly scaffold a Vue app that’s pre-configured with the best build tools for a modern frontend workflow. So, let’s set up the CLI first.
Step 1: Install Node.js
To use the Vue-CLI, you’ll require Node.js ( 8.x preferred, npm version 3+) installed on your system. You can download the installer for your platform from the Node.js downloads page here. Once you’ve set that up, test that the following commands work:
node --version and npm --version
Step 2: Install Vue-CLI
Next, open your system’s terminal (PowerShell in my case), and install the Vue-CLI (2.x) globally by running the npm install -g vue-cli command. Once complete, test that it works by running the vue --version command.
Setting up Vue-CLI (2.x) for creating Vue apps
In the image above, you’ll notice that I’ve also installed ESLint globally with npm install -g eslint. This is because I use the Visual Studio Code editor and its plugins to format and lint my JavaScript. You can use any code editor of your choice but configuring one with a JavaScript linter is highly recommended.
With the basic setup done, let’s create an app in WordPress with the Vue-CLI.
Scaffolding a Vue app with Vue-CLI
To create the Vue app, I’ve used the official webpack-simple vuejs-template. However, you may want to use a more sophisticated template based on your requirements.
The template sets up a Vue project with Webpack and configures it with a development server and other modern build tools. This provides us with an elaborate development workflow. Among other things, it allows us to write code using NextGen (ES6/ES7) JavaScript during development, but ship the compiled JavaScript bundle in ES5 for better browser compatibility.
Step 1: Set up the Vue app inside WordPress
To set up the Vue project, navigate to your WordPress theme or child theme using your system’s terminal. Here, I am using PowerShell (in Windows 10) integrated with the Visual Studio Code editor.
Navigate to the directory of your WordPress theme
Step 2: Create a Vue app with the Webpack-Simple template
Next, run the command vue init webpack-simple project-name, substituting project-name with the name of your project (spa in my example), and follow the on-screen instructions.
Scaffolding a Vue app with vue init and a Webpack template
Note: Skip this step if you’re following along with my vuetwentyseventeen child theme. It already contains the app in the spa project folder.
This creates the Vue project inside the <project-name> directory with configurations for modern build tools.
Step 3: Install Development Dependencies
If you head over to your WordPress theme using your code editor, and look inside the newly created project folder, among the many new files, you’ll notice a file called package.json. It basically lists all the development tools that the app will require. These tools still need to be installed though, and to do so, run the following:
cd project-name(substitue project-name with your project-folder)
npm install
NPM will then download and install all the required dependencies in a folder called node_modules
Installing development dependencies with NPM
Note that we won’t be deploying any of these downloaded files in WordPress. They are only required during the development phase.
Step 4: Run the Webpack Dev Server alongside WordPress
The final step involves running the Webpack development server that was installed in the previous step. It may seem strange at first, but you have to run the development server (installed in the previous step), and keep it running along with your local WordPress server (XAMP, WAMP, VVV etc.).
Even though the Vue SPA is a client-side application, it initially needs to be served by a server, and the Webpack server will do this for us. Only when development is complete, will we serve the final JavaScript bundle through WordPress.
To start the development server, run the command npm run dev from the Vue project folder. You will then see the starter Vue app automatically open at localhost:8080 in your browser.
Running the Webpack development server
The Vue Bundle (build.js)
If you look at the page source of the starter app in your browser, you’ll notice that the page contains only a single script file – build.js. This is because when you ran the development server, Webpack automatically compiled the Vue app and bundled it with the Vue library, and any other dependencies into a single JavaScript file.
However, do note that the file does not physically exist on your system, and is dynamically generated by Node and Webpack at runtime.
The JavaScript bundle dynamically generated at runtime by Webpack
To generate a physical build file that you can ship with your app, you have to run npm run build, which we will see at a later stage.
At this stage, we have a fully functional Vue app served by a development server from inside the WordPress theme folder. However, it has nothing to do with WordPress yet. So, let’s look at how you can integrate the Vue app with your WordPress theme.
Integrating the Vue SPA with WordPress
Integrating the Vue app with WordPress essentially requires three things:
A DOM element in WordPress for the Vue app to mount on
Enqueueing the Vue bundle in WordPress
Informing Vue about the DOM mount point in WordPress
Providing the DOM Element in WordPress for Vue
You may want to hook the Vue app on a single WordPress page or multiple pages, or conditionally. All Vue needs is a DOM element that exists on your WordPress page of choice.
For this, you can make use of the WordPress Template Hierarchy to decide the necessary template file that needs to be edited. In my example, I want the Search app to appear on any WordPress page that uses a specific Custom Page Template. You may instead want to use regular Page Templates to target specific pages based on your requirements.
The Custom Page Template templates/vue-search-app-template.php of my example child theme provides the DOM element, #wp-vue-app for Vue.
To let WordPress know about the Vue app, you have to register/enqueue the Vue bundle in WordPress. However, it is not feasible to generate a build file after every modification during development. For this, we can take advantage of the dynamic build that you saw earlier.
For as long as the Webpack development server is running, we can use the dynamic build path http://localhost:8080/dist/build.js to register the Vue script in WordPress.
The Webpack server will also automatically re-compile the Vue bundle and update the page as the app is modified.
Registering the dynamic build path in WordPress during development
This is the reason you have to run both the local WordPress server and the Webpack server during your development. When development is complete, you will have to modify the path to reflect the physical file that’s generated by running npm run build.
Registering the physical build file in WordPress after development
Also note, except for the final Vue bundle, none of the files in the Vue project folder needs to be shipped with your WordPress theme. They are required only during development, and when you have to make modifications to regenerate the Vue bundle.
In my theme example, I’ve registered the Vue bundle in the includes/enqueue-scripts.php
Finally, to load the Vue app in WordPress, all that is required is to tell Vue where to mount itself. This is done by specifying the WordPress DOM element with the el option in main.js of your Vue project. Alternatively, you can also use the $mount method instead.
In my example, I mount the app on the #wp-vue-app DIV container of my Custom Page Template.
Specifying the mount point in Vue using the ‘el’ option
And just like that, the starter Vue app will be rendered in WordPress.
Rendering the starter Vue app in WordPress
Great, with the Vue starter app successfully injected into WordPress, you can now build pretty much anything with Vue. So, let’s get into the details of my Vue Search app.
To build this, I simply used the Vue starter app as a base. I got rid of spa/index.html and src/assets from the Vue project, and arrived at the following folder structure:
Folder structure of the Vue Search app in WordPress
If you’re wondering about the includes folder in the child theme, it’s because I use functions.php only to specify the WordPress Hooks, and define the respective callbacks in individual PHP files under includes/. I prefer this approach to dumping everything in a single functions.php file.
Adding Additional Dependencies for ESLint and ECMAScriptNext Features (Optional)
If you intend to use ESLint (which I highly recommend) or ESNext features like Async/Await, you’ll have to add some additional development packages to your project.
Configuring ESLint for WordPress and Vue
To configure ESLint, I’ve installed the eslint-plugin-vue plugin and the eslint-config-wordpress configuration. To do this, stop the development server (Ctrl+C), and run the following from inside your Vue project folder: npm install --save-dev eslint eslint-plugin-vue npm install --save-dev eslint-config-wordpress
Next, add the following to your .eslintrc.json file: "extends": ["eslint:recommended", "wordpress", "plugin:vue/recommended"]
This will setup the JavaScript Coding Standards for WordPress, and the vue/strongly-recommended pre-defined linting rules for Vue. With modern editors like VS Code, this immensely helps me to catch and fix errors on the fly:
Catching errors with ESLint in Visual Studio Code
Adding Babel Presets for Async/Await
Babel presets are out of the scope of this article, but the following will basically allow you to use ES7 Async/Await in your Vue app. For this, you have to add babel-preset-vue-app by running: npm install --save-dev babel-preset-vue-app
Then, add the preset vue-app to the .babelrc file in your Vue project folder: "presets": [["env", { "modules": false }], "stage-3", "vue-app"]
When you’re done, don’t forget to start the development server with npm run dev. My example Vue child theme has all of this already configured for you, so you only need to install the packages by running npm install from within the spa directory.
Making Local WordPress Data Available to Vue
Vue is ultimately JavaScript that runs in your browser, and so, it won’t have access to any data in WordPress. To make local WordPress data available to the Vue app, you’ll have to use the good old wp_localize_script WordPress function.
I’ve done this in the includes/enqueue-scripts.php of my vuetwentyseventeen child theme.
The gist above should be pretty self-explanatory with all my comments, so I’ll instead focus on the data that I’ve made available to my Vue app:
wpData.template_directory_uri – to build the file path for static assets (like images) in the theme folder
wpData.rest_url – URL to retrieve posts from the WP REST API
wpData.app_path – the SPA WordPress page to build relative links
wpData.post_categories – to render checkboxes for filtering posts
With this out of the way, let’s finally explore the single-file components of the Search app.
Building the Search App with Vue Single-File Components
With the Search app structure chalked out, the first component that I actually built was the AppDisplayComponent. I started off with a very basic component to display only post titles using the JavaScript Fetch APIand the WordPress Posts resource – /wp/v2/posts.
A Basic Version of the AppDisplayPost Component
A very basic version of the AppDisplayPost component to get started
And to render it on the WordPress page, I deleted all of the starter content in App.vue, and invoked the AppDisplayPost component as shown below:
A very basic App.vue to render the AppDisplayPost Component
However, not everything worked on the first try (or even a few after that), which is when the Chrome extension of the Vue DevTools came to my rescue. I’d suggest you have it installed as well, as it will allow you to debug and inspect your Vue application with a more user-friendly interface rather than just logging everything to the console.
Debugging Vue applications with Vue Devtools
I’d also recommend that you use a tool like Postman to interact with the WP REST API. It’ll save you a lot of time understanding the API response, and provides the data in a format that’s much easier to view. This is what I mean:
Using a REST client like Postman to interact with the WordPress REST API
Rendering posts from WordPress in the Vue app did take me a while to set up initially, but after a few rounds between the Vue DevTools and Postman, I was good to go. At this point, I also decided to extend the API response to add custom content.
Extending the WordPress REST API for Custom Content
The default response from the REST API is pretty comprehensive; however, it’s likely that it may not satisfy all your requirements.
For example, you may want to display information such as the author name, comments and the featured image of a post. If you make a GET request to the posts route in Postman (or your preferred REST client), you’ll notice that these are not directly available in the default response. While extending the API is an option here, you can also retrieve these by simply adding the _embed=true parameter to the resource – wp/v2/posts?_embed=true. With _embed, the API will collate all metadata marked with embeddable: true in the post response.
For my Vue Search app, I decided to extend the API instead, and added the following custom content:
Extending the default response of the WordPress REST API
If you look at the final version of the AppDisplayPost component in my child theme, you’ll notice that I’ve used a field vue_meta which is not part of the default response. It was added with the register_rest_field function in includes/extend-api.php of the child theme. The code in there is fairly basic, and to know more about extending the API, take a look at the Modifying Reponses section of the REST API Handbook.
With this, I then moved the logic for retrieving posts to the AppGetPosts component, and only used AppDisplayPost for rendering the required content of individual post items.
The AppGetPosts Component to Consume Data from the REST API
Separating the logic for data retrieval also meant passing the Posts array to AppDisplayPosts via props.
I also decided to use Axios instead of the native Fetch API to retrieve posts from the WordPress REST API. I’m more comfortable using Axios to consume data from APIs but you can also choose to use jQuery (which is already included in WordPress) to make AJAX calls.
Retrieving only Specific Fields from the WordPress REST API
I recently discovered that you can use the _fields parameter to retrieve only the required fields from the API response. This significantly reduces the payload size, especially when you don’t want the post content in the JSON response. To do this, simply add the _fields parameter with a comma-separated list of field-names as values – wp/v2/posts?_fields=id,title,excerpt
Using the _fields parameter to selectively include fields in response JSON
The _fields parameter still needs to find its way into the REST API Handbook, so you might want to keep an eye on it.
Retrieving All Posts from the WordPress REST API
Currently, there is no way to retrieve all posts from the WordPress REST API. To do this, you’ll have to run a loop and make multiple requests to the API until the required data has been fetched.
To calculate the number of API requests, I made use of the Pagination Parameterper_page=100 and the X-WP-Total header field, which provides the total number of records in the collection. The per_page parameter is currently capped at at 100 records, which is why we need to make multiple requests to the API when there are more than 100 posts. You’ll see this in action in the get_posts method of the AppGetPosts component in the gist below:
In the gist above, get_posts is automatically invoked when the component is mounted. I’ve made use of the ES7 Async/Await feature to mark the method as an aynchronous function that contains await expressions.
You’ll notice that the very first Axios request is marked with await – const response = await axios( ... ) . This prevents the subsequent lines of code from executing until the request is resolved. I did this to retrieve the x-wp-total header to calculate the required number of API requests.
The second usage of await is at the end, where it waits for all Promises to resolve with Promise.all before rendering the data on the page. However, you can also render data as soon as it’s available like this:
With the required data available, I then added the search input box and filter logic in a computed property. In the gist below, notice how FilteredResults replaced wpPosts to invoke the AppDisplayPost component.
The AppQuickSearch and AppFilterSwitches Components
With AppGetPosts nicely taking care of the data retrieval and filtering, I then moved the user input to the parent component AppQuickSearch and used props to pass the data down the chain.
I created a new component AppFilterSwitches to render category filters using the localized WordPress wpData object. The component emits a custom event onFilterToggle that the parent component AppQuickSearch must listen to.
Finally, all the components were amalgamated in AppQuickSearch
In the end, I simply enqueued the final build generated by running npm run build.
Generating the final build with npm run build
If you’ve come this far, you should feel comfortable exploring the rest of the app on your own. The final versions of the components do have a lot more but they are built on all that you just saw.
Exploring Routing and Keep-Alive Components
While I could have ended the app with just the quick search, I’ve added another component AppCustomSearch for you to explore Vue routing, and how the various components can be reused easily with the help of props.
The Vue Router is beyond the scope of this article, but you can find the functionality for routing in spa/src/app-routes.js. It provides the mapping between the AppQuickSearch, AppCustomSearch and the navigation links. If you do end up using the Vue router on a WordPress page, just remember that Vue will use the URL '#' to simulate a page, so that it doesn’t reload when you switch between the router links. If you try to exclude the hash (see my comments in app-routes.js), the WordPress Rewrite API will take over, and you’ll end up with a 404 not found.
The App.vue component hosts the AppNavigation and router-view components. You’ll also notice that the router-view is wrapped with keep-alive to preserve the component states and avoids re-rendering of the AppQuickSearch and AppCustomSearch when you switch between them.
That’s it!
Summing Up
I hope you’ve found this article useful. Feel free to play around with my Vue Search app which you can download as part of the twenty-seventeen child theme here. You can use it as a playground to practice and grow your skills in WordPress and modern JavaScript.