The Ultimate WordPress Local Development Cheatsheet

Want to set up a local WordPress development environment without thumbing through pages and pages of documentation? Our WordPress local development cheatsheet will help you get up and running quick smart!

In this ‘no-fluff’ practical guide, we’ll cover briefly what WordPress local development is and some of the key benefits of using it, and we’ll then get straight into how to set up a local environment, install WordPress on your computer, and test your website before going live.

This guide covers the following:

What Is WordPress Local Development?

WordPress local development allows you to create a development environment for building, working, and testing WordPress sites on your computer without affecting your live site.

The local development environment replicates the production server, making it possible to test different scenarios and resolve issues before pushing changes to the live site.

Benefits of Local Development

Some of the key benefits of WordPress local development include:

  • Safe Testing Environment: The local development environment provides a safe space to test new features, plugins, and themes without affecting your live site.
  • Speed, Performance, and Efficiency: A local development environment is faster and more responsive than a remote server. This is because it runs on your computer, so your computer can access and process data much faster than a server, and there is no latency in communication between your machine and the server.
  • Cost-Effective: Setting up a local development environment eliminates the need for expensive hosting services and reduces the costs associated with deploying changes to a live site. You only need a computer and a text editor to get started.
  • Improved Collaboration: Multiple developers can work on a single project simultaneously without interfering with each other’s work.
  • Offline Development: With a local development environment, you can develop your site even when you’re offline.
  • Improved Security: Got a “top secret” project you want to work on? Since a local development environment runs on your machine, it is more secure than a remote server, so you can build and work on your site away from prying eyes. There is no risk of unauthorized access or hacking.

If you’re just getting started as a WordPress developer, see our introduction to WordPress local development article. If you’re already a little more experienced, check out our article on ways to improve your WordPress development workflow in a local environment.

Setting Up Your Local Development Environment

Before you can set up a local WordPress development environment, there are some things you’ll need.

What You’ll Need

In addition to a computer with enough storage space and processing power to support your development work, here’s all you need to set up a local development environment:

Local Server Software

You will need to install a local server software to run your local development environment.

XAMPP, MAMP, and WAMP are three popular options. Each of these local server software packages provide a complete development environment for web developers with all the necessary components (such as Apache web server, MySQL database, and PHP scripting language, in a single package), a control panel to manage these components and a tool to manage the database.

Each software package, however, also has its own unique features with key differences, so it’s important to choose one that meets your specific needs.

Let’s take a brief look at each:

XAMPP

XAMPP
XAMPP

XAMPP is a free, open-source, and easy-to-install web server software that provides a local development environment for web developers. It stands for Apache, MariaDB, PHP, and Perl, the four main components of XAMPP.

Some key features (and pros) of XAMPP:

  • Includes Apache web server, MariaDB database, and PHP and Perl scripting languages.
  • Supports multiple operating systems, including Windows, Mac, and Linux.
  • Easy-to-use control panel for managing web server and database components.
  • Option to install additional components such as phpMyAdmin for database management.

Cons:

  • Not as popular as MAMP or WAMP, so the community support may not be as strong.
  • More complex set-up compared to MAMP or WAMP, requiring more technical knowledge to install and configure components.

XAMPP is best for web developers who require a complete development environment with multiple components and are familiar with configuring and managing these components. It is also best for developers who work on multiple operating systems and need a cross-platform solution.

MAMP

MAMP
MAMP

MAMP is a local server software that provides a development environment for web developers. It stands for Macintosh, Apache, MySQL, and PHP, the four main components of MAMP.

Some key features (and pros) of MAMP:

  • Includes Apache web server, MySQL database, and PHP scripting language.
  • Supported by macOS operating system, but can also be used for Windows-based OS.
  • Easy-to-use control panel for managing web server and database components.
  • Option to install additional components such as phpMyAdmin for database management.

Cons:

  • Can only use PHP scripting language.
  • Fewer components compared to XAMPP, which may limit some developers’ needs.

MAMP is best for web developers who work on the macOS operating system.

For more information on using this option, check out our tutorial on how to develop WordPress locally using MAMP.

WampServer

WampServer
WampServer

WAMP is a local server software that provides a development environment for web developers. It stands for Windows, Apache, MySQL, and PHP, the four main components of WAMP.

Some key features (and pros) of WAMP:

  • Includes Apache web server, MySQL database, and PHP scripting language.
  • Supports Windows operating system.
  • Easy-to-use control panel for managing web server and database components.
  • Option to install additional components such as phpMyAdmin for database management.

Cons:

  • Only supports Windows, so developers using macOS or Linux may need to look elsewhere.
  • Fewer components compared to XAMPP, which may limit some developers’ needs.

WAMP is best for web developers who work on the Windows operating system and who require a complete development environment with basic components.

For more information about this option, check out our tutorial on how to develop WordPress locally using WAMP.

While XAMPP, MAMP, and WAMP are all excellent choices for web developers looking for a local development environment, there are other options available, including Local by Flywheel, DesktopServer, and (if you need to work on WordPress locally on more than one machine) even installing and running WordPress from a USB.

Text Editor

The other component you’ll need is a text editor for WordPress development specifically designed for working with programming languages such as PHP. A text editor is essential for editing code and making changes to your website.

Let’s look at a couple of popular options for text editors:

Sublime Text

Sublime Text
Sublime Text

Sublime Text is a popular text editor that is widely used by developers for coding and scripting purposes. It offers a clean, fast and intuitive interface, making it easy to work with large codebases.

Some key features of Sublime Text:

  • Syntax highlighting and code completion for over 80 programming languages
  • Customizable color schemes, key bindings, and macros
  • Advanced searching and editing tools such as multiple selections, split editing, and column editing
  • Instantly switch between projects with a project-specific settings system

Sublime Text is a great tool for developers who work on projects that require writing code in HTML, CSS, and JavaScript. It offers easy-to-use syntax highlighting, code completion, and editing tools that make the coding process fast and efficient.

Visual Studio Code

Visual Studio Code
Visual Studio Code

Visual Studio Code is a free, open-source code editor developed by Microsoft. It offers a range of features and tools to help developers create and manage large-scale projects.

Some key features of Visual Studio Code:

  • IntelliSense, a smart and advanced code completion and debugging tool
  • Built-in Git support and debugging
  • Supports multiple programming languages and has a large library of extensions
  • Customizable interface and workspace

For additional text editors, see our list of the best text editors for WordPress development.

Have you ticked all of the above requirements?

Computer meets required specs
Selected local server software
Selected text editor

Great! Then let’s move on to the next step…

Installing Local Server Software

For this example, we’ll install XAMPP on a Windows operating system. Use the same process described below to install your chosen local server software on your computer and follow the software package’s specific instructions:

  1. Download XAMPP: Go to the XAMPP official website and download the latest version of XAMPP for Windows.
  2. Install XAMPP: Double-click the downloaded file to start the installation process. Run the downloaded installer file and follow the on-screen instructions to install XAMPP. By default, XAMPP will be installed in the C:\xampp directory.
  3. Start XAMPP: After installation, open the XAMPP Control Panel from the Start menu or desktop shortcut. Start the Apache and MySQL modules by clicking on the “Start” buttons next to each module.
  4. Verify installation: To verify that XAMPP is working correctly, open a web browser and navigate to http://localhost. This should display the XAMPP welcome page.
  5. Create a virtual host: To create a virtual host, follow the steps outlined below.

XAMPP should now be installed and configured on your machine. You’re ready to start developing and testing your websites locally.

Note: The process of installing XAMPP or other local server software, such as MAMP or WAMP, may vary slightly depending on the operating system being used. For Mac and Linux operating systems, you can follow the installation instructions provided on the XAMPP website.

See our other XAMPP-related tutorials for additional information on setting up XAMPP, upgrading XAMPP, troubleshooting XAMPP, and migrating WordPress from a XAMPP localhost to the web.

Setting Up a Virtual Host

Setting up a virtual host in a local development environment allows developers to run multiple websites on their local machine, each with its own unique URL. This provides a more realistic testing environment and makes it easier to switch between different projects.

For the step-by-step guide below to set up a virtual host in your local development environment and start testing your websites:

1. Open the Apache configuration file: Open the configuration file for your local server software. For this example, we’re using XAMPP, so open the Apache configuration file, typically located at /etc/httpd/conf/httpd.conf or C:\xampp\apache\conf\httpd.conf.

2. Enable virtual hosting: Locate the section labeled “# Virtual Hosts” and uncomment the following line by removing the hash symbol (#) at the beginning of the line: #Include conf/extra/httpd-vhosts.conf.

3. Configure the virtual host: Open the virtual host configuration file, typically located at /etc/httpd/conf/extra/httpd-vhosts.conf or C:\xampp\apache\conf\extra\httpd-vhosts.conf.

4. Add a new virtual host: Add a new virtual host by creating a new block of code with the following format:

ServerName example.local
DocumentRoot "/path/to/document/root"
<Directory "/path/to/document/root">
AllowOverride All
Require all granted

Do this:

  • Replace “example.local” with the desired URL for the virtual host.
  • Replace “/path/to/document/root” with the full path to the document root directory for the virtual host.

5. Update the hosts file: The hosts file maps domain names to IP addresses. To make the virtual host accessible via the URL you specified, you’ll need to add an entry to the hosts file. The hosts file is typically located at /etc/hosts or C:\Windows\System32\drivers\etc\hosts. Add a new line with the following format: 127.0.0.1 example.local. Replace “example.local” with the URL specified in the virtual host configuration. Save the changes to the configuration file.

6. Restart Apache: Restart the Apache local web server to apply the changes.

7. Test the virtual host: Test your virtual host by visiting the URL in a web browser. The browser should display the content of the document root directory for the virtual host.

Creating a Database for Your Local WordPress Installation

The next step before setting up a WordPress project locally is to create a database for your local development environment.

Follow these step-by-step instructions to create a database in XAMPP:

1. Open the XAMPP Control Panel: Open the XAMPP Control Panel from the Start menu or desktop shortcut. Make sure the Apache and MySQL modules are running.

2. Access phpMyAdmin: To access phpMyAdmin, open a web browser and navigate to http://localhost/phpmyadmin. This will open the phpMyAdmin interface in your browser.

3. Create a new database: In the phpMyAdmin interface, click on the “Databases” tab. In the “Create database” section, enter a name for your new database and select the “utf8mb4_general_ci” collation. Then, click on the “Create” button.

4. Create a new user: To create a new user for the database, click on the “Users” tab and then the “Add user” button. In the “Add user” form, enter a username and password for the new user, and select “Local” as the host. Make sure to grant all privileges to the user by checking the “Grant all privileges on database” checkbox. Finally, click on the “Go” button.

5. Save your details: Write down or save your database name, username and password. You will need these to connect the database to WordPress later.

After completing the above steps, you will have successfully created a database for your local WordPress installation and local development environment.

You can now use this database to store and manage your data as you develop and test your WordPress site locally.

Have you completed all of the above steps?

Installed local server software
Set up virtual host
Created database

Great! Then let’s move on to the next step…

Installing WordPress Locally

Now that we have prepared our local environment, the next step is to download, install, and configure WordPress.

Downloading and Installing WordPress on Local Server

Follow the steps below to complete this process:

  1. Visit the WordPress website: Go to the official WordPress.org website and click on the “Download WordPress” button to download the latest version of WordPress.
  2. Extract the archive: The WordPress download will be a compressed ZIP file. Extract the contents of the archive to a directory on your computer.
  3. Move the extracted files to your local server: Move the contents of the extracted directory to the root directory of your local server. If you’re using XAMPP, for example, this is typically C:\xampp\htdocs on Windows or /Applications/XAMPP/htdocs on macOS.
  4. Create a database: (Note: if you have been following along, this step should already be done.) Before installing WordPress, you’ll need to create a database. You can do this using a tool like phpMyAdmin, which is included with most local server software like XAMPP and MAMP.
  5. Start the installation: Open your web browser and navigate to http://localhost/wordpress (or the equivalent URL for your local server). This will start the WordPress installation process.
  6. Choose the language: On the first screen, select your preferred language and click the “Continue” button.
  7. Fill in the database information: On the next screen, fill in the database information that you created in step 4. This includes the database name, database username, and database password.
  8. Fill in the site information: On the next screen, fill in the information for your local WordPress site. This includes the site title, username, password, and email address.
  9. Run the installation: Once you’ve filled in all the information, click the “Install WordPress” button to run the installation.
  10. Log in to your site: After the installation is complete, log in to your local WordPress site using the username and password you created in step 8 to start customizing and developing your local site.

You have now successfully downloaded and installed WordPress.

You can now start customizing and developing your site locally, with all the benefits of a local development environment, before deploying your site to a live server.

Configuring wp-config.php File

The wp-config.php file is a crucial component in the setup of a local WordPress installation and local development environment. This file contains configuration settings that control how WordPress interacts with your database and other important settings.

If you have followed the installation instructions above, your database credentials will be automatically added to the wp-config.php file.

If, for any reason, you need to manually configure the wp-config.php file, follow the instructions below:

1. Create a wp-config.php file: If your local WordPress installation doesn’t already have a wp-config.php file, you can create one by copying the wp-config-sample.php file and renaming it to wp-config.php.

2. Update database credentials: Open the wp-config.php file and update the following lines with the appropriate information:

define( 'DB_NAME', 'database_name' );
define( 'DB_USER', 'database_user' );
define( 'DB_PASSWORD', 'database_password' );
define( 'DB_HOST', 'localhost' );

Replace database_name, database_user, and database_password with the values you used when creating the database and user in a previous step.

3. Set the WordPress security keys: WordPress security keys add an extra layer of security to your site by encrypting information stored in cookies. You can generate a set of security keys at the official WordPress site. Copy the generated keys and paste them into your wp-config.php file, replacing the placeholder keys that are already there.

4. Enable debugging: For local development, it’s useful to enable debugging in WordPress. This will provide more detailed error messages and warnings that can help you troubleshoot issues with your site. To enable debugging, add the following line to your wp-config.php file:

define( 'WP_DEBUG', true );

5. Save the changes: Once you have made the changes to the wp-config.php file, save the file and close it.

Successfully configuring the wp-config.php file will ensure that your locally installed WordPress site is able to connect to the database, is secure, and provides helpful debugging information as you develop and test your site locally.

Importing a Live WordPress Site to Local Environment

Follow the steps below if you need to import a live WordPress site into your local environment:

Exporting the Live Site’s Database

To export the live site’s database, you’ll need to have access to the live site’s server.

Here are the steps to export the live site’s database (note: different server environments will perform this differently, but most should follow a similar process):

  1. Log into your live server’s control panel.
  2. Access the database: The first step is to access the database of the live site. You can do this using a tool like phpMyAdmin, which is often provided by your web hosting provider. Look for a section called “Databases” and click on “phpMyAdmin.”
  3. Select the database: Once you’ve logged into phpMyAdmin, select the database for your live site from the left-side panel.
  4. Export the database: Click on the “Export” button to start the export process.
  5. Choose the export format: On the export screen, choose the “Quick” export method, select the “SQL” format and make sure that the “Structure” and “Data” options are selected.
  6. Download the export file: Click the “Go” button to download the export file to your computer.

Importing the Database to the Local Server

To import the live site’s database to your local server, make sure your chosen local server software is already installed on your computer.

Here are the steps to import the live site’s database to your local server:

  1. Open phpMyAdmin in your local server software: Log into phpMyAdmin for your local server and select the database you created for your local WordPress installation.
  2. Import the database: Click on the “Import” button to import the data from the export file you just downloaded.
  3. Select the import file: On the import screen, click on the “Choose File” button, select the export file you just downloaded, and click the “Go” button to start the import process.

Replacing URLs in the Database

After importing the live site’s database, you will need to replace the URLs in the database to match your local development environment.

Here are the steps to replace URLs in the database:

1. Open phpMyAdmin in your local server software.
2. Select the imported database from the left-side panel.
3. Click on the “SQL” tab.
4. Enter the following query in the text area:

UPDATE wp_options SET option_value = replace(option_value, 'http://www.livesite.com', 'http://local.livesite.com') WHERE option_name = 'home' OR option_name = 'siteurl';
UPDATE wp_posts SET guid = replace(guid, 'http://www.livesite.com','http://local.livesite.com');
UPDATE wp_posts SET post_content = replace(post_content, 'http://www.livesite.com', 'http://local.livesite.com');

5. Replace “http://www.livesite.com” with the URL of your live site, and replace “http://local.livesite.com” with the URL of your local development environment.

6. Click on the “Go” button to execute the query.

Uploading the Live Site’s Files to the Local Environment

To upload the live site’s files to the local environment, you will need to have FTP access to your live site’s server.

Follow the steps below to upload the live site’s files to your local environment:

  1. Connect to your live site’s server using an FTP client such as FileZilla.
  2. Navigate to the root directory of your live site on the server.
  3. Download all the files to your local computer.
  4. Place the downloaded files in the root directory of your local development environment, which is usually located in the “htdocs” or “www” folder in XAMPP or other local server software.

Notes:

  1. If you already have a WordPress installation, the above folder won’t be empty and you will be prompted to replace existing files and directories, so replace all files except for the wp-config.php file to keep the same configurations, including the connected databases which have been populated with the live site’s data.
  2. Before uploading the live site’s files to the local environment, you may need to change the file permissions to make the files writable by your local server software.
  3. Also, make sure to test your local WordPress backup before making any changes.

That’s it! You have now successfully imported your live site into your local WordPress installation and local development environment.

Developing and Testing on Local WordPress Site

You’re finally ready to develop and test your site locally using the same data as your live site, giving you a true-to-life environment for testing and development.

Let’s go through the process:

Making Changes and Testing

  1. Log into the local WordPress site: Open your local WordPress site in your web browser and log in to the WordPress dashboard using your administrator credentials.
  2. Make changes to the site: You can make changes to your local WordPress site by editing themes, plugins, or custom code. Simply access these elements from the WordPress dashboard.
  3. Test changes: After making changes to your local WordPress site, it’s important to test the changes to make sure they work as expected. You can test changes by visiting the front-end of your site and checking that the changes have taken effect.

Debugging

  1. Use the Debugging mode: WordPress has a built-in debugging mode that makes it easier to identify and resolve issues on your site. To enable the debugging mode, you need to add the following code to your wp-config.php file: define( 'WP_DEBUG', true );.
  2. Check the error logs: If you’re having issues with your local WordPress site, you can check the error logs to see if there are any error messages or warning messages that can help you identify the issue. The error logs can be found in the WordPress debug log file, which is located in the wp-content directory.
  3. Use debugging tools: There are a number of debugging tools and plugins available for WordPress that can help you identify and resolve issues on your site. For example, the Query Monitor plugin provides detailed information about database queries, plugin usage, and more. See this tutorial for help with debugging WordPress: Debugging WordPress: How To Use WP_Debug

Testing Different Plugins and Themes

Installing, activating, and testing plugins and themes on a local WordPress site works in exactly the same way as it does on any other regular WordPress site. So, make sure to do the following while in testing mode:

  1. Install plugins: Install plugins on your local WordPress site to add new features or functionality to your site. To install a plugin, log in to the WordPress dashboard, go to the Plugins section, and click on the Add New button.
  2. Activate plugins: Activate the plugin you’re testing after installing it to use it on your site. To activate a plugin, go to the Plugins section of the WordPress dashboard and click on the Activate button next to the plugin you want to use.
  3. Test plugins: After activating a plugin, it’s important to test the plugin to make sure it’s working as expected. Test plugins by visiting the front-end of your site and checking that the plugin has taken effect.
  4. Install themes: Install themes on your local WordPress site to change the appearance of your site. To install a theme, log in to the WordPress dashboard, go to the Appearance section, and click on the Themes button.
  5. Activate themes: Activate the theme after installing it to change your site’s appearance. To activate a theme, go to the Appearance section of the WordPress dashboard and click on the Activate button next to the theme you want to use.
  6. Test themes: After activating a theme, it’s important to test the theme to make sure it’s working as expected. Test themes by visiting the front-end of your site and checking that the theme has taken effect.

Have you make all the changes you need, debugged issues, and tested different plugins and themes on your local site?

Great! Now you’re ready to make your local WordPress site live.

Deploying Local WordPress Site to Live Server

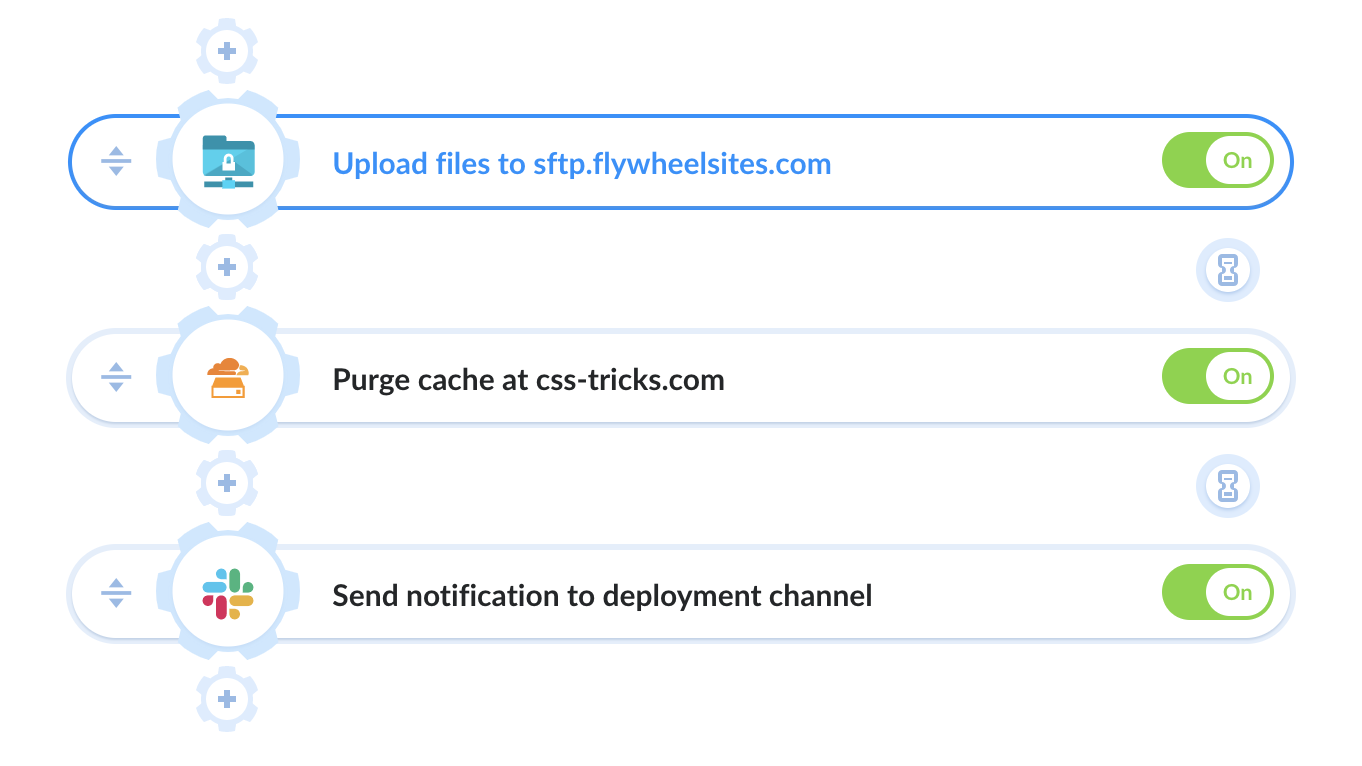
The final step in this process is to export all of your local WordPress files and database to your live hosting environment and make sure that all of your site’s changes, configurations, and URLs are working on your live site.

Exporting the Local Site’s Database

Follow the steps below to export your local WordPress site to your live server:

  1. Log in to the local site’s database using PHPMyAdmin.
  2. Select the database you want to export.
  3. Go to the “Export” tab.
  4. Choose the “Quick” export method.
  5. Select the “SQL” format.
  6. Click “Go” to download the SQL file to your computer.

Importing the Database to the Live Server

Follow the steps below to import your local WordPress database’s export file into your live site:

  1. Log in to the live server’s database using PHPMyAdmin.
  2. Create a new database for the live site.
  3. Go to the new database and select the “Import” tab.
  4. Choose the exported SQL file from your local site.
  5. Click “Go” to import the database.

Now that you have migrated the database over from your local site to your live site, let’s do the same for your site’s files.

Uploading the Local Site’s Files to the Live Server

Follow the steps below to upload your local WordPress site’s files into your live site:

  1. Prepare the files: Before uploading the local site’s files to the server, it’s a good idea to review and clean up the files. This may include removing any unnecessary files, such as backups or test files, to minimize the amount of data being uploaded.
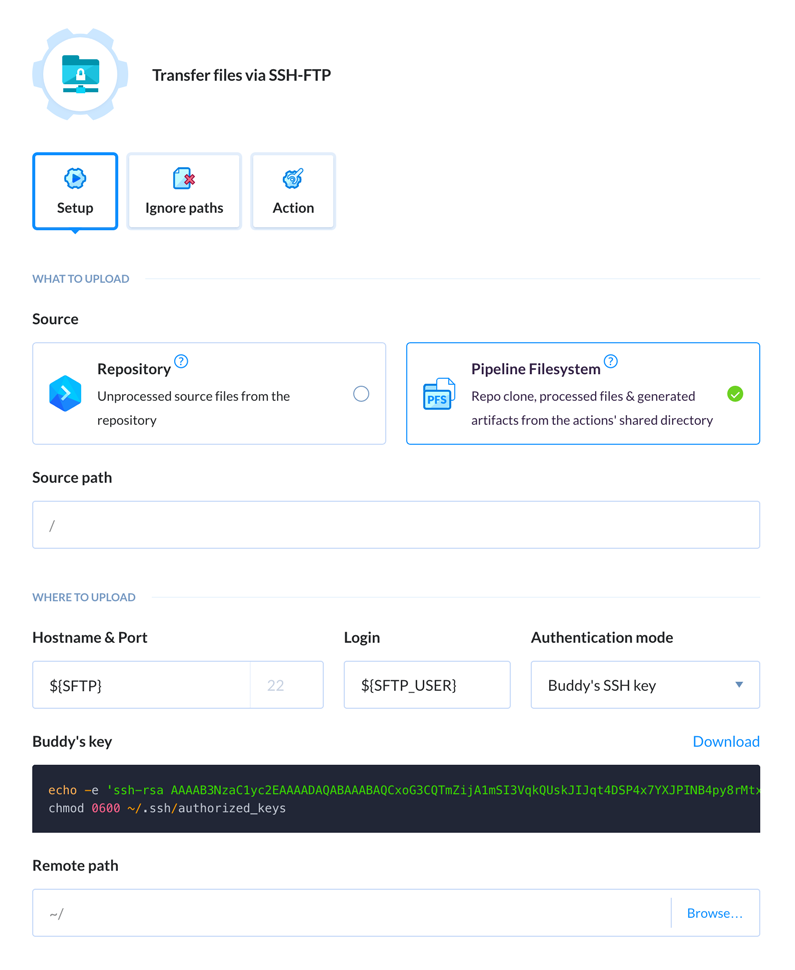
  2. Connect to the server: You can connect to the server using a variety of methods, such as FTP or SFTP. You will need to use a client software, such as FileZilla, to connect to the server. You will need to provide your server host, username, and password to connect.
  3. Upload the files: Once you are connected to the server, you can upload the local site’s files to the server. You can upload the files in a number of ways, including uploading individual files or uploading the entire local site folder. Navigate to the root directory of the live site on the server. Upload all the local site’s files to the live site’s directory on the server, and replace the existing files if prompted.
  4. Update the database information: After uploading the files to the server, you will need to update the database information in the wp-config.php file to reflect the live site’s database information. Open the wp-config.php file in a text editor and update the database name, username, and password to match the live database.
  5. Update URLs in the database:  See the section below.
  6. Test the site: After uploading the local site’s files to the server, it’s a good idea to test the site to make sure everything is working correctly. This may involve testing the site’s functionality, links, and images to make sure they are working as expected.

Updating URLs in the database

You can update the URLs in your database using a text editor or by working directly in your database (make sure your database is fully backed up before making changes).

Updating URLs Using a Text Editor

Follow the steps below to update the URLs in your database using a text editor.

  1. Export the database: Before updating the URLs in the database, you will need to export the database. Use your database management tool (e.g. phpMyAdmin).
  2. Find and Replace the URLs: Once you have exported the database, you will need to find and replace the URLs in the database. You can do this using a text editor such as Sublime or Visual Studio Code. Search and replace the URLs, and make sure to replace the URLs carefully and thoroughly, including URLs in serialized data.
  3. Import the database: After updating the URLs in the database, you will need to import the database back into your local development environment. You can import the database using a database management tool, such as phpMyAdmin.
  4. Test the site: After importing the updated database, it’s a good idea to test the site to make sure everything is working correctly. This may involve testing the site’s functionality, links, and images to make sure they are working as expected.

Updating URLs in the Database

Follow the steps below to update the URLs directly in your database:

1. Log in to the live site’s database using PHPMyAdmin.
2. Select the live site’s database.
3. Go to the “SQL” tab.
4. Run the following SQL query to update the URLs:

UPDATE wp_options SET option_value = replace(option_value, 'http://old-url', 'http://new-url') WHERE option_name = 'home' OR option_name = 'siteurl';
UPDATE wp_posts SET guid = replace(guid, 'http://old-url','http://new-url');
UPDATE wp_posts SET post_content = replace(post_content, 'http://old-url', 'http://new-url');

Replace “old-url” with the URL of the local site and “new-url” with the URL of the live site.

5. Click “Go” to run the query.
6. This will update all references to the local site’s URL with the live site’s URL in the database, ensuring that all links and images on the live site work correctly.

If you have followed the above steps correctly, the URLs in your database should have successfully updated. After these steps, your local WordPress site should now be fully functional on the live server. Make sure to thoroughly test the live site to ensure that all features are working correctly, and make any necessary adjustments to ensure a seamless transition from the local development environment to the live server.

Local Development vs Webhost Staging Environment

While WordPress local development provides a safe and efficient environment to build, edit, and test WordPress websites, you may decide to work in a webhost staging environment instead (here are some good reasons why you may not want to develop WordPress locally).

Both local development environments and webhost staging environments, however, have their pros and cons.

Here is a brief overview of the pros and cons of using a WordPress local development versus a webhost staging environment:

Pros of Local Development Environment

  • Easy to Use: Local development environments are easy to use, even for beginner developers.
  • Flexibility: You have complete control over your local development environment, so you can configure it however you like.
  • Test Any Changes: With a local development environment, you can test any changes you make to your site without affecting the live version.

Cons of Local Development Environment

  • Not a Live Environment: A local development environment is not a live environment, so you cannot test your site with live data.
  • Limited Resources: Your local machine may have limited resources, such as memory and processing power, which can affect your site’s performance.
  • Not a True Representation: A local development environment may not accurately represent a live server environment, so testing may not be 100% accurate.

Pros of Webhost Staging Environment

  • Live Environment: A webhost staging environment is a live environment, so you can test your site with live data.
  • More Accurate Testing: A webhost staging environment is a more accurate representation of a live server environment, so testing is more reliable.
  • More Resources: A webhost staging environment typically has more resources available than a local development environment, so your site’s performance will be better.

Cons of Webhost Staging Environment

  • Cost: Setting up a webhost staging environment can be expensive, as you have to pay for hosting and a domain name.
  • Not as Fast: A webhost staging environment is not as fast as a local development environment because it runs on a remote server.

For smaller projects, a local development environment is a great option because it is free and easy to use. For larger projects, however, a webhost staging environment may be a better option because it is a live environment and provides more accurate testing.

Ultimately, the choice between these two methods will depend on your individual needs, preferences, and hosting options.

Note: We recommend avoiding shared hosting, and hosting on our Quantum plan instead for basic WordPress sites, but if you have reasons for choosing shared hosting, then check out our article on how to run WordPress local development on shared hosting.

All WMU DEV hosting plans (except for Quantum) include a staging environment. Refer to our staging documentation for more details on the benefits of using a staging environment to develop and test WordPress sites.

Your Hosting Backups Are Automatically Safe With WPMU DEV…100% Guaranteed!

Fire, flood, rain, or shine, WPMU DEV’s managed WordPress hosting keeps your backups safe and fine.

If you follow IT-related news, you may recall the March 2021 fire that destroyed one of Europe’s largest hosting provider’s data centres in Strasbourg, France, knocking out major websites around the world.

News report - fire burns down OVHcliud's data center in Strasbourg.
Does your website disaster recovery plan include total hosting backup redundancy? Source: ChannelDailyNews.com

In this post, we explain why this will not happen to sites hosted on WPMU DEV’s managed WordPress hosting and how we guarantee that if your site should ever fall down, you will instantly get it back up.

Automated Hosting Backups for Ultimate Peace of Mind

Every WPMU DEV hosting plan includes access to our world-beating automated (and manual) hosting backups system.

So, what exactly does this mean?

In a nutshell…whether you host one or one thousand sites with us (single installs or multisite) on any plan, your backups are completely and automatically safe, even if the worst data-center-burning-down circumstances were to happen.

Here is exactly how this works…

First, set up your site on any of our blazing-fast, easy, and best-supported managed WordPress hosting plans.

That’s it!

Your hosting will be instantly and automatically configured for nearly instantaneous and extremely space-efficient hosting backups using the latest in advanced server-based technology, giving you ultimate peace of mind in the form of:

  • Nightly incremental backups.
  • Automated incremental hosting backups prior to critical events like WordPress updates, pushing staging sites to production, selecting a new primary domain, and updates using our automated schedule plugin.
  • A full backup of your site created every 15 days (automatically, of course!)
  • Various options available to create manual and cloud back ups of your site at any time.
  • Fast, one-click restores and exports.
  • No additional fees for hosting backups or their storage.

So, if anything happens to your site, you can get it all back (everything up to the last backup) quickly and easily with just one click.

But…what if the data center burns down?

Ahh…this is where our hosting backup system really shines.

We give you…

30 Days Of Remote & Off-Site Backups

As stated in our hosting backups documentation

“A copy of the most recent backup is stored locally to speed up subsequent backups. All other backups are encrypted and stored in a remote datacenter in the same general region as your site (USA, EU, Canada, etc) and are redundantly stored on multiple devices across multiple facilities.”

Do your due diligence and research some of the top hosts and you’ll discover that while most provide site backup services, not all offer remote redundancy and automated backup storage on multiple devices across multiple facilities.

WPMU DEV does.

We give you unlimited backups stored for 30-days with no extra backup storage charges.

Our hosting backups are managed offsite by AWS so that in the unlikely case our data centers burn down or disappear beneath the waves your backups will still be safe.

Manual Backups for Extra Protection

In addition to our automated hosting backup methods, we also give you several options to manually backup your site(s) files and data, including:

The Hub - SFTP/SSH screen
Easily create SFTP or SSH accounts in The Hub and use these accounts to back up your sites manually at any time.

One-Click Backup Restores and Exports

Exporting and restoring your backups is just as easy as creating them.

Simply go to The Hub, select your site, and click on the Backups tab to bring up a list of all your backups, then click on the little arrow next to the backup you’d like to export (download) or restore.

The Hub - Backups list
Select the backup you’d like to restore from the list of backups…

This will bring up the Backup Details screen. Click on the Restore button to restore your backup or the vertical ellipsis to view your options.

Backup details screen
We’re just one click away from restoring or downloading our backup.

Select an option, click a button…and you’re done!

Restore backup
Click Restore and you’re done!

Your backup files and data will be automatically restored to your site or generated for export and sent to your email for downloading.

Alternatively, if you don’t want to use The Hub, you can restore your backup manually via WP CLI.

WP-CLI Restore Backup
Restore backups via WP-CLI.

See our documentation for step-by-step instructions on how to set up an SSH user, log into the server and use custom commands to restore your backups via WP-CLI.

All the Backup Protection You Need Upfront!

With WPMU DEV, your sites are safe, secure, and protected right from the “get-go”.

Most of our users choose to take advantage of our membership option. This includes access to:

  • World-class managed WordPress hosting and world-beating hosting backups for all your sites.
  • 24/7 expert technical support for everything WordPress related.
  • The Hub (our all-in-one unlimited site management tool).
  • A complete suite of Pro plugins, covering everything from security, optimization, and SEO, to site migration, marketing, and analytics.
  • And much more (hint: how about getting a complete WordPress business in a box).
Hub backups
Use The Hub to manage hosting backups for unlimited sites.

Our plugins include Snapshot Pro and Automate, which give you additional backup features and automation for complete peace of mind.

Snapshot Pro supports various third-party backup storage locations (Amazon S3, Google Drive), giving your hosting backups even greater protection.

Snapshot dashboard
Use Snapshot to backup and restore WordPress data to third-party storage destinations.

Automate lets you schedule and create a new backup before every theme, plugin, or core update…automatically!

Automate plugin from WPMU DEV.
Schedule automated backups before updating your site’s core WordPress software, plugins, and themes with Automate.

We Got Your Back(up)

Even the most die-hard fan of dystopian fiction would be hard-pressed to imagine a situation where our hosting backups system would not be able to immediately recover their site’s last backup. Unless of course, they are not hosted with WPMU DEV…and forget to make a backup!

Learn more about our hosting backups in our hosting documentation or contact our team if you have any questions. If you’re new, check out our unbeatable WordPress hosting service for yourself with a 7-day membership trial and discover what ultimate peace of mind really means today.

So You’ve Been Hacked! How to Clean Up a Hacked WordPress Site

You visit your WordPress site and, wait a minute…it looks different. There were some changes made that you didn’t create yourself. So, you go to log in to take a peek around and fix the issues. However, it’s not letting you log in. Uh-oh. It looks like your WordPress site was (gulp!) hacked.

As concerning as that is, take a deep breath, relax, and know that there’s a path to get your website back into your control from hackers. And we’ll break it all down for you in this article.

Along the way, you’ll see how to resolve many hacking issues for free with the help of our WordPress security plugin, Defender.

I’ll be going over:

Plus, there’ll be some resources to prevent this from happening in the first place.

After reading this article, you’ll be able to be prepared for any hackers, know how to handle an attack, get your site under your control in no time — and breathe a sigh of relief.

Reasons Your WordPress Site was Hacked

All websites are susceptible to hacking, not just WordPress sites.

WordPress, in fact, is quite a secure platform. So, just because you’re using WordPress isn’t the only reason you might become a victim.

The thing is, WordPress is so popular that WordPress sites are frequently the target of hackers. There are just many WordPress sites worldwide, making the odds go up.

With that in mind, why do sites get hacked?

Hackers have their reasons. It could be because they want to use your WordPress site to attack other sites. Or, possibly the hacker has malicious intentions, like stealing personal data.

There’s a multitude of objectives why sites get hacked. Sometimes, it’s just a fun activity for a hacker to do on a Sunday afternoon while sipping on a mocha.

And it’s done in many ways, too.

It might just boil down to someone having your WordPress admin username and password. Or, it might be that you have insecure web hosting, which makes your site vulnerable to hacking attempts.

Plus, if your site is vulnerable, it’s more prone to attacks.

Here are several reasons why your site may have been targeted:

Weak Passwords: Most brute force attacks rely on weak or easily guessable login passwords (e.g. passwords related to names, places, birthdates, or mobile numbers).

Incorrect File Permissions: File permissions consists of a set of rules used by your web server. They assist your web server control access to files on your website. If you have incorrect file permissions, it can give a hacker access to change your files.

Outdated WordPress Theme or Plugins: If you have an outdated theme or plugins, they’re frequently littered with security flaws and bugs, making your site vulnerable.

WordPress Isn’t Updated: It’s vital to keep your WordPress up-to-date. What’s important to know is WordPress releases new updates for a reason. New versions of WordPress fix security issues and bugs.

All this goes without saying if you have a WordPress site — you can be hacked. However, with adequate prevention, it’s more likely to avoid hacking attempts and keep your site safe.

For more information about keeping your site secure, check our article on ways to secure your WordPress site for free.

Signs You’ve Been Hacked

As I mentioned in the introduction, you may notice things aren’t right. After all, it’s your website, and you’re used to how it looks and functions — so you catch on quickly when things look weird.

Sometimes, it’s harder to catch that your site has been hacked (e.g. malicious code); however, the signs are usually pretty clear.

Dev Man in front of a hacked computer.
It’s clear to Dev Man that something’s not right.

Here are some sure signs that your WordPress site was hacked. There’s also a quick explanation of why this may have happened, along with the reasons.

  • Your Site Redirects to Another Site: A redirect can occur when a hacker adds a script that redirects people to another site when they visit yours.
  • You Can’t Log In: Before jumping to conclusions about being hacked, make sure it’s not a matter of you just forgetting your password. If you conclude that forgetting your password is not the case, a hacker may have changed your password to prevent access or removed your account.
  • Sudden Drop in Traffic: This can happen if malware and trojans hijack your WordPress site’s traffic and have it redirected. Traffic drops also occur if you end up on Google’s blocklists, which can be the case if your site gets hacked.
  • Your Site was Changed: Change of a homepage to a static page links to unsavory sites, or a footer with links that you didn’t add, are all good signs of hacking. Site changes can happen if a hacker gains access to your admin. Be sure to check with any administers that have access to your site to confirm that they didn’t make the changes themselves.
  • Bad Links Added to Your Website: Same as your site being changed, this can happen if a hacker gets access to your admin.
  • Unknown File Scripts: If you find this, it could mean your website was compromised by a hacker who added malware or some other malicious software. This can happen if your website is susceptible to attacks (e.g. outdated, insecure theme).
  • Suspicious User Accounts in WordPress: Your site may be compromised, and a hacker created a new account in the admin. If you have a registration option on your site, be sure to double-check that to ensure it’s not just a user. Typically, a hacker account will have an administrator role.
  • You Get Notifications from Defender: Our answer to security, Defender, will give you detailed security reports and lets you know about suspicious activity. If some red flags occur, you may have been hacked.
  • Slow or Unresponsive Website: A DDoS attack can cause this. Check out this article to learn more about how and why they occur.
  • Google Gives a Warning that Your Site May be Hacked when Searched: Google may display a warning sign when your site is searched. This might be an indication that your WordPress sitemap has been hacked.

If you’ve noticed one or more of these signs and feel like your site may have been hacked, it’s crucial to take action as quickly as possible. Let’s take a look at what to do next.

13 Things You Can Do Once You Know You’ve Been Hacked

There are several steps you can take once you believe you’ve been hacked. Keep in mind that some of these steps may not be necessary. It all depends on what kind of attack from a hacker occurred.

These steps should give you a clear path, regardless of attack, on ways to get back in control of your WordPress site as quickly as possible.

  1. Don’t Stress: It’s essential to relax and be as clear-headed as possible when fixing a hacked site. Meditate, have a moment of Zen, or do whatever you can to try not to stress out about the situation. It’ll more than likely be okay, and you need to focus on getting things fixed.
  2. Reinstall WordPress Core: You might need to reinstall WordPress if the WordPress core files were compromised. A new installation will replace them. You can read more about reinstalling WordPress in this article.
  3. Reinstall Plugins and Themes: If you updated your plugins and themes and are still experiencing issues, delete them, and then have them reinstalled. If you question whether the plugin or theme is secure, be sure to investigate how updated it is and use your best judgment on whether to continue using it. If it was a free plugin or theme, you might want to reconsider installing it and opt for a premium version or an updated plugin or theme from the WordPress plugin or theme directory. Bottom line: make sure whatever theme or plugin you reinstall is updated, safe, and won’t be the cause of any security issues.
  4. Backup Your Site Immediately: A premium plugin like Snapshot Pro is an easy way to backup your site. Just ensure you have it backed up before tackling any hacking issues.
  5. Locate What Was Hacked: Do a rundown of the issue(s) and determine what the hack is (see the list above).
  6. Put Your WordPress Site in Maintenance Mode: To ensure visitors don’t see your site in a compromised state, put your site in maintenance mode with the help of a plugin like Branda. Of course, if you can’t log in, this can’t be possible. When you can log in again, and there’s still some cleaning up to do, then put it in maintenance mode at that time. Also, in some cases, it’s better if the site is turned off completely to prevent any access. That way you can avoid running any PHP code. For example, if the malware runs code on each WordPress load, putting it in maintenance mode won’t change a thing, as visitors might still open the site and the maintenance mode still triggers a WordPress load. Therefore, you end up cleaning and the code is getting re-added, which leads to a never-ending cycle.
  7. Contact Your Hosting Company: Good hosting companies can help determine the situation and advise. For example, they might be able to tell you where the hackers found their way in from. If you host your site(s) with us, we offer 24/7 customer support to assist with any hacking issues, including cleanup for infected sites.
  8. Contact Support: If you’re with a website support management company, it might be best to contact support before proceeding with DIY repairs, depending on the level of hacking. Like with our hosting, we have 24/7 support for all WPMU DEV members and can guide you through what’s best to do in your situation. Contacting support is good to do early or if you try to fix the issue independently and can’t.
  9. Reset Your Passwords: If you can access your admin, change all of your passwords. This ensures that a hacker can’t use your password if that was how it gained entry. Choose a strong password for your login, and reset the SFTP, database, and hosting password with your provider as well. Also, consider limiting the number of login attempts, and enabling two-factor authentication.
  10. Update Plugins and Themes: Ensure that all of your plugins and themes are up to date. It’s vital to tackle this before trying other fixes. If it’s a plugin or theme that’s the culprit, any other fixes you may try may be undone by the vulnerabilities.
  11. Remove Users: Search your users in the WordPress admin and remove any users you don’t recognize.
  12. Get Rid of Unwanted Files: Our plugin, Defender, can scan for files that may be from hackers. It’s important to remove these corrupt files as quickly as possible (more on this to come). Just be sure they are unnecessary files before deleting them.
  13. Clean Your Database: You’ll want to clean this up if your database was hacked. This will ensure that you have less stale data and aren’t taking up a lot of space, which in return will make your site faster.

Following some of these necessary steps will help you get your site back in no time from the grasp of a hacker that wreaked havoc on it.

That being said, it can’t be emphasized enough to make sure that you know how to clean up your website the right way after a hacker attacks it. The goal of cleaning up your site after an attack is to get it back the way you had it, so you don’t want to wreck your site trying to do it yourself if you’re not sure how.

If you have any questions on what to do, it’s important to contact support or get in touch with a professional.

How to Clean a Hacked WordPress Site with Defender

Luckily, depending on the type of hack, a lot can be done with our free security plugin, Defender. He’s been mentioned already several times throughout this article, and here’s a detailed look at what he can do after an attack.

This section is a four-step guide if it appears malware may be the cause of the hacking.

Here are the steps we’ll be taking:

  1. Scanning for Malware in One-Click
  2. Deleting Infected Files
  3. Running Another Scan
  4. Setting Up Notifications and Schedule Automated Scans

Keep in mind that Defender works as a great preventative measure as well, so you don’t get hacked in the first place. To get a glimpse at what all he can do, be sure to read our article on getting the most out of Defender.

If you were hacked, let’s check out what you can do to clean up the mess with Defender.

1. Scan for Malware in One-Click

To determine if malware might be an issue with your website, the first thing to do is scan WordPress’s core files for malicious code.

That’s done from Defender’s dashboard by tapping New Scan.

A new scan in Defender.
The blue New Scan button will get things moving.

It will be just a few moments for Defender to check out your site’s core files for malware.

A new scan in Defender.
Defender looks on as he actively scans for malware.

If any issues are detected, Defender will let you know how many were found.

The number of malware scan issues.
It looks like Defender found a few things that could be wrong.

Please note that the free version of Defender will scan WordPress’s core files. If you want him to scan other areas, you’re able to with Defender Pro. Defender Pro’s additional scanning includes:

Plugins & Themes: Plugins and themes are scanned for known, publicly-reported vulnerabilities.

Suspicious Code: Crank-up scanning a notch by scanning all site files for suspicious PHP functions and code.

Since we detected some issues, let’s get them taken care of.

And for more on scanning your WordPress site for malware, check out this article.

2. Delete Infected Files

After a scan, you can easily find all of the issues that Defender spotted in the admin’s Issues section.

Here, Defender discloses the issue. He will tell you detailed and specific information, including:

  • Issue Details: A brief description of the issue and a snippet of code
  • Location: Where the issue’s file path is located
  • Size: The suspicious file’s size
  • Date Added: This shows the date and time that the code was added to the WordPress site.

You then have the option to Delete or Ignore the code.

If you want to get rid of the issue immediately, you can in one-click by hitting the Delete File button.

suspicious code in Defender.
Delete the code in one-click.

If you decide to delete the file, it will be deleted permanently. The bad code will no longer be a problem.

Plus, you can delete things in bulk if there are numerous issues.

Bulk actions in Defender.
Take care of a lot of issues in one click.

Wiping-out bad code can’t get much easier after a hacker attacks your site.

A note of caution: It’s important to be 100% sure that something is harmless before deleting and/or ignoring it. Contact one of our experts 24/7 if you’re unsure or need advice.

Please read our article about finding and deleting suspicious code with Defender for more detailed information.

3. Run Another Scan

If you deleted suspicious code from your site, just like you ran a scan the first time, do it again to ensure that all of the issues are taken care of.

4. Set Up Notifications and Schedule Automated Scans

Ensure that you stay on top of any hacking activity by setting up notifications and automated scans in Defender. It’s easy to do and one of the most effective ways to know if you’ve been hacked.

In the Notifications section, you can configure what notifications you want to enable, add recipients for the notifications, schedule reports, and configure reports.

You can set up the Notifications for:

  • Security Recommendations
  • Malware Scanning
  • Firewall

And you can set up Reporting for:

  • Malware Scanning
  • Firewall
  • Audit Logging

Enable notifications individually or in bulk.

Choose what notifications and reporting you want: Individually or in bulk.

Set up users you have in your admin, or invite by email, that you’d like to receive notifications.

Where you add recipients to get email notifications.
Add as many users as you’d like.

You can schedule Security Notifications to be delivered daily, weekly, or monthly.

Where you schedule a scan.
In this example, it’s set for monthly.

When it comes to Reporting, customize the frequency, day of the week, and time to deliver reports.

Where you schedule notifications.
This report will get delivered to recipients Sundays at 4 AM.

You’re now set up to be aware of malware hacking issues and immediately take care of them.

There’s a ton more you can do with Defender when it comes to security, such as setting up a firewall, IP lockouts, and two-factor authentication.

Getting Your Site Off of Google Safe Browsing List

Once you have your site back in your hands and cleaned-up from any destruction a hacker caused, it’s essential to make sure you’re not on Google’s Safe Browsing List. If you are, it’s vital to get off it.

Luckily, it’s quick and easy to do. There are six main steps to take

    1. Begin by signing-in to Google Webmaster Tools.
    2. Add your WordPress site if you haven’t already.
    3. Follow Google’s instructions and verify your site.
    4. Select your site on the Webmaster Tools home page.
    5. Click on Site status, and then Malware.
    6. Click on Request a review.

After you submit a request to have your site reviewed, the timeline for the review to be processed varies depending on what type of attack you had. Here’s a look at the different timelines for review process times:

Hacked with Spam: Several weeks

Malware: A few days

Phishing: A day

Once Google determines that your site is clean, warnings from browsers and search results will more than likely be removed within 72 hours.

If your site request wasn’t approved, be sure to reassess your site for malware, spam, or any modifications that may have been caused by a hacker. Then, you can always submit it again for review.

Cleaning Up

You wake up and go to your website’s URL. After taking a look around, it’s perfect. Everything is in order, and there’s no evidence of a hack anywhere. Whew! It looks like you cleaned-up the hacker’s mess, and you’re protected a bit better now.

Hopefully, it won’t happen, but if a hacker does attack again, you’ll be ready to move quickly and get your site back with ease. With plugins like Defender and the tips mentioned in the article, the process of getting your site back into your control usually isn’t as daunting as you might think.

We have a lot more information about cleaning up your site after a hacking. After all, it can leave a mark. It’s not as simple as grabbing some rubber gloves and stain remover to make your site nice and shiny again.

Be sure to read our article How I Cleaned Up My Site After it Was Hacked and Blocklisted, and Have You Been Hacked? How to Clean Your Site and Get Off Google’s Blocklist.

Also, this is #SecurityMonth, so you can currently get 35% off your first year of our Security & Backups Pack featuring Defender Pro, Snapshot Pro, Shipper Pro, and Automate to help clean up your security. Click on the coupon below to unlock the exclusive deal.

35% Off Security & Backups Pack

With what we’ve mentioned in this article and our other resources, you should have your WordPress site clean in no time.

Multi-Protocol File Transfer API Integrations in Python Using Zato

In many domains, the transfer of static and batch files is an important part of systems integrations and a large number of applications produce and expect data in the form of files rather than network-based APIs. In this article, we shall see how Zato makes multi-protocol integrations of this kind possible in a way that is secure, scalable and easy to extend in Python.

File transfer is often found in scenarios such as:

How to Migrate a WordPress Multisite Subsite to a Single WordPress Site

Splitting a WordPress multisite network into single WordPress websites used to be quite challenging and downright clunky…until now! Shipper makes moving a website from a WordPress multisite network to a single WordPress install hosted on its own domain a breeze.

There are many benefits and advantages to running a multisite network. There are times, however, when you may want to take a site from a multisite network and set it up as a single WordPress site on its own domain.

In this post, we look at:

Why Split a Subsite From a Multisite Network?

Here are some of the reasons why you may want to take a site out of a multisite network and set it up as a single WordPress install:

  • A site may have outgrown the network and needs to have its own space or identity.
  • You want to have more control over the site and install plugins, themes, or third-party apps that can’t be added to Multisite or that may require its own server.
  • Your site isn’t performing as well as it could and you want to improve its performance.

If you search online, you will find a number of articles and tutorials aimed at showing multisite admins how to migrate a subsite to a single site. These are generally clunky and involve a number of steps like making backups, importing XML files, renaming database tables, making search-replaces via WP-CLI or a plugin, etc.

While this may work fine if you want to move a single WordPress site to a Multisite network, going the opposite way to split a subsite from a multisite environment and migrate the entire site over to a single WordPress install hosted on its own domain is more challenging.

Is there a simpler and easier way to automate this process–maybe just click a button or two–and have the whole thing done for you?

Sure! In WordPress, we call it a “plugin.” ;)

WordPress Multisite To Single Site Migration With Shipper Plugin

In version 1.2, Shipper Pro introduced the ability to migrate a subsite from a multisite network to a single site. This eliminates all the “clunkiness” of trying to split and migrate subsites manually.

Let’s go through the migration process step-by-step and show you how easy Shipper does it…

Initial Setup – Pre-Migration Checklist

Migrating sites with Shipper is so easy. Shipper works with any host. Just set up your destination site and make sure that the Shipper plugin is installed on both the source (ie, your multisite installation) and destination sites.

Notes:

  • There’s no need to back up your source site. Our migration method is 100% safe for your source site (i.e. your Multisite installation). We do recommend, however, performing a complete backup of your destination site in case something goes wrong while the system overwrites your destination site’s files, folders, and database.
  • If you’re a WPMU DEV member, use Snapshot Pro to perform an automatic backup of your entire site to our secure cloud storage (and restore your site in just one click if required).

For this tutorial, I have set up a demo multisite network with three subdirectory subsites on a dedicated server using cPanel and Softaculous.

WordPress Multisite demo
Our WordPress Multisite demo site.

Let’s suppose that we want to split Site 2 away from the Multisite environment and migrate the entire site over to a single WordPress install on its own domain.

This is what our demo site looks like:

WordPress subsitedemo frontend.
This is the WordPress subsite demo we will split from our Multisite network.

Our demo Site 2 includes posts, pages, comments, categories, tags, plugins, themes, media, etc. We want to migrate all of this over to a single WordPress install.

Demo subsite dashboard
Let’s migrate everything included in our subsite: all content, media, plugins, themes, etc.

Here is our brand new single WordPress installation.

New WordPress install.
Our new WordPress installation – this is the destination site.

And here is the dashboard of our brand new WordPress single site.

New WordPress install dashboard.
The dashboard of our brand new WordPress installation.

We are now ready to begin the migration process.

How to Migrate a WordPress Multisite Subsite to a Single WordPress Install Using Shipper

Shipper’s Multisite to single site migration feature lets you migrate a subsite from your multisite network to a single site installation using the following methods:

Package Migration

Shipper Dashboard - Package Migration.
Shipper Dashboard – Package Migration.

With this method, your website is packaged as a file with an installer application so you can download and transfer your site to the new server using SFTP.

Package Migration lets you create a package of the whole network or one of the subsites. If you package a subsite and then install it on a server, it will be installed as a single site.

API Migration

Shipper Dashboard - API Migration.
Shipper Dashboard – API Migration.

This method provides a one-click automated export/import function through secure server-to-server communication.

API Migration lets you both export and import a subsite from a network to a single site.

Refer to Shipper’s plugin documentation for a detailed step-by-step walkthrough on migrating sites using the above methods.

Time To Migrate Our Subsite…

Now that we have covered all of the preliminaries, let’s migrate our subsite to our new single WordPress install.

As per our earlier pre-migration checklist, you should already have connected both your source and destination sites to The Hub.

The Hub
Make sure that both your source and destination sites are connected to The Hub

You should also have Shipper already installed on both sites.

On your WordPress Multisite installation, navigate to the Shipper menu.

WordPress Multisite - Shipper menu.
WordPress Multisite – Shipper menu.

Method 1. Package Migration

Let’s go through the Package Migration method first. You can select this method from the plugin’s dashboard or go to Shipper > Package Migration and click on the Create Package button.

Shipper - Package Migration
We’ll use package migration to move our subsite.

In the Create Package screen, give your package a name, then select Subsite to Single site as the Package Type and select the subsite you would like to migrate from the Choose Subsite dropdown menu.

In this example, we’ll select “Site 2” as the subsite to migrate.

Shipper-Create Package for Subsite
Select your subsite from the dropdown menu.

After selecting the subsite to migrate, choose whether or not to password-protect your package and click the Continue button.

In the next modal window, click the Build Package button, unless you want to exclude specific files, folders, or database tables using filters.

Shipper - Package exclusion filters.
You can exclude files, folders, or database files from your package or export your entire subsite.

Shipper performs a comprehensive “pre-flight” check and builds your package automatically.

Shipper Building Package modal
Try winning a no-blinking staring contest with our one-eyed capt’n while you wait for your package to build.

Once your package is ready, download both the package archive and installer files to your hard drive.

Shipper - Package Ready modal
Your migration package has arrived!

Next, upload both the package archive and installer files via FTP to the root directory of your destination site’s server (i.e. your single WordPress install) using an FTP client (e.g. Filezilla).

Filezilla window
Upload archive and installer files to your single WP install root directory.

Note: You will need to obtain your FTP login details from your host. If your sites are hosted with WPMU DEV, you can grab your SFTP login details from The Hub by selecting your destination site and clicking through to the Hosting > SFTP/SSH tabs.

The Hub - Hosting - SFTP
Grab your SFTP login details from The Hub.

After uploading the package archive and installer files to your single WordPress install’s root directory, navigate to https://yourdomain.com/installer.php in your browser and follow the migration wizard’s instructions to complete the migration process.

Package Migration Wizard screen.
Follow the wizard to complete your migration.

You can create a new database on your single destination site or overwrite your existing WordPress installation. If you choose to overwrite your destination site, we recommend enabling the “Fetch database credentials from the config file” option. Since the destination site is there, it will pull the database credentials automatically from the wp-config.php file.

Choose an option and click the button to test the connection and deploy your migration.

Create a new database on your destination site or overwrite the existing one.

The Migration Wizard will automatically run through the deployment and installation process and then ask you to confirm and update your new site’s details.

Migration Wizard - Update Data modal
Last step…

Once this process is complete, you will be asked to log into your newly migrated site and check that everything is ok.

Log in with your source site’s details. If everything looks ok, run the cleanup script to remove the migration files from your server.

Migration Wizard - Finish and Cleanup modal
All done! Time to clean up and enjoy your new site!

Everything from your source Multisite subsite should now be copied over to your new, single WordPress site.

Your newly-migrated site on a single WordPress installation with everything from the source site copied over.

Now that we’ve looked at migrating a subsite to a single site using the Package Migration method, let’s go through the API migration method.

Method 2. API Migration

You can select the API method from the plugin’s dashboard or go to Shipper > API Migration.

This method lets you export a site to another server or import another site into the site you are working on.

API Migration screen.
With API Migration you can export and import sites.

For this tutorial, we’ll export a subsite from a Multisite installation into the single WordPress installation we’ve previously set up.

Click the Export button to begin the process (if you’re in the plugin’s dashboard screen, click on Export > Begin Migration).

Choose Subsite to Single site as the Migration Type, select the subsite to migrate from the subsite drop-down menu, then click Next to continue.

Shipper API Migration - Migration Type modal window
Select the subsite to export.

After confirming your password, Shipper does a few tasks in the background and asks you to select your destination site.

Choose the site you want to export your subsite to from the dropdown menu and click the blue arrow button to continue.

Shipper API Migration - Choose Destination modal window
Select your destination site.

After preparing your files, Shipper presents you with the Migration Filters window. As discussed earlier, this allows you to exclude any files, folders, or databases you don’t want to export.

Use the filters to exclude items or skip this step to migrate the entire subsite and click Next.

Shipper API Migration - Migration Filters modal window
Use the Migration Filters window to exclude any files, folders, or databases from your migration.

Shipper will run an extensive Pre-flight check and let you know if it detects any issues.

Issues in “red” indicate errors that will prevent your migration from completing successfully. These must be addressed before Shipper will allow your export to proceed.

If there are no red issues, you can ignore any yellow-coded warnings and continue.

Shipper API Migration - Pre-flight Issues modal window
Shipper lets you know if there are any issues that need fixing before migrating your site.

A modal window pops up asking you to select a destination database prefix. You can use the database prefix from your source site, your destination site’s existing database prefix, or create a custom DB prefix.

Shipper API Migration - Destination Database Prefix modal window
Select your destination database prefix.

Shipper calculates the size of your package and estimates how long your migration will take.

Click Begin Migration to proceed.

Shipper API Migration - Ready to Ship modal window
Shipper’s all ready to go!

Shipper will begin to migrate your site and send you an email when it’s all done.

Shipper API Migration - Migration in Progress modal window
Migration in Progress.

Once the migration has been successfully completed, you can log into your destination site and check your server to view all of your exported content, files, folders, databases, etc.

Migration complete.
Your subsite has successfully migrated. Yippee-API-Oh!

Note: If anything goes wrong while using the API Migration method (e.g. Shipper gets stuck exporting/importing files or is taking a very long time, you can cancel the migration process and try using the Package Migration method described earlier, or contact our support team for expert help.

Cancel Migration
You can cancel the migration if something’s not right.

Post-Migration Checklist

After migrating your multisite subsite to a single WordPress site, spend a little time going over your new site to make sure that everything has migrated successfully.

Check:

  • Posts, custom post types, and pages
  • Media attachments
  • Plugins
  • Themes
  • Comments
  • Settings (e.g. Permalinks)
  • Folders and files (server)
  • WordPress Database(s) (server)

Say Goodbye To Clunky Migrations

Whether you plan to migrate WordPress sites single-to-single, multisite-to-multisite, multisite-to-single, or single-to-multisite, Shipper makes the process easy and simple.

When migrating a multisite subsite to a single WP install, there’s no need to manually export or import files, migrate SQL databases, change wp prefixes, rename database tables, make search-replaces, etc. Shipper handles all this for you.

Shipper works with any host. However, we recommend hosting on WPMU DEV’s managed WordPress hosting service, using The Hub to manage your sites, and accessing our dedicated team of 24/7 support experts for hassle-free site migrations.

If you need help connecting sites to your Hub using the WPMU DEV Dashboard plugin, check out our documentation on how to add a site to The Hub.

And if you need a complete step-by-step walkthrough of the Multisite to single site migration process, refer to our Shipper plugin documentation. Also, make sure to check our roadmap for new Shipper features coming soon.

SFTP vs FTPS – Secure File Transfer Protocols Explained

It’s been a while since concerns were raised about FTP due to its lack of security. Now that it’s more or less a thing of the past, it’s time we all got better acquainted with its successors, SFTP and FTPS…

With so many acronyms in the file-transfer world, it can be very easy to feel overwhelmed.

In order to choose the best method for your needs, you need to understand how each one works.

That’s why I’m here to give you a quick run-through of two of the game-changers: SFTP and FTPS…

File Transfer Protocol Secure

FTPS (File Transfer Protocol Secure) builds upon FTP by combining it with SSL/TLS.

If you’re not clued up on SSL/TLS, I would recommend reading our article, but long story short, the concept started as SSL (Secure Sockets Layer), which has now evolved into TLS (Transport Sockets Layer).

TLS not only encrypts your data so that if you fall victim to a man-in-the-middle attack, the attacker won’t be able to make use of any information they manage to get hold of, but it authenticates the connection between the browser and web server.

This is done with SSL/TLS certificates. A website with a certificate signed by a publicly trusted certificate authority (CA) will be trusted by client software such as web browsers and operating systems.

When the browser connects to the web server, it checks whether a valid certificate is present. If it is, the “handshake” process begins, where the browser and server negotiate how to proceed.

A valid certificate allows the browser and server to verify that each other is legitimate and therefore form a binding connection that is very difficult to penetrate.

Adding this layer of security to FTP turns a completely unsecure method of file transfer into one which is pretty hard to hack.

Secure File Transfer Protocol

So now we know how FTPS keeps your files safe, it’s time to take a quick look at SFTP (Secure File Transfer Protocol).

SFTP was developed as an extension to SSH (Secure Shell Protocol) – check out our article for the full lowdown.

SSH is a way to remotely log in to one computer from another over an unsecured network, via a secure channel.

When you combine SSH and FTP, you get SFTP – a method of transferring files over a secure connection. SFTP encrypts your files and data and then sends them over a secure shell data stream.

You initiate the connection by creating or obtaining credentials, which you will need to input into an SFTP client. This authenticates you as a user and allows you to begin the connection.

You can also connect via the command/line terminal but you will still need to log into the system to verify yourself as an approved user.

SFTP vs FTPS

If you’re a WordPress user looking to grab a copy of your files from your server, SFTP may be your best bet, as you might not always have the certificate required to form an FTPS connection.

The good news is that file-transfer clients such as FileZilla allow you to select which method you want to use, and since all the encryption and securing of the channel is done in the background, they all look and work the same at the user’s end.

Screenshot of FileZilla showing how to switch from SFTP to FTP.
In FileZilla, you can easily switch from FTP to SFTP by heading to Edit>Settings.

So, the bottom line is this … if you care about security with a capital ‘S’, then you should give a ‘S’ about FTP too!

How To Migrate A WordPress Site From Localhost To Server Using Plugins

Building a site locally is a good idea, but just hearing the word ‘migration’ can strike fear into even the noblest of hearts. Luckily, migrating from local to live is easier than you might think…

I don’t need to spend half an hour rambling on about why you should use a local environment to build your site…because I already did that here.

But just in case you’re too fatigued to click on the above link and go a-a-a-l-l-l the way to another post, let me give you the cheat notes…

Think Global, Build Localhost

A localhost or local WordPress setup is where you have WordPress and all of its required components like a database, PHP, and Apache server installed on your own computer or laptop instead of a webhosting server.

There are pros and cons to using a WordPress localhost environment.

When you set up WordPress online, you can share your posts and content with other online users immediately after creating these. Just click Publish and the whole world can access and view your content simply by entering a URL into their web browsers.

This isn’t quite as simple with a local version of WordPress because everything is hosted on your computer, rather than online.

One of the pros of using a localhost WordPress environment, then, is that you can create content, install, and test plugins and themes, mess with code and templates and customize files on your site without anyone else being privy to what you’re doing, as it all takes place in your own computer.

In addition to being able to mess with things without anyone taking a peek at what you’re doing, there are other benefits and advantages to using a localhost environment.

Like cost, for example. You don’t need to buy a domain or pay for webhosting until you are ready to take your site(s) live.

Note that I said site(s) above. That’s because with localhost, you can build as many sites as your computer can handle…and you can work from anywhere around the world because no internet connection is required (yes, smartypants…even underwater if your computer is waterproof).

By keeping a clone version of your real site on a localhost setup, you can also test different settings and customizations, make updates to your WordPress core installation, plugins, and themes, and spot any conflicts or issues that could affect your users before transferring these changes across to your live site.

Localhost, Not Local(g)host

I’m here to tell you that if you’ve never migrated a localhost site to a live one, it’s not as scary as it might seem.

Building a local or offline version of a WordPress working environment on your laptop or PC may sound like it’s hard and complicated, but it’s really not.

All you need is a way to install applications like Apache (server), MySQL (database), and PHP (program language) –note the acronym AMP, and there are several software packages (called stacks) that will let you do this.

These include LAMP (Linux), AMPPS (Softaculous), MAMP (Mac), WAMP (Windows), and XAMPP (Cross-Platform).

If you fancy giving it a try but you’re not quite sure how to get set up with localhost, check out this XAMPP tutorial.

Ok, Got It! Now, How Do I Take My Localhost Site Live?

There aren’t many WordPress-related dilemmas that can’t be solved with a good plugin, so you shouldn’t be surprised to learn that there are a few solid ways to migrate your site without needing to set foot anywhere near a database.

In this article, we’ll take a look at two easy-to-use methods to migrate WordPress from localhost to server and go live – Duplicator/SFTP, and our very own Shipper plugin.

Cartoon showing Devman putting his computer into a boat and waving goodbye to it.
Either method of migrating your site is better than Devman’s!

As Shipper is a Pro plugin, it’s only available to members, so if you’re not quite ready to take the leap, you can skip straight to the Duplicator tutorial further down the article (we won’t hold it against you.)

Migrate with Shipper

First things first, you need to have Shipper installed on both your local site and live one.

You can then open Shipper on your local site and select ‘Export’.


First screen of Shipper where you can choose between import and export.
For local sites, you can only use the export option.

The next screen will show a list of the sites connected to your Hub – you’ll need to select your destination for the migration.

You are then given the option to exclude any files you don’t want to be included.


Screenshot showing the migration filter screen where you can select any files you don't want to be ported across.
If you want to migrate your entire site and everything in it, simply click “Next”.

You can use the advanced tab to exclude seldom-used WordPress files that you probably won’t need such as:

  • Spam comments
  • Post revisions
  • Inactive themes
  • Inactive plugins

When you’ve decided what you’re taking with you, it’s time for the Pre-flight Check.

This will detect any issues that might crop up during migration and will display recommended solutions.

Screenshot of the pre-flight check, showing the progress bar as it checks your files to make sure everything is ready for the transfer.
Keep your fingers crossed during this stage – migrations don’t always go through without a hitch (but our team is always on hand to help if needed!)

Once you make it safely past the check, you’ll need to choose a prefix for your database name.

By default, the WordPress database table prefix is wp_

When migrating tables with Shipper, you can migrate tables with:

  • Source’s prefix
  • Existing destination prefix
  • Custom prefix
Screenshot showing the three ways you can name your database - with the source's prefix, existing destination prefix or custom.
If you choose custom, try and ensure your prefix ends in an underscore, for example “newprefix_”

With setup complete, you’re now ready to begin the migration.

Screenshot of the screen where you need to click 'begin migration' to start the process.
Click the button and then sit back and wait.

You’ll get a rough estimate of how long your site should take to migrate based on the size of your files, and you can keep track of the progress with the bar as shown below:

Screenshot showing the progress bar of the migration and an estimate of a total time of 1-2 hours.
Shipper uses our advanced API to make sure the process is as stable as possible. It can take a long time to complete, but it’s worth the wait!

Migration Magic?

In the interest of complete transparency, I won’t sit here and claim that Shipper is completely immune to encountering migration headaches (you’ll be hard-pressed to find any plugin that is!).

For example, there’s no knowing when you might come across an incompatible file, or rogue bit of code – causing your migration to hit the wall.

The good news is, when you’re a WPMU DEV member, this should never be a reason to panic, as our expert team of WordPress superheroes are well-versed in rescuing people from migration misery.

Not a WPMU Member? Give Duplicator a Go!

So, Duplicator it is!

First things first – head to the plugin repo and download it.


Screenshot from wordpress.org of the Duplicator plugin.
The reviews speak for themselves.

Step One: Package and Download Your Files

Duplicator allows you to download two files – an archive of your content and configurations as well as an installer.php script.

These files hold everything you’ll need to transfer your site from one server to another.

Open Duplicator and click ‘Create New’ to start the process.

You’ll then need to name your file package ready for it to be compiled and downloaded.

Screenshot of the new package screen where you can name your package.
If you want a complete transfer of your site, you only need to fill out the site name on this screen.

The Archive tab above allows you to exclude certain files from the transfer, just like with Shipper.

The Installer tab allows you to input the database installer fields – if you don’t know them, that’s absolutely fine as they’re optional at this stage.

You can now click “Next”, which will allow Duplicator to undertake a quick scan to make sure everything is in order before your files are compiled.

Screenshot of the complete scan.
If the scan doesn’t detect any issues, you’re good to go.

Next, click the “Build” button,

Screenshot of the progress bar showing the package being built, currently at 51.5%
Sit back and wait as your files are packaged.

Once your files are ready, you’ll be able to download them with the links below.

You’ll need to download both the archive folder which will include all your files, plus your installer file.

Screenshot showing the package completed screen from which you can download the files.
Use the One-Click option to download everything in one go.

Step 2: Copy Installer and Archive Files to Live Site

Now that you have everything you need from your old site, it’s time to transfer all the goodness to your new one.

You’ll be doing this with an SFTP client such as FileZilla.

Firstly, you’ll need to connect your SFTP client to your live site using your credentials. If you’re using our hosting (which, let’s be honest, you should be), here’s a simple guide to creating credentials and getting your connection set up.

Once your connection is established, you need to navigate to your public_html folder and paste all the files you downloaded (you may need to extract them from zips first).

Showing the section of Filezilla which you have to tick to overwrite the old files on your server.
A popup will appear asking if you want to overwrite your files – click yes to all.

You can keep an eye on the progress of the upload in the bottom left corner.

Screenshot of the queue of files showing 2512 pending and 223 successful.
Unsurprisingly, the larger your site, the longer it will take!

Once your files are copied over, you’ll need to run the installer script.

You do this by heading to “your-url”/installer.php.

Just four simple(ish) steps now stand between you and a successful migration.

The first is easy – wait for the validation checks to be completed and hope they pass with flying colors.

If the checks do hit a hurdle, details of the issue(s) will be displayed.

You can then decide whether it’s something that requires fixing, or if it’s something that won’t interfere too much with the migration.


Screenshot of step one of the Duplicator installer process where the files are validated.
When you’re ready, click “Next”.

When you arrive at the next screen, you will have to enter four sets of details.

These details will allow the installer to connect to your live database and remove all the previous data.

You can get the details by heading to the hosting section of the Hub and clicking on ‘Tools’.

Screenshot of the section of the hub where you can reset your wp.config file.
Click on ‘Reset’ and then confirm.

You can then head back into FileZilla and download a fresh copy of your wp.config file, which will display the host, database name, username, and password.

You will then need to enter them during this step of the installer.

Screenshot of step two of the installer where credentials are input the configure the database.
When you’ve entered your details, click “Test Database”.

Step three allows you to rename your site if you need to.

Screenshot of step three where you can rename your site.
Then…you guessed it – click next!

You’re almost there – just one last step!

All you need to do is click on the “Admin Login” button and log into WordPress.

Screenshot of step four which shows the completed migration with a button directing you to the last step which is logging into your WordPress site.
Make sure you use the login details from your localhost site and not your previous live one!

Once you have successfully logged in, you will be back at the good ol’ WordPress dashboard.

Before you dive in, make sure you check the message from Duplicator:

Screenshot showing the message awaiting on WordPress regarding the successful cleanup of files.
The files should be removed automatically, however, if this is not the case, you will have to get rid of them yourself.

Time for a Migration Celebration or Commiseration?

All going well, your locally-built site has now been deployed onto your live server!

However, sometimes no matter which plugin you use, or how diligent you are, you’ll run into an issue or two.

This is exactly why a support team of WordPress Superheroes are so darn valuable.

When a problem hits, you don’t just need a second pair of eyes, you need reliable help, from a seasoned WordPress migrator, STAT!

We know that when you’re in the midst of a migration meltdown, the last thing you want to do is log a ticket and twiddle your thumbs for 24 hours.

Our live support team members know a thing or two about migrations and no matter who you’re hosting with or which method(s) you’ve tried, they’ll get you back on track.

Screenshot from the website showing the five live support categories
We mean it when we say our support team is on hand to help with ANY WordPress query.

On that final note, if you’re reading this article because you’ve already had a migration malfunction, our Support Team is ready and waiting to help you finish what you started.

We’d even be as bold as to say sign up for a free trial if you get stuck in a migration rut and need a hand to pull you out.

We’re confident you’ll wonder how you ever coped without our awesome support team.


Accepting Payments (including Recurring Payments) on WordPress.com

I’m a fan of building websites with the least amount of technical debt and things you have to be responsible for as possible for what you wanna do. Sometimes you take on this debt on purpose because you have to, but when you don’t, please don’t ;).

Let’s say you need to build a site that can take money from customers, but on a recurring basis. WordPress.com can do that now, and it’s a fantastic choice because it’s all of the power and control and none of the debt.

Here’s my thinking…

1) WordPress.com is the fastest way to spin up a WordPress site.

Not only is it fast, but you don’t have to worry about anything. Servers, SSL, security, performance, accessibility… that’s all handled for you and you can focus on what you do best. Even if you’re a seasoned developer, I’m sure you can understand how this is compelling. Automating work is what the best developers do.

2) WordPress.com sites can be eCommerce sites.

Not only sell-a-product style sites, but also recurring payments sites. Meaning you can very easily set up a subscription service, membership site, or site for monthly donations.

The pricing is like this:

WordPress.com PlanJetpack planRelated Fees
WordPress.com eCommerce —None
WordPress.com BusinessJetpack Professional2%
WordPress.com PremiumJetpack Premium4%
WordPress.com PersonalJetpack Personal 8%

So you do the math and figure out the most economical plan for you. That eCommerce plan on WordPress.com is only $45/month and means zero additional fees, so I imagine once you’re up and running and making sales, that plan becomes the obvious choice.

Ideas!

  • You build custom weekly meal plans for families and charge monthly for that.
  • You have a membership site for physical training videos where people have to be a member to see the videos.
  • Your site is has a bunch of completely free great content, and you offer a way to give yearly donations to support it.

Why roll your own eCommerce when you don’t have to?

3) It used to be that your WordPress site was a bit limited on WordPress.com, but those days are over.

eCommerce is one aspect of that, but I’m talking full SFTP and database access. You can build custom themes, use your own plugins, just like any other WordPress site. So if you’re thinking that you’re giving up too much control by going with WordPress.com, make sure to re-evaluate that.


So knowing all that, I’d say you really should give WordPress.com a hard look when you’re about to spin up an eCommerce site. I’ve seen far too much over-engineering and mountains of technical debt in my life, I’d rather see people use simpler tools and get started doing their actual business, especially to start.

The post Accepting Payments (including Recurring Payments) on WordPress.com appeared first on CSS-Tricks.

Get Movin’: Migrate Your Website with Shipper WordPress Migration Plugin

Moving can be stressful. You’re packing up all of your belongings, cleaning, tying up loose ends, and doing everything you can to ensure the move will go smoothly.

That goes for moving to a new home, office, or host. Luckily, migrating from host to host in WordPress can be an easy process. And you don’t even need to hire movers or rent a van.

In this article, pack your bags, because I’ll be moving you through the process of migrating to a new host.

Dev Man migrating from host to host.
This was the scene when WPMU DEV started hosting. Dev Man quickly left the old one.

We’ll be going over why to migrate in the first place, prepping for a move, the steps during the moving process, and more.

By the time you trek through this post, you’ll be ready to move your WordPress site into its new host home.

Every hosting company is different, so in this article, I’ll show you how our Shipper WordPress migration plugin can really help simplify this process through automation.

I’ll also explain the process of migrating a site to our WPMU DEV hosting using our built-in WordPress migration tool.

Even if you don’t host with WPMU DEV, the tips provided in this article apply to most hosting providers. This includes knowing what specific hosting information they’ll need to provide you with (which I’ll cover later) so you can complete the move.

Why It’s Great to Migrate

There are many reasons to consider migrating to a new host. Some of these might not be so obvious.

For example, let’s say you sign up for a web hosting company that promises the world in bandwidth, space, and support.

As time goes on, you see the service wasn’t all that it was cracked up to be. Your online traffic is picking up but your hosting can’t handle your users.

You need certain applications to run on your server but your host won’t allow it unless you upgrade to a more expensive plan. You have questions that support can’t answer, or aren’t answering promptly.

Meanwhile, the problem hasn’t gone away.

All this can impact your business and cost you time and money. All you wanted was to get your site up and running and get on with your business. Now you’re dealing with technical issues you don’t understand and getting frustrated and impatient.

Or, maybe you’re starting fresh (a first-time homeowner). You’ve just developed a site locally and it needs a fresh new home.

It’s not technically migrating from host to host but you’re migrating to a new site, now that it’s ready to launch.

Sometimes price or ease of use is a factor. Sometimes, you need a hosting company that offers way more than just hosting.

Like support, for example. Or access to hosting management features that put you in complete control of your site.

[Shameless plug: check out why WPMU DEV offers the best hosting on the planet. Seriously.]

The point being, you want your website to have a good hosting home. You want it to be reliable, practical, and dependable.

So, it basically boils down to — if you’re not happy with your hosting, or you’ve outgrown it, it’s time to move.

Ship Ahoy! Easy Site Migration With Shipper

If you’re a WPMU DEV member and you’re not hosting with us (yet), our Shipper Pro plugin is a great way to migrate your WordPress site from host to host.

Shipper Pro download.
Never fear, Shipper is here! Shipper makes moving yer WordPress site to yer new host smooth sailing!

Shipper Pro handles the moving of WordPress sites with a smile. He’ll also handle moving local to production, development to live — without using FTP or SFTP. It’s an easy option for migration.

Let me show you a brief tutorial on how it’s done.

To get started you’ll need:

  • One destination site
  • One source site
  • Both sites connected to The Hub
  • Shipper installed on both websites

After all four of these points are checked off, you’ll be ready to don your eyepatch and get a shippin’.

When you have Shipper downloaded and activated, you’re welcomed by this screen:

Ready to ship with Shipper.
Shipper includes everything you need to set sail and ship your site out speedily … except a bottle of Rum!

As you can see, you have a choice to export your website to another server or import a website to this location.

Let’s start with an export.

When you click Export, you’ll see that a destination screen pops up.

The destination screen.

As I mentioned in the bullet points, the site that you want to export to needs to be connected in The Hub.

If it is, your site will appear in a dropdown menu. Choose the website you’d like to export to from the list.

After this, click the blue arrow to continue.

Note: By default, Shipper is set up to export the entire website. However, you don’t have to migrate every file associated with your site.

For example, if you’re moving from a subsite to its own domain, you may want to do some configuring.

Shipper migration filters.
Use the Shipper migration filters to exclude files, folders, or database tables from your package.

In the Migration Filters area, you can easily exclude areas and adjust however you’d like for migration.

Pre-Flight Check

When the Migration Filters area is ready to go, click Next and get ready for boarding.

A screen will appear to let you know if you have any pre-flight issues.

Pre-flight Issues screen.

In this example, there’s a server difference. One of the sites is a multisite and the other one isn’t.

Shipper tells you exactly what is wrong. In this case, I can currently only migrate between the same installation types, so I will have to resolve this issue before moving forward.

Thanks for letting me know, mate!

If you have any issues that may or may not cause export issues, it would be indicated with a yellow exclamation point. If it’s good to go, you’ll get a green checkmark.

Until issues are resolved, the Continue Anyway option is greyed out.

If you have no issues or when you get your issue(s) fixed, you’ll be taken to the Destination Database Prefix.

Destination Database Prefix area.

By default, the WordPress database table is wp_. Sometimes this prefix is customized.

When Shipper migrates tables, you have three options:

  • Source’s prefix — Migrate tables with the shipping site prefix
  • Existing destination prefix — Use the existing destination prefix
  • Custom — Create a new custom prefix

When you decide what prefix you’d like to use, click Next and Shipper then gives you the option to Begin Migration.

Begin migration.
If you’re ready to fly, Shipper is ready to ship.

Once you begin the migration, a status will appear.

Migration in process.
The status bar shows the percentage and where it’s at in the process.

With advanced API, Shipper ensures the process is as stable as possible. Also, keep in mind this can take some time.

If you want, you can close out of the tab and you’ll get an email when the migrating is complete, calling for drinks all around.

A welcome email from Shipper.

If for some reason, you have a failed migration, Shipper will let you know. It will include some troubleshooting tips and ways to ensure it’s successful on the next attempt (so you can get those drinks on).

More Shipper Options…

You can also Import a site.

Importing is very similar to the export demo. All the options are the same — just instead of exporting, it’s importing.

Also with Shipper, you can:

  • Migrate a multisite network.
  • Create a package migration with a zip file of your WordPress site, multisite network, or subsite.
  • Check the latest logs, which is used to debug any issues you are having.

For more information on all of Shipper Pro’s features, check out the download page and all the documentation we have on using our favorite orange-bearded plugin.

Here’s An Even Easier Way To Migrate Your Sites…

An even easier way to migrate WordPress sites than using the Shipper WordPress migration plugin if you’re hosting with us is to use our built-in WordPress host migration tool (if you’re not hosting your sites with us you need to check out our amazing WordPress hosting options).

Let me show you how it works.

Whoah…Back-Up!

First things first. Before the big move, the number one step is to back up every aspect of your site.

If you’d like to use a plugin for this, we have a handy article on plugins that backup your WordPress site automatically. You can back your site up to the cloud or the server of your choice with an FTP transfer.

This process could take a bit of time, depending on the amount of media uploads you have on your site.

Export the WordPress Database

We’re going to start with exporting the WordPress database. This is an easy process that only takes a few steps to accomplish (whew!).

If you’re hosting on a server with cPanel installed, log into your web server and open phpMyAdmin.

cPanel dashboard with phpMyAdmin highlighted.
Click phpMyAdmin in your cPanel dashboard to view your WordPress database.

If you don’t have cPanel, look for a similar way to access phpMyAdmin.

For example, in the WPMU DEV Hosting Hub, you can access your database via phpMyAdmin by selecting your site and clicking on Manage Database.

WPMU DEV Hosting Hub - Manage Database.
WPMU DEV Hosting Hub – Manage Database.

phpMyAdmin will load your database on your web browser screen.

Example of what WPMU DEV phpMyAdmin looks like with our hosting.

From here, select the database that contains your WordPress installation on the left-hand side of the screen. Once selected, click on the Export tab located in the navigation menu.

The Export tab.
The Export tab.

By default, the Quick export and the SQL format for the export are perfect for what we need.

Export methods.

Just click Go and the database export process will begin. Your file will be downloaded to your computer.

When the database export and the FTP transfer of your files is completed, we’ll be all set to go to the next step.

Get Ready to Move In

Now that we’ve backed up our database, let’s begin migrating to the new host.

In this example, we’ll migrate to our hosting using WPMU DEV’s Hub 2.0.

If you’re not using our hosting, it’s okay (but why wouldn’t you be?). Just follow along using whatever process your host has in place.

The first step is to add your domain to The Hub 2.0. This simple process needs to be completed before any site can be migrated to WPMU DEV Hosting.

This applies to both manual migrations and those accomplished with the migration tool (which I’ll show you how to use next).

If you get stuck at any point, don’t worry. We have plenty of step-by-step documentation and 24/7 support if you need help.

After adding your domain, you’ll need to add the WPMU DEV Dashboard, which lets you manage everything from a central location and keeps everything synced together with easy one-click automation.

Simply download the plugin to your computer. Once downloaded, upload it to the WordPress site that you’ll want to host with us.

You can then sync it up to The Hub 2.0 in our dashboard and you should be all good to proceed.

WPMU DEV Dashboard plugin download.

You can migrate sites to WPMU DEV hosting using our migration tool (which I’ll show you how to use shortly) or by manually transferring files using SFTP/SSH and phpMyAdmin.

We recommend using our migration tool. It simplifies and accelerates the process and it also automatically resolves any issues that can interfere. Really, we make it easy.

Make sure you have your current FTP username and password on hand before beginning.

The migration tool works by connecting WPMU DEV servers to your host’s servers with the same FTP credentials you would use to connect by FTP.

If you’re not sure what they are, the best place to find them is in your dashboard or control panel of your original host. Still can’t find them? Contact your current host and get assistance.

Not sure WTF is FTP? Check out this article on using FTP or SFTP to transfer files securely.

Set Your Sights on a New Site

We’re now ready to get started on the actual migration. This is like picking up the keys to your new home.

First, you’ll want to be logged in to The Hub. Once here, click on the Hosting tab at the top of the page.

The hosting tab.
The hosting tab.

From here, click on the +Plus sign.

Once you click the plus sign, several options will pop up. You can create a new website, migrate an existing website, and clone an existing website.

Of course, with this example, you’ll want to click on the Migrate Existing Website.

Migrating in the Hub.
Here’s where you’ll start.

You’ll click on Migrate Site from here.

What comes up next is a dropdown of all the sites currently connected to The Hub (which you should have there if synced correctly from the steps above).

Select the site that you want to migrate and click the arrow to proceed.

Where you’ll select what website you want to migrate.
Select which website you want to migrate.

Once you click the arrow, you’ll be asked to create a temporary domain name. Your site will reside under this domain until the DNS record changes that you’ll make later have a chance to propagate.

Not sure WTF is DNS? Check out our ultimate guide to DNS for WordPress.

Temporary domain name.
Create a temporary URL.

After this, select which region you’d like your site to be hosted from the Server Location dropdown menu (tip: pick the closest location to where most of your traffic comes from).

Pick your location where your site is hosted.
Pick your location.

Click the arrow and let the process begin.

Status of migration.
This can take a few moments. It gives you the status as it goes through the process.

At this point, WPMU DEV servers need to log in to your website using the exact FTP or SFTP username and password you used to manage files with an FTP client.

If these credentials do not exist, you can create them.

Paste your (S)FTP credentials into the fields and click Start Migration.

Where you’ll put your FPT Username and FTP Password.
Where you’ll put your Username and Password for SFTP or FTP.

WPMU DEV servers will then try to locate your site’s files. Usually, this is flawless and there’s no problem.

However, if the path to those files contains some unknown directory that our servers can’t resolve, then the migration process will be interrupted and we’ll alert you of this.

Make sure you’ve entered all details correctly to avert any problems.

If you know the FTP path to your site files, you can place it in our WordPress Install Path area so that it can provide a backup in case our server cannot find the files.

And if you don’t know the FTP path — no worries. You can always contact your current host and they should be able to provide it.

You can also locate it on your own by logging in to your site via FTP. Regardless of the FTP client you use, your path will be displayed on the screen.

You can then cut and paste the path into the WordPress Install Path field.

If you’re hosting with WPMU DEV, this information can be found in Hosting > SFTP/SSH.

FTP and SFTP information.
Get your credentials from the SFTP/SSH screen.

And Away We Go…

Once everything is set up, hit Start Migration.

After hitting the button, you’ll get notified by email once the process has completed.

If all goes well and it’s a successful migration, the temporary domain you set up earlier (e.g. username.wpmudev.host) will be the primary domain for your migrated content for now.

Enter this temporary domain into your browser to view your site and content.

Unless the original site has been disabled in some way, your site and content should still be viewable at the original URL as well as your new temporary address.

This is because you have not set your domain to point to your new host’s nameservers yet.

In other words, you’ve made a copy of your site and added it to your new servers but your site is still hosted on your old server.

And that’s where visitors will go to until you change domain nameservers by updating your DNS records.

You’ll be asked to update your DNS records and set your original domain as the primary one. Then, your permanent domain will the only one users can have access to.

If you need help, check out our step-by-step documentation on how to set up your DNS records.

Before updating your DNS, we suggest visiting the temporary domain to verify that everything is a-ok and that the migration went well.

You can do this from The Hub by clicking WP Admin in the temporary domain.

Where the WP Admin is in The Hub.

If you experience any issues with your site after migration, contact your host. We provide 24/7 support and we’ll not only help you determine what the problem is, we’ll also do our best to fix it for you.

If everything is looking good, all you need to do is edit your DNS records and that’s all. WPMU DEV offers a DNS Management tool that lets you get this done ASAP on the W-E-B.

You’re good to go! Your site should now be migrated over to our hosting.

Welcome home.

Time To Settle In

You did it! You’ve moved in, are unpacking, and getting settled. Sure, you might have some boxes (or plugins) to unpack, but you made it.

Regardless of who you choose to host with, migration doesn’t have to be that difficult with good hosting (or with the assistance of a smooth-sailing plugin like Shipper).

If you haven’t migrated from host to host yet, but are thinking about it because you’ve outgrown your current hosting provider, consider giving WPMU DEV managed WordPress hosting a try.

Our hosting includes dedicated memory, CPU, SSD storage resources, blazing-fast CDN, WAF, DNS Manager, IPv6, SSH, WP-Cli, 24/7 support, and more.

A WPMU DEV Membership includes hosting for 3 sites, plus access to The HUB and all of our award-winning plugins (Pro version).

Migrating your website to a new host doesn’t have to cause a lot of anxiety and stress.

And once you’re settled in, the peace of mind knowing that your host can handle the traffic, cover your needs, and provide you with assistance will keep you happy to be in the neighborhood.


What The SFTP? Transfer Your Files Secure-ly!

You’ve just installed a brand new theme for your new site. You load it up and begin to admire it – it’s perfect! Except…what’s that weird orange tint on all of your photos?! How do you get rid of it? It’s time you unlocked the world of SFTP…

It’s often said that you can build sites on WordPress without ever touching a line of code.

This is absolutely true – however, it’s like owning a Ferrari and never going past the third gear.

I’m not saying you need to start building your own themes and creating new plugins to be able to get the most out of WordPress, just that developing the skills to at least make minor aesthetic changes to your site should be on most people’s to-do list.

Trust me – the sense of accomplishment you get from fixing that annoying layout issue on your site all by yourself is second to none.

But if you want to meddle with the files in order to make these kinds of changes, you need to know how to access them.

There’s a couple of different ways you can do this, but in this article, we’re going to focus on SFTP (Secure File Transfer Protocol).

If you want to skip straight to the good stuff, here’s what we will be covering:

  1. What is Encryption?
  2. SFTP V FTP
  3. How Does SFTP Work?
  4. What is FTPS?
  5. How Do I Access My Files With SFTP?
  6. Which SFTP Client Should I Use?
  7. Accessing Files With FileZilla
  8. Accessing Files Through the Command Line
Cartoon of Devman putting chains and a padlock around a letter, about to post it.
If only Devman knew there was another way to securely send files…

One of the main benefits of using SFTP to transfer your files over other methods is that it encrypts your data.

Therefore, before we delve into how SFTP works, we must first understand the basics of encryption.

What is Encryption?

Encryption is a method of protecting data by converting it to code or ‘cipher’ that can only be solved by the people who have permission to view it.

Simple encryption could be in the form of the A1Z26 cipher, which assigns each letter a numeric value based on their position in the alphabet (A = 1, B = 2), so the word ‘PASSWORD’, for example, would be converted to 16;1;19;19;23;15;18;4.

This is a very simple cipher and wouldn’t take a rocket scientist to crack the code.

With the help of computers, files can be encrypted in virtually uncrackable ways, as machines are able to generate complex, random encryptions that no amount of guesswork would be able to solve.

The recipient possesses the ‘key’, which unscrambles the code and allows them to read it.

A hacker’s goal would be to gain access to plain text data, i.e. data that hasn’t been encrypted.

If a hacker manages to get their hands on ciphertext (encrypted data) the chances of them being able to decode it and view the information it contains are virtually zero, which is why encryption is so widely used.

Take Passwords For Example

Any website which stores user information should encrypt it in case of a breach.

When you log into WordPress, you input your password which could be something as simple as ‘Lilac12’ however WordPress would encrypt it before storing it on the database, so at their end, it could look as complex as ef9ded6169f538c36f9ad613806a7b99.

If a hacker breaches the WordPress database, they wouldn’t be able to access your account unless they were able to transfer the code back into Lilac12 in order to log in.

In theory, the only person who truly knows your password is you!

SFTP v FTP

So, back to SFTP – what is it, and how does it differ from FTP?

One of the main distinctions between SFTP and FTP (File Transfer Protocol), is that SFTP is secure whereas FTP is not (I know, who’d have guessed?!)

Let’s say I call you on the phone and we’re having a private conversation.

If someone manages to tap into the line, they hear us speaking English and they will know everything we discuss. This is FTP, as there is no encryption taking place.

If I call you on an encrypted line, all they hear is gibberish, so even if they managed to intercept the connection, it’s encrypted in a way that means they learn nothing from it and the content is useless to them. This is SFTP – the encryption of files protects your data in the event of an interception.

How Does SFTP Work?

You start the process by logging into an SFTP client to initiate the connection.

The details required include a username, password, host (your site’s URL), and port number, which can all be obtained through your hosting provider.

You can also generate keys that are swapped between the servers, but for the novice user, a username and password is definitely the right way to go.

Once you have authenticated your connection with either of these methods, the files are encrypted and sent to the recipient.

As the files can only be decrypted by the intended recipient, anyone who manages to intercept the connection will only have access to a bunch of jumbled, unreadable files.

So I Guess This Means No One Uses FTP Anymore?

Unfortunately, no, they still do.

FTP has been around a very long time – the specification for it was written before the internet was even invented!

Back then, it was assumed that internet activity wasn’t malicious, and therefore FTP wasn’t created with the need to protect files from various types of hacking methods.

The goal was simply to transfer files from one place to another.

These days, cybersecurity is a huge threat to companies and individuals everywhere, so protecting data should be on the forefront of everyone’s mind when transferring files.

Despite the fact that SFTP is now in existence, millions of people and businesses around the world still use FTP, although some sources suggest that it is dying a slow death.

If you’re not sending confidential or valuable data, it can be easy to think that FTP will be fine in this instance, as no harm would come from anyone having access to this particular set of files.

Whilst this may technically be true, businesses would always be advised to use a secure method when transferring files regardless of the content.

Luckily, there are tons of regulations in place which prevent businesses from taking risks like this, so the bottom line is SFTP over FTP every time!

What About FTPS – Where Does That Come Into It?

With so many acronyms all containing the same few letters, it’s extremely easy to get confused.

So, before we get any deeper, let’s clear up the difference between everything we’ve learnt thus far and the next arrival to the data transfer party – FTPS.

The FTP part of FTPS is indeed the same FTP that we’ve already met – a way to transfer files over the internet, but without the added security that SFTP offers via encryption.

FTPS however, is something slightly different.

Whilst SFTP pairs FTP with an SSH connection in order to securely transfer files, FTPS works with SSL to keep your files safe.

“What Is SSL?!” I Hear You Cry

SSL puts the S in HTTPS – it stands for Secure Sockets Layer and is what differentiates a secure site (HTTPS) from an unsecure one (HTTP).

To do this, your browser binds to the website forming a secure connection which is extremely difficult to penetrate.

This is done with the help of an SSL certificate. The browser connects to the website’s server, checks if it has an SSL certificate and if it does and the browser can authenticate it, it forms a binding connection which allows you to safely transfer information.

How Can I Access My Files Using SFTP?

So now that we’re better versed in the terminology, how do we put this into practice and access our WordPress files?

There are a couple of different ways you can do this.

Some hosting providers supply a platform for you to directly access your files such as C Panel, however, if you don’t have access to anything similar, you can either use a plugin, the command terminal, or an SFTP client.

A plugin File Manager allows you to copy and amend your files, however, we wouldn’t recommend this method.

This is because if you change something in your site’s files, one simple syntax error could mean your whole site crashes and you are unable to even get to the dashboard.

If this is a mistake you have made using a plugin, you won’t even be able to get back into the plugin to fix the issue – it’s so much safer to use an external source such as an SFTP client so that you can get straight back in and correct the issue.

So now we’ve settled on SFTP, which client should we use?

Choosing an SFTP Client

There are a number of SFTP clients that you can use to access your files, and most are free.

Popular choices are WinSCP, Cyberduck and FileZilla

For basic users, all that really differs are the interfaces, so we’ll take a quick look at these three below.

First up, Cyberduck!

Cyberduck

Not all SFTP clients are a great fit for Mac users, but Cyberduck is one of the exceptions.

Screenshot of Cyberduck showing the layout of the folders and files
Cyberduck seems to have its ducks in a row.

It has a Mac-like aesthetic which is very beginner-friendly and supports a wide range of servers, so is a good choice for anyone looking to venture into the world of SFTP.

WinSCP

With 132 million downloads in the bag, WinSCP is also a great choice for your SFTP needs.

Screenshot showing the folder and file layour of WinSCP.
Ahh the good ol’ yellow folders we all know and love.

It’s only available for Windows, so it’s designed in a way that makes it quick and simple for Windows users to navigate, i.e. with lots of well-organized, yellow folders.

Like Cyberduck, it’s also completely free to use and you can easily access your files and make changes to your WordPress files using this client.

FileZilla

One of the most popular by far is FileZilla – it’s completely cross-platform (even Linux) and again, free.

Screenshot showing the folder and file layout of Filezilla.
FileZilla has been a solid choice for SFTP since its creation in 2001.

Below I will take you through how to use FileZilla to download copies of your files from WPMU DEV’s servers.

Not a WPMU DEV Member?

This quick tutorial should give you a good idea of what you would need to do to access your files from any hosting provider.

Orrrrrr, you could just take a look at all the awesome goodness included with our membership, take the plunge and host a site or two on our servers.

Using FileZilla To Access Your Files

First of all, let’s download FileZilla – just head to their site and get it installed.

In order to start the connection, you’ll need to enter your credentials as mentioned above.

To create these, you need to go to our website and into the hosting section of the hub.

You will find your sites in a list – just choose the one you want and click on ‘manage’ which will take you to the back-end of your WordPress site.

The section of the hub where you can click to manage your site preferences.
Click on the black arrow to display the ‘Manage’ button.
The section of the hub where you can make various changes to your site.
From here, click SFTP/SSH.

This will take you to the account creation screen.

The screen where you can click to add either an SSH or SFTP user.
Click ‘Add User’ and then ‘Add SFTP User’.

Here you need to choose a username and password:

The screen from which you can create SFTP credentials by entering a username and password.
You’re provided with a randomly generated password, but feel free to change it.

Your password needs to be a series of letters and numbers – and a pretty long one at that!

If your password isn’t sufficiently long enough, you won’t be able to continue – what’s the point in using a secure method of file transfer if your password is simple enough to guess?!

Now you’ve created your credentials, it’s time to head back to Filezilla to set up the connection.

The host is your website address, so enter that along with your username and password that you’ve just created within your hosting hub, and the port number, which is 22.

Click ‘Quickconnect’ and voila! You now have access to all of your WordPress files.

The screen where you input your credentials to connect to the host server.
You can save your site information for quicker connection by heading to File>Site Manager.


The list of files within FileZilla when you first connect to the server.
Just make sure you do your research before you jump in and start editing!

All you need to do now is right-click on the file you want to open and select “View/Edit”.

This will then open the file in your text editor.

Showing the opened style.css file inside the Notepad ++ text editor application.
Your file will open in the text editor (I’m using Notepad ++).

You can make the changes you need and then reupload the file back to the host server.

The pop-up which asks if you want to upload the file back to the server.
Once you click ‘Yes’, the changes will appear live on your site.

And it’s as simple as that!

The hard part is knowing what to do once you have the files within your reach.

There are tons of CSS tutorials online – check out our handy guide packed full of links to awesome resources if you’re hoping to jump into the world of web development languages, or if you just need a refresher. Also, here is another handy dandy tutorial on setting file permissions that you may find useful when working with files on your server.

Ready To Step It Up A Notch?

Another way to access your files is through the command line/terminal.

Be warned – if you have no idea what you’re doing with the command line, then I would strongly advise that you go away, do a bit of research and come back when you’re confident you’re not going to break your site!

I am simply here to show you how to access it via our hosting – what you do with that power is entirely up to you!

Unlike many hosting companies, for an added layer of security, websites hosted on our servers have one set of credentials for SFTP and one for SSH.

If all you want to do is download, make changes to your files and then reupload them, you can do this through SFTP.

If you want to do the more admin-y things such as add users or change settings, you will need to access the server via SSH instead.

It is a very similar process, however, you would need to head back over to the hosting hub and create an SSH user in the same way you did an SFTP one.

As before with FileZilla, using SFTP through the command line opens up a secure connection that allows files to be transferred over the internet.

If you’re on a Windows machine, you simply open up the command line by hitting Win+R and then typing in “cmd”. If you’re on Mac, head to ‘Terminal’ in your applications.


The screen you are greeted with when you open up the command line in Windows.
This is the screen that will appear on a Windows operating system.

You then need to establish the connection to your site by typing in the following:

sftp (your sftp username)@(your website address)

So in this example, mine would be sftp kirstan@kirstan.wpmudev.host

This is telling the server that I want to log in via SFTP with the account name ‘kirstan’ into my kirstan.wpmudev.host website.

It will then ask for your password – once you have entered this, you will have remote access to your files.

Credentials entered into the command line.
If you need to paste your password in, just right-click and hit enter.

Right, so we’re in!!

Now we can download copies of our WordPress files by simply inputting a few commands and hitting enter each time.

First, we type in “ls” so that we’re navigating within the server rather than our local machine.

The command line with the command 'ls' typed in to display the current folder.
This will firstly display the “site” folder, which is the one that contains all of your WordPress files.

Then you can navigate around the folders by using the “ls” command which will show you the list of folders and documents inside the folder you’re currently in, and “cd” which will take you to the folder you specify.

Let’s take a quick look below:

The next screen of the command line where you can see all folders and files inside the public_html folder.
It looks more daunting than it is – promise!

I am now inside the public_html folder and as you can see from above, I navigated here by typing in “cd site”, using “ls” to check the names of the folders and then typing “cd public_html”.

Each time you input a command, remember to hit enter so that it can be processed!

Your WordPress files are always organized in the same series of folders and subfolders no matter which method you choose to access them.

If I wanted to download my theme’s stylesheet, I would head into wp content>themes>twentynineteen.

I navigated to the theme’s files by using the “ls” and “cd” commands, and now I’m ready to download the file I need.

INside the Twenty Ninteen themes folder showing the list of files.
If you want to retrieve a file, you type “get” followed by the name of the file, and to upload, just replace “get” with “put”.

I typed “get stylesheet.css” and was able to easily download a copy of the file directly to my downloads folder:

The screen from where I downloaded the style.css filee.
I can then edit it and use the “put” command to send it back to the server.

Once you’ve learned the list of commands, you’ll be able to navigate your way through your WordPress site this way like it’s second nature.

If this is something you fancy getting to grips with, you can check out this ‘cheat sheet’ of some of the most frequently used SFTP commands.

Congratulations – You’ve Just Unlocked The Next Level of WordPress!

Now that you know how to get your hands on your files, you can start to think about what you’ll do with this new power.

Whether you fancy unleashing your imagination and customizing your perfect theme or you just want to find out a bit more about how the PHP behind WordPress really works, our WordPress Academy has everything you need or there are tons of free tutorials online.

Or, if you’re the type of person that likes to ‘get stuck into it boots and all’ and try things out for yourself, sign up for our no-risk 7-day membership trial and check out our secure file transfer tools and more in the [humblebrag alert!] best managed WordPress hosting on the planet.

What is SSH? The Magic Of Remote WordPress Access

Did you know you can securely access your WordPress site remotely? But how is it done? By some magician’s trick? Actually, it’s called SSH — and now’s your chance to get to know it.

It’s possible with a dash of login credentials, a sprinkle of an interface, and a pinch of a good network connection.

Then, like a good WordPress potion, everything works together and you’ll have a secure way of getting it all accomplished.

In this getting started guide, we’ll be going over all things WordPress SSH to get you started and familiar with how it operates.

More specifically I’ll be discussing:

  • What is SSH and when you’d use it.
  • How to setup SSH.
  • Accessing SSH.
  • Setting up a user for it.
  • Commands to perform SSH functions.
  • Differences between SSH, SFTP, and FTP.
  • Our hosting and SSH.
  • And more!

Though it looks like I’m trying to keep this under wraps (SSH can easily become confused with shhh), it’s no secret that by the time you get through this, you’ll be so comfortable knowing SSH that you can set it up and securely log in to your computer remotely.

You’ll also discover how the process can be simplified with good hosting.

Once you get the hang of SSH, you’ll see why it’s so popular and how remote access can make life easier for you (unlike some other things that are remote).

Dev Man looking under couch cushions.
Luckily, we’re not dealing with a lost TV remote.

So, What is SSH?

SSH is a UNIX-based command interface and protocol. It stands for ‘Secure Shell’ and is defined as a protocol for secure remote login and other secure network services over an insecure network.

It functions by using public-key cryptography for connection and authentication.

What this means is that you can use it to gain access to your WordPress website remotely from any computer.

It doesn’t matter where your site is hosted, as long as you have credentials to log in.

SSH is here to provide a secure login, to ensure nobody has access to your connection while you’re on it.

When you want to connect your server by using SSH, you just need two things:

  1. An interface
  2. Login Credentials

Something to keep in mind is if you’re running Linux or macOS, there is already an interface built into your operating system, so installing an SSH client isn’t necessary.

However, if you’re running Windows, you’ll have to install a client. More on that coming up…

Let’s Talk Client and Server

To establish an SSH, there are two components: a client and the corresponding server.

A client is an application that you’ll install on your computer to connect with another computer (aka — server).

The client uses the remote host information to initiate a connection and, when the credentials are verified, establishes the encrypted connection.

Meanwhile, on the server-side, there’s a component defined as SSH daemon that is regularly listening to a specific TCP/IP port for potential client connection requests.

When a client initiates a connection, the SSH daemon will reply with the software and the protocol versions it supports.

Then, the two will exchange their identification data. If all is well and the credentials pan out, SSH creates a new session for the appropriate environment.

It’s almost as if the client and server were passing each other a briefcase. Any crook getting in between that wants to get into the briefcase can’t, because they don’t have a key.

This keeps the items in the briefcase secure until the client opens it up with a key, and is able to pass things back and forth securely.

When Do You Need To Use SSH?

With cloud servers becoming increasingly popular and affordable, more and more clients favor the use of a cloud server for their website.

That makes SSH the most commonly used tool to handle tasks of various degrees on cloud servers.

Some examples of when SSH might be used are when a developer sets up a web server for a website of a client, or to possibly deploy source code to a production server.

Prerequisites For SSH

Before you can establish a secure remote desktop protocol with a remote machine, there are some requirements.

Here is the checklist:

Ensure you have the necessary permissions to access the remote computer.
The Firewall settings have to allow a remote connection.
Have the IP address or the name of the remote machine you want to connect up to.
The remote computer has to be turned on and have a network connection.
Client and server applications need to be installed and enabled.

Of course, to check some of these items off, you’ll need to know how to get set up in the first place.

On that note, here are…

The Key(s) To Getting Started

You will have to set up SSH correctly to ensure you’re able to login to the cloud server from your local computer.

So, how do we go about doing that?

As I mentioned, if you have a Linux or macOS, a pair of public and private keys are already built into your operating system.

If you’re Windows-based, you’ll need to install a client to get started.

It’s free and easy to do. It’s just a matter of downloading a client to your system.

There are a lot of free open source software options out there for Windows, such as PuTTY, SuperPuTTY, and PuTTYtray. Download whichever option you prefer, and then you’re ready to move forward.

They’re all a bit different. For example, Absolute Telnet is designed strictly for Windows and not for Linux. Whereas, eSSH Client is designed for both.

Example of SSH clients.
Example of SSH clients. (Source: Wikipedia)

You can take a look at more comparisons and see what works best for you.

SSH Set Up

To get set up, we’ll need to generate the public and private keys pair.

In this example, I’m on a Mac OS, so I’ll be doing this from Terminal. The Terminal is located in Applications>Utilities>Terminal.

Once there, we will run this command:

ssh-keygen -t rsa

In this command, the -t option will allow you to specify what type of key to create. It’s typical to use RSA.

RSA is one of the earliest public-key cryptosystems and is widely used in secure data transmissions.

RSA is here by default, so there is nothing to change unless you specify something else.

Enter file in which to save the key (/Users/demo/.ssh/id_rsa):

Now you’ll enter the path where you’d like to store the public and private key pairs. On Mac OS X, typically they’re saved in the user’s home directory. However, save it anyplace you’d like.

Once you have it saved, next up is to enter a passphrase.

If you’re running this for the first time, keep it as the default value.

Enter passphrase (empty for no passphrase):

Type in a password to protect your private key. This is the password you’ll need to enter each time you access the private key.

If you don’t want a password, you can keep it empty.

Enter same passphrase again:

You’ll next confirm your password.

Once you do that, your identification is saved and you’ll get a confirmation and the key’s randomart image will appear on the line below.

Example of randomart
Example of the key’s randomart image that will appear after successfully creating a key.

It will also tell you where the public and private key is saved to above the image.

An example of the public key would be /Users/demo/.ssh/id_rsa.pub and /Users/demo/.ssh/id_rsa for the private key.

You’re moving right along now with SSH. You have your key, passcode, and the information stored in a location on your computer.

Note: If you’re on Windows, search online for “generate ssh keys windows” and you will get a list of tutorials showing you how to do this.

Here, for example, is one that came up for manually generating ssh keys in Windows using PuTTY.

Okay, What’s In Store Next?

Glad you asked. We need to ‘store’ the public key to the cloud server, so you can allow users access to your website.

Your hosting company should have an admin section for you to upload the public key. Every cloud service will be different, so you may have to reach out to yours for specific information on where to do this.

Since we offer hosting here at WPMU DEV, I’ll show you how to do this through our hosting service.

(P.S. We’ll be going over hosting later in this article.)

We make it simple and easy to store the public key and allow users access.

With our hosting, you’ll log in to your WPMU DEV account and go to The Hub 2.0, click on your website, and then click the Hosting tab.

The hub hosting tab.
My website’s hosting area in The Hub.

You’ll see a bunch of tabs appear beneath. Click on SFTP/SSH.

This will give you the option to add an SFTP or SSH user. Click Add User.

Add SSH user image.

Once you hit Add User, you’ll have a choice between SFTP or SSH.

SFTP User and SSH User options.

Tough choice, huh?

If you’re wondering what the difference between an SFTP user and SSH user is, here is some clarification.

SFTP (SSH File Transfer Protocol) is a file transfer protocol that is built upon the SSH transport layer. It’s used to securely move large amounts of data over any given internet connection.

Of course, we defined it earlier, but just to refresh, SSH is a protocol that allows you to connect securely to a remote computer or server by using a text-based interface.

Similarities Between SSH and SFTP

With SFTP, the protocol can’t exist without SSH, making SSH the binding agent that lets SFTP transfer files securely. Most SSH servers include SFTP capabilities, however, not all SFTP servers support SSH actions and commands.

Differences?

They’re both used to transfer information securely, but unlike SFTP, SSH can exist on its own.

Many applications for SSH are remote command-line, remote command execution, and log in.

SFTP provides secure file access, file management, and file transfer over a data stream.

Alright, now that you know the differences, you can choose accordingly what type of user you’d like to add.

We’re going to stick with SSH for this tutorial.

Once you click on SSH User, a screen pops up with additional information to add for a new SSH user.

Screen to add a new SSH User.

Here, you set up a Username, Password, Path Restriction (optional), and Environment.

In the Password section, you have the option of using a Public Key that we went over earlier (/Users/demo/.ssh/id_rsa.pub). Or, you can create your own password.

In the Path Restriction area, you can add restrictions for wp-content, Plugins, or Themes. By default, it’s on None.

Path restrictions dropdown.

In the Environment area, we’ll select Production.

After you get the information entered, your Users will appear on the SFTP/SSH dashboard.

It shows the Username, Environment, Type (e.g. SSH), Path Restrictions, and SSH Connection Info.

SSH users image.
Where your Users will appear.

From this point, your users will have SSH access.

You can change your password and edit the user however you’d like in this area.

When you’re ready to log in, the Connection Info is where you can copy and paste the user name for configuration.

Connection info for SSH.
Quick configuration screen.

You would then paste or type this into your Terminal. After that, it will prompt you to enter a password.

If the username and password are correct, you’ll have access and a screen similar to the one below will appear.

WPMU DEV login screen for SSH.
What a successful login looks like.

You can now use commands and perform functions.

Setting up an SFTP User is similar to SSH. Just follow the prompts and, like our above example, it will then appear in your dashboard once successfully set up.

Connecting Client and Server

Now that you’re set up, refer back to our checklist at the beginning of this article. If you have your remote machine and your own computer set up with SSH, you should be in business!

To operate a remote machine, SSH is performed by commands. There are numerous command capabilities that you can use. Here’s a rundown…

SSH Commands

You can run certain commands from one computer on a remote machine. This will enable you to copy files, list files in a certain directory, move files, and more.

This is more advanced and will require getting to know the commands and what ones do what.

However, once you know what each command does, you can then operate a system remotely with them.

Several examples of commands are:

ls will display the details of the files, such as the modified date and time, size, and permissions.

Cd is used to change directories. It will take you to the new directory and the command line indicates where you are.

Mkdir will create a new directory.

There are a lot of popular commands in SSH. A list of commands that are allowed with WPMU DEV hosting can be found on our SFTP & SSH information page.

It will be necessary for you to know commands if you’re going to be the one working with a computer remotely.

There are cheat sheets out there that can give you more insight and examples of what commands can do.

Something to keep in mind is SSH is a pretty powerful tool, so if you DO create commands, you have to be careful or you could break your site.

You can add and delete files, so if you enter a wrong command, you could lose content.

Be sure to backup your website before using commands and get familiar with how they function.

SSH and FTP

You may have heard about FTP as a method of transferring information remotely.

So, what’s the difference between SSH and FTP?

FTP (File Transfer Protocol) is a standard network protocol that is used to transfer files between a client and a server on a data network. File transfer connections are (typically) initiated by an FTP client and responded to by an FTP server.

Then, when authenticated, a connection occurs between the client and the server.

Any files and folders can be transferred to either direction between the connected computers.

How FTP works.
An example of how FTP works.

It’s different from SSH for several reasons.

SSH is vastly more secure. When FTP was designed, network security wasn’t as important as it is today.

It wasn’t created to be secure and offers no protection for the privacy or integrity of the files that are being transferred. So, information can easily be intercepted.

And if you’re great at using Unix commands, then SSH is probably going to be your best choice. That being said, with FTP, you can use any favorite editor for file editing.

Also, for speed, SSH is quicker.

With FTP, you need to download files to your PC and then upload it to the server using FTP.

With SSH, getting files from server to server with commands is fast, once you learn what commands do what. You can download a library within seconds.

So, for a secure transfer of information, speed, and reliability, SSH is typically the best option.

There’s Never Been a Better Time To Try Our Hosting

I told you we’d talk hosting, and here it is…

As I showed you earlier in this article, setting up SSH with our hosting, it’s an easy way of doing it in The Hub 2.0.

Plus, with our hosting, we offer 24/7 support, our award-winning premium plugins, advanced releases on updates, and much more!

I mention specifically our hosting because this April we’re celebrating Hosting Month!

Yes, it’s a thing. And you can try our hosting for 3-months for FREE.

BTW: We’re also giving away a total of $10K in WPMU DEV credits!

I could go on and on about this big event, so the best thing to do is read all about it here and enter our giveaway at the bottom of this article.

Be sure to join the fun on our social media, too. You can find us on Instagram, Facebook, and Twitter.

We’re having an amazing caption contest this month that’s part of our $10K giveaway and always have tons of other shenanigans socially.

We’ll Fini(SSH) With This…

Now that you’ve dabbled in SSH, you can securely set up your website remotely and have it worked on without being there.

As you can see, it IS like magic!

Okay, in this day and age, maybe I won’t go that far. However, it is a great option for working on your WordPress site remotely.

Add in a dusting of great hosting (waving hand) and you’ll be in good SSH-ape — and I’ll stop with the play on words.

Different Favicon for Development

I bet a lot of us tend to have the production website and the development website up simultaneously a lot. It's almost a developer cliché at this point to make some local change, refresh, refresh, refresh, refresh, and just not see the change, only to discover you were looking at the production website, not your local development website.

It's just funny at first, but it's frustrating if it happens a lot. It's also totally avoidable by having an obvious visual¹ difference between the two sites. An easy way to do that? Different favicons.

There is no real trick to this. I literally just have a different favicon.ico file in development than I do in production. On this (WordPress) site, I only version control and deploy the wp-content folder, which is not the root of the site where the favicon lives. Any files at the root I have to manually SFTP in to change. I simply changed my local version, and there it sits, being all different.

Other trickery

Speaking of favicons...

This has me wondering what best practices for favicons are in 2020, at least for garden variety content websites like this.

I hate to say it, but I don't really care about what the icon is when someone adds this site to the home screen on an iPad, ya know? Aside from one fellow who wanted a copy of the whole database to use the site offline to teach prisoners, nobody has ever asked me about "installing" CSS-Tricks.

Nor do I care about the tile color on a Windows 8 tablet or to customize the color of the browser chrome on Android. That kinda stuff tends to be part of the process when "generating" favicons.

I do care that the favicon looks good on high-resolution displays (a 32×32 graphic isn't much of a splurge). I like the idea of SVG favicons. I like the idea of making sure dark mode is handled. I like the idea of doing this with as little code and files as possible. Anyone dig into this lately and want to enlighten me?

  1. "Visual" difference. Hm. I wonder what could be done for developers with visual impairments? Ideas?

The post Different Favicon for Development appeared first on CSS-Tricks.

254: Design Tools

Show Description

Klare and Chris talk about the design tools used at CodePen, and why we landed on the apps that we did.

Time Jumps

  • 01:06 We use Figma!
  • 02:33 What about Invision?
  • 07:57 Our flow typically is...
  • 16:31 Sponsor: WordPress
  • 18:04 What is auto layout?
  • 27:41 What about time?

Sponsor: WordPress.com now has SFTP and Database Access

I’m the type of developer who likes to hack on my theme! Me too, dear reader, me too. In the past, that may have been a reason not to choose to put your site on WordPress.com. No more. If you’re on the Business or eCommerce plans, you have direct access to your site’s database (via phpMyAdmin) and files (via SFTP). You can also install plugins, giving you as much control over your WordPress site as you’d likely ever need.

Show Links

CodePen Links

The post 254: Design Tools appeared first on CodePen Blog.

AWS Transfer For SFTP Explained: A VPC Use Case

Connect AWS Transfer for SFTP

Organizations often find themselves needing to make secure file transfers to outside entities such as clients and vendors. Not only do these transfers need to maintain the security and integrity of internal infrastructure, but the process needs to be practical and cost-effective, too. Secure-Shell File Transfer Protocol (SFTP) servers used to be the go-to answer for this enterprise requirement, but running these is costly and not necessarily efficient best practice. AWS launched it’s fully managed AWS Transfer for SFTP in direct answer to this dilemma.

Reduce Costly SFTP Overheads

Rather than have to go through the costly process of investing time and money to run an infrastructure setup of SFTP servers, AWS Transfer for SFTP removes all such maintenance overheads. AWS SFTP provides access to specific S3 buckets and prefixes per user. Organizations can fully leverage SFTP to upload, download, and delete files to and from these buckets to external entities with ease.

How to Send AS2 Messages With an EDI Trading Platform

Keep your confidential data secure

When business involves lots of confidential data, security becomes a major concern for all enterprises. Therefore, going for an EDI trading platform with a secure file transfer protocol is essential. AS2 Gateway is a SaaS EDI trading platform that is created based on AS2 protocol to provide secure communication for B2B enterprises.

In addition to all the benefits packaged with AS2 protocol, AS2 Gateway itself provides a flexible, easy-to-use, personalized piece of software to the customers. So, in this article let's talk about how to send AS2 messages via AS2 Gateway.

Buddy on CSS-Tricks

Here's a little direct product endorsement for ya: I literally use Buddy for deployment on all my projects.

Buddy isn't just a deployment tool, we'll get to that, but it's something that Buddy does very well and definitely a reason you might look at picking it up yourself if you're looking around for a reliable, high-quality deployment service.

Here's my current setup:

  • CSS-Tricks is WordPress site.
  • The whole wp-content folder is a private repository on GitHub.
  • The hosting is on Flywheel, which gives me SFTP access to the server.
  • When I push to the Master branch, Buddy automatically deploys the changed files over SFTP. This is fast because the fact it's only dealing with changed files.

The setup on Buddy for this is incredibly nice and simple and I've never once had any problems with it. You may want to look at zero-downtime deployments as well, where files are uploaded to a separate directory first and swapped out with the destination directories if the entire upload is successful.

And I don't just use this setup for CSS-Tricks but all my sites that need this kind of deployment.

But like I said, Buddy isn't just deployment. Buddy is all about pipelines. You (visually) configure a bunch of tasks that you want Buddy to do for you and the trigger that kicks it off. Pushing to Master is just one possible trigger, you can also kick them off manually or on a timer.

What tasks? Well, a common one would be running your tests. You know: Continuous Integration (CI) and Continuous Development (CD). You can tell Buddy to run whatever terminal commands you want (they'll spin up a Docker container for you), so however you run tests and get output will work just fine.

You could have it shoot you an email, hit some other web service, or run a build process.

Here's the actual tasks I run in my pipeline right now:

  1. Upload the files over SFTP
  2. Tell Cloudflare to purge all the cache on the site
  3. Send a message to a particular channel on Slack (also do that on failure)

So useful.

It's so easy to set up it almost encourages doing more with your pipelines. I need to get some Cypress tests in there and I'd love to integrate an action to automatically optimize all images in the commits.

The post Buddy on CSS-Tricks appeared first on CSS-Tricks.

Automating Website Deployments Through Buddy

Automating Website Deployments Through Buddy

Automating Website Deployments Through Buddy

Leonardo Losoviz

(This is a sponsored article.) Managing the deployment of a website used to be easy: It simply involved uploading files to the server through FTP and you were pretty much done. But those days are gone: Websites have gotten very complex, involving many tools and technologies in their stacks.

Nowadays, a typical web project may require to execute build tools to compress assets and generate the deliverable files for production, upload the assets to a CDN and invalidate stale ones, execute a test suit to make sure the code has no errors (for both client and server-side code), do database migrations (and, to be on the safe side, first execute a backup of the database), instantiate the desired number of servers behind a load balancer and deploy the application to them (through an atomic deployment, so that the website is always available), download and install the dependencies, deploy serverless functions, and finally notify the team that everything is ready through Slack or by email.

All this process sounds like a bit too much, right? Well, it actually is too much. How can we avoid getting overwhelmed by the complexity of the task at hand? The solution boils down to a single word: Automation. By automating all the tasks to execute, we will not dread doing the deployment (and having a trembling sweaty finger when pressing the Enter button), indeed we may not be even aware of it.

Automation improves the quality of our work, since we can avoid having to manually execute mind-numbing tasks again and again, which will enable us to use all our time for coding, and reassures us that the deployment will not fail due to human errors (such as overriding the wrong folder as in the old FTP days).

Introduction To Continuous Integration, Delivery, And Deployment

Managing and automating software deployment involves both tools and processes. In particular, Git as the version control system where to store our source code, and the availability of Git-hosting services (such as GitHub, GitLab and BitBucket) which trigger events when new code is pushed into the repository, enable to benefit from the following processes:

  • Continuous Integration
    The strategy of merging changes in the code into the main branch as often as possible, upon which automated tests against a build of the codebase are run to validate that the new code doesn’t introduce errors;
  • Continuous Delivery
    An extension to Continuous Integration which also automates the release process, enabling to deploy the project into production at any moment;
  • Continuous Deployment
    An extension to Continuous Delivery which automatically deploys the new code whenever it passes all required tests (as small a change it may contain), enabling to easily identify the source of any problem that might arise, and removing pressure off the team as it doesn’t need to deal with a "release day" anymore.

Adhering to these strategies has several benefits. The most immediate one is that our product can ship new features faster, indeed they can go live as soon as the team has finished coding them. The team can also receive feedback immediately (either from team members on a development environment, from the client on a staging environment, and from the users after it goes live) and be able to react straight away, thus creating a positive feedback loop. And because the whole process is fully automated, the team can save time and focus on the code, thus improving the quality of the product.

Continuous delivery enables getting feedback as early as possible
Continuous delivery enables getting feedback as early as possible. (Large preview)

Introducing Buddy, A Tool For Automating Software Deployment

The popularity of Git has given rise to a new generation of tools to manage the complexity of software deployments. Buddy is one of these new tools, born with the goal of making it easy to implement Continuous Integration/Delivery/Deployment, while broadening the number of features our application can provide, improving its quality, and reducing its costs by allowing to incorporate the offerings of the best or cheapest cloud-based service providers (among them AWS, DigitalOcean, Google Cloud Platform, Cloudflare, Rackspace, Azure, and others) into our stacks. This way, for instance, our application can be hosted on GitHub, be protected from DDoS through Cloudflare, have its static files hosted through DigitalOcean, use serverless functions from AWS Lambda, and authenticate users through Firebase, and everything is handled seamlessly.

Buddy operates through the use of pipelines: Sets of actions defined by the developer in a specific order, executed either manually or automatically when executing a Git push, that deliver the application from a Git repository to wherever needed and transforming it as required. Pipelines are extremely flexible, enabling developers to add only the required actions and have them customized for their specific needs.

For instance, the following pipeline performs all required tasks to deploy some Node.js application: execute the build step, upload files to the server through SFTP, upload assets to AWS S3 and purge them from the CDN, restart the server and finally inform the team through Slack (as it can be appreciated in the image below, the pipeline can be self-explanatory):

Buddy pipeline example
An example of a pipeline to deploy a Node.js application. (Large preview)

We can create different pipelines for different environments, and execute special actions when the process fails (such as when a test was not successful when the server to deploy to is down, or others). For instance, the following pipeline (to deploy a Node.js & PHP app that uses DigitalOcean, Fortrabbit & AWS CloudFront for hosting) makes a backup of assets and purges the CDN only when deploying to production, and sends a notification to the team through Slack in case of failure:

Demonstration of Buddy pipeline
Pipeline configured for different environments. (Large preview)

A noteworthy effect of configuring our pipelines with actions from different cloud-service providers is that we can conveniently switch among them whenever the need arises, making it easy to avoid vendor lock-in (this includes also changing the repository provider). Buddy offers slightly over 100 actions out of the box, and also allows developers to create and use their own actions. This image shows all the readily available actions:

Buddy actions
Out of the box actions in Buddy. (Large preview)

Creating A Pipeline

Let’s see how to create a simple pipeline to test and deploy a Node.js application, and send a notification to the team. The first step is to create a new project, during which you will be asked to select the project’s hosting provider (from among GitHub, GitLab, Bitbucket, Buddy Git Hosting, and your private Git server), and then to select the repository:

Tutorial step 1: Selecting the hosting provider
Selecting the hosting provider (Large preview)

Then we can create the pipeline, specifying when it must run (either manually, automatically after new code is pushed to the repository, or automatically every x amount of time) and from which branch:

Tutorial step 2: Creating a new pipeline
Creating a new pipeline (Large preview)

Then we can add actions to the pipeline. For that, we simply click on the “+” button to add a new action, upon which we must configure it as needed. To build and test a Node.js application we add and configure a “Node.js” action:

Tutorial step 3: Adding a Node.js action
Adding a Node.js action (Large preview)

After testing the application, we can deploy it by uploading it to our production server through SFTP. For this, we add an “SFTP” action, and configure it through custom-defined environment variables ${SFTP} and ${SFTP_USER}:

Tutorial step 4: Adding an SFTP action
Adding an SFTP action (Large preview)

Finally, we send an email to the team with the results of the execution. For this, we add and configure the “Email” action:

Tutorial step 5: Adding an Email action
Adding an Email action (Large preview)

That’s it. Our pipeline will look like this:

Tutorial step 6: Pipeline finished
Pipeline finished (Large preview)

From this moment on, if the pipeline was configured to run when new code is pushed to the repository, doing a git push will trigger the execution of the pipeline.

Staying Constantly Up To Date

Web development is in a never-ending state of flux, with new tools and services being launched without a break, some of them often becoming a hot trend immediately and the new normal barely a few months later. Technologies seldom heard of a few years ago progressively gain importance and eventually become a must (voice search, machine learning, WebAssembly), new frameworks and libraries offer new ways of building sites (GraphQL, Gatsby, Next.js, Nuxt.js), and our applications need to be accessed from newly-invented devices (Amazon Echo, In-car systems). To keep our applications relevant, we must continuously evaluate the latest offerings and decide if to add them to our technology stack. Hence, it is extremely important that our platforms for developing the application do not restrict what technologies we can use.

Buddy deals with this issue by continuously collecting feedback from its users about what they need (through user polls, their forum, communication channels, and tweets), and its team strives to deliver the required features. The Buddy blog provides a glimpse of the intense pace of development: For instance, in the last few months they implemented features for building static apps and websites with Gatsby, deploying to UpCloud and to Google Cloud Functions, triggering pipelines with webhooks, integrating with Firebase, building and running Docker containers on AWS ECS, and many others.

Conclusion

Automation has become a must to avoid being overwhelmed by the complexity of modern website deployment. We can make use of Continuous Integration/Delivery/Deployment (readily feasible by hosting our source code through Git) to shorten the time needed for delivering new features into our applications and getting feedback from the users.

Buddy helps in this task, enabling developers to create pipelines to execute actions concerning a wide array of technologies and cloud-service providers, and combining these actions in any possible way to satisfy the most particular needs.

You can check out Buddy for free for 2 weeks and, if you need to host your data, you can also install it on your own premises.

Smashing Editorial (ms, ra, yk, il)

How to Remove the “Proudly Powered By WordPress” Link

So, your website has finally come together. You’ve stormed up an eye-catching header, your content is on point, and you are ready to unleash your site to the world.

Then you notice the “Proudly Powered By WordPress” link on your footer. Is your masterpiece forever condemned to being a WordPress mascot, or can the footer be removed? The good news is, it CAN.

WordPress footer credits
If you run a business website you’ll want to change or remove the footer credits.

You’ve probably noticed the footer message that links back to WordPress.org: Proudly Powered by WordPress.

It’s a small message that lives in the footer section of several native WordPress themes, which rightfully gives a shout to the WordPress project volunteers. But while some people may not find this unappealing, you may have bigger plans for your website and this ‘shoutout’ may not be aligned with your plans. So here you are, trying to figure out how to remove the “proudly powered by WordPress” credit from your site. And that’s precisely what this post aims to help you achieve.

Is It Legal to Remove the WordPress Footer Credits?

You will be pleased to know that if you remove the WordPress footer from your website, you won’t get into trouble.

WordPress, as an entity, is free and licensed under the GPL (General Public License). This basically means you are well within your rights to use, modify, and even redistribute WordPress.

If that’s not enough reassurance for you, any WordPress theme you download from the official WordPress.org theme directory is covered by the license. So, you’re also free to make edits to those.

With that out of the way, in the rest of this post I will show you how to edit or even remove the WordPress copyright footer from your website – especially if you are using a WordPress default theme.

Looking to rebrand or white label your WordPress site completely including the login page and dashboard? Check out Branda. Branda lets you remove or replace the WordPress branding your theme can’t, without having to touch a line of code.

Always Backup Before Making Changes

First things first. Before making any changes on your website, it is always a good idea to back up the contents of your site, so that if you accidentally break anything, you can quickly fix it by restoring your website to an earlier version. Many people have lost valuable information and even whole websites by failing to back their websites up, and we would hate to see the same happen to you.

If you’re a WPMU DEV member you can schedule your site to backup automatically with Snapshot. You can get both Snapshot and Branda when you start a free trial. Now, let’s delve in and explore the various ways through which you can remove the “powered by WordPress” footer from your website.

How to Hide the WordPress Copyright Footer

To hide the proudly powered by WordPress in the footer you’ll need:

  • Access to your WordPress admin area

Using CSS

This is the quick, easy but unsavory method that deserves a mention, but it is one that you should avoid. It involves adding some CSS to the Theme Customizer, and here’s how you can do this:

  1. Go to Appearance > Customize on the WordPress dashboard
  2. Click Additional CSS at the bottom of the menu
  3. Paste in the CSS code below

While this might seem like a quick, easy, workaround, the potential detrimental effect on your website SEO is not worth the risk. Spammers use a similar technique to hide links from users so Google could flag your site.

If however, you’re a bit of a dare-devil or losing search traffic doesn’t concern you (maybe the majority of your traffic doesn’t come from searches), feel free to use this method. If you’re more cautious or if the majority of your site traffic is from searches, read the next alternative option.

How to Remove the WordPress Copyright Footer

To change the footer you will need:

  • Access to your WordPress admin area
  • A text editor on your computer

Method #1: Via the WordPress Theme Customizer

Depending on what theme you are using, you may have the option to remove or edit the powered by WordPress footer directly in your theme customizer.

  1. Go to Appearance > Customize on the WordPress dashboard
  2. Click Footer > Bottom Bar
  3. You can either Disable Footer Credits or put your own text in Edit Footer Credit

Method #2: Via the Native Theme Options.

This works best for most third-party themes. Sometimes, the native WordPress theme customizer may not be equipped to edit the footer in WordPress, so your best bet is to check in the theme settings first.

If you have been unable to locate the option to disable footer credits inside the theme customizer, you could also check the ‘Widgets’ section, or inside the individual theme’s options.

Method #3: Editing Footer.php

If maintaining your website’s SEO is important to you, editing your theme’s footer.php file is another easy way to remove the WordPress footer credit link. The footer.php file contains the information your site needs to display the footer of your site, including, you guessed it, the WordPress credit link.

The safest way to edit the WordPress footer code on your website is by using an SFTP file manager such as Filezilla to access your core files. For security reasons, some web hosts disable the option to edit your theme code directly from inside your WordPress admin area. If you notice that you are unable to locate your website’s theme editor inside your WordPress admin area, it might have been disabled by your host. This means that you will need an SFTP file manager to access your files. But don’t worry – we have you covered on how to go about this.

  1. Connect to your site using an SFTP file manager. If you’re uncertain about how to do this, this in-depth tutorial will guide you through the process.
  2. Navigate to the public_html/wp-content/themes directory.
  3. Open the directory containing the theme you wish to edit.
  4. Locate the footer.php file, then copy it to the appropriate child theme directory.
  5. Open the footer.php file using a text editor and search and delete the footer code, depending on what theme you’re using.

Twenty Sixteen theme:

Twenty Seventeen theme:

Twenty Nineteen theme:

  1. Click “Update File” and the footer credit link will be gone or modified.

Quick warning: Before making any changes to your WordPress theme, it’s always a good idea to create a child theme, rather than directly edit your WordPress website’s code.  There are a couple of reasons why you should do this:

  1. Any updates that bring your theme up to the latest version could potentially undo all your hard work and revert your footer back to its pre-edited state.
  2. By editing the code directly on your website, there’s a chance that you could change or delete the wrong code and break your website.

If you’re new to creating child themes, you can read more about it in our guide How to Create a WordPress Child Theme.

Happy Coding!

I hope you found this post useful for removing or editing the “Proudly powered by WordPress” footer link credit in your website. As you can see, there are several ways to skin the cat, so please feel free to try out other methods mentioned above if one does not work. If you have any questions about removing the WordPress copyright footer from your website, please do not hesitate to drop a comment below. Also, if you need any help with customizing your WordPress website, please reach out to our friendly support team who would be more than happy to help!