Yesterday, OpenAI's inaugural DevDay conference in San Francisco unveiled a series of groundbreaking announcements, leaving the tech community humming with both excitement and a degree of uncertainty. The reveal of GPT-4 Turbo, a new wave of customizable AI through user-friendly APIs, and the promise to protect businesses from copyright infringement claims, stand out as critical moments that are reshaping the landscape of artificial intelligence. As the tech industry digests the implications of these developments, several questions emerge: What do these advancements mean for the future of AI? And how will they reshape the competitive landscape of startups and tech giants alike?
Key Takeaways from OpenAI's DevDay
The announcements from DevDay underscore a dynamic and ever-evolving domain, showcasing OpenAI's commitment to extending the frontiers of AI technology. These are the key revelations:
GPT-4 Turbo: An enhanced version of GPT-4 that is both more powerful and more cost-efficient.
Customizable Chatbots: OpenAI now allows users to create their own GPT versions for various use cases without any coding knowledge.
GPT Store: A new marketplace for user-created AI bots is on the horizon.
Assistants API: This new API enables the building of agent-like experiences, broadening the scope of possible AI applications.
DALL-E 3 API: OpenAI's text-to-image model is now more accessible, complete with moderation tools.
Text-to-Speech APIs: OpenAI introduces a suite of expressive AI voices.
Copyright Shield: A pledge to defend businesses from copyright infringement claims linked to the use of OpenAIs tools.
Recommended articles with more details on these announcements can be found on The Verge, and additional coverage on TechCrunch.
Questions Raised by DevDay
The advancements announced at DevDay suggest the next seismic shift in the AI landscape, with OpenAI demonstrating its formidable influence and technological prowess. Notably, OpenAI's move to enable the creation of custom GPT models and their decision to offer a GPT store could also democratize AI development, making sophisticated AI tools more accessible to a broader audience.
However, this democratization comes with its own set of questions. Will this influx of AI capabilities stifle innovation in startups, or will it spur a new wave of creativity? Discussions on Reddit indicate a mixed response from the community, with some lamenting the potential demise of startups that relied on existing gaps in the AI market, while others see it as an evolution that weeds out those unable to adapt and innovate.
Another important implication is the potential for AI models like GPT-4 Turbo to replace certain jobs, as they become more capable and less costly. As the world's most influential AI platform begins to perform complex tasks more efficiently, what will be the societal and economic repercussions?
Furthermore, the Copyright Shield program by OpenAI suggests a world where AI-generated content becomes ubiquitous, potentially challenging our existing norms around intellectual property and copyright law. How will this impact creators and the legal frameworks that protect their work?
The Future of AI: An OpenAI Monopoly?
With these developments, OpenAI continues to cement its position as a leader in the AI space. But does this come at the cost of reduced competition and potential monopolization? As we've seen in other sectors, a dominant player can stifle competition, which is often the lifeblood of innovation. A historical example is the web browser market, where Microsoft's Internet Explorer once held a dominant position. By bundling Internet Explorer with its Windows operating system, Microsoft was able to gain a significant market share, which led to antitrust lawsuits and concerns over lack of competition. This dominance not only discouraged other browser developments but also slowed the pace of innovation within the web browsing experience itself. It wasn't until the rise of competitors like Firefox and Google Chrome that we saw a resurgence in browser innovation and an improvement in user experience.
From this point of view, the move to simplify the use of AI through user-friendly interfaces and APIs is a double-edged sword. On one hand, it enables a wider range of creators and developers to engage with AI technology. On the other, it could concentrate power in the hands of a single entity, controlling the direction and ethics of AI development. This centralization poses potential risks for competitive diversity and requires careful oversight to maintain a healthy, multi-stakeholder ecosystem.
The Rise of GPT-4 Turbo: Job-Insecurities & the Ripple Effect on Startups
The accessibility of advanced AI tools could mean a democratized future where innovation is not the sole province of those with deep pockets or advanced technical skills. It might level the playing field or, as some on Reddit have pointed out, could quash many startups that have thrived in the niches OpenAI now seems prepared to fill. The sentiment shared by the community reflects a broader anxiety permeating the tech industry: the fear of being rendered obsolete by the relentless march of AI progress. The speed at which OpenAI is iterating its models and the scope of their functionality are formidable, to say the least.
With the advent of OpenAI's GPT-4 Turbo, we're forced to confront an uncomfortable question: what happens to human jobs when AI becomes better and cheaper at performing them? The argument in favor of AI equipped with human-like abilities often hinges on the promise of automation enhancing productivity. However, the lower costs associated with AI-driven solutions compared to human labor could incentivize companies to replace their human workforce. With GPT-4 Turbo, not only is the efficiency of tasks expected to increase, but the economic rationale for businesses to adopt AI becomes even more compelling. While it's true that new types of jobs will likely emerge in the wake of AI's rise, the transition could be tumultuous. The risk is that the job market may not adapt quickly enough to absorb the displaced workers, leading to a potential increase in unemployment and the need for large-scale retraining programs.
And it's not just about the jobs that AI can replace, but also about the broader implications for the labor market and society. The possibility of AI surpassing human capabilities in certain sectors raises fundamental questions about the value we place on human labor and the structure of our economy. Can we ensure a fair transition for those whose jobs are at risk? As AI models like GPT-4 Turbo become more ingrained in our economic fabric, these are the urgent questions we must address to ensure that the future of work is equitable for all.
The AI Revolution is Accelerating
The implications of such rapid development in AI are profound. With increased power and reach, comes greater responsibility. OpenAI's commitment to defending businesses from copyright claims raises questions about how AI-generated content will be regulated and the ethical considerations of AI mimicking human creativity. Moreover, as AI becomes more integrated into our lives, the potential for misuse or unintended consequences grows.
OpenAI's DevDay has undoubtedly set a new pace for the AI industry. The implications of these announcements will be felt far and wide, sparking debates on ethics, economics, and the future of innovation. As we grapple with these questions, one thing is clear: the AI revolution is accelerating, and we must prepare for a future that looks markedly different from today's world.
From Nike to Coca-Cola to De Beers, renowned brands have equally recognizable catchphrases.
And you would be right to assume that these slogans are trademarked.
The good news is that you don’t have to be a multinational company to trademark a phrase or slogan.
Admittedly, the process can be time-consuming and bureaucratic. But it’s possible to trademark your phrase if you know the right steps to take.
In this post, I’ll highlight the easiest way to trademark a phrase, step-by-step.
The Easy Parts of Trademarking a Phrase
Many people are surprised to find that you don’t necessarily need to go through the tedious process of registering a trademark. Common-law trademarking gives you legal rights to a phrase without needing to file a single document with a government agency.
Under this trademark law, you only need to regularly use your phrase or tagline in your business to be able to consider it trademarked. You’ll also be able to enforce this trademark in the geographical area you operate in. Furthermore, you don’t need to pay anything to obtain your common-law trademark. There are no filing fees, registration fees, or any type of fees associated with this mark.
In some cases, you may even be able to continue using your trademark in your geographical area even if another business registers the phrase with the federal government. Additionally, you’ll be able to use the symbol after your phrase. This symbol indicates to other businesses that you hold common-law trademark rights for the phrase.
The catch is that you have to be the first business in your industry and geographical area to use the phrase in order for this rule to work for you, and you will need a proven first-use date for your phrase. This date is evidence that you used the trademarked phrase before anyone else did.
For example, if you’re using your trademark phrase in Los Angeles, it’s only protected in your geographical location. Anyone can use the exact same phrase in San Francisco, or anywhere else in California for that matter, not to mention in any other state. Additionally, you’ll be solely responsible for enforcing your trademark–no one else will do it for you.
But common-law trademarking is an easy way to avoid the bureaucratic process of trademark registration while still laying claim to the phrase you want to use.
The Difficult Parts of Trademarking a Phrase
A federal trademark offers far more protection. But, this process can be long and complicated. The process of trademarking your phrase can take up to eight months. There is also no guarantee that your trademark will be granted.
Additionally, registering a trademark can be expensive. This is because the federal trademark only protects you from other businesses in your class. You may need to file a trademark application for each business class you want to be covered. With the cost of each filing ranging from $225 to $400, the total price can soon add up.
Furthermore, the U.S. Patent and Trademark Office (USPTO) has stringent and often confusing rules and regulations. Understanding the regulations may require a legal and trademark background. Given that your application fee is non-refundable, you’ll need to be careful to meet all the rules.
In short, the entire process is time-consuming, confusing, expensive, and offers no guarantees of success. But online legal services like LegalZoom can help to make the registration process straightforward. In addition, LegalZoom offers two options for filing your federal trademark.
The first option is a self-service-style offering. LegalZoom will provide you with all the information and resources you need to complete the trademark application. The legal service provider also gives you access to a basic search to see if your mark is already taken. Finally, LegalZoom lawyers will complete, proofread, and file your application on your behalf.
The second option is more hands-off. You’ll only need to answer a few questions about your trademark. Then, an attorney will take over the entire process. After that, you only need to wait for the outcome of the application.
Below are the steps you need to take to trademark a phrase:
Step 1 – Choose the Phrase You Want To Trademark
The first step in the process is to choose the phrase you want to trademark. It helps if you already have a phrase in mind. Either way, you’ll need to pay special attention to this stage. A strong trademark will provide you with complete protection from trademark infringement. It will also ensure that you can file your trademark successfully.
Go Through the USPTO Trademark Requirements
You may want to familiarize yourself with the USPTO requirements. The U.S. Patent and Trademark Office is responsible for registering trademarks. As such, this federal agency has set out rules for words, symbols, and phrases that can and cannot be trademarked.
You can refer to the USPTO website to learn the trademark basics. Some of the basic rules you’ll need to adhere to include:
The phrase has to be original and not already on file. You cannot register a trademark that’s already registered or pending.
You can only use your trademark phrase for commercial purposes. This means that you must use the phrase in connection with goods or services you are selling. You cannot trademark a phrase that you like so that other people can’t use it, but then never use it yourself.
Your trademark shouldn’t merely describe goods or services. Instead, the trademark should identify your business as the source of goods or services. For example, you cannot register the trademark phrase “Creamiest Yogurt in Town.” This phrase merely describes the kind of goods you are selling and is therefore unacceptable.
You cannot trademark common or cliche phrases used in everyday speech. Examples of such phrases may include “Break a leg” or “Bite the bullet.”
Come Up With a List of Possible Trademarks
A strong trademark phrase is invaluable to marketing and promoting products and services. Think of iconic phrases like “Where’s the Beef?” from Wendy’s or “Whazzup?” popularized by Budweiser. You can enjoy immense brand recognition by trademarking and popularizing your catchphrase or tagline.
If you haven’t already, create a list of possible catchphrases for your business. Some of the things to consider when creating your list include:
Your unique selling proposition
Your target market
What your business stands for
The feelings you want your slogan to elicit
Additionally, you might want to consider a timeless slogan. For example, “Can You Hear Me Now?” was an excellent catchphrase for Verizon. But with the advancements in cell phone and network technology, the phrase is outdated. You can also find free slogan makers to help you come up with a catchphrase from scratch.
Finally, choose the phrase you are happy with. It pays to have alternative phrases, just in case your first pick falls through.
Step 2 – Choose an Online Legal Service
You don’t have to spend too much time looking for a trademark attorney. Online legal services are convenient. Moreover, these services are staffed with expert and experienced trademark attorneys.
Sign Up With LegalZoom
Once again, LegalZoom offers two pricing tiers. The do-it-yourself plan costs $249 exclusive of federal filing fees. The attorney-lead plan is a little pricier at $599, exclusive of federal filing fees. I highly recommend the latter option if you have the budget for it.
With this plan, a trademark attorney takes care of everything you need to trademark your phrase. This includes researching the words and filing the appropriate paperwork. Additionally, LegalZoom will cover the $599 fee for a second trademark if your mark gets rejected.
The rest of this guide covers how to register your trademark with LegalZoom manually. If you choose the second LegalZoom plan, you only need to submit your phrase and details about your business, and the legal service will take care of the rest. Even so, it’s still worth reading through the rest of the guide to find out what goes into trademarking a phrase.
Step 3 – Do Your Due Diligence
You’ll be prompted to enter your trademark phrase as soon as you sign up for your DIY LegalZoom trademark registration plan. But there are a few things to sort out before formally starting the trademark application process.
These steps will help ensure that the application process goes smoothly. Any mistakes registering your trademark means you forfeit your application fee, so it’s worth paying particular attention to these steps.
Choose Your Product Class
The USPTO has 45 classes for products and services. For example, Class 1 covers chemical products used in industries such as agriculture, science, and photography. Your trademark only protects your phrase in your product class. For example, if you’re in the cosmetics business, there’s nothing to stop a computer and software company from using your trademark.
You may need to register your trademark in two or more classes if you sell different types of products. For example, if you sell motorcycles and motorcycle clothes, these products will fall into distinct categories.
You can learn more about the USPTO product classes here.
LegalZoom charges an extra $410 for each additional product class. This fee also includes the USPTO filing fee. Either way, you’ll have to pay a filing fee to the USPTO for each extra product class.
Click Save and Continue to proceed to the next step.
Collect Proof of Using Your Trademark
You can’t just trademark a phrase that you like but don’t actually use. You’ll need to submit proof that you have used the phrase to sell your products or services. The LegalZoom application requires you to enter a specific date when you started using your phrase.
You’ll also need to submit proof of this use to the USPTO along with your application. Think about product packaging, marketing materials, product labels, or websites where you have used the phrase you need to trademark.
Conduct a Trademark Name Search
A USPTO examiner performs trademark searches for all applications. If there is an existing or pending application like yours, your request may be denied. So, you’ll need to make sure that the trademark doesn’t exist.
Your LegalZoom plan includes a basic USPTO direct-hit search. This means that LegalZoom will search the USPTO database to find similar trademarks as yours. If you want a more comprehensive search, you’ll need to pay extra.
Choose your search option to continue with your registration process. You can also search the USPTO database if you’re applying yourself. But, the search won’t include common-law trademarks. So, there’s no guarantee that your application will be successful.
Step 4 – File Your Application
The great thing about LegalZoom is you don’t have to worry about filing your application. The online service will take care of this for you regardless of your plan. Additionally, an attorney will look through your application to ensure that there are no inconsistencies. Errors and inconsistencies can delay your application process.
Review Your Application
If you’re applying yourself, it’s worth reviewing the document to make sure everything is correct. It’s also worth having a trademark attorney have a look at the application before you file it. Remember, it can take up to eight months to successfully trademark your phrase. You’ll also have to forfeit your filing fee if your application is successful.
So, take every measure to ensure that you have the correct details before filing your application.
File Your Application
Finally, you can file your application with the USPTO and pay the filing fee. Again, an attorney will take care of this process for you as soon as you make the payment. You’ll also get regular updates about the application process and any similar trademark applications that may come up during this period.
Step 5 – Maintain Your Trademark
The only thing left is waiting for the outcome of the application. You’ll be notified as soon as it is successful or otherwise. If your application is successful, you can now use the ® symbol after your phrase.
Finally, you’ll need to maintain your trademark. Otherwise, you may have to repeat the entire process if your trademark expires.
File Trademark Maintenance Paperwork
You’ll need to file maintenance paperwork five years after the original trademark registration. You’ll then need to file the paperwork every ten years to maintain your trademark.
Visual storytelling can be intimidating. We’re taught to communicate with words, but words are not always the best way to convey information and ideas. Sometimes the best way to tell stories is through thoughtfully crafted visuals, not long paragraphs of text. Creating visuals is not reserved for designers, illustrators, or artists. It’s a skill anyone can learn and put into practice every day.
The key to becoming more comfortable with visual communication is unlearning the rules you’ve subconsciously collected. Growing up, I loved creating rainbow text with WordArt, adding fancy document borders, and downloading decorative fonts on Dafont. My work in grade school all looked like this:
I was just playing with fonts and styles for fun. I had no notion of what makes up "good" or "bad" visual design. Looking back at this poem, the typography is objectively difficult to read. However, I intentionally found fonts that matched each adjective and made each heading the same font style. Through these moments of play, I started to build the foundation of my visual intuition.
Visual storytelling is the process of conveying ideas using things you can see. As we get older, visual storytelling becomes more intimidating because we’re conditioned to believe visuals are childish or purely decorative. We’re taught that all writing needs to be in 12pt Times New Roman and double spaced on letter-sized paper. We’re told that it’s “more professional” to minimize exclamation marks and emojis. We make excuses like “I’m just not artistic enough.”
Today, I communicate with visuals daily. I guide emerging designers to develop their visual intuitions and I design products for homeschooling families. Becoming a better visual storyteller is all about balancing play and practice with a foundation of principles. It’s about finding the happy medium between having fun with WordArt and playing it safe with Times New Roman.
In this article, we will explore visual principles, highlight why visual storytelling is a valuable skill for everyone to learn, and demonstrate how you can improve your visual storytelling through play.
Show > Tell
All visual storytelling can be broken down into a set of concrete principles. To ease you into the topic, let’s learn how typography sets the foundation for all visual storytelling and examine principles shared in effective visuals.
Typography Sets The Foundation
You don’t always need to add an illustration or graphic to visually communicate an idea! Good typography sets the foundation for all visual storytelling. There are plenty of typography resources out in the wild, but my two biggest pieces of advice are:
Stick to one typeface. Find a typeface with multiple weights and styles. Combining different typefaces is difficult. My favorite Google fonts right now are IBM Plex Sans and Inter.
Change one thing at a time. Creating enough contrast between type styles is an art. My recommendation is to change just one axis at a time: size, weight, style, and color are the most popular things to change.
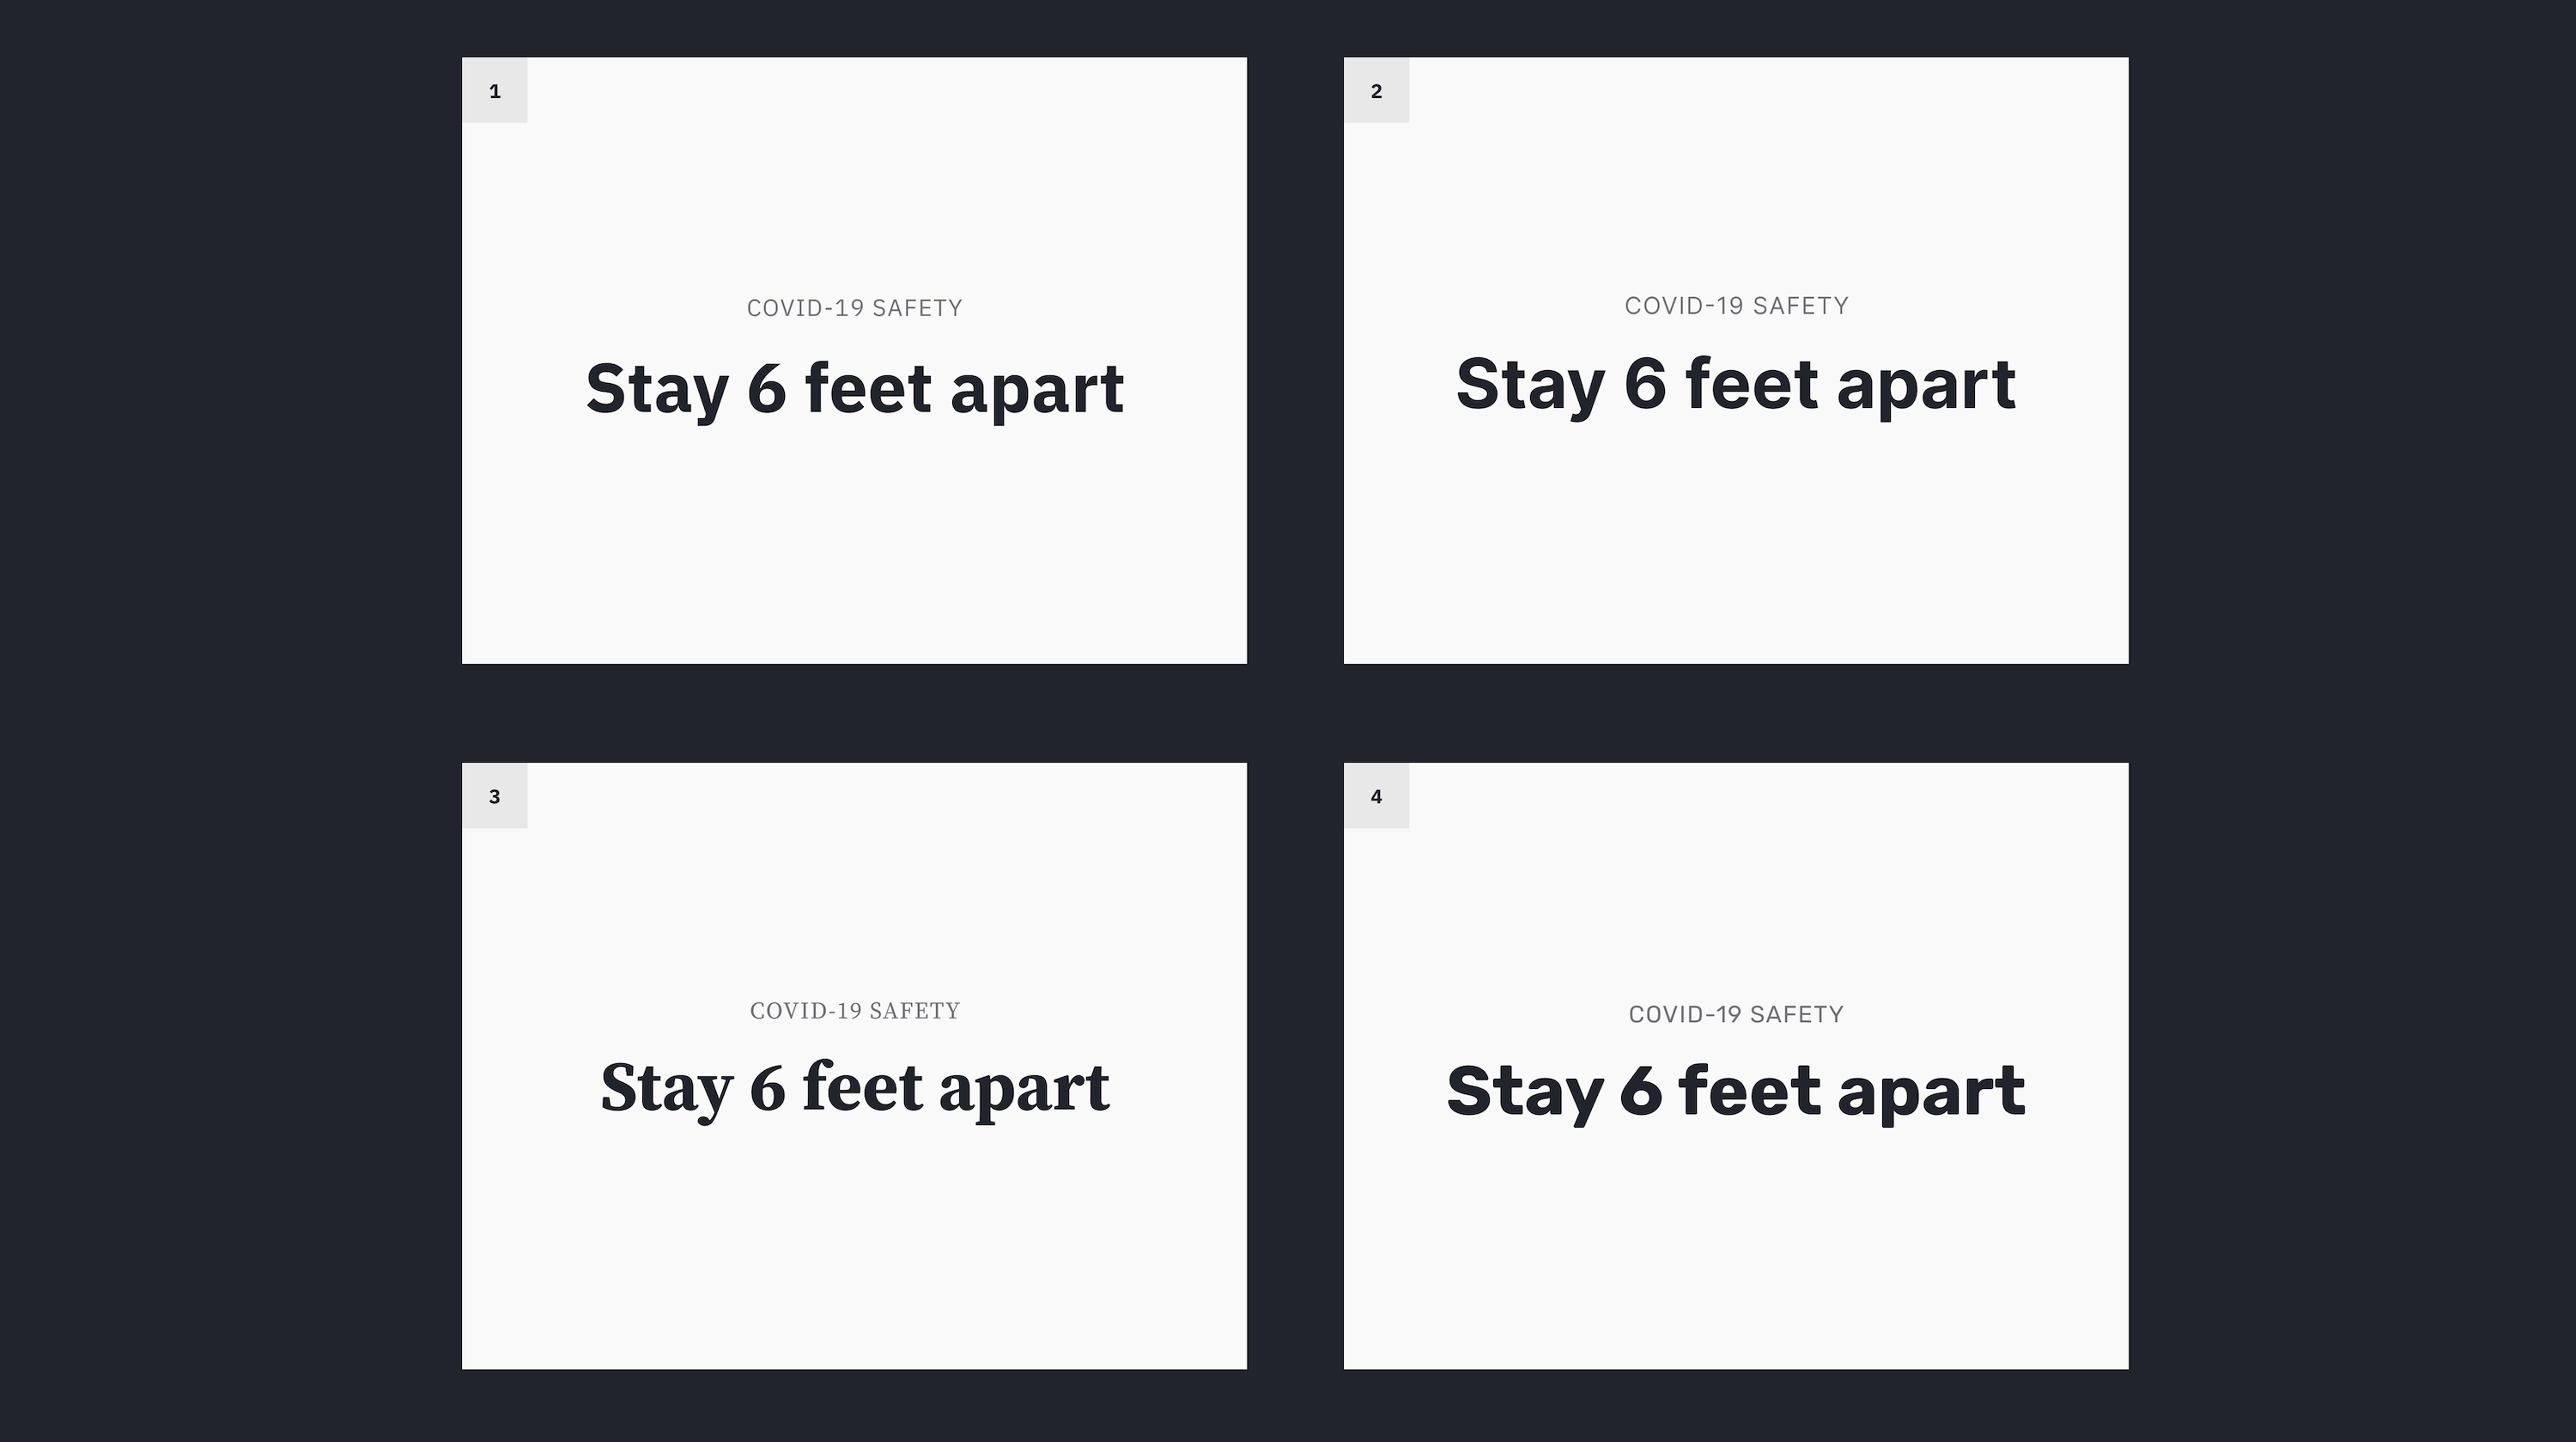
Here’s an example of visual storytelling using simply typography.
In version 1, I use the same style for the entire body of the text.
In version 2, I bold the most important text on the page: "Change one thing at a time"
In version 3, I decrease the paragraph text size and move the heading to its own line.
In version 4, I highlight the word "one" in pink to signify importance and I make the paragraph text a lighter shade of gray.
Small tweaks to typography can often communicate more than adding more words. Before you consider adding a visual, always experiment with the typography first. Typography is more than selecting a font. You can change the importance of text by adjusting the size, weight, composition, and color. Think about what is most important and make sure that stands out in a body of text.
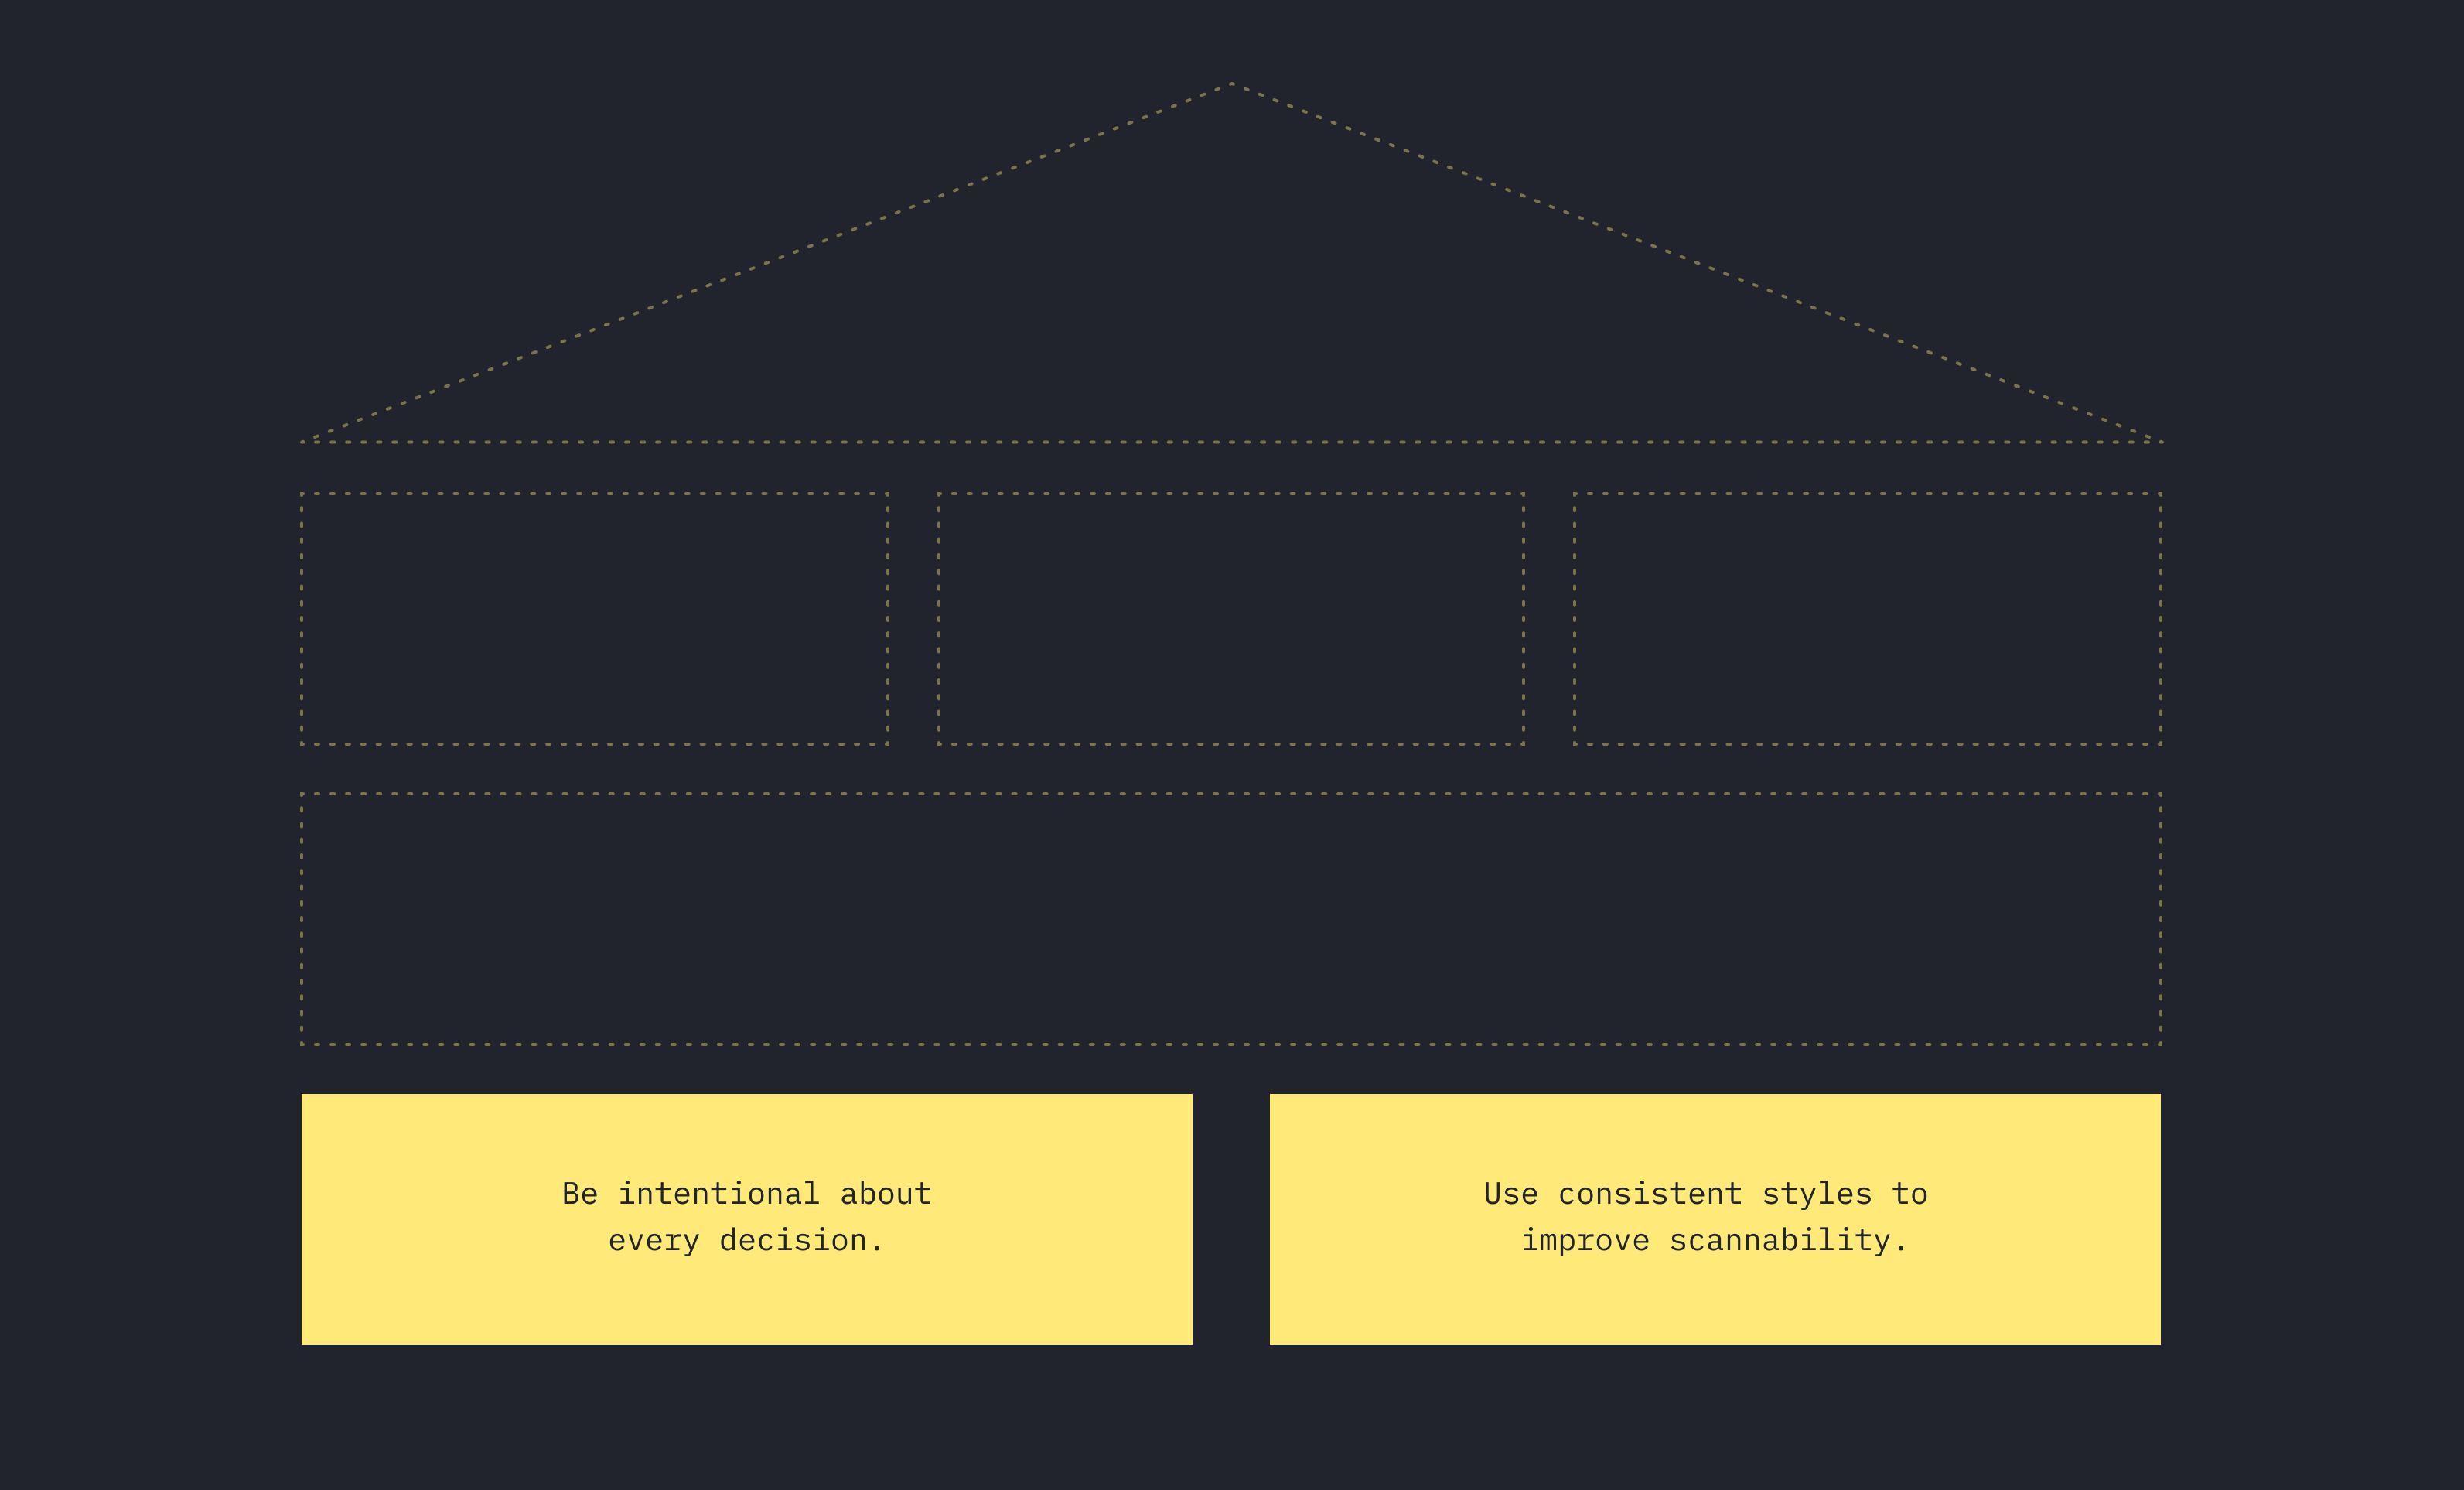
Good visuals have focus, communicating the most important idea at a glance. Reports should be informative, but easy to scan. Flowcharts should highlight differences between old and new processes. When you’re creating a visual, it can be easy to overwhelm the audience with too many ideas at once. The best visuals maintain a clear message by drawing attention to what’s most important.
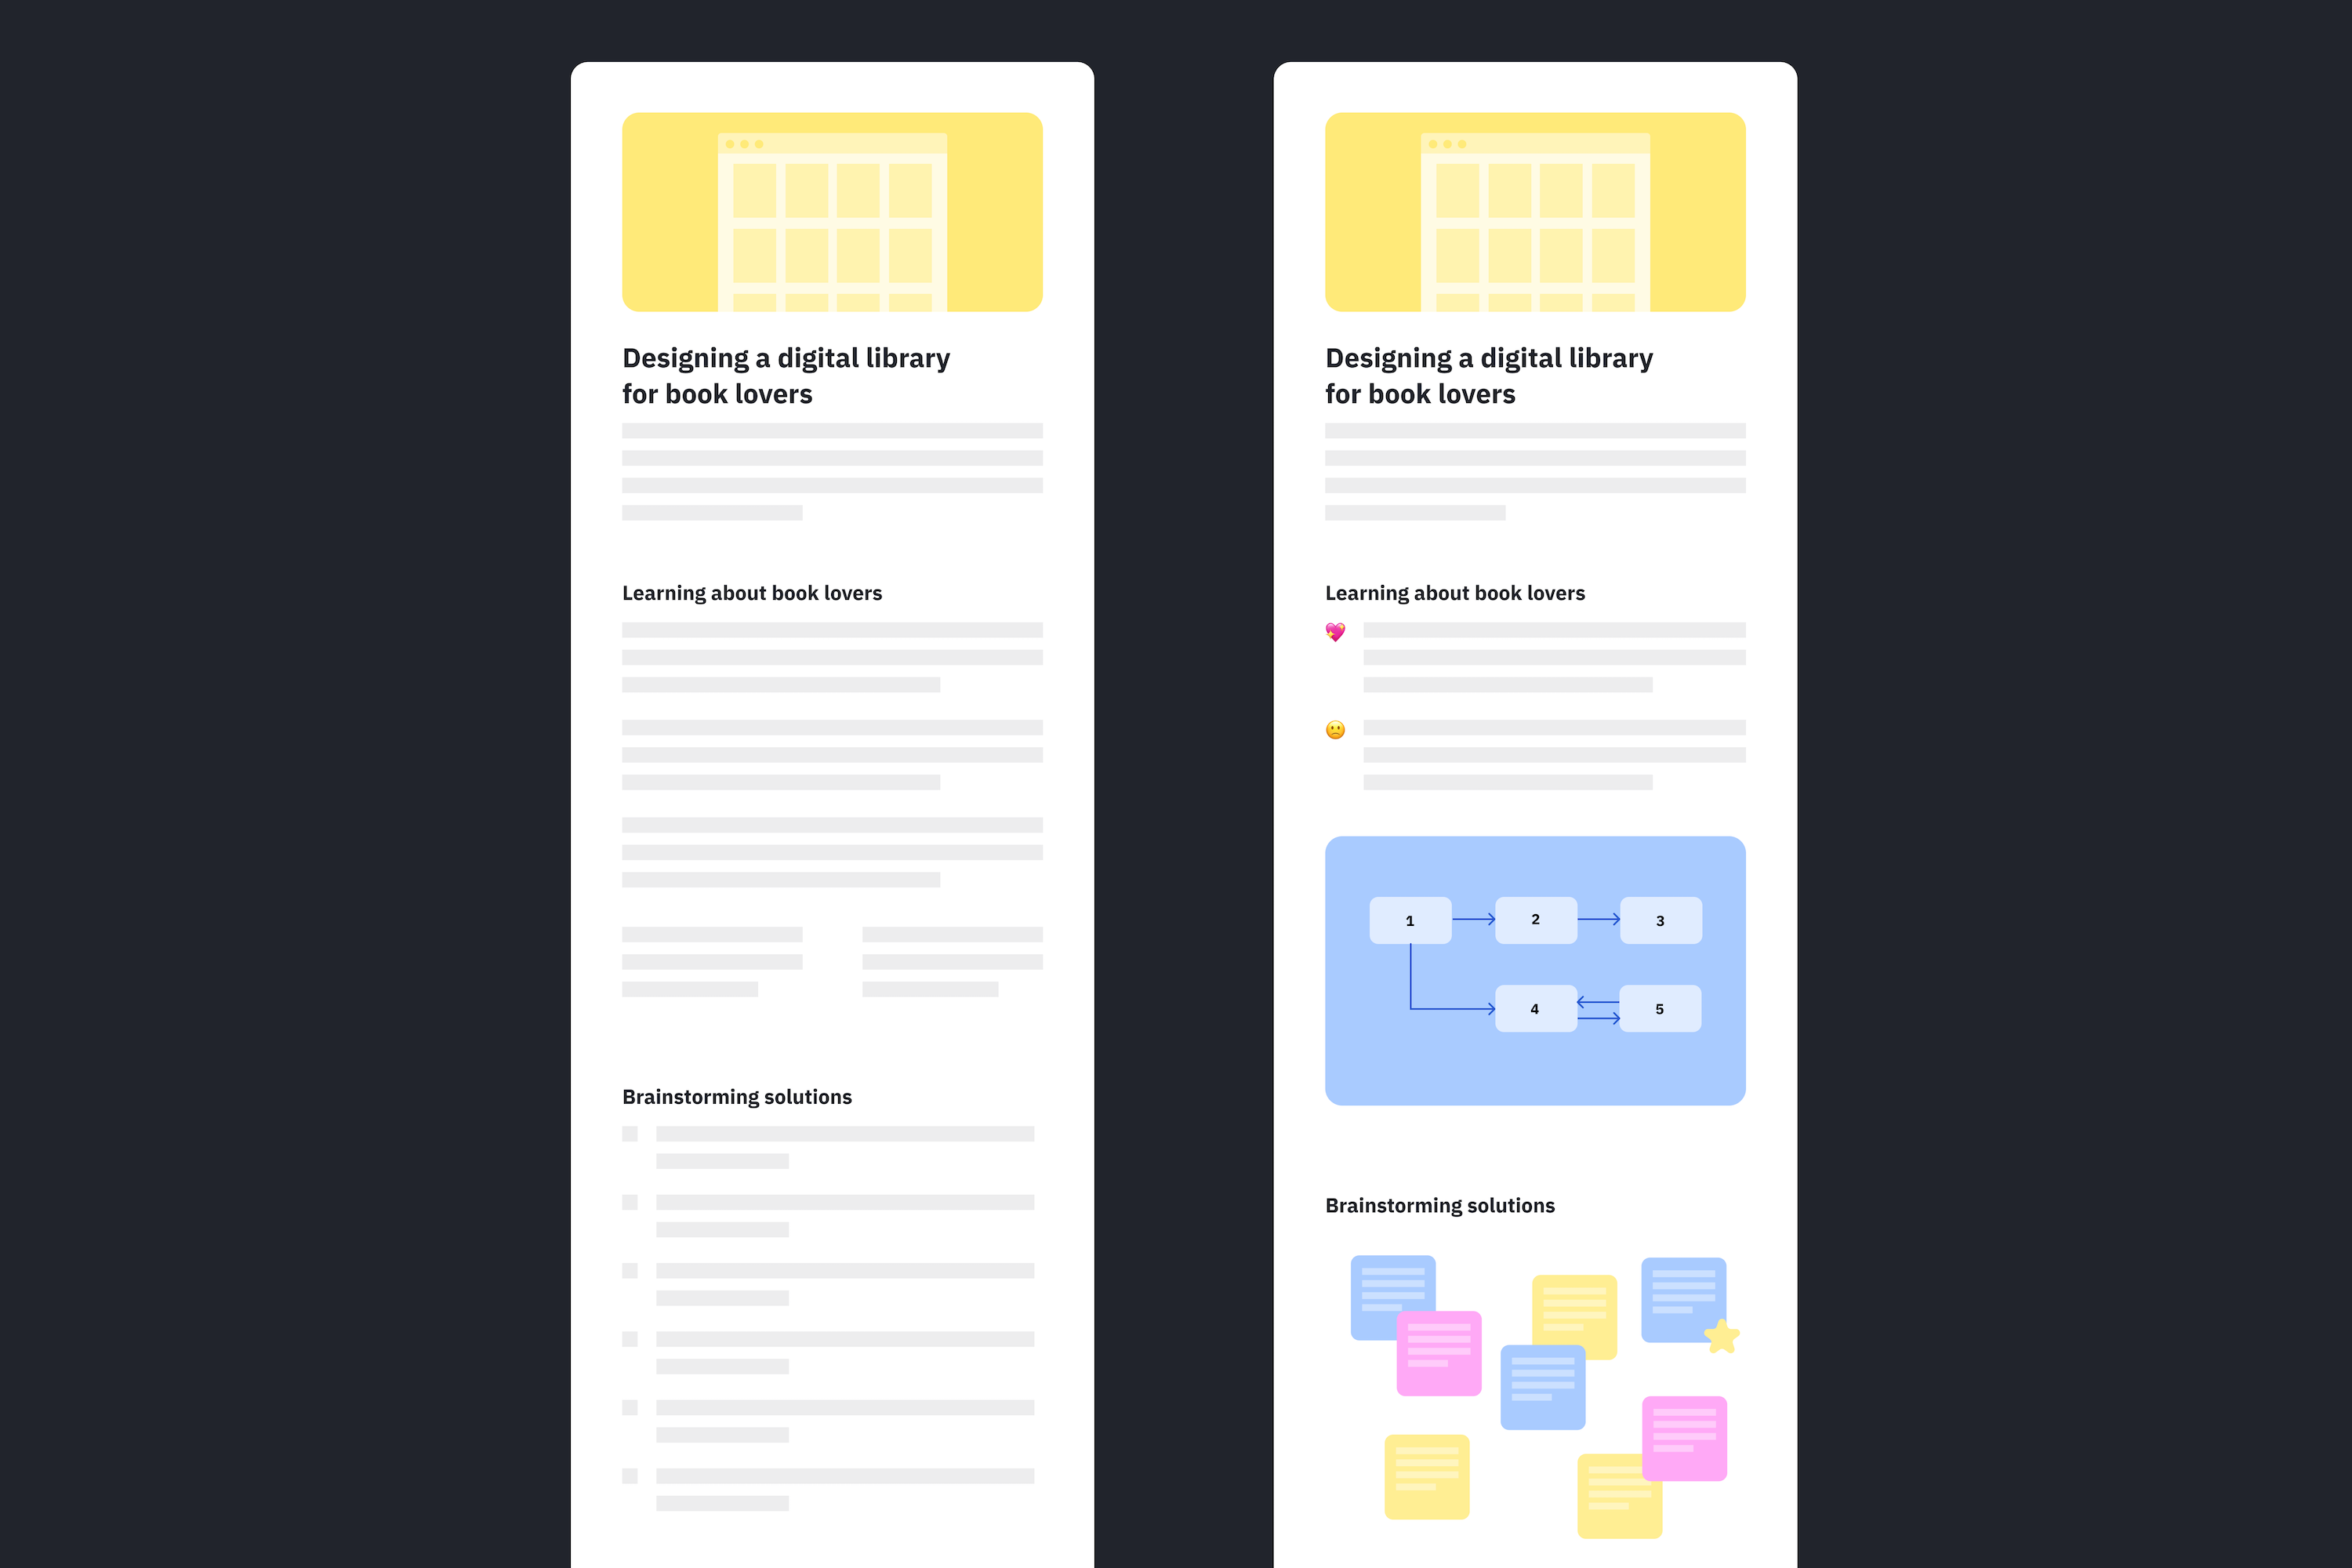
I’ve spent a lot of time mentoring emerging product designers on portfolio building. Design portfolios typically consist of a few case studies that walk through a designer’s thought process from beginning to end.
Below are two low fidelity sketches of portfolio case studies. This is an exaggeration, but the one on the left is less successful because there are no visuals to accompany the story. The one on the right is easier to scan because there are images showing the designer’s process.
Good visual communicators can highlight the most important parts of a visual. In the case studies graphic above, I intentionally blocked out the body text and made the two versions nearly identical. I tried to minimize all visual distractions. If I add filler body text, the graphic is harder to comprehend because it becomes visually cluttered.
Visuals can also be helpful when you need to communicate a change in the process. For example, if your company restructures the hiring process, it might be helpful to show a before-and-after flowchart that highlights the changes. Imagine these are the changes:
We moved the technical interview from the second to the first step;
We added a behavioral interview as the last step;
We now require at least one strong hire for a candidate to get an offer.
This might seem obvious, but we tend to default to emails and documents in the workplace. Before and after visuals are great because they help people visualize the differences.
In the example below, you’ll notice that I use color sparingly as a way to highlight new additions to the process. Color is one of the best ways to draw attention to important aspects of a visual.
You can create a graphic with anything including pen and paper! I used Figma for the one above because I’m familiar with the tool, but you can create a similarly effective visual with something as simple as Google Sheets.
Visuals are a tool you can use to add clarity to any idea. Remember that you don’t always have to add a graphic or illustration. You can communicate a lot with just small tweaks to typography and presentation. Just make sure to focus on the most important idea and make sure it shines through.
Tools For Creating Visuals
Figma has a higher learning curve but offers the most flexibility.
Whimsical is easy to use and has templates for creating common visuals like flowcharts.
Mural is like a digital whiteboard. It’s great for collaboration and has templates.
Developing Visuals Through Play
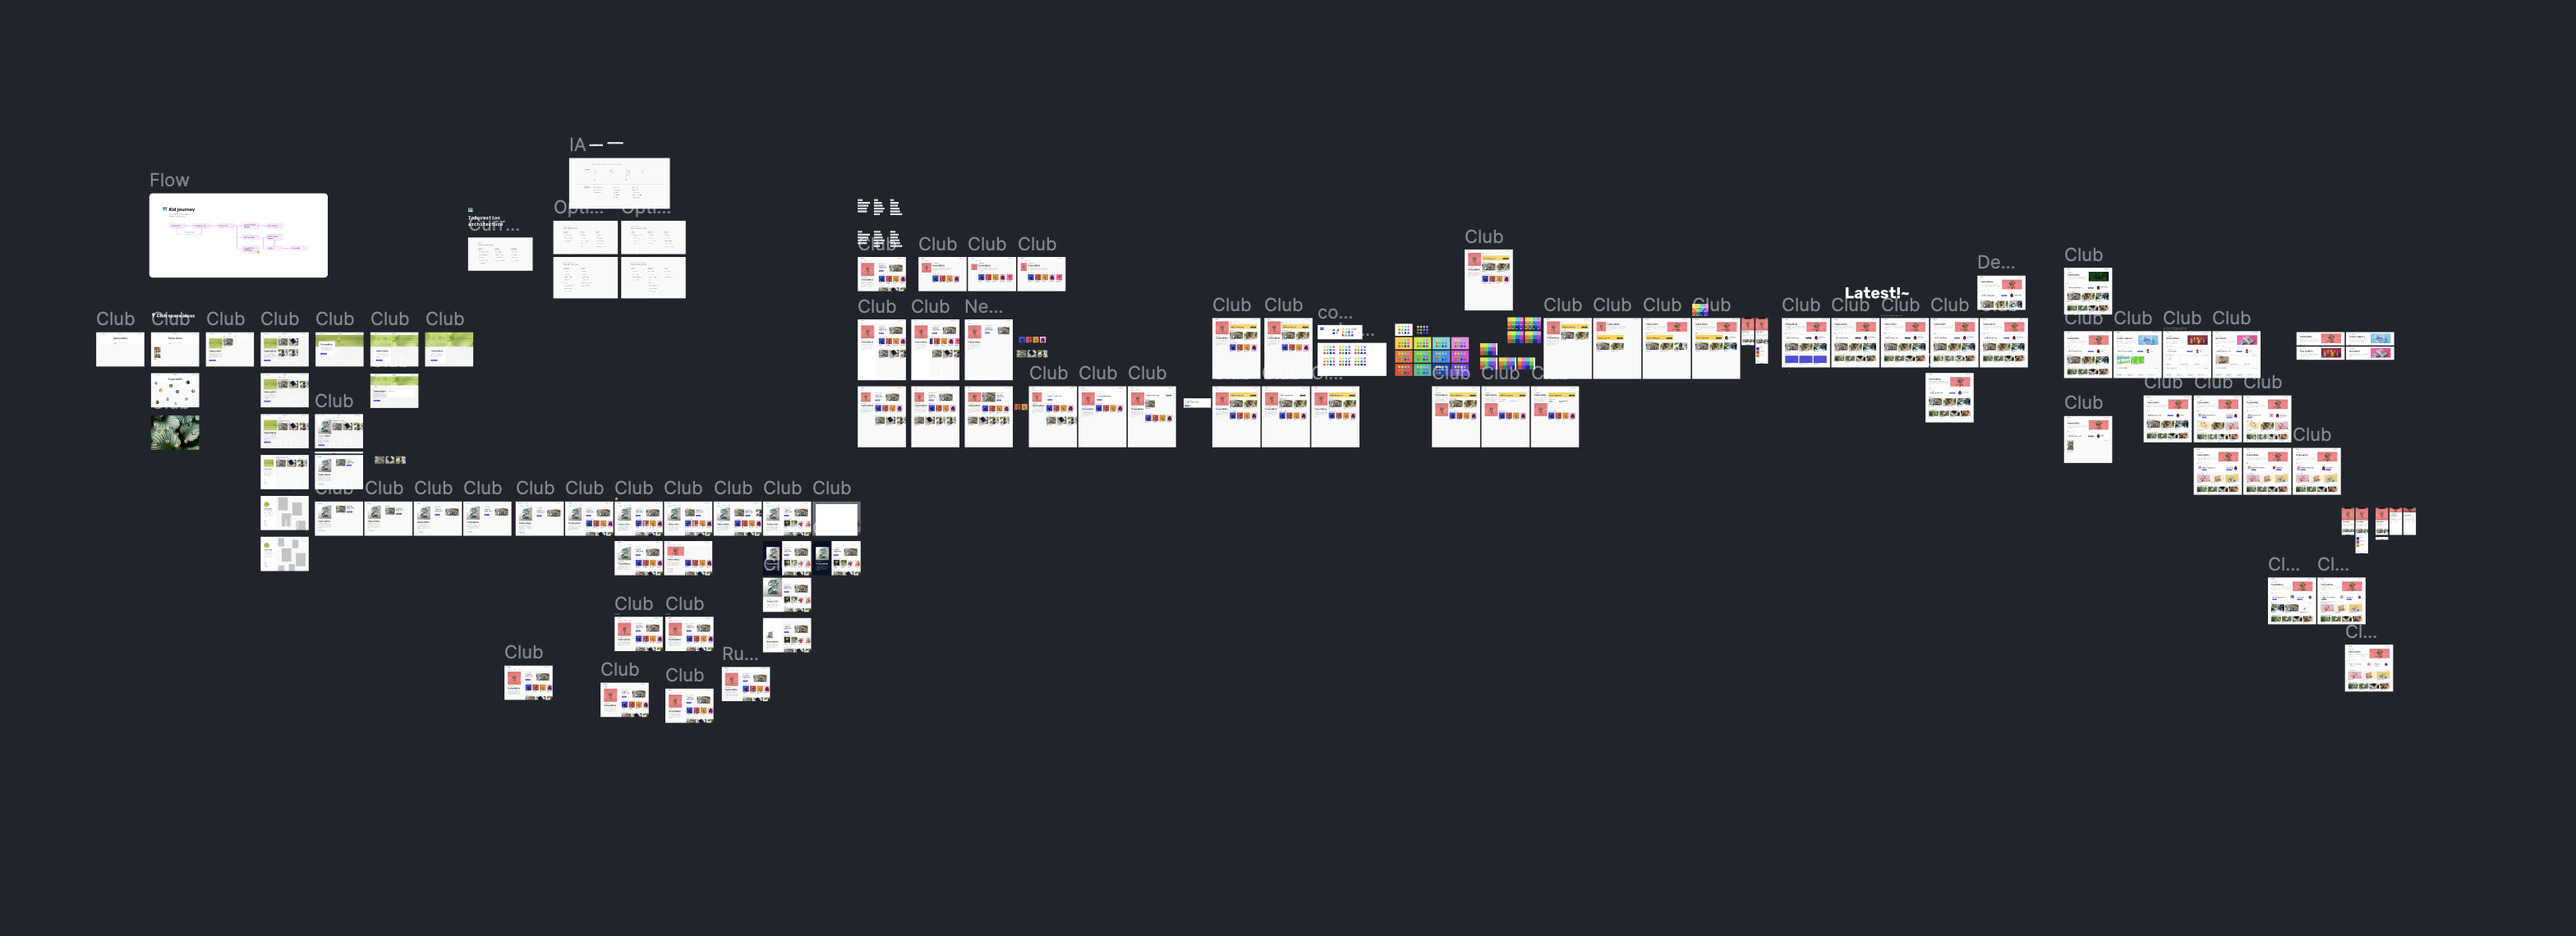
Developing visuals takes time, play, and experimentation. If you’re creating visuals from scratch, your first attempt will never be the best one! I’ve been in the design industry for a while now and I still fail and iterate every single day. This is a screenshot of my recent design iterations for just one screen in a flow.
Learning how to become a better visual storyteller is all about practice and iteration. In my design classes, I teach students to iterate by making it into a competition. I separate the students into teams and the goal is for each team to get the most iterations in a set period of time. For this activity, I encourage students to change one thing at a time as they iterate.
This exercise teaches students to be comfortable trying lots of things that might not work. After 15 minutes of iterating, I have the groups discuss which designs are their favorites. Why do you feel the designs you chose are the most effective?
Iterating might seem daunting, but it’s actually a really fun process. When you’re developing a visual, start by thinking about the one thing you want the audience to learn. Imagine that our goal is to communicate that you need to stay 6-feet apart to prevent the spread of Covid-19.
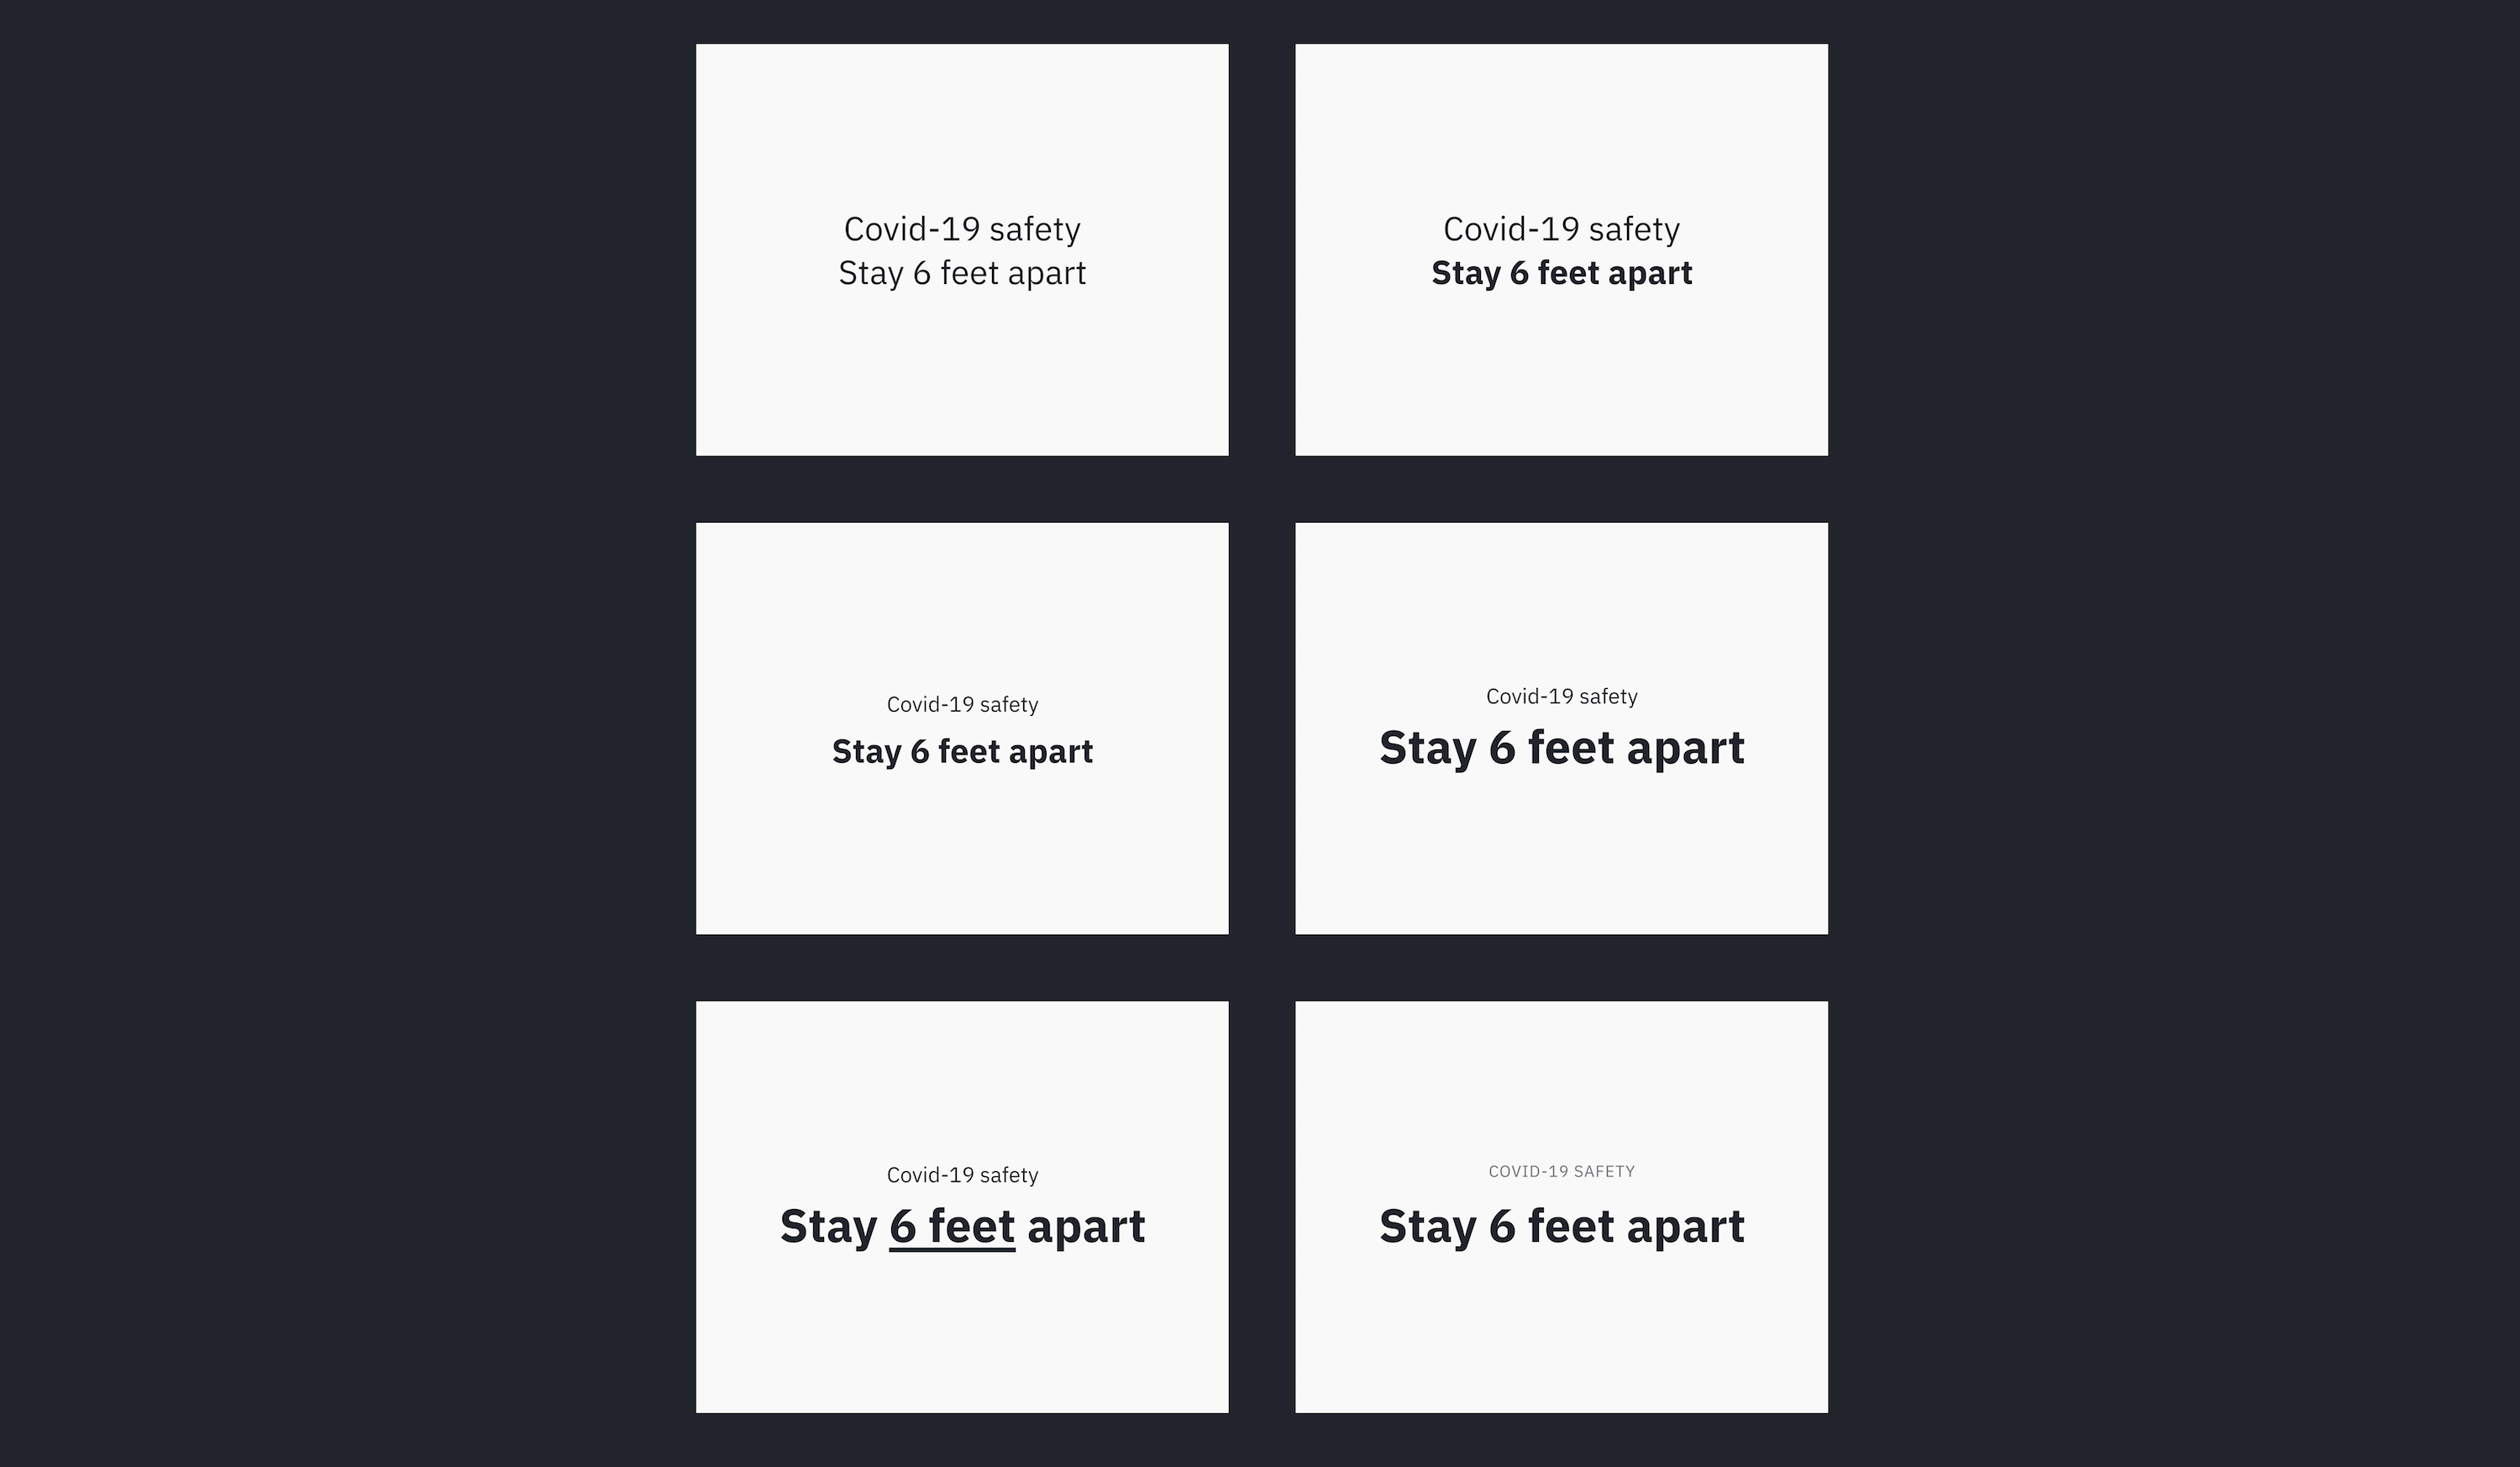
I always start with setting typography first. Here is a series of iterations where I only adjust the font size, weight, and style.
For each iteration, I only changed one thing! Which version do you think works the best? Personally, I think the last iteration works best because the message is loud and clear. Next, I experimented with a few different typefaces. Every typeface has a different personality:
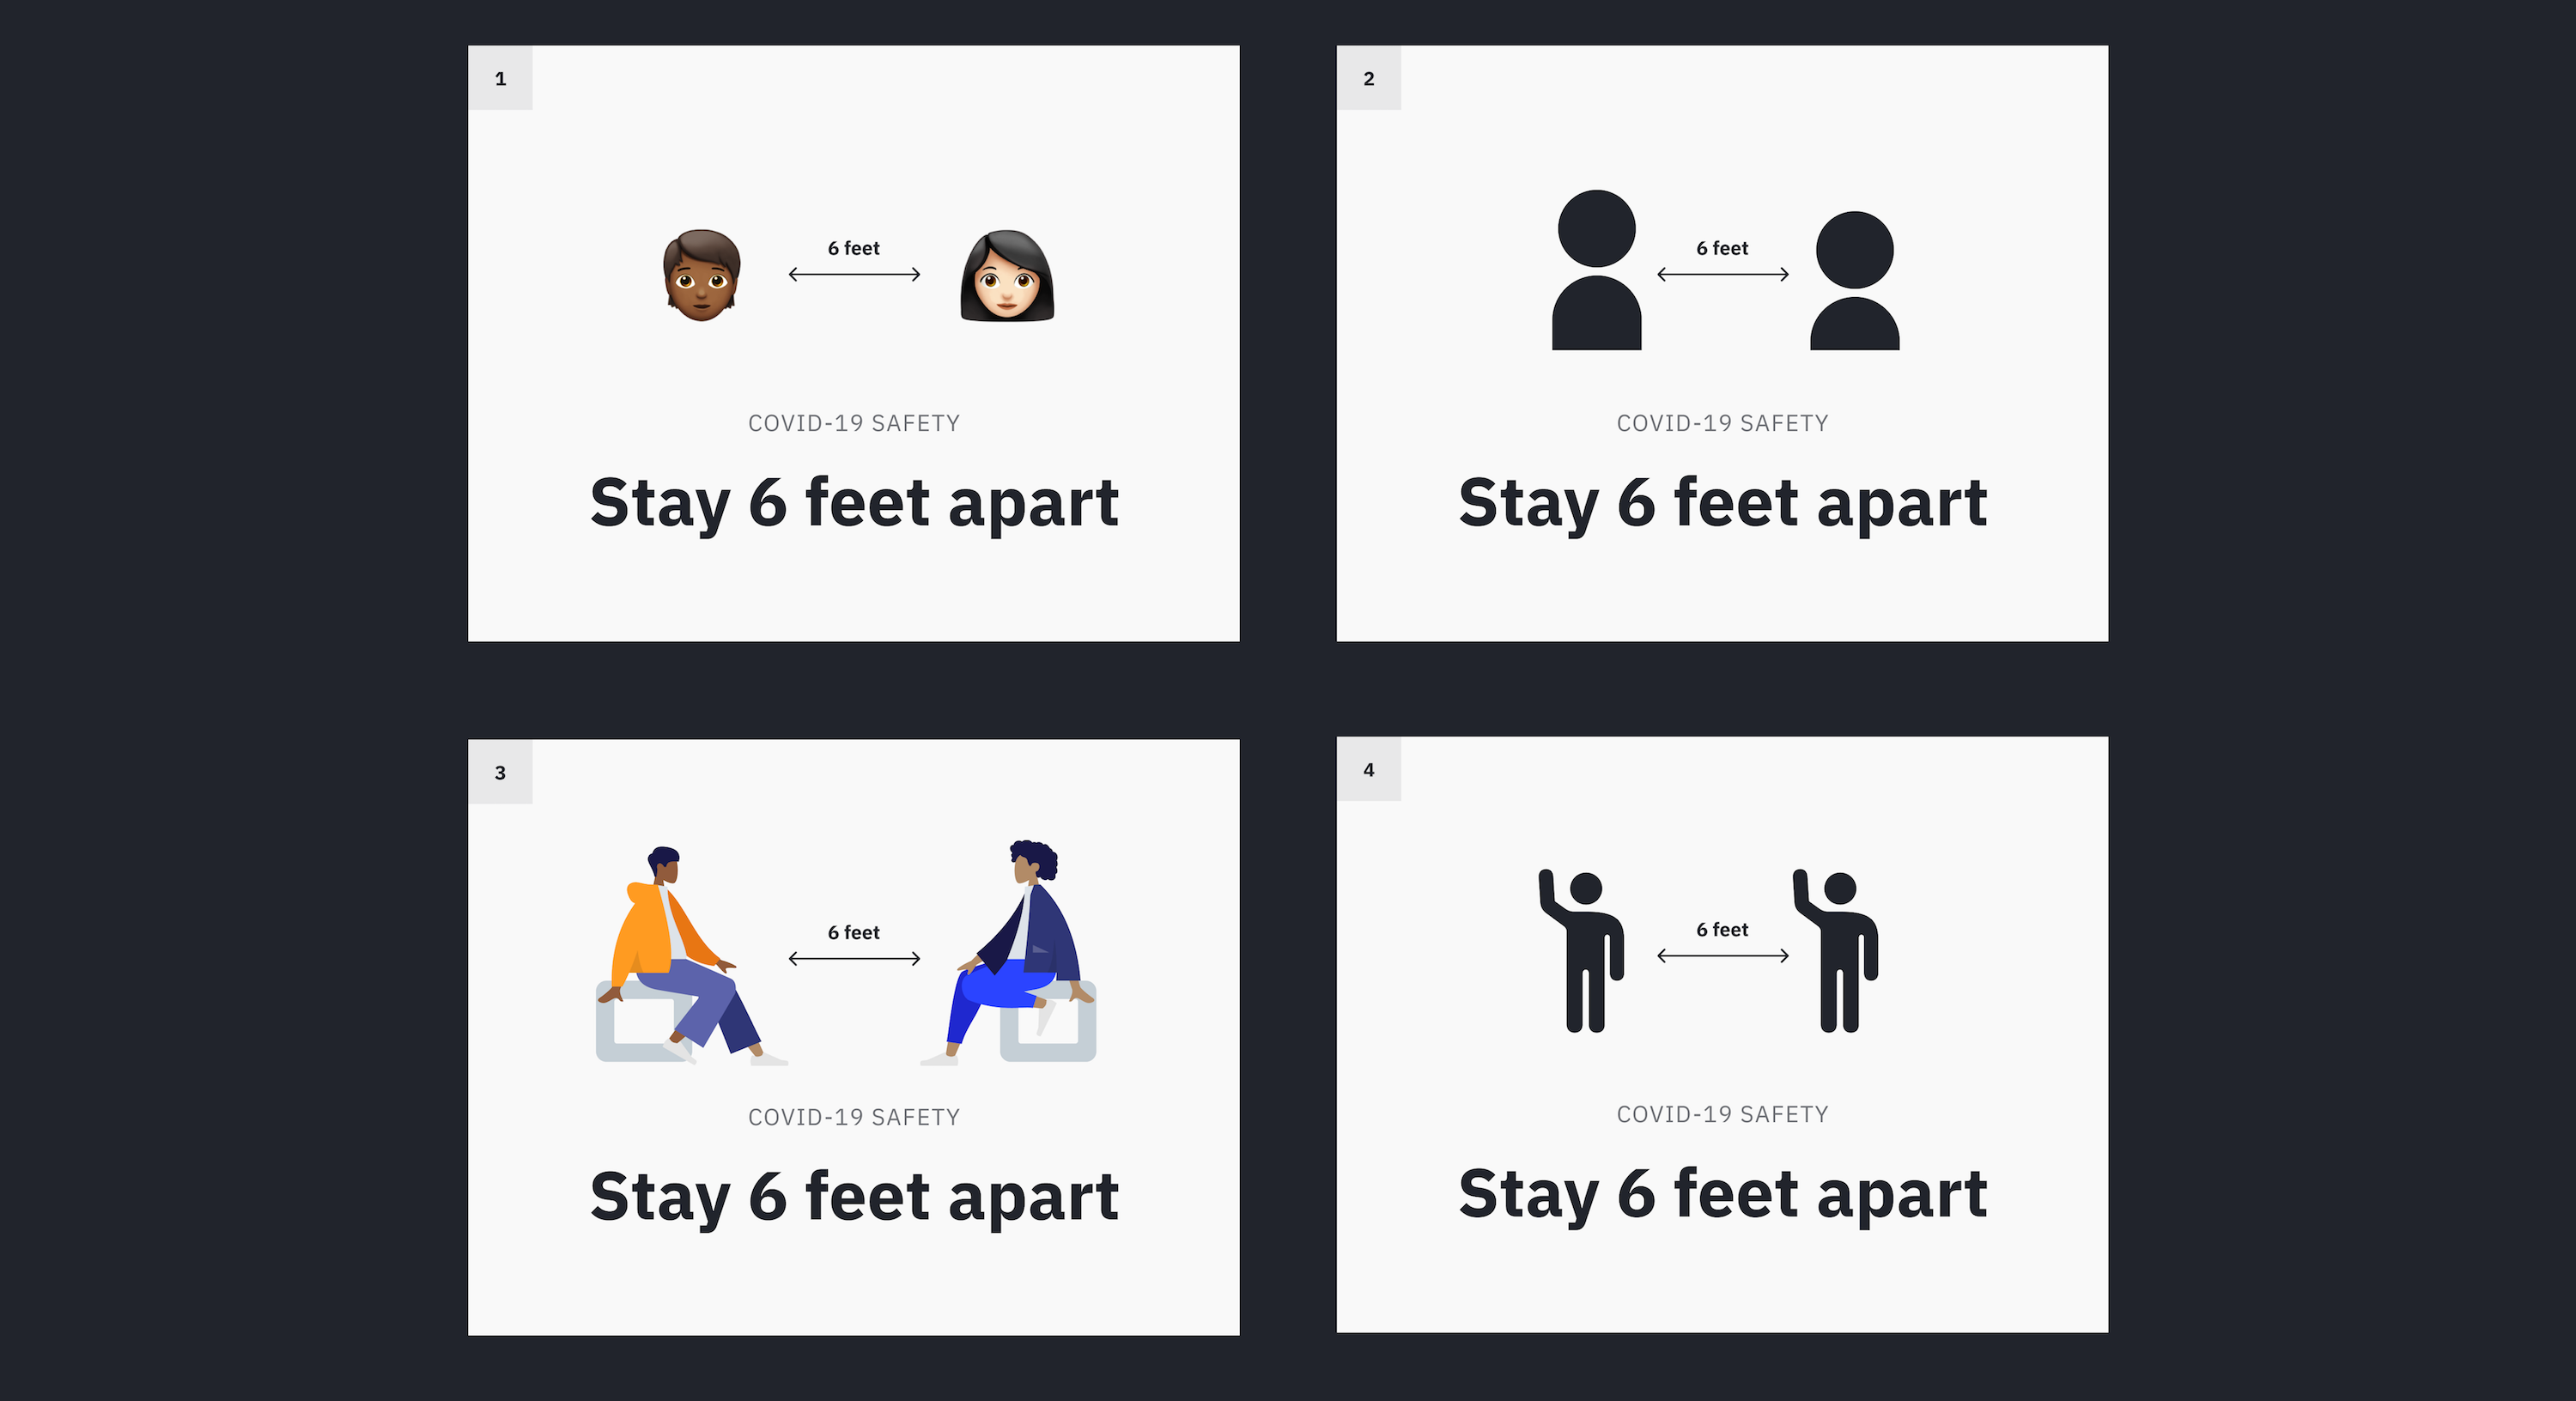
After experimenting with type, we can experiment with adding a graphic or illustration to the poster. You don’t have to be an illustrator to create a graphic. There are plenty of resources online that you can use to compose a graphic.
In version 1, I used Apple emojis.
In version 2, I drew an icon of a person using two circles and a rectangle.
In version 3, I used an illustration library Humaaans.
These directions are all effective. Directions 2 and 4 feel more like an official government graphic, but directions 1 and 2 feel more fun and inviting. With all our components in place, we can try adding style and color. It’s important to use style and color sparingly because they can overwhelm the message.
All four of these iterations work well! Directions (2) and (4) capture the eye of the viewer because they use a solid block of color in the background. Directions (1) and (3) might be easier to scan because of the simplicity of the background. I like how direction (3) uses purple to highlight the "6 feet" guidelines.
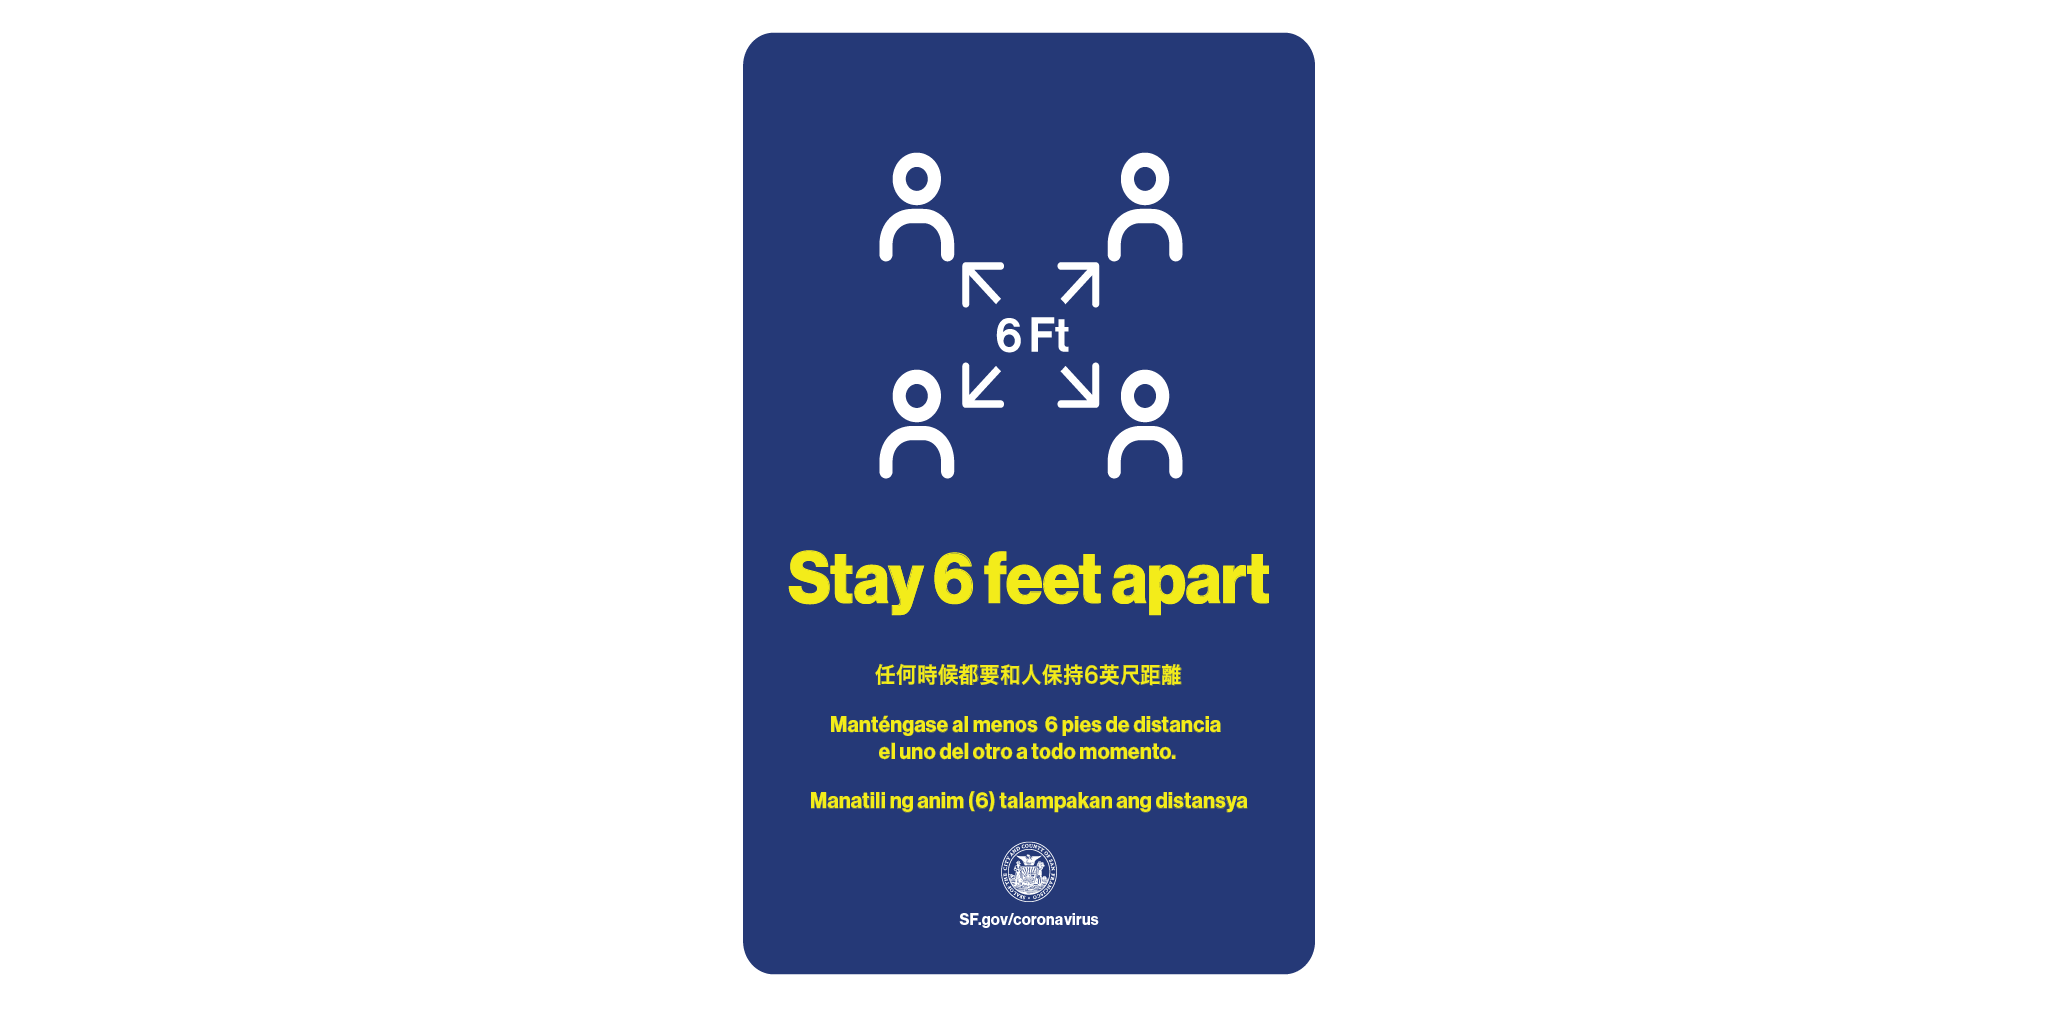
This is what San Francisco’s "Stay 6 feet apart" poster actually looks like. It communicates the message pretty well. The most important text "Stay 6 feet apart" is highlighted in yellow and it also includes a simple graphic that reemphasizes the message.
The next time you design a slide deck, make a poster or create a document, think about incorporating a piece of visual storytelling. Start small by emphasizing important parts of the text with typography. If you decide to add a visual, remember that you don’t have to use fancy tools. Try starting with a pencil and paper or any tool you’re familiar with. Visual storytelling is all about communicating ideas, not creating works of art.
If you’re unsure where to start below are some fantastic resources:
Anyone can learn to communicate with visuals! I recommend sharing your work with friends or peers to see if your message is getting across. Getting feedback early and often will improve your work and ideas. The more you iterate, the faster and better you’ll get in the future. With practice and play, you’ll start to collect your own visual principles and build your own visual foundation.
DGraph, a San Francisco based startup focused on providing a full-powered native GraphQL backend service that operates at a global scale, announced on September 10, 2020, the release of its premier product, Slash GraphQL. According to Manish Jain, CEO of the company, “Slash GraphQL takes away the work of building a fast and scalable GraphQL backend.”
San Francisco based Apollo GraphQL announced today the release of the company’s next-generation tool for GraphQL programming, Apollo Client 3.0. ProgrammableWeb conducted an interview with the company’s CTO Matt DeBergalis where we discussed this new offering.
Recently, I moderated round table discussions between dozens of CISOs at Evanta CISO Summits in Chicago and Atlanta. My colleague, Michelle Dufty, moderated a similar event in San Francisco.
The purpose of the sessions was to have an authentic conversation about the emerging practice of DevSecOps and explore the following unconventional idea:
During Day 1 of the GraphQL Summit in San Francisco, Victor Quinn, Head of Engineering at Knotel reported in an exclusive interview with ProgrammableWeb that his company has achieved success and also had challenges using Apollo Federation to transform the way company uses GraphQL.
One key success is that Apollo Federation allows Knotel to use the Squad Strategy to organize the way its technical staff works.
During her Day 1 keynote presentation at the GraphQL Summit in San Francisco, CA, Brie Bunge, Front-End Engineer at Airbnb told the audience that Airbnb has adopted TypeScript as its standard language for Web development.
Bunge said during her presentation, “TypeScript is now the official language of Web development at Airbnb and over half of our 3 million lines of code have been migrated so far.”
On Day 1 of the GraphQL Summit, being held from October 30-31 in San Francisco, Matt DeBergalis, Co-Founder, CTO at Apollo announced the release of the Apollo Client 3.0.
SmashingConf 2020 – San Francisco, Freiburg, New York And Austin
SmashingConf 2020 – San Francisco, Freiburg, New York And Austin
Rachel Andrew
We’ve been running SmashingConf since 2012, when we held our very first conference in Freiburg, Germany. Since then, we’ve continued to experiment and improve on our conference experience. Our aim is that you enjoy your time with us, but also return to work with new insights and knowledge. Each time we hope to leave you with practical takeaways that will help you in your own work and want to share with your team.
What is a SmashingConf like? It’s hard to explain until you have been there, however ,this video compilation from Toronto might just give you an idea!
Experimenting With Presentation Formats
Back in 2018, we began to experiment with the live-coding format. While not every presentation at SmashingConf was live-coded, many presenters brought a live element to their talk. Some speakers opted to present without slides completely, and these interactive sessions have been incredibly popular with audiences. Being able to watch an expert doing their work, seeing the tools they use and the choices they make in real time, brought many subjects to life.
“I love the fact that this talk format also kind of rid me of the expectation that it needed to be flawless.”
Many of our speakers enjoyed the chance to try something different on stage; some have gone so far as to decide to make live-coding part of how they present in the future.
“I didn’t expect this, but I’m now seriously considering this format as a way I do talks at other conferences.”
Not every talk fits a live-coding format, of course. Throughout 2019, we feel that we’ve found a great balance of practical live-coded (or live-designed) sessions, more traditional presentations with slides, and some which have mixed the two approaches. SmashingConf audiences are a mixture of designers and developers, of visual thinkers and those who learn best from seeing a lot of code.
“A few designers felt validated in their processes by seeing mine [...]
“A few developers said design felt less intimidating now, both to understand as well as to try.”
In mixing up the formats as well as the subjects being discussed, we hope to bring parts of the industry to life — even for those who don’t normally work in that area.
Talks are usually followed by an interview. (Photo credit: Drew McLellan)
In addition to playing with the format of presentations, we encourage audiences to engage with the speakers and each other. Talks are followed by an interview on stage — with the emcee posing questions asked by the audience. We publish a live Google Doc, so everyone can share their thoughts and ideas with the speakers as well as each other. Most of our speakers will attend the entire event, and enjoy the chance to chat with attendees. We believe everyone has useful knowledge to share — whether on stage or from the comfort of your seat!
Looking Forward To 2020
SmashingConf has always taken a holistic approach to the web. We believe that we all do better work when we work together and understand something of the roles of other team members. In 2020, we hope to build on the successes of 2019 by continuing to bring you some of the best live sessions — mixed with case studies, opportunities for networking, and surfacing some topics that are sometimes forgotten when focusing on design and development! We’ll cover topics such as HTML email, internationalization and localization, how to provide more accurate estimates, privacy, security, refactoring, debugging and the way designers and developers think as they work through their tasks and challenges.
We’re currently working hard on curating the line-up for all of the events next year. So, the big question is… where will you join us?
San Francisco, Freiburg, New York Or Austin!
The Smashing Cat will soon be on its way to Austin for the first time. We’re really excited about heading to Texas and about our events in cities we already know and love. Over the next few months, we’ll be announcing speakers and schedules for all of the events, but early-bird tickets are already available for San Francisco, Austin, and Freiburg 2020.
This year’s events have all been sold out well in advance of the conference dates, so mark the following dates in your calendars, have a chat with your boss, and work out where you will be heading to spend a fun and educational few days with the Smashing crew!
San Francisco, USA
SmashingConf SF will be taking place on April 21–22 where we’ll be bringing back two full days packed with front-end, UX and all that jazz! Live sessions on performance, accessibility, security, interface design, debugging and fancy CSS/JS techniques — and a few surprises along the way, of course! 🎸
Austin, USA
SmashingConf Austin will be taking place in the wonderful ZACH Theatre on June 9–10, 2020. Tacos, cats, and a friendly community — see ya in Austin, I reckon? 🌮
Freiburg, Germany
We will be returning to our hometown for SmashingConf Freiburg on the 7-8 September 2020. We pour our hearts into creating friendly, inclusive events that are focused on real-world problems and solutions. Our focus is on front-end and UX, but we cover all things web — be it UI design or machine learning. The Freiburg edition is, of course, no exception!
New York, USA
Join us for SmashingConf NYC on the 20-21 October 2020. This event is always a popular one, so watch out for tickets going on sale very soon!
Even though several announcements were made during the conference, both Sacha and Anders, independent of each other, were most excited about their new offering of Software Delivery Management (SDM) to facilitate and accelerate the delivery of software across teams, toolsets, and technology.
Can you afford to gamble on an idea for an app or on an assumption about how consumers will respond to it? I bet your clients aren’t too comfortable doing that either, especially when it’s their money and reputation on the line.
An app can be a risky investment for a business if it’s not approached with care. Even then, the most well-researched of app concepts can lead to disappointing user download and retention rates.
Whether you’re in the business of building mobile apps or SaaS products, have you thought about using minimum viable products (MVPs) to safeguard your clients’ investments?
Not only do MVPs allow you to get projects through your pipeline more quickly, but they enable developers to create stronger products overall for their clients.
Here’s what you need to know.
The Value Of MVPs In App Development
Frank Robinson was the first to define what an MVP was back in 2001. At its root, an MVP is a scaled-back version of a product that’s released to the public for the purposes of testing and validating the product’s concept and viability on the market.
Eric Ries, the author of The Lean Startup, was one of the early advocates of MVPs and he had some interesting things to say about why and how we should use them back in 2013:
The point isn’t to create leaner products. It’s to get the most basic version or concept of an app into the hands of adopters and evangelists. That way, the developer collects user feedback early on that, in turn, is used to properly shape the product into its final version.
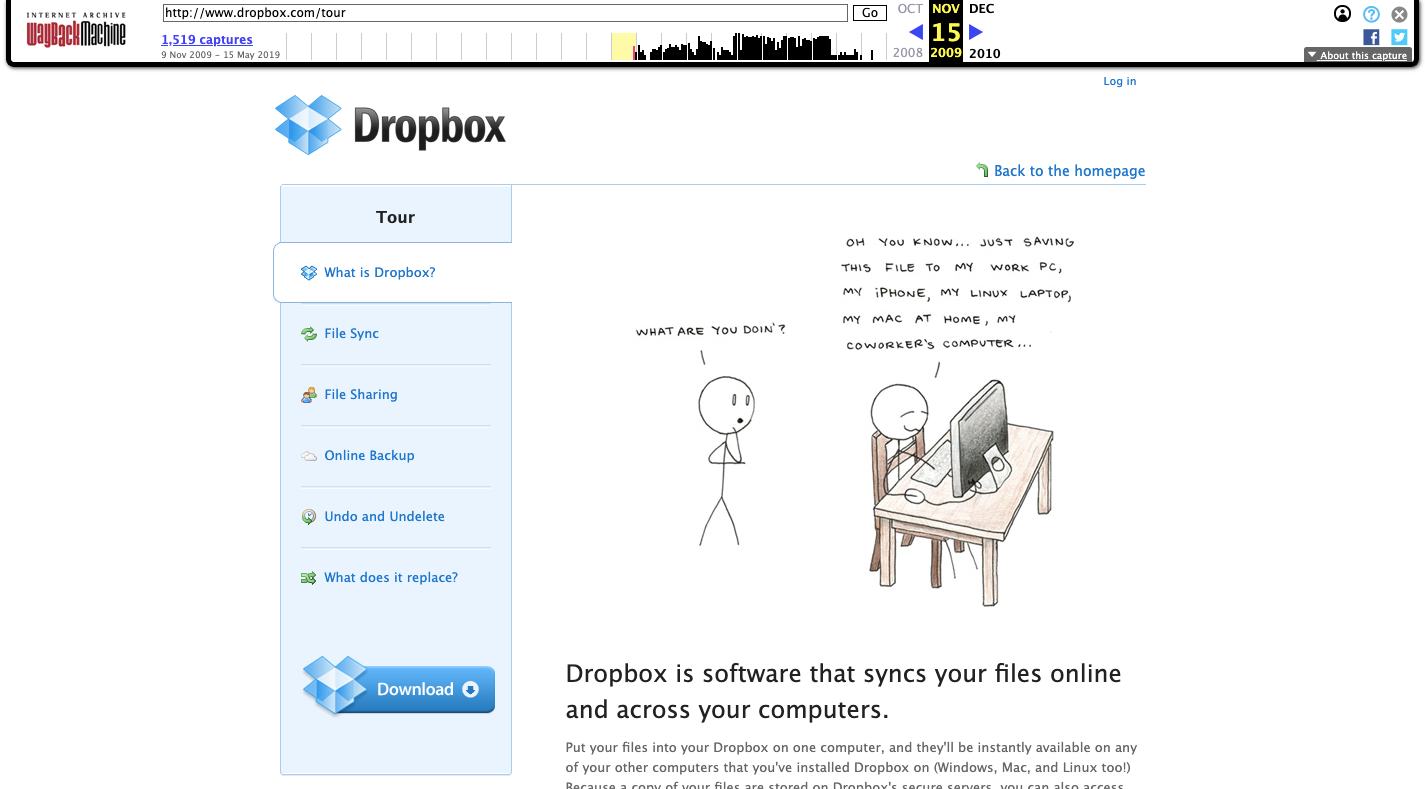
Take Dropbox, for example. This is what the product’s landing page looked like back in 2009:
It’s a simple page that includes the company name, an explanation of the software and a link to download the desktop or mobile app. For users that want to know more about what they’re getting, the “tour” took them to a mini-site with more information:
Dropbox’s MVP provides basic details on its software. (Source: Dropbox) (Large preview)
That’s a far cry from the powerhouse storage, content creation and collaboration service that both consumers and businesses use today:
But that’s the beauty of the MVP. Essentially, it forces developers to build products with only the minimum — but absolutely essential — set of features.
Dropbox didn’t need to foresee the power of cloud storage services or to create something that wasn’t right for the market at the time. All it needed to do was launch a simple solution that users needed then and there. Users could then validate the product and provide the company with the direction it needed to take its product.
There are other benefits to creating an MVP:
You can get the product on the market much more quickly than if you were to wait for the full app to be developed.
You get a chance to test the viability of the concept before you commit too many man-hours to the job.
You give yourself more room (and maybe even a little forgiveness, too) to work out the kinks in your final product.
You save money with an MVP. First, because you only spend time building features that are absolutely needed. Second, because you might find that users are content with the scaled-back version and you won’t need to do much more work to finalize the product.
With a tested idea that’s been embraced by users, you have something to bring to investors which could make the rest of the development process go much more smoothly.
As Eric says in the video, an MVP is the best way to maximize your chances of success and to do so in a much shorter timeframe than complete product development allows for.
How To Build A Valuable MVP That Users Want to Test
Your MVP’s success rides on its ability to leverage insights and feedback provided by early adopters — the ones who are 100% on your side, believe in the product and want to help you fill in the gaps. So, don’t lose sight of that.
An MVP is not some half-assed app thrown together. It still needs to be valuable.
Here are some things you must do before you build and launch your MVP:
1. Decide the Product’s Purpose
If you want your app to succeed, it needs to uniquely solve a problem for a large segment of the consumer base. That means your MVP needs to clearly break down what the product does and why users need it.
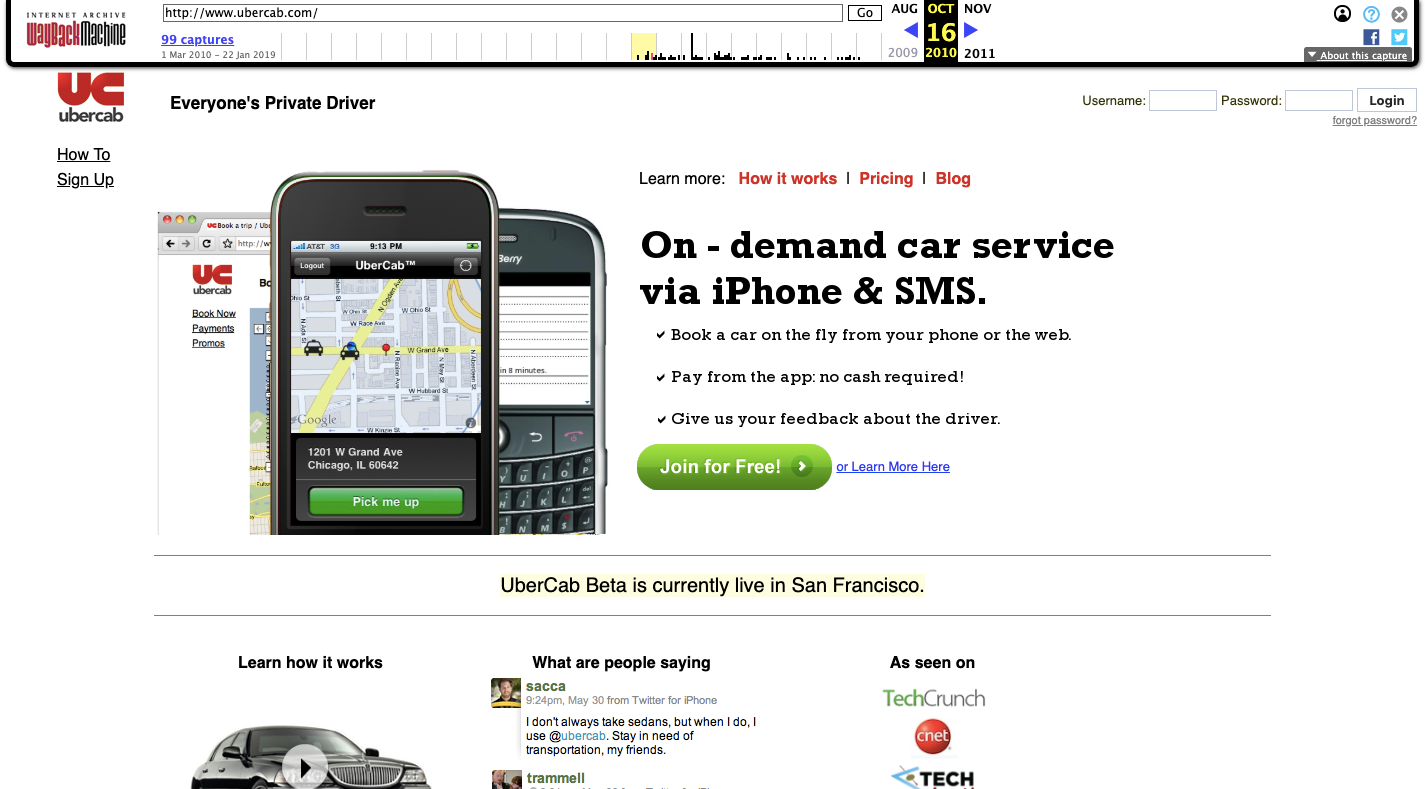
For example, this is how Uber (then UberCab) sold itself during its beta in 2010:
The website for Uber’s predecessor, UberCab, in 2010. (Source: Uber) (Large preview)
Like the Dropbox example earlier, it’s extremely simple in concept and no-frills in terms of explaining what it is or why it’s so valuable. But you still get the idea. It’s an app that lets people order and pay for a car from their phone. Essentially, it’s a convenient substitution for cabs.
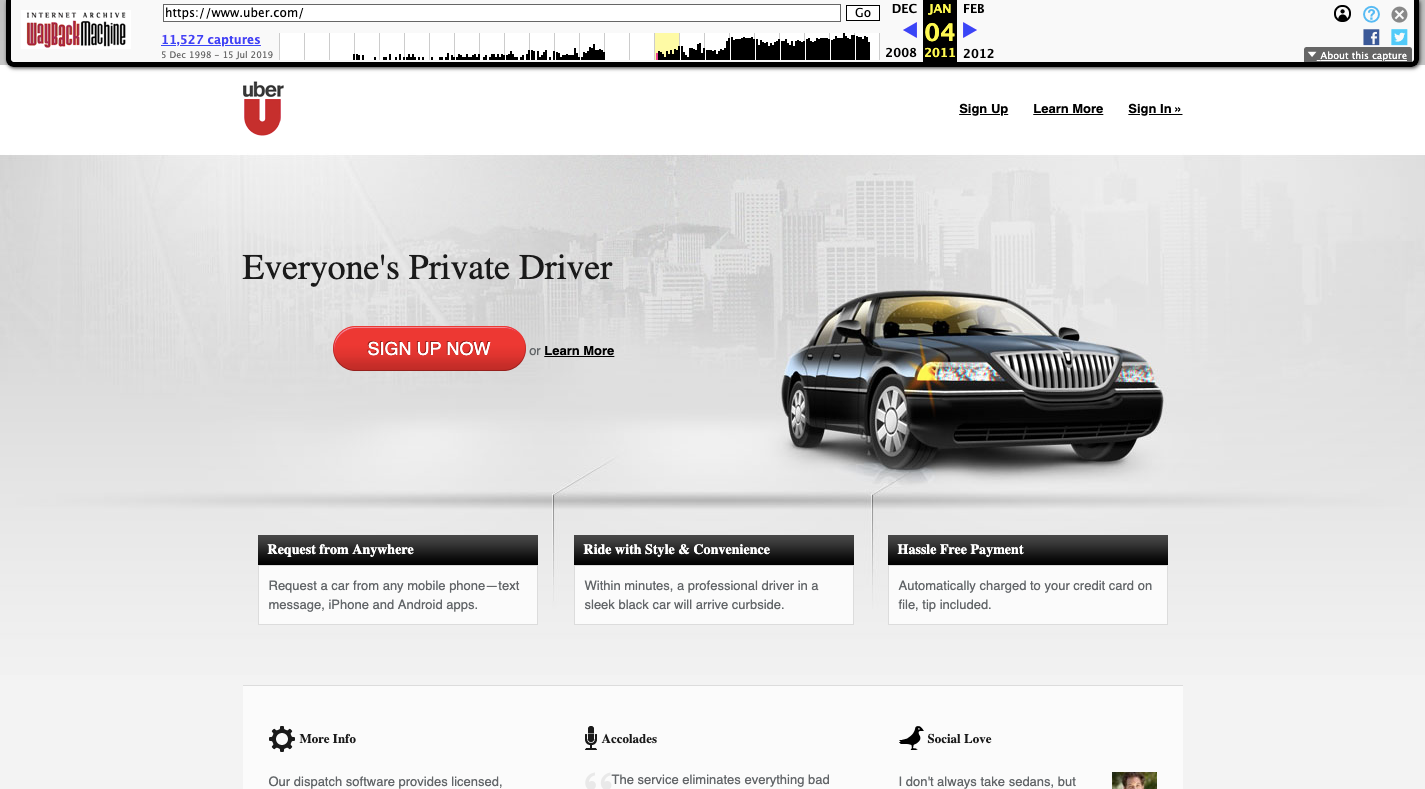
Jump ahead a year, you’ll see that Uber started to firm up its identity and value proposition with its official product launch:
Uber starts to refine its image in 2011 after beta testing completes. (Source: Uber) (Large preview)
This was back in 2011 when Uber dropped the “Cab” and labeled itself an on-call private driving service. It was a way to let consumers experience certain luxurious privileges they might not otherwise have been able to afford.
Although that’s not the final form Uber ended up taking, you can see how early user feedback helped the product developers decide which parts of the platform were really worth highlighting and building upon.
This is exactly the kind of thing that will happen when you build an MVP and start to gather valuable insights from users about what they want and which features they need. But, first, you have to start by getting clear on its general purpose and value. You can refine it later on.
2. Locate Your Ideal Users
You have your concept. Now, it’s time to figure out if consumers are going to want it. Even though an MVP is cheaper and faster to build doesn’t mean it won’t end up a complete waste of your time and resources. You have to at least confirm that the interest is there and then define, in clear terms, who your target user is.
Specifically, you need to think about location.
In the Uber example above, you can see that the beta product was only tested in San Francisco.
The initial version of Airbnb did something similar. Joe Gebbia, the co-founder of Airbnb, tells the story of his MVP on a 2017 episode of How I Built This.
Basically, he was low on cash and decided to rent out air mattresses in his San Francisco apartment for an upcoming conference. Knowing that hotels would be short on rooms, he figured he could make money off of it. But it wasn’t just rent money he made. He got an idea for a new business after a lot of people showed interest in renting space in his apartment.
So, he and his partner created a website called “AirBed & Breakfast”. Once it went live, though, it spread far beyond the original San Francisco test area.
An early version of the AirBnB concept from 2009. (Source: Airbnb) (Large preview)
In 2009, there were AirBnB rentals in 72 countries. Today, you practically have your pick of the litter in any town around the world. But it all started with San Francisco.
So, as you set about building your product, think about where the best places will be to test and get feedback on your app before you do a full release of it. You want the area to be a good representation of the population and demographics you aim to target. You also have to make sure there’s a demand for the product and that your target users can afford to use it (once you start monetizing).
3. Choose an MVP Format
The format of your MVP is another important thing to think about before you do any building.
In some cases, you’re going to have to build a workable product. For example, let’s say your goal is to build a new dating app. There are tons of dating apps on the market; with two apps, in particular, that continually dominate the pack. You know that building any sort of mobile dating app would be a huge and costly gamble, no matter how much you cut back on features. So, what do you do?
You could build a PWA dating app instead. The costs would be lower, the time-to-market significantly faster and it would be much easier to get your MVP in front of users than if you were to put something on the app store. You might even find that the PWA suffices in terms of product format in the end.
In other cases, the MVP won’t even need to be an actual product. It can just be a website announcing the product or providing a wireframe/prototype of the concept.
In 2018, Rand Fishkin announced that he was leaving Moz, the company he co-founded in 2004. Simultaneously, he announced a new product called SparkToro.
The SparkToro MVP landing page describes the upcoming product, but doesn’t provide access. (Source: SparkToro) (Large preview)
Now, Rand is someone who can launch a concept as an MVP and for it to still be successful. He has a long-standing history and solid reputation in this space, so, of course, users are going to gravitate to this new product despite it being unavailable for consumption.
For those of you building an MVP for a new brand, you probably won’t get so lucky. However, it’s really going to depend on what type of product you’re planning to build.
If there’s absolutely no way to create the product in a scaled-back version, then this could be an option worth exploring. It would also be a good idea if you or your client have absolutely no funds and need validated feedback to prove the viability of your concept to investors. That’s really the only way I see Joe Schmoes getting away with this.
If you do go this route, you’re going to need a really good explainer section, too. This is what SparkToro has on its What We’re Building page:
SparkToro’s website explains what it’s working on building. (Source: SparkToro) (Large preview)
I think for the kinds of users that would gravitate to a product like this — namely, advanced marketers that actually need this kind of solution — this way of testing the concept and viability of the features is good. It’s written in their language and with visuals they understand.
However, for users that aren’t familiar with your brand or aren’t as well-trained as Rand’s audience, a wireframe or prototype of the product’s dashboard would be a better idea. Even an explainer video from the founder would work well. It just needs to be something that convinces users to sign up and start providing feedback as early as possible.
4. Find Your Actual Minimum
If you watch the video of Eric Ries, you’ll see that he provides a formula for defining the minimum features of your MVP. It goes like this:
# of minimum features you think you need / 8 = The True Minimum
It makes sense if that formula makes you feel apprehensive. But think about it like this:
You build an MVP that is as simple as it can possibly be without it becoming useless. You ship it out to users and give them a chance to provide feedback.
A few things might happen as a result:
They absolutely hate it.
They complain to you about how Feature A sucks and how they wish it did something else or how Feature B was almost there, but then fell short of expectations. That’s perfect! Your test users will tell you exactly what they want from your product. Get enough consistent feedback and you’ll have a list of must-have features that need to appear in the next version of the app.
They’re okay with it, but don’t love it… yet.
Again, it’s okay if users aren’t 100% happy with it. You’ve given them an opportunity to try out a product that’s going to be awesome and they see the promise in it. Give them a chance to speak their mind and let you know what they loved and what they didn’t. Then, focus on strengthening those weak points and including the features that will make it a real game-changer.
They’ll love it as is.
Let’s be honest, this isn’t likely to happen. But wouldn’t it be great if feedback was so scarce that you could roll with the MVP as is? Plus, think of all that time you saved yourself and money you saved your client by cutting the product back so much. Sometimes simpler is better.
Don’t forget to thank these users for their feedback and support of the product. There’s no way you could create the solution they need without their insights and so it would be in your best interest to recognize the role they play in this. In return, they’ll continue to be your product’s evangelists long after launch.
5. Design Your Landing Page Early
Although I’m not too keen on a landing page or mini-website serving solely as the MVP (for the aforementioned reason), I do think it’s a good idea to get a mobile-first landing page up while the MVP is in the works.
Gaming apps and SaaS would be especially good choices to launch a beta signup page early. Here’s an example from Hytale:
Gaming app Hytale uses its landing page to educate users on the game and get beta users before launch. (Source: Hytale) (Large preview)
If you want your MVP to succeed, you should put some of that extra time you now have towards building out a strong landing page. Start by researching the early websites from the companies featured in this post. They all successfully explained their concepts, soft-marketed their products and convinced early users to sign up for testing.
While you’re at it, you should set up your blog, social media accounts and community features (with an active newsletter), too. You never know. Someone might find the announcement of your MVP somewhere other than Google search and decide they want to bookmark the site or sign up early to be a beta tester.
It’s never too soon to start getting buy-in from your user set!
6. Define Your Success Criteria
Last but not least, you have to decide how you’re going to measure the success of your MVP. Because it’s not just about the quality of feedback.
Consider the following:
How many visitors visited your landing page?
How many of those people signed up for the beta?
How many users did you retain over a set period (1 month, 3 months, etc.)?
How many people provided feedback and was it a substantial enough set to make solid decisions about the product design and features going forward?
Did the demographics of your user set match the audience you designed the app for? Why do you think that was?
How much time, on average, did users spend inside the app?
Which features did they spend the most time with? The least?
Which features received the most favorable feedback? The least?
Were there certain users who had a positive experience with the product? What made them different?
Take all of the information you gathered — from the original landing page, the beta testers, the usage data and so on — and really look over it all. What is it telling you about the MVP you’ve designed? And, now, what are you going to do with it?
Will you leave it as is or build it out to the full product it’s meant to be and that users want?
Will it be easy to attract and acquire customers based on the usage data you’ve collected? What’s more, will you be able to retain those users or is it more cost-effective to keep your app browser-side instead of in native app form?
And, finally, how much can and should you charge for access to the product? Will it ultimately make the company profitable or is there just not enough interest (at least in the monetization side of things) to make this a worthwhile venture?
I know I’m leaving you with a lot of questions, but there’s a lot you’re going to need to sort out once the tests begin. Plus, it’s the whole reason you created an MVP in the first place. This user feedback is invaluable to the process and is the only way you’re going to know if it’s a product worth pushing out to the market or taking back to the drawing board.
Test in Production is back! In May we hosted the Meetup at the Microsoft Reactor in San Francisco. The focus of this event was the culture of failure. Specifically, we wanted to hear how the culture of failure (avoiding failure, recovering from failure, and learning from failure) has an impact on how we test in production.
Ana Medina, Chaos Engineer at Gremlin, spoke about how performing Chaos Engineering experiments and celebrating failure helps engineers build muscle memory, spend more time building features and build more resilient complex systems.
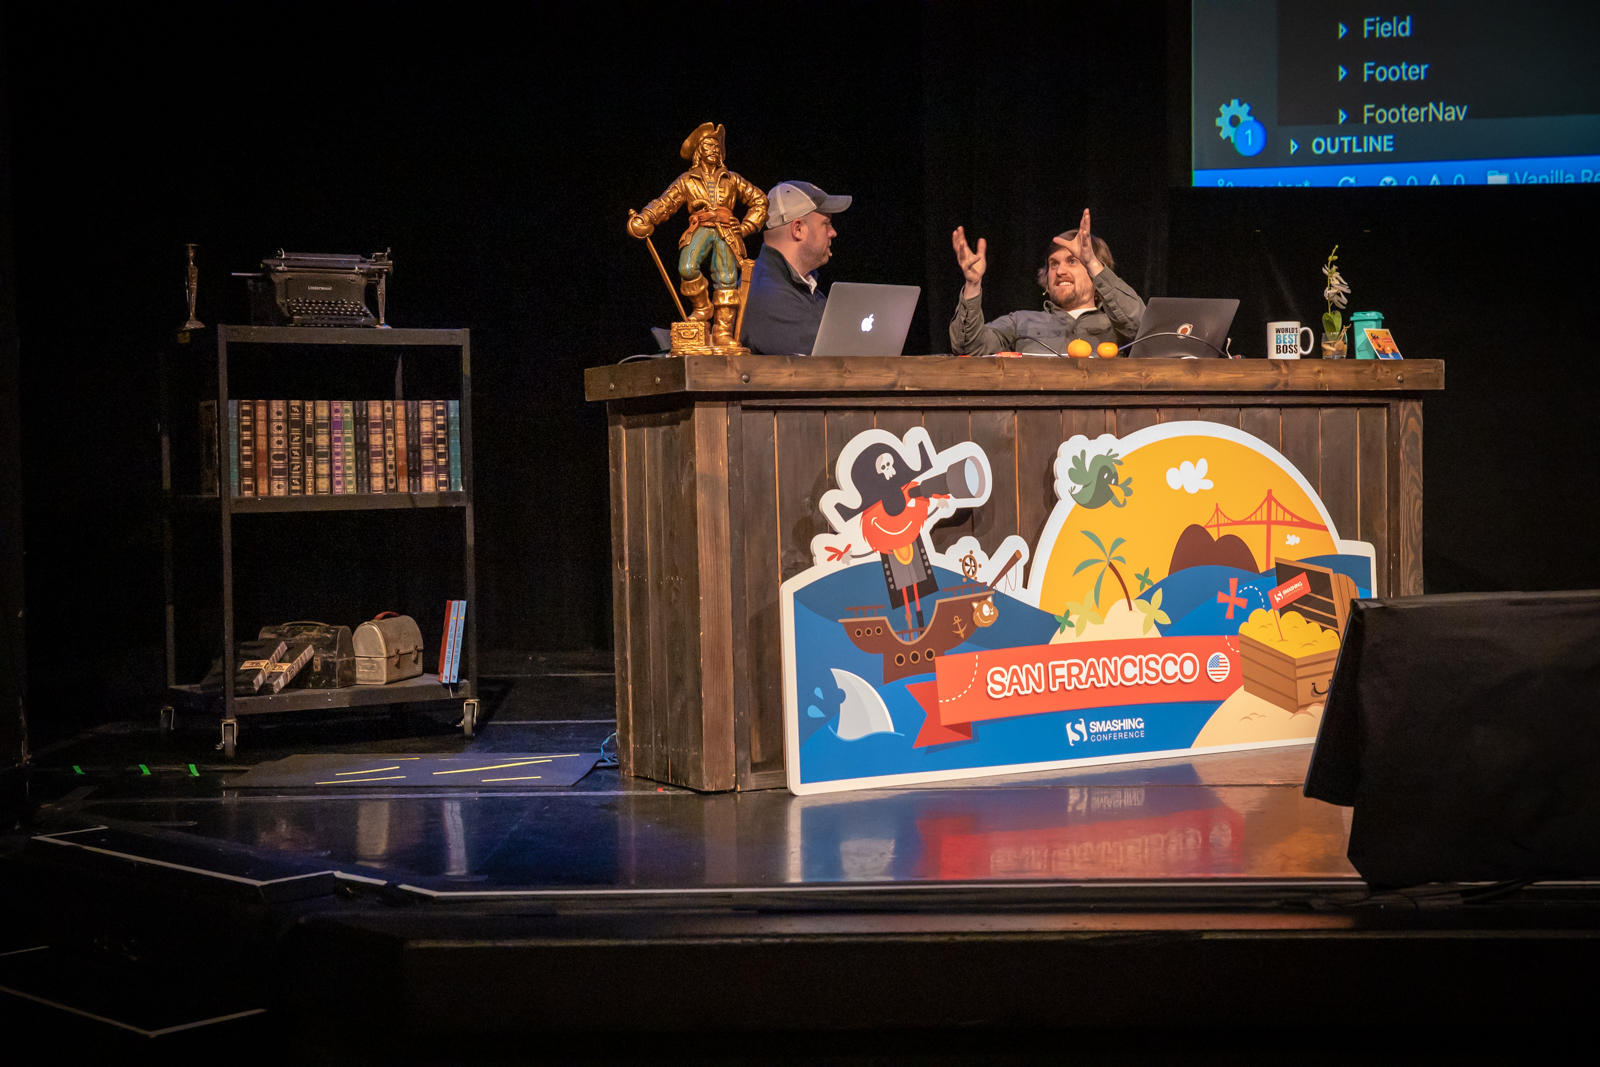
This year, SmashingConf took place at the Fort Mason Center which has superb views of the Bay and Golden Gate Bridge. The weather was very kind to us making it a very pleasant location to spend a few days in.
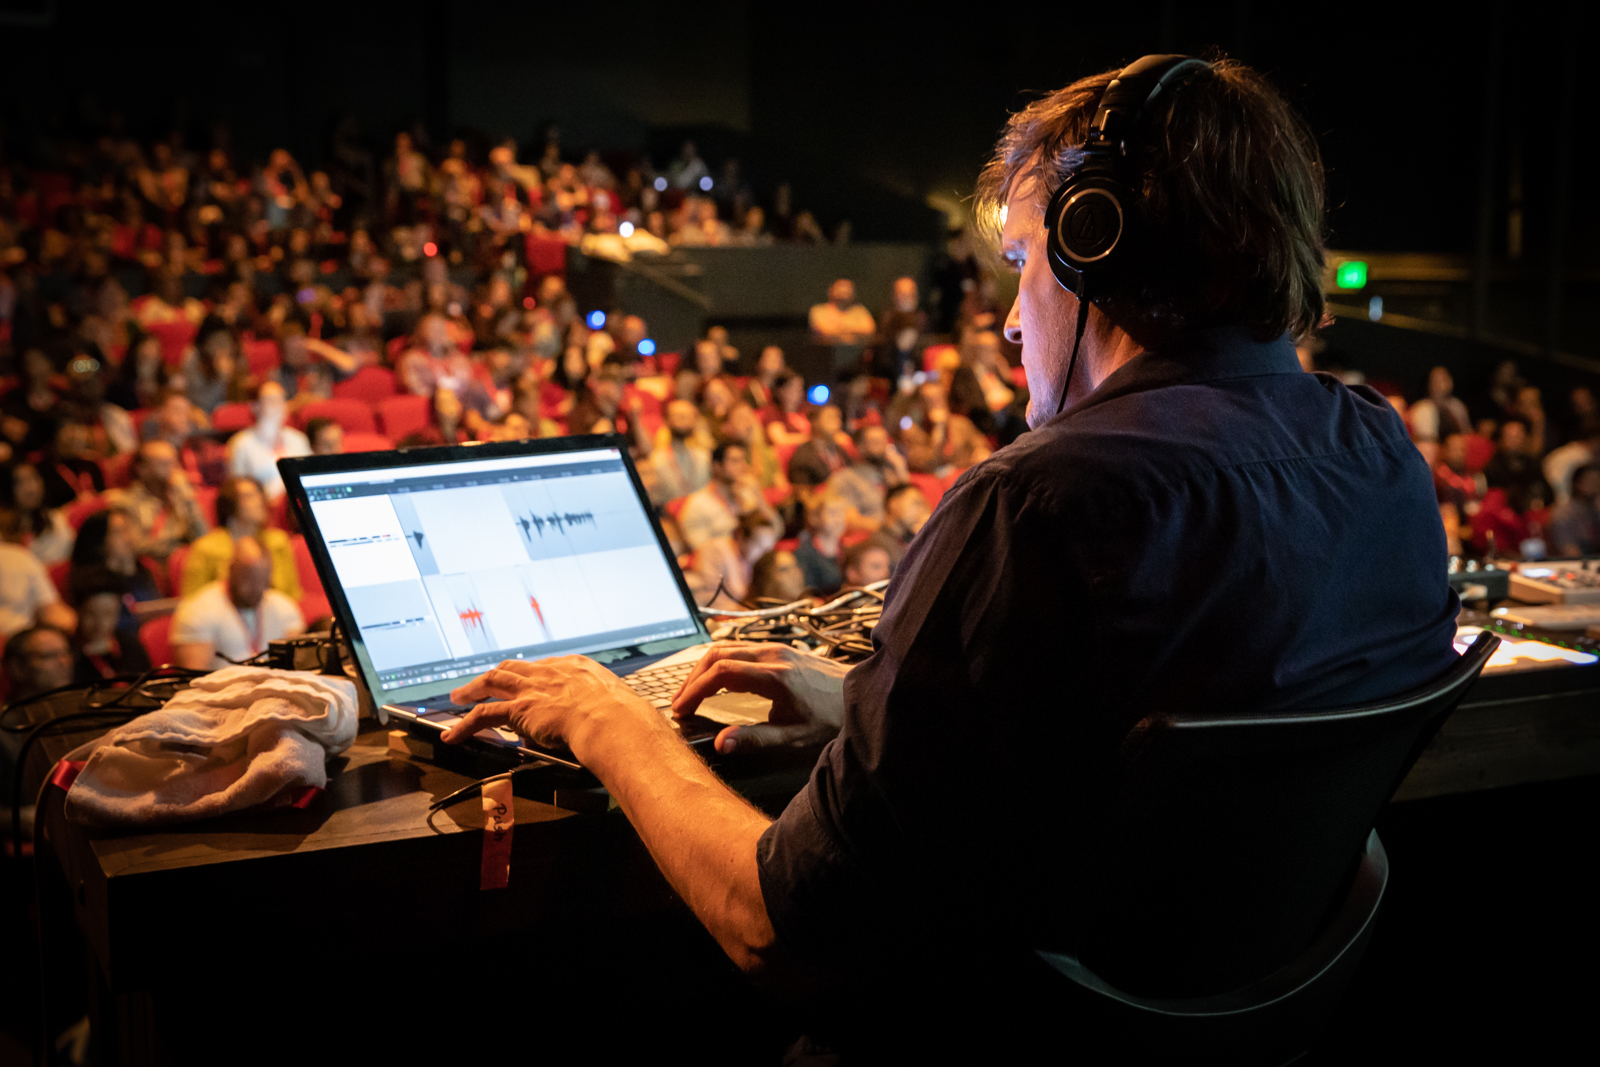
As always with any Smashing Conference, there were plenty of surprises! We had icecream and cookies, our amazing DJ Tobi Lessnow kept everyone well entertained between talks, and Vitaly opened the conference with just the right amount of balloons!
Our attendees collaborated on a Google Doc for both conference days. These documents are a treasure trove of information and links from our speakers.
Collaborative Doc (Day 1)
Notes for talks by Brad Frost, Sara Soueidan, Anna Migas, Darin Senneff, Steve Schoger, Chris Coyier, Jennifer Brook and David P. Simon.
Collaborative Doc (Day 2)
Notes for talks by Miriam Suzanne, Katie Sylor-Miller, Brendan Dawes, Jeremy Wagner, Jason Pamental and Jen Simmons.
In between the scheduled sessions, we had some great lunch sessions on both days from our friends at Deque, Netlify, and Medium.
Workshops are a great way to spend a day really thinking about a subject. We ran workshops on Monday (the day before) and on Thursday (the day after the conference); they were all sold out, and the rooms were packed! I got to demo subgrid in my workshop which had just appeared in an early build of Firefox the day previously, so they were some of the first people outside of Mozilla to get to see that working.
Here is the cards example for my @smashingconf workshop tomorrow, which I use to explain why we need subgrid and now I'll be able to demo. See how the footers line up even if they contain different amounts of content? That's useful. pic.twitter.com/xqoxPbCCeF
We always want to offer more than the conference, and try to arrange a bunch of side events which offer something for everyone.
Jam Session
On Monday, before the conference began, we had a Jam Session, organized by Mozilla and Shopify and held at the Mozilla offices. In addition to drinks and snacks, there were several micro-talks including:
“Creative Design With CSS Shapes And clip-path,” Mandy Michael
“Building Accessible Experiences,” Tiffany Tse
“The Power Of Code–Based Design,” Marcin Treder
“Axe-Pro: A New Kind Of Accessibility Tool,” April Ellsey
“Scroll Up! Scroll Up! A Tale Of Animating Over 10,000 Data Points,” Becky Rush
Also on Monday, we got together for a graffiti walk led by Scott Whitehead. A group of attendees spent time together exploring the street art of the Clarion Alley Art Street.
At Smashing SF 2018, Josh Clark suggested a morning run, which I helped organize. I thought we should continue the tradition this year and we had two lovely runs on both conference days out towards the Golden Gate Bridge. It has to be one of the most scenic locations possible for a conference run. It really is a great way to start a day of sitting and learning, by stretching your legs and getting some fresh air.
I was surprised to see so many Wednesday morning conference runners, as on Tuesday night we had a party sponsored by Speedcurve. There were drinks, mediterranean food, and the venue was filled with old-school arcade games!
Yesterday thanks to @smashingconf a dream from my childhood came true! Got to play with unlimited tokens all those great arcade games 🕹 Add nice beer to that and cool people to hang out with and you have the best conference party ever!#SmashingConfpic.twitter.com/zayrIm2wYE
After the final day of the conference, some attendees went off on a photo walk, to enjoy a pleasant San Francisco evening. If you have any photos from that we would love to see them — drop a note in the comments.
More Links
There are a few other places you can find conference resources, photos and feedback. If you have written a blog post, posted photos or anything else, add a link in the comments.
We are going to catch our breath and then we will be straight back into getting ready for our next SmashingConf in Toronto. We still have only a few tickets left, so be quick if you don’t want to miss out.
Note: Tickets to SmashingConf SF were quickly sold out. If you are keen to experience Smashing in San Francisco in 2020, tickets for that event are already on sale with super early-bird pricing.
Follow us on Instagram and Twitter for live updates when any Smashing Conference is ongoing — we always try and share some of the buzz and information with our friends around the world.
For more than 30 years, the Game Developers Conference (GDC) has been one of the prominent events for displaying the most innovative video game technology to developers around the world. Each year, more than 28,000 developers gather for one week and learn about the advancements taking place in the video game industry and share the techniques and technologies shaping the future of gaming. This year, GDC will run from Monday, March 18 until Friday, March 22 in San Francisco, CA.
In this series, we will cover the significant updates from GDC 2019 each day of the week and recap the conference after its conclusion on Friday, March 22. Even if video games are not the reader's specialty or not of particular interest, GDC 2019 will likely include many noteworthy announcements and innovations that will ripple far beyond video games. Regardless of background, it is essential to digest the wealth of information and transformative technologies that will emerge from San Francisco next week.
The National Security Agency’s newest contribution to the open source community is here. Unveiled at this year’s RSA security conference in San Francisco, Ghidra is the platform the agency has been developing internally for years to help them reverse engineer questionable pieces of code.


 symbol after your phrase. This symbol indicates to other businesses that you hold common-law trademark rights for the phrase.


