End-to-end tests are written to assert the flow of an application from start to finish. Instead of handling the tests yourself — you know, manually clicking all over the application — you can write a test that runs as you build the application. That’s what we call continuous integration and it’s a beautiful thing. Write some code, save it, and let tooling do the dirty work of making sure it doesn’t break anything.
>Cypress is just one end-to-end testing framework that does all that clicking work for us and that’s what we’re going to look at in this post. It’s really for any modern JavaScript library, but we’re going to integrate it with React in the examples.
Let’s set up an app to test
In this tutorial, we will write tests to cover a todo application I’ve built. You can clone the repository to follow along as we plug it into Cypress.
git clone git@github.com:kinsomicrote/cypress-react-tutorial.gitNavigate into the application, and install the dependencies:
cd cypress-react-tutorial
yarn install
Cypress isn’t part of the dependencies, but you can install it by running this:
yarn add cypress --devNow, run this command to open Cypress:
node_modules/.bin/cypress open
Typing that command to the terminal over and over can get exhausting, but you can add this script to the package.json file in the project root:
"cypress": "cypress open"Now, all you have to do is do npm run cypress once and Cypress will be standing by at all times. To have a feel of what the application we’ll be testing looks like, you can start the React application by running yarn start.
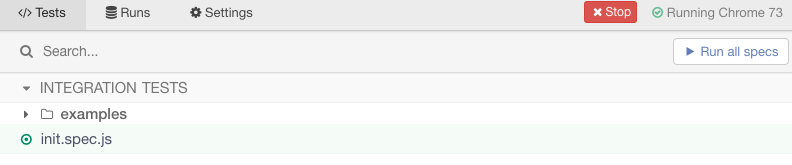
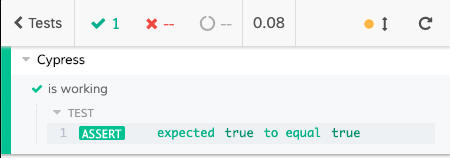
We will start by writing a test to confirm that Cypress works. In the cypress/integration folder, create a new file called init.spec.js. The test asserts that true is equal to true. We only need it to confirm that’s working to ensure that Cypress is up and running for the entire application.
describe('Cypress', () => {
it('is working', () => {
expect(true).to.equal(true)
})
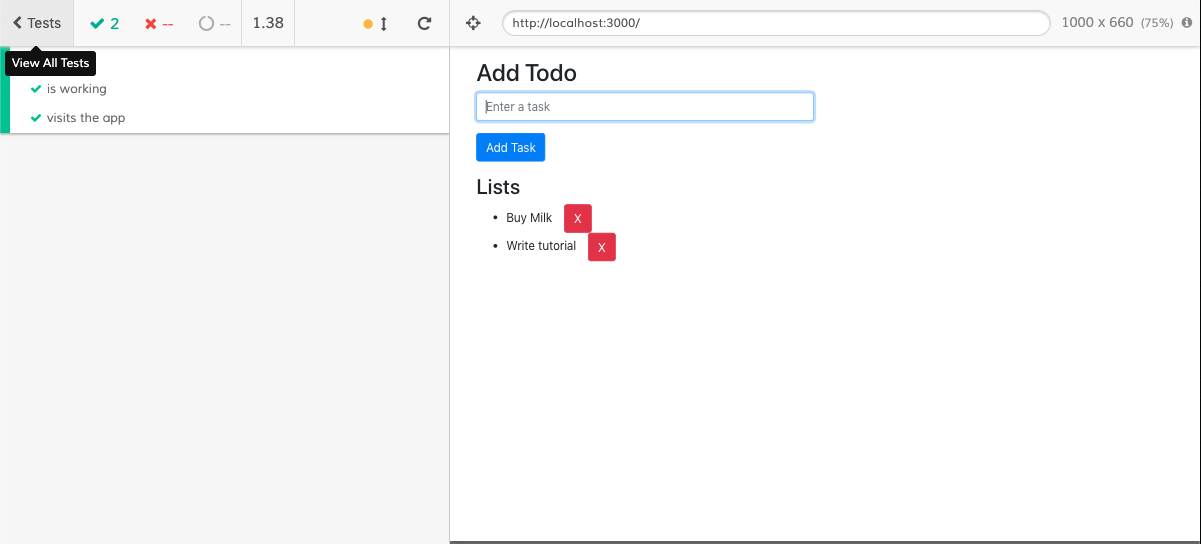
})You should have a list of tests open. Go there and select init.spec.js.
That should cause the test to run and pop up a screen that shows the test passing.
While we’re still in init.spec.js, let’s add a test to assert that we can visit the app by hitting http://localhost:3000 in the browser. This’ll make sure the app itself is running.
it('visits the app', () => {
  cy.visit('http://localhost:3000')
})
We call the method visit() and we pass it the URL of the app. We have access to a global object called cy for calling the methods available to us on Cypress.
To avoid having to write the URL time and again, we can set a base URL that can be used throughout the tests we write. Open the cypress.json file in the home directory of the application and add define the URL there:
{
  "baseUrl": "http://localhost:3000"
}
You can change the test block to look like this:
it('visits the app', () => {
  cy.visit('/')
})
...and the test should continue to pass. 🤞
Testing form controls and inputs
The test we’ll be writing will cover how users interact with the todo application. For example, we want to ensure the input is in focus when the app loads so users can start entering tasks immediately. We also want to ensure that there’s a default task in there so the list is not empty by default. When there are no tasks, we want to show text that tells the user as much.
To get started, go ahead and create a new file in the integration folder called form.spec.js. The name of the file isn’t all that important. We’re prepending "form" because what we’re testing is ultimately a form input. You may want to call it something different depending on how you plan on organizing tests.
We’re going to add a describe block to the file:
describe('Form', () => {
beforeEach(() => {
cy.visit('/')
})
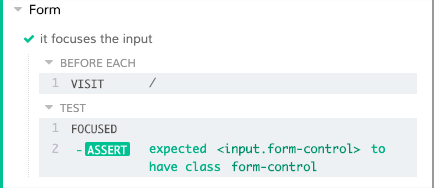
it('it focuses the input', () => {
cy.focused().should('have.class', 'form-control')
})
})The beforeEach block is used to avoid unnecessary repetition. For each block of test, we need to visit the application. It would be redundant to repeat that line each time beforeEach ensures Cypress visits the application in each case.
For the test, let’s check that the DOM element in focus when application first loads has a class of form-control. If you check the source file, you will see that the input element has a class called form-control set to it, and we have autoFocus as one of the element attributes:
<input
  type="text"
  autoFocus
  value={this.state.item}
  onChange={this.handleInputChange}
  placeholder="Enter a task"
  className="form-control"
/>
When you save that, go back to the test screen and select form.spec.js to run the test.
The next thing we’ll do is test whether a user can successfully enter a value into the input field.
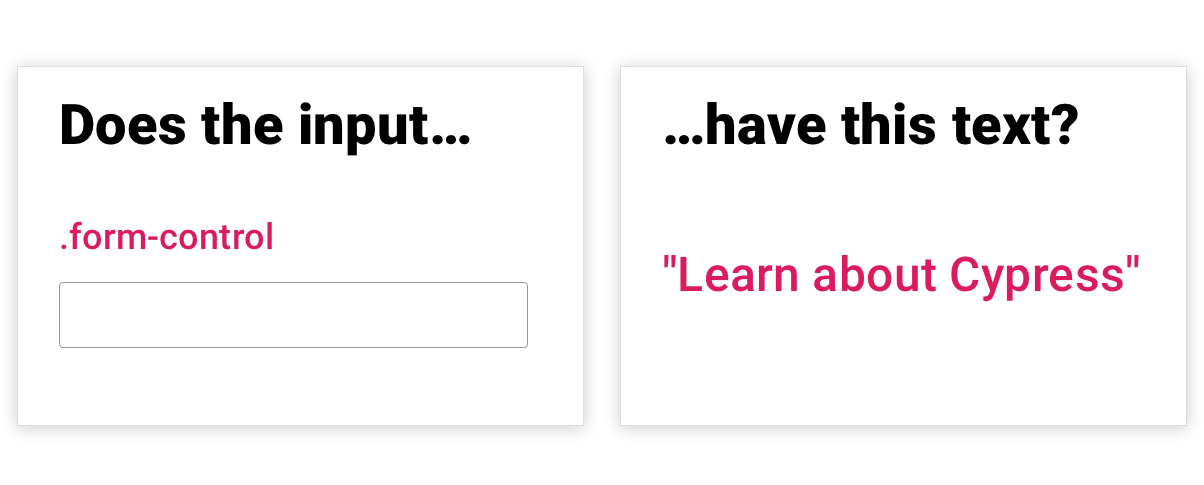
it('accepts input', () => {
  const input = "Learn about Cypress"
  cy.get('.form-control')
    .type(input)
    .should('have.value', input)
})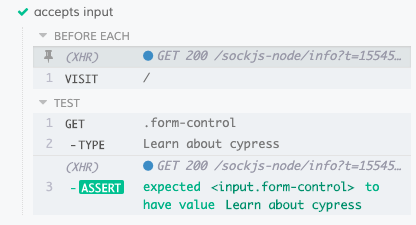
We’ve added some text ("Learn about Cypress") to the input. Then we make use of cy.get to obtain the DOM element with the form-control class name. We could also do something like cy.get('input') and get the same result. After getting the element, cy.type() is used to enter the value we assigned to the input, then we assert that the DOM element with class form-control has a value that matches the value of input.
In other words:
Our application should also have two todos that have been created by default when the app runs. It’s important we have a test that checks that they are indeed listed.
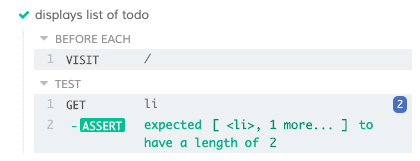
What do we want? In our code, we are making use of the list item (<li>) element to display tasks as items in a list. Since we have two items listed by default, it means that the list should have a length of two at start. So, the test will look something like this:
it('displays list of todo', () => {
  cy.get('li')
    .should('have.length', 2)
})
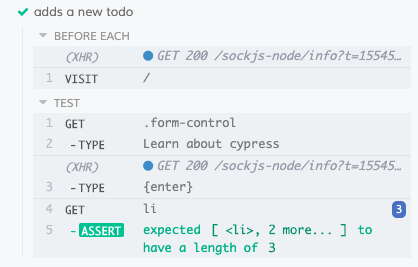
Oh! And what would this app be if a user was unable to add a new task to the list? We’d better test that as well.
it('adds a new todo', () => {
  const input = "Learn about cypress"
  cy.get('.form-control')
    .type(input)
    .type('{enter}')
    .get('li')
    .should('have.length', 3)
})
This looks similar to what we wrote in the last two tests. We obtain the input and simulate typing a value into it. Then, we simulate submitting a task that should update the state of the application, thereby increasing the length from 2 to 3. So, really, we can build off of what we already have!
Changing the value from three to two will cause the test to fail — that’s what we’d expect because the list should have two tasks by default and submitting once should produce a total of three.
You might be wondering what would happen if the user deletes either (or both) of the default tasks before attempting to submit a new task. Well, we could write a test for that as well, but we’re not making that assumption in this example since we only want to confirm that tasks can be submitted. This is an easy way for us to test the basic submitting functionality as we develop and we can account for advanced/edge cases later.
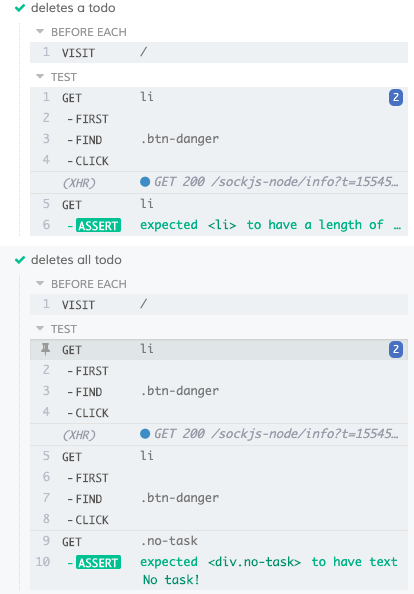
The last feature we need to test is the deleting tasks. First, we want to delete one of the default task items and then see if there is one remaining once the deletion happens. It’s the same sort of deal as before, but we should expect one item left in the list instead of the three we expected when adding a new task to the list.
it('deletes a todo', () => {
  cy.get('li')
    .first()
    .find('.btn-danger')
    .click()
    .get('li')
    .should('have.length', 1)
})
OK, so what happens if we delete both of the default tasks in the list and the list is completely empty? Let’s say we want to display this text when no more items are in the list: "All of your tasks are complete. Nicely done!"
This isn’t too different from what we have done before. You can try it out first then come back to see the code for it.
it.only('deletes all todo', () => {
  cy.get('li')
    .first()
    .find('.btn-danger')
    .click()
    .get('li')
    .first()
    .find('.btn-danger')
    .click()
    .get('.no-task')
    .should('have.text', 'All of your tasks are complete. Nicely done!')
})
Both tests look similar: we get the list item element, target the first one, and make use of cy.find() to look for the DOM element with a btn-danger class name (which, again, is a totally arbitrary class name for the delete button in this example app). We simulate a click event on the element to delete the task item.
Testing network requests
Network requests are kind of a big deal because that’s often the source of data used in an application. Say we have a component in our app that makes a request to the server to obtain data which will be displayed to user. Let’s say the component markup looks like this:
class App extends React.Component {
  state = {
    isLoading: true,
    users: [],
    error: null
  };
  fetchUsers() {
    fetch(`https://jsonplaceholder.typicode.com/users`)
      .then(response => response.json())
      .then(data =>
        this.setState({
          users: data,
          isLoading: false,
        })
      )
      .catch(error => this.setState({ error, isLoading: false }));
  }
  componentDidMount() {
    this.fetchUsers();
  }
  render() {
    const { isLoading, users, error } = this.state;
    return (
      <React.Fragment>
        <h1>Random User</h1>
        {error ? <p>{error.message}</p> : null}
        {!isLoading ? (
          users.map(user => {
            const { username, name, email } = user;
            return (
              <div key={username}>
                <p>Name: {name}</p>
                <p>Email Address: {email}</p>
                <hr />
              </div>
            );
          })
        ) : (
          <h3>Loading...</h3>
        )}
      </React.Fragment>
    );
  }
}
Here, we are making use of the JSON Placeholder API as an example. We can have a test like this to test the response we get from the server:
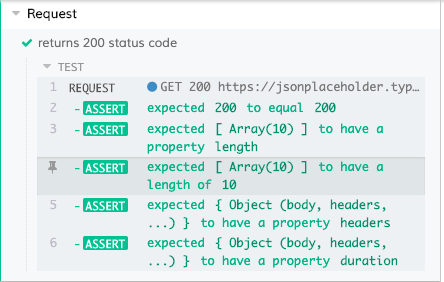
describe('Request', () => {
  it('displays random users from API', () => {
    cy.request('https://jsonplaceholder.typicode.com/users')
      .should((response) => {
        expect(response.status).to.eq(200)
        expect(response.body).to.have.length(10)
        expect(response).to.have.property('headers')
        expect(response).to.have.property('duration')
      })
  })
})
The benefit of testing the server (as opposed to stubbing it) is that we are certain the response we get is the same as that which a user will get. To learn more about network requests and how you can stub network requests, see this page in the Cypress documentation.
Running tests from the command line
Cypress tests can run from the terminal without the provided UI:
./node_modules/.bin/cypress run...or
npx cypress runLet’s run the form tests we wrote:
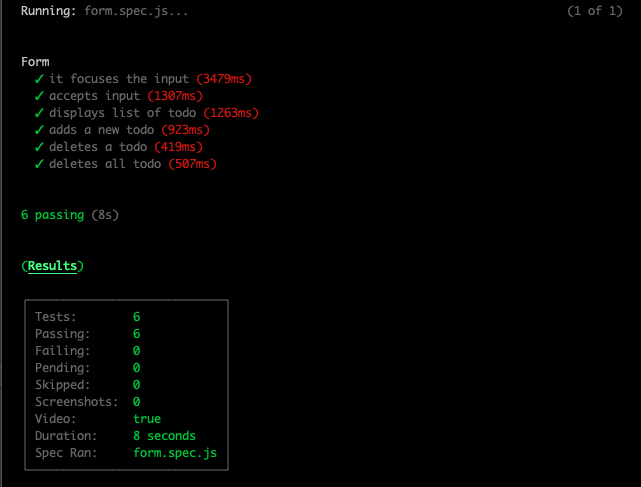
npx cypress run --record --spec "cypress/integration/form.spec.js"Terminal should output the results right there with a summary of what was tested.
There’s a lot more about using Cypress with the command line in the documentation.
That’s a wrap!
Tests are something that either gets people excited or scared, depending on who you talk to. Hopefully what we’ve looked at in this post gets everyone excited about implementing tests in an application and shows how relatively straightforward it can be. Cypress is an excellent tool and one I’ve found myself reaching for in my own work, but there are others as well. Regardless of what tool you use (and how you feel about tests), hopefully you see the benefits of testing and are more compelled to give them a try.
Related resources
- Cypress: Writing Your First Test
- GitHub: Cypress repository
- CSS-Tricks: Getting Started with React Testing Library
- CSS-Tricks: Writing Tests for React Applications Using Jest and Enzyme
- CSS-Tricks: Testing for Visual Regressions with Percy
The post Using Cypress to Write Tests for a React Application appeared first on CSS-Tricks.