How to Add Stripe QR Code Payment in WordPress

Are you looking for a way to add a QR code for Stripe payments on your WordPress website?

QR codes, or Quick Response Codes, are a type of barcode that users can scan using their mobile phones. You can show a Stripe payment form using QR codes and help customers easily purchase a product or service.

In this article, we will show you how to add Stripe QR code payment in WordPress.

How to add Stripe payment QR code payment in WordPress

Why Add Stripe QR Code Payment in WordPress?

Stripe is a popular payment gateway that lets you accept online payments on your WordPress site or eCommerce store. It makes it very easy for customers to pay using their credit cards.

The best part is that customers don’t have to go through a lengthy signup process. They can simply enter their credit card on the website to make a purchase.

Adding Stripe QR code payments to your site gives customers the flexibility to complete a purchase quickly. Customers can simply scan the code to open the payment link.

This makes the checkout process very simple and fast. It helps people to easily buy a product and service on your online store. As a result, you’ll see a boost in conversions and reduced cart abandonments.

That said, let’s look at how you can add a Stripe QR code payment to your WordPress website.

Create a Stripe Payment Form in WordPress

First, you’ll need to add a Stripe payment form on your website to accept online payments from customers.

The best way to do that is using WPForms. It is the best contact form plugin for WordPress that’s super easy to use and easily integrates with Stripe. There are many form templates to choose from, and you can customize them using the drag-and-drop builder.

For this tutorial, you’ll need the WPForms Pro license because it includes the Stripe addon. There’s also a WPForms Lite version that you can use for free. It allows you to accept Stripe payments, but there’s a 3% transaction fee for payments made through your forms.

To start, you’ll need to download and install the WPForms plugin. If you need help, then please see our guide on how to install a WordPress plugin.

Upon activation, you can go to WPForms » Settings from your WordPress dashboard and enter the license key. You can find the key in your account area on the WPForms website.

Adding a license key to the WPForms form builder plugin

Simply enter the key and click the ‘Verify Key’ button.

Once that’s done, you’ll need to go to the WPForms » Addons page and install the Stripe addon.

Installing the Stripe addon

Go ahead and click the ‘Install Addon’ button, and WPForms will automatically install and activate it.

From here, you can head to WPForms » Settings from the WordPress admin panel and go to the ‘ Payments’ tab.

Next, simply click the ‘Connect with Stripe’ button and follow the onscreen instructions to connect your account with WPForms.

Click the connect with Stripe button

Once Stripe is connected, you can go to WPForms » Add New to create a new form.

WPForms offers lots of form templates to choose from. You can select a simple contact form, an order form, or a Stripe payment form and customize it.

Stripe payment form

For this tutorial, we will use the ‘Stripe Payment Form’ template.

Next, you can customize your form using the drag-and-drop form builder. By default, you’ll see different form fields in the template.

However, WPForms lets you add more form fields to the template, like a dropdown, checkboxes, email, phone, address, website, and more.

Customize Stripe payment form

You can also click any form field on the template to customize it further.

For instance, we changed the text for each item on your demo form and enabled the option to show prices after the item label.

Customize form field in stripe payment form

Once you’re done editing the form, simply switch to the ‘Payments’ tab and select ‘Stripe’ from the menu on the left.

From here, ensure the ‘Enable Stripe payments’ option is enabled.

Enable Stripe payments

Next, you can switch to the Settings tab. Here, you’ll see options to change the notification and confirmation settings.

For instance, you can select what action should take place once a user submits a form. WPForms lets you show a message or a page or even redirect users to a URL.

Confirmation settings form

You’re now ready to display your Stripe payment form on your website.

Simply click the ‘Save’ button to store your changes and then click the ‘Embed’ button at the top.

Save and embed your form

Next, WPForms will show a popup where you can choose an existing page or create a new one to embed your form.

We will choose the ‘Select Existing Page’ option for this tutorial.

Embed a form in page

Next, you’ll need to enter a name for your new page.

Once that’s done, simply click the ‘Let’s Go’ button.

Enter name for your new page

After that, you’ll see a preview of your Stripe payment form in the WordPress content editor.

You can go ahead and publish the page and visit the website to see it in action.

Stripe payment form preview

Now go ahead and copy the link of your payment form page, as you’ll need it to create a QR code.

Alternative Method: You can also create a Stripe payment form using WP Simple Pay. It is the best Stripe payment plugin for WordPress and helps you collect online payments without setting up a shopping cart.

WP Simple Pay is a more straightforward option compared to WPForms. It is perfect if you’re just looking to create a basic form to accept credit card payments.

However, if you’re looking for more customization options and form templates, then we recommend using WPForms.

For more details, you can see our detailed guide on how to accept payments with Stripe in WordPress.

Add QR Code for Stripe Payments in WordPress

Now that your Stripe payment form is ready, you can create a QR code for it and display it anywhere on your site.

There are 2 ways you can add a QR code to your site. You can use the Google Chrome browser’s feature or use a WordPress plugin.

1. Create QR Codes using Google Chrome

If you’re using the Google Chrome browser, then you can use it to share a webpage via a QR code.

First, you’ll need to open the Stripe payment form page in a new tab or window.

Next, you can click the share icon in the top right corner of the site address bar. From here, simply select the ‘Create QR Code’ option.

Click the share icon in chrome

After that, Google Chrome will generate a QR code for your Stripe payment form page.

You can go ahead and download the QR code as an image.

Download the QR code

Next, simply place the image anywhere on your site.

For example, you can show the QR code on product pages, so customers can quickly scan them and open the form to make a purchase.

Add QR code to product page

2. Create a Stripe Payment QR Code using a WordPress Plugin

You can also add QR codes to your site using a WordPress plugin like Shortcodes Ultimate. It is a free plugin that lets you create over 50 different types of shortcodes, including QR codes.

First, you’ll need to install and activate the Shortcodes Ultimate plugin. If you need help, then please see our guide on how to install a WordPress plugin.

Upon activation, you will see the Shortcode Ultimate welcome screen.

Shortcode ultimate welcome screen

Next, you’ll need to edit a page or post to add your QR code.

Once you’re in the content editor, simply add a shortcode block.

How to add a shortcode block to WordPress

After that, you should see an ‘Insert shortcode’ option.

You can simply click the double brackets icon to add your QR code.

Click the select shortcode icon

Next, the plugin will display different shortcode options for your site.

Go ahead and select the ‘QR Code’ option.

Select QR code shortcode

After that, you’ll see options to enter details for your QR code.

In the Data field, you can enter the URL of your Stripe payment form that you created earlier.

Besides that, there is an option to enter a title for the code, which acts as an alt-text. You can also adjust the size of your QR code.

Enter QR code details

If you scroll down, then you’ll see more options to customize your QR code. For instance, you can change the primary color, background color, and more.

Once you’re done, simply click the ‘Insert shortcode’ button.

Click insert shortcode

The plugin also lets you see a live preview of the code on your blog post or landing page.

Go ahead and publish your page to see the Stripe payment form QR code in action.

QR code live preview

We hope this article helped you learn how to add Stripe QR code payment in WordPress. You may also want to see our guide on WooCommerce made simple and how to accept recurring payments in WordPress.

If you liked this article, then please subscribe to our YouTube Channel for WordPress video tutorials. You can also find us on Twitter and Facebook.

The post How to Add Stripe QR Code Payment in WordPress first appeared on WPBeginner.

Compare the Best POS Systems For Small Businesses

Want to jump straight to the answer? The best small business POS system for most people is Square or Shopify POS.

Small businesses need a fast and simple way to check out customers—regardless of the customer’s payment method or transaction environment. Things like tracking inventory, printing receipts, managing your cash drawer, and accurately tracking sales for bookkeeping purposes shouldn’t be a hassle for your employees or back office.

POS systems simplify payment acceptance and accounting while streamlining the checkout process for your customers. You can use this guide to find the perfect POS system for your small business.

Company logos for our best POS systems for small businesses reviews

The Top 5 Best POS Systems For Small Businesses

  • Square — Best Versatile POS Hardware For Simplicity
  • Shopify POS — Best For Retailers Selling In-Person and Online
  • Lightspeed — Best For Restaurants
  • Clover — Best POS System With Built-In Payment Processing
  • Vend — Best For Multi-Location Businesses

The following reviews cover features, benefits, highlights, and recommended use cases for the best small business POS systems on the market today. 

Square — Best Versatile POS Hardware For Simplicity

  • Integrated payment processing
  • Industry-specific solutions
  • Sell from anywhere
  • Customizable POS
Start For Free

Square has quickly become one of the most popular POS systems for small businesses in nearly every industry. That’s because they have such a wide range of hardware solutions to accommodate varying needs and checkout environments. 

For small business retailers, quick-service restaurants, full-service dining, professional services, and so much more, there’s a good chance Square has an option that fits your needs.

Screenshot of Square POS webpage - Hardware that makes selling easy
Find an option that fits your needs with Square’s wide range of POS hardware.

For such a feature-packed POS solution, every piece of hardware from Square is surprisingly easy to use. Square accommodates contactless payments, online orders, phone orders, pickup and delivery, invoicing, and more. 

You can choose from a wide range of POS hardware that works as a fixed register, mobile throughout your store, and even manage checkouts on the go.

  • Square Register — All-in-one cash register with a customer-facing display
  • Square Stand — iPad POS that lets you add printers and cash drawers
  • Square Terminal — Portable POS terminal with built-in payment processing and receipt printing
  • Square Reader — Turn any phone or tablet into a payment processing system and POS solution
  • Reader With Contactless Chip — To accept payments on the go

All of these solutions make it ultra-easy to set up and use, regardless of the checkout environment. 

Stands and Terminals start at $149 and $299, respectively. If you want a complete Square Register, pricing starts at $799. Financing is available for all hardware, and you can even get a free card reader

Shopify POS — Best For Retailers Selling In-Person and Online

  • POS free with any Shopify plan
  • Inventory management
  • Integrated ecommerce
  • Easy returns
Try Free

Shopify is best known for its industry-leading ecommerce platform. But it’s also an excellent option for small businesses that sell both online and in-person. 

That’s because you can manage all of your inventory, sales, and customer information from a single source of truth. It also has advanced inventory management features, including forecasting tools, so you can prepare your stock accordingly. 

Screenshot of Shopify POS webpage - How Shopify POS powers your business
Sell online or in-person with Shopify’s versatile POS tools.

This is an excellent option for brick-and-mortar retailers that are expanding to online sales. It also works really well for ecommerce stores that want to establish a retail presence. 

Keeping everything organized for your customers is another great perk. If someone buys a product online and wants to return it in person, Shopify POS can easily handle the transaction.

Customers can also buy online and pick up their purchases in your store. Let’s say an in-person shopper wants something, but you don’t have the right color or size on-site. You can use Shopify POS to process the transaction and ship the right product to their home—so you never miss a sale.

The setup and onboarding process is ultra simple. So you can get started right away and easily train your staff. If you have any questions, the Shopify support team is available 24/7 via phone, email, or live chat. 

Best of all, Shopify POS is free with all Shopify plans. For those of you who want more advanced features, there’s a Pro version that starts at $89 per month.

For new users, you can try Shopify for free with a three-day trial and get the POS software included.

Lightspeed — Best For Restaurants

  • Starts at $39
  • Tableside checkouts
  • QR code menus
  • Easy to split checks
Start 14-day free trial

Lightspeed offers industry-specific POS solutions for retailers, golf courses, and restaurants. But the restaurant systems are ideal for small businesses, as they accommodate such a wide range of needs within the food and beverage industry.

This POS system is versatile enough for bars, cafes, quick-service restaurants, full-service dining, hotels, and more. If you sell food and drinks, Lightspeed has you covered.

Screenshot of Lightspeed Restaurant webpage - the restaurant point of sale system that adapts with you
Lightspeed’s versatile POS system works for every type of restaurant.

Lightspeed has everything you need to scale your business and accommodate your customers. You can easily diversify your service offerings with online ordering and contactless delivery. 

The POS system makes it easy to change your floor plan and adjust tables—ensuring your staff always knows where to go. This also helps you handle large group reservations without confusing your staff. 

You can use Lightspeed to turn tables faster with tableside checkouts. The system also lets you set up QR codes for menus, ordering, and payments. 

Menu modifications and custom orders? No problem. Splitting the check and accepting multiple payment forms from a single party has never been easier. 

Lightspeed also syncs with third-party apps, like OpenTable, for reservations. It seamlessly integrates with popular food delivery services like UberEats and DoorDash.

Plans start at just $39 per month. You can try it free for 14 days with unlimited access to every POS feature. 

Clover — Best POS System With Built-In Payment Processing

  • PCI Compliant
  • $100,000 fraud protection
  • Next day deposits
  • Accept payments offline
Get 30 days free

Most modern POS systems come with payment processing. But Clover is unique in the sense that it’s branded a payment acceptance solution first and a POS solution second.

But don’t think that Clover’s POS tools are an afterthought. It’s still a feature-packed solution with plenty of options for businesses in different industries.

Screenshot of Clover POS webpage - process more payments
Quickly process any type of payment with Clover’s POS solution.

You can use Clover to accept virtually any type of payment from your customers:

  • EMV chip cards
  • Contactless NFC payments
  • Checks
  • Cash
  • Swipe cards
  • Phone orders
  • Online orders

The list goes on and on. The software is fully encrypted and PCI compliant. You can also take payments without WiFi, and everything will sync when you connect to a network.

With Clover, most businesses get bank deposits the next day. You’ll also benefit from fraud protection of up to $100,000. 

If you’re looking for a payments-first POS system that’s easy to use but highly sophisticated, look no further than Clover. 

Pricing varies based on your business type and your hardware requirements. Plans start at $14.95 per month, and hardware ranges from $499 to $2,000+. Processing rates start at 2.3% + $0.10 per transaction. 

Sign up now and get your first 30 days for free.

Vend — Best For Multi-Location Businesses

  • Starts at $69
  • Customer loyalty programs
  • Advanced inventory management
  • Built to scale
Try free for 14 days

As your small business grows, you need a POS system that will grow with you. Having to change your POS system as you’re opening new stores will only complicate things.

But Vend is specifically designed to accommodate small businesses with multiple locations. You can easily expand without any downtime and accommodate your customers no matter which location they’re visiting.

Screenshot of Vend POS webpage - platform that makes it easy to connect with your favorite solutions
Vend will help you smoothly run your Multi-location business with ease.

Vend really shines with its advanced inventory management features. It seamlessly tracks all of your stock in real time. You can easily transfer merchandise from one store to another and use the mobile stock-taking features to count items and reconcile your inventory. 

All of your customer information can be collected during the sale process. But this only needs to happen once, as that same customer profile can be accessed from any location.

This makes it much easier for you to track and manage customer loyalty programs across every storefront. You can also segment your customer database to further personalize the buying experience. 

Vend even has built-in employee management tools. Permissions can be managed by role, and you can set up sales targets to motivate your staff and track their progress. 

The solution works with nearly any payment processor, and you can accept all of your customer’s favorite payment methods from all of your locations. 

Plans start at $69 per month if you use Vend’s parent company for payment processing. Otherwise, you can get Vend POS starting at $99 per month. 

Try Vend for free with a 14-day trial.

How to Find the Best Small Business POS Systems For You

Every POS system offers the same functions. There’s a way for you to add products or services to an order, accept a payment, and complete the checkout.

But the variations come in the details, which is where you need to look closely as you’re evaluating different POS solutions and comparing them side by side. Beyond pricing and feature lists, you need to consider the factors that relate to your specific small business and operations.  

We used the key criteria below to narrow down our list of the best POS systems. You can use the same considerations as a buying guide to find the best option for your unique needs.

Hardware Types and Functionality

The first thing you need to consider is your checkout environment. 

Do you want a POS system that’s fixed to a specific location on a countertop? Or do you want the flexibility to process orders from anywhere in your store?

From there, think about how the POS system should function for your business type. For example, a quick-serve coffee shop may want a POS solution with a customer-facing screen. But that likely won’t be necessary for a local dry cleaner or hair salon.

Some POS systems are simply a screen with software. But you’ll need to sync them with a separate register and payment processing system.

Others are all-in-one payment stations with built-in cash drawers and credit card machines. So you’ll need to think about which hardware solutions make the most sense for your checkout process.

Payment Acceptance

POS systems and payment processing go hand-in-hand. 

If you’re already in business and happy with your payment processor, you shouldn’t get a POS system that forces you to change. So you should immediately see if the system is easily compatible with your processing system.

Others may want an all-in-one system for POS and payment processing from a single provider. While this option keeps things simple, it doesn’t always translate to the lowest possible rates. So that’s another factor you’ll need to consider.

You don’t want to turn away any paying customers. So look for a POS system that can accommodate any type of payment—including all major credit cards, cash, checks, Apple Pay, Google Pay, and other alternative payment methods. 

Mobility

Mobile POS systems are critical for small businesses that operate on the go.

Let’s say you have a food truck or you’re a retailer that sells shirts at local farmer’s markets. Or maybe you have a restaurant and want your servers to take orders and process payments tableside. 

You need something that’s not only small and easy to transport but also something that works from anywhere. You shouldn’t have to rely on a stable internet connection to check out customers or process payments. Look for a system that can still operate offline and then sync your records when you’re able to connect. 

Conversely, small businesses that want a register fixed in a specific location in the storefront don’t have to worry about mobility. 

Setup and Training

Since POS systems come in all different shapes and sizes, the setup process varies greatly as you’re comparing different solutions.

Some systems are ultra-simple and don’t require any specific hardware. You can just download software to a smartphone or tablet and turn any device into a mobile POS system.

Others do come with hardware components, but they’re ready to go out of the box. 

Generally speaking, the more hardware you have, the longer the setup takes. Complete POS stations with built-in cash drawers and payment acceptance may require a bit more setup. 

Beyond the initial setup, you need to think about the day-to-day use by your staff. Look for systems that are easy to use and don’t require specialized training. It should be an easy fix if someone on your team adds the wrong item to an order or needs to print a new receipt.

Otherwise, glitches and errors with your POS system could lead to long lines at your register—or worse, prevent you from accepting certain payments. 

Security and Compliance

POS systems contain sensitive data. Many of you are collecting information about your customers, and some of you might even be storing credit card details when you’re processing payments.

You need to make sure your POS system is PCI compliant to avoid fines and potentially damage your company’s reputation. If there’s a data breach and information about your customers gets stolen, people might think twice before they visit your business again. 

This is also important for small businesses that sell online in addition to in-person. Both digital and physical transaction environments must be secure—and you can find plenty of options that are safe with the POS systems reviewed in this guide. 

The Top POS Systems For Small Businesses in Summary

Square and Shopify POS are the two best POS systems for small businesses on the market today. If you want a simple solution with lots of options for hardware, Square has you covered. Shopify POS is perfect for small businesses that want to sell online while syncing inventory with in-person sales.

Be sure to consider the hardware, payment acceptance capabilities, mobility, setup, security, and recommended use cases as you’re evaluating the top picks on our list.

Using QR Codes In Your Business: Best Practices And Pitfalls

QR codes are a useful technology that simplify and enrich the customer journey. The technology is currently used almost everywhere: e-menus in restaurants, virtual business cards, customer feedback collection after food delivery, boarding passes at the airport. However, as with everything else, a business owner should consider several things when using this technology if they want to create a positive customer experience.

In this article, I’ve assembled a checklist of items to keep in mind as you try to leverage QR codes for your business, broken down by the steps of the customer journey. So, in this mini-journey, our customer:

  • Sees the QR code for the first time,
  • Examines the code,
  • Scans it,
  • Follows the link from the code.

Let’s take a closer look at what to consider in each stage.

Note: This list can and will be updated as it continues to grow, so if you have any ideas on what could be included, please do let me know. Let’s make this content even more valuable for everyone!

1. First Contact With The QR Code

Usage

A basic point: When appropriate, QR codes are worth using. The pandemic and the emergence of built-in code-scanning on our smartphones have set the stage: The public is ready for this technology. It’s a good time to use QR codes and to relieve your customers from having to memorize a long URL or type it in manually.

Gruzovichkof (a shipping company), for instance, states on its cars that its app is available in the App Store and Google Play, but it does not provide customers with any link to it:

Technopark (a retailer) performs this task more intelligently, allowing you to download the app by scanning the QR code placed on the surface of its delivery cars:

Code Visibility

Try to position the QR code in such a way that it is clearly visible from various points of the path that your customers are following. For example, if the QR code is not at eye level, then you run the risk of customers not noticing it at all.

IKEA is good at this, although initially I thought of mentioning it as a bad example. By placing QR codes under the feedback collection terminal, which seems illogical, it simplifies the process of providing feedback for visitors on wheelchairs:

Free Space

If possible, place the QR code in a way that it doesn’t “stick” to the other design elements on the surface. And minimize the visual noise around it, so that the client’s attention doesn’t dissipate and the code is easier to notice.

2. Examining The Code

Call To Action

Don’t show a QR code without an explanation. Let customers know explicitly what they are being asked. To increase the likelihood that customers will scan your QR code, place an explicit call to action (CTA) next to it:

Explanation Of Value

In addition to the CTA, explain to customers why scanning the QR code would be valuable to them. By managing their expectations, you further increase the likelihood that they will take action.

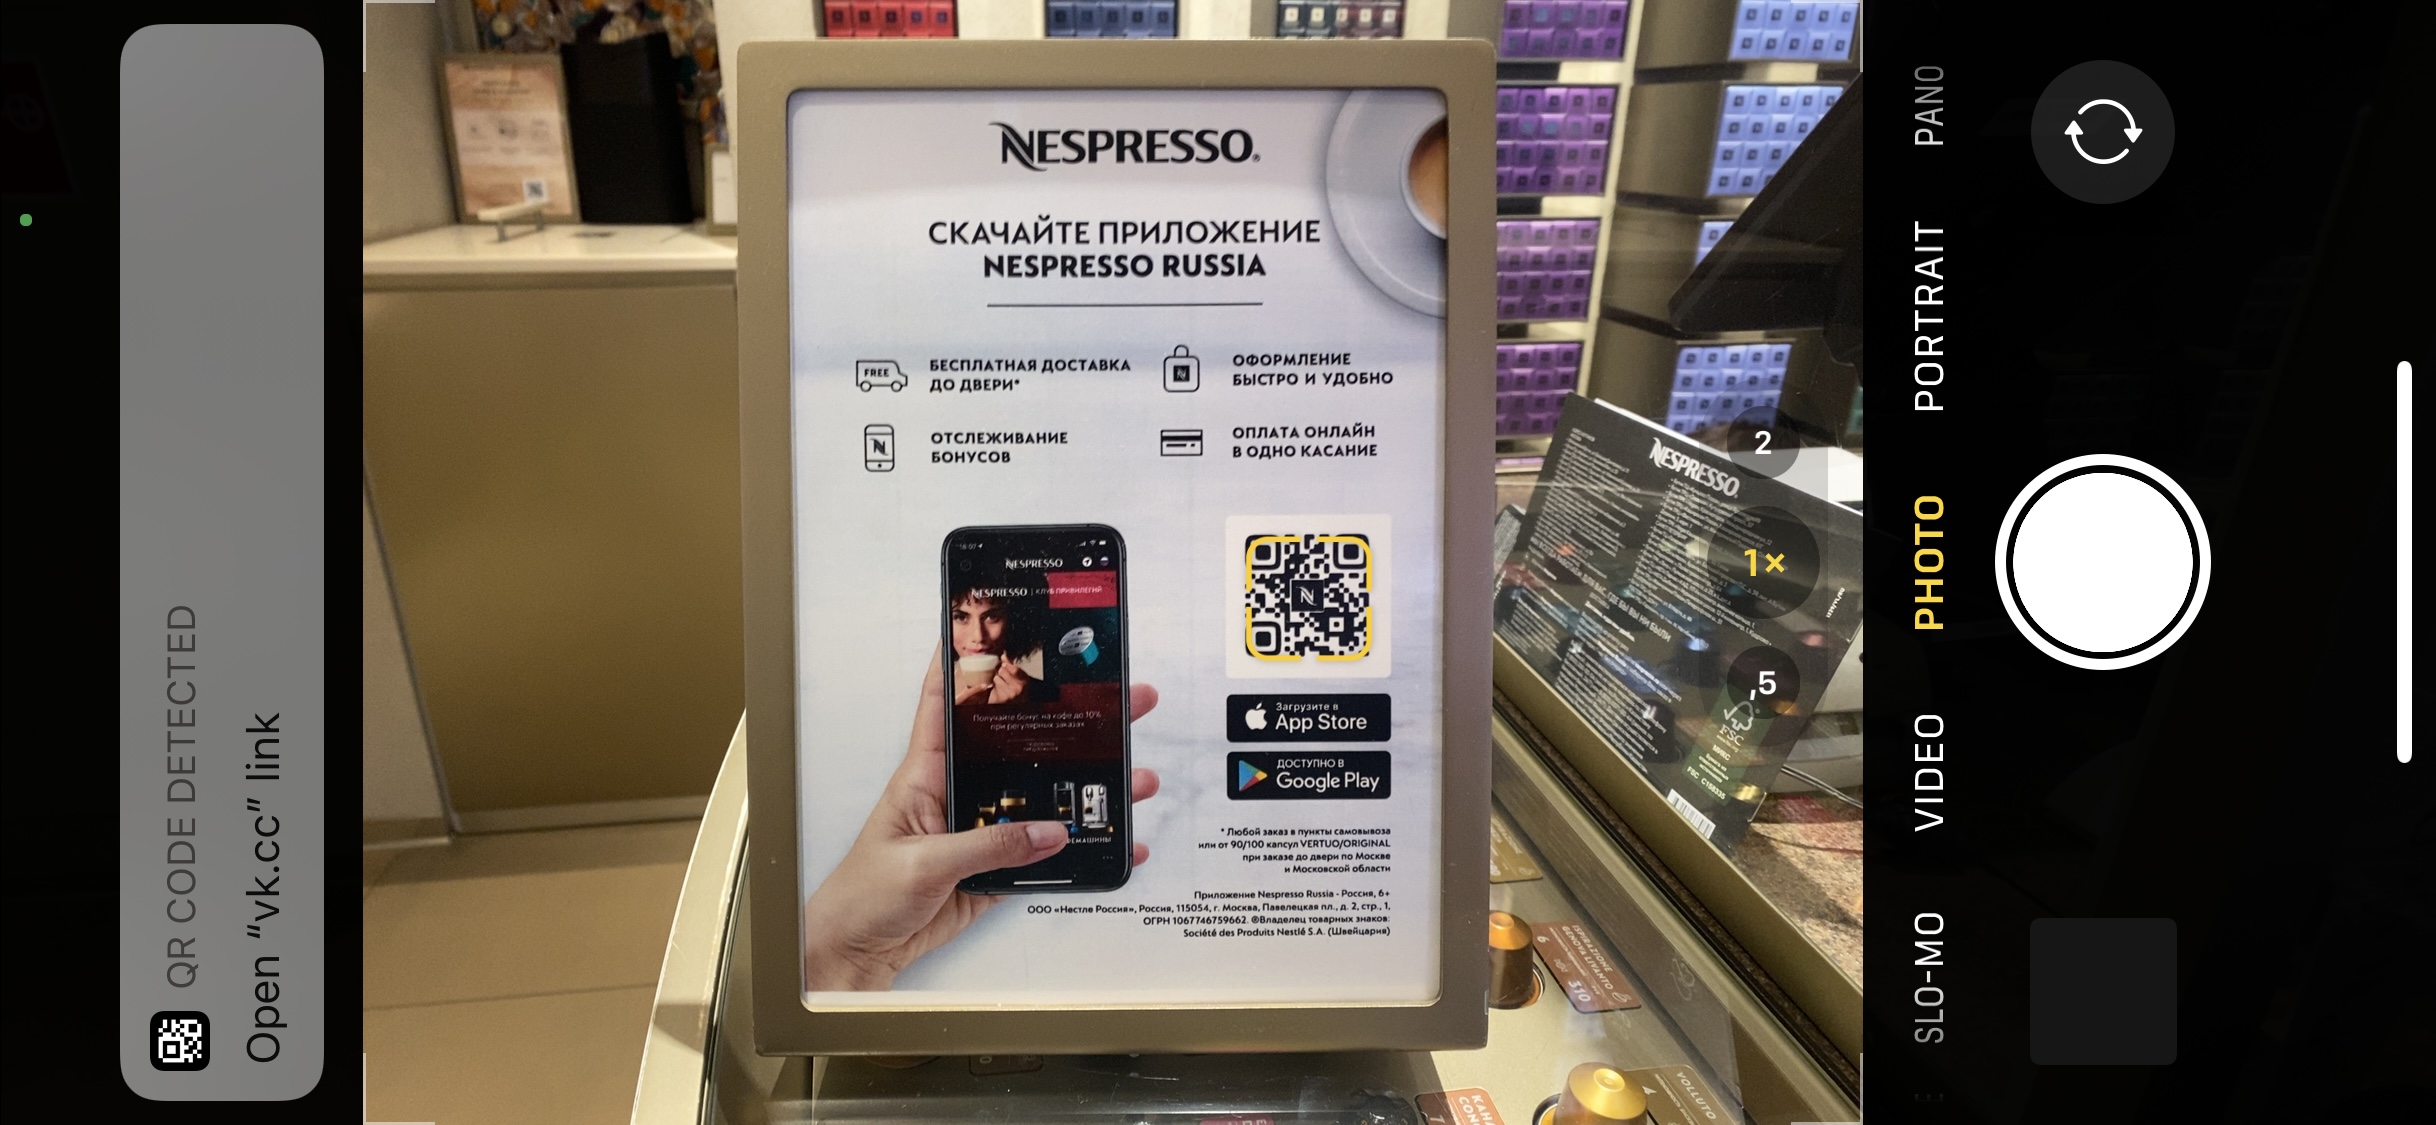
For example, the call to download the app in Nespresso’s boutique is accompanied by an infographic with key benefits:

Contact Details

Some businesses also place contact details next to their QR codes. It’s important not to overwhelm, but in some cases these details would be appropriate, such as for a hotline:

Company Logo

Most QR code generators allow you to brand the code by placing your company logo at its centre. This will make your code look more professional and increase the chance of drawing your customers’ attention.

Brand Colors

QR code generators also allow you to select a color for your code. This is a great opportunity to use your brand’s colors and make the code more visually appealing.

3. Scanning A QR Code

Size

Make sure that any QR code you place in offline media is not too small. Also account for the distance from which the code will be scanned. If it’s too small, customers will have trouble scanning it, and the code will be useless.

Non-Contact Surface

Minimize direct physical contact with your QR code. Otherwise, the surface will erode over time, and the code will become more difficult to scan. For example, for a storefront, stick the code inside the window, rather than outside.

In one of Street Beat’s stores (a sports apparel retailer), QR codes are placed on the checkout counter. The idea is quite good, but because it’s a contact surface, the sticker will come off gradually, and then it will look untidy and eventually have to be replaced.

Comfort Of Scanning

Place your QR code in a location where it’s comfortable to scan, without rushing. For example, a highway billboard will not only be inconvenient for customers, but will also increase the risk of accidents.

Mobile Network Availability

Many QR codes are links to websites. If yours is, make sure it’s somewhere where a mobile network or Wi-Fi is readily available. Otherwise, the value of the code will be close to zero.

Proper Surface

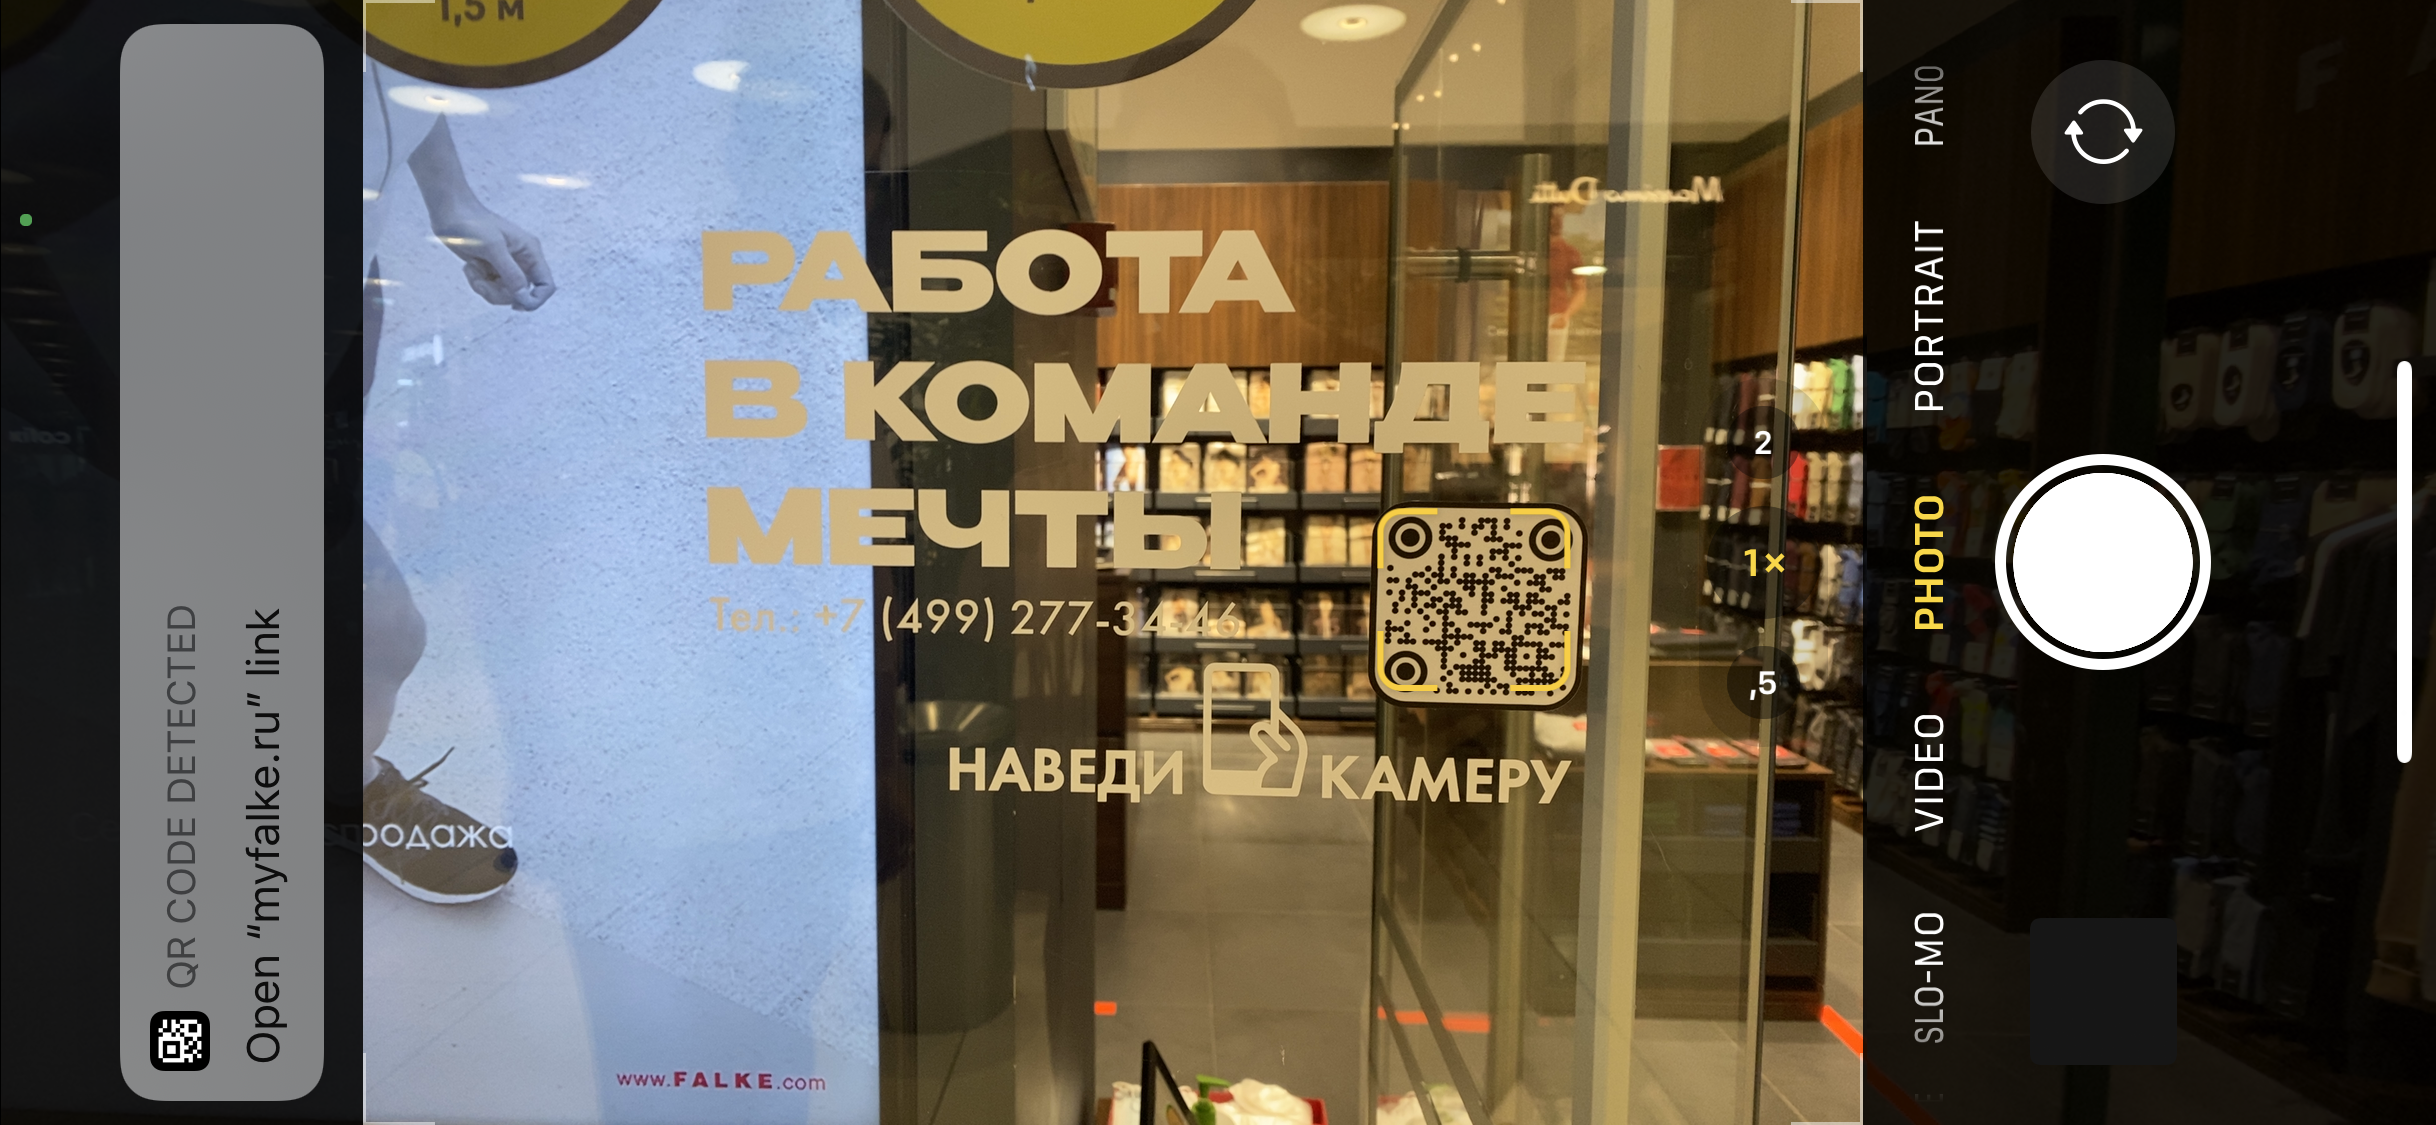
You’ll see some QR codes placed on transparent surfaces, which makes them difficult to scan or not scannable at all.

In Nespresso’s boutique, this issue is apparent: The code is almost unscannable. Store personnel found a solution: Every time a customer tries to scan the code, they hold up a sheet of paper as a background (which is still not the best customer experience at the end of the day):

X5 Retail Group (a food retailer) uses billboards along the streets to show its QR codes for downloading its app. Due to the format of the billboards, the codes are not as easy to read as they would be on a solid surface.

Environmental Factors

If you place a QR code outside, consider environmental factors such as lighting and weather. If the poster will be poorly highlighted at night, the code will be much harder to scan. If you’re using vehicles (such as delivery cars or cabs), ensure that they are cleaned regularly, especially in bad weather — the usefulness of a code covered with dirt is close to zero.

Explaining The Scanning Process

Despite the prevalence of QR codes, not everyone is aware of what to do with them. That’s why it’s a good practice to clearly explain this next to the code. For example, you could write, “Point your smartphone camera at the QR code to scan it”, along with an icon of a camera.

Scanning With Native Camera App

Set customers’ expectations correctly about how to scan the QR code, and if possible, do not implement a solution that requires people to install a specialized camera app.

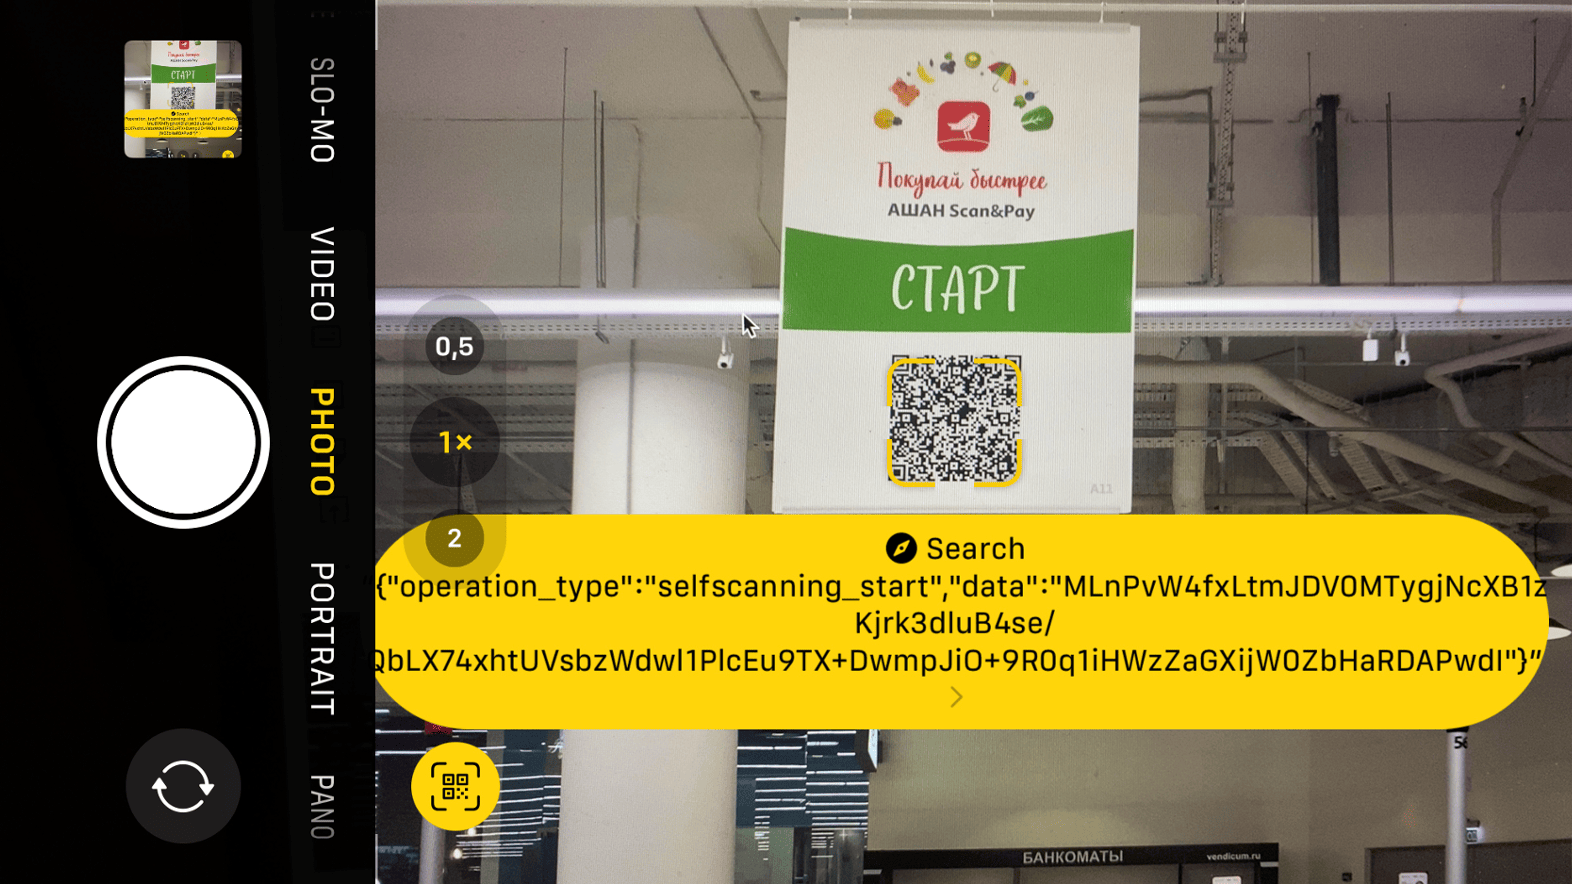
When Auchan launched its innovative “Scan & Pay” system, corresponding QR codes were placed all over the store. Hundreds of visitors tried to scan the codes with a standard camera and encountered an error. They were not taken to the landing page but came across a system code. (The QR codes had to be scanned with the camera in Auchan’s app.)

Scanning From Different Devices

A QR code may be easily scannable on some devices and not scannable at all on others. Check the scannability of your code on different smartphone models before sending it for printing.

Color Contrast

Standard QR codes are black and white. If you use your brand’s color, make sure that it contrasts with the background enough to be scanned without any issue.

Dark On Light

Always use a color contrast of dark on light — that is, a dark QR code on a light background. Not all devices can scan the opposite correctly.

Resolution

Before submitting the code for printing, make sure the code is at a resolution high enough not to blur or pixelate. Otherwise, your effort and money will be wasted.

Website Code: Desktop

QR codes can also be used in a digital environment. For example, if I’m visiting a website on a desktop computer, the usefulness of an HTML button to download an app is questionable. However, a QR code can be scanned from the page with a smartphone, resulting in a smoother download process:

Website Code: Mobile

Unlike on a desktop website, where a transition to a mobile environment can be justified, think twice about whether to put a QR code on your mobile website. If a user encounters a code on their smartphone screen, they will not be able to read it with their camera. In this case, using a button makes more sense.

A while ago, I noticed that both the desktop and mobile versions of Auchan’s e-commerce website contained QR codes. While the former was justified, the usefulness of the latter was questionable:

An exception is when users can share a code with others. A particular and quite widespread case nowadays is the verification of a person’s COVID-19 vaccination status using the QR code from the mobile version of a public-service website.

4. Opening A Link From A QR Code

Active Link

This is a basic point, but I decided to include it nonetheless. Mistakes sometimes happen at the execution level of a business. Before sending a QR code for printing, check that the link in the code does not contain any errors and is active. Also, check regularly that all existing QR codes are active and working.

Content Relevance

Don’t forget to regularly check the relevance of content both on the page that is accessible via the link and in the area surrounding the QR code, especially if you’re using the code for a limited-time offer, an event invitation, or the like. Otherwise, it could result in unmet expectations and a negative customer experience.

Landing Page vs. Several Codes

If you want your customer to take several actions, don’t create a QR code for each action. A better solution would be to present one QR code, and then outline the CTAs on the page that is accessible via the link in the QR code. This way, the presentation of the code will look neater, and the customer won’t be distracted when scanning it.

Below is an example of a case when this point was not thought through (by Persona Sport, a gym and wellness club). Links to Google My Business, Yandex.Maps, and 2GIS could have been placed on the landing page that is accessible via the QR code:

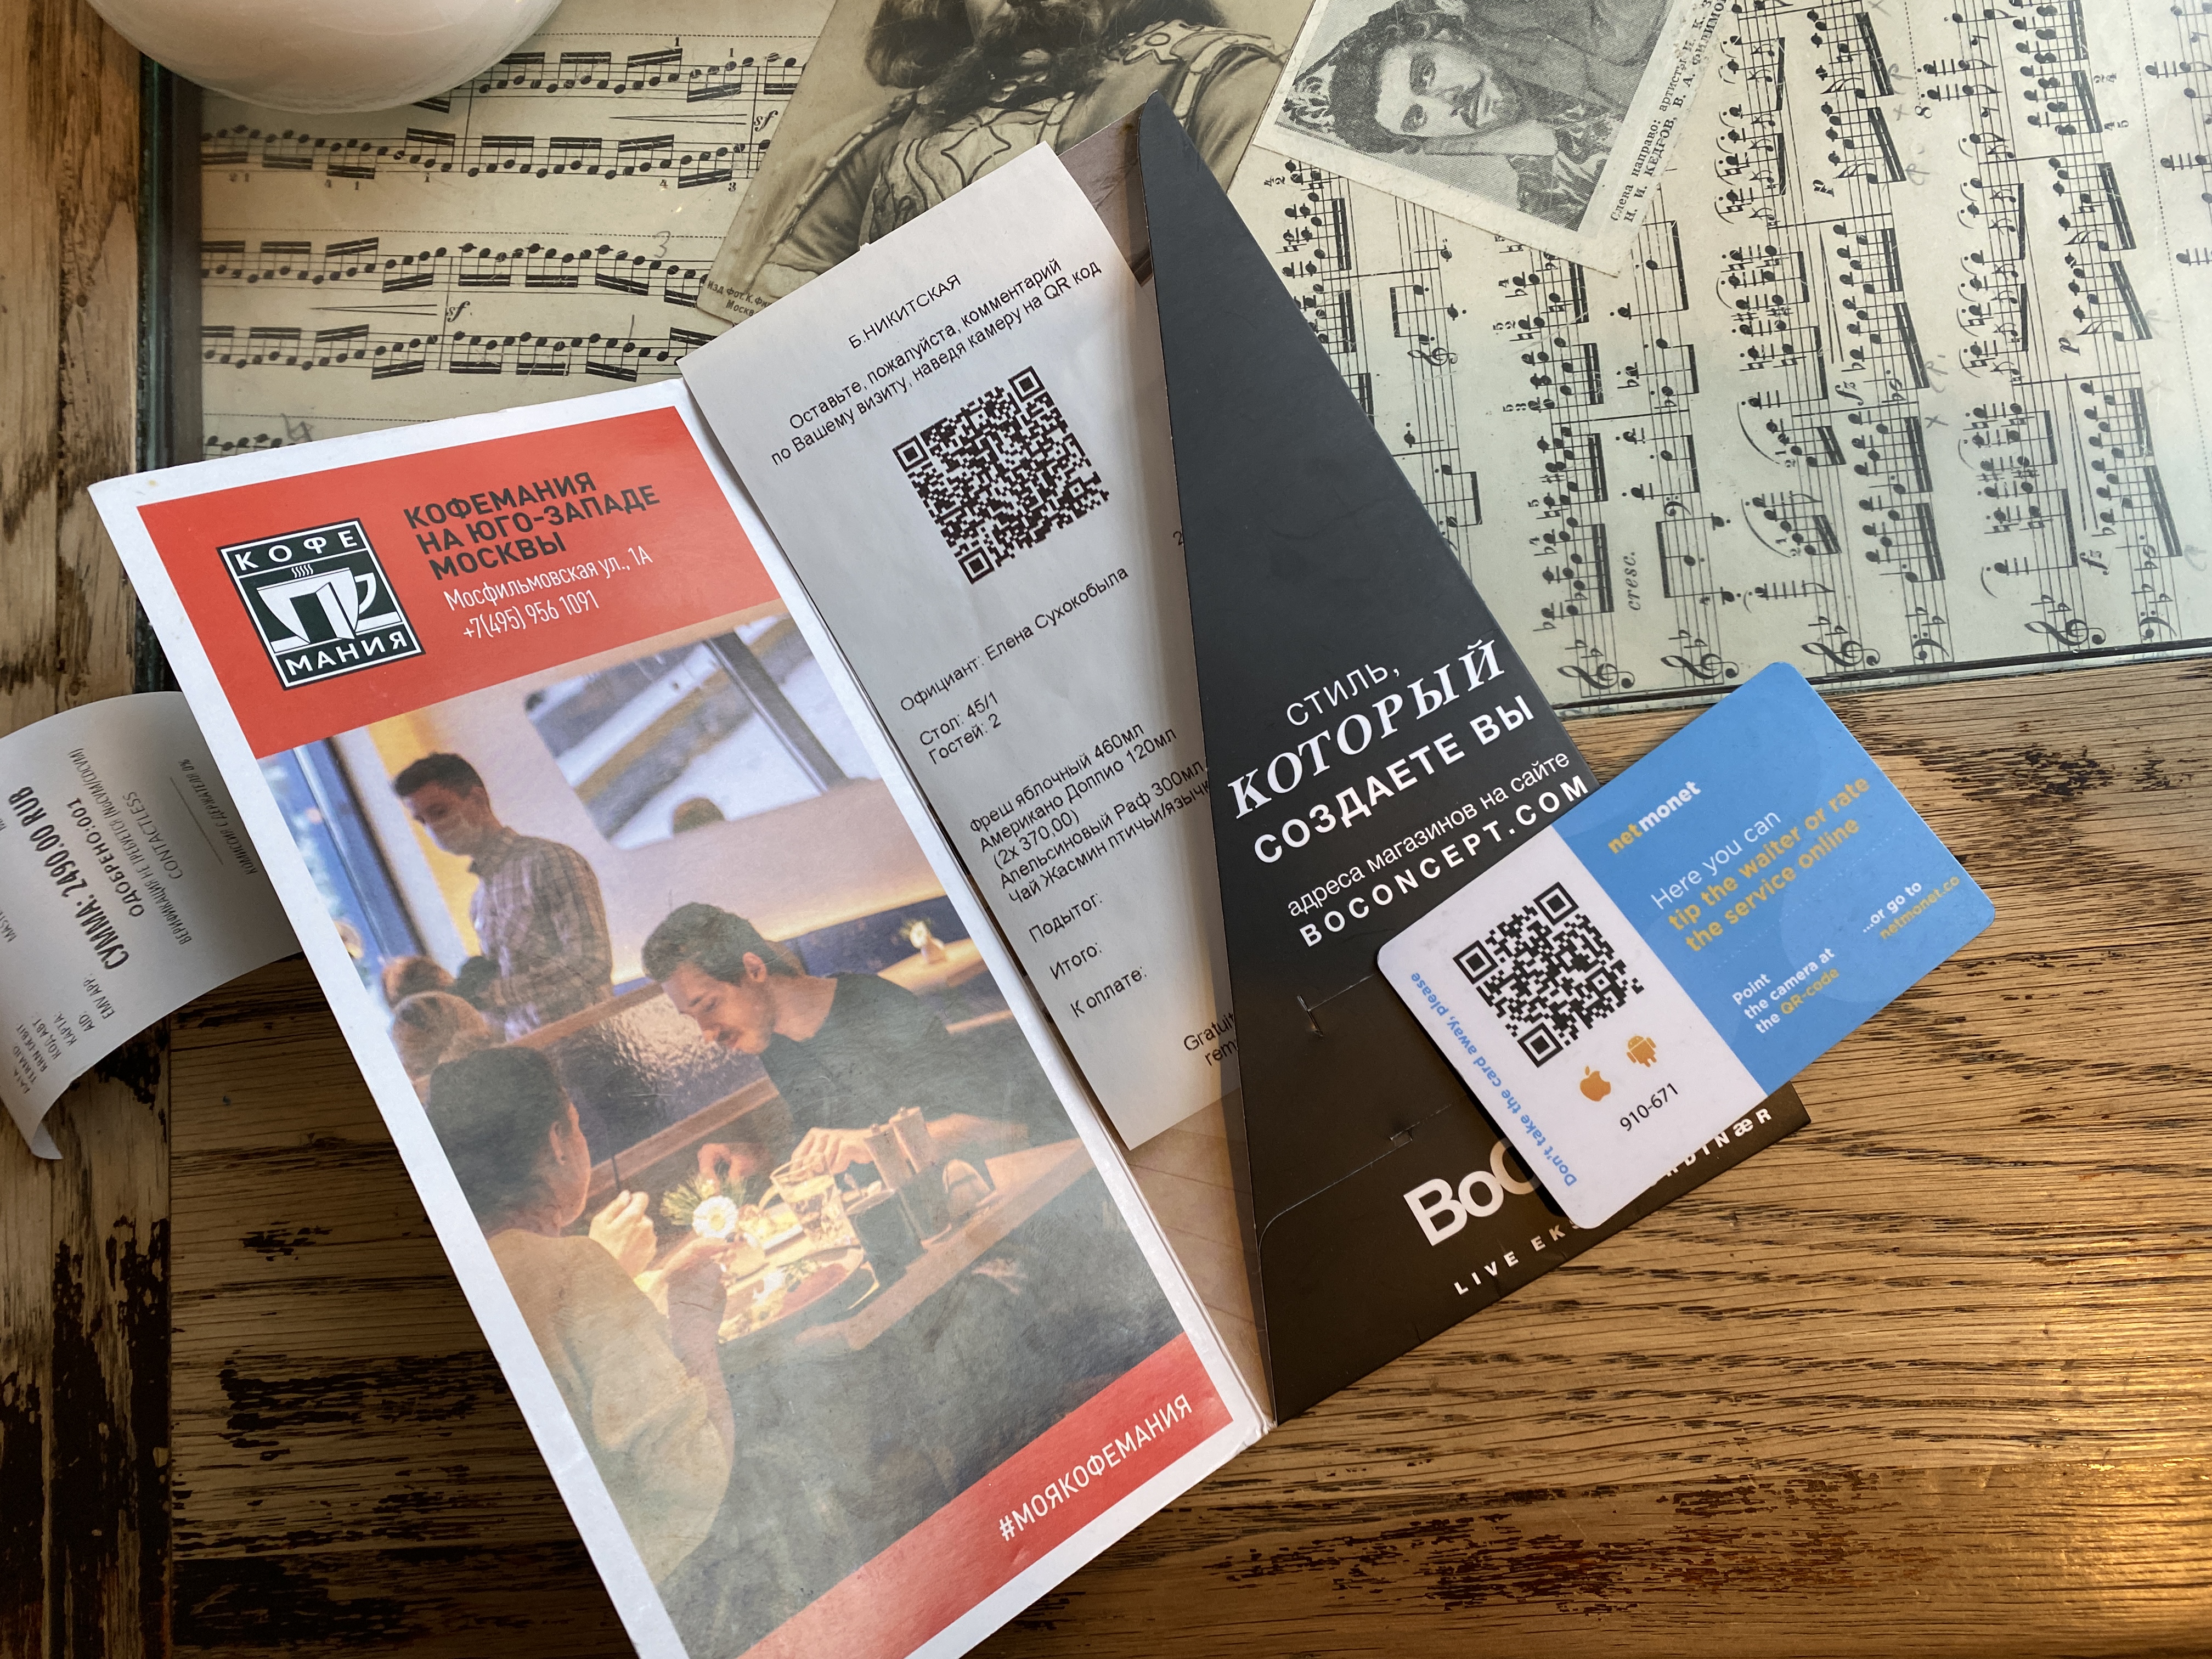
A while ago, Coffeemania (a restaurant) used one QR code for patrons to submit reviews, and another one for patrons to send tips to servers (whereas these actions could have been combined in a single code):

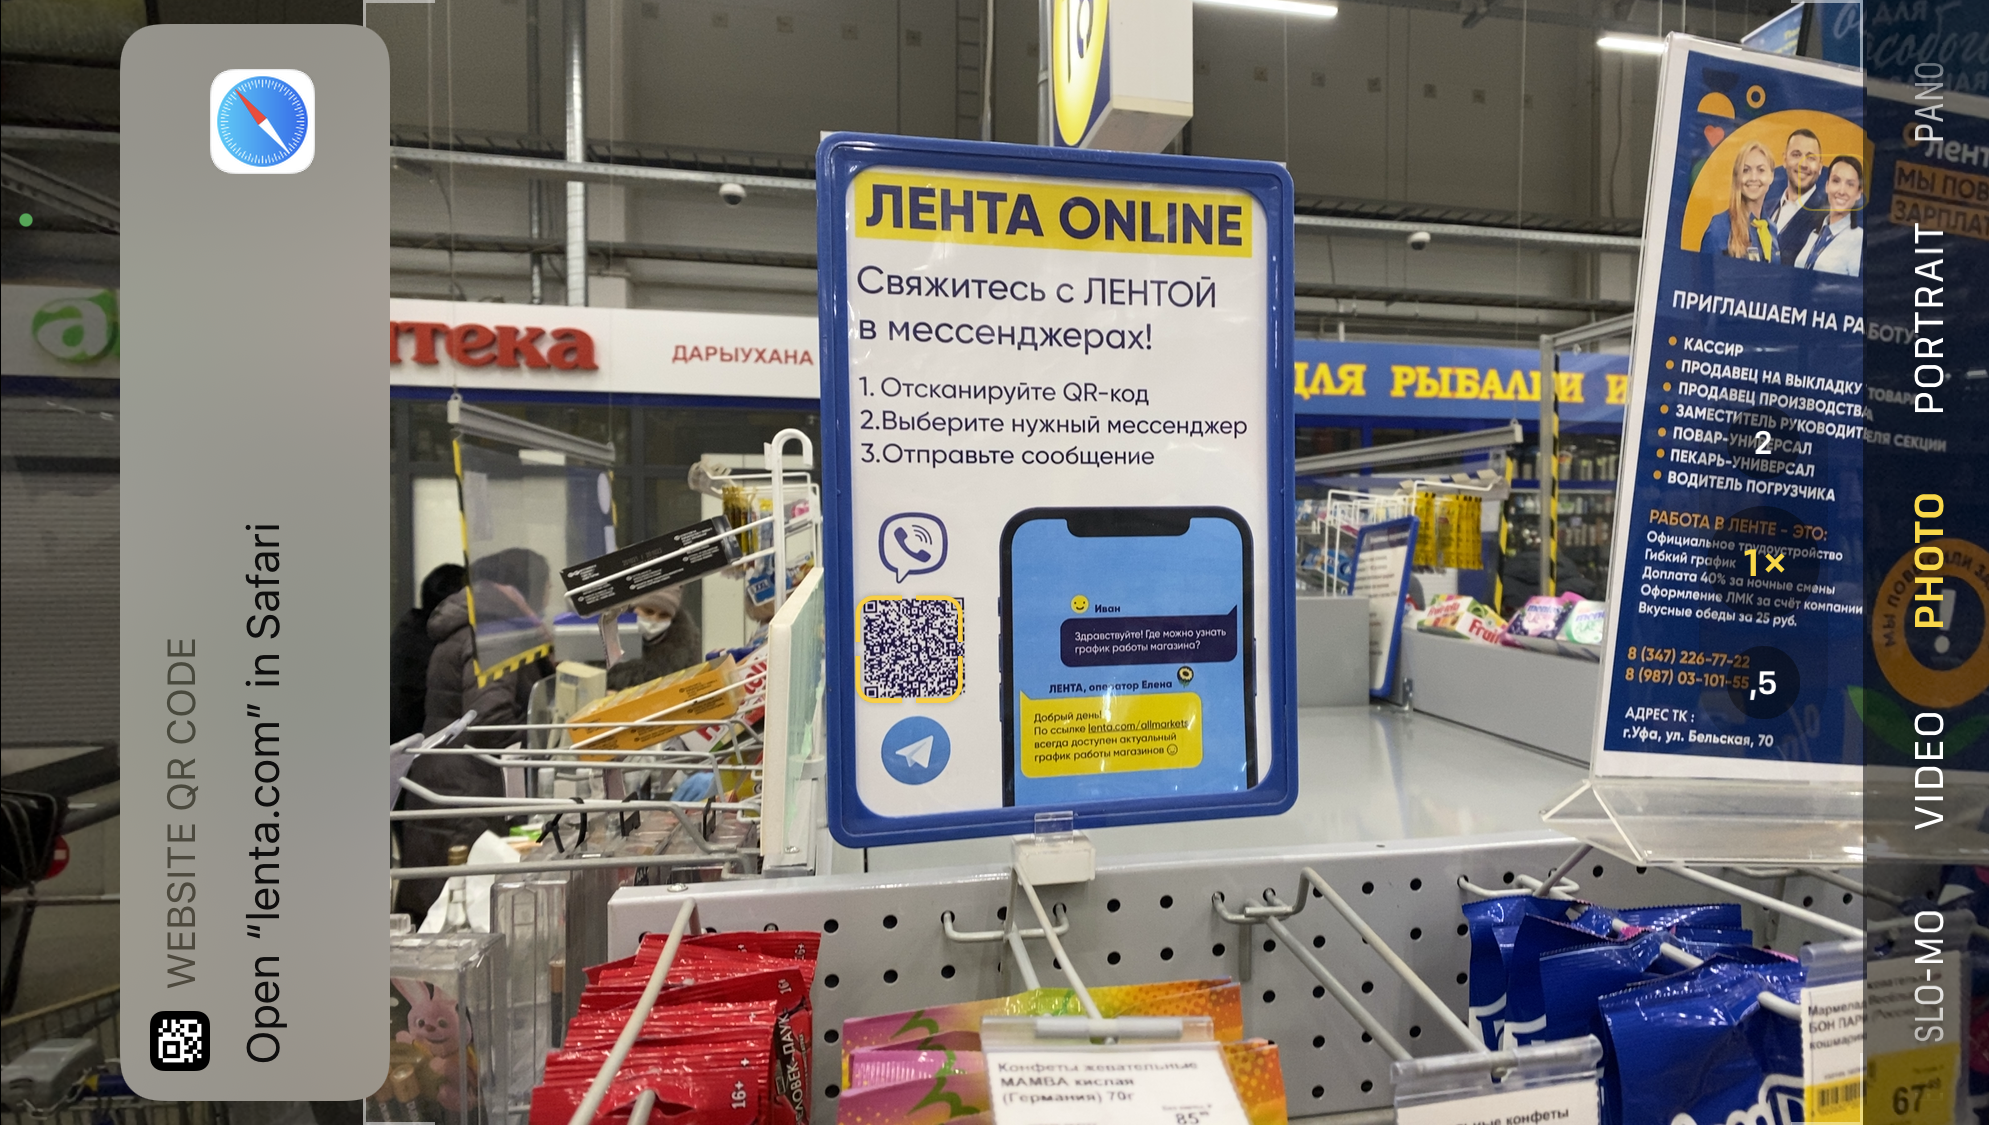
Lenta (a retailer) does this more efficiently, allowing customers to choose the medium by which to communicate with support at the level of the web page, rather than from printed media:

Managing Expectations

The content accessed via the link should match the CTA next to the QR code. If an invitation to subscribe to a social media account is the CTA, and the customer is prompted to take several unrelated actions upon scanning the code, then their attention might get diverted, and they might not take any action at all.

The drawback of the last example is that the QR code, which allows the customer to choose the medium by which to communicate with customer support, leads not to a dedicated landing page, but simply to the main e-commerce page, blurring the customer’s focus:

Mobile Optimization

It’s important to understand that scanning a QR code is just one part of the journey that a customer takes. That’s why thinking through all of the steps is important. Specifically, if the customer scans a QR code with their phone and ends up on a page that isn’t optimized for mobile devices, it won’t do them (or you) any good.

App Downloads

You can use deep linking to reduce your number of QR codes and to simplify the customer journey. This strategy allows you, among other things, to identify the type of device that the customer is using when scanning your QR code. It is useful when you’re providing a link to download an app. iPhone users who have scanned the QR code will go to the App Store, while Android users, having scanned the same code, will go to Google Play. The customer’s focus is not distracted by multiple QR codes, and there is no need to choose, while the value is the same.

Coffeemania’s loyalty program offers several QR codes, depending on the way the client wants to register. This could be overwhelming:

Uniqlo, on the other hand, doesn’t ask what kind of smartphone I have. The relevant app store will open automatically when I follow the link from the QR code:

Personalization

You can personalize the customer’s experience by leveraging UTM parameters in the link from the QR code. For example, to allow customers to evaluate a restaurant server’s work, you can add the server’s ID as a link parameter and personalize the feedback page with their name.

Analytics

Besides personalization, UTM parameters can also be used for analytics. For example, when placing QR codes on different banners around the city, you can add corresponding parameters with the ID of each banner to see which banners get more traffic and which ones should be relocated in the future.

To Be Continued

QR codes can simplify the customer journey and make it more convenient. As with everything else, however, the effectiveness of this touch point depends on the details, and poorly implemented details can turn your bright prospects into a bad customer experience.

If you use QR codes in your business, be aware of the pitfalls along the way, and leverage all of the technology available, and don’t rely on having to learn from your own mistakes. I hope this article was valuable, and if you have something to add, drop me a message — we’ll continue to refine the best practices.

Good luck and keep in touch!

HarmonyOS QR Code Generation

Introduction

A QR code (abbreviated from Quick Response code) is a type of matrix barcode (or two-dimensional barcode).

HarmonyOS provides code generation to return the byte stream of a quick response (QR) code image based on a given string and QR code image size. The caller can use the QR code byte stream to generate a QR code image.

Best Event Management Software

Executing a successful event from start to finish doesn’t have to be a distant dream once you discover event management software.

What makes event management software so special? With one, you can successfully market your events, process payments, develop agendas, and create engaging schedules to bring just about any event to life, no matter the size.

If you want to create top-of-the-line events with branded sign-up portals, a ticketing system, email marketing, social media integration, and a slew of additional options that make your event planning life ten times easier, read on. We are reviewing the best event management software on the market and how to choose the best one to execute your next successful gathering.

The Top 6 Best Event Management Software

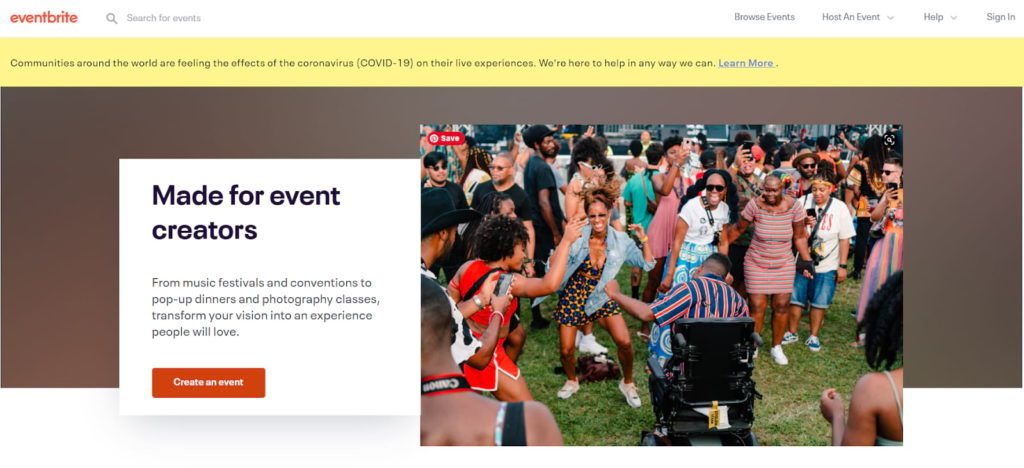
  1. Eventbrite — Best for Event Ticketing
  2. Splash — Best For Hybrid Events
  3. Whova — Best For Engagement and Ease of Use
  4. Odoo Events — Best Open-Source Event Management Software
  5. EventMobi — Best For Personalization
  6. Evite — Best For Simple Event Management

Read on to find the best features, pricing, and additional details of each EMS and learn which one fits you best for effective event planning and execution.

#1 – Eventbrite — Best for Event Ticketing

  • No fees for assigning free tickets
  • Great for online & digital events
  • Creates easily scannable tickets
  • Built-in price calculator
Try it today!

Eventbrite is an event management system that helps you organize ticketed events successfully right from your phone.

As an EMS with a ticketing system, one of their best perks is that they don’t charge fees for assigning any number of free tickets. If registration is free, you can organize and share your event through Eventbrite for free. Their real-time report capabilities let you keep track of important analytics like ticket sales and signups. Once your attendants show up, they can easily verify their tickets with the mobile ticket scanning option.

If you want to take it a step further, Eventbrite can also assist with equipment rentals, staffing, and logistics. If customization and branding are a cornerstone part of your event, Eventbrite allows you to create landing pages and registration forms with your brand’s personal touch. Embedding registration forms on your own site is easy. Or you can use their out-of-the-box event listing page, so you don’t have to create one from scratch.

Perhaps one of Eventbrite’s most useful features is its price calculator. With it, you can calculate your estimated revenue by entering how much you’d like to charge per ticket and choosing between their essential or professional package options. You can then decide whether to pass ticket fees to attendees or absorb the costs and deduct them from your payout. The app calculates your estimated payout, and you can customize your price from there.

Eventbrite streamlines your onboarding and signup process, so you can go on to use their ticket-oriented system with ease. This makes it a great EMS option for all event planners.

#2 – Splash — Best For Hybrid Events

  • Streamline your simulcasting
  • Seamless integration with Zoom
  • Centralized analytics dashboard
  • Comes with a free plan
Try it today!

If you’re looking to organize a hybrid event– that is, a live event that can be broadcast online to additional attendees, Splash streamlines the process and makes it possible.

With Splash, you get all the standard capabilities of a worthy EMS that includes building and saving your event marketing templates, syncing with the tech you’re already using like Slack and Marketo, mobile check-ins, a centralized dashboard with plenty of analytics, and the ability to send automated emails.

However, the basics aren’t the only things Splash takes care of. To host live events that people can also attend virtually, Splash seamlessly pairs with Zoom so you can create branded hybrid events that increase your brand’s reach. Beyond widening your possible audience pool, Splash also allows you to take your virtual event and repurpose it so you can reuse it whenever you need it. This functions much like a webinar.

The amount of access you get to each tool depends on the yearly plan you decide to go with.

Their pricing breaks down into four categories. The Free plan is for personal use and the occasional small business events. Splash’s Basic plan starts at $9,500 yearly and is best for individual use or small teams. The Pro plan is $19,500 annually and allows more design control.

They also offer an Enterprise option, and you can contact them for solutions and tools at scale and custom pricing.

#3 – Whova — Best For Engagement and Ease of Use

  • Award-winning event software
  • Fast check-in features
  • Real-time event analytics
  • Post-event reporting
Try it today!

As the winner of the Event Technology Award for four consecutive years and trusted by companies like Lego, Ikea, Tedx, and Harvard University, Whova enables you to create illustrious trade shows, virtual conferences, or virtual career fairs.

Whova saves time by streamlining the event planning process and cutting unnecessary parts, essential in an event management system. Whova has a QR code for checking in, making it lightning-fast for attendees, and also incorporates networking and sharing photos right in the app. The app is very intuitive and gives users a custom experience with personal agendas, polls, photos, messages, questions and answers from sessions, and more.

Whova is also easy to use as an organizer. You can generate hundreds if not thousands of name badges in a matter of minutes. Real-time event analytics and post-event reports ensure you’re never left in the dark on your event planning’s ROI and efficiency.

Whova lends itself to enterprise-grade events because of built-in tools like live polling, headcounts, and sharing audience opinions on a big screen through their interactive app. Their scope and versatility are impressive.

Whova does not list its prices publicly. Instead, you can fill out a few questions about your event, and they’ll reach out to you with a personalized quote.

#4 – Odoo Events — Best Open-Source Event Management Software

  • Highly customizable
  • Gantt charts for event production
  • Manage speakers & calendars
  • Customized pricing
Try it today!

Odoo is an open-source EMS that allows you the flexibility to truly customize it to your event. As an open-source management software, it’s able to take care of events of any size once it’s been configured.

Odoo functions as a suite of open-source business applications that can take care of e-commerce, email marketing, project management, and a slew of other business needs. Their Odoo event application seamlessly integrates with the vast array of additional applications they offer for a more customized experience.

Odoo can handle events like webinars, classes, festivals, and conferences with editable calendars and even the ability to sell tickets online. With their Gantt chart interface, they make it easy to look at your event plan timeline from concept to completion.

Do you need to manage event sponsors? Odoo’s open-source EMS can handle that, too, with the ability to showcase each sponsor while allowing you to sell additional sponsorships through their e-commerce add-on.

You can try Odoo completely free to begin and then select a customized monthly plan based on what applications you want to include.

For example, you can choose the events app, but it will also require their website application, which starts at $24 per user a month. If you want to add dedicated maintenance, you can do so for an additional $24 a month.

#5 – EventMobi — Best For Personalization

  • Custom branding
  • Easy integration with Stripe
  • Mobile-friendly dashboard
  • Personalized itineraries
Try it today!

EventMobi is an all-in-one event management software equipped to manage any type of event you can dream up. Companies like Facebook. Delta, Visa, and Cisco trust and use them to bring thousands of people together and organize events worldwide.

Online conferences and training sessions, on-demand webinars, virtual or hybrid events, and more are all possible through their all-in-one dashboard where you can manage appointment booking, attendee analytics, event networking, and customized event invites and registration pages. EventMobi was designed to make each part of your event timeline as easy and as streamlined as possible so you can spend time connecting with your audience with a quality branded event experience every time.

EventMobi allows you to easily set up events with custom branding and send people individual personalized itineraries and alerts. You can also send email blasts, programs, attendee information, and more directly through the app, allowing one person to manage an entire event. EventMobi also integrates with Stripe for payments.

One downside to mobile-driven products like EventMobi (and others on this list) is that it relies on connectivity, and sometimes conference centers and other event locations have poor wifi or bad reception.

Once you start configuring EventMobi, they offer plenty of support with their ever-present chat box feature where you can ask questions on anything you’re unsure about.

EventMobi’s all-in-one flexibility goes as far as their pricing. They aim to personalize a price based on your budget and event planning needs. You can request pricing details on their site once you answer and submit a few questions.

#6 – Evite — Best For Simple Event Management

  • Simple, intuitive event management
  • RSVP tracking
  • Real-time polls
  • Up to 2,500 guests per event
Try it today!

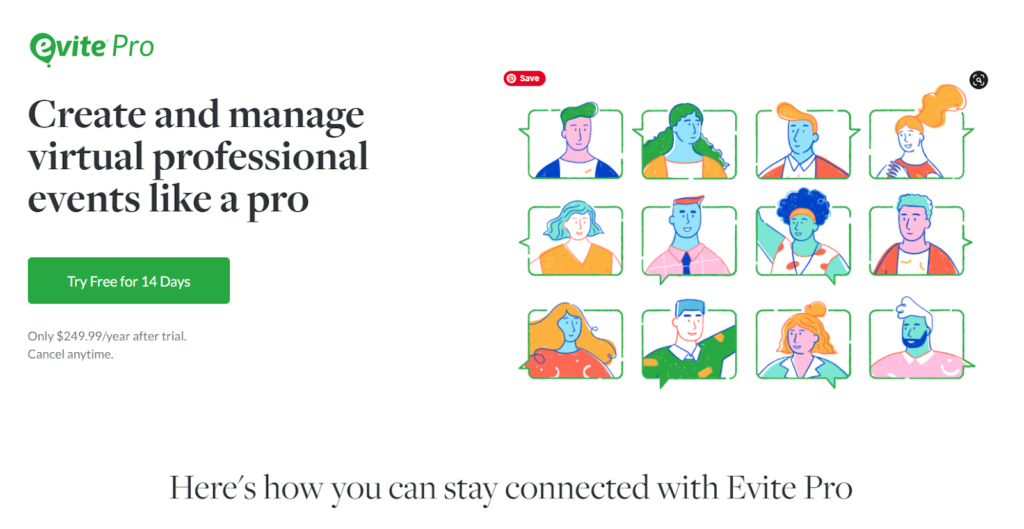
For a sturdy event manager that doesn’t run you over budget, which helps you host simple live or in-person events, Evite is your go-to event software.

Sometimes you don’t need all the functions an EMS built for a global enterprise offers. However, you still need RSVP tracking, performance analytics, real-time messaging and polls, event reminders, and an attendance tracker. Evite delivers on this by being a cost-effective platform that allows you to manage everything on their easily accessible dashboard accessible from any device.

Evite allows up to 2,500 guests per event, and you can send post-event thank you notes to all attendees. Evite doesn’t cap the number of virtual events you can host, which is optimal if you host multiple professional events on a budget that still needs stress-free organization.

A high point of Evite is a ton of invitation options and templates, plus you can design your own from scratch. It’s great to be able to create simple but professional invitations quickly.

You can start a free trial for 14 days. Afterward, their software runs at $249.99 yearly.

How to Find The Best Event Management Software For You

Finding the best event management software for you depends on what your event needs to come to life. Most EMS tools have things like ticketing capabilities, event marketing, email automation, event analytics, conferencing tools, agendas, task assignments, automated reminders, and social media integrations. And frankly, that list could be much longer. There is a myriad of tools you may need to use to plan and execute an event successfully.

One of the first things to consider is your budget. Thinking about features you’ll use versus cost keeps you from overspending on software that offers too much for what you need. Once you have a budget in mind, think about what the end goal of your event is. Consider the industry you’re operating in and if your event is designed to be lucrative or if it will come at a cost that your business will absorb.

With the budget and end goal in mind, think about the top non-negotiable event planning tools necessary to carry out your event. For instance, if your event is public and the ROI highly depends on ticket sales and attendance analytics, you’ll want to go with a more robust event management software like Eventbrite.

But if you’re planning a company-oriented event that’ll need conferencing tools, check-in requirements, and appointment setting, software like Whova is better equipped to do the job effectively. You don’t need the bells and whistles of a more comprehensive tool.

Here are a few additional factors to consider when choosing the right EMS.

Event Support

The last thing you want is for your event platform to leave you hanging when you need them the most. Before committing to any event software, you must check for support features.

Do they offer live phone support if you need it last minute? Is live chat an option if making a phone call in the middle of an event isn’t optimal? Do they answer customer support emails promptly?

Just as with any other technology, sometimes it fails. Being able to contact support and get speedy help is essential, so make sure to check if they have live support options in the evenings and over weekends, too.

Marketing Tools and Integrations

Some event management tools have more integrations than others. While most will be able to send email blasts and reminder alerts and have some social media integrations, some tools make it easier than others. EventMobi, for instance, integrates with Google to access your contacts. Splash integrates with your Google calendar. Eventbrite integrates with Facebook so you can easily share your event and interact with people. Whova integrates with other registration platforms like RegFox and also with Zoom.

When comparing event management options, make sure that the tool you are considering easily integrates with the tools and software you already pay for and use.

Event and Business Size

It’s a waste of time and resources to employ an EMS overqualified to take care of your event needs. Even if something is very highly rated, that does not mean it will be the best fit for your needs.

If you’re a small business, you hold infrequent events, or simply need event software for insider conference meetings, then you won’t need EMS that also comes with a hefty price tag unless you’re planning to scale soon and planning ahead.

However, if you’re planning massive conferences and events, some tools also offer vendor and exhibitor management tools, venue sourcing abilities, and more to handle large-scale events.

Event Management Software Makes Planning Easy

Gone are the days when you need to juggle a million calendars, sell paper tickets, and print name tags to ensure an organized event in any niche. Though event management software can be niche specific, generally reliable EMS is customizable and adaptable to your planning needs.

Event management software makes it easy to brainstorm, plan, and execute one-time or recurring events without the time-consuming hurdles you once had to jump over. As a quick recap, Eventbrite stands as the best EMS for ticket-oriented events, Splash is the perfect EMS for hybrid events, you’ll want to use Whova for enterprise-level event planning, Odoo for developer-level customization, EventMobi for an all-in-one platform with lots of customization, and Evite for simple professional events.

Nutella Spreads Its Brand New Jar Designs And We Are Loving It

Italy is responsible for some of the world’s greatest creations. 

While not everyone may appreciate all of the fine arts produced by Italy, one thing nearly everyone can agree upon is that Nutella is one of the greatest gifts Italy has brought into the world.

Nutella’s marketing team has decided to design 30 new casings for their creamy jars of goodness. They are designed to show off Italy’s beautiful scenery.

And boy is Italy beautiful. Not only does Italy have some of the most notable natural landmarks in the world, but it also contains some of the greatest marvels of the ancient world.

Nutella’s parent company, Ferrero, created these new designs to increase awareness of tourism in their county. Working together with Italy’s board of tourism, the team is attempting to spark interest in tourism one travel restrictions are lifted. 

Because a certain virus has crippled much of the countries tourism industry, Nutella is offering a new way to visit these historic landmarks.

If you simply scan the QR codes on the newly designed jar of Nutella, your mobile device will take you on a virtual tour of these landmarks.

The CEO of Ferrero said, “In this difficult moment for [the] tourism sector of our economy, Nutella and ENIT [will] showcase to Italians their greatest national wealth: the beauty of Italy itself, the true and real one, made of nature and art, cities and villages, seas and mountains, the envy of the world.”

We look forward to the day when we can go see these landmarks in person. Until then, we will just have to enjoy the great taste of Nutella and look forward to that day! 


Read More at Nutella Spreads Its Brand New Jar Designs And We Are Loving It

Create a Free Track and Trace COVID-19 Form for Businesses with Forminator

Whether you or your client runs a cafe, boutique, hair salon, a place of worship, or practically any business or organization, with the help of our 5-star rated plugin, Forminator, you can track & trace and help manage COVID-19.

We’ve developed an easy-to-implement track and trace template that you can use or add to your clients’ websites using Forminator.

It works by collecting personal data to slow the spread, following government guidelines.

Image of Forminator with a track and trace sheet.
Forminator is masked-up and ready for you and your clients to track and trace!

This straight-forward tutorial will show you how to set up and implement a track and trace form in just a few minutes (or less).

We’ll be going over:

  • How to Quickly Set Up a Track and Trace Form
  • Easily Keep Track of Check-ins
  • Using a QR Code to Link to Form

How to Quickly Set Up a Track and Trace Form

Creating a track and trace form can be created and published with just a few steps.

From Forminator’s dashboard, create a new form to get started.

The create a new form button.
You’re one click away from a new form.

For this form, a blank template will do. Give it a name, and then you’re ready to add Fields.

This simple form just needs the essential fields for track and trace information. We’re suggesting to add the fields for:

  • Name
  • Phone Number
  • Email
  • Number
  • Datepicker
  • GDPR
Where you choose what fields to include.
Add any additional fields that you’d like.

Hit Insert Fields when you have all of the fields you’d like to include ready. You can always add or remove fields at any time past this point.

Some of the information we want to have mandatory before a user can submit the form. To do that, just go to the individual fields required to be filled out, click on Settings, and select the Required option.

Add the mandatory option to as many fields as you’d like.

Once you make it required, a little red Asterisk appears next to that field. In this track and trace form, we have the name, number, and date. The GDPR is automatically set up as a required field.

We’re also going to want to change the text to some of these fields.

To start with, the Number field will have the caption Number of people in your party. For the Date field, we’ll add the text Date visiting. And finally, instead of Send Message, we’ll change that to Check-in in the Send Message field (automatically included in the form).

To do this, simply click on the field, and under the Labels tab, type in any text that you want to include.

Where you add the label for the form.
You can also add a custom placeholder, default value, and description.

Arrange the fields any way you want. Forminator’s drag and drop feature makes it a breeze.

Have several fields on one line or separate – the choice is yours!

Once you have the form sorted, hit Preview to get a glimpse of what it looks like.

A preview of the form.
With a preview, you may notice some changes you want to make.

When it comes to the GDPR, you can change the text inside the Privacy Policy and Terms and Conditions by clicking on Labels in the field.

Since this form is designed solely for COVID-19 track and trace, you must follow protocol and legal guidance set forth by your local governing body for the collection of personal data, ensuring compliance with GDPR.

Some good points to include in the GDPR can consist of:

  • Stating that this form maintains a minimum amount of data for the shortest duration of time as possible.
  • Ensuring customers are informed about how the data is used and secured safely.
  • That data is deleted securely after the duration set and limit the use of the data.
  • Information about following all legal obligations by law, for example, GDPR in the EU, or specific advice set out by your governing body (you are solely responsible for this).

Another feature to include on this form is the user’s message displayed once the form is submitted.

Under Edit Form>Behavior, you can quickly change the Inline Message to something along the lines of Thank you for checking-in.

Where you add a personalized message a user will receive once submitting form.
Create any personalized message that you’d like.

You can also integrate the form with the most popular 3rd party apps, such as MailChimp. We have some detailed information about doing that with Forminator in this article.

If there’s nothing else to do with your form and you have all the text edited, GDPR information included, and your form looks good, you’re ready to publish and start the track and trace process.

When you hit Publish, Forminator provides you with a shortcode that you can paste into any page, post, or acceptable widget in WordPress.

Forminator's shortcode.
When Forminator gives you the thumbs-up, your track and trace form is ready for use.

Easily Keep Track of Submissions

You can easily access the information in Forminator’s dashboard by clicking View Stats under the form’s name to view submissions and keep tabs on tracking and tracing.

Where you'll view your form's stats.
Click on the little icon to view stats.

From here, Submissions are just a click away.

You’ll see all of the submissions that have been made by Date Submitted, Name, Email Address, and the additional fields. Plus, you have options to export the submissions, delete entries, search by date, search by keyword, and get detailed information.

Where all of the form's submissions are located.
All the form submissions are in one place.

To view more detailed information, including what’s on the additional fields, click the dropdown by each name.

All the detailed information is accessible here.

Also, you can set up email notifications that will go to you and anyone that checks-in.

Simply go to Edit Form and Email Settings. Here, you can add a customized message, choose which admin email notifications get sent to, and edit how you’d like the email to appear to users.

Use the form data dropdown to add data to the body of your email.

You’re now all set to track and trace with all the necessary data needed.

Want to see it in action? Check out a live example of a track and trace form here.

Using a QR Code to Link to Form

To help with tracking and tracing, you can make it easy for users to get to the form by setting up a QR code that links back to it.

There are multiple ways of including one with the help of a plugin.

For example, the Kaya QR Code Generator plugin.

Kaya QR Code Generator.
The Kaya QR Code Generator is one of many options.

It functions by creating QR codes through a widget or a shortcode, so you can easily insert it into any page, post, or sidebar.

You can browse through numerous QR Code plugins here and find the best one that works for you and your client.

Ace the Track and Trace

With the help of Forminator, you can ace the track and trace. As you can see, it’s quick, easy to manage, and free to do. Your clients will benefit and it can help slow the spread.

With Forminator, there’s a lot more you can do as well that can help with the pandemic. This includes creating contact forms to keep customers in the loop of reopenings, collecting donations, registering for social distancing events, and more. If you’re not familiar with all of his capabilities, be sure to check out how to get the most out of Forminator here.

Soon enough, together, we’ll be able to stop this virus and get on with a bit more normalcy.


Paytm Launches SDK for All-In-One Payments System

Bringing disparate digital payments options under one system, Paytm today launched an All-In-One payments system along with an SDK for third-party integration. The All-In-One system includes point-of-sale touchscreen machines, payment gateway switches and a QR code that works across UPI through Paytm or other apps, RuPay cards and for Paytm wallet and Paytm Payments Bank accounts.

Generate Barcode And QR Code In Xamarin for Android

Generating QR codes for a robust user experience

Introduction

Here, I am going to discuss how to generate Barcodes or QR codes in Xamarin for Android. In order to do this, we need to get some information from the user, such as what message they want to convert, the code format they want to use, and their desired bitmap size. There is no default library for this, so we need to install a plugin.

You may also like: Model-View-Presenter (MVP) for Android.

Just write a few lines of code to generate 1D and 2D code. Barcodes have different formats, but I will demonstrate only a few code formats — Code 39, Code 128, AZTEC, and QR Code. Below is our final output for the project, so you can visualize our end-result throughout the tutorial. 

Blockchain-Based Excise Stamp Replacement System

The Task

Using QR codes as a replacement for excise stamps would allow decentralized and transparent control of the consumption goods logistics, delivery, and selling from the supermarkets and shops. This would eliminate the possibility for fraud and selling counterfeit wares, as well as increase the tax revenues.

The Solution

We have designed and developed a blockchain-based system that uses QR codes instead of excise stamps. Any manufacturer of excise goods can order the required amount of QR codes from the governmental authority. Each unit of the goods is then marked with the QR code, like a pack of cigarettes as shown in our example:

How to Transfer Music from PC to iPhone XS

If you are using your iPhone XS as a music player, then you probably know how to transfer music from computer to iPhone. The default way of transferring between your PC and iPhone is by using iTunes. This is the most common way of sharing music and other media to your iPhone. But there are also other easy ways which are worth considering. Take a look at the simple methods below and discover how fast and easy it is to move music from your computer to your iPhone XS.


ApowerManager

The first tool to help you transfer music to your iPhone is ApowerManager. This is a mobile device management tool that allows you to store, move, as well as stream data from your smartphone to PC. It lets you share files from your computer to your iPhone and vice versa. Aside from that, you may also use this program to back up your device to avoid data loss. This tool is ideal if you want to manage all your iOS data in a clear way. Now, let’s see how to transfer music from your computer to your iPhone using this method.

1.  Download the app on your computer and iPhone XS.
2.  Launch the app on both devices and connect your iOS device using a USB cable.
3.  Once your device is connected, the main interface of the app will be shown. From here, go to “Manage†tab and select “Music†from the sidebar menu.
4.  Then, click the “Import†button at the top, select from either “Import File†or “Import Folder†and wait a few moments.
5.  After that, you should be able to play all your download music from your computer to your iPhone XS.


AirMore

Another tool worth measuring is AirMore. It is a free app designed to transfer files between computer and phone wirelessly, supporting iOS and Android devices. This tool allows you to transfer pictures, music, videos and documents. Along with that, an hour of video can be sent to your iPhone in just minutes with a reliable internet connection. By just scanning the QR code on AirMore web, you will be able to connect your iPhone to PC easily. It can also access files from your cloud storage like AirDroid and OneDrive. On the other hand, here’s how you can transfer music from your PC to your iPhone XS.

1.  Get this program on your iPhone XS from App Store.
2.  Open a browser on your PC and go to AirMore web address “web.airmore.comâ€. A code will then appear.
3.  Launch the mobile app and tap on “Scan to connect†button then scan the QR code using your phone.
4.  Once connected, click on “Music†function then drag your music from your computer onto the web.
5.  You may also click the “Import†button at the top and choose from “Import Files†or “Import Folderâ€. Then, you should see all transferred music on your iPhone XS.

The two tools can help you transfer music from your computer to your iPhone XS easily. If you like to copy music even without internet connection, ApowerManager is a great option. Moreover, it can read all the music stored on your iPhone. On the other hand, you can choose AirMore to move music without the need of a cable.