Dropshipping Made Simple: A Step by Step Guide for WordPress

Dropshipping has become a popular online business idea because it’s easy to setup, requires very little investment, and the market is huge.

Unlike traditional eCommerce business that requires you to manage product inventory and handle shipping logistics, dropshipping allows you to start an online store without managing inventory or dealing with shipping.

In this beginner’s guide, we will walk you through the entire process of setting up a dropshipping business with WordPress. We will also share tips on how to find the best products for dropshipping and how to grow your dropshipping business.

How to start your dropshipping business with WordPress

Since this is a long and detailed dropshipping guide, we have broken it down into different sections that you can navigate to by using the navigation below:

What is Dropshipping?

Dropshipping is an online business where an eCommerce store doesn’t keep the products in stock, meaning no inventory cost. Instead, when customer purchases a product, the store owner places the order with the original vendor and have them ship the item directly to the customer.

The main difference between a dropshipping business vs traditional eCommerce business is that dropshipping doesn’t require you to stock or own any inventory. You also don’t have to deal with any shipping or handling logistics.

When a product is sold through your online store, you simply forward the purchase order to a wholesaler or manufacturer who fulfills it.

Due to the low operating cost and easier setup, dropshipping has become a global eCommerce trend.

The dropshipping business model has a few pros and cons that you need to keep in mind before getting started.

Pros of starting a dropshipping store

  • Setting up a dropshipping business requires much lower investment than a typical online store
  • You don’t need to purchase products or manage an inventory
  • You don’t need to ship the product by yourself
  • You can sell variety of products from different vendors and manufacturers

Cons of starting a dropshipping store

  • You are not in control of product quality and availability
  • Managing customer expectations can be challenging when you don’t have control over quality or shipping of the products
  • Providing customer support can be challenging
  • You’ll be making less profit because instead of bulk buying products, you’ll be selling one item at a time

With that said, dropshipping is a proven way to make money online. You can use dropshipping to make extra money on the side or build a large profitable online business.

Let’s take a look at how to properly start a dropshipping business.

How to Start a Dropshipping Business

Starting a dropshipping business is not as difficult as you’d think. There are plenty of eCommerce platforms that allow you to easily set up a dropshipping store without any technical skills.

We recommend using WooCommerce because of its low setup costs, ability to use multiple payment gateways, and flexibility to customize your online store.

According to Builtwith, WooCommerce is the #1 software used to build eCommerce stores.

It is also the most popular choice among dropshipping stores mainly because it runs on top of WordPress, the popular website builder. Using WooCommerce gives you access to thousands of WordPress extensions, third-party integrations, and beautiful store designs.

What You’ll Need to Start Dropshipping with WooCommerce

WooCommerce is available as a free plugin for WordPress. You’ll need a self-hosted WordPress.org website to start your dropshipping store. For details, see our guide on the difference between WordPress.com vs WordPress.org.

To get started with WordPress and WooCommerce, you’ll need the following items:

  • A domain name (This will be your store’s online address e.g. wpbeginner.com)
  • Web hosting account (This is where your website’s files will be stored)
  • SSL certificate (You’ll need it to accept online payments)

Normally, a domain name costs $14.99 / year, SSL Certificate $69.99 / year, and web hosting starts from $7.99/month.

Now, this is not a small investment if you are just starting out.

Luckily, Bluehost, our hosting partner, has agreed to offer WPBeginner users a discount on hosting with free domain name + SSL certificate. Basically, you’d be able to get started for $2.75 per month.

→ Click Here to Claim This Exclusive Bluehost Offer ←

Bluehost is one of the largest hosting companies in the world, and they are an officially recommended hosting provider by both WordPress and WooCommerce.

Once you sign up, Bluehost will send your login details to your email address. It will also automatically install WordPress for you, so you can easily login to WordPress dashboard from your hosting control panel.

Login to WordPress

Next, you need to install and activate the WooCommerce plugin. See our guide on how to install a plugin in WordPress for detailed instructions.

Upon activation, you WooCommerce will show you a guided a set up to select currency and other basic settings.

For more detailed instructions, see our tutorial on how to start an online store.

Choosing a Design for Your Dropshipping Store

Choosing templates and design for your online store

The first thing you would want to do is to change the appearance of your dropshipping store. Luckily, one of the best thing about using WordPress is that you can select from thousands of WooCommerce themes.

Here are our top picks for a dropshipping WooCommerce theme.

  • Astra WooCommerce Theme – A powerful WooCommerce theme built specifically to boost sales and increase conversions.
  • Divi – Another highly customizable WooCommerce theme that comes with built-in drag & drop page builder support.
  • OceanWP – OceanWP is a multi-purpose WooCommerce ready theme with flexible customization options.
  • Ultra – A multi-purpose WordPress theme with several ready-made layouts and a built-in drag and drop page builder.

Once you have found a theme you like, follow our guide on how to install a WordPress theme for step by step instructions.

Finding Dropshipping Products to Sell on Your Website

Finding dropshipping products

The next step is to find the products you want to sell on your dropshipping store. Before you start picking products, first you need to decide what kind of products you want to sell.

We recommend choosing a niche for your store. This will make it easier for you to find products as well as customers.

For example: if you want to sell clothing and accessories, then you can narrow it down to by style, theme, or a target audience.

It’s generally a good idea to pick a niche that you are familiar with and passionate about. Making a store about products or topics that you are unfamiliar with will require a lot more effort.

After choosing a niche for your store, you can look for products in that particular category.

In your product research, you want to look for products with low competition and high demand.

To find out which products are trending, you can browse Amazon to collect data and do your own research. Amazon shows best selling, most wished for, and top rated products for many categories.

Product research on Amazon

You can also use keyword research to find which product categories people are actually searching for. See our guide on how to properly do keyword research for detailed instructions.

For more on this topic, see our detailed guide on how to find the best products to sell online.

Where to Find Dropshipping Suppliers and Vendors

Once you have decided what products you are going to sell on your store, the next step is to find dropshipping suppliers offering those products.

There are many online marketplaces where you can find dropshipping suppliers and vendors from all over the world. Here is a quick list of the best dropshipping marketplaces to look for suppliers.

  • AliExpress – It is the largest online marketplace of suppliers offering millions of products. You can easily integrate it into your WordPress site to import products directly from AliExpress website.
  • SaleHoo – A powerful online marketplace for dropshippers, suppliers, and eCommerce stores. It is a paid platform and subscription costs $67 per year.
  • Doba – A large marketplace to find dropshipping suppliers. It allows you to manage lists, find products, and connect with suppliers. Subscription starts from $29 per month
  • Etsy – Etsy is an eCommerce platform for unique and hand-made products. Many of these manufacturers would gladly dropship products directly to your customers.

We recommend starting with AliExpress for multiple reasons. First, there are easy to use WordPress plugins that will make it easy to import products directly from AliExpress to your store (and keep it in sync).

AliExpress also makes order fulfillment quite easy for eCommerce stores. As the largest marketplace for dropshipping suppliers, you can find reliable vendors with great ratings and reviews.

AliExpress

Along with dropshipping products, you can also sell third-party products for affiliate commission on your store. This would allow you to offer a large range of products while diversifying your income stream.

Amazon.com is the best source to find affiliate products. Your affiliate earnings will be lower, and you’ll not be able to set custom pricing. However, you can find unique products and use it to provide more shopping choices on your store.

For details see our guide on how to create an Amazon affiliate store with WooCommerce.

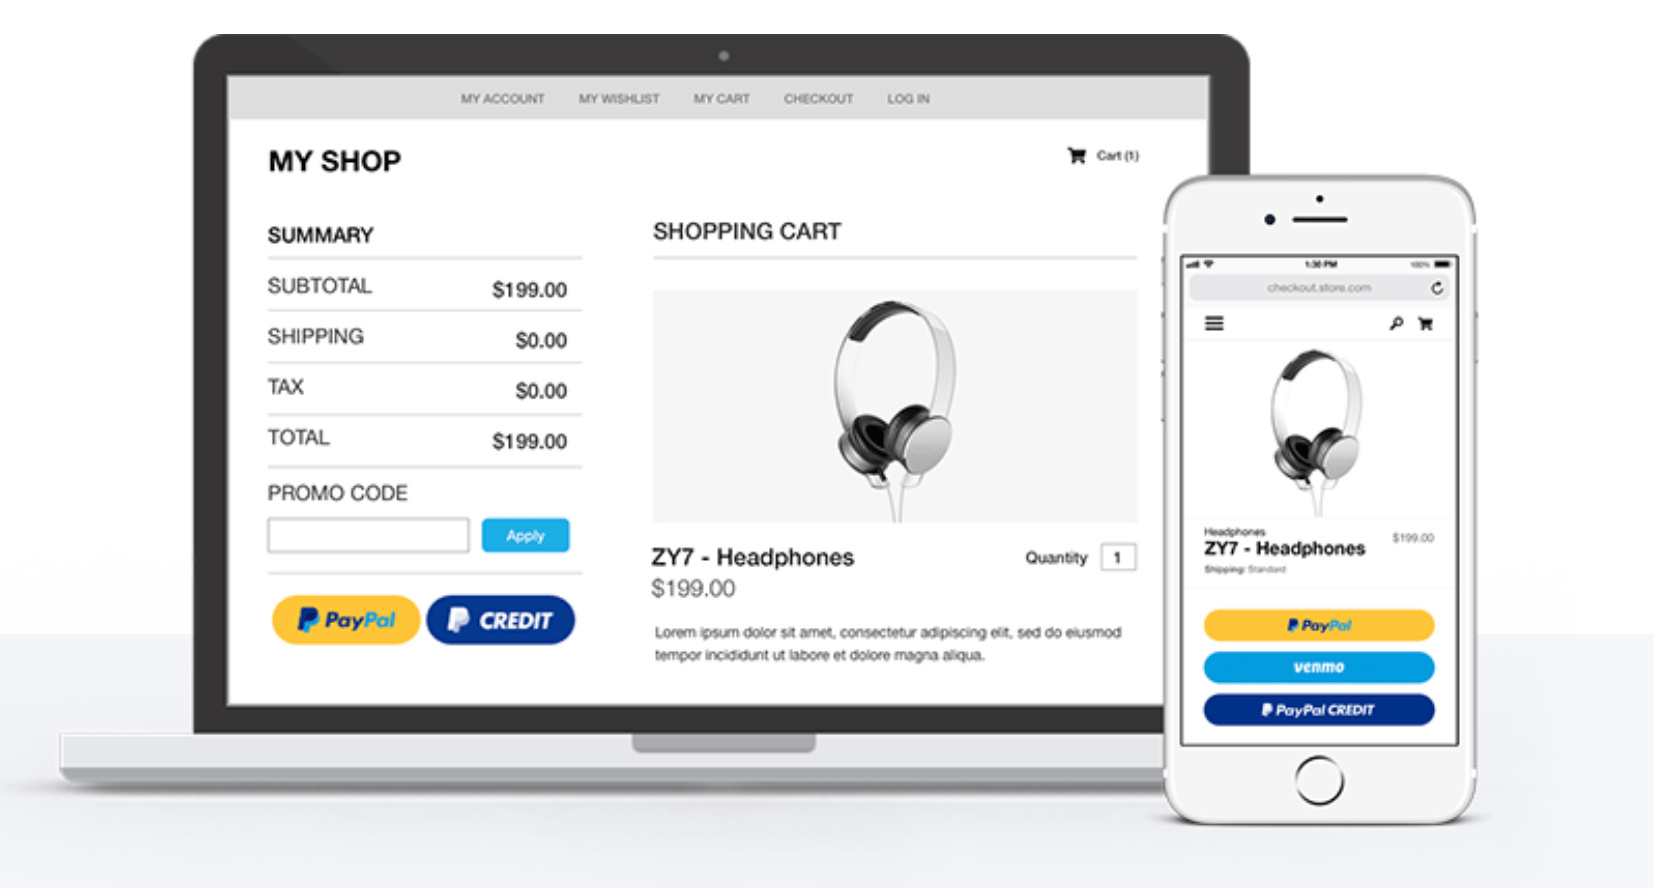
Adding Dropshipping Products to Your WooCommerce Store

By default, WooCommerce does not come with seamless dropshipping functionality. Luckily, there are several excellent WooCommerce dropshipping that allow you to do that.

Using a dropshipping extension, you’d be able to easily add dropshipping products, set custom prices with desired profit margin, collect orders, send them to your supplier, and more.

The functionality of your dropshipping extensions would entirely depend on the supplier or marketplace you choose.

If you are selling products from multiple suppliers from different marketplaces, then you may need multiple dropshipping extensions to automate the checkout process.

Here is our pick of the top dropshipping addons for WordPress.

  • AliDropship – Makes it easy to import from thousands of products on AliExpress, offer seamless checkout experience, and 1-click order fulfillment.
  • WooDropship – Another popular plugin that makes it easy to import products from AliExpress, automatically add product images and sync pricing.
  • WooCommerce Dropshipping – Allows you to add other third-party suppliers or vendors to your WooCommerce store, and send them order details in PDF format for fulfillment.

The way you add products to your WooCommerce store will depend on which extension, marketplace, or supplier you go with. If the extension you choose allows you to automatically import products, then you can just do that (hint: the first two in our list make it super easy to import products from AliExpress).

On the other hand, if you need to manually add products to your store, then here is how you would do it.

Manually Adding Dropshipping Products in WooCommerce

Adding products to your WooCommerce store is quite simple. First, you need to visit Products » Add New page inside your WordPress admin area.

Add new product in WooCommerce

Start by providing a product title and a detailed product description. After that, you need to select product category and start uploading product photo and product gallery images.

Choose product category and images

You can find product images from the supplier’s website. However, you need to ask their permission to use those images. They may also be able to provide you additional product images that you can use.

Next, you need to add product details under the Product data section. From here, you can set product price, attributes, and other options.

Add product data

Below that, you can provide a short description for the product. This short description will appear on the shop front, product category, and product search pages.

Go ahead and publish your product to make it appear live on your store.

Repeat the process to add more products.

Managing Dropshipping Orders in WooCommerce

After you have added products in your store, customers will be able to buy them from your website. You’d be able to review the customer orders by visiting WooCommerce » Orders page.

Managing dropshipping orders

Depending on your dropshipping extension, you may see an option to fulfill orders from here. This would basically send the customer’s order details to the supplier associated with the product.

WooCommerce plugins like AliDropship makes it super easy to send orders to the supplier with a single click.

If your extension does not support that feature, then you’ll need to manually place the order with your supplier by providing them the customer’s order details and shipping information.

You can review each order by clicking on it.

Change order details

On the order detail page, you can view products ordered, customer payment information, and edit the order status. Once the order is shipped by the supplier, you can change its status to completed.

Resources and Tools to Grow Your Dropshipping Business

Resources and tools to grow your dropshipping business

Setting up a dropshipping store with WooCommerce is quite easy. However, the real work starts once your store is up and running.

You would need to promote your business, bring traffic to your website, convert traffic into customers, and keep improving your marketing strategy over time.

Luckily, there are tons of great tools and extensions that you can use to help you achieve these goals. Let’s start with the basics first.

1. Ecommerce SEO

SEO or Search Engine Optimization helps you to get more traffic from search engines to your store. You can follow the instructions in our complete WooCommerce SEO guide to get more visitors to your website.

2. Optimize Conversions

Once you have a steady stream of visitors, you would want them to make a purchase. In marketing terms, this is called a conversion (converting a visitor into performing a desired action).

Conversion optimization helps you boost sales, which makes it incredibly important for your online success.

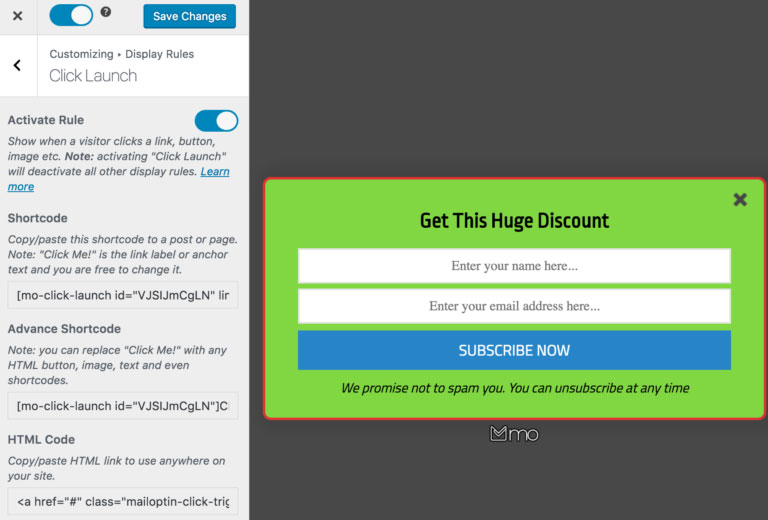
We recommend using OptinMonster, the #1 conversion optimization toolkit on the web. We have a detailed WooCommerce conversion optimization guide that helps you learn how to do that using the latest techniques.

3. Recover Abandoned Carts

Using conversion and SEO, you would be able to bring visitors to your site and help them discover more products. However, a lot of those visitors may not complete a purchase.

They may leave create an account, add products to the cart, but leave before purchasing. You’ll need to learn how to bring back those customers and recover your abandoned cart sales.

4. Ecommerce Analytics

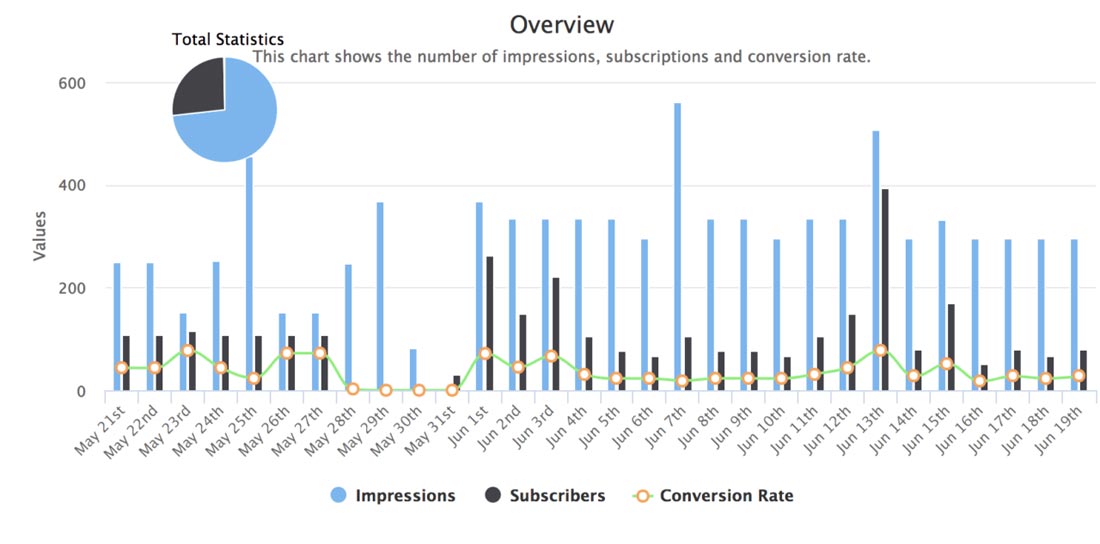
Obviously, you would want to see how all your efforts are paying off. For this, you’ll need MonsterInsights, which helps you install Google Analytics and comes with enhanced eCommerce tracking feature.

Using MonsterInsights you can track WooCommerce customers, see which products are popular, which product pages are not performing so well, and more.

5. Misc. Plugins

WooCommerce gives you access to more than 55,000+ WordPress plugins and many of them are made specifically for eCommerce websites.

These plugins allow you to add features like contact forms, product comparisons, currency switchers, and more. See our list of the best WooCommerce plugins to find more plugins for your store.

FAQs about Dropshipping with WordPress

You may come across new questions as you start working on your new dropshipping store. Following are the answers to some of the most commonly asked questions about dropshipping with WooCommerce.

1. Why not start my dropshipping business with Shopify?

You can totally start your dropshipping business with Shopify. However, Shopify charges you for each transaction, which affects your profits as a dropshipping store.

Another downside of using Shopify is the limited number of extensions and apps that you can use. As a dropshipping business, WooCommerce gives you more extensions and the flexibility to sell whatever you want on your website.

See our comparison of Shopify vs WooCommerce for more information.

2. Can I start my dropshipping business with BigCommerce?

Yes, you can. BigCommerce is a popular eCommerce platform and it even integrates with WordPress. BigCommerce also offers more payment gateways, and it does not charge transaction fees.

It lacks in extensions and the flexibility of WooCommerce, but it offers better scalability. See our comparison of WooCommerce vs BigCommerce for more details.

3. Which hosting company to choose for my WooCommerce store?

We recommend using Bluehost for a new dropshipping business. Their shared hosting plan is perfect to get started, and they are an officially recommended WooCommerce hosting provider.

If you are looking for an alternative, then we would recommend SiteGround. They are well-known for their heroic support and fast servers.

If you can spend a little more, then you can go WP Engine. They are a managed WordPress hosting provider, which is like a concierge service for your eCommerce store.

4. Can I install WooCommerce on my existing WordPress site?

Yes, you can. WooCommerce is available as a WordPress plugin and you can install it on any WordPress site.

5. How do I make sure that dropshipping suppliers deliver products on time?

Most dropshipping suppliers are located in China. This means slower delivery than choosing a vendors located in your own country. However, many dropshipping suppliers use ePacket for faster deliveries.

ePacket is basically a faster shipping method used by suppliers in China in partnership with USPS and other mail services. Ask your suppliers if they deliver products via ePacket for faster deliveries.

6. What to look for when finding a dropshipping supplier?

AliExpress and other marketplaces allow you to view supplier ratings, reviews, number of products they have delivered, and other useful information. This data tells you how reliable a supplier has been in the past. You can also read reviews to learn more about the quality of products delivered.

Since you don’t have control over the quality and delivery of products, you need to spend time on finding reliable dropshipping partners for your store.

7. Is dropshipping legal?

Because starting a dropshipping business is extremely easy, many beginners wonder if dropshipping is legal. The answer is YES. It is completely legal across the world.

In the simplest terms, dropshipping is just a form of order fulfillment where the supplier or manufacturer handles shipping. Nothing is illegal about that.

Of course like any other business, you have to pay proper business taxes depending on the country you’re based in.

We hope this guide helped you learn how to start dropshipping business with WordPress. You may also want to see our guide on how to add live chat support to your WooCommerce store.

If you liked this article, then please subscribe to our YouTube Channel for WordPress video tutorials. You can also find us on Twitter and Facebook.

The post Dropshipping Made Simple: A Step by Step Guide for WordPress appeared first on WPBeginner.

Pro Tips To Strengthen Online Repute Of Your Business

The online reputation of your brand or company constantly evolves and re-defined with each comment on your social media posts, customer review on social media or corporate website, and comments published on the blog posts. Potential customers discover a business online, and they observe these things and make buying decisions based on everything available online [...]

The post Pro Tips To Strengthen Online Repute Of Your Business appeared first on WPArena.

PayPal vs. Stripe For Ecommerce

As I’m sure you’ve figured out by now, building a website takes lots of hard work. This is even more so the case for those of you who are creating an ecommerce site.

In addition to your website design, architecture, and all of the standard website elements, you also need to figure out how you’re going to accept payments online.

If you’ve never done this before and you’re just starting some preliminary research, there’s a good chance that you’ll come across two names; PayPal and Stripe. These are both industry leaders in the online payment processing industry.

Both platforms will essentially let your customers buy products or services from your ecommerce shop, but the way that these services are provided are different from platform to platform.

So what’s the difference between PayPal and Stripe? Is PayPal or Stripe better for accepting payments online? These are questions that I hear all of the time when I’m consulting with ecommerce companies.

Truthfully, you probably can’t go wrong with either one. But with that said, I want to give you as much information as possible about each platform so you can decide which one is right for your ecommerce business.

Basics of payment gateways

Before we continue, I want to make sure you understand exactly how PayPal and Stripe work. There are two terms you need to know:

  • Payment gateway
  • Payment service provider

Payment gateways give ecommerce sites the capability to accept payments online. These gateways are like a middleman between a business payment processor and credit card network. PayPal and Stripe both have payment gateways, which you’ll need if you’re planning to authorize online payments.

A payment service provider (or PSP for short) on the other hand is a bit more involved. PayPal and Stripe are both PSPs as well. They link businesses with merchant accounts by providing the technology required to process online payments, as well as other forms of payment.

PayPal and Stripe group all of their merchants into one account, as opposed to each business having a dedicated account.

Basically, both of these platforms have everything you need to authorize payments as an ecommerce website.

PayPal for ecommerce

Paypal for Ecommerce

Even if you have no prior experience with running an ecommerce website, PayPal is definitely a name that you’ve heard before.

The company has always been known for payment processing. They have the reputation for being a safe and secure way for PayPal users to buy from merchants using a PayPal balance as well as a debit or credit account linked to their PayPal profile.

But PayPal offers much more features and services to accommodate ecommerce shops. So the days of PayPal only being suitable for things like eBay or other P2P payment situations are long behind us. Now they have a variety of plans for launching a business, whether you want to sell online, in person, or both.

You’ll be able to accept payments from credit cards, debit cards, PayPal credits, PayPal accounts, and Venmo as well.

With PayPal, you can design your own shopping cart. They have customizable solutions that are fully scalable for growing businesses.

PayPal offers three main plans for you to choose from. I’ll cover each one in greater detail below.

PayPal Checkout

Paypal Checkout

For those of you who already have an existing payment processor that you’re using to accept credit cards on your ecommerce site, PayPal Checkout might be a good option for you to consider.

Basically, you can just add the PayPal button to your current payments page with this supplemental plan. It’s easy to integrate with your existing ecommerce platform. Once the button is added, your customers will be able to use PayPal, PayPal credits, or Venmo to buy from your online store.

Conversion rates are up to 82% higher when PayPal Checkout is added to ecommerce sites. That’s because shoppers can complete the purchase in just a click or two, if they have PayPal on their phones or if they’re already logged into PayPal on their computers.

There is no setup fee or monthly fee for this plan. PayPal charges merchants 2.9% + $0.30 per transaction in the United States.

PayPal Payments Standard

The PayPal Payments Standard plan is made for merchants who don’t have an existing payment processor or want to switch providers.

In addition to the PayPal payment options, you’ll also be able to accept Visa, Mastercard, American Express, and Discover cards. Adding the button to your website is as simple as copying and pasting some code. The checkout pages will be hosted by PayPal.

This plan will cost you 2.9% + $0.30 per US transaction. There are no monthly fees or setup fees for the Payments Standard plan.

PayPal Payments Pro

Payments Pro is the top-tier plan offered by PayPal. It allows you to create a fully customizable checkout experience on your ecommerce site.

Unlike the Payments Standard plan, website visitors won’t have to leave your site to complete the checkout process. It also has a mobile-optimized checkout process and easy shopping cart integration. Payments Pro gives you a virtual terminal, which makes it possible to accept payments over the phone as well.

With the added features, this plan costs $30 per month, plus the standard 2.9% + $0.30 per transaction.

Stripe for ecommerce

Stripe for Ecommerce

Unlike PayPal, Stripe doesn’t have their services segmented into tiered plans. Stripe’s payment processing will be the same, regardless of what features you’re taking advantage of.

With that said, depending on which tools you want to use, it will cost more. But the nice part about this is that you’re only going to be charged for the features that you actually want, as opposed to paying for a plan that includes tools you don’t need.

You can easily add Stripe to your ecommerce site with just one simple integration.

Once that happens, the platform makes it easy for you to accept payments, process them, settle, and reconcile. You’ll be able to process credit cards and ACH transfers both online and via mobile app payments. In fact, big mobile app brands like Lyft are already using Stripe.

Stripe lets you build a checkout process from scratch, or select one of their pre-built templates.

The platform has features for invoicing and setting up recurring payments for subscriptions as well. Let’s take a look at some of those add-on features I was talking about earlier.

Connect

Stripe Connect is made so that marketplaces and platforms can accept money and pay it out to third parties. It supports ecommerce sites, crowdfunding, on-demand businesses, and travel or event platforms.

Take advantage of Stripe’s UI components that are pre-built, or use their tools to create and customize everything on your own.

Sigma

Sigma helps businesses analyze data from stripe using SQL. It can help improve the efficiency of business operations, finance departments, data teams, and product management.

It’s a great way for you to get to know your business better with data. Then you can make necessary adjustments based on your findings. Pricing for Stripe Sigma varies based on the volume of monthly charges.

Atlas

Stripe Atlas is made for those of you who are starting an online business from scratch. The startup toolkit guides you through the process of forming a company, establishing IP ownership, filling out the right documents, and getting a tax ID number from the IRS.

Stripe Atlas

Atlas also sets you up with a new bank account and debit card for your business.

There is a $500 one-time fee for using this service. Services like bank account maintenance, tax filing, and registered agents are not included in the setup fee. These are all billed individually at an annual rate.

Radar

Radar is Stripe’s fraud detection, prevention, and management tool. It’s designed to analyze your data and stop potential fraud cases before they are processed.

They take data from your checkout flows, payments, and financial partners to determine irregularities. Stripe’s partnership with major credit card companies and banks make it possible for them to identify fraudulent charges before you need to make a dispute.

Issuing

Stripe Issuing is made for ecommerce businesses that want to create, distribute, and manage both physical and virtual cards for in-house purposes.

You can use these cards for things like employee expense accounts. It’s supported by Google Pay and Apple Pay as well. It’s also worth noting that Stripe Issuing is a beta program that’s only being offered in the United States.

Terminal

For years, Stripe was better known for its online payment processing. But now they offer Stripe Terminal, which is a POS system for in-person payments.

This is a great option for those of you who have physical store locations in addition to your ecommerce shop. You can get everything you need both online and in-store from the same provider.

PayPal and Stripe compared

As you can see from everything that we’ve covered so far, these two payment service providers are very different from each other. But with that said, they have some things in common as well.

Deciding between PayPal and Stripe will mostly come down to personal preference and exactly what you’re looking for. Let’s take a look at some specific features to see how each platform stacks up against the other.

Price

The pricing for PayPal is very straightforward. Only the Payments Pro plan has a monthly fee, while all three plans charge 2.9% + $0.30 per transaction.

Stripe also charges 2.9% + $0.30 per transaction. But they do have custom pricing packages for things like volume discounts and multi-product discounts, which can be useful for those of you who want to take advantage of the products we looked at earlier.

According to research Value Penguin, Stripe is more expensive than PayPal.

Stripe vs Paypal cost

It can be argued that Stripe has more to offer, which might justify that higher amount. But when you compare the cost per transaction rates head to head, both services are even.

Support

Both PayPal and Stripe offer excellent customer service and technical support options. They each have their own variation of a help center, with different tools, guides, FAQ, and resources needed to troubleshoot on your own.

You can also get help using:

  • Email
  • Live chat
  • Phone
  • Social media

Based on all of this, I don’t think that I can definitively say that one platform has better support than the other, so this category is a tie.

Ease of use

Stripe and PayPal are both easy to use. But with that said, Stripe is definitely more developer-friendly, meaning it could present more of a challenge to ecommerce store owners who don’t have that type of technical knowledge.

PayPal is as simple as copying and pasting some code to get set up, which is about as straightforward as it gets. So I’d say PayPal is better for beginners, while Stripe has more customizable options for developers.

Contracts

Both PayPal and Stripe offer pay as you go contracts. So you won’t get locked into anything long term and can cancel at any time. You also won’t be charged a cancellation fee by either service if you decide to do so.

This category is another tie.

Reputation

PayPal always had a reputation for its P2P payments through third-party platforms like eBay. Although now they’re taking aim at providing more services for ecommerce sites. Stripe has always been known for ecommerce solutions, but not offers POS solutions as well.

Both of these companies have the tools, services, and resources you need to run an ecommerce shop. They both have exceptional online reviews as well.

PayPal is the most popular digital wallet in the United States and is the most popular mobile payment method in North America. There are more than 277 million PayPal users worldwide.

Based on these numbers, I’d have to give the edge to PayPal in terms of reputation. But by no means am I saying that Stripe doesn’t have an excellent reputation as well.

Conclusion

If you have an ecommerce shop and you’re trying to figure out the best payment service provider, both PayPal and Stripe are top options to consider.

At the end of the day, it’s going to come down to personal preference. Based on the information I gave you above, you can decide which plan meets your needs the most.

I can’t definitively give an edge to one platform over the other. I’d strongly recommend both options.

For those of you who still aren’t sold on PayPal or Stripe, you can review my guide on the best payment methods for your ecommerce site to find some alternative solutions.

MailOptin Review: WordPress Newsletter Signup Made Easy

One of the few regrets anyone can have in an online business is the failure to collect email addresses of their visitors. Simply put, the failure to have a list.
More often than not, you will hear people say, "the money is in the list" and that by itself is a statement of truth. Email list gets people coming back to your website, and by extension increases profit in business, because you are already dealing with a targeted audience.

Therefore, it is essential that you build an email list if you intend reaching out to old customers and engaging your readers. Whichever the case, this doesn't happen by rocket science, you will need to deploy pretty and conversion-optimized optin forms to your website and analyze your data to know what technique and strategy will work best for you.

MailOptin WordPress Plugin

MailOptin is a WordPress plugin that makes it super easy to ask people to join your email list; this is the elemental aspect of list building. Unlike other alternatives, MailOptin goes a step further to ensure your list subscribers are nurtured and constantly engaged using its suite of event-triggered and automated emails such as new post notification and email digest.

Without any further ado, let's take a look at MailOptin features and what makes it a good choice for growing your list.

How Can MailOptin Grow My Business?

MailOptin is not just a plugin, it is an all-in-one solution that allows you grow your list, and by extension, increase sales and revenue. No doubt, if you can grow a targeted list, you are always going to make money out of it.

You can start creating eye-catching forms that actually converts with MailOptin. In the plugin, you will find a collection of done-for-you optin themes which you can customize further to your heart content.

You also have several optin form types to select from such as

  • Popups (also called lightbox)
  • Before and After Post Content Form
  • Sidebar/Widget Forms: displays an optin on the sidebar or widgetize area of your site
  • Notification Bar (also called hello or floating bar)
  • Shortcode and Template Tag Embed: allows you display your optin anywhere on your site
Optin TypesMultiple optin types available

Essentially, with MailOptin, you can easily:

  • Create multiple opt-in form types using a live visual editor
  • Connect the optin forms to multiple email service providers
  • Determine how you want these forms to be displayed using its advanced trigger rules
  • Take advantage of statistical data, including A/B split testing to analyse your optin forms for conversions

And much more is possible with provided options.

Creating Optin Forms in MailOptin

In other to demonstrate how the plugins works, let's create a popup optin form. Click on "Optin Campaigns," within this page you should be able to create a new campaign. It is possible to have different forms running on your site. For instance, you could have popups, as well as "in-post" optin forms append to your articles. So, after deciding the type of optin forms you want to create, click on "Add New" and you will be taken to a new page where you can select a "Campaign Template."

Add New OptinAdd new optin forms

Give the campaign a name, select a theme and you will be redirected to the builder or customizer where you customize and setup the optin.

Autoresponder Integrations

MailOptin supports all the leading email marketing software and autoresponder. Integration is very easy as saving your account API key or clicking a button to authorize MailOptin to connect to your account.

Optin API integrationsOptin API integrations

Advance Targeting and Display Rules

One of the features of MailOptin you will fall in love with is its precise targeting and trigger options. The Display Rules are set of rules that determine how and where your optin form will be displayed.

Optin Display RulesOptin Display Rules

Basically, you can decide:

  • Which pages you want your optin forms to be displayed
  • If you want to show your optin forms to new or returning visitors
  • To show a success message or close the optin forms after getting a lead
  • If you want to display your optin forms to mobile, pc, tablet users
Optin After ConversionOptin After Conversion

Digging deeper, MailOptin also allows you display your optins using any of the following rules:

  • Exit-Intent: displays the optin at the precise moment a visitor is leaving your website
  • Scroll trigger: displays optin after visitors scroll down your site page
  • Time on site: displays optin after visitors have been on your site for a specific time
  • Referrer detection: displays optin targeted at visitors from specific website referrals
  • Pageviews: displays optin to visitors once they reach a certain number of page views

That is not all, you can also trigger your optin forms using the following more advanced rules:

  • Geolocations
  • User targeting
  • Visitors using adblock
  • Cookies

There is also an option to display optins forms only when a visitor clicks a specific link in your post. This is called Click Launch in MailOptin. A very handy feature that lets you hide contents behind an email signup box. If your visitors are interested in getting whatever is behind the form, they have to subscribe to get it.

Click launch optin triggerClick launch optin trigger

Email Automation

It is also possible to automatically send out newsletters to your email list each time you publish a new post or you can send a daily, weekly or monthly digest of your posts. You have a default email template you can use. There is also an option to "code your design" from scratch. Here, you will require some level of coding to get this done, otherwise you are free to use the predefined templates which is pretty good.

Therefore, if you published a new post, MailOptin can automatically send out an email alert to all your subscribers containing relevant information.

Optin Email AutomationsOptin email automations

Publish Your Optin Form

After choosing a form type and selecting a template, customizing same and going through the configuration steps, the next thing to do is to publish or enable your optin form.

In the "Optin Campaign" page, toggle on/off your optin campaign to enable or disable it. A blue optin campaign indicates that the specific form is live while a grey color means that the optin form has been deactivated.

Optin EnabledOptin enabled

Insight and Analytics

When your campaign goes live, you can carry out some extended functions which are necessary for analysing the growth of your list. The following data are available in MailOptin analytics section such as top converting pages, top displayed optin, number of impressions, number of subscribers, conversion rate etc.

Optin AnalyticsOptin analytics

Then, you can use those data to improve your optin forms, in other to boost your click through rate and overall get better results.

MailOptin Pricing

There are three options for purchasing MailOptin leads generation plugin

  • $69, Standard plan for use on 1 website
  • $169, Pro plan for use on 3 websites
  • $269, Agency plan for use on unlimited websites

You can view the full list of the simple pricing plan on the MailOptin website.

Alternatively, if you want to first try MailOptin for free before purchasing a premium plan, you can download it right away from the WordPress repository.

Is MailOptin Worth Your Money?

MailOptin is a cost-effective way to start building an email list. It doesn't come with a complex interface. It uses the WordPress Customizer that you already know and love.

While it is very powerful, it is also very easy to use. It can be used by bloggers, eCommerce website owners, marketing agencies and essentially anyone who uses WordPress with the intention of building an email list.

In conclusion, MailOptin brings a lot of new features into play. The beautifully designed built-in templates makes your work easier, you won't go blank staring at an empty white space trying to figure out what to do from the scratch. Then, you have a bunch of targeting options you use to control how and where you want your optin forms to be displayed.

More also, you can use that feature to build a segmented email list that targets a particular set of people. MailOptin also enables you analyse your data with its analytical and split test engine so you can make data-driven decisions.

Take your list building journey to the next level by trying out MailOptin today.

Special guest post by Collins Agbonghama


Cybersecurity tips to protect your business from online security threats

Small business owners think that cybercriminal attacks are only a thing for the multi-billion dollar companies to worry about. However, criminals also love to prey on small and medium-sized businesses. Implementing a robust cybersecurity plan to help in reducing the levels of criminality is a need that small business owners must also meet. There are Read More →

The post Cybersecurity tips to protect your business from online security threats appeared first on WPArena.

How to Make a Staff Directory in WordPress (with Employee Profiles)

Do you want to create a staff directory on your WordPress site? An employee directory allows you to introduce customers to your team members and win trust by showing the human side of your business.

One downside of running an online business is that your customers don’t get to know you or your team members personally. A team directory helps bridge that gap.

In this article, we’ll show you how to easily add a staff directory in WordPress with individual employee profiles.

How to Make a Staff Member List in WordPress

Creating a Staff Directory in WordPress (Step by Step)

First thing you need to do is install and activate Staff List plugin. It is a free WordPress team directory plugin. For detailed instructions, see our guide on how to install a WordPress plugin.

Next, you need to go to the Staff List » Admin page from your dashboard menu and click the ‘Quick Start’ tab. You will be asked to enter a name for your staff template and click the ‘Create Records’ button. For example, you can name it ‘New Staff Template.’

Create New Staff Template

Once done, the plugin will create a staff template and add 3 staff members automatically.

Next, go to Staff List » Staff Templates from your WordPress menu to preview your new staff template. You need to click on the ‘Edit’ link to configure the template.

Edit Staff Template

You will see the Template Options including staff page layout, single page layout, field order, shortcodes, etc.

Template Options - Staff List WordPress Plugin

You can review the template options to make changes or simply leave the default options.

Below that, you can see the ‘Input Fields’ section to customize your staff profile.

Staff List Field Options WordPress

As you can see in the screenshot above, there are 6 input fields created by default.

  1. Name
  2. Position
  3. Department
  4. Phone
  5. Email Link Text
  6. Staff Profile

You can change the label, display options, and style for each field from the Field Options.

Add Staff Members to Make a Team Directory

Now that you have customized your staff page template, you can add and customize your staff member profiles. Go to Staff List » Staff members, and you will see the 3 staff members already added by the plugin.

You can customize the default staff member profiles by changing the profile information. Click the ‘Edit’ link to get started.

Edit Staff Member Profiles

From here you can customize the Staff Member Data for team member listing page, individual profile page, and upload photos. The ‘Staff Page’ option shows you 6 input fields as shown in the staff page template above. The information you enter here will appear on your staff directory page.

Edit Staff Member List Page Data

Next, you can customize the ‘Single Page’ content. Like the Staff Page, it also has 6 input fields by default. However, it has a text field to write the individual employee profile bio.

Edit Staff Member Single Page

The information you enter here will appear on your individual employee profile page.

Next, you can add your team member images for the staff page and single page. You can quickly add your member’s profile photo by clicking on the ‘Select Image’ button.

Add Images to Staff Member Data

Lastly, you can see the ‘Options’ tab which includes Single Page SEO options. You can add a URL slug and page title for your team member profile page.

SEO Options Staff Member Data

If you leave the “Pretty” Permalink option blank, then your staff profile page will have a URL like this: http://example.com/profile/?smid=528.

You can make it a pretty link by entering your staff member’s name with a dash in between. For example, you can use laura-taylor which would make your staff profile page URL: http://example.com/profile/laura-taylor.

Don’t forget to click on the ‘Update’ button to save your changes.

Repeat the same process to customize all team member profiles.

If you need to add more team members, you can click the ‘Add New’ button on the top.

Add New Staff Member

First, add your staff member’s name. Then, choose your staff template from the right sidebar and click ‘Save Draft’ to load the input fields.

Choose Template for New Staff Member in WordPress

Next, you can see the same 6 input fields to create a team member profile. Add the necessary information as before.

Add New Staff Member Data

Once done, don’t forget to publish your staff member profile.

Publish Your Staff Member List in WordPress

Now that you have added all your staff member profiles, you are ready to publish your staff member list on your website.

First, you need to find and copy your staff page template’s shortcode. Go to Staff List » Staff Templates and click ‘Edit’ option below your staff page template. Then, the Template Options page will open.

Click on the ‘Shortcodes’ tab and copy the Staff Page Shortcode.

Staff List Page Shortcode

After that, you need to create a new page to display your staff member list. Go to Pages » Add New from your WordPress admin panel and enter a name for your staff list page. For example, you can name it ‘Our Team.’

Create Our Team Page in WordPress

Then add the Shortcode block to your WordPress page editor area.

Add Shortcode Widget to WordPress Editor

After the shortcode widget is added, paste the shortcode you copied earlier in the tutorial.

Add Staff Page Shortcode to Team Page in WordPress

Then, you can ‘Publish’ the page.

Now you can open the page to see how your staff directory looks. Here is how it looks on the default Twenty Nineteen theme with the default staff member details.

Staff Member List Page Demo in WordPress

In the list, you can see the ‘Profile’ option which does not have a link. We will show you how to add the link in the next step.

Adding Individual Staff Member Profiles

So far we have created a simple team directory in WordPress that lists all staff members.

The next part is to create a single page for each team member to display individual employee profiles.

Let’s start by going to Staff List » Staff Templates and click ‘Edit’ option below your staff page template.

On the next page, you need to click on the ‘Single Page – Options’ tab and copy the Single Page Shortcode.

Staff Member Single Page Shortcode

Now you need to create a new page in WordPress to add this shortcode. Go to Pages » Add New from your WordPress panel to add new a new page.

Enter your page title first — for example, Member Profile. Then, add the Shortcode widget to your WordPress page editor area and paste the Single Page Shortcode you copied before.

Add Staff Member Single Page Shortcode to your WordPress Page

After that, you need to customize your page permalink. It’s important if you want the pretty links to work, then you need to make sure that you add one of these words as your page URL slug.

  • bio
  • profile
  • profil
  • perfil

Open the ‘Permalink’ option in the right sidebar and add one of these words as your page URL. For example, we will choose the ‘profile.’

Staff Meember Single Page Permalink Setting

Once done, publish the page. Now you need to copy this page permalink and add to the Single Page Options.

You can do this by going back to Staff Template Options » Single Page – Options. Once there, simply paste the permalink in the Single Page URL field.

Add Staff Member Single Page URL to your Template Options

Once done, don’t forget to update your staff template.

After that, you need to refresh your WordPress Permalink settings to make the pretty permalinks work. Go to Settings » Permalinks and simply click ‘Save Changes’ at the bottom without changing anything on this page.

WordPress Permalinks Settings

Now you can open your staff member list page to see if the profile link is added or not. If it is working, then you will see the Profile text has a link.

Profile Link on WordPress Staff Directory Page

You can click the link, and it will open your team member’s profile page.

Staff Member Profile Single Page in WordPress

We hope this article helped you create a staff directory and add employee profile pages in WordPress. You may also want to see our guide on how to create your company org chart in WordPress.

If you liked this article, then please subscribe to our YouTube Channel for WordPress video tutorials. You can also find us on Twitter and Facebook.

The post How to Make a Staff Directory in WordPress (with Employee Profiles) appeared first on WPBeginner.

10 Best WordPress Contact Form Plugins Compared

There is absolutely no doubt that contact forms are a vital aspect of any online business. They have quickly become the norm and in a highly competitive online environment, it is a priceless asset to have. This is because providing an easy method for customers to voice their opinions, suggestions, concerns and anything else related Read More →

The post 10 Best WordPress Contact Form Plugins Compared appeared first on WPArena.

How to Create an Online Marketplace using WordPress

Do you want to create an online marketplace using WordPress? An online marketplace website allows users to buy and sell items by setting up their own mini-stores within your eCommerce platform.

It allows you to make money by sharing your online marketplace platform. Due to low overhead costs, it has become a popular online business idea.

In this article, we will show you how to easily create an online marketplace using WordPress without spending thousands of dollars.

Building an online marketplace using WordPress

What Do You Need to Start an Online Marketplace using WordPress?

First, you need to make sure that you are using the right website platform, and since you’re reading this article, you’re in the right place.

There are two types of WordPress available: WordPress.com vs WordPress.org. One is a limited blog hosting service while the other is known as the self-hosted WordPress which you’ve likely heard tons about. See the full comparison between WordPress.com vs WordPress.org.

We recommend using WordPress.org because it gives you the freedom and access to all WordPress features out of the box.

You will need the following items to build an online marketplace website using self-hosted WordPress.

  • A domain name (For example, wpbeginner.com)
  • Web hosting account (This is where your website’s files are stored)
  • SSL Certificate (To securely accept online payments)
  • WooCommerce (best WordPress eCommerce addon)
  • Online marketplace addon

The entire setup can take up to 40 minutes, and we will walk you through every step one by one.

Ready? Let’s get started.

Step 1. Setting up Your Ecommerce Platform

The first step is to buy a domain name and a web hosting account. You don’t just need a web hosting, but you will need a service that specializes in WooCommerce hosting because this is the software that we will be using as our eCommerce platform.

Typically a domain name costs $14.99/year, web hosting 7.99/month, and SSL certificate 69.99/year.

Now, this seems like a lot of money if you are just starting out.

Fortunately, Bluehost an officially recommended WordPress and WooCommerce hosting provider has agreed to offer our users free domain + SSL and discount on their cloud WordPress hosting.

Basically, you can get started for $6.95 / month.

→ Click Here to Claim This Exclusive Bluehost Offer ←

Once you have purchased hosting, then follow our step by step tutorial on how to start an online store for complete setup instructions.

You would now have a WordPress website with WooCommerce installed on it.

However, by default WooCommerce assumes that your website is a single vendor website, so it is not possible for other users to add their own products and services to your website.

Let’s change this.

Step 2. Turn Your WooCommerce Site into an Online Marketplace

First, you need to install and activate the WC Vendors plugin. For more details, see our step by step guide on how to install a WordPress plugin.

WC Vendors is a marketplace solution for WooCommerce. It simplifies building a marketplace website by turning WooCommerce into a multi-vendor platform.

Each vendor can sell their products while you keep full control of the website as the marketplace owner. You can choose your own business model, payment methods, product types, and more.

Upon activation, head over to WC Vendors » Settings page to configure marketplace settings.

WC Vendors settings

First, you will see the general items. You need to make sure that the ‘Vendor Registration’ box is checked to allow users to sign up as Vendor on your website.

You can review other items on the page and then click on the ‘Save Changes’ button to store your settings.

Next, you need to click on the ‘Commission’ tab to set a commission rate for vendors across your website. This is the amount you’ll pay to the vendor for each sale.

WC Vendors commission settings

Note: The global commission rate can be overridden for individual vendors and products.

Next, you need to click on the ‘Capabilities’ tab to set sitewide rules for vendors. This part of settings comes with three sections.

Set capabilities for Vendors

The general capabilities include allowing vendors to view and edit products and orders. The default options would work for most sites.

Next, switch to the ‘Products’ section and from here you can select which type of products vendors can add. For example, you can limit vendors to only add digital downloads or a physical product.

You can also select which data Vendors can see and use on the ‘Add Products’ page.

Set product rules

Lastly, switch to the ‘Orders’ section under ‘Capabilities’ to select what information vendors can see about the orders.

Set vendor permissions for orders

After setting up the capabilities, it is time to set up marketplace related pages on your website.

Switch to the ‘Display’ tab under plugin settings to set up pages. You can simply go to Pages » Add New to create a new page for each item and add the shortcode displayed in the settings to the page’s content area.

Set up marketplace pages

After creating all the pages and adding shortcodes to them, you can select them here.

Below the pages, you will also find ‘Store settings’ option on the same page. This where you can select a prefix to use in Vendor shop URLs, allow them to set custom headers for their shop pages, and use HTML in shop description.

Store settings for vendors

Next step is to set up payments for your vendors. Most marketplace websites set a minimum threshold for their vendors and pay them on a monthly or weekly basis.

We recommend using manual payments to vendors as this gives customers enough time to request refunds or give feedback about the products.

WC Vendors payments

However, if you want to payment withdrawal system for vendors, then you can buy premium add-ons. WC Vendors has add-ons available for Stripe, MangoPay, Escrow, and Manual Payouts.

Depending on the payment gateway you choose, you will need to set up a payment gateway by entering your API keys. Don’t forget to click on the ‘Save Changes’ button to store your settings.

Now that WC Vendors is ready, let’s set up WooCommerce for a multi-vendor environment.

Step 3. Enable Account Management in WooCommerce

First you need to visit WooCommerce » Settings page and click on the ‘Accounts’ tab. From here you need to check the boxes next to customer registration option.

Allow customers to create an account in WooCommerce

Don’t forget to save your changes.

Step 4. Setting Up Navigation Menus

Now that your multi-vendor marketplace setup is finished. It is time to make it easy for your users to find their way around your website.

To do that, go to Appearance » Menus page. From here you need to add your user account and checkout pages to the navigation menu.

Add to menu

Don’t forget to click on the ‘Save Menu’ button to store your changes. For more detailed instructions, see our guide on how to add navigation menus in WordPress.

If you don’t have a My Account page, then simply create a new page in WordPress and add the following shortcode in the post editor
.
[woocommerce_my_account]

Step 5. Testing Your Marketplace Website

Your online marketplace website is now ready for testing. You can visit your website in a new browser window and create a new account by clicking on the My Account link at the top.

Testing your marketplace website

From here, both customers and vendors can log in to their accounts as well as create a new account.

Register as vendor

Once users create a new account, you will receive an email notification. If you are unable to receive email notifications, then take a look at our guide on how to fix WordPress not sending email issue.

You can also view new vendor applications by visiting Users » All Users page. You will see all new vendor requests as ‘pending vendor’, and you can approve or deny applications by clicking the link under their username.

Approve vending vendors

Once approved, these vendors can log in to their accounts and add their products by visiting their vendor dashboard. They can also view their orders and sales reports.

Vendor dashboard

The first thing your vendors need to do is to set up their shop settings by clicking on the ‘Store Settings’ link.

Vendor shop settings

Depending on the payment methods you set up, they will need to provide their PayPal or Stripe email address to receive payments. They will also be able to provide bank account information for direct manual payments.

Once a vendor adds a new product, you will get a notification email and see an icon next to the products menu. You can then edit a product, approve it, or delete it.

Pending products

Your shop page will clearly show the products sold by vendor’s shop name.

Sold by vendor

Step 6. Growing your Online Marketplace Website

First, you may want to choose a design for your marketplace website. WordPress comes with thousands of free and paid themes but not all of them are eCommerce ready.

See our pick of the best WooCommerce themes to find a suitable theme for your marketplace platform.

After that, you would want to add new features to your website. For example, making it a multi-vendor auction site or a membership community.

You would want to track which products are getting more traffic and which vendors are bringing more users. For that you will need to enable customer tracking in WooCommerce on your website.

The biggest hurdle in growing any eCommerce website is abandoned cart sales. Learn how to recover abandoned cart sales like a pro to increase your profits.

We hope this article helped you learn how to create an online marketplace using WordPress. You may also want to see our ultimate WooCommerce SEO guide to get search traffic to your website.

If you liked this article, then please subscribe to our YouTube Channel for WordPress video tutorials. You can also find us on Twitter and Facebook.

The post How to Create an Online Marketplace using WordPress appeared first on WPBeginner.

7 Reasons Why You Do NOT Need to Hire a Website Designer

I’ve had a dream for a while to quit my job and build my own business.

Recently, I did just that. One of my businesses pays the bills while I build another one up.

I gotta say, it’s as amazing as I dreamt about it all those years. I wake up relaxed, calmly walk down the street and grab coffee, work on stuff that I want to work on all day, then hit the gym for a few hours. No rushing, no stress, no dead-end projects from my manager. Every day is a great and enjoyable day.

I didn’t make this happen on the first try. I have a closet full of failed sites and businesses that never went anywhere.

Looking back, a few things finally made it all come together. But hiring a web designer for my site wasn’t one of the critical pieces. Horrible site designs didn’t hold me back, nor did it finally give me the freedom to quit my job and build my business.

I’m going to be blunt.

By the end of this post, I’m hoping to convince you that a hiring a website designer is a waste of your time and money. Not only are there cheaper ways to get a great-looking site (I’ll show you them below), there are also much more important things to focus on before getting a fancy website design.

Reason #1: A Website Design Won’t Help

After countless business and site failures, I’ve learned a few things about what to prioritize.

Here’s what I obsess about when I’m starting a new business:

  • Do I have an extremely compelling offer that a specific market really wants?
  • Can I define that market precisely?
  • Have I proven a repeatable process for acquiring customers from that market?
  • Is it an attractive business model with healthy cash flow?
  • Do the challenges in this industry align naturally with my personal instincts?
  • How can I de-risk the opportunity as much as possible?

Guess what’s not on that list?

Website design.

Don’t get me wrong, website design can have a tangible impact on a business. But that opportunity happens at a much later stage.

If you don’t have enough revenue coming in to cover your rent or mortgage, hiring a website designer won’t change that fact. You’ll still be struggling to pay the bills. The only difference is that your savings with have gotten smaller by several thousand dollars.

I’ve used a personal blog to attract consulting clients for years. It also helped me get a few jobs that accelerated my career quite a bit. Have I ever paid a designer to give it a great design? Nope.

First I bought a $30 theme from Themeforest. Then I paid for Thesis (a WordPress framework) for about $100 and used the sample theme for years. Recently I bought Genesis (another WordPress framework) for $60 and currently use its sample theme.

After almost a decade, I put less than $200 into my website design. That didn’t stop me from landing speaking gigs, getting amazing jobs, closing clients, doing paid workshops, and having enough income to support myself while I quit my job to start another business.

Before getting a custom site design, I make absolutely sure I have a great offer that customers are paying for, a specific target market, and I know how to get in front of that market consistently. Any money spent on website design before hitting these milestones is a waste.

These days, there are plenty of low-cost ways to get great design assets anyway.

Reason #2: Buy a Theme for $60 Instead

What would you rather do at this stage of your business?

  • Hire a website designer for $10,000
  • Spend a few hours looking for a new theme for $60

To get a good website design that’s worth the extra hassle and time, $10,000 is a pretty conservative estimate.

For me, this decision depends entirely on the stage of the business. For a larger site that’s making real money, the $10,000 option makes perfect sense. The site has enough unique requirements that a theme really isn’t an option any more.

But when I’m just starting a new site, I’ll gladly use the $60 theme until the site is large enough to warrant a bigger design budget.

There is a catch to all this.

In order to buy a theme, you need to build your site with a tool that allows themes to be installed.

For blogs and basic sites, WordPress is perfect and has an enormous theme ecosystem. There’s an endless list of professional themes for $30–60. Our favorite web hosts all have one-click installs for WordPress which makes this option super easy. After you’ve installed WordPress, head over to Themeforest and pick the theme you want.

Theme Forest Website Themes

For an ecommerce site, Shopify gives you a ton of ecommerce features you’ll need while also having world-class themes. Many of them are free, some are $180. It’s our top recommended ecommerce tool.

You’ll get a great-looking site for a fraction of the cost it would take to hire a website designer.

Reason #3: Or Use Squarespace for $12/month

What if this whole WordPress or Shopify thing is too complicated? Is there an even easier way to get a website built?

You betcha!

Squarespace is your best option, it’s considered the market leader for website builders. These are tools that make building a website as easy as possible. It’s all drop-and-click and basic text editing. No programming or complicated settings to figure out.

It’s kind of like WordPress in that Squarespace is the tool that runs your site. Then you’ll pick a theme that changes how your site looks.

Squarespace Theme

The main differences are that Squarespace is much easier to use and the theme is included in the monthly price. Pricing starts at $12/month which is very reasonable. Squarespace is your best option if you need a basic website that describes your business. A homepage, an About page, a Contact page, and that’s about it.

If you’re building an ecommerce business, use Shopify.

If you’re building a blog or want to focus on SEO, use WordPress.

Regardless of which option you choose, you don’t need a website designer for any of them.

Reason #4: Use These Logo Hacks Instead

Any designer that’s really good will charge a boatload for a logo. For a major corporation that depends on its brand identity, it’s well worth the cost.

But when I’ve started websites and businesses, the last thing I want to spend money on is a logo. I need to conserve every dollar I have to get the business off the ground.

Among online business owners, there’s a hack for getting a great logo at a reasonable price.

The hack is 99 Designs.

99 Designs Logo

It’s a platform for connecting designers to clients. And it works like a contest. You put in your design spec, a bunch of designers submit designs, you give feedback on the top 3–5 that you like, then you pick the winner based on the one you like the most.

I’ve done a bunch of these over the years and have always ended up with a great logo.

It’s super easy to run and you’ll have a great logo for $299. Other than your website theme, this is the only money that you should spend on design in the early days.

What if $299 is too steep? Is there a cheaper way to get a logo?

Yes, a lot of folks have been using Fiverr recently. You can nab a logo for as low as $10. Keep in mind that these logos will be very derivative and basic. The designer has a bunch of basic logo templates and styles they’ve used in the past. They’ll take your company name and plop it right into one of these standard logos. It’s the only way to crank out logos for $10. As long as you’re okay with that, Fiverr has my full support.

Reason #5: The Best Website Designers Aren’t Available

When I was running website growth and optimization teams, I’d occasionally come across a good designer available for a reasonable rate. Can you guess what I did next?

I hired them full-time and took them off the market.

I had more than enough work to keep them busy and a good designer is indispensable to a larger site. I’d quickly employ them full-time and give them more than enough work that they’d stop freelancing.

This happens all the time.

Senior designers know their worth and are super expensive. Younger designers with talent that exceeds their cost are only available for brief periods. Either a client brings them in-house or they figure out what they’re really worth and up their rates. Regardless, it’s super hard to find talent at reasonable rates for a new business.

The last thing I’d do is pay through the nose when I’m just getting a business off the ground.

Reason #6: Cheap Designers Won’t Do Much Design Anyway

I can’t believe I’m about to tell this story.

Years ago, when I was just getting my career going, I did a bunch of freelance online marketing. I ran AdWords accounts, did conversion optimization, wrote copy, and built a lot of websites. Building websites was the bulk of the work that I brought in. A bunch of small businesses needed them and asked if I could help. Of course I said yes because I was living out of a barn and needed the cash.

So I teamed up with a good friend of mine who was a front-end developer.

Here’s the problem: we had no design skills whatsoever.

I wrote solid copy, my friend could build whatever you wanted, but we couldn’t design our way out of a paper bag.

Clients would ask me if I could design a website, I’d say yes, then I’d go buy a WordPress theme that was 90% of what they needed. We’d tweak it just enough to make it look unique.

Here’s the part that will make you cringe.

I’d pay like $30 for the WordPress theme. Then I’d charge the client thousands of dollars for the website. I never felt too bad about since we spun the site up, wrote all the copy, and got everything in place. But still, that’s a lot of extra money you don’t really need to spend.

And this was back when WordPress themes weren’t that good. You could tell the difference between a theme and a real site in those days. Themes are so good these days that if I was a junior designer, I’d play this theme arbitrage game all day long.

Moral of the story: if you find a cheap designer, they’re charging you to find a theme and make a few basic edits.

Reason #7: Website Designs Age Fast

If you find a great designer who charges you thousands or tens of thousands of dollars for your website, you’ll be thrilled with the design.

For about a year.

Then it will start to age.

By years two and three, you’ll desperately want a new design.

Design trends online charge so fast, I can barely keep up myself. They change so quickly that I’ve accepted the fact that my sites need major overhauls every 2–3 years. Instead of a website design being an investment in the future, it behaves more like a fixed cost.

A great design only looks great if it’s better than everyone else’s site. A great design from 5 years ago does not look great anymore – it looks pretty shabby.

Let’s say you buy a WordPress theme for $60. In 3 years, you can easily buy another WordPress theme for $60 that looks more up-to-date. Now you’re spending $20/year to keep your website fresh.

What if you get a spiffy site custom built? If you spend $9,000 on the design (a very conservative estimate), that works out to a budget of $3,000 per year. For a lot of small businesses, that’s a hefty price tag.

I Only Hire a Website Designer When I Can Afford One Full Time

Here’s my rule: I only start doing custom website designs once I have the budget to hire a full-time designer. I might choose a website design agency or a freelancer instead if I don’t have enough ongoing work for a full-time role, but my business should be large enough that I could hire a designer full-time if I really needed. Otherwise I stick to templates and small design projects.

How to Manage Multiple WordPress Sites from One Dashboard

Are you looking for an easy way to manage multiple WordPress sites?

Monitoring multiple websites and keeping them up to date can be very time-consuming.

Luckily, there are several WordPress management tools that make it super easy to manage multiple WordPress websites from a single dashboard. This will help you save a lot of time while keeping all your WordPress installs and plugins up to date.

In this article, we will share some of the best tools to help you easily manage multiple WordPress sites from one dashboard like a pro.

Best tools to easily manage multiple WordPress sites

Why Use a WordPress Management Tool to Maintain Multiple Sites?

WordPress management tools make it easy to manage multiple WordPress websites from a single dashboard.

You will be able to:

  • Quickly update WordPress software on all your websites.
  • Monitor theme and plugin updates across your websites and install them easily.
  • Automatically back up your WordPress sites and store them in an offsite location.
  • Manage users, comments, and other WordPress options.

Managing your sites using a multi-site management tool helps you keep an eye on all your sites without logging into each site separately.

Whether you are an individual user, freelancer, blogger, or agency, using one of these tools can help you save time while making sure that all your sites are functioning properly.

Providing website maintenance services to businesses is also a popular online business idea. You can use these WordPress site management tools to help grow your freelance business.

That being said, let’s look at the best tools to easily manage multiple WordPress sites from a single dashboard.

1. InfiniteWP

InfiniteWP

InfiniteWP is a powerful WordPress site management tool optimized for agencies, developers, and freelancers.

You can manage unlimited websites. However, the free version is limited to managing WordPress plugins, themes, and core updates. It also allows you to create on-demand site backups, but you will need a paid addon to store them in a remote storage location.

The real power of InfiniteWP is unlocked with their premium plan, which includes all paid features like easy website deployments, staging websites, migrations, malware scans, uptime monitoring, client reports, managing comments, publishing posts and pages, 2-factor authentication, a broken link checker, and more.

They also let you white-label the plugin with your own branding so that your clients see your logo instead of InfiniteWP.

InfiniteWP is not a SaaS application. Instead, it allows you to install the WordPress management tool directly on your own site. You can install it via an installer plugin, via cPanel, or manually upload it to your server.

Once set up, you can add websites that you want to manage and then install the InfiniteWP client plugin on those websites. This client plugin connects your websites to InfiniteWP’s admin panel. This gives you infinite control over the sites you manage.

Pricing: Paid plans start from $147/year for 10 sites.

2. iThemes Sync

iThemes Sync

iThemes Sync is a powerful WordPress management tool from the people behind the popular BackupBuddy plugin.

It allows you to manage WordPress updates from a single dashboard. You can also install themes and plugins from WordPress.org or manually upload them.

It also gives you access to uptime monitoring, client reports, user management, security, and integration with BackupBuddy cloud storage, Google Search Console, and more.

It comes with an easy-to-use, intuitive interface which makes site management a breeze.

Pricing: Paid plans start from $69 per year for 5 sites.

3. Jetpack

Jetpack WP

Jetpack is a powerful plugin suite that comes with multiple WordPress site management features. You will need a WordPress.com account to start using Jetpack. (See the difference between WordPress.com vs. WordPress.org).

The free Jetpack plugin acts as a connector between your website and WordPress.com servers. You will be using the WordPress.com dashboard to manage all your WordPress sites.

Using the free version, you can manage WordPress plugins and core updates across all your websites. It also comes with downtime monitoring and basic brute force attack protection.

However, you will need to upgrade to their paid plans to get more features. There are plans with different features, including automated backups with Jetpack, malware scanning, security fixes, site activity logs, and more.

Pricing: Paid plans start from $3.95/month (billed annually).

4. CMS Commander

CMS Commander

CMS Commander is a paid WordPress website management tool. You will manage your websites from the CMS Commander dashboard. To connect all your websites, you will need to install a client plugin on each site.

It includes 1-click updates, backup management, 2-factor authentication, a basic malware scanner, custom branding, and more.

What makes CMS Commander a little different than other tools on the list is its content management features. It allows you to utilize third-party sources like YouTube, Flickr, Yelp, and more to add content.

It also connects with article spinning services to rewrite the content and post it to your multiple websites. For affiliate marketers, it offers integrations with popular affiliate networks like Amazon, ShareASale, Commission Junction, and more.

Pricing: Plans start from $8/month for 5 sites. Business plans for agencies and large site networks start from $30/month for 50 sites.

5. MainWP

MainWP

MainWP is a free WordPress website management tool supported by paid addons. It comes as an admin plugin that you install on a separate WordPress website.

After that, you need to install the MainWP child plugin on all the websites you want to manage.

MainWP comes with easy update management, uptime monitoring, a security scanner by Sucuri, a vulnerable plugin and theme scanner, user and content management tools, and more.

It also comes with extensions for several popular WordPress backup plugins, including UpdraftPlus, allowing you to manage your backups as you want. You can also find extensions for bulk upload articles, client reports, access control, and more.

Pricing: The core plugin is free, with paid extensions for different features. All extensions subscription starts at 17/month (billed annually).

6. ManageWP

ManageWP

ManageWP is a free WordPress website management tool that allows you to manage all your WordPress sites from a single dashboard.

The dashboard is hosted on ManageWP’s website, and you connect all your websites by installing the Worker plugin on each site. This plugin acts as a bridge between your websites and the ManageWP dashboard.

Using a single dashboard, you can install one-click updates for all your WordPress plugins, themes, and core WordPress files. It lets you moderate comments on all your sites from the ManageWP dashboard.

The core ManageWP functionality is free for unlimited sites. However, they also offer paid addons on a monthly subscription basis. It includes automated monthly backups and security scans for free, but you will need the paid addons for real-time backups and automated scheduled security scans.

Other notable features include performance analysis, uptime monitoring, SEO rankings, and historical logs of all activities performed by ManageWP on your sites.

If you are an agency, you will like their client reports, which you can send to your clients to keep them in the loop. ManageWP also offers a white label service, which entirely hides ManageWP branding and allows you to offer your clients a user experience with your own brand.

Pricing: Free for unlimited sites with paid addons available on a monthly subscription basis.

7. WP Remote

WP Remote

WP Remote offers a simple way to manage updates on all your WordPress sites. It is a basic WordPress management tool with a limited set of features than some other tools on this list.

It lets you easily install WordPress updates for core, plugins, and themes. You can also use it to create backups and download them to your computer or store them on AWS or SFTP.

Pricing: Agency plans start from $29/month for 5 sites, allowing you to add more users.

Which Is the Best Tool to Manage Multiple WordPress Sites?

Choosing the best WordPress website management tool entirely depends on your needs. An individual user with fewer WordPress sites may want an easier and cheaper solution.

On the other hand, if you are a freelancer or agency working for clients, you will want to use something more powerful and advanced.

Regarding features, ease of use, and flexibility, we found InfiniteWP to be the best WordPress management tool. It is a perfect fit for freelancers, agencies, and developers.

If you only want to manage a few sites and don’t need all the advanced features that InfiniteWP offers, then we recommend iThemes Sync or Jetpack for basic website management.

We hope this article helped you find the best tools to manage multiple WordPress sites easily. You may also want to see our ultimate WordPress security guide and our expert picks for the must have WordPress plugins to grow your website.

If you liked this article, then please subscribe to our YouTube Channel for WordPress video tutorials. You can also find us on Twitter and Facebook.

The post How to Manage Multiple WordPress Sites from One Dashboard first appeared on WPBeginner.

How to Choose the Best Products to Sell Online (Beginner’s Guide)

You want to make extra money on the side, so you looked into several online business ideas and decided that creating an online store is the way to go.

The next step is where beginners often struggle the most: choosing which products to sell on your online store.

In this ultimate guide, we will explain how to easily choose the best products to sell online by following our step by step process.

Choosing products to sell online

1. Basics of Choosing Products to Sell on Your Ecommerce Store

Before you start looking into products that you can sell, there are some basics that you need to keep in mind. Let’s look at some of the most important ones first.

1. Choosing Your Ecommerce Platform

First you need to choose a platform that you want to use to sell your products.

Choosing the right eCommerce platform is important because it would affect your choice of products and how you do business.

Choosing an eCommerce platform

WooCommerce is the most popular eCommerce platform in the world. It is easy to use, and you can use it to sell all kind of products while accepting payments using multiple payment gateways. See our guide on how to start an online store to get started with WooCommerce.

However, WooCommerce is not the only platform out there. There are some great WooCommerce alternatives that could be better for you depending on what you are trying to sell.

If you lack technical skills and want a quicker way to build an online store, then you may want to look into Shopify. It is a fully hosted solution that takes care of all the technical stuff. The catch here is that you will be paying a little more, and your costs will grow as you make more sales.

For a side by side comparison, see our article on Shopify vs WooCommerce with the pros and cons of both platforms.

2. Shipping

Shipping has a huge impact on the success of an eCommerce store. A study conducted by Business Insider discovered that higher shipping costs are the #1 cause of all abandoned shopping carts online.

Shipping costs more cart abandonment

You would obviously want to select products that you can ship at lower costs or for free. If you only plan to sell digital products (music, video, software, ebook, etc), then you don’t have to worry about shipping because the products will be downloaded by customers online.

3. Inventory

Do you want to manage inventory and keep products stocked? For that, you will need storage space and inventory management through your eCommerce software. Keeping products in stock will increase your cost of business.

On the other hand, drop-shipping solves this problem. You can select products that are shipped directly by the manufacturer or supplier.

4. Price

You’ll need to find products where you can offer a competitive price to your customers. If the product you are selling is more expensive than your competitors, then obviously that would discourage many first time buyers.

2. Types of Products That You Can Sell Easily

There are many different kinds of products that you can sell in your online store. Let’s narrow them down into two major sections.

1. Commoditized Products

These are products that everyone needs and are sold by many small and large stores without any difference in quality. For example, everyday products like soap, detergent, cereal, and more.

These products are made by some of the largest brands in the retail industry and are available widely with little to no difference in price.

This makes it harder for you to compete with giants like Amazon, Walmart, Target, etc. They can offer those products at lower costs, free shipping, and other perks.

This rules out a large number of products for you.

2. Niche Products

These are products that are unique or hand-made, available in limited stocks, and from specific suppliers. Think of home-made soaps, novelty t-shirts, ceramics, gift items, software, and countless other products.

Since these products are not widely available, they give you a competitive advantage.

There are even unique platforms like Etsy stores where you can find small vendors who make beautiful products and would love to partner up with other stores.

Etsy stores

You can also find suppliers abroad using websites like AliExpress or Alibaba.com. These suppliers can make those niche products to your specifications and deliver them to you.

Niche products are available in almost any product category imaginable. You’ll find tons of unique ideas as you do your product research.

This brings us to our next tip.

3. Doing Product Research On Your Own

Don’t use your best guess to select products you sell online. Back it up with data so that you know there is a demand for these products and customers are looking for them.

The first tool you are going to use for your research is Amazon.

It is the world’s largest eCommerce store with thousands of products. Luckily, it is also a treasure trove of free data that you can scrap and make your decisions.

Go through different product categories to find out top performing products in each category. Keep narrowing down your search to sub-categories to find targeted sub-niches of products.

Let’s suppose you wanted to sell kid’s toys, narrow down your search to very specific toy categories. This excludes popular products, and you get a very focused set of products as you filter through.

Narrow down categories to find product data

Switch to the ‘Bestsellers’ view to find the top performing products on Amazon under each category.

Sort products by Bestsellers

SEMRush is another great tool that you can use to gather data from competitors or any eCommerce store you want.

SEMRush

It shows you where those eCommerce stores are getting most of their traffic, which products they are promoting through paid advertisements, what are their most viewed products, and more.

It also shows your competitor’s product listing ads from Google. You can see their best performing product listing ads, keywords, and other data.

Here are some other tools you can use to gather product data from other websites.

  • Ahrefs – A powerful competitor research tool that will show what’s popular on the websites of your competitors.
  • AdPlexity – A popular eCommerce research tool that helps you collect eCommerce data from across the web, from competitors, or any other website.
  • AmazeOwl – It is an Amazon product reseach tool available as a free desktop application.

4. Use Customer Personas to Find Product Ideas

Using customer personas to find products

A customer persona is a fictional profile of an ideal customer that you want to target. You create this profile by answering simple questions about an ideal buyer.

This is your target audience and personifying them helps you understand them better when you are doing product research.

If you have an existing store, then you can use eCommerce tracking in Google Analytics to build an ideal buyer persona.

If you are just starting out, then use your best guess to build a customer persona. This exercise helps you understand your customer’s needs, questions they may have, and what kind of products they would like to buy.

To learn more about buyer persona, see this guide on creating a concrete buyer persona with ready-made templates and examples.

5. Find Products You are Passionate About

As career advisors say, ‘Choose a job you love, and you’ll never have to work a day in your life’.

Similarly, choosing products that you are passionate about helps you sell them more effectively.

These could be products that you personally love and passionately recommend to your family and friends. These could be products related to a hobby or activity that you are passionate about.

Nothing drives more passion when you build something useful and want others to use it.

Following your passion allows you to look deeply into products and find ideas that offer real value to your customers.

We hope this article helped you learn how to choose the best products to sell online. You may also want to see our article on tips to grow your business online without spending a lot of money.

If you liked this article, then please subscribe to our YouTube Channel for WordPress video tutorials. You can also find us on Twitter and Facebook.

The post How to Choose the Best Products to Sell Online (Beginner’s Guide) appeared first on WPBeginner.

Shopify vs WooCommerce – Which is the Better Platform? (Comparison)

Are you thinking of starting an online store? Not sure whether you should use Shopify or WooCommerce?

Shopify and WooCommerce are the two top eCommerce platforms in the world each with their own pros and cons.

As a business owner, choosing the right eCommerce platform that fits your business needs is crucial for your success.

In this guide, we will show you a detailed comparison of Shopify vs WooCommerce. The goal is to break down their advantages and disadvantages to help you choose the best option for your eCommerce store.

Shopify vs WooCommerce

Since this is a detailed comparison of Shopify vs WooCommerce, here’s a quick table of content:

Overview: Shopify vs WooCommerce

Before we start with our in-depth comparison of the two most popular eCommerce platforms on the web, it’s important that we cover the basics and highlight what makes these platform stand out.

What is Shopify?

Shopify is an all-in-one eCommerce platform that makes it easy for you to create an online store, accept payments, and manage your inventory all from a single platform without ever worrying about the technical aspects of managing a website such as web hosting, security, caching, etc.

What is WooCommerce?

WooCommerce is an open-source eCommerce plugin built for WordPress. It allows you to leverage the most powerful content management system (CMS) and use it to run an online store. Because of the open-source nature, you can customize every aspect of your store and easily build custom extensions.

The decision to choose between the two platforms depend entirely on your needs and skill level.

What to Look for in Your eCommerce Platform?

There are few things that you absolutely need to keep in mind when starting an online store. These key factors will help you decide which platform is better suited for your needs.

  • Budget – The initial cost of starting a fully functional ecommerce store.
  • Ease of use – It should be easy to use even for absolute beginners.
  • Payment Methods – It should have support for multiple payment methods (e.g. PayPal, Stripe, other merchant processors).
  • Integrations – Number of services and third party tools you can integrate to grow your business.
  • Scalability – The platform should be able to scale as your business grows.

These are the very basic requirements that all online store owners must consider. However, depending on your needs, you may also want to look at other options like shipping, inventory management, invoicing, taxes, dropshipping, etc.

Our goal with this article is to take an in-depth look at how Shopify and WooCommerce stand on these basic requirements, and which one of them is best suited for your needs.

Cost: Shopify vs WooCommerce

Cost is often the most important consideration for eCommerce website owners. You need to evaluate the cost of getting started while also keeping in mind the variable costs for add-on services and software.

The true cost of using Shopify

Shopify makes it super easy to start your online store. Their basic plan starts at $29 per month, and you can upgrade to the Shopify plan for $79 or the Advanced Shopify plan for $299 per month.

Shopify pricing

Each of these plans includes domain name, SSL certificate, and web hosting.

The basic plan comes with enough features to set up a new online store. You can add unlimited products, 2 user accounts, unlimited file storage, and more.

However, this pricing doesn’t include third-party tools and add-ons that you will need to take your Shopify store to the next level. As your business grows, these costs will start adding up, and you’ll soon be paying a lot more than the basic plan.

Payments are another factor that affects your costs. Shopify offers their own Shopify Payments solution which costs 2.9% + 30 cents per transaction.

If you want to use third-party payment gateways or your own merchant account, then you will be charged a flat fee of 2.0% for all transactions. You can reduce this fee to 0.5% by using the Shopify Advanced plan which costs $299 per month.

These payment processing fees are fairly steep when using external payment gateways. However, if you’re just starting out and want to use the Shopify payment solution, then the fees are fairly comparable to popular platforms like Stripe and Braintree.

The true cost of using WooCommerce

WooCommerce is an eCommerce plugin for WordPress.org (also known as self-hosted WordPress). It is open source and freely available as a WordPress plugin.

However, you’ll need a domain name, SSL Certificate, and a WordPress hosting account to start a WooCommerce store.

Typically, a domain name costs $14.99, SSL Certificate costs $69.99, and web hosting around $7.99 / month. This is not cheap, particularly when you are just starting out.

Thankfully, there are several hosting companies who are now offering specialized WooCommerce hosting plans which significantly reduces the cost.

Getting started with WooCommerce

Bluehost, an official WordPress and WooCommerce recommended hosting provider, has agreed to offer our users a free domain name, free SSL certificate, and a discount on web hosting.

This will help you start your online store for as low as $6.95 / month.

→ Click here to Claim this Exclusive Bluehost offer ←

As you can see, the cost of starting a basic WooCommerce store is significantly lower than Shopify. WooCommerce also doesn’t charge you a percentage fee of your transactions which is a very nice perk.

But the WooCommerce costs start adding up as you purchase paid extensions. Your hosting costs will also increase as your online store grows.

However, one clear advantage of using WooCommerce is that you can often find free alternatives to the paid extensions. You can also keep your costs in control by only purchasing the tools and plugins as you need them.

With the number of free themes and free add-ons available for WooCommerce, it’s definitely the winner when it comes to cost.

Winner: WooCommerce

Ease of Use: Shopify vs WooCommerce

Most users starting an online store are not web designers or developers. Even users who are familiar with basic concepts need a platform that is easy to use and gets out of their way.

Let’s see how Shopify and WooCommerce stack up in terms of user-friendliness.

Shopify – Ease of Use

Shopify is a fully hosted platform which means you don’t need to install, manage, or update any software. You also don’t need to worry about security, performance, backups, and compatibility issues.

As soon as you sign up, it helps you pick a design for your website. After that, they walk you through customization and then help you add products.

Shopify customization

Shopify comes with an intuitive drag and drop interface. Managing your products, sales, and inventory inside Shopify is a breeze.

One downside of this guided, polished, and highly optimized user experience is that it limits your control. You can only use the design and development tools provided by Shopify or add-ons available in their marketplace.

However, this is not as bad as it sounds. For most users, the large selection of extensions and themes available in Shopify, is more than enough to get started and grow your online store.

WooCommerce – Ease of Use

WooCommerce is not a hosted platform like Shopify. This means you will need to install WooCommerce, manage updates, keep backups, and make sure that your website is secure. There are plenty of free and paid plugins that can automate most of these tasks for you.

WooCommerce setup wizard

WooCommerce is super flexible when it comes to customizations. You have full control of the whole platform. You can add any functionality imaginable to your website with the help of more than 55,000+ WordPress plugins.

However, there is no built-in drag & drop design builder. You can use one of the WordPress page builders like Beaver Builder, but it adds to your cost.

The biggest downside of the flexibility is that it comes with a learning curve and requires a more hands-on management of your website. You also have to signup for a merchant account or similar service like Stripe / PayPal.

While the WooCommerce guided setup wizard is helpful, it does not come close to the onboarding and ease of use of Shopify.

Winner: Shopify

Payment Methods: Shopify vs WooCommerce

There are many payment gateways that you can use to accept payments online. Some payment methods may not be suitable for you, and others may not be available to your customers.

This is why it’s important that the platform you choose offers multiple payment options. Let’s take a look at how Shopify and WooCommerce compare when it comes to payment integrations.

Payment Options in Shopify

Shopify offers plenty of payment options that you can use to receive payments from customers. It has its own payments solution called Shopify Payments (powered by Stripe) as well as all popular third-party payment gateways.

Shopify Payments

The problem is that Shopify charges an extra 2% fees on each transaction made through third party payment gateways. This is on top of the transaction fees charged by the payment gateway. You can reduce the fee to 0.5% by paying $299 per month for Advanced Shopify plan.

Shopify Payments has flat credit card fees, but no other transaction fees. Credit card rates start from 2.9% + 30¢ for the basic plan and get lower for other plans.

Payment Options in WooCommerce

WooCommerce offers PayPal and Stripe payments by default. It also supports all other popular payment service providers through add-ons.

WooCommerce payment methods

For payment gateways, WooCommerce even has support for many regional and less popular payment services. Since there is no barrier to entry, any payments company can create add-ons for WooCommerce and provide support for it.

As a self-hosted platform, you are only charged transaction fees by your payment gateway or your bank. WooCommerce never charges you a % fee on your store transactions which is a major plus.

If choosing your own merchant account and using a third-party gateway is important for you, then you will save A LOT of money by using WooCommerce. But if you’re a small store and willing to use Shopify Payments which has the same credit card rates as Stripe / Paypal, then it makes no difference.

Winner: Tie

Integrations and Add-ons: Shopify vs WooCommerce

No matter how robust an e-commerce platform is, you’ll always need third-party tools and services to grow your store. For example, an email marketing software, lead generation tool, analytics tools, outreach services, etc.

Both Shopify and WooCommerce have a massive extensions directory, and they integrate with many third-party services.

Shopify Add-ons and Integrations

Shopify comes with a powerful API and an App Store where you can buy third-party add-ons for your Shopify store. They have hundreds of apps in the store covering every feature you’ll want to add to your store.

Shopify App Store

For lead generation, they have integrations with software like OptinMonster which helps you grow your email list and reduce cart abandonment. They have apps for SEO, product reviews, discounts, countdowns, and more.

Shopify’s app store contains both free and paid apps. Free apps are usually created by third-party services that have their own pricing, and the app only integrates your store to their APIs. Pricing for paid add-ons varies and most apps offer monthly subscriptions.

WooCommerce Add-ons and Integrations

WooCommerce extensions

WooCommerce is open source and built on top of WordPress. This gives you access to more than 55,000 free WordPress plugins and many more paid plugins.

You can use these add-ons to add payment gateways, lead generation, SEO, performance optimization, and almost any feature you can think of.

Due to the low barrier of entry, there are a lot more integrations and add-ons available for WooCommerce than Shopify. Almost all third-party tools and service providers have their own plugins to seamlessly integrate with your WooCommerce store.

You can also hire a developer to create an integration or plugin just for your own website. However it’s important to keep in mind that WooCommerce is a lot easier to customize. Having personally gone through the process of submitting a plugin for WordPress and submitting an app to the Shopify store, we can say that the process is extremely harder on Shopify vs WooCommerce.

Winner: WooCommerce

Shopify vs WooCommerce Dropshipping

Shopify vs WooCommerce dropshipping

Dropshipping is an online business where an eCommerce store doesn’t keep the products in stock. Instead, it fullfills order by purchasing products from vendors and then shipping them directly to the customers.

Due to its low overhead, dropshipping has become popular around the world. Many of our users asked us to compare WooCommerce vs Shopify for dropshipping and which one of them is better for a dropshipping business.

Dropshipping with Shopify

When building a dropshipping business, the front-end of your website will look just like any online store. Your users will be able to browse the products, add them to cart, and make payment, just like they would do on any other eCommerce store.

Depending on the vendors you choose, you will then have to place user’s order for shipping.

Shopify also has integration apps for several popular dropshipping marketplaces like AliExpress, Oberlo, Printify, and more. However, each of these product marketplaces has their own membership fees, shipping, and other charges that you need to keep in mind when building your dropshipping website with Shopify.

Dropshipping with WooCommerce

WooCommerce is a popular choice among dropshipping businesses. Mainly because WooCommerce allows you to install extensions that make order fulfillment a breeze.

You can easily find extensions that allow you to instantly import products, fulfill orders from your website, and more. You can even create your own eCommerce marketplace allowing other vendors to sell on your website.

Keep in mind, that your supplier and vendor may have minimum order requirements, membership fees, and other charges. You need to keep those in mind when adding products to your WooCommerce dropshipping store.

Winner: WooCommerce

Scalability and Growth: Shopify vs WooCommerce

You have probably heard the term “growth-pains” from various CEOs. As your business grows, you will need more resources to handle new challenges and goals.

Shopify and WooCommerce can both be scaled to handle large amount of traffic and orders, but they’re not created equal. Let’s take a look at how these two eCommerce platform compare when it comes to scalability.

Scalability on Shopify

Shopify enterprise

Shopify handles the technical parts of your store which means you don’t ever have to worry about performance, security, and scalability. Once your business starts growing, you can simply upgrade your Shopify plans.

Their infrastructure can easily handle your growing business without you having to worry about downtimes, backups, updates, or security. They also offer enterprise services as part of the Shopify Plus plan.

This takes out the painful part of the growth, but it also adds to your cost of business. Your expenses will grow, and you’ll have to plan accordingly.

The good part is that your costs will be offset by you not having to hire / manage a technical team in-house.

Scalability on WooCommerce

WooCommerce Scalability

WooCommerce is a self-hosted platform which makes you responsible for maintaining updates, backups, and security of your website.

Your starter WooCommerce hosting plan would run out of resources as your store starts getting more traffic.

The good part is that you have plenty of options to manage growth as you are in full control of your website. Starting with better management of resources with caching to upgrading your hosting plan to more powerful servers.

Your WooCommerce hosting costs will increase, but you will have better control on resources, and you can make sure that you are not paying for resources that you don’t need. You can use a managed WordPress hosting provider like WP Engine or LiquidWeb to help scale your WooCommerce store.

Despite the control that WooCommerce offers, some business owners simply prefer a hassle-free solution.

Winner: Shopify

Support Options for WooCommerce vs Shopify

Both WooCommerce and Shopify are quite easy to use. However, sometimes you may need help to learn how to do something new on your store.

Let’s see how WooCommerce and Shopify handle support and what are your options to get help when needed.

Support Options on Shopify

Shopify is a fully hosted platform, which means they control the software and they are the ones who know their platform the best.

Shopify provides 24/7 support via live chat, phone, email, and Twitter. For users who want to fix things on their own, Shopify offers extensive documentation, how-to guides, knowledge base, video tutorials, and forums.

Shopify support options

It also maintains a directory of Shopify Experts that you can hire if you need extra help or if you want to integrate a third-party solution.

Shopify doesn’t provide support for any third-party apps or themes that you are using.

Support Options for WooCommerce

WooCommerce is the world’s most popular eCommerce platform, which means there are tons of support options that you can utilize when needed.

The official website has extensive documentation, tutorials, and guides that allow you to help yourself. They also have support forums where you can get help from other WooCommerce users and experts.

WooCommerce is a self-hosted platform, which means your hosting provider is responsible for providing support for issues with your server.

For your WooCommerce theme and extensions, those developers are responsible for answering support questions regarding their products.

Due to its immense popularity, it is quite easier and often cheaper to find developers to help you fix issues with your WooCommerce store. You can find developers on freelancing websites to fix WooCommerce issues.

Winner: Shopify

WooCommerce vs Shopify: Which is the Best eCommerce Platform?

Shopify and WooCommerce are both powerful platforms to start your eCommerce store. It truly comes down to your personal skills and preferences.

Shopify is a lot easier to use. It doesn’t require you to install anything, and you can get started quickly. Setting up payments is easier, and they have easy to understand pricing plans.

The disadvantage of Shopify is that you don’t have full control over everything. Your costs can go high with transaction fees, add-ons, and integrations. Your upgrade options are limited to select plans, and you cannot manage costs on a pay-as-you-grow basis.

WooCommerce is open source and gives you full control of your website. It costs a lot lower to start an online store with WooCommerce specially with these WooCommerce hosting companies.

The disadvantage is that you’ll have to maintain the software. It comes with a bit of learning curve. However, millions of beginners are already using it, and they get over the learning phase quite quickly.

If you are looking for a cost-effective solution, and you want to have full control of your online store, then WooCommerce is the best platform for you.

If you want something that’s completely hassle-free that has infinite scalability, then Shopify is the better platform for you.

We hope this article helped you compare pros and cons of Shopify vs WooCommerce. You may also want to see our guide on how to choose the best website builder.

If you liked this article, then please subscribe to our YouTube Channel for WordPress video tutorials. You can also find us on Twitter and Facebook.

The post Shopify vs WooCommerce – Which is the Better Platform? (Comparison) appeared first on WPBeginner.

How to Register a Domain Name (+ simple tip to get it for FREE)

Do you want to start a blog or a new online business in 2019? If you do, then you’ll need to register a domain name.

The first step towards building a website is to find a good domain name and register it. In this article, we will show you how to register a domain name, step by step. We will also share a tip on how you can register a domain name for free.

How to register your own domain name and how to get one for free

Since this is a comprehensive guide on how to register a domain name, we have created a table of content, so you can easily skip to the section that you’re most interested in:

Before we get started, let’s cover the basics so we’re on the same page.

What is a Domain Name?

A domain name is the address of your website that people type in the browser to visit your website. For example, wpbeginner.com.

In simple term, if your website was a house, then your domain name will be its address.

The whole internet is a giant network of computers. Each computer is assigned a number which is called an IP address, and it looks like this:

66.249.66.1

Now, this is not an easy to remember address. Imagine if you had to use this kind of addresses to visit your favorite websites.

To fix this problem, domain names were invented.

Domain names can have alphabets and numbers, which helps business owners create brandable names for their website’s address.

How domain names work

To learn more about domain names, see our beginner’s guide on domain names and how do they work.

When Do You Need to Register a Domain Name?

Each day, over 46,000+ new .com domain names were registered during the third quarter of 2018.

Currently, there are over 140 million .com domain names already registered.

This means that all the good domain names are being registered as we speak. Chances are that someone may register a domain name that you’re thinking of, so it’s smart to register a domain name as soon as you think of an idea.

This is why all smart entrepreneurs proactively register domain names even before launching a business.

Domain names are cheap, and you can register them for a year. If you decide to not pursue the online business idea, then you can let them expire.

The bottom line is, if you are serious about building a business, then you should register a domain name right away.

It will help you protect your brand’s identity, business name, and even future business ideas.

How much does a domain name cost?

Normally, a .com domain name costs $14.99 / year. The cost of a domain varies based on each different extension. Some are even more expensive than this.

We don’t recommend using anything but .com domains because everybody remembers a .com domain, and your smartphone keyboards have a pre-built key for .com.

Do I Need a Website to Register a Domain Name?

No, you do not need a website to register a domain name. You can register a domain name and make a website later. You can also register a domain name and setup a temporary website or coming soon page with SeedProd.

A lot of entrepreneurs treat domain names like digital real-estate, so they register a good domain name and hold it for the right buyer to purchase it from them for profit.

How to Choose The Best Domain Name?

Domain names play a very important role in your website’s identity and success. This is why it’s important for you to carefully think about the domain name you choose.

However, it’s also important to not overthink it otherwise you will never get past the research phase.

Following are some general tips to keep in mind when searching for a domain name.

  • Make sure that your domain name is easy to pronounce, spell, and as short as possible.
  • Stick with the .com extension because most users find them easier to remember than any other domain extensions.
  • Use your keywords and brand name in the domain name search. For example, stargardeninghouston.com is more search engine friendly, than stargardeningcompany.com
  • Do not use numbers or hyphens in your domain name. It makes them harder to pronounce and difficult to remember.

Need more advice? See our expert tips on finding the best domain name for your website.

You can also use a domain name generator like Nameboy to speed up your search.

How to Register a Domain Name (Step by Step)

You can register a domain name from any of the top domain registrars that are authorized by ICANN to register domain names.

Since there are so many different registrars, we will cover the three most popular ways to register a domain name, and you can choose the one that best fits your need.

  1. How to register a domain name for free
  2. How to register a domain with Domain.com
  3. How to register a domain name with GoDaddy

1. How to Register a Domain Name for Free

If you want to register a domain name to start a blog or make a website, then this is the best option for you.

Normally, a domain name costs $14.99 / year and website hosting plans start from $7.99 / month. This is a lot of money if you are just starting out.

Luckily, Bluehost has agreed to offer our users a free domain name, SSL Certificate, and 60% discount on web hosting.

Basically, you can pay $2.75 per month for web hosting, and you will get a domain name for free, so you can start your website without a lot of money.

→ Click Here to Get Free Domain with Bluehost ←

Bluehost is one of the biggest web hosting companies in the world. They are in business since 2003 and host more than 2 million websites. Not to mention, they’re officially recommended by WordPress.

To get started, you need to visit the Bluehost website and click on the Get Started button.

Get started with Bluehost

This will bring you to the pricing page. Their Basic and Plus plans are popular among our users.

Bluehost pricing

Click on the ‘Select’ button below a plan to continue.

On the next page, you will be asked to choose a domain name. Simply type the domain name in the “New Domain” box because that will get you a free domain name.

Select domain name you want to register

If the domain name you entered is available, then you will be taken to the signup page. From here you need to enter your account information like name, address, email, etc.

Below the account information, you will notice some hosting extras. We don’t recommend buying them, so you can safely uncheck them for now. If you feel that you need them, then you can always add them later.

Uncheck hosting extras

After that, you can enter your payment information to finish the purchase.

Bluehost will now register your domain name, set up your hosting account and send you an email with a link to your hosting control panel.

Since you need both a domain name and web hosting to start any type of website, it makes a lot of sense to purchase them together, so you can get the domain name for free.

If for some reason you don’t want to use Bluehost to get a free domain name, then you can use GreenGeeks or InMotion Hosting. Both of these companies are also offering our readers a free domain name with web hosting.

Related: See the difference between domain and web hosting to understand why you need both to build a website.

2. How to Register a Domain Name with Domain.com

If you only want to register a domain name at the moment without creating a website, then Domain.com is your best option.

It offers an easy way to manage your domain name without creating a website.

Once you are ready, you can just point the domain name to your preferred WordPress hosting company.

First, you need to visit the Domain.com website and search for your desired domain name.

Search for domain name on Domain.com

If your desired domain name is available, then it will be automatically added to your cart.

You can adjust the registration period to 1 year. You can either choose to keep or remove the privacy protection. Removing it will reduce your domain registration cost.

Domain.com is offering WPBeginner readers a 25% discount, and our domain.com coupon should be automatically applied.

Add domain name to cart

Click on the continue button to check out.

On the checkout page, you can review your order and click on the ‘Proceed to billing’ button.

Proceed to billing section

Next, you need will be asked to enter your account and payment information to finish the domain purchase.

Complete your domain registration

Domain.com will now register your domain name, and it will send you an email with the link to your domain control panel.

3. How to Register a Domain Name with GoDaddy

Godaddy is the largest domain name registrar in the world. They currently manage over 77 million domain names for 18 million users from around the world.

They offer an easy domain control panel, which allows you to point your domain to any hosting provider when you are ready to build a website.

Here is how to register a domain name with GoDaddy (step by step).

First, you need to visit the GoDaddy website and enter the domain name you want to register in the search box.

Search domain name on GoDaddy

If your domain name is available, then you will see a success message with your domain name listed on top. You can now go ahead and add it to the cart.

Add domain name to cart

Next, click on the continue to cart button to checkout.

GoDaddy will now show you some additional services that you can purchase with your domain name. You can skip those by selecting ‘No thanks’ and click on the continue button.

Continue checkout

On the next page, you will see your domain name and its registration period. You can change the registration period to up to 10 years if you want.

However, we don’t recommend that. You can always renew your domain name before it expires, so if you want to save money, then you can select just 1 year registration period.

Finish your domain registration

You will need to create a Godaddy account to proceed.

After you have created an account, you will be able to enter your billing address and make a payment for your domain name.

GoDaddy will now register your domain name, and they will send you an email with a link to your domain control panel.

Pro Tip: You should make sure that auto-renew on your domain is turned on, so Godaddy can automatically bill your account and renew your domain name. This way you won’t lose your domain if you forget to renew it.

Domain Name Registration FAQs

Since we have helped over 200,000 people start a website, we have gotten just about every question you can possibly think of. Below are the answers to some of the top domain name questions:

Which is the best domain name registrar?

We believe that Domain.com is the best registrar right now because they have the features you need, and they’re offering a 25% off discount.

However it’s a smarter money decision to get a free domain with web hosting like Bluehost because it saves you time and money.

You can always transfer your domain name to another popular domain name registrar if you’re not happy with your existing provider.

Which domain extension I should buy?

You should always stick to .com domain names. They are the easiest to remember, and most mobile devices have a dedicated .com key in their keyboards. For more details, see our article on the difference between domain name extensions.

Should I register new domain name extensions?

Apart from the most common .com, .net, and .org, there are dozens more domain name extensions available. However, these new domain extensions are hard to remember and difficult to brand. To learn more, see our article on choosing a new domain extension for your website.

How can I buy a domain name permanently?

You cannot buy a domain name permanently. Domain name registration is done on a yearly basis. However, you can pre-pay for up to 10 years which guarantees that you will have a domain name for 10 years.

What happens to my domain name once its registration expires?

Unless you renew your domain name, it will automatically expire after the registration period you have paid for. Some domain name companies offer a grace period to renew your registration, but it is not guaranteed, and you can lose control of your domain name if you let it expire.

How do I renew my domain name?

You can renew your domain name from your domain control panel. We strongly recommend that you turn on auto-renew feature to automatically renew your domain name. You can always turn it off if you decide not to keep a domain name.

Even though your domain registrar would remind you to renew your domain registration before it expires, you may miss those emails and lose control of your domain name.

How can I reserve a domain name without buying it?

There is no way to reserve a domain name without purchasing it. You have to buy it if you want to reserve it. Considering the low cost of a domain name, it’s a small investment for a business.

Is there a way to buy an existing domain name?

Yes, you can use brokerage like Sedo.com to potentially acquire an existing domain name. However, it’s not guaranteed that you will get the domain name that you want because the seller may not want to sell it or ask for an outrageous price.

You can also purchase premium domains from a premium domain broker like BuyDomains.

We hope this article helped you learn how to register a domain name for your website. You may also want to see our tips on how to make money online with your new domain name and/or how to create a professional email address with your domain.

If you liked this article, then please subscribe to our YouTube Channel for WordPress video tutorials. You can also find us on Twitter and Facebook.

The post How to Register a Domain Name (+ simple tip to get it for FREE) appeared first on WPBeginner.