The release of Jakarta EE 9, at the end of 2020, was in many ways a historic event. The Java Enterprise framework is already 20 years old, having its first release in 1999. It has changed names a few times but the main concepts of the first release can still be found in this new release. During all those years, it has adapted itself to keep it up to date but has always adhered to its main principle of stability and backward compatibility.
Regarding backward compatibility, this release was also historic as the namespaces changed (like package names that changed from 'javax' to 'jakarta'). The change is straightforward, no other changes are introduced between Jakarta EE 8 and EE 9. This to make the migration as easy as possible.
Quarkus is, in its own words, a cloud-native, (Linux) container-first framework for writing Java applications. It has become popular lately because of the amazingly fast boot time, incredibly low RSS memory. In this series of articles about Quarkus, we'll discuss how to deploy a Quarkus application even faster to the cloud with Platform.sh.
The first step is to create the application itself, and Quarkus has proper documentation. You have either a Maven Archetype or the start code link where you can define the dependencies that you need to write your application.
A few weeks ago I wrote a tutorial on the new Vue server-side rendering capabilities for Laravel. That tutorial mostly focused on the set up of SSR in a Laravel environment and so I only had time to demonstrate a simple "Hello World" app with no significant features.
Now I want to build on that previous tutorial and demonstrate how to server render a Vue app that includes multiple pages with Vue Router since most of your Laravel projects will have more than one page.
One of the more powerful concepts I've stumbled across recently is the idea of abstract syntax trees, or ASTs. If you've ever studied alchemy, you may recall that the whole motivation for alchemists was to discover some way to transform not-gold into gold through scientific or arcane methods.
ASTs are kind of like that. Using ASTs, we can transform Markdown into HTML, JSX into JavaScript, and so much more.
Why are ASTs useful?
Early in my career, I tried to change files using a find-and-replace method. This ended up being fairly complicated, so I tried using regular expressions. I ended up abandoning the idea because it was so brittle; the app broke all the time because someone would enter text in a way I hadn’t anticipated and it would break my regular expressions causing the whole app to fall down.
The reason this was so hard is that HTML is flexible. That makes it extremely hard to parse using regular expressions. String-based replacement like this is prone to breaking because it might miss a match, match too much, or do something weird that results in invalid markup that leaves the page looking janky.
ASTs, on the other hand, turn HTML into something far more structured, which makes it much simpler to dive into a text node and do replacements on only that text, or to mess with elements without needing to deal with the text at all.
This makes AST transformation safer and less error-prone than a purely string-based solution.
What are ASTs used for?
To start, let's take a look at a minimal document using a couple lines of Markdown. This will be saved as a file called home.md, which we'll save in the content folder of our website.
# Hello World!
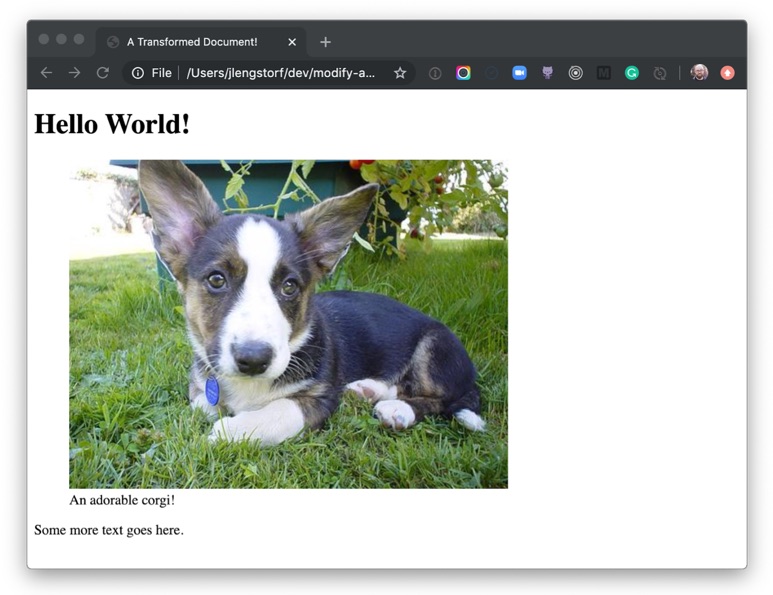
 An adorable corgi!
Some more text goes here.
Assuming we know Markdown, we can infer that when this Markdown is parsed, it'll end up being an <h1> that says, "Hello World!" and a <p> that says, "This is some Markdown."
But how does it get transformed from Markdown to HTML?
First, we need to install the dependencies required to parse the Markdown into an AST and convert it to HTML. To do that, we need to make sure we've initialized the folder as a package. Run the following command in your terminal:
# make sure you’re in your root folder (where `content` is)
# initialize this folder as an npm package
npm init

# install the dependencies
npm install unified remark-parse remark-html
If we assume our Markdown is stored in home.md, we can get the AST with the following code:
This code takes advantage of Node’s built-in fs module, which allows us to access and manipulate the filesystem. For more information on how this works, check out the official docs.
If we save this as src/index.js and use Node to execute this script from the command line, we’ll see the following in our terminal:
$ node src/index.js
<h1>Hello World!</h1>
<p><img src="<https://images.dog.ceo/breeds/corgi-cardigan/n02113186_1030.jpg>" alt="cardigan corgi"> An adorable corgi!</p>
<p>Some more text goes here.</p>
We tell unified to use remark-parse to turn the Markdown file into an AST, then to use remark-html to turn the Markdown AST into a HTML — or, more specifically, it turns it into something called a VFile. Using the toString() method turns that AST into an actual string of HTML we can display in the browser!
Thanks to the hard work of the open-source community, remark does all the hard work of turning Markdown into HTML for us. (See the diff)
Next, let's look at how this actually works.
What does an AST look like?
To see the actual AST, let’s write a tiny plugin to log it:
Note that the position values have been truncated to save space. They contain information about where the node is in the document. For the purposes of this tutorial, we won’t be using this information. (See the diff)
This is a little overwhelming to look at, but if we zoom in we can see that each part of the Markdown becomes a type of node with a text node inside it.
The type tells us what kind of node we're dealing with.
Each node type has additional properties that describe the node. The depth property on the heading tells us what level heading it is — a depth of 1 means it’s an <h1> tag, 2 means <h2>, and so on.
The children array tells us what's inside this node. In both the heading and the paragraph, there’s only text, but we could also see inline elements here, like <strong>.
This is the power of ASTs: We've now described the Markdown document as an object that a computer can understand. If we want to print this back to Markdown, a Markdown compiler would know that a "heading" node with a depth of 1 starts with #, and a child text node with the value "Hello" means the final line should be # Hello.
How AST transformations work
Transforming an AST is usually done using the visitor pattern. It‘s not important to know the ins and outs of how this works to be productive, but if you’re curious, JavaScript Design Patterns for Humans by Soham Kamani has a great example to help explain how it works. The important thing to know is that the majority of resources on AST work will talk about "visiting nodes," which roughly translates to "find part of the AST so we can do stuff with it." The way this works practice is that we write a function that will be applied to AST nodes matching our criteria.
A few important notes about how it works:
ASTs can be huge, so for performance reasons we will mutate nodes directly. This runs counter to how I would usually approach things — as a general rule I don't like to mutate global state — but it makes sense in this context.
Visitors work recursively. That means that if we process a node and create a new node of the same type, the visitor will run on the newly created node as well unless we explicitly tell the visitor not to.
We're not going to go too deep in this tutorial, but these two ideas will help us understand what's going on as we start to mess with the code.
How do I modify the HTML output of the AST?
What if we want to change the output of our Markdown, though? Let's say our goal is to wrap image tags with a figure element and supply a caption, like this:
To accomplish this, we'll need transform the HTML AST — not the Markdown AST — because Markdown doesn't have a way of creating figure or figcaption elements. Fortunately, because unified is interoperable with multiple parsers, we can do that without writing a bunch of custom code.
Convert a Markdown AST to an HTML AST
To convert the Markdown AST to an HTML AST, add remark-rehype and switch to rehype-stringify for turning the AST back to HTML.
npm install remark-rehype rehype-stringify
Make the following changes in src/index.js to switch over to rehype:
This is the AST for the HTML representation of the image, so we can start changing it over to use the figure element. (See the diff)
Write a plugin for unified
To wrap our img element with a figure element, we need to write a plugin. In unified, plugins are added with the use() method, which accepts the plugin as a first argument and any options as a second argument:
.use(plugin, options)
The plugin code is a function (called an “attacher” in unified jargon) that receives option. These options are used to create a new function (called a “transformer”) that receives the AST and does work to, er, transform it. For more details on plugins, check out the plugin overview in the unified docs.
The function it returns will receive the entire AST as its argument, and it doesn't return anything. (Remember, ASTs are mutated globally.) Create a new file called img-to-figure.js in the same folder as index.js, then put the following inside:
module.exports = options => tree => {
  console.log(tree);
};
Next, we need to add a visitor. This will let us actually get at the code. Unified takes advantage of a number of utility packages, all prefixed with unist-util-*, that allow us to do common things with our AST without writing custom code.
We can use unist-util-visit to modify nodes. This gives us a visit helper that takes three arguments:
The entire AST we're working with
A predicate function to identify which nodes we want to visit
A function to make any changes to the AST we want to make
To install, run the following in your command line:
npm install unist-util-visit
Let's implement a visitor in our plugin by adding the following code:
const visit = require('unist-util-visit');

  module.exports = options => tree => {
    visit(
      tree,
      // only visit p tags that contain an img element
      node =>
        node.tagName === 'p' && node.children.some(n => n.tagName === 'img'),
      node => {
        console.log(node);
      }
    );
};
When we run this, we can see there's only one paragraph node logged:
Now that we have the image attributes, we can start to change the AST. Remember, because ASTs can be really large, we mutate them in place to avoid creating lots of copies and potentially slowing our script down.
We start by changing the node’s tagName to be a figure instead of a paragraph. The rest of the details can stay the same for now.
Make the following changes in src/img-to-figure.js:
const visit = require('unist-util-visit');

module.exports = options => tree => {
  visit(
    tree,
    // only visit p tags that contain an img element
    node =>
    node.tagName === 'p' && node.children.some(n => n.tagName === 'img'),
    node => {
      node.tagName = 'figure';
    }
  );
};
If we run our script again and look at the output, we can see that we’re getting closer!
<h1>Hello World!</h1>
<figure><img src="<https://images.dog.ceo/breeds/corgi-cardigan/n02113186_1030.jpg>" alt="cardigan corgi">An adorable corgi!</figure>
<p>Some more text goes here.</p>
To avoid needing to write custom syntax, we're going to use any text passed inline with an image as the image caption.
We can make an assumption that usually images don't have inline text in Markdown, but it’s worth noting that this could 100% cause unintended captions to appear for people writing Markdown. We're going to take that risk in this tutorial. If you're planning to put this into production, make sure to weigh the trade-offs and choose what's best for your situation.
To use the text, we're going to look for a text node inside our parent node. If we find one, we want to grab its value as our caption. If no caption is found, we don’t want to transform this node at all, so we can return early.
Make the following changes to src/img-to-figure.js to grab the caption:
const visit = require('unist-util-visit');

module.exports = options => tree => {
  visit(
    tree,
    // only visit p tags that contain an img element
    node =>
    node.tagName === 'p' && node.children.some(n => n.tagName === 'img'),
    node => {
      // find the text node
      const textNode = node.children.find(n => n.type === 'text');

      // if there’s no caption, we don’t need to transform the node
      if (!textNode) return;

      const caption = textNode.value.trim();

      console.log({ caption });
      node.tagName = 'figure';
    }
  );
};
Now that we have our caption text, we can add a figcaption to display it. We could do this by creating a new node and deleting the old text node, but since we’re mutating in place it’s a little less complicated to just change the text node into an element.
Elements don’t have text, though, so we need to add a new text node as a child of the figcaption element to display the caption text.
Make the following changes to src/img-to-figure.js to add the caption to the markup:
const visit = require('unist-util-visit');

module.exports = options => tree => {
  visit(
    tree,
    // only visit p tags that contain an img element
    node =>
      node.tagName === 'p' && node.children.some(n => n.tagName === 'img'),
    node => {
      // find the text node
      const textNode = node.children.find(n => n.type === 'text');

      // if there’s no caption, we don’t need to transform the node
      if (!textNode) return;

      const caption = textNode.value.trim();
      // change the text node to a figcaption element containing a text node
      textNode.type = 'element';
      textNode.tagName = 'figcaption';
      textNode.children = [
        {
          type: 'text',
          value: caption
        }
      ];

      node.tagName = 'figure';
    }
  );
};
If we run the script again with node src/index.js, we see the transformed image wrapped in a figure element and described with a figcaption!
<h1>Hello World!</h1>
<figure><img src="<https://images.dog.ceo/breeds/corgi-cardigan/n02113186_1030.jpg>" alt="cardigan corgi"><figcaption>An adorable corgi!</figcaption></figure>

<p>Some more text goes here.</p>
Now that we've made a bunch of transformations, we want to save those adjustments to an actual file so we can share them.
Since the Markdown doesn't include a full HTML document, we’re going to add one more rehype plugin called rehype-document to add the full document structure and a title tag.
Run the script again and we'll be able to see a new folder in root called public, and inside that we’ll see home.html. Inside, our transformed document is saved!
If we open public/home.html in a browser, we can see our transformed Markdown rendered as a figure with a caption.
Holy buckets! Look at that adorable corgi! And we know it’s adorable because the caption tells us so.
What to do next
Transforming files using ASTs is extremely powerful — with it, we’re able to create pretty much anything we can imagine in a safe way. No regexes or string parsing required!
From here, you can dig deeper into the ecosystem of plugins for remark and rehype to see more of what’s possible and get more ideas for what you can do with AST transformation, from building your own Markdown-powered static site generator; to automating performance improvements by modifying code in-place; to whatever you can imagine!
Authentication and good user experience are crucial for all applications. Developers and companies need a quick way to verify and validate the requesters, without sacrificing the user experience. Seem like a lot of work, right? Luckily, we have tools like Spring Boot with Spring Security that allows developers to incorporate authentication within apps effectively.
In this post, we’ll use Spring Boot with OAuth 2.0 to build a “Hello World” app and deploy it through AWS Elastic Beanstalk. We’ll also use Okta as the OAuth provider.
I experienced a lot of pain points when I first started using Angular; I needed to open up so many files just to create a simple Hello World app. Luckily, Angular CLI took away a lot of my initial troubles.
Angular CLI is a command-line tool that creates a simple Angular project. Angular CLI asks you questions about your app and, based on your answers, it determines the routing and the stylesheet format. How does Angular CLI do this? It uses Schematics.
Logging is a natural part of coding. Believe it or not, we’ve all programmed logging into our code. After all, who hasn’t written a “Hello World” program?
It’s not just your code that writes out log messages, every other piece of software does, from the operating system all the way up the stack. Tools to ship, aggregate and index logs have been around for a long time; it’s a mature market. That does not mean that there is no room for a new startup to disrupt the market. Humio received $9M in Series A funding from Accel at the beginning of 2019 and is aiming to do just that. The Humio log management platform is lightning fast, flexible, and built to scale — all at an affordable price. Integrating data sources between Humio and Instana is useful because DevOps, IT Ops and Security professionals need many types of data and information to optimise their applications and speed up software development. Correlating APM performance data with log data helps teams build better software faster.
In this article, we will install Python and create the first “Hello World” application using Python.
What Is Python?
Python is a high-level, general-purpose, interpreted, Cross-Platform, Case Sensitive, and Object-Oriented programming Language. Python was created by Guido van Rossum and first released in 1991. It uses an Object-Oriented approach which makes the programmer write clear, logical code for projects. Python has become one of the most popular programming languages used in the world. It is easy to learn because its syntax is similar to the English language. It uses a new line to complete commands and indentation to indicate a block of code. Python is derived from C, C++, Algol-68, Unix Shell, and other scripting languages, etc. The latest version of the Python is Python 3.
We will create a simple Hello world program in this article. We will use Spring Boot to create our first Hello World program.
Developing your first Spring Boot application is quite easy. As we know, Spring Boot makes it easy to create stand-alone, production-grade Spring-based applications that you can "just run." It's basically used to minimize the configuration or the boiler plate code.
A React component goes through different phases as it lives in an application, though it might not be evident that anything is happening behind the scenes.
Those phases are:
mounting
updating
unmounting
error handling
There are methods in each of these phases that make it possible to perform specific actions on the component during that phase. For example, when fetching data from a network, you’d want to call the function that handles the API call in the componentDidMount() method, which is available during the mounting phase.
Knowing the different lifecycle methods is important in the development of React applications, because it allows us to trigger actions exactly when they’re needed without getting tangled up with others. We’re going to look at each lifecycle in this post, including the methods that are available to them and the types of scenarios we’d use them.
The Mounting Phase
Think of mounting as the initial phase of a component’s lifecycle. Before mounting occurs, a component has yet to exist — it’s merely a twinkle in the eyes of the DOM until mounting takes place and hooks the component up as part of the document.
There are plenty of methods we can leverage once a component is mounted: constructor() , render(), componentDidMount() and static getDerivedStateFromProps(). Each one is handy in it’s own right, so let’s look at them in that order.
constructor()
The constructor() method is expected when state is set directly on a component in order to bind methods together. Here is how it looks:
// Once the input component is mounting...
constructor(props) {
  // ...set some props on it...
  super(props);
  // ...which, in this case is a blank username...
  this.state = {
    username: ''
  };
  // ...and then bind with a method that handles a change to the input
  this.handleInputChange = this.handleInputChange.bind(this);
}
It is important to know that the constructor is the first method that gets called as the component is created. The component hasn’t rendered yet (that’s coming) but the DOM is aware of it and we can hook into it before it renders. As a result, this isn’t the place where we’d call setState() or introduce any side effects because, well, the component is still in the phase of being constructed!
I wrote up a tutorial on refs a little while back, and once thing I noted is that it’s possible to set up ref in the constructor when making use of React.createRef(). That’s legit because refs is used to change values without props or having to re-render the component with updates values:
The render() method is where the markup for the component comes into view on the front end. Users can see it and access it at this point. If you’ve ever created a React component, then you’re already familiar with it — even if you didn’t realize it — because it’s required to spit out the markup.
class App extends React.Component {
  // When mounting is in progress, please render the following!
  render() {
    return (
      <div>
        <p>Hello World!</p>
      </div>
    )
  }
}
We can also use it to render components outside of the DOM hierarchy (a la React Portal):
// We're creating a portal that allows the component to travel around the DOM
class Portal extends React.Component {
  // First, we're creating a div element
  constructor() {
    super();
    this.el = document.createElement("div");
  }

  // Once it mounts, let's append the component's children
  componentDidMount = () => {
    portalRoot.appendChild(this.el);
  };

  // If the component is removed from the DOM, then we'll remove the children, too
  componentWillUnmount = () => {
    portalRoot.removeChild(this.el);
  };

  // Ah, now we can render the component and its children where we want
  render() {
    const { children } = this.props;
    return ReactDOM.createPortal(children, this.el);
  }
}
And, of course, render() can — ahem — render numbers and strings...
Does the componentDidMount() name give away what it means? This method gets called after the component is mounted (i.e. hooked to the DOM). In another tutorial I wrote up on fetching data in React, this is where you want to make a request to obtain data from an API.
It’s kind of a long-winded name, but static getDerivedStateFromProps() isn’t as complicated as it sounds. It’s called before the render() method during the mounting phase, and before the update phase. It returns either an object to update the state of a component, or null when there’s nothing to update.
To understand how it works, let’s implement a counter component which will have a certain value for its counter state. This state will only update when the value of maxCount is higher. maxCount will be passed from the parent component.
In the Counter component, we check to see if counter is less than maxCount. If it is, we set counter to the value of maxCount. Otherwise, we do nothing.
You can play around with the following Pen below to see how that works on the front end:
The updating phase occurs when a component when a component’s props or state changes. Like mounting, updating has its own set of available methods, which we’ll look at next. That said, it’s worth noting that both render() and getDerivedStateFromProps() also get triggered in this phase.
shouldComponentUpdate()
When the state or props of a component changes, we can make use of the shouldComponentUpdate() method to control whether the component should update or not. This method is called before rendering occurs and when state and props are being received. The default behavior is true. To re-render every time the state or props change, we’d do something like this:
When false is returned, the component does not update and, instead, the render() method is called to display the component.
getSnapshotBeforeUpdate()
One thing we can do is capture the state of a component at a moment in time, and that’s what getSnapshotBeforeUpdate() is designed to do. It’s called after render() but before any new changes are committed to the DOM. The returned value gets passed as a third parameter to componentDidUpdate().
It takes the previous state and props as parameters:
Use cases for this method are kinda few and far between, at least in my experience. It is one of those lifecycle methods you may not find yourself reaching for very often.
componentDidUpdate()
Add componentDidUpdate() to the list of methods where the name sort of says it all. If the component updates, then we can hook into it at that time using this method and pass it previous props and state of the component.
We’re pretty much looking at the inverse of the mounting phase here. As you might expect, unmounting occurs when a component is wiped out of the DOM and no longer available.
We only have one method in here: componentWillUnmount()
This gets called before a component is unmounted and destroyed. This is where we would want to carry out any necessary clean up after the component takes a hike, like removing event listeners that may have been added in componentDidMount(), or clearing subscriptions.
Things can go wrong in a component and that can leave us with errors. We’ve had error boundary around for a while to help with this. This error boundary component makes use of some methods to help us handle the errors we could encounter.
getDerivedStateFromError()
We use getDerivedStateFromError() to catch any errors thrown from a descendant component, which we then use to update the state of the component.
In this example, the ErrorBoundary component will display “Oops, something went wrong” when an error is thrown from a child component. We have a lot more info on this method in a wrap up on goodies that were released in React 16.6.0.
componentDidCatch()
While getDerivedStateFromError() is suited for updating the state of the component in cases where where side effects, like error logging, take place, we ought to make use of componentDidCatch() because it is called during the commit phase, when the DOM has been updated.
componentDidCatch(error, info) {
  // Log error to service
}
Both getDerivedStateFromError() and componentDidCatch() can be used in the ErrorBoundary component:
There’s something neat about knowing how a React component interacts with the DOM. It’s easy to think some “magic” happens and then something appears on a page. But the lifecycle of a React component shows that there’s order to the madness and it’s designed to give us a great deal of control to make things happen from the time the component hits the DOM to the time it goes away.
We covered a lot of ground in a relatively short amount of space, but hopefully this gives you a good idea of not only how React handles components, but what sort of capabilities we have at various stages of that handling. Feel free to leave any questions at all if anything we covered here is unclear and I’d be happy to help as best I can!
A lot of beginner tutorials start with “Hello World” examples. There are plenty of websites that use a calculator application as a kind of “Hello World” for GUI beginners. Calculators are a good way to learn because they have a set of widgets that you need to lay out in an orderly fashion. They also require a certain amount of logic to make them work correctly. For this calculator, let’s focus on being able to do the following:
Addition
Subtraction
Multiplication
Division
I think that supporting these four functions is a great starting place and also give you plenty of room for enhancing the application on your own.