Conducting Accessibility Research In An Inaccessible Ecosystem

Ensuring technology is accessible and inclusive relies heavily on receiving feedback directly from disabled users. You cannot rely solely on checklists, guidelines, and good-faith guesses to get things right. This is often hindered, however, by a lack of accessible prototypes available to use during testing.

Rather than wait for the digital landscape to change, researchers should leverage all the available tools they can use to create and replicate the testing environments they need to get this important research completed. Without it, we will continue to have a primarily inaccessible and not inclusive technology landscape that will never be disrupted.

Note: I use “identity first” disability language (as in “disabled people”) rather than “people first” language (as in “people with disabilities”). Identity first language aligns with disability advocates who see disability as a human trait description or even community and not a subject to be avoided or shamed. For more, review “Writing Respectfully: Person-First and Identity-First Language”.

Accessibility-focused Research In All Phases

When people advocate that UX Research should include disabled participants, it’s often with the mindset that this will happen on the final product once development is complete. One primary reason is because that’s when researchers have access to the most accessible artifact with which to run the study. However,

The real ability to ensure an accessible and inclusive system is not by evaluating a final product at the end of a project; it’s by assessing user needs at the start and then evaluating the iterative prototypes along the way.

Prototype Research Should Include Disabled Participants

In general, the iterative prototype phase of a project is when teams explore various design options and make decisions that will influence the final project outcome. Gathering feedback from representative users during this phase can help teams make informed decisions, including key pivots before significant development and testing resources are used.

During the prototype phase of user testing, the representative users should include disabled participants. By collecting feedback and perspectives of people with a variety of disabilities in early design testing phases, teams can more thoughtfully incorporate key considerations and supplement accessibility guidelines with real-world feedback. This early-and-often approach is the best way to include accessibility and inclusivity into a process and ensure a more accessible final product.

If you instead wait to include disabled participants in research until a product is near final, this inevitably leads to patchwork fixes of any critical feedback. Then, for feedback not deemed critical, it will likely get “backlogged” where the item priorities compete with new feature updates. With this approach, you’ll constantly be playing catch-up rather than getting it right up front and in an elegant and integrated way.

Accessibility Research Can’t Wait Until The End

Not only does research with disabled participants often occur too late in a project, but it is also far too often viewed as separate from other research studies (sometimes referred to as the “main research”). It cannot be understated that this reinforces the notion of separate-and-not-equal as compared to non-disabled participants and other stakeholder feedback. This has a severe negative impact on how a team will view the priority of inclusive design and, more broadly, the value of disabled people. That is, this reinforces “ableism”, a devaluing of disabled people in society.

UX Research with diverse participants that include a wide variety of disabilities can go a long way in dismantling ableist views and creating vitally needed inclusive technology.

The problem is that even when a team is on board with the idea, it’s not always easy to do inclusive research, particularly when involving prototypes. While discovery research can be conducted with minimal tooling and summative research can leverage fully built and accessible systems, prototype research quickly reveals severe accessibility barriers that feel like they can’t be overcome.

Inaccessible Technology Impedes Accessibility Research

Most technology we use has accessibility barriers for users with disabilities. As an example, the WebAIM Million report consistently finds that 96% of web homepages have accessibility errors that are fixable and preventable.

Just like websites, web, and mobile applications are similarly inaccessible, including those that produce early-stage prototypes. Thus, the artifacts researchers might want to use for prototype testing to help create accessible products are themselves inaccessible, creating a barrier for disabled research participants. It quickly becomes a vicious cycle that seems hard to break.

The Limitations Of Figma

Currently, the most popular industry tool for initial prototyping is Figma. These files become the artifacts researchers use to conduct a research study. However, these files often fall short of being accessible enough for many participants with disabilities.

To be clear, I absolutely applaud the Figma employees who have worked very hard on including screen reader support and keyboard functionality in Figma prototypes. This represents significant progress towards removing accessibility barriers in our core products and should not be overlooked. Nevertheless, there are still limitations and even blockers to research.

For one, the Figma files must be created in a way that will mimic the website layout and code. For example, for screen reader navigation to be successful, the elements need to be in their correct reading order in the Layers panel (not solely look correct visually), include labeled elements such as buttons (not solely items styled to look like buttons), and include alternative text for images. Often, however, designers do not build iterative prototypes with these considerations in mind, which prevents the keyboard from navigating correctly and the screen reader from providing the necessary details to comprehend the page.

In addition, Figma’s prototypes do not have selectable, configurable text. This prevents key visual adjustments such as browser zoom to increase text size, dark mode, which is easier for some to view, and selecting text to have it read aloud. If a participant needs these kinds of adjustments (or others I list in the table below), a Figma prototype will not be accessible to them.

Table: Figma prototype limitations per assistive technology

Assistive Technology Disability Category Limitation
Keyboard-only navigation Mobility Must use proper element type (such as button or input) in expected page order to ensure operability
Screen reader Vision Must include structure to ensure readability:
  • Including elements in logical order to ensure correct reading order
  • Alternative text added to images
  • Descriptive names added for buttons
Dark mode/High contrast mode Low Vision
Neurodiversity
Not available
Browser zoom Low Vision
Neurodiversity
Mobility
Not available
Screen reader used with mouse hover
Read aloud software with text selection
Vision
Neurodiversity
Cannot be used
Voice control
Switch control device
Mobility Cannot be used

Inclusive Research Is Needed Regardless

Having accessibility challenges with a prototype doesn’t mean we give up on the research. Instead, it means we need to get creative in our approach. This research is too important to keep waiting for the ideal set-up, particularly when our findings are often precisely what’s needed to create accessible technology.

Part of crafting a research study is determining what artifact to use during the study. Thus, when considering prototype research, it is a matter of creating the artifact best suited for your study. If this isn’t going to be, say, a Figma file you receive from designers, then consider what else can be used to get the job done.

Working Around the Current State

Being able to include diverse perspectives from disabled research participants throughout a project’s creation is possible and necessary. Keeping in mind your research questions and the capabilities of your participants, there are research methods and strategies that can be made accessible to gather authentic feedback during the critical prototype design phase.

With that in mind, I propose five ways you can accomplish prototype research while working around inaccessible prototypes:

  1. Use a survey.
  2. Conduct a co-design session.
  3. Test with a similar system.
  4. Build your own rapid prototype.
  5. Use the Wizard of Oz method.

Use a Survey Instead

Not all research questions at this phase need a full working prototype to be answered, particularly if they are about the general product features or product wording and not the visual design. Oftentimes, a survey tool or similar type of evaluation can be just as effective.

For example, you can confirm a site’s navigation options are intuitive by describing a scenario with a list of navigation choices while also testing if key content is understandable by confirming the user’s next steps based on a passage of text.

Image description
+

Acme Company Website Survey

Complete this questionnaire to help us determine if our site will be understandable.

  1. Scenario: You want to find out this organization's mission statement. Which menu option do you choose?
    [List of radio buttons]
    • Home
    • About
    • Resources
    • Find an Office
    • Search
  2. The following describes directions for applying to our grant. After reading, answer the following question:

    The Council’s Grant serves to advance Acme's goals by sponsoring community events. In determining whether to fund an event, the Council also considers factors including, but not limited to:
    • Target audiences
    • Alignment with the Council’s goals and objectives
    • Evaluations measuring participant satisfaction
To apply, download the form below.

Based on this wording, what would you include in your grant application?
[Input Field]

Just be sure you build a WCAG-compliant survey that includes accessible form layouts and question types. This will ensure participants can navigate using their assistive technologies. For example, Qualtrics has a specific form layout that is built to be accessible, or check out these accessibility tips for Google Forms. If sharing a document, note features that will enhance accessibility, such as using the ribbon for styling in Microsoft Word.

Tip: To find accessibility documentation for the software you’re using, search in your favorite search engine for the product name plus the word “accessibility” to find a product’s accessibility documentation.

Conduct Co-design Sessions

The prototyping phase might be a good time to utilize co-design and participatory design methods. With these methods, you can co-create designs with participants using any variety of artifacts that match the capabilities of your participants along with your research goals. The feedback can range from high-level workflows to specific visual designs, and you can guide the conversation with mock-ups, equivalent systems, or more creative artifacts such as storyboards that illustrate a scenario for user reaction.

For the prototype artifacts, these can range from low- to high-fidelity. For instance, participants without mobility or vision impairments can use paper-and-pencil sketching or whiteboarding. People with somewhat limited mobility may prefer a tablet-based drawing tool, such as using an Apple pencil with an iPad. Participants with visual impairments may prefer more 3-dimensional tools such as craft supplies, modeling clay, and/or cardboard. Or you may find that simply working on a collaborative online document offers the best accessibility as users can engage with their personalized assistive technology to jot down ideas.

Notably, the types of artifacts you use will be beneficial across differing user groups. In fact, rather than limiting the artifacts, try to offer a variety of ways to provide feedback by default. By doing this, participants can feel more empowered and engaged by the activity while also reassuring them you have created an inclusive environment. If you’re not sure what options to include, feel free to confirm what methods will work best as you recruit participants. That is, as you describe the primary activity when they are signing up, you can ask if the materials you have will be operable for the participant or allow them to tell you what they prefer to use.

The discussion you have and any supplemental artifacts you use then depend on communication styles. For example, deaf participants may need sign language interpreters to communicate their views but will be able to see sample systems, while blind participants will need descriptions of key visual information to give feedback. The actual study facilitation comes down to who you are recruiting and what level of feedback you are seeking; from there, you can work through the accommodations that will work best.

I conducted two co-design sessions at two different project phases while exploring how to create a wearable blind pedestrian navigation device. Early in the project, when we were generally talking about the feature set, we brought in several low-fidelity supplies, including a Braille label maker, cardboard, clay, Velcro, clipboards, tape, paper, and pipe cleaners. Based on user feedback, I fashioned a clipboard hanging from pipe cleaners as one prototype.

Later in the project when we were discussing the size and weight, we taped together Arduino hardware pieces representing the features identified by the participants. Both outcomes are pictured below and featured in a paper entitled, “What Not to Wearable: Using Participatory Workshops to Explore Wearable Device Form Factors for Blind Users.”

Ultimately, the benefit of this type of study is the participant-led feedback. In this way, participants are giving unfiltered feedback that is less influenced by designers, which may lead to more thoughtful design in the end.

Test With an Equivalent System

Very few projects are completely new creations, and often, teams use an existing site or application for project inspiration. Consider using similar existing systems and equivalent scenarios for your testing instead of creating a prototype.

By using an existing live system, participants can then use their assistive technology and adaptive techniques, which can make the study more accessible and authentic. Also, the study findings can range from the desirability of the available product features to the accessibility and usability of individual page elements. These lessons can then inform what design and code decisions to make in your system.

One caveat is to be aware of any accessibility barriers in that existing system. Particularly for website and web applications, you can look for accessibility documentation to determine if the company has reported any WCAG-conformance accessibility efforts, use tools like WAVE to test the system yourself, and/or mimic how your participants will use the system with their assistive technology. If there are workarounds for what you find, you may be able to avoid certain parts of the application or help users navigate past the inaccessible parts. However, if the site is going to be completely unusable for your participants, this won’t be a viable option for you.

If the system is usable enough for your testing, however, you can take the testing a step further by making updates on the fly if you or someone you collaborate with has engineering experience. For example, you can manipulate a website’s code with developer tools to add, subtract, or change the elements and styling on a page in real-time. (See “About browser developer tools”.) This can further enhance the feedback you give to your teams as it may more closely match your team’s intended design.

Build a Rapid Website Prototype

Notably, when conducting research focused on physical devices and hardware, you will not face the same obstacles to inaccessibility as with websites and web applications. You can use a variety of materials to create your prototypes, from cardboard to fabric to 3D printed material. I’ve sewn haptic vibration modules to a makeshift leather bracelet when working with wearables, for instance.

However, for web testing, it may be necessary to build a rapid prototype, especially to work around inaccessible artifacts such as a Figma file. This will include using a site builder that allows you to quickly create a replica of your team’s website. To create an accessible website, you’ll need a site builder with accessibility features and capabilities; I recommend WordPress, SquareSpace, Webflow, and Google Sites.

I recently used Google Sites to create a replica of a client’s draft pages in a matter of hours. I was adamant we should include disabled participants in feedback loops early and often, and this included after a round of significant visual design and content decisions. The web agency building the client’s site used Figma but not with the required formatting to use the built-in screen reader functionality. Rather than leave out blind user feedback at such a crucial time in the project, I started with a similar Google Sites template, took a best guess at how to structure the elements such as headings, recreated the anticipated column and card layouts as best I could, and used placeholder images with projected alt text instead of their custom graphics.

The screen reader testing turned into an impromptu co-design session because I could make changes in-the-moment to the live site for the participant to immediately test out. For example, we determined that some places where I used headings were not necessary, and we talked about image alt text in detail. I was able to add specific design and code feedback to my report, as well as share the live site (and corresponding code) with the team for comparison.

The downside to my prototype was that I couldn’t create the exact 1-to-1 visual design to use when testing with the other disabled participants who were sighted. I wanted to gather feedback on colors, fonts, and wording, so I also recruited low vision and neurodiverse participants for the study. However, my data was skewed because those participants couldn’t make the visual adjustments they needed to fully take in the content, such as recoloring, resizing, and having text read aloud. This was unfortunate, but we at least used the prototype to spark discussions of what does make a page accessible for them.

You may find you are limited in how closely you can replicate the design based on the tools you use or lack of access to developer assistance. When facing these limitations, consider what is most important to evaluate and determine if a paired-down version of the site will still give you valuable feedback over no site at all.

Use Wizard of Oz

The Wizard of Oz (WoZ) research method involves the facilitators mimicking system interactions in place of a fully working system. With WoZ, you can create your system’s approximate functionality using equivalent accessible tools and processes.

As an example, I’ll refer you to the talk by an Ally Financial research team that used this method for participants who used screen readers. They pre-programmed screen reader prompts into a clickable spreadsheet and had participants describe aloud what keyboard actions they would take to then trigger the corresponding prompt. While not the ideal set-up for the participants or researchers, it at least brought screen reader user feedback (and recognition of the users themselves) to the early design phases of their work. For more, review their detailed talk “Removing bias with wizard of oz screen reader usability testing”.

This isn’t just limited to screen reader testing, however. In fact, I’ve also often used Wizard of Oz for Voice User Interface (VUI) design. For instance, when I helped create an Alexa “skill” (their name for an app on Amazon speech-enabled devices), our prototype wouldn’t be ready in time for user testing. So, I drafted an idea to use a Bluetooth speaker to announce prompts from a clickable spreadsheet instead. When participants spoke a command to the speaker (thinking it was an Alexa device), the facilitator would select the appropriate pre-recorded prompt or a generic “I don’t understand” message.

Any system can be mimicked when you break down its parts and pieces and think about the ultimate interaction for the user. Creating WoZ set-ups can take creativity and even significant time to put together, but the outcomes can be worth it, particularly for longer-term projects. Once the main pieces are created, the prototype set-up can be edited and reused indefinitely, including during the study or between participants. Also, the investment in an easily edited prototype pays off exponentially if it uncovers something prior to finishing the entire product. In fact, that’s the main goal of this phase of testing: to help teams know what to look out for before they go through the hard work of finishing the product.

Inclusive Research Can No Longer Wait

Much has been documented about inclusive design to help teams craft technology for the widest possible audience. From the Web Content Accessibility Guidelines that help define what it means to be accessible to the Microsoft Inclusive Design Toolkits that tell the human stories behind the guidelines, there is much to learn even before a product begins.

However, the best approach is with direct user feedback. With this, we must recognize the conundrum many researchers are facing: We want to include disabled participants in UX research prior to a product being complete, but often, prototypes we have available for testing are inaccessible. This means testing with something that is essentially broken and will negatively impact our findings.

While it may feel like researchers will always be at a disadvantage if we don’t have the tools we need for testing, I think, instead, it’s time for us to push back. I propose we do this on two fronts:

  1. We make the research work as best we can in the current state.
  2. We advocate for the tools we need to make this more streamlined.

The key is to get disabled perspectives on the record and in the dataset of team members making the decisions. By doing this, hopefully, we shift the culture to wanting and valuing this feedback and bringing awareness to what it takes to make it happen.

Ideally, the awareness raised from our bootstrap efforts will lead to more people helping reduce the current prototype barriers. For some of us, this means urging companies to prioritize accessibility features in their roadmaps. For those working within influential prototype companies, it can mean getting much-needed backing to innovate better in this area.

The current state of our inaccessible digital ecosystem can sometimes feel like an entanglement too big to unravel. However, we must remain steadfast and insist that this does not remain the status quo; disabled users are users, and their diverse and invaluable perspectives must be a part of our research outcomes at all phases.

How to Request UPI Payments with Google Forms

Cake Studio is a local bakery that accepts orders through Google Forms. When a customer places an order, the customer automatically receives a UPI QR Code to make the payment. This QR Code is generated dynamically based on the order amount and the customer can pay the bill using any UPI app.

UPI Payment for Google Forms

In the above screenshot, the customer ordered a Butterscotch Cake through Google Form and they received a customized UPI QR Code that includes the exact bill amount. The amount is calculated automatically based on the selected items in the Google Form.

Google Forms and UPI Payments

This tutorial explains how you can send custom UPI QR Codes to customers automatically whenever they place an order via Google Forms. We will use Google Sheets to calculate the bill amount and generate the QR codes, and Document Studio to send the emails with the QR codes to the customers.

Let’s see how you set up this workflow in a few simple steps.

Prepare Google Form for Orders

Here is a sample Google Form that we have created for Cake Studio. As you can see, and this is important, we have mentioned the amount of each cake in the options itself.

Google Form for Orders

Prepare Google Sheet

Open the Google Sheet that is linked to the Google Form. The Google Sheet will contain columns for the questions in the Google Form. We’ll now add extract columns that would help us generate the custom UPI QR codes.

You may find the Google Sheet with UPI formulae here

Add Columns to Google Sheet

1. Bill Amount - This column will store the price of the cake that the customer has ordered. We’ll write a formula using the REGEXREPLACE function to extract the price from the selected option.

=ARRAYFORMULA(IF(ROW(D:D)=1,"Bill Amount",
  IF(NOT(ISBLANK(D:D)),REGEXREPLACE(D:D,".+₹ ",""),)))

Calculate Bill Amount in Google Forms

2. Total Amount - Our second column will store the total bill amount which adds GST on the price of the cake. We’ll use Arrayformula to apply the calculation down the entire column.

=ARRAYFORMULA(IF(ROW(E:E)=1,"Total Amount",
  IF(NOT(ISBLANK(E:E)), E:E * 1.18,)))

3. UPI QR Code - The final column will store the custom UPI QR code that includes the total bill amount. We will use the built-in UPI function to generate the QR code.

A customized UPI QR Code will be generated for each order. The QR code will include the total bill amount so that the customer can make the payment without having to enter the amount manually.

Generate UPI QR Code in Google Sheets

Embed UPI QR codes in Email

Now that we have the UPI QR codes in the Google Sheet, we will use Document Studio to send emails to customers with the QR codes embedded in the email body.

Launch Document Studio in your Google Sheets and create a new workflow. Add a Send Email task to the workflow. Create a message template that includes the Embed Image marker to embed the UPI QR code in the email.

{{Embed IMAGE, UPI QR Code}}

We have mentioned UPI QR Code as the second parameter in the above marker since it is the title of the column that contains the generated QR codes in our Google Sheet.

Email Template for UPI Orders

Save the Workflow and make sure to enable the Run on Form Submit option so that the emails are sent automatically whenever a new order is placed through the Google Form.

Test the UPI Payment Workflow

Fill this Google Form and you should see a new row added to this Google Sheet with the bill amount and the UPI QR code. You’ll also receive an email with the UPI QR code embedded in the email body.

How to Schedule Form Availability and Limit Submissions in Google Forms

When you create a Google Form, it is public by default meaning anyone who has the link to the form can submit a response. There forms, whether they are quizzes, polls or surveys, have no expiration date and they can collect unlimited number of responses until the form owner chooses to close it manually.

However, there are scenarios when setting limits on Google Forms can be beneficial. For instance:

  1. Contests and Giveaways: Limit entries to a specific number, on a first-come, first-served basis, and close the form automatically.
  2. Event Registrations: Set a closing date and automatically close registration forms after the event date.
  3. Quizzes and Assignments: School teacher can add restrictions and keep the form open only during specific days and hours, mimicking in-class availability.

Limit Google Form Responses

Google Forms doesn’t natively support the ability to schedule forms or limit responses. However, you can easily incorporate this functionality into your forms with the help of Form Notifications add-on for Google Forms. The add-on is primarily designed to send form responses in an email message but it also includes features to schedule Google Forms and limit responses.

How to Set Limits in Google Forms

Install the Forms add-on, go to your Google Form and click the add-ons menu (it looks like a puzzle icon).

Open Google Forms Limiter

From the menu, choose Email Notifications > Open App > Options > Limit Google Form Responses and you’ll see the settings panel as shown above. This is where you can easily control when and how many people can submit your Google Form.

1. Close Form after a Certain Number of Responses

You can specify the maximum number of responses that your Google Form should accept. Once the form has received the specified number of responses, it will automatically close itself and no new responses will be accepted.

You can also specify a custom message that will be displayed when someone accesses your closed form.

2. Close Form after a Specific Date and Time

You can specify the exact date and time when your Google Form should be closed for new responses. The form will automatically close itself on the specified date and time and no new responses will be accepted.

You may also specify an open date and your closed Google Form will automatically open on the scheduled date. This can be useful for event registration forms where the registrations should be opened for public only on a specific date.

Limit Google Form responses

3. Open and Close Form on a Recurring Schedule

You can easily set up a recurring schedule and keep your Google Form open only on specific days and within specific hours. The above example shows the form being available only on weekdays between 11:00 AM and 3:45 PM.

The Form limiter is written in Google Apps Script. You can find the source code on Github should you wish to roll out own form limiter.

Also see: How to Automate Google Forms

Important Things to Know

  • The form will close based on whichever condition is met first, either the response limit or the closing date.

  • All times mentioned are in the local timezone of the user’s browser who is setting up the form schedule and limits.

  • Due to Google add-ons’ technical constraints, the actual opening and closing times of the form may differ from your set times by about ±30 minutes.

  • If you would like to manually close your Google Form for new responses, open the Form, go to the Response tab and uncheck the Accepting Responses option. You can re-open the form anytime later by checking the Not Accepting Responses button.

How to Send Confirmation Emails with Google Forms

You have a Google Form and you would like to send an auto-confirmation emails to the person as soon as they submit the form. The autoresponder email message can contain a custom note (like an acknowledgement saying that you have received their form entry)  and also a copy of the form answers that that they have submitted.

These auto-responders are similar to canned responses in Gmail but for Google Forms. You may use the technique for sending welcome messages, acknowledge support requests, and more. Here’s a sample confirmation email that was sent through Google Forms:

A sample auto confirmation email sent through Google Forms A sample auto confirmation email sent through Google Forms

Send a Confirmation Email to the Form Submitter

The other day I got an email from N.Vamsi asking me how to send these confirmation emails using Google Forms?

Would you mind telling me how you have set up auto email updater for inputs taken from Google forms. I have seen your video tutorial on setting up Google forms and getting input values to an email address but auto email responder is something new! Do you have any tutorials for that as well?

This is easy and you can can add the auto-reply feature to your Google Forms in less than a minute. Here are the steps involved:

  1. Create a new Google Form with one or more fields. You can also use an existing form but do make sure you have a field where you would be asking for the email address of the form respondent. This should be a mandatory field.
  2. Install the Google Forms add-on, then go to the add-ons menu inside forms, choose Email Notification for Forms and select Create New Rule.
  3. Enter your name, choose your Gmail alias that you wish to use for sending confirmation emails and check the “Notify Form Submitter” option. Select the form field that you are using to get the email address of the respondent.
  4. On the next screen, customize the email subject and message as described in the Google Form Email tutorial.

Create the rule and you’re done. When anyone submits the Google Form, they’ll get an automatic confirmation email in HTML format and copy of the email data will also be cc’ed to you so you are in the loop.

google-form-confirmation-email.png

How to Mention Someone in a Slack Message from Google Forms

This video tutorial explains how you can automatically send Slack messages from Google Forms with the help of Document Studio.

For this example, we have an event registration form created with Google Forms. When a participant completes the form and clicks the submit button, a message is instantly posted in the company’s Slack channel with details of the attendee like their name and email address.

The Google Form has a “Preferred Location” question as well and based on this answer, a specific member of the team will be tagged or mentioned in the Slack message. For instance, if the attended selects New York as the location in the form, the internal Slack message will tag @Angus since they takes care of New York registrations.

Google Forms for Slack Message

Send Slack Messages on Google Form Submit

Go to your Google Form and launch Document Studio. Create a new workflow and add a Slack task.

Connect your Google Account to your Slack account and you’ll be presented with a list of #channels available in the Slack workspace that you have linked with your account.

Select the relevant Slack channel where you wish to post messages and specify the message template that will be sent to Slack on new form submissions.

Slack Mentions Logic

The template message includes variables like {{ Attendee Name }} which will be replaced with the values from the form submission. It also includes a scriptlet to add conditional content in the Slack message.

The Scriptlet looks at the Location entered in the Google Form and, based on the answer, a specific user gets tagged in the Slack message. You can learn more about the syntax of Scriptlets here.

🎉 {{Attendee Name}} would attend the event from {{Location}}

{% assign answer = "{{ Location }}" %}
{% if answer == "New York" %}
  <@U08N2HAQTF9>
{% elsif answer == "Boston" %}
  <@U05N6HAQZM1>
{% else %}
  <@U09PX8AQLJ1>
{% endif %}

How to @Mention a Slack User

Slack assigns a unique ID to each account and we put this ID in the Slack message to mention / tag that user in the message.

To obtain the User ID of a Slack account, follow these steps:

  1. Open slack.com, navigate to your Slack channel and find any @mention of the user you’re interested in.
  2. Right-click the @mention, and from the contextual menu, select “Copy link.”

The user link you’ve copied will have the following format:

labnol.slack.com/team/U05N6HAQZM1

In this link, the portion starting with U… represents the User ID of the Slack user.

If you want to @mention this user in your Slack message, enclose the User ID inside angle brackets and prefix it with the @ symbol, like this:

How are you <@UABC123> 🎉

Find Slack User ID

Create a BMI Calculator using Google Forms and Google Sheets

This tutorial explains how you can build a BMI calculator app with Google Sheets and Google Forms. When a user submits the form, their BMI score is calculated in Google Sheets and a personalized report is generated in Google Docs. The user then receives an email with their BMI score and the PDF report.

👋 Complete this quick Google Form to calculate your BMI and receive a personalized report in your inbox.

BMI Calculator with Google Forms

Google Forms BMI Calculator

We have a Google Form that asks the user to enter their height and weight. The response is stored in a Google Sheet and the BMI score is calculated automatically using the BMI formula.

The PDF report is personalized and includes the user’s BMI score, BMI category, and suggestions on how to improve their BMI score. The user’s photo is also embedded in the report as shown in the screenshot above.

BMI Calculations in Google Sheets

We perform the following calculations in Google Sheets to calculate the user’s BMI score.

Age of the respondent

The form requires the user to enter their date of birth. We use the DATEDIF function to calculate the age of the user in years.

=MAP(C:C, LAMBDA(c, IF(ROW(c)=1, "Age", 
   IF(ISDATE(c), ROUND(DATEDIF(c, TODAY(), "Y"), 0),))))

BMI Calculations in Google Sheets

BMI Score (kg/m²)

The user enters their height and weight in the form. We use the MAP function to calculate the BMI score for each form response in the sheet.

=MAP(E:E,F:F, LAMBDA(ht, wt, IF(ROW(wt)=1, "BMI", 
    IF(AND(ISNUMBER(wt),ISNUMBER(ht)), 
      ROUND(wt/(ht/100)^2,2),))))

BMI Category

The BMI category is calculated using the array function.

=ARRAYFORMULA(IF(ROW(J:J)=1, "BMI Category", IF(ISNUMBER(J:J), 
  IF(J:J < 18.5, "Underweight", 
  IF(J:J < 25, "Normal weight", 
  IF(J:J < 30, "Overweight", "Obese"))),)))

Prepare BMI Report

We’ve created a template in Google Docs that will be used to generate personalized BMI reports for each user with the help of Document Studio.

BMI Report in Google Docs

The report uses conditional content to display suggestions based upon the BMI score of the user. For instance, if the BMI score is less than 18.5, the user is underweight and the report suggests that they should eat more calories.

The image is inserted in the report using a special Embed Image tag to add thethe photo uploaded by the user in the Google Form in the document.

Create BMI Workflow

Launch Document Studio inside the form responses sheet and go to Extensions > Document Studio > Open to create a new BMI workflow.

We’ll only process the form responses that have a valid email address, the age of the user is numeric, and the calculated BMI score is at least 10.

Workflow Conditions

On the next screen, add a Create File task and select the Google Docs template that we’ve created in the previous step. You may also want to change the name of the generated PDF file to include the name of the form respondent.

Click the Add Another Task button to add the Send Email task. This will send the generated PDF report to the user via email.

For the recipient’s email address, select the Email column from the Google Sheet. You can also customize the email subject and the body of the email.

Email BMI Report

The Attach Merged Files option should be enabled so that the generated PDF report is attached to the email. That’s it. Click the Save Workflow button and your BMI calculator is ready for use.

You can view the tutorial section for more ideas on Google Forms automation with Document Studio.

How Teachers can Email Parents of Students from Google Forms

Parent Consent Form

A school provides email accounts for students that are enrolled in high school. The school has published a Google Form and any student can put their name in the form to request access to an email address.

Parent’s consent is required though. When a child submits the request, an email confirmation is sent to the parent of the child for them to provide consent before the student’s email address can be created.

Lookup Parent’s Data in Google Sheets

The key here is that an email should be sent to the parent of the student. This data itself is not available in the Google Form but the school maintains a Google Sheet with the parent’s data and we’ll do a lookup to fetch the parent’s name and email address based on the student’s name.

Student Parent's Data

When the Google Form is submitted, a new row is added to the Google Sheet with the form response.

We’ll add two new columns to the form response sheet that will lookup up the parent’s email address and name from the parent records sheet. It uses ArrayFormula to instantly fetch the parent’s data in the form sheet after a new form response is submitted.

=ArrayFormula(
    IF(ROW(B:B) = 1, "Parent's Email",
    IF(NOT(ISBLANK(B:B)),VLOOKUP(B:B, Parents!$A$2:$C$100,3, FALSE),))
)

If the Row Number of the current row is 1, we set the column title which in this case is Parent's Email. If the row is not 1 and there’s form data in column B, we use VLOOKUP to get the matching data from the parent records sheet into the form response sheet.

Google Sheets Lookup

Send Email to Student’s Parent

The first step is to install Document Studio from the Google marketplace. Next, switch to the Google Sheet storing the Google Form responses and go to Extensions > Document Studio > Open to launch the add-on.

Create a new workflow and give it a descriptive name like Send Consent Letters to Parents. On the task screen, create a new Email task and choose the Parent’s Email field from the “Send Email to” dropdown.

Here’s how the final email template will look like:

Parent Email Template

You can include placeholders, enclosed in double curly braces, to include form answers and values from Google Sheets formulas.

Switch to the Save screen of your workflow and turn on the option that says Run on Form Submit. This will internally enable the form submit trigger and your workflow will run whenever a new form is submitted.

Form Submit trigger

Go to your Google Form, submit a sample response and you should see a copy of the consent email that was sent to the student’s parent.

You may also add a Create File task in the same workflow to generate a consent document in Microsoft Word or PDF. This can be automatically attached to the email message and the parent can email the signed copy.

For assistance, see this tutorial - Generate Agreements from Google Form Responses

How Spammers Avoid the Gmail Spam Filter through Google Forms

Gmail is very effective at filtering spam emails but spammers seem to have figured out a new way to bypass the spam filters and send emails that land right in the user’s inbox. The emails are sent through Google Forms and because the messages originate from Google’s own email servers, they do not get caught in the spam filters.

Google Forms - Spam Emails

Here’s how spam emails are sent through Google Forms.

  1. A public form is created with Google Forms.
  2. The form creator uploads images for the various question fields and also adds links to spam websites in the form.
  3. Inside the Form settings, they turn on the option to “Collect Email Addresses” including the option to send “Response receipts” when a new form is submitted.

Google Form Email

Now the spammers can simply open the Google Form, fill in the recipient’s email address and hit the submit button.

Google Forms will automatically email a copy of the form response, including all the pictures and links contained in the original form, to the email address that was entered in the form.

Here’s a screenshot of one such email from Google Forms that easily tricked the spam filters.

Google Forms

How to Block Spam from Google Forms

If you would like to prevent spam emails from Google Forms from landing in your inbox, Gmail filters can help.

All pre-filled Google Forms emails have the sender’s email address as below:

forms-receipts-noreply@google.com

You can create a filter in Gmail that will automatically delete emails that have Google Forms as the sender.

Google Forms Filter

Alternatively, you may open the form link from the email and click the “Report Abuse” button to report the form to Google. That is not likely to be a very effective strategy though as spammers can always switch to a different Google account.

7 Best Google Forms Alternatives in 2021 (Better Features + Free)

Are you looking for a Google Forms alternative? Google Forms is one of the most popular free form builders and is part of Google Workspace (G Suite).

However, it doesn’t provide a high level of flexibility when it comes to customization or advanced features to collect data from visitors.

In this article, we’ll share the best Google Forms alternatives, so you can select the best form tool for your business.

best alternatives for google forms

Why Do You Need a Google Forms Alternative?

Google Forms is a popular tool to create online forms. It is a free service by Google and easy to use. Users can create surveys and questionnaires and gather the data in spreadsheets for further analysis.

While Google Forms might be good for basic use, it lacks features that might be beneficial for businesses. For instance, if you’re looking to collect payments for customers through a form, then that is not possible in Google Forms.

Another drawback of using Google Forms is that there is no conditional logic option. This means you can’t automatically show or hide fields based on user responses.

Plus, there’s not a lot of option for customizing the form’s style. The default look of Google Forms may look unprofessional for businesses.

Last but not least, Google Forms also lack advanced security features such as locking forms based on user’s access level, passwords, and more.

That said, there are many other popular online form builders out there that offer better features and integrations. Let’s look at the best Google Forms alternatives.

1. WPForms

wpforms

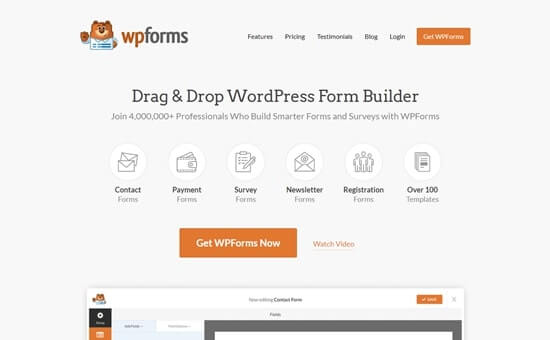
WPForms is the most beginner-friendly WordPress form plugin and the best Google Forms alternative. It is used by over 4 million websites.

You can use their easy to use drag and drop form builder to create just about any type of form you like without writing any code.

There are over 100 different form templates to choose from. You can create all kinds of forms from a simple contact form to more sophisticated forms like surveys, donation forms, file upload forms, and more.

wpforms templates

What makes WPForms the best Google Forms alternative is its simplicity and feature-rich options.

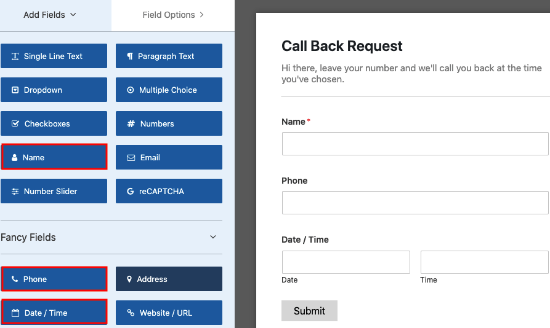
You can add form fields to accept online payments, allow users to submit posts, sign forms online, add Likert scale, net promote score (NPS), add reCAPTCHA, ratings, enter payment fields, and more.

Each field is further customizable, as users can change the label, add a description, edit field size, mark a field required, and enable conditional logic.

add fields in wpforms

Aside from that, WPForms offers powerful addons to expand it features. Through Form Abandonment addon, you can follow up with people who left your form without completing it, so you can convert them into leads.

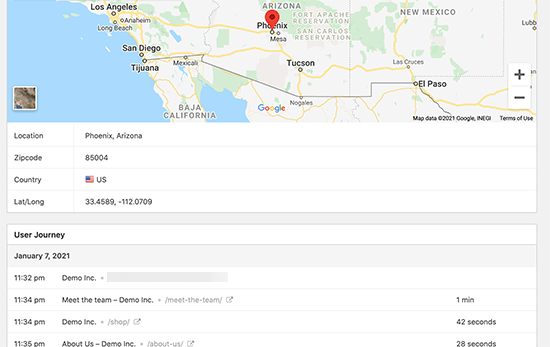
The plugin even lets you track the path a user takes before filling out a form with their User Journey addon. WPForms also helps in capturing the geolocation of a visitor and shows a user’s country, city, and state along with form submission.

Geo location tracking for form submissions in WordPress

They have a form landing pages addon that allows you to create Google Form like form pages, and a conversational form addon that boosts form completion.

Another benefit of using the plugin over Google Forms is its integration with payment services like PayPal and Stripe. WPForms also easily integrates email marketing services like Drip, Constant Contact, AWeber, Sendinblue, and more.

Pricing: WPForms offers a free version called WPForms Lite. However, if you’re interested in more powerful features and form field customization options, then go for WPForms Pro ($199.50 per year).

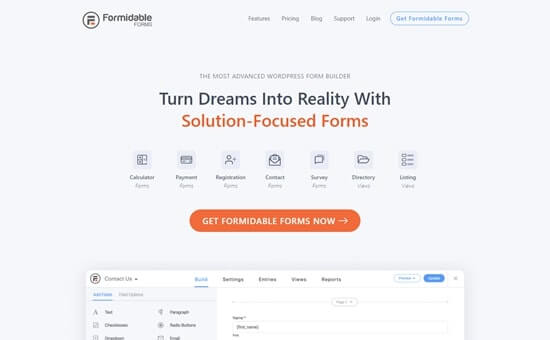
2. Formidable Forms

formidable forms

Formidable Forms is the next Google Forms alternative on our list. It is an advanced WordPress form builder that offers lots of powerful features to create solutions-focused forms.

Using its visual drag and drop builder, it is easy for anyone to create different types of forms like polls and surveys, payment forms, quizzes, contact forms, and more.

Each form design is mobile responsive and users can customize the form using its visual styler. There is even an option to edit the form HTML and add conditional logic to show form fields based on the user’s answers.

The standout feature of Formidable Forms that it allows visitors to perform calculations. For instance, you can create calculators like a percentage calculator, mortgage calculator, or car payment calculator.

The plugin offers different form templates, easily integrates with various email marketing services, offers WooCommerce integration to help you build product forms, and is a perfect alternative for advanced users and developers.

Pricing: Formidable Forms prices start from $46.36 per year with the Basic plan.

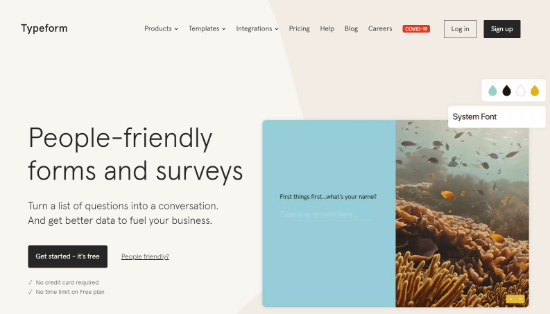
3. Typeform

typform

Typeform is a powerful tool to build forms for your website. It’s packed with features and lets users create all types of online forms.

There are numerous form templates to get started and you can select from different categories such as quizzes, surveys, questionnaires, lead generation, polls, giveaways, and others.

Once you’ve selected a template, Typeform will ask the purpose of creating the form and what is it for. It will then show predefined questions, which you can edit as per your needs.

The form builder also offers different options for customization. You can change the layout of each question, edit the design, theme, and set up conditional logic.

Furthermore, Typeform offers additional features that make it a great Google Forms alternative. For instance, it allows you to set a response limit, schedule a close date, show closed messages to visitors, set up email notifications, and more.

Typeform also integrates with Google Sheets, Google Analytics, Google Tag Manager, Salesforce, Freshdesk, HubSpot, Facebook, Slack, Drip, Zoho CRM, and other marketing automation tools.

Pricing: Typeform offers a free plan and its paid version’s prices start from $30 per month billed yearly.

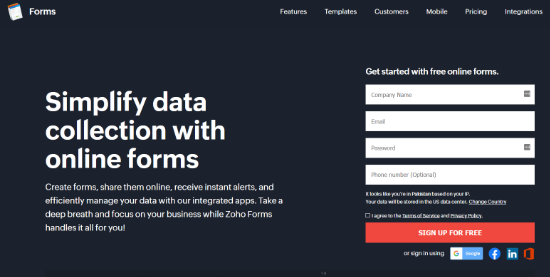
4. Zoho Forms

zoho forms

Zoho Forms is a popular form builder in the market and offers many features that you won’t find in Google Forms.

You get multiple form templates for different industries and business units. For instance, Zoho offers templates for businesses, construction companies, medical institutions, eCommerce sites, HR, educational institutes, and more.

After selecting a template, there are various options for customization. Simply use the drag and drop builder to add or remove fields in the form, use conditional logic to set rules for each field, or create multipage forms.

Zoho Forms also offers built-in security measures to protect your data and limit access to forms. It shows how your forms are performing with detailed analytics reports.

Another benefit of using Zoho Forms is that you can automate workflows quickly. It lets routes form data to different apps and easily integrates with other Zoho apps.

Pricing: Zoho Forms prices start at $8 per month billed annually.

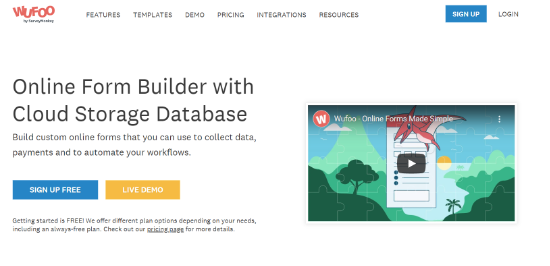
5. Wufoo

wufoo

Wufoo is an online form builder by SurveyMonkey and is a popular choice among small businesses and large corporations. Like many other tools on our list, Wufoo also offers a drag and drop builder.

It has a user-friendly interface and you can easily create different kinds of forms using a pre-built template. It also lets you start from scratch and adding new fields is simple thanks to the drag and drop builder.

For each field, there are more options for customization. For example, you could rename a field, add ranges, show fields to certain people, add placeholder text, and more.

Other features of Wufoo include Google Analytics form tracking, collection of respondent’s IP addresses, captcha spam protection, and integration with payment services to collect payments.

Pricing: You can try out Wufoo for free and its paid plans start from $169 per year.

6. Microsoft Forms

microsoft forms

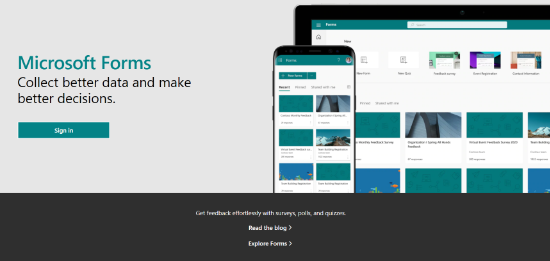
Microsoft Forms, as the name suggests, is Microsoft’s version of Google Forms.

It’s an excellent alternative for anyone who has an Office 365 subscription and ties easily with other Microsoft services. You can gather your form entries and view data in Excel.

Microsoft’s form builder is easy to use and resembles a lot like Google Forms. You can add different form fields such as multiple choice questions, text, rating, date, ranking, Likert scale, and NPS.

Each field can be edited and the form can be broken down into different sections.

Microsoft Forms comes with basic pre-built templates to get started. This includes quizzes, surveys for customer feedback, event registration forms, party invitation forms, and more.

However, the form templates are limited and not as extensive as WPForms. Microsoft Forms also lacks a few other features as it doesn’t offer conditional logic or fields to accept payments from customers.

Pricing: Microsoft Forms is free for users that have an Office 365 license.

7. JotForm

jotform

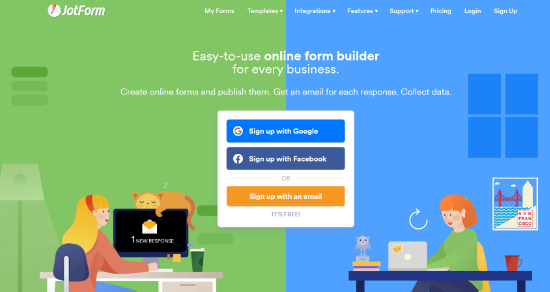
JotForm is the last Google Forms alternative on our list. It offers an online form builder and you can get started for free. The free version lets you create up to 5 forms, record 100 submissions, and offers 100 MB storage space.

However, if you’re looking for more form submissions, storage space, Health Insurance Portability and Accountability Act (HIPAA) compliance, and no JotForm branding, then consider upgrading to one of its paid plans.

What makes JotForm a good alternative to Google Forms is the features it offers.

You get tons of templates to create any type of form, be it a product order form, registration form, contact form, surveys, file upload forms, or membership form.

Each field in the form template is editable and just like other form builders, it also offers a drag and drop builder. You can even collect payments by integrating your forms with PayPal, Square, Stripe, and other services.

There are also multiple options for conditional logic such as show and hide fields, perform complex calculations, skip or hide a page, and more.

Pricing: JotForm is available for free but its premium plans start from $174 per year.

Which is the Best Google Forms Alternative? (Expert Pick)

While all the tools we have mentioned in our list are great Google Forms alternative, we believe that WPForms is the best Google Forms alternative in the market.

It offers a lot of powerful features that you simply won’t find in Google Forms. Plus, it’s very easy to use and lets you create amazing forms using pre-built templates and drag and drop builder.

There is a reason why over 4 million website owners are using WPForms to build smart forms for their business.

The only downside of WPForms is that it requires you to have a WordPress website.

If you’re using other website builders than WordPress, then you may want to look at Typeform or Zoho Forms.

We hope this article helped you find the best Google Forms alternative for your business. You may also want to take a look at our list of best live chat software and must have WordPress plugins to grow your business.

If you liked this article, then please subscribe to our YouTube Channel for WordPress video tutorials. You can also find us on Twitter and Facebook.

The post 7 Best Google Forms Alternatives in 2021 (Better Features + Free) appeared first on WPBeginner.

Useful Regular Expressions for Validating Input in Google Forms

Your organization has a few vacant positions and you are planning to use Google Forms to prepare a pre-interview questionnaire for job applicants. You have created a form and it has all the standard fields where candidates can enter their name, email address, website URL, phone number, zip code and other essential details.

The form is ready for publishing online but before you make it live, how would you ensure that candidates have entered data in the correct format? And even if the format is proper, is the data itself valid? Can you add a CAPTCHA to Google forms to prevent spam bots? Can you include a profanity filter to block people from submitting entries that include obscene words?

When you are expecting dozens, or even hundreds, of responses in your Google Forms, it is always a good idea to have some rules in place and respondents data should be matched against these rules even before they submit the form. For instance, if your form is asking for a person’s year of birth, they should only be allowed to enter a number between 1900 and 2014.

Advanced data validation in Google Forms using RegEx (regular expressions) Advanced data validation in Google Forms using RegEx (regular expressions)

Regular Expressions in Google Forms

Google Forms makes it relatively easy to add such advanced date validation rules to individual fields through Regular Expressions (or regex or regexp). Think of them as search patterns and every character entered in a form field is matched against that pattern - the form can only be submitted if the patter and the user-input matches.

Let’s understand this with a real-world example.

Say your Google form expects the user to enter their year of birth. At the time of designing the form, expand the “Data Validation” section below the form field (see screenshot above) and choose Regular Expression from the drop-down. Next select “Matches” in the other drop-down and enter ^(19\d{2}|20[0-1]\d)$ in the input field. The field will now accept input value like 1920, 2010 but would reject other values that fall outside the range.

Regular Expressions for Common Form Fields

A regular expression may appear gibberish but they aren’t so difficult to read and understand if you can know the basic rules of the language. What you see here is a compilation of some useful regular expressions that can be used to validate common form fields like URLs, phone numbers, zip codes, dates, etc.

1. Postal Address - allow only alphanumeric characters, spaces and few other characters like comma, period and hash symbol in the form input field.

[a-zA-Z\d\s\-\,\#\.\+]+

2. ZIP Code - the regex allows ZIP codes in standard formats and it matches both US and Indian zip codes.

^\d{5,6}(?:[-\s]\d{4})?$

3. Date - accept date input in the mm/dd/yyyy or mm-dd-yyyy formats.

((0[1-9])|(1[0-2]))[\/-]((0[1-9])|(1[0-9])|(2[0-9])|(3[0-1]))[\/-](\d{4})

Also see: Get Google Form Data by Email

4. Email Address - the regex below should match most common email address formats, including Gmail aliases that accept the ”+” sign but there’s no perfect solution.

[a-zA-Z0-9_\.\+-]+@[a-zA-Z0-9-]+\.[a-zA-Z0-9-\.]+

5. URL (Web domain) - this is useful for fields that require the user to enter their website address and it even matches the upcoming TLDs like .directory or .restaurant. The other regex matches YouTube URL including those using the youtu.be domains.

https?\:\/\/[a-zA-Z0-9\-\.]+\.[a-zA-Z]{2,}
https?\:\/\/(www\.)?youtu(\.)?be(\.com)?\/.*(\?v=|\/v\/)?[a-zA-Z0-9_\-]+

6. Character Limit - the default text box in a Google form allows users to input any number of characters but you can impose a limit with the help of regular expression. Here we limit the input to 140 characters much like Twitter.

[\w]{1,140}

7. Phone Numbers - these are often a series of numbers preceded by an optional ”+” sign and the area code may be inside brackets.

\+?\(?\d{2,4}\)?[\d\s-]{3,}

8. Price (with decimal) - if a form field requires users to enter a price of an item in their own currency, this regex will help. Replace the $ sign with your own currency symbol.

\$?\d{1,3}(,?\d{3})*(\.\d{1,2})?

9. Complex Password - only accept a string that has 1 uppercase alphabet, 1 lowercase alphabet, 2 digits and 1 special character. Also the minimum allowed length is 8 characters.

(?=.*[A-Z])(?=.*[a-z])(?=.*[0-9].*[0-9])(?=.*[^a-zA-Z0-9]).{8,}

10. CAPTCHA - Google forms do not offer CAPTCHAs but you can create one using regex. Here’s a simple captcha that requires users to answer a simple question - what is 2+2?

^(4|[Ff][Oo][Uu][Rr])$

Also see: Regular Expressions for Gmail Search

11. Word Limit - If you would like to limit the number of words that a user can type in the input field of a Google Form, there’s a regex for that as well. In this case, we only allow any input that has between 10 to 15 words:

^[-\w]+(?:\W+[-\w]+){9,14}\W*$

The Best Google Add-ons for Docs, Sheets, Slides and Google Forms

The availability of third-party add-ons for Google Docs, Sheets and Google Slides have certainly made the Google productivity suite more capable and useful. If you haven’t tried them yet, open any Google document or spreadsheet in your Google Drive and look for the extensions menu near Help. Google Workspace users may have to ask their admin to enable support for add-ons for the organization.

For starters, Google add-ons are like extensions for Chrome. Extensions add new features to the Chrome browser and add-ons extend the functionality of Google Office applications.

Anyone can write a Google add-on with some basic programming knowledge for writing HTML and CSS for styling the add-on. The server side code is written in Google Apps Script which is similar to JavaScript but runs on the Google Cloud.

Google Apps Script vs Google Add-ons

Google Add-ons are written in the Google Apps Script language but while regular Google Scripts can work on any document in your Google Drive, add-ons only work against the document or sheet that’s currently open in your browser.

The other big difference is that you can view the source code of regular Google Scripts while in the case of add-ons, the code is hidden from the end user. This helps developers protect their code but a downside is that the user has no clue about what’s happening behind the scenes.

We have seen issues with Chrome extensions and add-ons for Google Docs can be a target as well. For instance, an add-on can possibly email a copy of the current document or sheet to another email address? Or maybe it can share a folder in Google Drive with someone else. The good part is that add-ons listed in Google Workspace have been tested and reviewed by Google and, they go through a security review process if it requires access to sensitive scopes (like sending Gmail or accessing Google Drive).

The Best Add-ons For Google Docs, Sheets and Google Slides

The Google Workspace marketplace lists hundreds of Google add-ons and here are some of favorite ones that you should have in your Google Docs and Sheets. The are compatible with both GSuite and consumer Google accounts.

  1. Mail Merge for Gmail - Send personalized emails with emails to multiple email recipients with Mail Merge for Gmail and Google Workspace.
  2. Document Studio - Generate certificates, invoices, and other documents automatically from source data in Google Sheets or Google Form submissions.
  3. Download Gmail Emails - Download your Gmail messages and attachments in Google Drive for archiving.
  4. Email Scheduler for Gmail - Schedule emails inside Gmail for sending later at a specific date and time. Send repetitive emails that go on a recurring schedule.
  5. Google Drive Permissions Auditor - Know who has access to your files in Google Drive.
  6. Gmail Address Extractor - The add-on extracts the email addresses from the header and body of email messages for preparing a mailing list.
  7. Creator Studio for Google Slides - Convert Google Slides presentations to animated GIF and MP4 movies.
  8. Notifications for Google Forms - Get Google Forms responses in an email message when people submit your forms. Send customized email notifications to respondents.
  9. Email Google Spreadsheet as PDF - Convert and email Google Spreadsheets as PDF, Excel or CSV to multiple people. Email sheets manually or on a recurring schedule.
  10. Bulk Gmail Forward - Easily forward one or more email threads from Gmail to any other address.

Related tutorial: How to Create a Google Docs Add-on

How to Move Files Uploads from Google Forms to Specific Folders in Google Drive

The File Upload feature of Google Forms lets you receive files from form respondents directly in your Google Drive. You may add the File Upload question in your Google Form to receive PDF assignments from students, job applications, portfolio images from contestants, and more.

While the file upload feature in Google Forms is handy, it does have one big limitation. For instance, when a respondent uploads a file through Google Forms, the file is stored in a fixed folder within the form owner’s Google Drive. All uploaded files are are saved to the same folder, making it difficult to determine which respondent has uploaded which set of files.

Move Uploaded Files in Google Forms

This is where Document Studio can help you. The add-on can help you automatically organize uploaded files in custom folders as soon as they are received in your Google Drive through Google Forms. You can move uploaded to another folder, or rename the files based on the respondents’ answers in the Google Form. Additionally, you can organize the uploaded files into subfolders for convenient access.

Prepare Google Form

For this example, we’ve created a Google Form for collecting job applications for different positions in our company. The candidates have to provide their full name, the position they’re applying for, and then upload their resume in PDF format.

Move Google Forms File Uploads

By default, all uploaded files will be added in a new parent folder that is created by Google Forms in your Google Drive. However, you can organize the resume files in subfolders and move them to a specific folder based on the position the candidate has applied for. This will help you easily find the resumes of candidates who have applied for a specific position.

The uploaded files can also be renamed based on the candidate’s name or their email address. This will help you quickly identify the resumes of specific candidates.

Move Files to Custom Folders in Google Drive

Install the Document Studio and open the add-on in your Google Form. Create a new workflow and choose the File Uploads task from the list of available tasks.

Document Studio File Uploads

With Document Studio, you can move the uploaded files to another folder, copy the files to another folder, or rename the files based on the form responses. For our example, we’ll move and also rename the uploaded files based on the position the candidate has applied for.

Select the file upload question from the list of available questions. Next, choose the parent Google Drive folder where you wish to copy or move the uploaded files. You may also choose to save the uploaded files in a Shared Drive Folder, something that is not possible with the default Google Forms file upload feature.

For the subfolder path input field, provide the full path where you want the uploaded files to be saved. You can use placeholders like {{Country}} or {{Position}} to dynamically create subfolders based on the form responses.

Finally, provide a new name for the uploaded files. For our example, we have used the {{Name}} placeholder to rename the uploaded files based on the candidate’s name provided in the Google Form.

Rename file uploads in Google Forms

Save the workflow and your automation is ready. Now, whenever a candidate uploads their resume through your Google Form, the uploaded file will be moved to a custom folder in your Google Drive. The file will also be renamed based on the candidate’s name.

Move File Uploads with Google Apps Script

If you are comfortable with Google Apps Script, you can also write a custom script that will move the uploaded files to a specific folder in Google Drive. The script can be attached to your Google Form and will run automatically whenever a new form response is submitted.

To get started, go to your Google Drive and create a new folder (or use an existing folder). Open the folder and grab the ID of the folder from the browser’s address bar as shown in the screenshot.

Next, go to your Google Form that is accepting File Uploads and choose Script Editor from the 3-dot menu. Inside the script editor, remove all the existing code and copy-paste the following snippet. Remember to replace the Folder Id in line #1 with the Id of the folder that you’ve created in the previous step.

const PARENT_FOLDER_ID = '<<Folder ID here>>';

const initialize = () => {
  const form = FormApp.getActiveForm();
  ScriptApp.newTrigger('onFormSubmit').forForm(form).onFormSubmit().create();
};

const onFormSubmit = ({ response } = {}) => {
  try {
    // Get a list of all files uploaded with the response
    const files = response
      .getItemResponses()
      // We are only interested in File Upload type of questions
      .filter((itemResponse) => itemResponse.getItem().getType().toString() === 'FILE_UPLOAD')
      .map((itemResponse) => itemResponse.getResponse())
      // The response includes the file ids in an array that we can flatten
      .reduce((a, b) => [...a, ...b], []);

    if (files.length > 0) {
      // Each form response has a unique Id
      const subfolderName = response.getId();
      const parentFolder = DriveApp.getFolderById(PARENT_FOLDER_ID);
      const subfolder = parentFolder.createFolder(subfolderName);
      files.forEach((fileId) => {
        // Move each file into the custom folder
        DriveApp.getFileById(fileId).moveTo(subfolder);
      });
    }
  } catch (f) {
    Logger.log(f);
  }
};

Create OnFormSubmit Trigger

Inside the script editor, select initialize from the function drop-down and click the Run button to create the OnFormSubmit trigger for your current Google Form.

This will essentially run the Apps Script code whenever someone submits a new form entry and upload files to a specific folder in Google Drive.

OnFormSubmit Trigger

That’s it. Go to your Google Form and submit a new test entry. You should now see all the uploaded files neatly organized in a custom folder under the parent folder. The name of the custom folder is the unique Response Id that Google Forms automatically assigns to every form submission.

Also see:

  1. Change the Google Forms Upload Folder
  2. Move Google Forms Uploads to Shared Drive

Build a COVID-19 Self Assessment Tool with Google Forms
Businesses and schools worldwide are using Google Forms to build COVID-19 self-declaration forms that employees, students and visitors must complete every day before they can attend work. Here is a sample COVID-19 Health Screening Form - if the answer is “yes” to any of the questions, the person is expected to stay home.
COVID-19 Google Form

After a respondent submits the form, a confirmation email is sent to them instantly with the Email Notifications add-on. The email is like a clearance certificate detailing whether the person can attend work or not. If they are allowed entry, the email also contains a dynamic QR Code that can be scanned and verified at the entry point.

Send Conditional Notification Emails

The conditional notifications feature of the Google Forms add-on automatically determines if the respondent should be sent the “Allowed to enter premises” email or not. It looks at the form’s answers and compares them with the specified criteria to make this choice.
COVID-19 Health Screening Questionnaire

For instance, if the employee has entered a value greater than 100.4 in the temperature field, they are sent the “Work from home” email. Similarly, they are not allowed to attend work if they selected any value other than “None of the above” for the symptoms question.

To enable this workflow with Google Forms, you are required to create two email rules - one rule for employees that have passed the self-assessment test and the other rule for people who are required to work from home based on their self-assessment.

Rule 1: Allowed to Attend Work

Create a new rule for the respondents and set the conditional notifications as shown in the screenshot.

Allowed to Attend Office

You can put {{Email Address}} in the email field and this will be replaced with the respondent’s email address that is submitted in the form entry. If you have a Google Form that is restricted to your school or organization, the email address of the submitter will be automatically recorded in the form entry.

For the email template, you can use the QR Code function that will add a dynamic image in the outgoing email with the form answers.

Email Template

Rule 2: Work from Home

To save time, duplicate the previous rule and edit the conditional notification to send a different email to people who aren’t considered fit to attend office and should continue working from home.

If you compare this conditional logic screen with the previous one, you’ll notice that it uses OR instead of AND with different criteria indicating that if either of the conditions is true, the email should be sent.

Any condition matches

Demo Check-in Google Form

If you would like to test this self-assessment tool, fill this COVID-19 Google Form and you’ll receive an instant confirmation email with the result. Here’s a copy of the email sent by the Google Form when the respondent passes the self-assessment.

Check the Form Notifications user guide to learn more about the features of the add-on.

How to Embed Barcode and QR Code In Google Forms Notifications

The Google Form Notifications add-on lets you automatically send Google Form responses in an email message to one or more recipients. The email notifications are dispatched the moment your form receives a new submission.

The more recent version of the Google Form addon includes support for QR Code and Barcode symbols that you can embed in the email messages. The images can be generated from static text or you can create dynamic images based on answers submitted by the user.

Add QR Code images in Emails

The basic syntax for adding QR Code images in emails is:

=QRCODE(Your Text Goes Here)

You can customize the colors and size of the QR code image by adding key-value pairs in the QRCODE function.

For instance, if you would like the QRCode to have Indigo background and the QRCode should be itself in white color, the modified formula with the hex color codes would be:

=QRCODE(TEXT textcolor=#FFFFFF backgroundcolor=#4B0082)

The QR Code images have a default width of 300px but if you customize the size with the width parameter as shown below:

=QRCODE(TEXT width=225)

Insert QR Code in Google Form

Include dynamic text in QR Code images

Until now, we have seen examples of static text but the Google Forms addon can also create QR Code images from text in Google Form Answers using placeholders.

For instance, if your Google has a question title “What is your website address?”, you can use a QR Code function like the one below. This will turn the user’s answer into a dynamic QR code that, on scanning, will take you to the form respondent’s website.

=QRCODE({{WWhat is your website address}} textcolor=#4B0082)

Embed Barcode in Email Notifications

The Email Notifications add-on also includes support for BARCODE function to help you embed barcode images in PNG format for EAN, UPC, ISBN, postal codes, GS1 Database and all other popular formats.

The basic syntax for barcode function is:

=BARCODE(TEXT format=CODE39)

For instance, if you would like to embed the barcode image for a book whose ISBN-13 code is 9781786330895, the function would be:

=BARCODE(9781786330895 format=EAN13 includetext=true)

The includetext=true parameter would ensure that the text for data is included into the barcode image.

Insert Barcode symbol in Google Form

You can also modify the colors of barcode image using hex codes:

=BARCODE(9781786330895 format=EAN13 includetext=true barcolor=AA0000 textcolor=008888 backgroundcolor=FFFF60)

You can similarly modify the width of the Barcode image, the height of the bars, add borders, padding and more. Please consult the documentation for a complete range of formats and options supported by the =BARCODE() function in Google Forms.

How to Use a Different Reply-to Address in Gmail

With Document Studio, you can specify a different reply-to email address for outgoing email message. When the recipient hits the “Reply” or “Reply All” button, the To field in their email reply gets populated with the email address that you’ve specified as the Reply-to email at the time of sending.

You can even specify more than one email addresses in the reply-to field, separated by commas, and they will all show up in the To field of the reply field.

The reply-to addresses can also be dynamic and can be based on data in your Google Sheets and Google Forms. For instance, if you have a question in your Google Form that asks the form respondent’s email address, that email can be set as the reply-to address.

Thus, when you reply to the email message, the reply will automatically go to the form respondent’s inbox.

Reply-to Email Address for Gmail

To get started, open your Google sheet, go to the add-ons menu and choose Document Studio. Next click on the Open menu to open the Document Studio sidebar. Expand the Mail Merge section and click on visual email editor.

Reply-to email address

This opens the visual email template designer. Specify the address(es) in the Reply-to addresses field as shown in the screenshot.

If you are specifying a dynamic field, enclose the question title (or the column header) inside double curly braces like {{Email Address}}.

Troubleshooting: Gmail may not always send replies to the email address specified in the reply-to field. See solution - Gmail ignores reply-to setting.

Compare Free and Premium Editions of Form Notifications

The Google Forms notification add-on is available as a free download for all Gmail and G Suite accounts.  The basic features are free but you can upgrade to premium for more features.

The license applies to the entire Google account and thus all Google Forms under the same Google Account will be upgraded to premium. In other words, you require a single license for all Google Forms in your account. Also, the license is only required by the form owner and not the form respondents.

FeatureFree EditionPremium Edition
Email LimitMax 20 responses per daySend 400 - 1500 email recipients per day depending on the type of your Gmail / GSuite account. Learn more.
Send multiple emails per Google Form submissionYesYes
Number of Form Rules allowedOneUnlimited
CC and BCCNot availableAdd one or more email recipients in the CC or BCC field of the email
Notify form respondentYesYes
Send email notifications from a different email aliasYesYes
“Sent via” branding removed from email notifications.NoYes, all branding removed from emails
Send emails from a generic no-reply email addressNoYes (requires a G Suite or Google Apps account)
Send conditional email notifications based on form answersNoYes, send responses to different people based on user’s answers
Manually resend email notifications to old responsesNoYes
Technical support includedNoEmail support included
Premium Upgrade-
Upgrade to Premium

How to Use Template {{Markers}} in Document Studio

Your Document Studio templates can include any variable field that is available as a column title in the Google Sheet. In case of Google Forms, you can use any question title as your marker and the marker should be exactly as your question title enclosed in double curly braces.

For instance, if a question in your Google Form says “What is your name”, the marker you’ll use in your document template will be {{What is your name}}.

You can also create additional columns in the source Google Spreadsheet with formulas and use them as dynamic markers in your Google template. Let me show you an example.

Create a new column and call it Row Number. Now go to the first empty cell of that column and put this ArrayFormula function:

=ArrayFormula(if(LEN(A2:A); row(A2:A) -1;))

What we have added a column that displays the row number of the rows and we can now put {{Row Number}} in your document templates, merged file names and Drive folder path. For instance, if you put Invoice #{{Row Number}} in the file name, the files name would be named Invoice #1, Invoice #2 and so on automatically.

Formatting Date and Time

The same technique can be used to format date and time information for including in your templates.

Say the first column in your Google Sheet in called Timestamp and it includes the date and time when a Google Form response was submitted. Add a new column called Submission Time and add this formula in the first empty cell.

=ArrayFormula(if(NOT(ISBLANK(A2:A)),HOUR(A2:A)&":"&MINUTE(A2:A),))

You can now include the submission time in your email and document template using the {{Submission Time}} variable field.

Standard Markers for Google Forms

In addition to standard form questions and column headers, Google Forms also support a few standard markers like:

  • {{Response Number}} - Form Response number
  • {{Form Name}} - The name of the Google Form
  • {{Form Url}} - A link to the associated Google Form
  • {{Response Id}} - Unique response ID generated by Google Form
  • {{Response Url}} - Directly link to view / edit the current form submission
  • {{Response Date}} - The full timestamp when a form was submitted
  • {{Respondent Email}} - If your Google Form is capturing email addresses, this will include the email address of the form respondent.
  • {{All Markers}} - An HTML table containing all the form responses in a neat tabular format.

You should put {{All Answers}} in your email body to receive a copy of the form answers in an email notification.