Dropbox has been a reliable way for teams to upload and share files for over a decade. The company states that it has over 700 million registered users, including National Geographic, Lonely Planet, and Servcorp. While the brand is definitely on our list of the top cloud storage software services, it’s far from the only choice.
The research team at Quick Sprout spent hours scouring the web, testing services, and analyzing reviews to find the top Dropbox alternatives and competitors.
Founded in 1995, IDrive has nearly 30 years of experience providing backup services. Impressively, IDrive has kept up with its competitors and continues to emerge as a leading player in the backup software space.
IDrive offers multiple-device backup, online file syncing, electronic and physical backup retrieval, a history of each file going back 30 versions, and 256-bit AES encryption for security.
IDrive is best for businesses that want a no-nonsense backup service, while Dropbox is ideal for brands of any size that want file sharing and document signing services in addition to cloud storage.
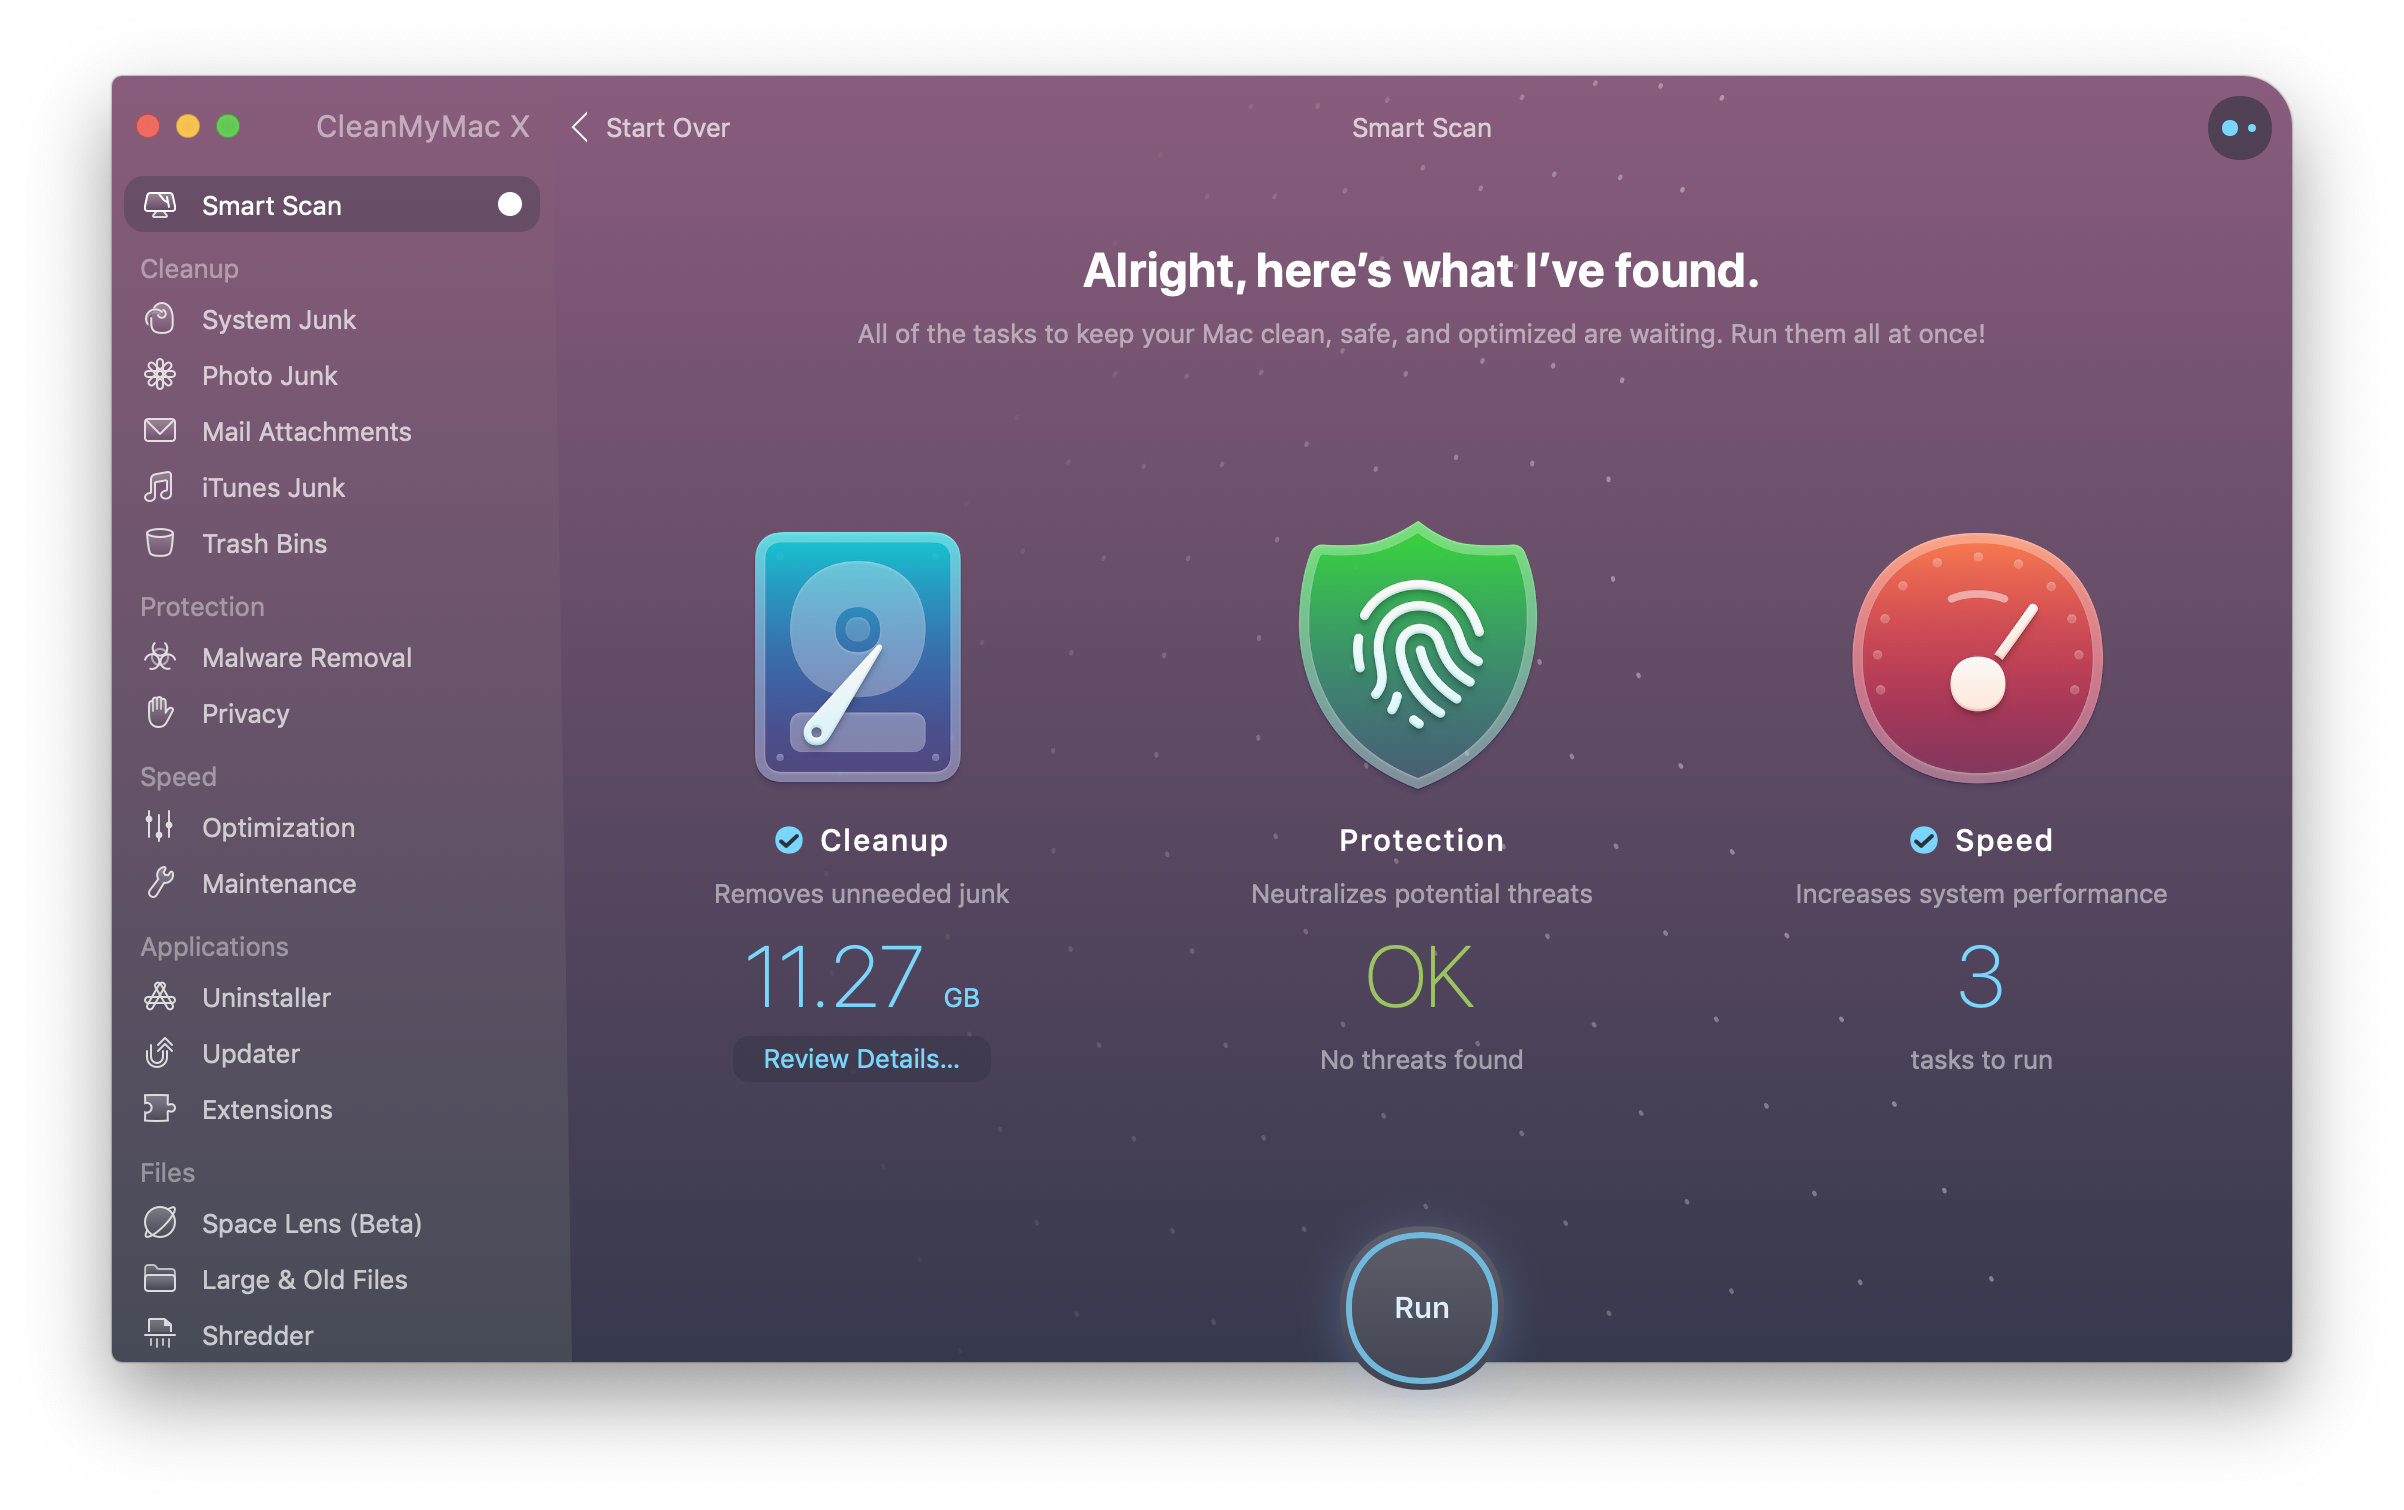
We evaluated these two brands according to three criteria: syncing, integrations, and scalability. IDrive does back up files on a semi-automatic basis—if you put them in the relevant Sync folder.
An example of how IDrive’s Sync folders look.
Dropbox, on the other hand, automatically backs up all the files on your computer once you install the Dropbox app and set up Dropbox Backup. Dropbox Backup is available on every paid Dropbox plan. It’ll also automatically back up any external hard drives that are plugged into your computer. If you like automatic syncing, you’ll prefer Dropbox. If you’d rather pick and choose what to sync, IDrive is for you.
Dropbox offers integrations with popular apps like Google Suite, Salesforce, Slack, Adobe, Microsoft Office, Zoom, AWS, Canva, and Autodesk. IDrive does not. If you don’t use any of those apps, that won’t be a problem.
Both services scale well, offering affordable rates for 5 TB of storage, although Dropbox claims it’ll give you as much space as you need at a rate of $24 per month. IDrive gets pricey when you get much past 5 TB.
If you’re already a devoted PC user, you’re probably already using Microsoft OneDrive. This online backup service is ideal for families who want to share photos, files, and other documents seamlessly—and securely—across devices.
When it comes to syncing capabilities, integrations, and scalability, Microsoft OneDrive and Dropbox are pretty even. Both come with automatic syncing, along with syncing of external hard drives when they’re plugged in. Both also let you upload photos and videos straight from a plugged-in camera.
Microsoft OneDrive and Dropbox both come with a robust suite of integrations, including Microsoft Office, Salesforce, DocuSign, Trello, Zoom, Google Suite, and Slack.
An example of some of the solutions and integrations you’ll get with OneDrive.
In addition, both services come with impressive scalability. Microsoft OneDrive lets business users utilize up to 25 TB of storage, but it takes a bit of hoop-jumping to get there. Dropbox scales with you as much as you need it to.
Microsoft OneDrive can work for businesses, but the business plans and features can be trickier to navigate than those for Dropbox—there are multiple business tiers offering different groupings of features, and you have to read the fine print to get information on how much storage space you’ll get beyond 1 TB.
You’re probably already familiar with Google Drive if you have a Google Workspace account of any kind. Google Drive is the cloud storage powerhouse that backs up everything you work with in Workspace, like files produced in Google Docs, Google Sheets, and Google Forms.
Google Drive and Dropbox exist on such a level playing field that it all comes down to preference. If you’re already familiar with Google Workspace, utilizing Google Drive to upload more files from your computer makes more sense than switching to Dropbox. But you can use either service and enjoy high-quality, high-capacity file sharing and storage capabilities.
When we analyzed Google Drive according to syncing capability, integrations, and scalability, we found that it matched up with Dropbox in just about every way. Like Dropbox, Google Drive comes with automatic syncing after an initial setup.
Google Drive offers many of the same integrations Dropbox does, including Asana, Adobe, Slack, Trello, and DocuSign. However, Google Drive also wastes space with many poorly rated, obscure integrations that you’ll probably never use, and it doesn’t come with a Canva integration.
A sampling of Google Drive’s integrations, some of which are high-quality and some of which aren’t.
All in all, both Google Drive and Dropbox work well for individuals or large companies. It all depends on what you prefer—and Google Drive does have an edge in its free plan, which offers 15 GB compared with the Dropbox free plan’s 2 GB limit.
Apple iCloud – Most Intuitive Cloud Storage Service
For Apple users, iCloud is the built-in cloud storage solution that keeps music, notes, videos, files, and photos safely stored in the cloud. All Apple products come with iCloud storage of up to 5 GB.
With iCloud+, users can get up to 2 TB of storage. iCloud+ comes with HomeKit Secure Video capabilities, a Hide My Email function, and Family Sharing. iCloud+ is also rolling out a private web browsing feature called Private Relay.
iCloud is ideal for personal use, but it doesn’t stack up as a business solution. Like Dropbox, it comes with automatic syncing, along with automatic full backups when devices are connected to WiFi and power. However, iCloud doesn’t come with any integrations, and its scalability is limited to 2 TB per user. It’s ideal for freelancers, particularly those who work in photography, as its photo storage is phenomenal.
Apple does have a solution for small businesses, though. It’s a newer service called Apple Business Essentials, and it comes with automatic backups, management of third-party apps the business uses, and other IT essentials. Because it’s new, it’s hard to gauge how much people use or like this service.
Apple Business Essentials is geared toward IT and app management for small businesses.
In addition, Apple Business Essentials doesn’t come with any extra storage. Even its most expensive plan is limited to 2 TB, making it difficult for mid- to large-sized companies to use it. Individuals who already use Apple products, along with small businesses that are invested in the Apple ecosystem, will benefit the most from iCloud+ or Apple Business Essentials.
It is extremely tough to manage all of your customers while keeping track of everything else without any dedicated system. Leads are dropped, opportunities are missed.
The good news is that CRM software can help you automate and efficiently manage all these customer-related processes. The great news? A lot of the CRM software available today is free.
This software allows you to take all of your data across multiple platforms and departments and store it in one convenient place.
I’ve put together a list of the best free CRM software tools to help you decide which is right for your business.
The Top 8 Best Free CRM Software Tools:
HubSpot — The Best Free CRM for Massive Contact Lists
Insightly — The Best Free CRM Software for Project Management
HubSpot is a great choice when it comes to the number of contacts it offers. You’re looking at 1,000,000 contacts with no time limit or expiration date—no matter the size of your team.
There’s no doubt such a vast number of contacts would be more suitable for larger businesses in general, but it’s also a useful feature to have as you grow your business. You won’t have to worry about maxing your contact list out any time soon.
The CRM software’s contact records allow you to view everything about a contact, too. From your history of emails to the calls, meetings, and deals you’ve made.
Additional options include the ability to create forms and popups where you can start to acquire data about a contact, and there’s even a live chatbot to gather information and schedule meetings for your business.
In other words, HubSpot is aware of just how vital customer data is and keeps it all in a readily accessible place.
Other features of the CRM include:
Email tracking
You can set recurring tasks
Shared history options
Sales automation
Social media integration
Task planning, scheduling, and tracking
Live chatbots to capture leads
Call monitoring and email monitoring
I’ve said the HubSpot CRM is free to use, and that’s true, but there are extra features available for those that want more. For instance, higher pricing tiers allow for automation, traffic analytics, user roles, and Salesforce integration, to name a few.
It’s a good idea to get familiar with the CRM first before deciding which of these enhanced features you need.
#2 – Insightly — The Best Free CRM Software for Project Management
Managing projects, large and small, is at the core of any business. You’ll need a robust system to be able to handle day-to-day operations. Insightly is my top pick for free CRM software that can manage multiple projects of all sizes.
Each project and sale are presented in an easy-to-use pipeline that you can customize to fit your business. What’s more, recurring projects can be automated to keep things running smoothly while saving you time.
It’s worth mentioning that the free version of Insightly is aimed at a two-person team, but higher pricing tiers can provide you with more users. It’s a good starting point to see what the software can do, but it wouldn’t be suitable for larger teams.
Perhaps the most significant thing is that Insightly is just so simple to use for everything from building email campaigns to using pre-built templates for other crucial projects.
Visually speaking, you can also expect a clean, clear, and highly functional CRM that gets the job done without the fuss.
Project management proficiency aside for one second, Insightly also provides the following features:
Native iOS and Android mobile apps
Permission management
Powerful Google and Microsoft calendar integration
Quote generation
Reporting and statistics
Scheduled reporting
Social media integration
Tags and keywords
A useful Gmail add-on also allows you to view email opens, create leads, and projects.
The three tiers available for Insightly are Plus, Professional, and Enterprise. Plus starts at $29 per user per month and is billed annually. Professional and Enterprise are $49 and $99 per user per month, respectively.
#3 – Streak — The Best Free CRM Software for Gmail
I mentioned that Insightly had a Gmail add-on to help you manage projects from your inbox, but Streak takes that concept to the next level.
Simply put, this free CRM software allows you to control your entire business through Gmail. There’s no additional app or platform to log in and manage—it literally lives inside your inbox.
The immediate advantage of this is that you can use a familiar and most likely already frequently used email platform for so much more. For example, Streak allows you to create pre-made pipelines for your business projects, sales, and lead lists, all within the email interface.
Even more impressively, contact details from your emails can seamlessly be pulled into Streak, including company information. This process auto-populates, too, giving you more information to work with in less time.
Keep in mind that Streak’s free plan is for two users only. While you can certainly do everything you could possibly need with that in the right situation, larger teams will miss out unless you upgrade to the paid-for plans.
Other features of Streak include:
“Send later” email scheduling
Mass email/mail merge
API access (including webhooks)
Tasks/reminder/Google Calendar integration
Import/Export via Google Sheets
Call logs
Meeting notes
There are four pricing plans for Streak overall, including the free plan. Solo starts at $15 per user per month, Pro is $49, and Enterprise is $129, each with increasingly more features.
#4 – SuiteCRM — The Best Free Open-Source CRM Software
One of the best things about SuiteCRM is that it’s both free and open-source CRM software.
By open-source, I mean the software itself can be customized almost any way you want. It also means it’s available to the public to enhance it collaboratively.
SuiteCRM is an excellent choice for businesses with a particular need to modify the software to their liking.
For example, let’s say you’re a business that needs the functionality of collecting multiple leads from numerous sources and then converting them into customers. Not a problem. SuiteCRM’s open-source and flexible nature allows you to tailor its modules to your bespoke goals.
Even better, there’s a wide variety of free add-ons that can be downloaded and added to the software to help you further achieve specific goals.
Other features include the following:
Customer support
Marketing automation
Landing pages and web forms
Calendar management
Client portals
Contact database
Real-time data and reporting
Sales reporting
Search functionality
Third-party integrations
The pure SuiteCRM is free to use and doesn’t expire, so there won’t be many extra costs from that point. You’ll be able to self-host the CRM, too, if you desire. However, it’s worth noting that customer support is only available through the forum for all but the highest package.
The other versions of SuiteCRM, which are hosted, and can be scaled to your business, are not free to use indefinitely—be aware that very few hosted CRMs are—but they do come with a 30-day trial, giving you more than enough time to decide.
#5 – Flowlu — The Best Free CRM Software for Financial Management
Flowlu shines on the financial side of things, making it a top choice for businesses that produce many invoices and need to keep up to date with transactions. If that’s you, then you might just have found the right software.
The creators consider it to be “business management software” first and foremost. There’s a deep focus on quotes, payments, and other financial priorities.
If you’re selling to a customer, for example, then you can create a custom invoice, choose your preferred payment method, and when you’ve been paid, the status of the invoice will update automatically.
What’s more, an automatic email can be sent out to the customer thanking them, and the entire transaction is then logged in the invoice record. Handy indeed.
Flowlu also includes the following valuable features:
Mind maps
Records and revenue management
Sales reporting
Security and encryption
Status tracking
Task management
Time tracking
Workflow management
Flowlu is free CRM software, but it’s worth mentioning that quite a few features are locked out if you remain on the initial plan. If you’re a business that needs multiple accounts for a large team, keep in mind that the free plan only offers two places and no user access control.
There are five overall tiers to the pricing, with the Enterprise plan offering everything along with a custom domain and two-factor authentication for extra security.
#6 – Freshworks — The Best Free CRM for Tech Support
How important is tech support for your business? If the answer is very important, then Freshworks is an excellent choice. Freshworks’ free CRM software comes with phone and email support five days a week, 24 hours a day.
The highly-rated customer support makes this software ideal for smaller businesses, especially when ongoing help and care are crucial to long-term success.
With that said, any business that puts customer support as a top priority on their list should consider the software.
Some of the other highlights of the Freshworks CRM include the following:
Lead scoring
Lost deal analysis
Mobile integration
Open and click notifications
Pipeline dashboard
Preview reports
Record calls
Revenue analytics
Sales campaigns
Team segmentation
Individual add-ons can improve the CRM software further, but these can quickly become costly, which seems somewhat at odds with the rest of what Freshworks offers.
Still, I’m nitpicking here, and you shouldn’t let that stop you from checking the software out.
The best part is the startup plan that offers top-notch support is free forever, making it a generous proposal. Pricing for other plans starts at $29 per month per user. The free trial of the more advanced tiers includes everything, too, and gives you 21 days to see whether the software is worth buying.
The top tier of the pricing even features a dedicated account manager that can personally resolve issues and relay information to other specialists. Either way, whatever choice you make, Freshworks is unlikely to let your team down.
#7 – Bitrix24 — The Best Free CRM For Your First Year In Business
While other CRMs on this list offer a free trial of their software, some even indefinitely, they are typically held back by limited features or a smaller number of users.
That’s where Bitrix24 comes in, and really, the strongest point about this CRM software is that the starting free plan provides businesses with enough to really get going. For some small companies, it may even be all they need.
Bitrix24 provides a cloud-based CRM for up to 12 users, 5 GB of online storage, and most of the significant features of the other plans just scaled down a bit.
In other words, for the cost of $0, you’re getting an awful lot. It also allows you to try the software out, almost in its entirety, before deciding to opt for a more premium plan. It’s a good deal, and I’m impressed.
Other features of Bitrix24 include:
Landing page creator
Group chats
Badges
Ticket management
Website forms
Approval workflows
Voice and video calls / conferencing
Synchronous document editing
Version control
Customizable callback widget
Document management
Task management
Of course, just because the free starting plan is generous doesn’t mean that Bitrix24 is necessarily the best free CRM for your business.
For example, I think the customization features of Bitrix24 aren’t the strongest, and the UI can be confusing to navigate.
But for just getting your business off the ground, it’s a very solid choice.
Sales forecasting is a vital part of any business, allowing you to see your available budget and what a given strategy or route will potentially return to you. It also helps mitigate risk, keeping your business healthy in the long term.
As the name suggests, Really Simple Systems makes sales forecasting as simple as it needs to be. This free CRM software provides you with a weighted and unweighted revenue forecast for all of your projects.
Effectively, the weighted figure gives your business a clear understanding and probability of closing a deal. The fields in which this data is located can be auto-populated, too, saving essential time for other areas and giving you more data to work with overall.
Accuracy is key to sales forecasting, and the more data you have, the more accurate you’ll be.
Other features I like in the Really Simple Systems free CRM are:
Free customer support
Two-way email integration
Quotations
User permission levels
Integrated marketing module
Web-to-Lead forms
Automated campaigns
In-product help drawers and tutorials
The free plan of Really Simple Systems isn’t free forever, and after the trial expires, you’ll need to upgrade to one of their other plans. It’s also worth mentioning that the free plan lacks quite a few features of the other more premium plans, including email integration, user profiles, and design templates.
The Starter package is $14 per user per month, the Professional is $30, and the Enterprise plan is $46 per user per month. The document storage on the free tier is only 100 MB, which can be easily used—if that’s important for your business, another CRM plan might be better.
How to Find The Best Free CRM Software For You
You’re interested in a free CRM, but you’re not sure which? Fret not. Here, I’ll explain the CRM categories and then go into the specific factors to consider in your search.
The first thing to think about is the kind of CRM you want for your business.
There are three main types of CRM software to consider:
Operational
Analytical
Collaborative
The difference between these types of CRMs is the areas they focus on overall.
For example, an operational CRM system focuses on capturing leads and streamlines and automates the process. It would be suitable—although not exclusively—for small businesses that prefer automation and those which run a linear sales process. HubSpot is an example of an operational CRM.
An analytical CRM is all about the data, as you might assume from the name. So, here we’re talking about customer data and the insights you can get from it. Information from multiple channels will be structured and available for a team to use—for example, they might use the data which details customer preferences to improve customer relationships. Freshworks CRM delivers robust analytics through custom reports and a win-loss analysis.
The last type is the collaborative CRM. This is CRM software that looks at all of the interactions a business has with its customers. The central aim is to share customer information between departments to bolster the overall customer service and eliminate problems. This would be suitable for businesses with many different departments and those happy to share the data around in a considerable manner. Bitrix24 is an example of a good collaborative CRM.
In addition to the above three types of CRMs, these are the other key factors you need to think about when deciding on the right free CRM software for you:
Self-Hosted vs. Hosted
A CRM system can be self-hosted or hosted. What that essentially means is the difference between sorting out the server and security for yourself or letting someone else take care of it.
For example, most of the free CRMs on this list can take care of the hosting for you, and it’s included in almost all of the free and paid plans. SuiteCRM is an example of software that can be self-hosted or hosted through the cloud.
There are advantages and disadvantages of self-hosting vs. hosting a CRM.
In a nutshell, self-hosting gives you more control and is generally cheaper, but you will have to potentially manage and fix any problems that occur, such as a cybersecurity attack.
Hosted CRMs are generally more expensive and give you less control—in theory—but you have access to top customer service teams and better infrastructure. It’s the peace of mind knowing that any problems will be fixed by a team of experts that make this a popular choice, certainly for larger businesses.
Number of Users
The number of users that free CRM software allows varies greatly. As you might expect, most of the free CRMs on this list limit the number of users on the free plan but significantly increase it on the paid plans. My advice is to think carefully about the number of users your business needs.
For instance, does your business consist of a large team? Or maybe it’s a two-person effort?
Bitrix24 is generous and offers 12 users on their free plan, while conversely, Insightly is aimed at two people on their initial offering. The last thing you want is a team member locked out of the software. However, a two-person setup might be all you need.
Customer Support
The level of total customer support you’ll receive when using a free CRM isn’t consistent across the board. For example, Freshworks provides customer support five days a week on their free plan, while Flowlu and Streak’s offering is more basic.
It comes down to what your company needs right now.
Is it crucial that you receive as good customer support as possible at this stage in your business? Or would you rather test the waters with a free CRM and then upgrade later for better support? Think about what you need in your situation.
Type of Free Plan
The type of free plan on offer with CRM software fits into one of two main scenarios: the software is free forever but is probably limited in some ways. Or, there’s a free trial available for the software with most of the key features available, but once it expires, you will have to upgrade to a paid plan.
For instance, on our list, we can see that SuiteCRM is free forever but limited in some features, but if you’re happy with what that offers, you need not pay anymore. Others, such as Really Simple Systems, have free trials, and once they expire, you will need to move onto a paid plan to continue to access it.
The critical question is: what’s best for you and your business right now?
Summary
There isn’t any free CRM software on this list I would recommend entirely over the others because it really does depend on your business context. The one thing I can say for sure is that every single one of them has plenty to offer.
If you’re looking for customer service as a top priority, go for Freshworks, but if financial management is more the thing you need, Flowlu is a good bet. For a great free starting plan, Bitrix24 has you covered.
Maybe managing everything from Gmail is important. If so, I say go for Streak. Or perhaps powerful sales forecasting is what you’re after instead? In that case, Really Simple Systems is a strong choice.
Need CRM software that can manage countless contacts? HubSpot offers 1,000,000. For everything project management, you should turn to Insightly, and SuiteCRM is an open-source delight.
Use this guide carefully, and you’ll be up and running with free CRM software before you know it.
Looking for the best Dropbox plugins for WordPress?
Dropbox is one of the most popular free cloud storage providers. Using cloud storage to save your WordPress backups, media files, and other important documents is a great strategy. Your documents and files will remain safe no matter where you are and what device you are using.
There are several WordPress plugins that allow you to integrate your WordPress site with a Dropbox account.
In this article, we’ll share some of the best Dropbox plugins for WordPress to upload your website backups.
What is Dropbox?
Dropbox is a modern solution to keep your files and documents secure on cloud storage. It offers a file synchronization feature to provide easy access to your files on your devices and apps, plus file sharing with other people.
The basic free plan comes with 2 GB storage. If you want more storage space, you should look for their premium plans.
Dropbox is a great tool for teams as well as individuals. You can set up permissions to provide access to certain files to specific team members.
By using the right WordPress Dropbox plugins, you can backup your entire WordPress site on the cloud and also restore the complete files when you need them.
Let’s look at the best Dropbox plugins for WordPress.
UpdraftPlus is one the most popular Dropbox plugins for WordPress. It allows you to backup WordPress files, databases, external databases, and more.
It manages a log for all your backups in the WordPress admin area, and displays an error or warning message to update you about the status of your backups. Once the backup is completed, it sends you a complete report so you can monitor the events that occurred during the backup process.
UpdraftPlus is also a multisite-compatible plugin. The backup panel will be available in the network dashboard, and you can backup or restore your individual websites without having to restore all sites at once.
UpdraftPlus also offers a Dropbox Sub-Folders addon to extend the cloud storage functionality. If you’re using WordPress multisite, then this addon will manage your files in the right folders to provide easy access to restoration.
BackupBuddy is one of the most popular and reliable WordPress site backups and restoration plugins. It comes with the ability to automatically create backups on a given schedule and save them to any location you want, including your Dropbox account.
Once you connect your website with Dropbox, you don’t have to do it again and the plugin will keep storing your backups to Dropbox automatically.
BackWPup is a free WordPress Dropbox plugin. It allows you to create a complete backup of your WordPress site and store it on your Dropbox account.
You can also schedule your backups based on how frequently you update your website. BackWPup will automatically take care of storing them on your Dropbox cloud storage.
WPForms is a beginner-friendly WordPress contact form plugin. It comes with a drag and drop form builder to create a contact form, user registration form, file upload form, and other useful forms.
It integrates with Zapier to connect thousands of apps to your WordPress website, including Dropbox. This allows you to upload user-submitted files directly to Dropbox cloud storage.
All files are accessible in your WordPress admin dashboard. You can view and delete any file without downloading it on your computer. WPForms with Dropbox is a perfect solution to store your files.
Duplicator also allows you to create a copy of your live site to a staging site. You can move or backup your entire website, including the database, without losing any files.
BlogVault is a reliable backup plugin for your WordPress blog. It allows you to create a complete backup of your website with databases and upload it to your Dropbox cloud storage account.
The backups are secure with encryption. However, it doesn’t offer a website restoration option from a Dropbox backup. You need to use a decryption tool to use the backups stored in your Dropbox account.
With over 3.5 million accounts, Basecamp is one of the more popular project management platforms. It offers many benefits, including a highly user-friendly design and multiple in-platform communication options to help streamline your workflow and keep team members focused and working within the platform. But Basecamp also has some downsides, like limited reporting and time tracking functionality. While it’s ideal for smaller projects, it might not be the right choice for highly complex, larger projects.
How Basecamp Compares to Top Project Management Software
When it comes to affordability and a user-friendly design, Basecamp wins out over most other project management software. Its free version is a great option for freelancers and startups, while Basecamp Business is still highly affordable for businesses of all sizes. Basecamp lacks when it comes to task automation and timesheet tracking, so if you’re looking for those specific perks, Zoho Projects is a better choice that’s still highly affordable. Basecamp is also frequently mentioned in the same sentence as Trello, which is also ideal for smaller projects and which offers a highly functional free plan. Any of these project management software options are suitable for smaller-scale projects and businesses working on a limited budget.
Basecamp Project Size Capabilities
Basecamp operates on a to-do list basis. You can break larger projects down into lists smaller tasks and assign team members to-dos with deadlines. Team members can upload files directly to tasks, keeping work centralized.
With the ability to create and customize multiple projects and endless tasks for each project, Basecamp theoretically has the capability to handle everything from a small and simple project to a much more complex multi-stage project. You can simply keep adding on as many tasks as are needed, and it’s easy to tailor those tasks as the project evolves and progresses.
Task templates help to streamline the creation and assignment process, but this process is already much simpler than what you’d be facing with other project management software. With Basecamp, you can create a task by giving it a name – and that’s it. There’s no need to provide a description, pick a start or end date, or create milestones. This can save time, letting you quickly create tasks that you can then return to and add detail at a later time.
While a to-do list can help manage smaller projects, bigger projects require bigger, more detailed planning. Enter Basecamp’s hill charts. These charts give project managers a better view of the big picture.
Each hill chart effectively visualizes the uphill project phase that involves figuring out an approach and solving potential problems. It also shows the downhill phase that’s all about task execution and making those plans happen.
With Basecamp, you’ll have the option to develop a hill chart for each to-do list within your project. It’s as easy as turning on hill chart tracking and dragging and dropping the tasks into the chart. The fact that the charts are human-generated means that they can be tailored to your specific project, rather than based on deadlines or milestones that are input and fulfilled. The result is that the hill chart can establish a realistic way to visualize and track project progress, and to identify when and why challenges arise.
Although Basecamp can absolutely support larger projects, it does have some shortcomings. It lacks task dependency settings, so if one team member misses a deadline and a second task depends on that task being completed, your project can go off the rails without you being able to see that problem coming. Basecamp also lacks in project reporting, budget monitoring, and other important details that you might need to provide to stakeholders and supervisors.
Basecamp has the capability to support all of the to-do lists that a big project might need, but without features like task dependency and reporting capabilities, it’s probably better suited for smaller projects with limited complexity.
Basecamp Team Size Capabilities
Basecamp can accommodate teams of all sizes. Basecamp Personal supports up to 20 users. Upgrading to Basecamp Business means you can have an unlimited number of users, ideal for larger businesses and projects that require big teams or multiple teams. Basecamp has done away with per-seat charges, so you can enroll anyone who may even have a small role in the project without having to worry about increased plan costs.
Basecamp Ease of Use
One of Basecamp’s major strengths lies in its ease of use. This is a platform that everyone–including team members, clients, and team supervisors–can quickly learn to navigate. Basecamp has a user-friendly design and a relatively simple dashboard. This easy learning curve makes it practical for businesses with a large freelancer base; while freelancers might not work in the platform as regularly or intensely as full-time employees, Basecam is easy enough to use that even occasional users can still pick up right where they left off when they last logged in.
Basecamp’s largely central design also contributes to its ease of use. With in-platform communication tools, users can stay focused on Basecamp, rather than jumping back and forth into email and other chat platforms during the day. Basecamp also makes it easy to upload documents, files, and images, and those files are stored within Basecamp where they’re easily accessible. This design saves time and makes it easy for team members to retrieve the files they need.
All of that information is conveniently located in a “My stuff” menu. Team members can quickly view their assignments, schedule, recent activity, and more. It’s quick and easy to catch up after a day out of the office, and this centralized summary of the need-to-know information can help team members to prioritize their work and ensure they meet their deadlines.
Project managers enjoy a similarly concise view of their own. A manager’s view displays all of the activity, including the overview tasks and upcoming milestones. At a glance, a manager can identify potential problems that need attention, so they can work more productively.
Basecamp Communication
Good project management software not only makes establishing deadlines and assorting tasks easier, but also facilitates in-platform communication so you don’t have to constantly jump back and forth from the platform to your email or office chat function during the day. This is one area where Basecamp excels.
Basecamp features message boards that let team members communicate right within the platform. The message board creates an organized discussion, and users can look back through the message history for pertinent information, rather than trying to track down details in a fragmented email thread.
For quick questions that need prompt responses, you can also use Basecamp’s real-time group chat, which Basecamp refers to as a Campfire. There’s no need to bring up a separate chat app, and users can continue to work right within the platform while waiting on their response. This can help to keep users focused and productive, eliminating the distractions of other apps.
The automatic check-in function also saves users time on status meetings and check-ins. This function will automatically ask your team members a question at a scheduled time. Replies are compiled into a single thread, so you can review them and get the most up-to-date information about your project’s progress.
Basecamp Integrations
Quality project management software needs to work with, and not detract from, the other apps and programs that you’re already using. Basecamp offers many integrations that can streamline your workflow, including some of the most popular mobile and desktop apps, time tracking and accounting apps, reporting and planning apps, customer service apps, and more.
Basecamp might be light on capabilities like time tracking and reporting, but its integrations do make up for some of those shortcomings. Just be sure to consider the subscriptions that you’ll need to have with these other apps when deciding if Basecamp’s price is right for your business.
Basecamp Mobility
Basecamp is highly mobile, and you can use it on most platforms. Apps are available for iPhone, iPad, and Android phones, so you can check in on project progress and respond to messages.
In terms of getting tough work done, Basecamp is available as a download for your Mac of Windows computer, and you can also access it as a web browser on any tablet, laptop, or phone.
You can also respond to basecamp emails from your email inbox without logging into an app, so you can always stay connected no matter which device you’re using.
Basecamp Support
Basecamp offers significant online information to help you learn and implement this software. Its online video library covers the topics that users need to get up and running. These videos are free to access and guide users through essential skills and features.
While those videos are pre-recorded, users can also register for Basecamp’s live Q&A classes. These classes are free and users have the chance to ask experts any questions they might have about Basecamp in a live setting.
Basecamp also offers a detailed help library of articles that can help users learn how to better use Basecamp. Articles offer step-by-step guidance and feature plenty of screenshots.
If you can’t find the help you need in the tutorials or help guides, Basecamp also offers free online support. You can send a message detailing your help request, and according to Basecamp, the average response time is 20 minutes. Support is available from 8:00 am to 6:30 pm Central Time Monday through Friday.
While the lack of phone support is a definite downside, the 20-minute response time means that you should still be able to access quality support when needed.
Basecamp Personal
Basecamp Personal is the base tier, and it’s available for free. This plan includes up to three projects and up to 20 users. It also includes up to 1 GB of storage space.
While Basecamp Personal is light in terms of its capability and features, it’s an efficient option for students, freelancers, families, and personal projects. It can also be a good choice for anyone looking to try out the Basecamp platform, or for a brand-new business that is growing and needs an affordable yet helpful project management platform.
Basecamp Business
With Basecamp Business, you’ll enjoy the full functionality and features of Basecamp. This plan is highly affordable at $99 per month. There are no per-user fees to worry about, so pricing is simple and upfront.
Basecamp Business includes everything you need to manage multiple projects and teams of any size:
Unlimited project capacity
Unlimited users with no per-seat charge
500 GB of storage space
A company HQ space to run your whole company
Team projects
Unlimited clients and contractors
Advanced client access so you can see what your clients can see
Project templates to save you time on creating similar projects
Priority support over Basecamp Personal users
Basecamp offers a free 30-day trial for its Business plan, and there’s no credit card required. Basecamp also notes that it will extend the 30-day trial if you contact them to explain that you need more time.
Discounts are available for non-profits, and teachers and students can get free accounts. Paying for a year upfront will get your business a 15% discount. Basecamp doesn’t require minimum contracts, allowing you to cancel at any time. They’ll even refund your unused months if you paid for a year and need to cancel early.
Basecamp is one of the more affordable project management software options available, and it delivers impressive functionality and versatility, even in its free plan. Its simplistic task management and document uploading make this platform very easy to learn and use, and its unlimited users capability accommodates teams of all sizes. That ease of use does come with downsides, mainly in the lack of reporting tools, task dependencies, and time tracking tools that other software options commonly offer. As a result, Basecamp is an excellent choice for smaller projects that aren’t highly complex. Large-scale multi-part projects with significant detail and complexity are better handled by a more robust project management platform.
Jira is a project management software solution from the developer Atlassian. Jira’s initial focus was for handling bug tracking for software development teams.
While still relying on its roots, it has evolved into a general tool for managing projects, although it remains highly popular among companies involved with software and app development projects.
Teams and organizations can use Jira to map out a series of tasks required to complete a project. Jira has a number of collaborative features that make team members more efficient.
Jira supports popular planning methodologies in Kanban and Scrum. This gives Jira users the ability to customize the software interface to perfectly match the type of work they’re doing.
Versus the best project management software, Jira compares favorably. As shown in our Jira review, we believe Jira’s features are particularly suited for those organizations that need to follow a linear pattern to complete a project.
Jira is missing a few key features, such as budget tracking. Depending on the needs of the organization, other project management software packages will work better. As with most of these types of software, there’s no one-size-fits-all recommendation.
Think about the features you need to manage your group’s specific types of projects. If Jira matches those features, it will serve you well. If Jira doesn’t quite match the group’s needs, other packages exist that will work better.
How Jira Compares to Top Project Management Software Solutions
Jira’s overall feature set and pricing tiers work extremely well for projects involving software and app development or projects that have a sequential pattern from beginning to end. Jira excels in report generation and in giving users the ability to select the interface that matches the type of work the organization does.
On the other hand, Projects that need versatility and creativity to move forward may be better served with a software package other than Jira.
Zoho Projects, which is an excellent all-around project management software package, delivering the best mix of features, powerful tools, and integrations with popular apps.
Wrike, which delivers versatility in managing projects and gives marketing organizations the flexibility they need to adjust the project scope, tasks, and timeline on the fly.
Favro, which helps small organizations that need agility above all else in project management because team members often must perform a wide range of tasks.
Jira’s Project Complexity
Because Jira’s roots lie in software development, Jira works especially well for breaking down large projects into several smaller tasks. Jira gives organizations the ability to set up these tasks sequentially, moving the project from beginning to end in a clear linear fashion.
As problems arise along the way, Jira simplifies the process of setting up tickets to handle the problem before moving forward with the remainder of the task.
For projects where the tasks don’t have a clear sequential movement, Jira may not be the best choice, though.
For highly complex products that involve multiple steps and substeps to complete, LiquidPlanner is a better choice. It can handle a large number of contributors, meshing groups involved in a project that may need to work independently or collaboratively.
For many large organizations, LiquidPlanner has the adaptability required to complete complex projects, and Jira can’t quite match it.
Jira’s Team Size
When fewer than 10 people will be working on a project together, Jira’s Free tier has some strong features. Organizations may be able to use the Free version for small projects.
For larger groups, Jira is able to scale to meet their needs. It has a nice collection of administrative tools, allowing the project manager to keep a close eye on the workload of each team member.
Jira’s Standard pricing tier works well for those teams that are growing, while the Premium tier offers a few more tracking features, giving administrators extra project management tools versus the Standard tier.
Jira has enough flexibility in terms of the number of users it can successfully manage in a particular project that it compares favorably to the best software packages. Its Free version is especially strong versus its peers for small projects.
Jira’s Ease of Use
Those new to Jira and new to project management software will find they need to spend some time learning how to use the software.
Newcomers can be up and running in a short amount of time, as Jira does a nice job of walking users through the basic setup process. To take full advantage of the software’s advanced and strongest features, though, it will require a bit of ramp-up time.
Users will need to select the interface they want to use as part of the setup process, so it’s beneficial to spend some time learning the strengths and weaknesses of each interface.
Once the setup process is over, for those people who have some familiarity with other project management software packages, Jira will be relatively easy to use. Its workflow management process is similar enough to other packages to give experienced users very few problems.
For newcomers, Jira offers quite a few popup windows to provide help for users as they move through the software. Experienced users can clear these popup windows immediately, while newcomers to the software can read through the tips to gain knowledge about various features.
As with most project management software packages, we’d recommend trying the Free tier of Jira or trying a free trial of the Standard or Premium tier to gain a feel for how the software works. Using a hands-on trial is the best way to determine if the interface will be easy to use for your organization.
Jira’s Features
Prioritizing and scheduling tasks lie at the heart of Jira’s strongest features. For those who need help with managing the project from start to finish in a linear manner and following a sequential path, Jira’s features are ideal.
Scheduling
In the early days of the project, Jira helps the project manager lay out a timeline for the overall project, as well as for the individual tasks required along the way. The manager can plan out the entire project, creating and assigning tasks.
Jira includes a time tracking feature, so those involved with the project can see which aspects are taking longer than they should or whether certain tasks required less time than originally estimated, freeing up some team members to help in other areas.
Tracking Progress
Jira allows team members to follow the execution of each task along the way. However, the software is missing a checklist feature, which would be a benefit for a visual reminder of the steps remaining in the project.
The tracking features in Jira allow project managers to clearly see which team members have some availability in their workloads to aid in a different area of the project.
Report Generation
A pleasant surprise within the Jira software is the ability to generate multiple kinds of reports. For those who can better visualize the progress on a project through a graph, Jira excels in this area.
Jira simplifies report generation by providing a number of templates for reports. Users only have to select a template, and the software will populate it with the relevant data.
For those groups that need strong real-time reporting features, but who need a project management software package that offers a bit more flexibility than Jira, we like Wrike. It has excellent report generating features in a product that works well for marketing and creative collaboration projects.
Comparing Features
Jira’s feature list is strong for the right types of projects, but it is lacking in a few important areas.
For example, Jira does not have the ability to track budgets and expenses related to the project. To manage the financial aspect of any project, Jira users will need to make use of a different project management software package. As a competing product, LiquidPlanner has some strong features for tracking budgets and spending on projects.
The most feature-rich project management software, though, is Zoho Projects. It offers a wide range of features that will equally handle complex and simple projects. It includes an extensive time tracking feature that allows the administrator to track time spent on the project, including designations for billable and non-billable hours spent.
Another feature-rich software package is Wrike. We appreciate how Wrike gives users the ability to add extra features for an extra cost, almost in an ala carte setup. Those who have basic needs can stick with the base plan without incurring extra costs. This flexibility is helpful for a wide range of organizations.
Jira’s Price
In the past, Jira used some odd pricing tiers, offering a flat price for a certain range of users, which made it quite a bargain versus its peers in certain instances.
However, over the past few years, Jira has moved to a commonly accepted per-user, per-month pricing plan. Jira’s pricing structure now is far more similar to the majority of the other best project management solutions.
Jira’s price tiers are competitive with its peers, so those organizations that like Jira’s features and interface will receive a good value. Those organizations that need certain features Jira doesn’t offer won’t have the temptation of purchasing Jira because it’s so much cheaper than competitors.
Pricing Tier Options
The available pricing tiers include:
Free: The Free version has a limit of 10 users. For the end users, the features in the Free tier are pretty similar to what’s found in the pay versions of the software, but the Free version lacks the administrative tools found with the pay tiers.
Standard: The Standard version costs $7 per user per month for up to 10,000 users. It delivers advanced administrative tools, such as specifying permissions, and advanced security features, including audit logs. It provides professional customer support options during business hours, whereas only community support is available in the Free version.
Premium: The Premium version costs $14 per user per month for up to 10,000 users. Versus the Standard version, Premium provides project archiving tools, 24/7 customer support, and administrative insights. Premium delivers unlimited cloud storage for files, whereas the Standard version has a 250 GB storage limit.
Enterprise: The Enterprise version works for companies with advanced security needs and with a global reach. It allows for connecting an unlimited number of sites to Jira, where the Premium version only allows one site. Users with the Enterprise version will receive a custom pricing option from Atlassian.
Jira offers a significant price discount for non-profit organizations.
Jira also has an on-premises solution for those organizations who prefer it to the cloud solution. Organizations will need at least 500 users to make use of the on-premises solution.
Other Packages to Consider on Price
For those with small teams that want a favorable pricing tier, we like Favro, which has a number of features aimed at providing flexibility.
For big teams that are looking for a more favorable price than Jira offers, we would strongly consider TeamGantt. It has some nice price points for large groups.
Jira’s Interface
Jira’s interface has gone through a significant upgrade in the past few years, so for those who may have tried Jira in the past and disliked it, it’s worth another look now.
One of the strongest aspects of Jira is the ability to select among several templates, allowing users to match the interface in use with the template. Understanding exactly how each template works is important to making the most out of the Jira software.
Jira provides explanations of each template at the time users will be making a selection, which is helpful. But some users will need to do a little extra homework to understand exactly what they’re selecting to make the most of the software.
Jira’s’ options for selecting planning methodologies include:
Kanban: The Kanban interface in Jira allows team members to take on any of the various roles listed for the project. Should one team member need help with a task, others may jump in and help out as needed. Changes during the project may occur, as the Kanban interface provides flexibility.
Scrum: The Scrum interface in Jira gives each of the team members a particular role. The administrator will set up the goals and timelines, and the members of the team will work toward completing them. In the Scrum interface, changes to the timeline and to the project deliverables rarely happen.
In addition to the desktop software, Jira has a mobile app, so users can remain in touch with team members regarding the project at all times.
Two other project management software packages with strong mobile apps are Zoho Projects and Favro. We also really like the overall interface that both Zoho Projects and Favro provide in their desktop versions.
Jira’s Collaboration
Jira’s collaborative features focus less on live, real-time collaboration and more on tracking discussions and messages that involve moving toward the competition of the project.
Jira does not offer a live chat function, but it does allow users to leave messages for each other. Users can make comments on different aspects of the project, suggesting changes.
Through Jira’s file sharing and document storage functions, users can keep the most important documents for the project in one place, simplifying collaboration.
Although Jira has a nice collection of features in this area, Teamwork is a stronger project management software package in terms of helping far-flung organizations and groups work on projects as if they’re working face to face. It includes a built-in chat feature that further enhances collaboration on all kinds of projects.
Although Jira works for nearly any kind of project management situation, its strengths lie in projects that have a linear and sequential process. Software developers and app developers use Jira regularly and have for a long time, so it’s no surprise that Jira’s strengths closely align with these kinds of projects.
Those who have projects that don’t follow a linear pattern and who need quite a bit of flexibility in managing projects may want to look to Jira’s competitors, many of which have more of a focus on versatility.
As a user of the internet, it is without question that you’ve come across your fair share of bugs. You know the ones: those pesky little glitches that affect site load time, design, and general usability. If I’m candid, they’ve had me pulling my hair out on the odd occasion.
So, how can you limit the possibility of bugs impacting your websites, systems, and businesses?
Enter bug tracking software.
Bug tracking tools can help detect, identify, and fix bugs that may arise in software or website development, and after those software and platforms are live. This software can be used to assign tasks to the appropriate team member for fixing, assist in analyzing steps to squash the bug, and alert the right people that the problem is resolved.
In a nutshell, the right bug tracking software can simplify your life.
Now that you’re aware of some of the advantages of using bug tracking software in your business, we will talk about which bug tracking software may be a good option for your organization. This guide will also discuss things to keep in mind when deciding which is the right one for you.
Rollbar – The Best Automated Bug Tracking Software
There is something in there for everyone. Stick with me as we go through each bug tracking software if a particular feature or capability sticks out to you.
Zoho BugTracker is a cloud-based bug tracking software designed for businesses of all sizes. It’s simple, easy to use, fast, and extremely scalable. It sits among Zoho’s suite of incredible business applications, but it can also be used as a standalone product.
One of the main reasons Zoho BugTracker is so popular is its straightforward dashboard. Its usability means that just about anyone can work their way around the system. The software will record bugs quickly and report details, including severity and due date, assign them to users, and add followers all from the one dashboard.
Some other features of Zoho BugTracker are:
Allows managers to trigger automated bug defect alerts via email to relevant parties
Create custom fields and workflows
Track your progress with bug reports in the form of charts or graphs
Configure severity and set notifications for new bugs
Filter bugs based on status, urgency, and user
Create, upload, and store files in one place to collaborate easily with your team
Zoho BugTracker is on our list as best for business scalability because of its month-to-month flexibility. You can start with a free monthly subscription to test the waters, and then you can upgrade, downgrade, or cancel at any time.
The monthly subscriptions with Zoho BugTracker look like this:
Free: $0/month for 3 users
Standard: $2 per user per month for up to 10 users
Premium: $3 per user per month for up to 15 users (with unlimited scalability)
Jira is easily the pick of the list when it comes to the best bug tracking program for software development teams. It’s designed to catch bugs right in their tracks throughout the development process to ensure the end product is spot on.
With features like the ability to build custom project roadmaps to track progress from start to finish, it’s the perfect asset to assist agile teams in planning, tracking, and releasing software without skipping a beat. It also integrates with 3000+ third-party applications, so you’re unlikely to run into any software integration issues.
Something unique to this software is Jira’s own JQL (Jira Query Language), which allows developers to easily create queries and manipulate data within a short time.
Other key features you can expect from Jira are:
Capture bugs, assign and prioritize, and track to done, all within one workflow
Automated notifications to the right parties when a new bug requires actioning
Flexible workflow options such as Scrum and Kanban boards allowing full visibility for all your team members into what’s coming next
Sketch out the big picture for key stakeholders with a visual roadmap
Real-time, agile reporting with actionable insights
Custom filters using JQL
As you can see, Jira is a great option for those looking for a program that can assist in both software development and project management. Of course, it can be used to track bugs alone, too.
For cloud-based access, Jira’s pricing plans are:
Free: $0/month for up to 10 users
Standard: $7 per user per month for minimum 10 users
Premium: $14 per user per month for minimum 10 users
Enterprise: Contact Jira for pricing. This plan is suitable for large organizations needing to manage more than one site.
You can either get started on your free plan today or take a 7-day free trial of the standard or premium plan.
BugHerd is a cloud-based bug tracking software positively loved by web developers and designers for website development. It is also a great feedback tool, allowing developers to work closely with clients on exactly which elements of the website need adjusting.
In a nutshell, it’s like using sticky notes to provide feedback, but on a webpage.
BugHerd’s simple bug tracking tool sits at the top of the client’s website and instantly lets the user log a bug. Any feedback or comments made on the bug are pinned to that element for easy resolution. It then categorizes the bugs into four categories: Backlog, To Do, Doing, and Done.
With such a simple process, the whole team (including the client) can stay up to date on what needs attention and each bug’s urgency.
Some other features you’ll find with BugHerd include:
Automatically captures data relating to bug activity to allow your team to replicate and fix the bug issues faster
Reports bugs and captures screenshots across mobile websites (premium plan only)
Client feedback sticks directly to the element – so if the element is moved, there is no confusion on the updates required
Simple installation options via Javascript or browser extension
BugHerd is used by the likes of Amazon, Nissan, and Dyson, among 6,000 other companies, so you can rest easy knowing that you are going to be in great hands for your next web development project.
The pricing plans available for this software are:
Standard: $39/month for up to 5 users and 10 GB storage
Studio: $59/month for up to 10 users and 20 GB storage
Premium: $109/month for up to 25 users and 50 GB storage
Enterprise: Contact for pricing
You can also request pricing for the standard, studio, or premium plans for more users (in lots of 25) through the website. All plans offer a free trial, so give BugHerd a whirl today.
In a day and age where we use our phones for just about everything except for making phone calls, I had to include a bug tracking software for mobile apps. And really, how often do we find ourselves pulling our hair out over a crashed mobile app?
InstaBug is a hybrid in-app feedback and bug tracking solution that allows mobile teams to develop and release apps with confidence. It provides a platform for beta testing, comprehensive bug and crash reporting, and user engagement reports.
Testers can leave in-app bug reports by simply shaking their device when the issue is occurring. Or, if more detailed information is required, they can attach annotated screenshots, voice notes, or screen recordings to better describe the problem—all done within the app, without interruptions.
Some other key features of InstaBug include:
Receive detailed logs and metadata related to each feedback submitted
See the steps required to reproduce the issue along with a full overview of the user’s session details
Send users in-app chats to ask for more information or let them know when their issue is fixed
Integrations with project management workflows such as Trello, Jira, GitHub, and Slack
In terms of pricing, the basic plan only covers bug reporting and integrations. You can add extras to your plan, such as crash reporting, app performance monitoring, and user surveys for an additional fee. Otherwise, pricing plans for this software look like this:
Basic: From $124/month for small companies
Pro: From $208/month for medium and large companies
If you’re an indie developer, you can use this software in a very limited fashion for free. Or, if you’re an early-stage startup, you can speak to InstaBug to receive a discount on their plans.
See if InstaBug is worth the investment for your business with a 14-day free trial.
#5 – Rollbar — Best Automated Bug Tracking Software
Rollbar is a cloud-based bug tracking and monitoring solution that focuses on resolving issues while software is still in production. With Rollbar, software developers can spend more time building and less time fixing code.
Developers will save time with a little help from artificial intelligence. Rollbar uses AI to automatically monitor for errors, triage those errors, and then grade issues in order of severity.
This software is designed to fix critical errors sooner with real-time alerts and automated workflows. It also reduces deployment risk with predictive code analytics at every step of your process, from development to staging to release.
Some other features you’ll have access to with Rollbar are:
Straightforward dashboard with automation-grade grouping of errors
Automatically receive all the diagnostic and contextual data needed to triage errors
Root cause analysis
Strong security with data encryption
Custom integrations with full-featured REST API
Without a doubt, this software is a bug-catching powerhouse bound to make software developers’ lives so much easier.
Rollbar pricing plans are:
Free: For up to 5,000 error events per month with essential features
Essentials: From $1/month for up to 6,000 error events per month (includes additional features)
Advanced: From $83/month for up to 100,000 error events per month (for multi-project teams)
Enterprise: Custom event volume. Contact Rollbar for pricing.
How to Find the Best Bug Tracking Software For You
We’ve only scratched the surface of the available bug tracking software on the market today. With so many options to choose from, it can be hard to determine which one might be best for your business.
In a nutshell, there are certain things that every bug tracking software should do at an absolute minimum. These include task management, customization to team preferences, collaboration among team members, and general information reporting.
If the bug tracking software you’re considering doesn’t include these things, step away from it and look for a better option.
When you’re doing your own research or testing out some free trials, consider the following criteria in your decision-making process.
Storage Capabilities
One complaint that came up a lot in my research and testing was the lack of storage space included in some of the lower-priced plans. Many tools have the option to upgrade the storage space, but it’s linked to a steep increase in price.
If you have a small team, you will likely find the storage included in the basic plans sufficient for your needs.
But if you’re a business facing lots of bug issues or have large projects, you may want to consider included storage a significant deciding factor when choosing the best bug tracking software for you.
Scalability
No matter the size of your organization, having the ability to adapt and scale as needed is always a good option to have. You never know how quickly business is going to take off.
Of course, we want just about any software to have the opportunity to scale alongside the growth of our business. However, aspects you should consider here are more in-depth than whether you can upgrade your plan to include more storage or more features.
Look at whether your bug tracking software can keep up in terms of the software’s speed when it’s under pressure to catch a lot of bugs or issues and how many tasks or users it can cope with at one time.
Does the software slow down or let bugs slip through the cracks when trying to identify and allocate lots of issues to team members in a short period of time, or can it keep up without breaking a sweat?
This consideration may help your decision between a cheaper software designed for smaller businesses or a pricier software developed to handle such workload.
Simplicity of Workflow
Usability is always an important consideration to make when introducing any new software into your business, but in the case of bug tracking software, it’s really important to make sure that the workflow is easy to understand and take action from.
At one point or another, you may have loads of bugs that need fixing all at the same time. Some will be of higher severity than others, and if your software workflow can’t tell you which is which or where it is, you are in for one big headache. And nobody wants that.
A good workflow should do three things:
Capture and report
Prioritize and assign
Resolve and review
Following this, consider whether or not the workflow can be presented so that it is easy for everyone to understand clearly. Especially those who have no technical experience but want to be included in updates on the project (like managers or key stakeholders, for example).
Nearly every single bug tracking software offers a free trial, so there are plenty of opportunities to play around with different software to see which workflow you like best.
Summary
The two bug tracking software listed in this guide that will suit just about any business are Zoho BugTracker and Jira.
In this article, we’ve really taken a deep dive into five of the best bug tracking software option, each serving a different purpose. In reality, there are tons of options for you to choose from. To find the one that’s right for you, don’t forget to follow our recommended considerations and do the free trials to hone in on which software will be best for you and your business’s needs.
In our last survey, Bronze plan members requested more storage, so we looked at every possible way we could manage this increase, and we were able to come up with a 50% net storage increase in real terms.
SSD Hosting Storage Plans Explained
Previously, the Bronze plan gave members 10GB of storage. But, since we offer true compartmentalized managed WordPress hosting for every site (yes, even on our starter plan!), we also had to allocate space for the system resources required to run each account.
This meant that not all of 10 GB SSD storage allocated to each account was available.
So, we’ve not only increased the SSD storage we allocate to our Bronze hosting plan, but we have also upgraded our storage reporting feature in the hosting section of the Hub.
This lets you see exactly how much space your sites are taking up on your hosting account, and how much of your hosting server is being allocated to running and processing essential system resources.
To view how much storage is being used by your site, simply go to The Hub > Hosting > Analytics section and click on the Storage tab.
See exactly what is going on in your dedicated hosting account in real-time.
50% More Storage At No Extra Cost, And Without Compromising Your Resources
The bottom line, then, is that as a Bronze hosting member, you now get more 50% more SSD storage space than our previous plan without compromising essential resources your server needs to run.
Why is Silver Hosting Also 25GB?
If you look at our pricing plans, you will see that both the Bronze and Silver plan give you the same amount of storage (25 GB).
We’ve had to do this due to limits imposed by our hosting partner (Digital Ocean), system resources constraints, and to make seamless downgrades possible.
So, while both Bronze and Silver plans offer 25GB storage, if you’re on the Silver plan and need additional storage space, we’ll help you offload extra media to S3 or similar.
For details of all hosting features and inclusions, check out our hosting plans. If you have any questions about our hosting or need help deciding on the best plan to suit your needs, just reach out to our support team. We’re available 24/7.
Let’s build ourselves a CMS. But rather than build out a UI, we’re going to get that UI for free in the form of GitHub itself! We’ll be leveraging GitHub as the way to manage the content for our static site generator (it could be any static site generator). Here’s the gist of it: GitHub is going to be the place to manage, version control, and store files, and also be the place we’ll do our content editing. When edits occur, a series of automations will test, verify, and ultimately deploy our content to Cloudflare.
You can find the completed code for the project is available on GitHub. I power my own website, jonpauluritis.com, this exact way.
What does the full stack look like?
Here’s the tech stack we’ll be working with in this article:
Why should you care about about this setup? This setup is potentially the leanest, fastest, cheapest (~$5/month), and easiest way to manage a website (or Jamstack site). It’s awesome both from a technical side and from a user experience perspective. This setup is so awesome I literally went out and bought stock in Microsoft and Cloudflare.
But before we start…
I’m not going to walk you through setting up accounts on these services, I’m sure you can do that yourself. Here are the accounts you need to setup:
I would also recommend Typora for an amazing Markdown writing experience, but Markdown editors are a very personal thing, so use which editor feels right for you.
Project structure
To give you a sense of where we’re headed, here’s the structure of the completed project:
In a terminal, change directory to wherever you keep these sorts of projects and type this:
$ mkdir cms && cd cms && npm init -y
That will create a new directory, move into it, and initialize the use of npm.
The next thing we want to do is stand on the shoulders of giants. We’ll be using a number of npm packages that help us do things, the meat of which is using the static site generator Metalsmith:
Along with Metalsmith, there are a couple of other useful bits and bobs. Why Metalsmith? Let’s talk about that.
Step 2: Metalsmith
I’ve been trying out static site generators for 2-3 years now, and I still haven’t found “the one.” All of the big names — like Eleventy, Gatsby, Hugo, Jekyll, Hexo, and Vuepress — are totally badass but I can’t get past Metalsmith’s simplicity and extensibility.
As an example, this will code will actually build you a site:
// EXAMPLE... NOT WHAT WE ARE USING FOR THIS TUTORIAL
Metalsmith(__dirname)
  .source('src')
  .destination('dest')
  .use(markdown())
  .use(layouts())
  .build((err) => if (err) throw err);
Pretty cool right?
For sake of brevity, type this into the terminal and we’ll scaffold out some structure and files to start with.
To save space (and time), you can use the commands below to create the content for our fictional website. Feel free to hop into “articles” and create your own blog posts. The key is that the posts need some meta data (also called “Front Matter”) to be able to generate properly. The files you would want to edit are index.md, post1.md and post2.md.
The meta data should look something like this:
---
title: 'Post1'
layout: article.hbs
---
## Post content here....
Or, if you’re lazy like me, use these terminal commands to add mock content from GitHub Gists to your site:
Next, we’ll be creating our layouts and partial layouts (“partials”). We’re going to use Handlebars.js for our templating language in this tutorial, but you can use whatever templating language floats your boat. Metalsmith can work with pretty much all of them, and I don’t have any strong opinions about templating languages.
Our “navigation” hasn’t been defined yet, but will ultimately replace the area where {{>navigation }} resides.
{{#each }} will iterate through the “collection” of articles that metalsmith will generate during its build process.
Metalsmith has lots of plugins you can use for things like stylesheets, tags, etc., but that’s not what this tutorial is about, so we’ll leave that for you to explore.
You may have noticed that this is the exact same layout as the About page. It is. I just wanted to cover how to add additional pages so you’d know how to do that. If you want this one to be different, go for it.
Add navigation
Add the following to the layouts/partials/navigation.hbs file
Sure there’s not much to it… but this really isn’t supposed to be a Metalsmith/SSG tutorial. ¯\_(ツ)_/¯
Step 4: The Build file
The heart and soul of Metalsmith is the build file. For sake of thoroughness, I’m going to go through it line-by-line.
We start by importing the dependencies
Quick note: Metalsmith was created in 2014, and the predominant module system at the time was common.js , so I’m going to stick with require statements as opposed to ES modules. It’s also worth noting that most of the other tutorials are using require statements as well, so skipping a build step with Babel will just make life a little less complex here.
// What we use to glue everything together
const Metalsmith = require('metalsmith');


// compile from markdown (you can use targets as well)
const markdown = require('metalsmith-markdown');


// compiles layouts
const layouts = require('metalsmith-layouts');


// used to build collections of articles
const collections = require('metalsmith-collections');


// permalinks to clean up routes
const permalinks = require('metalsmith-permalinks');


// templating
const handlebars = require('handlebars');


// register the navigation
const fs = require('fs');
handlebars.registerPartial('navigation', fs.readFileSync(__dirname + '/layouts/partials/navigation.hbt').toString());


// NOTE: Uncomment if you want a server for development
// const serve = require('metalsmith-serve');
// const watch = require('metalsmith-watch');
Next, we’ll be including Metalsmith and telling it where to find its compile targets:
// Metalsmith
Metalsmith(__dirname)
  // where your markdown files are
  .source('src')
  // where you want the compliled files to be rendered
  .destination('public')
So far, so good. After we have the source and target set, we’re going to set up the markdown rendering, the layouts rendering, and let Metalsmith know to use “Collections.” These are a way to group files together. An easy example would be something like “blog posts” but it could really be anything, say recipes, whiskey reviews, or whatever. In the above example, we’re calling the collection “articles.”
 // previous code would go here


  // collections create groups of similar content
  .use(collections({
    articles: {
      pattern: 'articles/*.md',
    },
  }))
  // compile from markdown
  .use(markdown())
  // nicer looking links
  .use(permalinks({
    pattern: ':collection/:title'
  }))
  // build layouts using handlebars templates
  // also tell metalsmith where to find the raw input
  .use(layouts({
    engine: 'handlebars',
    directory: './layouts',
    default: 'article.html',
    pattern: ["*/*/*html", "*/*html", "*html"],
    partials: {
      navigation: 'partials/navigation',
    }
  }))


// NOTE: Uncomment if you want a server for development
// .use(serve({
//   port: 8081,
//   verbose: true
// }))
// .use(watch({
//   paths: {
//     "${source}/**/*": true,
//     "layouts/**/*": "**/*",
//   }
// }))
Next, we’re adding the markdown plugin, so we can use markdown for content to compile to HTML.
From there, we’re using the layouts plugin to wrap our raw content in the layout we define in the layouts folder. You can read more about the nuts and bolts of this on the official plugin site but the result is that we can use {{{contents}}} in a template and it will just work.
The last addition to our tiny little build script will be the build method:
// Everything else would be above this
.build(function(err) {
  if (err) {
    console.error(err)
  }
  else {
    console.log('build completed!');
  }
});
Putting everything together, we should get a build script that looks like this:
I’m a sucker for simple and clean and, in my humble opinion, it doesn’t get any simpler or cleaner than a Metalsmith build. We just need to make one quick update to the package.json file and we’ll be able to give this a run:
 "name": "buffaloTraceRoute",
  "version": "1.0.0",
  "description": "",
  "main": "index.js",
  "scripts": {
    "build": "node build.js",
    "test": "echo \"No Tests Yet!\" "
  },
  "keywords": [],
  "author": "Your Name",
  "license": "ISC",
  "devDependencies": {
    // these should be the current versions
    // also... comments aren't allowed in JSON
  }
}
If you want to see your handy work, you can uncomment the parts of the build file that will let you serve your project and do things like run npm run build. Just make sure you remove this code before deploying.
Working with Cloudflare
Next, we’re going to work with Cloudflare to get access to their Cloudflare Workers. This is where the $5/month cost comes into play.
Now, you might be asking: “OK, but why Cloudflare? What about using something free like GutHub Pages or Netlify?” It’s a good question. There are lots of ways to deploy a static site, so why choose one method over another?
Well, Cloudflare has a few things going for it…
Speed and performance
One of the biggest reasons to switch to a static site generator is to improve your website performance. Using Cloudflare Workers Site can improve your performance even more.
Here’s a graph that shows Cloudflare compared to two competing alternatives:
The simple reason why Cloudflare is the fastest: a site is deployed to 190+ data centers around the world. This reduces latency since users will be served the assets from a location that’s physically closer to them.
Simplicity
Admittedly, the initial configuration of Cloudflare Workers may be a little tricky if you don’t know how to setup environmental variables. But after you setup the basic configurations for your computer, deploying to Cloudflare is as simple as wrangler publish from the site directory. This tutorial is focused on the CI/CD aspect of deploying to Cloudflare which is a little more involved, but it’s still incredibly simple compared to most other deployment processes.
(It’s worth mentioning GitHub Pages, Netlify are also killing it in this area. The developer experience of all three companies is amazing.)
More bang for the buck
While Github Pages and Netlify both have free tiers, your usage is (soft) limited to 100GB of bandwidth a month. Don’t get me wrong, that’s a super generous limit. But after that you’re out of luck. GitHub Pages doesn’t offer anything more than that and Netlify jumps up to $45/month, making Cloudflare’s $5/month price tag very reasonable.
Service
Free Tier Bandwidth
Paid Tier Price
Paid Tier Requests / Bandwidth
GitHub Pages
100GB
N/A
N/A
Netlify
100GB
$45
~150K / 400 GB
Cloudflare Workers Sites
none
$5
10MM / unlimited
Calculations assume a 3MB average website. Cloudflare has additional limits on CPU use. GitHub Pages should not be used for sites that have credit card transactions.
Sure, there’s no free tier for Cloudflare, but $5 for 10 million requests is a steal. I would also be remise if I didn’t mention that GitHub Pages has had a few outages over the last year. That’s totally fine in my book a demo site, but it would be bad news for a business.
Cloudflare offers a ton of additional features for that worth briefly mentioning: free SSL certificates, free (and easy) DNS routing, a custom Workers Sites domain name for your projects (which is great for staging), unlimited environments (e.g. staging), and registering a domain name at cost (as opposed to the markup pricing imposed by other registrars).
First, make sure the Cloudflare CLI, Wrangler, is installed:
$ npm i @cloudflare/wrangler -g
Next, we’re going to add Cloudflare Sites to the project, like this:
wrangler init --site cms
Assuming I didn’t mess up and forget about a step, here’s what we should have in the terminal at this point:
⬇️ Installing cargo-generate...
🔧   Creating project called `workers-site`...
✨   Done! New project created /Users/<User>/Code/cms/workers-site
✨  Succesfully scaffolded workers site
✨  Succesfully created a `wrangler.toml`
There should also be a generated folder in the project root called /workers-site as well as a config file called wrangler.toml — this is where the magic resides.
You might have already guessed what comes next… we need to add some info to the config file! The first key/value pair we’re going to update is the bucket property.
bucket = "./public"
Next, we need to get the Account ID and Zone ID (i.e. the route for your domain name). You can find them in your Cloudflare account all the way at the bottom of the dashboard for your domain:
Stop! Before going any further, don’t forget to click the “Get your API token” button to grab the last config piece that we’ll need. Save it on a notepad or somewhere handy because we’ll need it for the next section.
Phew! Alright, the next task is to add the Account ID and Zone ID we just grabbed to the .toml file:
name = "buffalo-traceroute"
type = "webpack"
account_id = "d7313702f333457f84f3c648e9d652ff" # Fake... use your account_id
workers_dev = true
# route = "example.com/*"
# zone_id = "805b078ca1294617aead2a1d2a1830b9" # Fake... use your zone_id


[site]
bucket = "./public"
entry-point = "workers-site"
(Again, those IDs are fake.)
Again, those IDs are fake. You may be asked to set up credentials on your computer. If that’s the case, run wrangler config in the terminal.
GitHub Actions
The last piece of the puzzle is to configure GitHub to do automatic deployments for us. Having done previous forays into CI/CD setups, I was ready for the worst on this one but, amazingly, GitHub Actions is very simple for this sort of setup.
So how does this work?
First, let’s make sure that out GitHub account has GitHub Actions activated. It’s technically in beta right now, but I haven’t run into any issues with that so far.
Next, we need to create a repository in GitHub and upload our code to it. Start by going to GitHub and creating a repository.
This tutorial isn’t meant to cover the finer points of Git and/or GitHub, but there’s a great introduction. Or, copy and paste the following commands while in the root directory of the project:
# run commands one after the other
$ git init
$ touch .gitignore && echo 'node_modules' > .gitignore
$ git add .
$ git commit -m 'first commit'
$ git remote add origin https://github.com/{username}/{repo name}
$ git push -u origin master
That should add the project to GitHub. I say that with a little hesitance but this is where everything tends to blow up for me. For example, put too many commands into the terminal and suddenly GitHub has an outage, or the terminal unable to location the path for Python. Tread carefully!
Assuming we’re past that part, our next task is to activate Github Actions and create a directory called .github/workflows in the root of the project directory. (GitHub can also do this automatically by adding the “node” workflow when activating actions. At the time of writing, adding a GitHub Actions Workflow is part of GitHub’s user interface.)
Once we have the directory in the project root, we can add the final two files. Each file is going to handle a different workflow:
A workflow to check that updates can be merged (i.e. the “CI” in CI/CD)
A workflow to deploy changes once they have been merged into master (i.e. the “CD” in CI/CD)
This is a straightforward workflow. So straightforward, in fact, that I copied it straight from the official GitHub Actions docs and barely modified it. Let’s go through what is actually happening in there:
on: Run this workflow only when a pull request is created for the master branch
jobs: Run the below steps for two-node environments (e.g. Node 10, and Node 12 — Node 12 is currently the recommended version). This will build, if a build script is defined. It will also run tests if a test script is defined.
The second file is our deployment script and is a little more involved.
Important! Remember that Cloudflare API token I mentioned way earlier? Now is the time to use it. Go to the project settings and add a secret. Name the secret CF_API_TOKEN and add the API token.
Let’s go through whats going on in this script:
on: Run the steps when code is merged into the master branch
steps: Use Nodejs to install all dependencies, use Nodejs to build the site, then use Cloudflare Wrangler to publish the site
Here’s a quick recap of what the project should look like before running a build (sans node_modules):
Okay, so I made it this far… I was promised a CMS? Where is the database and my GUI that I log into and stuff?
Don’t worry, you are at the finish line! GitHub is your CMS now and here’s how it works:
Write a markdown file (with front matter).
Open up GitHub and go to the project repository.
Click into the “Articles” directory, and upload the new article. GitHub will ask whether a new branch should be created along with a pull request. The answer is yes.
After the integration is verified, the pull request can be merged, which triggers deployment.
Sit back, relax and wait 10 seconds… the content is being deployed to 164 data centers worldwide.
Congrats! You now have a minimal Git-based CMS that basically anyone can use.
Troubleshooting notes
Metalsmith layouts can sometimes be kinda tricky. Try adding this debug line before the build step to have it kick out something useful: DEBUG=metalsmith-layouts npm run build
Occasionally, Github actions needed me to add node_modules to the commit so it could deploy… this was strange to me (and not a recommended practice) but fixed the deployment.
Please let me know if you run into any trouble and we can add it to this list!
Asset Hosting is one of our PRO features here on CodePen. We’ve just totally redesigned and rewritten it to make the experience much better. Let’s walk through all the things you can do with it, showing off the new interface and functionality.
Uploading an image and using it
This is likely the #1 usage of Asset Hosting: you have an image that you need to use in a Pen, and you need to upload it somewhere reliable to link to and use. Here’s how quick and easy it is:
Open the Assets Panel
Drag and Drop the image (or any other asset)
Grab the URL
Cropping an image during upload
The Assets Panel right within the Pen Editor is extremely useful as it’s right within the editor where you likely need the files. Because of that, we try and stay out of your way in uploading as best as possible, just drag and drop.
But we also have an Asset Manager page that has also been entirely revamped and offers new functionality, even during uploading itself!
Note the other options available there to while editing and image, making it into a circle, and rotating. All these options, and in fact the whole uploader itself, come by way of Filestack, which we’re now using. The Filestack uploader is really well done and allows us to offer this much more reliable and fully-featured asset upload experience. Heck, you even get an upload progress bar now instead of just a spinner!
Filtering, Searching, Sorting
We wanted to make it as easy as possible to find all your existing assets. You can do a quick search for them, filter by file type groupings, and sort by useful things like date uploaded, file size, and alphabetical based on file name.
Previewing Assets
Rollovers on images, video, and audio assets will show you a preview (hover either the filename or the icon). Or, click on the asset to see a larger preview.
This works in the Asset Manager, but the popups also work in the Asset Panel right in the Pen Editor. Here’s an example of some video and audio previews:
Quick Access Actions
The three-dot “kebab” (•••) menu for each asset has a variety of actions you can do with that asset. All of them have certain common actions, and different file types have specific actions that are useful to them.
All assets have:
Copy URL
Duplicate
Delete
Image assets have:
Copy as HTML <img>
Copy as CSS background-image
Copy as Markdown ![]() image
JavaScript assets have:
Copy as HTML <script>
Add as External Resource*
CSS assets have:
Copy as HTML <link>
Copy as CSS @import
Add as External Resource*
* Super useful! Rather than copy-and-pasting the URL over there, it’s a one-click action.
Uploading from URLs
Say you have a URL to the image already somewhere on the internet. You might be able to use the asset directly from there, but that isn’t really under your control all the time*. With our new uploader (Asset Manager only), you can paste in the URL for that asset and we’ll upload that way.
* Speaking of control, assets hosted through us have the correct CORS headers via our S3 bucket policy, which you aren’t likely to get with random assets around the internet. We might change the URL we give out for assets eventually so we can offer more features, but your existing URLs will always work and always have the right CORS.
Easy Multiple File Upload
You can upload as many files as you want! We literally don’t cap the number of files you have in assets there is only a total storage limit and per-file size limit. If you have a bunch of files to upload, it’s never been easier.
Here’s another little thing to know: if you upload a file with a duplicate name, we’ll just rename it for you so it doesn’t conflict. That way we just stay out of your way. If you don’t like the name, you can always change it easily, as long as it doesn’t conflict. And if it does conflict, you can change or delete the original.
You don’t have to re-upload to duplicate either, duplication can be done right from any assets menu.
Mobile Uploading Support
You can now upload from your phone, so that’s nice.
Higher Limits!
To cap off this release we literally more than doubled everything.
Do you want to move your site to a new web host? Or perhaps you want to create a staging version of your site where you can try out new plugins without affecting your live site.
You can move your site manually, but it is a technical process that’s extremely time-consuming and prone to errors.
In this article, we’ll share the best WordPress plugins to clone or duplicate a site to help you save time and hassle.
When Might You Want to Clone or Duplicate a Site?
There are plenty of situations where you might want to make a copy of your website. You may need to:
Duplicator Pro is our favorite WordPress cloning plugin. It’s extremely popular, with over 15 million downloads. You can use it to simply backup your site, but it’s also a very powerful plugin for cloning a site.
One of Duplicator’s biggest advantages is that it allows you to move a site between domains or hosts with zero downtime. If you don’t want to miss out on any traffic or customers, this could be a really important consideration.
Duplicator works by bundling up everything from your site into a single “package” in the form of a zip file. This package includes absolutely everything from your site such as plugins, themes, content, database, and even the WordPress files.
This means you can use the package to move everything to a new location. You don’t even need to have WordPress already installed there, as the Duplicator package will contain all the WordPress files.
You can use Duplicator Pro to create scheduled backups, migrate multisite networks, and much more.
Duplicator Pro costs from $59/year, which lets you use it on up to 3 websites.
If you’re on a tight budget, then the free version of Duplicator is also a great option. This does have some limits though, and you can’t use advanced features like the scheduled backups, multisite network support, etc..
WP Stagecoach is a great plugin that lets you set up a WordPress staging site especially if your WordPress hosting company doesn’t offer this feature.
A staging site is a special testing version of your site where you can try out new plugins or code, or simply perform updates that you don’t want to do live.
With the WP Stagecoach plugin, you can create a short-term staging site. You can use this to test everything out and then push your changes to your live site when you’re ready.
The plugin merges your database changes, rather than overwriting the database. This means you won’t lose anything that’s happened on your live site in the time since you created the staging site.
It’s a really quick and easy plugin to use, with robust testing that means it should work with virtually any site. WP Stagecoach host your staging site on their servers, too, so you won’t need to use your own web hosting space for it.
WP Stagecoach doesn’t work with multisite networks, however. If you want to create a staging version of your multisite setup, you’ll need to opt for a different plugin.
Price:
WP Stagecoach costs from $12/month. You can save money by paying for an annual plan (from $120/year).
There’s a 5 day free trial available, plus a full money-back guarantee if the plugin doesn’t work for you.
The premium version of UpdraftPlus includes the Migrator tool as well as UpdraftClone. You’ll get all their other add-ons included too.
You can use Migrator to duplicate your website and move it to a new domain name or host. You’ll need to install WordPress and UpdraftPlus on both your original and new sites to begin the process.
UpdraftPlus’ Migrator even lets you move a standalone WordPress site into a WordPress network.
The UpdraftClone add-on lets you create a temporary site where you can try out changes. It takes just a few clicks to set up the test site as it’s hosted on UpdraftPlus’s servers.
The drawback to this is that you’ll need to buy tokens in order to create and maintain your staging sites. You do get some of these free with UpdraftPlus Premium, but you’ll probably want to buy more.
You’ll also need to be careful about merging the changes back to your live site if there have been any changes to your live site since you cloned it.
Price:
You can get the Migrator add-on for $30. UpdraftClone itself is available with the free version of UpdraftPlus, but you’ll need to pay for tokens. These cost $15 for 5. You can buy more at a time, or take out a monthly subscription, for a better deal.
We recommend buying the premium version of UpdraftPlus. It includes Migrator plus all the other UpdraftPlus add-ons. You’ll also get 12 months of support. It costs from $70/year.
On the Personal plan, you’ll get 1 free token for use with UpdraftClone. If you buy a more expensive plan, you’ll get more tokens included.
Migrate Guru is a free plugin that works with almost all popular WordPress hosting providers. It’s designed to help you move your site from one host or server to another.
It comes from the people behind the popular BlogVault plugin, and it uses BlogVault’s servers. This helps make it a quick and easy process. Once your migration is complete, Migrate Guru will remove the copy of your site from the BlogVault servers.
If you’ve got a fairly large website, Migrate Guru is a good option as it can move a 1 GB site in less than 30 minutes. It can be used on sites as large as 200 GB. You’ll get real-time and email alerts about where your migration has got to.
This isn’t suitable for developing a website on your localhost, though, as it doesn’t support moving to/from your localhost and your live website.
With Migrate Guru, you’re limited to 5 site migrations per month. You can move these 5 sites unlimited times, though. This is likely to be more than enough for the majority of users, and developers can apply to have this cap changed.
Price:
Migrate Guru is completely free. There isn’t a paid version or any paid extensions for the plugin.
The All-in-One WP Migration plugin from ServMask is another very straightforward way to clone your website and move it to a new server or domain name.
The plugin is compatible with a huge range of different hosting providers, as it doesn’t have any dependencies. It also bypasses any file size limits that your web host may have by breaking your data into chunks for importing.
There are a few limitations to the plugin, though. The main one is that it only supports importing up to 512MB of data. This may not be enough if your website is fairly large.
You’ll need to add the Unlimited extension to remove this limit. There are lots of other premium extensions available, too. These include a Multisite extension that lets you use the All-in-One WP Migration plugin with a multisite setup.
Price:
The basic All-in-One WP Migration plugin is free. You can buy paid extensions to add more functionality. The Unlimited extension, which many website owners will want, costs $69 for personal use, and $69 + $29/month for business use.
Note that there’s no money-back guarantee. Refunds are solely at the company’s discretion.
XCloner is a simple, free WordPress plugin that lets you create backups of your site. It can create “differential backups” that only include files modified after a certain date.
You can set XCloner to create automated backups on a regular basis. You can even use it to generate automatic backups before any automatic WordPress updates.
Once you’ve created a backup, you can either use it to restore your website or in a new location. This lets you duplicate your website on a new host or at a new domain.
It’s completely free. However, it’s a little more technical than some other plugins. You may want to pick a different plugin if you haven’t got a reasonable amount of experience with WordPress.
Price:
XCloner is currently free. You can pay to get premium 24/7 support, though, which currently costs €49.95/year or €99.95 for lifetime support.
At the time of writing, XCloner had just been acquired by Watchful. This means it’s possible that the pricing will change in the near future.
NS Cloner is specifically designed for WordPress multisite networks. It lets you take any existing site on your network and make a new, identical site with the same theme settings, plugins, and content.
It’s a great plugin if you host and manage lots of client sites within a multisite environment. It also works well if you want to set up multiple test sites or produce sites for members of an organization.
Keep in mind that it only works with WordPress multisite. You’ll need the NS Cloner pro version if you want to use it with single sites. The pro version also lets you clone between single and multisite WordPress and vice versa.
With the pro version, you also get extra features, like the ability to clone all the site’s users and their permissions.
Price:
NS Cloner is free. There’s a pro version too that offers extra features and costs from $99.
Which is the Best WordPress Plugin to Clone or Duplicate a Site?
For the vast majority of use-cases, Duplicator Pro is the best WordPress plugin to clone or duplicate a website.
Whether you’re looking to migrate a site, move a site to local server, or anything else, Duplicator can do the job.
If your goal is to create a staging site, then we always recommend using the option that’s built-in to your WordPress hosting provider. All good hosting providers like SiteGround, Bluehost, WP Engine, Liquid Web, etc offer this feature to their users.
However if your host doesn’t have the staging feature, then you can use WP Stagecoach. It’s easy to use, budget-friendly, and has a free trial.
Finally, if you’ve got a multisite network of sites, then NS Cloner might be just what you need. It’s specifically designed to copy sites within a multisite network, and the basic version is free.
Blockchain is a technology that drives all the cryptocurrencies. In every one of them, a set of validator nodes are responsible for validating all the transactions. The validators are assumed to be rational and self-interested, i.e. they are only interested in making as much money possible for themselves. Under such assumptions, it is generally assumed that a required majority of the validators would agree on the sequence of transactions that have ever happened on the blockchain.
However, such blockchain validator nodes are generally expensive in terms of the size of the disk space they need. The oldest and most popular cryptocurrency, Bitcoin, for example, needs about 200 GB of disk space to store the entire transaction log. This makes it necessary to have a high-speed connection and a lot of time to even get started on mining or validation. This is a problem that prompted researchers to suggest sharding as a solution, i.e. storing only part of the log in each node, but storing the entire log as a whole. Sharding comes with its own challenges when it comes to validating transactions.
Document management software has become a crucial component of running a business in 2020. So many organizations are either going paperless, have remote employees, or both.
These new trends make it unrealistic to keep documents and paperwork in physical filing cabinets or boxes in an office.
Document management software allows you to declutter your office, improve security, and access files or data from anywhere. This software also enhances efficiency when sharing documents or collaborating with team members.
Are you ready to digitally upload, track, and securely archive your documents? You need document management software to achieve this.
Whether your company is going paperless, or you just want to digitize your records for improved organization, this guide has everything you need to know about DM software (DMS).
The 7 Best Document Management Software
There are hundreds, if not thousands, of document management solutions on the market today. Cloud storage tools like Google Drive or Dropbox could technically fall into this category as well.
But for the purpose of this guide, I focused on DMS for businesses. For this instance, there are really only seven solutions that I would recommend.
The reviews below include a brief summary, features, benefits, prices, and any potential drawbacks of each software. Use this as a resource to find the best document management software for your unique situation.
eFileCabinet
eFileCabinet is one of the best document management solutions on the market today. Since 2001, this company has helped individuals, small business owners, and enterprise-level companies organize data and files online.
The software makes it easy for you to stay organized and find a document, regardless of how many you have on file.
You can search for documents or locate them based on folder templates or pre-defined file names. eFileCabinet also keeps a portfolio of your most used documents for quick access.
The eFileCabinet solution does all of the hard work for you. Simply upload a document, and the software will file it for you. The automated workflow streamlines your time-consuming tasks to improve efficiency in the office.
All of your documents can be accessed from anywhere with a web browser or mobile app. You can upload documents directly from your phone using the camera on your device. eFileCabinet also allows you to sign contracts.
One of the biggest standouts for this solution is the collaboration features. The system allows you to create different levels of security, so only certain people can access data.
eFileCabinet has encrypted file sharing and requests, two-factor authentication, and role-based permissions. You can even set IP or location-based authentication.
The software integrates with popular third-party services like DocuSign, Salesforce, and Microsoft Office.
Here’s an overview of the plans and price points for eFileCabinet:
Starter — Starting at $15 per month (25 GB of storage)
Advantage — Starting at $55 per month (1 TB of storage)
Business — Starting at $99 per month (5 TB of storage)
Unlimited — Starting at $199 per month (Unlimited storage)
All prices are listed per user and billed on an annual basis. Once you upgrade from the Starter plan to Advantage, you’ll need to pay for a minimum of three users.
I’d only recommend the Starter plan to individuals. Sole proprietors or very small businesses can probably get away with the Advantage plan, but the Business package will likely be the best for the majority of you.
With eFileCabinet, you get to choose if you want your storage either on-site or on the cloud. Personally, I prefer the cloud storage. But there are advantages to on-premises as well.
M-Files
M-Files represents the future of document management. The software leverages AI technology to automate your organizing process.
When you upload content to M-Files, the platform automatically organizes the data based on what it is, as opposed to just where you want to store it.
You even have the ability to connect M-Files to your existing network and systems to protect your information and categorize everything with AI, automatically and securely.
Another top benefit of M-Files is that they offer industry-specific solutions. Some popular industries that they service include:
Financial services
Construction and engineering
Oil and gas
Real estate
Manufacturing
Professional services
M-Files is great for larger teams that need to access documents at different times. If someone on your staff needs a file that was uploaded and saved by another colleague, they won’t need to search through different folders to see what the document was saved as.
With AI technology, all you need to know is what type of document you’re looking for. Then you can organize the content based on criteria like project title, author, customer, or expiration date.
M-Files will automatically detect duplicate content. Rather than having multiple versions of the same or slightly different documents on your storage system, it will automatically update the latest document to one singular file. This way you always know that you’re viewing or working with the latest version.
With M-Files, you can store a wide range of document types, including emails. The software also allows you to collaborate with external users who don’t have M-Files. That content can be shared as a secure link.
M-Files offers cloud storage, on-site storage, and hybrid storage solutions as well.
You can try M-Files free for 30-days by filling out a form on their website. Pricing for M-Files is not listed on their website. You need to contact their sales team to inquire about a custom solution.
Templafy
Templafy is a relatively new DMS. After launching in 2014, they have been providing all-in-one document management solutions for enterprises all over the world. It’s designed specifically for large businesses and helps streamline tasks to save time when it comes to storing and accessing files.
More than 300 enterprises across 80+ countries use Templafy for document management. This translates to more than one million users.
Using intelligence software, Templafy will automatically show the most relevant content to each employee based on their usage and position.
Your marketing team doesn’t need to see accounting documents, and vice versa.
One of the biggest pain points with DMS, in general, is having to create new documents using another platform. Templafy eliminates this pain point by giving users the ability to create and edit new content directly within the system.
Both new and uploaded content can all be managed in a simple and singular feed on your dashboard.
Templafy’s cloud storage software means you can access documents from anywhere, including on your smartphones and tablets.
You can integrate Templafy with Microsoft Office 365, G-Suite, and other platforms that you’re using to run your business on a daily basis. You can even integrate Templafy with CRM solutions like Salesforce or Microsoft Dynamics.
Big brands like Pandora and IKEA trust Templafy to manage their documents with enterprise-grade software.
In addition to managing documents and files, Templafy has solutions for maximizing employee productivity and creating an evergreen IT infrastructure.
Security is another top benefit of using Templafy. You and your team can securely store and access content from anywhere, using any device, whether you’re online or not.
Like most enterprise software, Templafy provides custom solutions for each unique company. So they don’t list any prices online. You can try Templafy for free before you commit to a contract by reaching out to their sales team.
DocuWare
For those of you who are looking for a high-quality cloud-based solution for document management, look no further than DocuWare.
This DMS is unique because it has specific solutions for tasks within your business processes:
Document management
Invoice processing
Employee management
Sales
Marketing
DocuWare has everything you need for digital transformation and going paperless using cloud technology.
This is another software that’s used by large businesses and enterprises. Sony, Toshiba, Levi’s, and Kellog’s are just a handful of their most well-recognized customers.
But with that said, DocuWare stands out as a top option for small and medium-sized businesses as well.
Small business owners can use DocuWare to automate their digital workflow, securely organize and store documents, and automate certain tedious tasks.
DocuWare allows you and your staff to edit or annotate documents directly on the platform. Not every DMS on our list gives you this capability.
I like DocuWare because it has features designed to connect remote employees and your deskless workforce. Anyone can easily access content at home or on the go from any device.
More than 12,000 businesses in 90+ countries trust DocuWare for document management. So you know that the company is legitimate with a track record like that.
It has specific use cases for things like contract proposals, finance processes, and HR tasks as well.
The pricing for DocuWare follows a common theme in this guide. They offer a free trial, but you need to contact their customer support team directly for a custom quote.
Hightail
Hightail is a document management solution with a specific purpose—sharing and collaboration.
Other DMS on the market have features for file sharing as well, but Hightail takes this to the next level.
I recommend Hightail to businesses that need the ability to send large files securely.
Sharing is simple. Just drag or upload a file from your device or cloud storage solution into your Hightail account. Enter the information for who you want to share it with, and automatically send an email notification to the recipient.
With Hightail, you’ll be able to track the delivery and downloads of content you shared. So you know exactly who opened it and when.
Hightail lets you send files of up to 500 GB. You can add password protection to files and set expiration dates as well.
Here’s an overview of the plans and pricing for Hightail:
Lite — Free
100 MB file send limit
7 day file expiration
Comments for feedback enabled
Sync from third-party integrations
Pro — $12 per month per user
25 GB file send limit
Configurable file expiration
File previews enabled
Send tracking and delivery notifications
Password protection
Phone and live chat support
Teams — $24 per month per user
50 GB file send limit
Custom branding
Organization and archiving tools
Version control with side by side comparisons
Real-time discussions for collaboration
Members management
Business — $36 per user
500 GB file send limit
Enterprise-grade security
Dedicated customer support team
Organizational level permissions
Admin reports
As you can see, the pricing is largely based on the file sending limits. But the features get significantly better with each plan as well.
The free option is actually pretty good if you don’t need to send huge files, and even the entry-level Pro plan is suitable for a number of individuals.
If you’re interested in a paid plan, you can try Hightail free for 14 days.
MasterControl
MasterControl is a DMS made for businesses where security is a top priority and concern. Certain industries have strict regulations for companies to comply with.
MasterControl understands those compliance concerns and created a document management solution that meets any security requirements.
One of the top features of MasterControl is its ability to track changes and revisions. If a document needs to be reviewed by a particular person, you can schedule a time and send out reminders as well.
MasterControl can also limit revisions based on access. You have complete control over who can make changes to a document.
You can also create custom watermarks, sequential numbering, and location tracking to control copies of your files.
MasterControl is 21 CFR Part 11 compliant. This means that documents have a time-stamped audit trail, as well as e-sign functionality that complies with federal regulations.
Another unique standout of MasterControl is its learning center. You’ll have access to tons of free videos, documents, and other resources to educate you about the platform and security compliance in general.
If you need enterprise-grade security for document management in a strict industry, MasterControl will be a top option for you to consider. Contact their sales team for a custom quote.
PaperTracer
PaperTracer has solutions for small, medium, and enterprise-level businesses. It’s a simple solution for document management.
With PaperTracer, you’ll have the ability to automate your contracts and digitize all of your documents in a centralized database. PaperTracer has tracking and reporting capabilities and HIPPA compliant solutions as well.
Your document management solution is completely customized. You can benefit from a cloud-based implementation with end-to-end workflow solutions.
E-signature capability is also available with PaperTracer.
PaperTracer is a top solution for businesses in healthcare and legal industries.
Here’s a brief overview of the available plans, although all pricing is customized.
Small
Up to 10 users
Electronic signing
Searchable database
Upload and scan to PDF
Advanced reports and dashboards
Input forms
Mid Size
Up to 100 users
Contract authorizing
Custom fields
Custom workflows
Implementation
Enterprise
Unlimited users
Unlimited input forms
Single sign-on
Demos and free trials are available for all three plans. I’d recommend PaperTracer for small and medium-sized businesses. While they do have an enterprise-grade solution, there are better options for that on our list.
How to Find the Best Document Management Software
Choosing a document storage solution can be challenging if you don’t know what to look for. There are certain features and benefits that you need to keep an eye on when you’re evaluating a prospective software.
I’ll show you the methodology that we used to come up with the choices in this guide. You can use the same system to help narrow your search.
Storage Location
In most cases, document management solutions are either cloud-based or on-site. Some companies offer just one, while others let you choose which one you prefer.
For example, eFileCabinet offers both on-premises and cloud-based storage. M-Files has both as well, and also has a hybrid solution. Other solutions, like DocuWare are completely cloud-based.
I personally prefer cloud solutions because you can access content from anywhere. But for security reasons, some companies want files stored locally on their network.
File Sharing and Collaboration
What can you do with your files once they are uploaded and stored? While organizing files is obviously important, it’s useless for some companies if the documents can’t be shared with teams or external users.
Look for a DMS that accommodates your internal needs for editing or collaborating on files. Features like automated version updates and in-platform editing capabilities are crucial here.
The size of your files will also depend on which solution is best for your business. If you need to share large files, Hightail is the best choice.
Security
Most business-related files and data are sensitive. So it’s important to have a document management solution that can securely store information.
Some solutions offer access permissions based on individual clearance levels or even location.
Other platforms specialize in compliance for unique industries, like healthcare, legal, or government businesses.
Price
Pricing for DMS is usually based on storage limits and users. At each price tier, you can expect the plan to have additional features and benefits.
The majority of the solutions on this list offer custom plans and pricing. So to get a better idea of how much your document management software will cost, you’ll need to consult with a sales representative.
For those of you who are looking for a cost-effective solution and instant sign-ups, eFileCabinet will be a top choice for you to consider.
Integrations
Ideally, you want to find document management software that works with the platforms you’re already using. Whether it’s CRM like Salesforce, or document editing and creation software like Microsoft Office 365, certain platforms have a wide range of integrations for you to choose from.
However, other solutions that are niche-specific are a bit more limited. So make sure you use software that will actually benefit your workflow process.
Conclusion
Document management software is extremely diverse. Each solution offers unique benefits for businesses based on size, industry, or specific needs.
What’s the best document management software? It’s impossible to say since every option is so different. Here’s a quick recap of the platforms reviewed above:
eFileCabinet — Best administrative controls and third-party integrations.
M-Files — Best document management software for automated organizing with AI.
Templafy — Best enterprise-grade document management software.
DocuWare — Best cloud-based DMS for small to medium-sized businesses.
Hightail — Best document management software for sending large files.
MasterControl — Best DMS for strict security and compliance standards.
PaperTracer — Best for small or medium-sized legal and healthcare companies.
If you’re looking for a basic all-in-one document management solution, eFileCabinet will probably be your best bet.
But for those of you with unique circumstances and needs, you can find custom software from one of the providers on our list.
The days of developers and web designers being the only people who can create a website are long behind us. Anyone can create a website in minutes without writing a single line of code. All you need to do is find a website building platform.
But if you’re creating a website for the first time, you’re probably looking for the most cost-effective solution. You might want to test out different options to see what you like the best.
If this sounds like your situation, then I’m sure you’re looking for a free website builder.
Dozens and dozens of platforms out there will tell you that you can build a website for free. Unfortunately, building a legitimate website for free is actually not very realistic.
Most free website builders will be extremely limited or have some contingencies that require you to pay. It might start out as free, but you’ll quickly learn that it’s not truly free.
This shouldn’t discourage you from trying different website builders. Free website building plans are a great way to get your feet wet with web creation. A free plan will also help you pick a platform that you ultimately want to pay for down the road.
In this guide, I’ll show you the best free website builders on the market today. I’ll explain what you actually get for free, and what features require a premium membership.
The Top 12 Free Website Builders
All website builders offer free features. You’ll be able to get a free trial with nearly every website builder on the market today. But these 12 website builders have free plans that go beyond a trial period:
WordPress
34% of the entire Internet is powered by WordPress. It’s the most popular CMS in the world and a top choice for building a website.
With WordPress, you can create a website and get it live on the web without paying anything. Free plans include hosting, themes, and a WordPress.com subdomain.
Don’t expect high-level performance from the free hosting plan. The WordPress subdomain won’t be very professional either.
We use WordPress here at Quick Sprout, but we have a premium plan. If we stuck with the free option, our domain would look like this: www.quicksprout.wordpress.com, which is obviously no good.
You do not need a credit card to create a free WordPress site. So you won’t have to worry about an expiring trial or being charged for hidden fees.
The free WordPress plan is best for getting started with something small, like a personal blog. It comes with Jetpack essential features, which has SEO tools and automation functionality. You’ll get a pre-installed SSL certificate, free templates, and 3 GB of storage.
It’s worth noting that WordPress is not a traditional website builder. You should have a basic understanding of writing HTML code and how it works to use WordPress.
When you’re ready to upgrade to a paid version of WordPress, these are your options:
Personal — $4 per month
Premium — $8 per month
Business — $25 per month
Ecommerce — $45 per month
WordPress users rely on plugins to add features and functionality to their sites. Many of these plugins require payment as well, which will add to your costs.
Wix
Wix lets you create a website for free without writing any code. It has a drag-and-drop editor that makes it easy for anyone to build something beautiful, regardless of their technical experience.
All you need to do is choose a template and customize it with your own content.
Here’s what you get with a free Wix plan:
Hundreds of templates
Stock images, icons, and clip art
Free web hosting
SEO assistance
Mobile optimization
Access to free apps in the Wix App Market
500 MB of storage and 1 GB of bandwidth
Free Wix domain
The free Wix domain is even weirder than the WordPress one. It’s yourwixusername.wixsite.com/yoursiteaddress; which would look like this for us here at Quick Sprout — quicksproutadmin.wixsite.com/quicksprout.
Obviously, this type of domain is not reasonable or realistic to use if you’re serious about creating a legitimate website. But it’s fine for the beginning while you’re evaluating the Wix platform.
The free plan will also have Wix ads appear on every page of your website.
Using Wix for free will give you an introduction to their platform, but you’ll quickly learn that it’s very limited if you’re not paying. You’ll take an action or try to do something and be prompted to upgrade your plan, which can be a bit annoying.
Wix has premium plans starting at $13 per month for blogs, portfolios, and personal sites. Business and ecommerce rates start at $23 per month.
Weebly
Weebly is powered by Square, making it a website builder that’s geared toward ecommerce websites. So for those of you who are looking to create an online store from scratch, Weebly would be a top choice to consider.
Unfortunately, the free Weebly plan doesn’t come with any ecommerce functionality. You’ll need to upgrade for selling capabilities.
Here’s what you get with Weebly for free:
SSL certificate
500 MB of storage
Free hosting
Domain name with Weebly branding
SEO tools
Lead capture and contact forms
Access to community forums
Live chat and email support
Compared to other free plans we’ve seen, this one is actually pretty good. It’s still extremely limited and I wouldn’t recommend it for the long-term, but it’s a viable option for starting out.
You can begin to collect customer information before your online store officially launches.
For $5 per month, you can connect your own domain to eliminate the Weebly branding. Aside from that, Weebly has premium plans starting at $12, $25, and $38 per month.
Webnode
Webnode is website building made easy. In minutes, you can create and publish your site on the web. It’s a great option for personal sites, businesses, and ecommerce shops.
More than 30 million people have built a website using this platform. Webnode has stunning templates that you can easily customize with your own content.
Unlike other free website builders, you can create an unlimited number of pages with the free plan from Webnode.
You’ll also get reliable hosting and access to customer service representatives.
The biggest catch is that your site will have a Webnode subdomain with your free plan. But this is pretty much the industry standard if you’re not willing to pay.
I’d only use the free plan for something simple like a blog. You can create your site, publish content, and then share your work on social media. But once you’re ready to take things to the next level, you’ll need to consider one of the following paid plans:
Limited — $3.95 per month
Mini — $5.95 per month
Standard — $11.95 per month
Prof — $19.95 per month
Webnode does require an annual subscription with all plans. So this won’t be the best choice for those of you who prefer month-to-month contracts.
Ucraft
Ucraft is a bit unique compared to some of the other platforms we’ve seen so far. It’s advertised as a landing page creator, as opposed to a website builder.
The free plan can be used to create simple single-page websites.
If you already have a domain name, you can connect it for free. This means your free site won’t be forced to use a ucraft.net subdomain, which is a big bonus since most free website builders won’t give you this luxury. However, your website will have Ucrafted branding on the page itself.
Here are some of the other features and benefits you’ll get for free with Ucraft:
SSL certificate
Drag and drop builder
Visibility settings
SEO tools
Google analytics
24/7 support
Password protected pages
Free hosting
Unlimited bandwidth
For a free plan, this is actually pretty good. Again, the only catch is that you’ll be limited to building just one page. To create more than that, you’ll need to upgrade to one of the following paid plans:
Pro — $10 per month
Pro Shop — $21 per month
BigCommerce — $39 per month
All premium plans come with a 14-day free trial. No credit card required.
Onepager
Onepager is a website builder marketed toward small business owners. It’s intended for people without much technical ability who want to create a site with ease.
Onepager offers a “free forever” plan, which is extremely limited. Here’s a quick overview of what you get (and don’t get) for free:
Onepager branded domain
No web analytics
No email
Onepager ads on your pages
No ecommerce capability
No custom forms
No custom CSS
You’ll still get hosting and 24/7 support, but overall, I wouldn’t recommend the free site for any serious websites. Use this plan if you’re interested in trying Onepager as an extended trial.
To remove Onepager ads, use your custom domain, and activate ecommerce functionality, paid plans start at $8 per month with an annual contract.
Cindr
Building a website with Cindr is about as easy as it gets. They eliminated lots of the complex features and distractions for users who prefer simplicity.
You’ll be able to quickly add and publish photos, videos, music, text, and other content on your site in minutes. Designs are mobile-friendly and highly responsive.
You can create a site with Cindr without providing any credit card information. In fact, Cindr has just two plans; Free and Premium.
The free plan comes with:
Custom design capability
MyCindr.com domain
Live chat and email support
Unlimited pages
Free hosting
1 GB of bandwidth
Unlimited storage
Your free Cindr site will have Cindr ads displayed on your pages. To remove those ads, connect your own domain, and build multiple sites, you’ll need to upgrade your plan.
The Premium plan is $9 per month with no long term contracts. It also comes with unlimited bandwidth and storage.
Site123
Similar to our previous review, Site123 also has just two plans; Free and Premium. Compared to other website builders, the free plan is actually packed with quality features.
You’ll get everything included with the Premium plan, except you won’t be able to use your own custom domain. You’ll also be limited to just 500 MB of storage and 1 GB of bandwidth.
Aside from that, here are some of the features that come standard for free with Site123:
Intuitive page editor
Mobile-friendly designs
Free hosting
SEO tools
24/7 support
This website builder is a bit different from a traditional drag-and-drop editor. But it’s still easy to use and doesn’t require any code.
To get the most out of your Site123 website, upgrade to a Premium plan starting at $12.80 per month. This comes with ecommerce capabilities.
Strikingly
Millions of users have used Strikingly to create a website. It stands out from the other platforms on our list because it has ecommerce capability built-in, including the free version.
That’s right. For free, you can build an online store with Strikingly.
There’s just one catch. You can only have one product on display per website.
However, Strikingly lets you create an unlimited number of websites with the free plan. This is definitely better than some of the other options we’ve seen that restrict you to just one website or limited pages.
The free plan from Strikingly also offers 5 GB of bandwidth, which is more than we’ve seen from its competition.
As expected, you’ll be stuck with a Strikingly subdomain if you sign up for the free plan. To use your own domain and benefit from premium features, these are your upgrade options:
Limited — $8 per month
Pro — $16 per month
VIP — $49 per month
These prices are based on annual contracts. To save money, Strikingly offers long-term contracts for up to five years. All premium plans come with a 14-day free trial.
Webstarts
Webstarts is another popular free website builder. It’s reliable, versatile, and extremely easy to use.
You can create a website with an unlimited number of pages, but Webstarts pretty limited beyond that.
The free plan doesn’t allow you to use a custom domain. There’s no social integration, emails, SEO tools, contact forms, or slideshows either.
Your free Webstarts site won’t be mobile-friendly and won’t give you HTML access or ecommerce capabilities. All free sites will have ads on every page.
Overall, you can’t really build a legitimate site unless you upgrade to a premium plan. There are two paid options, priced at $7.16 and $19.99 per month, respectively.
Yola
With Yola, you can create and publish a website online in less than 30 minutes. Unlike other free website builders, Yola won’t put ads on your pages, although you will have a Yola domain.
Yola’s drag-and-drop site builder is simple and easy to use. It doesn’t require any technical experience, making it a top choice for beginners.
With that said, advanced users can edit using HTML, JavaScript, and CSS.
The Yola free plan has 1 GB of bandwidth and 1 GB of storage. You’ll also benefit from features like:
SEO tools
Email support
Web hosting with 99.9% uptime
Social sharing
Ability to embed YouTube videos
Google Maps integration
Video backgrounds
Contact forms
Tumblr blog integration
Site statistics
However, there is one major contingency here. You can only build three web pages.
Obviously, that’s not reasonable for those of you who want to create a full website. The three pages are only enough to test out Yola’s platform to see if you like it enough to upgrade to:
Bronze — $4.95 per month
Silver — $9.95 per month
Gold — $19.95 per month
All of these plans come with a 30-day money-back guarantee. You can add ecommerce capabilities to any premium plan for an extra $10 per month.
Jimdo
Jimdo was born back in 2007. Since then, more than 20 million websites have been built using this platform.
You can build a website for free using Jimdo, although your options will be extremely limited.
All free websites will have a .jimdosite.com subdomain. You’ll get 500 MB of storage, 2 GB of bandwidth, and HTTPS security. That’s pretty much it.
Jimdo will only let you build five web pages with the free plan. That’s obviously not enough to build a full website. But you’ll still be able to get your site live and see if you like the software before you upgrade.
I’d treat this free website builder as a trial that never expires. If you’re happy with the platform, then you can upgrade to one of the following paid plans:
Start — $9 per month
Grow — $15 per month
Grow Business — $19 per month
Grow Legal — $20 per month
Unlimited — $39 per month
To get the most out of Jimdo, the Unlimited plan will be your best bet. It doesn’t have any restrictions and gives you better access to customer support. Jimdo also has ecommerce plans starting at $15 per month.
Hidden Costs of Free Website Builders
Lots of website builders say they are free, but they fail to mention any hidden costs. In reality, the majority of website builders are not truly free if you want to create and publish a legitimate website. These are some of the top hidden costs you need to keep an eye out for.
Custom Domain
Every free website builder on the market will give you a free branded domain with their name somewhere in the URL. But if you’re serious about publishing your site on the web, you’ll need to buy your own domain name.
There are a couple of site builders that let you connect your custom domain with a free plan, but you’ll still be paying for that elsewhere.
I do not recommend buying a domain from your website builder. Check out my list of the best domain registrars for more guidance with this process.
Web Hosting
Most free website builders will also offer free web hosting. But to be blunt—free web hosting stinks.
If you plan to have site visitors at any point after your site goes live, you’ll definitely need to take web hosting more seriously. Don’t worry, web hosting isn’t that expensive. These are my top recommendations for the best cheap web hosting plans.
Page Limitations
There are plenty of website builders out there that let you build a site for free with an unlimited number of pages. Some will even let you create an unlimited number of sites with a free plan.
However, there are other free website builders that restrict how many pages you can create before you’re forced to upgrade.
These page limitations can be as low as one or three pages. Obviously, you can’t build a full website with those types of restrictions. Adding pages will cost you money.
How to Choose the Best Website Builder For You
With so many free website builders on the market, choosing just one can be difficult. Here is the process that you should use when narrowing down the best option for your website.
Upgrades
If you want to start with a free website builder for now, that’s fine. But eventually, you’ll need to upgrade. You can’t really make a legitimate and high-quality website for free.
So choose a website builder that has plenty of upgrade options to meet your needs.
You don’t want to switch to a different platform when you’re ready to start paying. That’s too much of a hassle, and you’ll probably need to rebuild the majority of your site.
Ease of Use
You shouldn’t be struggling to create a website. Look for platforms with drag-and-drop builders and lots of templates that you can easily customize.
If you don’t have a technical background, this will make your life much easier.
Basic functions like adding text, images, videos, and creating new pages shouldn’t require too much effort. Managing your site, publishing blog posts, and everything else must be simple.
Some website builders, like WordPress, are extremely popular. However, WordPress doesn’t have a traditional drag-and-drop builder. So if you don’t have certain technical skills, avoid website builders that require coding knowledge.
Type of Website
What kind of website are you building?
Blogs, portfolios, ecommerce shops, and small business websites are all very different. You have to make sure that the website builder you choose has the ability to accommodate your needs.
Just because a website builder makes it easy for you to publish blog posts, it doesn’t mean it’s a great option for your online store. If you refer to the list above, you’ll see that some builders are definitely made for creating certain types of websites.
Conclusion
Creating a website for free is easy. All of the website builders on our list allow you to create a website for free.
But with that said, even the best free website builders are limited in some capacity. Some of these platforms will have more restrictions than others.
If you’re serious about creating a website, I would not recommend building it for free.
Instead, use these free builders to try different options. Think of these as extended free trials that won’t expire. Once you find a platform that you like, take a look at their paid options and upgrade to a suitable plan that meets your needs.
Every website needs to be hosted. So if you’re building a new website for the first time, learning how to host it is the only way your site will be published on the web.
The concept of web hosting is pretty straightforward.
Your website lives on a server. A web hosting provider maintains the server and technology needed to connect your site to the Internet.
When an Internet user wants to visit your website, they simply type your domain or web address into their browser. Their device connects with the server and your pages are delivered to the user.
Hosting a website isn’t complicated. But you want to make sure you get it right the first time. Otherwise, it can cause you big headaches and problems down the road.
So how do you host a website?
There’s an overwhelming amount of information on the Internet about web hosting. The answer depends on multiple factors, such as your technical experience, type of website, and size of your website.
That was my inspiration for creating this guide. I’ve simplified the web hosting process into just five easy steps.
No matter what type of website you’re creating, you’ll be able to host it with ease if you follow the steps below.
Step #1: Research Web Hosting Providers
Web hosting is just like any other consumer product or service. If you wanted to buy a new car, you wouldn’t just walk up to a dealer and purchase the first one on the lot. You’d research different types of cars, makes, models, and dealerships to help you make an informed decision.
The same concept can be applied to web hosting.
All web hosting providers are not the same. Some are undoubtedly better than others.
Here’s the thing. There are dozens, if not hundreds of different web hosting providers on the market today. Your research process can help narrow your search. You’ll be able to eliminate certain hosts right away.
There are web hosting providers out there that specialize in speed, while others prioritize customer service. Some providers are best for small business websites and others are best for agencies or enterprises.
So where should you start your research?
Don’t just blindly start clicking through different web hosts on Google. That’s way too time-consuming and it won’t be very productive. Plus, you won’t know what to look for to see if the company is legit or not.
Nobody is going to search through all of those results. Instead, I’d recommend finding a third-party guide of reviews.
As an expert in web hosting, I’ve written one of these guides myself. After personally checking the features and performance of nearly every web host in existence, I was able to narrow down the top options. So check out my list of the best web hosting providers.
You don’t need to pick a provider just yet. But the research process will guide you in the right direction as you continue through each step in this guide.
Step #2: Determine Your Budget
This step can be tricky because it involves more than picking a price point. Your budget will also depend on the features you need and the type of hosting that you want (which we’ll get to in the next step).
How much does web hosting cost?
You can find hosting providers that offer plans for less than $1 per month, and other providers offering plans for $2,000 per month.
Having a rough idea of what you’re willing and able to spend will at least help you narrow down your options.
For example, if you’re starting a small personal blog and not expecting tons of traffic, you can get away with paying less than $5 or $10 per month for a cheap web hosting provider. Small business owners and ecommerce sites would likely want to look towards a higher pricing tier.
Web hosting is like any other type of product or service. In most instances, you get what you pay for. So don’t expect to pay $2 per month for the best web hosting experience on the planet.
While price doesn’t automatically equate to quality, it’s usually a good indication of how many additional features and benefits you’ll get with the plan.
If you want dedicated resources, lightning-fast loading speeds, cPanel, freebies, and 24/7 customer support, you can expect to pay a bit more for those hosting services.
Step #3: Choose a Hosting Type
Now that you’ve had a chance to research some providers and get an idea of how much you want to spend, it’s time to determine the type of hosting that’s best for your website.
You have four main options to choose from:
Shared hosting
VPS hosting
Dedicated hosting
Cloud hosting
I’ll give you a brief overview of each so you can figure out which one to use.
Shared Hosting
Shared web hosting is a popular choice for new or entry-level websites. It’s the most affordable type of web hosting and doesn’t require a ton of technical knowledge.
A shared plan is ideal for websites that won’t be getting high volumes of traffic.
As the name implies, your website will be sharing server resources with other sites as well. This can impact the performance of your website. If another site on the same server has a traffic spike, it can cause the server to crash and bring down your website with it.
VPS stands for virtual private servers. With this type of hosting, you’ll be using a single server that’s been separated into multiple virtual machines.
VPS hosting is a step above shared hosting. Since you won’t be sharing your resources with other websites, it will improve the performance of your site. Expect to have more disk space, bandwidth, higher uptimes, and faster loading speeds with a VPS plan.
This is a great option for websites that will be expecting higher volumes of traffic and need enough resources to accommodate those users. VPS plans give you more control over your server settings as well.
The majority of new websites do not need a dedicated server. This hosting type is reserved for large websites that need enterprise-level hosting capabilities.
With that said, for those of you who are more tech-savvy and want complete control over your server settings and hosting environment, a dedicated server plan is the best way to get that.
A dedicated server gives you the most resources and therefore delivers the highest performance.
The biggest downside of a dedicated server is the price. This is the most expensive type of web hosting, which is another reason why it’s not ideal for new or small websites.
Cloud Hosting
Cloud web hosting is new compared to the other three options. But it’s definitely becoming a popular choice for website owners.
A cloud plan is ideal for websites that are growing and need to scale server resources as their site gets bigger. If your site is going to surpass 50,000 monthly visitors, it’s time for you to consider cloud hosting.
Cloud hosting is a step above shared hosting, yet it’s usually cheaper than a VPS plan.
If you choose this option, your site will be run on multiple cloud servers, which decreases your chances of having unexpected downtimes due to traffic surges or server issues.
I’d recommend a cloud hosting plan to new website owners who plan on growing their site as fast as possible in the coming years. By going with a cloud plan from the beginning, you won’t have to change your hosting type down the road as you outgrow a shared plan. Check out my list of the best cloud hosting companies to help you find the best plan for your needs.
Step #4: Select Your Hosting Plan
Using the information you’ve gathered in the first three steps, it’s time for you to choose a hosting plan.
Find a provider that offers the type of web hosting option you need at a price point that’s within your budget. You’ll likely have at least a couple of choices that fit this description. So here are some other factors that you should keep in mind when you’re evaluating a hosting plan.
Uptime
Uptime is the most important feature in web hosting. If your hosting provider isn’t offering a minimum of 99.9% uptime, then look elsewhere. Most web hosts will offer an uptime guarantee in their plans, and compensate you if they fail to meet that promise.
Resources
You need to make sure that your plan has enough resources to accommodate your website content and traffic.
The first thing to look at is RAM, which is your storage. 4 GB of RAM is enough for an average website. That’s the minimum I would recommend for you.
Next, you’ll have to consider the bandwidth offered in the plan. 120 GB of bandwidth is enough for 2,000 daily page loads of a 4 GB website. So if you are expecting more traffic or plan to have a larger website, you need to get more bandwidth.
Customer Support
You may not think so right now, but aside from the performance of your hosting plan, customer service should be your next priority. Roughly 20% of web hosting customers agree with this.
In a perfect world, nothing will ever go wrong with your website or servers. But realistically, something is bound to go wrong at some point. That’s just the nature of the web hosting world. It happens to everyone, and your site probably won’t be immune from it.
During a time of trouble, you want to be able to get in contact with your web host immediately. So look for a plan that offers 24/7 support via phone and live chat.
Aside from that, you should also look for providers that have a knowledge base and resource center that will teach you how to do certain tasks on their platform. This type of customer support can really help you get the most out of your web hosting plan.
Renewal Rates
You need to look beyond the introductory rate of your web hosting plan to make sure that it will continue to fit within your budget in the coming years.
It’s common practice in the web hosting industry for providers to heavily discount new contracts, and then increase the fees when it’s time to renew. Normally, you can lock in the best possible rate by committing to the longest term length, which is usually up to 36 months.
But make sure you know how much your plan will cost you at the end of that period.
Freebies, Add-ons, and Additional Features
You should also be looking for plans that give you the best value for your money. Most hosting providers will include some extras in their plans as an incentive for you to sign up.
Here are some common features to look for:
Free domain (usually for the first year)
Free SSL certificate
Free cPanel license
Google Ads credit
Free site builder
Free site migration
Unlimited email accounts
Automatic backups
Most plans come with a money-back guarantee as well. 30 days seems to be the industry standard for this, but I’ve seen plans offer up to 97 days for you to change your mind.
Step #5: Register Your Domain Name
The domain name is your digital address. Ours is www.quicksprout.com.
I included this step last because you can potentially register your domain name from your hosting provider when you sign up for a hosting plan. Sometimes this will even come free depending on the plan and provider you go with.
But with that said, you can register your domain name elsewhere before you settle on a plan.
Personally, I like to keep my domain registration services and web hosting services separate. So I’d recommend using a domain registrar for this step. If you’re lost and don’t know where to do this, take a look at my guide on the best domain registrars.
Getting your domain from a web host isn’t necessarily wrong. So it’s fine if that’s what you prefer.
Regardless of where you get it from, this step needs to be completed in order for your website to be live on the web.
Alternative Option: Self Hosting (Not Recommend)
It’s possible to host your website without using a web hosting provider, although I would not recommend this option.
Self-hosting can be accomplished by using your computer or a Linux machine as a server. It requires lots of technical experience and a full understanding of how websites and servers work.
In many cases, self-hosting is slow, unstable, and unreliable. Plus, you’ll be responsible for all of the server maintenance, backups, software updates, and security on your own.
Overall, self-hosting is a bad idea, especially for beginners. So I don’t want to spend too much time talking about it. But I wouldn’t be doing my job properly if I didn’t at least mention it as an option.
Conclusion
Hosting a website isn’t as complicated as you might think. In fact, the whole process can be accomplished in just five simple steps.
Research web hosting providers.
Determine your budget.
Choose a hosting type.
Select your hosting plan.
Register your domain name.
If you follow the steps in this exact order, it will give you enough information to make an informed decision. This is the most ideal way to host any website.
Get started by reading our expert reviews of the top web hosting providers to find the best host for your website.
I am running Windows 10 64 bit on an HP Compaq 8200 Elite Small Form Factor with 8 GB RAM. I just learned the max RAM for this computer is 32GB.
Though the computer runs fine as is, I've given some thought to upgrading the RAM. As I do not do any gaming and use the computer in just an 'ordinary' fashion, I'm wondering how much RAM would be overkill. For example, would I see more speed and general overall operating improvement at 16 GB? And even more at 32GB or no?
If you’re on the hunt for a new web hosting service, Bluehost is definitely a top option to consider. This platform powers more than 2 million sites across the globe.
All web hosting services are not created equally.
I see so many new webmasters make the mistake of just going with the cheapest web host or the web hosting site that appears first in their Google search results.
For something as important as web hosting, you can’t rush this decision. It’s crucial that you take the time to weigh your options in order to find the best web hosting plan for your needs.
That’s what inspired me to write this guide. Since so many of you will likely come across Bluehost during your search, I wanted to give you as much information about this web hosting service as possible.
I’ll explain all of their hosting plans, pricing, and discuss the best parts about using Bluehost. I’ll even tell you about a couple of cons associated with Bluehost, just to make sure you have all the facts before you sign up.
Bluehost Web Hosting Plans
Not every website has the same web hosting needs. Bluehost knows this and has three different types of web hosting options for you to choose from.
Shared
VPS (virtual private server)
Dedicated server
Choosing which kind of web hosting plan to go with will vary based on how much you want to pay, your expected site traffic, and the type of website you have. If these terms are foreign to you, I recommend reading my guide on everything you need to know about web hosting. This will give you a more detailed description of the differences between these hosting options.
Shared hosting
If you have a new website and you’re on a tight budget, shared hosting might be your best option. Bluehost offers four different pricing plans for its shared hosting services.
Basic — $3.95 per month
Plus — $5.95 per month
Choice Plus — $5.95 per month
Pro — $13.95 per month
I know what some of you are thinking. If Plus and Choice Plus are priced the same, wouldn’t you automatically go with Choice Plus?
All Bluehost plans go up in price once you renew. The advertised prices above are just the introductory rates. It’s worth noting that Plus renews at $10.99 per month, while Choice Plus renews at $14.99 per month.
Bluehost has managed shared hosting platforms, meaning you won’t have to worry about managing servers or anything like that.
VPS hosting
VPS hosting from Bluehost is the middle-tier option of the three plans. There are three pricing options for a Bluehost virtual private server.
Standard — $19.99 per month
Enhanced — $29.99 per month
Ultimate — $59.99 per month
The biggest differences in these plans are the cores, SSD storage, RAM, bandwidth, and IP addresses.
With the Standard plan, you’ll get 1 core, 30 GB of SSD storage, 2 GB of RAM, 1 TB of bandwidth, and 1 IP address. Cores, SSD storage, and RAM double at each tier for the Enhanced and Ultimate packages.
Using Bluehost for a VPS gives you dedicated server resources. You’ll be able to use your RAM, CPU, and disk space, no matter what other users on the same server are doing. VPS hosting also has increased security, since you won’t be sharing an operating system with any other Bluehost users.
Dedicated hosting
Picking a dedicated server plan from Bluehost means you’ll be taking advantage of their top of the line services. These plans are made for those of you who are tech-savvy and want complete control over your server.
Standard — $79.99 per month
Enhanced — $99.99 per month
Premium — $119.99 per month
As you can see, top-tier plans come at higher price points. With VPS hosting, you’re maxed out at 120 GB of SSD storage, 8 GB of RAM, 3 TB of bandwidth, and 2 IP addresses. But dedicated servers from Bluehost go all the way up to 1 TB of storage, 16 GB of RAM, 15 TB of bandwidth, and 5 IP addresses.
These plans will probably exceed the needs and uses for what most of you are looking for. But with that said, as your website grows and your traffic scales, you might want to consider a dedicated server in the future.
Benefits of Bluehost for web hosting
Now that you have a better understanding of the plans offered by Bluehost, it’s time for us to discuss what makes Bluehost a great choice for web hosting.
Low pricing options
If you have a brand new website, you don’t need to be spending thousands of dollars per year on web hosting. With Bluehost, you won’t have too.
As you’ve already seen, the introductory rates for Bluehost shared web hosting starts at just $3.95 per month. Being able to host your site for less than $50 is a great deal.
All Bluehost shared hosting plans come with a free SSL certificate and free marketing credits. When you factor in the storage and bandwidth you’re getting, that’s a fairly decent value for the price.
Overall, this is one of the lowest prices you’ll see for a legitimate web host.
Great security
Even though Bluehost has some inexpensive pricing options compared to other web hosts on the market today, it doesn’t mean that they’re inferior when it comes to crucial security features.
I’ve already mentioned that an SSL certificate comes standard, regardless of which plan you choose.
Furthermore, their plans have a feature to hide the personal information that you used when signing up for a private domain. Lots of times hackers will target this information from website owners.
Bluehost has features to prevent malware attacks, as well as tools used for automatic daily backups. You’ll also get a security tool that offers spam protection for the email address associated with your website.
Again, this is all a great value considering how much these plans go for.
Top loading speeds
Page loading speed is something that always needs to be taken into consideration when you’re shopping around for the best website host.
If your site takes too long to load, it’s going to kill your engagement metrics. People will abandon your site, and you won’t be able to drive conversions. It’s as simple as that.
So let’s take a look the response time for a Bluehost test website.
The average response time for Bluehost so far in 2019 is 352 ms. To put that into perspective, refer to my SiteGround web hosting review. SiteGround’s average response time over the same period of time was 662 ms, which is still fast.
Bluehost nearly cuts that time in half.
Easy to use
You don’t need to be a tech expert to host your website with Bluehost. Nearly anyone, regardless of their experience level, can find a beginner hosting plan from this platform.
That’s definitely not the case with all web hosting providers on the market today. There are plenty of web hosts out there that are specifically designed for advanced webmasters.
Whether you’re using WordPress or taking advantage of the Bluehost website builder, everything will be pretty straightforward and easy to follow.
Excellent support
Even though Bluehost is easy to figure out, you may still find yourself in a situation where you need some help or guidance.
In most cases, you should able to find an answer through their knowledge base page. This is essentially a support center that has how-to guides, tutorials, and articles with instructions for troubleshooting and FAQ. Simply search what you’re looking for, and there will likely be a resource to help you out.
Furthermore, Bluehost has 24/7 phone support, which is great for those of you who like to be talked through problems.
If you’re like me, you’ll probably just take advantage of their live chat agents. It’s a fast and easy way to get an answer without having to leave their website.
High uptimes
You can’t give a web hosting review without referring to uptime rates. Take a look at where Bluehost stacks up compared to other web hosting providers in this recent study.
Bluehost ranked second on the list with a 99.991% average uptime for the year. That percentage is identical to MidPhase, which ranked first on the list.
Furthermore, you can see that Bluehost only had seven total outages on the year, which was the lowest for all hosts in the top five, including the top-ranking provider on the list.
It really doesn’t get much better than that. So if you host your website with Bluehost, you can rest assured knowing that your site isn’t going to have much downtime throughout the year.
Money-back guarantee
Like most web hosting services, you won’t get a free trial to try them out. But with that said, Bluehost does offer a 30-day money-back promise.
So if you’re on the fence about using Bluehost, it’s comforting to know that you’ll get refunded if you’re not ultimately satisfied in the first month.
But with that said, it’s worth noting that the refund only applies to web hosting costs. So if you use Bluehost for a domain name or other add-ons, those purchases are final.
WordPress hosting
If you’re using WordPress, Bluehost is definitely a top option for you to consider. That’s because this web host is just one of the three “official” recommended choices from the WordPress website.
DreamHost and SiteGround are the other two recommended web hosting services on this WordPress resource.
With that said, you can still use nearly any other web hosting service on the market to create your WordPress website. But it’s definitely a positive sign that Bluehost is recognized as a WordPress partner.
Other considerations
While Bluehost has its fair share of positive characteristics, it’s still not perfect. I wouldn’t be doing my job if I didn’t mention some of the shortcomings of this web host.
High renewal rates
I briefly mentioned this before when we were discussing the different plans and pricing options. Like many other web hosting services, Bluehost jacks up the prices once you renew your subscription.
Depending on your plan, the monthly rate will change as follows:
$3.95 to $7.99
$5.95 to $10.99
$5.95 to $14.99
$13.95 to $23.99
$19.99 to $29.99
$29.99 to $59.99
$59.99 to $119.99
$79.99 to $119.99
$99.99 to $159.99
$119.99 to $209.99
As you can see from this list, in some instances the price more than doubles. So it’s in your best interest to commit to a longer term plan if you want to get the best rate for the longest amount of time.
Bluehost offers plans for 12, 24, or 36 months. So if you know that you’re ready to commit to this web host, I’d recommend going with a three-year contract when you first sign up. It will save you money down the road.
Costly site migrations
It seems like the majority of web hosting services out there will migrate your current website to their service at no cost. This is a major selling point for new customers.
However, Bluehost does not offer free website migrations.
For $149.99 they’ll migrate up to five websites and 20 email accounts. This gets handled by experts at Bluehost, so you won’t have to do any heavy lifting.
But with that said, you do have to pay for it, which can be a turn-off for those of you with an existing site.
Conclusion
Simply put, I definitely recommend Bluehost as a web hosting provider. There’s a reason why it’s one of the most popular services on the market today.
Bluehost has exceptionally fast loading times as well as one of the highest uptime rates we’ve seen in the last year.
They offer different hosting types, plans, and options to meet the needs of any website. I’m sure you’ll be able to find a plan from Bluehost that is suitable for your web hosting needs.
[Chris]: I'm a lifelong Mac user. Ever since our family upgraded from a Commodore 128 to an Apple Macintosh Performa 636 (CD) when I was in middle school, I've never owned or worked on anything other than a Mac. I'm pretty dedicated to running a clean, fast, optimized, safe, and organized machine. If I was a woodworker, my truck would probably be a mess, but my shop would probably be in perfect shape. Organized pegboard of tools, swept floor, and sharp tools.
If it seems off to see a review of this Mac software seems here on a web development blog, it shouldn't. Keeping a clean machine makes sure we can do out job without anything getting in the way. Just look up what Abraham Lincoln had to say about sharpening axes.
I really like CleanMyMac X. I've used it for years and years, and it is my primary tool for helping me keep a clean shop.
Nicely designed UI, wouldn't you say?
The cornerstone of CleanMyMac X is to regularly run a scan of your whole system and follow its recommendations for what to clean up. The scan only takes a few minutes, even on my machine, which is pretty loaded with files including god-knows how many node_modules folders and such. Plus, it provides an alert once it finishes.
Then you get a bit of an overview of things CleanMyMac X can help you with, and away you go.
Give it another few minutes to do its thing, and a boatload of the heavy lifting will be done for you.
Clearing up hard drive space is one of CleanMyMac X's superpowers
If you haven't run it in a while (particularly on your first-ever run), you're going to be clearing many, many gigabytes of unused junk off your system. That's a lot of space, making this tool a godsend if you're dealing with space issues on your hard drive, as I certainly have.
But what I've found is that tracking down big and old files is the best way to clear up space. They have a feature that literally does exactly that, which helps me track down giant files that I have zero use for anymore. I find stuff like enormous log files, old SQL dumps I don't need any more, original media recordings that have already been backed up. That kind of thing.
The new Space Lens feature is great to helps you visualize the biggest hoarders on your system. It helped me discover that the largest offenders on my system were recordings for CodePen Radio, which could easily be removed from my system with no harm.
Dropbox has a "selective sync" feature that allows me to keep some files backed up, but not keep them locally on my Mac. CleanMyMac X gives me hints on the best directories to use for certain files.
Nuking applications correctly
I used to rely on a little tool called AppZapper to delete apps, because it had this neat feature where it would entirely clean up after the app. Not only would the app be gone, but any files strewn across the entire system that relate to that app as well, of which there might be a dozen... or more.
I don't need that anymore because CleanMyMac X does this automatically! Say I'm cleaning out my Applications folder and find an app that I just don't use whatsoever. I can simply drag that application to the trash. CleanMyMac X will notice that I did that and help me delete it correctly.
Popping over to the app, I can see exactly what it's doing:
Saving myself from a restart
I can't quite explain why, but sometimes my machine feels bogged down. It runs slowly and every task seems to take forever. The dreaded Mac beachball seems to happen for even the simplest of things. Maybe it's because of how many different development environments I spin up and down, coupled with the fact that I only restart once a week... if that. Who knows.
Restarting usually does make for a snappier machine, but sometimes I really want to avoid it. Like, when I'm in the middle of some long-running task, or I'm trying to complete a thought, or I only have 30 minutes left in my work day and I want to use them to do work. I've found the reason for the slowness usually has to do with my RAM usage peaking out, and amazingly, CleanMyMac X has a one-click solution for that right in the handy-dandy menu bar app:
This machine that I'm writing on and that I just took that screenshot with is brand-spanking new. I went with 32 GB of RAM because my old machine came with 16 GB and had these RAM issues constantly. In that screenshot above, you can see I'm using 23 GB of RAM just sitting here hardly doing anything other than typing up this blog post. 🥺. But I can get a lot of that back after "freeing up" RAM.
CleanMyMac X will even remind me of low RAM, among other things, and help you prevent that from causing bigger issues.
I find CleanMyMax X pretty dang reliable and valuable. I'm grateful for that since trust is paramount with an application like this. I'm not just going to let any app scour my hard drive, delete files and have this general kind of access. I wouldn't want to be in a position where I really needed an app like this right away and had to choose something without being able to lean on years of trust.
Hi
I have python code that can list all drive letters but now I need also list the name of drive letter (Label) and the size of hard drive like below!
      Ltr    Label                   Size
    ----  ------                  ---------
     C       Windows              800 GB
     E      Local Disk           200 GB
     F       My Passport          500 GB
     Y        Secret               1 GB

import string
from ctypes import windll

def get_drives():
    drives = []
    bitmask = windll.kernel32.GetLogicalDrives()
    for letter in string.ascii_uppercase:
        if bitmask & 1:
            drives.append(letter)
        bitmask >>= 1

    return drives

if __name__ == '__main__':
    print (get_drives())    # On my PC, this prints ['A', 'C', 'D', 'F', 'H']
OR This code
import os
print (os.popen("fsutil fsinfo drives").readlines())


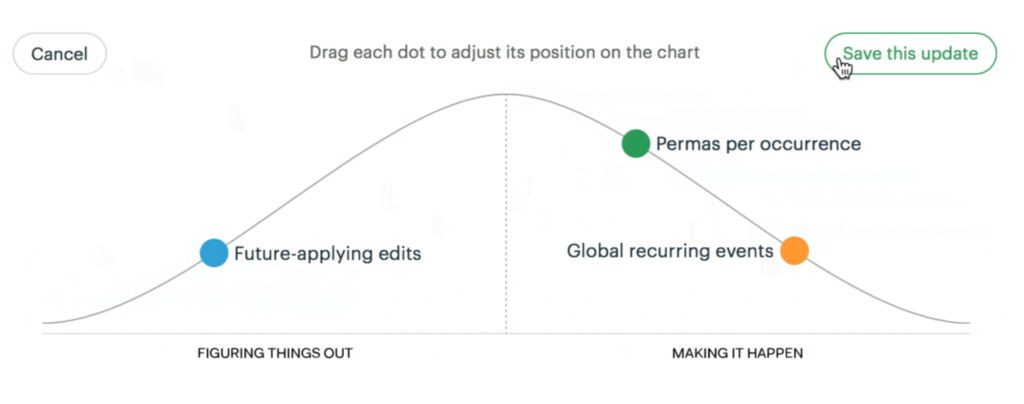


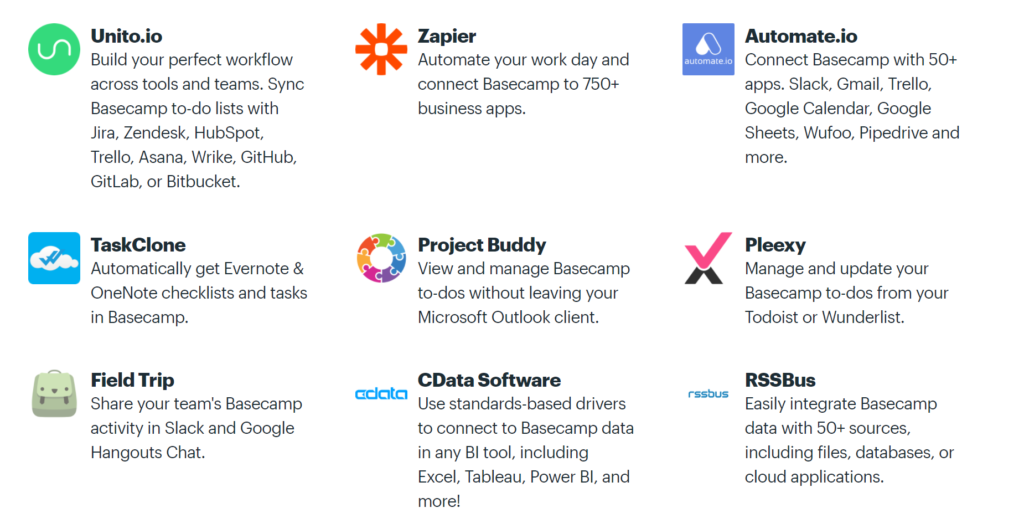


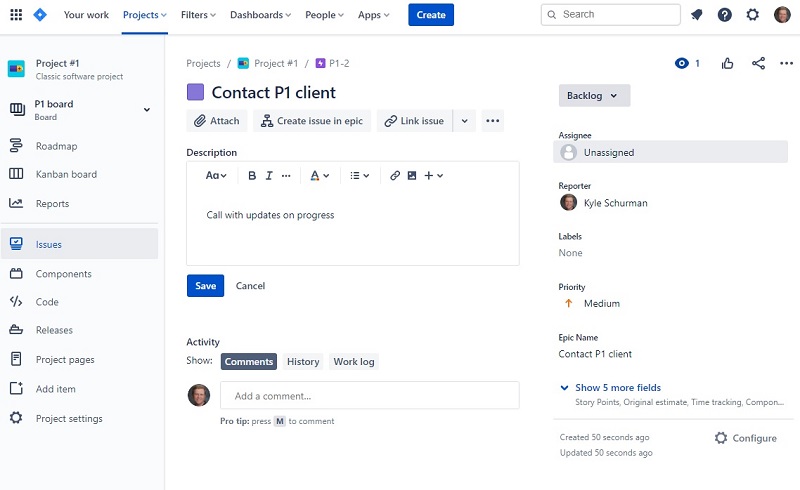
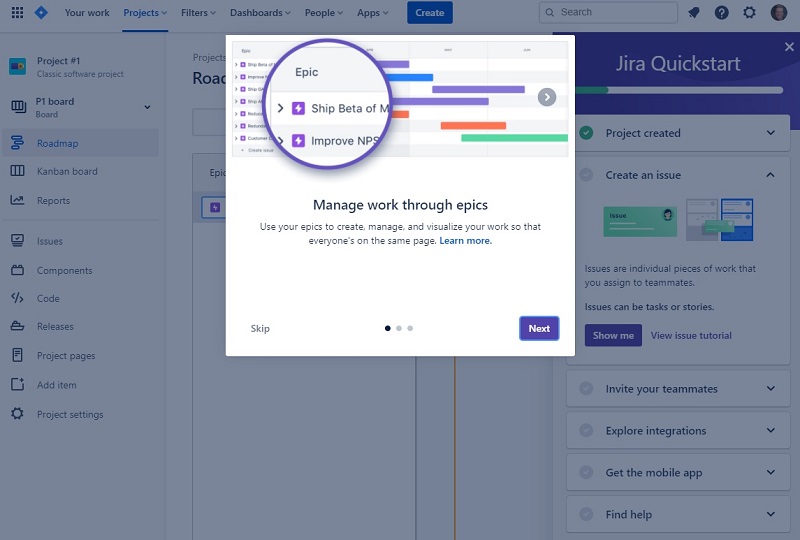
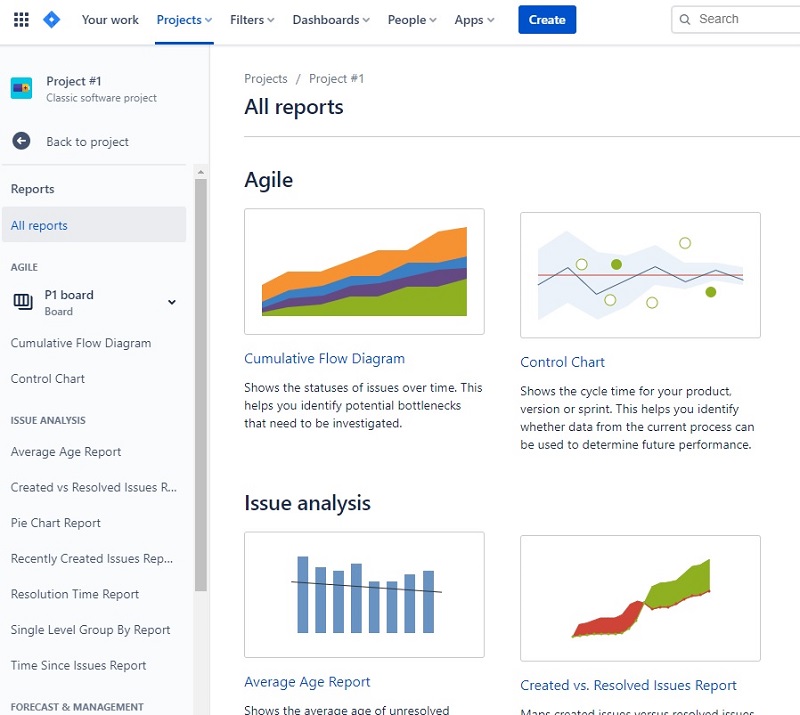
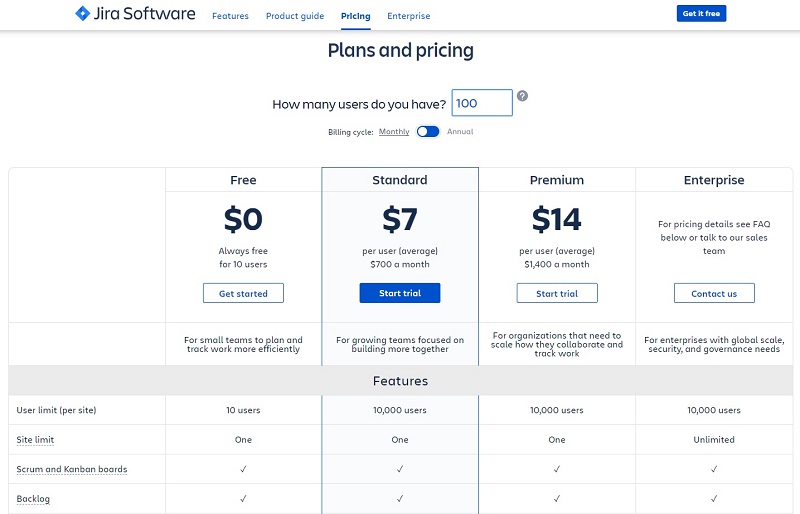
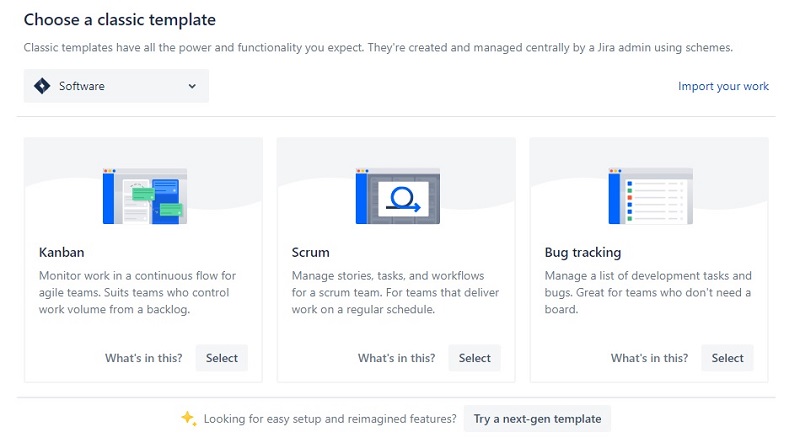

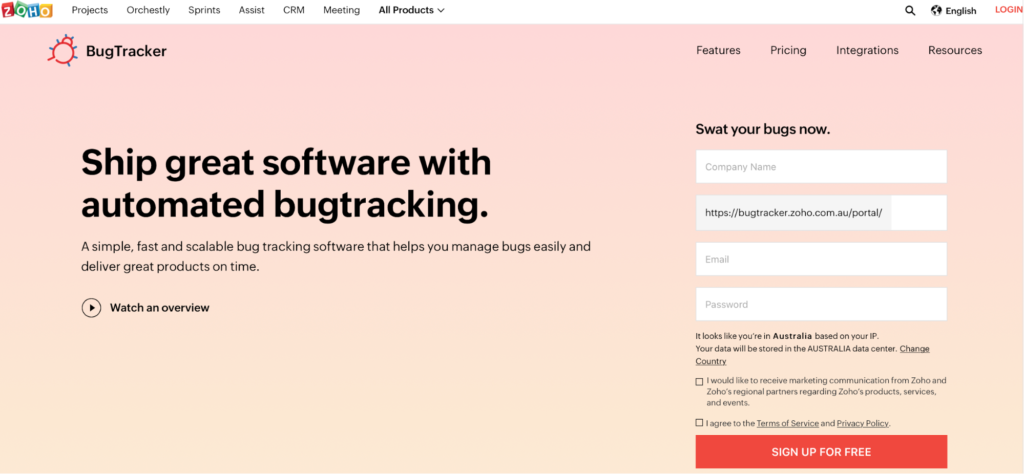
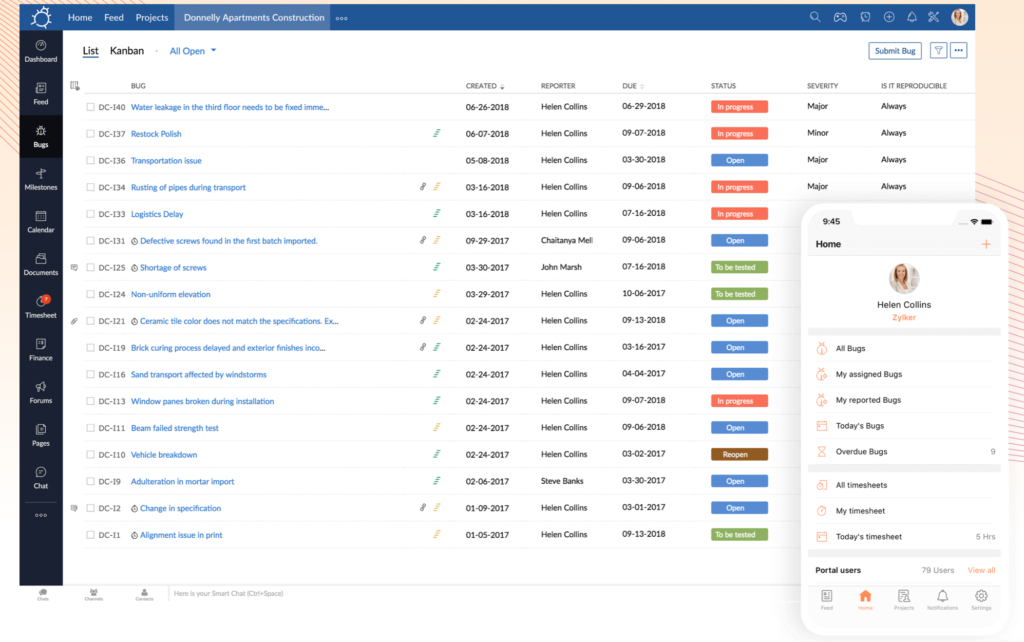
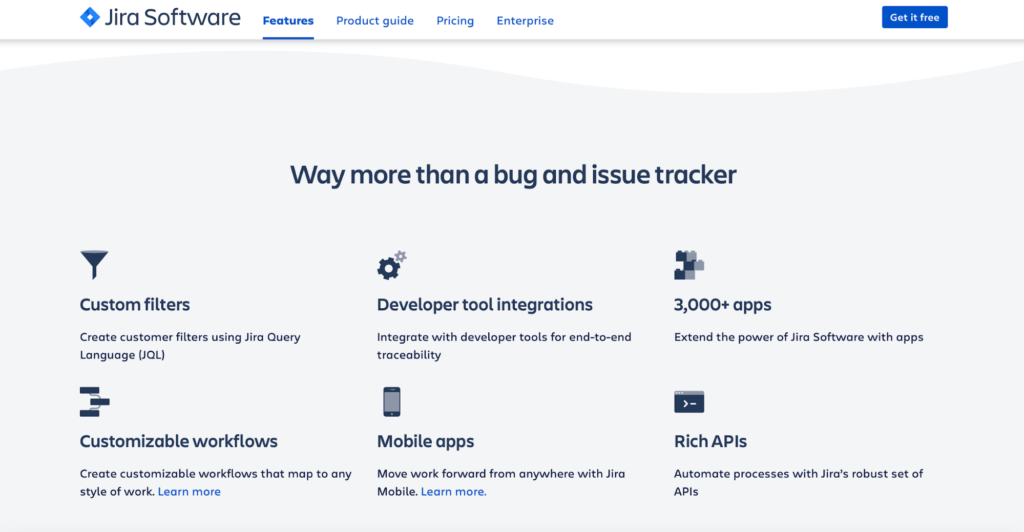
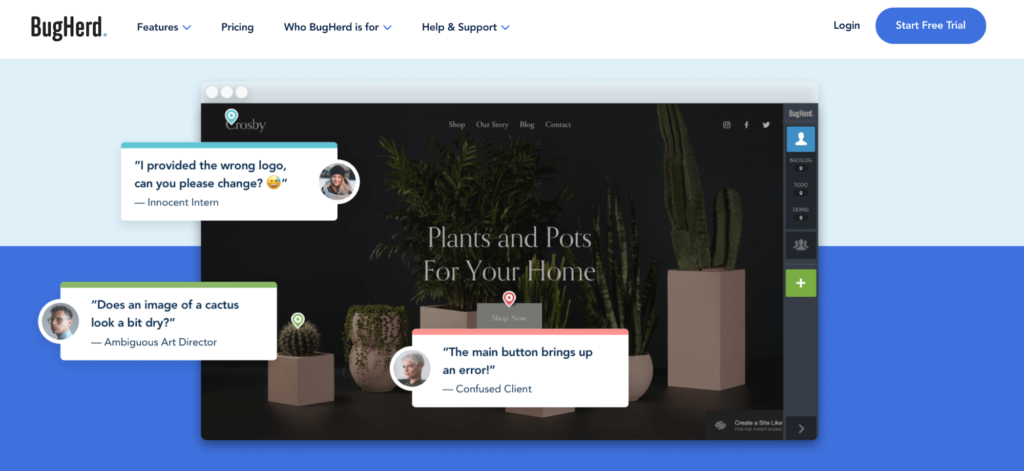
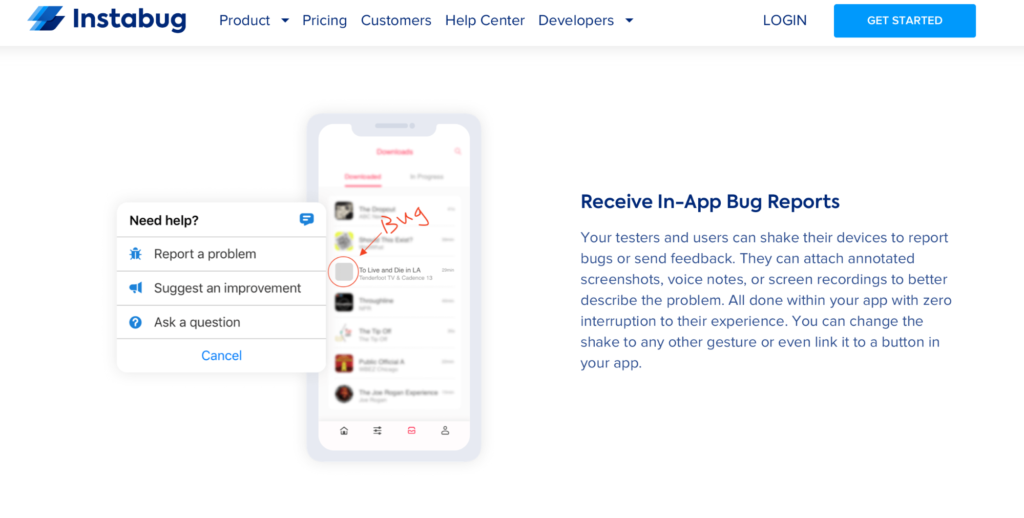
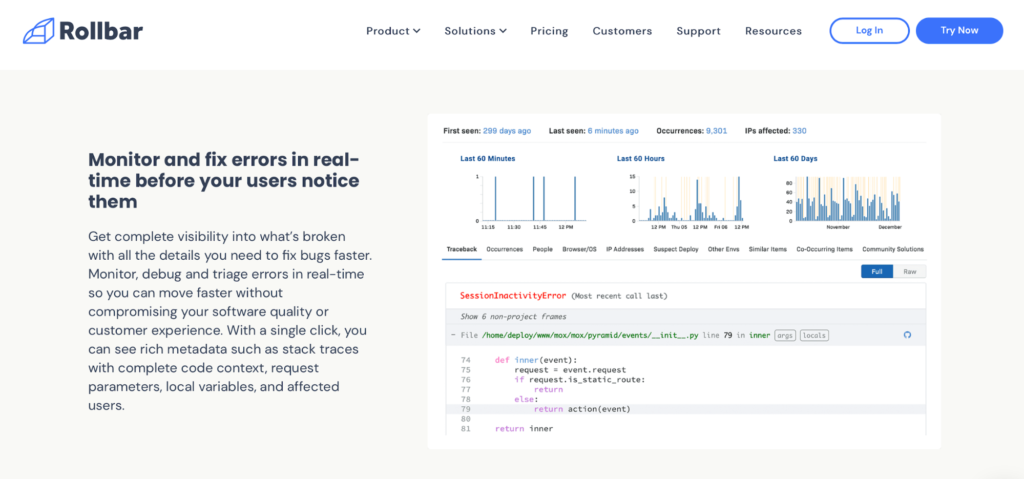


 icon). Or, click on the asset to see a larger preview.