Top 9 WordPress Plugins (2022 edition)

WordPress powers more than 42% of the web, making it by far the world’s most popular website platform. This platform has the tools needed to build any type of website. They include themes that serve to make building high-quality sites easier. Also, cool WordPress plugins that add special features and functionalities that themes often lack.

The right plugin can do wonders for a website’s design and performance. But with more than 42,000 essential WordPress plugins to choose from, finding the “best” plugin to satisfy a particular need can be a time-consuming task. It is one that has no guarantee of being successful.

Finding just the right plugin is best left up the experts, those people in the back room that are very good at comparing one thing against another.

What those experts have found as we enter 2022 is simply amazing. Perhaps one or more of these 9 top WordPress plugins will be exactly what you’ve been looking for.

  1. Amelia

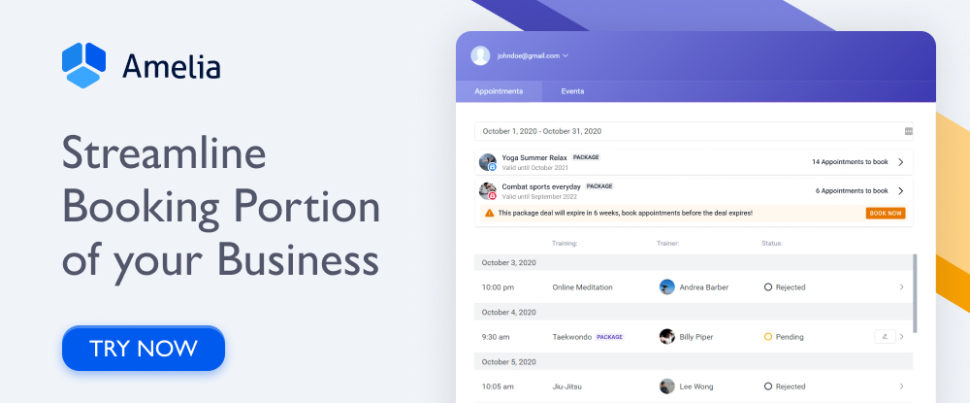
Amelia is an automated booking system that can flawlessly manage an unlimited number of appointment bookings for an unlimited number of business clients.

Amelia can manage appointments for multiple locations and does so using a single insightful dashboard from a single platform.

A WordPress website design that utilizes the Amelia plugin’s features and functionalities can completely streamline a business’s booking operations.

  • Clients can make or change appointment bookings online at any hour of the day
  • They can request appointments with specific employees
  • They can receive reminders and follow-ups and be notified of forthcoming special events or learning sessions online
  • They can also make any payments due online, or pay deposits for appointments and events
  • Businesses can schedule training or educational sessions, or other events and sell packages of services online
  • Booking forms can be customized to fit a business’s brand

Amelia’s time and money-saving automated booking system is ideal for service-oriented businesses like beauty parlors, gyms, health and fitness centers, training centers, and barbershops.

Click on the banner to see how Amelia can help you leverage your business.

  1. wpDataTables

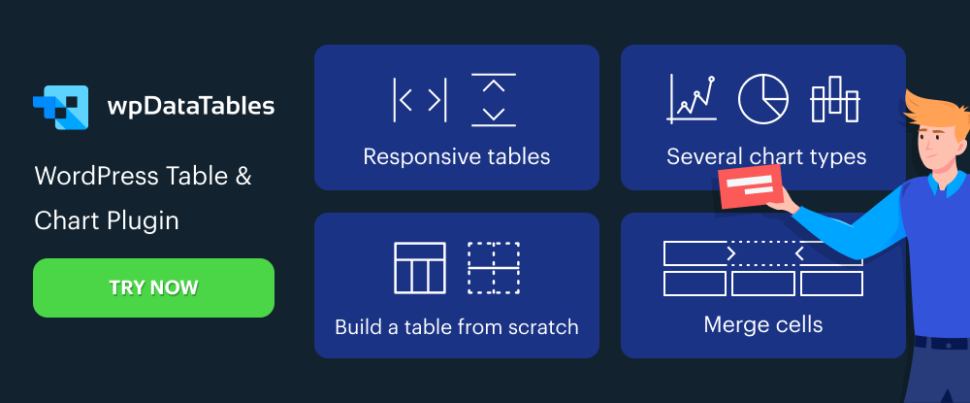
You’re tasked with building a responsive, interactive, and maintainable table, the task must be completed relatively quickly, and you’ve got several million rows of data to process. When you start to think seriously about seeking a new line of work, you hear about wpDataTables, an absolute workhorse when it comes to creating tables and charts from massive amounts of data quickly.

This powerful WordPress plugin –

  • can process data from multiple sources using multiple formats
  • can highlight key data and color code essential data in both tables and charts
  • can help users build tables manually, from spreadsheet or database data, or a real-time MySQL database
  • wpDataTables features a large amount of data sorting and filtering options. It also provides ready access to Chart.js, HighCharts, and Google Charts libraries.

Click on the banner to see what 50,000+ satisfied users already know. 

  1. LayerSlider

The LayerSlider plugin has been on the market for more than a decade. Following web design trends and customer demand, the developers have elevated LayerSlider’s functionality and ease of use to new heights.

LayerSlider 7 has just made its debut. This is the biggest update yet, and by far the most exciting. With this release, LayerSlider has evolved into a powerful tool to dazzle your website visitors with eye-catching web design and effects.

  • LayerSlider 7 introduces a powerful, totally redesigned project editor that is a joy to work with and gives users the ability to design anything without limits
  • Users can also design popups with stunning effects. Popups can be used to grab visitors’ attention with adverts, store messages, newsletters, and similar solutions
  • With a growing selection of templates and Add-Ons, LayerSlider continues to offer an all-in-one solution for every need

LayerSlider 7 is well worth a closer look. Click on the banner to do precisely that.

  1. Essential Grid

A gallery is often meant to be the focal point of a website, but from a design standpoint it is all too often treated just like any other website page.

Essential Grid can give your website gallery a shot in the arm with its –

  • features that let you display products, videos, and portfolios as you always meant them to be displayed
  • variety of screen layout options coupled with row, column, and spacing adjustments
  1. TheDock

As a web designer you’ve probably found website building easier when you use a website theme. You might even have given some thought to creating your own theme(s), but you don’t believe you have the skills to do so.

TheDock plugin’s visual editor changes all that.

  • It runs as a plugin and writes the code for you.
  • TheDock-created themes are always responsive.
  • You can edit theme design, layout, and architecture without writing a line of code.
  1. Slider Revolution

The Slider Revolution plugin is designed to help web designers incorporate healthy doses of spice and flair into their websites – and impress their clients by doing so.

  • Slider Revolution takes into account today’s over-the-top web design demands
  • The 25+ addons and 200+ website and slider templates that are included are designed to impress
  • Slider Revolution users can also import dynamic content from the web

Customers can look forward to receiving one-on-one support.

  1. Tablesome – Advanced WordPress Table Plugin

Tablesome is a data table plugin that enables its users to create tables they can embed in their website pages or posts.

  • Tablesome’s drag and drop feature can be used to manually sort or reorder tabular data
  • A table can be partially or fully duplicated to create a new table

Tablesome stores Contact Form 7 submissions and stored data can be uploaded to external sources such as Google Sheets, MailChimp, etc.

  1. Wordlift

The WordLift SEO plugin helps web designers improve their websites’ search engine capabilities by working with them to create custom AI-powered Knowledge Graphs.

The designers can use their Knowledge Graphs to –

  • enhance their websites’ expertise, trustworthiness, and authority
  • help Google understand website content
  • lead website visitors to content that is most likely to keep them engaged

WordLift also serves as an SEO knowledge and training partner for its users.

  1. Heroic Inbox

Incorporate the Heroic Inbox plugin’s features into your company’s website and you’ll be able to manage all of your company’s emails from shared inboxes.

  • A third party platform is not required. All email inboxes can be managed from your company’s website.
  • Past customer email communications can be displayed on a sidebar to support customer-company dialogs.

Heroic Inbox tracks key company and team performance metrics.

*****

Having just the right plugin in hand can do amazing thing for a website’s performance and capabilities. But with so many useful WordPress plugins to choose from, searching for the “best” plugin to scratch an itch or satisfy a particular need can be a time-consuming if not hopeless task. The one that has no guarantee of being successful.

This is an area that is best left up to those who have the expertise to locate the top WordPress plugin(s) in a given category. They are recommended to web designers and interested businesses. The experts’ pick of the top WordPress plugins for 2022 is what you see in this post.

Read More at Top 9 WordPress Plugins (2022 edition)

Advent Calendars For Web Designers And Developers (December 2021 Edition)

Once again, the web community has been busy with creating some fantastic advent calendars this year. As you’ll see, each and every one of these calendars are sure to cater for a daily dose of web design and development goodness with stellar articles, inspiring experiments, and even puzzles to solve.

It doesn’t really matter if you’re a front-end dev, UX designer or content strategist, we’re certain you’ll find at least something to inspire you for the upcoming year. Use this month of December as a time to slow down, and your time to reflect and plan ahead — you won’t regret it.

Advent of JavaScript

If you sign up to the Advent of JavaScript, you’ll be getting an email every day that outlined a JavaScript challenge. Each of the given challenges include all of the HTML and CSS you need to get started, allowing you to focus on the JavaScript. You’ll also receive a brief on how to get started, ways to push yourself, and steps to help you get started. You can get the challenges for free (or pay for the solutions).

Advent of CSS

For folks who’re more into CSS, there’s the Advent of CSS where you can sign up for a daily email outlining a CSS challenge that includes all the assets you need to get started — including a Figma design file. (If you don’t have a Figma account, don’t worry, it’s free.) Before accepting this challenge, you really should know basic HTML and CSS.

JVM Programming Advent Calendar

The Java Advent 2021 is here! To make the advent season even sweeter for JVM enthusiasts, there will be a new article about JVM-related topic everyday. The project started in 2012 with the idea of providing technical content during the Christmas Advent period, so keep looking for nice things under the Java Christmas tree! 🎄

Advent of Code

If you prefer a puzzle over an article, take a look at Advent of Code. Created by Eric Wastl, this is an advent calendar of small programming puzzles for a variety of skill sets and skill levels that can be solved in any programming language you like. You don’t need a computer science background to participate — just a little programming knowledge and some problem solving skills will get you pretty far. Go ahead and give it a go!

Perl 6/Raku Advent Calendar

Back in October of 2019, “Perl 6” was renamed to “Raku”. It’s the 6th year since (what was then called) Perl 6 was released, and the 13th year in a row for this Raku Advent calendar. Stay tuned for lots of articles on metaprogramming, applications, useful Raku modules, programming techniques, guides on how to work with Raku inside containers, and even how to migrate from good ol’ Perl.

24 Pull Requests

24 Pull Requests is a yearly initiative to encourage contributors around the world to send 24 pull requests between December 1st and December 24th. The project is available in twenty languages, and encourages all kinds of contributions to open-source projects — including non-pull-request contributions. There’s a new contribution form on the site that allows you to record the contributions you’ve made each day that wouldn’t usually make sense as a pull request. Join in!

HTMHell Advent Calendar

If you’re already familiar with the HTMHell website, then you can guess how interesting its advent calendar is going to get! Take a peek behind each door of the HTMHell calendar where you’ll find an article, talk or tool that focuses on HTML. To be fair, HTMHell isn’t just about bad practices — Manuel also shares good practices and useful HTML tips and tricks. 🔥

PerfPlanet Calendar

An advent calendar that has been publishing since 2009 is back again. Good ol’ PerfPlanet is back for another season with all things speed and web performance. Anyone is welcome to contribute to the calendar, so do feel free to reach out with a topic or tool you’re passionate about, or a technique you’d like to teach and tell the web performance community about.

C# Advent Calendar

It’s time for the fifth annual C# advent calendar that will feature two pieces of content every day. Anyone can contribute by sharing their blog posts, videos, articles or podcast episodes dedicated to C# development. In case all of the spots are already claimed, you can always sign up to be a substitute author. Rock on! 🎸

Inclusive Design 24

The good folks at Inclusive Design 24 are sharing their favorite talks from previous years of the good ol’ #id24 online-only conferences while counting down the days until the New Year. All videos have even been manually re-captioned, just so they’re all at their best.

Lean UXMas

Lean UXMas has been publishing each advent since 2014 and is a collection of the most popular articles from this year’s Agile and Lean UX latest news. If you find yourself impatiently waiting for the next article to be posted, you can always check out the previous advent calendars smashing the year in the base URL, or simply search for them below the website’s header.

Code Security Advent Calendar

If you’re up for a challenge that involves spotting security vulnerabilities, then the Code Security Advent Calendar is just the right one for you. Every day, there will be a code security puzzle and/or riddle announced on Twitter to which you’re welcome to join and share with your friends to discuss solutions together. The most active players with the best solutions will be contacted to receive a cool swag pack. 🎁

Advent of Cyber

Security can be a daunting field. With Advent of Cyber, you can get started with Cyber Security by learning the basics and completing a new, beginner friendly security exercise every day. For each task you get correct, you get a raffle ticket and on the 26th December, meaning the more questions you answer, the more chance you have of winning. Every day you complete a challenge, you get entered into another prize draw for the chance to win a mini-prize. So, what are you waiting for?

24 Days In December

“PHP is not just a language. PHP is a group of people, a community of developers who build things for the web. The PHPamily spans the globe, and while we might not always agree or get along, we have one thing in common, we’re passionate about what we do.” Jonathan Bossenger hits the nail right on the head as he welcomes everyone to participate in the 6th edition of 24 Days in December. We’re all look forward to hearing your personal journey and stories with PHP! 🌈

Umbraco Christmas Calendar

It’s the 10th year of 24 Days In Umbraco and it’s time to learn more about Umbraco (otherwise known as the ‘Friendly CMS’). If you’re interested in it but not sure where to start, you can always check out the articles by tag(s) and find the answers to your questions. The calendar was first started back in 2012 so there’s plenty of content to sift through.

Festive Tech Calendar 2021

With over 2K subscribers on YouTube, the Festive Tech Calendar is back at it again this year with videos from different communities and people around the globe. As you’ll see, you’ll quickly be able to find an entire collection of videos from all of the previous years, and topics as well as the diversity of speakers both don’t fall short indeed. By the communities, for the communities indeed.

SysAdvent

SysAdvent is back this year! 🙌 With the goals of sharing, openness and mentoring, you’re in for some great articles about systems administration topics written by fellow sysadmins. Tune in each day for an article that explores the wide range of topics in system administration.

IT Security Advent Calendar

“Don't store sensitive data in the cloud; keep it entirely disconnected from the web.” Yup, that’s the credo delivered in the first advent door of the good ol’ IT Security Advent Calendar this year. Counting down to Christmas, this calendar is dedicated to sharing a new tip for protecting your devices, networks, and data each day.

Bekk Christmas

This year’s Bekk Christmas features opinion pieces, tutorials, podcasts, deep dives and lots of other formats. Pick the ones that seem interesting to you, and consume them whenever you like. It’s worth digging through the archives (see e.g. 2020) — there’s a golden gem hidden in each one of them!


It’s nice to find some calendars in languages other than English, too! Here are a few we stumbled upon:

24 Jours De Web (French)

24 Jours De Web is a lovely French calendar which first appeared back in 2012, and has been continuing the lovely tradition of online advent calendars ever since. 24 authors come together each year and publish an article on UX, accessibility, privacy, and other topics related to the good ol’ web.

SELFHTML Adventskalender (German)

This year’s SELFHTML Adventskalender is dedicated to accessibility — a topic that concerns everyone. Why? Because accessibility is good for all of us. Accessible websites are simply better websites. At the end of the day, everyone in the world hits a large key faster and more reliably than a small key. To all the German-speaking developers out there, you’ll understand why it’s important to include accessibility as much as possible. Also, make sure to bookmark the SELFHTML wiki so you can have the latest documentations and tutorials at hand.

WEBアクセシビリティ Advent Calendar (Japanese)

This Japanese advent calendar has been running since 2013 and is moderated by @hokaccha. Its focus lies on web accessibility, with a new author exploring a topic each day — from web accessibility to all the different types of programming languages you may want to explore for your projects. Once logged in, you can save a spot on the calendar and have your article or work published on that particular day.

Kodekalender (Norwegian)

Knowit is one of the Nordic region's leading consulting companies. They have once again brought their Norwegian calendar to life, and it is just the kind of holiday calendar for those of you who love programming. Behind each hatch hides a task you have to answer in the form of a simple text string or a number. The hatches vary in degree of difficulty and design, but common to all is that they are best suited for solving with code. Solve as many slots as possible to increase your chances of winning! Good luck! 🙌


Do you happen to know any other advent calendars that have been created in languages other than in English? Please do feel free to reach out to me on Twitter and I’ll be sure to add them to this list.

Oldies But Goodies

Christmas Experiments (2018)

Christmas Experiments started back in 2012, with the goal to deliver great experiments and highlight top web creative as well as newcomers. It was a pretty cool WebGL advent calendar that featured a daily new experiment that was quite obviously made with love by digital artists. Unfortunately, it did not continue after the 2018 edition.

24 Accessibility (2019)

An advent calendar we surely miss is the 24 Accessibility. The site hasn’t had a new article since 2019, but still offers a good resource of articles on all subjects related to digital accessibility. Whether you are new to accessibility or a veteran, a developer, designer, user experience professional, quality assurance analyst or project manager, you’ll find an article of interest during the run of the series.

It’s A Shape Christmas (2019)

It’s A Shape Christmas is a digital calendar that counts down to Christmas and reveals a bespoke illustration each day themed around four different shapes (Square, Triangle, Circle and Hexagon) and Christmas. The project was started in 2011 by a UK design agency called Made by Shape. The website still showcases some of the best from the previous seasons. I’m sure you’ll agree: they’re all just too good not to be shared! ✨

24 Ways (2019)

First initiated by Drew McLellan, 24 ways started out as a simple website that published a new tip or trick each day leading readers through December up until Christmas. It launched in 2005 and still has all of the calendars available online. Unfortunately, the last one was published in 2019 and will be taking a well-earned break after that year’s “final countdown”.

Perl Advent (2020)

The Perl Advent started back in 2000 and is perhaps the longest running web advent calendar that many know of. You’ll find insightful articles written by diverse author submissions from all types of Perl programming levels. A different Perl module will be featured each day for the twenty four days of advent, and an extra module on Christmas day. Make sure to go through the previous Perl advent calendars — it’s worth it.

PWAdvent (2020)

PWAdvent is a nice advent calendar for everyone who’s excited about the web platform and Progressive Web Apps, of course. Take a look at all the great stuff the web has to offer in last year’s calendar, in which a new progressive browser feature was introduced every day by Nico Martin himself and others.

A11y Advent Calendar (2020)

Heydon Pickering once said, “Accessibility is not about doing more work but about doing the right work.” Last year, Kitty Giraudel decided to publish an accessibility tip a day in his very own #A11yAdvent. Some of the tips are probably common knowledge for many, yet each of the posts cover so many of the important aspects of accessibility that will still hold true for years to come.

Last But Not Least...

Of course, we wanted to join in the fun ourselves and brought our very own #SmashingAdvent to life! As you already probably know, the Smashing team has been organizing conferences and events since 2012, so there are plenty of gems to shine the spotlight on. Do give @SmashingConf a follow on Twitter where we’ll be sharing our favorite talks and interviews with speakers from all over the globe.

On behalf of the entire Smashing team, we’d like to say thank you to each and every one involved in these projects — we see you! The communities in our web industry wouldn’t be able to learn so much and thrive if it wasn’t for your time, hard work and dedication. We all sincerely and truly appreciate each and every one of you. 🙏

And of course, if there’s a calendar that isn’t mentioned here, please do post it in comments section below.

How to Add Captions to Featured Images in WordPress

Do you need to add captions to your featured images in WordPress?

Captions are helpful because they add context and background information about the images you use. However, many WordPress themes don’t display captions for a post’s featured image.

In this article, we’ll show you how to display captions for your featured images in WordPress.

How to Add Captions to Featured Images in WordPress

Why Add Captions to Featured Images in WordPress?

Featured images are a WordPress theme feature. Almost all WordPress themes come with built-in support for featured images and display them beautifully across different areas of your WordPress website.

Adding a featured image to your post will make it look more appealing and build user engagement. To learn more, check our guide on how to add featured images or post thumbnails in WordPress.

When you upload a featured image, you have the option to add a caption and description, along with other fields.

When You Add a Featured Image You Are Asked to Add a Caption and Description

But when the image is displayed on your website, it may only show the image.

This depends on the theme you are using. For example, the Twenty Twenty and Twenty Twenty-One themes do show featured image captions by default. The Twenty Sixteen and Twenty Nineteen themes do not.

If your WordPress theme does not display featured image captions, then we’ll show you how to add them by using a plugin.

Adding Captions to Featured Images in WordPress

The first thing you need to do is install and activate the FSM Custom Featured Image Caption plugin. For more details, see our step by step guide on how to install a WordPress plugin.

Upon activation, you need to visit the Settings » FSM Custom Featured Image Caption page to configure the plugin.

The default settings will work for many users, however, if you want the featured image captions to be displayed on the front page of your WordPress website, then make sure you click the ‘Show image captions in lists’ checkbox.

FSM Custom Featured Image Caption Settings

For this tutorial, we’ll leave the ‘Default Class’ option selected. However, if you would like to style the caption using your own custom CSS, then you should select one of the other two options.

Once you have finished selecting those options, make sure you click the Save Changes button to store your settings.

You’re finished! When you visit your WordPress website, you should see any captions that you have added to your feature images.

Here are before and after screenshots from our demonstration website. We are using the Twenty Sixteen theme that does not show featured image captions by default.

Featured Image Caption Preview

We hope this tutorial helped you learn how to add captions to your featured images in WordPress.

You may also want to learn how to choose the best web design software , or check out list of must have plugins to grow your site.

If you liked this article, then please subscribe to our YouTube Channel for WordPress video tutorials. You can also find us on Twitter and Facebook.

The post How to Add Captions to Featured Images in WordPress first appeared on WPBeginner.

Forminator’s New Pagination for Quizzes (and more!)

Our 5-star free form creating plugin, Forminator, has a few advanced features that you can implement today for your WordPress site.

For example, he has pagination for Knowledge & Personality Quizzes! This allows you to show quiz questions one at a time, or all the questions at once. The pagination feature helps further determine how your quiz will be displayed and used.

Plus, Forminator also has Bulk Editing, image support in Checkbox and Radio fields, and reCAPTCHA badge positioning!

What's new in Forminator.
There’s plenty new in Forminator!

This article will show you pagination support and rundown other features so that you can implement them for your WordPress site today.

We’ll look at:

By the time you read through this, you’ll hopefully have some ideas to put these features immediately to work!

Creating a New Paginated Quiz

If you want to display several questions for your knowledge quizzes at a time, then you’ll want to use Quiz Pagination. As you’ll see, creating a quiz with pagination is as easy as ever with Forminator.

You’ll start just like usual by making a new quiz. Just hit Create

Where you start to create a quiz.
The Create button will get you started!

…then, give it a Quiz Name. For this example, we’ll create a Knowledge Quiz.

Where you create a new knowledge quiz.
Create a name that you can remember what it’ll be used for.

At this point, Forminator will ask you how you want to present your quiz. Since we’re focused on pagination, we’ll choose the Paginated Quiz option and hit Continue.

The paginated quiz option.
The choice is yours: No Pagination or Paginated Quiz.

Once you continue, you’ll also have the option to collect leads. That’s up to you and won’t have any effect on your pagination options.

After creating the quiz, you can set it up like a regular quiz (e.g. adding a title, featured images, etc.). Additionally, add your questions.

If you need help getting a quiz set up in detail, check out our Getting the Most Out of Forminator article to walk you through the process.

Editing Pagination

I’ve set up some questions and am now ready to edit the pagination (and again, if you need help setting up questions, please refer to this article).

Editing pagination is done from the Behaviour tab.

Once you’re here, you have the option No Pagination or Paginated Quiz. This is so you can remove pagination if you decide not to use it in the future.

For this article, we’re going with Paginated Quiz.

The paginated quiz option.
This will determine how your questions will be presented.

Paginated Quiz then lets you determine the number of questions per page, the Start Quiz Button text, and the text for previous & next buttons. You can also check the box if you want to show a page indicator.

It’s as simple as filling in the details in the spaces provided.

Pagination details.
Add as many questions per page as you’d like!

When the pagination details are entered, the rest can be created like any other knowledge quiz. That includes:

  • Results Display Method (real-time or on submission)
  • Option to Show Evaluation Loader
  • Correct Answer Message
  • Incorrect Answer Message
  • Social Sharing Options
  • Rendering Options (load quiz using AJAX and prevent page caching on quiz pages)

Set the quiz up as you feel appropriate, and then you’re on to…

Previewing the Quiz

When you have your quiz configured to your standards, click Preview to see what it looks like. Let’s check it out!

I uploaded a cover image and titled it Forms and Superheros, and added a description. This is how the quiz begins…

Beginning of quiz image.
You hit ‘Start Quiz’ to begin.

And here’s a quick walkthrough where I have a correct — and incorrect — answer. Plus, it’ll show me the results. Keep in mind that this is a two-question quiz that I wanted on the same page.

As you can see, Forminator lets you know when you have the answer right or wrong immediately.

When you click View Results, Forminator lets you know exactly how many you got right and wrong. Whew! This was a tough one.

Results of quiz.
½ isn’t a great score. I shouldn’t have picked Dev Man as my favorite character.

If the preview looks good, like any quiz, hit Publish, and Forminator will deliver a shortcode that can be used on any page, post, or acceptable widget.

Forminator shortcode.
The thumbs up from Forminator mean it’s ready to go.

And that’s it!

If you need to, you can always edit the quiz at any time through Forminator’s dashboard. Otherwise, your paginated knowledge quiz is ready to go.

Bulk Editing

Another great advanced editing feature in Forminator is Bulk Editing. Bulk editing lets you add a large number of options at once. This makes the process of editing more streamlined, efficient, and quick.

This feature works with the Radio, Checkbox, and Select fields.

Various fields in Forminator.
All of these fields can be bulk edited.

When it comes to bulk editing, you have three options. You can bulk edit:

  • Manually
  • Via CSV File
  • Predefined Options

The process to get this implemented is the same in all of the fields. Bulk Edit is located in the Labels tab in each respective field.

To get started, simply click the Bulk Edit option.

One-click is all it takes to get moving.

Once implementing Bulk Edit, any existing options you have manually created will automatically populate in the Bulk Edit section.

Various options.
A couple of the options included are Option 1; one; 0 and Option 2; two; 0.

Let’s take a look at each option when it comes to bulk editing.

Manually Entering Bulk Options

This option is great if you want to manually enter or paste your list of options into the Bulk Edit area. When doing this, enter them one per line with each term separated by a semicolon in this order:

  • Option Label;
  • Option Value;
  • Selected;
  • Image URL (this can be blank if you have no image)

Or, you can enter Label only. By doing this, Forminator will generate the value automatically and set selected to zero. Plus, it won’t add an image URL.

An example of this might look like this…

Manual example of entering field options.
As you can see, I added my URL to the image.

Manually entering options is best for adding just several options at a time in bulk.

Adding Options Via CSV File

When you have a ton of options on a CSV file, you can quickly bulk upload these to Forminator.

What if you don’t have a CSV file? Download Forminator’s CSV template. It has a list of examples that you can edit to include your own options.

Where you download a CSV template.
You can conveniently download a CSV template.

The example file is fundamental, with just a few pieces of information. Edit however you want, and then click Upload File once you have edited and saved the CSV file. Then, hit Import to add all of your options into the Bulk Edit section.

The import button.
The file name will appear, and just import it in.

Keep in mind that uploading will replace any existing options that you have in place.

Predefined Options

Forminator has quite a few predefined options you can use in an instant. They’re all available via the dropdown menu.

The dropdown menu has them all.

Choose from the dropdown menu:

  • Age
  • Gender
  • Educational Attainment
  • Employment Status
  • Occupation
  • Marital Status
  • Continents
  • Countries
  • American States
  • Canadian Provinces

Plus, you can add New Option, which will allow you to input your data.

The predefined options make it quick and easy to bulk edit whatever field you’re working in.

Additional Advanced Features

There are several more advanced features for Forminator that you may find helpful. These were all included in the release of 1.14.12, and include Image Support for Checkbox & Radio Field, HTML Quiz Description Field, and Setting reCAPTCHA Badge Position.

We’ll quickly check out each one of these and demonstrate how they work.

Image Support in Checkbox and Radio Field

Forminator now gives you the option to upload an image to the Checkbox and Radio fields. This can help forms become much more visually appealing and easier to set up than uploading an image separately for a form.

Just have a form with the fields in them (if you need help setting up a form, please check out our How to Get the Most Out of Forminator article).

Go into the form field, and you’ll see that under the Labels tab, there’s a checkbox you can click to Enable Images.

Where you enable images.
Enabling images is just one click away!

Once enabled, you simply go to the Options, click the dropdown by any option you want an image in, and upload a photo.

The dropdown to upload images.
Upload an appropriate image that goes with your option.

Once you have your images uploaded, click Apply, and you’re all set! Your images will be included with your Checkbox or Radio field.

Image options examples.
Forminator makes for some fitting images to use here.

You can always edit and adjust your images at any time.

HTML Quiz Description Field

Add descriptions for each individual quiz answer in Forminator’s HTML Quiz Description Field. This feature helps clarify any answer for your users and can help make for a more engaging quiz.

All you do is type it in the Description area in each individual question field.

Description of quiz response.
Add the perfect description to your personality or knowledge quiz!

Once you have the description entered, click Apply. Your description is now added!

Set reCAPTCHA Badge Position

This is a fast adjustment that can be made regarding the reCAPTCHA position. It puts you in control of where your reCAPTCHA is displayed.

You just go into your reCAPTCHA field, click Settings, and choose where you want your badge to appear on your site.

Choose from these specific areas:

  • Bottom Right
  • Bottom Left
  • Inline in Form
Image of badge position options.
It’s just a matter of choosing the perfect position for your WordPress site!

Once you select where you want your badge to appear, click Apply.

Keep in mind that this only works with V2 Invisible and reCAPTCHA V3 options.

And for even more about using reCAPTCHA, please read our article covering incorporating it with our security plugin, Defender.

Pagination is Quite the Sensation!

If you think features like pagination are sensational, Forminator is constantly adding new beneficial features and enhancements. Be sure to follow our Roadmap to see what’s next!

And now that you know how, implement these advanced features (for free!) and give them a try today.

Happy form building!

Create Per-Post Social Media Images With the Social Image Generator WordPress Plugin

Auto-generated decorative image for the post, showcasing the Social Image Generator output.

It was a bit of a low-key announcement when Daniel Post introduced Social Image Generator to the world in February via tweet. But, when you get repped by Chris Coyier of CSS-Tricks and the co-founder of WordPress uses your plugin (come on, Matt, set a default image), it means your product is on the right track.

I am not easily impressed by every new plugin to fly across my metaphorical desk. I probably install at least a couple dozen every week. Sometimes, I do so because something looks handy on the surface, and I want to see if I can find some use for it. Other times, I think it might be worth sharing with Tavern readers. More often than not, I consider most of them cringeworthy. I have high standards.

As I chatted with Post about this new plugin, I was excited enough to call Social Image Generator one of those OMG-where-have-you-been? types of plugins. You will not hear that from me often.

Post quit his day job to venture out earlier this year, creating his one-man WordPress agency named Posty Studio. Social Image Generator is its first product.

“I kept seeing tutorials on my Twitter feed on how to automatically generate images for your social media posts, but unfortunately, they all used a similar approach (Node.js) that just wasn’t suitable for WordPress,” said Post of the inspiration for the plugin. “This got me thinking: would it be possible to make this for WordPress? I started playing around with image generation in PHP, and when I got my proof of concept working, I realized that this might actually be something I should pursue.”

In our chat over Slack, we actually saw the plugin in action. As he shared Coyier’s article from CSS-Tricks, the chatting platform displayed the social image in real-time.

Social image displayed via a Slack article preview.
Auto-generated image appearing via Slack.

Maybe it was fate. Maybe Post knew it would happen and thought it would be a good idea to show off his work as we talked about his project. Either way, it was enough to impress the writer who is unafraid to call your plugin a dumpster fire if he smells smoke.

Post seems to be hitting all the right notes with this commercial plugin. It has a slew of features built into version 1.x, which we will get to shortly. It is dead simple to use. It is something nearly any website owner needs, assuming they want to share their content via social networks. And, with a $39/year starting price, it is not an overly expensive product for those on the fence about buying.

How the Plugin Works

After installing and activating Social Image Generator, users are taken to the plugin’s settings screen. Other than a license key field and a button for clearing the image cache, most users will want to dive straight into the template editor.

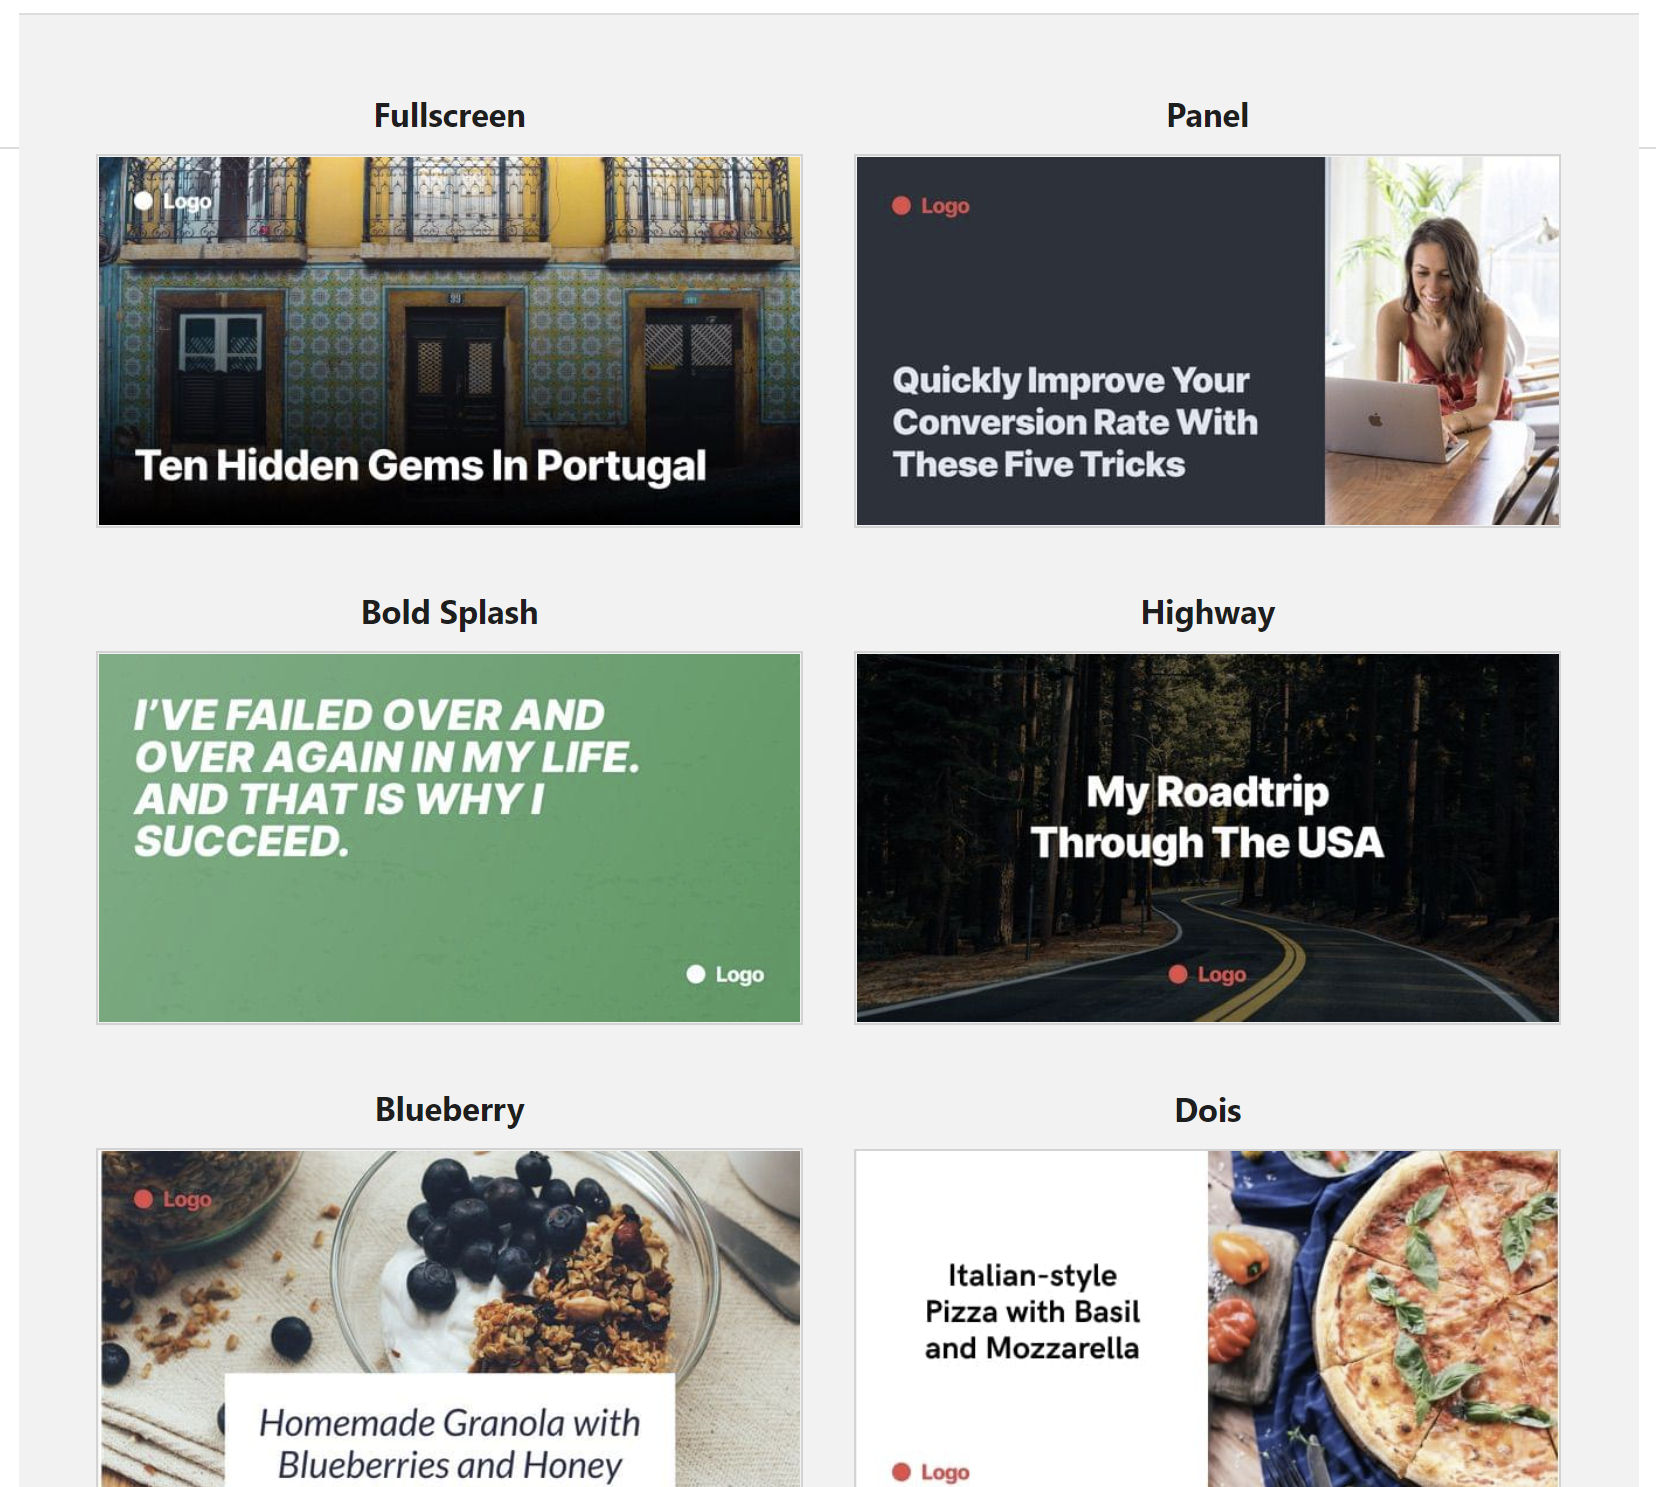
At the moment, the plugin includes 23 templates. From Twenty Seventeen to Twenty Twenty-One, each of the last four default WordPress themes also has a dedicated template. After selecting one, users can customize the colors for the logo, post title, and more — the amount of customization depends on the chosen template.

Screenshot of several of the Social Image Generator plugin's built-in templates.
Browsing the plugin’s templates.

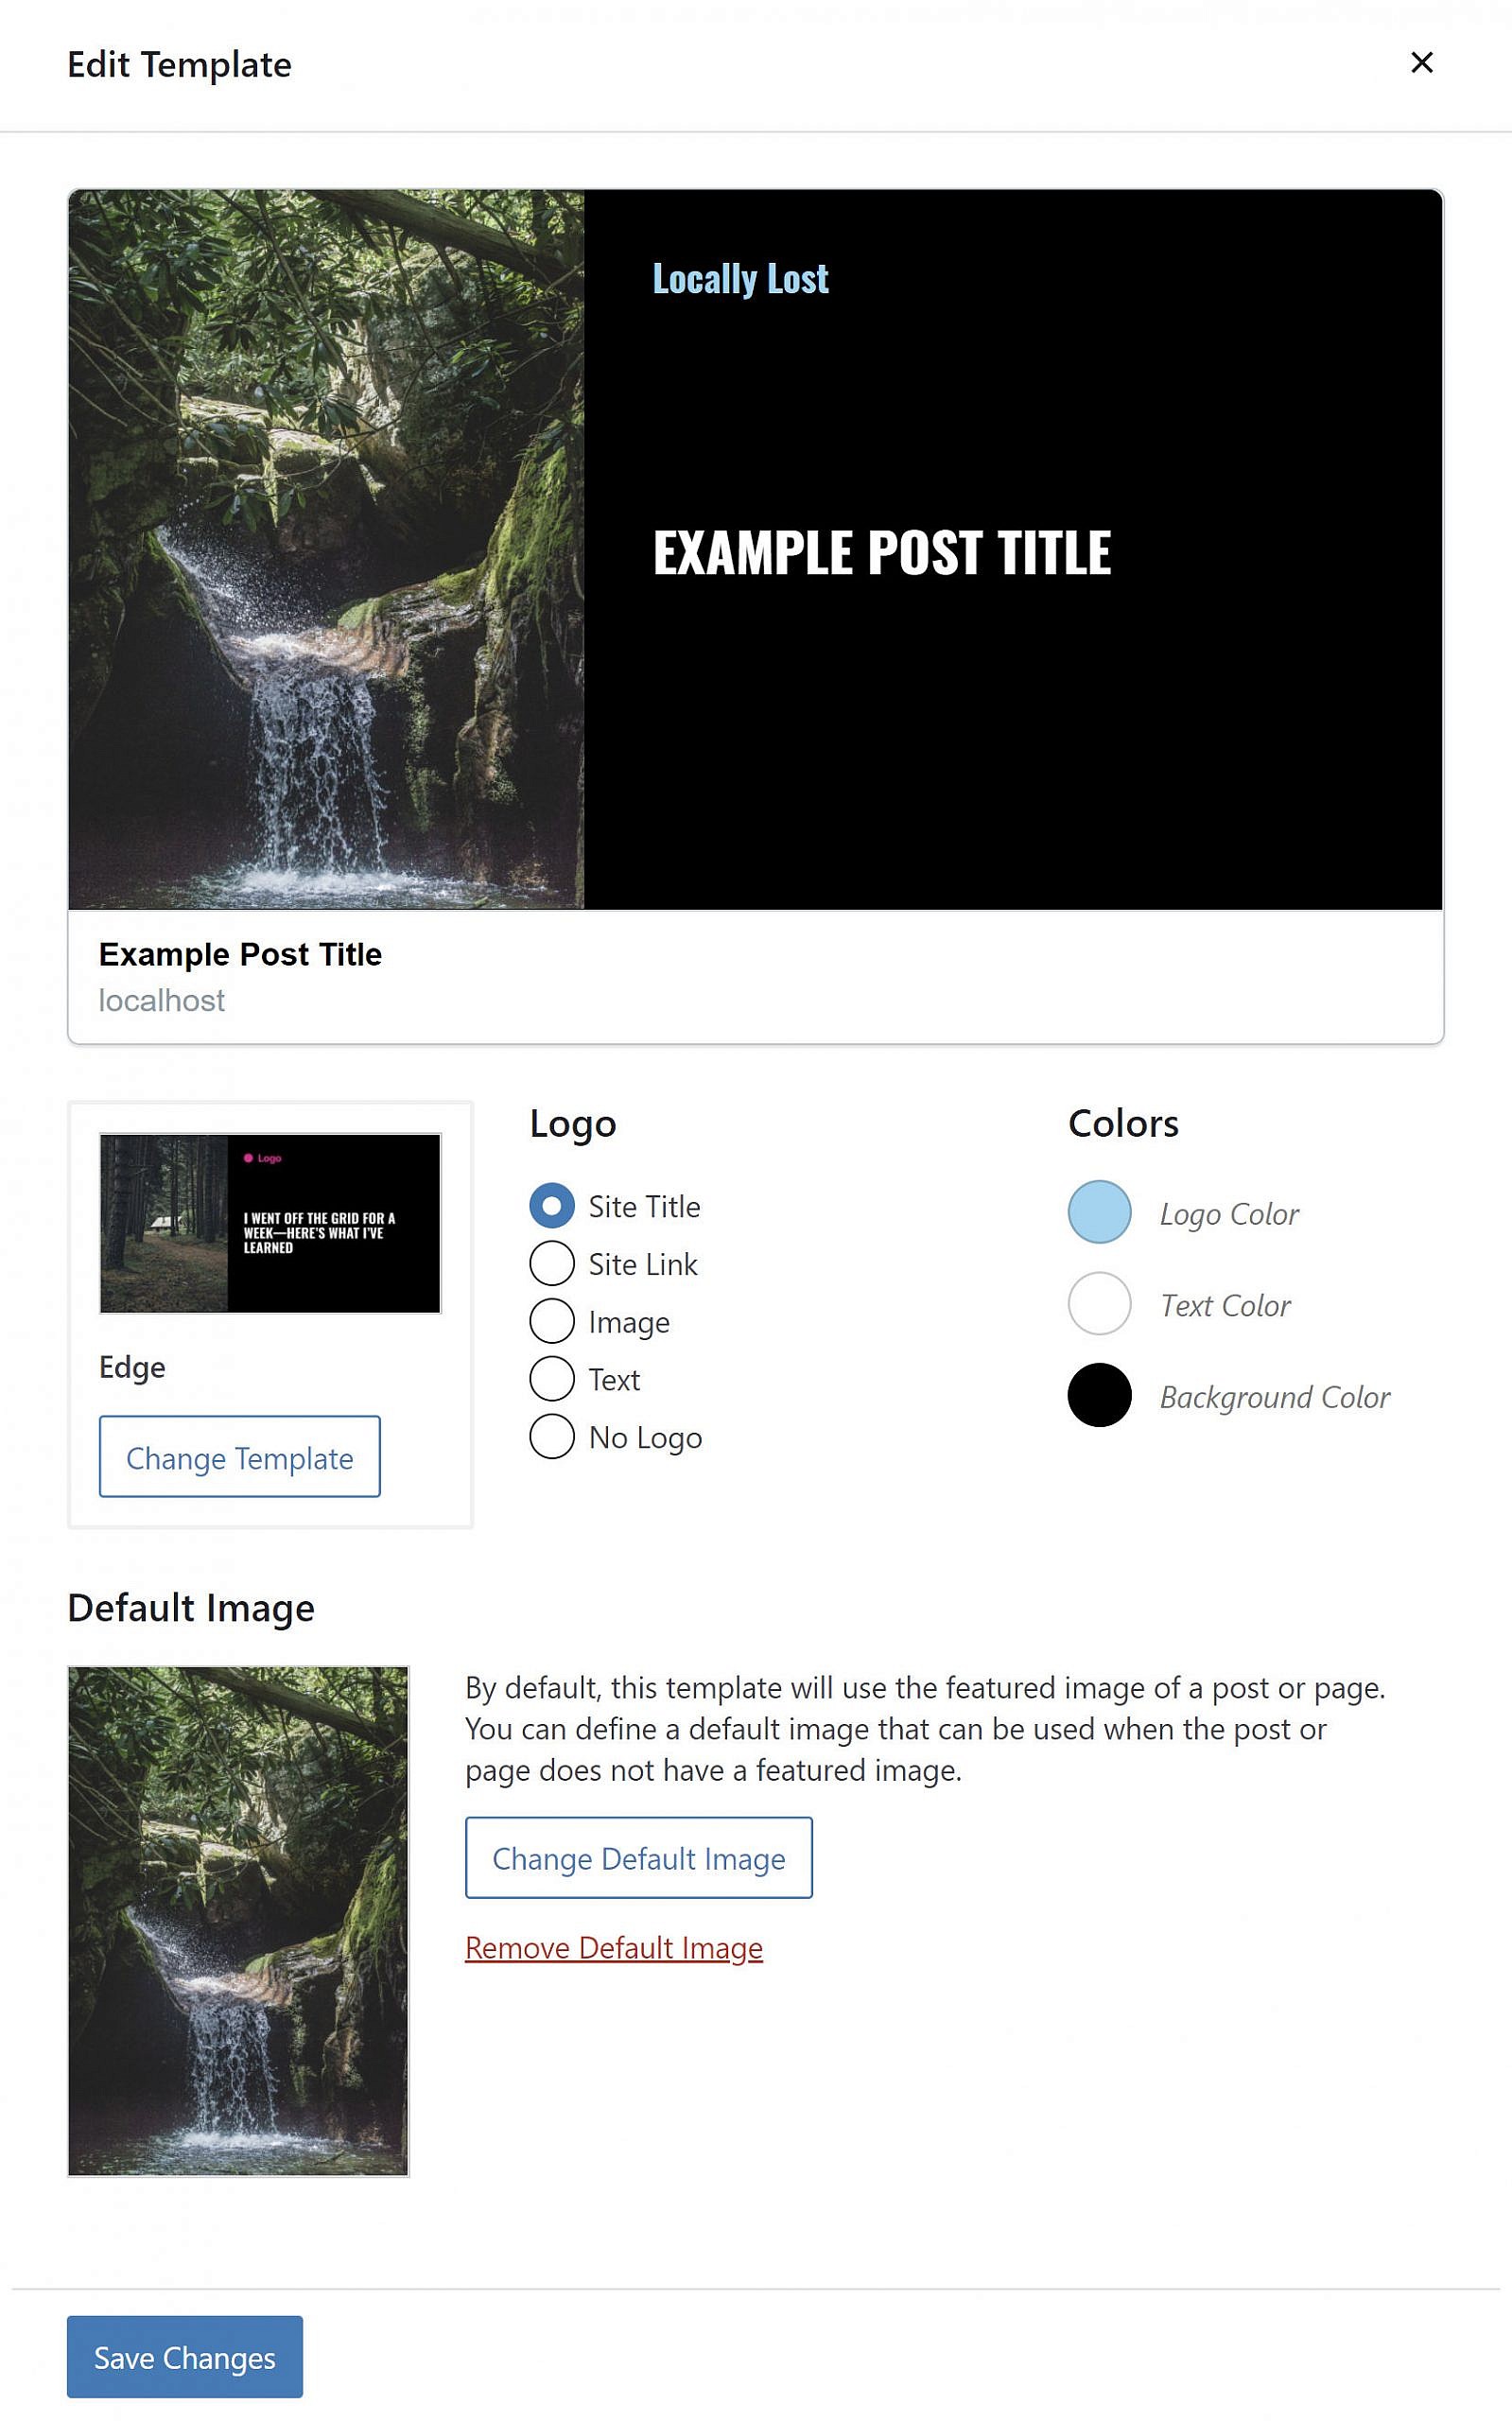
Aside from selecting colors, users can choose between various logo and text options. They can also upload a default image for posts without featured images.

Template editing popup/overlay for the Social Image Generator WordPress plugin.
Editing a template from Social Image Generator.

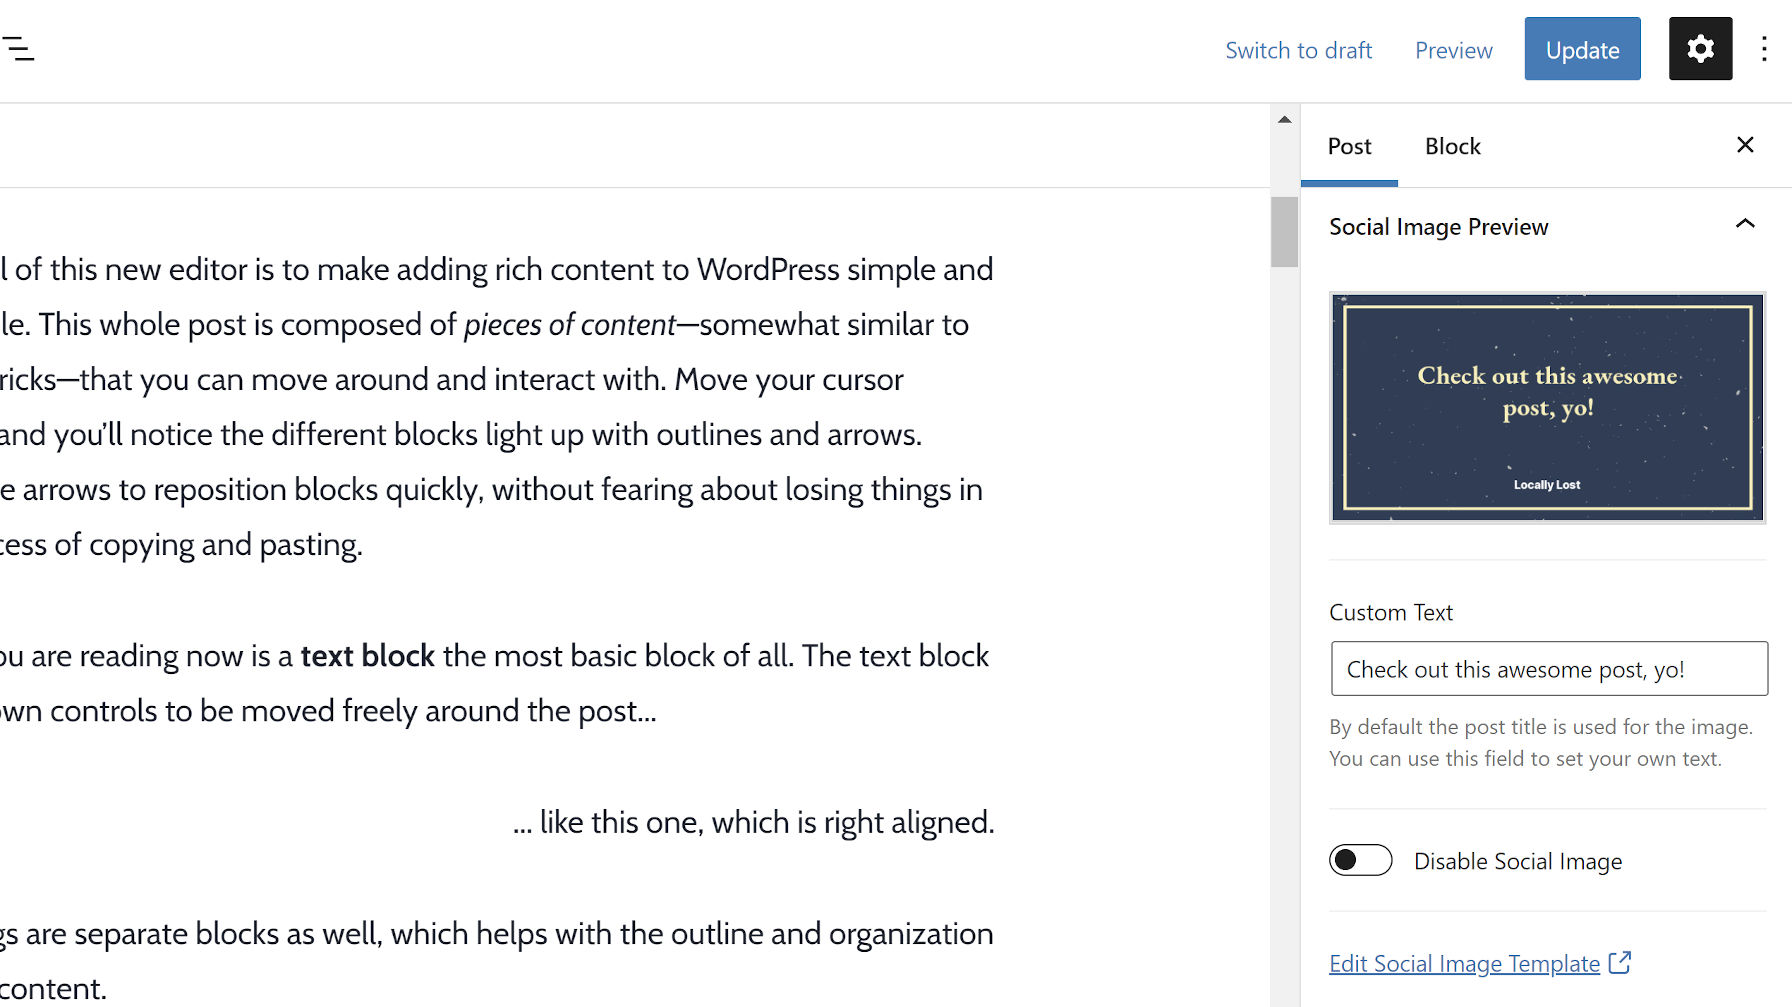
When it comes time to publish, the plugin adds a meta box to the post sidebar. Users can further customize their social image and text on a per-post basis.

Customizing the social image via a sidebar meta box from the WordPress post editor.
Social image preview box on the post-editing screen.

Once published, the plugin creates an image that will appear when a post is shared on social media.

On the whole, there is a ton that anyone can do with the built-in templates. There is also an API for developers to create their own. For a first outing, it is a robust offering. However, there is so much more that can be done to make the plugin more flexible.

Version 2.0 and Beyond

Thus far, Post said he has received tons of positive feedback along with feature requests. Primarily, users are asking for more customization options and the ability to create and use multiple templates. These are the focus areas for the next version. With a 1,718% increase in revenue in the past month, it seems he might have the initial financial backing to invest in them.

“I’ve started building a completely overhauled drag-n-drop editor, which will allow you to create basically any custom image you want,” he said. “It will be heavily inspired by the block editor, and I want to keep the UI and UX as close to the block editor as possible.”

The new template editor would allow users to create multiple layers, an idea similar to how Photoshop, Gimp, and other image-editing software works. The difference would be that it can pull in data from WordPress.

“For example, an ‘Image’ layer will have options such as height/width and positioning, as well as some stylistic options like color filters and gradient overlays,” said Post. “A ‘Text’ layer can be any font, color, and size and can show predefined options (post title, date, etc.) or whatever you want. You can add an infinite number of layers and order them however you’d like.”

He seems excited about opening up new possibilities with an overhauled editor. Users could potentially create social image templates for each post type. A custom layer might pull in post metadata, such as displaying product pricing or ratings from eCommerce plugins like WooCommerce.

“The prebuilt templates will still exist, similar to Block Patterns in the block editor,” said the plugin developer. “They will, however, serve as a starting point rather than the final product. I’ll also try to implement theme styling as much as possible.

“The possibilities here are so endless, and I’m incredibly excited for this next part.”

Happy June Vibes For Your Screen (2021 Desktop Wallpapers Edition)

There’s an artist in everyone. Some bring their creative ideas to life with digital tools, others capture the perfect moment with a camera, or love to grab pen and paper to create little doodles or pieces of lettering. And even if you think you’re far away from being an artist, well, it might just be hidden somewhere deep inside of you. So why not explore it?

Since more than ten years, our monthly wallpapers series is the perfect opportunity to do just that: to challenge your creative skills and break out of your daily routine to do something just for fun, fully immersing yourself in the creative process.

For this post, folks from across the globe once again took on the challenge and designed beautiful and unique wallpapers to cater for some good vibes on your screens. All of them come in versions with and without a calendar for June 2021 and can be downloaded for free. At the end of this post, we also compiled some wallpaper goodies from our archives that are just too good to be forgotten. A big thank-you to everyone who shared their designs with us — this post wouldn’t exist without you. Happy June!

  • You can click on every image to see a larger preview,
  • We respect and carefully consider the ideas and motivation behind each and every artist’s work. This is why we give all artists the full freedom to explore their creativity and express emotions and experience through their works. This is also why the themes of the wallpapers weren’t anyhow influenced by us but rather designed from scratch by the artists themselves.

Submit a wallpaper!

Did you know that you could get featured in our next wallpapers post, too? We are always looking for creative talent! Join in! →

Mother Nature

“Rain, fog, and winter jackets have been our companions for the last couple of weeks, but we are challenging the gloomy weather with this colorful, vibrant, picturesque calendar design. Spring is the most wonderful time of the year, intense, powerful, and vivid. We hope to summon sunny June with our desktop wallpaper - join us!” — Designed by PopArt Studio from Novi Sad, Serbia.

Reef Days

“June brings the start of summer full of bright colors, happy memories, and traveling. What better way to portray the goodness of summer than through an ocean folk art themed wallpaper. This statement wallpaper gives me feelings of summer and I hope to share that same feeling with others.” — Designed by Taylor Davidson from Kentucky.

Happy Father’s Day

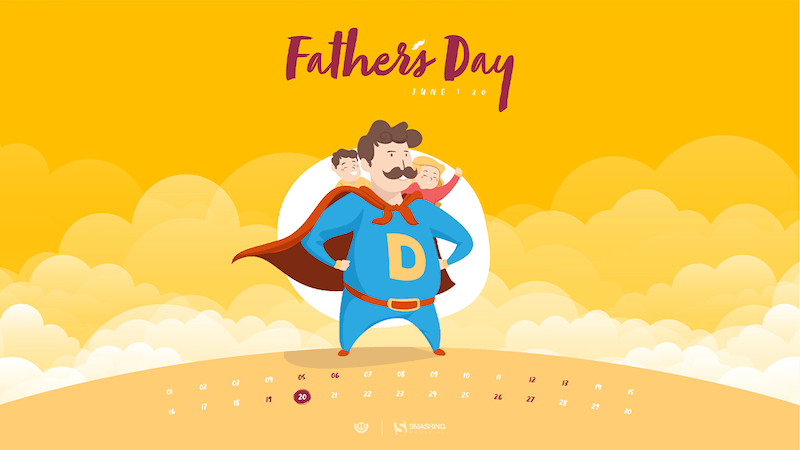
“Whatever you call them, Pa, Dad, Daddy, Pops, they all have one thing in common: they are our superheroes. So, to honor superhero fathers this Father’s Day, we created this super calendar for you to enjoy.” — Designed by Ever Increasing Circles from the United Kingdom.

Bikini Season

“June reminds me of growing up on the lake. For me, this month is the official start of bikini season! I wanted to create this wallpaper to get everyone excited to put on their favorite suit and find their favorite body of water.” — Designed by Katie Ulrich from the United States.

Summer Party

Designed by Ricardo Gimenes from Sweden.

Happy Squatch

“I just wanted to capture the atmosphere of late spring/early summer in a fun, quirky way that may be reflective of an adventurous person during this time of year.” — Designed by Nick Arcarese from the United States.

Dancing In The Summer Moonlight

“If you’re happy and you know it - show some dance moves - because summer is finally here!” — Designed by ActiveCollab from the United States.

Love Yourz

“J Cole is one of the most inspiring hip hop artists and is known for his famous song ‘Love Yourz’. With all of the negativity and hate we have been having the past year, this is a message to remind people to love your life (love yourz) because there is no such thing as a life that is better than yours.” — Designed by James from Pennsylvania.

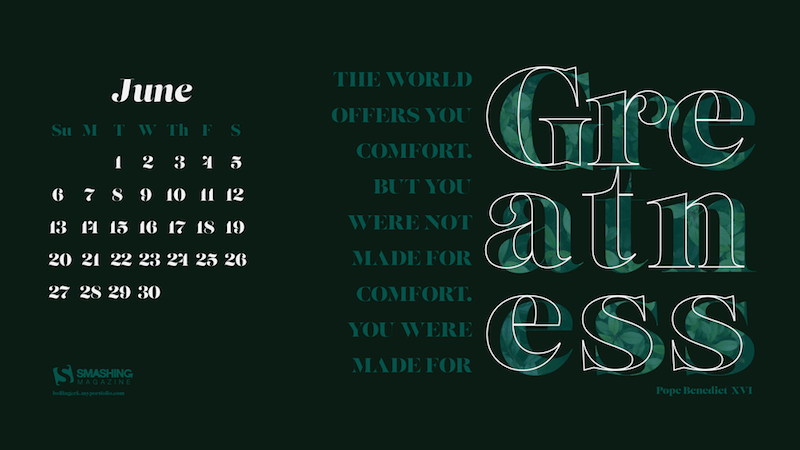
Made For Greatness

“Inspiring to more than mediocrity.” — Designed by Katherine Bollinger from the United States.

Summertime

Designed by Ricardo Gimenes from Sweden.

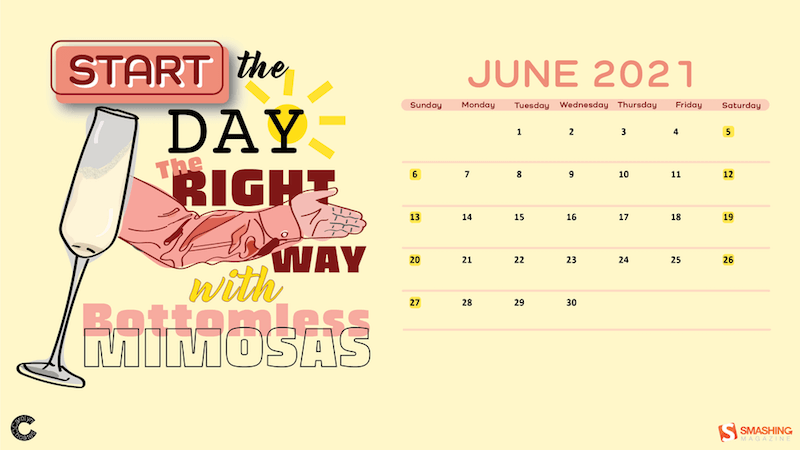
This Is How You Start The Day

“When I think of June, I think of what summer items make you happy. For the 21+ club, summer means grabbing a drink with your friends on a hot summer day. The preferred drink of the summer is bottomless mimosas! And what better time to start drinking than the beginning of the day (responsibly of course)!” — Designed by Carolyn Choates from the United States.

Under The Starlight

“After being cooped up inside for so long, everyone needs a little nature break! And what’s more calming than a crackling campfire on a cool midsummer night, looking up at the shining stars and full moon!” — Designed by Hannah Basham from the United States.

Oldies But Goodies

Ready for more? Below you’ll find a little best-of from past June wallpapers editions. Enjoy! (Please note that these designs don’t come with a calendar.)

Summer Coziness

“I’ve waited for this summer more than I waited for any other summer since I was a kid. I dream of watermelon, strawberries, and lots of colors.” — Designed by Kate Jameson from the United States.

Wildlife Revival

“In these turbulent times for men, we are witnessing the extraordinary rebirth of nature, especially of the wildlife around the planet. Maybe this situation is a blessing in disguise? Either way, one thing is for sure, this planet is the home that we share with all other forms of life and it is our obligation and sacred duty to protect it.” — Designed by LibraFire from Serbia.

Summer Is Coming

“Imagine a sunny beach and an endless blue sea. Imagine yourself right there. Is it somewhere in Greece? The Mediterranean? North Africa? Now turn around and start wandering through those picturesque, narrow streets. See all those authentic white houses with blue doors and blue windows? Feel the fragrance of fresh flowers? Stop for a second. Take a deep breath. Seize the moment. Breathe in. Breathe out. Now slowly open your eyes. Not quite there yet? Don’t worry. You will be soon! Summer is coming…” — Designed by PopArt Studio from Serbia.

Solstice Sunset

“June 21 marks the longest day of the year for the Northern Hemisphere — and sunsets like these will be getting earlier and earlier after that!” — Designed by James Mitchell from the United Kingdom.

Ice Creams Away!

“Summer is taking off with some magical ice cream hot air balloons.” — Designed by Sasha Endoh from Canada.

Deep Dive

“Summer rains, sunny days and a whole month to enjoy. Dive deep inside your passions and let them guide you.” — Designed by Ana Masnikosa from Belgrade, Serbia.

The Call Of Koel

“The peak of summer is upon us, and June brings scorching heat to most places in India. Summer season in my state also reminds me of the bird songs, especially the Koel bird. A black bird with a red eye, this bird’s elegant voice rings through the trees on hot summer afternoons. This June, I have created a wallpaper to give life to this experience — the birds singing in scorching heat give us some respite!” — Designed by Anuja from India.

Oh, The Places You Will Go!

“In celebration of high school and college graduates ready to make their way in the world!” — Designed by Bri Loesch from the United States.

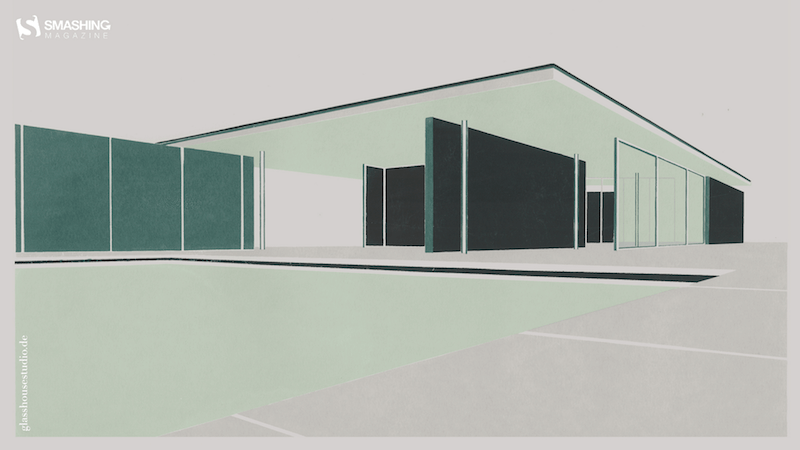
Bauhaus

“I created a screenprint of one of the most famous buildings from the Bauhaus architect Mies van der Rohe for you. So, enjoy the Barcelona Pavillon for your June wallpaper.” — Designed by Anne Korfmacher from Germany.

Join The Wave

“The month of warmth and nice weather is finally here. We found inspiration in the World Oceans Day which occurs on June 8th and celebrates the wave of change worldwide. Join the wave and dive in!” — Designed by PopArt Studio from Serbia.

Flamingood Vibes Only

“I love flamingos! They give me a happy feeling that I want to share with the world.” — Designed by Melissa Bogemans from Belgium.

Shine Your Light

“Shine your light, Before the fight, Just like the sun, Cause we don’t have to run.” — Designed by Anh Nguyet Tran from Vietnam.

Summer Surf

“Summer vibes.” — Designed by Antun Hirsman from Croatia.

Ice Cream June

“For me, June always marks the beginning of summer! The best way to celebrate summer is of course ice cream, what else?” — Designed by Tatiana Anagnostaki from Greece.

Lavender Is In The Air!

“June always reminds me of lavender — it just smells wonderful and fresh. For this wallpaper I wanted to create a simple, yet functional design that featured — you guessed it — lavender!” — Designed by Jon Phillips from Canada.

Strawberry Fields

Designed by Nathalie Ouederni from France.

Start Your Day

Designed by Elise Vanoorbeek from Belgium.

Pineapple Summer Pop

“I love creating fun and feminine illustrations and designs. I was inspired by juicy tropical pineapples to celebrate the start of summer.” — Designed by Brooke Glaser from Honolulu, Hawaii.

<img loading="lazy" decoding="async" src="https://cloud.netlifyusercontent.com/assets/344dbf88-fdf9-42bb-adb4-46f01eedd629/16db22ee-c7f8-47a3-856c-992c82cd61f9/june-16-pineapple-summer-pop-preview-opt.png" alt="Pineapple Summer Pop"

Nine Lives!

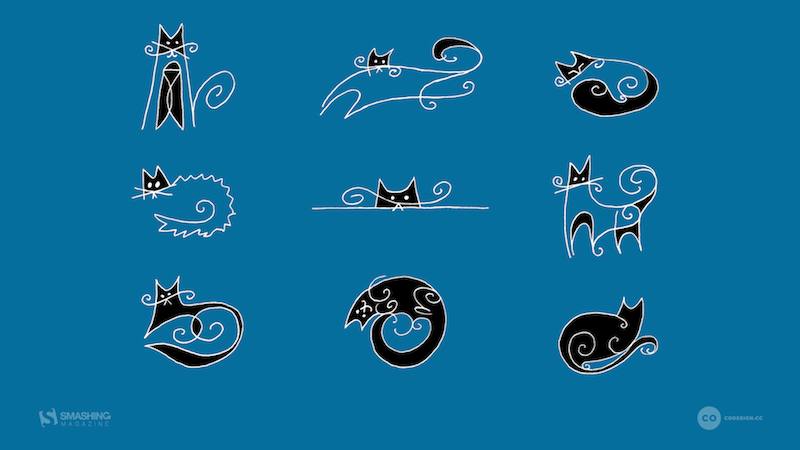
“I grew up with cats around (and drawing them all the time). They are so funny… one moment they are being funny, the next they are reserved. If you have place in your life for a pet, adopt one today!” — Designed by Karen Frolo from the United States.

Frustrating Design Patterns: Mega-Dropdown Hover Menus

Complex websites often rely on complex navigation. When a website houses thousands of pages, often combined with micro-websites and hundreds of subsections, eventually the navigation will go deep and broad. And with such a complex multi-level navigation, showing the breadth of options requires quite a bit of space. Think of large eCommerce retailers and large corporate sites, catering to many audiences and having plenty of entry points.

No wonder that a common way to deal with this complexity is to expose customers to a large amount of navigation quickly. That’s exactly why mega-dropdowns have become somewhat an institution on the web — albeit mostly for complex and large projects. A mega-dropdown is essentially a large overlay that appears on a user’s action. Usually it includes a mixed bag of links, buttons, thumbnails and sometimes nested dropdowns and overlays on its own.

For decades, a common behavior for this kind of navigation is to open the menu on mouse hover. And for decades, a common user’s complaint about this pattern has been the absolute lack of certainty and control about how and when the sub-navigation opens and closes.

Sometimes the submenu appears unexpectedly, and sometimes it suddenly disappears, and sometime it stays on the screen for a while, although the mouse pointer is already in a very different part of the page, or on another page altogether.

Why Are Mega-Dropdowns Hover Menus Frustrating?

The main reason why mega-dropdowns can be cumbersome to use is because of a mismatch of intentions and expectations. With hover menus, we try to deduce and act on a particular intent by tracking mouse behavior, yet our customers might have very different objectives and very different limitations when accessing a page.

Customer’s behavior is usually unpredictable, even although our analytics might tell a slightly different story with data points gathered and normalized over a longer period of time. We just rarely can predict behavior accurately.

The common scenarios we usually explore are:

  1. The customer is aiming at the category link and travels there directly to explore the sub-navigation items in that category.
  2. The customer is moving the mouse towards a target on the screen, but the trajectory that the mouse has to travel covers a nav link that opens a mega-dropdown.

However, there are also plenty of other situations to consider. Just to name a few:

  1. The customer wants to look up mega-dropdown options while typing in a search autocomplete. To do that, they have to keep re-opening mega-dropdown, or use separate browse tabs, positioned side by side.
  2. The customer might use a trackpad (or a mouse) to operate a large secondary display, so pointer movements will be slower, abrupt and inaccurate. This would cause the mega-dropdown to open involuntarily every time the user pauses when traveling to CTAs or shopping cart at the top of the page.
  3. The customer wants to open the category page, so they travel to the category link, click on it, but experience flickering because a mega-dropdown appears delayed.
  4. With nested sub-menus within a mega-dropdown, the customer wants to explore similar items within the category in which they currently are, but because of nesting, they have to re-open the mega-dropdown over and over again, and travel the same hover tunnel over and over again.
  5. Imagine a situation when you want to resize the window, and just as you are about to snap to the right edge of the window, a hover menu keeps showing up — just because you’ve moved your mouse cursor too closely.
  6. The user starts scrolling down slowly to assess the content on a page, but the menu keeps popping up. And every time the user bumps away a cursor to read the contents of the mega-dropdown, the menu accidentally disappears.

The problem is that we need to support all these intentions and all these accidents, but at the same time we need to make sure that we don’t create an annoying and frustrating experience for any of these cases either. Of course, as designers and developers, we’ve invented a number of techniques to tackle this problem.

Hover Entry/Exit Delay

One of the first solutions, and also one of the most common ones still, is to introduce a hover entry/exit delay. We need to make sure that the enu mdoesn’t open and doesn’t close too early. To achieve that, we introduce a delay, usually around 0.5 seconds. That means that we give customers a buffer of around 0.5 seconds to:

  • Cross the trajectory to a remote target if needed, or
  • Indicate that they intent to explore the navigation by remaining on the mega-dropdown category link, or
  • Correct a mistake if they left the boundaries of a mega-dropdown by accident.

In other words, as long as the customer stays within the mega-dropdown overlay, we keep displaying it. And we hide the overlay once the customer has moved their mouse cursor outside of the sub-navigation overlay for at least 0.5 seconds.

While it solves the problem of accidental flickering on the page, it introduces a lag in cases when a user has left the mega-dropdown for more than 0.5 seconds. As a result, it slows down every interaction with the mega-dropdown across the entire site. Unfortunately, it becomes very quickly very noticeable, especially if the navigation is used a lot.

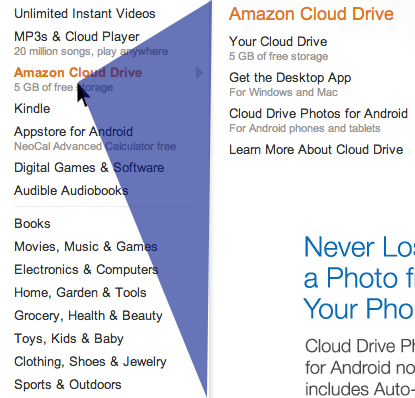
As long as the user stays within the triangle or within the entire mega-dropdown area, the overlay is still displayed. If the user chooses to travel outside of the triangle, the content of the mega-dropdown overlay will change accordingly. And of course it will disappear altogether immediately once the user has moved outside of the category list altogether.

Chris Coyier highlights some of the technical intricacies of this technique in his post on Dropdown Menus with More Forgiving Mouse Movement Paths, along with a vanilla JavaScript demo by Alexander Popov on “Aim-Aware Menus”.

With this technique we minimize the friction of sudden disappearance and re-appearance of sub-navigation. But it might become ineffective if category links are positioned too close to each other, or we display the hover menu by hovering over a larger button. We can do a bit better with SVG path exit areas.

SVG Path Exit Areas

When calculating a trajectory triangle with the previous technique, sometimes we would not only track the exact position of the mouse pointer, but also recalculate the triangle with every pointer movement — all the time. We can improve the strategy by calculating the overall SVG overlay area once and track whether the mouse pointer is inside it — without recalculating the triangle all the time. A great example of it is Hakim el Hattab’s implementation that draws the areas dynamically with SVG based on the position of the navigation item on the screen.

Hakim’s solution is actually responsive, so if the sub-navigation doesn’t fit on the screen, it will float next to the main navigation item, displayed in full width or height. The SVG path area will be recalculated accordingly, but only if the user scrolls vertically or horizontally. You can see a working demo of the technique in action on Hakim’s debug view mode of the Menu pattern.

In case you do have to deal with a complex navigation of this kind, it might be worth testing if issues disappear when only one (rather than two) hover menu is used. That menu would be slightly larger and house all options within columns. Or if possible, for every category, consider displaying all navigation options within that category as a permanent navigation bar (sidebar or a sticky top bar) — usually it should eliminate all these issues altogether.

Category titles doing too many things

As we’ve seen previously, sometimes category titles have two different functions. On the one hand, each category title could be linked to the category’s page, so customers could click on them to go straight to the page. On the other hand, they also could open a mega-dropdown overlay. So if the user is hovering over the title for a long enough time, the mega-dropdown will open, but the user might have clicked on a link already, and this will cause flickering. For customers, it’s difficult to have the right expectations when the interface doesn’t really provide any hints.

There are a few options to resolve this problem:

  1. To indicate that the category’s title is a link, it might be helpful to underline it,
  2. To make the distinction between the category title and a dropdown more obvious, add a vertical separator (e.g. vertical line) and an icon (chevron),
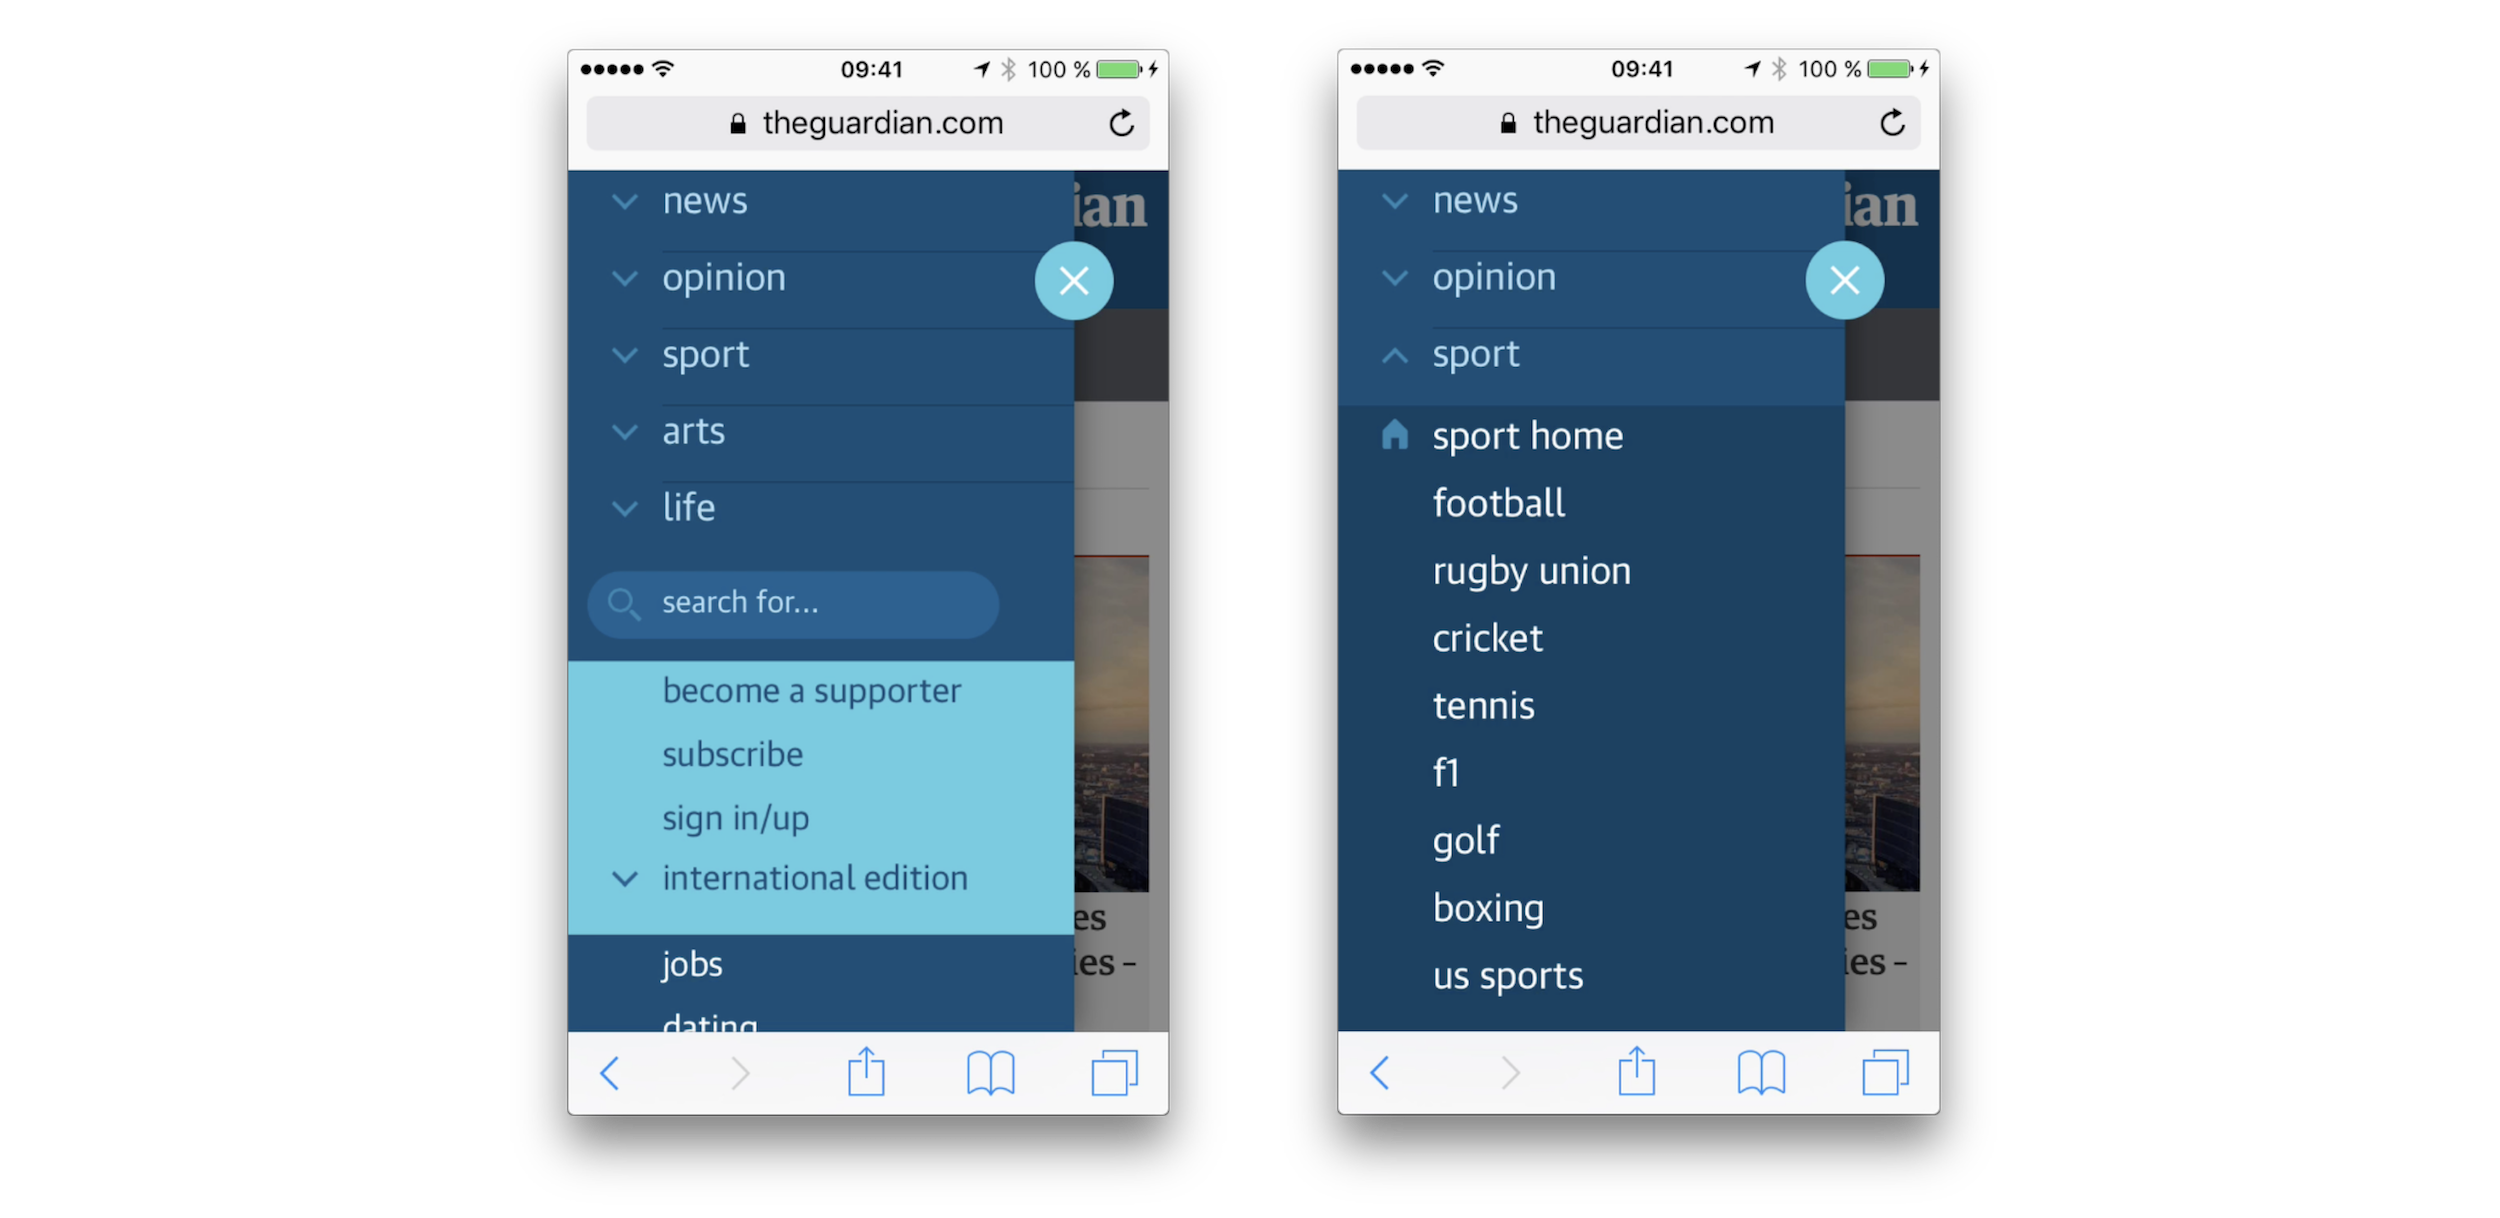
  3. Leave the category’s title opening only the mega-dropdown, and add a link to the category’s “Home” section within the mega-dropdown overlay. It could also be a prominent “See all options” button instead (see The Guardian example above).

As mentioned above, sometimes you can see an extra icon being used to indicate that the menu opens an overlay, while the category’s title is a link. In our usability tests, we noticed that whenever an icon is present (and it doesn’t matter which icon that is), users often make a mental distinction between the action that will be prompted by a click on an icon, and the action prompted by a click on the category title.

In the former case, they usually expect a dropdown to open, and in the latter case, the category page to appear. More importantly, they seem to expect the menu to open on tap/click, rather than hover.

If you are looking for a technical implementation, you can check In Praise of the Unambiguous Click Menu, in which Mark Root-Wiley shows how to build an accessible click menu. The idea is to start building the menu as a CSS-only hover menu that uses li:hover > ul and li:focus-within > ul to show the submenus.

Then, we use JavaScript to create the <button> elements, set the aria attributes, and add the event handlers. The final result is available as a code example on CodePen and as a GitHub repo. This should be a good starting point for your menu as well.

Accordions vs. Overlays vs. Split-Menus On Mobile

It goes without saying that not every mega-dropdown on tap/click is performing well though. Target.com is another interesting example for an accessible, large navigation that avoids multi-column layout and shows only one level of navigation on the time — all opening on tap/click.

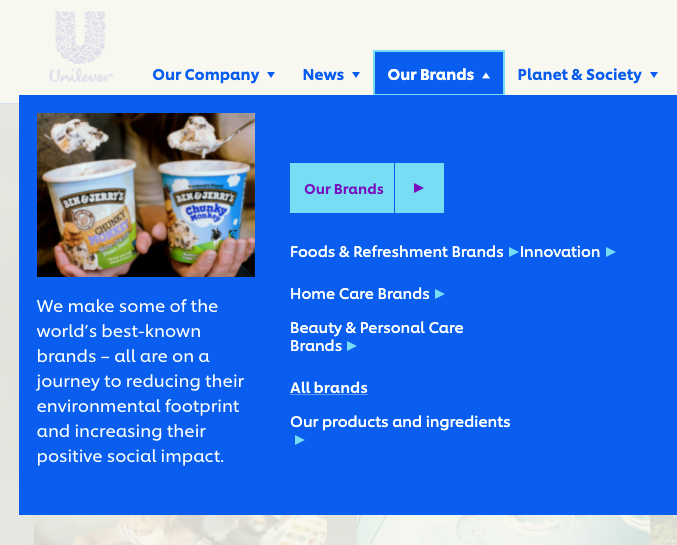
“Our brands” leads to a separate page while each label under it opens a new navigation overlay on top of the mega-dropdown. Did you notice that “All brands” is underlined, while the rest of the navigation option isn’t? One can see the intention of designers creating the menu. Indeed, “All brands” is a link, while the other labels open an overlay:

With all of these options in place, how would we go around displaying a mega-dropdown navigation on mobile? As it turns out, grouping such mega-dropdown overlays on mobile is difficult: usually there isn’t enough space nor visual aid to highlight different levels differently and make them easy to distinguish. In the example above, it might take a while to figure out on which page we actually have landed.

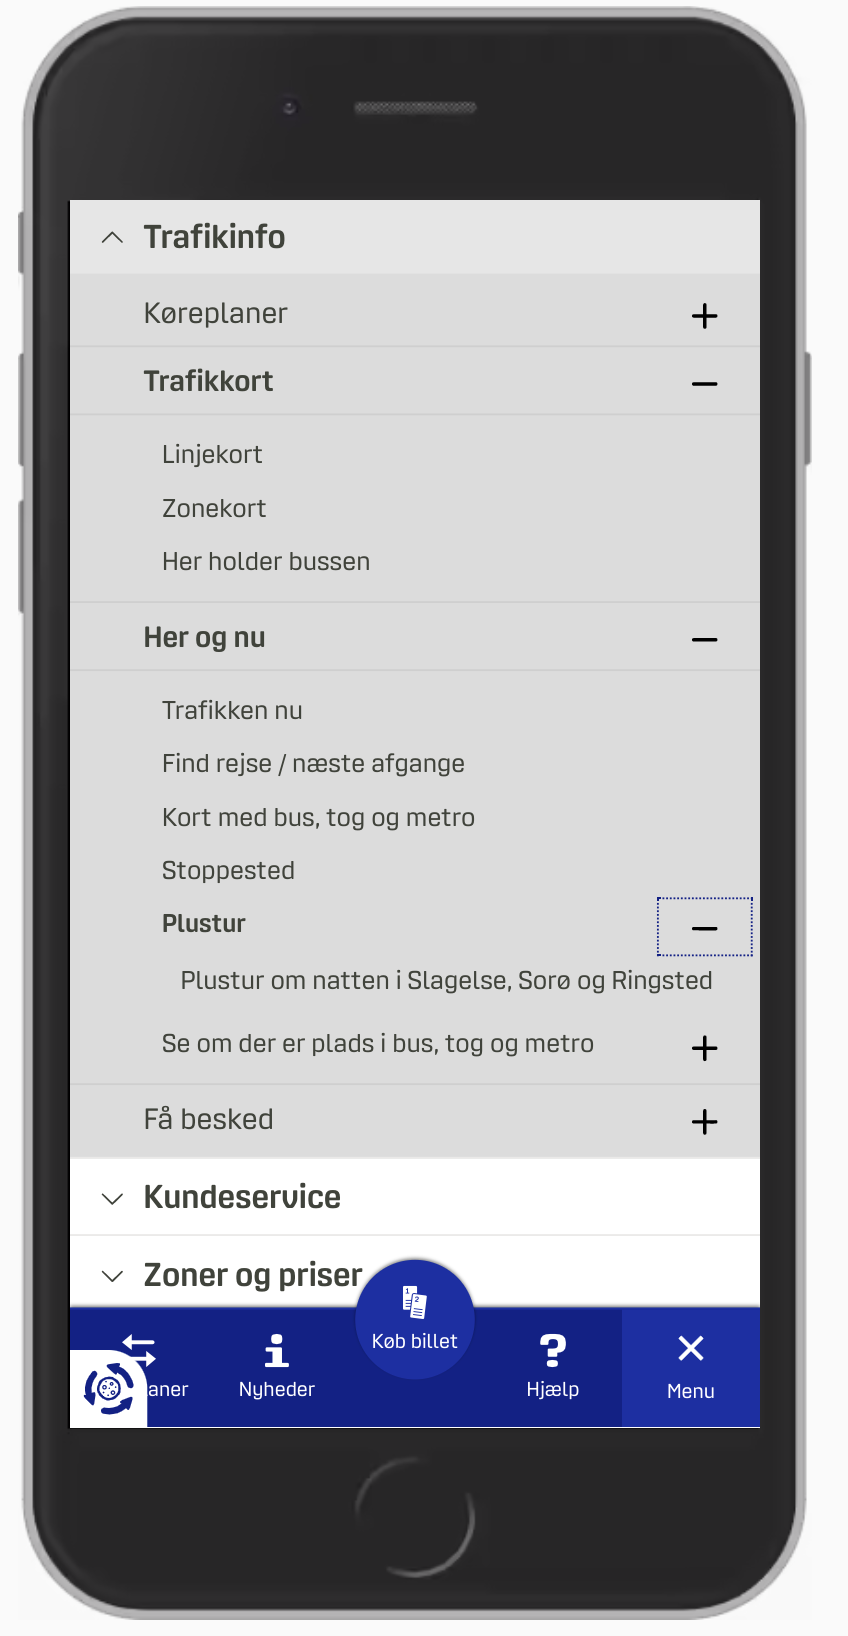
It’s a bit easier to understand at which level we currently are and what options we have with an accordion approach, as we can see on Dinoffentligetransport.dk. However, it might be a good idea to underline links within each subsection as they drive customers to the category’s page. Also, the entire category bar should probably be clickable and expand the accordion.

In the example above, most of the time we probably will be able to show a limited amount of navigation sections at a time. But if the titles of each sections are relatively short, we could split the screen horizontally and display multiple levels at the same time. LCFC.com is a good example of this pattern in action.

Which Option Works Best?

In my personal experience, when we compare the implementations of mega-dropdowns on mobile, vertical accordions appear to be faster and more predictable than overlays (be it single-column or multiple layers). And split-menus appear to be faster and more predictable than accordions.

There are a few advantages that both accordions and split-menus provide:

  • There is no need to display a “Back” button to return to the parent page.
  • The eye doesn’t have to jump between the top of the navigation menu and the section’s sub-navigation with every jump.
  • Customers can navigate between multiple levels faster: instead of hitting “Back” multiple times, the can jump to the accordion that they find interesting.
  • Customers can explore multiple sections at the same time (unless the implementation automatically closes one accordion when another one has been opened). It isn’t possible with overlays.

In general, accordions and split-menus appear to be a better option. But they don’t seem to be working well when there is a lot of navigation in place. Whenever each category has more than 6–7 items, it proved to be a good idea to either add a “Browse all” button underneath 6–7 items within another accordion (or on a separate page), or use overlays instead.

So depending on the amount of navigation, we can start out with split-menus, then if it’s not viable, move to accordions, and if the navigation is getting complex still, eventually turn accordions into overlays.

When Mega-Dropdown Might Not Be Needed After All

We’ve referenced the work of the Gov.uk team in the previous article already, but their insights are valuable in the context of mega-dropdowns as well. For large, multi-level navigation, the team has decided employed findings by form expert Caroline Jarrett’s one thing per page principle. According to Caroline, “questions that naturally ‘go together’ from the point of designers […] don’t need to be on the same page to work for users”. Caroline primarily applied it to the design of web forms, but we could apply it in the context of navigation as well.

The idea, then, is to avoid complex mega-dropdowns altogether, and provide customers with a clear, structured way to navigate through the trenches of the website, from one page to another. In the case of Gov.uk, it seems to be happening through a well-considered information architecture and guides, that lead the visitors through predictable steps towards the goal.

The Kanton Zürich is using the same pattern. Instead of layers of mega-dropdown navigation, all options are displayed in a structured way, with main topics featured on the top as “Top topics” and the navigation within each section displayed as a sticky navigation bar on the top.

An alternative approach is to use the “I-want-to” navigation pattern. In addition to the conventional navigation, we could provide a “navigation dropdown” to allow customers to construct a navigation query of their choice, and be directed straight to the page they are lookin for. Basically, it’s a series of drop-downs that appear under another to let the user select what they intend to do or find on the website.

For a while, the pattern was used on Commonbond (see the video above), and it’s also used on Corkchamber.ie. An interesting, albeit unconventional way to provide access to a deep level of navigation without having to use a mega-dropdown at all.

Mega-Dropdown Navigation Design Checklist

Every time we bring up a conversation about mega-dropdown menus, everyone seems be settling in a few groups: some colleagues prefer hover, the others prefer tap and click, some prefer both, and the others don’t mind either as long as there is both a category link and an icon that opens the menu.

It’s impossible to say that one approach is always better than the others, but both in terms of technical implementation and UX, opening the menu on tap/click usually causes way less trouble and way less frustration while allowing for a simple implementation, and thus resulting in a predictable and calm navigation. Before moving to a hover menu, we could try keeping tap/click behavior first, measure the engagement, and study if hover is needed after all.

And as always, here are some general things to keep in mind when designing and building a mega-dropdown:

  • Avoid placing important, frequently used items close to the mega-dropdown navigation (e.g. search bar, CTA, shopping cart icon) (if hover),
  • Avoid multiple sub-navigations within mega-dropdown appearing after each other with delays (if hover),
  • Avoid overloading category titles with multiple functions.
  • Underline category titles to identify them as links to the category’s page (of course if they are linked to the category page).
  • If you can, add a “Home” link or a “Browse all” button within each sub-category instead of linking the category directly.
  • Avoid horizontal overlays and consider replacing them with vertical accordions and split-menus,
  • Add an icon to indicate that a category title triggers a mega-dropdown on click (e.g. chevron) and always make it large enough for comfortable tapping (e.g. 50×50px),
  • Avoid long fade-in/fade-out transitions when a mega-dropdown appears/disappears (at most 300ms),
  • Consider testing a structured guide or a navigation query (“I-want-to” navigation pattern) instead or additionally to the mega-dropdown.
  • Avoid mega-dropdown hover menus if possible.

Related Articles

If you find this article useful, here’s an overview of similar articles we’ve published over the years — and a few more are coming your way.

May Is In The Air (2021 Wallpapers Edition)

We always try our best to challenge your creativity and get you out of your comfort zone. In all these years we’ve been running it, our monthly wallpapers challenge has turned out to be the perfect occasion to do just that: to put your creative skills to the test, try out a new technique you haven’t tried before, tell a story that matters to you, or indulge in a little project just for fun. And, well, the submissions that reach us every month always make for a unique collection of community artworks, adorning desktops and phone screens and, who knows, maybe even sparking new ideas.

It wasn’t any different this time around. Created with love by designers and artists from across the globe, the wallpapers in this collection all come in versions with and without a calendar for May 2021. For some extra variety, we also compiled a little best-of with designs from our archives at the end of this post. Thank you to everyone who took on the challenge and shared their wallpapers with us — you’re smashing! Happy May!

  • You can click on every image to see a larger preview,
  • We respect and carefully consider the ideas and motivation behind each and every artist’s work. This is why we give all artists the full freedom to explore their creativity and express emotions and experience through their works. This is also why the themes of the wallpapers weren’t anyhow influenced by us but rather designed from scratch by the artists themselves.

Submit a wallpaper!

Did you know that you could get featured in our next wallpapers post, too? We are always looking for creative talent! Join in! →

From Nope To Hope

“Hope helps us define what we want in our futures and is part of the self-narrative about our lives we all have running inside our minds. Whether we think about it or not, hope is a part of everyone’s life. Everyone hopes for something. It’s an inherent part of being a human being.” — Designed by Hitesh Puri from Delhi, India.

Night Falls In Cairo

“Night falls in Cairo and it is the perfect moment to walk through its streets and its pyramids.” — Designed by Veronica Valenzuela from Spain.

Working From Home

“After more than a year of working remotely, we have developed a lasting connection between our decorated home offices, our outdoor spaces, and our beloved pets. Our diverse environments play a role in our newfound identities as we learn to navigate a remote world.” — Designed by Mad Fish Digital from Portland, OR.

The Off-Hours Guardian

“In May, we are marking Labour Day, the international holiday celebrating workers’ achievements and urging fair pay and better working conditions. But for many, this day will be a reminder of countless hours of overtime, stress, and strain caused by tight deadlines, lack of workers’ rights for freelancers, and a paycheck that covers just the basics. Our thoughts are with all of you who will spend International Workers’ Day at their jobs, with freelancers fighting for their rights, and with anyone who feels difficulty maintaining their work-life balance.” — Designed by PopArt Studio from Serbia.

That’s Cracking

Designed by Ricardo Gimenes from Sweden.

Love Japanese Food

Designed by Ricardo Gimenes from Sweden.

American French Fries

Designed by Ricardo Gimenes from Sweden.

Oldies But Goodies

Some bold, others delicate, some minimalist, others witty — the May wallpapers which reached us in the past few years are as diverse as the artists who created them. Here are some of our favorites from the past. Which one is yours? (Please note that these designs come from our archives and, thus, don’t include a calendar.)

Today, Yesterday, Or Tomorrow

“During the last few months we have experienced significant and profound changes in our lifestyle and work habits due to the pandemic. One of the most signifcant changes is how we relate to time. Our day to day blurs as we try to make the best of this situation while hoping for a better tomorrow. While working on my daily lettering practice, I lost track of time and thought what day is it today? From there, I wondered if it was today, yesterday, or tomorrow. The rest followed as I kept thinking how time and routine or the new routine of being home blurs the days for each of us.” — Designed by Alma Hoffmann from the United States.

Sweet Lily Of The Valley

“The ‘lily of the valley’ came earlier this year. In France, we celebrate the month of May with this plant.” — Designed by Philippe Brouard from France.

Spring Gracefulness

“We don’t usually count the breaths we take, but observing nature in May, we can’t count our breaths being taken away.” — Designed by Ana Masnikosa from Belgrade, Serbia.

Spring Is In The Air

“Spring is the most inspiring time of the year, so I’ve decided to create this wallpaper to celebrate this beautiful season.” — Designed by Hristina Hristova from Bulgaria.

Enjoy May!

“Springtime, especially Maytime is my favorite time of the year. And I like popsicles — so it’s obvious isn’t it?” — Designed by Steffen Weiß from Germany.

Poppies Paradise

Designed by Nathalie Ouederni from France.

May The Force Be With You

“Yoda is my favorite Star Wars character and ‘may’ has funny double meaning.” — Designed by Antun Hirsman from Croatia.

Birds Of May

“A little-known ‘holiday’ on May 4th known as ‘Bird Day’. It is the first holiday in the United States celebrating birds. Hurray for birds!” — Designed by Clarity Creative Group from Orlando, FL.

April Showers Bring Magnolia Flowers

“April and May are usually when everything starts to bloom, especially the magnolia trees. I live in an area where there are many and when the wind blows, the petals make it look like snow is falling.” — Designed by Sarah Masucci from the United States.

Cool As An Octopus

“A fear I need to conquer inspired this wallpaper design. I never really liked the ocean because of how much we don’t know about it or anything that lives in it. However, I have decided to try and focus on the beautiful parts of this great unknown by choosing an octopus.” — Designed by Alexandra Covaleski from the United States.

Mental Health Awareness Day

Designed by Kay Karremans from Belgium.

Leaves Of Grass

“For many, the month of May is the preferred month of the year. Nature blossoms, birds sing, and leaves of grass sprout all around us. Coincidentally, this is the month at the end of which the poet Walt Whitman was born. As he said in his famous poetry collection: ‘Spontaneous me, Nature, The loving day, the mounting sun, the friend I am happy with, The arm of my friend hanging idly over my shoulder.’ Sounds like a perfect setting to fly a kite — so, let’s get to it!” — Designed by PopArt Studio from Novi Sad, Serbia.

Asparagus Say Hi!

“In my part of the world, May marks the start of seasonal produce, starting with asparagus. I know spring is finally here and summer is around the corner when locally-grown asparagus shows up at the grocery store.” — Designed by Elaine Chen from Toronto, Canada.

Celestial Longitude Of 45°

“Lixia is the 7th solar term according to the traditional East Asian calendars, which divide a year into 24 solar terms. It signifies the beginning of summer in East Asian cultures. Usually begins around May 5 and ends around May 21.” — Designed by Hong, Zi-Cing from Taiwan.

Stone Dahlias

Designed by Rachel Hines from the United States.

Hope Shakes The Branches

“The promise of the return of spring feels normal in our new strange and abnormal world.” — Designed by Jeffrey Berg from the United States.

Make A Wish

Designed by Julia Versinina from Chicago, USA.

Old vs. New

Designed by Wannes De Roy from Belgium.

Be On Your Bike!

“May is National Bike Month! So, instead of hopping in your car, grab your bike and go. Our whole family loves that we live in our bike-friendly community. So, bike to work, to school, to the store, or to the park — sometimes it is faster. Not only is it good for the environment, but it is great exercise!” — Designed by Karen Frolo from the United States.

Mondriaan

Designed by Siemon Donvil from Belgium.

  • preview
  • without calendar: 1024x768, 1280x800, 1920x1080, 2560x1440
  • 9 Recommended WordPress Plugins (2021 updated)

    If you plan to add social media posts to a website, add a few colorful, informative, and responsive charts. Or, simply spice things up with a few carefully placed animations, you may need to enlist the aid of a plugin to do it well.

    If you really want to take your site or business to the next level, it only makes sense to seek out one of the best WordPress plugins in a given category. So, you won’t get just good results, but awesome results.

    Which is presumably why you’re reading this article.

    Since all useful WordPress plugins are obviously not created equal you might want to do some comparisons to see what might perform best for you.

    Or you could simply check out the following selection of 9 top WordPress plugins. Select one that provides the functionality you’re looking for, and get on with it.

    You will not be disappointed.

    1. Amelia WordPress Booking Plugin

    Automated processes can save time, minimize or eliminate stress, give you error-free performance, and make all interested parties happier than was previously the case.

    At least that is what Amelia can do for fitness centers, beauty parlors, training centers, consulting firms, photographers and other businesses as 30,000+ businesses already benefit from Amelia scheduling.

    • Amelia automates the appointment booking process, while at the same time giving clients and employees full control over their respective actions.
    • Clients can make, change, or cancel appointments 24/7.
    • Appointments are only made at times that are convenient for the parties concerned (usually a client and an employee).
    • Selling packages of appointment for a single price is possible
    • There is no limit to the number of clients, the number of appointments that can be booked, or the number of employees, plus Amelia can serve multiple locations.
    • This Enterprise-Level booking manager can schedule events as well as appointments.
    • Business owners can check overall status at any time. Clients do not have to login to WordPress to cancel or reschedule an appointment.

    Click on the banner to learn more.

    1. wpDataTables

    wpDataTables is a WordPress table and chart plugin that gives its users the easiest way to create responsive tables and charts from a variety of sources and in a variety of formats.

    wpDataTables –

    • creates simple tables, data tables, and 3 types of charts
    • easily manages massive amounts of data and organizes the data into intuitive and interactive tables and charts
    • accepts data from Google spreadsheets, Excel files, CSV files, and other sources
    • generates real-time data directly from MySQL
    • features conditional formatting techniques for highlighting and color-coding key data

    While wpDataTables can be used by anyone and in any industry, this popular plugin has proven to be particularly useful when working with financial statistics, operational statistics, large product inventories, complex analyses, and comparisons.

    Click on the banner to review the full range of wpDataTables’ features and capabilities. 

    1. WPC Product Bundles for WooCommerce

    Cross-selling is an established marketing practice in which products from different product lines are combined or bundled, a practice that can be difficult without a well-planned system as WPC Product Bundles for promotion offering, stock management and order packaging to keep the ball rolling.

    WPC Product Bundles can bring about to your business –

    • Combine simple products, variable products, selected variations of a product to form a bundle (e.g., combine a t-shirt with jeans and shoes)
    • Display bundled products with an appalling interface of your preference: ddSlick, Select2, HTML tags or Radio Buttons
    • Use drag and drop to rearrange the order of bundled products
    • Auto-calculate or manually set regular and sale prices
    • Smartly manage inventory, tax, shipping charges, and order invoice

    Plus, WPC Product Bundles can work with many other WPC plugins (ie. Smart Wishlist, Quick View, and Compare) to strengthen the user experience and sales boosting effects.

    Click on the banner to learn more about the benefits of this top-rated product bundling plugin. 

    1. Slider Revolution

    Slider Revolution’s new template library isn’t just for building sliders. It’s also for creating stunning and responsive hero sections and other web page sections and content elements.

    • Slider Revolution’s drag and drop intuitive editor will save you hours of work on every project
    • Everything you need is there for creating jaw-dropping designs
    • Royalty-free background images, videos, font icons, and more are at your fingertips

    Click to learn more about this amazing plugin. 

    1. LayerSlider

    The name LayerSlider doesn’t come close to describing what this amazing WordPress builder is capable of.

    LayerSlider –

    • Is a multi-purpose tool for animation and content creation
    • Is perfect for giving old and run-of-the mill websites a new lease on life
    • Can be used to create engaging popups you can use to display important messages or store offers
    • Does not require coding. It’s all drag and drop.

    Click to find out even more.

    1. Logic Hop – Content Personalization for WordPress

    Personalization is more important than ever. Without it, your site shows the same message to every visitor. Every time they visit…

    Logic Hop shows the right message to the right person and helps you increase conversions. Features like geolocation, dynamic text replacement  and integrations with WooCommerce and Gravity Forms make Logic Hop the best personalization tool on the market.

    Try Logic Hop and see what personalization can do for you. 

    1. Heroic Inbox

    Instead of relying on a slap-dash method of trying to manage a customer support staff’s email inbox, Heroic inbox makes it much easier for staff members to work together.

    • With a snappy UI and fast workflows to work with, your support staff can quickly achieve Inbox Zero status and maintain it
    • Heroic Inbox tracks the key metrics involved in inbox management, so you can always see how the staff is performing
    1. Ads Pro Plugin – Multi-Purpose WordPress Advertising Manager

    “More and Better” is always a nice place to be, and Ads Pro, the best ad manager for WordPress puts your ad management operation firmly in that place with its –

    • 20+ ad display techniques
    • 25+ ready-to-use user friendly and responsive ad templates
    • Intuitive Frontend User Panel and Order Form and Statistics Module
    • 4 Payment methods and 3 Billing modules

    Click on the banner to learn more about how ads Pro can help you. 

    1. Flow-Flow Social Feed

    Flow-Flow is a friendly, fast, and powerful way to customize the design and behavior of your site’s social media feed.

    • You can add as many social feeds to a stream as you need
    • Flow-Flow is responsive, highly customizable, and no coding is required to set it up
    • A free Lite test drive version is available

    Flow-Flow has been Envato’s best-selling social media plugin since 2014.

     *****

    WordPress plugins are great tools for adding and extending functionality to WordPress and WordPress user sites. To get the greatest value for your money, we recommend that you always set your sites on getting the best plugin in its category.

    As you can see from the above selection, best-in-class useful WordPress plugins can be reasonably priced. Any one of these is capable of turning a website into a conversion and money-making machine.

    These essential plugins for WordPress are easy to set up and work with, and were designed to make life easy for WordPress website administrators.

    Read More at 9 Recommended WordPress Plugins (2021 updated)

    How to Allow Users to Upload Images on a WordPress Site

    Do you want users to be able to upload images on your WordPress site?

    If you want to accept guest post submissions, product reviews, or run a photo contest, then you will need to allow users to upload images. However, you may not want to give them access to your WordPress admin area.

    In this article, we’ll show you how to safely allow users to upload images on a WordPress site without giving them access to WordPress admin.

    How to allow users to upload images on a WordPress site

    Allowing Users to Safely Upload Images in WordPress

    If you want to run a multi-author blog, then the easiest way to allow users to upload images is by adding them as an author on your website.

    However giving users access to the WordPress admin area isn’t ideal for one-time scenarios such as guest post submission, product reviews, photo contests, etc.

    Luckily there are several WordPress plugins that let users upload images, without compromising your website security or giving them access to the WordPress admin area.

    Having said that, let’s take a look at some ways to easily allow users to upload images in WordPress.

    Method 1. Let Users Upload Images Using a File Upload Form

    This method comes in handy when you only need users to upload an image or another file such as resumes, cover letter, etc.

    You can simply create a file upload form that collects the user’s name, email address, the photo / file itself, and any message they want to include.

    First, you will need to install and activate the WPForms plugin. For more details, see our step by step guide on how to install a WordPress plugin.

    WPForms is the best WordPress form builder plugin that’s used by over 4 million websites. It comes with a file upload field that we’ll be using in this tutorial.

    Upon activation you need to visit the WPForms » Settings page in your WordPress dashboard to enter your license key. You can find your license key in your account area on the WPForms site, under the ‘Downloads’ tab.

    This is how it will look when you enter it on your site:

    Entering your license key for WPForms

    Now, go to WPForms » Add New to create your form. We’re going to use the ‘Simple Contact Form’ for this example. Click on it, and your new form will appear.

    The default simple contact form, showing fields for Name, Email, and Message

    Next, drag and drop a ‘File Upload’ field onto your form. You can find this field under the ‘Fancy Fields’ section on the left.

    Adding a File Upload field to the form

    Once added, click on the File Upload field on your form to edit it.

    We’ll change the name of this field (its label) to “Your Photograph” and specify which file extensions are allowed. We only want image files, so we’re going to allow JPG/JPEG, GIF, and PNG files.

    Note: By default, WordPress only allows certain file types to be uploaded. For instance, users won’t be able to upload .svg images, or .zip files unless you explicitly add them to the allow list. We’re going to explain how to do that in a moment.

    For now, let’s continue tweaking our field settings. We recommend specifying a maximum file size of 5 MB and check the box next to ‘Required’, so that the user can’t submit the form until they’ve uploaded an image.

    The file size limit helps you save disk cost on your WordPress hosting account.

    Editing the file upload field. Label now reads 'Your Photograph'.

    You can also set further options for this field by clicking the downward arrow next to ‘Advanced Options’.

    Here, you can choose the style of your upload field. It defaults to a ‘Modern’ drag and drop field. If you want, you can replace it with a ‘Classic’ field that looks like this instead:

    Switching to the Classic upload field

    You can also choose to store the image in the WordPress Media Library by checking that box. This is a good idea if you’re going to collate your submitted images for a blog post or similar.

    Once you are satisfied with your form, you can save and exit the form builder.

    Adding Your Image Upload Form in WordPress

    Next, you would want to add your form to a WordPress post or page. WPForms makes it super easy to add your forms anywhere on your website.

    Simply edit the post or page where you want to add the image upload form. In the WordPress content editor, you need to add the WPForms block to your content area.

    Adding a WPForms block to your page

    After that, you need to select the form you created earlier from the dropdown menu. WPForms will display a preview of your form inside the content area.

    You can now save your post or page and view it live to see your image upload form in action.

    Allowing Additional File Types to Be Uploaded

    Sometimes, your users might see this error when trying to upload a file, even when you’ve allowed that file type in your upload field’s settings:

    Sorry, this file type is not permitted for security reasons

    The problem is that WordPress only allows certain file types by default. The easiest way to allow more file types is to use a companion plugin.

    We recommend the File Upload Types plugin from WPForms.

    Once you’ve installed the plugin in WordPress and activated it, go to Settings » File Upload Types.

    You can then pick file types from the list that you want to allow, or you can add custom file types.

    Whitelisting additional file types in WordPress
    Note that the list doesn’t include the types that WordPress already allows by default.

    Method 2. Allow Users to Upload Images as Guest Authors

    A key reason to let users upload images is if you’re collecting guest post submissions. You could also use a very similar method for other user-generated content, like testimonials.

    First, you will need to install and activate the WPForms plugin. For more details, see our step by step guide on how to install a WordPress plugin.

    Note: You’ll need the ‘Pro’ version (or higher) in order to use the ‘Post Submissions’ addon.

    After activating the plugin, you need to visit the WPForms » Settings page in your WordPress dashboard to enter your license key. You can find your license key under the ‘Downloads’ tab of your account on the WPForms site.

    This is what you’ll see when you enter the license key on your site:

    Entering your license key for WPForms

    Next, go to WPForms » Addons to install the Post Submission Addon. Click the ‘Install Addon’ button. It will automatically install and activate

    Installing the WPForms post submissions addon

    Now, you can start building your guest post submission form.

    Go to WPForms » Add New, then scroll down to find the Blog Post Submissions Form.

    Creating a Blog Post Submission form

    Click on it, and your new form will be created for you. This will have default fields for the guest author’s details as well as the post’s proposed title, content, featured image, post excerpt, and category.

    You can add more fields (sections of your form) if you want. For instance, you might want to add a ‘Website / URL’ field where the author can enter their own blog’s URL.

    Adding a website/URL field

    To change the label on a field or any text on the form, just click on it.

    For instance, you can click on the ‘Featured Image’ box and change the ‘Description’ to give your preferred size for featured images.

    Editing the File Upload field in WPForms

    Files uploaded through the preset ‘Featured Image’ field will be stored in your Media Library within WordPress.

    You can toggle this option on and off by clicking on the ‘Advanced Options’ dropdown for the field.

    Choose whether to store uploaded images in the Media Library

    Tip: If you want to create a form from scratch, note that the ‘File Upload’ field does not store files in the Media Library by default. Make sure you switch this setting on if you want to use it.

    If you want, you can change the image types that the ‘File Upload’ field will accept. For instance, you might want users to only upload PNG files.

    You can also enter a maximum file size, in MB. If you want, you can allow users to upload 2 or more files.

    Changing the file upload settings

    The ‘Modern’ upload field (the default) allows users to drag and drop files. If you prefer, you can change it to a ‘Classic’ field under advanced options. Note that this only allows users to upload a single file.

    Switching to the classic upload

    Once you’ve got all the fields you want on your form, go to the ‘Settings’ tab. You may want to change details under ‘Notifications’ here.

    For instance, if your guest posts go to an editor, you’ll want their address in the ‘Send to Email Address’ box.

    Changing your form's settings

    You might also want to change the confirmation message that a user sees after submitting the form. You can do this under Settings » Confirmation.

    Once you’re happy with your form, click the ‘Save’ button at the top of the screen.

    Adding the Guest Post Submission Form to Your Site

    You can add your form to your site in any post or page. You might want to create a new page specifically for guest post submissions.

    If you’re using the Gutenberg (block) editor, simply click the (+) icon to create a new block. Then, select ‘WPForms’ from the ‘Widgets’ section.

    Adding a form to your page using the block editor (Gutenberg)

    Next, you’ll see a WPForms dropdown. Select your form from the list and it’ll be added to your post.

    Tip: If you’re still using the Classic editor, then you’ll see an ‘Add Form’ button next to ‘Add Media’ instead. Click this to get a dropdown list of your forms. Select the one you want, then click ‘Add Form’ to put it into your post.

    You can use the ‘File Upload’ field in any form you create, of course. That means you can use the above method for any type of user-generated content you’d like to collect.

    Method 3. Allow Users to Upload Photos for a Contest

    While a file upload form allows users to upload any type of file, it may not be the best solution if you’re running a photo contest.

    That’s because WPForms is a form builder, not a contest plugin. It doesn’t come with features like selecting winners, viral sharing, etc.

    That’s where RafflePress comes in. It’s the best WordPress giveaway plugin that lets you create viral contests to grow your traffic and social media followers.

    You can use it to design a contest widget that lets users upload photos, but also incentivize sharing and other engagement actions to grow your following.

    Submit an image action

    We have created a detailed guide on how to create a photo contest in WordPress with RafflePress that you can follow more details.

    We hope this article has helped you learn how to allow users to upload images on a WordPress site. You may also want to see our comparison of the best email marketing services and best push notification software to connect with your visitors after they leave your website.

    If you liked this article, then please subscribe to our YouTube Channel for WordPress video tutorials. You can also find us on Twitter and Facebook.

    The post How to Allow Users to Upload Images on a WordPress Site appeared first on WPBeginner.

    Rough Pixels Releases Empt Lite, a Block-Supported Freemium WordPress Theme

    Single blog post view when using the Empt Lite WordPress theme.
    Single post view.

    Empt Lite, the latest theme by Rough Pixels, landed in the WordPress theme directory today. Like most of the company’s prior work, the design is on par with the best free themes currently available.

    I have come to disregard that icky feeling whenever I see “Lite” attached to a theme name, at least when it falls under the Rough Pixels brand. The company does not deal in the stripped-down lite themes I wrote about a couple of weeks ago. Empt Lite is one of those rare themes that does not downgrade the experience with the free version. Most additional features in the pro version seem to be value-adds for users who need something extra. There is almost an honesty to it. Users can get a feel for the theme quality before deciding to hand over money for the commercial version.

    Some pro features probably do not make sense as an upsell in the long run. WordPress’s upcoming Full Site Editing (FSE) could make them obsolete. For example, an option for customizing archive titles will be easy to accomplish in the site editor. An “about me” widget will not be a great upsell a year from now. However, custom patterns for an “about me” section might make more sense.

    This is assuming the theme developer goes down the block-based theme path in the months to come. Looking at theme releases in 2021 needs to be done with an eye toward how they might function in an FSE world. This includes what freemium-based theme companies are upselling. Some will likely need to change tactics in time.

    The one missing feature that I would like to see Rough Pixels include in this theme and others is custom block patterns. They are already covering all of their bases with block editor styles. Now that patterns have been in WordPress since version 5.5, it is time to keep building on the work already in place. This is also an opportunity to transition toward selling design-based upgrades. Put together some custom pattern packages and see what type of feedback customers provide.

    Theme Features

    In essence, Empt Lite is mostly a standard blogging theme. Where it shines is its support of the block editor.

    Cover block output on the front end by the Empt Lite WordPress theme.
    Wide-aligned Cover block.

    One of the surest signs of a theme author doing their due diligence with block styles is to test a full-aligned Cover block with text afterward. If the text butts against the Cover, the theme probably has numerous other issues. If there is spacing between the two, the theme author likely took the time to test almost all WordPress blocks in various scenarios. I promise you this test works 90% of the time. Empt Lite passed this test and my entire block-testing suite with ease.

    The feature that immediately caught my eye was the gallery-style blog layout. Rather than the typical top-aligned or masonry-type grids, the theme employs an offset style reminiscent of the Twenty Twenty-One theme’s image and gallery patterns. The effect is achieved by using varying featured image orientations, which the theme aligns to the middle. It is a break from the monotony of typical layouts.

    Gallery-style blog layout for the Empt Lite theme.
    Offset, gallery-style layout.

    This gallery style does require that every post have a featured image. Posts without them simply disappear from the blog and archive pages, but not completely. These posts leave empty gaps, throwing off the layout. Their titles appear when hovering over seemingly-random spots on the page. There is also an empty <figure> tag in the source code. These are obviously bugs. If the theme author wants to support posts without featured images, the easiest solution would be to add a fallback.

    Users who love to customize their theme and make it their own will find enough theme options to whet their appetites. Whether it is colors and typography or post meta and the nine sidebars, the theme has settings to cover it. Outside of the gallery blog layout, none of the customizer options seemed groundbreaking.

    If anything, I look forward to the day when theme authors do not have to build all of these options and relegate them to the site editor. Rough Pixels and others put so much custom code behind the customizer that it feels like a waste of development hours in the long term. FSE cannot get here soon enough.

    The theme has a few noticeable issues, but they are relatively trivial.

    The mouse cursor is set to “pointer” when hovering a post featured image, even when that image is not linked. Yes, I unsuccessfully attempted to click a featured image multiple times, wondering why it was doing nothing.

    The wide-layout for single posts provides plenty of breathing room for custom layouts. However, the default font-size, set to 17px, is too small for comfortable long-form reading. There is an option to customize the size, but it applies to the text across the entire site and not just the post content on single views. Making it larger creates the opposite problem on non-single pages. When a project is billed as a blog theme, words-per-line matter. Nailing the typography is a must, even when it is on an alternative layout option. Outside of this one case, the theme gets the defaults right.

    The default quote style can make the text tough to read. The quote icon in the background bleeds too much into the foreground. I love the style; the color just needs to be dialed back while letting the text take center stage. The theme provides an option for changing the blockquote icon’s color. I suggest tinkering with it.

    Empt Lite WordPress theme's blockquote output style.
    Blockquote style.

    Overall, this is one of the better themes to land in the WordPress theme directory in the past few months. Recreating the theme’s demo requires almost no fuss. The typography is on-point for a blogging theme, and it works well with the block editor.

    8 Best Popular Posts Plugins for WordPress (Compared)

    Are you looking for a way to show popular posts on your WordPress website?

    Displaying popular posts helps your visitors find your best content and increase your page views. It’s also a great way to interlink your pages to boost SEO.

    In this article, we will share the best popular posts plugins for WordPress.

    best popular post plugins for wordpress

    Why Use a WordPress Popular Posts Plugin?

    Using a WordPress popular posts plugin helps you point users towards the articles that other users already found helpful.

    Popular posts are usually your most successful content, which means they more likely to increase user engagement, conversions, and sales.

    They are also a good opportunity for internal linking to your other less popular articles. This improves the SEO score for other articles and helps users discover more content.

    You can create highly engaging funnels using popular posts, related posts, and conversion optimization tools. All of which lead users to sign up and help you grow your business.

    That being said, let’s take a look at some of the best popular post plugins for WordPress that you can on your website.

    1. MonsterInsights

    monsterInsights

    MonsterInsights is the best Google Analytics plugin for WordPress used by over 2 million websites. It lets you properly setup Google Analytics without editing code or hiring a developer.

    They have the best Popular Posts feature which allows you to show your popular articles anywhere on your WordPress site. You can use also use Inline Popular Posts to show articles inside your content.

    MonsterInsights Inline Popular Posts

    If you want to show articles in the sidebar or at the end of your content, you can select the Popular Post Widget.

    MonsterInsights even lets you display your top-performing products anywhere on your eCommerce store.

    MonsterInsights Popular Products for WooCommerce

    The plugin offers different themes to choose from, and you can customize the design by changing the title color, size, label color, border, and more.

    MonsterInsights Popular Post Templates

    You can sort your popular posts based on comments, share count, or manually select posts that will randomly rotate in the widget.

    If you have custom dimensions set up like post type, then MonsterInsights will automatically pick the top 5 posts from Google Analytics from the past 30 days and show them as popular posts.

    Pros: MonsterInsights offers lots of options to display popular posts. You can select different themes, layouts, styling, and customize each popular post widget. It can automatically determine popular posts and show them on your website.

    Cons: To get powerful features like eCommerce tracking, conversion tracking, and custom dimensions, you’ll need the MosterInsights Pro plan.

    2. WordPress Popular Posts

    wordpress popular posts

    WordPress Popular Posts plugin is one of the most downloaded popular posts plugin on the market with over 300,000+ active installs. It allows you to show popular posts with many different conditions.

    You can show recently trending articles by selecting a date range. You can also show most commented or most viewed articles.

    It is multi-widget capable, which means you can add the same widget multiple times into the same or different sidebar. You can apply your own custom CSS, show post thumbnails, excerpts, author, comment count, number of views, and more.

    Pros: WordPress Popular Posts is a powerful plugin with all the options you would need to display your popular posts. Support for custom post types and the ability to add the widget multiple times allows you to create a different set of popular views, e.g., Popular Posts, Popular Reviews, etc.

    Cons: The plugin creates two extra tables in the database to store popular posts data and cache. While some people might argue that it is a better approach to keep this data out of default WordPress tables, others may find it database intensive. Also there’s no option to connect with real analytics.

    3. Top 10 – Popular posts plugin for WordPress

    top 10 popular posts plugin for wordpress

    Top 10 Popular posts plugin for WordPress is another strong candidate in our list of the best popular posts plugins.

    As far as the features are concerned, it matches WordPress Popular Posts and even adds some more features. Top 10 also comes with a highly configurable widget and shortcodes.

    Despite the name, you can choose to display any number of popular posts. It allows you to select a date range to choose from. You can show post views, author, post summary or excerpt, and post thumbnails in the popular posts list.

    Top 10 comes with a built-in caching system to make it less resource intensive. It also plays along nicely with WordPress caching plugins like W3 Total Cache and WP Super Cache.

    Pros: Top 10 Popular Posts Plugin is feature-rich, flexible, and easy to setup. It has aggressive caching to reduce the server load, and it works nicely with WordPress caching plugins.

    Cons: Plugin settings page have way too many options, and beginners may find it a bit complicated. Also there’s no option to connect with real analytics.

    4. Relevant

    relevant popular posts plugin for wordpress

    Relevant will help you show your popular posts, featured articles, related content, and latest posts on your WordPress website. It comes with multiple widgets including one for popular posts and a neat settings page.

    You can display popular posts by comments or page views. It also allows you to display post thumbnail, author, excerpt, and post date.

    Don’t want to use the widget? Relevant also comes with shortcodes and template tags that you can use to display popular posts anywhere on your website. You can also enable post blocks before or after post content.

    Pros: It combines featured, latest, and related posts functionality into one convenient package.

    Cons: The popular posts feature does not allow you to show popular posts in a particular date range.

    5. Trending/Popular Post Slider and Widget

    trending popular post slider and widget

    Trending/Popular Post Slider and Widget allows you to show popular posts in a slider, a grid block, or as a plain list. This way, you can show your best content in more engaging ways than just a list of links in your sidebar.

    It comes with a simple settings page where you can choose the time range. This allows you to show posts trending during a particular year, month, or week.

    The plugin comes with easy to use shortcodes that you can add to your posts or pages. You can also use the shortcode in your page builder plugin modules.

    If you want to implement it directly into your theme, then you can use template tags to do that.

    Pros: Ability to add popular posts sliders, carousels, and grid blocks and show them anywhere on your site.

    Cons: Limited features than other popular posts plugin. The slider, carousel, and grid blocks only work with shortcodes. The widget is basically a list of links with post thumbnails, excerpts, and some metadata.

    6. WP-PostRatings

    wp-post ratings

    WP-PostRatings is the next popular posts WordPress plugin on our list. It helps you show the most highly rated posts on your website and allows users to rate articles.

    You can choose the rating icons and who can vote on articles (all users vs. only logged-in users). It supports rich snippets, and it is highly customizable through filters and template tags.

    The best part about the plugin is its ratings widget, which shows top-rated posts on your website. This allows you to show popular posts by user votes. The plugin also works with WordPress Popular Posts plugin.

    For detailed instructions, see our guide on how to add post rating system in WordPress

    Pros: You can show popular posts based on user rating instead of page views or comments.

    Cons: To implement the plugin, you will need to add template tags in your WordPress theme files, which can be tricky for beginners. If you haven’t done this before, then check out our guide on how to copy and paste code in WordPress.

    7. Display Posts

    display posts

    Display Posts is a popular WordPress plugin that allows you to display WordPress posts by creating your own custom queries using shortcode.

    It lets you easily showcase your top content anywhere on your site through shortcodes. For instance, you can show posts by comment count using the following shortcode:

    [display-posts orderby="comment_count"]

    It also works with plugins like shared counts, which allows you to display your most shared articles as well.

    The plugin lets you filter posts by category and display content based on share count and the number of comments. In your display parameter, you can include excerpts, thumbnails, author avatar, and more.

    Pros: Display Posts is extremely flexible and you can fetch and display any posts you want as popular posts. It offers detailed documentation and tutorials to help you get started.

    Cons: The shortcode has many parameters and no styling. This would make it a bit difficult to use for beginners.

    8. WP Tab Widget

    wp tab widget

    WP Tab Widget is a user-friendly and fast WordPress plugin to display popular posts on your website. You can show articles based on pageviews, comments, tags, and recent posts all in a single widget.

    The plugin lets you select which tab to show on your site and control the number of posts to show in each tab. The best part about WP Tab Widget is that it only loads posts when a user clicks on any tabs.

    This makes the plugin lightweight and ensures your WordPress site runs without slowing down. Besides, you get different customization options such as show or hide post date, number of comments, excerpts, and more.

    Pros: A super-fast plugin that doesn’t compromise website performance, as it uses AJAX to display popular posts under each tab. Plus, you get to show different types of posts in one widget.

    Cons: WP Tab Widget lacks flexibility and offers limited features in the free version. To get predefined designs, drag and drop features, and more, you’ll have to upgrade to its Pro version.

    Which Popular Posts Plugin is the Best?

    We believe that MonsterInsights is the best popular posts plugin for WordPress. It lets you show your best content anywhere on your site and offers lots of options for customization.

    You can display posts based on share count, comments, manually select articles, or automatically pick the top 5 posts from Google Analytics through custom dimensions.

    With MonsterInsights, you also get additional tracking features that help you better understand your audience. Find out the source of your web traffic, top landing pages, referrals, device breakdown, and much more.

    We hope this article helped you find the best popular posts plugin for WordPress. You may also want to see our list of the best WordPress plugins for all websites, and our tutorial on how to add web push notifications in WordPress to grow your traffic.

    If you liked this article, then please subscribe to our YouTube Channel for WordPress video tutorials. You can also find us on Twitter and Facebook.

    The post 8 Best Popular Posts Plugins for WordPress (Compared) appeared first on WPBeginner.

    How to Rearrange Post Edit Screen in WordPress

    Do you want to change the look and feel of the post edit screen when creating WordPress posts?

    WordPress comes with an intuitive content editor, with different sections and toolbars. To reduce distraction, you may want to hide the areas that you don’t use.

    In this article, we’ll show you how to rearrange the post edit screen in WordPress.

    How to rearrange post edit screen in WordPress

    Rearrange WordPress Post Edit Screen

    By default, the WordPress block editor offers a sleek user experience. However, as you get used to it, you’ll notice that you use some areas more than others.

    There are a few built-in options that you can use to customize the post editor to your own liking.

    Here’s what the standard editor looks like:

    Default post editor view

    On the right, you have your document settings and block settings, which show up when you click on any block on your post.

    If you have been using WordPress for a while, then your default editor view may also include the WordPress admin sidebar.

    If you don’t see it, then there’s an option to view the admin sidebar by switching off the full-screen mode (we’ll show you how later in this article).

    Standard WordPress Post Editor

    Show / Hide Panels in WordPress Post Editor

    What if you want to hide some of the panels in the WordPress content editor? Let’s say you want to get rid of the categories, tags, featured images, and excerpts?

    First, you’ll need to click on the 3 dots menu in the upper right corner and then select ‘Options’ from the menu.

    Settings options link

    This will bring up a popup with a list of panels that you can show or hide.

    Options choices

    Now you can check or uncheck any of the boxes you want to be displayed in the right panel.

    This is helpful if you’re not using certain panels very often.

    Stick Block Toolbar to the Top

    When you are working on a block, the editor shows a block toolbar right above it. The toolbar is displayed as you move between blocks.

    Original block toolbar

    If you find the toolbar to be distracting, then you can move it to the top.

    To do this, you’ll want to click on the 3 dots in the upper right corner and then you’ll see the ‘Top toolbar’ option.

    Clicking on it will move the block toolbar to the top making your blocks less distracting.

    Here’s how it would look:

    Top toolbar

    This setting can make it easier to edit each block when you are working on complex layouts with columns, groups, and tables.

    Bonus: See our list of the best Gutenberg block plugins to get the most out of the new block editor.

    Remove Right Side Panel

    Want to remove the panel on the right side, so you can focus on the content?

    WordPress makes this super easy. Simply click on the gear icon at the top and the right column will disappear.

    Gear remove sidebar

    Clicking the gear again will display the right column, so you can use your document and block settings.

    Gear in sidebar

    Using The Fullscreen Editor in WordPress

    WordPress editor comes with a fullscreen editor that removes the WordPress admin sidebar and toolbar. You can enter the fullscreen editor or exit it any time you want.

    All you need to do is click on the 3 dots menu in the upper right corner and then select ‘Fullscreen mode’ in the dropdown.

    Fullscreen view

    Repeat the same steps when you want to exit the fullscreen editor.

    Before fullscreen

    WordPress will remember your preference and next time it will open the post editor in the same view that you had selected.

    For more on this, here’s how to disable the fullscreen editor in WordPress.

    Use Spotlight Mode in Post Editor

    By default WordPress uses the spotlight mode to highlight the block you have been working on. Basically, it just dims the opacity of other blocks, so you can focus and locate the block you are currently editing.

    Spotlight mode turned on

    However, sometimes you want to see all your blocks together to get an idea of how they’ll look. You can turn off spotlight mode by simply clicking on the three dot menu icon and selecting ‘Spotlight Mode’.

    Repeat the same steps when you want to turn it back on.

    Collapse Document Panel Sections

    The document panel in the right column shows all the standard WordPress settings for a post. Your WordPress plugins and themes may also add sections to this panel.

    This would make the panel a bit longer and difficult to locate things.

    You can simply collapse document sections by clicking on the upward arrow next to each section.

    Expanded panels

    And when you click on the arrows, you’ll collapse them, making your document look much cleaner.

    Collapsed panels

    That’s all.

    We hope this article helped you learn how to rearrange post edit screen in WordPress. You may also want to see these useful WordPress keyboard shortcuts to save time, and our guide on how to create members only content in WordPress.

    If you liked this article, then please subscribe to our YouTube Channel for WordPress video tutorials. You can also find us on Twitter and Facebook.

    The post How to Rearrange Post Edit Screen in WordPress appeared first on WPBeginner.

    7 Best Web Push Notification Software in 2020 (Compared)

    Are you looking for the best push notification software for your website?

    Web push notifications are a powerful tool that allows you to connect with visitors after they leave your website. You can send targeted messages to your users which leads to more traffic, conversions, and sales.

    In this article, we’ll share our pick of the best web push notification software for your website.

    The best push notification software compared

    Why Push Notifications Are a Powerful Marketing Tool

    Push notifications allow you to engage and retain visitors after they leave your website.

    You can send targeted personalized messages to users and bring them back to your website. This could be blog post notifications, product announcements, abandoned cart reminders, and more.

    An example push notifiation from PushEngage

    Push notifications go directly to the user’s web browser or mobile device which means it has a much higher engagement rate.

    Many big sites like Facebook use push notifications. However, most small businesses haven’t yet realized how powerful they are. On WPBeginner website, push notifications are consistently a top 5 traffic source.

    If you’re not using push notifications, then now is a great time to start, so you can get ahead of your competition.

    With that said, here’s our comparison of the best push notification tools that you can try. All of them are fully compatible with WordPress which is the most popular website builder in the world.

    1. PushEngage

    PushEngage

    PushEngage is the best push notification tool on the market. It allows you to connect with visitors after they leave your site with targeted push messages.

    You can set it up to automatically send your new blog post notifications, or use it to manually send custom messages.

    It is super easy to set up and is a perfect solution for both beginners as well as advanced users. It works on both HTTP and HTTPs websites, and they support all devices / browsers.

    PushEngage comes with powerful features such as A/B testing, automatic drip campaigns, smart opt-in reminders, custom triggered campaigns, and more.

    Their triggered campaign feature lets you automatically create abandoned cart notification, schedule messages, send price drop alerts, and more.

    Plus, you can track the performance of each campaign and even calculate the revenue generated from them using goal tracking.

    PushEngage’s dynamic segmentation helps you send more targeted messages based on users’ actions. For example, you can segment visitors who added products to the cart, bought something, viewed a specific page, and more.

    This level of personalization helps you get maximum results, so you get more traffic and sales.

    Over 10,000+ companies use PushEngage, including big name brands like Dominos, TUI, Harvard Business Review, and of course WPBeginner.

    Price:

    PushEngage costs from $25/month, which gives you 5,000 subscribers and unlimited notifications.

    There’s also a limited free plan, which gives you up to 2,500 subscribers and 120 notifications/month.

    Editor’s note:

    Our founder, Syed Balkhi, fell in love with this platform because of the impact it had on our business. In October 2020, we acquired PushEngage, and it’s now part of WPBeginner’s family of products.

    2. OneSignal

    OneSignal

    OneSignal is a popular push notification tool. It has similar features to PushEngage. You can use it to create automatic push notifications, announcements, abandoned cart notifications, and more.

    You can easily set your push prompt to display after a certain number of page views and/or seconds. This means you don’t need to display the push prompt the moment someone arrives on your site.

    Along with offering push notifications, OneSignal lets you create in-app messages and emails. Like PushEngage, OneSignal offers A/B testing and useful analytics. You can also segment your audience for better targeting.

    One key drawback to OneSignal is that it gets expensive as you need more features. It also has fewer automation, personalization, and customization options than PushEngage.

    Price:

    At the time of writing this article, OneSignal’s paid plans started at $99/month. They have introduced a Growth plan which will be available in November at $9 per month.

    However, this plan is still limited, and you will need their Professional plan at $99/month to get the most features. There’s also a free plan available with up to 10,000 subscribers.

    3. VWO Engage (PushCrew)

    VWO Engage

    VWO Engage, which used to be called PushCrew, has a web push notifications tool that works on both desktop and mobile.

    It’s designed to let you create push notification campaigns, which have entry and exit triggers. That means the campaign can automatically start based on the user’s actions, such as clicking a particular link.

    Users can also be automatically opted out of the campaign when they take a set action, such as clicking a button or filling out a form.

    VWO Engage offers segmentation, analytics, personalized notifications, and A/B testing. However, their segmentation tools and engagement campaigns are quite limited.

    Price:

    VWO Engage costs from $99/month. This gives you up to 10,000 subscribers and unlimited notifications.

    There’s no free plan available. However, you can take a free trial for 30 days, with no credit card required.

    4. iZooto

    iZooto

    iZooto offers real-time push notifications, recurring notifications, and scheduled notifications.

    Like the other tools we’ve featured, iZooto allows you to personalize push notifications. You can also set up segmentation for more targeted messaging.

    It includes A/B testing, Timezone based notifications, capture key user attributes and interests, and more.

    Your initial push prompt can appear when the user scrolls down, after a certain length of time, or after a button click. This can help you increase the percentage of site visitors signing up for push notifications.

    The iZooto customer success team will help you transfer over your subscribers if you’re already using a different push notification tool.

    iZooto only works with https websites, which means your site needs to be using an SSL certificate.

    Price:

    iZooto costs from $85/month, which gives you up to 30,000 subscribers and unlimited notifications.

    There’s no free plan available. However, you can take a 14-day free trial (no credit card required).

    5. Webpushr

    Webpushr

    Webpushr is a straightforward web notifications platform that supports all popular browsers. It offers a range of different prompt templates that you can customize.

    Webpushr makes it easy to transfer subscribers from another platform. It includes features like user segmentation, automatic web push, and HTTP support. Plus, it’s designed to integrate seamlessly with both WordPress and WooCommerce.

    Webpushr gives you unlimited team members and unlimited segments for your subscribers. It also supports large images, action buttons, emoji, and custom branding.

    Unlike most push notification plugins, Webpushr gives you all features on all plans. This includes their free plan. The only difference is how many subscribers you can have.

    Price:

    Webpushr costs from $19/month for up to 100,000 subscribers and unlimited notifications.

    There’s also a free plan available. This gives you up to 60,000 subscribers and unlimited notifications.

    6. PushAssist

    PushAssist

    PushAssist is a push notification tool that supports Chrome, Firefox, and Safari browsers. It’s easy to set up, and works on both desktop and mobile.

    With PushAssist, you get audience segmentation, personalization, scheduling tools, and insights into your customer data.

    You also have the option to monetize your push traffic by letting advertisers send out push notifications to your audience. This could help you make money online.

    You can use PushAssist with an HTTP or HTTPs website. However, you cannot remove the PushAssist branding unless you’re using the Business plan or higher.

    Price:

    PushAssist costs from $9/month for up to 3,500 subscribers.

    There’s also a free plan available. This gives you up to 3,000 subscribers and unlimited notifications.

    7. WonderPush

    WonderPush

    WonderPush works in a similar way to most other push notification plugins. It lets you segment your subscribers, automate notifications based on behavior or time, access real-time analytics, and more.

    WonderPush lets you create various types of notification. These include eCommerce push notifications, such as automated abandoned cart notifications.

    You get all the features however much you’re paying. This includes unlimited staff members, unlimited notifications, A/B testing, personalization, and more.

    Price:

    WonderPush has a different pricing model from the other tools we’ve featured. It costs from €1 per month for up to 1,000 subscribers, then it’s an extra €1 for every 1,000 subscribers after that.

    There’s no free plan, but you can take a 14-day free trial. This doesn’t require a credit card.

    Which is the Best Push Notification Software?

    PushEngage is the best push notification software on the market. It’s beginner-friendly and easy to get started with, yet it also offers lots of powerful features.

    Their free plan is suitable for small businesses and blogs. Their pricing is the most competitive as it scales which is a big reason why many large businesses use PushEngage. Their platform is robust and the support team is top-notch.

    OneSignal can be a good fit too. However, their free plan is quite limited and even the paid plans have fewer features and customization options.

    We hope this article helped you learn about the best push notification software for websites. You might also like our article on the best email marketing services, and the best business phone services for your small business.

    If you liked this article, then please subscribe to our YouTube Channel for WordPress video tutorials. You can also find us on Twitter and Facebook.

    The post 7 Best Web Push Notification Software in 2020 (Compared) appeared first on WPBeginner.

    Apple Will Release 217 New Emojis and We Have A Sneak Peek of What They Might Look Like

    I don’t know about you, but when I text, I use a lot of emojis to express myself.

    Maybe too many.

    And there were so many times where there just wasn’t an emoji I needed to express myself, or something to describe what I was doing.

    That’s why I’m so incredibly excited to announce that Apple will be adding an additional 217 emojis to the pack.

    This year, they already added over 100 new emojis, including one of my personal favorites, the otter. 🦦

    And now, we wait for 217 more in 2021.

    new emojis 2021 apple

    If you’re a big dreamer, you’ll finally have an emoji to describe your head being in the clouds.

    There’s also a mending heart, which I love, an exhaling face, and a few others!

    new emojis 2021 apple

    One important thing that you should know is that 200 of 210 of these emojis are skin tone variants, which is incredibly exciting!

    It’ll be amazing now that we can all find the perfect relationship emoji to describe our lives.

    new emojis 2021 apple

    The update is expected to take place in January and will gradually roll out new emojis until October of next year.

    And although we haven’t gotten an exact image of the new emojis from Apple, the talented designer Joshua Jones from emojipedia has made some mock-ups of what we can expect to see soon!

    new emojis 2021 apple

    What are you most excited for in the upcoming emoji release?

    What other emojis would you like for Apple to release?

    Let us know in the comments below.

    new emojis 2021 apple

    Maybe we can come together and make some emoji mock-ups and send a request to Apple to implement them.

    Who knows what we could accomplish if we all come together.

    Anyways,

    Read More at Apple Will Release 217 New Emojis and We Have A Sneak Peek of What They Might Look Like

    21 Best Clothing Store WordPress Themes

    Are you looking for the best clothing store WordPress themes?

    If you run a clothing store and want to set up your business website to sell online, then you need a theme that’s suitable for creating an eCommerce website. Your theme should also have an attractive and engaging design.

    In this article, we will share some of the best clothing store WordPress themes that you can use.

    Best Clothing Store WordPress Themes

    Making a Clothing Store Website With WordPress

    WordPress is the most popular website builder in the market. Many top brands use WordPress for their websites and eCommerce stores.

    There are 2 types of WordPress and it’s important to know the difference. WordPress.com is a hosting solution and WordPress.org is a self-hosted platform.

    For full details about the difference between them, check out our complete article on the difference between WordPress.com vs WordPress.org.

    You will need to use self-hosted WordPress.org for your clothing store website. It’s highly flexible and works seamlessly with third-party resources such as eCommerce plugins.

    Before you start, you will need a domain name for your store’s website. Your domain name is your website’s address on the internet, such as amazon.com or wpbeginner.com.

    You will also need web hosting. Your web host stores all your website’s files, such as your product pages and images.

    We recommend using Bluehost. It’s one of the most popular web hosting companies and an official WordPress hosting partner.

    Bluehost offer for WPBeginner readers

    For WPBeginner users, Bluehost offers a fantastic deal. You can get a free domain name, free SSL certificate, and a 65% discount on web hosting when you sign up.

    Next, go through our article on how to start an online store to set up your clothing store professionally.

    Let’s take a look at our handpicked list of the best clothing store WordPress themes.

    1. Astra

    Astra Clothing

    Astra is a modern multipurpose WordPress theme for all types of websites. It comes with a beautiful clothing store template that you can use to get started quickly.

    It supports drag and drop page builders to create and customize landing pages. It’s fast, lightweight, and easy to set up even for absolute beginners.

    Astra offers full-width page templates, responsive font sizes, multiple header options, different blog layouts, and much more to help your site look great.

    You can also use Astra’s pro addons to support features like WooCommerce Ajax add to cart buttons. This means the page won’t need to refresh after a customer adds a product to their cart, creating a better user experience.

    2. Neve

    Neve

    Neve is a beautiful WordPress theme well-suited for any blog or website. It includes multiple starter sites that you can use as the basis for your clothing store. You could even use Neve to create an Amazon Affiliate store.

    The theme is easily customizable using WordPress page builders. It integrates with WooCommerce and popular WooCommerce plugins to start your online clothing store in just a few clicks.

    3. Divi

    Divi

    Divi is an elegant WordPress theme with a highly flexible and custom layout design. It also comes with a built-in page builder to create your clothing store’s online shop quickly.

    It includes custom page layouts, animation effects, a visual editor, unlimited colors, Google Fonts, and tons of customization options. Divi is translation ready and lets you create a multilingual website easily using WPML.

    4. Ultra

    Ultra Clothing

    Ultra is a stylish WordPress multipurpose theme. It comes with a few pre-designed website layouts, including a template for clothing and fashion designers.

    It offers powerful addons to add more functionality to your website without writing any code, helping make your site as user-friendly as possible. Ultra has color choices to customize your site beautifully. Plus, it uses responsive design so your site looks great with all devices and screen sizes.

    5. OceanWP

    OceanWP Clothing

    OceanWP is a free and responsive WordPress theme for any type of website. It provides with a 1-click demo content importer and dozens of ready-made demo sites.

    It’s fast and easy to set up. The theme includes lots of options for eCommerce stores that help you sell your clothes to a large market online. It’s also built with good SEO (search engine optimization) in mind.

    6. Authority Pro

    Authority Pro

    Authority Pro from StudioPress is a classic WordPress theme. It has a minimalist layout design with all the features you need to create a beautiful clothing store website.

    It offers color choices, homepage widget areas, layout options, and a theme options panel for customization. You can use the WordPress customizer to see a live preview of changes to your site. Plus, it’s SEO friendly.

    StudioPress is now part of WP Engine, the most popular managed WordPress hosting company. You can get this theme and all 35+ other StudioPress themes when you sign up for WP Engine hosting to build your website.

    Bonus: WPBeginner users also get an additional 20% OFF. Get started with WP Engine today!

    7. Neto

    Neto

    Neto is a stunning eCommerce WordPress theme built specifically for fashion websites and clothing brands. It integrates with WooCommerce out of the box and supports all its extensions.

    With a flexible layout, you can make changes to your website template and create custom page templates easily. Neto is also compatible with popular page builder plugins like Elementor.

    8. Gear

    Gear

    Gear is a minimalist WordPress theme with light and beautiful colors. It’s suitable for fashion stores, lifestyle blogs, clothing, and textile design websites.

    It seamlessly integrates with WooCommerce to let you sell your products online. Other notable features include video embeds, contact forms, Google Fonts, and multilingual compatibility.

    9. Hestia Pro

    Hestia Pro

    Hestia Pro is an excellent WordPress theme for any type of website. It comes with a few built-in website templates for different business niches.

    The theme is suitable for a clothing store or fashion eCommerce store, offering a great user experience. With page builder integration, Hestia makes it easy to set up and customize your landing pages.

    10. Shoptimizer

    Shoptimizer

    Shoptimizer is a WordPress WooCommerce theme designed specifically to create online clothing stores. The template provides a category navigation menu, a shopping cart page, and more.

    Shoptimizer’s eCommerce functionality means it integrates with popular payment plugins to accept online payments easily.

    With a distraction-free checkout system, Shoptimizer should give you a high conversion rate of prospects to customers. It also offers optional wishlist functionality.

    11. Hugo

    Hugo

    Hugo is a beautiful clothing store WordPress theme or fashion WordPress theme. It comes with a fullscreen custom background slider where you can showcase your featured products and redirect users to landing pages.

    Other notable features include custom widgets, multiple color schemes, WooCommerce compatibility, and a shopping cart system. Hugo is highly flexible and easy to set up without editing any code.

    12. Storebox

    Storebox

    Storebox is one of the best WordPress eCommerce shop themes to start an online clothing store. It has a clean design and works perfectly with drag and drop page builders like Visual Composer for real-time customization.

    The Storebox theme has multiple homepage templates, product categories, featured videos, and more. With shortcodes support, it gives you the option to add dozens of elements to your website quickly.

    13. Altitude Pro

    Altitude Pro

    Altitude Pro is a black and white WordPress multipurpose theme for any kind of website. It’s well-suited for an online business like a clothing store and offers a parallax layout design to engage users on your site.

    It features color styles, custom background, header templates, sidebar layout options, and so on. With 7 homepage widget areas, it only takes a few minutes to set up and launch your clothing store’s website.

    Altitude Pro is a StudioPress theme. You can get a great deal on it plus all StudioPress’ other themes when you buy hosting from WP Engine.

    14. Blossom Shop

    Blossom Shop

    Blossom Shop is a free WordPress clothing store theme. It fully supports WooCommerce and the extensions that you need to start an online store.

    Blossom Shop offers a built-in Instagram section to display photos and enhance your social presence. The theme supports RTL languages, and you can also use it to create a multilingual website.

    15. Storefront

    Storefront

    Storefront is an intuitive WooCommerce WordPress theme. It has a clean layout design to showcase your clothing brand and products professionally.

    The homepage lets you display product categories, featured products, sale items, and more. It has built-in SEO optimization to help your clothing store rank highly in Google and other search engines.

    16. Herringbone

    Herringbone

    Herringbone is a fantastic WordPress eCommerce theme built specifically for clothing stores. It offers a beautiful homepage layout to showcase your products and a sidebar to add product categories.

    This theme lets you display a sale banner in the header section to catch the attention of your visitors. Other features include social media icons, content widgets, and more.

    17. Balance

    Balance

    Balance is a classic WordPress business theme suitable for eCommerce sites. It supports eCommerce features out of the box, and is a perfect choice for clothing brands and online clothing stores.

    Inside, you will find 2 demo sites, a sticky header, a featured slider, multiple homepage sections, and footer widgets. It comes with built-in page templates and also integrates with page builders like Beaver Builder and WPBakery for easy customization.

    18. Open Shop

    Open Shop

    Open Shop is a WordPress clothing store theme with WooCommerce integration. It’s designed for speed and performance. With multiple colors and background options, Open Shop is an eye-catching theme.

    When it comes to features, Open Shop offers custom widgets, product carousel slider, category filter, and more. It also lets you start a blog for your clothing store.

    19. Silk

    Silk

    Silk is a gorgeous WordPress fashion shop and clothing store theme. It comes with a featured post slider, social sharing icons, an Instagram feed display, and a mega menu.

    The theme offers excellent font choices that make your content highly readable. With the built-in style manager, you can customize colors and fonts for the full website easily.

    20. Velure

    Velure

    Velure is a beautifully crafted WordPress theme for boutiques, fashion blogging, and lifestyle bloggers. It has gorgeous typography and lets you present your clothing brand in a stylish and professional way.

    You get a visual customizer to manage colors, fonts, background, and more. Velure is fully responsive and retina ready, meaning your store will look great on all devices.

    21. Modern Store

    Modern Store

    Modern Store is a premium-like free WordPress theme for clothing stores. It has a minimalist, trendy design with all the features you need to add your products and run an online store.

    The theme provides custom color choices, social icons, built-in shopping cart buttons, the option for a custom logo, an ad banner, and more. It also offers a few homepage templates to launch your site quickly.

    We hope this article helped you find the best clothing store WordPress themes. You may also want to check out our guide on the best email marketing services to stay in touch with your prospects and customers.

    If you liked this article, then please subscribe to our YouTube Channel for WordPress video tutorials. You can also find us on Twitter and Facebook.

    The post 21 Best Clothing Store WordPress Themes appeared first on WPBeginner.