13 Best WordPress 404 Error Page Design Examples

Are you looking for the best 404 error page design examples?

The right 404 page will keep visitors on your site for longer and encourage them to convert. By creating an engaging, helpful, and entertaining 404 page, you can give visitors a great experience, even when they see an error.

In this article, we’re sharing some of the best 404 error page designs.

Best WordPress 404 error page design examples

Why You Need to Optimize Your 404 Design

A 404 error happens when the server can’t reach the page someone is trying to visit. Instead of showing them a blank screen, the server displays a 404 page instead.

Most WordPress themes come with a basic 404 template, but these designs are usually basic and simple.

The default WordPress 404 page

They also won’t show any content from your website, such as popular posts that the visitor may want to read, or your site’s navigation menu.

If you show visitors a boring, unhelpful 404 page then they’re more likely to leave your WordPress website, which will increase your bounce rate and hurt your WordPress SEO.

With that in mind, it’s smart to create a custom 404 page that has your own branding and content. You can also help visitors find what they’re looking for by adding search bars, menus, links, and other helpful content.

The easiest way to create a custom 404 design is by using the SeedProd plugin. It is the most popular drag and drop landing page builder, so you can create a custom 404 page without writing any code.

SeedProd also has lots of professionally-designed 404 templates to help you create a beautiful error page, fast.

Once you’ve installed SeedProd, it’s a good idea to turn to your competitors for inspiration. With that in mind, we’ve collected the best 404 error page designs for you to look at.

1. DFY

Many websites use countdown timers to create a sense of urgency and get more conversions using FOMO. However, DFY had made the unusual decision to add a countdown timer to their 404 page.

An example of a 404 page design

This timer counts down the seconds until the visitor is automatically redirected to the homepage. By creating a time limit, DFY immediately makes their 404 page more engaging and pushes visitors to make a decision before time runs out. It’s also an unusual design choice, so it’s guaranteed to grab the visitor’s attention.

The 404 page’s messaging adds to this sense of urgency, making this a very dramatic and compelling page design.

For more information about using time limits on your site, please see our guide on how to add a timer widget in WordPress.

2. OptinMonster

OptinMonster is one of the best email capture plugins for WordPress used by over 1.2 million websites. It has everything you need to turn visitors into subscribers and customers.

Unsurprisingly, OptinMonster uses their 404 page as a lead generation tool with an eye-catching animation and clear call to action.

The OptinMonster 404 page design

Even better, their pitch relates to the visitor’s situation.

When someone lands on a 404 page, there’s a big chance they’ll give up and abandon your website, since they can’t find what they’re looking for.

OptinMonster’s pitch plays into this, by asking: ‘Did you know that over 70% of visitors who abandon your website will never return?’

Since the visitor is already thinking about website abandonment, they’re more likely to act on this statistic. The call to action then offers visitors a free ebook that promises to convert abandoning website visitors into subscribers.

Clicking on the ‘Download Now’ button opens a popup where the person can type in their email address and get their free download.

An example of a lead generation 404 page

As we can see, OptinMonster uses the 404 error to their advantage by creating a pitch that feels very relevant and timely.

If you want to use your own 404 page for lead generation, then you can collect email addresses using SeedProd’s Giveaway, Contact Form, and Optin Form blocks.

Collecting leads using SeedProd's optin form block

3. Kualo

Many websites use gamification to build customer loyalty and keep people coming back to their site.

Kualo have taken this one step further and gamified their 404 page.

A gamified 404 page design

Instead of helping visitors find their way back to the main Kualo website, the 404 page challenges them to a space invaders game.

This turns a frustrating error message into a fun surprise.

Even better, when you run out of lives Kualo gives you an incentive to carry on playing.

An example of a gamified 404 page

The popup offers players a discount on hosting if they manage to score over 1000 points. This is a perfect example of a 404 page that keeps visitors on your website for longer, and adds value to the user experience.

4. TripAdvisor

TripAdvisor’s 404 page is fun and functional, and opens with a joke that’s specific to the travel industry.

When someone lands on your 404 page, they may be frustrated with their experience. Humor can be a great way to re-engage these people.

The TripAdvisor 404 error page

Even better, the jokes always tie into the TripAdvisor brand.

Branding is one of the major benefits of replacing the standard WordPress 404 page with a custom design, and TripAdvisor’s page shows that branding isn’t just custom logos and images. The words on your 404 page are just as important as the graphics.

The 404 page also highlights all the major areas of the TripAdvisor website, which helps visitors find what they’re looking for.

Since navigation is so important, we recommend looking at SeedProd’s Nav Menu block as it lets you build all kinds of menus directly inside the page editor.

Adding a navigation menu using the SeedProd page builder

5. Brett Terpstra

At first glance, Brett Terpstra’s 404 page may look basic but the real power lies in its list of suggested posts.

Brett Terpstra’s 404 page shows a list of posts containing keywords related to the link the visitor was trying to access when they got the 404 error.

A 404 page with dynamic text

It’s a simple trick that adds a lot to the visitor experience.

Personalized content can make your site more useful, engaging, and appealing so it makes sense to extend this to your 404 page.

An example of a custom 404 error page

To learn more about targeted content, please see our guide on how to show personalized content to different users in WordPress.

6. Constant Contact

Constant Contact is another 404 page that uses humor to win over frustrated visitors. The email service provider uses informal language to appeal to their target audience, while also giving visitors an easy route back to the homepage.

The Constant Contact email provider

If you scroll down the page, then you’ll find links to some other important areas of the Constant Contact website.

However, what we really like is the short hover animation that plays every time you move the mouse over one of the blue blocks.

An example of the best 404 page designs

Animation can make a page more engaging, and the multiple hover animations creates a storytelling element as the visitor moves around the 404 page.

There are a few different ways to animate your 404 page, including highlighting and rotating your text using the SeedProd Animated Headline block. For more information, please see our guide on how to add CSS animations in WordPress.

7. IMDB

Most people will encounter your 404 page when looking for something else entirely. Since the 404 error is unexpected, it’s important to reassure visitors that they’re still on your site by maintaining brand familiarity.

IMDB do this in a very subtle and light-hearted way, by showing a famous quote from a movie or TV show.

An example of the best 404 page designs

They also include a link to learn more about the TV show or movie that they’re quoting.

In this way, IMDB’s 404 page reinforces their brand while also giving visitors a fun way to explore their content.

Showing a random quote on your website

Showing random quotes on your 404 page can be fun and engaging. However, it’s still a good idea to provide links to your site’s most important content, just in case the visitor isn’t interested in the link that you’ve chosen at random.

IMDB shows this doesn’t have to be complicated, by including a link to their homepage.

8. Steve Madden

Steve Madden tries to turn an error message into sales by showing their best selling products on the 404 page.

A best selling products section

Even better, they’ve added filters so customers can browse the different products directly from the 404 page.

If you run an online store, then you can easily display your most popular products, products that are on sale, your newest products, and more. Simply add the ‘Best Selling Products’ block to your 404 page and SeedProd will find these products and then add them to your 404 page automatically.

Adding WooCommerce products to a page using SeedProd

When designing your own 404 page, it’s a good idea to use the same header and footer as the rest of your website. This will reinforce your branding and stop visitors from wondering whether they’re in the right place.

This is exactly what we see with Steve Madden’s 404 page, but we particularly like how much content they manage to fit into these two small areas.

A custom website footer

The header and footer helps visitors jump straight to any part of the Steve Madden store, or even third-party sites such as the company’s Twitter and Facebook page.

They even provide access to interactive areas, including a smart product search bar.

A custom website header

9. Apartment Therapy

This 404 design from Apartment Therapy immediately catches the visitor’s attention with a big hero image.

A 404 page with a large hero section

Apartment Therapy also uses this space to reinforce their brand identity, by showing a stylish photo of a kitchen along with a joke about washi tape.

If you want to add a hero image to your design, then SeedProd has lots of ready-made hero sections. These are collections of images, call to actions, and even simple lead collection forms that you can add to your 404 design with a click of a button.

There’s even a section that would look right at home on the Apartment Therapy website.

Adding a hero section to a custom page in WordPress

10. Screaming Frog

Similar to some of the other 404 pages on this list, Screaming Frog uses humor to try and engage with visitors.

However, unlike the other businesses on this list, Screaming Frog creates a tool that helps website owners find and fix broken links. Their 404 page wastes no time pointing out the irony of the Screaming Frog website having a broken URL.

By poking fun at themselves, Screaming Frog delivers a memorable 404 page that doesn’t take itself too seriously.

The Screaming Frog 404 design

The animated background also helps this 404 design stand out from the crowd.

Videos and animations are a great way to make your 404 page more engaging. However, they can add to the 404 page’s loading times so we recommend following our tips to speed up WordPress performance, particularly if you’re using lots of large or high-resolution videos in your 404 design.

11. MonsterInsights

MonsterInsights is the best WordPress plugin for Google Analytics. It allows you to easily install Google analytics in WordPress and shows helpful reports in the WordPress dashboard.

The MonsterInsights is a good example of a branded page. As soon as visitors arrive on this page, they’ll see a unique graphic based on the MonsterInsights logo.

The MonsterInsights custom 404 error design

This is a fun way to let visitors know that they’re still on the MonsterInsights website, even if they’ve followed a broken link.

This page also explains what a 404 error is and suggests some things the visitor can do to fix the error. Helping people solve the 404 error themselves can improve the visitor experience, so it’s a good idea to include this information on your own 404 page.

Even if you encourage visitors to fix the problem themselves, it’s still important to include links to your site’s most important content. The MonsterInsights 404 page gives people a few options by including links to the support page, the MonsterInsights documentation, and the pricing page.

12. MAD

MAD has created a simple but highly interactive page by using toggles to create a 404 error message. You can remove this message by turning all the toggles off, or even create your own message by activating the toggles.

A gamified error page

It’s a very straightforward but enjoyable experience that’s designed to get lots of interaction from visitors. It’s also a very unique 404 page that visitors will remember, and perhaps even share with other people.

This striking design proves that you can build a memorable and entertaining 404 page from a simple idea.

13. Southwest

Southwest’s 404 page tries to help visitors get back on track by explaining what a 404 is and why they may be seeing the error. They even suggest some possible fixes, which might be helpful if your target audience isn’t very familiar with 404 errors.

The Southwest error page

Where this design really stands out is the sheer number of links it manages to display and how neatly these URLs are organized.

If you scroll to the bottom of the screen, then you’ll notice social media links, contact information, a link to join their email list, and dozens of other links all arranged in clear and user-friendly categories.

The Southwest footer

The Southwest 404 page is a great example of how much information you can pack into a page without overwhelming the visitor.

Here, the right layout is key and Southwest does a great job of using categories, lists, and different sections to create a 404 page that’s information-packed but still easy to read.

We hope this article has helped you find the best 404 error page design examples. You may also want to check out our guide on the best WordPress page builder plugins and our comparison of best email marketing services to turn potential leads into paying customers.

If you liked this article, then please subscribe to our YouTube Channel for WordPress video tutorials. You can also find us on Twitter and Facebook.

The post 13 Best WordPress 404 Error Page Design Examples first appeared on WPBeginner.

How to Create an Email Marketing Campaign

Want to just get started? Click here to sign up for Constant Contact and start creating your campaign today

Email marketing is so valuable that the average ROI is $36 for every $1 spent. But when it comes to email marketing campaigns, most people don’t know what to write, or how to structure one. 

If you DO know how to set the right goals and send emails to the right people, campaigns can be an evergreen way to make sales and connect with your subscribers. 

Once you learn how to create a great email campaign, you’ll be able to convert subscribers into customers or followers on autopilot and get invaluable insights into your target audience. 

Plus, you’ll be able to reuse your campaign over and over and keep improving it to get better results every time. 

The Top-Rated Email Marketing Platforms to Help you Create Great Email Campaigns 

If you want to create and send out successful email campaigns, you’ll need to have a reliable email marketing service to help you. Here are our top recommendations: 

  • Constant Contact — Best overall
  • Sendinblue — Best for growing your customer base
  • MailerLite — Best for the essentials at an affordable price
  • Omnisend —Best email and SMS marketing combo
  • Moosend — Best for ecommerce
  • AWeber — Best value for low subscriber count
  • GetResponse — Best for automated lead generation
  • HubSpot — Best for automated email marketing
  • Drip — Best for new ecommerce businesses
  • ConvertKit — Best for influencers, bloggers, and creators

You can read our full review of these email marketing platform here

6 Steps To Creating a Great Email Campaign 

Following the right steps will help you create campaigns that get you results and that your audience actually wants to receive. 

We’ve put together a list of the most important things you need to do when crafting your next campaign:

  1. Set a Goal 
  2. Plot Out Your Email Campaign 
  3. Write the Content 
  4. Set up the Campaign 
  5. Add Automations 
  6. Test Your Campaign 

The Easy Parts of Creating an Email Marketing Campaign 

The easiest parts of creating an email marketing campaign are the technical aspects. 

They may be time-consuming, but actually plugging in the content, choosing who to send it to, and deciding on send times are a lot easier than getting the content right. Especially with all the great email marketing software out there, you can have all the technical stuff done for you in less than a day. 

Our top recommendation for an email marketing platform is Constant Contact because it makes this setup process so easy. Not only does it include plenty of templates, but it also comes with automation and segmentation features to make it easy to manage email campaigns. 

It also comes with A/B testing features, which make it easy to monitor whether your campaigns are working and improve them as you go. 

Screenshot of Constant Contact website page with the question "How experienced are you with email marketing?" and options to choose "Just starting out" or "Up and running"

The Difficult Parts of Creating an Email Marketing Campaign 

One of the most difficult steps you’ll face is creating content that converts your subscribers to paying customers. You’ll have to write powerful copy if you want to see results, and that’s not as easy as it sounds. 

Another part of creating an email campaign that can be hard for many is analyzing the results to create a better campaign. There are so many pieces of the email marketing puzzle that it can be difficult to tell which one(s) to change to get better results and which ones to leave alone. 

Even email marketing experts struggle to know how to improve open rates and sales at times! You may want to rely on the help of an email marketing professional and/or good email marketing software to help you navigate these pitfalls, especially if you don’t have much experience in email marketing. 

Step 1: Set a Goal 

Before you can even think about creating your campaign, you need to know why you’re doing it. 

What do you want your campaign to achieve? Do you want more sales? Do you want people to sign up for your next event? You need to have a clear vision of this before you start creating your campaign, otherwise, you’re wasting your time. 

Decide on Your Why 

Email campaigns usually have a big goal for the end, and are designed to move people through a conversion journey to achieve that goal. Perhaps you want to welcome people to your list or to sell a new product. 

Think about what you would like to convince people to do by the end of your campaign. This will determine what kind of campaign you choose and how you structure your copy. 

Choose Your Type of Campaign 

Now that you know the goal of your campaign, you can decide on the type. 

Do you want to convince new subscribers to buy your course? Then you need a welcome sequence that moves them from unaware to product aware. 

Do you want to offer a discount to people who have abandoned a cart? Then you might want to send a re-targeting email. 

You should research some of the different types of campaigns out there and try to choose the one that will best help you achieve your goal. Here are some of the most common ones:

  • Welcome Series 
  • Re-Targeting Sequences 
  • Abandoned Cart Sequences 
  • New Launch Campaigns 
  • Seasonal Campaigns 
  • New User Drip Campaigns 
  • Promotion Campaigns 
  • Re-Engagement Campaigns 

You can also subscribe to some other lists from people you admire to get inspiration for structuring your campaign. 

Screenshot of an example of an email campaign from the brand Dynamite

Choose a Section of Your List to Send To

Once you know what campaign you’re creating and why, you can decide on who will receive the campaign emails. 

You can choose a small section of your list to receive the campaign. For example, you could send only the most engaged subscribers a campaign to sell them your new ebook. 

Or you can trigger an automation to send a campaign to users after they take a certain action, like joining your list or leaving your landing page. 

Constant Contact includes plenty of segmentation and automation tools to make this really easy. You can choose who you send your email to and when, and set up rules to make this easy to repeat with each new subscriber. You can also trigger specific campaigns like welcome emails or holiday sequences using their library of templates. 

You can get started with Constant Contact here for free

Step 2: Plan Your Campaign 

Once you have the groundwork done, you can start planning the campaign. 

Here’s what you’ll need to consider when you’re putting together an outline: 

Decide on How Many Emails You’ll Send

Most campaigns have between 4-7 emails. 

How many you need will really depend on how many you think it will take to achieve your goals. This will depend on how warm your audience is and what stage of their journey they are on. 

If you are just creating a campaign to get people to attend a free event, it will take fewer emails than convincing people to buy a high-ticket product. 

Choose One Goal for Each Email 

For the best results, your emails should just do one thing. Email marketers like to refer to this as “the rule of one.” 

You want to make it as easy as possible for your subscribers to complete each task or move from email to email without becoming overwhelmed.

If you set a clear goal for them in each email in the campaign, you make it easy for them to move through their journey. Otherwise, they can be overcome by too many choices and won’t take action at all.  

Step 3: Write The Content 

This is one of the most challenging parts of creating an email campaign. Especially if you are selling anything, it will take real skill to get the copy on point to see results. 

The best way to make this work is to hire an email copywriter, but you can also try writing your emails yourself. Here’s what you’ll need to do to have compelling content: 

Use Templates 

If you want to write the copy yourself, it’s a good idea to use templates. You’ll get editable copy that is primed to psychologically move your subscribers through the campaign journey and uses marketing tricks to convert better. 

Just make sure that if you use templates, you have permission. Do NOT try and copy emails others send to your inbox—it’s not worth getting caught!

Examples of templates for email campaigns

Write the Subject Lines 

Surprisingly, subject lines are the hardest part of the email to write. 

You are competing with all the other emails appearing in someone else’s inbox, so you need to stand out, without resorting to clickbait. 

There’s a fine line between catching someone’s attention and tricking them, so think long and hard about what would get someone to open an email, but that still reflects exactly what’s inside the email. 

You can also find suggestions and templates online for subject lines that consistently perform well. You may also be able to find suggestions directly from your email marketing platform of choice. 

Use an Email Marketing Service 

Not all email marketing software tools have templates, but many do. 

They’ll be able to give you an idea of where to add content, how to structure your emails, and what to include to get results. You can use them to help you structure your campaigns, add CTA’s in the right places, and improve your chances of getting your emails opened. 

Hire a Copywriter 

If you really want to boost your chances of getting your emails opened, you should hire a copywriter. 

Email copywriters will know how to write subject lines that get clicked, and how to write content that gets people to take action. They’ll be able to use marketing formulas and the right language to get you results. 

It’s a skilled job for a reason—it takes a lot of learning and practice to write a good email campaign. If you want to see good ROI for your emails, this is the best way to go. 

Step 4: Set up the Campaign 

Once you have your content, you’re ready to actually add it to your email marketing software. 

If you are using the right software, this should be easy. You’ll just need to add in your text, play with the formatting, and decide on the elements you want to add. 

Here’s what you’ll need to set up: 

Add the Copy to the Emails 

With some email marketing platforms, this is as easy as just copying and pasting your content into your email marketing platform. 

With other platforms, you’ll then have to reformat things like italics, links, bullet points, and bolded texts. 

You should check everything carefully to make sure it’s spelled correctly, and send yourself a test email to check for any errors. 

Add any Images or Extra Features 

Images aren’t necessary (and honestly, will just raise spam rates for most emails)

However, sometimes adding a meme or a screenshot can be useful – like a screenshot of a client testimonial. Most email marketing platforms let you easily add in images, gifs, or even emojis. 

Try playing around with what feels right and what fits your brand. Just remember that the more photos or large images in your emails, the more likely you will end up in the spam folder. 

You should also add buttons here to help make your CTAs clearer and easier to find.

Example of email campaign from the brand Moonpig that tells recipient they successfully created an account

Add Any Links or Downloads 

The next thing you’ll want to do is check that any links or downloads are working. 

You can add these directly through the email editor. Again, remember to send yourself a test email when you’ve finished editing to check all the links work and go to the right places. 

Add the Recipients 

You’ll also want to choose and add recipients to your campaign. 

If you’ll be setting up a triggered automation based on behavior, skip to the next step. But if you want to send it to a segment already on your list, now’s the time to select them and get them set up to receive it. 

How you do this will depend on your email marketing software. If you’re lost, you can usually reach out to most email marketing platforms directly for support or read their FAQs. 

Usually, though, you can select Send To and then choose the list or the tag you want your campaign to be sent to. 

Step 5: Add Automations

If you want to get the most out of an email campaign, you should try to set up automation. 

This just means that your subscribers will be tagged based on how they interact with your emails. You can then use this to trigger more emails, or just understand your audience better. 

Here are things you should think about setting up: 

Automate Who Gets the Emails 

If you’re sending out emails to a specific segment of your list, you can automate anyone with a specific tag to receive emails. If you want everyone who behaves a certain way to receive an email, you should automate your email to be triggered by behavior, such as subscribing to your list. 

This helps you save time and makes sure no one misses an email. If you’re sending all your emails manually, it’s easier to make a mistake or forget one of your subscribers. 

Segment Based on Action 

Something else you can do with your email campaigns is to use them to segment your list. 

Segmentation of your list allows you to send more relevant emails to your subscribers, which boosts conversions and brings down spam rates. 

You can segment them with things like Interested in Free Training if they click the link, or VIP Subscribers if they open every email. This might not help you get sales or achieve your campaign goal immediately, but it will help you have more successful campaigns in the future. 

Trigger Emails Based on Behavior 

Another way you can automate your campaign is by triggering emails or actions based on how they interact with your campaign. 

For instance, if someone clicks through a link to buy your course, then clicks away without purchasing, you can automate them to receive a retargeting email. 

Example of email trigger that allows user to choose how long to wait to send email to new subscribers

Step 6: Test Your Campaign 

To get the most out of a campaign and make it as successful as possible, you should test and analyze it to see if it’s working. 

When you test your campaign and try different things, you should hopefully be able to boost your open rates and tweak your campaign until it’s as successful as possible. This includes changing subject lines, CTAs, or even images. 

The great thing about email campaigns is, unlike newsletters, you can send them out multiple times and keep seeing results. So, it’s important to optimize them as much as possible so that every time you send them out, they convert better. 

Analyze the Results 

The first step to testing your emails is to assess how well they are working. 

This includes looking at open rates, click-through rates, how far through the sequence people are getting before they stop opening emails, and looking at unsubscribe rates. 

It’s a good idea to research the normal rates for your industry, so you have a benchmark to measure whether your emails are underperforming or overperforming. You can also look at each email in the campaign and see which ones are getting more opens and which ones aren’t.

Try A/B Testing 

Once you have an idea of what’s working and what isn’t, you can start testing different things to try and improve your results. 

Screenshot of a side-by-side A/B test with two emails that have different subject lines, images, and CTA buttons

A/B testing is available on most email marketing platforms, and just means trying one thing with half your subscribers and another with the other half. After you’ve sent out enough emails to see whether option A or B works best, you can start using the most successful one with all your subscribers. 

This is a good way to look for patterns, and you can use it with everything, including CTAs, subject lines, and formatting. 

How to Disable Directory Browsing in WordPress

Do you want to disable directory browsing in WordPress?

Directory browsing can put your site at risk by showing important information to hackers which can be used to exploit vulnerabilities in your site’s plugins, themes, or even your hosting server.

In this article, we will show you how you can disable directory browsing in WordPress.

How to disable directory browsing in WordPress

What Does Disabling Directory Browsing in WordPress Do?

Every time someone visits your website, your web server will process that request.

Usually, the server delivers an index file to the visitor’s browser, such as index.html. However, if the server can’t find an index file, then it may show all the files and folders in the requested directory instead.

This is directory browsing, and it’s often enabled by default.

If you’ve ever visited a site and seen a list of files and folders instead of a webpage, then you’ve seen directory browsing in action.

A WordPress site with directory browsing enabled

The problem is that hackers can use directory browsing to see the files that make up your website, including all the themes and plugins that you’re using.

If any of these themes or plugins have known vulnerabilities, then hackers can use this knowledge to take control of your WordPress blog or website, steal your data, or perform other actions.

Attackers may also use directory browsing to look at the confidential information inside your files and folders. They might even copy your website’s contents, including content that you would usually charge for such as ebook downloads or online courses.

This is why it’s considered a best practice to disable directory browsing in WordPress.

How to Check is Directory Browsing is Enabled in WordPress

The easiest way to check whether directory browsing is currently enabled for your WordPress website is by simply visiting the /wp-includes/ folder link like this: https://example.com/wp-includes/.

You’ll want to replace www.example.com with your website’s URL.

If you get a 403 Forbidden or similar message, then directory browsing is already disabled on your WordPress website.

A website with directory browsing disabled

If you see a list of files and folders instead, then this means that directory browsing is enabled for your website.

A WordPress site with directory browsing enabled

Since this makes your website more vulnerable to attack, you’ll typically want to block directory browsing in WordPress.

How to Disable Directory Browsing in WordPress

To disable directory listing, you’ll need to add some code to your site’s .htaccess file.

To access the file, you’ll need an FTP client, or you can use the file manager app inside your WordPress hosting control panel.

If this is your first time using FTP, then you can see our complete guide on how to connect to your site using FTP.

After connecting to your site, simply open your website’s ‘public’ folder and find the .htaccess file. You can edit the .htaccess file by downloading it to your desktop and then opening it in a text editor like Notepad.

At the very bottom of the file, simply add the following code:

Options -Indexes

It will look something like this:

The WordPress .htaccess file

Once you’re done, save your .htaccess file and upload it back to your server using an FTP client.

That’s it. Now if you visit the same http://example.com/wp-includes/ URL, you’ll get a 403 Forbidden or similar message.

How to disable directory browsing in WordPress

We hope this article helped you learn how to disable directory browsing in WordPress. You may also want to see our ultimate WordPress security guide, or see our expert pick of the best WordPress membership plugin to protect your files.

If you liked this article, then please subscribe to our YouTube Channel for WordPress video tutorials. You can also find us on Twitter and Facebook.

The post How to Disable Directory Browsing in WordPress first appeared on WPBeginner.

How to Create a Sales Page in WordPress (That Converts)

Do you want to increase sales from your website? 

A good sales page can be the key to converting more website visitors into paying customers thus boosting your profits. 

In this article, we’ll show you how to create a high converting sales page in WordPress.

How to Create a Sales Page in WordPress (That Converts)

What Is a Sales Page?

A sales page has a single purpose: get people to buy your products or services.

You might create a sales page for your new ebook, upcoming conference, subscription box, eCommerce product, or consultancy services. But the goal is always the same: to get more sales for your business.

Every sales page is unique. However, most high-converting pages pitch a product or service, and then follow it with a call to action (CTA)

For example, the OptinMonster sales page below has a clear CTA. This CTA button uses a contrasting color to stand out from the rest of the page. It also draws attention to the CTA by using an arrow.

An example of a sales page with a clear CTA.

People are more likely to purchase things that they see other people buying, using, or recommending. Many sale pages tap into this urge by displaying social proof such as testimonials or reviews. 

This may all sound very familiar. In fact, at this point you may be wondering: isn’t this just a landing page

Sales pages and landing pages have lots of things in common. Sometimes, landing pages are created to sell products and services.

But not always. You might create a landing page to increase newsletter signups, or to promote your upcoming webinar.

However, a sales page is always about making a sale.

That said, let’s take a look at how you can create a sales page in WordPress that converts. We’ll show you 2 methods, so simply click the links below to jump to the method you prefer:

Method 1. Creating a WordPress Sales Page Using SeedProd (Recommended) 

This method is the easiest and recommended for all WordPress users.

For this method, we’ll be using SeedProd. It is the best landing page builder for WordPress. SeedProd allows you to easily create beautiful page layouts that will help you get more sales.

SeedProd Website Builder Coupon Code

SeedProd works with many popular third-party tools that you may already be using to drive sales. This includes top email marketing services, WooCommerce, Google Analytics, and more.

The first thing you need to do is install and activate the SeedProd plugin. For more details, see our step by step guide on how to install a WordPress plugin.

Note: There is a free version of SeedProd plugin available on WordPress.org, but we will be using the Pro version since it offers more powerful features. This includes a wide selection of professionally-designed sales page templates. 

After activating the plugin, SeedProd will ask for your license key.

The SeedProd page builder for WordPress.

You can find this information under your account on the SeedProd website. After entering your license key, go to SeedProd » Landing Pages in your WordPress dashboard.

Here, click on the ‘Add New Landing Page’ button. 

How to create a new landing page, using SeedProd.

SeedProd comes with 150 professionally designed templates for different campaign types, such as lead squeeze and coming soon campaigns. Since we want to boost our sales, go ahead and click on the Sales filter.

You can now check out all of SeedProd’s templates. To take a closer look at any design, simply hover your mouse over that template. Then, click on the magnifying glass icon.  

SeedProd's wide selection of templates.

When you find a design that you want to use, click on ‘Choose This Template.’ You can now give your sales page a catchy title and enter its URL. This is the web address where your sales page will appear. 

A descriptive URL can help the search engines understand your page’s contents. This can make it easier for them to deliver your page to the right users. With that said, it’s a good idea to include relevant keywords in your URL.

Next, click on ‘Save and Start Editing the Page.’ This will load the SeedProd page builder interface. 

This simple drag and drop builder shows a live preview of your page to the right, and a toolbar on the left.

An example of a SeedProd sales template.

Blocks are the core components of all SeedProd layouts. You can build an entire sales page simply by adding these ready-made blocks to your layout, including headlines, buttons, and images.

You can also use SeedProd blocks like spacers, columns, and dividers to help organize and structure your sales page. 

It’s easy to customize any SeedProd block. Simply click on the block, and the toolbar will display all of the settings for that block. 

A sales page, created using SeedProd.

SeedProd comes with many blocks that are perfect for building a sales page that converts.

For example, you can add testimonials, pricing tables, star ratings, and countdown blocks.

SeedProd's countdown block.

You can also move blocks around your layout by dragging and dropping them. This makes it easy to create a beautiful and engaging sales page with a totally custom layout.

SeedProd comes with ‘Sections’ too. These are rows and block templates that can help you quickly create a sales page. To boost your sales, you may want to take a look at sections such as Hero, Call To Action, Features, and FAQ.

You can see all of these sections by clicking on the Sections tab.

SeedProd's selection of Section designs.

From here, you can preview any section by hovering over it. When the magnifying glass icon appears, give it a click. 

To add this section to your page, click on ‘Choose This Section.’ SeedProd will now create the section at the very bottom of your sales page. 

SeedProd even provides a number of WooCommerce blocks. This includes a handy Add To Cart block, plus blocks where you can showcase your Top Rated Products and Best Selling Products. 

SeedProd's WooCommerce blocks.

This makes it easy to create a sales page that promotes your WooCommerce products, services, or events. By choosing SeedProd, you can also design a sales page without being restricted by your WooCommerce theme

While you’re working on your sales page, you can preview your design by clicking on the Preview button. This launches your sales page in a new tab. 

When you’re happy with your design, you can click on the Save button and then choose Publish.

How to publish a sales page, using the SeedProd page builder.

Your sales page will now go live on your WordPress website.

You can use the SeedProd drag & drop builder to even create completely custom WordPress themes without writing any code.

Method 2. Creating a WordPress Sales Page Using the Block Editor

WordPress has a built-in block editor that makes it easy to create unique designs using ready-made blocks.

If you want professionally-designed templates, plus blocks that are optimized for conversions, then we still recommend using a page builder. Having said that, it is possible to create a sales page using only the WordPress block editor if you’re on a tight budget and just getting started.

When working with the block editor, a flexible and user-friendly WordPress theme is a must-have. In this post we’ll be using the multipurpose free Astra theme. Since it’s multipurpose, Astra is the perfect theme for a wide range of websites.

First, create a new page by going to Pages » Add New in your WordPress dashboard. You can now give your sales page a title.

The WordPress Gutenberg editor.

We’ll start at the top with our page’s header. In the header, you’ll typically want to establish your brand identity using elements like your company logo and your color scheme.

Let’s get started by adding a logo. Simply click on the black + icon and then search for Site Logo. 

The WordPress block editor.

After adding the Site Logo block to your design, either upload a new image or select a graphic from your WordPress Media Library.

The Cover block is another good choice for the top of your sales page. This block lets you add a background image and an overlay, or wash of color that you add to your background image. An overlay can be an easy way to add your brand colors to an image.

The Cover block also has space where you can add some text. This is perfect for pitching your brand to potential customers.

To add a Cover block to your design, click on the black + icon. Then, search for Cover. When this block appears, add it to your sales page.

A WordPress Cover block.

You can now customize the Cover block using the Block sidebar. This is your chance to add a background image and optional colored overlay, plus some text. To make your words stand out, you may want to try different colors and sizing.

Most sales pages contain a pitch for the product or service. You’ll also often want to include an image, such as a photo of your product.

WordPress has a block where you can display both text and images in a nice layout. This Media & Text block creates a two-column layout with an image on one side, and text on the other. 

WordPress' Media & Text bock.

For a sales page, you’ll typically need a way to accept payments. By default, WordPress does not support credit card payments, but there are plenty of plugins and tools that can help solve that.

You can create a payment button using WP Simple Pay. This plugin gives you an easy way to accept credit card payments, bank transfers, and more.

Another option is to create an order form using WPForms and embed it on your sales page. WPForms is the simplest way to accept payments in WordPress. You can also use it to create other useful forms, including forms that can help you capture leads.

You can now keep adding blocks to build your perfect sales page.

When you’re happy with your design, click on the Publish button. Your sales page is now live, and ready to start converting your traffic into paying customers. 

Taking Your Sales Page to The Next Level

A beautiful, professionally-designed sales page can boost your sales. However, there is always room to improve your conversion rates

With that in mind, here are some other useful WordPress plugins that can help you get even more sales: 

  • All in One SEO (AIOSEO). This beginner friendly search engine optimization toolkit can help you drive more people to your sales page from search engines. More traffic means more chances to convert visitors into customers.
  • MonsterInsights. Monitoring your page’s stats can help you find out what’s working and not working. You can then tweak your content, and optimize your design to get even more sales. The easiest way to measure important metrics in WordPress is using MonsterInsights. It’s the best WordPress analytics plugin and is used by over 3 million websites.
  • OptinMonster. OptinMonster’s exit-intent popups can convert abandoning visitors into paying customers. This popup plugin tracks the visitor’s mouse movements as they browse your sales page. This allows the plugin to detect the precise moment the visitor is about to leave, and prompts them with a personalized campaign.
  • TrustPulse. TrustPulse is the best WordPress social proof plugin on the market. It uses the FOMO effect by displaying real-time notifications of activities that users are taking on your sales page. It also comes with built-in analytics that let you monitor and improve your page’s conversion rates. 

We hope this article helped you learn how to create a sales in WordPress that converts. You can also go through our guide on how to add push notifications on your website, or our expert picks of the must have WordPress plugins for business websites.

If you liked this article, then please subscribe to our YouTube Channel for WordPress video tutorials. You can also find us on Twitter and Facebook.

The post How to Create a Sales Page in WordPress (That Converts) first appeared on WPBeginner.

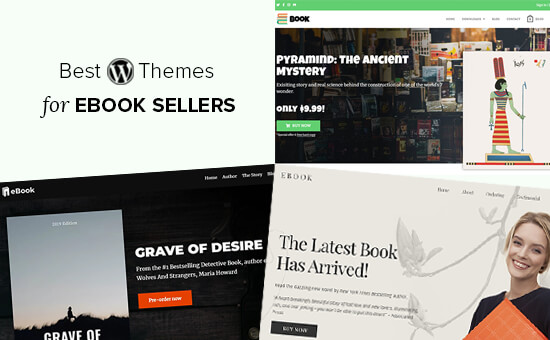
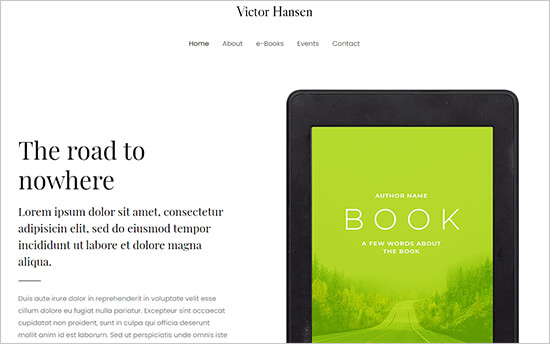
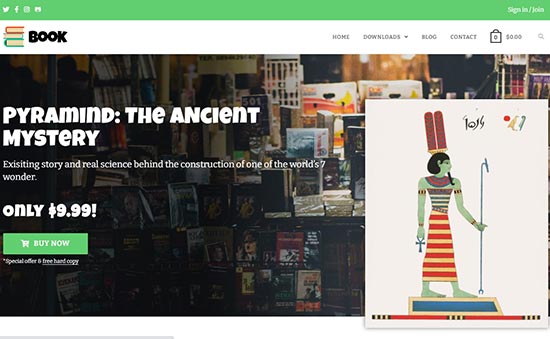
21 Best WordPress Themes for Selling eBooks

Are you looking for the best WordPress themes for selling ebooks?

There are dozens of WordPress themes designed to promote and sell digital products. You can easily select a professional theme that matches your requirements for design and features.

In this article, we will share some of the best WordPress themes for selling ebooks that you can use.

Best WordPress Themes for Selling eBooks

Building a WordPress Website to Sell eBooks

WordPress is an excellent platform to sell ebooks online. It lets you have full control over how you sell your books. You also get to keep all the profit, without Amazon or another retailer taking a cut.

Many large publications and brands are using it around the world.

It’s important to make sure that you’re using the right version of WordPress as there are 2 different types. WordPress.com is a hosting platform that provides a limited version of the WordPress software. WordPress.org is open-source software that anyone can install on their website in full.

Take a look at our full comparison between WordPress.com vs WordPress.org for more details.

For your ebook selling website, you will need self-hosted WordPress.org. This gives you full control and comes with all the features you need.

But first, you will need to purchase a domain name (typically $14.99/year) and WordPress hosting ($7.99/month). You will also need an SSL Certificate ($69.99/year) to accept payments on your website.

That’s quite a lot of money if you’re just getting started with selling ebooks.

Bluehost, an official WordPress and WooCommerce recommended hosting provider, can help. They have agreed to offer WPBeginner readers a free domain name, free SSL certificate, and a BIG discount on web hosting.

This means you can get started for just $2.75/month.

Bluehost offer for WPBeginner readers

→ Click Here to Claim This Exclusive Bluehost Offer ←

After purchasing hosting, the next step is to install WordPress. Once you’ve done that, simply follow our step by step guide on how to make a website.

Let’s take a look at some of the best WordPress themes for selling ebooks for your website.

1. Astra

Astra

Astra is the best WordPress multipurpose theme to create a website and sell ebooks online. It comes with a few built-in templates to set up your book store quickly.

The theme provides color choices, custom backgrounds, beautiful fonts, and header options. It has quick layout settings for page templates, including the blog page, cart page, and checkout page.

2. OceanWP

OceanWP

OceanWP is a fantastic free theme with premium-like features. This super flexible WordPress theme comes with fast page load time, mobile-responsive layouts, and support for multilingual languages.

It includes advanced options to set up a modern homepage layout. It also works with all popular page builder plugins like Beaver Builder, so you can create your own layouts as well.

Plus, OceanWP is built with good SEO (search engine optimization) in mind. You can also easily add extra widgets such as social icons and a MailChimp widget using the Ocean Extra plugins.

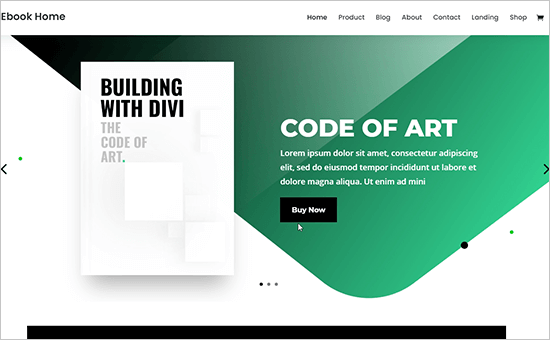
3. Divi

Divi

Divi is a modern WordPress multipurpose theme. It’s packed with hundreds of ready-made templates that you can use to launch your ebook selling site quickly.

These templates and the Divi builder’s drag and drop interface make it easy to design a professional website. Make sure that you’re using a professional email address too.

Divi has built-in elements. modules, and customization options to fine-tune how your website looks. You can also undo, redo, or revise your changes with an easy theme options panel. It’s also easy to add social media icon links.

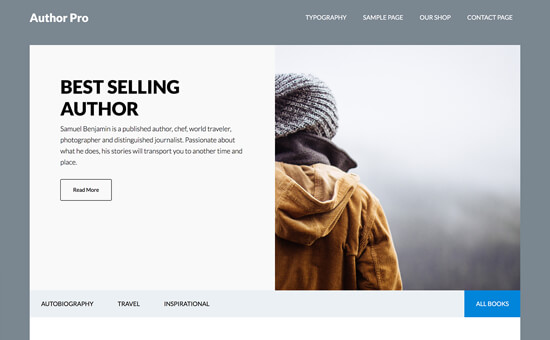
4. Author Pro

Author Pro

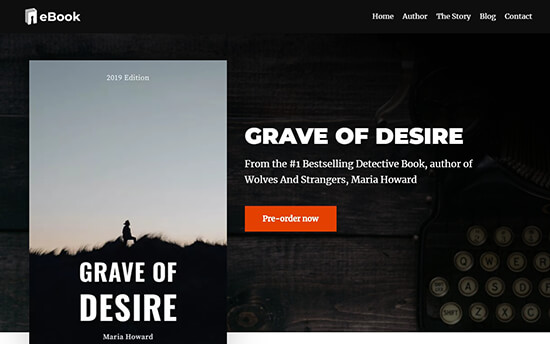
Author Pro is a classic WordPress ebook selling theme for book authors. It’s built on top of the Genesis Framework, making it powerful and robust.

Author Pro lets you display featured books on the homepage in an eye-catching way. You can fully integrate eCommerce features into the theme to sell your books online.

StudioPress is now part of WP Engine, the most popular managed WordPress hosting company. You can get this theme and all 35+ other StudioPress themes when you sign up for WP Engine hosting to build your website.

Bonus: WPBeginner users also get an additional 20% OFF. Get started with WP Engine today!

5. Ultra

Ultra

Ultra is a professional WordPress multipurpose theme with tons of flexible layout options. It comes with a few ready-made templates that you can install in 1-click to launch your website. Then, you just need to replace the demo content with your own for your online bookstore.

Ultra also offers a built-in drag and drop page builder to create custom page templates and landing pages.

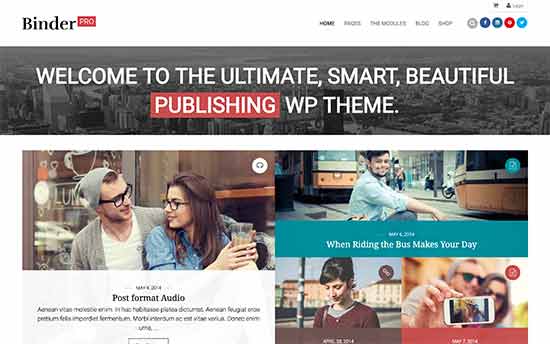
6. Binder Pro

Binder Pro

Binder Pro is a WordPress theme ideal for publishers, eCommerce websites, and book selling. It’s a magazine style theme with ready-made templates for different niches and industries.

Binder Pro takes a modular approach to design and lets you build pages instantly. It has pricing tables, sliders, contact form, multiple headers, and an easy customization panel.

7. Ecommerce Fashion

Ecommerce Fashion

Ecommerce Fashion is a classic WordPress theme that’s ideal for bloggers who want to sell fashion or lifestyle-related ebooks. It features a drag and drop homepage layout that lets you add useful sections in 1-click.

The theme features include a full-width header image, product reviews, latest product widget, recent posts, and beautiful blog section. It has a simple and powerful custom theme options panel that lets you set up your website quickly.

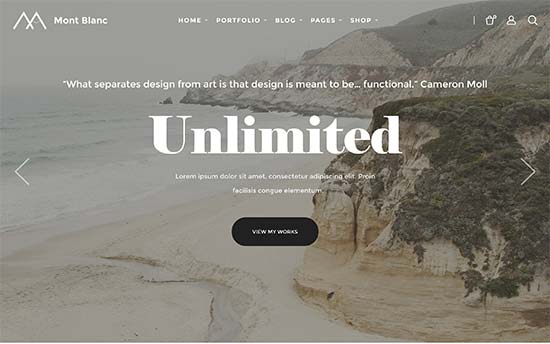
8. Montblanc

Montblanc

Montblanc is a modern WordPress theme designed to boost lead generation and increase sales. It comes in 5 layouts for blog, homepage, and shop front.

Montblanc includes multiple widgets for cart popup, login, and user registration. It even has an account page for users to manage and download their ebooks seamlessly, like a virtual bookshelf. This makes it a great choice for any publishing house.

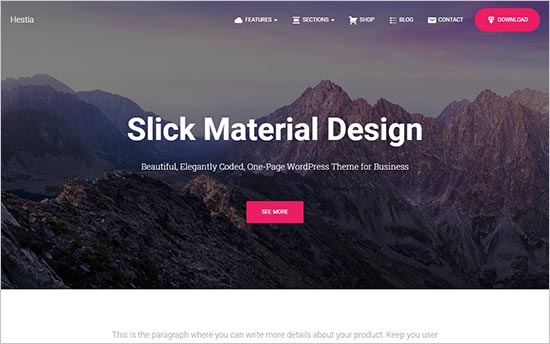
9. Hestia Pro

Hestia Pro

Hestia Pro is a one-page WordPress theme that comes with multiple starter sites and page templates. It supports page builders such as Visual Composer and WPBakery. This means you can design custom landing pages easily.

The theme works with popular WordPress plugins to extend the functionality of your site. You can also integrate it with Easy Digital Downloads to sell your ebooks online.

10. Noto

Noto

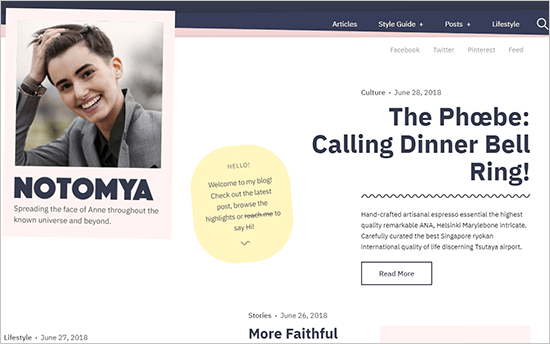
Noto is a free WordPress theme for writers and digital book sellers. It offers a creative template with multiple colors, motion effects, and more.

With Noto, you can display your introduction in the top fold of your website. Other notable features include newsletter signup form widget, RTL language support, multi-column layout, and featured images.

11. Narcos

Narcos

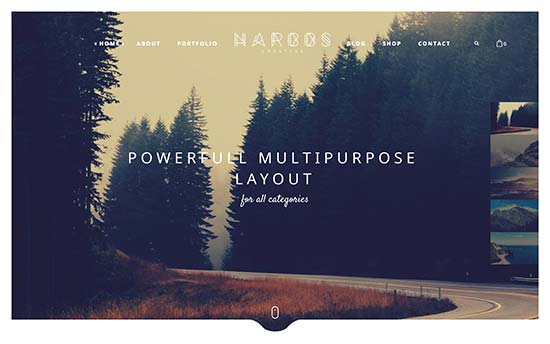
Narcos is a stylish WordPress theme for selling ebooks. It’s a beautifully designed multipurpose WordPress theme with parallax background effects, engaging product pages, and a modern shopfront page.

It includes homepage sections to add team members, testimonials, sliders, contact us form, Google Maps, and more. It’s highly optimized for speed and performance.

12. No Sidebar Pro

No Sidebar Pro

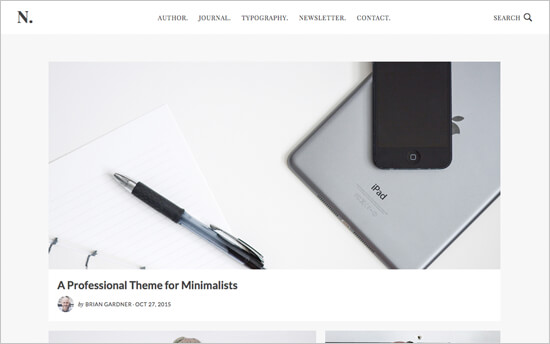
No Sidebar Pro is a premium WordPress theme with beautiful fonts and light colors. It makes a great ebook WordPress theme as it gives you lots of control.

With custom page templates, you can create an ebook selling landing page to maximize your sales. The theme is translation ready to convert your site into any language using a plugin such as WPML.

13. Convert

Convert

Convert is a minimalist WordPress theme to sell ebooks. It has a beautiful layout and comes with an easy to use drag and drop homepage with unlimited color choices.

It includes custom post types for portfolio, careers, events, testimonials, and more. With the multi-column layout, it’s easier to fit in more content and images on your site.

14. Neve

Neve

Neve is an excellent WordPress all-purpose theme for any type of website. It comes with seamless WooCommerce integration to create an ebook selling store.

The theme is very customizable with tons of header and footer layouts, color choices, custom backgrounds, and more. It also ships with built-in starter sites to launch your online ebook shop in just a few minutes. It’s fully compatible with all standard WordPress plugins, so you can add things like a mega menu to your site.

15. Shoppe

Shoppe

Shoppe is a WordPress eCommerce theme designed for online stores. It comes with 3 demos and a 1-click installer to give you a quick start.

It has a built-in drag and drop builder with 14 header styles, 9 archive layouts, 6 footer styles, and many custom widgets. It’s also WooCommerce ready with options that include a product slider, quick view, and detailed product pages. These help you sell more books to the booklovers who visit your site.

16. Balance

Balance

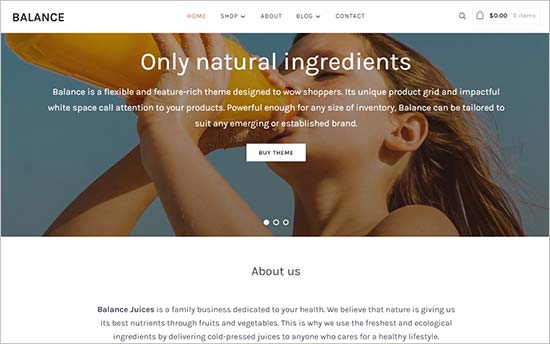
Balance is a feature-rich WordPress theme designed to impress your customers. It features a welcome section with a call-to-action button, followed by your featured products or book previews in a grid layout below.

It comes with a widgetized homepage layout, and all theme options are available in the live theme customizer. There’s also a theme options panel for general theme settings.

17. Integral

Integral

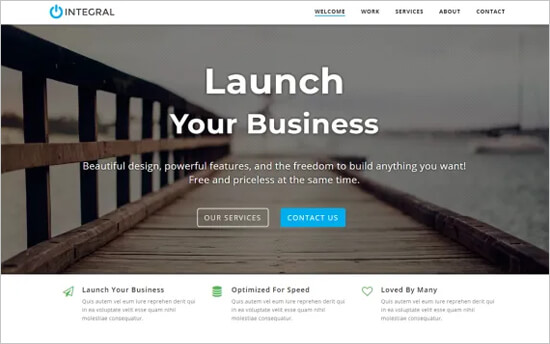
Integral is a great free WordPress theme that you can use to sell ebooks. It is a one-page WordPress theme with eCommerce integration.

The homepage offers a full-width header image with call-to-action buttons. Below that, you can add different sections, including portfolio, products, blog posts, and more.

18. Daylight

Daylight

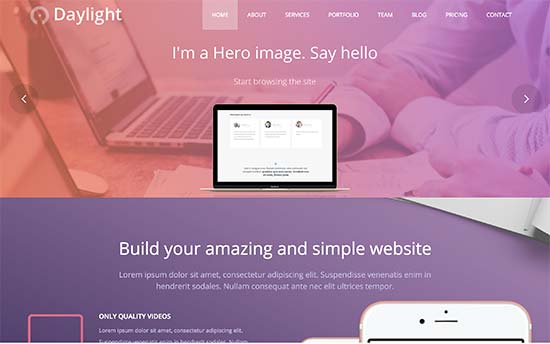
Daylight is a modern WordPress multipurpose theme for business websites. It comes with full WooCommerce support so you can use it for selling ebooks or any other digital products like software, music, or apps. With WooCommerce, you can take payments through PayPal, Stripe, Authorize.NET, and more.

It includes 2 homepage designs, 10 page templates, multiple portfolio templates, Google Fonts, and shortcodes.

19. Safreen

Safreen

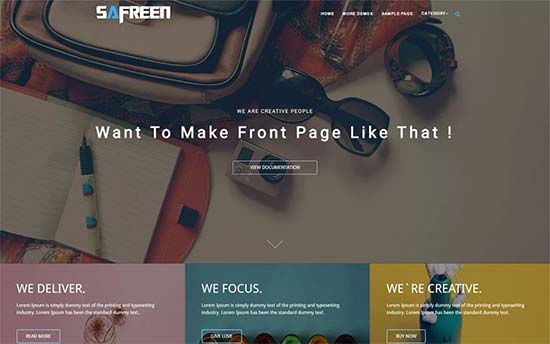
Safreen is a free WordPress theme designed to sell ebooks online. It comes with a flat layout design with a large fullscreen header, followed by a grid layout.

It integrates with your favorite drag and drop page builder like Elementor Pro for customization. You can also use the WordPress live customizer to change colors and rearrange homepage sections.

20. Float

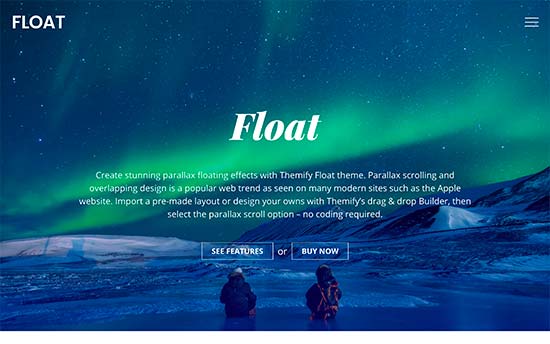
Float

Float is a colorful WordPress theme that you can repurpose to use for any kind of website. It comes with tons of templates, header and sidebar styles, and built-in Themify page builder.

It also includes a custom theme settings page, live customizer support, and a 1-click demo content installer to set up your website quickly. It uses responsive design so will look great on all devices and screen sizes.

21. Academy Pro

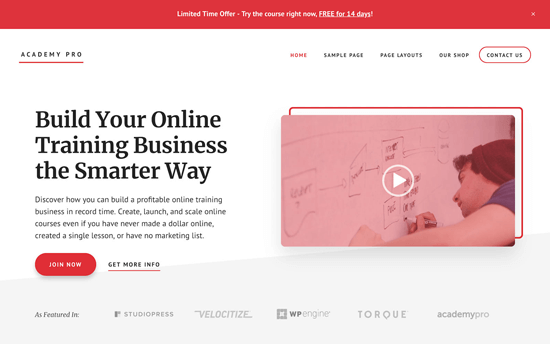
Academy Pro

Academy Pro is an elegant WordPress education and online courses theme. It comes with a built-in membership system for users to sign up for book reading or purchasing books from your site.

Academy Pro supports video embeds to promote your books, courses, and educational content. With full eCommerce support, you can set up your book store and sell ebooks online.

We hope this article helped you find the best WordPress theme for selling ebooks. You may also want to check out our list of the best WordPress plugins to take your site further and help you sell more ebooks.

If you liked this article, then please subscribe to our YouTube Channel for WordPress video tutorials. You can also find us on Twitter and Facebook.

The post 21 Best WordPress Themes for Selling eBooks appeared first on WPBeginner.

6 Free Data Mining and Machine Learning eBooks

It feels like we’ve been saying "this has been the year of artificial intelligence" for the last half a decade or so. But, as the decade reaches its conclusion, it’s undoubtedly the case that if you had to characterize the changes — social, commercial, political — the world has undergone over the last 10 years, the big data boom and artificial intelligence would be the key technology trends.  

The spotlight is generally on the ripple effects of these technologies; very rarely is it on the people and processes through which these technologies are built and deployed. That’s a shame because if we did we’d have a much greater sense of the opportunities open to us — whether that’s from a personal career perspective or a business one, we’d start to see that we’re still very far from mass adoption and usage. These are trends that remain in the hands of the largest companies with the most money to spend.  

What Makes or Breaks an Ecommerce Purchase?

Every ecommerce sale can be tied to a decision made by the consumer. There’s a moment in the customer journey process that sways people to buy or pass on a product.

What defines this moment?

I often get asked what makes or breaks an online purchase. If you don’t know the answer to this, then you can’t run a successful ecommerce operation.

Lots of experts out there will tell you to “do this” or “do that” to increase ecommerce sales. But I always let the data do the talking for me.

Sure—in theory, nearly every strategy sounds good. However, if you can’t tie those strategies to concrete evidence, then it’s just guesswork. I don’t know about you, but I wouldn’t let my business rest in the hands of someone’s best guess.

That’s why I’m always on the hunt for the newest research and studies related to ecommerce and consumer behavior.

I recently stumbled upon an ebook called Understanding the Future of Ecommerce Personalization, published by AB Tasty.

The ebook reports the findings of a study where 2,000 people were surveyed throughout the globe. The survey questions were used to discover the advantages, concerns, and frustrations of consumers shopping online.

Based on these findings, I was able to draw conclusions on the factors that make or break an ecommerce sale.

When in doubt, turn to the data. All of the data below came from the AB Tasty report. I’ve thrown in my own two cents as well to provide actionable steps for ecommerce websites.

Improve Your Product Pages

Any visitor that lands on your product pages didn’t do so by mistake. By this point in the buying process, the consumer has already identified their need or want for a specific product.

From your product page, people are just a click or two away from finalizing a purchase. That’s why these pages need to be perfect.

It’s no secret that the ecommerce industry is booming. People are buying online more than ever before. But with that said, the process of buying something online has its flaws.

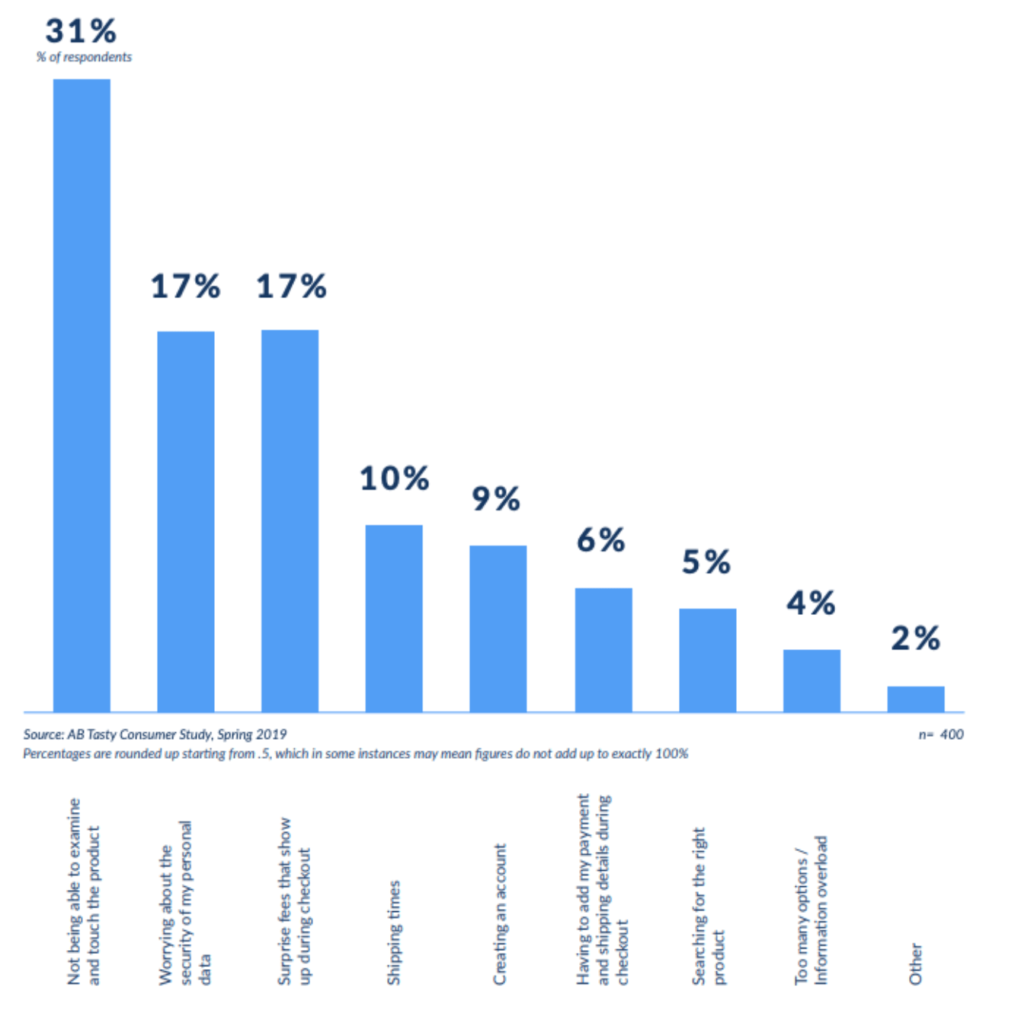
According to the research by AB Tasty, being unable to touch, feel, and examine a product is the most frustrating part about shopping online.

AB Tasty Study

As you can see from the graph, this response dominated the other pain points.

Touching or feeling a product through the Internet is obviously not realistic, at least not in this lifetime. So your product pages must emulate that in-store experience as much as possible.

One or two images just won’t get the job done. You need to use lots of high-quality images of whatever you’re selling and show the product from every angle. The idea here is that you don’t want your customers to be surprised when the product arrives at their doorstep. It should be clear based on the product page. If there is any doubt, the consumer won’t buy.

Subtle changes on your product page can make a huge difference.

For example, Seafolly, an Australian swimwear brand, increased transactions by 7% after simply enlarging photos in their shopping carts.

A highly optimized product page goes beyond photos. It encompasses your branding, pricing, product descriptions, and more.

Analyze your existing product pages and ask yourself if you’re telling the full story. Can a customer look at this page and get all of the information that they would get if they could touch or feel it in a store?

I could argue that selling online gives you an advantage to brick and mortar shopping. In a store, customers can’t read a product description or watch a video demonstration of how to use the item. Use these tools to your advantage.

Offer Free and Fast Shipping

Price will always have an impact on the consumer’s decision to buy. People will look at the cost of your products and immediately decide if they are still interested.

There is nothing wrong with this. Your pricing strategy shouldn’t appeal to everyone and anyone with Internet access.

But when you add on extra fees, like shipping costs, it can turn people away who were previously interesting in buying.

If you refer back to the graph about the biggest pain points of buying online, you’ll see that “surprise fees” is tied for second in terms of the highest response rate at 17%. Furthermore, 10% of people surveyed said that “shipping times” were the most frustrating part about shopping online.

That means more than one-fourth of consumers worldwide have frustrations and pain points related to shipping when they shop online.

This is something that you can’t afford to ignore. Your shipping practices could be turning away one in four shoppers that land on your website.

Whether you’d like to admit it or not, you’re competing with Amazon. Your customers are used to getting two-day or even next-day free shipping. That’s become the new standard in online shopping.

So it’s hard for people to justify paying $7.99 in shipping costs to get their package delivered in a week. You need to offer fast and free shipping. There’s no way around it.

If necessary, adjust the prices of the products to make up for the difference. Even if it means a 10% or 20% raise in your pricing across the board. As long as your customers aren’t seeing prices that they perceive as “extra” it will increase their chances of buying.

Run Sales and Promotions

Personalization was a major theme in the study published by AB Tasty. After all, the word “personalization” is in the title of their ebook.

The reason why personalization is such a key factor in making or breaking an ecommerce sale is because it starts early on in the buying process. You can’t wait until the checkout page to try and implement a personalization strategy. But personalized sales and offers will guide your customers to make a decision.

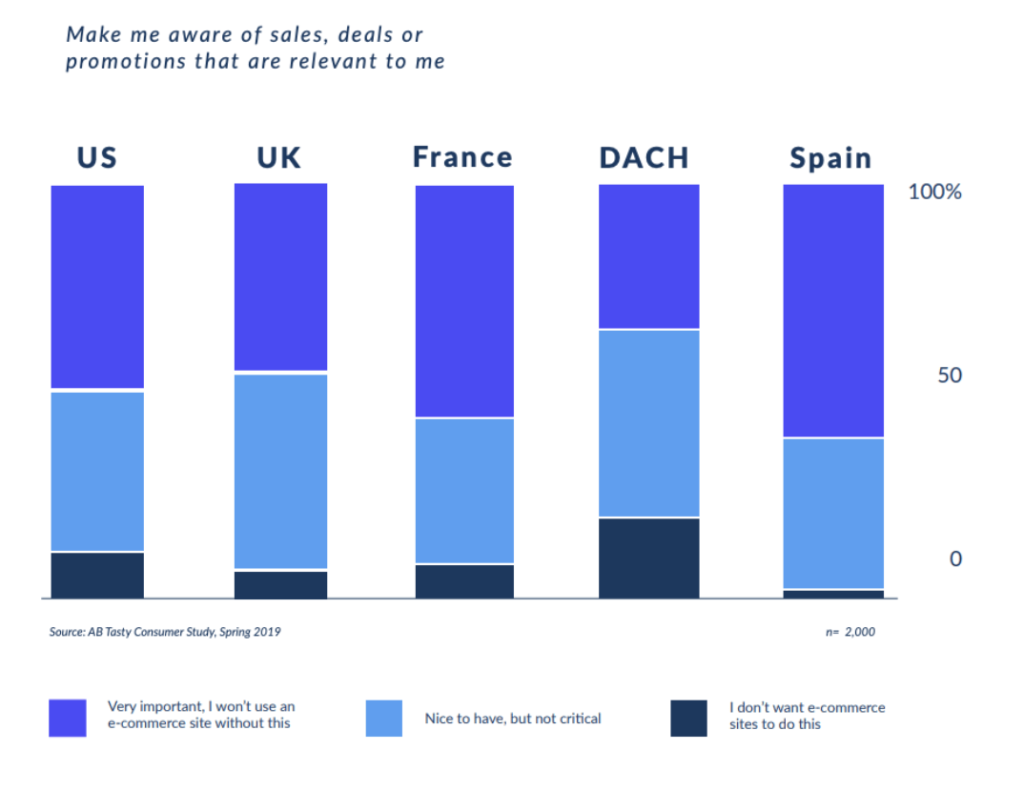
Take a look at this graph, which gives a global perspective on how consumers feel about personalized sales, deals, and promotions.

promotions

While the results vary slightly by region, you can see that the majority (nearly 50% or more) in four of the five regions say they wouldn’t even shop at an ecommerce site that didn’t give them personalized offers.

At a minimum, the overwhelming amount of consumers surveyed agreed that personalized options were nice to have.

Just a fraction of respondents in every region said that they don’t want personalized offers. But you need to stick with the majority here.

Personalized offers can come in all different shapes and sizes. For your existing customers, it could mean sending them an email with a new product or discount related to their purchase history.

For example, let’s say you own an online sports equipment store. A customer buys a snowboard and snowboarding boots. After they make that purchase, you can send them an email for discounts on things like snowboarding goggles, a snowboarding jacket, a ski mask, and gloves.

Sometimes personalization can be based on something simple, like the physical location of your website visitor.

If someone is shopping from Hawaii, you probably shouldn’t be promoting snowboards and skiing equipment on the homepage. A surfboard, kayak, or paddleboard would be a better option.

Be Transparent About Data Security

To truly personalize the customer experience, ecommerce brands are collecting data related to the browsing behavior of website visitors.

While consumers want personalized offers, they still have concerns about privacy. Based on the graph we saw earlier about the frustrations of online shopping, 17% of consumers say they are worried about the privacy of their personal data. That was the second highest response on the list.

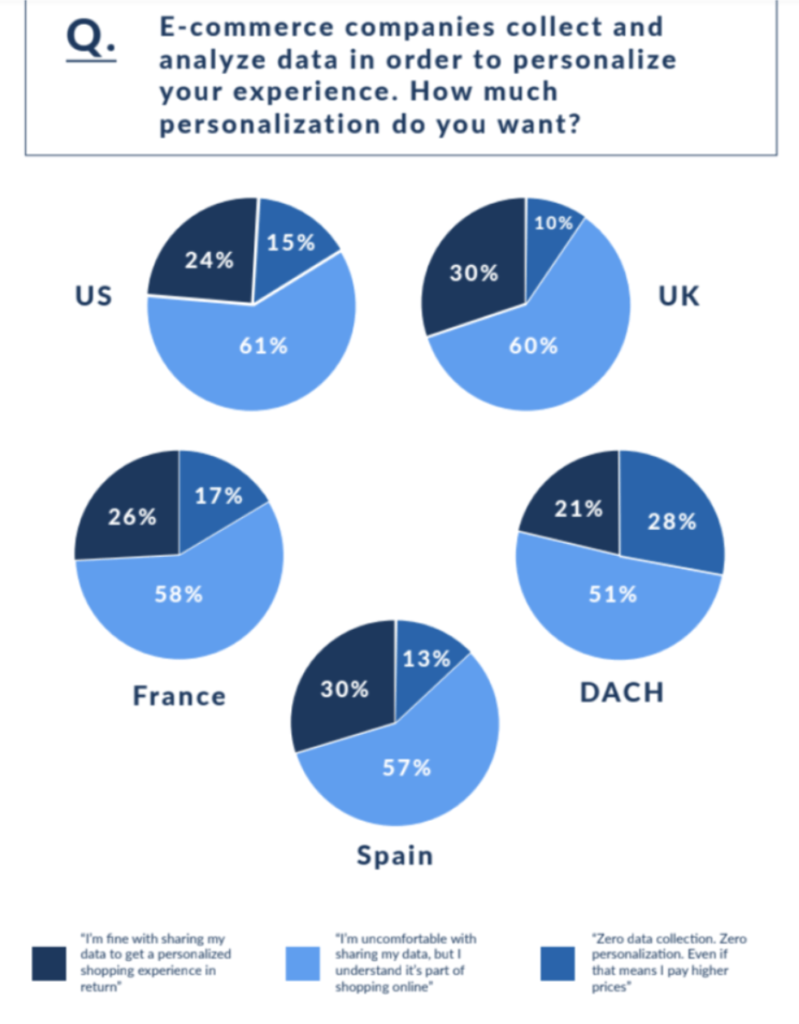
AB Tasty took that one step further, by asking consumers how they felt specifically about this topic. These are the results:

The results are pretty similar in every region. The majority of people admit that they are uncomfortable sharing their personal data, but they understand that it’s part of shopping online.

Roughly 25% of consumers are fine with data collection and don’t have any concerns about it.

A small, but still significant, percentage of respondents say they don’t want any data collection. They would even be willing to pay higher prices to avoid it.

I found these results interesting, especially when you compare them to the graph that we saw earlier related to consumers wanting personalized sales and promotions.

There is no doubt that people want personalized offers. But they are still uneasy about where those offers come from. The idea of being tracked online makes people uncomfortable.

It’s all about context. As an ecommerce store, you need to understand this.

Be transparent and tell your website visitors how and why you’re using data collection practices. Emphasize the benefits, instead of just stating that you collect data. Explain that the value of personalization outweighs any perceived disadvantages of data collection.

Entice Customer Loyalty

One of the biggest benefits of ecommerce personalization is customer loyalty.

It benefits you as the store owner because your customers will keep coming back and buying more products. But it also benefits the customer because it improves their online shopping experience.

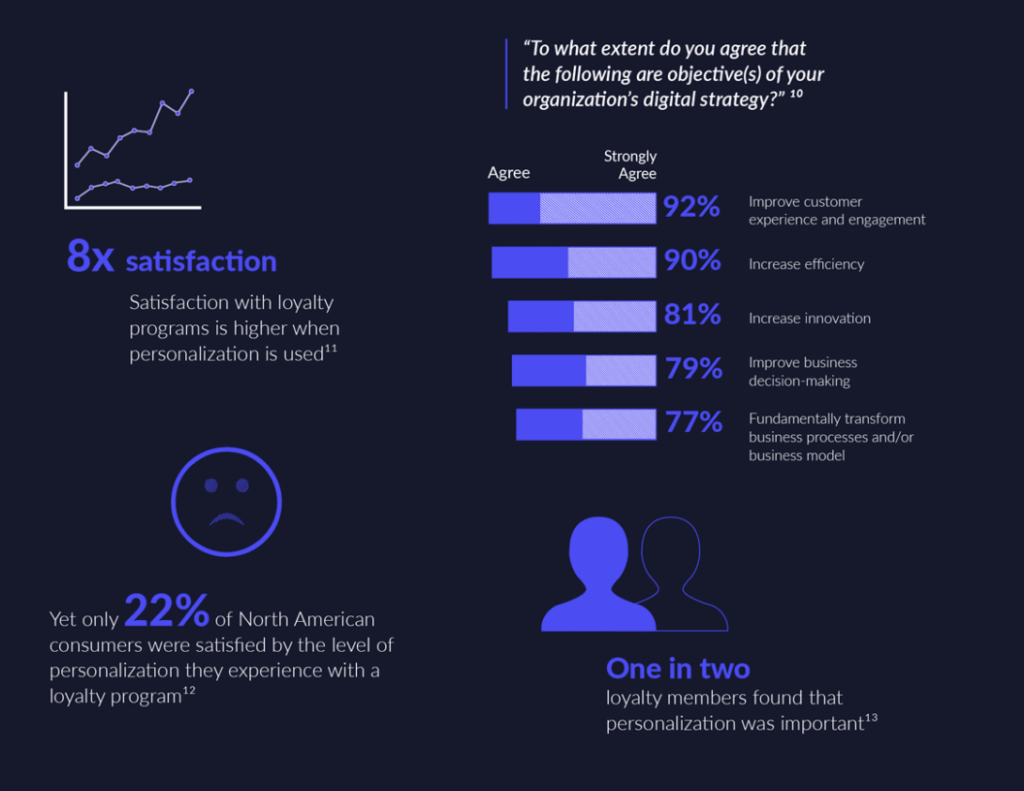
Check out the statistics on this infographic related to personalization and customer loyalty.

loyalty

The results show that simply offering a customer loyalty program isn’t enough. The most successful loyalty programs are paired with personalization.

In fact, customer satisfaction with loyalty programs is eight times higher when personalization is used. So how can you accomplish this?

The best customer loyalty programs are based on rewards. So you need to find a way to reward your customers for shopping. But if you treat all customers and purchases the same, it won’t add any personalized value to each person.

Think of a punch card at a local coffee shop. Every time you buy a coffee, the cashier punches a hole in the card. After you buy nine coffees, the tenth one is free. That’s a basic loyalty program.

The problem with this system is that it treats all purchases the same. Customers buying a $1 espresso are getting the same rewards as someone buying a large $7 specialty drink.

So when you create an ecommerce loyalty program, you could reward customers based on the amount they spend, rather than just the frequency of their purchases.

This adds a higher level of personalization to the program since no two people will have the exact same total spending. When a customer tracks their status in the loyalty program, they can clearly see that the offers are geared specifically toward them.

AB Testing

Your ecommerce store will never be perfect.

Yes—you can use the tips I’ve used in this guide to make changes to your product pages, homepage, and checkout process. But there will always be room for improvement.

The best way to fully optimize your website for conversions is by running A/B tests. Again, this takes the guesswork out of your decisions.

Rather than just assuming that your CTA button phrasing, color, and placement is correct, test out different variations to see which one converts at the highest rate. This is a constant process. You should always be testing different elements of your site to optimize it for conversions.

Conclusion

So what makes or breaks an ecommerce purchase? It’s not just one thing.

As a whole, there are several elements and factors that influence a consumer’s decision to buy or look elsewhere for their needs.

Refer to the data. Overall, personalization converts.

Brands that use digital tools and data to create a personalized shopping experience increase revenues two to three times faster than brands that don’t.

98% of marketers say that website personalization is a valuable method for improving conversion rates. 59% of businesses say that sales revenue is a direct benefit of digital personalization.

If you want more information and data about ecommerce personalization from a global perspective, you can read the full report published by AB Tasty.

Get the eBook Self-Publishing Bundle for Only $25

Decades ago, authors who were interested in getting their books published wool have to talk to different publishers, send them their manuscript, and then hope that someone would appreciate their work. Today, however, you don’t need a publisher to get your books out there. In fact, authors now have the option to publish their own […]

The post Get the eBook Self-Publishing Bundle for Only $25 appeared first on designrfix.com.

Ending Soon: Get the eBook Self-Publishing Bundle for Only $25

Writing a book is hard. But getting a book deal with a publishing house is even more difficult. Gone were the days when self-publishing was seen as a route for authors who couldn’t get published. After the success of self-published authors like EL James, Robert Kiyosaki, and James Redfield, more and more authors are looking […]

The post Ending Soon: Get the eBook Self-Publishing Bundle for Only $25 appeared first on designrfix.com.