I had a fella write in to me the other day. He had some HTML, CSS, and JavaScript, and it just wasn’t behaving like he thought it ought to. The HTML had some placeholders in it and the JavaScript had some data in it, and the assumption was that the data would fill the placeholders.
To those of us with some degree of web knowledge, we can look at this and see why it’s not working like he thought it would. But I think it’s also valuable to try to see things from that perspective and then look at solutions that are hopefully as simple as the original problem seems to be.
var company_data = {
  "{company_name}" : "SOME COMPANY",
};
There is nothing invalid going on here.
That’s all perfectly valid code. It is linked up right. It will run. It just doesn’t do anything besides render {company_name} to the screen. The expectation is that it would render SOME COMPANY to the screen instead, replacing the {company_name} placeholder with the data from the JavaScript file.
Let’s fix it with a one-liner.
In this exact scenario, to display the correct company name, we need to select that element in the DOM and replace its content with our data. We could do that by adding this one extra line to the JavaScript:
That’s not particularly re-usable or resiliant, but hey, it’s also not over-thinking or over-tooling it.
The expectation was templating
I think we can see at this point that what he hoped would happen is that this sort of templating would automatically happen. Provide an object with keys that match what is in the HTML, the content in that HTML is automatically swapped out. It just doesn’t work that way with raw web technologies.
No joke, there are hundreds of ways to go about handling this. Here’s a few off the top of my head:
As a general preference, I’d say doing the templating server-side or during a build is ideal — why mess with the DOM if you don’t need to?
But just to ignore that advice for a second, here’s an example of doing it client-side with Handlebars, just so the fella from the original email has a working example of how that can work:
Today we’re gonna talk about application bundlers — tools that simplify our lives as developers. At their core, bundlers pick your code from multiple files and put everything all together in one or more files in a logical order that are compiled and ready for use in a browser. Moreover, through different plugins and loaders, you can uglify the code, bundle up other kinds of assets (like CSS and images), use preprocessors, code-splitting, etc. They manage the development workflow.
There are lots of bundlers out there, like Browserify and webpack. While those are great options, I personally find them difficult to set up. Where do you start? This is especially true for beginners, where a "configuration file" might be a little scary.
That’s why I tend to reach for Parcel. I stumbled upon it accidentally while watching a tutorial on YouTube. The speaker was talking about tips for faster development and he heavily relied on Parcel as part of his workflow. I decided to give it a try myself.
What makes Parcel special
The thing I love the most about this bundler: it doesn’t need any configuration. Literally, none at all! Compare that to webpack where configuration can be strewn across several files all containing tons of code… that you may have picked up from other people’s configurations or inherited from other projects. Sure, configuration is only as complex as you make it, but even a modest workflow requires a set of plugins and options.
We all use different tools to simplify our job. There are things like preprocessors, post-processors, compilers, transpilers, etc. It takes time to set these up, and often a pretty decent amount of it. Wouldn’t you rather spend that time developing?
That’s why Parcel seems a good solution. Want to write your styles in SCSS or LESS? Do it! Want to use the latest JavaScript syntax? Included. Need a server for development? You got it. That’s barely scratching the surface of the large list of other features it supports.
Parcel allows you to simply start developing. That’s the biggest advantage of using it as a bundler — alongside its blazing fast compiling that utilizes multicore processing where other bundlers, including webpack, work off of complex and heavy transforms.
Where using Parcel makes sense
Parcel, like any tool, is not a golden pill that’s designed as a one-size-fits-all solution for everything. It has use cases where it shines most.
I’ve already mentioned how fast it is to get a project up and running. That makes it ideal when working with tight deadlines and prototypes, where time is precious and the goal is to get in the browser as quickly as possible.
That’s not to say it isn’t up to the task of handling complex applications or projects where lots of developers might be touching code. It’s very capable of that. However, I realize that those projects may very well benefit from a hand-rolled workflow.
It’s sort of like the difference between driving a car with an automatic transmission versus a stick shift. Sometimes you need the additional control and sometimes you don’t.
I’ve been working on a commercial multi-page website with a bunch of JavaScript under the hood, and Parcel is working out very well for me. It’s providing my server, it compiles my Sass to CSS, it adds vendor prefixes when needed, and it allows me to use import and export in my JavaScript files out of the box without any configuration. All of this allowed me to get my project up and running with ease.
Let’s create a simple site together using Parcel
Let’s take Parcel for a test drive to see how relatively simple it is to make something with it.
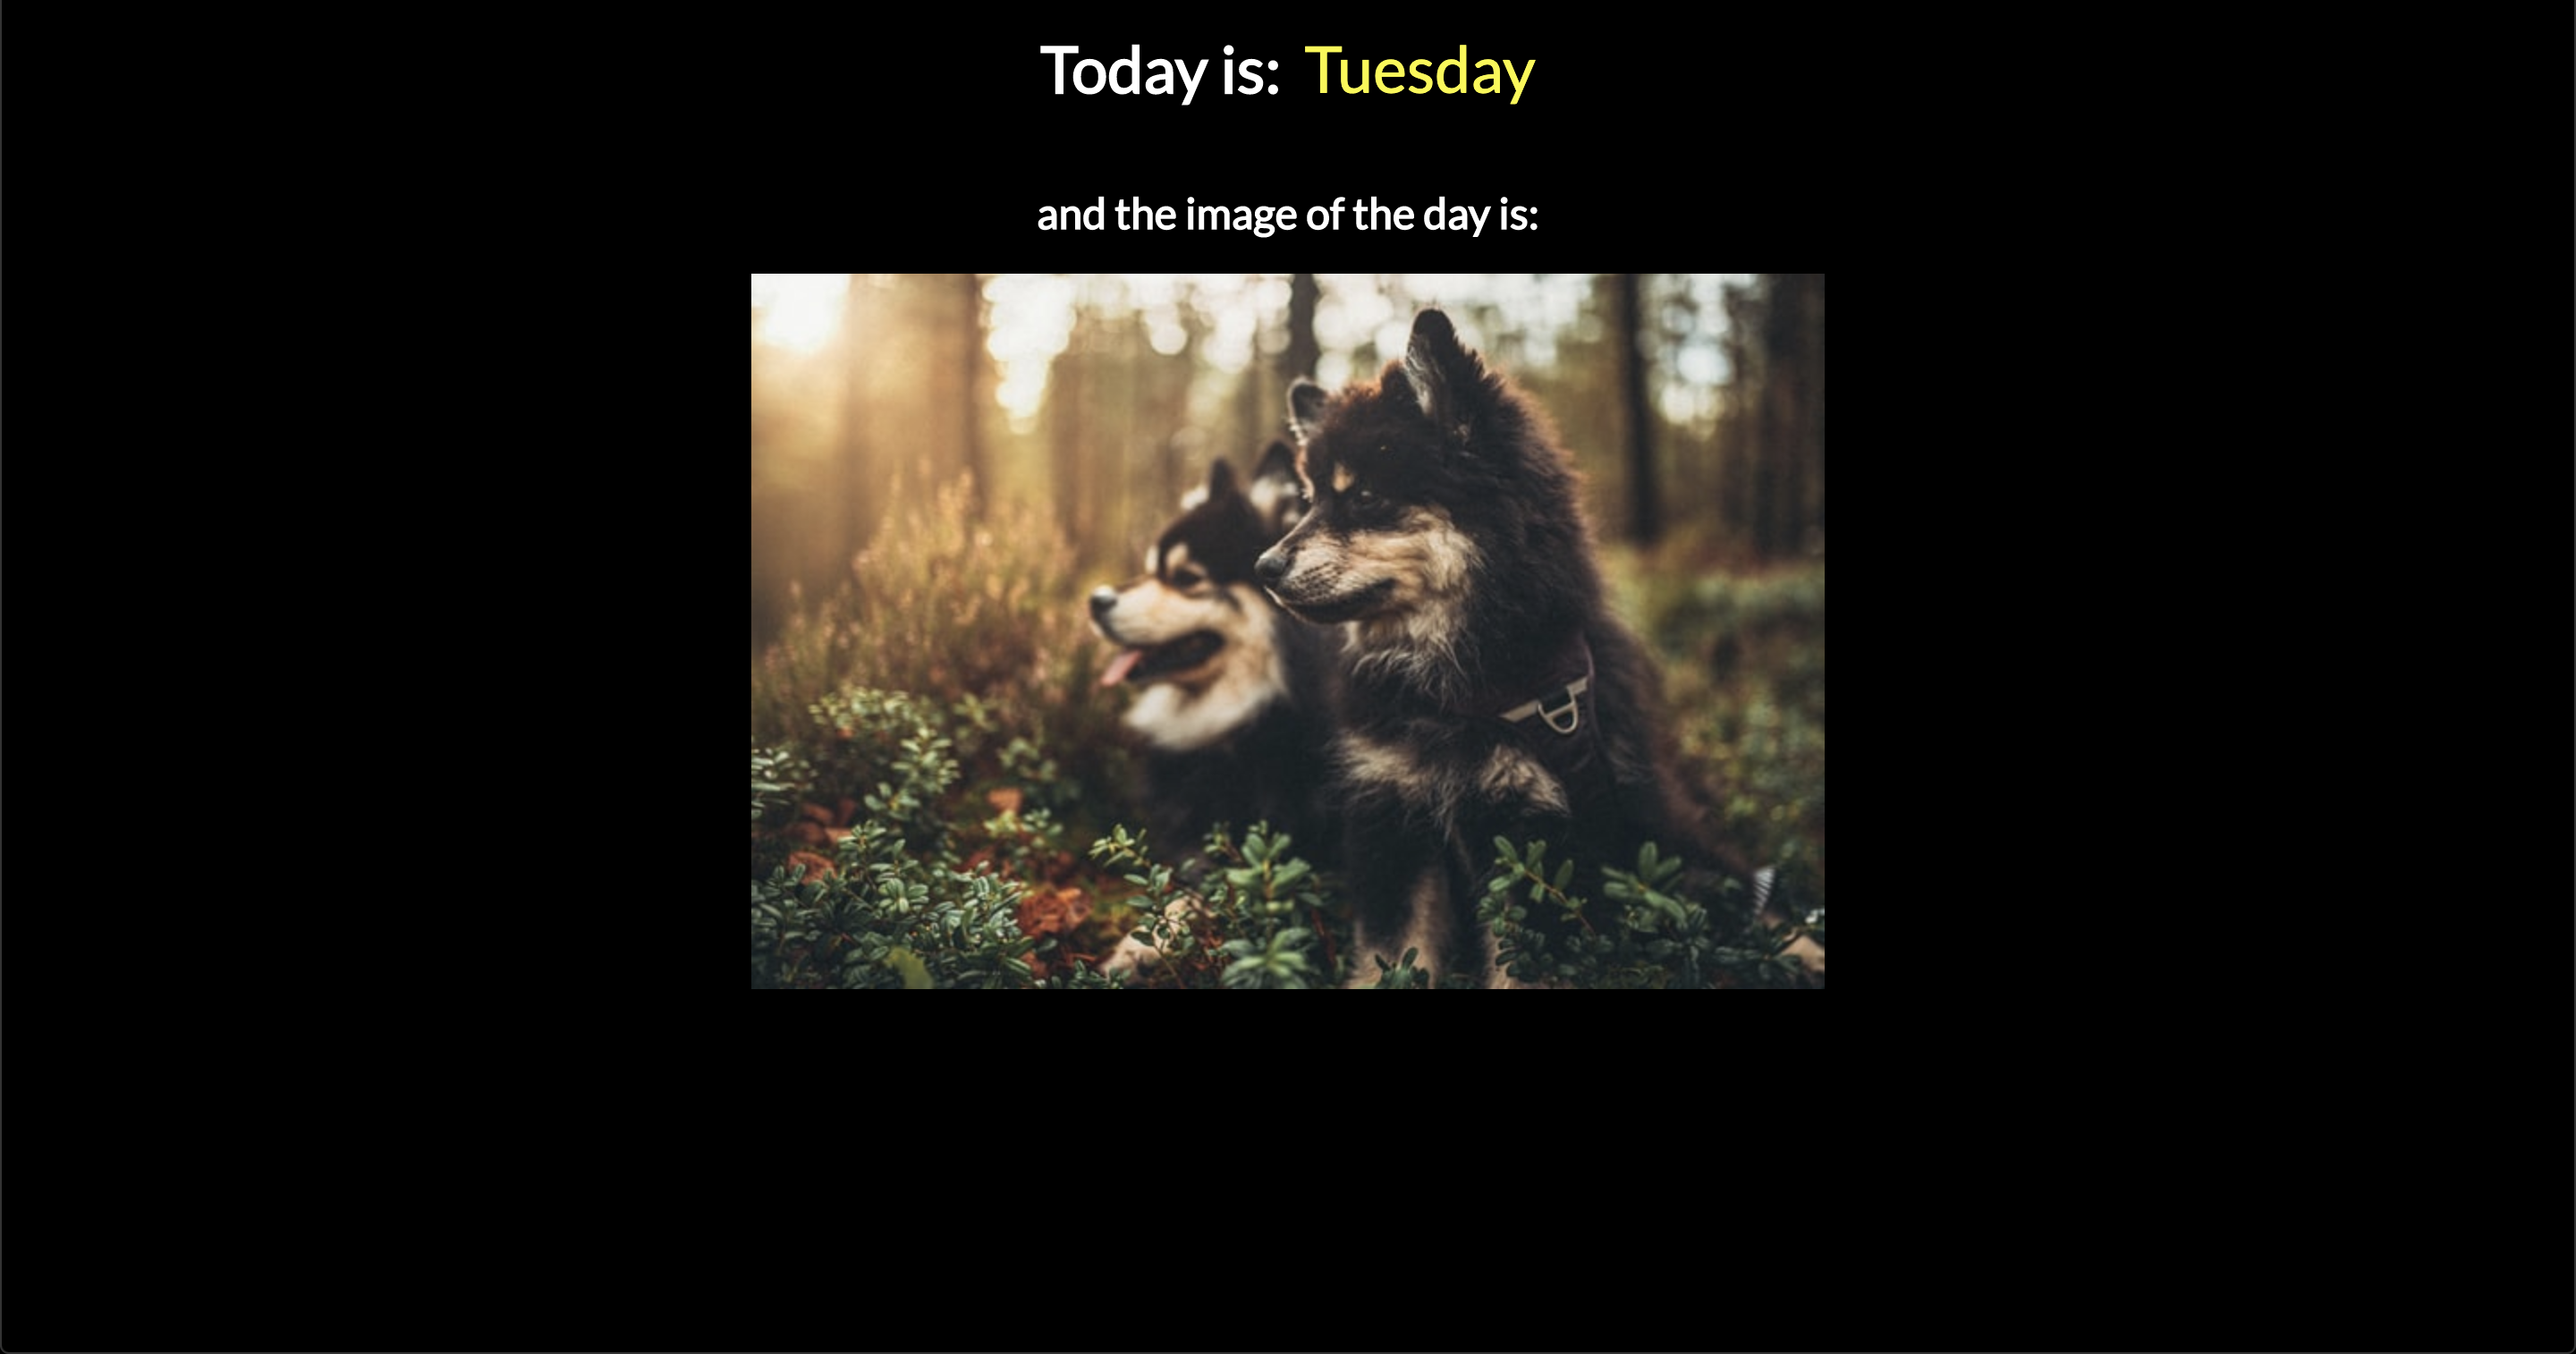
We’re going to build a simple page that uses Sass and a bit of JavaScript. We’ll fetch the current day of the week and a random image from Unsplash Source.
The basic structure
There's no scaffolding we’re required to use or framework needed to initialize our project. Instead, we’re going to make three files that ought to look super familiar: index.html, style.scss and index.js. You can set that up manually or in Terminal:
You may have noticed that I’m pulling in a web font (Lato) from Google, which is totally optional. Otherwise, all we’re doing is linking up the CSS and JavaScript files and dropping in the basic HTML that will display the day of the week and a link from Unsplash that will serve a random image. This is all we really need for our baseline.
Marvel at Parcel’s quick set up!
Let’s run the application using with Parcel as the bundler before we get into styling and scripts. Installing Parcel is like any thing:
npm install -g parcel-bundler
# or
yarn global add parcel-bundler
Let’s also create a package.json file should we need any development dependencies. This is also where Parcel will include anything it needs to work out of the box.
npm init -y
# or
yarn init -y
That’s it! No more configuration! We only need to tell Parcel which file is the entry point for the project so it knows where to point its server. That’s going to be our HTML file:
parcel index.html
If we open the console we’ll see something like this indicating that the server is already running:
Server running at http://localhost:1234
Parcel’s server supports hot reloading and rebuilds the app as change are saved.
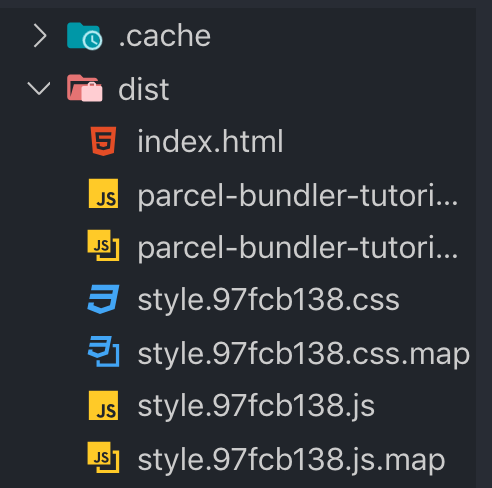
Now, heading back to our project folder, we’ll see additional stuff,that Parcel created for us:
What’s important for us here is the dist folder, which contains all our compiled code, including source maps for CSS and JavaScript.
Now all we do is build!
Let’s go to style.scss and see how Parcel handles Sass. I’ve created variables to store some colors and a width for the container that holds our content:
Once we save, Parcel’s magic is triggered and everything compiles and reloads in the browser for us. No command needed because it’s already watching the files for changes.
This is what we’ve got so far:
The only thing left is to show the current day of the week. We’re going to use imports and exports so we get to see how Parcel allows us to use modern JavaScript.
Let’s create a file called today.js and include a function that reports the current day of the week from an array of days:
💡 It’s worth a note to remember that the getDay function returns Sunday as the first day of the week.
Notice we’re exporting the getDay function. Let’s go into our index.js file and import it there so it gets included when compiling happens:
import { getDay } from './today';
We can import/export files, because Parcelsupports ES6 module syntax right out of the box — again, no configuration needed!
The only thing left is to select the <span> element and pass the value of the getDay function to it:
const day = document.querySelector('.today');
day.innerHTML = getDay();
Let’s see the final result:
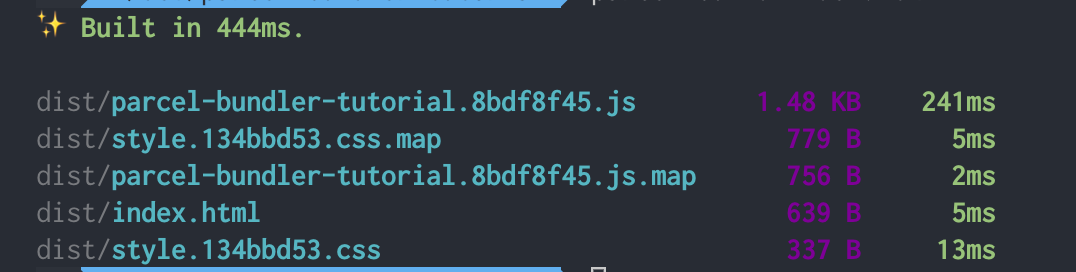
Last thing is to build for production
We’ve created the app, but we want to serve it somewhere — whether it’s your personal server or some zero-configuration deployment like Surge or Now — and we want to serve compiled and minified code.
Here’s the one and only command we need:
parcel build index.js
This gives us all of the production-ready assets for the app. You can read more aboutParcel’s product mode for some tips and tricks to get the most from your environment.
I’ve said it several times and I’ll say it again: Parcel is a great tool. It bundles, it compiles, it serves, it pre- and post-processes, it minifies and uglifies, and more. We may have looked at a pretty simple example, but hopefully you now have a decent feel for what Parcel offers and how you might start to use it in your own projects.
I’m interested if you’re already using Parcel and, if so, how you’ve been using it. Have you found it works better for some things more than others? Did you discover some neat trick that makes it even more powerful? Let me know in the comments!
Most static site generators make installation easy, but each project still requires configuration after installation. When you build a lot of similar projects, you may duplicate effort during the setup phase. GitHub template repositories may save you a lot of time if you find yourself:
creating the same folder structures from previous projects,
copying and pasting config files from previous projects, and
copying and pasting boilerplate code from previous projects.
Unlike forking a repository, which allows you to use someone else’s code as a starting point, template repositories allow you to use your own code as a starting point, where each new project gets its own, independent Git history. Check it out!
Let’s take a look at how we can set up a convenient workflow. We’ll set up a boilerplate Eleventy project, turn it into a Git repository, host the repository on GitHub, and then configure that repository to be a template. Then, next time you have a static site project, you’ll be able to come back to the repository, click a button, and start working from an exact copy of your boilerplate.
Are you ready to try it out? Let’s set up our own static site using GitHub templates to see just how much templates can help streamline a static site project.
I’m using Eleventy as an example of a static site generator because it’s my personal go-to, but this process will work for Hugo, Jekyll, Nuxt, or any other flavor of static site generator you prefer.
We're going to kick things off by running each of these in the command line:
cd ~
mkdir static-site-template
cd static-site-template
These three commands change directory into your home directory (~ in Unix-based systems), make a new directory called static-site-template, and then change directory into the static-site-template directory.
Next, we’ll initialize the Node project
In order to work with Eleventy, we need to install Node.js which allows your computer to run JavaScript code outside of a web browser.
Node.js comes with node package manager, or npm, which downloads node packages to your computer. Eleventy is a node package, so we can use npm to fetch it.
Assuming Node.js is installed, let’s head back to the command line and run:
npm init
This creates a file called package.json in the directory. npm will prompt you for a series of questions to fill out the metadata in your package.json. After answering the questions, the Node.js project is initialized.
Now we can install Eleventy
Initializing the project gave us a package.json file which lets npm install packages, run scripts, and do other tasks for us inside that project. npm uses package.json as an entry point in the project to figure out precisely how and what it should do when we give it commands.
We can tell npm to install Eleventy as a development dependency by running:
npm install -D @11ty/eleventy
This will add a devDependency entry to the package.json file and install the Eleventy package to a node_modules folder in the project.
The cool thing about the package.json file is that any other computer with Node.js and npm can read it and know to install Eleventy in the project node_modules directory without having to install it manually. See, we're already streamlining things!
Configuring Eleventy
There are tons of ways to configure an Eleventy project. Flexibility is Eleventy’s strength. For the purposes of this tutorial, I’m going to demonstrate a configuration that provides:
A folder to cleanly separate website source code from overall project files
An HTML document for a single page website
CSS to style the document
JavaScript to add functionality to the document
Hop back in the command line. Inside the static-site-template folder, run these commands one by one (excluding the comments that appear after each # symbol):
mkdir src           # creates a directory for your website source code
mkdir src/css       # creates a directory for the website styles
mkdir src/js        # creates a directory for the website JavaScript
touch index.html    # creates the website HTML document
touch css/style.css # creates the website styles
touch js/main.js    # creates the website JavaScript
This creates the basic file structure that will inform the Eleventy build. However, if we run Eleventy right now, it won’t generate the website we want. We still have to configure Eleventy to understand that it should only use files in the src folder for building, and that the css and js folders should be processed with passthrough file copy.
You can give this information to Eleventy through a file called .eleventy.js in the root of the static-site-template folder. You can create that file by running this command inside the static-site-template folder:
touch .eleventy.js
Edit the file in your favorite text editor so that it contains this:
Lines 2 and 3 tell Eleventy to use passthrough file copy for CSS and JavaScript. Line 6 tells Eleventy to use only the src directory to build its output.
Eleventy will now give us the expected output we want. Let’s put that to the test by putting this In the command line:
npx @11ty/eleventy
The npx command allows npm to execute code from the project node_module directory without touching the global environment. You’ll see output like this:
Writing _site/index.html from ./src/index.html.
Copied 2 items and Processed 1 file in 0.04 seconds (v0.9.0)
The static-site-template folder should now have a new directory in it called _site. If you dig into that folder, you’ll find the css and js directories, along with the index.html file.
This _site folder is the final output from Eleventy. It is the entirety of the website, and you can host it on any static web host.
Without any content, styles, or scripts, the generated site isn’t very interesting:
Let’s create a boilerplate website
Next up, we’re going to put together the baseline for a super simple website we can use as the starting point for all projects moving forward.
It’s worth mentioning that Eleventy has a ton of boilerplate files for different types of projects. It’s totally fine to go with one of these though I often find I wind up needing to roll my own. So that’s what we’re doing here.
We may as well style things a tiny bit, so let’s add this to src/css/style.css:
body {
  font-family: sans-serif;
}
And we can confirm JavaScript is hooked up by adding this to src/js/main.js:
(function() {
  console.log('Invoke the static site template JavaScript!');
})();
Want to see what we’ve got? Run npx @11ty/eleventy --serve in the command line. Eleventy will spin up a server with Browsersync and provide the local URL, which is probably something like localhost:8080.
Even the console tells us things are ready to go!
Let’s move this over to a GitHub repo
Git is the most commonly used version control system in software development. Most Unix-based computers come with it installed, and you can turn any directory into a Git repository by running this command:
git init
We should get a message like this:
Initialized empty Git repository in /path/to/static-site-template/.git/
That means a hidden .git folder was added inside the project directory, which allows the Git program to run commands against the project.
Before we start running a bunch of Git commands on the project, we need to tell Git about files we don’t want it to touch.
Inside the static-site-template directory, run:
touch .gitignore
Then open up that file in your favorite text editor. Add this content to the file:
_site/
node_modules/
This tells Git to ignore the node_modules directory and the _site directory. Committing every single Node.js module to the repo could make things really messy and tough to manage. All that information is already in package.json anyway.
Similarly, there’s no need to version control _site. Eleventy can generate it from the files in src, so no need to take up space in GitHub. It’s also possible that if we were to:
version control _site,
change files in src, or
forget to run Eleventy again,
then _site will reflect an older build of the website, and future developers (or a future version of yourself) may accidentally use an outdated version of the site.
Git is version control software, and GitHub is a Git repository host. There are other Git host providers like BitBucket or GitLab, but since we’re talking about a GitHub-specific feature (template repositories), we’ll push our work up to GitHub. If you don’t already have an account, go ahead and join GitHub. Once you have an account, create a GitHub repository and name it static-site-template.
GitHub will ask a few questions when setting up a new repository. One of those is whether we want to create a new repository on the command line or push an existing repository from the command line. Neither of these choices are exactly what we need. They assume we either don’t have anything at all, or we have been using Git locally already. The static-site-template project already exists, has a Git repository initialized, but doesn’t yet have any commits on it.
So let’s ignore the prompts and instead run the following commands in the command line. Make sure to have the URL GitHub provides in the command from line 3 handy:
This adds the entire static-site-template folder to the Git staging area. It commits it with the message "first commit," adds a remote repository (the GitHub repository), and then pushes up the master branch to that repository.
Let’s template-ize this thing
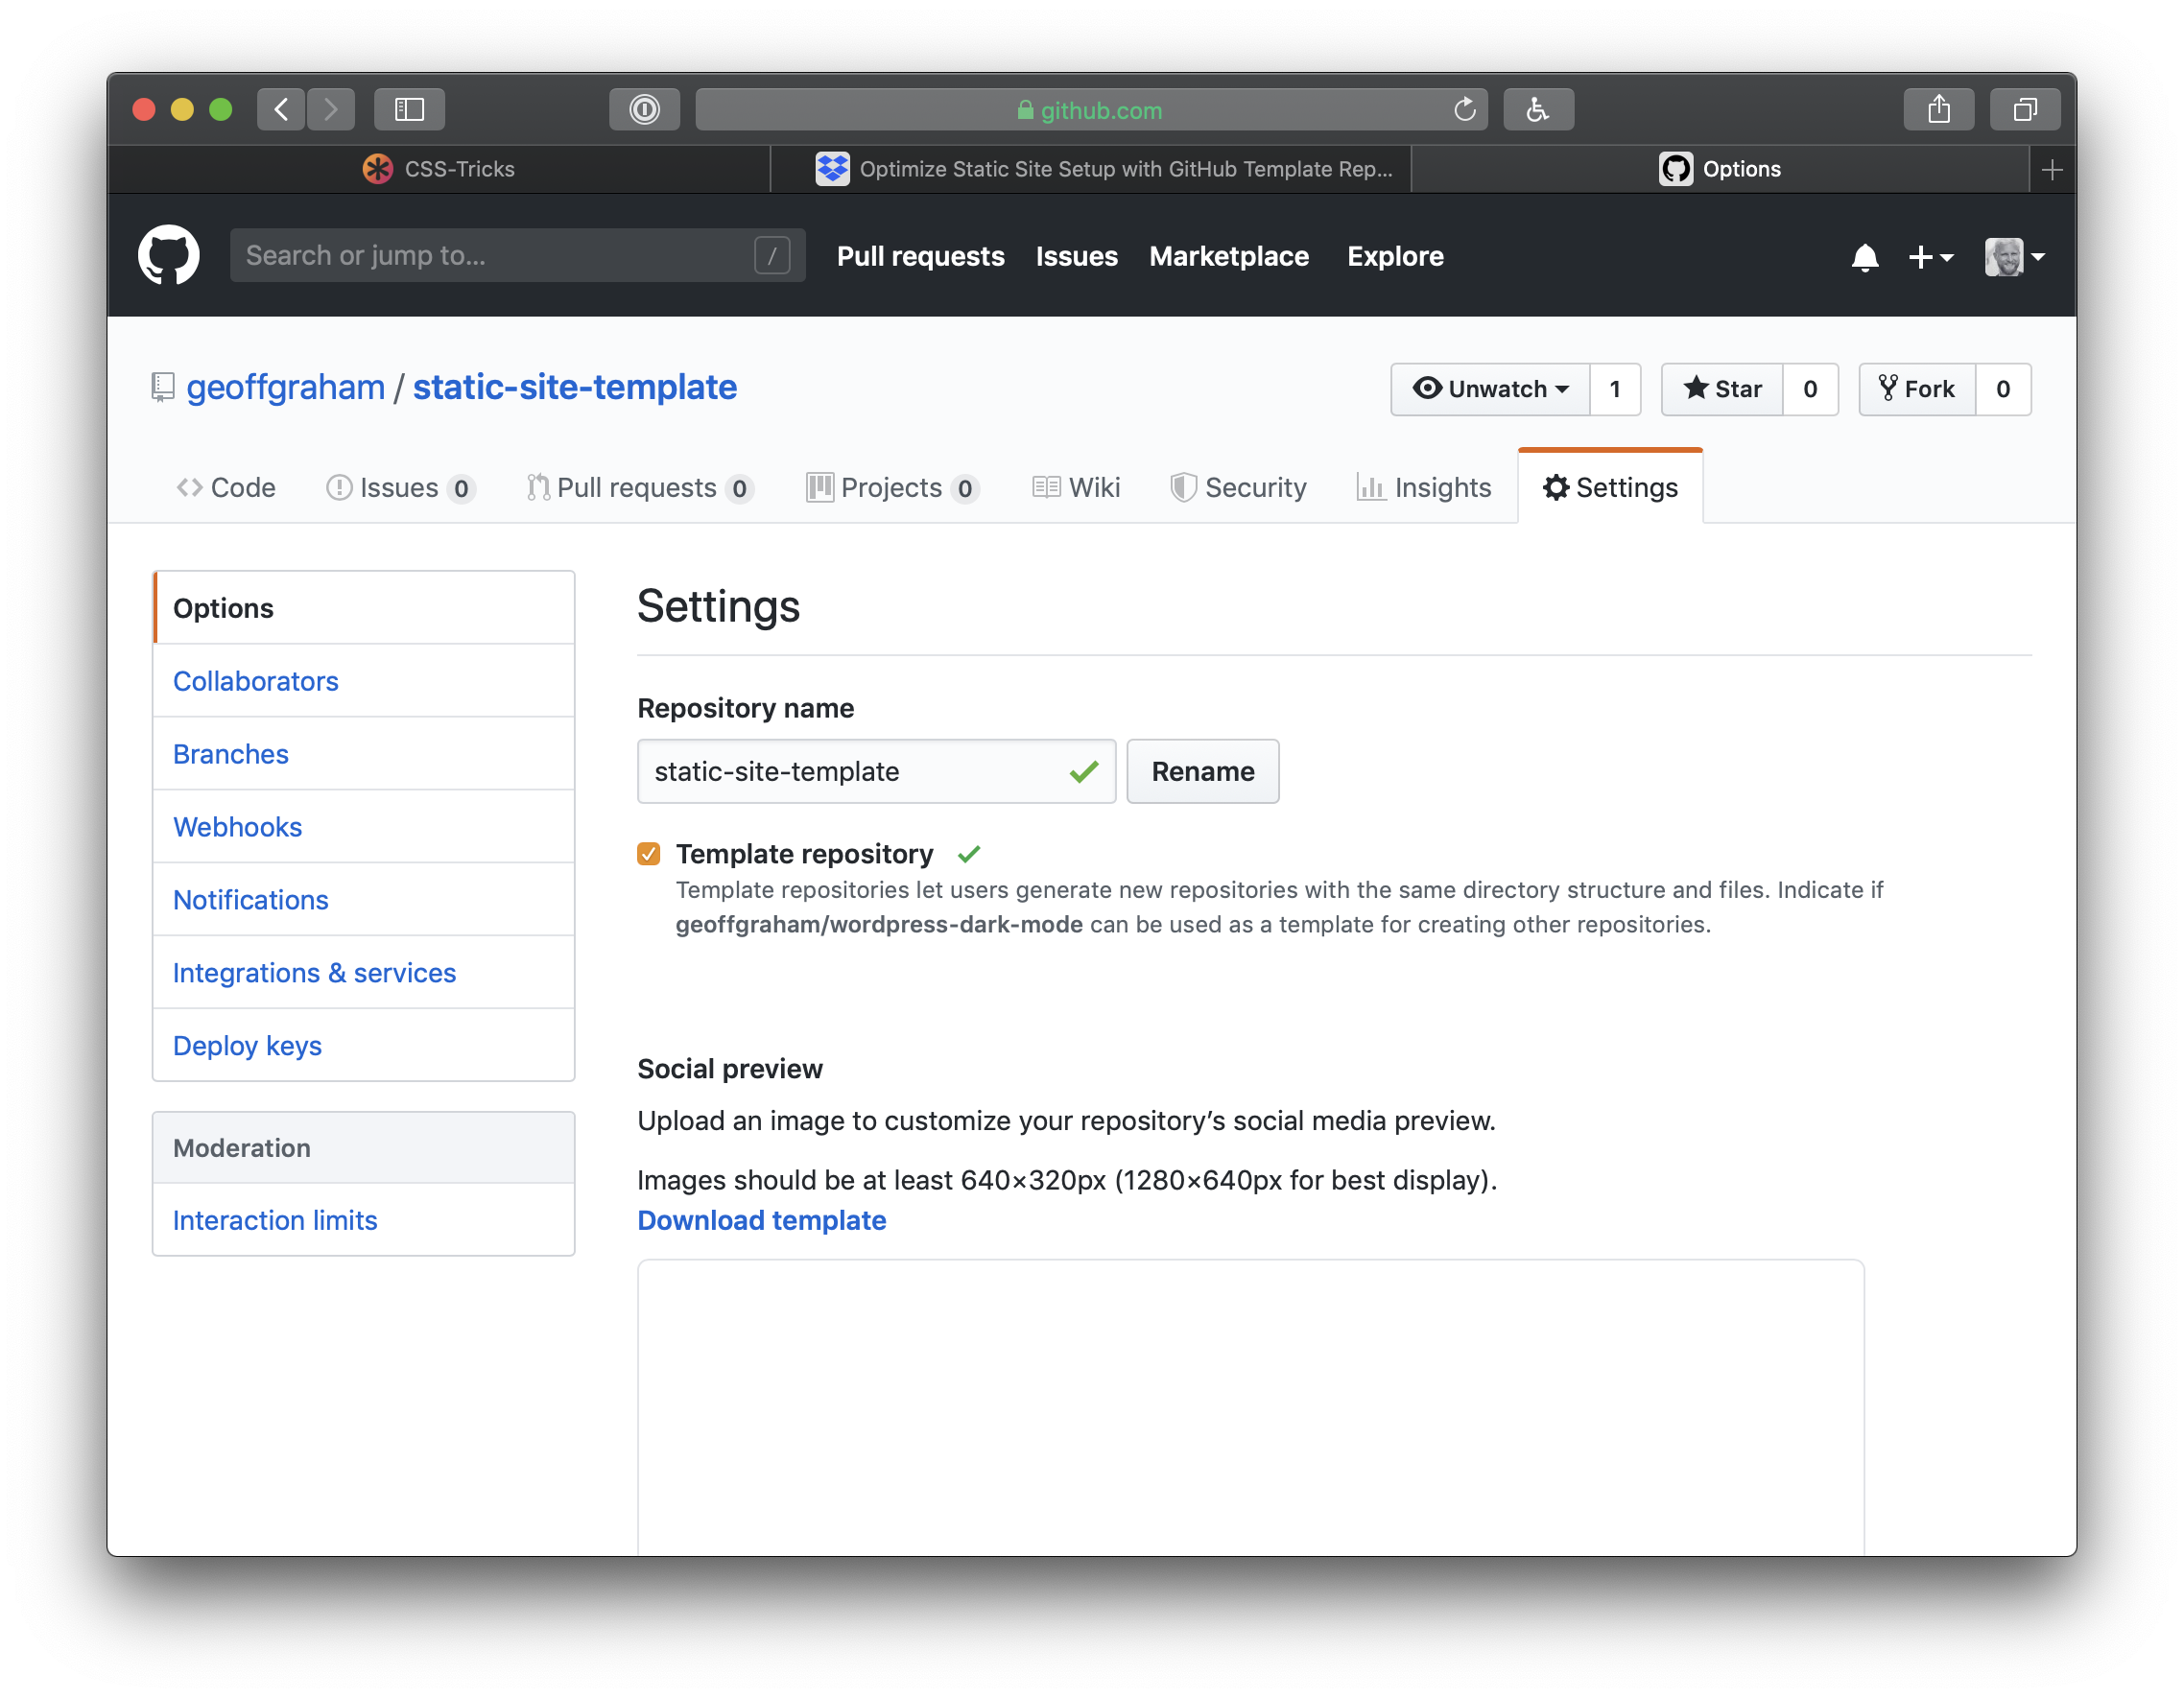
OK, this is the crux of what we have been working toward. GitHub templates allows us to use the repository we’ve just created as the foundation for other projects in the future — without having to do all the work we’ve done to get here!
Click Settings on the GitHub landing page of the repository to get started. On the settings page, check the button for Template repository.
Now when we go back to the repository page, we’ll get a big green button that says Use this template. Click it and GitHub will create a new repository that’s a mirror of our new template. The new repository will start with the same files and folders as static-site-template. From there, download or clone that new repository to start a new project with all the base files and configuration we set up in the template project.
We can extend the template for future projects
Now that we have a template repository, we can use it for any new static site project that comes up. However, You may find that a new project has additional needs than what’s been set up in the template. For example, let’s say you need to tap into Eleventy’s templating engine or data processing power.
Go ahead and build on top of the template as you work on the new project. When you finish that project, identify pieces you want to reuse in future projects. Perhaps you figured out a cool hover effect on buttons. Or you built your own JavaScript carousel element. Or maybe you’re really proud of the document design and hierarchy of information.
If you think anything you did on a project might come up again on your next run, remove the project-specific details and add the new stuff to your template project. Push those changes up to GitHub, and the next time you use static-site-template to kick off a project, your reusable code will be available to you.
There are some limitations to this, of course
GitHub template repositories are a useful tool for avoiding repetitive setup on new web development projects. I find this especially useful for static site projects. These template repositories might not be as appropriate for more complex projects that require external services like databases with configuration that cannot be version-controlled in a single directory.
Template repositories allow you to ship reusable code you have written so you can solve a problem once and use that solution over and over again. But while your new solutions will carry over to future projects, they won’t be ported backwards to old projects.
This is a useful process for sites with very similar structure, styles, and functionality. Projects with wildly varied requirements may not benefit from this code-sharing, and you could end up bloating your project with unnecessary code.
Wrapping up
There you have it! You now have everything you need to not only start a static site project using Eleventy, but the power to re-purpose it on future projects. GitHub templates are so handy for kicking off projects quickly where we otherwise would have to re-build the same wheel over and over. Use them to your advantage and enjoy a jump start on your projects moving forward!
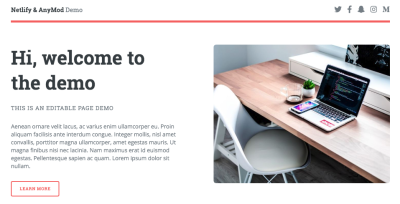
Add these mods by clicking "Clone" for each one and then scroll down and copy/paste the installation code into the index.html file. Also copy and paste your project script at the top.
Your index.html should now look something like this:
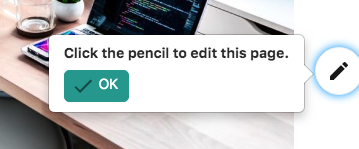
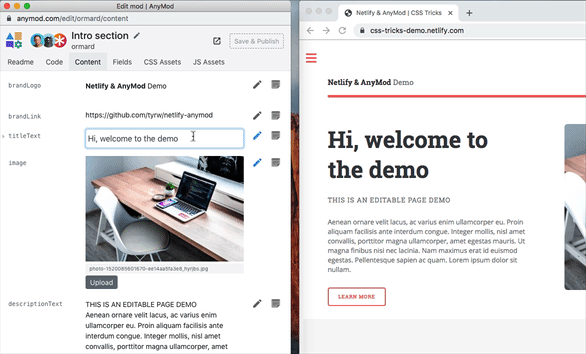
Now you can live edit the content and code for each mod. When viewing your own page (while also logged into AnyMod), you see a pencil on the right side:
AnyMod pencil
Click the pencil and choose a mod. Now try making some edits to the content (or code) and notice that it updates on the page automatically in real time.
AnyMod live edit
You can use this method to make edits now or in 6 months when you've forgotten how the project is set up.
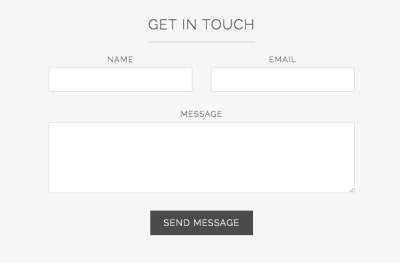
Form
The form also works automatically. Try submitting a message on your own page; the response will be emailed to you right away.
Conclusion
You now have a great way to build fast, reliable, secure static sites.
Remember: with great power comes great responsibility.