Getting to Grips with the Airtable API

The Airtable web app is pretty neat. You can use it like a spreadsheet but it’s useful for all sorts of other things too. The neatest thing about it for me is that it has an API so that you can treat it like a database.

I’ve been thinking about making weekly notes for the different teams I work with at Gusto to read about what the design systems team is working on, things we've fixed, and any bugs we've encountered during that might impact other designers and engineers across our organization. I’ve spent a couple of hours thinking about how we might use Airtable to collect a whole bunch of data and then use its API to extract that info and show it in a web app.

Here’s an example of what we’ll end up building, which is basically a React web app that’s using Airtable as a nifty sorta CMS:

To get started, we have to head on over to the command line and run the following (but first make sure npm is installed):

npx create-react-app airtable-test

This will create a new directory called airtable-test which is where we’ll be making our little React app. If we run yarn start in the command line after that’s finished installing, then we’ll see the default page for the project:

And, if we open up src/App.js in that airtable-test directory, we can see how this page is being rendered with React:

import React, { Component } from 'react';
import logo from './logo.svg';
import './App.css';

class App extends Component {
  render() {
    return (
      <div className="App">
        <header className="App-header">
          <img src={logo} className="App-logo" alt="logo" />
          <p>
            Edit src/App.js and save to reload.
          </p>
          <a
            className="App-link"
            href="https://reactjs.org"
            target="_blank"
            rel="noopener noreferrer"
          >
            Learn React
          
        </header>
      </div>
    );
  }
}

export default App;

Now that we have React up and running, we can go ahead and install airtable in the command line which will let us interact with the Airtable API:
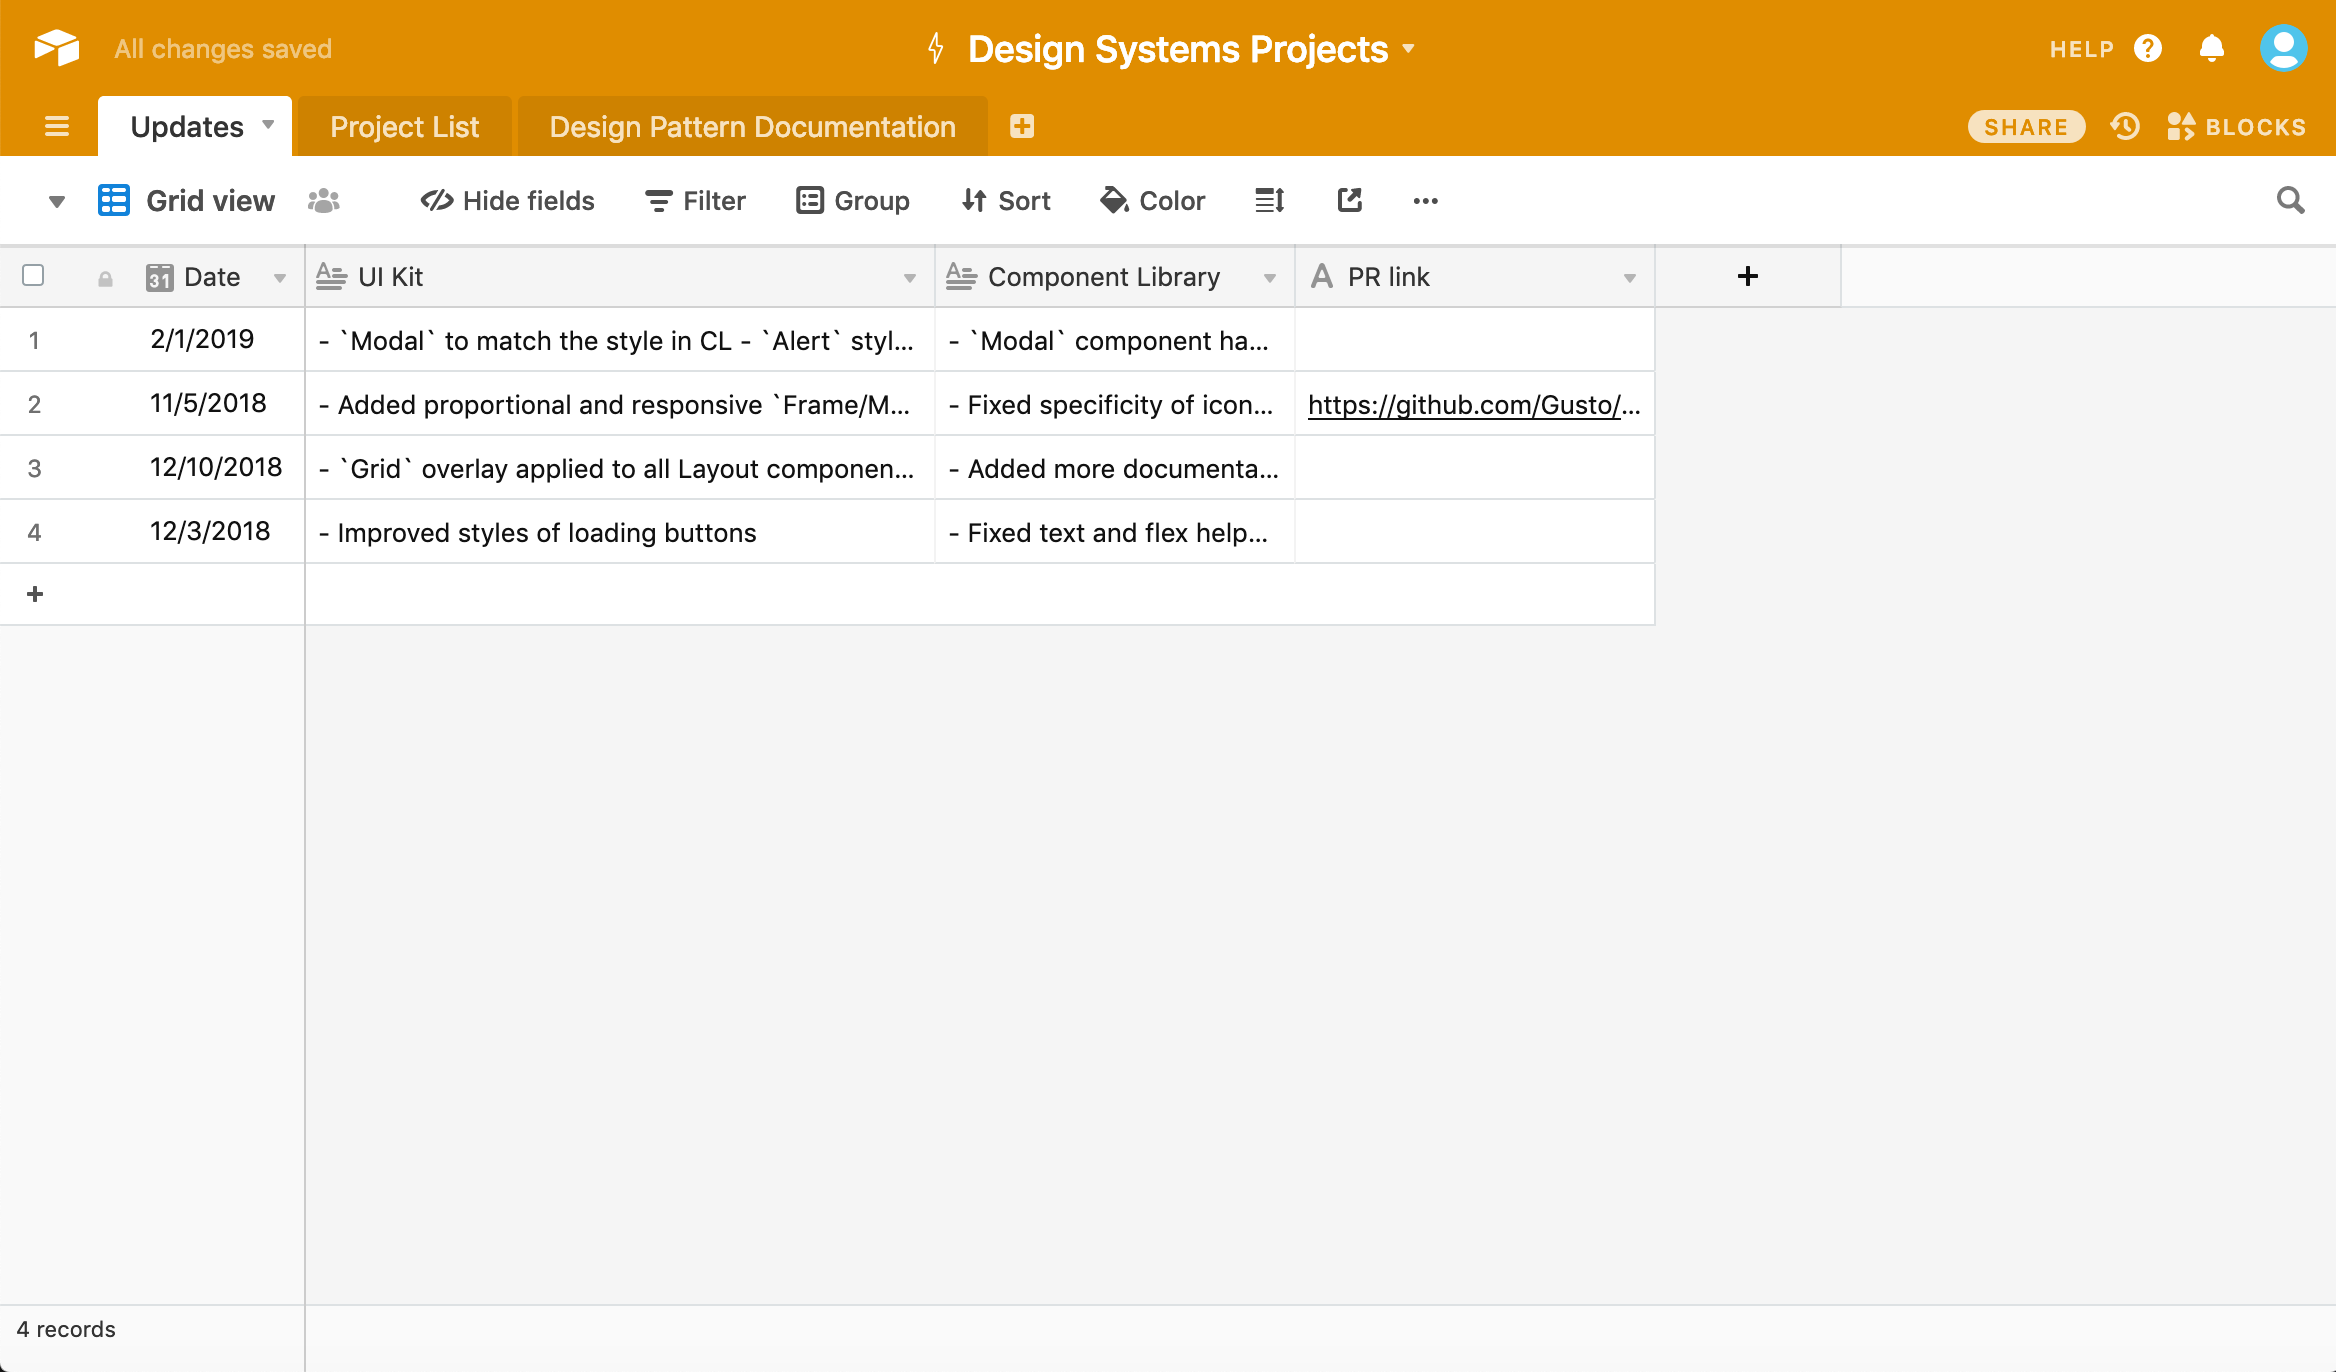
npm i airtable

Once we’ve done that, we’ll need to create an Airtable account and create a project. We should wind up with something like this spreadsheet:

A screenshot of a spreadsheet. The header is a bright orange and the sheet contains four rows and four columns of content, ordered by date.

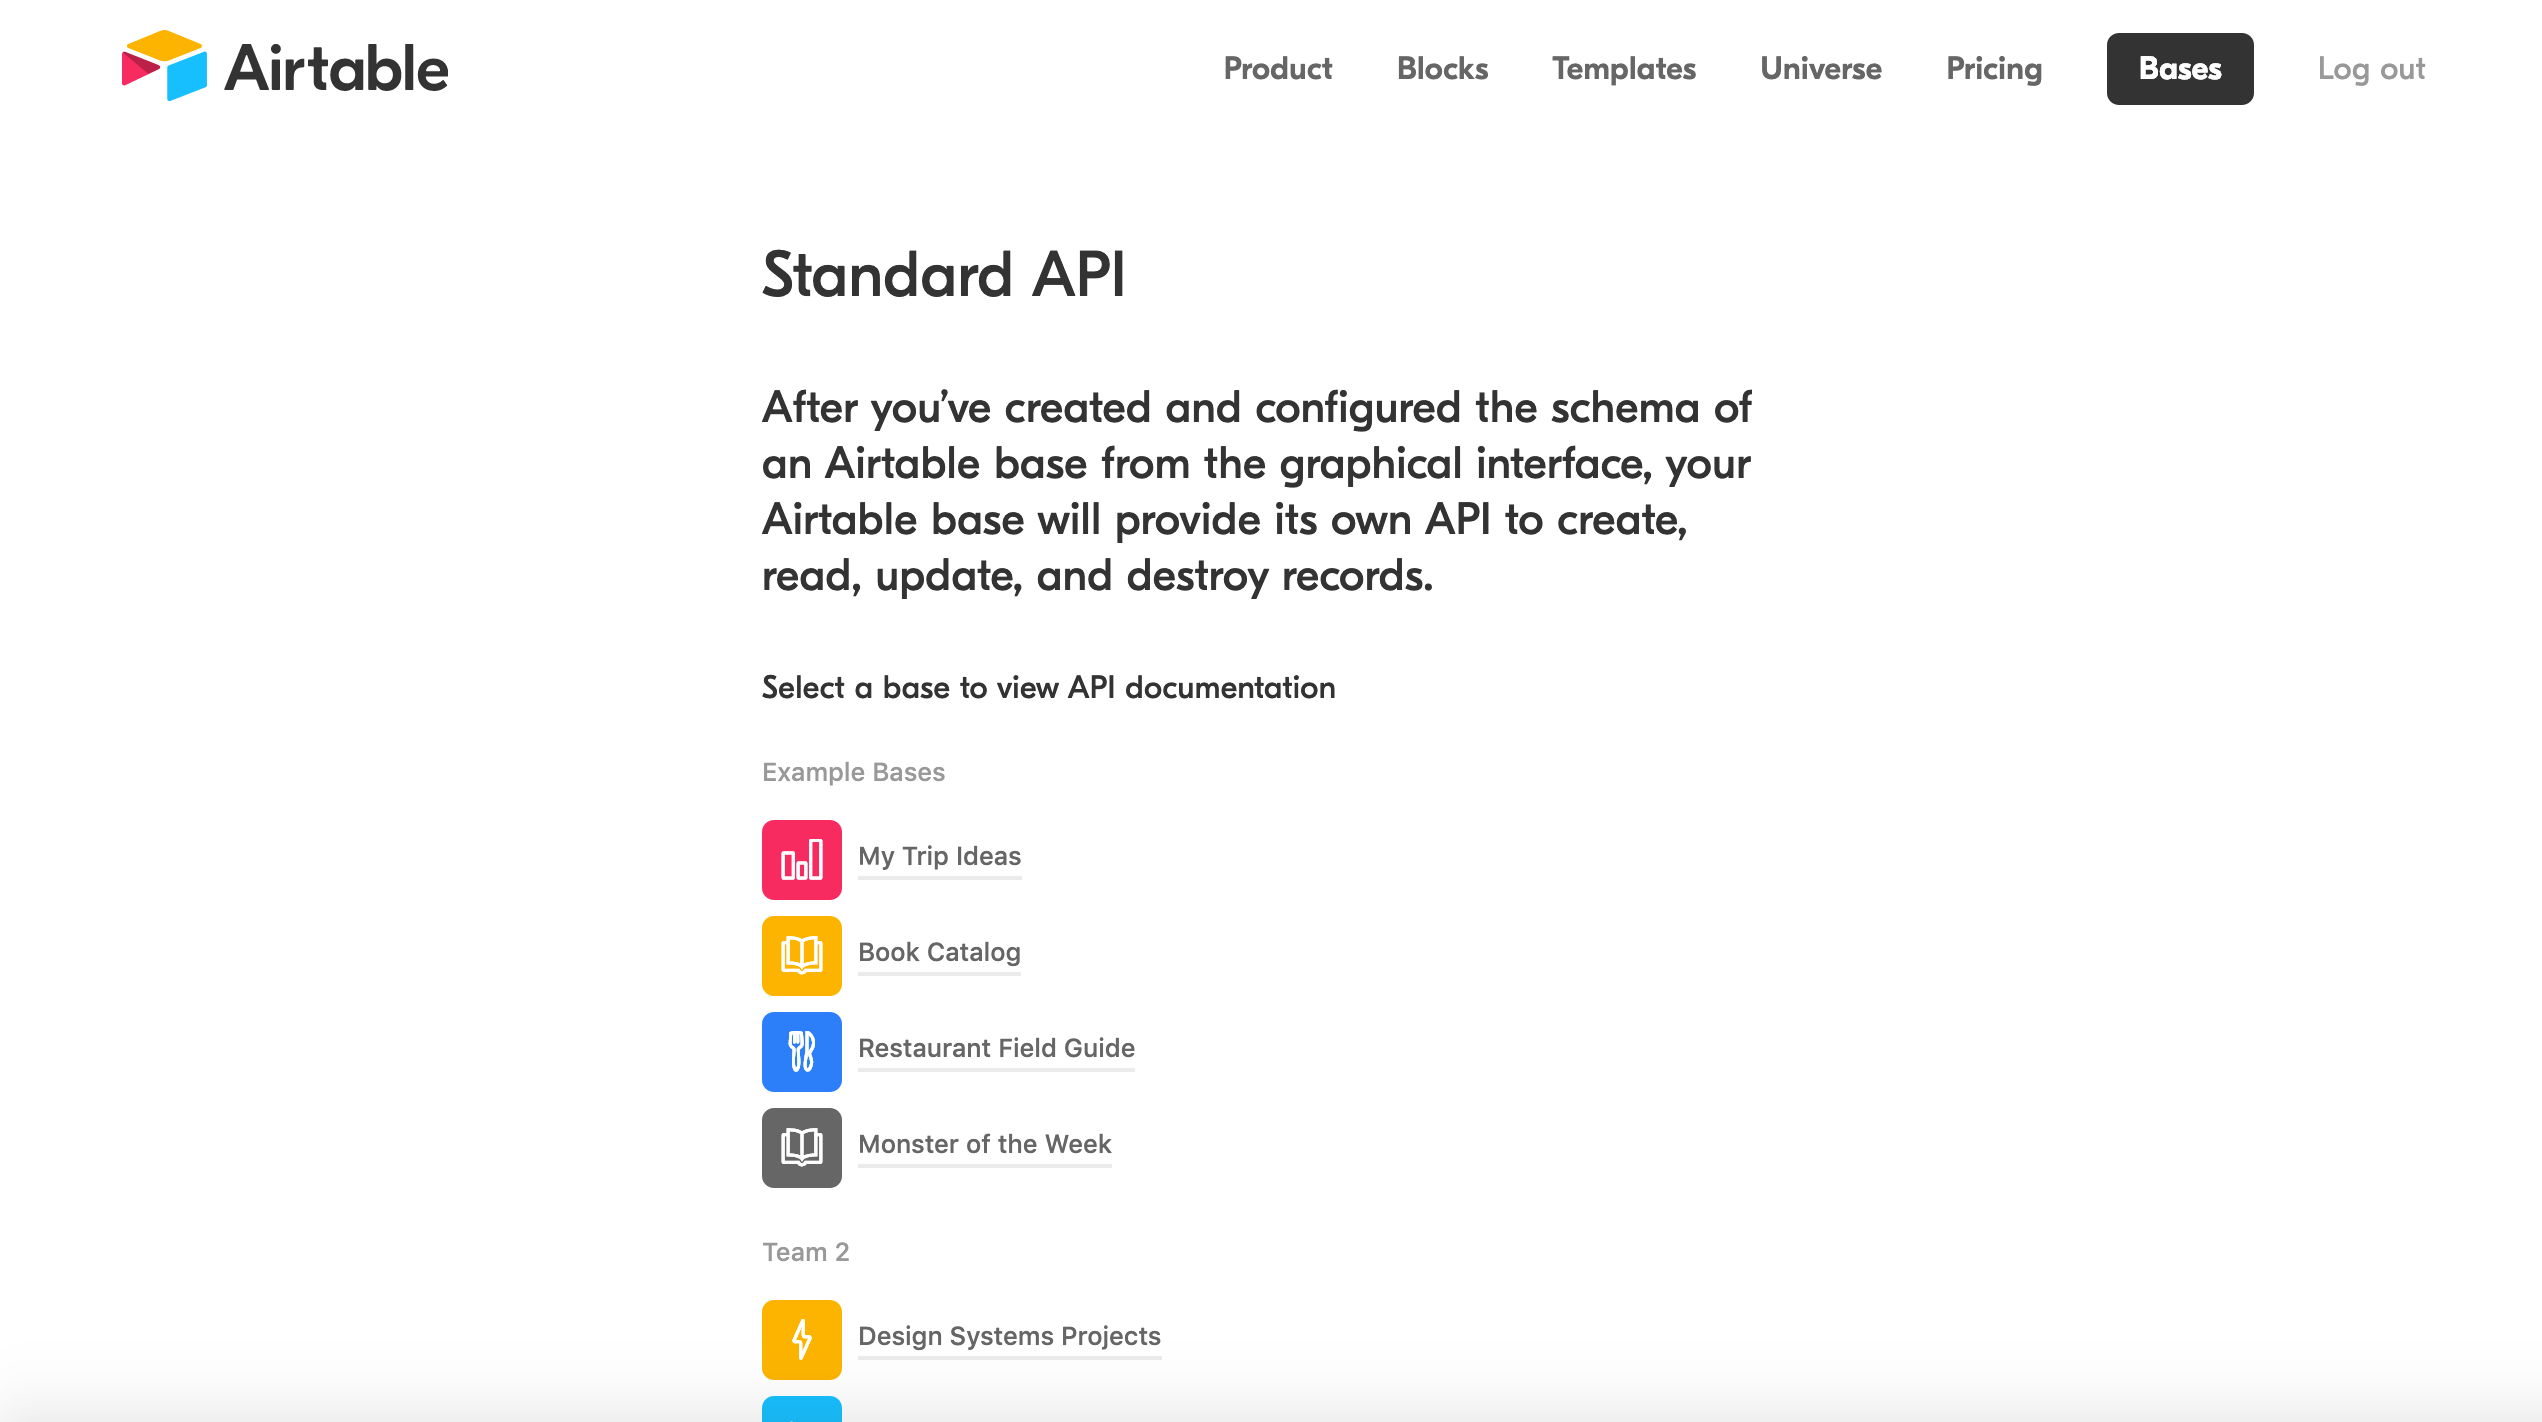
Now we can then head to airtable.com/api and select our project so that is serves as data we're pulling from. In this case, I selected “Design Systems Projects” which you can see right at the bottom here:

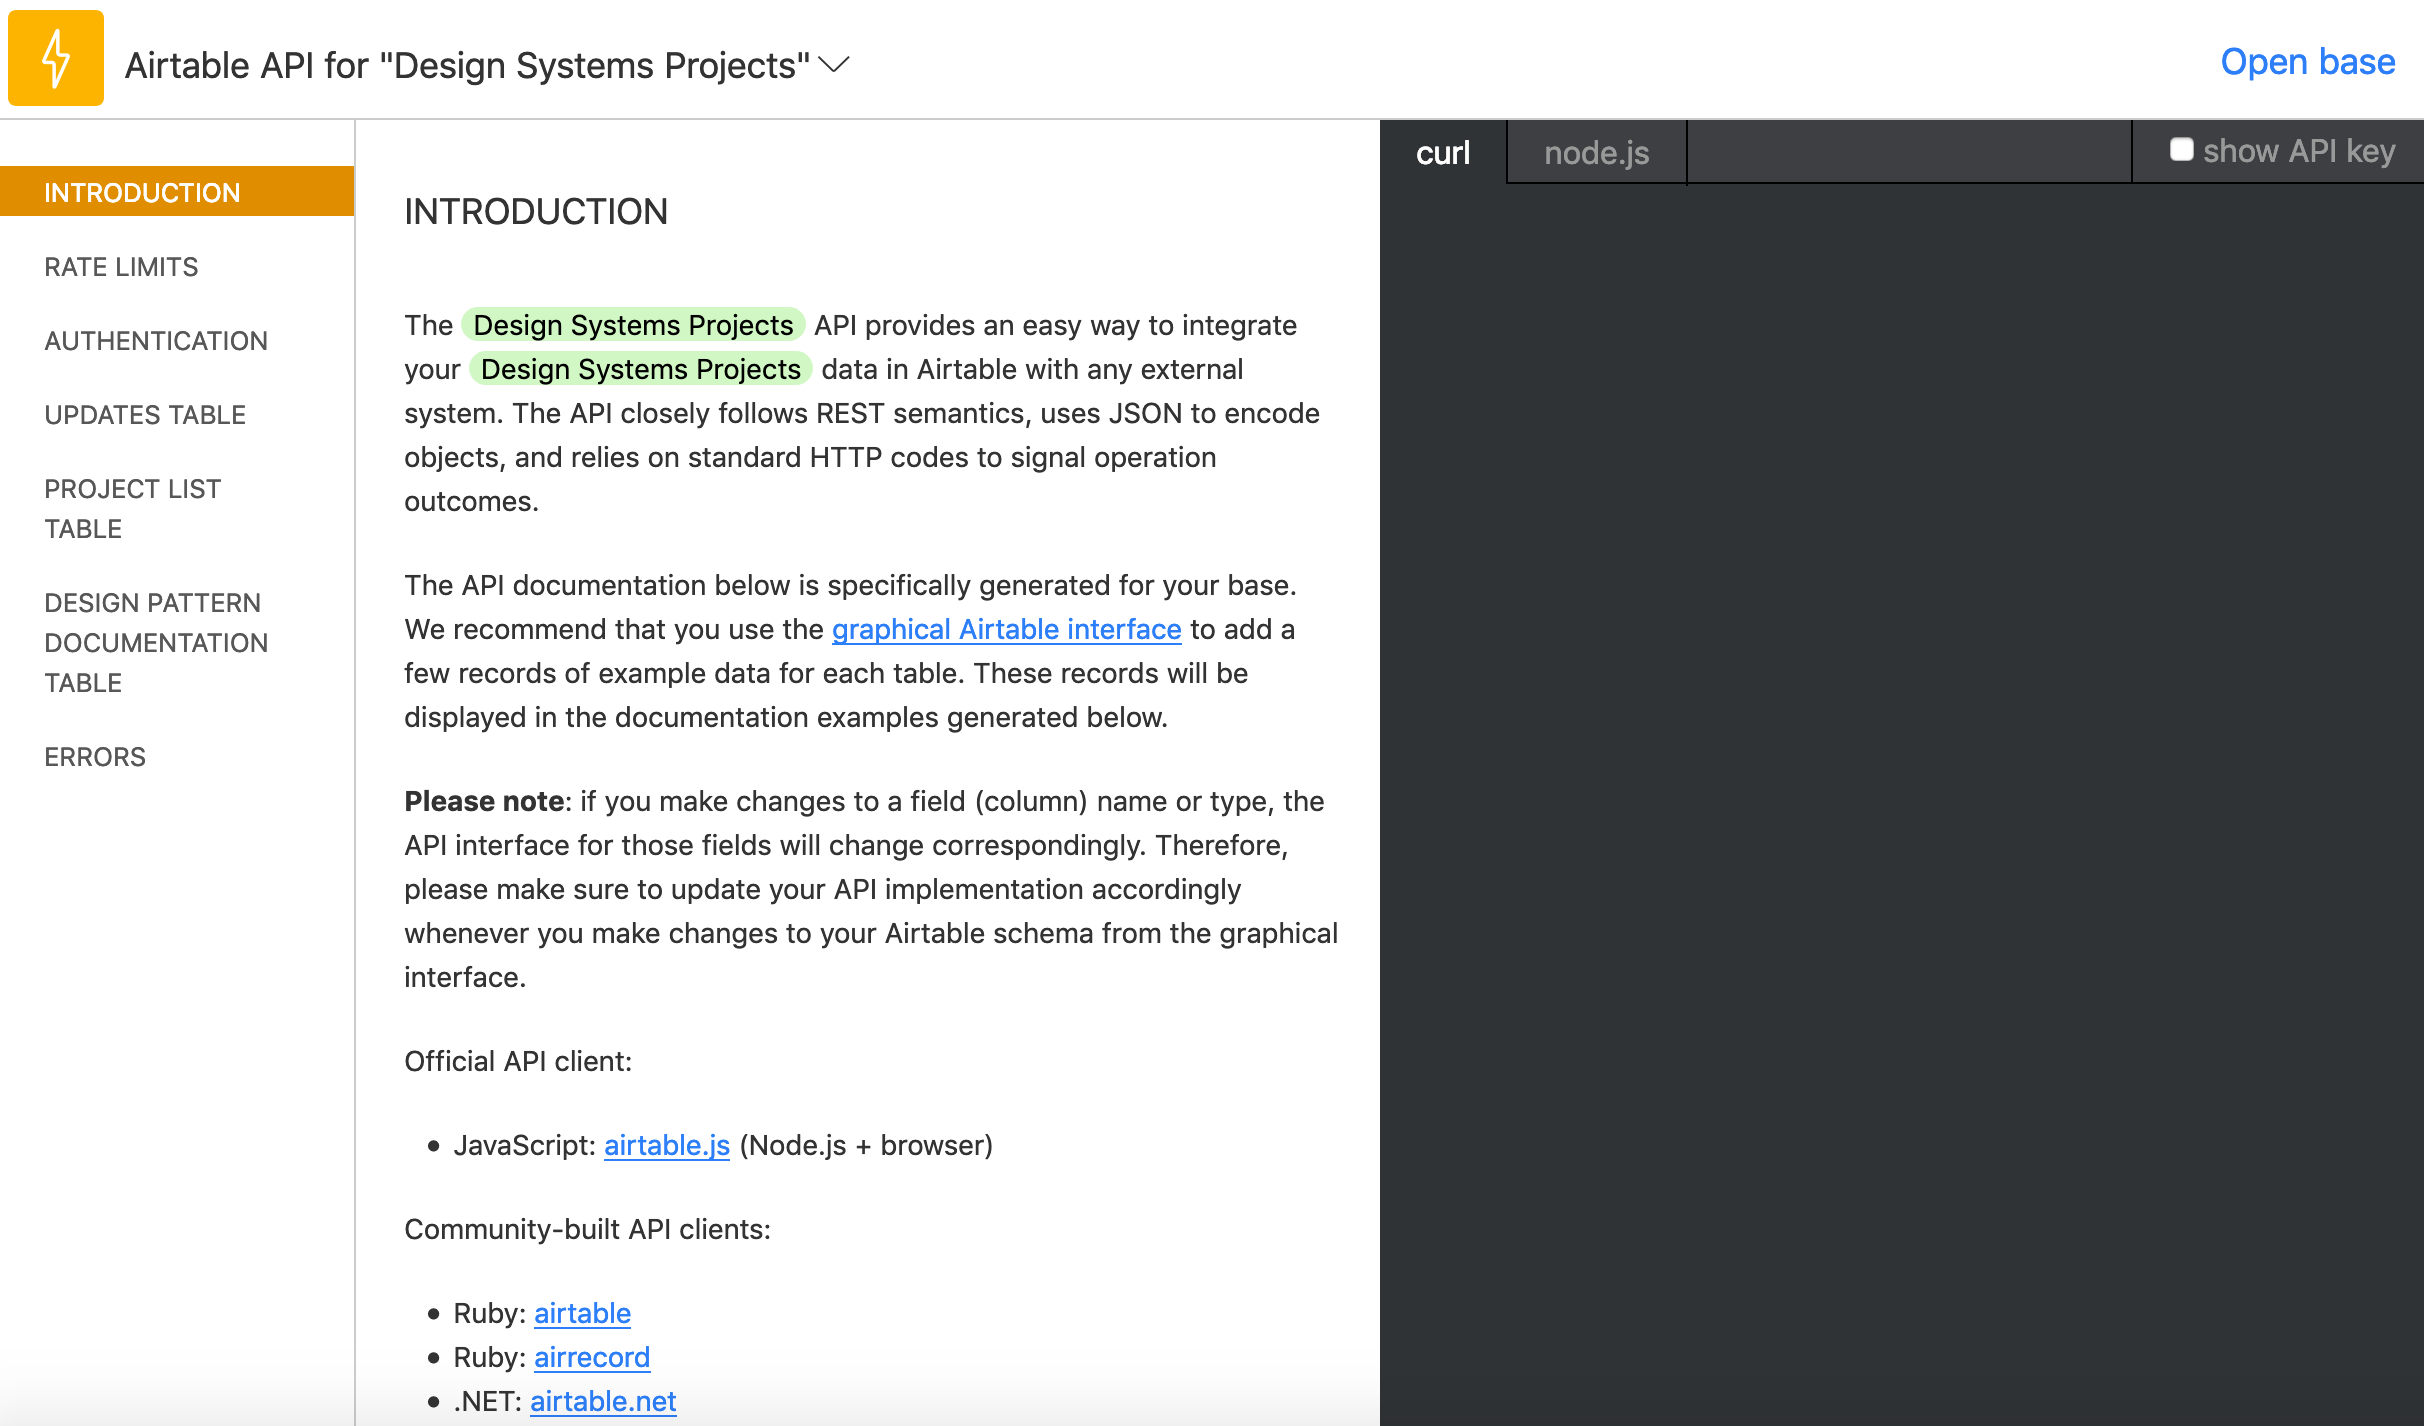
This will send us to a handy docs website that gives us an incredibly easy to read API for our specific project! Scrolling down we’ll find our API key which we’ll need to access this data as well as a ton of examples that we can use to manipulate the data we get back:

A screenshot of the Airtable API webpage. The heading says Standard API and a list of options, including example projects, is provided. Below the example projects is the project configured in this post, called Design Systems Project.

Let's head back to App.js in our airtable-test directory, delete all the code in that file, and replace it with the following:

import React, { Component } from 'react';
import Airtable from 'airtable';
const base = new Airtable({ apiKey: 'XXXXXXXXXXX' }).base('XXXXXXXXXXX');

Make sure to replace those Xs with the details that you can see in that Airtable API doc we just opened. But now that we’ve done all the setup, we can finally get around to creating our interface by calling data from our spreadsheet.

In App.js we can start to construct the App component:

class App extends Component {
  constructor(props) {
    super(props);
    this.state = {
      records: []
    };
  }
  render() {
    return {
      <div className="App">Hello</div>		}
    }
  }
}

All this will do for now is setup the app’s state and then render “Hello” on the page. Next up, we’ll be add each record from Airtable to that state.

First thing that’s important to note below: in componentDidMount() we’ll be selecting Updates which is just a way of telling Airtable that we want the spreadsheet called Updates. Make sure that this name is the same name as the spreadsheet. We’ll also be looping through all the records, or rows, of our table in that function too:

class App extends Component {
  constructor(props) {
    super(props);
    this.state = {
      records: []
    };
  }
  componentDidMount() {
    base('Updates').select({view: 'Grid view'})
    .eachPage(
      (records, fetchNextPage) => {
        this.setState({
          records
        });
        console.log(records);
        fetchNextPage();
      }
    );
  }
  render() {
    return (
      <div className="App">
        <div>Hello</div>
      </div>
    );
  }
}

fetchNextPage() is the Airtable API’s way of giving us the next record in our spreadsheet and it’s neat that it will keep going until there are no more records. Again, we’re not doing anything with that data yet; we only want to make sure everything is working correctly at this point.

Open up the console in DevTools and we should see something like this:

Array(4) [ {…}, {…}, {…}, {…} ]

And if we dive through each of the objects in this array, then we should find all the data from the spreadsheet! Doing this bit always feels like magic to me.

Anyway, next up we can update our render() function like so:

render() {
  return (
    <div className="App">
      {this.state.records.length > 0 ? (
        this.state.records.map((record, index) =>
          <div key={index}>
            <h2>{record.fields['Date']}</h2>
            {record.fields['UI Kit']}
            {record.fields['Component Library']}
          </div>
        )
        ) : (
          <p>Loading...</p>
        )}
      </div>
    </div>
  );
}

We’re going to be looping through the state that we setup earlier and then rendering the record.fields[] for each column in our spreadsheet. We have a Date, UI Kit, and Component Library column, and once we’ve updated our App.js with the code above, we should see all the content from our spreadsheet!

A screenshot of a default webpage with no styling with four headings containing dates in year/month/day numeric format following by a block of text containing content from the spreadsheet.

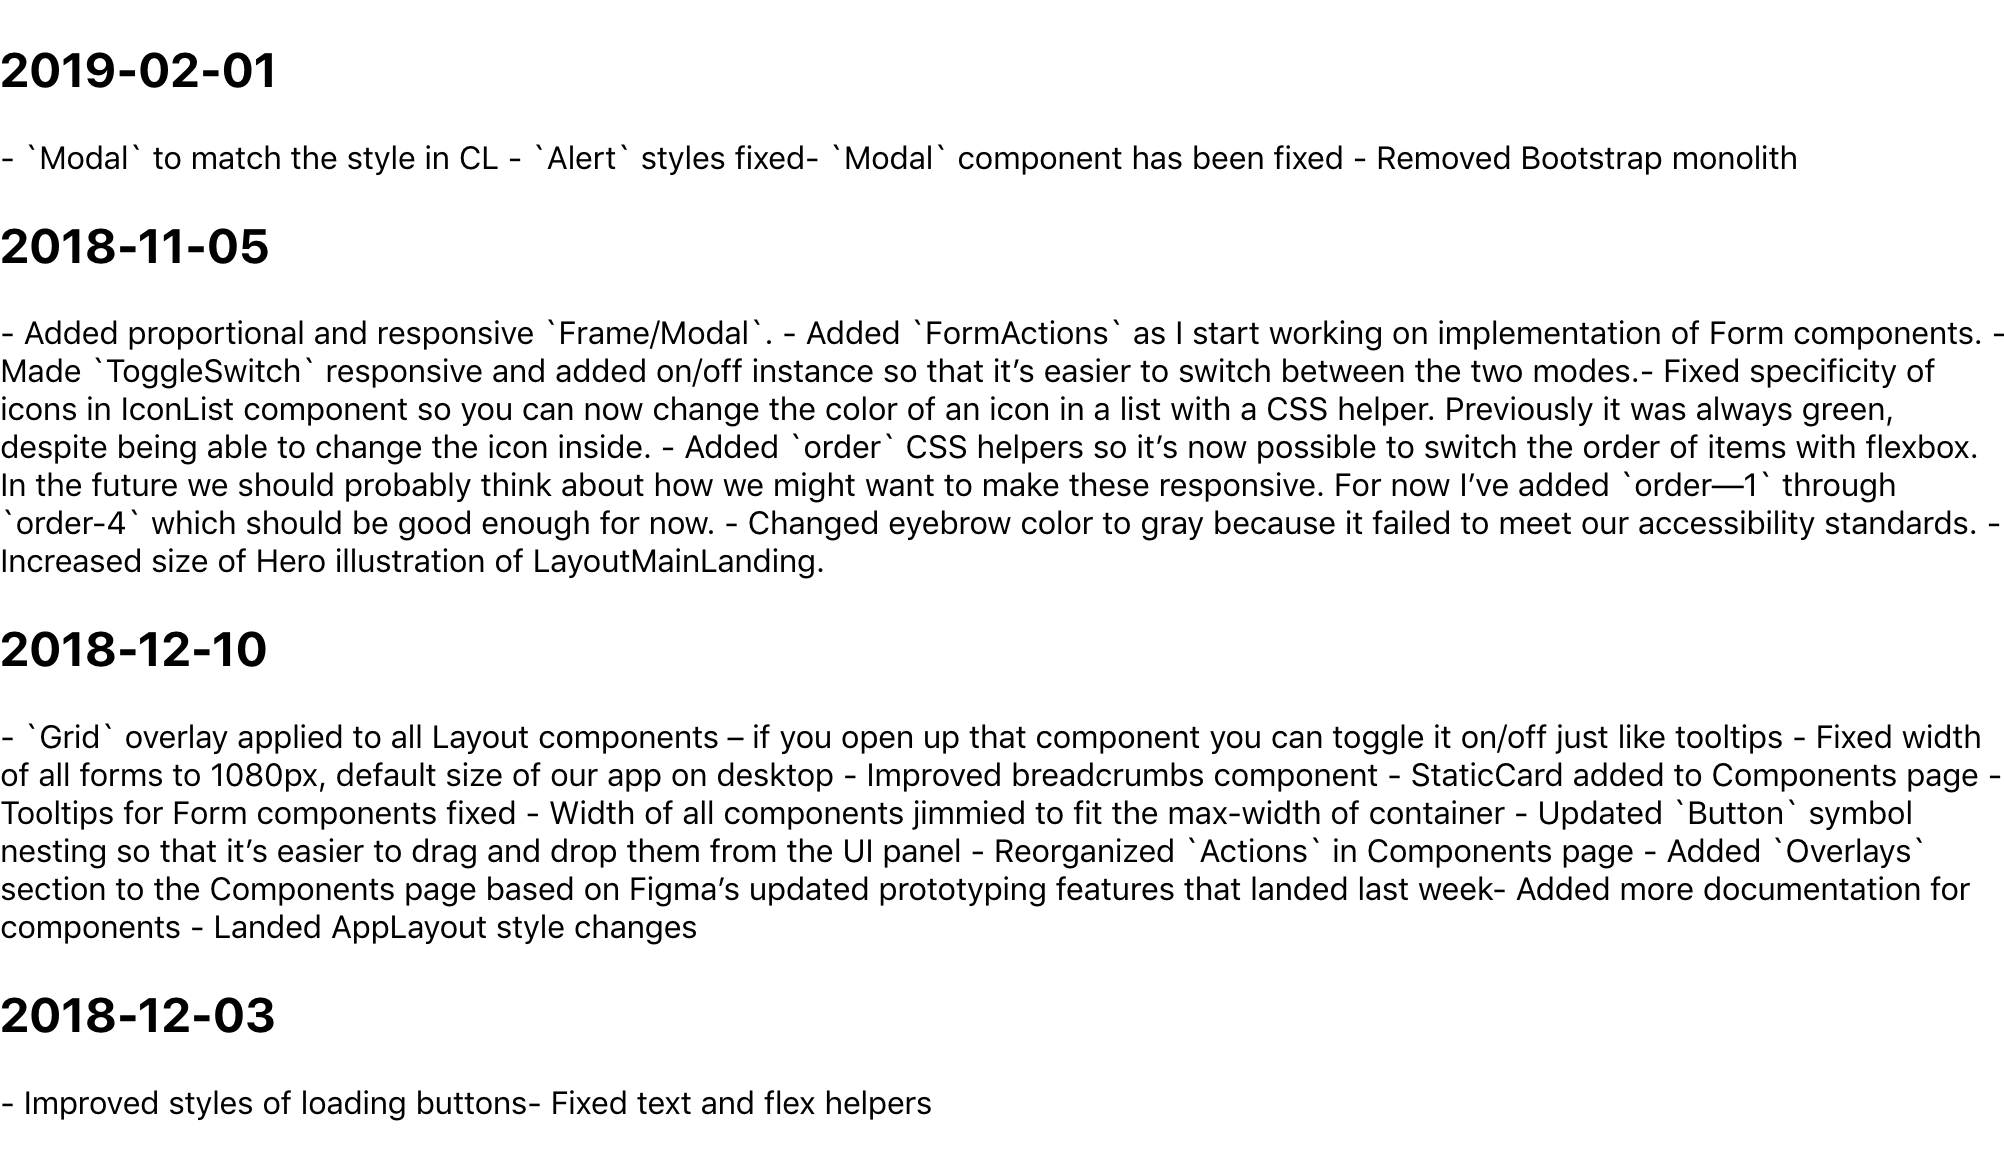
It’s like magic! But why does this data look so weird? Well, it’s because I wanted to write Markdown in each cell, so now we’ll need to use a parser to convert that data into good ol’ fashioned HTML. First, we need to head back to the command line though:

npm i showdown 

showdown will help us parse all that Markdown we’ve written in our Airtable spreadsheet. After installing it, we only need to import it at the top of our App.js file, like this:

import showdown from 'showdown';
const markdownConverter = new showdown.Converter();

After the componentDidMount() function, we can create another function that will create our HTML using showdown:

createHTML(markdown){
  return(
    markdownConverter.makeHtml(markdown)
  )
}

It’s a little iffy, but it makes me feel like the code is a bit tidier this way. Now we can update our render() function:

  render() {
  return (
    <div className="App">
      {this.state.records.length > 0 ? (
        this.state.records.map((record, index) =>
          <div key={index}>
            <h2>{new Date(record.fields['Date']).toISOString().split('T', 1)}</h2>
            <div dangerouslySetInnerHTML={{__html: this.createHTML(record.fields['UI Kit'])}} />
            <div dangerouslySetInnerHTML={{__html: this.createHTML(record.fields['Component Library'])}} />
          </div>
        )
      ) : (
        <p>Loading...</p>
      )}
    </div>
  );
}

We’re doing a couple of new things here: we’re using dangerouslySetInnerHTML in each div which, in turn, uses our createHTML function to convert the data from each column (specifically, the UI Kit and Component Library columns). We’re also converting the dates of each row into headings to make things a bit easier to read.

And with that we’re pretty much done! Here’s the final App.js:

import React, { Component } from 'react';
import Airtable from 'airtable';
import showdown from 'showdown';

const markdownConverter = new showdown.Converter();

const base = new Airtable({ apiKey: 'xxxxxxx' }).base('xxxxxxx');

class App extends Component {
  constructor(props) {
    super(props);
    this.state = {
      records: []
    };
  }
  componentDidMount() {
    base('Updates').select({view: 'Grid view'})
    .eachPage(
      (records, fetchNextPage) => {
        this.setState({
          records
        });
        fetchNextPage();
      }
    );
  }
  createHTML(markdown){
    return(
      markdownConverter.makeHtml(markdown)
    )
  }
  render() {
    return (
      <div className="App">
        {this.state.records.length > 0 ? (
          this.state.records.map((record, index) =>
            <div key={index}>
              <h2>{new Date(record.fields['Date']).toISOString().split('T', 1)}</h2>
              <div dangerouslySetInnerHTML={{__html: this.createHTML(record.fields['UI Kit'])}} />
              <div dangerouslySetInnerHTML={{__html: this.createHTML(record.fields['Component Library'])}} />
            </div>
          )
        ) : (
          <p>Loading...</p>
        )}
      </div>
    );
  }
}

export default App;

There’s still a ton of updates we could make to improve things. I took a first pass at styling, but we probably want to do things like improve the date format and maybe have some kind of indication as to which updates refer to which rows in the spreadsheet. Maybe we could even toggle showing which information to show depending on whether you’re a designer or engineer.

An animating screenshot of the final result which contains the same content as the earlier example but with extra spacing between sections and the column headings in dark orange and flushed to the left of the content instead of above it.

Anyway! I think this is a good start to getting to grips with the Airtable API and I’d love to hear about how you use it in the comments below.

The post Getting to Grips with the Airtable API appeared first on CSS-Tricks.

A Quick CSS Audit and General Notes About Design Systems

I’ve been auditing a ton of CSS lately and thought it would be neat to jot down how I’m going about doing that. I’m sure there are a million different ways to do this depending on the size and scale of your app and how your CSS works under the hood, so please take all this with a grain of salt.

First a few disclaimers: at Gusto, the company I work for today, our engineers and designers all write in Sass and use webpack to compile those files into CSS. Our production environment minifies all that code into a single CSS file. However, our CSS is made up of three separate domains. so I downloaded them all to my desktop because I wanted to test them individually.

Here’s are those files and what they do:

  • manifest.css: a file that’s generated from all our Sass functions, mixins and contains all of our default HTML styles and utility classes.
  • components.css: a file that consists of our React components such as Button.scss, Card.scss, etc. This and manifest.css both come from our Component Library repo and are imported into our main app.
  • app.css: a collection of styles that override our components and manifest. Today, it exists in our main application repo.

After I downloaded everything, I threw them into an S3 bucket and ran them through CSS Stats. (I couldn’t find a command line tool that I liked, so I decided stuck with this tool.) The coolest thing about CSS Stats is that it provides a ton of clarity about the health and quality of a site’s CSS, and in turn, a design system. It does this by showing the number of unique font-size and unique background-color CSS declarations there are, as well as a specificity graph for that particular CSS file.

I wanted to better understand our manifest.css file first. As I mentioned, this file contains all our utility classes (such as padding-top-10px and c-salt-500) as well as our normalize and reset CSS files, so it's pretty foundational for everything else. I started digging through the results:

There are some obvious issues here, like the fact that there are 101 unique colors and 115 unique background colors. Why is this a big deal? Well, it’s a little striking to me because our team had already made a collection of Sass functions to output a very specific number of colors. In our Figma UI Kit and variables_color.scss (which gets compiled into our manifest file, we declare a total of 68 unique colors:

So, where are all these extra colors coming from? Well, I assume that they’re coming from Bootstrap. Back when we started building the application, we hastily built on top of Bootstrap’s styles without refactoring things as we went. There was a certain moment when this started to hurt as we found visual inconsistencies across our application and hundreds of lines of code being written that simply overrode Bootstrap. In a rather gallant CSS refactor, I removed Bootstrap’s CSS from our main application and archived it inside manifest.css, waiting for the day when we could return to it and refactor it all.

These extra colors are likely come from that old Bootstrap file, but it’s probably worth investigating some more. Anyway, the real issue with this for me is that my understanding of the design system is different from what’s in the front-end. That’s a big problem! If my understanding of the design system is different from how the CSS works, then there’s enormous potential for engineers and designers to pick up on the wrong patterns and for confusion to disseminate across our organization. Think about the extra bloat and lack of maintainability, not to mention other implications.

I was reading Who Are Design Systems For? by Matthew Ström and perked up when he quotes a talk by Julie Ann-Horvath where she’s noted as saying, “a design system doesn’t exist until it’s in production.” Following the logic, it's clear the design system I thought we had didn't actually exist.

Going back to manifest.css though: the specificity graph for this file should be perfectly gradual and yet there are some clear spikes that show there’s probably a bit more CSS that needs to be refactored in there:

Anyway, next up is our components.css. Remember that’s the file that our styles for our components come from so I thought beforehand that it’s bound to be a little messier than our manifest file. Throwing it into CSS Stats returns the following:

CSS-Stats shows some of the same problems — like too many font sizes (what the heck is going on with that giant font size anyway?) — but there are also way too many custom colors and background-colors. I already had a hunch about what the biggest issue with this CSS file was before I started and I don’t think the problem is not shown in this data here at all.

Let me explain.

A large number of our components used to be Bootstrap files of one kind or another. Take our Accordion.jsx React component, for instance. That imports an accordion.css file which is then compiled with all the other component’s CSS into a components.css file. The problem with this is that some Accordion styles affect a lot more than just that component. CSS from this this file bleeds into other patterns and classes that aren’t tied to just one component. It’s sort of like a poison in our system and that impacts our team because it makes it difficult to reliably make changes to a single component. It also leads to a very fragile codebase.

So I guess what I’m saying here is that tools like CSS Stats are wondrous things to help us check core vital signs for CSS health, but I don’t think they’ll ever really capture the full picture.

Anyway, next up is the app.css file:

This is the “monolith” — the codebase that our design systems team is currently trying to better understand and hopefully refactor into a series of flexible and maintainable React components that others can reuse again and again.

What worries me about this codebase is the specificity of it all what happens when something changes in the manifest.css or in our components.css? Will those styles be overridden in the monolith? What will happen to the nice and tidy component styles that we import into a new project?

Subsequently, I don’t know where I stole this, but I’ve been saying it an awful lot lately — you should always be able to predict what your CSS is going to do, whether that’s a single line of code or a giant codebase of intermingled styles. That’s what design systems are all about — designing and building predictable interfaces for the future. And if our compiled CSS has all these unpredictable and unknowable parts to it, then we need to gather everyone together to fix it.

Anywho, I threw some of the data into a Dropbox Paper doc after all this to make sure we start tackling these issues and see gradual improvements over time. That looks something like this today:

How have you gone about auditing your CSS? Does your team code review CSS? Are there any tricks and tips you’d recommend? Leave a comment below!

The post A Quick CSS Audit and General Notes About Design Systems appeared first on CSS-Tricks.