I have an exciting project that offers interesting opportunities for bloggers, SEO publishers and their subscribers - it's a challenge game that is designed to be an interesting content for bloggers' subscribers.
As part of this project, bloggers will be able to upload their own photos or images to the gallery of this game, as well as add images, photos or avatars for greeting screens and splash screens. In doing so, the resulting clone of the game - the refub - bloggers will be able to promote to their subscribers.
This project involves an opportunity for bloggers' subscribers to feel part of the game process.
Each participant of the process, including both bloggers and SEO publishers, will be able to earn in the amount of their specified markups from each sold copy of the game.
SEO specialists act as publishers and also earn from sales in the amount of their specified markup on each copy of the game sold.
Special attention is paid to personal motivation and congratulations: subscribers who upload their photos or images will receive a personalized greeting from a blogger inside the game, which will help them keep their spirits up and motivated.
I would like to hear your opinions and ideas on how to promote this project online.
What strategies and methods of promotion would be the most effective?
I would be grateful for any ideas, advice and for your recommendations!
Every blogger knows about backlinks and their importance to search rankings. But the actual challenge lies in knowing how to and being able to gain quality links from sites with high domain authority. Thankfully, there...
Do you want to know about the history of blogging?
If you are thinking about starting a WordPress blog today, then you might like to know that there are 1.9 billion websites in the world, and the blogging industry makes up one-third of it. But it didn’t start out that way.
In this article, we’ll share the small beginnings of blogging, the powerful blogging platforms that evolved, and how WordPress came to power over 43% of all websites.
1993-1994: The First Blogs Were Published
Blogging was born sometime around 1993 or 1994. No one was expecting the impact it would have on the world, and the word ‘blog’ didn’t even exist. As a result, there were no historians watching out for it, and no one kept careful records.
We know that Rob Palmer started a plain text journal online in late 1993. In an article on how he became the first blogger, Rob explains how costly it was to run a website in those days. The domain name cost him $100, and basic hosting cost over $100 a month (for comparison, it costs $2.69 per month now).
However, it’s more widely recognized that the first blog was created by 19-year-old student Justin Hall. His home page contained hyperlinks to interesting content he found online, and articles he wrote himself. The content included basic HTML text formatting and small images.
Ten years later, the New York Times Magazine named him the “founding father of personal bloggers”. You can still find an early version of Justin’s page preserved on links.net.
Three or four years later, the tech blog SlashDot was launched in September 1997.
December 1997: The Term ‘Weblog’ Was Coined
Originally, blogs didn’t have a name. They were thought of as online journals or diaries, or personal home pages.
In December 1997, Jorn Barger came up with the term ‘weblog’. He maintained an internet culture website called Robot Wisdom, and the term reflected his process of ‘logging the web’ as he browsed.
August 1998 was the first time a traditional news site tried blogging. Journalist Jonathan Duke ‘blogged’ about Hurricane Bonnie for the Charlotte Observer, but didn’t use the term itself.
October 1998: The Open Diary Platform Was Launched
Creating websites was technical, so eventually blogging platforms were created that made it easy for users to record their thoughts and experiences online.
One of the earlier ones was The Open Diary, which developed an online community by allowing users to comment on one another’s posts.
Here’s an early screenshot preserved on the Internet Archive. Notice that blogs were designed for much lower-resolution screens back then.
March 1999: RSS Made Blog Subscription a Reality
RSS is an abbreviation for Really Simple Syndication or Rich Site Summary. It was initially released in March 1999 and is a format used for delivering frequently changing web content from websites and other online publishers.
It allows users to keep track of updates to their favorite websites without having to visit each site individually. They are able to read the latest content in an RSS feed reader or their email.
In April 1999, developer Peter Merholz added some humor to his website, Peterme.com. He broke up the word ‘weblog’, into two words, ‘we blog’. This caught on, and the term ‘blog’ was born.
April 1999: LiveJournal, an Early Blogging Platform, Was Launched
In April 1999, programmer Brad Fitzpatrick launched the LiveJournal platform as a way to keep in touch with his high school friends. It quickly grew into a community of people recording their thoughts online.
LiveJournal was easy to use because it provided a single open text area. Its competitors at the time offered form-based text fields.
In January 1995, the blogging company Six Apart purchased the company that operated LiveJournal, and the platform is still operating today. Although a lot of LiveJournal users have switched to WordPress by following our guide on how to move from LiveJournal to WordPress because WordPress is more powerful and easier to use.
In July 1999, another blogging platform called Metafilter was launched. It was known as MeFi, and its members could post entries to be published on the main website.
August 1999: Blogger Was Launched by Para Labs
Blogger is another early blogging platform, first launched in August 1999 by Pyra Labs. It offered a quick and easy way to create a blog for non-tech-savvy users.
Every entry on Blogger was given a permanent and shareable URL or permalink. This made it easy for users to access the content they were searching for and made Blogger the platform of choice for a lot of writers.
Later in 2003, Google acquired Blogger and over time redesigned it into the product we know today. It is WordPress’s largest competitor, and you can learn more in our comparison of WordPress vs Blogger (Pros and cons).
In January 2000, the first known vlog entry was created by Adam Kontras, and also the popular blog Boing Boing was born.
Early 2001: b2/cafelog, the Precursor of WordPress, Was Launched
In early 2001, the French programmer Michel Valdrighi launched a personal publishing system with a new design known as b2 or cafelog.
In contrast with most other blogging systems at the time, the software needed to be installed on the user’s own web server, and it dynamically created pages from the contents of a MySQL database. WordPress users will find this familiar.
b2/cafelog became popular and was eventually installed on about 2,000 blogs. Unfortunately, the project was abandoned, paving the way for its source code to form the basis of WordPress in 2003.
October 2001: The Moveable Type Blogging Platform Was Released
The company Six Apart launched the Moveable Type blog publishing system in October 2001. Like b2, it needed to be installed on a web server. They introduced a trackback system in version 2.2 that has been adopted by other blogging platforms including WordPress.
In February 2002, Heather Armstrong lost her job for writing about her work colleagues on her personal blog, dooce.com. As a result, ‘dooced’ has become a term that means ‘fired for blogging.’
April 2002: TheMommyBlog.com Was Founded
In April 2002, Melinda Roberts started TheMommyBlog.com, one of the first blogs focussing on parenting and family life. This would inspire more than 3.9 million other parenting blogs over the next ten years.
The popular Gizmodo blog was also launched in July 2002.
August 2002: Blogads Allowed Blogs to Be Easily Monetized
Blogads, the first broker of blog advertising, launched in August 2002. This allowed many bloggers to turn their hobby into their primary source of income.
Less than a year later, Google launched AdSense, a competing platform.
November 2002: The Blog Search Engine Technorati Was Launched
Technorati provided a search engine for bloggers in November 2002, allowing blog readers to easily find useful content. In 2008, Technorati also launched an ad network.
Gawker, the first gossip blog, was launched in December 2002. It ceased operations in August 2016 after a legal battle and was later relaunched in July 2021.
February 2003: The Birth of Live Blogging
In February 2003, The Guardian made use of live blogging during the Prime Minister’s question time. They called this ‘live text’ and started to use it frequently for sporting events.
Today live blogging has taken many forms from self-hosted live blogs done on CNN and other blogs, to even real-time tweets which in essence are a form of live blog.
In February 2003, Google acquired Blogger, which was at that time the biggest and most successful blogging platform. It continued to grow in popularity until mid-2010.
However, since then WordPress steadily rose in popularity, and has been beating Blogger and dominating the trends since 2014.
Blogger remains the second most popular platform used by about 0.4% of blogs, while WordPress used is by an astonishing 97%.
In March 2003, an anonymous Iraqi blogger known as ‘Salam Pax’ blogged about the Iraq War to a worldwide audience.
May 2003: WordPress Was Released
In May 2003, Matt Mullenweg and Mike Little released the first version of WordPress. It was based on the code of an earlier blogging platform, b2/cafelog, that they were involved in. The new software retained the best parts of the older platform and added new features.
Like b2/cafelog, the software needed to be installed on a web hosting server, and dynamically created web pages from a MySQL database, just as the current version of WordPress does.
One goal of the platform was to be easy to set up. Here’s a preview of the WordPress 1.0 basic settings screen:
After purchasing Blogger, Google launched its online advertising platform Adsense in June 2003. Its unique feature was to match ads with blog content, and it made it easy for bloggers to start making money.
Jason Calacanis founded Weblogs, Inc. in September 2003. It eventually grew into a portfolio of 85 blogs. In 2005 he sold the company to AOL for $30 million.
TypePad, a commercial blogging platform based on Moveable Type, was released in October 2003 and hosted blogs for major multimedia companies such as the BBC.
February 2004: The Year of the Video Blog
In February 2004, videographer Steve Garfield started to upload one or two short videos each month to his personal blog. These often covered news events such as protests and rallies.
Other video bloggers started doing the same, and this became known as ‘vlogging.’ Steve Garfield dubbed 2004 ‘the year of the video blog.’
This led the way for YouTube to be launched the following year.
In September 2004, Darren Rowse launched ProBlogger.net.
December 2004: ‘Blog’ Was the Merriam-Webster Word for the Year
In 2004, the most looked-up word in the Merriam-Webster online dictionary was ‘blog’. It became their word for the year.
This shows how much blogging was impacting the mainstream world. In fact, 32 million Americans were reading blogs at the time according to one study.
In February 2005, WordPress 1.5 was released, introducing themes.
February 2005: YouTube Was Launched
With the growth of video blogging, YouTube was launched in February 2005. This made it much easy for users to upload video content to the internet.
It would be purchased by Google the following year.
Blogging continued to grow in credibility. In March 2005, Garrett Graff became the first blogger to be granted a press pass for the White House. The popular tech blog TechCrunch was launched in June 2005, and Mashable the following month.
August 2005: Automattic Was Founded
In August 2005, WordPress co-founder Matt Mullenweg founded a new company, Automattic. The following year, it launched a new blog hosting service known as WordPress.com.
This allowed you to create a WordPress blog for free, but without the advanced features of self-hosted WordPress. You could purchase additional options like a custom domain name, additional storage, and other premium services.
Because of the similarity in names, beginners often start with WordPress.com thinking they are getting the powerful WordPress.org software.
In December 2005, it was estimated that $100 million worth of blog ads were sold that year. Also, WordPress 2.0 was launched, introducing the new admin dashboard.
November 2005: Google Analytics Was Launched
To create a successful blog, it’s helpful to know how users interact with your website, including the blog posts they enjoy and those they don’t. In November 2005, Google Analytics was launched to help website owners track user activity.
It was initially developed from other analytics software acquired by Google, including Urchin on Demand and Adaptive Path, and additional features were added in the following years.
March 2006: Launch of Twitter, the Popular Microblogging Platform
In March 2006, Jack Dorsey co-founded Twitter and sent out the first tweet. This new platform restricted posts to 140 characters or less, introducing the concept of microblogging.
You can use WordPress Twitter plugins to include your recent tweets on your website or encourage visitors to share your blog posts.
Automattic filed for trademark registration for the WordPress name and logo in March 2006. At the time there were 50 million blogs on the internet according to Technorati.
August 2006: The First WordCamp Was Held in San Fransisco
WordCamps are locally-organized conferences covering everything related to WordPress. The first WordCamp was organized in San Francisco by Matt Mullenweg in August 2006.
Since then local communities around the world have organized hundreds of others. If you would like to attend one, you may be interested in our infographic on what a WordCamp is and why you should attend.
October 2006: Wix Hosted Blogging Platform Was Launched
Wix was launched in October 2006. It is a popular hosted platform that offered a drag-and-drop website builder, allowing small businesses to easily build a website without coding skills. However, themes were limited, and you had to pay for every third-party plugin.
Wix currently has over 110 million users across the globe. Learn how it compares with WordPress in our article on Wix vs WordPress.
Google acquired YouTube in October 2006.
February 2007: Tumblr Microblogging Platform Was Released
Tumblr was launched in February 2007. It’s a microblogging platform with social networking features including following other blogs, reblogging, built-in sharing tools, and more.
The platform was purchased by Yahoo in 2013, then acquired by Verizon in 2017. It is currently owned by Automattic.
Posterous, a similar microblogging platform, was launched in May 2008. On an unrelated note, the White House started its own blog in January 2009.
July 2009: WPBeginner Was Launched
In July 2009, the WPBeginner blog was launched by 18-year-old web developer Syed Balkhi. He decided that instead of maintaining his clients’ WordPress websites, he would teach them to do it themselves.
He scoured the web to find a resource that could help his clients and other new WordPress users, but most WordPress tutorials were written by developers for developers. So he created WPBeginner as a resource targeted toward WordPress beginners and DIY users.
Since then, WPBeginner has become the largest free WordPress resource site in the industry.
In June 2010, Automattic donated the ‘WordPress’ trademark to WordPress.org. By the end of the year, there were more than 152 million blogs across all platforms and 11% of bloggers were earning their primary income from blogging.
August 2012: Medium Was Launched
Evan Williams, a co-founder of Pyra Labs which created Blogger, launched a different type of blogging platform called Medium. It works like a social network where you can publish articles.
Medium has grown into a community of writers, bloggers, journalists, and experts. It is an easy-to-use blogging platform with limited social networking features.
April 2013: Ghost Minimal Blogging Platform Was Launched
Ghost is a minimalist blogging platform with features entirely focused on writing blog posts. It was launched in April 2013 and is available as a hosted platform, and also a version that you can host on your own server, though this is tricky.
Ghost now has over 3 million installs with an active monthly user base of over 10,000. You can learn how it compares with WordPress in our WordPress vs Ghost guide.
In April 2013, LinkedIn acquired the Pulse blogging platform, which was rolled out to all users over the next couple of years.
September 2013: OptinMonster Was Launched
In September 2013, Syed Balkhi and Thomas Griffin co-founded OptinMonster, the most powerful conversion optimization software. It was designed to help bloggers grow their email lists in WordPress and convert website visitors into subscribers.
Over the years, Syed had tried numerous techniques to get more email subscribers. He was able to get 70–80 new subscribers each day by adding a sidebar form, contact form, and other landing pages to his site.
When he started using OptinMonster, he started getting 600% more email subscribers even though his blog was getting the same amount of traffic as before.
In April 2015, there were more than 227 million blogs worldwide.
March 2016: WPForms Was Launched
The following year, Syed Balkhi co-founded another product, this time with Jared Atchison. WPForms is a powerful WordPress plugin that makes it easy for bloggers to create forms using templates and drag and drop.
You can easily create a contact form, online survey form, email subscription form, donation form, billing order form, or any other type of form with just a few clicks without hiring a developer or learning how to code.
In April 2016, Syed Balkhi acquired Yoast Analytics, the most popular Google Analytics integration in the world, and rebranded it as MonsterInsights. The plugin allows you to easily install Google analytics in WordPress and shows you helpful reports in your dashboard.
Google Analytics shows you how your audience interacts with your website, which is crucial for a successful blog. The best part about using MonsterInsights is that you can add the Google Analytics tracking code without editing code or hiring a developer.
In May 2016, WordPress introduced the .blog domain extension as an alternative to .com, .net and .org. By February 2017, there were more than 300 million blogs online.
November 2017: Substack Was Founded
Substack, an online newsletter publishing platform, was founded in November 2017. It allows you to easily send newsletter emails to your subscribers.
You can have both paid and free subscriptions, and Substack gets a share of all your paid subscription fees. Apart from newsletters, you also get a basic website and podcast hosting.
However, Substack doesn’t have all the functionality of a typical blogging platform or a content management system. You can learn how it compares with WordPress in our guide on Substack vs WordPress: which one is better?
WordPress 5.0 was released in December 2018 and introduced the block editor, codenamed Gutenberg.
October 2018: SeedProd Joined Awesome Motive
In October 2018, SeedProd, the popular coming soon and maintenance mode plugin for WordPress joined Awesome Motive through a merger, along with the plugin’s founder, John Turner. At the time it was used by 800,000 WordPress sites.
To celebrate the tenth anniversary of the WPBeginner blog, the WPBeginner Engage Facebook Group was launched in April 2019. It currently has over 89,000 members and is the largest WordPress group on Facebook.
February 2020: All in One SEO Acquired by Awesome Motive
In January, Awesome Motive acquired All in One SEO (AIOSEO), the original WordPress SEO plugin that was being used by over 2 million websites at the time.
The plugin was released in 2007 by Michael Torbert and allows you to easily optimize your WordPress blog for search engines and social media platforms.
Later that year, PushEngage a leading web push notification software was acquired by Awesome Motive to help more bloggers use push notification to notify their users about new blog posts.
Web push notifications have become one of the most effective way to notify blog subscribers about new content, and it’s used by large news sites and publishers.
July 2021: SearchWP Acquired by Awesome Motive
Awesome Motive made another acquisition in July 2021: SearchWP, the leading search engine plugin for WordPress. It was originally developed in 2013 by Jon Christopher.
Effective site search is important to bloggers. It allows their users to find what they’re looking for, resulting in more sales and page views.
By 2022, 43% of the web was built on WordPress. There were 572 million blogs globally, and over 31 million bloggers in the US alone. For more statistics like this, see our list of blogging statistics, trends, and data.
July 2023: End of Life for Google Analytics UA
Google Analytics 4 is the latest version of Google’s analytics platform. It has many changes, like a new reporting system and metrics. The way GA4 collects and processes data is also different from the previous version known as Universal Analytics (UA).
Google will sunset the old Universal Analytics on July 1, 2023. It’s important to switch your blog over to the new version before then.
We hope this article helped you learn about the history of blogging. If you have additional blogging history facts, please let us know by leaving a comment below.
Are you looking for the best WordPress banner plugins?
Banner plugins make it easy to add high-converting banners to your WordPress website. You can then use them to promote your products, highlight your services, sell advertising placements, and more.
In this article, we will compare the best WordPress banner plugins to help you boost your website revenue.
Why Use a WordPress Banner Plugin?
Many website owners use banners to encourage visitors to take some action on their website, like buying their products or services. For example, you might use a banner to promote your online courses.
Banners are also a great way to generate leads. You might create a banner that offers visitors a coupon code if they sign up to your email newsletter.
Whether you want to show a banner announcements on your eCommerce store, use a simple banner to generate leads, or sell banner ads in a slider, a WordPress banner plugin lets you do it without writing any code.
Some WordPress banner plugins also have advanced targeting features, so you can show personalized messages to the right people at the right time.
They may also come with professionally-designed templates for your banners, and offer other design tools to help you customize them.
That being said, let’s take a look at the best banner plugins for WordPress for various industry use-cases.
Pro Tip: There is a free version of OptinMonster that you can use to get started. They have a special free plan that can only be found from inside their WordPress plugin dashboard.
OptinMonster lets you add all kinds of banners to your website, including floating banner bars like in the image below.
This is a “sticky” floating bar that attaches to the top or bottom of the page and follows visitors as they scroll. This allows you to show a banner without annoying the visitor or interrupting what they’re doing on your WordPress website.
OptinMonster also has full support for popup banners. You can even level-up these banners with OptinMonster’s powerful exit-intent technology. This allows you to show a popup just as the user is about to leave your website.
Many website owners use these extent-intent popups to convince visitors to stay on the website by offering them exclusive discounts.
Popups are a great way to get the visitor’s attention, but they can also become intrusive. With that in mind, OptinMonster gives you the option to show your banners as slide-ins.
These are small popups that OptinMonster shows in the bottom-right corner of the screen as the visitor scrolls down. As you can see in the following image, slide-ins are a way to show content without interrupting whatever the visitor is currently doing on the website.
Gamified popups are a fun alternative to the traditional banner.
Many website owners have increased their conversions and overall engagement by using OptinMonster to create ‘spin to win‘ banners.
Even better, you can create all of these different banners within minutes by using OptinMonsters huge library of templates.
All of these templates are fully mobile responsive. This means your banner is guaranteed to look good on mobile devices, tablets, and full-sized desktop computers.
Simply choose a template from the OptinMonster setup wizard, and you’re ready to start creating your banner.
All of OptinMonster’s banner templates are easy to customize. Just open the built-in OptinMonster editor and start making changes using simple drag and drop. You can also remove content from the template and add new content with just a few clicks.
Let’s look at an example.
Many of OptinMonster’s banner templates have optin fields, so you can collect names, email addresses, or phone numbers, plus a call to action (CTA) button. To customize this button, you just need to give it a click.
The OptinMonster editor will then update to show all the settings you can use to customize that field or button.
You can now go ahead and make your changes in the left-hand menu.
For example, you might type a new call to action into the ‘Button Text’ field.
Once you’re happy with your banner, you’ll want to show it in the right places, to the right people, and at the right time.
OptinMonster makes it easy to create advanced targeting rules.
This allows you to show personalized banners based on things like the page the visitor is on, their location, and even the device they are using. You can even show different banners to first-time visitors and returning visitors.
OptinMonster comes with hundreds of powerful targeting rules to help you maximize your banner conversions.
Smart website owners often use OptinMonster banners to:
You can set up TrustPulse within a few minutes, and then create notification bubbles that show recent purchases, form submissions, sign ups for a free trial, and more.
TrustPulse’s notifications aren’t banners in the traditional sense. However, TrustPulse has an Action Message campaign that lets you show text in a notification bubble.
TrustPulse’s Action Messages are perfect for letting visitors know about sales, promotions, updates, and much more.
Plus, they use the power of social proof so you can get maximum conversions.
The TrustPulse editor makes it easy to create an Action Message that acts exactly the same as a banner would.
When the visitor clicks on your Action Message, you can redirect them to any WordPress page or post such as your landing pages or product pages. You can also send visitors to any third-party URL, which is perfect for promoting your affiliate links.
TrustPulse comes with built-in analytics so you can see which pages and Action Messages have the best conversion rates. You can then use this information to fine-tune your content and boost your conversions even further.
Advanced Ads is an ad management plugin that works with all the major ad types and networks. This includes Google AdSense, Google Ad Manager, and Amazon Ads.
Using this plugin, you can create and show unlimited banner ads on your WordPress website.
Large banners can be intrusive on devices with smaller screens, especially mobile devices. The good news is that with Advanced Ads, you can choose to show or hide your banners based on whether the visitor is using a smartphone, tablet, or a desktop computer.
You can also show or hide your banners depending on the visitor’s user role, or whether they’re logged into your membership site. This is a simple but effective way to show personalized banners and boost your conversion rates.
Advanced Ads supports lots of different ad placements as well.
Price:Advanced Ads starts at €49 (about $52 USD) per year. There’s also a basic free version you can use to try it out.
Upon activation, WPFront Notification Bar adds a new area to your WordPress dashboard under Settings » Notification Bar.
Here, you can build your banner by working through the different menus and checkboxes. You can then simply type your banner text into the standard WordPress text editor.
You can also encourage visitors to click on your banners by adding a button.
This button can redirect the visitor to any page, post, or third-party URL. It can also run JavaScript code.
When it comes to customization, this free plugin is much more limited than premium plugins like OptinMonster.
For example, there are no professionally-designed templates and no drag-and-drop builder. However, you can change your banner’s color and height.
If you accept user registrations on your WordPress site, then you can show or hide the banner based on the visitor’s role. After creating your banner, you can choose where this banner will show up on your website.
WPFront Notification Bar can show your banner at the top or bottom of the page. It can also hide the banner until the visitor scrolls.
If you like to schedule your banner campaigns in advance, then WPFront Notification Bar gives you the option to set a start and end date.
AdSanity can show ads from external networks like Google AdSense. However, you can also create your own banner using web design software such as Canva and then upload it to WordPress.
Once you’ve done that, you can show your banner on any page or post using a shortcode that AdSanity creates automatically.
AdSanity also adds three new widgets to your WordPress dashboard: Ad Group, Random Ad, and Single Ad. You can use these widgets to add banners to any widget-ready area of your WordPress blog or website such as your sidebar.
Many WordPress website owners want to show several different ads in the same area, similar to a banner slider plugin.
With AdSanity, you can group ads together by creating ad groups. Once you’ve created some ads and assigned them to ad groups, you can place these groups on your site in exactly the same way you place single ads.
Once you’ve done that, your ad groups will rotate through their different ads on every page refresh. In this way, AdSanity can also work similar to a banner slider plugin.
This plugin has separate sections where you can create unique banners for the different areas of your WooCommerce store. This includes WooCommerce’s cart, checkout, thank you, and product pages.
This makes it easy to run lots of different campaigns at the same time. You can even show multiple banners on the same page.
Product images are a big part of running a successful WooCommerce store. With that in mind, you can use this plugin to create image carousels showing lots of different products.
You can also set a start and end date for your banners, which is perfect for scheduling all of your different campaigns ahead of time.
Since this banner plugin is designed to be used with WooCommerce, you’ll need to install and activate the WooCommerce plugin first. If you need help, then please see our complete guide on WooCommerce.
Price:WooCommerce Banner Management costs $99 per year for a single website. There is also a limited free version that you can download from the official WordPress repository.
Once you start adding banners to your website, you’ll want to track how many people are clicking on each banner and whether those banners are bringing you conversions.
After adding MonsterInsights to your website, you can see how many people are clicking on your banners, where they come from, and whether they convert. You can then make data-driven decisions to encourage more people to interact with your banners and boost your conversion rates.
Price: MonsterInsights starts at $99.50 per year. There is also a free version version that lets you track your banners, no matter what your budget.
Expert Pick: Which is the Best Banner Plugin for WordPress?
In our opinion, OptinMonster is the best banner plugin for WordPress because of all the different types of banners you can create, including popup banners, floating banners, and full-screen banners. It also comes with a huge selection of templates, so you can create high-converting WordPress banners within minutes.
Not to mention it also comes with powerful personalization and targeting features that are helpful for publishers, eCommerce site owners, and just about every small business website.
If you are a blogger or publisher looking to sell ads, then we believe that WP Advanced Ads is the best banner ad management plugin for WordPress.
If you are an eCommerce website owner, then we believe that TrustPulse is the best social proof banner plugin for WordPress.
Have you been thinking about starting a blog, but don’t have any idea where to start? Setting up a blog seems really overwhelming, but it doesn’t have to be. Once you’ve figured out...
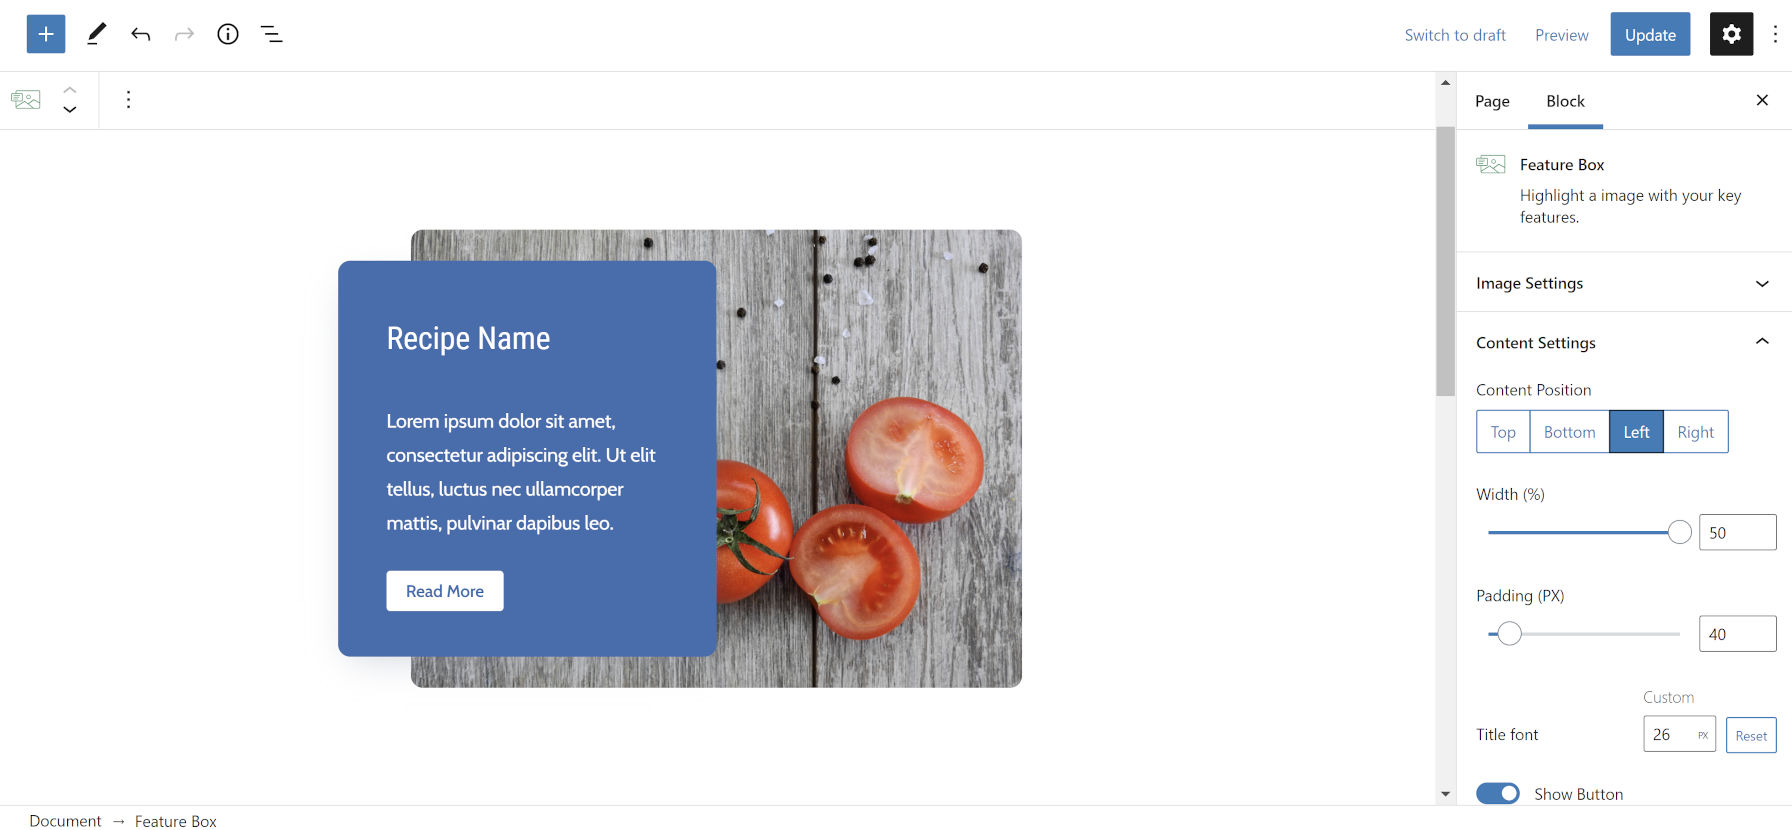
It is a new day with another chase for that elusive block plugin that will bring a little joy into my life. Today’s experiment comes courtesy of the Feature Box plugin by Sumaiya Siddika. It is a simple block that allows end-users to upload an image and add some content to an offset box.
The plugin’s output is a typical pattern on the web. As usual, I am excited to see plugin authors experimenting with bringing these features to WordPress users. I want to see more of it, especially from first-time plugin contributors.
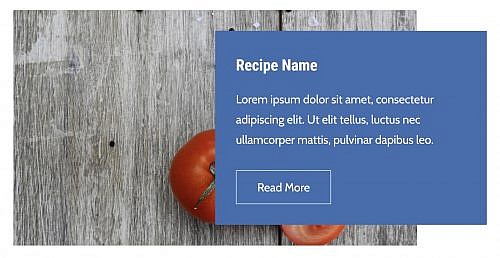
I was able to quickly get the block up and running, adding my custom content. The following is what the block looked like after entering my content and customizing it. I envisioned myself as a recipe blogger for this test.
Inserting and modifying the Feature Box block.
On a technical level, the plugin worked well. I ran into no errors. Everything was simple to customize. However, it never felt like an ideal user experience.
The first thing I immediately noticed is that image uploading happens in the block options sidebar. Core WordPress blocks have a dedicated button in the toolbar for adding images and other media. I also found myself wanting more direct control over individual elements. How could I change the heading font size? Where were the typical button styles like Outline and Solid Color? How do I insert other blocks, like a list?
None of those things were possible. Like many other blocks, the developer has created a system with specific parameters, and the user cannot move outside of them. There are times when that rigidity makes sense, such as when building custom blocks for clients. However, more often than not, publicly-released plugins should be far more open.
This tightly controlled block is reflective of how WordPress worked in the past. It was often inflexible, leaving users to what theme and plugin developers thought was best for their sites.
The block system is about tossing out these overly rigid concepts and giving users power over their content. The job of plugins and themes is to define the framework the user is operating under. They set up some rules to more or less keep things from breaking, but the users get to strap themselves into the driver’s seat. Their destination is their own.
The block would have been far more well-rounded if users could control all of the content in the box. Ideally, they could put whatever blocks they wanted into the “content” area of the Feature Box block. The design would match their theme better too.
A couple of weeks ago, I wrote a post titled You Might Not Need That Block. The premise was that users could recreate some blocks with the current editor and that themers could make this easier by offering patterns.
I knew replicating this particular block would be impossible without at least a little custom code. WordPress’s editor does not have a feature for offsetting a block’s position.
A theme author could easily duplicate this functionality. Typically, I would create a custom pattern, complete with all the existing pieces in place. However, I wanted to approach this with custom block styles. This would allow end-users to select the content offset from the sidebar and switch it around if needed.
Note: For those who wish to learn how to create custom block styles, Carolina Nymark’s tutorial is the best resource.
The Cover block made an ideal candidate for this. Because it has an existing “inner wrapper” element, it meant that I could target it with CSS and move it around. The following is a screenshot of the Offset Left style I created:
Offset Left Cover block style.
I simply replicated the code and changed a few values to create an Offset Right style immediately after. The code is available as a GitHub Gist. It is a simple proof-of-concept and not a polished product. There are various approaches to this, and several Cover block options are left unhandled. Theme authors are free to take the code and run with it.
These block styles looked far better because they matched my theme. Everything from the spacing to the border-radius to the button looked as it should.
Offset Left and Right block styles.
The big win was that I had design control over every aspect of the content box. I could select the button style I wanted. I could change my font sizes. The default spacing matched my theme as it should.
The problem I ran into with the block style method is allowing users to control the content box’s background color. The Feature Box plugin wins in the user experience category here because it has an option for this. The block style I created inherits its background from the Cover block parent. It may not be immediately obvious how to change it.
The other “problem” with the block style is that it does not handle wide and full alignments for the Cover block. That is because I did not take the experiment that far, only replicating the plugin’s layout. I will leave that to theme designers to tinker around with. There are many possibilities to explore; don’t wait for me to provide all the ideas.
My goal with this post and similar ones is to show how I would approach these things as both a user and developer. As a user, I want flexibility in all things. As a developer, I want to provide the solutions that I desire as a user.
I also want to see plugin and theme authors thinking beyond their initial use case when building blocks, patterns, styles, and more. Lay the groundwork. Then, expand on that initial idea by thinking of all the ways that users might want to customize what you have built.
Do you want to learn how to make a gaming website with WordPress?
Gaming has never been more popular. With your own gaming website, you can create a gaming community, start a popular gaming blog, and even earn a side income.
In this article, we’ll show you how to easily make a gaming website with WordPress without any technical skills.
What Do You Need to Build a Gaming Website Site Using WordPress?
You will need the following things to make a gaming website with WordPress.
A domain name (This will be the name of your website that people type to find your site online e.g. wpbeginner.com)
A web hosting account (This is where your website’s files will be stored)
A WordPress theme (This will control how your site looks and functions)
The right WordPress plugins (This is how you will add the specific gaming features you require)
SSL certificate (You need this if you’re planning on selling products or adding Twitch streams)
Your undivided attention for 1 hour
Depending on the type of gaming website you’re building, it’s entirely possible to build it in under an hour. We’ll walk you through the entire process, step by step.
In this tutorial, we’ll cover the following:
Different types of gaming websites you can make
How to get a free domain name
How to choose the best website hosting
How to choose the best WordPress gaming theme
What WordPress gaming plugins can enhance your site
Best resources to grow your gaming website
That being said, let’s get started.
Step 0: What Kind of WordPress Gaming Site Will You Make?
If you love video games, then there’s nothing better than being involved in the space.
Gaming blogs and websites cater to the large community of gamers who are looking for articles about the latest games, consoles, hardware, events, and more.
What kind of gaming websites can you make with WordPress?
A dedicated gaming forum for your favorite game
A gaming review site and news blog
A site that hosts simple and fun online games
A site that sells products to the gaming community
Maybe your new gaming website will be the next IGN, Kotaku, or GamesRadar?
Whatever kind of gaming website you want to make, this tutorial will help you build it using WordPress.
Step 1. Choosing the Right Website Platform
To start, you need to choose the right website builder, and since you’re reading this, you’re on the right track.
You’re going to want to use WordPress. But, there are two types of WordPress software that share the same name, so it’s easy to get confused.
First, you have WordPress.com, which is a blog hosting platform. The second is WordPress.org, which is the self-hosted version of WordPress.
We recommend using the self-hosted WordPress.org version because it gives you more freedom, control, and access to all WordPress features.
Next, you’ll need a domain name and web hosting. But, you don’t want just any web hosting company. You need a high-quality hosting provider that’ll support your WordPress website as it grows.
A domain name typically costs $14.99 / year, and web hosting starts around $7.99 per month. If you’re just getting started, this can be a big investment.
Fortunately, Bluehost, a hosting provider recommended by WordPress, has agreed to offer our readers a free domain, SSL certificate, and discount on their web hosting.
Once you have WordPress installed, it’s time to set up the rest of your WordPress gaming website.
You can follow our step by step tutorial on how to make a website for complete setup instructions.
Step 2. Choosing the Perfect WordPress Gaming Theme
The next step after setting up your WordPress is site is to select the perfect WordPress gaming theme.
When you’re searching for the best WordPress gaming theme, you’ll come across several choices that have gaming-related features baked right in.
Even though it may seem like a good idea, you’ll actually want to avoid using these themes.
You don’t need a WordPress theme that’s built for gaming.
Most gaming WordPress themes are bloated and will lock you into using them forever. You could even run into compatibility issues when trying to add new features to your site.
It’s better to choose a flexible, high-quality theme and add more functionality with WordPress plugins. There are all kinds of plugins to help you add the features you’re looking for.
By taking this approach, you have the flexibility to change themes in the future while keeping the same features and not having to hire a WordPress developer.
A magazine template can be perfect for gaming websites since it models what other large successful sites are doing in the gaming space.
Once you’ve found a theme you like, you can install and activate the theme. If you need help installing the theme, see our step by step guide on how to install a WordPress theme.
Step 3. Installing the Right WordPress Gaming Plugins
After that, it’s time to add more functionality to your website with WordPress gaming plugins.
Plugins are like apps for your WordPress site. They allow you to add all sort of features to your website. There are over 58,000+ free plugins for WordPress.
What kind of gaming features can you add to WordPress?
Detailed video game reviews
A community gaming forum
Twitch video streaming
Real-time games visitors can play
Selling game-related products
Adding Game Reviews to WordPress
If you’re a gaming blogger that’s blogging about games, hardware, and consoles, then you’ll want to add advanced review functionality to your site.
That way, when you’re writing product reviews, you can add starred ratings and improve the appearance of your reviews.
Look how your reviews will stand out in the search engines:
The best way to do this is by using the WP Product Review Lite plugin. It lets you manage and display gaming reviews on your site.
The plugin gives you customization options to add pros and cons, product images, ratings, and more to your reviews.
There’s even a feature to add a sidebar, top products, and wrap-up widgets to your site.
Another great feature you may want to add to your site is a forum for your gaming community.
A forum can be a discussion board, a place to share tips about a specific game, or even a question-and-answer platform.
Forums allow your visitors to feel like part of your website. When they participate in the discussion and share with others, they’re more likely to come back to your WordPress blog and engage in other ways.
The best way to add forum functionality is with a WordPress plugin like bbPress or BuddyPress. These are two of the best WordPress forum plugins and will help you easily add forum functionality to your site.
After the plugin is installed and activated simply navigate to Settings » Easy Embed for Twitch TV (Rail).
On this screen you’ll find the ‘Main Settings’ where you can set up the streams you want to display.
Using the free version of the plugin, you can enter the ‘Game’ or ‘Channel’ you want to stream.
Finally, make sure you click ‘Save Channel’ before existing the screen.
Here’s how it will display when adding the Twitch game ‘Hearthstone’.
To add Twitch streams to WordPress you can use the shortcode [getTwitchRail].
Simply copy the shortcode and paste it into any page or post, or even in your sidebar widget.
Just make sure you click the ‘Publish’ or ‘Update’ button to save your page and make your Twitch stream live.
If you want to add an entire wall of Twitch streams to WordPress, then you can use the Twitch TV Easy Embed (Wall) plugin. It’s created by the same team of web developers and follows the same setup instructions as above.
Adding Simple Fun Games to WordPress
You might be wondering how do you add games to a WordPress website?
Adding games to your site can give your visitors something fun to do and will hopefully leave them with a positive impression.
The best way to add games to your website is with a WordPress gaming plugin.
If you want to turn your WordPress website into an online gaming platform we recommend using MyArcadePlugin. It’s a premium plugin that’s used by over 100,000 WordPress sites.
Selling Game-Related Products in WordPress
Maybe your goal when creating a gaming website is to sell your own gaming guides and gear.
This could be a custom gaming eyewear you’ve created to help reduce eyestrain.
Or, you’re the master at a specific game, and you want to sell courses and walkthrough guides.
WordPress makes it easy to create your very own eCommerce store, selling digital or physical products.
To start selling products with WordPress, you’ll need to use the WooCommerce plugin.
Stella Jones, A creative and professional writer and blogger by passion. Loves to write and travel and likes to share travel experiences through writing blogs, articles and magazine.
If you are a blogger or an affiliate marketer or a site owner that is looking for a content planning system that can streamline their site content, then you are reading the right review. Source: PublishPress website Introducing PublishPress Plugins PublishPress is a great plugin for WordPress teams to easily manage the workflow and organize content […]
You’ve followed all of the marketing guides, sales funnel tips, and carefully built your subscriber list, yet your online business seems to be plateauing. What gives? This problem is common for a lot of online business owners. You don’t really want to use typical social media influencers because it feels… overdone or fake. Instead, you’d […]
With our hand-picked collection of the best free blogger templates in 2020, you can choose one to start your online project & Enjoy Success. Blogging is typically one of the oldest forms of blogger platforms...
The XML Sitemap file is like a directory of all web pages that exist on your website or blog. Google, Bing and other search engines can use these sitemap files to discover pages on your site that their search bots may have otherwise missed during regular crawling.
The Problem with Blogger Sitemap Files
A complete XML sitemap file should mention all pages of a site but that’s not the case if your blog is hosted on the Blogger or blogspot platform.
Google accepts sitemaps in XML, RSS, or Atom formats. They recommend use both XML sitemaps and RSS/Atom feeds for optimal crawling.
The default atom RSS feed of any Blogger blog will have only the most recent blog posts – see example. That’s a limitation because some of your older blog pages, that are missing in the default XML sitemap file, may never get indexed in search engines. There’s however a simple solution to fix this problem.
Generate XML Sitemap for your Blogger Blog
This section is valid for both regular Blogger blogs (that have a blogspot.com address) and also the self-hosted Blogger blogs that use a custom domain (like postsecret.com).
Here’s what you need to do to expose your blog’s complete site structure to search engines with the help of an XML sitemap.
Open the Sitemap Generator and type the full address of your Blogger blog.
Click the Generate Sitemap button and this tool will instantly create the XML file with your sitemap. Copy the entire text to your clipboard.
Next, go to your Blogger.com dashboard, navigate to Settings –> Search Preferences, enable Custom robots.txt option (available in the Crawling and Indexing section). Paste the XML sitemap here and save your changes.
And we are done. Search engines will automatically discover your XML sitemap files via the robots.txt file and you don’t have to ping them manually.
Internally, the XML sitemap generator counts all the blog posts that are available in your Blogger blog. It then splits the posts in batches of 500 posts each and generates multiple XML feed for each batch. Thus search engines will be able to discover every single post on your blog since it would be part of one of these XML sitemaps.
PS: If you have switched from Blogger to WordPress, it still makes sense to submit XML sitemaps of your old Blogspot blog as that will aid search engines discover your new WordPress blog posts and pages.
Ihave been thinking a lot about digital gardens this week. A blog post by Tom McFarlin re-introduced me to the term, which led me down a rabbit hole of interesting ideas on creating a digital space that is more personalized and tended in a way that is antithetical to the chronological blog.
The concept of digital gardens is not new. It predates the modern blog, but there may be a resurgence, albeit small, of the sort of curated content that grows within a digital garden.
The term “digital garden” is not well-defined. In general, it is a collection of thoughts, unfinished projects, links, and much more. However, it can be different and wholly unique to the individual. I would like to broaden the term to enclose any sort of website that allows you to truly browse without viewing posts chronologically. Digital gardens, collections, spaces — call it what you want.
I began my personal website in 2003. I hacked together a main page with a few internal links. I began blogging before I knew what blogging was. This was all done with basic .txt files that I edited in Notepad on Windows. I knew enough PHP to load and display those files. My blog posts were merely random thoughts — bits and pieces of my life.
Despite having something that worked sort of like a blog, I maintained various resources and links of other neat ideas I found around the web. It was a digital garden that I tended, occasionally plucking weeds and planting new ideas that may someday blossom into something more.
I created a films page in which I shared 30-second trailers of short films I was planning. I maintained a list of my DVD collection. I had a page in which I showcased hate messages I received on my guestbook. All in good fun, of course. I kept a curated list of cool webpages to visit.
All of this was a painstaking, manual process before WordPress crashed into my life, but it was still fun.
Over the years, WordPress changed everything for me. I officially became a blogger. The problem was that, at a certain point, blogging became work. I needed to think about keywords, perfecting a post title, and making sure that each word was carefully crafted. The initial joy I had with my personal space had waned.
“The idea of a ‘blog’ needs to get over itself,” wrote Joel Hooks in a post titled Stop Giving af and Start Writing More. “Everybody is treating writing as a ‘content marketing strategy’ and using it to ‘build a personal brand’ which leads to the fundamental flawed idea that everything you post has to be polished to perfection and ready to be consumed.”
It is almost as if he had reached down into my soul and figured out why I no longer had the vigor I once had for sharing on my personal blog. For far too long, I was trying to brand myself. Posts became few and far between. I still shared a short note, aside, once in a while, but much of what I shared was for others rather than myself.
I still love the idea of a personal blog, but there is room for this space to be reshaped. Personal websites can be so much more than a progression of posts over time, newer posts showing up while everything from the past is neatly tucked on “page 2” and beyond.
Amy Hoy, in How the Blog Broke the Web, describes the downfall of the digital gardens that once grew across the landscape of the web. It is a history of how personal websites, particularly through the ease of use of the modern CMS, changed for the worse. Instead of carefully tending to our gardens, we became lazy caretakers of our space, molding our content based on the tools the system provided.
She concluded with:
“There are no more quirky homepages. There are no more amateur research librarians. All thanks to a quirky bit of software produced to alleviate the pain of a tiny subset of a very small audience. That’s not cool at all.”
She shares my nostalgia for the early web in which webmasters poured everything about themselves into their little slice of it. It was done over the sweat and tears of late-night HTML mastery. It was about fighting weird CSS quirks just to align something on the center of the page. No grid or flex-box existed in those days.
While I lament the loss of some of the artistry of the early web and lay much of the blame at the feet of blogging platforms like WordPress, such platforms also opened the web to far more people who would not have otherwise been able to create a website. Democratizing publishing is a far loftier goal than dropping animated GIFs across personal spaces.
WordPress is in a position to reshape the web into whatever we want.
Throughout the platform’s history, end-users have remained at the mercy of their WordPress theme. Most themes are built around what WordPress allows out of the box. They follow a similar formula. Some may have a fancy homepage or other custom page templates. But, on the whole, themes have been primarily built around the idea of a blog. Such themes do not give the user true control over where to place things on their website. While some developers have attempted solutions to this, most have never met the towering goal of putting the power of HTML and CSS into the hands of users through a visual interface. This lack of tools has given rise to page builders and the block editor.
WordPress has not been, by and large, an ideal platform for building a unique digital space, unless you had the technical know-how to wrangle its front-end output into something unique. At times, that is more frustrating than building a simple HTML page.
This is the reason that I continually push the Gutenberg project. I write about some of the wild and wacky ideas. I share things like a T-Rex game within a block.
I want end-users to be able to create their own digital gardens. I want them to put a large yellow box on their homepage to share a notice that everyone should read “this important page” on their site. I want them to be able to do this without having to learn how to code or ask their theme author how to make such customizations. It should be as simple as clicking a few buttons.
I also want them to be able to easily build something like Tom Critchlow’s wikifolder, a digital collection of links, random thoughts, and other resources.
More than anything, I want personal websites to be more personal.
We’re still in a somewhat frustrating transitional period where WordPress is not even halfway to becoming the platform that it will be. We are still beholden to our themes, though less so than before.
Whether it is a digital garden, a plain ol’ blog, or some new thing we do not have a term for yet, we will all be able to put our unique spin on our personal spaces. It is part of the web that we lost in the last couple of decades with the emergence of the CMS. However, WordPress is on the right path.
It may be a rough ride for some agencies and businesses around the platform, but I am OK with that. They will manage and pull through on the other side, mostly unscathed. I am more concerned about our mission statement of democratizing publishing. And, that mission is not simply about having the ability to write content via a $free system. It is about the freedom to create whatever types of digital homes that we desire without learning to code or breaking the bank.
Pre-Gutenberg WordPress got us part of the way there. It is the post-Gutenberg world that will get us the rest of the way. I am ready to see what people create when they gain the freedom that particular world promises.
Email is one of the most powerful marketing tools at your disposal. It can drive engagement, build relationships, and deliver a higher ROI than every other type of marketing campaign.
Success with your email strategy starts with finding the right email marketing service. Whether you’re starting a new list from scratch or just need an easier way to reach your audience, this guide has a solution for you.
Top 13 Best Email Marketing Platforms
Best of 2023: AWeber, Brevo, Campaigner, Constant Contact, ConvertKit, Drip, GetResponse, HubSpot, MailerLite, Moosend, Omnisend, Salesforce, and SMPT.com.
I’m confident recommending all of my top picks to different businesses in different situations. However, our research team found a handful of providers that quickly rose to the top of the list.
Of the top 13, our favorite email marketing platforms for 2023 are:
Whether you’re looking to streamline multiple marketing channels, start a new email list, sink your teeth into automation, or nurture and grow an existing list, you’ll likely find everything you need and more in one of the eight platforms above.
Keep reading to learn more about our favorite platforms as well as other top contenders for different situations.
Constant Contact is our recommendation for most users. Beginners will find a complete toolkit that’s easy to use, and veteran email marketers will recognize immediately how much time Constant Contact can save their team, especially when it comes to marketing automation.
Don’t take my word for it. Constant Contact lets you try the full email marketing platform risk-free for 60 days, with no credit card required.
And forget about needing to be good at designing emails. The intuitive drag-and-drop email builder allows you to easily create new emails that look good and on-brand—no coding knowledge is needed. Adding text, images, videos, coupons, polls, and events to any message is simple and straightforward.
It’s a really welcoming platform to work with. People who aren’t “techy” will quickly find themselves producing much more polished newsletters. There are more than 100 pre-built, mobile-optimized templates.
Constant contact delivers 100+ mobile-friendly templates that are easy to customize with its intuitive drag-and-drop email builder.
Automation is another key benefit of Constant Contact. A lot of the legwork can be set on autopilot. For example, you can trigger welcome messages for new subscribers and set up drip campaigns based on their actions.
How much time can you save list building with beautiful templates and simple marketing automation? Constant Contact excels as an email list service, but it’s so much more.
And as soon as you hit send, Constant Contact is recording results in real-time. You’ll see everything from open rates to click-through rates, as well as data for each individual subscriber.
This is so important–how else are you going to know which strategies are working and which need to be put on pause?
real-time analytics quickly give you all the information you need to understand your email campaign performance.
Pricing for Constant Contact’s email software is straightforward. There are three plans for you to choose from—Lite, Standard, and Premium.
Like most email marketing platforms, your rate will be based on the number of subscribers on your list. Both plans allow you to send unlimited emails.
Here’s what some of the prices look like for each plan:
Lite
0 – 500 Subscribers — Starting at $12 per month
501 – 1,000 Subscribers — Starting at $30 per month
1,001 – 2,500 Subscribers — Starting at $50 per month
2,501 – 5,000 Subscribers — Starting at $80 per month
Standard
0 – 500 Subscribers — Starting at $35 per month
501 – 1,000 Subscribers — Starting at $55 per month
1,001 – 2,500 Subscribers — Starting at $75 per month
2,501 – 5,000 Subscribers — Starting at $110 per month
Premium
0 – 500 Subscribers — Starting at $80 per month
501 – 1,000 Subscribers — Starting at $110 per month
1,001 – 2,500 Subscribers — Starting at $150 per month
2,501 – 5,000 Subscribers — Starting at $200 per month
Both plans offer pricing tiers for up to 50,000 subscribers.
For basic and professional emails, the cheaper plan will be fine. But for those of you who want to get the most out of your email campaigns, I highly recommend the Standard plan.
This plan comes with more advanced features like subject line A/B testing, dynamic content, and automated behavioral campaigns. You’ll also get access to personalized demographic data, coupons, polls, and surveys.
MailerLite offers all of the essentials with none of the frills. It’s free to use for up to 1,000 subscribers, so there’s no commitment if you’re looking to test it out.
It’s a great option for anyone who wants a straightforward email marketing service. You’re a creator who doesn’t need a ton of bells and whistles. You just need the tools to start your newsletter or manage a simple campaign.
It’s also nice for teams. Nobody is going to be intimidated by this platform, which means everyone is going to use the core features at their disposal.
The platform still offers tools for automation, landing pages, pop-ups, and surveys, so it’s not like you’re extremely limited. But even the UI for each one is fairly spartan and straightforward.
MailerLite has a drag-and-drop editor, which makes it easy for anyone to design a high-quality message. Segment your subscribers to enhance personalization and optimize your campaigns with features like A/B testing.
MailerLite delivers a very simplified interface with a drag-and-drop editor and the ability to segment subscribers and optimize campaigns with A/B testing.
I’d recommend MailerLite for those of you who want simple email software at an affordable rate.
MailerLite offers four pricing plans:
Free — $0 per month
up to 1,000 subscribers
12,000 monthly emails
1 user
Monday-Friday email support
ten landing pages
email automation builder
signup forms & pop-ups
Growing Business — $10 per month
up to 1,000 subscribers
unlimited monthly emails
three users
24/7 email support
unlimited templates
dynamic emails
unlimited websites & blogs
Advanced — $21 per month
up to 1,000 subscribers
unlimited monthly emails
unlimited users
Facebook integration
custom HTML editor
promotion pop-ups
multiple automation trigggers
There is also an Enterprise plan for businesses with over 100,000 subscribers. Pricing is by quote only.
MailerLite offers a 15% discount if you sign up for annual billing, making it one of the most affordable options on our list.
Salesforce is a behemoth in the world of customer relationship management (CRM) systems. It has a well-earned reputation as cloud-based software that manages everything from sales and marketing to customer service and commerce for some of the biggest companies in the world.
Yet, despite being the backbone of many enterprise-level businesses, Salesforce also recognizes that smaller companies need the same type of support on a smaller scale. Which is where Salesforce Starter comes in.
Salesforce offers a great package to get even the smallest business started on the path to success.
With Salesforce Starter, even the smallest startup can have access to powerful sales, service, and email outreach tools. It doesn’t require much setup, and onboarding is a breeze with simple, built-in guides to help you every step of the way.
Once you’re up and running, you can automate your email activities and segment your customers so that the right people get the right messages at the right time. You’ll also get proven, pre-built sales process templates that your team can use to convert those email leads into deals.
The best part? As your business grows, so does Salesforce, especially when it comes to email marketing.
The Salesforce Email Studio lets you quickly build sophisticated, visually appealing messages with a simple drag-and-drop interface. You can also include interactive content, like carousels and weather reports, to keep readers engaged.
You can start from scratch or use one of the many customizable templates. It is also easy to optimize your messages so they look great no matter what device a recipient uses. And once you build the perfect email, you can save the whole thing or individual content blocks to reuse again and again.
Salesforce Email Studio lets you build beautiful and engaging emails with a simple drag-and-drop interface
There are also other features to help you build and execute email campaigns that deliver results, including:
A/B testing
Tracking
Subscriber importing
Folder management
Enhanced segmentation
Send logging
Return paths to monitor deliverability and reputation
Once you reach a size where Email Studio makes sense for your organization, you’ll have virtually unlimited power for your email marketing efforts. Until then, you can still maximize your efforts with Salesforce Starter.
Salesforce is not going to be the cheapest solution on our list. But for companies poised for rapid growth, it is an excellent solution that lets you stay with the same software through all your growth phases.
Pricing is as follows:
Small Business Solutions
Starter $25—includes sales, service, and email outreach tools
Sales Professional $75—Complete sales solution for teams
Service Professional $75—Complete customer service solution for teams
Marketing Cloud Account Engagement $1,250—Marketing automation tools for teams
All of the prices for these small business solutions are per user, per month and require an annual contract billed annually.
Marketing Cloud Engagement
Growth $1,250—marketing automation tools
Plus $2,500 per month—marketing automation plus analytics
Advanced $4,000 per month—advanced marketing automation and analytics
Premium $15,000 per month—enterprise-level features plus predictive analytics and support
All prices for these packages require an annual contract billed annually. The Growth, Plus, and Advanced packages include up to 10,000 contacts. Premium gives you up to 75,000 contacts.
Salesforce pricing can get complicated fast once you move beyond the small business packages. So it is best to contact them to discuss specific needs.
But if you’re in the small business phase, you can try Salesforce for free for 30 days. No credit card is required, and you won’t have to install any software.
HubSpot is the king of marketing automation–so it’s no surprise they offer a fantastic email marketing solution for any size business.
HubSpot’s tool allows you to quickly and easily create, personalize, and optimize your emails without the need for designers or IT.
Where the software really shines is in the automated workflows. This allows you to easily set triggers for your email subscribers and nurture the leads into customers (or whatever else you want them to do).
Think of it as a choose-your-own-adventure journey that you set for your subscribers. Depending on the specific actions they take, you can have them branch off to experience different, targeted things via email.
The email marketing service is just one tool in the Swiss Army Knife that is HubSpot. It can stand alone or be used in tandem with other offerings such as Marketing Hub and their CRM. Your email marketing only becomes stronger when coupled with those products, too.
HubSpot also has plenty of pre-made email templates to help you get the results you want. With their drag-and-drop builder, you can create great emails with no coding or development knowledge needed.
HubSpot is simple to use and allows you to customize your layout, add calls-to-action and images, and modify your content and colors to match your brand.
Use their advanced personalization tools to personalize your emails in order to boost your open and clickthrough rates with ease. You can use any information in an email subscriber’s contact records to automatically serve up the most relevant subject lines, content, links, attachments, and calls to action.
Their A/B testing tool is top-notch. Use it and dive into the in-depth analytics after you send your emails to see which performed better—and why.
Hubspot is a behemoth in the marketing automation arena, yet still makes it easy for businesses of all sizes to master email marketing.
Use this data to determine which subject lines get the most opens and the content and calls-to-action that will earn you more sales. You can also leverage this with landing pages and signup forms to accurately get a sense of the ROI of email campaigns.
The HubSpot email tool is free for up to 2,000 email sends per month, with paid plans starting at $50/month.
Join HubSpot for free to create and send email campaigns that look professionally designed and display perfectly across any device—all by yourself.
Omnisend is a simple yet powerful marketing solution that’s perfect for ecommerce shops. The platform comes with a wide range of features for automated email and SMS messaging designed to convert leads into customers.
Conversions are achieved by going one step further than most solutions. Omnisend combines text messages, web browser push notifications, email marketing, Google Customer Match, and Facebook ad retargeting to ensure you connect with as many customers as possible.
Omnisend lets you target customers in detail with numerous segmentation options.
All of these channels allow for campaign segmentation. This means you’ll be able to target the exact customers you need for specific products and services.
Omnisend also offers pre-built automations based on actions a customer might take. For example, let’s say you send them a cart abandonment email. If they don’t open that message, Omnisend can automatically send them a cart abandonment text message.
Take your marketing efforts to the next level by combining email and sms campaigns with custom triggers and flows.
Omnisend has a vast library of drag-and-drop templates to choose from. You can browse by theme as well—simplifying the process of creating gorgeous, on-brand emails.
Here’s a closer look at Omnisend’s plans and pricing. Prices are based on the number of contacts you need:
Free — $0
Up to 500 emails per month and reach up to 250 contacts
Up to 60 SMS messages per month
Omnisend-branded email campaigns
Signup forms, boxes, and pop-ups
Sales and performance reports
Standard — Starts at $16 per monthfor 500 contacts
Up to 6000 emails per month
Up to 60 SMS messages per month
Email campaigns
Signup forms, boxes, and pop-ups
Sales and performance reports
SMS campaigns and automation
Unlimited audience segmentation
24/7 email and chat support
Pro — Starts at $59 per monthfor 500 contacts
Unlimited emails per month
Up to 3,933 SMS messages per month
Email campaigns
Signup forms, boxes, and pop-ups
Advanced reporting
SMS campaigns and automation
Unlimited audience segmentation
24/7 priority email and chat support
Unlimited web push notifications
Facebook custom audiences
Google Customer Match
Like most email marketing platforms, the cost per month increases as your contact list scales. So all the rates above are month-to-month, and Omnisend does not offer annual contracts.
The Free plan isn’t really viable for most businesses, so most of you will be evaluating the Standard and Pro options. For low-volume SMS needs, the Standard plan will be fine. But the Pro plan is definitely better for larger contact lists and businesses that want to use SMS marketing combined with email campaigns.
Standard and Pro plans both come with a customer success manager, and the Pro plan gives you access to 24/7 priority support. Sign up now to get started for free.
Brevo (formerly Sendinblue) offers everything you need to launch and track an email campaign. Add your content to their machine and watch your outreach take flight.
This is a mature platform–it’s got all of the features you expect and more. You can add live chat to your site and grab new email addresses from folks browsing your store or learning about your company.
Give customers a personalized experience with real-time chat options on their preferred channels and manage these conversations all in one place.
There’s a lot to like. More than 40 customizable templates, simple tools to build workflows, and a built-in CRM with room for as many contacts as you like.
You can use the free forever version of Brevo and send up to 300 emails per day without paying a cent. Once you see how it drives, you’ll understand why it’s so popular.
In terms of reaching more people, Brevo has everything you need. They provide a host of lead nurturing tools to help you grow your contact list:
Landing pages. Create actionable and engaging web pages to collect leads for you.
Sign-up forms. Place forms anywhere on your website to get user information.
Facebook ads. Leverage the power of Facebook marketing to nurture more leads.
Retargeted ads. Powerful ads based on a user’s previous online interactions.
Make it as simple as possible to build that list with eye-catching forms that turn website traffic into subscribers. Brevo’s intuitive interface makes embedding a form no harder than a few clicks.
Brevo is a powerful platform with intuitive marketing automations, a built-in CRM, and more than 40 customizable templates.
It’s easy to see how these tools help you cultivate an audience, leads, and customer growth. And, unlike other email marketing services, Brevo can support chat and SMS if you want to drive leads on your site or by text.
The platform is available via a fantastic free plan that gives you unlimited contacts and up to 300 emails per day. That’s a pretty great deal—especially if you’re running a bootstrap startup or solo operation.
Their email builder has a beginner-friendly editor that allows you to easily create the look and feel of your email.
They currently offer four different pricing tiers:
Free — $0 per month
Up to 300 emails per day
Unlimited contacts
Chat
SMS marketing
Email template library
Starter — $25 per month
Up to 100k emails
No daily sending limit
A/B testing
Remove the Brevo logo
Business — $65 per month
Up to 1MM emails
Marketing automation
Facebook ads
Retargeted ads
Landing pages
Telephone support
Brevo+ — Customized pricing
Customized email volume
20+ landing pages
Customer success manager
Access for 10+ users
Dedicated IP
The Starter plan should be more than enough for most small businesses and startups.
However, as your business scales, the Business plan is always a great option. That comes with even more marketing features, such as Facebook and retargeted ads, along with telephone support.
Try Brevo today. Start out for free, and upgrade when it’s time to grow.
SMTP.com offers one of the most trusted email relay services that supports email at high volume. It doesn’t matter how many hundred or million emails you need to send. Payments or purchases? Not a problem.
Dealing with email deliverability problems is the worst. You put so much time into your list, segmentation, email design, and then some IP issue grinds your machine to a halt.
With SMTP.com email relay service, you can avoid deliverability issues entirely. Kick off your campaigns with confidence.
smtp is a great solution for high-volume email campaigns.
Think of SMTP.com as a final mile delivery service for email campaigns. Ensure the maximum number of emails reach their intended destination, track all the important metrics, and report back.
It’s not here for designing, strategizing, or project managing your email marketing. Instead, it’s a focused product that ensures your careful work is carried directly to the recipient’s inbox.
You can implement SMTP.com in a variety of ways. Teams that want a hands-off experience can use managed services, and those that want more control can implement the email relay API.
However you choose to deploy SMTP.com, the software is secure and built to scale. Integrations are minutes, not days, and support is available 24/7.
It’s a great solution for companies that send a lot of transactional emails for billing, accounts, ecommerce, and so on. These emails have to be fast in order to keep customers happy and their information secure. With SMTP.com, you know the message is going to make it safe and sound.
Pricing for SMTP.com services is broken into several packages, with custom pricing available for high-volume senders:
Essential: $25/month for 50,000 emails per month
Starter: $80/month for 100,000 emails per month
Growth: $300/month for 500,000 emails per month
Business: $500/month for 1 million emails per month
Notably, the Essential plan comes with a shared IP. All other plans have a dedicated IP. For people looking to send over 250 million emails each month, SMTP.com offers a custom high-volume plan that comes with its own dedicated IP and mail transfer agent (MTA).
Any plan may add on SMTP.com’s Reputation Defender service, which monitors and protects your IP against soft and hard bounces.
This is a very focused solution that can help email marketers put deliverability issues behind them. Get started with SMTP.com today.
Campaigner is the perfect tool for a team with experience that’s outgrown lightweight, beginner-facing email marketing options.
The sophistication of this tool keeps it out of the beginner camp, but it’s not so advanced as to require a developer by any means.
You’ll be able to customize your email segmentation, personalization, and customer journeys. Capture the info you really need and capitalize on it.
Campaigner automates a lot of the busy work, giving you more time to dive into the pre-built reports on open rates, conversion rates, and so on.
When your team outgrows your lightweight email marketing solution, consider replacing it with campaigner — the midpoint between a beginner and expert campaign management solution.
Everything from an email marketing service you would want is built into the platform. Total rookies might be overwhelmed by how much you can do, but if you’ve run some campaigns, you’ll recognize how easy it is to stay on track with Campaigner.
Deliverability is exceptionally high, even among top services, and there are plenty of tools to keep your contact lists groomed and your email in good standing.
Send transactional emails reliably with Campaigner’s SMTP relay service. Track opens, clicks, and specific links within your email. Figure out exactly what works and compound your success.
The built-in A/B testing features let you experiment with subject lines, senders, dynamic content, send times, and more.
Campaigner is available in several packages, but you can always contact them for a custom plan. You can also sign up for a 30-day free trial, which gives you access to the entire Campaigner platform.
Here’s how the plans break down:
Starter: $59/month for up to 5,000 contacts
Essential: $179/month for up to 25,000 contacts
Advanced: $649/month for up to 100,000 contacts
eCommerce: $79/month for up to unlimited contacts
The Starter plan comes with a trim set of segmentation tools, autoresponders, and the drag-and-drop email editor, among other tools. Upgrading your plan gives you a higher number of contacts and more advanced email marketing features.
Off the shelf, Campaigner is going to work fine for just about any email marketing use case. It gives you the tools and visibility to find wins and fine-tune your campaigns over time. Get started with Campaigner for free today.
GetResponse is a bit more than a basic email marketing service. It’s more of an all-in-one solution that specializes in automation.
And when we say all-in-one, we mean it.
With tools and features such as audience segmentation, autoresponders, landing page builders, automated emails, advanced analytics, and even webinar software, you’ll be able to collect beaucoup leads, put them in the right workflows, and turn them into returning customers.
One standout tool that GetResponse offers is called Autofunnel. It can be used to create funnels for sales, leads, webinars, and more. It’s fully automated and very easy to use.
Funnels include things like emails, landing pages, exit popups, marketing automation, Facebook ads, and ecommerce integration. It all depends on your goals and how you want to set them up. But GetResponse provides all the tools you need to grow your subscriber list and monetize those contacts.
Once a user enters your funnel, everything is fully automated by GetResponse. It’s the perfect way to guide customers through the conversion process with multiple digital touchpoints.
GetResponse is an all-in-one solution that includes Autofunnel which takes the guesswork out of growing your subscriber lists.
Let’s take a closer look at GetResponse’s plans and pricing.
Email Marketing — Starting at $19 per month
Autoresponders
Unlimited newsletters
Basic segmentation
Website and landing pages
Integrations and API
Marketing Automation — Starting at $59 per month
Everything in Email Marketing, plus
Marketing and event-based automation
Advanced segmentation
Webinars with up to 100 attendees
Sales funnels
Ecommerce Marketing — Starting at $119 per month
Everything in Marketing Automation, plus
Quick transactional emails
Ecommerce segmentation
Abandoned cart recovery
Promo codes
These prices are all based on 1,000 subscribers. The rate will increase as your list grows. As you can see, even the entry-level plan offered by GetResponse comes with advanced features like autoresponders, signup forms and pop-ups.
All plans come with unlimited monthly email sends, inbox preview, click tracking, and 24/7 live chat support.
GetResponse offers discounts for annual and 24-month contracts if you pay in advance. At the very least, you can try GetResponse free for 30 days.
ConvertKit – Best for Influencers, Bloggers, and Creators
ConvertKit is one of my favorite email marketing services.
It’s a perfect choice for creators of all stripes. That includes influencers, bloggers, video producers, musicians, artists, and more. That’s because their platform focuses more on engaging your audience and nurturing them with landing pages, ecommerce platforms, and membership sites.
You’ll be able to create leads out of casual visitors to your social media accounts, blogs, YouTube videos, Facebook pages, and more.
For those of you who want to build automated email funnels at an affordable price, ConvertKit will be a top option for you to consider.
ConvertKit excels at audience engagement and nurturing, making it a favorite with creators.
To set up automated emails, you’ll be guided through a simple visual flow chart.
Instead of having multiple lists of contacts, ConvertKit groups all of your subscribers into one list. But you’ll still be able to tag them manually for segmentation purposes or with auto tags based on their behavior to improve the personalization of your campaigns. That’s great for creators with big audiences.
ConvertKit is best for sending quick emails with clean formatting. There are no complex designs or distracting elements here.
ConvertKit offers three pricing plans:
Free — $0 per month up to 300 subscribers
Creator — $15 per month up to 300 subscriber
Creator Pro — $29 per month up to 300 subscribers
As you gain subscribers, the monthly price will increase accordingly. If you pay annually, you can get two months free.
ConvertKit has more than 70 third-party direct integrations, customizable forms, and custom reporting. Email and live chat are available for 12 hours per day, Monday through Friday, with limited support on nights and weekends.
Drip is a relatively new platform. It’s a CRM that offers email marketing for ecommerce businesses.
I like Drip because they’re great for new ecommerce merchants since they focus on offering smaller, independent shops the same powerful automation and segmentation tools for email marketing as larger ecommerce stores.
As such, they’re great for newer brands looking to get a leg up.
With Drip, you can track valuable commerce metrics related to customer intent and purchase behavior.
You’ll be able to segment new website visitors from returning customers. Drip also lets you target users who abandoned their carts.
Get nitty-gritty without hours of data mining–Drip gives you tools that make it easy to target the right people with timely offers.
Drip brings powerful automation and segmentation tools to small, independent shops, giving them the ability to compete with their bigger competition.
Their CRM helps you reach customers through multiple touchpoints online, including email. Drip also has a revenue attribution feature, giving you a clearer view of which campaigns are actually making you money.
Again, this is ideal for ecommerce shops.
With personalization capabilities, powerful segmentation options, and detailed analytics, Drip has everything you need to succeed with email marketing.
Pricing is based on the number of customers in your account. All plans come with the same features and benefits.
1-2,500 subscribers — $39 per month
2,501-3,000 subscribers — $49 per month
3,001-3,500 subscribers — $59 per month
3,501-4,000 subscribers — $69 per month
4,101-4,500 subscribers — $79 per month
4,501-5,000 subscribers — $89 per month
This stretches all the way up to plans that allow for up to 180,000 subscribers before pricing becomes custom.
All Drip plans come with 24/7 live chat and email support. You can try it out free for 14 days and have access to all of the features.
Moosend offers an email marketing solution no matter if you’re a complete beginner or if you’re a seasoned pro. If you have an online store, this is the perfect tool.
From their easy drag-and-drop email builder to their easy segmentation tool to their accurate real-time analytics, they have all the features you need to nail your email marketing campaigns.
Our favorite thing about Moosend is their ecommerce AI. It leverages machine learning and collaborative filtering to target customers with products they might like based on the shopping habits of similar customers.
Moosend’s Ecommerce AI tool lets you target customers with products them might like based on the behavior of similar customers.
You’ll also be able to easily cross-sell based on customer shopping habits and keep track of how often they buy certain products (e.g., perishables), so you can regularly promote the products they need when they need them.
A lot of otherwise great email list services really struggle to give you this insight, if they can do it at all. Moosend makes it easy with a simple interface that lets any ecommerce business looking to level up its targeting and segmentation game.
Moosend makes it easy to cross-sell based on detailed customer data displayed in a simple user interface.
Moosend also does the basics of email marketing very well. Their advanced personalization features allow you to create unique emails for your target customer. Their segmentation tool allows you to spit your audience by purchasing behavior, cart abandoned products, and more.
They don’t offer that many themes, with just 40 responsive themes to choose from. However, they’re all highly customizable and eye-catching.
Pricing starts free for a 30-day trial, with their premium plans starting at $9 per month. More detailed information is below:
How to Find the Best Email Marketing Service for You
The best available email marketing service is going to be unique to you. After all, the multi-million dollar info product business is going to have very different needs than the humble blogger.
But there are specific factors that we took into consideration because we believe that they tend to be the most important ones for most businesses.
I’ll break down the details of our process for making this list and explain what matters, what doesn’t, and what you need to know to find the best option for you.
Use our methodology to help guide your ultimate decision.
And while we don’t recommend using price as a deciding factor, if you’re just starting out and need to watch every penny, there are some solid free email marketing tools to consider, too.
Plenty of Email Templates
There are a lot of reasons to want an email marketing service. You might want to create your first sales funnel and incorporate email into your marketing strategy. Or maybe you just want to send the occasional newsletter out to subscribers.
Whatever your reason, you want your emails to look good while you do it.
That’s why you should find an email marketing service that takes the stress out of things like formatting and typesetting by giving you a list of great email templates for any of your needs.
Many of the offerings above offer drag-and-drop email templates to help take the headache out of designing a great-looking email. With tools like MailChimp’s email builder, you’re filling out the basic info, and a stunning email takes shape on its own.
look for a solution with a variety of templates that are easy to customize.
They’ll also offer a variety of different email template types to fit specific purposes.
For example, HubSpot comes with a library of pre-built sales email templates ready for you and your business to use. If you want, they’ll even allow you to create your own templates unique to your business. You can customize them to your exact needs and save them for use whenever you need them.
MailChimp is another great service with tons of different email templates for different needs, such as selling a product or promoting a blog post. It’s also highly customizable, allowing you to create specific ones for your brand’s goals.
Simple Segmentation
As your business grows, you’re going to want to target different parts of your audience for different products. After all, if you offer a variety of different services and products, not everyone on your list will want the same thing.
A good email marketing service gives you easy but powerful ways to segment your audience.
For example, a service like MailChimp allows you to tag segments of your audience depending on how they subscribed to your email list. That way, you can put those segments into specifically targeted funnels easily and automatically.
make sure you can segment your subscribers and that it is easy to do, like you can in Omnisend.
A service like Omnisend (pictured above) allows you to send segmented campaigns based on things like your subscriber’s interests, demographics, email open rates, and the products they’ve purchased.
It’s important to note: If you want segmentation features (and if you’re serious about email marketing, you should), you’re going to have to pay for it. This often doesn’t come with a service’s free plan. However, it’s well worth it, especially if you’re focused on growth and conversions.
Seriously–all the marketing automations, striking templates, and great writing in your campaigns depend on your ability to understand your audience. The perfect message is still an airball if it’s sent at the wrong time or to the wrong person.
Segmentation and other aspects of an email list service aren’t as flashy as some of the other features, but they are absolutely critical.
In-Depth Analytics
As the old business adage goes: “If you can measure it, you can improve it.”
To that end, a good email marketing service will give you all the reporting tools you need to provide you with in-depth metrics and KPIs.
Knowing this information will give you vital data about where your subscribers live, who they are, and what they want from your business.
It’ll also help you create better services and marketing strategies in the future. For example, you’ll be able to better segment your audiences with the right analytics.
HubSpot has some of the best traffic and conversion analytic tools available. Along with their A/B testing feature, their analytics tools will let you know exactly how each of your emails performs and why.
Data is key to understanding email campaign performance, so be sure the solution you select makes it easy to find and understand the analytics.
Easy Automation
There’s nothing quite like the “set it and forget it” approach to business.
When an email marketing service is automated, you don’t have to worry about making sure that each and every one of your new subscribers is in the right sales funnel. Once you’ve set it up, they’ll receive the emails they should receive automatically.
That’s why you want to find an email marketing service that will let you easily set up automated emails without a lot of fuss and complex tagging schemes.
Automation makes your life easier, so choose a solution that makes it easy to do.
Constant Contact (pictured above) is a standout when it comes to automating emails. It lets you trigger welcome messages for any new subscribers and put them into specific drip campaigns depending on their actions. The simple design allows you to do this easily, too, with no headaches involved.
GetResponse is another option to definitely consider if automation is your game. Its Autofunnel platform allows you to easily create fully automated sales, leads, and webinar funnels in just a few clicks.
Best Email Marketing Services: Your Top Questions Answered
What platform is best for email marketing?
Constant Contact is the best platform for email marketing because it’s easy to use, scalable, and accommodates the needs of most businesses. It’s packed with features at an affordable price, making it a great value—especially for companies that are just getting started with email marketing software.
Email marketing typically costs $10 to $20 per month for 500 to 1,000 subscribers. On the higher end of the spectrum, email marketing can cost upwards of $15,000 per month for an enterprise-level sales CRM with 75,000 contacts. But most small businesses with less than 5,000 subscribers will pay $80 or less for email marketing.
The cost of email marketing depends on the provider, plan tier, and number of subscribers. If you want premium features, like automation and A/B testing, it will cost more than an entry-level plan. Expect your monthly rate to increase as your subscriber list grows.
What is the cheapest email marketing software?
With plans starting at $10 per month for up to 1,000 subscribers, MailerLite is the cheapest email marketing software. It’s a great value because it still comes with all the tools you need to succeed, and it’s still affordable as your subscriber list grows.
HubSpot is free for up to 2,000 contacts, which is the best completely free email marketing deal on the market. However, HubSpot’s paid plans start at $50 per month, which is more expensive than other cheap email marketing tools, like MailerLite.
Is email marketing still effective?
Email marketing is still highly effective for businesses of all sizes. It also delivers the highest ROI compared to other marketing strategies. Email marketing helps give brands more control over their messages and the scope of their reach compared to other marketing channels.
Email marketing is not dead, and it will stay relevant for the foreseeable future.
Is Gmail good for email marketing?
Gmail is not good for email marketing because it’s not scalable. It doesn’t have any built-in features for campaign automation and growing lists.
While Gmail works well for sending one-to-one messages to leads and customers, it does not work well for bulk email blasts to an entire subscriber list. Business users will be better off using a dedicated email marketing platform instead of Gmail.
Top Email Marketing Providers for 2023 in Summary
What’s the best email marketing service? I wish I could point you to just one, but your strategy, goals, audience, and budget are going to determine the right solution.
Use the reviews and methodology in this article to hone in on the perfect one for you. Here’s a recap of our top eight picks:
Most people would think a fight between WordPress and Blogger is just plain unfair… But you might be surprised at just how close it is. In fact, what if I told you that Blogger actually manages to steal a couple of rounds? Stick around to see how the fight goes down.
While pretty much anybody can set up a website or blog in 2019, it does come with its challenges.
One of the most challenging aspects usually occurs before you write or publish a single word…
I’m talking about choosing which platform to use.
Although there are many fantastic and unique blogging options out there… all with their own advantages (Gator, Tumblr, Squarespace, Medium, Ghost, etc.).
Today we’re pegging two of the heavyweights of the blogosphere against each other.
WordPress(.org) Vs. Blogger
The idea being that after these two blogging heavyweights go head to head, you’ll hopefully have a better sense of which platform is the best choice for you.
Now to start with, I’m going to assume most of you are familiar with WordPress, but for those who haven’t been introduced to Blogger (or had no idea it still existed!)…
Blogger is a platform owned by Google that lets anyone start their own blog or website for free in a couple of clicks.
The good thing about Blogger’s association with Google is that your website or blog is hosted by the conglomerate and everything is taken care of for you.
However, as you’ll soon find out, as good as this association may be, it does come with its drawbacks.
In any case, if you’ve finished listening to the referee’s instructions…touch gloves, and…
Ding ding!
Round 1: Cost To Set Up
Okay, this first round might be a tad unfair, but you did this to yourself WP…
Blogger has the upper hand clearly because it’s a completely free platform. There is an option to connect your own domain (domains can cost around $10), but it’s entirely up to you.
The only downside is if you don’t register your own domain, your default URL will always be: “http://(websitename).blogspot.com/”
But as mentioned, the option for a custom domain name is there if you want it.
As for WordPress, although the software itself is free to use there are some costs involved.
You’ll need to set your site up with a domain name, which as mentioned could cost you around $10. And you’ll also need hosting which can cost anywhere from $50 – $500+ per year.
As well as this, although they aren’t always needed, premium WordPress plugins and themes also come at a cost.
But if you’re just starting out the free themes and plugins available will usually be enough.
Of course, what you’re willing to spend will depend on the type of blog or website you’re setting up.
With all that said, I’m going to have to declare the winner of round 1…
Winner Of Round 1: Blogger!
Round 2: Managing Your Website and Publishing Content
Once you’ve got your blog set up, it’s time to have a look around and start posting.
For this round, we’ll look at the functionality of each platform and how easy it is to publish a simple page and adjust a few settings.
Starting with Blogger:
Although visitors only ever get to see the front end of your website, the real action happens behind the curtain.
It all starts with the dashboard:
You’ll also notice a number of different menu items which will enable you to customize your blog or website:
If you head to the settings section, you can change the title and description of your blog:
You can also play around with other settings such as changing the URL, as well as adding blog authors and adjusting the privacy settings of your blog (below).
It’s also simple to publish pages and posts on your website. This could be evergreen pages like an about page or a contact page.
On that note, let’s see how easy it is to whip up a simple “about page.”
Start by clicking pages on the sidebar menu. Next click “new page” to create your page.
The Blogger interface is much what you’d expect from this kind of platform. Simply enter your content using the WYSIWYG editor.
You can also see a preview your page before you publish it, which gives you an idea of how the page is going to look when it goes live.
Once you’re ready click publish and your page will be out there in all its glory.
When it comes to publishing posts, it’s pretty much the same process. You can also manage your pages and posts from your dashboard:
Okay now let’s see how WordPress stacks up…
Once you’ve installed WordPress you’ll be greeted with the following dashboard, where you can manage your website and create content.
Creating posts and pages in WordPress is similar to the way it’s done in Blogger, the big difference being there are a lot more settings and options available to you.
For example, in Blogger you only have the option of labeling your posts… whereas WordPress lets you add tags and categories to your posts so they can be grouped into appropriate sections and digested by the right audience.
When it comes to the actual editor, you’ll find that the layouts and functionality of these to be relatively similar.
Like Blogger, you can create a draft post, preview it, and then hit publish when it’s ready to go live.
Changes to the title and tagline of your site also happens in the settings like it does in Blogger. However, WordPress does offer some additional settings.
For instance, WordPress allows you to grant users different levels of access to your website.
So you might create an account which only allows a user to create new posts, as opposed to making changes to how the site looks and operates.
Okay, I think this round we have a clear winner…
Winner Of Round 2: WordPress!
Round 3: Security
Because Blogger was bought by Google back in 2003 your website is hosted on Google and covered by their security blanket.
This essentially means you don’t have to worry about managing server resources, creating backups, and your blog’s security.
And although Google isn’t going anywhere anytime soon, the company does have a history of axing underperforming platforms (ahem Google+).
Of course, when it comes to WordPress YOU are solely responsible for the security of your website.
There are plenty of great WordPress plugins for security and backing up…
But if the user fails to stay on top of things and continue to update, what’s the point?
Hmmm, this is a hard round to call…
But I’m going to have to give it to:
Winner Of Round 3: Blogger!
That could have gone either way, but I gave it to Blogger – mainly because big brother Google was involved…
Round 4: Customization
Now it’s WordPress’ turn to have an unfair advantage… you did this to yourself, Blogger.
Because when it comes to customization and variety of options, WordPress certainly floors Blogger.
Not only this, things that are relatively simple in WordPress somehow become frustratingly complicated in Blogger.
For example, if you’re looking to create a website with multiple pages and a separate blog section, it’s way easier to do on WordPress.
But WordPress really stamps its authority when it comes to themes and plugins.
Although Blogger’s theme selection is decent (and free) and you can access some third party templates if needed…
You’ll find it all in the WordPress plugin directory, as well as in off-site market places like CodeCanyon.
No surprises this round…
Winner Of Round 4: WordPress!
It’s 2-2 going into the final round!
Who’s going to take it out?
Let’s find out:
Round 5: Support And Community
When it comes to the amount of support available to users Blogger appears to be much more limited.
You do have access to documentation and a blog forum. However, in terms of direct support, it’s certainly not extensive.
WordPress, on the other hand, has a more active support network.
Like Blogger, there’s plenty of documentation and community forums … as well as an internet relay chat (IRC) chat room, where you can seek help from experienced WordPress experts.
In terms of a user community, again and unfortunately, Blogger cannot compete with WordPress.
In fact, Blogger’s community doesn’t extend much further than its help forums and documentation…
Whereas the WordPress community is always active with WordCamp events and meetups constantly being held around the world.
There are also huge amounts of blogs, articles, tutorials and new developments coming out of the WordPress community everyday.
On that note, I think we know who takes this round, and the fight…
Winner Of Round 5: WordPress!
Was that closer than you were expecting?
Blogger put up a good fight, but it was always facing an uphill battle.
Having said that, just because WordPress won this particular fight, it’s not to say that Blogger doesn’t have its place.
Which Platform Should You Choose?
If you just want a basic blog that serves its purpose, and you’re not worried about extensive features, plugins, or a cutting edge design – Blogger could be the solution for you.
It’s also free and comes with no start-up costs.
On the other hand, if a blog is the first step on your way to conquering the world, then maybe WordPress is the one for you.
In order to grow your website or blog, you’re going to need access to the extra plugins and themes WordPress has on offer.
This is especially relevant if your blog or website is going to be used as part of a business venture.
Yes, it may set you back a bit of cash.
Yes, it requires a little more effort to set up and there is a learning curve.
But the sheer amount of customization and flexibility available to you is comprehensive and will enable you to create an amazing statement piece.
In our opinion, WordPress scores the TKO.
We’ll leave it up to you to decide who wins in your world.
As a user of WordPress and blogger writing about the platform, there are some rules about the WordPress logo and trademark that you need to keep in mind.
WordPress is an open-source software, but it is still protected by copyright and trademark laws. Many beginners don’t know them, and they may accidentally violate the guidelines.
In this article, we will explain the rules you need to follow when using the WordPress logo and trademark. We will also discuss why it is important and what rights you are given under the WordPress license.
Understanding GPL – The WordPress License
Let’s start with the basics first.
There are two types of WordPress websites. First, there is WordPress.com which is a hosted solution, and then there is the popular WordPress.org also called self-hosted WordPress.
WordPress is released under the open source GPL license. This makes WordPress a free software. However, free here is used as in freedom not as in free coffee.
This license gives anyone the freedom to download, copy, use, study, and modify the WordPress code.
While the software itself is free to use, you will need to purchase a domain name and web hosting account to install WordPress and make a website.
There is a misconception among beginners about free software and copyright. While you are free to to use the software code in any way you want, the software itself is protected by copyright and trademark laws.
What does that mean?
Basically, you can copy the WordPress code to make new software, but you cannot call your software WordPress.
The name WordPress is a registered trademark owned by the WordPress foundation. It is a non-profit organization which ensures that WordPress runs successfully as a free open source project.
Why You Need to Understand WordPress Logo and Trademark Rules?
WordPress powers nearly 33% of all websites on the internet. That’s a really huge number.
Millions of businesses rely on WordPress to effectively run their website, online communities, and blogs.
To make sure that everything works smoothly, WordPress brand and trademark needed to be protected. For this purpose, the WordPress trademark was transferred to The WordPress Foundation in 2010.
Now the problem is that WordPress foundation is not the only one that works on WordPress. It is an open source project where thousands of people contribute to its success.
Apart from those contributors, there are many companies, individuals, and freelancers who sell WordPress related products and services around the world.
If you are running a WordPress website, a web design agency, or providing WordPress related services, then you need to understand these rules to comply with the trademark policies.
That being said, let’s take a look at the rules and guidelines that you must follow to properly use the WordPress trademark and logo in your projects.
Rule 1. Always Write WordPress with a Capital P
The correct way to spell WordPress is with a capital P. This capitalization is taken very seriously by the WordPress community.
If you are going to mention WordPress anywhere, then make sure that you use the correct spelling. Using an incorrect spelling is frowned upon and considered unprofessional.
WordPress team takes it so seriously that in 2010 they added a built-in filter called capital_P_dangit() in WordPress 3.0 release.
This function automatically corrects the misspelled instances of WordPress in title, content, and excerpts.
As we mentioned earlier that the name WordPress is a registered trademark owned by the WordPress foundation. This protects the WordPress brand and ensures its continued success.
Just like any other registered trademark, the WordPress Foundation reserves exclusive usage rights for the term WordPress. This means you cannot use WordPress as part of your brand name or website.
This restriction also includes domain names. For example:
WordPressBeginner.com Wrong!
WPBeginner.com OK!
You can use WordPress in a subdomain such as (wordpress.example.com), the WordPress Foundation is mainly concerned about top-level domains.
If you see someone using WordPress in their domain name or brand name, then you should contact the WordPress Foundation and notify them about the violation.
The WordPress logo consists of the letter W in a grey or sometimes white circle with a grey ring around it.
The height of the letter W is tall and graceful. Many bloggers and website owners sometimes mistakenly use the faux logo which usually has a shorter W in it.
Make sure that you are using the correct WordPress logo in your projects. The WordPress logo is also available as a text mark, text mark with W logo, and W logo.
Feel free to use these images in your projects. However, make sure that you use them in accordance with WordPress trademark policy.
Rule 4. No Affiliation or Endorsement
The WordPress foundation wants you to use the WordPress logo and brand to promote the WordPress project itself.
However, you are not allowed to use it in a way that suggests endorsement or affiliation with the project. Here are some examples:
You cannot use WordPress logo in your product’s advertisements.
You cannot use WordPress or its logo as part of your own logo.
You can place ‘Powered by WordPress.org’ on your website, but you cannot say ‘Recommended by WordPress’.
In easier words, any attempts to take unfair advantage of WordPress brand name are a violation of the trademark policy.
What Happens When Someone Doesn’t Follow These Rules?
The WordPress foundation takes these violations very seriously. You may receive an email from them to comply with their trademark guidelines.
Failure to comply may lead to further actions. These actions may include several legal procedures.
For example, if you are using WordPress in your domain name, then foundation can claim that domain name. Their lawyers can also send you a legal notice.
The legal proceedings would cost you a lot of money, and you would lose support from the WordPress community itself.
The WordPress community relies on the WordPress foundation to take these actions. It benefits everyone in the ecosystem and helps countless WordPress related companies grow and succeed.
We hope this article helped you understand the rules you must follow to comply with the WordPress logo and trademark policies. You may also want to see our guide on the best WordPress plugins and best email marketing services for small businesses.
If you liked this article, then please subscribe to our YouTube Channel for WordPress video tutorials. You can also find us on Twitter and Facebook.
The following is a guest post written by Jennifer Bourn. With 21 years experience as a graphic designer, 15 years experience as a web designer, 14 years as a creative agency owner, and 11 years as a blogger, Jennifer Bourn has worked with hundreds of service-based businesses to build brands and establish profitable online platforms. She also co-organizes the Sacramento WordPress Meetup and WordCamp Sacramento.
After being the lead organizer for WordCamp Sacramento for two years, speaker wrangler for two years, managing the program for a year, and speaking at several WordCamps and non-WordPress related conferences myself, I have seen a lot of amazing and a lot of awful speaker submissions. Some speaker submissions have been from people I know personally — people I want to choose and say yes to — but ultimately couldn’t because their submission was subpar.
It’s incredibly tough to both apply to speak and select speakers from applications.
If your title is confusing, weird, unclear, too cutesy, or it feels like you put no effort into it, that will work against you. Organizers want talks attendees will be interested in and excited for. It must be easy to understand what the talk is about based on the title alone.
If your talk description is all about you, is only one sentence long, is sarcastic/unprofessional, isn’t aligned with the event focus/theme, or it’s totally self-serving, you should rethink things. Your talk isn’t about you, it’s about helping attendees expand their knowledge and move the needle and helping organizers host a successful event.
It is never ever a good idea to disparage or put down a person, job, tool, piece of software, or anyone/anything to make your point or make your topic interesting. If the only way you can communicate your point is through negativity, reconsider the topic. Being controversial may have been a draw in years past, but now it’s a risk most organizers aren’t willing to take.
Consider that someone else (or several people) may submit a talk on the exact same subject. Your title and description need to convince organizers why your submission should be picked over the other person’s submission.
Consider that if you submit multiple talks, none of them may be selected if your titles aren’t interesting and your descriptions are not descriptive. It must be clear what the talk is about and what the takeaways are, and how this talk will benefit the attendees.
Always think about how you can make the organizers’ or event planners’ jobs easier and follow instructions. For example, if they ask for bios in third-person, provide your bio in third-person. If they ask for full name, provide your full name.
Spell the name of the conference, software, industry, etc. correctly in your speaker application. Want to speak at a WordPress event? Double check that you’ve capitalized the P and proofread your submission.
Look at the topics requested by the event organizers. Submit talks on those topics and your chances of being selected will be higher because they are telling you what they want. Lists of preferred topics are usually included because that is what their local community has specifically requested.
Don’t submit the same talk you’ve submitted 10 times to other events. Put in some effort. Look at the event theme and submit something that relates to it or customize the talk title/description to include the theme.
Look at the past event schedules, agenda, or programs. Look at the types of talks they accept. For example, if a WordCamp has only had 2-3 business related talks in the past four years, it might be a sign they aren’t looking for business talks and want talks focused more on using WordPress.
Look at the topics the event has already covered in previous years. Then find the gap and find something they haven’t already heard or done.
Steer clear of the marketing hype. Avoid topics related to killing it, hustling, crushing, and dominating. Don’t refer to yourself as a guru or a thought leader (that’s only cool when other people say it about you). Avoid negativity, sarcasm, and assumptions about the audience.
If organizers ask how or why you’re qualified to talk on the topic being submitted:
It’s okay to be new/just learning — fresh voices are awesome.
Don’t just copy and paste your bio into the field. They already have your bio and that’s not what they meant or what they want.
Never assume the people reviewing your application are experts on your talk topic or have the same technical background you do.
Avoid submitting a talk that is all about one piece of software — i.e. one plugin — especially if the software is premium and requires an investment. An entire session dedicated to a paid plugin 1) excludes those who have not purchased it or cannot purchase it and 2) will apply to few attendees. Instead, consider a compare/contrast presentation that covers both free and paid options or a talk that introduces attendees to multiple options.
It’s okay to submit opinion pieces as talks, but be careful to NOT position your opinion or approach as the only one or the right one, when there are other options. Often there isn’t one right way (unless it’s technical and there is one right way).
If the submission form asks what skill level audience your talk is the best fit — Beginner, Intermediate, or Advanced — don’t pick them all. That isn’t helpful. The same is true if they ask who your talk is aimed at — designers, developers, or users, etc.
Organizers for events like WordCamps need to satisfy a diverse audience. The attendee makeup often ranges from those who make a living with WordPress all the way to newbies who just learned what WordPress is a few days ago, so talks at and for every skill level are needed and valued. Don’t skip applying because you think your talk isn’t advanced enough.
If there is a ‘notes to the organizer’ field in the talk submission form, communicate that you’re open to suggestions or making tweaks to the talk focus to ensure it’s a great fit for their audience. Often a talk being reviewed is close to what they want, but it needs a small tweak to be selected.
If something funky happened when you hit submit, don’t be afraid to submit your talk again. Organizers would rather have duplicate submissions than miss your submission. Also, it’s okay to reach out to confirm your submission was received.
Don’t skip applying to speak because you don’t think you know enough yet or don’t have enough experience yet. Everyone has value to contribute and fresh perspectives are always appreciated. Plus, there are people who just discovered or figured out the thing you want to talk about exists — I guarantee you can help them.
Behind the scenes organizers work hard to create a diverse lineup of speakers that provides representation for everyone in the community. Organizers can ask, beg, plead, and do loads of outreach, but ultimately, they are limited by who is willing to apply and/or who is willing to accept an invite to speak. So please say yes and apply.
When organizers make the offer to help you brainstorm talk ideas, craft a talk title/description, and even create your slide deck or watch your practice, say yes. Take them up on the offer. Asking for help doesn’t make you any less awesome. There are a lot of people who are incredibly talented and smart with great value to share but find it difficult to put what they know into a talk format. If that’s you, you’re not alone and there are people who want to help.
Interested in trying your hand at speaking for the first time?
Every event has limited space. When securing rooms for multi-track events and planning the schedule, organizers need to be able to split attendees across the different rooms/tracks. This means they need competing talks in each track that will be a draw and attract attendees. No one wants one full room and one empty room. No one.
If you don’t get selected, don’t get down on yourself. Often the selection choice has nothing to do with you and is simply a matter of many submissions on the same topic(s), needing to balance topics across disciplines to serve the range of attendees or skill sets, and looking for more diverse representation in the speaker lineup.
If the event is local to you, always apply. Many times event/conference organizers want to fill the speaking spots (or at least half of them) with local people from their community or region and you’ll have a leg up on the out-of-towners. Similarly, if there is a meetup group in the area tied to the event/conference, go to the meetup and get to know the organizers and other attendees.
New to a subject/topic? Just learning it? No problem! Consider submitting a talk reviewing your experience as a new user. Share surprises and obstacles encountered, lessons learned, and suggestions for improvement. This can be hugely valuable for advanced users who tend to what new users deal with and it can provide a different perspective and voice.
Want to learn a topic better? There’s no better way than to teach others about it. Submit the talk, do the work to learn it, and teach everything you’ve learned so far. For example, if you want to build a membership site, submit a talk on how to choose a membership plugin, document your research in finding the right plugin, and share what plugins you reviewed, what criteria you used for evaluation, what you discovered (pros/cons), and which you ended up choosing.
Never underestimate the power of awareness. Consider pitching a talk that presents options to expand attendees awareness of what is available or possible and gives them a starting place to research things on their own.