14-Step Technical WordPress SEO Framework (Proven Checklist)

Do you need a technical search engine optimization (SEO) checklist?

Optimizing your site for search engines can be a challenge if you’re not sure what to look for. Many website owners will ensure basic SEO practices but overlook technical elements.

In this article, we will show a WordPress technical SEO framework and share a checklist you can use for your business.

WordPress technical SEO framework checklist

Why Do You Need a WordPress Technical SEO Framework?

Technical SEO is a key component of your WordPress SEO strategy. You could be creating the world’s best content, but if search engines can’t find and understand your content, then all your efforts are wasted.

That’s why it is important to have a WordPress technical SEO framework.

Our WordPress SEO framework checklist will ensure that search engines can easily crawl and index your content. Plus, you can also evaluate other technical aspects of your WordPress website that might be preventing you from achieving higher rankings.

For example, your website might be taking a long time to load. This would result in poor rankings since the page load time is a ranking factor.

Similarly, you might have mistakenly added nofollow tags and prevented search engines from crawling and indexing your content.

How to Evaluate Technical SEO in WordPress

There are many SEO tools that let you conduct SEO audits and find out if your site is technically optimized. However, not all tools will show details inside your WordPress dashboard.

The easiest way to evaluate technical SEO for your WordPress site is by using All in One SEO (AIOSEO). It is the best WordPress SEO plugin that helps you optimize your website for search engines.

It offers a free SEO Analysis tool that you can use to conduct a technical SEO audit. The tool is available in the AIOSEO Lite version, which you can use for free. There are also premium AIOSEO plans that offer more features like schema markups, sitemaps, redirection manager, and more.

First, you’ll need to install and activate the AIOSEO plugin. For more details, please see our guide on how to install a WordPress plugin.

Upon activation, you can go to All in One SEO » SEO Analysis from your WordPress admin panel. Under the ‘SEO Audit Checklist’, you’ll see an overall score for your website.

SEO analysis

Next, you can scroll down to the Advanced SEO and Performance sections.

Here, the plugin will evaluate the technical SEO aspects of your website based on different parameters and ranking signals. It will then highlight missing elements and critical issues that could stop your site from ranking higher.

View advanced SEO and performance

You can use AIOSEO to continuously monitor your site’s technical SEO and fix issues. Similarly, you can also perform a competitor analysis and see what they’re doing differently for their technical SEO optimization.

That said, let’s look at our WordPress SEO framework checklist that you can use to ensure higher rankings and organic traffic. You can click the links below to jump ahead to any section:

1. Ensure Your Website is Visible to Search Engines

The first thing you need to check is whether search engines are able to find your WordPress site.

You can simply enter site:example.com in the search engine and see if your website appears in the search results. Just replace ‘example.com’ with your own domain.

Perform site search

If your site isn’t showing up, then you can check the visibility settings in WordPress.

Go ahead and visit the Settings » Reading page from your WordPress admin panel. Next, scroll down to the Search engine visibility setting and be sure the ‘Discourage search engines from indexing this site’ option is unchecked.

Search Engine Visibility Setting in WordPress

This option is usually enabled if your website is under construction or is put in maintenance mode.

2. Uncover Crawling and Indexing Issues

If your website is visible to search engines, then it is important to check that your content is crawled and indexed.

Crawling is the process where Google, Bing, and other search engines discover and understand your website. Indexing is the process where search engines collect and store information about your website.

A simple way of checking crawling and indexing issues is using webmaster tools. For example, Google Search Console is a free tool by Google that shows your site’s performance on search results, helps uncover bugs, and allows you to submit your site to Google.

If you haven’t connected to the webmaster tool, then see our guide on how to add a WordPress site to Google Search Console.

In Google Search Console, you can head to the ‘Pages’ report. Here, you’ll see pages that are indexed and not indexed.

Page indexing in search console

Next, you can scroll down to the ‘Why pages aren’t indexed’ report.

Google Search Console will show you crawling and indexing errors on your website and which pages are affected by them. You can then resolve these issues, so your web pages can appear in Google search results.

Why pages are not indexed

Besides that, you can also check indexing and crawling issues for individual URLs.

Simply enter the page link in the URL inspection tool at the top. Google Search Console will then show you a report on whether the URL is indexed and on Google.

URL inspection tool

If it is not, then you’ll see a ‘URL is not on Google’ message. To fix this, you can click the ‘Request Indexing’ button so Google can crawl and index your page.

3. Make Sure Your Website is Secure with HTTPS

Another important thing to check from a technical SEO framework standpoint is whether your website is secure or not.

Google and other search engines will give preference to sites that use HTTPS over those that use HTTP. To secure your site, you will need an SSL certificate to encrypt the connection between your website server and the user’s browser.

You can check this by looking for the padlock sign in your browser’s search bar at the top.

Look for padlock sign

Most WordPress hosting companies now offer free SSL with all their plans. You can ask your host to see if they offer that.

For more details, please see our guide on how to move your WordPress site from HTTP to HTTPS.

Broken links are bad for your website’s SEO framework, and it negatively impacts your user experience. These are links that no longer exist and will return a 404 error.

Since search engine crawlers find different pages on your website by following internal links. A broken link can stop them from discovering new content. As a result, your page might not get indexed in the search results.

Similarly, if a visitor clicks on a link and is unable to find a page they’re looking for, then they might exit your website.

The MonsterInsights custom 404 error design

With All in One SEO (AIOSEO), you can easily find and fix broken links on your WordPress website.

It offers a powerful redirection manager that helps track 404 errors on your website and lets you set up permanent 301 redirects to fix broken links.

404 error logs in AIOSEO

To learn more, you can follow our detailed guide on how to find and fix broken links in WordPress.

5. Look for Duplicate Versions of Your Site

It is important that Google and other search engines only index one version of your website.

Your website can have different versions, but they should all point to one version. For example, you can have a site that has www and non-www version or HTTP and HTTPS version:

https://www.example.com
https://example.com
http://www.example.com
http://example.com

Whether you choose a www or non-www version, all the URLs should redirect to the primary WordPress URL. Otherwise, Google will consider each version as a different website.

This can negatively impact your overall SEO rankings. Search engines won’t know which version to index, and it could cause duplicate content issues.

You can check the primary URL for your site by going to Settings » General from the WordPress dashboard. Next, look at the web address in the ‘WordPress Address (URL)’ and ‘Site Address (URL)’ fields.

Look for primary URL

With AIOSEO, you can automatically set the proper canonical URL in your site header, so search engines will know your preference.

6. Use SEO-Friendly URL Structures

After setting a primary URL for search engines to index, you can now check the URL structure of your website.

URL structure plays an important role in your SEO. Having an SEO-friendly URL structure will help Google, Bing, and other search engines easily crawl your pages and understand your content.

Here’s an example of a bad URL structure:

https://www.example.com/category.php?id=42012

Instead, you should be using URLs that describe the content, like:

https://www.example.com/blog/how-to-start-a-wordpress-website

You can create SEO-friendly URLs by making sure that they are short and descriptive. Besides that, don’t forget to include a keyword in the permalinks, use hyphens to separate words, keep all the words in lowercase, and don’t use stop words.

Pro Tip: Don’t include numbers in your URL slugs, either. That way, you can update your content in the future

7. Ensure Your Site is Mobile Friendly

The next item in the technical SEO framework checklist is to ensure your WordPress site is mobile responsive.

With Google now going mobile-first, it will now index your site’s mobile version instead of the desktop version.

You can check your site’s mobile responsiveness by using the free Google Mobile-Friendly Test tool.

Mobile friendly test

Simply enter your website URL and click the ‘Test URL’ button.

The tool will then show results for your website. You can see if it is mobile-ready or not.

See mobile friendly test tool results

If your site is not mobile-friendly, then you can start by changing to a responsive WordPress theme.

You can also follow our guide on how to change your WordPress theme without losing any data or traffic.

8. Check Your Website Speed and Improve Performance

Your website speed is also a critical part of your WordPress technical SEO framework. Google uses page load speed as a ranking factor and will rank fast-loading sites higher compared to slow-performing websites.

You can check website load time by running a site speed test. For instance, you can use MonsterInsights, which is the best Google Analytics plugin that shows a site speed report inside your WordPress dashboard.

You’ll first need to install Google Analytics to your WordPress site using MonsterInsights.

After that, you can head to the Insights » Reports page from your WordPress admin panel. Next, you can go to the ‘Site Speed’ tab. Here, you’ll see an overall score for your website speed for desktop and mobile.

Site speed report

The report will also show other metrics that are important for measuring your website speed.

If you scroll down, then MonsterInsights offers recommendations and benchmark goals for each metric you should target.

Recommendations for improving speed

To improve website load time, you can see our ultimate guide to boost WordPress speed and performance.

A quick tip that you can use to improve your website speed is minifying your CSS and JavaScript files.

The term minified means reducing the size of website files by removing white spaces, lines, and unnecessary characters. When a user visits your website, different files are sent to the user’s browser, which includes CSS, HTML, and JavaScript files.

By reducing the file size, you can significantly improve website speed and performance. There are many WordPress plugins and hosting services that allow you to minify CSS and JavaScript files, like WP Rocket and SiteGround.

For more details, you can check out our guide on how to minify CSS and JavaScript files in WordPress.

9. Improve Your Internal Linking Structure and Remove Orphaned Pages

Internal links play an important role in your website’s technical SEO framework. Search engines reward websites that have a proper internal linking structure without too many orphaned pages.

AIOSEO has a powerful SEO Link Assistant feature that makes it easy for you to discover link opportunities and even automate the process for you.

It is the best internal linking plugin for WordPress that crawls the links on your WordPress website and provides a detailed report. You can see the number of internal links, outbound links, and affiliate links for each post and page.

AIOSEO Link assistant dashboard

You can see all the link suggestions in one place, and it can even automatically go back and add internal links in your older posts with a single click.

Find internal link opportunities and orphaned pages

10. Generate XML Sitemaps and Submit Them to Search Engines

Another important part of technical SEO framework is making it easier for search engines to find your content. One of the ways you can do that is by creating an XML sitemap.

It tells search engines about the important pages on your website. This way, search engine bots can crawl your site faster and index your content. While a sitemap won’t boost your rankings, it will improve the overall crawling and indexing process.

You can create and customize the sitemap using AIOSEO. The plugin will automatically generate a sitemap upon activation. Besides, it also lets you create a video sitemap, a news sitemap, an HTML sitemap, and an RSS sitemap.

AIOSEO sitemap options

Once you’ve created a sitemap, you can then submit it to different search engines using their webmaster tools.

For instance, Google Search Console gives the option to enter the sitemap URL and submit it to the search engine. To learn more, you can see our guide on how to submit your site to search engines.

Submit sitemap to Google

Similarly, you can also add your site to Bing Webmaster Tool and then submit an XML sitemap to improve crawling and indexing.

11. Use Schema Markup for Rich Snippets

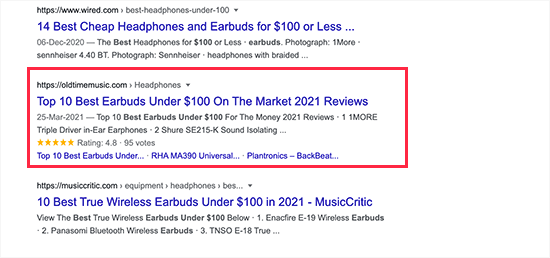
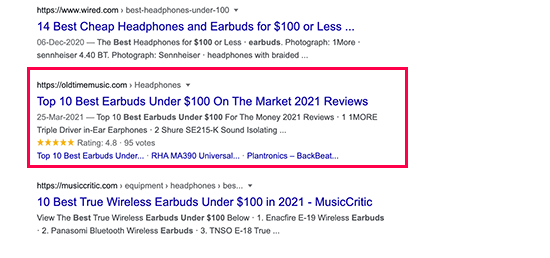
The next technical SEO framework item you should check is schema markup. It helps search engines understand your content better and how it will appear on the search results.

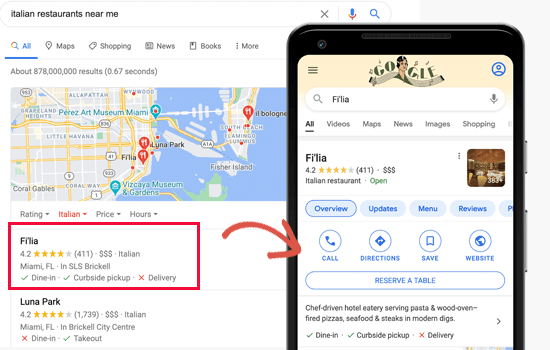
You can use schema markup for recipes, reviews, events, organizations, FAQs, blog posts, product pages, multiple locations for local businesses, and more.

Search engines can use this information and display rich results. It also helps capture Google featured snippets, which can increase organic clicks and traffic.

For example, here’s how Google shows recipes, ingredients, ratings, cooking time, and other information for blog posts that use a recipe schema markup.

Recipe schema markup

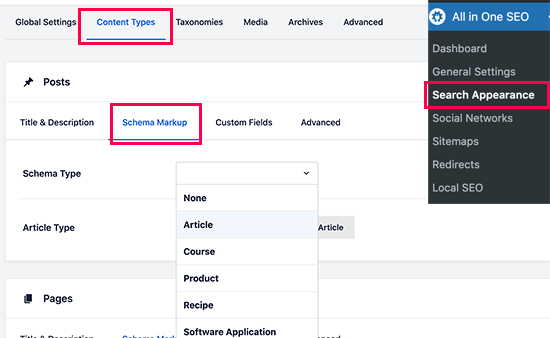
You can easily add a schema markup in WordPress and WooCommerce using AIOSEO.

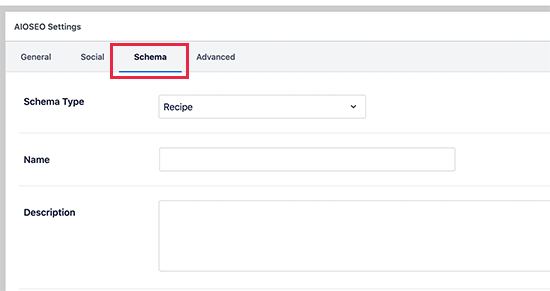
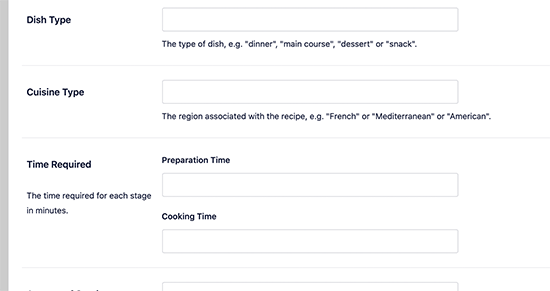
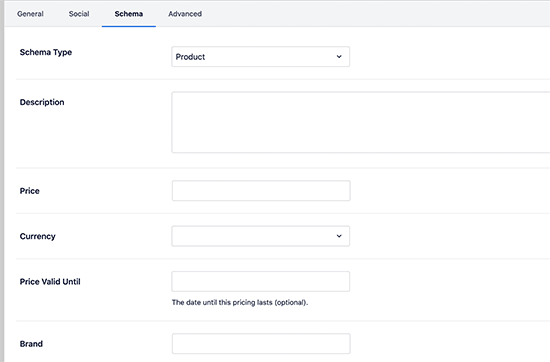
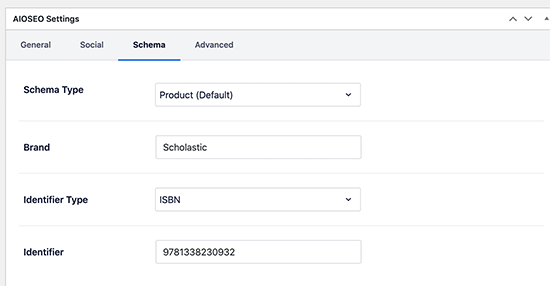
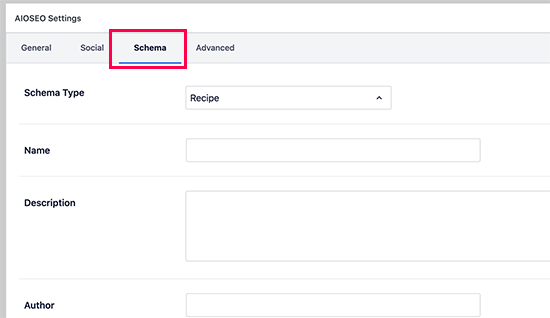
The plugin lets you choose the schema type depending on your content, and it takes care of the rest.

Schema markup settings in AIOSEO

With AIOSEO, you can also add completely custom schema markups based on your needs using the WordPress custom schema generator feature. This can help you get star ratings, and other rich snippets in Google.

AIOSEO Custom Schema Generator for WordPress

12. Optimize Your Robots.txt File for SEO

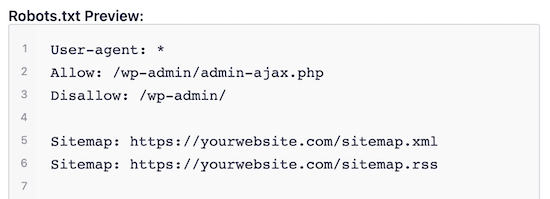
Robots.txt is a text file that specifies instructions for search engine bots on how to crawl your website. You can tell which pages to crawl and which pages to skip while crawling.

Here’s what a robots.txt file would look like for a WordPress site:

User-Agent: *
Allow: /wp-content/uploads/
Disallow: /wp-admin/
Disallow: /readme.html
Disallow: /refer/
 
Sitemap: http://www.example.com/post-sitemap.xml
Sitemap: http://www.example.com/page-sitemap.xml

Adding a robots.txt file helps save the crawl quota. A search engine crawler will crawl a certain number of pages during a session. If they don’t finish crawling all the pages on your site, they will resume crawling in the next session.

This can slow down the indexing of your content, and it will appear in search results after some delay. That’s why optimizing the robots.txt file is an important component of the technical SEO framework.

You can disallow pages unnecessary pages like the WordPress admin area, theme folder, plugin files, and more. This way, you get to save the crawl quota and allow search engine bots to crawl even more pages.

On the other hand, you can add sitemaps and other important pages to robots.txt. This way, search engines will crawl and index them as quickly as possible.

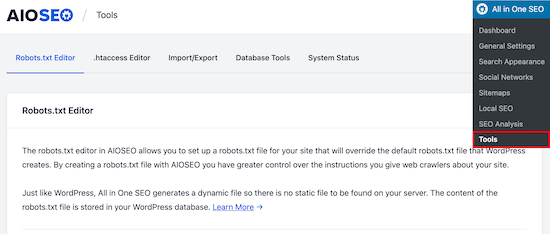
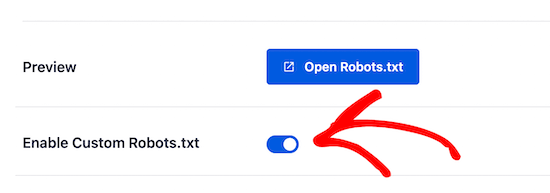
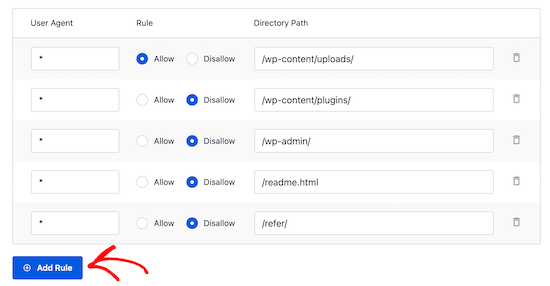
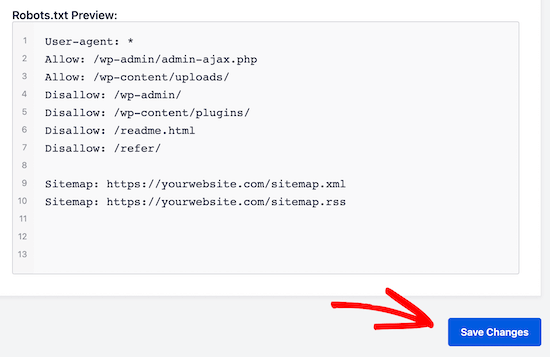
A simple way of optimizing the robots.txt file is by using AIOSEO. You can enable custom robots.txt using the plugin and add rules to allow or disallow search engines to crawl.

Optimize robots txt file

To learn more, please see our guide on how to optimize your WordPress robots.txt for SEO.

13. Make Sure Google Doesn’t Flag Your Site for Malware

Another important technical SEO checklist item is to ensure your site isn’t flagged by Google for malware or unwanted software.

If your website is a security risk for users, then Google will show the following warning message:

Google safe browsing malware warning

This can be really bad for your WordPress SEO. It will keep people away from visiting your website, and impact your rankings, and overall website traffic.

To scan for malicious files on your website, you can use a WordPress security scanner. At WPBeginner, we use Sucuri as it is the best WordPress firewall and security plugin. It checks for vulnerabilities like malware, spam injection, malicious code, and helps clean up the website.

You can also take a look at our guide on how to fix ‘this site ahead contains harmful programs’ error in WordPress, if Google flags your site for malware.

14. Use Server Side Rendering vs Client Side Rendering

Another technical SEO best practice is ensuring that your site’s JavaScript renders on the server side and not on the client side.

Server-side rendering is when the JavaScript files render on the website server. While client-side rendering is when the JavaScript files render in the user’s browser.

Client-side rendering is bad for your site’s user experience and SEO. All the burden of loading your site quickly falls on the visitor. Plus, search engine bots use JavaScript resources for crawling and indexing your content. This could result in JavaScript content being missed by crawlers and not included in the search engine index.

With server-side rendering, your website server ensures everything loads quickly. This way, you get a better user experience, faster page load speed, and reduce any risk of content being missed from indexing.

One way of ensuring that JavaScript is rendering on your site’s server is by running a site speed test. If your website speed is low, then it could be because of this issue. You can also look at crawled pages in Google Search Console and see if Google missed any content while crawling. If it did, then it could be because of JaveScript-related SEO issues.

That’s it. You’ve made it to the end of the list. You don’t need to go through each and every point in the technical SEO framework at once. Simply go one step at a time and work your way through the list.

We hope this article helped you learn about WordPress technical SEO framework. You may also want to see our comparison of the best keyword research tools, and our proven tips on how to increase your blog traffic.

If you liked this article, then please subscribe to our YouTube Channel for WordPress video tutorials. You can also find us on Twitter and Facebook.

The post 14-Step Technical WordPress SEO Framework (Proven Checklist) first appeared on WPBeginner.

How to Check If Your WordPress Blog Posts Are Ranking for the Right Keywords

Do you want to check if your WordPress posts are ranking for the right keywords?

Most beginners manually check rankings for their articles by typing keywords in Google. This does not give you an accurate idea of where your articles stand for the target keyword.

In this article, we will show you how to easily check if your WordPress blog posts are ranking for the right keywords.

How to Check If Your WordPress Blog Posts Are Ranking for the Right Keywords

Why Check Keyword Rankings for Your WordPress Posts?

If you follow our complete WordPress SEO guide, then you will learn how to optimize each article on your website for specific keywords. This helps you get more traffic to your website.

Most beginners simply search on Google to see if their posts are appearing for those keywords. Even then, they usually only check the first or second page at best.

The issue is that sometimes your article might be ranking way below the first two pages or worst it may not even be ranking for the keyword that you want.

If you rely on manually checking your keyword rankings, then you are missing out on useful information that you can use to improve your SEO rankings and increase traffic.

That being said, let’s take a look at how to properly check keyword rankings for your WordPress blog posts. We’ll cover three different keyword reference tools, and then show how to use keyword ranking information to increase traffic to your site.

Method 1: Checking Keyword Rankings With Semrush

SEMRush

Semrush is one of the best SEO and keyword research tools on the market. It’s a comprehensive SEO suite with all the useful tools you’ll need.

It comes with a powerful organic research tool that can show keyword rankings for any domain name. You don’t need to type in URLs for individual articles. It will automatically fetch results for all URLs on that domain name.

Using Semrush to check that your blog is ranking for the right keywords

Simply enter the domain name you want to look up and Semrush will get a ton of information. After that, click on the organic research tab to view the full list of all keywords your website is ranking for.

You can sort the results by position, URL, traffic, and more. You can also export the results to a CSV file and research offline using your favorite spreadsheet program.

You can also track specific keywords with Semrush, and they will track those keywords on your dashboard, so you can instantly see their performance.

Semrush can also do these things for any domain name. That means you can enter your competitor’s domain name and see which keywords they are ranking for.

You will also be able to see their paid search traffic, paid keywords, and other useful information that you can use to outrank them.

Method 2: Checking Keyword Rankings With Google Search Console

The Google Search Console

Google Search Console (formerly Google Webmaster Tools) is a set of tools offered by Google to help webmasters improve their website for search. See our guide on how to add your website to Google Search Console.

At the top of the Performance tab, you will see a graph of your website’s performance in search results.

Finding your keyword positions in Google Search Console

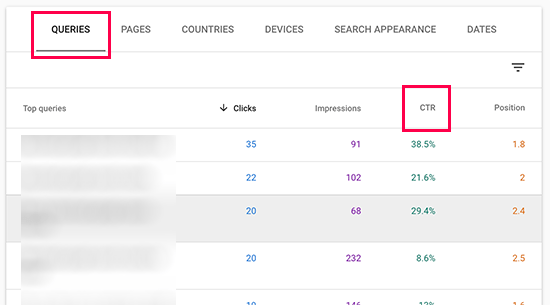
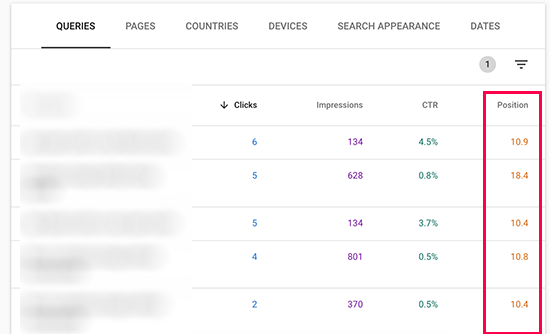
As you scroll down, you will see the keywords data. Next to each keyword, you will see how many clicks and impressions it gets, and its position on the search results page.

You can sort this data by clicking on any column.

Top keyword in search console

If you sort the list by position, then you will be able to see your top ranking keywords. As you scroll down the list, you will see keywords where your site appears lower on search engine results pages.

You can also export this data and open it with your favorite spreadsheet software.

Method 3: Checking Keyword Rankings With Ahrefs

The Ahrefs keyword research and SEO tool

Ahrefs is another popular SEO tool among professional marketers. It comes with an easy to use interface and tries to make information understandable even for new users.

Simply enter your website domain name in the search box, and it will create a neatly organized report with beautiful graphs and charts.

You will find all your keyword rankings under the organic keywords report.

Next to each keyword, you’ll be able to see its search volume, keyword ranking position, keyword density, and more.

Ahrefs Keywords Report

Using Keyword Rankings to Get More Traffic in WordPress

Now that you have learned how to check keyword rankings for your WordPress site, let’s talk about improving your rankings.

How to Analyze Which Keywords Need Improvement

When you’re deciding which keywords to improve, it’s important to note that not all keywords are created equal.

For example, ranking #5 on a high traffic keyword is way better than ranking #1 for a low traffic keyword.

Also, appearing in the #1 position won’t always bring you the most traffic. You might notice that while some of your keywords rank pretty well, they don’t get a significant number of clicks or impressions.

During your research, you might also find some surprise keywords that you didn’t know you were ranking for.

If these keywords have a significant number of impressions and search volumes, then you should see if you can make strategic changes to your content to improve the rankings for those keywords as well.

How to Improve Rankings for Specific Keywords

After you decide which keywords you need to work on, you can go ahead and see which of your articles are ranking on those keywords and what you can do to optimize them better.

Here are a few tips.

You can find helpful suggestions on how to improve these important keywords by using the All in One SEO plugin. When editing a post, simply scroll down to the AIOSEO settings at the bottom and you will find fields for your ‘Focus Keyphrase’ and ‘Additional Keyphrases’.

All in One SEO Focus Keyphrase

Simply enter the most important keyword for the post in the ‘Focus Keyphrase’ field then click the ‘Add Focus Keyphrase’ button. You can add other keywords as additional keyphrases.

All in One SEO will now analyze your content for that particular keyphrase and will show you a score along with practical tips to improve your content for that keyphrase.

Focus Keyphrase Score

To learn more, see our beginner’s guide on how to use a focus keyphrase in WordPress.

Next, you should look for articles that are old, don’t have enough content, or contain outdated information. Updating these articles with newer information and just improving the content can give them an SEO boost.

Finally, see if you can improve your internal linking, where you link to an article from other pages of your site. Linking to an article from other related posts can give it an SEO bump. Use your target keyword as the anchor text when linking to it from other articles on your website.

For more details on this topic, please see our article on how to optimize your WordPress blog posts for SEO.

Learning What Your Visitors Do on Your Website

Semrush and Google Search Console can help you find your keyword positions, but they can’t show you how many visitors are coming to your articles, where they are from, and what they do when they are on your website.

This information is crucial when planning your content strategy to rank for certain keywords.

This is where Google Analytics comes in. It shows you the number of pageviews for your articles, your top content, your visitor information, and more.

Google Analytics can be difficult to set up for beginners, that’s why we recommend using MonsterInsights. It’s a Google Analytics plugin for WordPress that will help you easily install Google Analytics and see all reports inside your WordPress dashboard.

To learn more, see our guide on how to track website visitors to your WordPress site.

We hope this article helped you check if your WordPress posts are ranking for the right keywords. You may also want to see our list of actionable tips to drive traffic to a new WordPress site, and learn how to keep your website secure.

If you liked this article, then please subscribe to our YouTube Channel for WordPress video tutorials. You can also find us on Twitter and Facebook.

The post How to Check If Your WordPress Blog Posts Are Ranking for the Right Keywords first appeared on WPBeginner.

9 Best Schema Markup Plugins for WordPress (2022)

Are you looking for the best schema markup plugins for WordPress?

The right SEO plugin will help you properly optimize your content for search engines, so you can outrank your competitors and grow your business. You can also use schema markup plugins to create valuable rich snippets for search engines like Google.

In this article, we’ll share our expert pick of the best schema markup plugins for WordPress.

The best schema markup plugins for WordPress

Why You Should Use Schema Markup Plugins for WordPress

If your site has lots of high quality original content, then you’re already off to a great start. However, you also need to help search engines understand that content, so they can include it in relevant search results and drive more people to your website.

Schema markup is structured data that help your website communicate with search engines behind the scenes. It uses invisible code to clearly label your pages and posts, so search engines know exactly what your content is about, and when to show it to users.

Search engines such as Google also use schema to create rich snippets.

An example of a rich snippet in Google's search results

These valuable snippets show additional information about your pages and posts. If you manage to get a rich snippet on a search engine like Google, then your content immediately stands out from the crowd. This can improve your organic click through rate and increase your blog traffic.

Using the right schema markup is important, but it can also be complicated. Thankfully, there are WordPress SEO plugins that can walk you through the process of adding schema markup to your site. Some of these plugins will even generate the right schema automatically.

Using a schema markup plugin doesn’t guarantee that your rich snippets will appear in the search results, but it will improve your chances.

With that being said, let’s take a look at the best schema markup plugins for WordPress.

1. AIOSEO

The AIOSEO SEO plugin for WordPress

All in One SEO for WordPress (AIOSEO) is the best WordPress SEO plugin on the market used by over 3 million websites. This complete SEO toolkit has everything you need to outrank your competitors including support for rich snippets schema.

AIOSEO makes sure your schema markup is properly set up, so search engines can show your content to people who are searching for pages, posts, and products just like yours.

The plugin even has special schema for FAQs, courses, recipes, software, ratings, and dozens more. This helps your customers find your products, services, and digital downloads over your competitors.

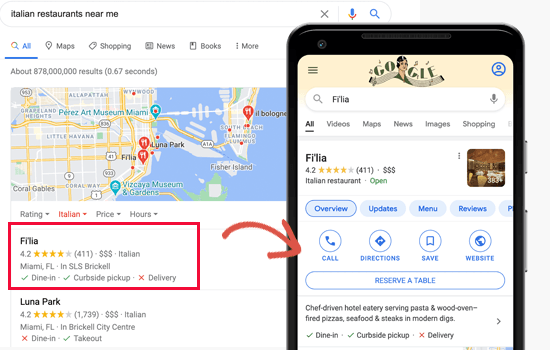
If you have a physical store or business, then AIOSEO has local schema markup for your business logo, address, business phone number, opening hours, and more. This gives you the best possible chance of appearing in Google Maps and local search results.

AIOSEO’s Google Map integration has multiple location support, which is perfect for successful businesses that have multiple offices, stores, salons, or other locations.

To learn more, see our guide on how to add multiple locations schema for local businesses.

This powerful WordPress SEO plugin is also easy to set up. To start, simply enter all your website information into the plugin’s settings.

Adding schema using AIOSEO

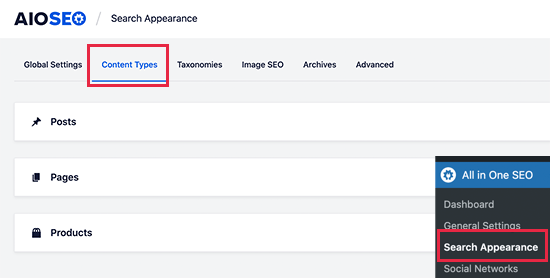
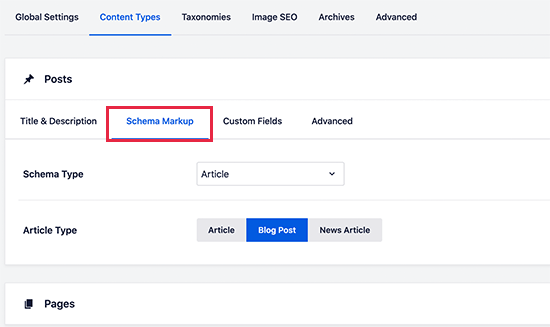
Then, just work your way through the Schema Markup settings for each content type.

For example, you’ll typically map your Posts to the Article schema type, and Pages to the Web Page schema.

Configuring rich snippets using AIOSEO

AIOSEO is flexible, so you can override these default settings for specific pages, posts, courses, and more from inside the content editor.

When editing your content, simply scroll to the AIOSEO Settings section and then click on ‘Generate Schema’ to open the Schema Generator.

Generating schema using the All in One SEO WordPress plugin

You’ll now see all the different schema that you can add to this particular piece of content.

By simply repeating these steps, you can optimize your entire WordPress website without having to write a single line of code.

One of the best schema markup plugins for WordPress

AIOSEO has support for all the modern schema types to get you rich snippets including the new FAQ schema. SEO pros can use the custom schema tab to enter any type of schema format they wish.

It also has built-in schema validation to ensure that your website is properly optimized for highest SEO rankings.

To get started with AIOSEO, please see our ultimate guide on how to set up All in One SEO for WordPress correctly.

Price: AIOSEO Pro licenses start at $49.60 per year for a single website. There’s also a free version that you can use to get started.

2. Schema Pro

The Schema Pro WordPress plugin

The Schema Pro plugin has more than 20 schema types including recipe, article, book, job posting, and more.

You can add all of these schema types to your WordPress blog or website without writing a single line of code. Simply choose a schema type from a dropdown menu and then tell the plugin where to add this schema.

To help you use the correct schema, Schema Pro will even map default data such as page title, featured image, author, and data. You can then simply fine-tune these defaults to suit your content, and Schema Pro will add the correct code across your website.

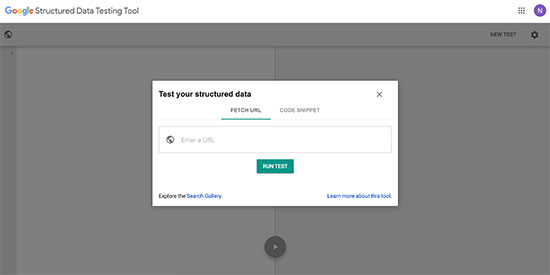
If this is your first time adding schema, then the plugin integrates with the Google Structured Data Testing Tool and comes with built-in field validation. This allows you to test your schema and see whether you’re likely to get a rich snippet.

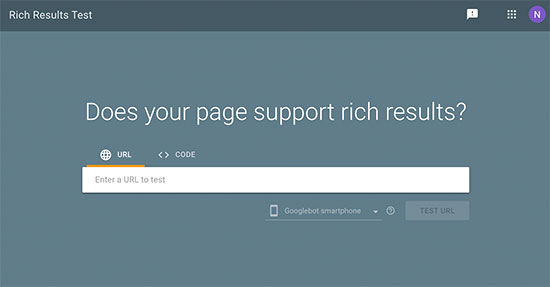
If you’re using custom post types or other unique content, then more advanced users may want to try the plugin’s Custom Schema markup tool. This allows you to create your own schema in JSON-LD format, and then test it using the Structured Data Testing Tool or Rich Results Test.

Price: You can buy an annual Schema Pro license for $67 which includes product updates, premium support, and advanced schema types.

3. WordPress Review Plugin

The Review Schema plugin for WordPress

Positive customer reviews can convince shoppers to buy from your online store and will make your website seem more trustworthy. With that being said, you’ll want the search engines to highlight your reviews.

The WordPress Review plugin can add the schema that search engines need to correctly identify your customer reviews, and include them in rich snippets.

You can use this plugin to create both single and multi-criteria reviews. This helps your customers make a decision about your company or products at a glance, and then explore more detailed reviews if they want extra information.

Creating a multi criteria review for your online store

The plugin can also generate rating schema and markup for your WooCommerce products, which makes it a great choice for any WooCommerce user.

The WordPress Review plugin comes with a selection of layouts that you can apply to your reviews plus support for numeric pagination. In this way, the plugin can display your reviews in a way that makes sense to shoppers as well as the search engines.

The best schema plugins for WordPress

Despite the focus on eCommerce, this plugin can also create review schema for any page, post, or custom post type. For example, you might encourage visitors to rate their favorite blog post.

If you’re worried about spam and fake reviews, then the plugin comes with built-in support for reCAPTCHA v3. For more information on how reCAPTCHA works, please see our guide on how to add reCAPTCHA to WordPress.

Price: You can download this plugin for free from the official WordPress repository.

4. WP Review Plugin

The WP Review schema plugin

WP Review is another plugin that’s perfect for anyone who sells digital downloads, products, or services online.

This plugin adds 9 different schema types and allows you to show reviews in a structured box that features star, point, and percentage ratings. You can also add user comments, affiliate buttons, and more to create an eye-catching layout.

Adding a review box to your WooCommerce website

By presenting this data in a box with the correct schema, you can encourage search engines to include the information in their search results. For example, Google often shows star ratings next to each product.

As long as you get a high rating, this can make your products stand out from the competition and should improve your click-through rates.

WP Review’s boxes are completely customizable, so you can fine-tune them to perfectly suit your WordPress theme by changing the text color, adding a border, changing the background, and more.

Using schema to create a review box

Price: You can download WP Review for free from the official WordPress repository.

5. Structured Content

The Schema Structured content WordPress plugin

This plugin allows you to add structured data to any page or post, and it then renders that information as JSON-LD.

In total, Structured Content adds 6 schema types including LocalBusiness, FAQPage, and Person. If you sell online courses, then there’s a Course structured data type that will help search engines show your training in relevant search results.

If you run a job board in WordPress, then we recommend looking at the plugin’s JobPosting schema as this can help your job listings appear in Google’s job search experience.

Here, Google will show your job listings along with your logo, plus any company reviews or ratings you’ve received. This instantly makes your job listings more interesting and should get you lots more applicants.

To help you add schema to your website, Structured Content comes with its own blocks. Simply click on any block to add it to your content.

Adding schema blocks to your WordPress website

After that, you configure the schema markup by filling out a form.

This makes it easy to add correctly-formatted markup to your website.

Configuring a schema block in WordPress

Price: A free download of Structured Content is available from the WordPress repository.

6. WP SEO Structured Data Schema

The SEO Structured data schema plugin for WordPress

If you want more control over your schema markup, then you may want to look at this free WordPress plugin.

Although WP SEO Structured Data Schema does have some site-wide settings, it places an emphasis on flexibility and manual customization.

Setting site-wide schema settings for WordPress

This plugin allows you to add schema in JSON-LD format on a page-by-page basis.

WP SEO Structured Data Schema does require a bit more setup compared to some of the other plugins on this list.

However, it is a powerful solution that gives you lots of freedom to fine-tune your schema. This makes it a good choice for users who are more familiar with schema markup.

The best schema plugins for WordPress

Just be aware that you’ll need to upgrade to the pro version if you want to add schema to custom post types.

Price: You can download WP SEO Structured Data Schema for free from the official WordPress repository.

7. WPSSO Core

The WPSSO Core scheme plugin for WordPress

The WPSSO Core plugin supports an impressive 500 schema types and sub-types.

It also stands out from the crowd by providing structured data markup for social media sites including Facebook, Pinterest, LinkedIn, Twitter, and WhatsApp.

The best schema plugins for WordPress

If you’re already using some of the best SEO plugins, then you’ll be happy to hear that WPSSO Core integrates with WP Product Review, WP-PostRatings, and WP Meta SEO. WPSSO Core can even read settings and data from AIOSEO.

Beyond SEO plugins, WPSSO Core also integrates with Easy Digital Downloads and WooCommerce, so we recommend checking out this plugin if you run an online store.

WPSSO Core is also a good choice if you previously tried to add schema markup manually, but encountered errors. This plugin claims to fix all schema markup errors in Google Search, Rich Results, Merchant Listings, and more.

Price: To download WPSSO Core for free, simply visit the WordPress repository.

8. Five Star Business Profile and Schema

The Five Star schema plugin for WordPress

Like many plugins on this list, Five Star Business Profile and Schema can add LD+JSON schema structured data to any page or post.

However, it also has a unique contact card feature that lets you add all your business details with the correct schema markup. This includes a Google Map, opening hours, plus your phone number and WhatsApp number with a click-to-call feature.

Search engines can then discover this information and show it next to your listing.

The best WordPress schema plugins

If you accept appointments and bookings, or own a physical store then this will help customers contact you. In fact, if you have multiple locations then Five Star Business Profile and Schema will automatically add a dropdown menu so customers can choose between the different locations.

Even better, you can add the card to any page, post, or widget-ready area using either a shortcode or a special Contact Card block.

The Contact Form WordPress block

Beyond the SEO-friendly contact card, this plugin has a database of every organization type schema and every rich results type.

Each schema and rich results type comes with the corresponding fields and properties. Simply fill in the default values that you want to use and the plugin will handle the rest.

Configuring the default schema for your WordPress website

If you want to use different values on a specific page, then you can easily override these defaults from the post editor.

Price: You can download Five Star Business Profile and Schema for free.

9. Schema and Structured Data

The Schema Structured data plugin for WordPress

This plugin adds 16 schema types to your WordPress website including reviews, email, and comments, plus support for custom schema.

After activating the plugin, Schema and Structured Data will automatically fetch the data from your website and then enhance it in the Google search results.

If you have an online store, then this plugin is compatible with WooCommerce so you can get your products and services featured on search engines like Google. If you’re using WooCommerce extensions, then this plugin is also compatible with WooCommerce Booking and WooCommerce Membership.

If you want to add schema to lots of content, then the plugin has some useful conditional fields. This allows you to include and exclude posts, pages, and taxonomies from the schema.

Schema and Structured Data has some extra features that can help search engines understand your content. This includes support for breadcrumbs and Google AMP compatibility so you can easily enhance the markup for the AMP version of your site.

For more information about AMP, please see our guide on how to properly setup Google AMP on your WordPress site.

Price: An annual license for a single website is priced at $99.00.

Which is the best WordPress schema plugin?

After carefully evaluating all the popular schema plugins in the market, we believe that AIOSEO – All in One SEO is the best WordPress schema plugin.

In the past, websites will use their main SEO plugin and then a separate schema plugin which would lead to complication, plugin conflicts, and even performance issues.

With All in One SEO, you can use just one plugin that gives you everything you need to grow your SEO rankings.

The free All in One SEO plugin has support for on-page schema markups, but you will need the Pro version to unlock access to their powerful custom schema generator.

Frequently Asked Questions

Being the largest free WordPress resource site on the planet, we have helped tens of thousands of people choose the best WordPress SEO plugins. Below are the answers to some of the most frequently asked questions.

Does schema improve SEO?

Yes, having a proper schema markup will absolutely improve your SEO rankings. Google and other search engines reward websites with rich snippets and higher rankings when they use proper schema tags.

Does WordPress use schema?

By default, WordPress does not add schema markup. That’s why website owners use WordPress schema plugins. You can easily add schema markup in WordPress by using the All in One SEO plugin.

For a more detailed explanation, see our guide on how to add schema markup in WordPress and WooCommerce.

Does Yoast SEO plugin add schema?

Yes, Yoast SEO plugin does offer limited schema support. However they do not have powerful custom schema generators or schema validation like other plugins such as All in One SEO, Schema Pro, and others mentioned in the list above.

Can you add schema to WordPress without a plugin?

Yes, you can absolutely add custom schema markup in WordPress without using a plugin. All you need to do is simply add the custom schema code in your theme’s functions.php file.

Although we don’t recommend this because if you update your theme, then your customizations will be overwritten. This is why it’s better to future-proof your custom snippets using WPCode.

With that said, most professionals use a plugin like AIOSEO to add schema because they keep it updated with new SEO guidelines.

Will schema markup help me get a featured snippet in Google?

Yes, having a proper schema markup will increase your chances of getting a featured snippet in Google, also known as position zero. At the end of the day, Google decides which sites get the featured snippet, but generally only websites with schema markup get the featured snippet.

What’s better JSON+LD Schema vs Microdata?

Modern search engines like Google prefer JSON+LD schema markup over the microdata schema markup. This is why most large websites have switched to using JSON+LD schema, and the plugins we recommend in our list all output as JSON schema markup.

Which is the best review schema WordPress plugin?

The best review schema plugin for WordPress is All in One SEO. It lets you add review schema, so your search listings can get start ratings and other rich snippets. But unlike other plugins, AIOSEO will not force you to use their styles, so you have full control over how your website brand looks.

The second option people often use is Schema Pro which is built specifically for generating schema blocks.

Which is the best custom schema markup generator for WordPress?

We believe that All in One SEO is the best custom schema generator for WordPress. It offers a guided wizard for all schema.org markups, and for true SEO pros, it even has a fully custom schema markup input, so you can experiment further.

We hope this article helped you find the best schema plugins for WordPress. You may also want to see our guide on how to add keywords and meta descriptions in WordPress and our expert pick of the best analytics solutions.

If you liked this article, then please subscribe to our YouTube Channel for WordPress video tutorials. You can also find us on Twitter and Facebook.

The post 9 Best Schema Markup Plugins for WordPress (2022) first appeared on WPBeginner.

The WordPress SEO Crawl Budget Problem and How to Fix It

Are you trying to fix the WordPress SEO crawl budget problem?

SEO crawl budget is the number of times search engines will crawl pages on your website. A lower crawl budget can delay your pages from getting indexed in a timely manner. This can hurt your SEO rankings and lower your overall traffic.

In this article, we’ll explain the WordPress SEO crawl budget problem and how to fix it quickly.

Fixing SEO crawl budget issues in WordPress

Because this is a huge topic, we have broken it down into easy-to-understand sections. Here are the different items we’ll cover in this article:

How Does Search Crawling work?

Search engines like Google, use sophisticated bots (computer programs) to visit websites across the internet.

These bots look for changes on a website and compare them to the main search index.

If they discover new content, then they add it to the search index. If they find content that is already in the index but has changed, then they update the index with fresh content.

How search crawling works

They follow links on a page and then do the same for those pages as well.

The way bots move from one link to other links on a page is similar to how real spiders crawl along their webs.

That’s why the term crawling is used to describe this activity, and you may sometimes see the bots referred to as search engine spiders.

For better SEO, you need to make sure that search engines can crawl your website easily.

Tip: See our complete WordPress SEO guide for beginners to learn more about SEO.

What is SEO Crawl Budget?

SEO crawl budget is the number of times search engines like Google will crawl pages on your website.

Google bots crawl billions of pages each day. They try to calculate how many pages they will crawl on each website domain to efficiently use resources.

This number is automatically determined by the crawling algorithms based on multiple factors.

It fluctuates daily, which means there is no fixed number for how many pages the Google bot will crawl on your WordPress website.

Generally, larger websites with more content have a higher crawl budget, and smaller websites have a lower budget.

Other factors also influence the crawl budget, like the popularity of a URL, freshness, update frequency, and more.

However, due to several reasons, you may be losing your crawl budget on unwanted pages.

For instance, if your website isn’t properly optimized, then search engines will spend your crawl budget on less significant parts of your website than important content.

What Causes WordPress SEO Crawl Budget Issues

The way WordPress generates URLs and duplicate content can cause crawl budget issues.

For instance, WordPress automatically generates RSS feeds for different areas of your website.

There are RSS feeds for the main blog, categories and tags, comments on each individual post and page, and even custom post types have separate RSS feed URLs.

Links to these RSS feeds are added to the HTML source code of your website which makes them discoverable by search engines.

Now, search engines are smart enough to recognize duplicate content and ignore it. However, they would still crawl them and spend your SEO crawl budget.

Apart from that, search engines would crawl less important items a lot more than needed. This includes your archives, taxonomies, authors, PDF files, and more.

WordPress plugins or other third-party tools can also add query parameters to your WordPress URLs.

Google’s spiders may consider these query parameters to be a different page and crawl them.

For instance, UTM parameters are used for Google Analytics tracking and a page with or without these query parameters would still look the same.

Example: https://yourdomain.com/landingpage/?utm_source=newsletter

This wastes your SEO crawl budget on less important items and becomes an issue.

How to Calculate Your SEO Crawl Budget

The SEO crawl budget is not a set number of pages.

It fluctuates a lot, and there is no reliable way of predicting how many pages Google will crawl on your website on any given day.

However, you can get a pretty decent idea based on recent crawl activity to see how Google crawls your website.

If you haven’t done so, you first need to add your website to Google Search Console. It is a free tool provided by Google to help website owners find out how their website is doing in Google Search.

Simply go to your Search Console dashboard. Switch to the ‘Settings’ menu from the left column and then click on ‘Open Report’ next to ‘Crawl stats.’

Open crawl stats report in Google Search Console

The Crawl stats report will show an overview of crawl requests on your website during the last few weeks.

You can hover your mouse over the chart to see how many pages were requested each day.

Crawl stats overview

This gives you an idea of what the average crawl rate was on your site during this period of time.

Below that, you can see a breakdown of crawl activity by response code, file types, purpose, and Google bot type.

Crawl break down

From here, you can see how much the crawl budget is spent on errors, syndication (RSS feeds), JavaScript, CSS, Images, and more.

This gives you a snapshot of items that you can optimize to utilize the SEO crawl budget more efficiently.

For example, if you have a lot of 404 errors being crawled, then you can use a redirection plugin to ensure those crawlers land on useful content.

(Later in the article, we show you how to redirect crawl errors step-by-step.)

Why You Should Care About SEO Crawl Budget

Search engines need to crawl your website efficiently, so they can properly index your content on time.

However, if your SEO crawl budget is being wasted, then your important and newer content may not get crawled on time.

It may even take weeks for the search engines to notice updates to your older articles or discover your new content.

You will miss out on getting traffic from search engines, your SEO rankings may not improve, and you will definitely lose money on sales or ad revenue.

How to Easily Optimize SEO Crawl Budget in WordPress

The easiest and safest way to optimize your SEO crawl budget in WordPress is by using All in One SEO for WordPress.

It is the best WordPress SEO plugin that comes with an SEO crawl optimization tool built-in.

First, you need to install and activate the All in One SEO for WordPress plugin. For more details, see our step-by-step guide on how to install a WordPress plugin.

Note: There is also a free version of All in One SEO which also includes a crawl clean-up feature. We recommend using the PRO plan of the paid plugin because it will also give you access to the Redirection manager tool to fix 404 errors on your website.

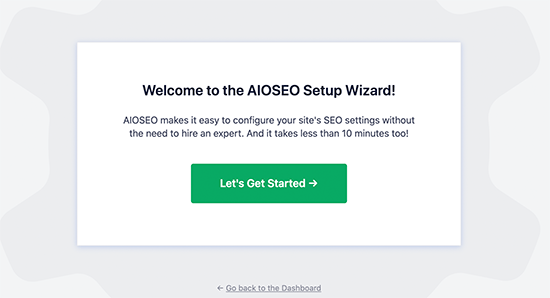
Upon activation, the plugin will show you a setup wizard. Simply follow the on-screen instructions to set up the plugin.

All in One SEO wizard

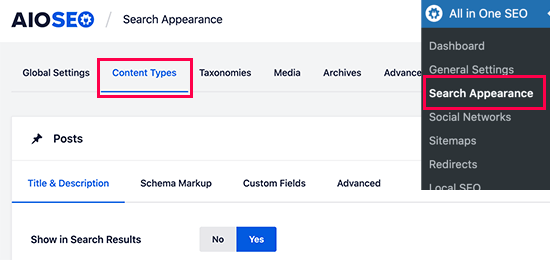
After that, you can go to All in One SEO » Search Appearance page.

Then, just switch to the Advanced tab.

Search Appearance - Advanced

Scroll down to the bottom of the page and there you’ll see the ‘Crawl Cleanup’ option.

Click the toggle to enable the ‘Crawl Cleanup’ feature.

Crawl cleanup

The first option you will see in the crawl cleanup is to remove the query arguments.

Below that, you can provide a list of query arguments that you want to allow. Advanced users can use Regex regular expressions here.

Next, you’ll see options for WordPress RSS feeds. All in One SEO will show you all different kinds of RSS feeds generated by WordPress, and you can disable the less important RSS feeds.

Disable RSS feeds

For instance, if you have a single-author blog, then you can Disable the Author Feeds.

Once you have disabled all the unwanted RSS feeds, don’t forget to click on the ‘Save Changes’ button to store your settings.

How to Set Up Redirects for Error Pages

All in One SEO will automatically set up redirects for feeds you have disabled. For instance, a tag RSS feed will now redirect users to the tag archive page.

Next, you need to switch to your Google Search Console dashboard and open the crawl stats report.

From here, you can see the pages that resulted in errors.

Find error pages

Now depending on the status code, you can set up redirects for those pages.

For instance, you can redirect 404 errors to a similar page. You can check other pages with errors and set up redirects for them as well.

All in One SEO makes it very easy to set up redirects on your WordPress website. Simply go to All in One SEO » Redirects page and add the old URL under the ‘Source URL’ and new URL under the ‘Target URL’ field.

Redirects manager

Click on the ‘Add Redirect’ button to save your settings. Then, you can just repeat the process to set up more redirects as needed. For more details and alternate methods, see our guide on how to set up redirects in WordPress.

We hope this article helped you learn about the WordPress SEO crawl budget problem and how to fix it. You may also want to see these expert tips on using Google Search Console to grow traffic or see practical examples of how to improve organic click-through rate in WordPress.

If you liked this article, then please subscribe to our YouTube Channel for WordPress video tutorials. You can also find us on Twitter and Facebook.

The post The WordPress SEO Crawl Budget Problem and How to Fix It first appeared on WPBeginner.

17 Reasons Why We Switched From Yoast to All in One SEO

Many of our users have asked us about the reasons we switched from Yoast SEO to All in One SEO for WordPress.

At WPBeginner, we decided to move to the All in One SEO plugin for WordPress. It has improved our SEO workflow and given us the tools we need to manage our website.

In this article, we will share our top reasons for switching to All in One SEO for WordPress and why we believe it is the best WordPress SEO toolkit on the market.

Why we switched from Yoast to All in One SEO

Why Use All in One SEO for WordPress?

If you are making a website, then installing an SEO plugin is one of the first things you should do in order to start getting traffic.

When we first started WPBeginner in 2009, we were using All in One SEO Pack because it was the original WordPress SEO plugin. After a couple of years, we switched to Yoast SEO because it was a newer plugin, and it brought some new innovations.

Over the next several years, our website grew a lot. However, we felt that Yoast SEO stopped innovating and no longer had the features we needed.

For instance, we needed better control over XML sitemaps, powerful schema.org tools, and more.

In 2020, our parent company, Awesome Motive, acquired the All in One SEO plugin.

The All in One SEO team did a fantastic job of completely overhauling the plugin, adding all the latest SEO features, and truly making it the best in class.

After numerous rounds of testing, we decided to make the move from Yoast SEO to AIOSEO in November 2021 because our team was convinced that AIOSEO had surpassed Yoast in terms of SEO features.

Since then, we have noticed a significant improvement in our editorial workflow and day-to-day SEO tasks.

That being said, here are the top reasons we switched from Yoast SEO to All in One SEO:

1. Better On-Page SEO Tools

On-page SEO means optimizing blog posts for SEO. This is one of the biggest day-to-day SEO tasks for most users as they add content to their websites.

All in One SEO offers the best on-page SEO experience, with many helpful features and tools at your fingertips.

On-page SEO in All in One SEO for WordPress

You will see two prominent buttons in the top-right corner of your screen while writing content.

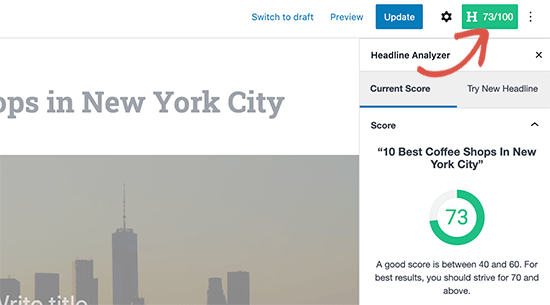
First, there is The Headline Analyzer tool, which gives a score for your post title with suggestions to improve it.

You can also try different headlines without changing the post tile and pick the best one. See our article on how to use the headline analyzer to write better SEO titles.

Headline Analyzer

Under the ‘General’ settings, you can add a focus keyphrase. This will give you an SEO score for your focus keyphrase with tips to improve it.

Plus, you can optimize your content for more than one focus keyphrase.

Multiple focus keyphrases

The snippet editor allows you to easily add the SEO title, meta description, and focus keyphrases.

You will also see a live preview of how the page would look in search engines.

Snippet editor

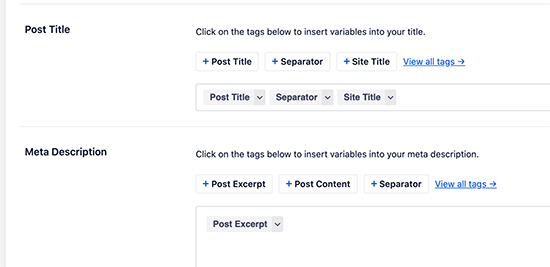
All in One SEO lets you use dynamic tags in your SEO title and description. This way, you can automatically change the title and description.

For instance, you can use current month and year tags to always display the current year in the post title without editing them manually each year.

Best of all, the tags are searchable, and you can easily add them from the dropdown menus, so you don’t need to know all the tags or look up any documentation.

Dynamic tags

You can even add emojis to your post titles to increase the click-through rate in the search results.

The ‘Social’ tab in the SEO settings will show a preview of how your article will appear on Facebook and Twitter.

From here, you can set the title, description, and thumbnail you want to use.

Social preview

All in One SEO allows you to choose from a bunch of options for your social media thumbnails.

You can also just use the Custom Image option and manually upload an image to use as a social media thumbnail for each article.

Social media image

Need to redirect an article to a different post or page? No worries.

The Redirects feature lets you easily set up redirects for any post or page on your website without harming your site’s SEO.

Redirect post or page easily

Other on-page SEO tools include a schema generator, Link Assistant, and SEO Revisions. We will talk about them individually later in this article.

Overall, we believe that All in One SEO offers a much easier yet incredibly powerful on-page SEO experience than any other tool on the market.

2. Powerful XML Sitemaps

WordPress itself comes with built-in XML sitemaps, and almost all other SEO plugins include some kind of XML sitemap functionality.

However, All in One SEO lets you take XML sitemaps to the next level.

The plugin will automatically generate sitemaps for all your content types, including posts, pages, custom post types, products, and more.

AIOSEO sitemaps

You can easily exclude any post or page that you don’t want to include in your sitemaps.

You can also exclude any content types or taxonomies from your sitemaps.

Exclude post types and taxonomies from sitemaps

Some users want to include their standalone landing pages in their sitemaps.

All in One SEO lets you include any page not generated by WordPress in your sitemaps.

Additional pages in sitemap

The plugin also generates an RSS sitemap.

This includes the latest updates to your content and helps your newer content get indexed much more quickly.

RSS sitemap

If you run a news website, then you can generate a news sitemap to appear in the Google News carousel.

Additionally, you can create a video sitemap. This helps your videos appear in Google Video search results.

Video, News, and HTML sitemaps

This is the most extensive XML sitemap tool currently available to WordPress users, and it is still incredibly easy to use, even for absolute beginners.

3. Most Comprehensive Schema Markup Support

Schema markup is a special type of HTML code that you can add to your WordPress website to tell search engines more about your content.

For instance, you can tell the search engines that a particular page is a blog post, a recipe, an FAQ section, a news article, or a product page in your online store. Search engines can then use this data to display rich results.

Rich snippets example

All in One SEO comes with the most comprehensive support for schema markup for your WordPress website.

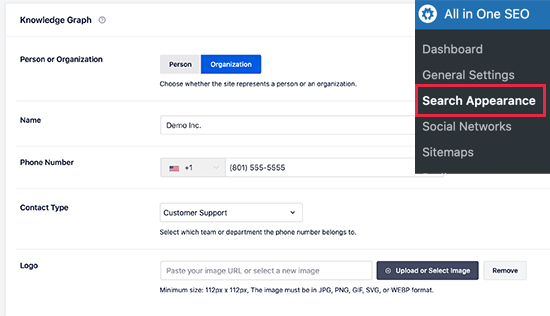
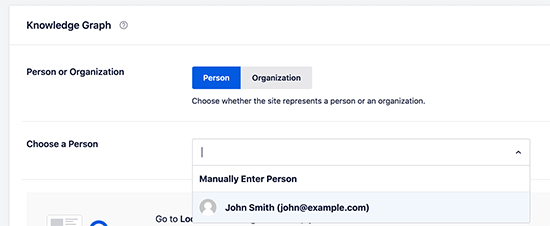
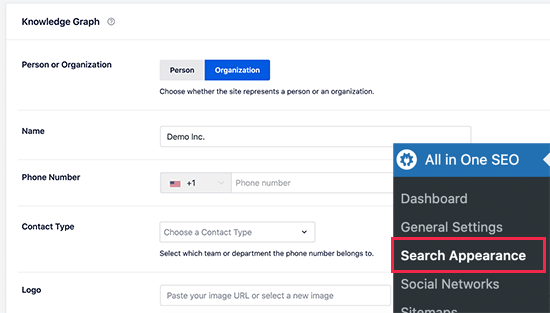
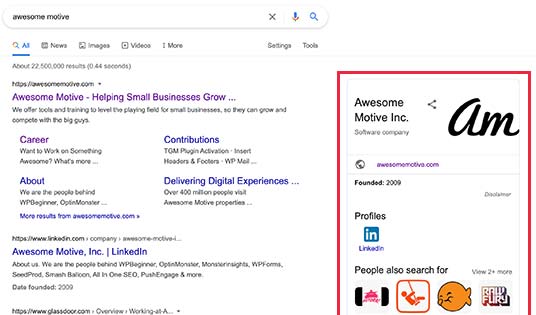
It starts with the Knowledge Graph data that helps search engines like Google get additional information about your website or business.

Knowledge graph

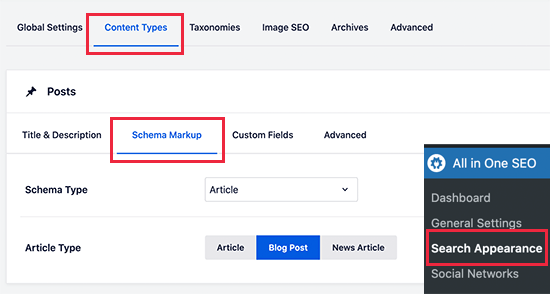
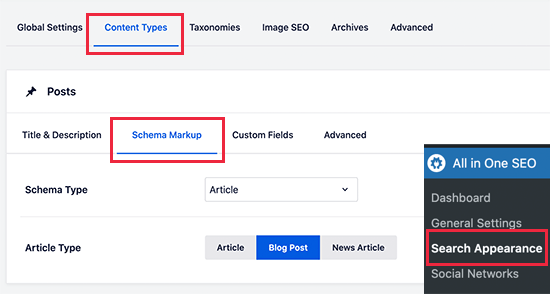
After that, you can set the default schema type for each post type.

For instance, you can set Article for your blog posts and Web Page for your pages.

Select Schema for content types

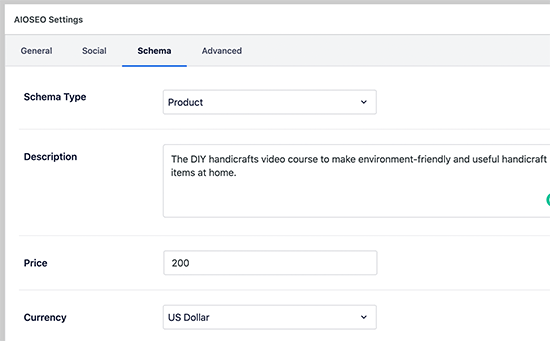
You can also generate schema markup for individual posts or pages.

For instance, you can differentiate your regular articles from recipes, FAQs, online courses, and more.

Generate schema markup for individual post

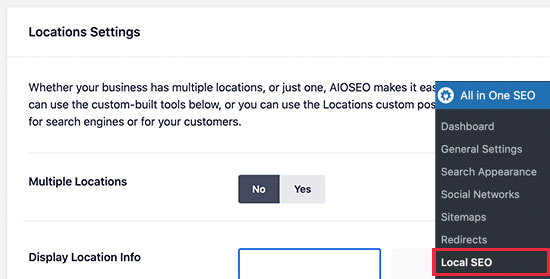
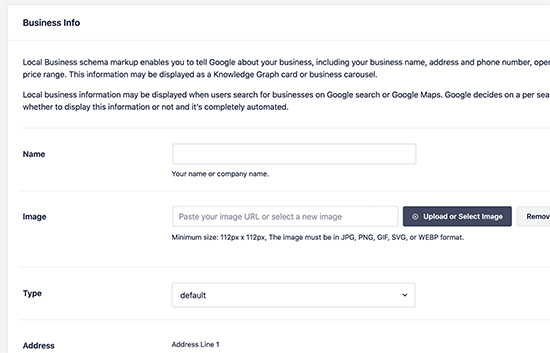
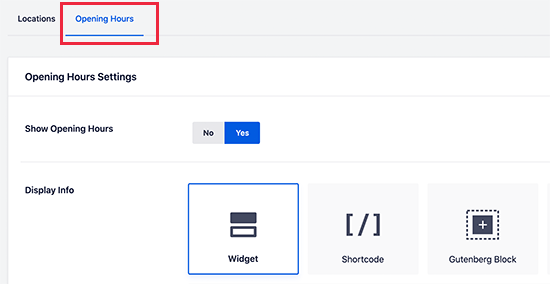
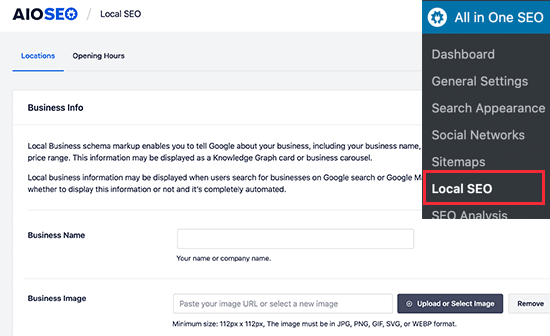
If you run a local small business, then All in One SEO lets you easily add local SEO schema markup. This way, your site gets more exposure in local search results and Google Maps.

You can add multiple locations, display business hours, provide contact information, and more.

Local SEO

This extensive Schema.org support allows you to easily optimize your content for rich results in Google.

AIOSEO lets you generate custom schema markup for recipes, videos, products, FAQ schema, and more. You can also use their next-gen Schema templates to get rich snippets.

AIOSEO Custom Schema Generator for WordPress

For power users, you can even write your custom schema and save it as reusable templates. All in One SEO also has built-in schema validation to check your custom schema markup.

4. Monitor and Undo SEO Changes With SEO Revisions

Are you wondering if the SEO changes you made to an article or page gave it a boost or drop in search rankings?

All in One SEO comes with a built-in SEO Revisions feature that allows you to easily track SEO changes made to each article.

SEO revisions in All in One SEO

You will be able to see who made the changes and at what time.

You can then click on the Compare or Preview icon to see the changes.

Compare SEO changes

Want to undo a change? No problem.

Simply click the delete button next to a revision to undo that change.

Undo an SEO change

Do you want other team members to know what changes you made, or just want to remind yourself?

Click on the ‘Add Note’ link next to a revision, and leave a quick note about the changes you made.

Adding notes to your SEO revision

SEO Revisions can help you understand which changes improved your search rankings and which ones didn’t work.

You can then apply the successful changes to all your articles and improve your SEO strategy.

5. Beginner-Friendly User Experience

Not all WordPress users are SEO experts, and even people with SEO expertise can benefit from a smooth user experience.

All in One SEO for WordPress makes SEO simpler for both beginner and advanced users.

It comes with a much cleaner onboarding experience than other SEO plugins, and a simple setup wizard walks you through the basic SEO setup.

All in One SEO wizard

It uses a modern user interface that is easy on the eyes and fast.

It saves you from unnecessary page loads when making changes to SEO settings. The plugin also gets out of your way when you want to write content or work on your website.

Once properly set up, beginner users can focus on creating content and growing their business instead of reviewing SEO settings.

At the same time, all the advanced features are easily accessible when you need them.

We believe this polished user experience makes a big difference when working on your website and performing day-to-day SEO tasks.

6. Use Artificial Intelligence to Write Headlines and Descriptions

All in One SEO comes with built-in integration with OpenAI’s ChatGPT.

When writing your post’s SEO title or description, you can simply click on the robot button next to those fields.

Use AI to generate SEO titles and descriptions

It will ask you to connect to your ChatGPT account.

After that, it will use artificial intelligence (AI) to suggest 5 titles or descriptions based on your content.

AI generated titles

You simply need to click on the post title you want to use, which can save you a lot of time on brainstorming headlines and meta descriptions.

Internal links play a crucial role in SEO. They not only help your users and search engines discover new content, but they can also improve search engine rankings.

However, tools that allow you to analyze your website’s internal and external links are usually very expensive.

All in One SEO brings that same functionality to your WordPress website for a fraction of the cost. The Link Assistant tool helps you analyze internal and external links added to each article.

Link assistant in All in One SEO

The plugin will also make smart link suggestions. You can click on a post to review a suggestion and add the link without editing a post.

This comes in handy for promoting newer articles by adding links to your older articles.

Link suggestions

You can also click on the ‘Edit’ button and change the anchor text or surrounding text without editing the entire article.

We feel that the Link Assistant tool alone is a strong reason for switching to All in One SEO for WordPress.

8. Redirection Manager

Broken links cause 404 errors in WordPress, which may affect your site’s SEO.

All in One SEO comes with a powerful Redirects Manager tool that allows you to easily set up redirects on your website.

All in One SEO Redirects Tab

It keeps a log of 404 errors on your WordPress site.

Then, you can easily find posts that may need to be redirected.

404 error log in AIOSEO

Also, if you change a post or page’s permalink, AIOSEO will immediately ask if you want to redirect the old URL to the new one.

Plus, if you ever plan to move your WordPress site to a new domain name, then All in One SEO comes with a full site redirect that automatically redirects users to your new domain name.

Full site redirect

9. Social Media Integrations

Social media platforms play an important role in promoting your website beyond organic search traffic.

All in One SEO provides deep integrations to social media platforms with its open graph metadata integration.

You can add links to all the social media profiles associated with your website and help search engines discover them.

Social networks

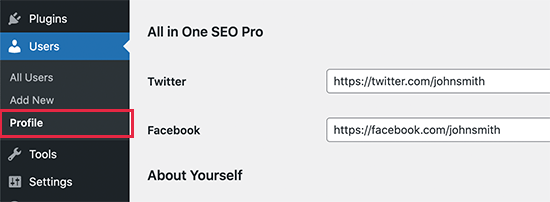
Each author on your website can also add links to their individual social media profiles.

This allows search engines to discover social media accounts for authors on your website.

Social profiles for authors

Finally, you can easily set open graph metadata and thumbnails for each article.

This allows you to override default settings and get more control over how each article appears when shared on social media.

Social preview

10. Enhanced Image SEO for WordPress

Image search is an important source of traffic for many websites. All in One SEO allows you to easily optimize your images to get more search traffic.

Simply go to All in One SEO » Search Appearance and switch to the ‘Image SEO’ tab.

Image SEO in All in One SEO

From here, the plugin can automatically use the filename to generate an image title and alt tags.

You can also tell it to replace dashes and underscores with spaces and change letter casing.

Generate image title and alt tags

With Image SEO, you can disable WordPress attachment pages and redirect them to the original post or page where the image is embedded.

Lastly, you can optimize filenames by not stripping dashes, changing letter casing, and stripping common stop words.

11. Sitewide SEO Audit

For many beginners and small businesses, purchasing an expensive SEO tool for a site-wide SEO audit or competitor analysis is not a practical option.

Luckily, All in One SEO comes with a built-in sitewide SEO audit and competitor analysis tool.

SEO audit in AIOSEO

With an SEO audit, you can see an overall SEO health score for your website.

All in One SEO will give you a detailed report with practical suggestions to improve your SEO score. You can also see how your competitors are doing and get an SEO score check for any website.

Competition analysis tool in All in One SEO

12. Search Statistics in Your WordPress Dashboard

The easiest way to see how your website is performing in Google Search is by using the Google Search Console.

However, many beginners either don’t add their website to Search Console or don’t check it that often.

All in One SEO brings your Google Search Console data into the WordPress admin dashboard and makes it human-readable and easy to understand.

All in One SEO search statistics

At the top, you will see graphs for your search performance. They show your recent search impressions, total clicks, average organic click-through rate, and average position in the search results.

Below that, you will see your Top Keywords and Content Performance report overview.

You can also switch to more detailed views of these reports. For instance, switching to the ‘SEO Statistics’ tab will show you the full Content Performance report.

SEO statistics showing content performance

It will show your top-performing articles, their search positions, the number of clicks, and more.

Similarly, switching to the Keyword Rankings report will show you the keywords your site is ranking for.

From here, you can see top keywords with the number of clicks, average position, impression, and difference in search ranking.

Keyword rankings report

Top Losing and Top Winning will help you sort keywords that have recently gained or lost in search rankings.

You can also switch to the ‘Content Rankings’ tab, which gives you a clearer picture of which content has gained or lost SEO rankings and by how many points.

All in One SEO content rankings in Search Statistics

Additionally, you can see if any changes to the Google algorithm have affected your rankings. For more details, see our guide on how to monitor Google algorithm updates in WordPress.

13. Fixing SEO Crawl Budget Issues in WordPress

SEO crawl budget is the number of times search engines like Google will crawl pages on your WordPress blog or website.

Google bots crawl billions of pages each day. They try to calculate how many pages they will crawl on each website domain to efficiently use resources.

As a website owner, you will want to make sure that your most important content gets crawled and ranked quickly. However, search engines may end up spending the crawl budget on less important pages.

All in One SEO helps you fix this problem. Just go to the All in One SEO » Search Appearance page and switch to the ‘Advanced’ tab.

Advanced tab under Search Appearance

Scroll down to the bottom of the page, and you’ll see the ‘Crawl Cleanup’ option there.

Click the toggle to enable the ‘Crawl Cleanup’ feature.

Crawl cleanup

From here, you can disable the Query Arguments from getting crawled.

Below that, you can disable different RSS feeds generated by WordPress.

Disable less important RSS feeds from crawl

To learn more, see our article about the WordPress SEO crawl budget issue and how to fix it.

14. Generate Keyword Ideas While Writing Content

All in One SEO allows you to optimize your content by including more relevant keywords in your article. It will even generate those ideas from your content itself using Semrush.

Simply edit a post and scroll down to AIOSEO settings. From here, add a focus keyphrase for your content and then click on the ‘Get Additional Keyphrases’ button.

Generate additional keyphrases

This will open a popup asking you to sign in to your Semrush account.

If you don’t have one, then you can create a free account.

Login Semrush

Once you are logged in, you will be asked to give All in One SEO permission to connect to your Semrush account.

After that, you will be redirected back to your website, where you will see a list of relevant keywords that you can add to your content.

Generated keyword ideas

15. Add Dynamic Table of Contents to Your Posts

A table of contents is a list of links to different areas of longer articles. It helps your users easily navigate to the topic that interests them instead of scrolling down.

Table of contents example

Apart from improved user experience, a table of contents can also help you improve the organic click-through rate in search results.

Search engines may include items from the table of contents as jump to sections below your listing in the search results.

Example of table of contents in search rankings

All in One SEO comes with an advanced and customizable Table of Contents block that you can add to your posts and pages.

Once you add the block, it will automatically display all headings below it as list items. You can choose to show or hide an item or edit the anchor text if needed.

All in One SEO table of contents block

For more details, see our tutorial on how to add a table of contents in WordPress posts.

16. Use Better Breadcrumb Navigation

Breadcrumb navigation is a navigational aid that shows users links for where they are within your website’s navigational layout.

It’s like a path to show them how to get back to earlier parts of the website they may have visited before landing on their current page or post.

Breadcrumb navigation preview

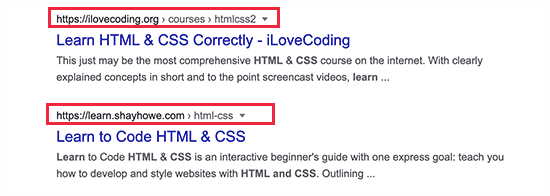
It is not only useful for your users, but it also helps with SEO.

Search engines can use this information when displaying a site in the search results.

Breadcrumbs in search results

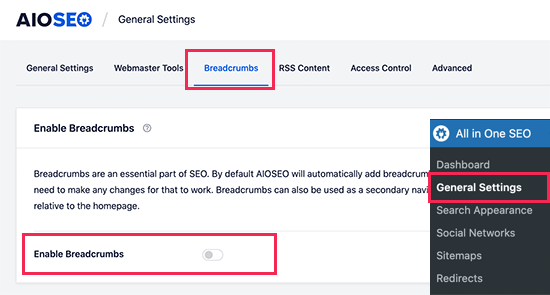
For beginners, All in One SEO automatically configures and sets up breadcrumbs.

However, it also comes with the easiest and most customizable breadcrumb navigation settings of any WordPress plugin on the market.

Just go to the All in One SEO » General Settings page and switch to the ‘Breadcrumbs’ tab. From here, you will see different ways to easily display breadcrumbs on your website.

Breadcrumbs All in One SEO

You can customize the appearance of breadcrumbs on your WordPress website. You can even disable them (not recommended) if you need to.

For more details, see our tutorial on adding breadcrumb navigation links in WordPress.

17. Easily Control User Access to SEO Features

Want to give some users access to your site’s back end so that they can work on SEO tasks?

All in One SEO comes with powerful access control features that enable you to easily share access. You can control which parts users can access.

Simply go to the All in One SEO » General Settings page and switch to the ‘Access Control’ tab.

Access control settings

From here, you can customize access to existing user roles such as Editor, Author, Contributor, and more.

Below that, you can even turn on/off SEO-specific user roles:

  • SEO Manager – Users with this role can access SEO settings for General Settings, Sitemaps, Link Assistant, Redirects, Local SEO, and individual pages and posts.
  • SEO Editor – These users can only access SEO settings for individual pages and posts.

To assign a user an SEO role on your website, you will need to add them as a new user in WordPress and set their user role to SEO Manager or SEO Editor.

Changing user role in WordPress

Bonus SEO Tools Included With AIOSEO

Aside from the above reasons for switching from Yoast to All in One SEO, AIOSEO also gives us dozens of other powerful SEO features that we simply didn’t have previously.

For example, they were the first ones to add IndexNow support in WordPress to speed up search indexing for Bing.

Also, if you are using a headless WordPress site, then they also have full REST API support to improve your SEO rankings.

All in One SEO also offers seamless support for eCommerce SEO.

Need more reasons? Take a look at this extensive list of useful All in One SEO features.

How to Switch From Any WordPress SEO Plugin to All in One SEO

Switching to All in One SEO for WordPress is quite simple.

First, you will need to install and activate the All in One SEO for WordPress plugin. For more details, see our step-by-step guide on how to install a WordPress plugin.

Note: There is also a free version of All in One SEO that you can use. However, it may not have all the features we mentioned above.

Upon activation, you will be asked to run the setup wizard.

During the setup, the plugin will automatically detect your other SEO plugin and offer to import SEO data.

Import SEO data from other plugins

Simply check the box next to the old SEO plugin and click on the ‘Import Data and Continue’ button.

All in One SEO will automatically import all your SEO data, including post titles, meta descriptions, keywords, and more.

You can also manually run the importer by visiting the All in One SEO » Tools page and switching to the ‘Import/Export’ tab.

Manually import SEO data

Simply select the SEO plugin you were using before and hit the ‘Import’ button.

We hope this article helped explain the reasons why we switched from Yoast to All in One SEO for WordPress. You may also want to see our complete WordPress SEO guide for beginners or take a look at our detailed side-by-side comparison of Yoast SEO vs. All in One SEO.

If you liked this article, then please subscribe to our YouTube Channel for WordPress video tutorials. You can also find us on Twitter and Facebook.

The post 17 Reasons Why We Switched From Yoast to All in One SEO first appeared on WPBeginner.

How to Add Your Website to Bing Webmaster Tools

Do you want to submit your WordPress site to Bing Webmaster Tools?

Bing is among the top search engines in the world. Submitting your site to its webmaster tool helps you monitor your site’s performance and keyword rankings and fix indexing issues.

In this article, we’ll show you how to add your websites to Bing Webmaster Tools.

How to add your website to Bing Webmaster Tools

What is Bing Webmaster Tools?

Bing Webmaster Tools is a free service by Microsoft that allows you to add your website to Bing search engine results.

This free tool helps your WordPress SEO by optimizing your site for Bing, so you can get more traffic.

The webmaster tools help you monitor and track your site’s performance in Bing. You can find out which keywords people use to find your site, so you can optimize those search terms in the content and get more traffic.

You can also see how Bing crawls and indexes your content. This helps to uncover and resolve indexing issues that might be preventing a blog post from appearing in Bing search results.

Aside from that, Bing Webmaster Tools shows your site’s backlinks and which websites you are linking to. It also helps remove content that you don’t want to display on Bing search results and scan for potential malware or spam issues that can threaten your WordPress website security.

That said, let’s see how you can add a website to Bing Webmaster Tools using the All in One SEO (AIOSEO) and WPCode plugin. We’ll also show how you can use the webmaster tool and import your site from Google Search Console.

You can use the links below to jump to the method you want to use.

Method 1: Add Website to Bing Webmaster Tools Using AIOSEO

The best way to add a website to Bing Webmaster Tools is using All in One SEO (AIOSEO).

It is the best SEO plugin for WordPress and helps you optimize your site search engines without technical knowledge or the need to hire an expert.

Note that we’ll use the AIOSEO Lite version for this tutorial because it is free and includes the ‘Webmaster Tools Verification’ feature. There is also an AIOSEO Pro version which includes more advanced features like link assistant, redirections, video sitemaps, and more.

Next, you’ll need to install and activate the AIOSEO plugin. If you need help, then please see our guide on how to install a WordPress plugin.

Upon activation, you can go to All in One SEO » General Settings from your WordPress dashboard. Next, head to the ‘Webmaster Tools’ tab and select the ‘Bing Webmaster Tools’ option.

Go to webmaster tools

Next, you’ll need to enter the Bing Verification Code. Let’s see how you can access the code in the webmaster tool.

How to Get Verification Code in Bing Webmaster Tools

First, you’ll need to visit the Bing Webmaster Tools website and click the ‘Get started’ button.

We suggest opening the Bing Webmaster Tools website in a new browser window or tab because you’ll need to switch back to your WordPress admin dashboard to complete the verification process.

Sign in to your Bing account

After that, you’ll need to sign in to your account.

You can use Microsoft, Google, or Facebook accounts to log in. Simply click on any options and choose your email address to sign in to the webmaster tool.

Choose an account to sign in

Next, Bing Webmaster Tools will show you 2 options to add your website.

You can import your sites from Google Search Console or manually add your website.

We’ll use the manual method to get the verification code.

Go ahead and enter your website address under the ‘Add your site manually’ section and then click the ‘Add’ button.

Manually add your website

When adding your WordPress website, make sure to enter the URL used by WordPress. That’s because Bing will see HTTP and HTTPS as different sites. It will also consider your domain’s WWW and non-WWW versions as two separate websites.

To check which URL is used by WordPress, simply login to your WordPress admin area and head to Settings » General. Then look for the link in the ‘Site Address (URL)’ field.

View your site address URL

Once you add this website URL in Bing Webmaster Tools, a window will slide in from the right.

Here you will see different methods for verifying your website, including an XML file, HTML meta tag, and adding CNAME records to DNS.

For this tutorial, we’ll use the HTML Meta Tag method. When you click the ‘HTML Meta Tag’ option, Bing gives you a validation code you need to install on your website.

Go ahead and click the ‘Copy’ button to copy this line of code.

Different methods for verifying your site

Next, you’ll need to add the code to your WordPress website.

Add Verification Code & Verify Your Site in Bing Webmaster Tools

You can now head back to the WordPress admin browser window or tab.

After that, simply go to All in One SEO » General Settings from your WordPress dashboard.

Now, head to the ‘Webmaster Tools’ tab and enter the HTML Meta Tag you copied earlier in the ‘Bing Verification Code’ field.

Enter Bing verification code in AIOSEO

When you do that, don’t forget to click the ‘Save Change’ button at the top.

After adding the HTML meta tag to your website, go back to the Bing Webmaster Tools tab or window and click the ‘Verify’ button.

Verify your site after entering meta tag

Next, you’ll see a message in Bing Webmaster Tools that your verification was successful.

You can then close the message and view your Bing Webmaster Tools dashboard.

View success message on verification

Method 2. Add Website to Bing Webmaster Tools Using WPCode

Another method of adding your website to Bing Webmaster Tools is using WPCode. It is the best WordPress code snippet plugin and helps you manage your website’s scripts. You can easily use WPCode to add the Bing Webmaster Tools HTML code to your website.

First, you’ll need to install and activate the free WPCode plugin. For more details, please see our guide on how to install a WordPress plugin.

Upon activation, you can go to Code Snippets » Header & Footer from your WordPress admin panel. Here, you’ll need to add the HMTL code provided by Bing Webmaster Tools.

Paste code into the header box in WPCode

Access HTML Meta Tag & Verify Your Website

You can find the HTML code by going to the Bing Webmaster Tools website and logging into your account.

Once signed in, simply add your website URL under the ‘Add your site manually’ field and click the ‘Add’ button.

Manually add your website

On the next screen, Bing will show you multiple methods for verifying your website in the webmaster tool.

Go ahead and select the ‘HTML Meta Tag’ option and copy the code.

Different methods for verifying your site

After copying the code, you can head to your WordPress admin panel and go to the Code Snippets » Header & Footer page.

Next, you’ll need to paste the HTML meta tag into the ‘Header’ section.

Enter meta tag in header section

Don’t forget to click the ‘Save Changes’ button.

Now that you’ve added the HTML meta tag to your site, simply go back to the Bing Webmaster Tools tab or window and click the ‘Verify’ button.

Verify your site after entering meta tag

Bing Webmaster Tools will now show a message that your verification was successful.

Simply close the message to view the webmaster tool dashboard.

View success message on verification

Import Your Website from Google Search Console

You can also add your WordPress site to Bing Webmaster Tools by importing it from Google Search Console.

If you use this method, then you don’t have to worry about verifying your website by adding an HTML code. However, Bing will need access to your Google account, which could be a security risk if either your Webmaster Tools or Google account gets compromised.

To start, you can log in to Bing using your Microsoft, Bing, or Facebook account.

Next, go ahead and click the ‘Import’ button under the Import your site from the GSC section.

Manually add your website

After that, you’ll see a message showing you what data will be imported from the Google Search Console account and how Bing will use it.

Simply click the ‘Continue’ button to move ahead.

Import site from search console

Next, you’ll need to select your Google account to sign in.

Go ahead and select the account that you use for logging into Google Search Console.

Sign in to your account

On the next screen, Bing will request access to your Google account.

Simply click the ‘Allow’ button to continue.

Allow access to your account

Next, you will see websites that are connected to Google Search Console.

Go ahead and select any websites you’d like to import into Bing Webmaster Tools and click the ‘Import’ button.

Select your site and import it

You’ll now see a message that your website has been successfully imported.

You can click the ‘Done’ button to close the window and view the Bing Webmaster Tools dashboard.

Successful import message

Bonus: How to Use Bing Webmaster Tools

In the Webmaster Tools dashboard, you have access to many different tools and options. Do note that Bing will take up to 48 hours to reflect data in its webmaster tools reports after setting it up on your WordPress site.

For example, you can view your site’s search performance by going to the Search Performance tab. You can then use this data to see which search terms people use to find your website and perform keyword research to develop new content ideas.

Similarly, the tool also lets you inspect a specific URL to see if there are any crawling issues. You can simply enter the post or page link in the URL Inspection tab and view the errors.

URL inspection tool in webmaster

With Bing Webmaster Tools, you can submit your website sitemap in the Bing Webmaster Tools to help the search engine to discover new content quickly.

For more details, please see our guide on how to submit your site to search engines.

Submit sitemap in Bing

Plus, you can scan for any errors that could be preventing your content from appearing in Bing search results.

If a blog post or landing page isn’t appearing in the search results, then you can go to the ‘URL Submission’ tab and manually submit your content for indexing.

Submit URLs for indexing

We hope this article helped you learn how to add your website to Bing Webmaster Tools. You can also see our guide on WooCommerce SEO made easy, and our expert pick of the best WordPress SEO plugins and tools to grow your website.

If you liked this article, then please subscribe to our YouTube Channel for WordPress video tutorials. You can also find us on Twitter and Facebook.

The post How to Add Your Website to Bing Webmaster Tools first appeared on WPBeginner.

How to Add Multiple Locations Schema for Local Business in WordPress

Are you managing a local business website that have multiple physical locations?

In that case, you would need to add local business schema markup for multiple locations on your site, so Google and other search engines can display detailed information about your various business locations.

In this article, we’ll show you how to properly add local business schema markup for multiple locations in WordPress to improve your SEO.

How to Create multiple locations with schema markup in WordPress

Why Create Local Business Schema Markup for Multiple Locations?

Schema markup or structured data is HTML code that provides more details about your content to search engines.

By adding schema markup to the source code of your WordPress website, search engines can easily find the extra information and display it in the search results as featured snippets. For instance, you can show FAQs in search results, add Google Maps in WordPress, display recipes, and more.

If you have multiple business locations like retail outlets, restaurants, or regional offices, then you can display them on Google and Bing search results through schema markup.

For example, if you search for McDonald’s locations in Florida, Google will show you a featured snippet with the different destinations and a map with pinned locations.

Multiple location map preview on Google

Creating multiple local business locations with schema markup helps improve your website SEO rankings.

Since the featured snippets are placed right at the top of the search results, it helps you to increase your click rate in search. That means more organic traffic and more conversions.

That being said, let’s take a look at how you can create local business schema for multiple business locations in WordPress.

Creating Multiple Locations Using Schema Markup

The easiest way of setting up local business schema markup in WordPress is by using the All in One SEO (AIOSEO) plugin. It’s the best SEO tool for WordPress that’s used by over 3 million website owners and professionals.

AIOSEO removes the need for any technical knowledge or hiring an expert to boost your search engine visibility.

For this tutorial, we’ll be using the AIOSEO Pro license because it includes the Local SEO addon which is what you need to dominate local business SEO. It also other powerful features like the redirection manager, advanced sitemap, link assistant, and more. If you’re on a budget, then you can use the free version of AIOSEO to get started with SEO optimization.

The first thing you’ll need to do is install and activate the AIOSEO plugin. For more details, please see our guide on how to install a WordPress plugin.

Upon activation, you’ll see the setup wizard. Go ahead and click the ‘Let’s Get Started’ button.

All in One SEO setup

After that, follow the onscreen instructions in the setup wizard to configure the plugin. If you need help, then please see our guide on how to properly setup AIOSEO in WordPress.

Next, you’ll need to head over to All in One SEO » Local SEO from your WordPress dashboard and click the ‘Activate Local SEO’ button.

Activate local SEO

Once the Local SEO addon is active, you’ll see different Location Settings.

Go ahead and click the ‘Multiple Locations’ toggle to enable the option. This will add a new menu in your WordPress admin panel called Locations.

Enable multiple locations

After that, you can scroll down to the ‘Advanced Settings’ section.

Here you can see the permalink AIOSEO will use to show your multiple business locations and location category. If you wish to use a custom link, then simply check the ‘Use custom slug’ box and enter your permalink url structure.

Next, you can also switch on the ‘Enhanced Search’ option, which will include your business locations in your WordPress site search results.

Advanced settings for local SEO

When you’re done, don’t forget to click the ‘Save Changes’ button.

More advanced settings

Next, you can go to the ‘Opening Hours’ tab and configure the times for your local businesses.

By default, the ‘Show Opening Hours’ option will be set to Yes. If you don’t want to show opening hours, then simply click the toggle to No.

Configure opening timings

After that, you can scroll down and change the labels for when your business is open or closed.

There are also options to change the opening and closing timings for specific days or set it to open 24/7.

Set opening and closing hours

Note: The opening hours will be used across all the locations you add in WordPress. However, you can disable them for specific locations in the content editor.

AIOSEO also lets you integrate Google Maps with your WordPress website which helps show your local business on Google Maps. For more details, you can see our guide on how to add Google Maps in WordPress.

Next, you’ll need to add your multiple business locations in WordPress.

Adding Multiple Business Locations in WordPress

When you enable the Multiple Locations option in AIOSEO, a new ‘Locations’ option will appear in your WordPress admin panel.

To add your local business locations, simply go to Locations » Add New from your WordPress dashboard.

Add a new location

Next, you’ll need to add your location details in the WordPress content editor. Here you can add a title for your business location, which can be the location name.

Under the title, you can add more details or description about your location. You can also create location categories from the settings panel on your right.

Add title and description for your location

After that, simply scroll down to the AIOSEO Local Business metabox.

In the ‘Business Info’ section, you can add your business name, select a business type (industry), add an image, enter the address for your location, business phone, payment info, area served, and more.

Enter local business details

Next, you can switch to the ‘Opening Hours’ tab under the AIOSEO Local Business metabox.

AIOSEO will use the default settings automatically. However, you can disable the ‘Use Defaults’ option and then configure the opening and closing hours for your local business.

Disable default opening hours

Next, you can go to the ‘Maps’ tab and configure how your local business will appear on Google Maps.

For instance, you can change map style and upload a custom marker to pin your location on the map.

Add maps info

When you’re done, go ahead and publish your location page.

Now you can simply repeat this process for other locations you want to add to your WordPress website.

We hope this article helped you learn how to create multiple locations in WordPress with schema markup. You may also want to see our guide on must have WordPress plugins for business websites, and our comparison of the best email marketing services for small business.

If you liked this article, then please subscribe to our YouTube Channel for WordPress video tutorials. You can also find us on Twitter and Facebook.

The post How to Add Multiple Locations Schema for Local Business in WordPress first appeared on WPBeginner.

9 Best Internal Linking Plugins for WordPress (Automatic + Manual)

Are you looking for the best internal linking plugins to improve your SEO strategy?

Internal links play an important role in search engine optimization (SEO). They help search engines discover your content and rank them higher in search results. An internal linking plugin can help automate the process and provide suggestions for building better links.

In this article, we’ll show you some of the best internal linking plugins for WordPress.

Best internal linking plugins for WordPress

Why Use an Internal Linking Plugin for WordPress?

Internal links are links between pages on your own website. Having internal links is important for your WordPress SEO. They help search engines like Google crawl your website and discover new content to index and rank.

For example, the paragraph above has two internal links to our relevant content which not only helps users, but also helps search engines rankings.

Generally, the more links a page has pointing to it, the more likely it is to rank higher in search results. That means that you can use internal links to point to important pages on your site as a way to increase their traffic.

Internal links also help your visitors easily find related articles and provide a better user experience overall. This can also help increase pageviews and reduce your bounce rate.

WordPress provides an easy way to add links to your blog posts and pages. However, manually adding internal links can be time-consuming, and the chances are that you might miss an opportunity to link an important page.

This is where an internal linking plugin for WordPress comes in handy. It helps save time and lets you automatically link specific keywords and focus keyphrases.

You also get suggestions for adding internal links. This way, you won’t miss out on linking essential pages. It even helps find content that doesn’t have any internal links and offers recommendations for building internal links.

That said, let’s look at the best internal link plugins for WordPress.

1. All in One SEO (AIOSEO)

The All in One SEO plugin

All in One SEO (AIOSEO) is the best SEO plugin for WordPress. Over 3 million people use the plugin to optimize their site for search engines.

The plugin is beginner-friendly and helps you improve your SEO score without technical knowledge.

AIOSEO offers a Link Assistant feature which enables you to build better internal links.

Link assistant overview

It crawls the links on your WordPress website and provides a detailed report. You can see the number of internal links, outbound links, and affiliate links for each post and page.

The plugin also shows opportunities to improve your internal links. You can see the exact phrase and the anchor text on which it will create the link. With a click of a button, you can then add them to your content.

Find internal link opportunities and orphaned pages

Plus, you get to see orphaned pages. These are pages that have no internal links. Adding links to these pages can help them to get indexed faster and rank higher in search results.

AIOSEO also lets you quickly search for blog posts to link to from inside the WordPress content editor, and provides options to add nofollow, sponsored, and UGC (user-generated content) tags.

Other than that, AIOSEO offers many other powerful features to optimize your website. You can create XML sitemaps, perform an SEO audit, find and fix broken links, optimize your site for rich snippets, and more.

2. MonsterInsights

MonsterInsights

MonsterInsights is the best Google Analytics plugin for WordPress and is trusted by over 3 million professionals.

It offers a Popular Post feature that lets you show your best articles anywhere on your site. Using the Inline Popular Post option, you can show your top blog posts within the content.

MonsterInsights Popular Posts Widget

The plugin offers different themes you can choose from and customize the color and size of the title, label, and background. MonsterInsights also lets you select whether to show popular posts based on views, comments, and share count.

With MonsterInsights, you can also track affiliate link clicks and outbound link clicks on your WordPress website. This way, you get to see how people interact with your content and which link they click the most.

Other advanced features offered by MonsterInsights include eCommerce tracking, form conversion tracking, dashboard reports, and more.

3. Yoast SEO

Yoast SEO

Yoast SEO is another popular WordPress SEO tool that helps optimize your site for search engines. It is an alternative to All in One SEO.

The plugin also comes with a basic internal linking tool for premium users. It scans your content for internal links and then provides suggestions for improving your links from within the WordPress content editor.

However, it is not as comprehensive as the All in One SEO link assistant. You can see our detailed comparison of Yoast SEO vs AIOSEO for more details.

Yoast offers several other basic SEO features like adding SEO titles and meta descriptions, adding images for Facebook and Twitter cards, generating XML sitemaps, and more.

4. Internal Link Juicer

Internal Link Jucier

Internal Link Juicer is the next internal linking plugin for WordPress on our list. It’s a free WordPress plugin and helps you automatically build internal links in your content.

You can add specific keywords and phrases in the plugin, and it will add links for you. It gives you more control over your internal links, such as diversifying anchor text, so they look natural and don’t appear computer-generated.

The plugin also lets you backlist and whitelist specific posts from internal linking. This way, you can prevent authors from linking particular articles and pages. It even provides an option to limit the number of links per post.

5. Rank Math

Rank math

Rank Math is another SEO plugin for WordPress that has built-in basic features to help you improve your internal linking strategy. The plugin quickly scans your website for links and then provides you suggestions for adding internal links.

It shows the suggestions inside your WordPress content editor. You can simply copy the recommended link and add it to your text.

Rank Math link builder is not as comprehensive as AIOSEO but rather more in line with the basic link building solution like Yoast.

Besides link suggestions, the plugin also offers other features like Google Schema Markup, keyword rank tracking, 404 error tracking, redirection manager, and more.

6. Link Whisper

Link whisper

Link Whisper is a premium WordPress plugin that helps you create internal links for your website and boost your search engine rankings.

Like many other plugins on our list, it also suggests adding internal links to your content inside the WordPress editor. The plugin is straightforward to use and offers a simple interface.

Using the plugin, you can also find blog posts and pages with little or no internal links. Then using the internal link suggestion tool, you can add links to these orphaned pages.

7. Interlinks Manager

Interlinks Manager

Interlinks Manager is a free internal linking plugin for WordPress. The plugin lets you monitor and optimize your internal links with ease, and you can see the data inside your WordPress admin area.

This plugin is different from the rest because it uses an algorithm to detect whether your internal links are properly optimized and estimates the link juice for each link.

Using this information, you can improve the link juice distribution and build internal links to important pages to boost your SEO. The plugin also offers options to customize the algorithm and lets you tweak it according to your needs.

8. YARPP

YARPP

YARPP or Yet Another Related Posts Plugin is a free-to-use plugin and it’s great for showing your top landing pages anywhere on your website.

When your site starts to grow, your top pages could get buried under new pages. Using the plugin, you can make your top pages visible to visitors and create internal links so search engines can also easily find them on your site.

What’s different about the plugin is that it not only lets you show related pages, but you can also use it to show related blog posts, media files, and call to action buttons.

YARPP is extremely easy to use, and it offers options to change the algorithm that determines which pages and posts to show. Besides that, it comes with pre-built themes, and you can customize them according to your website’s design.

9. Internal Links Manager

Internal links manager

Internal Links Manager is a simple and beginner-friendly WordPress plugin that helps you automatically add links to specific keywords.

The plugin only focuses on adding internal links when certain words and phrases are mentioned in the content. All you have to do is provide the URL and the keyword for the link.

The user interface is straightforward to use. However, you don’t get internal linking suggestions or a report showing how many internal and external links are on your website.

Which Internal Linking Plugin is the Best?

After going through the list, we believe that All in One SEO (AIOSEO) is the best internal linking plugin for WordPress.

It provides a comprehensive internal link report and offers detailed suggestions to add internal links to your content. AIOSEO also helps find pages that don’t have any internal links.

Other than that, it’s a complete SEO toolkit with powerful features. You can use it to optimize your WordPress site for search engines and grow your organic traffic.

At WPBeginner, we use AIOSEO to optimize our site for higher rankings.

We hope this article helped you pick the best internal linking plugin for WordPress. You may also want to see our guide on how to get a free SSL certificate for your website, or our comparison of the best domain registrars.

If you liked this article, then please subscribe to our YouTube Channel for WordPress video tutorials. You can also find us on Twitter and Facebook.

The post 9 Best Internal Linking Plugins for WordPress (Automatic + Manual) first appeared on WPBeginner.

How to Add RSS Sitemap in WordPress (The Easy Way)

Are you looking to add a RSS sitemap in WordPress?

RSS sitemap helps Google index your new website content and updates faster. Google recommends using RSS sitemap in combination with XML sitemap for maximum SEO results.

In this article, we will cover how to easily add RSS sitemap in WordPress without any code.

How to Add RSS Sitemap in WordPress

What is RSS Sitemap?

Unlike a traditional XML sitemap which are usually large, RSS sitemap are small because they only contain the most recent updates to your site.

Google crawls RSS sitemaps more frequently which helps your content updates get indexed faster and improves your WordPress SEO rankings.

A good way to think about it is that your XML sitemaps give Google information about all of the posts and pages on your website. Whereas RSS sitemap update Google on the content that has been recently updated.

For optimal crawling, Google recommends using both XML sitemaps and RSS sitemap.

WordPress RSS Sitemap Example - Generated by All in One SEO

Depending on the type of website you have, you may also want to take add a video sitemap and news sitemap alongside the RSS sitemap for maximum SEO benefits.

With that said, let’s take a look at how to add RSS sitemap in WordPress.

How to Add RSS Sitemap in WordPress

The easiest way to add RSS sitemap in WordPress is by using the All in One SEO plugin. It is the best WordPress SEO plugin used by over 3 million websites.

We’re using the premium version of AIOSEO on WPBeginner to improve our SEO rankings, but the RSS sitemap feature is available in the free version as well.

AIOSEO

First thing you need to do is install and activate the All in One SEO plugin. For more details, see our step by step guide on how to install a WordPress plugin.

Once activated, you will be prompted to go through the guided set up wizard. It’s very beginner friendly, and it will help you setup all the right settings.

To enable the RSS sitemap in WordPress, you need to go to AIOSEO » Sitemaps settings page and click on the RSS Sitemap tab.

Simply toggle the enable Sitemap option, and that’s it.

WordPress RSS Sitemap Setting in AIOSEO

You have successfully added RSS sitemap in WordPress. You can click on the Open RSS Sitemap button to see how your RSS sitemap looks.

Alternatively, you can also go to the following link:

https://yoursite.com/sitemap.rss

Once you have enabled it, you will need to submit the RSS sitemap in Google Search Console.

The process of submitting a RSS sitemap is similar to how you would add any other sitemap. Here’s a detailed tutorial on how to submit your sitemap in Google search console.

Google Search Console RSS Sitemap Read Date
As you can see in the screenshot above, Google reads the RSS sitemap faster than it reads the general XML sitemap.

This is why we strongly recommend enabling this feature to get a competitive SEO advantage.

AIOSEO is a powerful WordPress SEO plugin with all the features that you need to improve your search engine rankings. You can see our ultimate guide on how to properly setup All in One SEO for maximum benefits.

Final Thoughts on WordPress RSS Sitemap

RSS sitemap technology has been around for a long time, but many website owners don’t know how to leverage it. That’s because most website builders and WordPress SEO plugins don’t have this feature.

AIOSEO short for All in One SEO is the most comprehensive SEO toolkit, so it comes built-in with RSS sitemap feature along with dozens of other features.

When we switched WPBeginner from Yoast plugin to AIOSEO plugin, we saw a boost in our SEO rankings and website traffic. We believe a big reason for that is the RSS sitemap feature because it helped our content updates get indexed faster.

In the recent months, Microsoft has launched the IndexNow protocol to further boost SEO speed. Currently that’s only being used by Bing and Yandex, so we’re using both IndexNow and RSS sitemap to speed up our SEO results.

The good news is that AIOSEO was the first WordPress SEO plugin to add IndexNow support as well because they’re staying at the forefront of SEO changes.

We hope this article helped you learn how to add RSS sitemap in WordPress. You may also want to see our ultimate WooCommerce SEO guide to improve your SEO rankings, and our comparison of the best email marketing services to connect with readers after they leave your website.

If you liked this article, then please subscribe to our YouTube Channel for WordPress video tutorials. You can also find us on Twitter and Facebook.

The post How to Add RSS Sitemap in WordPress (The Easy Way) first appeared on WPBeginner.

How to Add IndexNow in WordPress to Speed Up SEO Results

Are you wondering what is IndexNow, and whether you should add IndexNow in WordPress?

IndexNow is a new SEO initiative created by Microsoft to help your website get indexed faster in search engines. This boosts new content discoverability and speed up your SEO results.

In this article, we will share how to add IndexNow in WordPress to speed up SEO results.

How to Add IndexNow in WordPress

What is IndexNow?

IndexNow is an automatic ping that lets search engines know when a post or page (URL) on your website has been added, updated, or deleted. This allows search engines to quickly update their search results speeding up overall SEO results. Simply put, it’s instant indexing!

This is a new initiative started by Microsoft, and it’s currently supported by both Microsoft Bing and Yandex. A Google spokeperson has also confirmed that they will be testing the IndexNow protocol due to environmental sustainability.

Currently, all search engines use XML sitemaps to discover new content and updates. The challenge is that it can sometimes take days to weeks for search engines to discover new content updates because they visit your website at random intervals.

Search engine bots are inefficient due to their legacy design, and they have a high carbon footprint.

When a search engine bot visits your sitemap, it attempts to visit every single link that it finds on the sitemap as well as every single link that’s inside of each page. This is a resource intensive process, and IndexNow protocol aims to solve that.

How Search Engine Crawl Bots Work

Instead of having search engine bots randomly scan every single page on your site to see what’s been updated, IndexNow allows your website to simply ping the search engine to let them know when you publish a new post or update an existing piece of content.

This way they can quickly update their search results while helping the environment.

IndexNow is a win for website owners, win for search engines, and a win for the world.

That being said, let’s take a look at how to add IndexNow in WordPress to speed up your SEO results.

Method 1. How to Add IndexNow in WordPress using AIOSEO

AIOSEO is the best WordPress SEO plugin used by over 3 million websites. We use AIOSEO on WPBeginner to improve our SEO rankings.

In their recent update, AIOSEO became the first WordPress SEO plugin to add IndexNow support for WordPress.

All in One SEO

First you need to install and activate the AIOSEO plugin. For more details, see our step by step guide on how to install a WordPress plugin.

For this tutorial, we will be using the premium version of AIOSEO because it includes IndexNow and other powerful SEO features. There is also a free version of AIOSEO that you can use to try it out.

Once activated, you need to go AIOSEO » Feature Manager from your WordPress dashboard to enable the IndexNow feature.

All in One SEO Enable IndexNow Feature

Once enabled, IndexNow is automatically configured and ready to go – no action is needed on your part.

AIOSEO partnered with Microsoft to build this integration, and they made the process beginner friendly. They automatically generate an IndexNow API key for your website and configure it for you, so you don’t have to do anything.

You can verify this by going to AIOSEO » General Settings and click on the Webmaster Tools tab. There you will see the IndexNow icon, and if you click it you’ll see that your website’s IndexNow API key is already pre-configured.

AIOSEO IndexNow WordPress

AIOSEO comes with many other powerful features to help you improve your WordPress SEO rankings including Link Assistant, redirection manager, and more.

We have a step by step guide on how to properly setup All in One SEO which also includes instructions how you can switch from Yoast, RankMath, and others to AIOSEO.

Method 2. How to Add IndexNow in WordPress using the IndexNow plugin

While other WordPress SEO plugins have begun to add IndexNow support, most don’t have it yet. If you don’t want to switch to AIOSEO, then you can use this option instead.

First you need to install and activate the IndexNow utility plugin. For more details, see our guide on how to install a WordPress plugin.

Upon activation, you need to go Settings » IndexNow in your WordPress dashboard. You will need to click on the Get Started now button, and it will automatically generate your API key and get everything configured.

After that, you will see a screen with IndexNow stats like successful URL submissions and more.

IndexNow WordPress plugin by Microsoft

That’s all, you have successfully added IndexNow to WordPress.

Final Thoughts on IndexNow and Future of SEO

IndexNow is a new initiative and it has already been adapted by Microsoft Bing and Yandex. Google is said to be testing support for this, and we really hope they adapt it as well.

We believe that all popular website builder platforms will add IndexNow integrations with AIOSEO leading the way for WordPress, but other companies like Duda, Cloudflare, etc have all added IndexNow integrations in the recent months.

IndexNow is a great solution for both small and large sites, and it’s a SEO professional’s dream come true since it finally speeds up SEO results with nearly instant indexing.

It’s important to emphasize that IndexNow does NOT replace sitemaps. You still should have XML sitemaps, video sitemap, news sitemap, and other advanced sitemaps to help improve your SEO rankings. You should use IndexNow alongside sitemaps to gain a competitive advantage.

We hope this article helped you learn how to add IndexNow in WordPress. You may also want to see our guide on how to do keyword research and our comparison of best push notification software to grow your traffic.

If you liked this article, then please subscribe to our YouTube Channel for WordPress video tutorials. You can also find us on Twitter and Facebook.

The post How to Add IndexNow in WordPress to Speed Up SEO Results first appeared on WPBeginner.

How to Add SEO-Friendly Recipe Schema in WordPress (Easy Way)

Are you looking for a way to add recipe schema to your WordPress website?

If you have a food blog, then you can display your recipes as snippets in search engine results using schema markup. This can help you get more clicks and traffic to your site.

In this article, we will show you how to add SEO-friendly recipe schema in WordPress.

How to Add SEO-Friendly Recipe Schema in WordPress (Easy Way)

What Is Recipe Schema and Why Use It?

Recipe schema markup (structured data) is a special type of HTML code that’s added to your WordPress website. It offers more information about your content to search engines.

This information isn’t displayed on your website. Instead, it’s added to source code for search engine bots to read.

Google, Bing, and other search engines use the schema markup to display additional information as featured snippets. These are highlighted results with extra info that are shown at the top of the search results pages.

For example, Google may show ingredients, ratings, cooking time, nutritional value, and other information from your recipes in the featured snippets.

Recipe snippet in Google

Google gets this extra info from the recipe schema markup on the page.

That’s why adding recipes with schema can help you capture these snippets and boost your WordPress search engine optimization (SEO).

Featured snippets are a great way to get more clicks to your website from organic search results and increase your traffic.

That being said, let’s look at how you can easily add recipe schema in WordPress.

Adding SEO-Friendly Recipes With Schema in WordPress

The easiest way to add recipe schema markup in WordPress is by using the All in One SEO (AIOSEO) plugin for WordPress.

It’s the best WordPress SEO plugin on the market that helps you optimize your website for search engines without needing to hire an SEO expert.

Note: You will need the AIOSEO Pro version as it includes the Schema Generator feature, which allows you to add any type of schema markup to your content. Plus, there are other powerful features like sitemaps, redirection manager, and more. There is also a free version of AIOSEO that you can try.

First, you will need to install and activate the AIOSEO plugin on your site. If you need help, then just follow our tutorial on how to install a WordPress plugin.

Upon activation, the plugin will automatically launch its setup wizard. You can go ahead and click the ‘Let’s Get Started’ button to set up the plugin on your website.

Click let's get started AIOSEO setup wizard

For more details, you can read our guide on how to set up All in One SEO for WordPress.

After setting up AIOSEO on your site, you must now go to AIOSEO » Search Appearance from your WordPress admin area and then click on the ‘Content Types’ tab.

Schema markup in AIOSEO settings

Under the Content Types section, you can edit the schema markup for posts, pages, products, groups, memberships, and all other types of content on your WordPress blog.

Go ahead and select the ‘Schema Markup’ tab for Posts. You can now click on the Schema Type dropdown menu and choose the ‘Recipe’ option.

Choose recipe schema type

You can do the same for pages, products, custom post types, and all other content types.

After selecting ‘Recipe’ as the schema type, don’t forget to save your changes. You can do this by clicking the blue ‘Save Changes’ button at the top right of the page.

Adding Schema Recipe Information to Posts & Pages

The next step is to add your recipe information to each WordPress post or page that you want to display in the featured snippets.

To start, go ahead and edit an existing post or add a new one. Once you are in the WordPress editor, simply scroll down to the ‘AIOSEO Settings’ meta box and select the ‘Schema’ tab. Then, click the ‘Generate Schema’ button.

Click the Generate Schema button in AIOSEO

The Schema Catalog will open. This is a popup where you can choose the type of schema you want to add.

Go ahead and click the ‘Add Schema’ button next to the ‘Recipe’ option.

Add Recipe Schema in AIOSEO

Now, a modal will open up where you can enter details about your recipe and tell Google what it’s about.

You can start by adding the name of the dish, a description, and the author that you want to display in the search results.

Enter schema details of your recipe

You can also scroll down to add relevant keywords.

For example, you might include a season or specific holiday and the image that will display in search results.

Add keywords and image in AIOSEO Schema Generator

Besides that, AIOSEO offers additional fields to add more details about your recipe. Filling out these extra fields is really useful because Google will show different information for different search terms.

You can enter details about the dish type, cuisine type, time required, number of servings, ingredients, calories, instructions, ratings, and much more.

Additional fields to enter recipe schema information

Once you have filled out your recipe information, go ahead and click the ‘Add Schema’ button.

Then, you can publish your blog post. AIOSEO will add the recipe schema with the data you just provided.

You and your visitors won’t be able to see a difference on the front end of your website, but now search engine bots will have all the extra data they need for featured snippets.

Optimizing Your Recipes in WordPress

To optimize your recipes for even more traffic from search engines, you can use our blog post SEO checklist.

We also recommend using a plugin like WP Tasty Recipes alongside AIOSEO.

WP Tasty Recipes

WP Tasty Recipes is one of the best recipe plugins for food bloggers. It lets you easily create customizable recipe cards to make your recipe posts look amazing.

It comes with six different recipe card themes, step-by-step video integrations, ingredient checkboxes, custom share and save buttons, ‘jump to recipe’ shortcuts, and more.

Preview of recipe card with nutrition facts labels

Additionally, with Nutrifox, you can create nutrition facts labels for your recipes. These will display the nutritional content of your dishes beneath your recipes so that readers can make more informed decisions.

For more information, you can see our guide on how to make nutrition facts labels in WordPress.

We hope that this article helped you learn how to add SEO-friendly recipes with schema in WordPress. You may also want to see our guide on how to get a free SSL certificate for your WordPress website and our expert picks for the best WordPress themes for recipe and food blogs.

If you liked this article, then please subscribe to our YouTube Channel for WordPress video tutorials. You can also find us on Twitter and Facebook.

The post How to Add SEO-Friendly Recipe Schema in WordPress (Easy Way) first appeared on WPBeginner.

How to Rank New WordPress Content Faster (In 6 Easy Steps)

Do you want to rank new WordPress content faster?

Sometimes search engines take some time to index new content, so your WordPress site may not show up in search results or get much traffic at first.

In this guide, we’ll show you how to easily rank new WordPress content faster with practical tips.

Easily rank new WordPress content quickly

Why Is It Important to Rank New Content?

As a WordPress website owner, you’ll miss out on a ton of traffic if you don’t work on ranking your content from day one.

When you do, your content can gain higher search rankings and get more traffic from the start. Later on, your rankings will continue to improve as your site gets more credibility in search engines.

However, many websites struggle to get more organic traffic to their content right away.

Luckily, there are some easy to implement WordPress SEO best practices that can help. Simply follow the steps below to rank your new content and start getting more traffic right away.

That being said, let’s take a look at how to easily rank your new WordPress content faster.

1. Install All in One SEO for WordPress

First thing you need to do is install and activate All in One SEO for WordPress. For more details, see our step by step guide on how to install a WordPress plugin.

All in One SEO for WordPress

All in One SEO (AIOSEO) is the best WordPress SEO plugin on the market. It allows you to easily optimize WordPress SEO without any special skills.

Note: There is a free version of All in One SEO available as well. However, we recommend using the premium version to unlock its full potential.

Upon activation, the plugin will launch a setup wizard which will walk you through the process to get started. Simply follow the on-screen instructions and you’ll be all set in a few clicks.

AIOSEO setup wizard

Setting up AIOSEO will automatically take care of many important search engine optimization tasks. For instance, if an older blog post is missing an SEO title or description, then the plugin can automatically generate those for you.

However, there’s a lot more that you can do with the plugin that will further boost search rankings for your new content.

For step-by-step instructions and more tips, see our complete guide on how to set up All in One SEO.

2. Add Your Website to Google Search Console

Google Search Console is a free tool provided by Google to help website owners monitor their website performance in search results.

It allows you to track search rankings and get notified when Google is unable to crawl or index any page on your website. You’ll also be able to notify Google of any new content you publish automatically by using a sitemap.

First, you need to visit the Google Search Console website and click on the start now button.

Next, you need to provide your website URL and click on the continue button.

Add website URL

Now, you’ll be asked to verify ownership of your website. There are several ways to do that, but we will show the HTML tag method because it is the easiest one.

HTML tag method

Click on the HTML tag to expand it and then copy the code inside it.

All in One SEO for WordPress comes with a built-in tool to easily add this code to your website. Simply switch to the admin area of your WordPress website and go to the All in One SEO » General Settings page.

Adding Search Console HTML tag in WordPress

From here, you need to switch to the Webmaster tools page and click on the Google Search Console box to add your search console verification code.

Don’t forget to click on the Save Changes button to store your settings.

You can now switch back to the Google Search Console tab and click on the Verify button.

Verify search console HTML tag

That’s all! You’ve successfully added your website to Google Search Console.

3. Add XML Sitemaps to Google Search Console

An XML sitemap is a file that lists all your website content in an XML format, so search engines like Google can easily discover and index your content.

WordPress comes with its own basic XML sitemaps, which you can find by adding wp-sitemaps.xml at the end of your website address (for example, https://example.com/wp-sitemap.xml).

However, if you are using AIOSEO, then it generates its own XML sitemaps that are more powerful. It includes XML sitemaps, video sitemaps, news sitemaps, and RSS sitemaps as well.

AIOSEO sitemaps are also completely customizable, so you can decide exactly which content to include. You can even use your sitemap to help hide specific pages from Google.

You can view and manage your sitemaps by visiting All in One » Sitemaps.

View sitemap

To view your sitemap, simply click on the Open Sitemap button, or you can just add sitemap.xml at the end of your website domain (for example, https://example.com/sitemap.xml).

Next, login to your Google Search Console account dashboard and then click on the Sitemaps menu from the left column. After that, you need to add ‘sitemap.xml’ in the the ‘Add a New Sitemap’ field.

Add new sitemap

Click on the Submit button to continue.

Add RSS Sitemap to Google Search Console

All in One SEO also comes with an RSS Sitemap feature which contains your most recent blog posts.

Search engines recommend adding an RSS sitemap to your site, too. It is a smaller file and search engines can access it more frequently to look for new content.

First, you need to visit All in One SEO » Sitemaps page and switch to the RSS Sitemap tab.

RSS sitemap

From here you need to make sure that the RSS sitemap option is enabled. You can click on the Open Sitemap button to view it.

By default, the RSS sitemap URL has sitemap.rss added to your domain name (e.g. https://example.com/sitemap.rss).

Now you can switch back to Google Search Console dashboard and click on the Sitemaps menu. From here, add ‘sitemap.rss’ in the Add a New Sitemap option, and then click the Submit button.

RSS sitemap

That’s all. Google will now start using your sitemaps to find new content on your website more quickly.

4. Optimize Your New Content for Ranking

The first three tips mentioned above ensure that search engines can quickly find your content. Now let’s talk about how to prepare your new content for ranking faster in higher positions.

All in One SEO allows you to easily add a meta title and description to any post or page under the AIOSEO settings box below your content.

All in One SEO settings

Below that, you can add the Focus Keyphrase that you want to rank for.
This allows All in One SEO to analyze your content for those focus keywords, and give you suggestions to improve your optimization.

Focus keywords

You can view your overall SEO score at the top right corner of the screen.

Clicking on it will also show you actionable tips that you can apply to improve your content.

SEO score

For more details, see our checklist on improving your blog posts for SEO.

5. Add Internal Links

An internal link is a link to another page on your own website. Internal linking to your own content has a huge impact on SEO.

To improve your SEO, it’s smart to make it a habit to add links to your most important content in any new content that you write. This can help to boost rankings for your older content.

However, it’s also important to add internal links that point to your new content when you publish it.

Make internal linking a habit

You can do this by editing your older articles to add links to your newer content whenever you publish. Many successful bloggers dedicate time to add internal links to new articles on a weekly or monthly basis.

6. Share Your Content

Another quick way to promote your new blog posts is by sharing them with your followers on social media platforms like Facebook, Twitter, Pinterest, and more.

To get the most engagement on social media, you want to make sure that your content looks good on every platform.

That’s where All in One SEO comes in. AIOSEO makes it possible to control how your content looks when it’s shared on social media websites like Facebook and Twitter.

You can add Open Graph meta data to include proper thumbnail images for each article on your website.

Social settings

For more details, see our complete social media cheat sheet for WordPress with step by step instructions on promoting your content on social media.

Bonus: Track Website Traffic

Finally, you need a way to make sure your new content is getting indexed and ranked properly.

The easiest way to track this is by using MonsterInsights. It is the best Google Analytics plugin for WordPress and allows you to easily monitor your website traffic and rankings.

First, you need to install and activate the MonsterInsights plugin. For more details, see our guide on how to install Google Analytics in WordPress.

Once you have set up MonsterInsights, you can view your website performance directly from your WordPress dashboard.

MonsterInsights reports overview

MonsterInsights also shows you your search engine rankings, so you can track the performance of your content and make sure it’s indexed properly.

MonsterInsights search console data

We hope this article helped you learn how to rank your new WordPress content faster. You may also want to see our guide on how to start your own podcast, or our expert comparison of the best email marketing services for small business.

If you liked this article, then please subscribe to our YouTube Channel for WordPress video tutorials. You can also find us on Twitter and Facebook.

The post How to Rank New WordPress Content Faster (In 6 Easy Steps) appeared first on WPBeginner.

How to Add Schema Markup in WordPress and WooCommerce

Do you want to easily add schema markup in WordPress?

Schema markup helps you provide important information to search engines that they can use to enhance your listing in the search results.

In this article, we’ll show you how to easily add schema markup in WordPress and bring in more free SEO traffic from search engines to your website.

Adding schema markup to a WordPress website

Here is a quick overview of the topics we’ll cover in this article:

What is Schema Markup?

Schema markup is a special type of HTML code that you can add to your WordPress website to tell search engines more about your content.

For instance, you can tell the search engines that a particular page is a blog post, a recipe, FAQ, news article, or product page in your online store. Search engines can then use this data to display rich results.

Rich results in Google Search

Search engines like Google also use schema markup to display information in other searches. For instance, in Google Maps your listing would appear with directions, open hours, business phone number, and more.

Local search results preview

These enhanced search listings are called rich results or rich snippets. They make your site stand out in SERPs which improves your organic click through rate and brings you more free traffic.

That being said, let’s take a look at how to easily add schema markup in WordPress without writing any code.

How to Add Schema Markup in WordPress

The easiest way to add schema markup in WordPress is by using All in One SEO for WordPress. It is the best WordPress SEO plugin on the market and allows you to easily add schema markup to your WordPress site.

All in One SEO for WordPress

The first thing you need to do is install and activate All in One SEO for WordPress. For more details, see our step by step guide on how to install a WordPress plugin.

Upon activation, the plugin will launch a setup wizard that will walk you through the setup. If you need help, then follow our article on how to set up All in One SEO for WordPress.

Now if you completed the setup, then the plugin will automatically set up the correct schema markup and apply it across your website.

However, we’ll walk you through all the schema markup settings manually so that you can change the settings if needed.

Setting Site Wide Schema Markup in WordPress

First, we’ll start by telling search engines some basic information about your WordPress website. Go to All in One SEO » Search Appearance page and scroll down to the Knowledge Graph section.

Provide your website information for Knowledge Graph

From here, you need to choose whether your website is about a person or an organization. For an organization, you can provide a name, business phone number, contact type, and a business logo.

If your website is about a person (such as a personal blog, resume website, or a portfolio website), then you can select the person’s user account from the drop-down list or enter their information manually.

Person meta data

If you choose an existing WordPress user, then you can edit the selected user’s profile by visiting Users » Profile page.

Here you can provide the user’s Twitter and Facebook profile URLs.

Edit user profile

Also, make sure that you have entered the user’s first and last name correctly and have chosen the correct name to be displayed publicly.

Lastly, you’ll need to set up the user’s profile photo as a Gravatar.

Don’t forget to click on the ‘Update Profile’ button to save your changes.

Setting up Default Schema Markup in WordPress

The next step is to choose default settings to use for generating schema markup for all your WordPress posts and pages.

This will ensure there is schema markup correctly set up for all your WordPress posts, pages, products, or any other content types.

Simply go to the All in One SEO » Search Appearance page and switch to the Content Types tab. From here you will see all your post types listed.

Search Appearance content types

For each post type, you’ll notice a Schema Markup tab. Switching to it will allow you to choose the default schema type for that particular post type.

Choosing default Schema markup for content types in WordPress

From here you can review the settings and change them if needed. For instance, if you run a news website that uses WordPress posts as news articles, then you may want to change the Article Type to News Article schema.

Changing Schema Markup for Individual Posts and Pages in WordPress

Since you’ve already set up default schema settings, you won’t need to manually change your schema markup for most of your content.

However, there are a few cases where you may want to adjust the schema settings for an individual post or page.

For example, if you’re using custom WordPress landing pages as product pages, then you would want search engines to know that. Similarly, some blogs may be using WordPress posts to publish recipes, news articles, or reviews.

In these scenarios, you may need to change the schema markup for that particular post or page.

Simply edit the post or page that you want to modify. On the post edit screen, scroll down to the AIOSEO Settings box below the editor and switch to the Schema tab.

Change a single post or page's schema markup

From here you can change that post’s schema markup settings. There are different types of schema to choose from, and each one comes with its own microdata.

For instance, if you change a post to Recipe, then you can provide a recipe description, cuisine type, preparation time, instructions, and more.

Recipe schema meta data

Similarly, if you change a page to a Product schema type, then you can provide price, brand, currency, availability, and more.

Product schema markup

This is such a handy tool for websites that are selling products using a simple online payment form instead of an eCommerce platform.

Setting up Schema Markup for WooCommerce

All in One SEO is the most comprehensive WooCommerce SEO plugin on the market. Apart from the usual SEO settings, it also correctly selects product schema markup for all your products.

It will fetch all the necessary metadata from your WooCommerce product listing like pricing, currency, availability, reviews, star ratings, and more. Additionally, you can provide brand, identifier type, and identifier number under the Schema tab for each product.

Product schema metadata

This comes in handy if your store is selling products from other brands with a standardized identifier.

Adding Schema Markup for Local SEO

Nearly 36% of all searches on Google have local intent. That means those users are looking for local businesses and services nearby.

Most local searches lead to a purchasing decision, which makes them highly lucrative for small businesses.

Local SEO helps you put your business on the map for users to easily find. This allows your store or business to appear in local Google search results.

Local search results

It also makes your business appear in other Google products like Google Maps, which brings more walk-in customers to your physical location.

Local search results preview

All in One SEO comes with a Local SEO addon that allows you to easily optimize your website for local search results.

Simply go to the All in One SEO » Local SEO page and click the Activate Local SEO button.

Enable Local SEO

Upon activation, if your business has multiple locations, then you’ll want to turn that option on. You’ll then be able to add individual locations and set them up.

Multiple or single location business

Below that, you can provide your information including business name, logo, phone number, business type, payment options, and more.

Business information

After that, you can switch to the Opening Hours tab to enter your business hours.

Opening hours

Simply enter working hours for each day and mark the days when your business is closed.

Working hours

Don’t forget to click on the Save Changes button to store your settings.

For more details, take a look at our guide on how to add business hours in WordPress.

Once you have set up local SEO on your WordPress website, you can also sign up for a Google My Business account to claim your business.

Testing Your Schema Markup for Rich Snippets

You can test the schema markup on your WordPress website using Google’s Structured Data Testing tool. Simply enter the URL of your website and it will fetch the structured data markup found on that URL.

Structured data testing tool

If there is an error or warning, then you can troubleshoot it by revisiting the schema markup settings on your website.

Google also provides a newer Rich Snippets testing tool. It not only checks Schema markup on your website for rich snippets, but will also show you if some data is missing.

Rich snippets testing tool

We hope this article helped you learn how to easily add schema markup to your WordPress website. You may also want to see our expert pick of the must-have WordPress plugins and our comparison of the best email marketing services for small business.

If you liked this article, then please subscribe to our YouTube Channel for WordPress video tutorials. You can also find us on Twitter and Facebook.

The post How to Add Schema Markup in WordPress and WooCommerce appeared first on WPBeginner.

How to Get a Google Featured Snippet with Your WordPress Site

Do you want to get a Google featured snippet with your WordPress site?

Featured snippets are the highlighted results for a Google search. Users are more likely to click on a featured snippet than a plain search result.

In this article, we will show you how to get a Google featured snippet with your WordPress site without any technical knowledge.

how to get Google featured snippets for your WordPress website

Here is a quick overview of things we’ll cover in this article:

What are Google Featured Snippets?

Google featured snippets are highlighted results that’s shown at the top of the page above position one that’s why they’re also known as position 0.

In the featured snippet, Google may display a search result in the Answer box or highlight it using microdata from your website.

For example, if Google thinks that your website will answers user’s question adequately, then it will appear on top with relevant text displayed as the description.

Answer box

Similarly, Google also uses Schema.org metadata to fetch important information from websites and display them in search results at the top. For example, if you search for a local business, then their relevant business information will be at the top.

Local search results preview

Featured snippets can enhance product pages for your online store, better showcase your recipes, highlight your real estate listings, and more.

Product results with ratings and reviews

The enhanced search display of featured snippets improves your organic click-through rate and brings more free traffic to your website.

This is why all smart business owners optimize their website, so they can have maximum chances of appearing as featured snippets in Google search.

That being said, let’s take a look at how to get Google featured snippets for your WordPress posts and pages.

Getting Google Featured Snippet using All in One SEO

Google uses Schema.org metadata and their knowledge graph API to display different types of featured snippets.

Schema markup is a special vocabulary that you can use in your content’s HTML code to give search engines more context about your website and individual pages.

In the early days, this used to be hard for small businesses because it involved a lot of coding.

But that’s not the case anymore, thanks to plugins like All in One SEO for WordPress.

It is the best WordPress SEO plugin on the market that’s used by over 2 million websites. They help you easily optimize your website for higher search engine rankings.

AIOSEO automatically adds Schema.org support which helps you provide information for Google Knowledge Graph. It has full WooCommerce SEO support, local SEO, images, news, video optimization, and more.

First, you need to install and activate the All in One SEO for WordPress plugin. For more details, see our step by step guide on how to install a WordPress plugin.

Upon activation, you’ll be asked to run the setup wizard. It is the easiest way to quickly select the best SEO settings for your website.

All in One SEO set up wizard

Need help with the setup? See our complete guide on how to install and set up All in One SEO for WordPress.

Now, if you have followed the setup wizard, the basic settings for your website to appear in featured snippets are already set.

But we’ll show you what they do and how to change them if you need to.

Setting up Knowledge Graph Information in WordPress

First, you need to visit All in One SEO » Search Appearance page and scroll down to the Knowledge Graph section.

Knowledge graph information

From here, you can tell the search engines who your website represents (i.e. An organization or an individual). After that, you can provide your business phone number, logo, and contact type information.

Don’t forget to click on the Save Changes button to store your settings.

Knowledge Graph information is used by search engines to display knowledge panels. These panels appear when someone searches for an organization or individual person.

Knowledge panels in Google Search

Adding Local Business Information to Featured Snippets

More than 40% of all searches on the internet have a local intent. Majority of these searches lead to sales as users are looking for directions and things to buy near them.

Many businesses and organizations have retail locations and offices that customers can visit.

You can add this information using All in One SEO and let search engines automatically display it in featured snippets.

Local search results preview

First, go to the All in One SEO » Local SEO page and activate the Local SEO feature.

Choose single or multiple locations

Upon activation, you can choose if your organization or business has multiple locations. If you do, then you can go ahead and start adding those locations otherwise you can scroll down to add your business information.

Business information

After that, switch to the Opening Hours tab to add your business hours.

Opening hours for your business

For more details, check out our article on how to add business hours in WordPress.

Finally, you need to connect and verify your business using Google My Business website. This gives you more control over your business’s appearance in Google search results and improves your chances appearing more often in featured snippets.

Add SEO Schema Markup in WordPress Posts / Pages

All in One SEO automatically adds the correct Schema markup for your content. However, you can review these settings and change them if needed.

Simply go to All in One SEO » Search Appeaerance page and switch to the content types tab. From here, you’ll see all your post types listed (posts, pages, products).

You need to click on the ‘Schema’ for a post type to change its default settings.

Default schema settings

What if you didn’t want to change schema type for all posts? Well, AIOSEO let’s you change Schema markup for individual posts, pages, and other post types as well.

Simply edit the post or page you want to change and scroll down to the AIOSEO settings box below the post editor.

Default schema settings

This feature is particularly useful for businesses that use Pages to sell products with or without using an Ecommerce plugins. You can then simply edit your product landing page and change its schema type to Product.

Changing any page schema to a product in WordPress

Another way to turn your search listing into a more enhanced featured snippet is by using Breadcrumb navigation.

Breadcrumb navigation tells users where they are on a website relative to the homepage. It is then displayed as a trail of links and would also appear in search results.

Breadcrumb navigation in search results

You can also display the breadcrumb navigation trail on your website. This allows users to go up and down, browse categories, and discover more products and content.

Breadcrumbs on a WooCommerce store product page

For search engines, All in One SEO automatically adds the required markup to your website’s HTML code. However, if you want to display breadcrumbs on your site too, then you can go to All in One SEO » General Settings page and switch to the Breadcrumbs tab.

Enable breadcrumbs display in All in One SEO

From here, you need to Enable Breadcrumbs and then use one of the available methods to display the links. For more details, check out our article on how to add breadcrumb navigation links in WordPress.

Get Site Links for WordPress in Google Search

Site Links are the additional links that Google may show below a particular search term. They usually appear for brand and website names, but they may appear for other types of searches as well.

Site Links

To get site links, you need to add your website to Google Search Console and submit your XML sitemap.

Add sitemap to Google Search Console

You can increase your chances of getting site links by creating a proper website structure. This includes adding all the important pages for your website and use categories to properly organize your website structure.

Appear in The Answer Box for Google Search

What’s better than ranking #1 for a keyword?

Ranking #0 in the answer box.

Answer boxes are the search results that appear on the top and Google considers them to be answering user’s search intent.

Answer box

Answer boxes have an average click-through rate of 32% which makes them highly lucrative. Particularly for keywords with a purchase intent Answer boxes can lead to sales and boost conversions.

The only way to appear in the answer boxes is to improve the quality of your content. Make sure it is comprehensive and answers users’ questions from different angles.

See our detailed tutorial on how to appear in the Google Answer boxes with your WordPress posts and pages.

We hope this tutorial helped you get featured snippets with your WordPress site. You may also want to see our guide on how to get more traffic to your website with proven tips, and our comparison of the best email marketing services.

If you liked this article, then please subscribe to our YouTube Channel for WordPress video tutorials. You can also find us on Twitter and Facebook.

The post How to Get a Google Featured Snippet with Your WordPress Site appeared first on WPBeginner.

How to Improve Organic Click Through Rate (CTR) in WordPress – 12 Proven Tips

Do you want to improve the organic click through rate (CTR) for your WordPress website?

Organic click-through rate is the average clicks a page gets when displayed in search results. Improving your CTR can help improve your SEO rankings and get more traffic to your website from search engines.

In this article, we’ll share our proven tips on how to easily improve organic click through rate (CTR) in WordPress like a total SEO pro.

Improving organic click through rate CTR in WordPress

Here is a quick overview of the topics we’ll cover in this guide.

What is Organic Click Through Rate?

Organic Click Through Rate is the percentage of users who click on an item in the search results.

Let’s suppose, one of your articles appeared 100 times in search results for a particular keyword. Out of those, 3 users clicked to view your article, which gives you a click-through rate of 3%.

Search engine algorithms use organic CTR to analyze the performance of your website in search results. The pages that have a higher click through rate tend to rank higher in search results.

Many SEO experts have found that improving your CTR is the fastest way to improve your SEO rankings.

As a website owner, you can see which pages on your website are getting more clicks, so you can replicate those techniques on other pages.

You can also find out which pages are not getting any clicks and then work to improve them, so they can get higher click through rate.

How to Find Out Organic Click Through Rate?

The easiest way to find out your organic click-through rate is by using Google Search Console.

Google Search Console is the free tool offered by Google to help website owners see how their website is doing in search results.

If you haven’t already done so, then follow our guide to learn how to add your website to Google Search Console.

After that, you can login to your Google Search Console dashboard and switch to the Performance tab. At the top, you’ll see your website’s average click-through rate.

Average click through rate

Click on the average click through rate to add it as a metric to your report. Next to it, you’ll also see the average position box, go ahead and click to select it as well.

Add CTR and Average Position to your performance report

Now you need to scroll down to the detailed report section. Under the Queries tab, you’ll see keywords you rank for with average clicks, impressions, CTR, and position.

CTR details for keywords

You can click on any column to sort the results by position or by CTR.

Similarly, you can switch to the Pages tab to view the results for individual pages on your website instead of keywords.

Improving your Organic Click Through Rate in WordPress

Now that you know how to view your website’s average CTR scores, the next step is to improve your organic click through rate of your WordPress blog posts.

Ideally, you would want to start with pages that already rank higher, have good search impressions, with an average position of 1-10, but very low CTR.

After that, you would gradually move on to low-hanging fruits. These are the pages that rank on page 2 or 3 of the search results. You may want to improve their CTR, so you can rank higher and get more traffic.

That being said, let’s take a look at some of the proven tips that you can use to improve your click-through rates across the board.

1. Write Powerful Headlines and SEO Titles

Your blog post’s title or the headline is the most noticeable thing in search results.

Title in search results

It has to be relevant, catchy, and engaging to compel user’s attention and get them to click.

But how do you figure out which headline will help you get better click through rates in search results?

Luckily, there are several headline analyzer tools that will analyze your headlines and make suggestions for improvements.

We’ll be using the MonsterInsights plugin since it has a built-in headline analyzer. It is the best Google Analytics plugin for WordPress and helps you see where your visitors are coming from and what they do on your website.

First, you need to install and activate the MonsterInsights plugin. For more details, see our step by step guide on how to install a WordPress plugin.

Note: The free version of MonsterInsights also has the headline analyzer built-in.

Next, you’ll need to connect the plugin to your Google Analytics account. It will automatically you walk through it, but if you need help then see our tutorial on how to install Google Analytics in WordPress.

Once it is set up, you can simply edit any post or page where you want to optimize the headline. On the post edit screen, click on the Headline Analyzer button at the top right corner of the screen.

Headline analyzer

This will open the Headline Analyzer tool with a score and some practical tips to improve your post or page title. You can switch to the ‘Try New Headline’ tab and try new headlines without saving them.

Try a new headline

Alternative: You can also try the web version of MonsterInsights headline analyzer tool, or the IsItWP’s Headline Analyzer tool both of which allows you to test headlines outside your WordPress admin area.

2. Use Dynamic SEO Titles for Better Headlines

By default, WordPress automatically uses your page or post title as the <title> tag in the HTML. This title tag is used by search engines to display your website listing.

You can use All in One SEO plugin to automatically generate better SEO titles for your older blog posts and pages.

It is the best WordPress SEO plugin on the market used by over 2 million website owners to improve search rankings and click through rates.

First, you need to install and activate the All in One SEO plugin. There’s also a free version of AIOSEO available.

Upon activation, the plugin will walk you through a guided a set up wizard. You can follow along the instructions and if you need help then see our tutorial on how to properly set up All in One SEO for WordPress.

Once finished, you need to visit All in One SEO » Search Appearance page and switch to the Content Types tab.

Setting post types in All in One SEO

From here, you can set up dynamic SEO titles and descriptions for all your posts, pages, products, or any other post types. This title will be used when a post or page doesn’t have its own SEO title or description.

Dynamic post title and descriptions

You can also edit any post or page on your WordPress site to edit its SEO title and description. Simply edit the post and scroll down to the ‘AIOSEO Settings’ section below the post editor.

Adding an SEO post title and description in All in One SEO

From here you can add a custom SEO title for your post and page. You’ll see a live snippet preview of how it will look in search results.

You can also use Dynamic tags like Current Month or Year in your post titles, so you don’t have to manually update them each year.

Don’t forget to Save and update your post once you’re done editing it.

3. Write Helpful Meta Descriptions

Most search engines automatically generate the description part when showing search results, so the most relevant content appears in the snippet.

Custom excerpt in Google search result

However, for some results, they would just show the description provided by the website owner. This is why it is important to add an SEO description for all your posts and pages.

If you are using All in One SEO for WordPress, then you can edit each post and page and simply provide your own SEO-friendly description.

Meta description

Make sure that your SEO description includes your target keywords and explains what users will see when they visit your website. This helps users understand your content better and encourages them to click more often.

4. Use Meaningful URL Slugs

WordPress uses SEO-friendly URL structure. This allows you to create meaningful URLs for your content like this:

https://example.com/best-coffee-shops-in-new-york-city/

The last part of these URLs is called the URL slug, and WordPress automatically generates it based on your post / page title.

However, if your post title contains numbers, years, or is too lengthy, then it could become less user-friendly.

To remedy that, make sure that you manually correct the URL slug before publishing any post or page. You can do that by clicking on the Gear icon at the top right corner of the content editor screen.

Change URL slug for your post or page

Switch to the Post tab and then expand the Permalink option. Here you can replace the default URL slug with your own. Make sure that your URL slug is not using any capital letters, and words are separated by dashes.

Don’t forget to save or update your post / page to store your settings.

5. Aim to Appear in Rich Snippets or Answer Box

What’s better than ranking #1 for a search query?

Ranking as the Answer box or Rich Results. The answer box is Google’s attempt to answer user’s search queries right on the search page with more detailed results.

A rich snippet result in Google Search

According to research conducted by Advanced Web Ranking, Answer boxes secure a whopping 32.3% CTR on average.

However, there is no easy shortcut to rank as a rich snippet for a search term. The most common strategy that has worked for most websites is simply improving the content.

For details, check out our complete guide on how to appear in Google Answer box / Rich snippets with real examples and practical tips.

6. Use Rich Snippets Schema Markup to Standout

Rich snippets schema markup allows you to provide structured data along with your content. This structured data is written in a special format called Schema.org markup.

Search engines use this markup to show your content with additional information in search results. This makes your page stand out among other results and improves CTR.

Rich snippets in search results

The easiest way to add rich snippets schema markup to your WordPress website is by using All in One SEO plugin. It comes with built-in support for schema markup, allowing you to set it up for each post type like posts, products, reviews, and more.

Setting schema type markup

You can also change schema type markup for individual posts and pages. Allowing you to use your blog posts as recipes, reviews, articles, with additional structured data for search engines to use.

Schema markup for individual posts

7. Improve Local SEO for Higher Click-Through Rates

Making your content appear for relevant terms but for the wrong audience can cause lower CTR. Local SEO helps you remedy that by allowing you to target regional audiences.

Local SEO search result example

This allows you to rank for a targetted audience which makes your result more relevant and boosts CTR.

First, you may want to create a Google My Business account. This allows you to add your business listing, prove that you own the business, and manage your business information using Google’s My Business dashboard.

Google My Business

Next, you will need All in One SEO for WordPress plugin which has a Local SEO add-on. This addon allows you to add your local business information as Schema markup to your website.

Local SEO in AIOSEO for WordPress

You can provide your business information and opening hours by simply out the forms and AIOSEO adds the schema markup for search engines to use in their results.

8. Improve Older Articles for Better Click-Through Rates

You may have older articles on your website that have become outdated and dropped in ranking. Many WordPress blogs have several articles just ranking somewhere on page 2 of search results.

You can find them by simply sorting the Google Search Console’s Performance report by position.

Low performing search results

It would be quite easy to improve these pages with additional updated content. Making this optimization a part of your regular content review routine is a quick and easy way boost search rankings.

9. Fix Keyword Cannibalization Issues

If your targeted keywords are in a very niche category, and your website has multiple resources on them, then it is likely that some of them will cannibalize others.

This may create a confusing situation for search engines. For instance, they may ignore your most important page for something that is less important or even less relevant.

Contradictory results

You may be able to rank two pages for the same keyword, but they will give a contradictory impression. This can even create confusion for users as well.

We recommend keep an eye on your top keywords and consider merging similar keywords into one comprehensive resource when needed. After that, you can set up 301 redirects to point search engines to the main resource.

Related: See our guide on the best SEO keyword tracking tools.

10. Improve Page Load Times for Better User Experience

As of 2021, Google will be rolling out page experience algorithm updates. These updates will be focused on user experience and website speed.

Speed is already an important factor in SEO. Faster page loads affect your search rankings.

Here are some quick tips that you can apply right away.

We have a complete WordPress performance and speed guide with step by step instructions to optimize your website perfo

11. Keep Users Engaged on Your Site

Some of your pages may already have a very good organic CTR but very high bounce rate. This means users are coming to those pages but leaving without visiting any other pages.

Keeping users engaged allows you to show them other content and lead through your sales funnel to become a customer or a subscriber.

In our experience, nothing works better than internal linking to keep user engaged. Make sure that your top articles are linking to your other articles and giving users plenty of opportunities to click.

You can also add related posts or popular posts widgets to your site to add some more content discovery options for new users.

When users spend more time on a website, they’re more likely to visit more pages, join your email list, and buy your products.

For more details, see our detailed guide on how to reduce bounce rate and increase pageviews in WordPress.

12. Convert Users Into Subscribers and Customers

It is important to keep in mind that bringing traffic to your website is often not enough to grow your online business. Relying heavily on search traffic alone can hit your business hard when the algorithm update.

The ultimate goal for any business is to take advantage of higher CTR and convert those users into customers and subscribers.

This is where you’ll need OptinMonster. They have a free WordPress plugin that you can use.

It is the world’s best conversion optimization software. With OptinMonster, you can easily boost conversion rates, make more sales, and grow your email list.

It comes with beautifully designed lightbox popups, countdown timers, notification bars, slide-in pops, spin the wheel popups, and more.

OptinMonster popup preview

All these tools help you nudge customers to spend more time on your website, buy products / services, follow you on social media or join your email list.

Spin the wheel popup

With powerful display rules, it allows you to show personalized campaigns at just the precise time. For instance, you can geo-target users in particular region with free delivery or give users a discount coupon just when they are about to leave your site.

GeoTargetted Popups in WooCommerce

With dozens of templates, you can easily convert traffic coming from your CTR into sales and returning visitors.

We hope this article helped you improve organic click through rate (CTR) for your WordPress website. You may also want to see our complete WordPress SEO guide for more tips, and our tutorial on how to add push notifications in WordPress to grow your traffic.

If you liked this article, then please subscribe to our YouTube Channel for WordPress video tutorials. You can also find us on Twitter and Facebook.

The post How to Improve Organic Click Through Rate (CTR) in WordPress – 12 Proven Tips appeared first on WPBeginner.

How to Optimize Your WordPress Robots.txt for SEO

Recently one of our readers asked us for tips on how to optimize the robots.txt file to improve SEO.

Robots.txt file tells search engines how to crawl your website which makes it an incredibly powerful SEO tool.

In this article, we will show you how to create a perfect robots.txt file for SEO.

Using WordPress robots.txt file to improve SEO

What is robots.txt file?

Robots.txt is a text file that website owners can create to tell search engine bots how to crawl and index pages on their site.

It is typically stored in the root directory, also known as the main folder, of your website. The basic format for a robots.txt file looks like this:

User-agent: [user-agent name]
Disallow: [URL string not to be crawled]

User-agent: [user-agent name]
Allow: [URL string to be crawled]


Sitemap: [URL of your XML Sitemap]

You can have multiple lines of instructions to allow or disallow specific URLs and add multiple sitemaps. If you do not disallow a URL, then search engine bots assume that they are allowed to crawl it.

Here is what a robots.txt example file can look like:

User-Agent: *
Allow: /wp-content/uploads/
Disallow: /wp-content/plugins/
Disallow: /wp-admin/

Sitemap: https://example.com/sitemap_index.xml

In the above robots.txt example, we have allowed search engines to crawl and index files in our WordPress uploads folder.

After that, we have disallowed search bots from crawling and indexing plugins and WordPress admin folders.

Lastly, we have provided the URL of our XML sitemap.

Do You Need a Robots.txt File for Your WordPress Site?

If you don’t have a robots.txt file, then search engines will still crawl and index your website. However, you will not be able to tell search engines which pages or folders they should not crawl.

This will not have much of an impact when you’re first starting a blog and do not have a lot of content.

However as your website grows and you have a lot of content, then you would likely want to have better control over how your website is crawled and indexed.

Here is why.

Search bots have a crawl quota for each website.

This means that they crawl a certain number of pages during a crawl session. If they don’t finish crawling all pages on your site, then they will come back and resume crawl in the next session.

This can slow down your website indexing rate.

You can fix this by disallowing search bots from attempting to crawl unnecessary pages like your WordPress admin pages, plugin files, and themes folder.

By disallowing unnecessary pages, you save your crawl quota. This helps search engines crawl even more pages on your site and index them as quickly as possible.

Another good reason to use robots.txt file is when you want to stop search engines from indexing a post or page on your website.

It is not the safest way to hide content from the general public, but it will help you prevent them from appearing in search results.

What Does an Ideal Robots.txt File Look Like?

Many popular blogs use a very simple robots.txt file. Their content may vary, depending on the needs of the specific site:

User-agent: *
Disallow:
 
Sitemap: http://www.example.com/post-sitemap.xml
Sitemap: http://www.example.com/page-sitemap.xml

This robots.txt file allows all bots to index all content and provides them a link to the website’s XML sitemaps.

For WordPress sites, we recommend the following rules in the robots.txt file:

User-Agent: *
Allow: /wp-content/uploads/
Disallow: /wp-content/plugins/
Disallow: /wp-admin/
Disallow: /readme.html
Disallow: /refer/

Sitemap: http://www.example.com/post-sitemap.xml
Sitemap: http://www.example.com/page-sitemap.xml

This tell search bots to index all WordPress images and files. It disallows search bots from indexing WordPress plugin files, WordPress admin area, the WordPress readme file, and affiliate links.

By adding sitemaps to robots.txt file, you make it easy for Google bots to find all the pages on your site.

Now that you know what an ideal robots.txt file look like, let’s take a look at how you can create a robots.txt file in WordPress.

How to Create a Robots.txt File in WordPress?

There are two ways to create a robots.txt file in WordPress. You can choose the method that works best for you.

Method 1: Editing Robots.txt File Using All in One SEO

All in One SEO also known as AIOSEO is the best WordPress SEO plugin in the market used by over 2 million websites.

It’s easy to use and comes with a robots.txt file generator.

If you don’t have already have the AIOSEO plugin installed, you can see our step by step guide on how to install a WordPress plugin.

Note: Free version of AIOSEO is also available and has this feature.

Once the plugin is installed and activated, you can use it to create and edit your robots.txt file directly from your WordPress admin area.

Simply go to All in One SEO » Tools to edit your robots.txt file.

AIOSEO robots.txt editor

First, you’ll need to turn on the editing option, by clicking the ‘Enable Custom Robots.txt’ toggle to blue.

With this toggle on, you can create a custom robots.txt file in WordPress.

AIOSEO enable custom robots.txt

All in One SEO will show your existing robots.txt file in the ‘Robots.txt Preview’ section at the bottom of your screen.

This version will show the default rules that were added by WordPress.

Robots.txt default rules

These default rules tell the search engines not to crawl your core WordPress files, allows the bots to index all content, and provides them a link to your site’s XML sitemaps.

Now, you can add your own custom rules to improve your robots.txt for SEO.

To add a rule, enter a user agent in the ‘User Agent’ field. Using a * will apply the rule to all user agents.

Then, select whether you want to ‘Allow’ or ‘Disallow’ the search engines to crawl.

Next, enter filename or directory path in the ‘Directory Path’ field.

Add rule in robots.txt

The rule will automatically be applied to your robots.txt. To add another rule clicks the ‘Add Rule’ button.

We recommend adding rules until you create the ideal robots.txt format we shared above.

Your custom rules will look like this.

Robots.txt custom rules file

Once you’re done, don’t forget to click on the ‘Save Changes’ button to store your changes.

Method 2. Edit Robots.txt file Manually Using FTP

For this method, you will need to use an FTP client to edit robots.txt file.

Simply connect to your WordPress hosting account using an FTP client.

Once inside, you will be able to see the robots.txt file in your website’s root folder.

FTP connection robots.txt

If you don’t see one, then you likely don’t have a robots.txt file.

In that case, you can just go ahead and create one.

FTP connection create robots.txt

Robots.txt is a plain text file, which means you can download it to your computer and edit it using any plain text editor like Notepad or TextEdit.

After saving your changes, you can upload it back to your website’s root folder.

How to Test Your Robots.txt File?

Once you have created your robots.txt file, it’s always a good idea to test it using a robots.txt tester tool.

There are many robots.txt tester tools out there, but we recommend using the one inside Google Search Console.

First, you’ll need to have your website linked with Google Search Console. If you haven’t done this yet, see our guide on how to add your WordPress site to Google Search Console.

Then, you can use the Google Search Console Robots Testing Tool.

Select website property robots.txt tester

Simply select your property from the dropdown list.

The tool will automatically fetch your website’s robots.txt file and highlight the errors and warnings if it found any.

Robots.txt tester results

Final Thoughts

The goal of optimizing your robots.txt file is to prevent search engines from crawling pages that are not publicly available. For example, pages in your wp-plugins folder or pages in your WordPress admin folder.

A common myth among SEO experts is that blocking WordPress category, tags, and archive pages will improve crawl rate and result in faster indexing and higher rankings.

This is not true. It’s also against Google’s webmaster guidelines.

We recommend that you follow the above robots.txt format to create a robots.txt file for your website.

We hope this article helped you learn how to optimize your WordPress robots.txt file for SEO. You may also want to see our ultimate WordPress SEO guide and the best WordPress SEO tools to grow your website.

If you liked this article, then please subscribe to our YouTube Channel for WordPress video tutorials. You can also find us on Twitter and Facebook.

The post How to Optimize Your WordPress Robots.txt for SEO appeared first on WPBeginner.