Using Percy to add visual testing to a Jekyll site

Visual testing is the automated process of reviewing software from a purely visual standpoint. Instead of testing the code underneath, visual testing is all about what end users actually see and interact with.

Similar to functional testing, however, visual testing fits directly into your stack and workflow. And with Percy, it’s easy to add snapshots to and run visual reviews for anything that runs in a browser.

Let’s set up an app to test

In this tutorial, we’re going to clone an example Jekyll site, add Percy snapshots, make some visual changes, and review them in Percy.

Before we add Percy, let’s set up our example app:

git clone https://github.com/percy/example-percy-jekyll.git

Navigate to your local app, install dependencies, then build and run the site:

cd example-percy-jekyll/
bundle install
bundle exec jekyll build
bundle exec jekyll serve

Note: Ruby >= 2.3 is required

Open and click around the site locally to see what we’ll be taking Percy snapshots of.

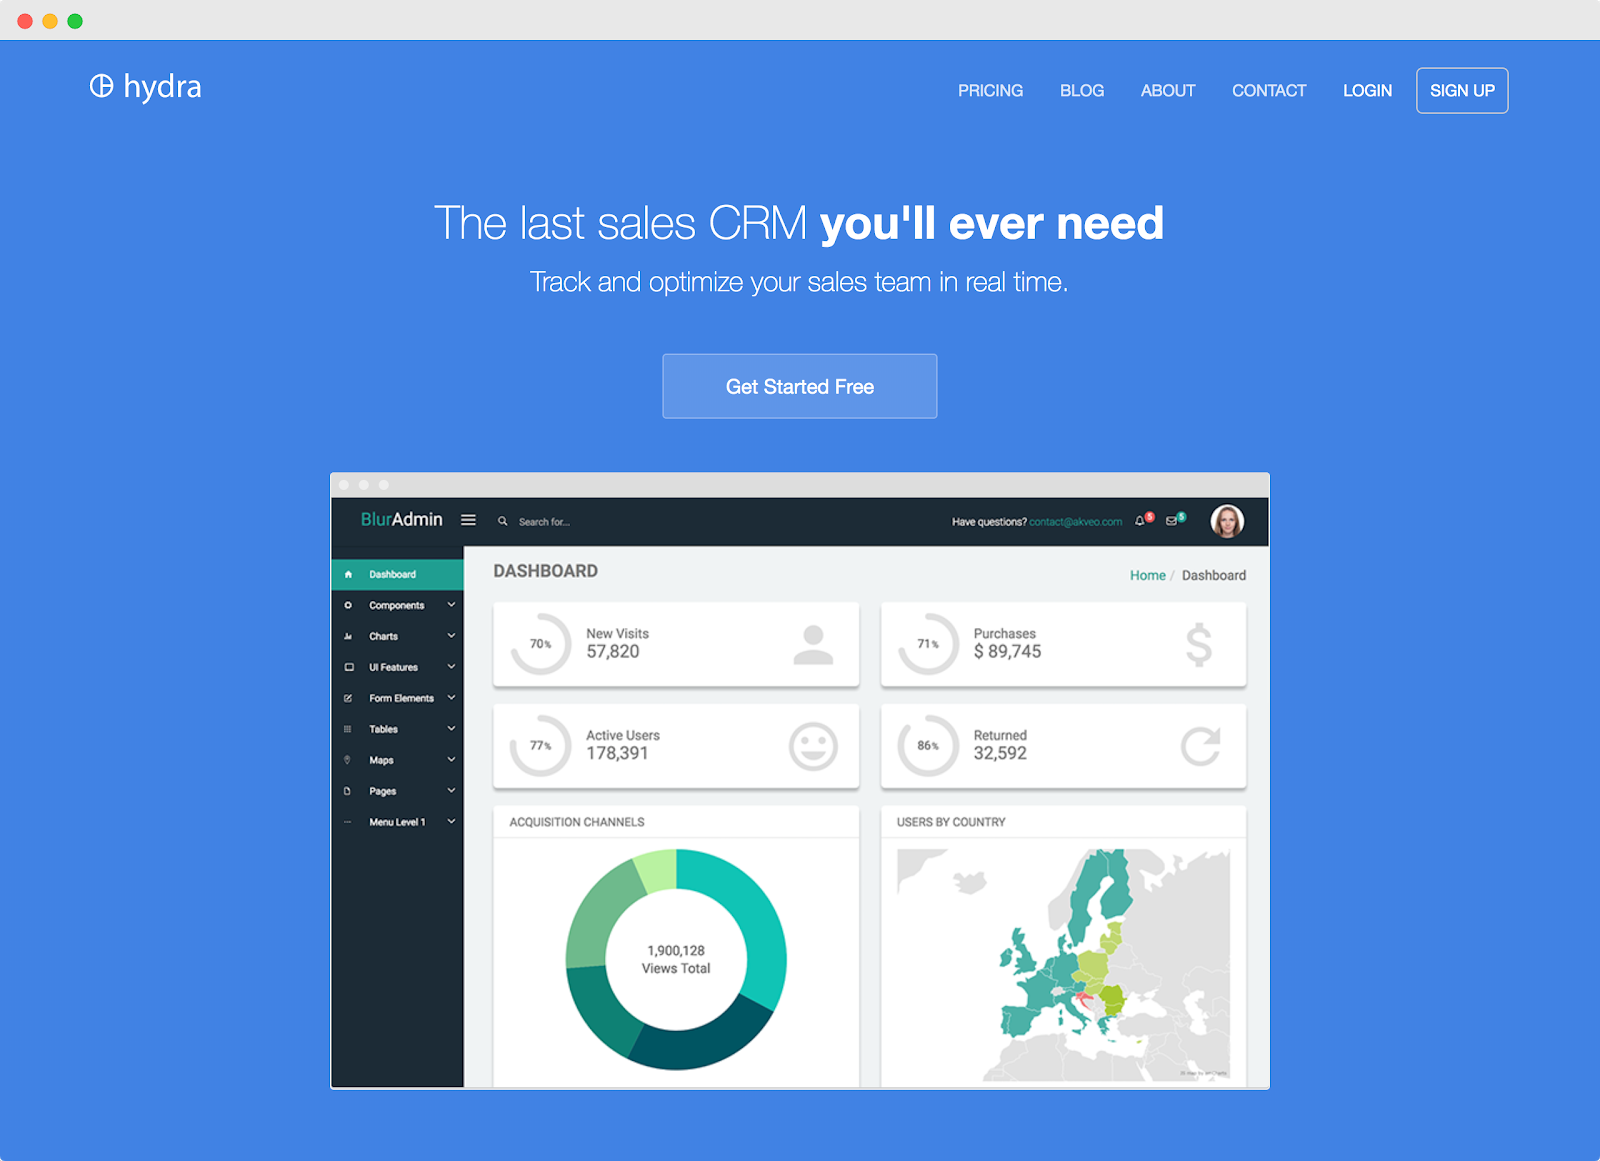
Shoutout to CloudCannon for the Hydra theme.

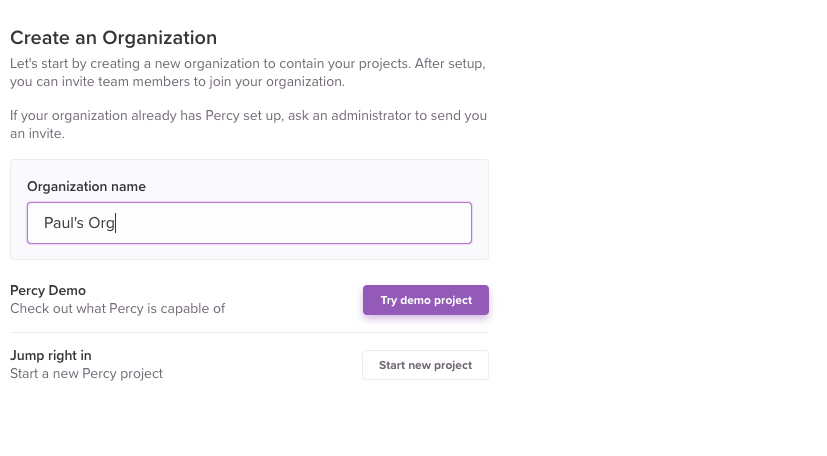
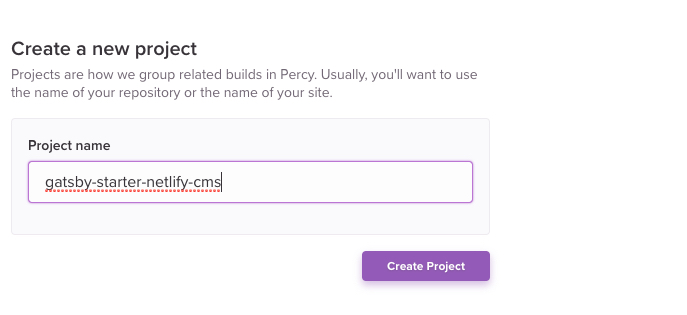
Next, if you haven’t already, sign up for a free Percy account and create an organization and a new project:

Percy projects correspond to the web application, component library, or static site you’re testing. In this case, we’ll be connecting our Percy project to our Jekyll site.

Generating Percy snapshots

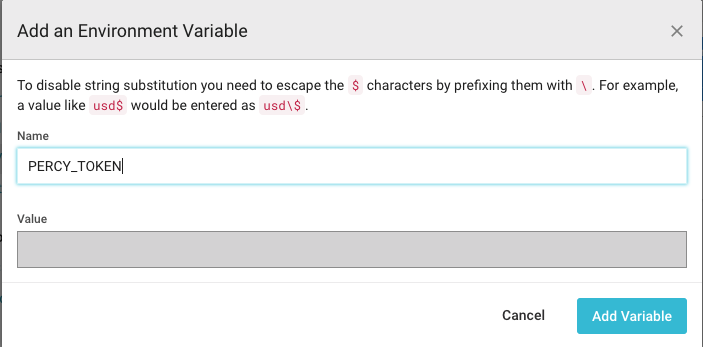
To authenticate your local environment with your new Percy project, copy the PERCY_TOKEN environment variable from the new project screen or your project settings, then run:

$ export PERCY_TOKEN=aaabbbcccdddeee
$ npx percy snapshot _site/

Note: Be sure to replace the token with your project-specific token.

You’ll see output like this:

$ npx percy snapshot _site/
Downloading Chromium r662092 - 88.3 Mb [====================] 100% 0.0s 
[percy] created build #1: https://percy.io/jekyll-test-site/hydra-theme/builds/2048096
[percy] percy has started.
[percy] serving static site at http://localhost:5339/
[percy] snapshot taken: '/404.html'
[percy] snapshot taken: '/index.html'
[percy] snapshot taken: '/about/index.html'
[percy] snapshot taken: '/blog/index.html'
[percy] snapshot taken: '/contact/index.html'
[percy] snapshot taken: '/contact-success/index.html'
[percy] snapshot taken: '/pricing/index.html'
[percy] snapshot taken: '/category/marketing/index.html'
[percy] snapshot taken: '/category/sales/index.html'
[percy] snapshot taken: '/category/tips/index.html'
[percy] snapshot taken: '/sales/2016/07/20/the-process-for-direct-sales/index.html'
[percy] snapshot taken: '/marketing/2016/08/12/the-history-of-marketing/index.html'
[percy] snapshot taken: '/sales/2016/08/06/definition-of-sales/index.html'
[percy] snapshot taken: '/sales/tips/2016/07/28/effective-upselling-techniques/index.html'
[percy] snapshot taken: '/sales/tips/2016/08/02/sales-effectiveness/index.html'
[percy] shutting down static site at http://localhost:5339/
[percy] stopping percy...
[percy] waiting for 15 snapshots to complete...
[percy] done.
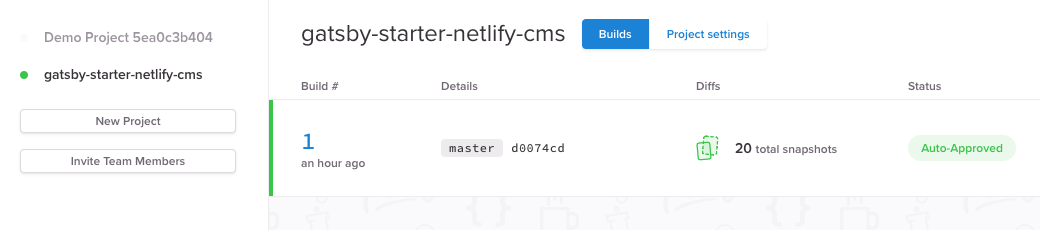
[percy] finalized build #1: https://percy.io/jekyll-test-site/hydra-theme/builds/2048096

Click the build link or head over to your Percy project to check out your first build.

What’s going on behind the scenes?

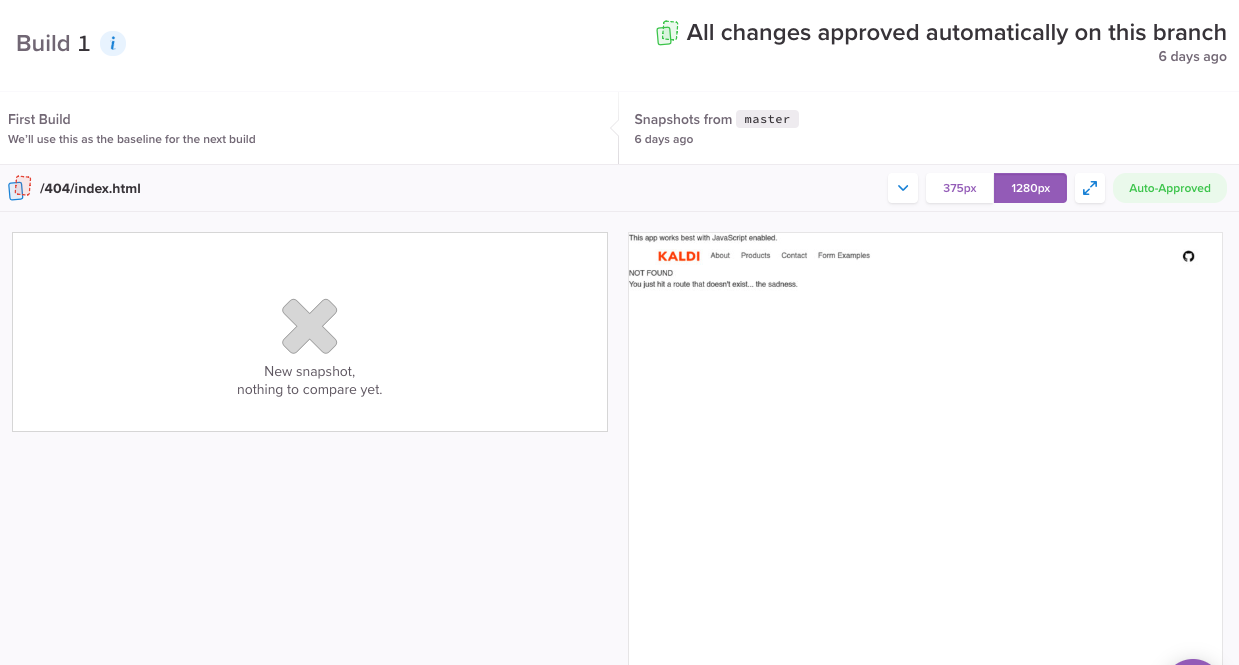
Once npx percy snapshot _site/ was called, Percy captured the DOM snapshots for each page of your Jekyll site. Percy then recreated the snapshots to compare against baseline snapshots and determine which pixels have changed.

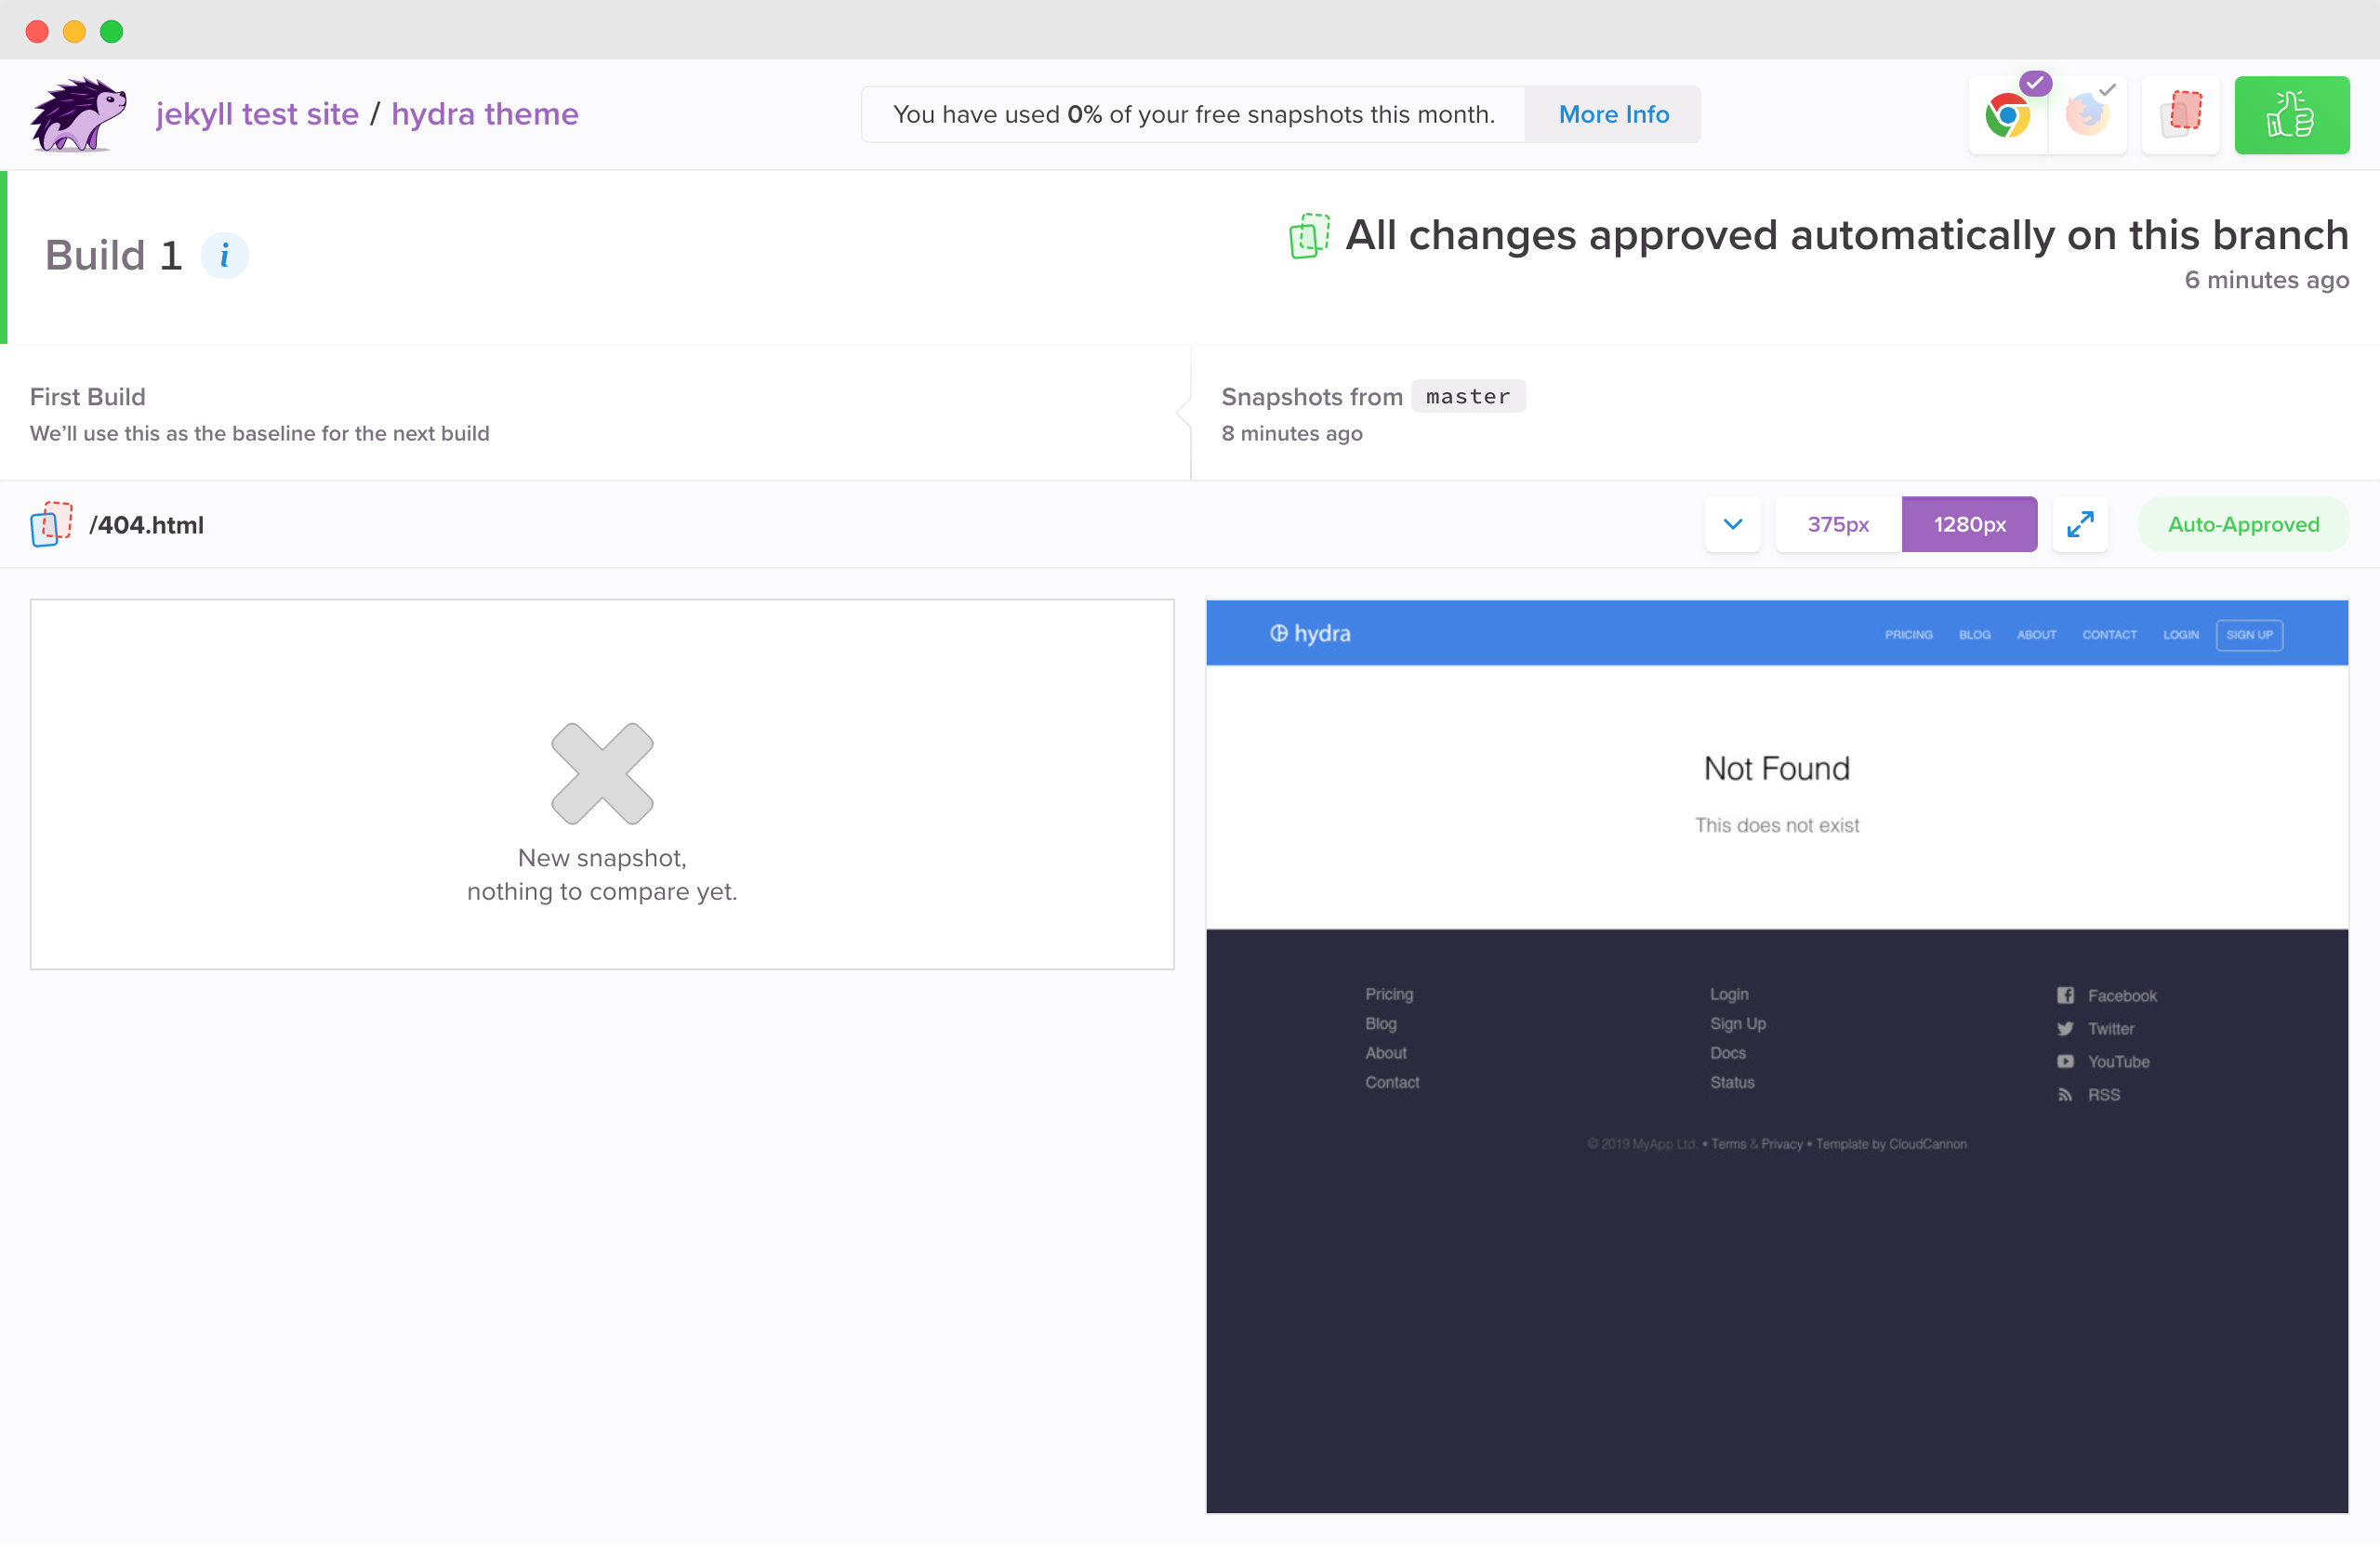
Since this is the first build, there isn’t anything to compare it to. It has also been auto-approved because the commit was on master and we assume that master builds are production-ready.

Making and reviewing visual changes

Now that you’ve pushed your first build and established a baseline to compare your next snapshots to, let’s make a visual change to review.

Let’s make a wide sweeping CSS change. Head over to the cloudcannon.scss file and change the brand colors:

$brand-color: #ff8a00;
$secondary-brand-color: #da1b60;

Since we’re pushing these changes directly to master, be sure to disable auto-approve on master branches from your Percy project settings.

Once those changes are saved, build your site and run Percy again:

$ bundle exec jekyll build
$ npx percy snapshot _site/

Head back to Percy or click the Percy build link to see the visual changes!

If you haven’t been following along, you can check out the build.

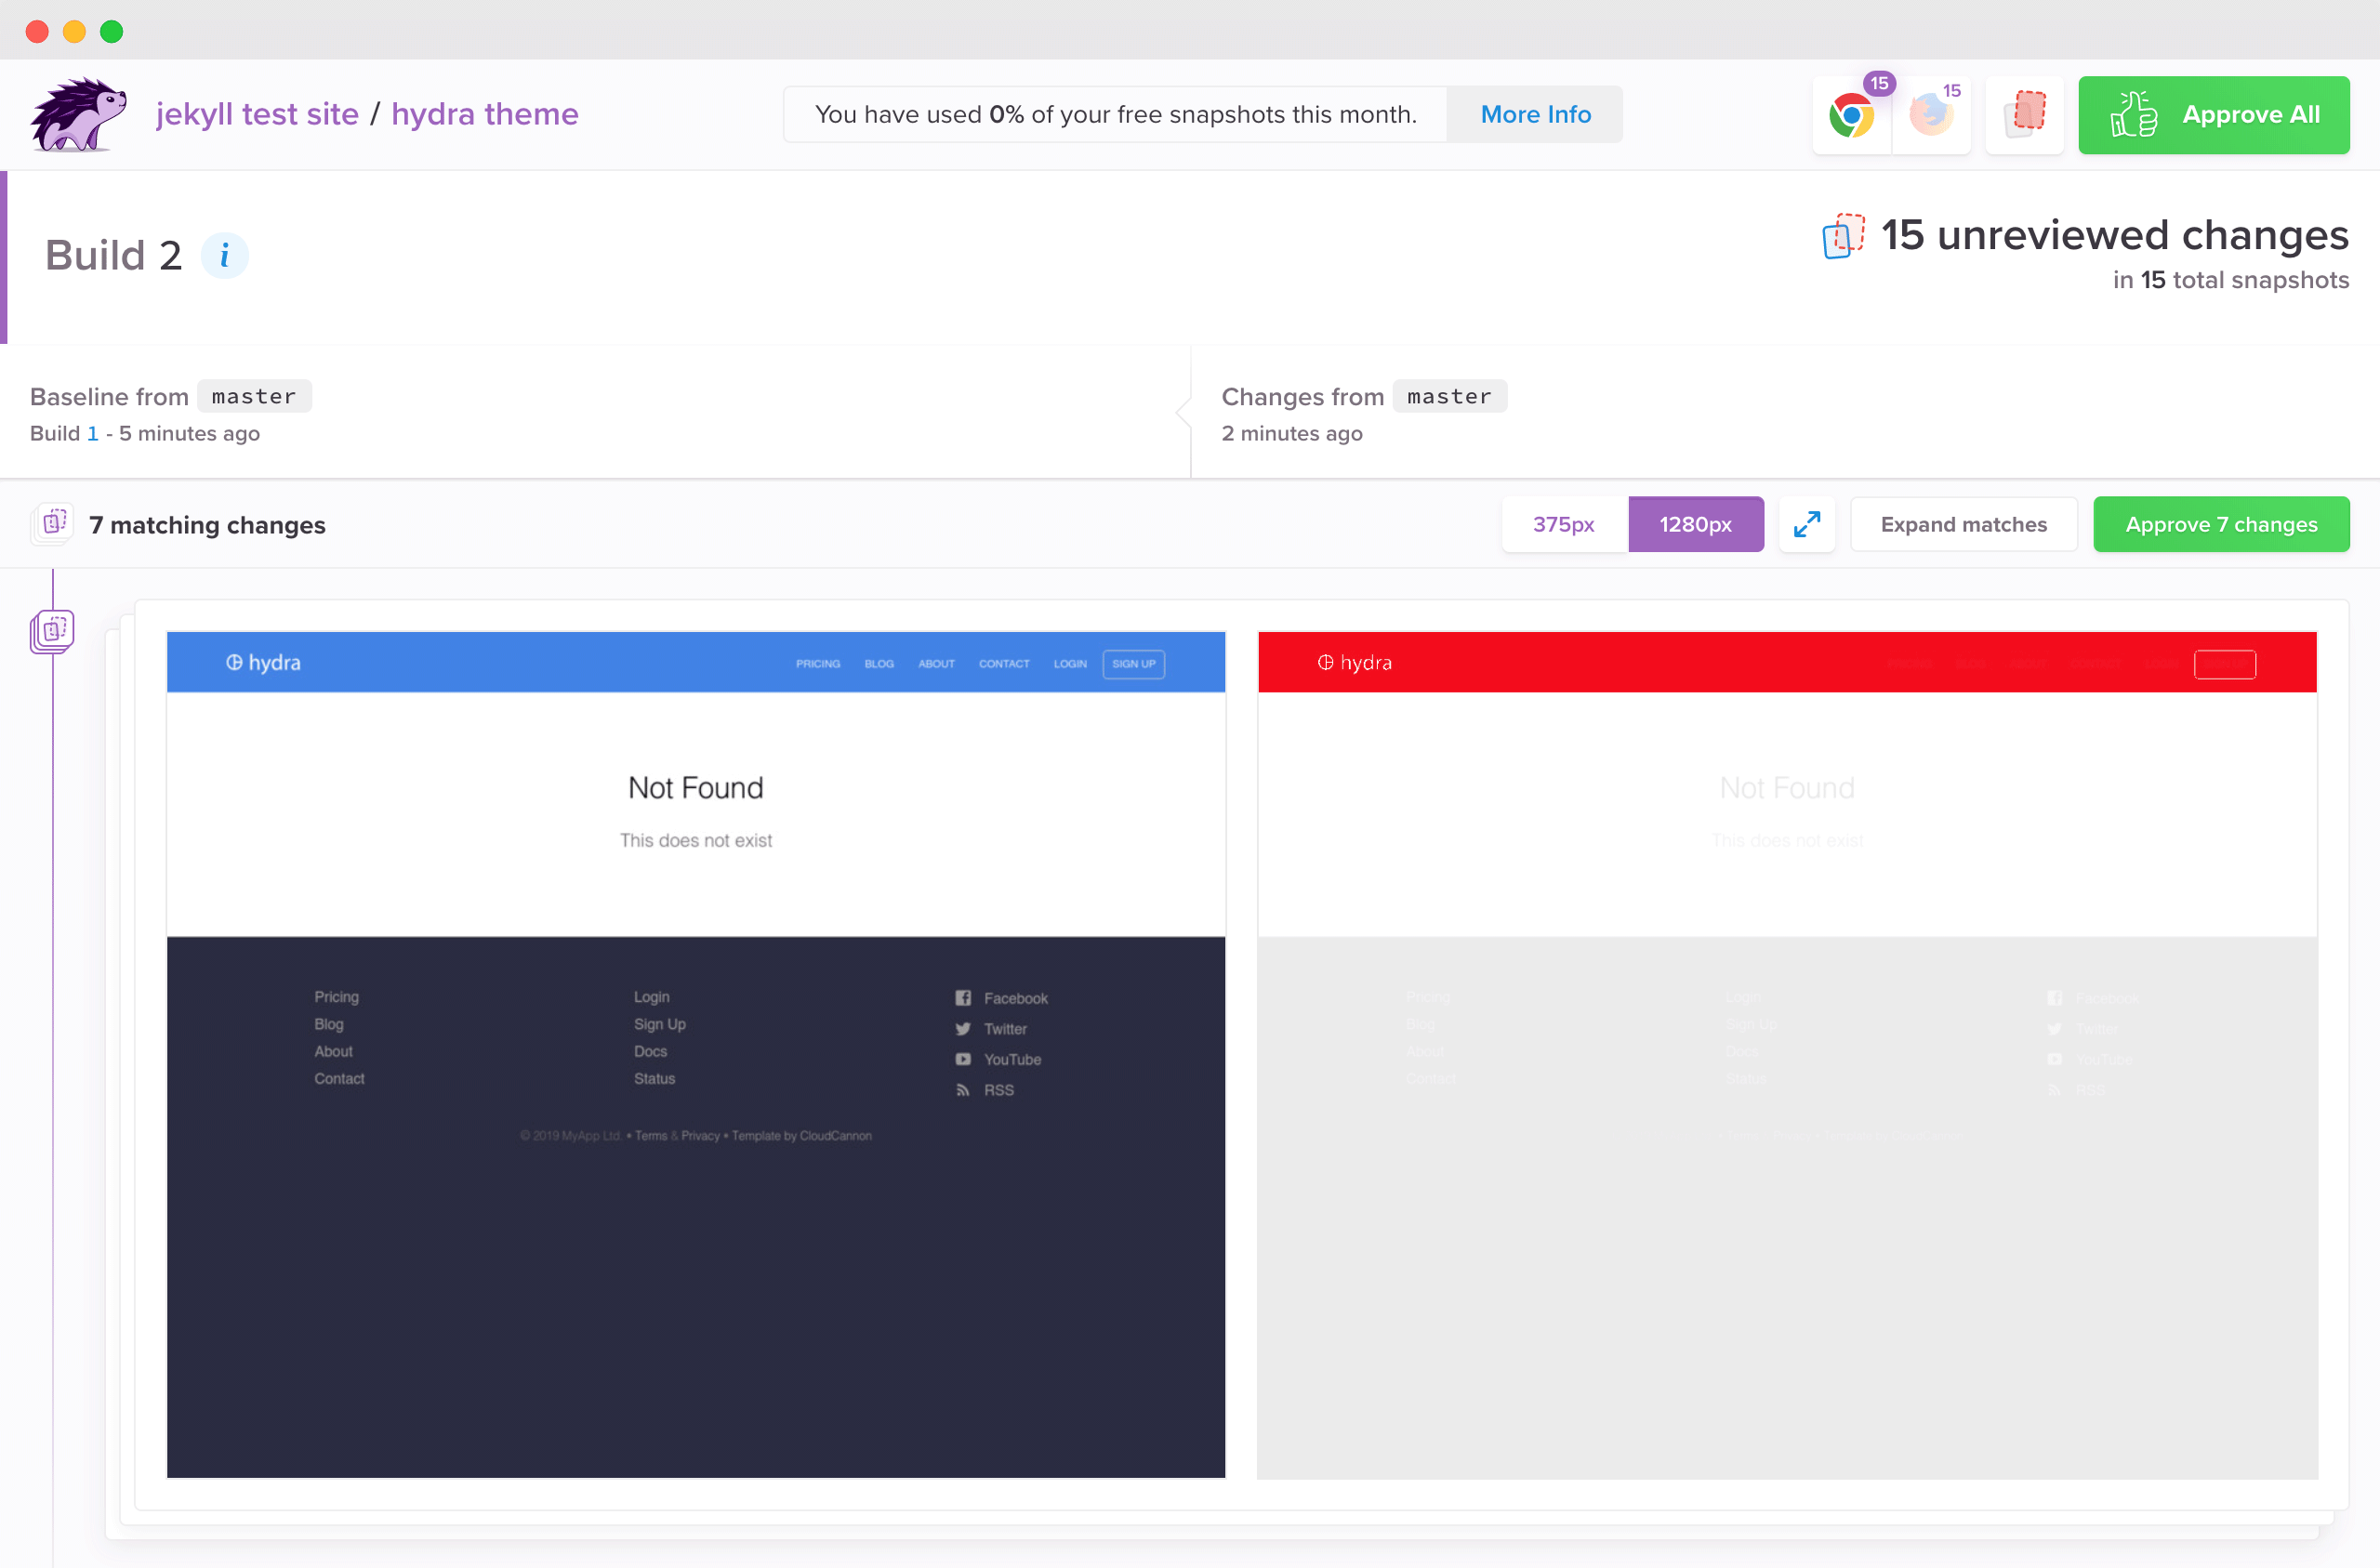
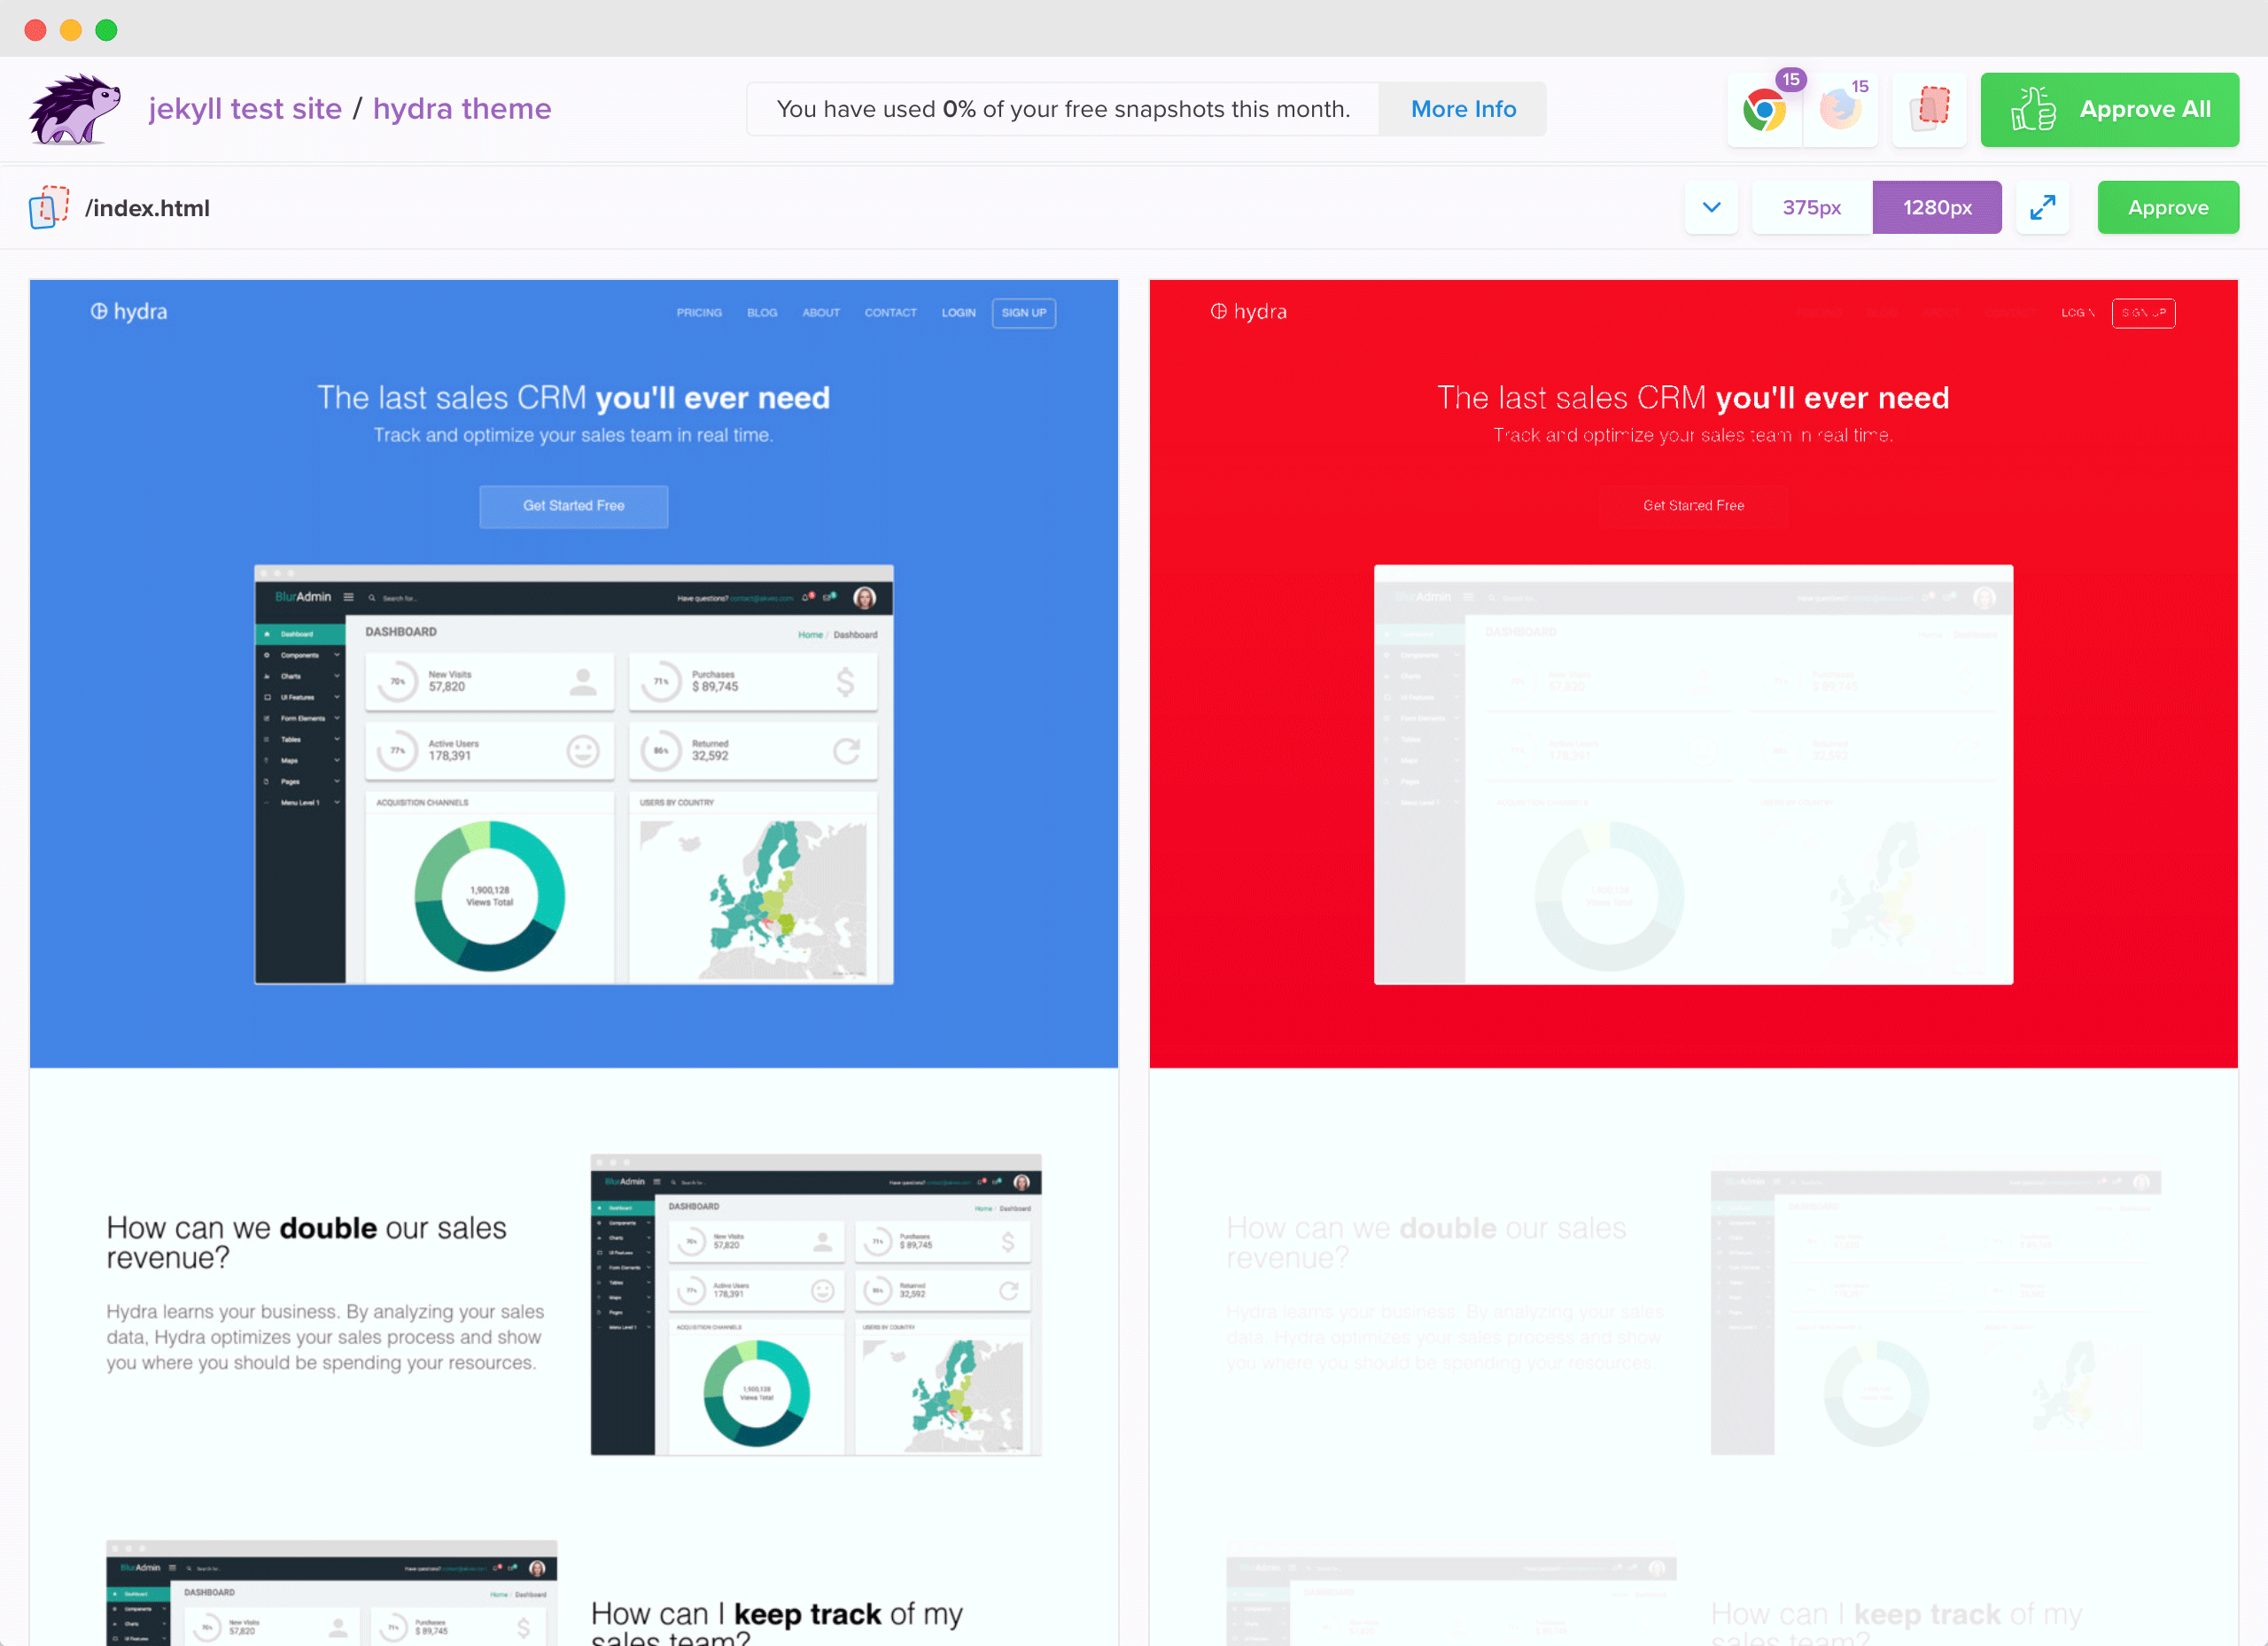
What’s going on in the Percy UI?

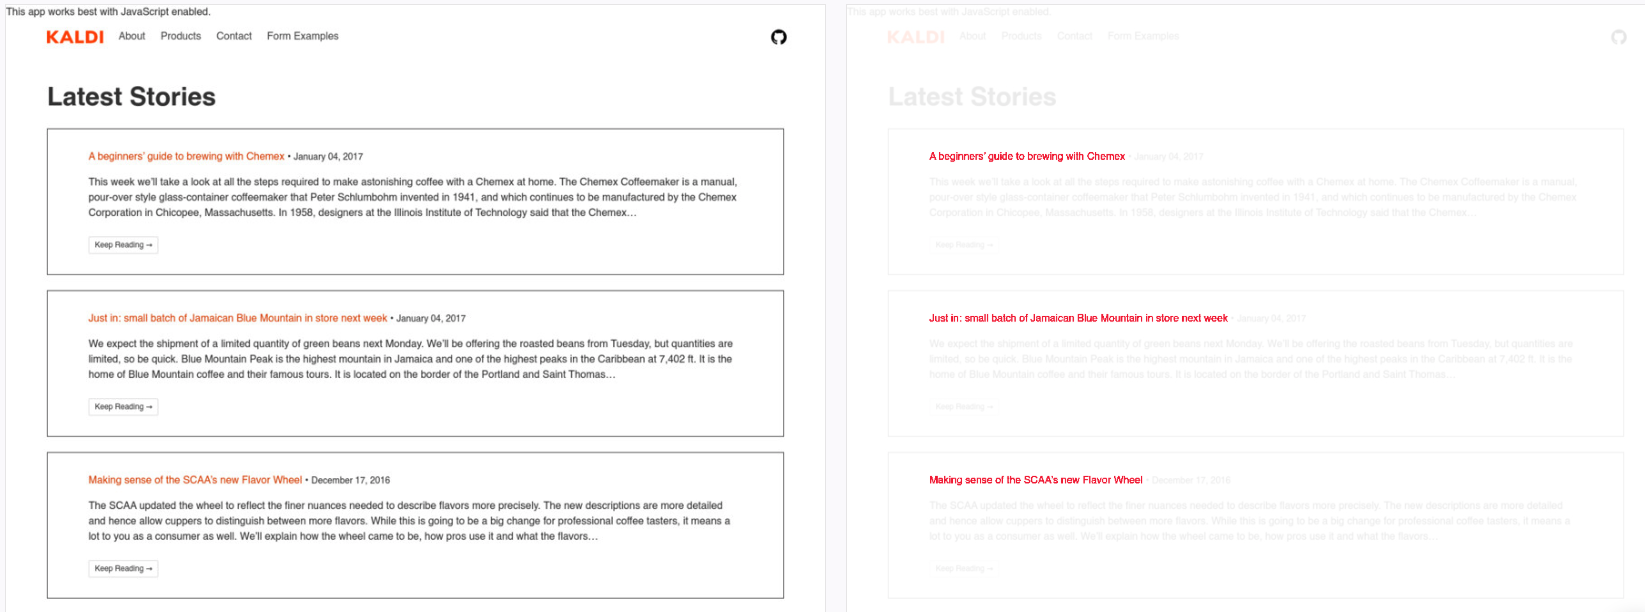
The red areas in the right panel represent pixels that have changed—the visual diffs. Clicking that area (or pressing "d") will toggle between the underlying snapshot and the overlaid diff so you can easily see what exactly has changed. You’ll also notice that the first several diffs have been matched and grouped to make it easier and faster to review.

Each snapshot has been rendered across both Chrome and Firefox, and at mobile and desktop widths. Rendering your site across these variations helps you detect subtle differences caused by browser rendering or responsive bugs.

Now that we’re happy with our fresh new look, hit "Approve All." ✅

You’ve done your first visual review! Visual testing is great not only for catching visual bugs, but also for knowing the exact impact of any given code change. Seeing your UI visualized during code reviews is invaluable, helping you fix regressions before they make their way to production, or to deploy with complete confidence.

Configuring your snapshots

You can configure how and where Percy runs for each build by creating a global .percy.yml file in the root of your project.

You can customize the responsive widths at which your snapshots are rendered. For example, if you want to add a super wide snapshot in addition to our mobile and desktop widths:

version: 1
snapshot:
	widths: [375, 1280, 1920]

You can also ignore certain pages. For example, if you’d like to ignore multiple pages with the same layout like blog categories posts:

version: 1
static-snapshots:
	ignore-files: "/blog/category/*"

Learn more about Percy SDK configuration in our docs).

Adding Percy to your workflow

What we’ve done so far demonstrates how Percy generates snapshots and detects visual changes locally, but to get the most value out of automated visual testing, we recommend integrating Percy with your CI service.

For instructions and to see all of our supported CI services, check out our CI setup documentation. Here are a few of our most popular supported services:

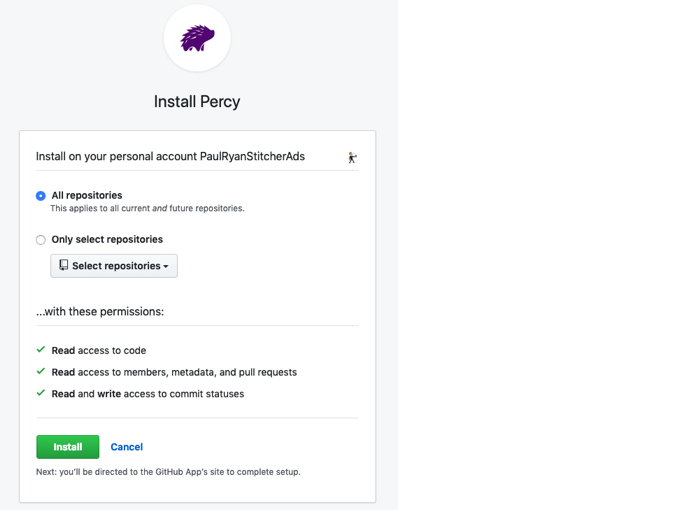
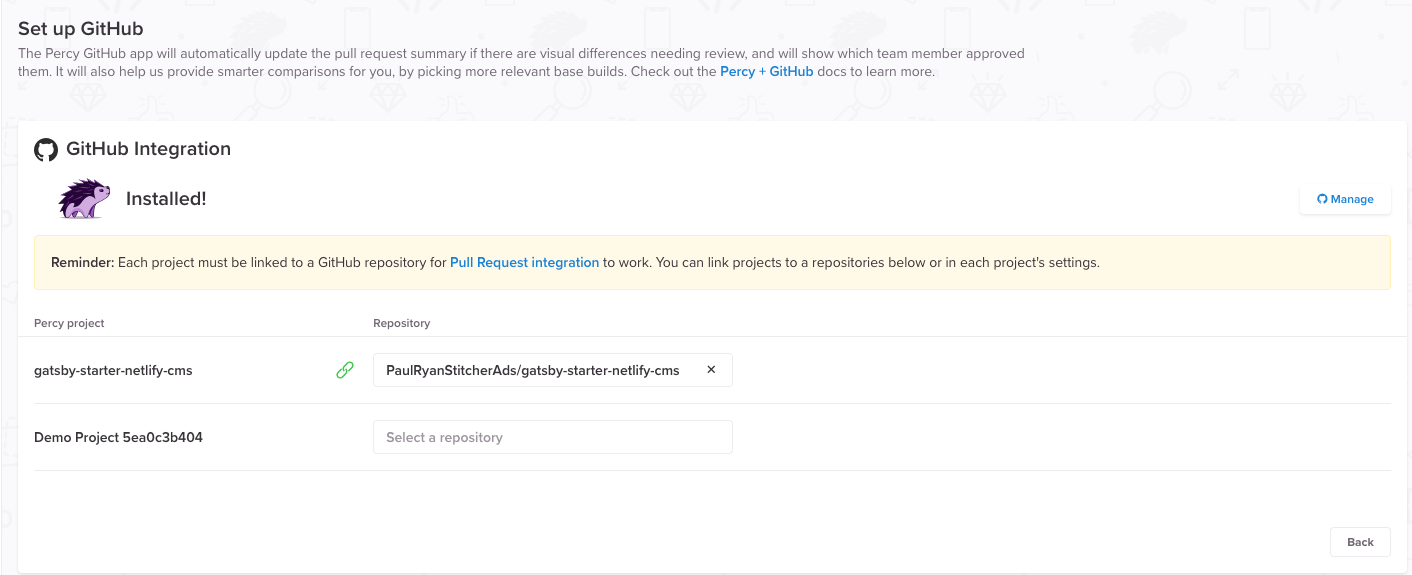
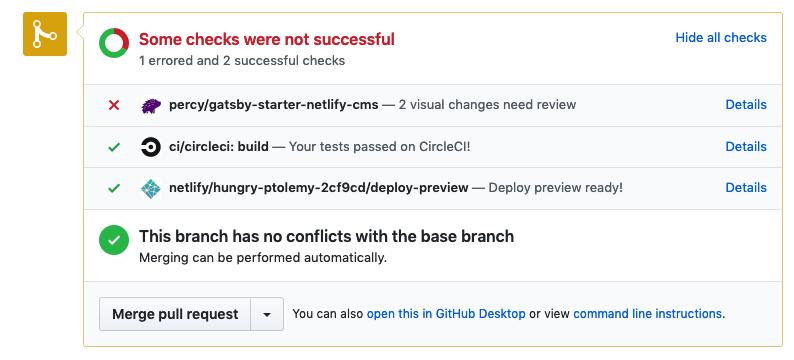
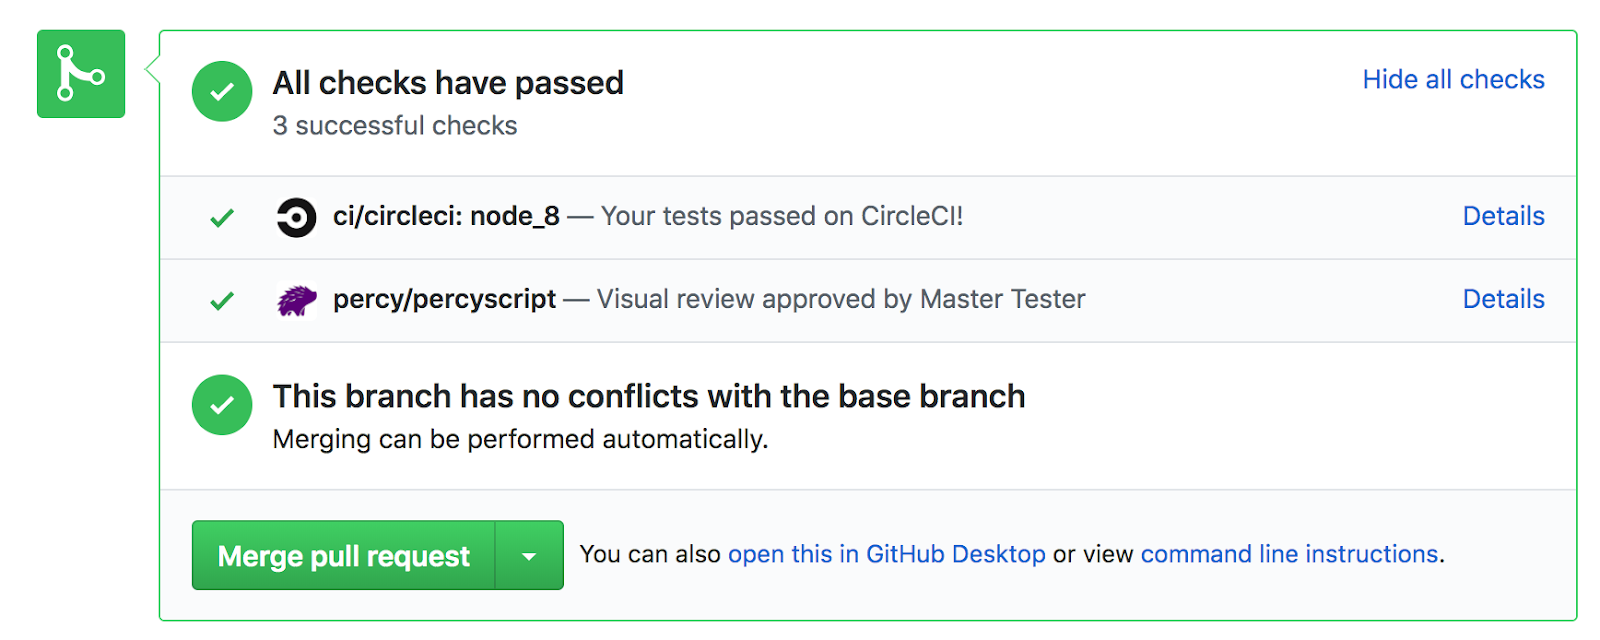
Visual testing is best when done alongside code reviews. We support integrations with GitHub, GitLab, and Bitbucket (coming soon)! With an integration enabled, Percy will show up in your checks commit and pull request checks, notifying you if visual changes are detected:

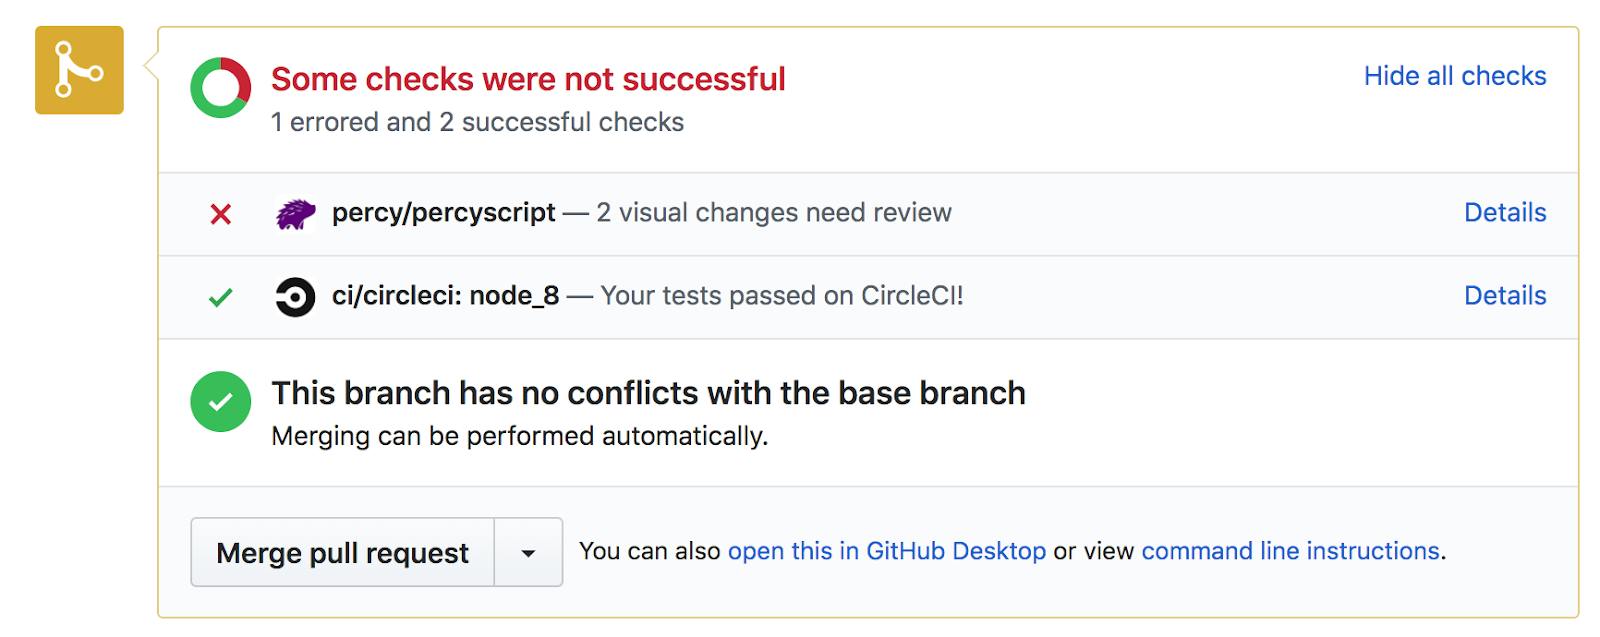
Clicking "Details" will take you right to the Percy build where you can review visual changes.
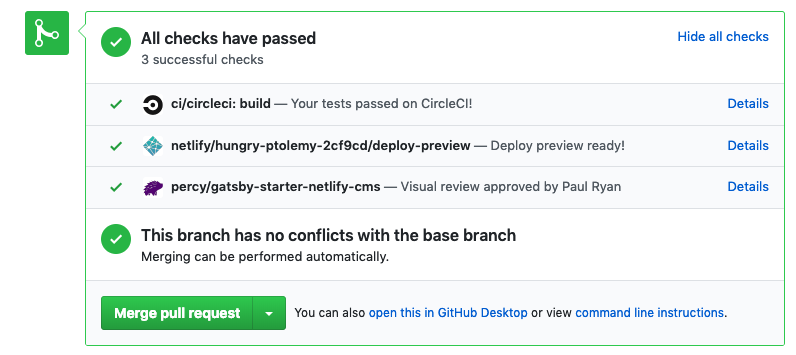
After snapshots are approved, your commit status will change to green and the pull request can be merged.

With continuous visual reviews on every feature branch, it’s easy to have 100% confidence the visual changes you’ll be deploying.


We hope this tutorial has helped you get acquainted with Percy’s visual review platform and workflow. To learn more about how Percy works, feel free to check out these docs:

Happy testing! 💜

The post Using Percy to add visual testing to a Jekyll site appeared first on CSS-Tricks.

Testing for Visual Regressions with Percy

While this post is not sponsored (it is based on Paul’s own personal experience), we have worked with Percy before on a sponsored video, that also goes through the process of setting up Percy on a site. It’s fascinating, powerful, useful stuff and I highly recommend checking it out.


Let me set the stage:

  1. You've pushed some code and all the meticulously unit tests you wrote pass. Fantastic! Let’s get this branch into QA.
  2. You receive a Slack message from your QA team asking why a button is now floating off the screen?
  3. "But... I didn't touch any code in that part of the application," you think to yourself.
  4. Then you remember you did change some CSS.
  5. Panic! What else has changed in the UI? Does this affect iPad? Will Firefox behave differently than Chrome? What about mobile?

This is a very common scenario many of us face when building large-scale applications that deal with different screen sizes and browsers. It’s a Herculean task to test UI for each and every change to code.

What now, throw in the towel and move to the mountains? Thankfully, no. We have Percy to help save the day! And it’s really the best friend we have for testing unexpected outcomes that impact design and layout. Percy has become an indispensable part of my development stack and I convinced CSS-Tricks to let me share some things about it that have made my code stronger and helped prevent errors from shipping.

Plus, it integrates well with other tooling and is a relative breeze to set up. So hang with me a bit as we walk through what Percy is and how to leverage it for your projects.

So, what exactly is Percy?

According to Percy’s site, it’s an “all in one visual review platform."

I’ve found that holds true. What it boils down to is that Percy provides a way to test visual regressions. That’s pretty awesome if you think about it. Many changes to a codebase — especially working with CSS — can introduce breaking changes to a site’s design. If you’ve ever inherited a large legacy stylesheet, modified a class, and hit Save, then you probably have a great idea of how nerve-wracking that can feel. Percy’s goal is to provide confidence in those types of situations where it’s difficult to know all of the UI that depends on the same line of code.

Excited? Let's get started.

Setting up an example site

Let’s set up a little site that Percy can hook into and test some UI we’re going to make together. These days, this couldn't be easier, thanks to Gatsby and Netlify. It is way beyond the scope of this article to do a deep dive into these technologies, but rest assured, they are wonderful as well and can get us online without a bunch of server setup.

Head over over to Netlify templates and click the "Deploy to Netlify" button, which will set up a git repo on your GitHub account and also deploy the app using Netlify.

After completing the setup steps, we should get something like this (after the site is deployed):

Magically, our site is now live! We will use this to get to grips with Percy.

Using CircleCI for automated testing

Percy works best in a continuous integration (CI) environment that will trigger testing based on an action. We will use CircleCI to make it happen by integrating with the example site’s GitHub repo and running the builds, allowing us to test every commit.

The first thing we need to do is clone down our new repo on GitHub, I clone mine as follows:

git clone https://github.com/PaulRyanStitcherAds/gatsby-starter-netlify-cms.git

With our repo now cloned, we can head over to CircleCI and sign up with a GitHub account.

We now need to add our project, so click "Add Projects" in the side navigation and you should see a screen like the following screenshot. Find the project we just cloned and click “Set Up Project."

In the Set Up Project area, we want to select Linux as our operating system and Ruby as our language (pery-cli is in Ruby). Here are the rest of the steps for this part:

CircleCI tells us that we need a .circleci directory and that we need a config.yml file in it. Create the following structure within your project.

CircleCI offers a configuration snippet to copy and paste for our configuration, but it is far too verbose for us; we only need a simple config.yml file.

Go ahead and use the following snippet. You’ll see that we install the percy-cli gem along with Percy in our tests:

version: 2
jobs:
  build:
    docker:
      - image: circleci/ruby:2.4.1-node-browsers
    working_directory: ~/repo
    steps:
      - checkout
      - run:
          name: install dependencies
          command: |
            npm install
            gem install percy-cli
      
      - run: 
          name: run our tests
          command: |
            npm run build
            percy snapshot public

This config is all we need.

At first, It took me a while to figure out why my build was failing and turned out I was trying to install percy-cli as an npm module. Yikes!

We now have the CircleCI configuration set up so finally we can start using Percy!

As a sanity check, comment out the run our tests step above and push your code to the master branch.

Now click the "Start building" button which will use the configuration you just pushed to create a build. Here's what you should see in the workflows section:

From here on out, CircleCI will create a build for us whenever we do a push.

Hooking Percy up to CircleCI

A Percy account is needed to use the service. Head over to Percy’s site and sign up with your GitHub account.

Once signed up, you can create a new organization (if you don't already have one) and call it whatever you want.

Next thing to do is add a project to the organization. It’s probably a good idea to call the project something matching the name of the repo so that it’s recognizable later.

Now we need to add a Percy token to CircleCI. Percy tokens are located under "Project Settings."

My access token is blocked out.

Alright, let’s add the token in CircleCI in Environment Variables under “Build Settings." You can find Build Settings by clicking the gear icon beside your project in the workflows section.

Again, my token is blocked out.

It’s time to run Percy! If you commented out the run our tests line in the config file earlier, then remove the comment because that command will run Percy. Push to master again and then head over to the Percy app — we will see Percy has started its own build for creating snapshots. If all goes well, this is what we should get:

If you click on this build, then you can see all the screens Percy has snapped of the application.

You might be wondering what the deal is with that empty left column. That's where the original screen normally is, but since this is the first test, Percy informs us that there are no previous snapshots to compare.

The final thing we need to do to wrap up this connection is link our repo to Percy. So, in Percy, click “Project Settings" then click on the “install an integration" link.

Select the organization and hit install for all repositories:

Finally! We can link to our repository.

Unlocking the true power of Percy

Since we now have everything set up, we can see how Percy can be used in a code review workflow! The first thing we will do is create a branch from master. I’m calling my branch "changing-color."

Go to the /src/components/all.sass file, change Line 5 to use the color pink, then push the change to the repo. This is what we’re going to evaluate in our visual test.

Create a pull request for the change in GitHub.

CircleCI is carrying out checks for us but the one we are focused on is the Percy step. It may need a minute or two for Percy to pop up:

Percy is letting us know that we need to review changes we made, which in this case, is the change from red to pink. We can see the impact of that change:

Although the changes on the right are red, that is highlighting the areas that have been changed to pink. In other words, red is indicating the change rather than the actual appearance.

We can give this a quick glance and then click the “Approve" button which will give us a green tick on GitHub indicating we’re free to merge the pull request.

This is the true power of Percy: allowing us to see the impact of a small change and giving us the option to approve the changes.

Fantastic! We have now taking a tour on how to set Percy up in our projects along with how to integrate CircleCI. I really hope this will save you many headaches in the future when managing your UI.

The post Testing for Visual Regressions with Percy appeared first on CSS-Tricks.