How to Improve Accessibility on Your WordPress Site

Do you want to improve accessibility on your WordPress site?

When building a website, accessibility often gets neglected, which can create a poor user experience (UX). Ideally, you want your WordPress site to be user-friendly and inclusive to all individuals, regardless of their needs.

In this article, we will show you how to improve the accessibility of your WordPress website.

How to Improve Accessibility on Your WordPress Site

Why Is Accessibility Important for My WordPress Site?

In web design, accessibility refers to techniques used to make a website easier to use for people with disabilities. Some visitors use assistive technologies to navigate the web, like screen readers for people with visual impairments and keyboard navigation for folks who cannot use a mouse.

There are some common best practices that are recommended by experts to make websites more accessible. They help make sites more inclusive and user-friendly for everyone, regardless of ability.

By prioritizing accessibility, more people will be able to navigate your WordPress website and explore your content. If you run an online store, then you will also increase your chances of converting users into customers.

Accessibility is also important for search engine optimization (SEO). Google values websites with good user-friendliness. Besides making your website more responsive for mobile devices, you can also prioritize inclusivity in your web design to improve rankings.

Additionally, if you are a business website owner and the front end of your site is inaccessible, then you could face legal consequences.

The Americans with Disabilities Act (ADA) states that consumers can file a complaint if a site does not comply with accessibility guidelines. What’s more, your reputation could get ruined, which could result in financial losses.

How Does WordPress Make My Website More Accessible?

WordPress has several built-in functionalities to help users make their WordPress websites accessible. For example, by default, you can add alternative text (alt text) and title attributes to images so that screen readers can read them out loud for users with visual impairments.

WordPress has also made it mandatory for all new and updated code in WordPress to follow its accessibility coding standards. This is to ensure WordPress developers comply with best practices for accessibility when creating themes and plugins.

Other than that, WordPress includes features that make it easy for users with disabilities to build their own websites, like the accessibility mode for adding widgets.

For more information, we recommend keeping up with the Accessibility tag on the Make WordPress Core page for more information.

With all this in mind, WordPress is not entirely accessible out of the box. As a website owner, it’s important to take extra steps to help your site meet accessibility standards.

We have broken down this guide into a few easy tips to improve your WordPress website’s accessibility. You can use these quick links to navigate to a specific section:

1. Get Familiar With the Web Content Accessibility Guidelines (WCAG)

First things first, we recommend reading the Web Content Accessibility Guidelines (WCAG). These are the standards laid out by the W3C Web Accessibility Initiative (WAI) for users to make their websites more accessible.

You can check out the WCAG 2.1 and WCAG 2.2 updates for starters. If both documents seem too long to read, then feel free to bookmark this quick reference instead.

2. Use an Accessibility-Ready WordPress Theme

Accessibility-ready themes have met the minimum accessibility standards that the WordPress theme review team has set.

Using an accessible WordPress theme does not mean your website will automatically comply with all accessibility requirements, as you still have to make some tweaks on your own. However, it can give you a jumpstart to making your website more accessible.

At the very least, an accessibility-ready theme will have:

  • Menus that can be navigated using the keyboard alone.
  • Good color contrast that makes the content readable for users with visual impairments.
  • Semantically correct HTML, which helps assistive technologies understand the content and structure of a web page.

If you want to take things a step further, you may also want to check if the theme has ARIA attributes in it. These attributes are like extra information that complements your theme’s HTML to make a website even easier to navigate for assistive technologies.

The easiest way to look for an accessibility-ready theme is by going to Appearance » Themes on your WordPress dashboard. Then, click ‘Add New Theme.’

Adding a new theme in WordPress

From here, select ‘Feature Filter’ and choose ‘Accessibility Ready.’

Feel free to add more filters to find the theme that matches your exact needs.

Selecting the Accessibility Ready filter in WordPress themes page

Now, scroll down and click ‘Apply Filters.’

You will then see some accessibility-ready themes on the screen.

Applying theme filters in WordPress

For more theme recommendations, check out our expert picks of the best WordPress themes.

3. Install a WordPress Accessibility Plugin

A WordPress accessibility plugin adds helpful features for visitors with disabilities to navigate your website.

One WordPress accessibility plugin we recommend is WP Accessibility. Some of the things this plugin can do include:

  • Adding an accessibility toolbar
  • Detecting whether your theme is accessibility-ready
  • Tracking how the accessibility features on your website are being used so that you can assess them

First, you need to install and activate the plugin on WordPress.

Upon activation, you need to go to Settings » WP Accessibility to configure the plugin.

WP Accessibility Settings

Let’s take a look at each section of the settings page.

Add Skip Links

In the first section of the plugin settings, you can use skip links on your website, and this setting is enabled by default. A skip link allows users to jump directly to the content section of a post or page.

This is an extremely useful feature for people using screen readers. Without a skip link, they will have to listen to everything displayed on your website, including your navigation menus, before they reach the content part.

If your theme already uses skip links, then you will see a notification confirming that.

WP Accessibility Add Skiplinks

Accessibility Toolbar

The WP Accessibility plugin comes with an accessibility toolbar.

When you enable it, the plugin will add a toolbar on your website where users can resize fonts or view your site in high-contrast color mode.

This lets your users select the options they need to make the page easier to read.

WP Accessibility Toolbar

To enable the toolbar, simply check the ‘Font size’ and ‘Contrast’ checkboxes.

There are also settings where you can control the toolbar’s font size and placement.

WP Accessibility Toolbar

If you make changes to these settings, then make sure you click the ‘Update Toolbar Settings’ button to store your settings.

This is what the toolbar looks like on our test website.

WP Accessibility Toolbar Preview

Accessibility Fixes

WP Accessibility also provides several accessibility fixes that could solve potential issues on your site. You can go through each option and see if you need it.

Some recommended settings will be checked by default. These options prevent links from opening in new windows, display an error when you submit an empty search submission, and remove the tabindex HTML attribute where it is not needed to simplify keyboard navigation.

WP Accessibility Fixes

If you are using an accessibility-friendly theme that has already enabled some of these features, then you will see a message confirming this at the top of the section.

Don’t forget to click the ‘Update Miscellaneous Settings’ button to store your changes.

Accessibility Features

The plugin also provides a few options to help make your content more accessible.

The first group of settings makes images easier to handle for those using screen readers.

There are also options to display summaries at the top of your posts and pages. This allows those with screen readers to hear a summary of the content before deciding to listen to the entire article.

WP Accessibility Features

If you change any of these options, then please remember to click the ‘Update Accessibility Features’ button.

Testing & Admin Experience

Next, you will find some settings that let you improve the accessibility of your WordPress admin area and help with testing.

This section is more technical, so make sure you consult the plugin’s documentation before checking the boxes.

WP Accessibility Testing & Admin Experience

Make sure you click the ‘Update Accessibility Tools’ button to save your changes.

Remove Title Attributes

This section lets you remove the title attribute from tag clouds.

The title attribute is considered to be useless by some accessibility experts. Most screen readers usually ignore the title attribute and instead read the anchor text.

WP Accessibility Remove Title Attributes

This setting is enabled by default, but if you change it, then make sure you click the ‘Update Title Attributes Settings’ button.

4. Check Your Website’s Color Contrast

Color contrast means the difference between the text color and background color. It’s a very important part of website accessibility because it can affect how readable your website content is for people with poor vision and color blindness.

To meet web accessibility standards, regular text should have a high contrast of at least 4.5 to 1. This means the text needs to be 4.5 times brighter than the background.

For larger text, the requirement is a bit less, at 3 to 1. This means a slightly lower contrast is acceptable. The same rule applies to graphics and user interface elements, such as form input borders.

The WP Accessibility plugin has a built-in color contrast checker that you can use.

In the plugin settings, simply scroll down to the Color Contrast Tester section and choose a foreground color (the color you will use for your text) and its background color.

Then, click ‘Check Color Contrast.’

Checking color contrast using WP Accessibility

The plugin will then tell you if the colors pass or do not pass the contrast test.

Here’s what the result looks like:

WP Accessibility color contrast test results

Alternatively, you can use the free WebAIM Contrast Checker. As with the previous tool, you will only need to select a foreground color and a background color.

This tool not only tests your color contrast but also shows you what the colors may look like as normal and large text, as well as graphical objects and user interface components.

Free WebAIM Color Contrast Checker

For more details, you may like to see our guide on how to pick the perfect color scheme for your WordPress website.

5. Add Alternative Text to Images

Besides being useful for search engines, alt text is helpful for screen readers to describe images to individuals with visual impairments.

Adding a title to an image in WordPress

Previously, we mentioned that WordPress has a built-in feature for adding alt text. The process is pretty easy, and you can read all about setting it up in the following guides:

Expert Tip: If you want to automatically set a consistent alt text format for all of your images, then you can use All in One SEO’s Image SEO tool.

6. Add Labels to All Form Fields

If you have forms on your website, then you will want to make sure that you use the appropriate labels for each form element. This includes form fields, buttons, menus, and so on.

Adding checkout date and time fields to a form

The WCAG recommends adding labels to all form elements to make it easier for assistive tools to identify and relay information about each one to users.

Furthermore, adding clear and descriptive labels is a good web design practice. By helping users understand what each form field is for, user errors are less likely to occur, and more people will be able to submit their forms.

If you are not sure how to create great forms, then we recommend checking out WPForms. It’s the best WordPress form builder that makes it super easy to customize forms to your exact needs, including improving them for accessibility.

WPForms

You can read more about WPForms in our WPForms review. Also, check out these guides on how to create forms in WordPress:

7. Use Proper Heading Tags in Your Content

Heading tags are HTML tags that can mark the titles or subtitles of a web page. This way, your content is much more organized and easier to follow.

These tags also help tools like screen readers generate a navigable outline for users with visual impairments. This will allow them to jump between sections and understand your content’s overall structure.

If you are not sure how to take advantage of heading tags, then you can read our guide on how to properly use heading tags in WordPress.

8. Use Descriptive Anchor Text

Anchor or link text is basically the clickable words or phrases in a link. You can usually tell which text is linked because it will be in a different color.

Often, bloggers will use the link text ‘click here’ or ‘read more’ to direct visitors to a page.

This is not a good practice for accessibility because it doesn’t give any information about where the link goes. This makes it hard for people using assistive technologies to understand the purpose of the link.

That’s why it’s best to use descriptive anchor text instead. This means using words that describe what the content is about when you click the link.

For example, let’s say that you want to add a link to an article about the best WordPress hosting in this sentence: ‘Follow this guide to learn about the best WordPress hosting services on the market.’

Instead of adding the link to ‘Follow this guide’ or anywhere else in that sentence, you should insert it into ‘best WordPress hosting services.’ This way, the user gets an overview of what they will find in the linked content

For more information about links and anchor text, see our beginner’s guide on linking in WordPress.

9. Add Captions or Transcripts to Video and Audio Content

One of the main struggles for users with hearing disabilities is the inability to understand spoken content in videos and audio. That’s why a lot of video content creators and podcasters add captions or transcripts.

At WPBeginner, we strongly discourage you from uploading videos to your own website because they can slow your site down. Instead, it’s best to use services like YouTube or Vimeo, both of which have built-in tools for adding captions.

As for audio content, you may want to consider using a transcription service to convert speech to text easily. This way, you won’t need to manually create a written version of your audio content.

Check out our list of the best transcription services for more information.

10. Do Usability and Accessibility Testing

If you have implemented all the tips from this guide, then the final step is to do usability and accessibility testing on your WordPress website.

This testing can help you identify any remaining issues and help you make your website user-friendly and accessible to everyone.

WebAIM has a Web Accessibility Evaluation Tool (WAVE) that you can use for free.

Simply type in your website’s domain name, and the tool will identify any accessibility-related issues for you.

WebAIM's Web Accessibility Evaluation Tool (WAVE)

You can also use an accessibility scanner. We recommend checking out Accessibility Checker by Equalize Digital. It also comes with a free plugin version to scan unlimited posts and pages on your website.

After installing the plugin, you can simply go to the block editor of your page or post. If you scroll down to the meta box section, you will find an Accessibility Checker that identifies your accessibility issues.

Example of what the Accessibility Checker plugin does

Another option is to perform a UX audit, which basically means checking your website to see if it has a good user experience. Just head over to our UX audit guide for more information.

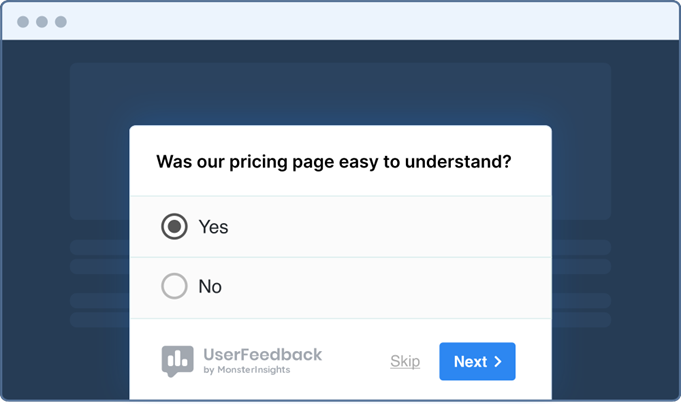
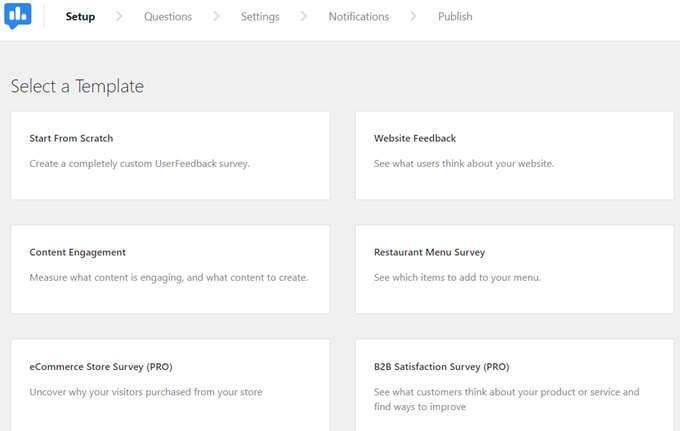
Last but not least, we encourage you to ask for your user feedback. While testing can get you results, getting feedback from actual visitors who use your site’s accessibility features can provide much more accurate insights.

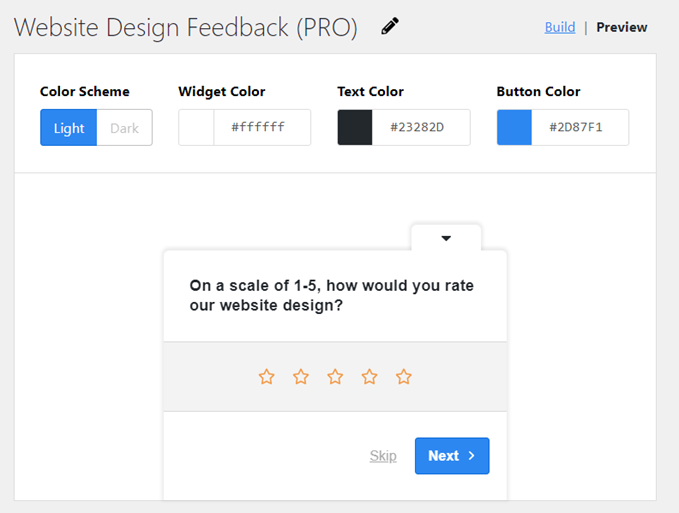
UserFeedback is the best plugin for this job. It lets you create surveys to collect your users’ opinions and thoughts. There are also templates for website design feedback, so you won’t have to create the survey from scratch.

UserFeedback plugin

For more information, just see our guide on how to get website design feedback in WordPress.

Expert Guides on WordPress Accessibility

Now that you know how to improve accessibility on your site, you may like to see some other guides related to WordPress accessibility issues:

If you liked this article, then please subscribe to our YouTube Channel for WordPress video tutorials. You can also find us on Twitter and Facebook.

The post How to Improve Accessibility on Your WordPress Site first appeared on WPBeginner.

16 User Experience Feedback Questions to Ask Website Visitors

Are you looking for some user experience feedback questions to ask your visitors?

By asking user experience feedback questions, you can better understand your users’ needs and expectations, identify areas that need improvement, and measure overall customer satisfaction. This can help you gain a competitive advantage over other websites.

In this article, we will share some of the best user experience feedback questions to ask website visitors and show you how to survey users in WordPress.

User Experience Feedback Questions to Ask Website Visitors

Why Ask User Experience Feedback Questions in WordPress?

If you have a WordPress website, then asking users for feedback will help you gather insights into their needs, preferences, and dislikes. This is essential for improving your website’s design, content, and functionality to align with user expectations.

Feedback can even reveal website areas that can be optimized to increase conversions, like improving the checkout process. You can then implement these suggestions to generate more leads and make more sales.

User experience feedback preview

Additionally, asking for user experience feedback can also boost user engagement by showing visitors that their feedback is valued and you are actively working to improve your content.

Having said that, let’s take a look at some of the best user experience feedback questions to ask your website visitors.

User Experience Feedback Questions to Ask Website Visitors

Here are some general questions that you can ask your visitors to learn more about the UX of your website.

1. How would you rate the overall usability of our website?

If you have a WordPress blog, then asking users to rate the overall usability of your website can help you quickly and easily see if your website is doing well or if it has areas that need improvement.

It can also help you track your website’s progress over time as you make changes to improve the overall user experience.

Once you ask this question, you can also add a follow-up question that asks for the user’s reason for the rating that they gave. This will help identify patterns in usability issues and make it easy to troubleshoot those problems.

2. How would you rate the overall speed and responsiveness of our website?

A website’s speed is one of its most important factors because fast-loading page times can improve the user experience, increase pageviews, and boost your WordPress SEO.

You can gauge user satisfaction and engagement by asking users to rate your website speed. For example, if your visitors are giving you low ratings, then it means that your loading times are too long, and people are leaving your site frustrated.

If this is the case, then you can use different tips to speed up your WordPress site and improve the user experience.

3. What suggestions do you have for improving our website?

By asking users to provide suggestions for improving your website, you can identify usability issues that may have been overlooked by your developers.

For example, a call to action (CTA) on your website may not work, which has caused a lot of users to leave your site frustrated.

MonsterInsights CTA

We recommend asking this question in a feedback form after users have provided a rating for the overall website usability. This question can help you find out about this issue and also show users that you care about their opinions and experiences.

4. What is your first impression of our website’s homepage?

The homepage is the introduction to your website and is usually the first page that visitors interact with. This page should create positive emotions in users and encourage them to explore your site.

By asking users about their first impression of your website’s homepage, you can assess if the page is effectively communicating your website’s purpose. It can help gain insights into the user’s impression of your branding and overall homepage look.

If you need to make improvements, then you can check out our guide on how to create a custom home page in WordPress.

5. What did you dislike most about our website?

Asking users what they dislike about your website can uncover specific issues that are causing frustration and dissatisfaction among your visitors and customers.

For example, you might discover that users are annoyed by the number of ads on your site or intrusive popups.

Once you have identified these issues, you can fix them to prevent users from abandoning your website. This can lead to better user loyalty, improve the user experience, and even help increase conversions.

6. What changes can we make to our website design?

By asking for user suggestions, you can gain more ideas for design elements and aesthetics that were overlooked when you were creating your pages.

Visitors can also provide suggestions that will ultimately help improve the user experience. For example, some people may find it difficult to use your navigation menu. This can give you the idea to make your navigation menu more visible and easier to navigate.

An example of an eCommerce mega menu

Additionally, this user feedback can help you stay up-to-date with the current website design trends and update your pages to match them.

User Experience Feedback Questions to Ask WooCommerce Store Customers

If you have a WooCommerce store, then asking these questions can help improve the user experience in your online store.

1. How was your shopping experience today?

Asking users this question immediately after purchasing can help you gather feedback about the customer’s experience.

It will also help you better understand the overall customer journey, from browsing through your products to completing checkout. This question will reveal patterns, trends, and any errors that are repeatedly being faced by your customers that need to be fixed or improved.

2. What can we do to make our product(s) better?

Asking users for suggestions to improve your products allows you to gain insights into your customers’ unmet needs. This lets you understand the type of solutions that your users are looking for and potentially come up with new features for your products.

This can help you gain a competitive advantage over other online stores by letting you tailor your products to meet users’ needs and expectations.

3. Did you find the information you were looking for on our product page?

This question improves the user experience by helping you identify information gaps. It determines whether your product page effectively communicates the necessary information to help users make informed decisions.

This allows you to understand the type of information that the users want to see for a product and change your pages accordingly.

Product page preview

For more details, see our guide on how to customize your WooCommerce product pages.

4. Were you looking for anything today that you couldn’t find?

Asking visitors if they were looking for something they couldn’t find allows you to broaden your store’s scope by taking user ideas into account and adding those products to your inventory.

For example, if you sell clothes online, and users on your website answered that they wanted to find matching accessories with their clothing items, then you could expand into jewelry as well.

5. Was there anything that made you cancel your order?

Customers cancel their orders for several reasons, like high shipping costs, delayed shipping, unexpected charges, or issues during the checkout process.

By asking this question, you can identify the main reason for users canceling their orders in your online store.

For example, if many customers are canceling their orders due to shipping delays, then you can improve the shipping process to reduce delays and improve customer satisfaction.

6. What is the one part of our checkout process that we should improve?

Your store’s checkout process should be seamless to provide a top-notch customer experience. By asking users this question, you can gain a variety of perspectives and identify common issues in the checkout section.

For example, if your checkout is too long and complicated, then you might switch to an express checkout.

An example of an express checkout form, created using FunnelKit Funnel Builder

Alternatively, see the tips in our guide on how to customize the WooCommerce checkout page.

7. What was your main concern or fear before purchasing this product?

By asking users this question, you can find out the potential barriers to purchase and take steps to address those issues on your site.

For instance, you can improve your product messaging and positioning to encourage more users to complete their purchases.

It is also a good idea to create a personalized user experience by setting up personalized recommendations, addressing customer concerns proactively, and offering customer support to boost engagement and satisfaction.

User Experience Feedback Questions to Ask Website Visitors on Mobile

The majority of your users will access your website using mobile devices. These are the user experience feedback questions you can ask visitors to improve your website on mobile.

1. Was our website easy to navigate on mobile?

Over 55% of your website traffic will come from mobile devices. However, your website will look different on mobile due to a smaller screen size and a touch-based interface.

View mobile screen preview

Asking users how easy it is to navigate your site on a mobile device can help identify any design issues that are causing people to leave your site unsatisfied. For instance, you may need to use a responsive WordPress theme and other responsive design elements.

This will help you optimize your site for mobile navigation and can ultimately lead to more conversions.

2. Were any parts of the page not visible or hard to see?

A mobile device’s small screen size can limit the amount of information displayed on a page and make your site look crowded.

By asking users this question, you can identify areas that need to be optimized for mobile viewing. You can also check this information yourself by following our guide on how to view the mobile version of WordPress sites from desktop.

3. Did you find the website’s blog posts easy to read on your mobile device?

Blog posts can look different on mobile devices because the text is smaller and the images are more compressed, giving the page a cramped look.

By asking users if they could easily read your posts on mobile devices, you can identify parts of your content that may be difficult to read.

You can then change the font size, break up paragraphs, and use an uncluttered layout to make your blog posts more readable. For more details, just see our guide on how to improve readability in WordPress.

How to Add a User Experience Feedback Prompt in WordPress

You can easily add a quick user experience survey on your WordPress website with UserFeedback. It is the best WordPress feedback plugin on the market that comes with 25+ premade survey templates and lets you ask unlimited questions.

Plus, the plugin offers different types of questions that you can ask, including multiple-choice questions, an NPS survey, a quick rating question, radio buttons, email captures, or an open-ended question for feedback.

First, you need to install and activate the UserFeedback plugin. For detailed instructions, see our beginner’s guide on how to install a WordPress plugin.

Note: UserFeeback also has a free plan. However, we will be using the premium plan to unlock more features.

Upon activation, visit the UserFeedback » Surveys page from the WordPress admin sidebar and click the ‘Create New’ button.

Click Create New button on Surveys page

This will direct you to the ‘Select a Template’ page, where you can choose any of the premade templates.

Since you want to ask for user experience feedback, you can select the ‘Website Experience’ template.

Choose the website experience feedback template

This will take you to another screen where you can start creating a user experience feedback survey.

By default, the website experience template asks users to rate their experience on your website. If you want, you can change the question from the text field and then choose a question type from the dropdown menu.

You can add checkboxes, radio buttons, star ratings, text fields, and more.

Once you do that, click the ‘Add Question’ button to add another question to the user experience feedback survey.

Choose a question type

This will expand another prompt on the screen where you can add another question.

For example, if you asked users to rate the website user experience in the first question, then you can ask users about everything they think needs to be improved on your site.

After that, you can select ‘Long Answer’ as the question type so that users can answer without any word count restrictions.

Add a question asking for suggestions to improve user experience

You can then switch to the ‘Preview’ link at the top to customize your user experience feedback prompt.

Here, you can change the color scheme, button color, widget color, and text color for the prompt. Once you do that, just click the ‘Next Step: Settings’ button.

Customize the user experience feedback prompt

You will now be taken to the ‘Settings’ page, where you can start by scrolling down to the ‘Targeting’ section.

Here, you can choose the device type where the survey will be displayed. For example, if you created this survey to gather insights into your performance on mobile devices, then you can select the ‘Mobile’ option. The survey will then only be displayed to the visitors browsing your site on their mobile phones.

After that, you can select the ‘All Pages’ option if you want to display the survey on all the pages and posts on your website.

Configure targeting settings

However, if you want to display the survey on a specific post or page, then you can select the ‘Advanced’ option.

Then, you can specify the conditions for the survey display from the dropdown menu.

For instance, if you want to display the survey on a single page, then you can select the ‘Page URL is’ option from the dropdown menu on the right and then add a page URL into the field on the left.

Add conditional logic for prompt display

Next, scroll down to the ‘Behaviour’ section to configure the display timing of your user experience feedback survey.

Here, you can decide when the survey will appear on your page, how often it will be displayed, and how long it will run on your website.

Once you have done that, simply click the ‘Next Step: Notifications’ button.

Configure behaviour settings

On the new page, you must toggle on the ‘Send Email’ switch and then enter the email address where you want to receive notifications every time a website visitor completes your feedback survey.

After that, click the ‘Next Step: Publish’ button.

Toggle send email switch

Now that you are on the ‘Publish’ page, simply toggle the ‘Survey Status’ switch to ‘Publish’ to activate your survey.

If you want to schedule your survey for a later date, then you can do that by toggling the ‘Schedule for Later’ switch and adding a specific date and time.

Publish user experience feedback survey

Finally, don’t forget to click the ‘Save and Publish’ or ‘Save and Schedule’ button to store your settings.

You can now visit your WordPress site to view the user experience feedback survey in action.

User experience feedback prompt preview

Once the survey is published, you can easily view its results by visiting the UserFeedback » Results page from the WordPress dashboard.

You will now be able to check the number of responses, impressions, and all the answers provided by your visitors. This can help you improve the overall user experience of your website.

View feedback results

Bonus: How to Do a UX Audit of Your WordPress Site

Apart from gathering feedback to improve the user experience, it is also important to do a UX audit of your website. This means testing your site to see if there are any usability issues that you can fix.

This is a crucial step to ensure that your site is efficient and provides a high-quality experience.

To do a UX audit, you should first be able to recognize your target audience and understand their needs and preferences. Then, you can move on to finding pages on your website with poor user experience.

To do this, you can use MonsterInsights, which is the best Google Analytics plugin on the market. It lets you see where your users are coming from and how they interact with your website. MonsterInsights also allows you to see pages on your site where you get conversions.

The MonsterInsights Google Analytics plugin

Upon installing and activating the MonsterInsights plugin, all you have to do is visit the Insights » Addons page from your WordPress admin sidebar to install and activate the ‘eCommerce’ addon.

After that, go to the Insights » Reports page and switch to the ‘eCommerce’ tab. You will now be able to overview your top-performing products and conversion sources. This will also help you identify the pages and products where you don’t get many conversions.

Viewing eCommerce reports

Additionally, your UX audit may involve optimizing your website’s speed and performance, making your navigation menu simpler, testing conversion elements, and more.

For detailed instructions, you can see our beginner’s guide on how to do a UX audit of your WordPress site.

We hope this article helped you learn some user experience feedback questions to ask your website visitors. You may also want to see our tutorial on how to track user engagement in WordPress with Google Analytics and our top picks for the best WordPress survey plugins.

If you liked this article, then please subscribe to our YouTube Channel for WordPress video tutorials. You can also find us on Twitter and Facebook.

The post 16 User Experience Feedback Questions to Ask Website Visitors first appeared on WPBeginner.

How to Plan a Holiday Sale for Your WooCommerce Store (12 Tips)

Do you want to plan a holiday sale for your WooCommerce store?

The holiday season is the busiest time for online stores across the world. By planning a sale for the holidays, you can capitalize on this demand and boost your sales and revenue.

In this article, we will share some tips on how to easily plan a holiday sale for your WooCommerce store.

How to Plan a Holiday Sale for Your WooCommerce Store

Why Plan a Holiday Sale for Your WooCommerce Store?

If you have a WooCommerce store, then planning a holiday sale for it can be a great way to attract new customers.

This is because most users are looking for sales during the holiday season and offering them discount coupons can help you generate more revenue. A well-executed online store sale can even increase your brand awareness and retain existing customers.

Additionally, a holiday sale can improve your website SEO due to the increased traffic, improved click-through rates, and relevant content.

Having said that, here is our list of some of the best tips that can help you easily plan a holiday sale for your WooCommerce store.

1. Create Holiday-Themed Lead Generation Campaigns

OptinMonster is the best lead generation and conversion optimization tool that allows you to create popups, yes/no optins, banners, sliders, and more.

It comes with a drag-and-drop builder, exit-intent technology, and A/B testing, making it super easy to convert website visitors into customers.

OptinMonster even comes with premade templates for the holiday season that can be used to launch a marketing campaign in just a few minutes.

First, you’ll need to visit the OptinMonster website to create an account by clicking the ‘Get OptinMonster Now’ button.

OptinMonster – The best WordPress popup plugin

Then, you need to visit your WordPress site to install and activate the OptinMonster plugin. For details, see our beginner’s guide on how to install a WordPress plugin.

Upon activation, this plugin will act as a connector between your OptinMonster account and website. You will now see a setup wizard on the screen, where you have to click on the ‘Connect Your Existing Account’ button.

Connect your existing account

Once you have done that, visit the OptinMonster » Templates page from the WordPress dashboard.

Here, you will notice a list of holidays under the ‘Seasonal’ section in the left column. Now if you are planning a sale for the Christmas season, check the box next to that option.

OptinMonster will now display all the premade templates for this holiday season. You can even select a campaign type from the top including popups, floating bar, fullscreen, gamified, inline, or slide-in.

Upon making your choice, simply click the ‘Use Template’ button to launch the template in the OptinMonster’s drag-and-drop builder.

Choose a holiday campaign template

Here, you can add headings, and dynamic content, add your discount offers, configure the countdown timer, and so much more.

You can even connect your campaigns to your email marketing services. For detailed instructions, you may want to see our tutorial on how to create WooCommerce popups to increase sales.

Customize holiday campaign popup

Once you are done, you can easily publish your campaign by switching to the ‘Publish’ tab from the top.

Upon its launch, the WooCommerce campaign for holiday sales will promote the discounts that you are offering, increase engagement, help you build an email list, and even boost sales on your online store.

Apart from that, you can also schedule your Christmas campaign, check analytics, and create mobile popups, making OptinMonster a great tool for building campaigns.

Holiday sale popup preview

2. Start a Giveaway Contest

You can also promote your holiday sales by hosting a giveaway competition on your website. This can create excitement and increase user engagement.

You can even make the giveaway competition exclusive for the customers who have bought something from your store which can convince potential customers to make a purchase.

When hosting a giveaway, keep in mind to choose a prize that may interest your entire audience, make the competition easy to enter, and announce the winner publicly.

To create and add a giveaway on your website, we recommend using RafflePress.

It is the best WordPress giveaway plugin on the market that comes with a drag-and-drop builder, premade templates, fraud protection, CRM (Customer Relationship Management) integration, and more.

RafflePress

Upon installing the plugin, you can navigate to the RafflePress » Add New page from the WordPress dashboard and select a template for your giveaway.

Once the template opens up in the drag-and-drop builder, you can add a name, prize, countdown timer, and a background image related to the holiday season.

For detailed instructions, see our tutorial on how to run a giveaway in WordPress with RafflePress.

Create Christmas giveaway

Once you are done, simply switch to the ‘Publish’ tab from the top to launch it.

The holiday season giveaway will now help you grow your audience and encourage them to buy from you to return the favor for freebies.

However, you can also host competitions on your website during the season to promote sales. For detailed instructions, you can see our beginner’s guide on how to create a WooCommerce contest to boost loyalty.

3. Offer Holiday Discount Coupons to Customers

When planning a holiday sale, it is important to create discount coupons, gift cards, and loyalty programs for your customers.

Discount coupons can help you clear out the inventory, increase sales, and even attract new customers.

On the other hand, offering gift cards on a new purchase for store credits can help build loyalty among users.

Another tip is to launch a loyalty program on your WooCommerce store during the holiday season to encourage customers to purchase more products in order to gain points.

You can do all of this on your website using Advanced Coupons. It is the best WordPress coupon plugin on the market that allows you to create BOGO (Buy One, Get One) deals, loyalty programs, gift cards, and smart coupons for your WooCommerce store.

It is super easy to use and offers features like coupon URLs, scheduled coupons, auto-apply coupons, shipping coupons, bulk coupons, and more.

Advanced Coupons

First, you’ll need to install and activate the Advanced Coupons plugin. For detailed instructions, see our beginner’s guide on how to install a WordPress plugin.

Upon activation, you must visit the Coupons » Add New page from the WordPress dashboard. Here, you can start by adding a name and description for the coupon.

Next, you can select a discount type and add the coupon amount next to the ‘Coupon amount’ option.

Now according to the studies, most online stores offer a discount of about 30-40% during the holiday season. While some stores also add discount offers of up to 70% for selected items only.

We recommend creating discount coupons of up to 35-40% off on all products to maximize your sales during the holidays.

Create a discount coupon

Once you have added all the details, simply click the ‘Publish’ button at the top to store your settings.

For detailed instructions, you may want to see our complete tutorial on how to create smart coupons in WooCommerce.

If you also want to add a loyalty program or offer gift cards to your customers, then you can see our guides on how to create a loyalty program in WooCommerce and how to add advanced gift cards in WooCommerce.

4. Add Social Proof to Your WooCommerce Store

You can also plan and promote your holiday sale by displaying social proof on your website. It is a social phenomenon wherein people copy the actions of others in choosing how to behave in a situation.

This means that a user is more likely to purchase your products if they see testimonials or reviews from other users talking positively about them.

You can easily add social proof to your WooCommerce store using TrustPulse. It is the best WordPress social proof plugin on the market that displays real-time notifications of user activities on your site.

Is TrustPulse the best social proof plugin for WordPress?

TrustPulse shows recent purchases or customer interactions to all the users who are visiting your online store at the time in order to convince them to make a purchase as well.

It offers actionable insights, real-time event tracking, smart targeting, and flexible design options, making it super easy to add social proof to your site.

For more detailed instructions, you can see our beginner’s guide on how to use FOMO on your WordPress site to increase conversions.

Fomo notification preview

5. Add Banners to Promote the Holiday

Another amazing tip that can help promote your WooCommerce holiday sale is to add banners at the top of your website.

These banners can include your brand name, logo, and discount offers to promote the holiday season and even create a festive atmosphere on your site.

If you also run a WordPress blog separately, then adding banners there for your online store sale can help drive more traffic.

You can easily create a banner on your WooCommerce store using OptinMonster which is the best WordPress banner plugin on the market.

All you have to do is create an account on the OptinMonster website and then connect it to your WordPress site using the free OptinMonster plugin.

Once you have done that, visit the OptinMonster » Templates page from the WordPress dashboard and select the ‘Floating Bar’ campaign type.

After that, choose the ‘Christmas’ option from the ‘Seasonal’ section on the left. You can now select any of the premade banner templates for your WooCommerce store.

Add a sale banner

Once you choose a template, it will be launched in the drag-and-drop builder where you can customize it according to your liking.

After that, you must switch to the ‘Publish’ tab to activate the Christmas sale banner on your online store.

Customize the WooCommerce holiday sale banner

However, if you don’t want to use OptinMonster, then you can also create a banner for your store using Thrive Leads or Canva. For detailed instructions, please see our tutorial on how to make a website banner easily.

6. Start a Holiday Countdown

When planning for a holiday sale on your WooCommerce store, it is important to also add a countdown timer on your website.

This can create a sense of urgency among your customers and encourage them to make a buying decision. It can also reduce cart abandonment rates by reminding customers to complete their purchase before the sale ends.

Plus, countdown timers also help highlight your sale and make it more visible to customers.

Countdown timer for the WooCommerce sale

You can easily create a countdown timer using a free plugin like Countdown Timer Ultimate or by opting for paid plugins like Thrive Ultimatum which is one of the best countdown plugins for your website.

For detailed instructions, you may want to see our tutorial on how to add a countdown timer widget in WordPress.

7. Offer Free Shipping

Offering free shipping upon purchase during the holiday season can help increase conversions by removing a purchase barrier.

This builds customer loyalty, encourages customers to spend more money, and also creates a sense of urgency because you are offering this service for a limited time only.

You can easily offer free shipping with a purchase using the Advanced Coupons plugin.

Upon activation, all you will have to do is visit the Coupons » Add New page from the WordPress dashboard. This will take you to a new screen where you can start by creating a discount coupon for the holiday season.

After that, simply check the ‘Allow free shipping’ box in the ‘General’ section to enable free shipping for customers who use the discount code on your website.

Allow free shipping in WooCommerce

This will encourage more customers to use your discount coupons and will boost your sales during the holiday.

For more information, you may want to see our tutorial on how to offer a shipping discount in WooCommerce.

8. Run an Email Campaign For the Sale

Email campaigns can also be an effective way to promote your WooCommerce store sales.

You can send personalized emails to your existing customers to let them know about the sale or encourage users to sign up for your newsletter to stay updated about future discount offers.

You can also send automated emails to all your subscribers and launch drip campaigns for further sale promotion. This can create a buzz around your holiday sale and help generate more leads.

You can easily launch an email marketing campaign for your holiday sale by connecting your email marketing service and WordPress site using WP Mail SMTP.

It is the best WordPress SMTP plugin on the market that allows you to properly configure your email settings and improve the overall deliverability rate.

WP Mail SMTP

With WP Mail SMTP, the emails that you send to your customers will never end up in the spam folder, ultimately helping you gain more visitors and revenue for your online store’s holiday sale.

9. Create Attractive Landing Pages

Another way that you can plan and promote your WooCommerce holiday sale is by creating attractive landing pages that represent the holiday.

These landing pages will quickly grab the user’s attention with their visuals and eye-catching colors, encouraging users to take action.

To easily create landing pages in WordPress, you can use SeedProd which is the best page builder plugin on the market.

It comes with a drag-and-drop builder, numerous pre-made templates, and advanced WooCommerce blocks that allow you to create landing pages for online stores in just a few minutes.

The SeedProd page builder plugin for WordPress

First, you’ll need to install and activate the SeedProd plugin. For details, see our guide on how to install a WordPress plugin.

Upon activation, visit the SeedProd » Landing Pages screen from the WordPress dashboard and click on the ‘Add New Landing Page’ button.

Click the Add New Landing Page button

This will take you to the ‘Choose a New Page Template’ screen where you can select any of the premade templates for your WooCommerce store.

You can easily create a pricing page for your services, a 404 error page, a coming soon page, a products page, or a home page.

Upon making your choice, you will be asked to enter a name for the landing page that you are about to create. Once you do that, click on the ‘Save and Start Editing the Page’ button to continue.

Add a page for the WooCommerce sale

This will launch SeedProd’s drag-and-drop page builder, where you can now start editing your page.

You can add a heading, CTA, dynamic content, images, videos, navigation menu, or anything else you like by dragging and dropping blocks. You can even use the WooCommerce blocks from the left column.

For detailed instructions, you may want to see our beginner’s guide on how to create a landing page in WordPress.

Publish landing page for the holiday sale

Once you are done, simply click the ‘Save’ and ‘Publish’ buttons at the top to launch your page on the store.

Tip: You can even create a fully customized theme for the holidays without using any code with SeedProd. For detailed instructions, see our guide on how to easily create a custom theme in WordPress.

10. Use Surveys and Polls to Plan Holiday Sale

You can also use surveys and polls to plan your holiday sale. These polls can help you learn more about your customers, their shopping habits, and preferences and help you plan a sale according to them.

For example, if most of the customers who filled out the survey form have said that free shipping or a 50% discount on all products encourages them to buy from the store, then you can use these suggestions for your holiday sale as well.

Adding a poll or survey form to your WooCommerce store is the easiest way to gather feedback for your holiday sale plan and make improvements where needed.

You can add polls and survey forms to your website using WPForms which is the best WordPress contact form plugin on the market. It comes with a drag-and-drop builder, spam protection, and numerous pre-made templates.

Keep in mind that you will need the Pro plan of the plugin to unlock the surveys and poll extension.

WPForms

Once you do that, visit the WPForms » Add New page from the WordPress dashboard and select from the multiple Survey or Poll form templates.

WPForms will then load the template in the drag-and-drop builder where you can add, remove, rename, or rearrange fields in a few minutes.

For detailed instructions, check our tutorials on how to create a survey in WordPress and how to create an interactive poll in WordPress.

createsurveyform

If you don’t want to create surveys for your online store, then you can use the UserFeedback plugin. It is the best WordPress feedback plugin on the market that makes it super easy to collect feedback from your users.

It shows a small prompt on the screen that you can use to ask users about their shopping habits and holiday sale preferences.

UserFeedback preview

11. Plan Your Social Media Strategy

When planning a holiday sale, it is important to also build a social media strategy for it. These are tips that you will be using on different social media platforms to drive more traffic to your WooCommerce store.

To develop a solid social media strategy, you will first need to identify your target audience, and then choose the right social media platforms according to it.

For example, if you have a store that sells teen clothes, then you may want to focus on Instagram to target the younger audience.

To do this, you can start selling your products on Instagram as well, add Instagram shoppable images to your store, or add your whole Instagram feed to your WooCommerce store.

Instagram feed preview

Similarly, if you sell home decor products or DIY, then Pinterest is the go-to platform for you.

Once you do that, use a content calendar to plan and schedule your social media posts, create high-quality content, use relevant hashtags and keywords, and then start promoting your holiday sale on the platforms in advance.

You can also offer discounts to your Facebook or Instagram followers, run social media contests, and so much more.

This will help drive traffic to your WooCommerce store from different social media platforms.

For more tips, you can see our complete social media cheat sheet for WordPress.

12. Start an Affiliate Program

Another great way to promote the holiday sale is by starting an affiliate program on your WooCommerce store.

A referral program lets you build partnerships with other small businesses on the market who promote your products or services on their websites to earn a small commission.

This practice can help you reach to a different audience and bring more traffic to your online store, ultimately leading to more conversions.

You can easily create an affiliate program for your store using AffiliateWP. It is the best WordPress affiliate tracking and management software that gives you complete control over your affiliate program.

Plus, it is super cost effective making it a great choice.

AffiliateWP website

For detailed instructions, you may want to see our beginner’s guide on how to easily add an affiliate program in WooCommerce.

Bonus: Spread Holiday Spirit on Your WooCommerce Store

By spreading holiday spirit on your WooCommerce store, you can drive more traffic and generate more leads.

This is because customers are more likely to buy from vendors who have decorated their websites for the holidays and look as excited about the season as they are.

To spread the holiday spirit, you can use free plugins like Christmasify or Christmas Greetings to add jingle music, Santa Claus, gift boxes, and change the fonts of your store for the holidays.

Christmas Greetings preview

This can make your WooCommerce store look more fun and approachable and users are more likely to buy from it.

For more tips, you can see our tutorial on how to spread the holiday spirit on your WordPress site.

We hope this article helped you learn how to plan a holiday sale for your WooCommerce store. You may also want to our tutorial on how to create a sales page in WordPress and our list of amazing holiday gift ideas for bloggers, designers, and developers.

If you liked this article, then please subscribe to our YouTube Channel for WordPress video tutorials. You can also find us on Twitter and Facebook.

The post How to Plan a Holiday Sale for Your WooCommerce Store (12 Tips) first appeared on WPBeginner.

12 Best WordPress Voting Plugins (Compared)

Are you looking for a WordPress voting plugin for your website?

A WordPress voting plugin allows you to easily conduct polls on your website where users can vote. It is an effective strategy to build user engagement while collecting insights.

In this article, we have hand-picked the best WordPress voting plugins that help you easily add voting and polls to your website.

Comparing the best WordPress voting plugins

Why Use a WordPress Voting Plugin?

WordPress voting plugins help you build user engagement on your website.

User engagement refers to how users interact with your website. It ensures users spend more time on your website for a more engaged experience.

Businesses that invest in creating meaningful, interactive, and positive user experiences on their website tend to see better user engagement, which leads to higher sales and conversions.

Buzzfeed viral quiz example

A WordPress voting plugin allows you to improve user engagement by adding surveys, polls, and quizzes to your website.

For instance, if you run a food blog, you can ask users to vote on which recipe they want you to cover next on your blog.

Similarly, if you run an online store, you can ask users to vote on products, participate in surveys, or take a quiz to win discounts.

Customer feedback poll example

Here are some of the top benefits of using a WordPress voting plugin:

1. Improved User Engagement – By adding a poll or survey, you allow users to spend more time on your website. This leads to more user engagement and reduces bounce rates on your website.

2. Build a Community – Allowing users to vote and participate on your website gives them a sense of community. It improves your brand recognition and builds your business a loyal following.

3. Gather Feedback – By adding surveys and polls you can collect invaluable customer feedback to help you improve your business.

4. More Traffic and Social Shares – Users are more likely to share viral quizzes and online polls to their socials. This helps you get more traffic and social shares for your website.

That being said, here is a quick list of plugins we’ll compare in this article:

1. WPForms

WPForms

WPForms is the best WordPress voting plugin on the market. It is one of the most feature-rich WordPress form builders and allows you to easily create any type of form, including forms to conduct polls and surveys.

It comes with a drag-and-drop interface where you can create your form easily.

You can point and click to add form fields like multiple-choice checkboxes, radio buttons, drop-down fields, Likert scale fields, and more.

WPForms poll form example

Beginners would love the read-made form templates that allow you to quickly load form fields and edit them to your liking.

WPForms also allow you to show poll results in beautiful charts and graphs on the front end.

WPForms poll results

You can also view survey results with beautiful charts and graphs in the backend.

This provides you with more insights into customer feedback and voting patterns.

WPForms survey graphs and charts

For more details, see our tutorial on how to create interactive polls in WordPress.

Pricing: $199.50 – WPForms also has a free version called WPForms lite, but you’ll need their PRO plan to unlock surveys and polls add-on.

2. RafflePress

RafflePress

RafflePress is a WordPress giveaway plugin with built-in polls and survey features.

Users can join a giveaway or contest by voting in a poll or answering a survey question. This is particularly helpful in boosting user participation by providing users with an incentive to vote in the survey.

RafflePress is built with social and viral capabilities in mind. This allows you to create successful polls and encourage users to share them to gain more entry points.

It is effortless to use, highly interactive, and highly effective in reaching a larger audience.

Pricing: $99.50 for their Pro plan, which includes polls and survey features.

3. WP-Polls

WP-Polls

WP-Polls is a free WordPress poll and voting plugin. It is simple and quite basic compared to some other options on the list, but it is comprehensive and gets the job done.

It has a basic user interface that blends in your WordPress admin area. Advanced users can add custom CSS to change the style and appearance of their poll form and results.

You can easily schedule your polls, run multiple polls, sort poll questions and results, and more.

Pricing: Free

4. Thrive Quiz Builder

Thrive Quiz Builder

Thrive Quiz Builder is the best WordPress quiz plugin on the market. It allows you to easily create highly interactive BuzzFeed-like quizzes to boost user engagement on your website.

You can also create a quiz to use as a poll or survey, which allows users to vote and see the results at the end of the quiz.

Building your quiz with Thrive Quiz Builder

You can choose from various templates for five main quiz types. Each template allows you to customize the quiz screens step by step.

The quiz builder also makes it easy to create branching questions, which is when the next question to be displayed depends on the previous answer.

It also includes built-in features to encourage social sharing inside the quiz screens. Increasing the chances that your users may help spread the word by sharing their voting results.

Pricing: $99 as a standalone plugin. $299 as Thrive Suite Bundle.

5. Formidable Forms

Formidable Forms

Formidable Forms is the most advanced form builder for WordPress. It allows you to create any type of form, including powerful calculators, solution-focused forms, and online polls and surveys.

Formidable Forms comes with a powerful form builder that supports various fields that you can use in your polls. You can use checkboxes, radio buttons, Likert scale, dropdown menus, and more to create your online poll.

It also comes with a Quiz Maker feature, allowing you to turn your poll into an interactive quiz.

Formidable Forms can show poll results in graphs and charts on the front end. It also summarizes form results in graphs and charts in the backend.

Pricing: Starting from $39.50/year

6. UserFeedback

UserFeedback

UserFeedback is an easy way to collect feedback on your website by running quick polls and surveys.

It is handy for businesses that want to get insights and feedback from users directly.

For instance, you can ask users about your new website design, which products they are interested in, what they would like to read on your blog, and more.

UserFeedback is easy to use and allows you to add any type of form fields to your polls, surveys, or feedback forms.

Poll builder in UserFeedback

You can use one of the dozens of templates to add a poll quickly. You can use conditional logic to show users questions based on their answers.

It also comes with smart targeting features, allowing you to choose when to show the form.

UserFeedback integrates with Google Analytics using MonsterInsights, which gives you even deeper insights into customer interactions with your forms.

Lastly, it integrates with Uncanny Automator, allowing you to take advantage of 100+ interactions with all popular third-party apps, CRM software, email services, and other WordPress plugins.

Pricing: Starting at $49.50. There is also a free version of UserFeedback with limited features.

7. YOP Poll

YOP Poll

YOP Poll is a good WordPress voting plugin suitable for creating polls and surveys for users to vote in.

It lets you easily create and embed the poll anywhere on your WordPress website. It supports single and multiple-form fields.

The plugin also lets you manage how you wish to sort the questions, display results, show/hide details, set voter permissions, and even block users.

It also allows you to schedule your polls. You can run several polls simultaneously or schedule them to run one after another.

You also have multiple style options for your polls and poll results. This helps you easily divert user’s attention to the polls.

Pricing: Free. There is also a paid version starting at $27.

8. CrowdSignal Polls and Ratings

Crowdsignal

CrowdSignal (formerly Polldaddy) is a simple WordPress voting plugin that allows you to create engaging online polls, surveys, and forms.

It allows you to show real-time poll results and comes with beautiful styles to make your polls look more appealing.

The plugin supports 14 types of poll questions and comes with an intuitive poll builder to create your forms.

It also includes beautiful poll results with bars and graphs. In the backend, you can see more details of how your users interacted with a poll.

Pricing: Paid plans start at $180. There is also a limited free version available.

9. Poll Maker

Poll Maker

Poll Maker is another option to create polls for your WordPress website. It comes with a modern poll builder that lets you easily design your polls.

It has five poll types and dozens of style options, including seven pre-built themes.

Creating a poll is quite straightforward and easy. You can then add the poll to your WordPress website using a shortcode or a block.

Once a user has submitted a vote, you can choose to redirect them to any page on your website. The plugin also lets you schedule polls, limit who can vote, limit the number of votes a user can add, and more.

Pricing: The basic version of the plugin is free. There is also a pro version starting at $39.

10. WP Poll Maker

WP Poll Maker

WP Poll Maker is another way to create polls and contests on your WordPress website. This free voting plugin for WordPress allows you to easily create basic polls and surveys for your website.

It includes a poll builder where you can design your poll questions and adjust individual poll settings.

It comes with several templates to choose a style for your theme. Each theme is designed to be engaging and stand out, which helps you boost user engagement.

The plugin allows you to control and limit who can vote in a poll. You can also show live results for each poll, allow comments, or add social sharing features to trigger viral reach.

Pricing: The basic version of the plugin is free, and the paid plan starts at €35.

11. WP-PostRatings

WP-Postratings

WP-PostRatings is a WordPress post rating plugin that allows users to vote on a post or page. It is not a poll or contest plugin but if you were looking for a way for users to vote on your articles, then WP-PostRatings is the way to go.

It supports schema.org markup out of the box, meaning the post ratings may appear in search results.

It uses Ajax for voting functionality, ensuring users don’t leave a page when they add their rating.

WP-PostRatings has a rating dashboard where you can see how users voted on your posts, which posts are highest rated, and which posts are the lowest.

The one downside of the plugin is that it requires you to add a code snippet to your WordPress theme. For details, see our article on adding a post rating system in WordPress.

Pricing: Free

12. kk Star Ratings

kk Star Ratings

kk Star Ratings is another option to let users rate and vote on your WordPress posts and pages. Unlike other voting and polling plugins, kk Star Ratings only allows your users to rate your posts.

It supports schema.org markup, which enables search engines to use ratings data and show it in search results.

One advantage of using kk Star Ratings is that you don’t need to add custom code to your theme. However, unlike the WP-PostRatings plugin, it only allows you to use Stars as your rating icons.

Pricing: Free with paid add-ons.

Which is The Best WordPress Voting Plugin?

WPForms is the best WordPress voting plugin on the market. It is the best WordPress form builder, allowing you to create beautiful forms with a drag-and-drop tool.

With WPForms Survey and Polls addon, you can create dynamic polls and display results with beautiful charts and graphs.

For contests and giveaways, we recommend using RafflePress, which has built-in social features to make your polls go viral.

How to Create a Successful Voting Page?

Many of the WordPress voting plugins allow you to easily create a voting page on your WordPress site. However, to ensure that users participate in your polls you will need to make your poll questions interesting for your audience.

For instance, you can ask questions suitable for your target audience. You can also use tools like OptinMonster to boost engagement by showing your polls in lightbox popups, slide-in forms, display banner notifications, and more.

We hope this article helped you choose the best WordPress voting plugin for your website. You may also want to see our guide on showing personalized content to users in WordPress or our top social proof plugins for WordPress.

If you liked this article, then please subscribe to our YouTube Channel for WordPress video tutorials. You can also find us on Twitter and Facebook.

The post 12 Best WordPress Voting Plugins (Compared) first appeared on WPBeginner.

7 Best User Feedback Plugins for WordPress (Free and Paid)

Are you looking for an easy way to collect feedback from visitors and customers on your website?

Getting user feedback can help you uncover interesting insights. You can better understand your audience and find out what they’re interested in. With the right plugin, you can easily collect user feedback in WordPress.

In this article, we will show you the best user feedback plugins for WordPress.

Best User Feedback Plugins in WordPress

Why Use a WordPress User Feedback Plugin?

A WordPress feedback plugin helps you gather and organize feedback from your visitors, customers, and subscribers.

Instead of sending cold emails or physical surveys, a user feedback tool lets you collect feedback directly on your WordPress website in real-time. You get to capture your user’s thoughts and opinions instantly.

A user feedback plugin also helps save time. It lets you add an interactive and engaging feedback question or survey to your website. This also helps build trust with your audience and improves communication.

Besides that, a plugin makes it super easy to organize the data you collect. You can view the responses from your WordPress dashboard and many plugins also offer built-in reports to show the results of your poll or survey.

Using this data, you can enhance customer support, introduce new features, improve your products, and grow your business.

That said, let’s look at some of the best user feedback plugins you can choose for your business.

1. UserFeedback

UserFeedback

UserFeedback is the best WordPress user feedback plugin in the market. It lets you collect in-the-moment surveys to collect quality feedback from your website visitors.

The plugin is beginner-friendly and offers lots of features. It simplifies the process of gathering feedback. You get over 20 pre-built templates, unlimited questions, and more responses.

Click the Post Purchase Review Template

UserFeedback also offers different types of questions you can ask your audience. For instance, there are options to ask multiple-choice questions, set up an NPS survey, ask a quick rating question, or ask an open-ended question for feedback.

The plugin also lets you show the feedback form on specific devices. For example, you can show it to desktop, mobile, and tablet users.

UserFeedback popup survey example

Other than that, UserFeedback offers options to control when the feedback form will be shown, how long the survey will run, and more.

Another advantage of using the UserFeedback plugin is that it easily integrates with MonsterInsights and Google Analytics. This way, you get to make data-driven decisions instead of just guessing.

Pros:

  • Beginner friendly plugins
  • Overs 20+ pre-built templates
  • Show surveys on specific pages and devices
  • Unlimited questions and surveys
  • Easily integrates with Google Analytics
  • Set up conditional survey questions

Cons:

  • The free version has limited features

Pricing: UserFeedback prices start from $49.50 per year, but you can also use a free version to get started.

2. WPForms

WPForms

WPForms is the best contact form plugin for WordPress. It is very easy to use and offers a drag-and-drop form builder that lets you create all types of forms without editing code.

With WPForms, you get over 1,000 form templates and many customization options. For instance, you can create a simple suggestion form and place it on your site to collect feedback from visitors.

WPForms also offers powerful addons that add more features to your site. With its Surveys and Polls addon, you can create interactive surveys and polls to get quick feedback from website visitors.

WPForms' user review form template

Besides that, you can collect customer reviews and testimonials, conduct an NPS survey, get client feedback, and much more using WPForms. It also lets you create a file upload form where users can submit logos, articles, pictures, and more.

What makes WPForms a great user feedback plugin is its simplicity and customization options. You can edit any form template using the drag-and-drop builder, add or remove form fields, and more without touching a single line of code.

Pros:

  • Offers a drag-and-drop form builder
  • Choose from 1,000+ form templates
  • Set up smart conditional logic to show form fields based on users’ responses
  • Get built-in spam protection
  • Easily integrates with email marketing tools

Cons:

  • WPForms addons are only available for Pro or higher license

Pricing: WPForms prices start from $49.50 per year. If you want to use the Surveys and Polls addon, then you’ll need the Pro version, which costs $199.50 per year. There is also the WPForms Lite version you can use to get started for free.

3. HubSpot

HubSpot customer feedback

HubSpot is the best customer relation management (CRM) software for small businesses. It offers a complete suite of products alongside a CRM. You get live chat, a form builder, a ticketing system, a marketing automation tool, a website builder, and customer feedback software.

The HubSpot Customer Feedback tool helps you create surveys on your site and collect feedback from users. You can choose from a wide range of questions and select customizable templates.

For instance, it lets you create an NPS survey, a customer effort score (CES) survey, and a customer satisfaction (CSAT) survey.

HubSpot lets you share your surveys using its email marketing tool or simply embed them anywhere on your WordPress site. It also offers dashboard reports to see your survey results and identify improvement areas.

We chose HubSpot because it offers a complete collection of tools in its CRM, including a customer feedback tool. From marketing to sales, customer support, operations, and other free tools, you get a lot of value from HubSpot.

Pros:

  • Get lots of tools in its CRM software
  • Create multiple types of surveys
  • Choose from pre-built templates and customization options
  • View survey results from dashboard reports

Cons:

  • It can be overwhelming for new users to use multiple features at once
  • The paid pricing plans can be expensive

Pricing: You can get started on HubSpot for free, while the premium plans start from $18 per month for small teams and individuals.

4. FeedFocal

FeedFocal

FeedFocal is a free WordPress user feedback plugin that helps you collect feedback data from website visitors. It connects with your JustFeedback account and you can embed your surveys anywhere on your site.

The plugin is simple and easy to use. You can create different surveys in a matter of minutes using the pre-built templates.

For instance, FeedFocal lets you create a survey for customer satisfaction score, customer effort score, net promoter score, employee satisfaction score, and employee net promoter score. There is also an option to set up a custom survey for your website.

What’s great about the plugin is its clean interface, and you can choose from pre-built templates to quickly add a feedback form to your site. Plus, it offers advanced targeting features and shows survey results in real-time.

Pros:

  • Use pre-built survey templates
  • Simple and easy to use
  • Customize your surveys
  • Advanced targeting features
  • Get real-time analytics

Cons:

  • The free version is limited to 10 results only
  • Limited forms fields to choose from
  • Paid plans are expensive for individuals and small businesses

Pricing: FeedFocal is a free WordPress plugin and shows up to 10 responses. You’ll need the premium version to unlock more responses, costing you $49 monthly.

5. Thrive Quiz Builder

Thrive Quiz Builder

Thrive Quiz Builder is part of the Thrive Themes suite and lets you create stunning quizzes in WordPress. It is the best quiz plugin for WordPress and you can use it to collect user feedback.

For example, you can ask visitors what they’re interested in using quizzes. Or ask customers what’s their favorite part about the product.

The Thrive Quiz Builder lets you set up complex quizzes without editing code. You can easily customize your quizzes using the quiz builder. It also lets you select different types of quizzes, including surveys.

Besides that, Thrive Quiz Builder shows powerful analytics for your quizzes. You see results at different time intervals, see how many people started and finished the quiz, and more.

The best part about using Thrive Quiz Builder is pairing it with other tools in the Thrive Themes suite. Plus, the tool is super easy to use and helps you create interactive surveys to collect feedback.

Pros:

  • Choose from 5 different quiz types, including surveys
  • Use pre-built quiz templates
  • User-friendly plugin to use
  • Create complex quizzes without editing code
  • Choose from 3 types of questions
  • A/B test quizzes

Cons:

  • There is no free version
  • You cannot purchase Thrive Quiz Builder separately

Pricing: Thrive Quiz Builder is part of the Thrive Themes suite, and it will cost you $299 per year.

6. Formidable Forms

Formidable Forms

Formidable Forms is one of the best contact form plugins for WordPress and lets you create polls and surveys to collect user feedback.

It also helps you create complex and advanced WordPress forms. For instance, you can create advanced calculators, web applications, payment forms, listings, and more.

Using Formidable Forms polls and surveys addon, you can set up interactive user feedback forms on your site. The drag-and-drop form builder makes it easy to customize forms and add new fields. Besides that, there are lots of pre-built form templates to choose from.

Formidable Forms also offers graphs, charts, and reports to display the results of your survey and poll. There are more options to limit the survey responses, set up conditional logic, show a progress bar, show a summary of responses before submitting, and more.

Pros:

  • Drag and drop form builder
  • Choose from prebuilt form templates
  • Create advanced WordPress forms
  • Easily integrates with email marketing tools
  • Use charts, graphs, and visuals for survey results

Cons:

  • There is no free version of the plugin

Pricing: Formidable Forms prices start from $39.50 per year.

7. YOP Poll

YOP polls

YOP Poll is the next WordPress user feedback plugin on our list. It lets you create unlimited polls in WordPress to ask users about their suggestions and preferences.

The plugin has a basic interface and offers 2 templates to choose from. Once you select a template, there are multiple designs you can use for your poll. Besides that, you can customize options to change the padding, text color, text size, text weight, and more.

Other features offered by YOP Poll include a start and end date for your poll, redirecting users after completing the voting, changing the voting button label, and more.

YOP Poll is a great solution for anyone looking for a free WordPress plugin to add polls to their WordPress site. It offers simple and basic features and you can embed your polls using shortcode anywhere.

Pros:

  • Choose from pre-built designs to customize your poll
  • Basic and clean interface
  • 100% free to use
  • Add custom fields to your polls
  • Use different ways to view voting results

Cons:

  • Limited poll templates to use
  • Basic customization options

Pricing: YOP Poll is a free WordPress plugin.

Which is the Best User Feedback Plugin for WordPress?

After reviewing multiple plugins, we believe that UserFeedback and WPForms are the best WordPress plugin to collect user feedback.

UserFeedback is very easy to set up and use. There are pre-built templates, different types of questions to ask, device and page-level targeting, and more. You can also customize the survey form to match your site’s branding.

On the other hand, if you’re looking to create different types of suggestion and feedback forms, then WPForms is the best user feedback tool.

It offers a drag-and-drop form builder, pre-built form templates, multiple form fields for customization, and more. WPForms also offers powerful addons that add more features to your site. For instance, you can run surveys and polls using an addon.

FAQs about WordPress User Feedback Plugins

Here are some common questions people have about user feedback tools for WordPress.

1. What is the user review plugin for WordPress?

A user review plugin helps you collect reviews, feedback, and suggestions from your audience. It makes it easy to ask questions and organize them in a simple way. Many review plugins also show the results of surveys and polls inside your WordPress dashboard.

2. How do I add feedback to WordPress?

The easiest way of adding feedback to WordPress is by using a plugin. Many user feedback plugins make it very easy to add forms to your site. For instance, UserFeedback and WPForms offer blocks to add your feedback to your site.

3. How do I add a survey to WordPress?

The best way to add a survey to WordPress is by using a plugin. There are many options like UserFeedback, WPForms, and HubSpot that let you add surveys to your site without editing code. You can simply choose a template, customize the form, and embed it on your site.

We hope this article helped you find the best user feedback plugins for WordPress. You may also want to see our guide on how to increase your blog traffic and the best auto-dialer software for small businesses.

If you liked this article, then please subscribe to our YouTube Channel for WordPress video tutorials. You can also find us on Twitter and Facebook.

The post 7 Best User Feedback Plugins for WordPress (Free and Paid) first appeared on WPBeginner.

11 Ways to Bring Halloween Effects to Your WordPress Site

Do you want to add Halloween effects to your WordPress site?

Holidays are the perfect time to boost sales, increase conversions, and build brand recognition. Halloween is a particularly fun holiday, bringing you more opportunities to grow your business.

In this article, we will show some neat ways to bring Halloween effects to your WordPress site (no coding skills required).

Ways to bring Halloween effects to your WordPress site

Why Add Halloween Effects to Your WordPress Site?

It’s that time of the year again. Creatures too vile and horrible to speak of are roaming everywhere. But don’t worry! Your website can be a safe haven from the frightful frenzy.

Getting into the Halloween spirit is a great way to spruce up your website and ramp up engagement with your audience.

Whether you own an online store or a local small business, Halloween is the perfect opportunity to brew up some spellbinding special discounts, giveaways, or contests.

For you, that means more email subscribers and sales to enjoy this holiday season. You can add some tricks and treats to your website by adding Halloween-themed effects to help draw attention to your offers and boost conversions.

Q4 is always the biggest quarter of the year, so why not start it with a bang?

With that being said, we’ve come up with a list of the best Halloween effects to enhance your WordPress website. Feel free to jump around to any method that appeals most to you.

1. Boost Conversions with Halloween-Themed Campaigns

trick or treat savings

OptinMonster is the world’s leading conversion optimization software. It helps you convert website visitors into paying customers or email subscribers.

They have three pre-made spooky Halloween-themed templates that you can now use in your campaigns.

The first one is simply called the ‘Halloween’ theme. It has a dark background color, which makes it pop up on all website page colors.

You can use strategic popups on your site to advertise secret Halloween promotional offers for your products or services. This works specifically for Exit Intent popups to help prevent potential customers from leaving your product page without making a purchase.

The second template is called Spooky, with Halloween-themed colors and illustrations.

It comes with a countdown timer, which increases urgency and brings a sense of FOMO (fear of missing out), compelling visitors to act now.

Halloween savings

The last Halloween template in OptinMonster is the Spooktacular offer.

This is a floating bar template that displays at the bottom of the page, ensuring all important promotions are highly visible to visitors as they scroll through your website.

Halloween floating bar

It is especially effective for drawing attention to limited-time offers for your WooCommerce store.

You can connect all popups to your email marketing service and customize them to your own liking using OptinMonster’s drag-and-drop builder.

Apart from that, you can use it to offer holiday discounts, create Yes / No campaigns, and trigger it on any page of your website.

2. Add Halloween Decorations to Your WordPress Theme

Halloween panda

If you don’t want to modify your existing design but still want Halloween effects, then this method is for you.

First, you need to install and activate the Halloween Panda plugin.

Upon activation, the plugin will add a new menu item labeled Halloween Panda to your WordPress admin sidebar. Clicking on it will take you to the plugin’s settings page.

It comes with different decorations like a floating bar, monster fall (like snowfall but with pumpkins and bats), and scary popups.

3. Gamify Your Site with Spooky Wheel of Fortune

Spooky wheel of fortune optin monster

OptinMonster comes with over 50 ready-made templates you can use for campaigns. Spin to win optin campaigns can help to engage visitors and get them interacting with your website.

A wheel pops at any point during their visit. Users spin the wheel to see what type of prizes they can win. Once they land on a wheel, they can only access their treat by entering their email address.

To create this Spooky Wheel of Fortune, you can upload a cartoon Halloween background image. Then, go ahead and change the font to ‘Lakki Reddy’ and customize all the colors to fit in with the Halloween theme.

You can even add a ghost icon in the center of the wheel.

Also, make sure to customize the wheel options to anything Halloween-related. For example, changing the options to say ‘Trick’ or ‘Treat’ could be a fun way to gamify their experience.

To do this, you would click on the wheel in the builder and click on ‘Customize Wheel Sections.’

Customize wheel sections

Then, you can adjust the text and coupon codes.

You can even adjust their chances so they always land on a ‘Treat’ and never a ‘Trick.’ That way, they always have a reason to convert into a customer.

4. Redirect Lost Visitors with a ‘Pumpkin Boogie in Session’ 404 Page

404 page pumpkin boogie in session

You can add Halloween effects and themes to just about any page on your WordPress site, even your 404 page.

The easiest way to customize your WordPress theme is with theme and page builder. SeedProd is the best page builder plugin for WordPress there is. Unlike other page builders, this plugin lets you build custom pages without writing any code.

It features a drag and drop interface with hundreds of ready-made templates so you can create custom landing pages, homepages, sales pages, and even custom WordPress themes.

404 pages help you redirect visitors who land on a page that no longer exists. It’s a great opportunity to send them back to an important page so they can focus on finding what they were looking for in the first place.

To add the ‘Pumpkin Boogie in Session’ 404 page, you can simply add a new 404 landing page.

Then, find a GIF of a pumpkin dancing and add the shortcode to SeedProd builder. From there, customize the text and buttons to fit your style.

And SeedProd lets you add animations as well. So, if you want to enhance your visual effects, go ahead and add a fade-in animation.

Animation effects

All you need to do is click on the element you want to add the effect to.

Then go to Advanced » Animation Effects.

5. Add a ‘Spooktacular Savings’ Pricing Page

halloween pricing page

Adding Halloween effects to your pricing page is a good way to drive home the point that you’re offering special discounts and deals. For example, you could create a limited-time Halloween sale just for your email newsletter subscribers.

With SeedProd, you can add a pricing table that helps customers see how much they are saving.

Pricing table

You can use the ‘Creepster’ font to add a gothic style to your header text. Then, all you need to do is find a simple Halloween background to use. Freepik is a great resource where you can find Halloween themes to add to your page backgrounds.

6. Skyrocket Your Email List with Halloween Giveaways

Halloween giveaway example

Kickstart your seasonal marketing campaigns with a Halloween-themed giveaway. This is where participants must complete a task for a chance to win a prize. Often, you’ll ask participants to submit a photo, follow your social media accounts, or share your post.

Most eCommerce websites and small businesses run online giveaways as part of their marketing campaigns. That’s because it’s much more cost-effective than running paid advertisements.

Also, giveaways can help brands grow their audience and generate leads. When you give freebies, your audience feels compelled to return the favor with purchases.

If you want to add a giveaway to your website, Rafflepress is the best giveaway and contest plugin for WordPress. It has a drag-and-drop interface, so you can design the giveaway how you like.

Halloween-themed bundle

Simply create the giveaway. Then, you’ll want to add your prize and entry options.

Also, decorate the form by throwing in background images and form images to fit the Halloween theme. You can even change fonts and update the button colors.

7. Run a Halloween Costume Contest

Halloween costume contest

Everyone loves to dress up for Halloween. It’s the one time of the year you can wear the wackiest, silliest, or most horrific costumes and get away with it!

So why not turn it into a game that helps you make more sales?

All you need to do is create a new campaign in Rafflepress. Choose the prize you want to give. Then, add a description of the prize and a Halloween-related image with text explaining what the contest is about.

Enter halloween contest

In the example above, we’ve given people three ways to enter:

  • Post and tag us with your costume
  • Write a review of our product with a picture
  • Join an email newsletter

Be sure to add different ways people can participate in the contest, even if they’re unable to participate in the costume contest or another way.

8. Create Holiday-Themed Surveys & Polls

Halloween poll

Now that you have your audience captivated with Halloween effects on your website, you may want to engage them so they spend more time on your website.

Quick polls and surveys can help you do that. For example, you can run a poll asking users about what types of Halloween products they’re most likely to purchase this year. This gives you important information you can choose to better market to your potential customers.

The easiest way to add polls and surveys in WordPress is by using WPForms . It is the best WordPress contact form plugin in the market and allows you to create beautiful forms using a drag-and-drop builder.

You’ll need the Pro plan to access their surveys and polls extension. Once you have installed it, go ahead to WPForms » Add New page and select from Survey or Poll form templates.

createsurveyform

Once you select a template, WPForms will load it in the drag-and-drop form builder. After that, you can add, remove, rename, or rearrange fields with a simple point and click.

For details, see our guides on how to create a survey form in WordPress and how to create an online poll in WordPress.

While surveys work great, it does require time and effort for users to complete. In that case, you may want to consider installing the UserFeedback plugin from MonsterInsights.

UserFeedback form

This powerful plugin makes it effortless to ask visitors just about anything you want by creating pop-ups to collect real-time feedback about your website. You can ask questions such as what types of products they would want to buy, what type of content they are interested in, and more.

9. Add a Free Halloween Countdown

halloweentimer

Another way to build excitement for an upcoming holiday is by adding a simple countdown timer.

If you would like to add a free countdown timer, then you can install and activate the Halloween Countdown plugin. For more details, see our step-by-step guide on how to install a WordPress plugin.

It works out of the box, and there are no settings for you to configure. Simply add the shortcode [hcount] to any WordPress post, page, or custom HTML widget, and it will start showing the countdown timer.

10. Use Halloween Themed Fonts

halloweenfonts

We have mentioned a couple of these already, but one of the best ways to add Halloween effects to your WordPress site is by using spooky typography during the holiday season.

Google Fonts has some really cool fonts that you can use.

Google Fonts

We experimented with Shojumaru, Bungee Inline, and Ranchers. They looked great for headings, but we do not recommend using them for paragraph text as this would make the smaller text a bit difficult to read.

For detailed instructions, see our article on how to add custom fonts in WordPress.

11. Create Halloween Themed Graphics with Canva

canvahalloween

Canva is the perfect place to create images that will stimulate your readers’ imagination and creativity. Halloween is a very visual holiday, so you’ll need graphics to accompany your holiday-themed campaigns.

Canva is simple and easy to use, even if you’re not a graphic designer. Anyone can make professional-looking Halloween-themed graphics with it.

You can simply use ready-made templates, illustrations, backgrounds, icons, and fonts with an easy drag and drop tool.

Need more free images to use for your website? Check out our expert pick of the best resources for free public domain and CC0-licensed images.

BONUS: Try a Spooky WordPress Theme

You can also use a special Halloween theme for your website. This is a bit drastic, and we don’t recommend doing it on an established site because it will completely change the appearance of your pages and maybe functionality.

You can create a similar effect using your existing theme by adding a background image, changing its colors, or customizing your site with SeedProd.

However, if you’re creating a limited-time or new WordPress site, you can pick a dark WordPress theme to create a horror movie atmosphere on your website. You can revert back to your original theme after the Halloween.

Here are a few free themes that we found interesting.

1. Halloween

Halloween theme

Halloween is a very simple and free blog theme using orange as the accent color, a dark background, and a white reading area.

It adds a festive touch and creates a subtle Halloween look to your site.

2. Zombie Apocalypse

Zombie Apocalypse

Zombie Apocalypse is a basic blog theme with a dark horror-themed background and colors. It has drips of blood splattered throughout the page, providing a chilling atmosphere for those who dare to visit.

If you have a hardcore audience who’s comfortable with horror-like design, you may consider the Zombie Apocalypse theme.

3. Blackoot Lite

Blackoot Lite

Blackoot Lite is a dark WordPress theme with a haunted feel to it. It is suitable for simple blogs, photography websites, or small business websites. The theme comes with a sidebar with widgets, an optional footer, and two custom menu locations.

And when Halloween is over, you’ll want to move off of the Halloween effects and choose one of the overall best WordPress themes to ensure your site is beautiful and user-friendly all year.

We hope this article helped you find new ways to bring Halloween effects to your WordPress site. You may also want to see our list of the most useful tools to manage and grow your WordPress site or read our guide on how to create an email newsletter.

If you liked this article, then please subscribe to our YouTube Channel for WordPress video tutorials. You can also find us on Twitter and Facebook.

The post 11 Ways to Bring Halloween Effects to Your WordPress Site first appeared on WPBeginner.

How to Get Quick Feedback on Your Articles in WordPress

Are you looking for a way to get quick feedback on your articles in WordPress?

Feedback will help improve content quality by identifying any areas of improvement for your WordPress articles. It can also help build trust, leading to increased engagement on your website.

In this article, we will show you how to easily get quick feedback on your articles in WordPress.

Getting quick feedback on your articles in WordPress

Why Ask For Quick Feedback on Your WordPress Posts And Pages?

Most WordPress websites encourage users to leave comments and provide feedback on blog posts and articles.

However, fear of judgment, lack of time, or preferring to use social media prevents many users from doing this. Readers may also not know what exactly to say in their comments.

By using ‘was this helpful’ WordPress plugins, you can enable users to easily give their feedback on whether your content was useful to them.

These plugins usually display a thumbs-up/thumbs-down or a Yes/No button at the end of your WordPress post or pages that visitors can use to rate your content.

Was this article helpful? prompt

You can even use WordPress survey plugins to create a quick survey so that visitors can provide feedback.

This helps increase user engagement on your WordPress blog and shows the user that their feedback is valued. It also shows that you, as the website owner, are actively working to improve the user experience.

Using feedback plugins can also improve your website’s SEO rankings by reducing bounce rates, as users are more likely to stay on a website that has useful content.

Having said that, let’s see how you can easily get quick feedback for your WordPress articles. We will cover two methods in this post, and you can use the quick links below to jump to the method you want to use:

Method 1: Add Quick Feedback Using a Plugin (Easy)

If you are looking for an easy way to add quick feedback to your WordPress posts and pages, then this method is for you.

First, you need to install and activate the Was This Helpful? WordPress plugin. For detailed instructions, please see our tutorial on how to install a WordPress plugin.

Upon activation, the plugin will automatically start working out of the box and add a ‘Yes’ and ‘No’ option next to the ‘Was this article helpful?’ question at the end of your posts and pages.

Users visiting your site can now easily rate your content using these buttons.

Was this article helpful? prompt

To view the feedback on your WordPress posts, you will need to visit the Posts » All Posts page from the WordPress admin sidebar.

Once there, you will see the ‘Helpful’ column added to the right side of the screen.

From here, you will be able to monitor the ratings for your content and find out the number of people who have clicked the Yes and No buttons on your posts.

Check feedback from dashboard

Method 2: Add a Survey for Quick Feedback Using UserFeedback (Recommended)

If you want to add a quick survey to your pages and posts to collect feedback, then this method is for you.

First, you need to install and activate the UserFeedback plugin. For more instructions, you may want to see our guide on how to install a WordPress plugin.

Note: The UserFeedback plugin also has a free version that you can install. However, we will be using the Pro version for this tutorial to unlock more features.

Upon activation, you need to head over to the UserFeedback » Surveys page from the WordPress admin sidebar and click the ‘Create New’ button.

Click Create New button on Surveys page

This will take you to the ‘Select a Template’ page.

From here, you can use any of the pre-made templates as surveys on your website, including restaurant menu surveys, eCommerce store surveys, phone lead forms, post-purchase reviews, and more. You can also ‘Start From Scratch’ and design your own survey.

For this tutorial, we will be using the Content Engagement template because we want to add a quick feedback survey on our site asking people how we can improve our content.

Select the Content Engagement template

Just click on the survey template. This will direct you to a new page where you can start creating your survey.

By default, the Content Engagement template already comes with a question asking users if they found the content engaging.

However, you can easily change this by typing a question of your choice, like ‘Did you like this article?’ into the ‘Question Title’ field.

Type question in the Question Title field

Once you have done that, you need to choose an answer mode for users from the ‘Question Type’ dropdown menu.

For instance, if you want users to provide a star rating for your article, then you can choose the ‘Star-Rating’ option.

You can also display checkboxes, radio buttons, email capture options, single text fields, long answers, and Net Promoter Scores as modes of answers.

If you choose the radio button or checkbox, you will have to provide the different answers for the survey question under the ‘Possible Answers’ option.

Choose an answer mode

After that, scroll down to the next question that already comes in the Content Engagement template, asking users the kind of content they’d like to see created.

You can change that question to ask users to provide their feedback on the article they just read. This way, users will first get to rate your content, and then they can provide any feedback that they may have for the article.

For this question, make sure to choose the ‘Long Answer’ option from the ‘Question Type’ dropdown menu so that users can easily provide descriptive feedback on your website.

Create second question for the quick feedback

Once you have done that, just click the ‘Preview’ button at the top to customize the survey widget. From here, you can select the background color, text color, and button color.

Once you are done, you need to click the ‘Next Step: Settings’ button to move forward.

Customize the survey widget to your liking

This will take you to the ‘Settings’ page, where you can start by scrolling down to the ‘Targeting’ section. From here, you can select the device types where the survey will be displayed, including desktop, mobile, and tablet.

After that, you must choose the pages where the survey will be displayed. If you select the ‘All Pages’ option, then the quick feedback survey will be shown across all posts and pages on your website.

Choose the All Pages option to display the quick feedback survey everywhere

However, if you want to limit the survey to certain pages, then you can select the ‘Advanced’ option.

Once you do that, you must specify the conditions for the survey display from the dropdown menu.

For instance, if you want to only display the survey on posts, then you can select the ‘Post type is’ option from the dropdown menu on the left. After that, pick the ‘Post’ option from the dropdown menu on the right.

Now your quick feedback survey will only be displayed on WordPress posts.

Select conditions on choosing the Advanced option

Next, scroll down to the ‘Behavior’ section. Here, you can configure the display timing and length of your survey.

You can even schedule a run time for your survey by selecting the month and date you want the survey to end.

After you are done, simply click the ‘Next Step: Notifications’ button to move ahead.

Configure behavior section

On the next screen, you can start by toggling the ‘Send Email’ switch to active if you want to receive an email notification every time a user provides feedback on your website.

Next, you need to provide the email address where you want to receive the notifications and click the ‘Next Step: Publish’ button.

Toggle send email switch

On the new screen, simply scroll down to the ‘Publish’ section and switch the ‘Survey Status’ to ‘Publish’.

If you want, you can also schedule your survey for later by toggling the ‘Schedule for Later’ switch to active and providing a publication date and time.

Switch the Survey status to Publish

Finally, click the ‘Save and Schedule’ or ‘Save and Publish’ button to store your changes.

Now, you can visit your website to check out the quick feedback survey in action.

Quick feedback survey

Once your survey has been published, you can see its results by visiting the UserFeedback » Results page from the admin sidebar.

From here, you will be able to check out the number of responses, impressions, and all the answers provided by your visitors.

This can help you improve the overall content of your WordPress website.

Survey report

We hope this article helped you learn how to get quick feedback on your articles in WordPress. You may also want to see our tutorial on how to easily add a client feedback form in WordPress and our top picks for the must-have WordPress plugins to grow your site.

If you liked this article, then please subscribe to our YouTube Channel for WordPress video tutorials. You can also find us on Twitter and Facebook.

The post How to Get Quick Feedback on Your Articles in WordPress first appeared on WPBeginner.

How to Do a UX Audit of Your WordPress Site

Do you want to perform a User Experience (UX) audit of your WordPress website?

User experience is an important factor in the success of a website. A good user experience can lead to more conversions and sales, while a poor UX can cost you money.

In this article, we will show you how to easily do a UX audit of your WordPress website step-by-step.

Performing a UX audit on a WordPress website

Here is a quick overview of all the steps we will cover to perform a UX audit on your WordPress website:

What Is UX, and Why Is It Important?

User experience or UX describes the feelings and opinions that users have while using your website.

A pleasant user experience means users find your website easy to use and helpful.

By contrast, a poor user experience means users find your website difficult to use and can’t do what they want to do.

Creating a good user experience allows you to help users make the most out of your website. This eventually leads to conversions, sales, and business growth.

On the other hand, a negative user experience can cause visitors to leave your website without signing up or buying something in your online store. This causes you to lose potential sales and customers.

How to Perform a UX Audit of Your Website

As a business owner, you need to regularly check your website to make sure that it offers a good user experience.

This practice is called a UX audit. You can perform a UX audit by yourself using a combination of tools (you may already be using some of them).

During this process, you will look for issues that may negatively affect user experience on your website. When you find a problem, you can document it and then start fixing it.

Ready? Let’s get started.

Step 1: Define User Goals and Objectives

First, you need to put yourself into users’ shoes to understand what they are looking for when they reach your website.

For instance, if your website is an online store selling pet toys, your audience’s goal is likely to look at pet toys, read customer reviews for those products, and make a purchase.

Similarly, if you run a how-to blog, then your audience’s goal would be to read a tutorial and learn how to do something.

Understanding what your users want to achieve will allow you to help them better.

The easiest way to do this is by creating user personas for your target audience.

Creating user personas for UX audit

This exercise allows you to better understand users and their expectations of your website. Most importantly, it helps you figure out the goals and objectives of your target audience.

You can then analyze your website using these personas to see how quickly your content, products, and services can help those users.

Step 2: Test Your Website for Usability Issues

Testing your website for usability helps you quickly find problems that could destroy the user experience.

However, many issues often go unnoticed by website administrators until a user reports them. Users are more likely to switch to your competitor’s website than tell you about issues on your site.

Luckily, there are plenty of excellent tools that you can use to quickly detect potentially harmful usability issues on your website.

PageSpeed Insights (Free)

Google’s PageSpeed Insights tool lets you quickly examine a URL for performance and usability issues.

It runs tests on your website and then presents the results for both mobile and desktop devices by assigning each one a score.

This score is given in four categories:

  1. Performance
  2. Accessibility
  3. Best Practices
  4. SEO

It also tests for Core Web Vitals, which are a set of website performance metrics that Google considers essential to a website’s overall user experience. 

PageSpeed Insights preview

When you run the test, the language may initially sound too technical. However, you will also find links to resources explaining these concepts in beginner-friendly terms with tips on resolving each issue.

You can also read our guide on how to optimize your website for Google’s Core Web Vitals.

Google Search Console

PageSpeed Insights is a handy tool to quickly look up URLs.

However, you will have to manually run the tests, and you can’t find which pages on your website are having issues until you specifically test them.

What if you could automate this process, quickly find the pages with usability issues, and get alerts when a new problem is detected?

This is where Google Search Console comes in.

It is a free tool provided by Google for website administrators who want to see how their websites are performing in search.

User experience is an essential metric for search rankings. This is why Google wants to alert website owners when a usability issue is detected.

First, you will need to visit Google Search Console and add your website as a property. For instructions, you can follow our tutorial on how to add your website to Google Search Console.

Once you have added your website, it may take a while for Google to collect some data and start showing reports.

After that, you will see your site’s performance and usability reports in the ‘Experience’ section.

User experience section under Google Search Console

You can click on each report and drill down to find the pages where usability issues are detected.

For example, on this demo website, we found four pages in the ‘Mobile Usability’ section that were having issues.

Pages with usability issues

You can click on each row to find the exact pages where the issues were detected.

Google Search Console will also alert you by email when a new crawling or usability issue is detected.

Besides usability and crawling issues, Google Search Console is a treasure trove of valuable data. To learn more, you can see our expert tips on using Google Search Console to get more traffic.

Step 3: Find the Pages Performing Poorly

Automated tools can help you catch many problems. However, they are not perfect and may not be able to identify many common UX problems.

If you have a small website, you can go to each page to manually review it yourself. However, it is impossible for most medium to large websites to do this manually.

So, how do you find pages with poor UX?

One easy way to find these pages is by using MonsterInsights. It is the best Google Analytics plugin on the market that allows you to see where your users are coming from and how they interact with your website.

The MonsterInsights Google Analytics plugin

First, you need to install and activate the MonsterInsights plugin. For more details, see our tutorial on how to install a WordPress plugin.

Note: There is also a free version of MonsterInsights that you can try. However, we recommend upgrading to the paid version and unlocking the full potential of the plugin.

Upon activation, the plugin will run the setup wizard and help you connect WordPress with your Google Analytics account.

For more details, you can see our tutorial on how to install Google Analytics in WordPress.

Once you are connected, MonsterInsights will start tracking your website visitors.

Next, you need to set up the plugin to easily track conversions.

Enable eCommerce Conversion Tracking

If you use an eCommerce platform on your WordPress website, MonsterInsights can help you easily track conversions.

Google Analytics comes with enhanced eCommerce tracking, which works for most eCommerce websites, including WooCommerceEasy Digital DownloadsMemberPress, and more.

However, you will need to enable it for your website manually.

Start by visiting the Insights » Addons page in your WordPress admin dashboard to install and activate the eCommerce addon.

Enable eCommerce tracking

Next, you need to enable enhanced eCommerce tracking in your Google Analytics account. Go to your Google Analytics dashboard and select your website.

From here, click on the ‘Admin’ button in the bottom left corner.

Switch to admin view in Google Analytics

On the next screen, you will see different Google Analytics settings.

Under the ‘View’ column, just click the ‘Ecommerce Settings’ link.

Ecommerce settings in Google Analytics

On the next screen, simply turn on the toggles next to the ‘Enable Ecommerce’ and ‘Enable Enhanced Ecommerce Reporting’ options.

Don’t forget to click the ‘Save’ button when you are done.

Enable eCommerce reporting in Google Analytics

Check Low Conversion Pages for UX Issues

Poor user experience is one of the main reasons for low conversions, abandoned carts, and high bounce rates.

You can view your conversion tracking reports in MonsterInsights to find pages with low conversions and higher bounce rates.

Simply go to the Insights » Reports page inside the WordPress admin area and then switch to the ‘eCommerce’ tab.

Viewing eCommerce reports

From here, you can see an overview of your top-performing products and conversion sources.

For advanced reports, you need to switch to your Google Analytics account and go to the Engagement » Pages and screens tab.

From here, you can sort the pages by conversion rate to see the pages with the least conversions.

Low conversion pages

Using Google Analytics, you can also track pages with the highest bounce rates, the least amount of time spent on them, and more.

For more conversion tracking options, you can see our complete guide on WordPress conversion tracking. It will also show you how to track form conversions, affiliate link conversions, and more.

Step 4: Ask For User Feedback

As you can see, many UX audit activities involve automated tools, analytics reports, and manual testing.

The entire point of the UX audit exercise is to improve user experience. So, why not just ask your users what they think?

Asking for user feedback can get you accurate input from real visitors about your website. It can help you find specific problems and fix them more easily.

This is where UserFeedback comes in.

UserFeedback

Note: There is also a free plugin called UserFeedback Lite that you can try. We recommend upgrading to the Pro version to unlock the full potential of the plugin.

UserFeedback allows you to quickly run surveys and collect user feedback on your website. It also lets you show the surveys to the right users at the right time.

For example, you can show surveys to users on the pages with fewer conversions or display a feedback form to users on mobile devices.

UserFeedback form

For more information, you can see our UserFeedback announcement post.

Step 5: Optimize Your Website Speed & Performance

Website speed is a major contributor to user experience. Slow sites cause poor UX and prevent users from moving forward and accessing your content.

The tools we mentioned earlier, like PageSpeed Insights and Core Web Vitals, can help you evaluate the performance of your website.

However, if you are using MonsterInsights, then you can also run a website speed test inside your WordPress admin area.

Simply switch to the Insights » Reports page and then open the ‘Site Speed’ tab.

Site Speed in MonsterInsights

The report will run the same tests as PageSpeed Insights and show you a report. It will also give you practical tips to improve website performance.

Fixing Performance and Speed Issues

The easiest way to fix most performance issues is by simply installing a WordPress caching plugin.

We recommend using WP Rocket, which is the best WordPress caching plugin on the market. It lets you easily optimize your WordPress website without learning the technical stuff.

WPRocket

First, you need to install and activate the WP Rocket plugin. For details, see our tutorial on how to install a WordPress plugin.

Upon activation, WP Rocket will start caching your website’s content.

Unlike other caching plugins that generate a cache when a user visits your website, WP Rocket automatically starts creating a cache in the background.

This means each new user on your website will see a cached version that loads much quicker and improves user experience.

You can learn more by reading our tutorial on setting up WP Rocket with more detailed instructions.

If caching doesn’t immediately fix your website speed, we recommend following our complete WordPress speed and performance guide. It includes step-by-step instructions on how to optimize your website speed.

Step 6: Evaluate Website Navigation

Users expect your site to have a navigation menu with the links they need to find the information they want.

Sometimes, a website may not have a navigation menu that helps users reach the page they want. This leads to a poor user experience, and visitors may leave and try some other website.

You need to make sure that your website has a straightforward navigation menu that takes users to the critical areas of your website.

Navigation menu example

Adding a search bar to your website’s header or navigation menu can also improve user experience. If users can’t find a link quickly, then they can try searching on your website.

However, the default WordPress search is not very good.

Instead, we recommend using SearchWP. It is the best WordPress search plugin on the market and quickly improves the search experience on your website.

SearchWP website

SearchWP allows you to make everything on your website searchable, including custom fields, eCommerce attributes, custom tables, categories, tags, and more.

First, you need to install and activate the SearchWP plugin. For more details, see our tutorial on how to install a WordPress plugin.

Upon activation, you need to visit the SearchWP » Algorithm page and switch to the ‘Engines’ tab.

From here, you can adjust the search engine settings for the different content types by scrolling to the Posts, Pages, and Media sections.

SearchWP engines

Here, you can choose which attributes are searchable on your website. You can also choose their relevance.

Don’t forget to click on the ‘Save’ button to store your settings.

SearchWP will now replace your default WordPress search feature with its own custom search engine.

For more details, you can see our tutorial on how to improve WordPress search with SearchWP.

Step 7: Test Conversion Elements

A lot of the time, poor user experience is caused at the end of a conversion path.

For instance, you might have users trying to submit your lead capture form, but something is stopping them from doing so.

Luckily, you can run split tests and manually test elements on your website to identify and fix problems.

Run A/B Split Tests to Figure Out UX Issues

An easy way to test your conversion elements is by running A/B split tests.

An A/B split test allows you to create two or more versions of a page with slight differences. It then shows users a different version randomly.

You can then compare the results to find out which variation of the page performed the best among your users.

The easiest way to run these tests on your WordPress website is by using Thrive Optimize. It lets you quickly create and run A/B tests on your WordPress website.

First, you will need to install and activate Thrive Optimize plugin. You can purchase the plugin with Thrive Architect or get it with Thrive Suite bundle.

Next, install and activate the Thrive Product Manager plugin on your website. You can download it from your Account Dashboard on the Thrive Themes website.

Install Thrive Product Manager

Upon activating the plugin, you need to go to the Product Manager page in the WordPress admin area.

Next, you need to check the ‘Install Product’ box under the Thrive Optimize and Thrive Architect products.

Thrive Optimize installation

After that, click on the ‘Install Selected Products’ button to continue.

After installing the plugins, you will need to create or edit a post/ page and then click on the ‘Launch Thrive Architect’ button at the top.

Editing a page with Thrive Architect

This will show a popup where you can choose how to edit the page.

You can edit the page as a regular page using your theme template or as a landing page with a custom template.

Normal vs Landing page

If you choose a pre-built landing page, then you will be asked to choose a template.

Thrive Architect comes with dozens of beautiful templates for various niches to choose from.

choose a template

After that, you will be able to edit your page in Thrive Architect’s page builder.

It is an intuitive design tool where you can point and click on any element to edit it or click on the ‘+’ button to insert new elements.

Editing page in Thrive Architect

Once you have finished editing your page, don’t forget to click the ‘Save Work’ button to store your changes.

After that, click on the ‘A/B’ button in the right column to create a new A/B test.

Create a new A/B test

To run your A/B test, you need to have at least two versions of a page.

On the next screen, click on the Add New Variation button to create a new version of your landing page.

Add variation

It will now create a new variation, and you can start editing it using the Thrive Architect.

Make the changes to the page you think will work better than the previous version.

After that, simply click on the ‘Save Work’ button to store your changes, and then click on the ‘A/B’ button again.

Run the test

You can choose how much traffic you want to send to each page variation and then click on the ‘Set Up & Start A/B Test’ button at the top.

This will bring up a popup where you can configure the A/B test settings.

A/B test settings

You need to give your test a title and description. Afterward, you can turn on Automatic Winner settings and set minimum requirements for a variation to win.

Click on the ‘Next’ button to continue.

Finally, you will be asked to choose a goal for the test. For example, if it is a product page, then you may want to choose ‘Revenue’.

Set test goal

Finally, click on the ‘Start A/B Test’ button to finish the setup.

Thrive Optimize will now start showing the two variations of the page to your users and keep track of user interactions on the page.

You can view the test results anytime by visiting the Thrive Dashboard » Thrive Optimize page.

Thrive Optimize dashboard

Once the test has run its duration, you can see which page has performed better for conversions or the goals you set during the test. You will then be able to make changes to improve the UX on your website.

For more details, you can see our guide on how to run A/B tests on your WordPress website.

Manually Test Conversion Elements

A lot of time, you may not be able to run A/B split tests for all your pages. Luckily, there are other ways to test whether conversion elements on your pages are working.

Website owners are often just looking at the static representation of their website and not interacting with it like a real user would. That’s why many interactive failures go unnoticed for a long time.

This is when you will need to do some manual work. You can try to imitate a user journey as best as possible to complete a conversion.

For instance, if you run an eCommerce store, you can start from the page where your users usually land. Afterward, look at product pages, add items to the cart, and complete the checkout.

Within your UX audit, you must test all your forms, cart functionality, and checkout experience by interacting with those elements like a customer.

Plus, don’t forget to test these elements on both mobile and desktop environments.

Step 8: Test User Flows to Find Bottlenecks

A user flow is a customer’s journey across your website. A user will usually take a predictable path to different areas of your website until they buy something or submit a form.

The best way to track user flows is by using MonsterInsights. It comes with a User Journey addon that allows you to see every step of a customer’s journey throughout your site, including the pages and products they looked at and how long they were there.

Simply install and activate the MonsterInsights plugin.

Note: You will need at least the Pro plan of the plugin to use the User Journey addon.

After setting up MonsterInsights, you need to go to the Insights » Addons page. From here, locate the User Journey addon and then install and activate it.

User Journey addon MonsterInsights

Next, you need to install and activate the eCommerce addon. This will help you track customer journeys on popular eCommerce platforms for WordPress like WooCommerce, Easy Digital Downloads, MemberPress, and more.

Now, MonsterInsights will show the user’s journey on individual orders. For example, in WooCommmerce, you can go to WooCommerce » Orders page and click on an individual order.

Click on an individual order

On the order details page, scroll down to the MonsterInsights User Journey section.

This will show you all the user interactions on your site with their times and durations.

User journey preview

For more details, you can see our guide on how to enable customer tracking in WooCommerce.

If you are not using an eCommerce platform, then you can still track the user journey for your WordPress forms.

If you are using WPForms to capture leads, then it comes with user journey tracking that helps you track which path a user took to submit the form.

User Journey tracking

Like conversion elements, other areas of your website could disrupt user flow and block the path that leads them to become a customer.

You will need to manually evaluate user paths in Google Analytics to see where their journey abruptly ends. You can also simulate the user paths to see if you can come across a usability issue preventing the user from going forward.

Step 9: Evaluate Website Content Quality

Visual elements are not the only things that create a good or bad user experience.

Your website content plays a significant role in convincing users to stay on your WordPress blog or website and look around. It also helps search engines find your content more easily and send more visitors to your site.

We recommend performing a complete SEO audit of your website and optimizing your content for SEO.

To do that, you will need All in One SEO for WordPress. It is the best WordPress SEO plugin on the market that allows you to easily improve your content for search rankings and user experience.

All in One SEO plugin

All in One SEO comes with built-in SEO analysis, a headline analyzer, and site-wide SEO audit tools. All these features help you improve the quality and discoverability of your content.

You will also need to evaluate your content. For example, if a particular page is not ranking or converting well, then consider making it more comprehensive by adding more helpful content.

For more details, you can see our guide on how to fix content decay in WordPress.

Don’t forget to check your content for spelling and grammar mistakes. They could make your website seem unprofessional and create a bad user experience.

We recommend using Grammarly. It is the best AI-powered writing tool that helps you automatically correct spelling and grammar mistakes.

Grammarly

Grammarly also has a free forever plan with spelling and grammar checks. However, we recommend buying a paid plan to unlock more powerful features.

We hope this article helped you learn how to do a UX audit of your WordPress website. You may also want to see our guide on how to do an SEO audit of your site or our expert picks for the best email marketing services to grow your website.

If you liked this article, then please subscribe to our YouTube Channel for WordPress video tutorials. You can also find us on Twitter and Facebook.

The post How to Do a UX Audit of Your WordPress Site first appeared on WPBeginner.

How to Easily Create Post Purchase Surveys in WooCommerce

Are you looking for the best way to gather useful feedback about your WooCommerce store from your active customers?

User surveys can help you get valuable information so you can use it to make data-driven decisions. For example, they can help you find out how to improve your sales funnel or why your customers bought a particular product.

In this article, we will show you how to easily create post purchase surveys in WooCommerce.

How to Easily Create Post Purchase Surveys in WooCommerce

Why Use Post Purchase Surveys in WooCommerce?

If you have a WooCommerce store, then you may be wondering what your customers think of your products and online store. There’s no easy way to find out without actually asking them.

Luckily, you can use a WordPress survey plugin to collect real user feedback quickly and easily. This feedback will help you discover the ‘why’ behind every website visitor’s action. This is something you can’t learn from Google Analytics alone.

When creating your customer survey, make sure you don’t add any unnecessary questions. The questions you ask should get you the most valuable information and insights.

Here are some examples of questions you can ask your customers after checkout:

  • How long have you been a customer?
  • How did you discover us?
  • Was our pricing page easy to understand?
  • Which of our products have you used?
  • How satisfied are you with our products?
  • Have you needed to contact customer service?
  • Do you have any additional comments or suggestions?

By asking for user feedback after each WooCommerce purchase, you will learn ways you can improve your sales funnel to boost user experience and increase sales.

When you know the why or the intent behind users’ actions, you can easily figure out why your visitors buy or do not buy your products.

With that being said, let’s take a look at how to easily create post purchase surveys in WooCommerce. We will cover two different methods:

Method 1: Creating Post Purchase Surveys Using UserFeedback

UserFeedback is an easy-to-use survey plugin by the MonsterInsights team. It lets you ask your website visitors questions and collect their feedback in real time. It also makes it easy to add the survey to specific WooCommerce pages, such as the order confirmation page.

UserFeedback includes a Post Purchase Review template to give you a head start in creating your survey. Plus, you can customize how your popup surveys look so that they completely match your brand and site design.

First, you need to install and activate the UserFeedback plugin. For step-by-step instructions, you can follow our tutorial on how to install a WordPress plugin.

Note: There is a free version of UserFeedback that you can use to get started. However, you will need the features of the Pro version to create a post purchase survey.

Setting Up the UserFeedback Plugin

Once the plugin is activated, the setup wizard will automatically launch. Click the ‘Start’ button to begin the setup.

UserFeedback Setup Wizard

Next, you will be prompted to create your first survey to show you what the plugin is capable of.

We won’t be using this example survey, so you can go ahead and use the default answers.

Choose question for your first UserFeedback survey

You can choose from a few pre-written questions or create your own question. You will also be able to change your questions at any time.

For this tutorial, you should simply click the ‘Next Step’ button to continue.

Click on Next Step in the UserFeedback setup wizard

Next, you will see the option to enable specific UserFeedback features, depending on your license level.

Go ahead and enable the features you want or that your license level allows.

Enable UserFeedback features

Once you have done that, you need to click the ‘Next Step’ button at the bottom of the page.

Now, you can enter the email address where you want the survey responses to be sent.

Customize notifications for UserFeedback

Since we won’t be using this survey, you don’t need to make any changes and can simply click the ‘Next Step: Publish’ button.

In the final step of the setup wizard, the features and addons you enable will be installed.

UserFeedback features and addons successfully installed

Then, you can click on the ‘Exit to dashboard’ button at the bottom of the page.

You will see the sample ‘First Survey’ that you created with the wizard.

Exit to UserFeedback dashboard

Now you can unlock the Pro features of the plugin. You need to enter the license key that was emailed to you when you purchased a UserFeedback plan.

You will need to navigate to UserFeedback » Settings in the WordPress admin area. Once there, simply paste your license key into the field and click the ‘Verify’ button.

Paste Your UserFeedback License Key

Make sure you click the ‘Save Settings’ button once you have done this.

After that, you can enable the Pro features by going to the UserFeedback » Addons page.

For each addon, you will need to click the ‘Install Addon’ button, followed by the ‘Activate’ button that appears.

Install the UserFeedback Addons

This is important since the Additional Templates addon includes a Post Purchase Review template, and the Question Types addon allows you to add star ratings and more. Other addons allow you to further customize your survey form.

Now that you have successfully installed the UserFeedback plugin and its addons, you are ready to create your post purchase survey.

Creating a Post Purchase Survey Using UserFeedback

To create a new survey, you need to return to the UserFeedback » Surveys page and click the ‘Create New’ button.

Creating a New UserFeedback Survey

This will show you dozens of survey templates that you can use as a starting point.

You need to scroll down until you find the Post Purchase Review template and then click it.

Click the Post Purchase Review Template

A new survey will be created for you. Some helpful questions have already been added.

You can change any question’s type and title by simply pointing and clicking.

Editing a Survey Question in UserFeedback

Each question has a Settings tab where you can set the question as ‘Required’. The Logic tab lets you show or hide the question based on the customer’s previous answers.

With UserFeedback, you can ask unlimited questions and receive unlimited responses. You can ask all types of questions, including multiple-choice and free-form questions, and even capture emails and collect star ratings.

You might like to add some of the questions we listed at the beginning of this article. To add a question to your survey, simply click the ‘Add Question’ button after the last question.

Adding a New Question in UserFeedback

When you choose a question type from the dropdown menu, a new question will be added.

After that, you will be able to add a question title. Depending on the question type, you can then customize the question in other ways, such as labeling checkboxes or radio buttons.

Customizing a UserFeedback Question

Tip: The ‘Preview’ link at the top of the page doesn’t just preview the form but also allows you to customize its colors.

You can also create a custom thank you message and redirect users after their submissions.

Customizing the UserFeedback Thank You Question

When you have finished editing your survey questions, just hit the ‘Next Step: Settings’ button. This will open the Settings page, where you can customize your survey even more.

In the ‘Tracking’ section, you can enable or disable Google Analytics tracking if you have MonsterInsights installed.

Next, in the ‘Targeting’ section, you can select what types of devices and pages you want your survey to appear on. You can display the survey on all device types or create different surveys that target desktop and mobile users.

Targeting Device Type in UserFeedback

Next, you can scroll down to the Pages setting area. This is important because it allows you to choose where the survey will be displayed.

The default setting is ‘All Pages’. This will display the survey on every page of your online store. However, we only want to survey customers after they have made a purchase.

In this case, we should display the survey on the order confirmation page that is displayed after checkout. This page is also known as the WooCommerce thank you page.

To target this page, you will need to select ‘Page url is’ from the dropdown menu. After that, you should type ‘order-received’ in the next field.

Targeting the WooCommerce Order Confirmation Page in UserFeedback

This works because the setting matches partial URLs. The full URL will change with each transaction but will always contain the characters ‘order-received’.

You can also scroll down to the ‘Behavior’ section. Here, you can configure settings like:

  • Display Timing – When the survey will appear on the page.
  • Display Length – How often the survey will appear to website visitors.
  • Survey Run Time – How long the survey will appear on the designated pages.
UserFeedback Behavior Settings

In addition, you can enable or disable the ‘Start Survey Minimized’ option.

This displays a less visible version of your survey instead of automatically opening the first question.

Enable minimized survey option

Once you are done changing the settings, you can click the ‘Next Step: Notifications’ button.

This will take you to the Notifications page, where you can choose to send yourself an email with each new response to the survey. Simply leave the ‘Send Email’ toggle switched on and then enter one or more email addresses.

UserFeedback Notifications Settings

You can also enable conditional logic to trigger email notifications when visitors respond to your questions in a certain way.

For example, you might only want to receive an email if the user checks a box labeled ‘Do you want a callback?’

For this to work, your survey needs to contain at least one question with a radio, checkbox, NPS, or star rating question.

After that, click on the ‘Next Step: Publish’ button to continue.

Publish Your Survey

Lastly, there’s an option to schedule the survey for a later date and time.

If you are ready to publish your survey immediately, then go ahead and click the ‘Save and Publish’ button.

Save and publish the UserFeedback survey

That’s it! You’ve successfully created a survey form.

Now when your customers purchase items from your store, your survey will pop up on the order confirmation page.

UserFeedback Survey Preview

Tip: You may not see the customer survey when you are logged into WooCommerce. You will need to open your online store in a new incognito window or a different web browser.

Viewing Your Survey Form Results

Once you start getting responses, you can analyze them right from your WordPress admin dashboard using easy-to-read reports.

Simply navigate to UserFeedback » Results to see the total responses, impressions, and more details.

UserFeedback survey reports

Method 2: Creating Post Purchase Surveys Using WPForms

WPForms is the best WordPress contact form plugin on the market. It comes with a powerful surveys and polls addon, which allows you to quickly create highly-engaging survey forms.

It lets you combine the Surveys and Polls addon with powerful WPForms features like conditional logic, multi-page forms, custom notifications, email integrations, and more.

Note: You will need the Pro plan because it includes the WPForms Surveys and Polls addon. WPBeginner users can use our WPForms coupon to get 50% OFF on all WPForms licenses.

Setting Up the WPForms Plugin

The first thing you need to do is install and activate the WPForms plugin. For more details, see our step-by-step guide on how to install a WordPress plugin.

Once the plugin is activated, you need to go to the WPForms » Settings page and enter your license key. You will find this information in your account on the WPForms website.

Entering the WPForms license key

Don’t forget to click the ‘Verify Key’ button.

Once you have done that, you should head over to the WPForms » Addons page and scroll down to the Surveys and Polls addon.

Go ahead and click on the ‘Install’ addon button to install and activate the addon.

Install surveys and polls addon

Now you are ready to create the post purchase survey form.

Creating a Post Purchase Survey Using WPForms

You need to visit the WPForms » Add New page to create a new form. This will launch the WPForms form builder interface, and you can choose from different pre-built form templates.

First, you should provide a title for your survey form at the top of the page.

After that, you need to choose a template. Start by clicking on ‘Addon Templates’ to list templates that are compatible with the Surveys and Polls addon.

Select the Survey Form Template in WPForms

Then you need to click the ‘Use Template’ button on the Survey Form template. This will load a sample customer feedback form template with several fields already added to it.

You can just point and click to edit the fields, rearrange them with drag and drop, or remove them from the form. You can also add new form fields from the left column.

The WPForms Form Editor

WPForms supports all commonly-used form fields, including dropdown, radio buttons, checkboxes, Likert scale, text input, rating scale, and many more. This makes it super easy for you to build highly-interactive survey forms.

There is some conditional logic already built into the form. For example, the ‘How can we improve?’ field will only appear if a user selects 1 or 2 stars in the ‘Your Experience’ field.

Add conditional logic to survey form

You can see this by selecting the ‘How can we improve?’ field and then clicking the ‘Field Options’ tab on the left, as seen in the image above.

If some of your customers log in to your online store, then you can make their life easier by auto-filling some of their information from their user profiles.

For example, to auto-fill their email address, you need to click on the Email field, then click the ‘Field Options’ tab on the left. Once there, just click on the ‘Advanced’ tab to show the advanced field options.

The Advanced Field Options in WPForms

You will notice a field where you can set a Default Value for the email field.

You can enter information from their profile automatically by clicking on ‘Show Smart Tags’.

Entering the User Email Smart Tag in WPForms

Now you simply click the ‘User Email List’ option, and the {user_email} smart tag will be entered into the field. This will automatically add the email address for logged-in users.

You can also easily remove any fields that you don’t need on the form.

For example, if you would like to remove the ‘Name’ field, then you should point at that field with your mouse and then click the red Trash icon that appears at the top right of the field.

Deleting a Field in WPForms

If you would like to add more questions, such as the ones we listed at the beginning of this article, simply drag a new field onto the page and then customize it.

Once you have created the form, you need to click the orange ‘Save’ button at the top of the page to store your form settings.

Next, you can go to the Settings tab and select ‘Confirmations’ in the WPForms form builder.

Edit survey form confirmation settings

Here, you can choose whether to show a message or a page or even redirect users to a URL when they submit the survey form.

Besides that, the WPForms Notifications tab lets you edit the notification settings so that you get email alerts when a user fills out your survey.

Edit notification settings

You can now click on the close button to exit the form builder.

Adding the Survey Form to a Custom Thank You Page

If you have gone through the trouble of creating a custom WooCommerce thank you page, then you can easily add your post purchase survey to it using a shortcode or a block.

Note: Whether you are using the default thank you page or a custom one, you can also display the survey as a popup using a plugin. See the next section for details.

You will find the shortcode you need by visiting the WPForms » All Forms page.

Finding the Survey Shortcode in WPForms

You can then use the shortcode to add the form to your custom thank you page by following our guide on how to add a shortcode in WordPress.

Alternatively, if you created your custom thank you page using the block editor or a page builder plugin like SeedProd, then all you need to do is drag the WPForms widget onto the page and then pick the survey form you just created from a dropdown menu.

Dragging the WPForms Widget Onto a Page in SeedProd

Once you have saved your custom thank you page, your customers will see the survey after checking out.

Automatically Showing a Survey Popup Using OptinMonster

You might prefer to have the survey pop up automatically over the order confirmation page, similar to what happens with the UserFeedback plugin in Method 1.

The first thing you need to do is install the free OptinMonster plugin. For more details, see our step-by-step guide on how to install a WordPress plugin.

Note: In this tutorial, we will use the free OptinMonster plugin because it does everything we need. However, with a Growth subscription, the premium version of OptinMonster has much stronger integration with WooCommerce.

Upon activation, the OptinMonster setup wizard will start.

Simply follow the onscreen instructions to set up OptinMonster on your website and create a free account.

The OptinMonster Setup Wizard

Once you complete the setup, you will find yourself on the OptinMonster dashboard.

You will see a welcome message, a link to the OptinMonster user guide, and a video to help you get started.

The OptinMonster Dashboard

Now you will need to scroll down until you find a box where you can create a new popup.

Simply click the ‘Create New’ link.

Create a New Popup in OptinMonster

You will now see a collection of popup templates. Since our popup will just contain our post purchase survey, we will use the minimal Canvas template.

You can find this template by typing ‘canvas’ into the search field.

Search for the Canvas Template in OptinMonster

When you point your mouse over the Canvas template, two buttons will appear.

You can create your popup by clicking the ‘Use Template’ button.

Click the Use Template Button in OptinMonster

You will see a popup asking you to give the campaign a name.

You can type in ‘Post Purchase Survey’ and then click the ‘Start Building’ button.

Name the New Campaign in OptinMonster

The OptinMonster builder will open with your selected template. You can see a preview of the popup on the right, and there are blocks on the left that you can add to the popup.

You need to find the WPForms block and drag it onto the page.

Drag the WPForms Block Onto the Page

You can now select the survey you want to add.

Simply click on the name of the WPForms post purchase survey that you created earlier. The WPForms shortcode will be added to your popup.

Select the WPForms Survey You Created Earlier

There is still a placeholder image and text block on the page. These can be safely deleted.

When you hover your mouse over the image, a purple toolbar will appear. You can delete the image by clicking the Trash icon. You will be asked to confirm the deletion.

Deleting an Image in OptinMonster

You can delete the text block that says ‘Drag blocks and elements to start building your campaign’ in the same way.

Your finished popup should include just the WPForms shortcode. This is a good time to save your work by clicking the ‘Save’ button at the top of the screen.

Save the Popup in OptinMonster

Your next job is to click the ‘Display Rules’ tab and set how and where the popup will be displayed.

The first rule determines when the popup will be shown. The default value is after you have been on the page for 5 seconds. This will work for most online stores, but you can change the value if you like.

OptinMonster Time on Page Setting

Now you need to scroll down to the second rule, which you will find just below the ‘AND’ label.

The default value is to display the popup on every page of your WordPress website. You need to change this so that it only displays the post purchase survey on the order confirmation page.

The Current URL Path Setting in OptinMonster

To do this, you need to click the dropdown menu for ‘is any page’ and select ‘contains’ instead.

Another field will appear, and you need to type ‘order-received’ here.

The Current URL Path Matches When Contains Order-Received

This rule will match the confirmation page URL. Although the URL changes with every transaction, it will always contain the characters ‘order-received’.

Now you can click the ‘Next Step’ button to determine what happens when the conditions in those two rules are met.

OptinMonster Then Rules

The default settings here will display the popup without any effects or sound. If you would like to add an effect or sound, just use the dropdown menus.

Once you are finished, you need to click on the ‘Next Step’ button. You will see a summary of the display rules you just created.

Summary of Display Rules in OptinMonster

Make sure you click the ‘Save’ button to store your settings.

Finally, you can click the ‘Publish’ tab at the top of the screen and then click the ‘Publish’ button under ‘Publish Status’. This will push the popup live on your online store.

Publishing Your OptinMonster Popup

You can now close the OptinMonster builder by clicking the ‘X’ icon in the top right corner.

Your customers will now see the post purchase survey whenever they finish checking out. Here’s how it looks in our demo store.

WPForms Post Purchase Survey Preview

Viewing Your Survey Form Results

WPForms shows survey results in beautiful charts and graphs. You can also print survey results and export them to your favorite spreadsheet software.

To view your survey results, you need to visit the WPForms » All Forms page and click on the ‘Survey Results’ link below your survey form.

Click the Survey Results Link

On the results page, you will see your survey responses displayed in an interactive chart and tables.

You can export responses to a single question and the entire survey.

Export survey results

On the top, you will see options to switch to different chart types and export options.

You can save individual survey results in JPEG, PDF, and Print formats to easily share them on presentation slides, blog posts, or social media.

We hope this tutorial helped you learn how to create post purchase surveys in WooCommerce. You may also want to see our guide on how to create smart coupons in WooCommerce or our expert picks for the best WooCommerce plugins for your store.

If you liked this article, then please subscribe to our YouTube Channel for WordPress video tutorials. You can also find us on Twitter and Facebook.

The post How to Easily Create Post Purchase Surveys in WooCommerce first appeared on WPBeginner.

Introducing UserFeedback – Easy Survey Tool to Uncover What Users are Really Thinking

Do you want to know why your website visitors abandon your site?

Ever wished there was an easy way to read your website visitors’ minds WITHOUT learning telepathy or using an expensive user survey tool that costs a fortune?

If you’re like me and most other smart website owners, then you have at least wished for this solution a couple of times in your WordPress journey.

Today, I’m excited to share the launch of my free UserFeedback plugin, which enables you to collect real user feedback quickly and easily.

We built this tool because we want to know the “why” behind every website visitor’s action that Google Analytics won’t tell you.

announcing userfeedback plugin

When you know the why or the intent behind users’ actions, you can easily figure out why your visitors buy or do not buy your products.

Background Story

In 2016, I acquired a Google Analytics plugin for WordPress, completely revamped it, and launched it as MonsterInsights.

The goal of this plugin was to help users make informed decisions by showing them the data that matters to their businesses.

For example, you can easily see which products or pages are the most popular or where your most profitable traffic comes from.

As the plugin grows, I often get asked by our users: is there a way to understand the intent of every website visitors’ actions?

When you know the intent … the “why” behind users’ actions, you can figure out why customers purchased from you or, better yet, why they did NOT purchase from you.

Unfortunately, Google Analytics only tells you half the story: “What is happening on your website?”. It’s not built to answer the other half of the question: “Why are your visitors doing that?”

In fact, most of the customer feedback tools in the market charge exorbitantly high prices, which aren’t affordable to small businesses.

After a lot of thought and consideration, we decided to release a brand-new plugin called UserFeedback, which enables you to understand user intent by collecting real time feedback from them.

With UserFeedback, you can:

  • Create a demographic survey to fill out your buyer personas
  • Ask website visitors to leave their phone number for a callback
  • Run customer satisfaction surveys to see what buyers think about your products
  • Run NPS surveys
  • Ask for feedback on your website design
  • Run product surveys to find out what buyers are actually using your products for
  • And so much more

What is UserFeedback?

UserFeedback is a free and powerful WordPress plugin that lets you launch in-the-moment surveys to collect quality feedback from your website visitors.

pricing page survey tool

It comes with built-in templates and questions to make creating feedback surveys quick and effortless, including:

  • Website feedback/experience
  • Ecommerce store survey
  • NPS survey
  • Post purchase review
  • Product usage survey
  • Competitive research
  • And so much more!

Anything you’ve ever dreamed of being able to easily ask your customers, you can ask with UserFeedback.

In combination with a powerful analytics tool like MonsterInsights, website owners can finally see both the “why” and the “what” of their users’ behavior on their WordPress websites.

When you have direct access to your visitors’ wants and needs, you can make changes that will take your website and business to the next level.

My plan is to continuously add more helpful templates and addons to make UserFeedback even more powerful and essential to understanding your website visitors.

Collect Feedback in Minutes, not Hours

UserFeedback makes it super easy to launch a survey in minutes, not hours. Its 20+ survey templates give you a head start, so you don’t always have to start a feedback survey from scratch.

userfeedback surveys

Each of those templates is pre-designed for different user needs. Based on your requirements, choose the right template, make quick changes, and publish it on your website.

For example, the Website Design Feedback template comes with a star-rating question, whereas the NPS Survey template lets your users grade their loyalty on a scale of 1 to 10.

star rating feedback

The best part is that you can build and preview your design within the dashboard.

Get Best Results with Laser Targeted Surveys

UserFeedback enables you to display the right surveys at the right time to the right users. Here are some targeting options you can use for the best results.

survey targeting options
  • Logged in status: Choose to show your surveys only to logged in or not logged in users.
  • Page URL: Show it only on certain pages
  • Traffic source: Display it based on the traffic source, like organic traffic, PPC ads, social media, and so on.
  • Device type: Choose which types of devices the survey should appear
  • Display timing: Choose the right time to show the survey.
  • Exit intent / scroll targeting: You can show it to users who abandon the site on desktop or show when a user scrolls halfway down the page.
  • And much more…

Now that you know how UserFeedback works, let’s take a look at how our customers are using UserFeedback to grow their businesses.

1. Focus on What to Prioritize Next

Are you looking to redesign your website? Wondering how to improve your website copy to boost sales and conversions?

One of the best things about UserFeedback is that it lets you collect feedback score on every page of your site. That way, you can quickly find pages that aren’t resonating well with your audience and prioritize those pages while redesigning.

2. Get Feedback to Validate Your Plans

Pushing out new changes on your site can be intimidating. It’s especially true when you change the pricing plan on your website.

With UserFeedback, you can validate your plans with a survey and learn what users think about your latest plans.

3. Boost Profit by Reducing Customer Churn

UserFeedback comes with several targeting options, including exit intent. This targeting option helps you understand why users are leaving by collecting feedback at the exact moment when people churn.

4. Collect a Constant Stream of Great Suggestions

Do you want to encourage users to provide you with suggestions to improve your product?

One of the reasons most people hesitate to provide feedback is that it’s not easy to do so. With an on-site survey, you can make it convenient for them to send you feedback. Plus, you can collect a constant stream of suggestions to improve your product.

5. Fix the Problems Before They Develop

The biggest benefit of collecting feedback is that it helps you quickly identify problems before they develop. That means you can quickly rectify your problems before your customers start complaining about it.

Get Unlimited Everything – Questions, Responses, and Sessions

A big reason why we built UserFeedack is that most feedback tools are just too expensive. They slow down your site and charge you based on the number of responses and sessions …

Let’s take a look at how UserFeedback surveys compare to another feedback tool, Hotjar.

hotjar pricing
As you can see while the basic plan is free, it only allows you to get responses for up to 35 daily sessions.

On the other hand, UserFeedback lets you ask unlimited questions and get unlimited responses without a daily session limit!

userfeedback pricing

What’s Coming Next for UserFeedback?

UserFeedback is a great tool that helps you uncover more insights about your website visitors that Google Analytics won’t tell you. I’m extremely pleased with the community response so far, as everyone is loving the new features.

We have lots of great features coming, including:

  • Customizable survey designs so you can fully tweak them to match your website’s colors, fonts, and personality.
  • Advanced integrations to automatically let you send a special email, add entries to a spreadsheet, and so on.
  • Additional prebuilt templates to collect feedback for a variety of additional websites.

We’re truly building something special here. If you have ideas on how we can make the plugin more helpful to you, please send us your suggestions.

As always, I want to thank you for your continued support of WPBeginner, and we look forward to continuing to serve you for years to come.

Yours Truly,

Syed Balkhi
Founder of WPBeginner

P.S. Want us to acquire or invest in your WordPress business? Learn more about the WPBeginner Growth Fund.

The post Introducing UserFeedback – Easy Survey Tool to Uncover What Users are Really Thinking first appeared on WPBeginner.

How to Create a Net Promoter Score® (NPS) Survey in WordPress

Do you want to create a Net Promoter Score (NPS) survey in WordPress?

Net Promoter Score is a popular method to measure customer loyalty, so you can improve your brand image, find new product ideas, and provide better customer service.

In this article, we will show you how to easily create a Net Promoter Score® survey in WordPress and how to properly use it to improve your business.

How to create a net promoter score survey in WordPress

What is Net Promoter Score?

Net Promoter Score is a management tool that helps businesses measure customer loyalty. The idea was first introduced in 2003, and more than two-thirds of Fortune 1000 companies have adopted it since then.

Here is how it works.

It is based on a single question, ‘How likely are you to recommend our company/product/service to a friend or colleague?’

The answer is provided on a scale of 0 to 10.

NPS survey form preview

Customers who respond with a score of 9 or 10 are called ‘Promoters’. These are your brand’s most loyal customers and are highly likely to purchase again and recommend your business to others.

Users who answer with a score between 0-6 are considered ‘Detractors’. These customers are unhappy with your business and are least likely to purchase or recommend your business.

Customers responding with a score of 7 or 8 are called ‘Passives’. They can be either promoters or detractors and are less likely to actively recommend your business and products to their friends or colleagues.

Your final NPS score is calculated by subtracting the percentage of detractors from the percentage of promoters. The overall score ranges from -100 to 100.

A score of -100 means all customers are detractors, and a full 100 score means all customers that took part in the survey were promoters. Normally, a score of positive numbers (0-40) is considered good, and a score of 50 or above is considered excellent.

Due to the popularity of NPS surveys among businesses, there are numerous very expensive survey tools that will charge you hundreds of dollars per month. These solutions are not very affordable for small businesses.

We’ll show you 2 methods of creating an NPS survey in WordPress. You can use WPForms or UserFeedback plugin. Simply click the links below to jump ahead to your preferred method.

Method 1: Creating NPS Survey in WordPress using WPForms (Recommended)

The first thing you need to do is install and activate the WPForms plugin. For more details, see our step-by-step guide on how to install a WordPress plugin.

WPForms is a paid plugin, and you will need at least their Pro plan to access the surveys addon used in this tutorial.

Upon activation, you need to visit the WPForms » Settings page from your WordPress to enter your license key. You can find this information under your account area on the WPForms website.

Entering the WPForms license key

After entering your license key, you must visit the WPForms » Addons page and locate the ‘Surveys and Polls Addon.’

Go ahead and click on the ‘Install Addon’ button. WPForms will now install and activate the addon.

Install surveys and polls addon

You are now ready to create your first Net Promoter Score survey form.

Head over to WPForms » Add New from the WordPress admin panel to create a new form. First, you must provide a title for your form, then select a form template.

WPForms offers lots of prebuilt form templates. You can simply search for an NPS form template from the search bar on the left.

For this tutorial, we will use the ‘NPS Survey Simple Form’ template.

Select a NPS survey form template

WPForms will now load the form builder interface with some typical survey form fields.

This is a drag-and-drop form builder where you can just point and click to edit any existing form fields or add new fields from the left column.

Edit your NPS survey

If you click on the existing fields in the form, then you’ll see more options for customization.

For instance, you can change the text for each question and make it a required field.

Customize each NPS survey field

Your Net Promoter Score survey form is now almost ready. Simply getting the score is not very helpful because you don’t know why these customers are unhappy or happy.

Let’s add some smart conditional fields to the form to get more helpful feedback from users.

Adding Conditional Logic to Net Promoter Score Survey Form

WPForms comes with a smart conditional logic feature that allows you to show or hide form fields based on the user’s answers to previous form fields.

You can use that feature to ask users for more feedback based on their answers.

For example, you can ask users who select a score between 0-6 to give you another chance to make things right. These customers are unhappy, and asking them for an opportunity to make things right will help you improve your relationship with these customers.

Similarly, you can also ask users giving a score between 9-10 to leave a testimonial and ask for their permission to share it on your website. These are your most loyal customers, and their testimonials can help you add social proof to your website.

Let’s add these conditional fields to your NPS survey form.

First, select the question after the NPS scale. Next, switch to the ‘Smart Logic’ tab from the menu on your left and click the ‘Enable Conditional Logic’ toggle to enable the option.

Enable conditional logic

We only want to show this field to users responding with a score between 0 and 6. To do that, we will add conditional logic to this form field.

WPForms will add the logic by default. However, you can edit the rating for which you’d like to show the survey question.

Similarly, you can set up conditional logic for the second question in the survey. By default, WPForms will set the condition for you and only show the field when the score is between 7 and 9.

Conditional logic for second question

You can edit these conditions according to your survey needs. However, if you’re just starting out, then we recommend using the default settings.

Now repeat the process for other questions in the form. Don’t forget to save your changes.

Adding Your Net Promoter Score Survey in WordPress

WPForms makes it super easy to add forms to any post or page on your website.

You can simply click the ‘Embed’ button inside the form builder to get started.

Click the embed button

Next, you’ll see 2 options to embed the NPS survey. You can create a new page or select an existing page.

We’ll choose the ‘Create New Page’ option for this tutorial.

Embed a form in page

After that, a popup window will open.

Simply enter a name for your new page and click the ‘Let’s Go’ button.

Enter name for your new page

Next, you should see your NPS survey form embedded in the content editor.

Alternatively, you can also use the WPForms block to add the NPS form anywhere on your website.

Add a WPForms block in wordpress

Simply click the ‘+’ button to add the WPForms block. After that, select your form from the dropdown menu.

You can now save your changes and visit your website to see the form in action.

NPS survey form preview

Now, whenever a user selects a score between 0 to 6, they will see another form field asking for their feedback.

Viewing Your Net Promoter Score Results

After your form is live, WPForms will start calculating your Net Promoter Score based on survey results. You can send the NPS survey link to your customers using an email marketing service to encourage them to fill it out.

You could use OptinMonster to embed the survey form and show it to users who meet certain criteria, such as after they complete a purchase in your WooCommerce store.

After a few users have filled out the form, you can go ahead and check your score.

To do that, head over to WPForms » All Forms from your WordPress dashboard and click on the ‘Survey Result’ link under your Net Promoter Survey form.

View survey results in WPForms

WPForms will now display your total Net Promoter Score along with the number of promoters, detractors, and passives. It will also break down the results into beautiful charts, bars, and graphs.

You can use the feedback from users to improve your product, add new features, as well as offer support to unhappy customers, and turn them into loyal brand evangelists.

View NPS survey results

Method 2: Creating NPS Survey in WordPress using UserFeedback

Another way you can create Net Promoter Score (NPS) survey in WordPress is by using the UserFeedback plugin. It helps you collect user feedback quickly and easily.

The plugin is super easy to use and offers pre-built templates to help you set up an NPS survey in no time.

For this tutorial, we will use the UserFeedback Pro version because it includes customization options, 20+ templates, unlimited questions and responses, and more. However, there is also a UserFeedback Lite version that you use to get started for free.

Setting Up UserFeedback Plugin in WordPress

First, you’ll need to install and activate the UserFeedback plugin. For more details, please see our guide on how to install a WordPress plugin.

Upon activation, the plugin will launch the setup wizard. You can click the ‘Start’ button to begin.

UserFeedback setup wizard

Next, the plugin will ask you to build your first feedback survey.

Since we’ll be creating an NPS survey, you use the default option and move ahead to the next step.

Choose question for your first UserFeedback survey

After that, you can enable different features to enable in UserFeedback. These options will depend on your license level.

Go ahead and enable the features you’d like to use and move to the next step.

Enable UserFeedback features

The UserFeedback plugin will now ask you to enter an email address where you can receive responses from users.

Simply enter your email address and click the ‘Next Step: Publish’ button.

Customize notifications for UserFeedback

In the final step, the plugin will install everything, including the UserFeedback widget, addons, and other integrations.

When that’s done, you can click the ‘Exit to dashboard’ button.

UserFeedback final check in the setup wizard

Once the plugin is set up, then you can head to UserFeedback » Settings from the WordPress dashboard.

After that, you’ll need to enter the license key and click the ‘Verify’ button. You can easily find the key in your account area.

Paste Your UserFeedback License Key

From here, you’ll need to go UserFeedback Addons from the WordPress dashboard.

Next, you can install the ‘Additional Templates’ and ‘Question Types’ addons by clicking the ‘Install Addon’ button.

The Additional Templates addon will unlock 20+ survey form templates in the UserFeedback plugin. While the Question Types addon will add all question types for your feedback surveys.

Install the UserFeedback Addons

Once the addons are installed, you can then activate them.

Let’s see how you can create one in UserFeedback.

Creating an NPS Survey Using UserFeedback

Next, you can create a new survey by going to UserFeedback » Surveys page and clicking the ‘Create New’ button.

Creating a New UserFeedback Survey

From here, the plugin will show multiple survey templates to choose from.

Go ahead and choose the ‘NPS Survey’ template.

Select NPS survey template

Next, the NPS survey will be created for you. The template will automatically add a question and rating scale for you.

However, you can edit the question type, and question title, and add a low score label.

Edit NPS survey template

You can scroll down and add more questions if you want to your NPS survey.

Simply click the ‘Add Question’ option and select the question type you’d like to add.

Adding a New Question in UserFeedback

Next, you can switch to the ‘Settings’ tab at the top.

Here, you can make the question mandatory for users to respond to and enable a comment box.

Edit NPS survey settings

Besides that, there is also an option to edit the thank you message that users will see when they submit the survey form.

You can change the text of the message. Once that’s done, simply click the ‘Next Step: Settings’ button.

Edit the thank you message

After that, you can enable Google Analytics tracking if you have MonsterInsights installed.

It is the best Analytics plugin for WordPress and helps install Google Analytics in WordPress without editing code or hiring a developer. MonsterInsights also helps set up advanced tracking features like form conversion tracking.

Enable tracking in UserFeedback

UserFeedback also offers a Targeting addon that lets you select what type of devices and which pages the NPS survey will appear on.

For instance, you can show the survey on desktop, tablet, and mobile. Plus, the plugin will show it on all the pages by default. However, you can edit this and set up conditions on which the survey will appear.

Enable targeting addon

If you scroll down, then you’ll see the Behavior section.

Here, you can set the display time for your NPS survey. For instance, there are options to show the survey after a delay, when a user is about to abandon a page, or when a user scrolls halfway through the page.

Besides that, you can also show the display length of your survey and configure a survey run time. The display length will let you decide how often the survey will appear to a user and run time helps you set how long the survey will appear on specific pages.

Set behavior settings for NPS survey

Lastly, you can scroll down and view the ‘Start Survey Minimized’ setting.

Enabling this will show a minimized version of the survey widget. Once you’re done, simply click the ‘Next Step: Notifications’ button.

Enable minimized survey option

In the next step, you’ll see notification settings for your NPS survey.

You can enter your email address to receive responses to the survey. The plugin also lets you set up conditional logic for receiving notifications.

Notification settings for NPS survey

When you’re done, simply click the ‘Next Step: Publish’ button.

You can change the Survey Status from Draft to Publish or schedule a specific time and date to publish the survey.

Save and publish the UserFeedback survey

Don’t forget to click the ‘Save and Publish’ button.

That’s it! You can now visit your website to see the NPS survey in action. It will open as a popup in the bottom right corner.

NPS survey preview

We hope this article helped you learn how to easily create a Net Promoter Score (NPS) survey in WordPress. You may also want to see our article on how to choose the best WordPress hosting and how to get free SSL certificate for your WordPress site.

If you liked this article, then please subscribe to our YouTube Channel for WordPress video tutorials. You can also find us on Twitter and Facebook.

The post How to Create a Net Promoter Score® (NPS) Survey in WordPress first appeared on WPBeginner.

How to Track User Engagement in WordPress with Google Analytics

Are you properly tracking user engagement on your WordPress site?

User engagement is one of the most important metrics to track because it helps you better understand your audience and what they want. With Google Analytics, you can easily see how people interact with your website.

In this article, we will show you how to track user engagement in WordPress with Google Analytics.

How to Track user management with Analytics

Why Track User Engagement With Google Analytics?

Generally, WordPress website owners consider traffic and pageviews to be the most important indicators of their website’s performance. They assume that higher traffic will result in more conversions and sales.

While that is generally true, you can get even better results by tracking and optimizing user engagement.

User engagement shows you what users do when they arrive on your website. It helps you identify patterns of highly engaged user behavior that lead to more conversions and sales.

For example, you may realize that users visiting a specific page are 10X more likely to make a purchase than any other visitor on your website. You can use this insight to redirect the user’s attention to that page.

Similarly, tracking engagement can help you see which affiliate links or banner ads your visitors are clicking. Using this data, you will be able to optimize your content to get more clicks and boost conversions.

That said, let’s see how you can set up user engagement tracking in WordPress using Google Analytics.

Tracking User Engagement in WordPress Using Google Analytics

The best way to set up user engagement tracking in WordPress is by using MonsterInsights. It’s the best analytics plugin for WordPress that helps you configure Google Analytics without writing code.

MonsterInsights automatically sets up outbound link tracking, form conversion tracking, scroll depth, affiliate link clicks, and other advanced tracking features in Google Analytics out of the box.

It automates the process of pasting different analytics codes and event tracking in WordPress, so you don’t have to deal with the hassle of code and configuration.

The MonsterInsights Google Analytics plugin

For this tutorial, we will use the MonsterInsights Pro version because it includes advanced tracking features and more dashboard reports. However, there is also a MonsterInsights Lite version that you can use for free and get started with user engagement tracking.

First, you will need to install and activate the MonsterInsights plugin. If you need help, then please see our guide on how to install a WordPress plugin.

Upon activation, you will see the MonsterInsights welcome screen. Go ahead and click the ‘Launch the Wizard’ button. You can then follow the setup wizard to get everything ready in minutes.

Launch setup wizard

For more details, please see our guide on how to install Google Analytics in WordPress.

Now that you have Google Analytics with MonsterInsights ready to go, let’s take a look at what user engagement metrics are best to track and how you can track them.

These aren’t all of the metrics you can track with MonsterInsights and Google Analytics, but they are the most important ones to start with. You can click the links below to jump ahead to any section:

The first thing you want to figure out is which posts and pages on your WordPress blog are popular amongst your users. These important pages and posts on your website get the most traffic.

Figuring out what your users like on your site can help you plan a content strategy that expands on what’s already working.

MonsterInsights makes it really simple. You just need to visit the Insights » Reports page in your WordPress admin area and go to the ‘Overview’ report.

Overview report in MonsterInsights

After that, you can scroll down to see other reports with different data.

You will find your most popular content in the ‘Top Posts/Pages’ section.

Top posts and page report

On most websites, 90% of the traffic goes to 10% of the top pages and posts.

Once you find these top pages, you can optimize them for maximum conversions by adding content upgrades or targeted lead magnets on these posts.

2. Tracking How Users Engage With Forms on Your Website

Most websites rely on contact forms to collect user leads and feedback. Sadly, most WordPress contact form plugins don’t give you accurate tracking and conversion data.

MonsterInsights lets you leverage the events tracking feature in Google Analytics to see how many times your forms are viewed and submitted.

To enable form tracking, you need to visit the Insights » Addons page. On this page, you will need to install and activate the Forms addon.

Install forms addon

Once you have activated the addon, MonsterInsights will automatically start tracking all forms on your website.

It works with popular contact forms plugins like WPForms, Formidable Forms, and others. MonsterInsights also tracks your website comment forms, user registration forms, and more.

You can check these settings by going to Insights » Settings in your WordPress dashboard and then clicking on the ‘Conversions’ tab.

MonsterInsights settings - conversions tab

Next, MonsterInsights shows the performance of your WordPress forms inside your dashboard.

Simply go to Insights » Reports from the admin panel and click on the ‘Forms’ tab. The report shows the number of impressions and conversions, as well as the conversion rate for your different WordPress forms.

Forms report in MonsterInsights

For more details, please see our guide on how to track form conversions in WordPress.

3. Tracking eCommerce Store Performance in Google Analytics

Google Analytics offers many features specifically for eCommerce websites. However, these features are not turned on by default in Google Analytics, and most users don’t even know that they exist.

eCommerce tracking lets you see shopping behavior, checkout behavior, product performance, sales performance, and so much more. The best part is that you can combine this data with your overall website traffic to gather better insights.

With MonsterInsights, you can easily set up Enhanced eCommerce on your website without editing code. It seamlessly works with popular plugins like WooCommerce, Easy Digital Downloads, GiveWP, MemberPress, and more.

You can see our guide on how to set up eCommerce tracking in WordPress for more information.

Once you have configured tracking, you can head to Insights » Reports from your WordPress admin menu and click on the ‘eCommerce’ report and select ‘Overview’.

View eCommerce report in MonsterInsights

Using the report, you can quickly see how your online store is performing.

It shows stats like conversion rate, number of transactions, revenue, and average order value. It also helps identify products that users engage with the most and where they are coming from.

Ecommerce overview report in MonsterInsights

MonsterInsights also lets you track coupons in your online store.

You can go to eCommerce » Coupons in MonsterInsights reports to view the report.

Coupons report in MonsterInsights

You can also view the eCommerce report in your Google Analytics property.

Simply visit your Google Analytics account and go to Reports » Monetization » Ecommerce purchases.

Ecommerce report GA4

You may also want to see our guide on how to set up WooCommerce conversion tracking.

4. Tracking Who’s Clicking on Your AdSense Ads

Many websites rely on ads to make money online while creating useful content. With Google Analytics, you can actually see how users interact with ads on your site.

For instance, you will be able to track how many clicks each ad is receiving, discover which ads your audience is ignoring, identify the most effective ad placements, and more.

First, you need to sign up for a Google AdSense account and integrate it with your website. You can follow our guide on how to add Google AdSense to your WordPress site.

Next, you can link your Google Analytics account with Google AdSense. To do this, log in to your AdSense account and head to Account » Account and Authorization » Google Analytics Integration from the menu on your left.

Google AdSense ga4 integration

From here, you can click the ‘+ New link’ button and select your Google Analytics property.

Once your accounts are connected, you can visit Google Analytics to view the reports.

To view your AdSense reports, go to your Google Analytics 4 account and visit Monetization » Publisher Ads.

AdSense report in ga4

If you have a Universal Analytics property, then you can view the data by going to the Behavior » Publisher page.

Note: Universal Analytics is no longer collecting your website data. However, you can still access its reports and view old data.

View AdSense report

5. Tracking How Far People Scroll Your Website

When tracking user engagement in WordPress, it’s also important to see how far visitors scroll your website.

It gives you insights into how people use your site and helps improve your page length. Plus, you can use the data to place your AdSense ads, call-to-action buttons, and affiliate links where they will get the most visibility and conversions.

MonsterInsights automatically enables scroll-depth tracking. You can view the report by going to Insights » Reports from the WordPress admin panel and clicking the Publishers » Overview tabs.

Publisher overview report in MonsterInsights

Next, scroll down and view the ‘Scroll’ report.

It will show the average scroll depth percentage. MonsterInsights will trigger events in Google Analytics 4 as users scroll 25%, 50%, 75%, and 100% of a page and compute the percentage from those results.

View scroll depth report

Most marketers use affiliate plugins to manage and cloak affiliate links. This makes your affiliate links look more user-friendly.

Here is an example of a cloaked affiliate link:

https://example.com/recommends/product-name/

MonsterInsights allows you to track affiliate links in Google Analytics. This data helps you figure out which affiliate products are doing well, which pages are generating more affiliate revenue, and more.

To enable affiliate link tracking, you need to visit the Insights » Settings page. Next, you can switch to the ‘Publisher’ tab and head to the Affiliate Links section.

Change affiliate link settings

First, you need to enter the prefix for your link under the Path field, like ‘/refer/’ or ‘/recommend/.’ After that, you must provide a Label that you would like to use for those links in your Google Analytics reports.

When you are done, click on the ‘Save Changes’ button to store your settings.

Next, you can view your top affiliate link clicks in MonsterInsights reports. Simply head to the Publishers tab and scroll down to the ‘Top Affiliate Links’ section.

Outbound and affiliate links report

Here, you will see which affiliate links are getting the most clicks so that you can promote them more on your site and boost sales.

Additionally, MonsterInsights will also show your Top Outbound Links. These are external links that people click and exit your site. You can use insights from this report to get more backlinks, form partnerships, sign up for affiliate programs, and exchange guest posts.

For more detailed instructions, see our guide on how to track outbound links in WordPress.

7. Tracking Video Engagement in Google Analytics

Do have you videos embedded on your WordPress website? If so, then you can track how people engage with them.

With the MonsterInsights Media addon, you can automatically track YouTube, Vimeo, and other HTML 5 video embeds on your website. The best part is that you don’t have to edit code to set up tracking. The plugin takes care of everything.

You can view the data inside your WordPress dashboard. Simply head to Insights » Reports and then click the ‘Media’ tab.

View media report

Next, you will see stats about your top videos.

For instance, you can see how many people played the video, the average watch time, the completion rate, and more.

Media report

To learn more, please follow our guide on how to track video analytics in WordPress.

8. Tracking Marketing Campaigns in Google Analytics

If you are running different campaigns on your website, then you can track their performance in Google Analytics. This data helps you see which campaigns get the most engagement so that you can replicate them.

To start, you can add UTM parameters to your campaign links. These are special tags that pass additional information to Google Analytics and help differentiate campaign URLs from regular links.

If you are using MonsterInsights, then you can use the URL Builder tool to create links with UTM parameters. Simply head to Insights » Tools from your WordPress dashboard and select the ‘URL Builder’ tab.

Go to tools in MonsterInsights

Next, you can fill in the details of your URL.

For instance, you can add your website link, a campaign source like a newsletter, a campaign medium such as email, a campaign name, and other details.

Enter campaign source and medium

After entering these details, MonsterInsights will create a custom URL with UTM parameters. It will look something like this:

https://example.com?utm_source=newsletter&utm_medium=email&utm_campaign=spring_sale

You can simply copy the link and use it in your campaigns.

Copy custom link with UTM parameter

Once you have added custom links with UTM parameters, MonsterInsights will start to track them in Google Analytics.

You can then view a report inside your WordPress dashboard and see which campaign is generating the most engagement.

Simply head to your MonsterInsights reports and then go to Traffic » Campaigns.

View campaigns report in MonsterInsights

Next, you can scroll down to see campaign details.

The report will show the number of sessions, engaged sessions, purchases, conversion rate, and revenue for each campaign.

Campaign details in MonsterInsights

9. Tracking Bounce Rate in Google Analytics

The bounce rate is the percentage of users who land on your website and decide to leave without going to a second page.

In the latest version of Google Analytics, you won’t find bounce rate as a default metric that’s visible on your reports. This is one of the key differences you will notice between Google Analytics 4 (GA4) and Universal Analytics.

You will need to manually add the bounce rate to pages and screens reports in GA4. This can be tricky for beginners, especially for anyone who isn’t familiar with the Google Analytics interface.

However, an easier way to view the bounce rate is by using MonsterInsights. Simply go to Insights » Reports from your WordPress admin menu and click on the Publishers » Overview tabs. The plugin shows the bounce rate for your important pages.

Top landing pages report

A higher bounce rate indicates that you were unable to convince the user to visit other pages. Users can leave your website by clicking on the back button in their browser, clicking on an outgoing link, or closing the window.

Every site has a bounce rate. However, higher bounce rates can indicate problems with your website that are affecting user experience and causing low engagement.

To lower the bounce rate, you can speed up your website, improve internal links, ensure that your content meets the search intent, improve the readability of your articles, show popular posts, and more.

For more tips, you can see our guide on how to increase pageviews and reduce the bounce rate in WordPress.

10. Tracking Time Spent on Your Website

Another indicator that shows user engagement is session duration or the amount of time users spend on your site.

If users are abandoning your site without spending enough time to look at it, then something is wrong, and you need to fix it.

In the MonsterInsights Overview report, you can see the average session duration for your website in the past 30 days.

Session duration report

If you are using Google Analytics 4, then you will see a new metric called average engagement time. It tells you the average time your webpage was being focused on by a user.

You can view the report by logging in to your GA4 account and then heading to Reports » Engagement » Overview.

See average engagement time report

Using the data, you can better understand your user journey. If the engagement time is low, then you can look into issues like fixing slow site speed, debugging any errors, and making your site’s interface user-friendly.

11. Tracking Pageviews Per Visit With Google Analytics

Pageviews per visit is another excellent indicator of how engaged your users are. A higher number of pageviews per session means that people are visiting multiple landing pages and articles on your site. This helps increase the time users spend on your site and decreases the bounce rate.

In Google Analytics 4, you can view the sessions per user metric based on different traffic sources and see how many pages users view in a single session.

Just head to Reports » Acquisition » User acquisition from your GA4 property.

Engaged sessions per user metric

This helps you see which traffic channels are converting the best for your website. You can then focus your content marketing efforts on areas that are actually driving results.

Universal Analytics will also show you the total page views for a given period on the Audience » Overview page. However, to track engagement, you want to see pageviews per session.

See pages per session metric

You can also break down page views per session by source and channel.

Simply go to the Acquisition » All Traffic » Channels page.

View pages per session based on channel

As a bonus, you can also use the UserFeedback plugin to find out what your visitors really think about your website.

This is something that analytics can’t track.

UserFeedback popup poll example

UserFeedback, built by the MonsterInsights team, lets you easily create popup widgets to collect real-time feedback about your website.

You can ask questions like what information is missing from your site, why users didn’t buy a product, what type of content they are interested in, and more. This will help you better understand intent and improve engagement. There’s also a free version of UserFeedback that you can try out.

For more details, you can see our guide on how to get quick feedback on your articles in WordPress.

We hope this article helped you track user engagement in WordPress with Google Analytics. You may also want to see how to create an email newsletter the right way and our expert pick of the best SEO plugins and tools to optimize your website for search engines.

If you liked this article, then please subscribe to our YouTube Channel for WordPress video tutorials. You can also find us on Twitter and Facebook.

The post How to Track User Engagement in WordPress with Google Analytics first appeared on WPBeginner.