CSS Infinite 3D Sliders

In this series, we’ve been making image sliders with nothing but HTML and CSS. The idea is that we can use the same markup but different CSS to get wildly different results, no matter how many images we toss in. We started with a circular slider that rotates infinitely, sort of like a fidget spinner that holds images. Then we made one that flips through a stack of photos.

This time around, we’re diving into the third dimension. It’s going to look tough at first, but lots of the code we’re looking at is exactly what we used in the first two articles in this series, with some modifications. So, if you’re just now getting into the series, I’d suggest checking out the others for context on the concepts we’re using here.

CSS Sliders series

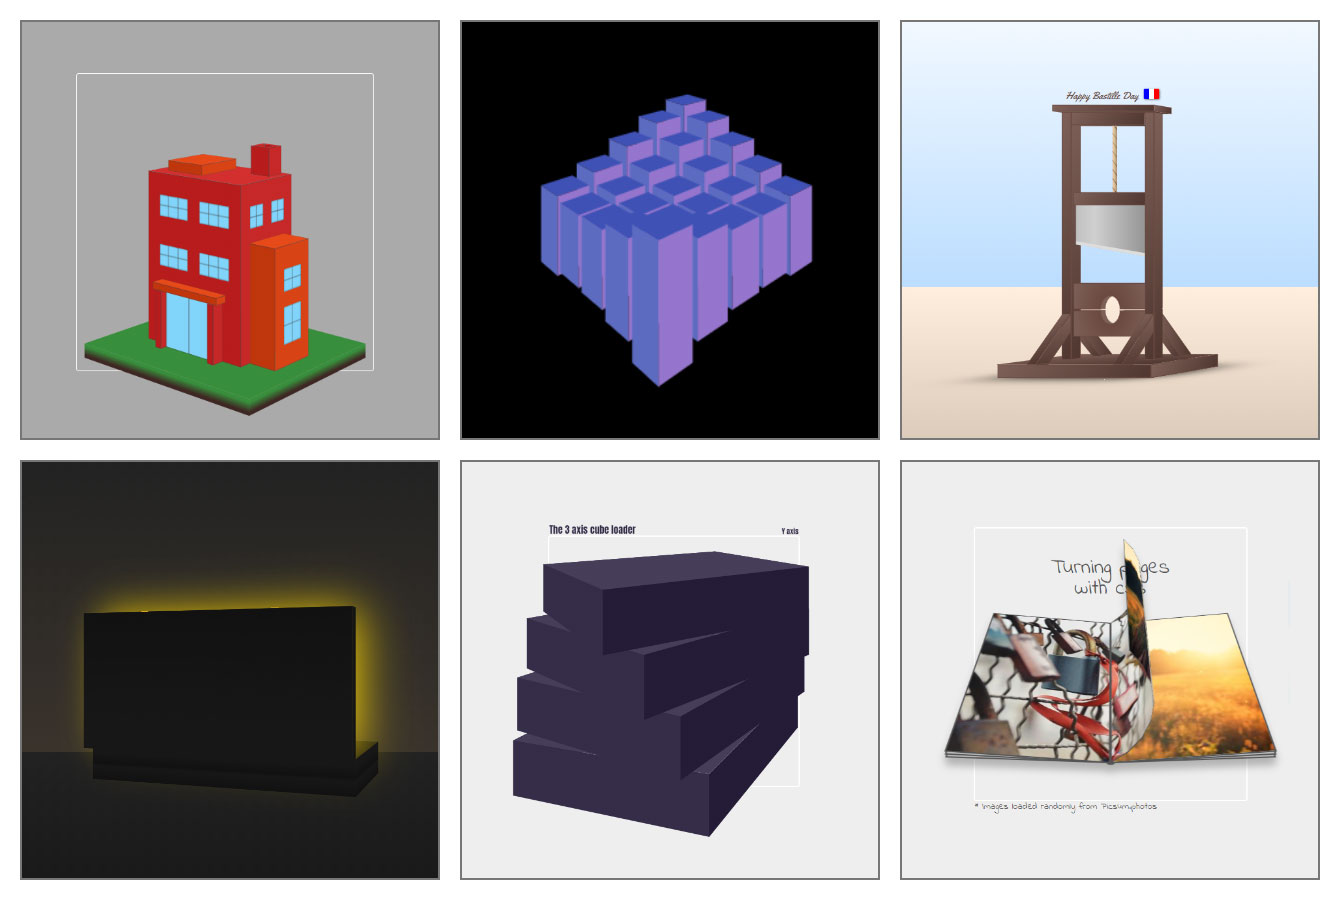
This is what we’re aiming for:

At first glance, it looks like we have a rotating cube with four images. But in reality, we’re dealing with six images in total. Here is the slider from a different angle:

Now that we have a good visual for how the images are arranged, let’s dissect the code to see how we get there.

The basic setup

Same HTML as the rest of the sliders we’ve used for the other sliders:

<div class="gallery">
  <img src="" alt="">
  <img src="" alt="">
  <img src="" alt="">
  <img src="" alt="">
  <img src="" alt="">
</div>

And once again, we’re using CSS Grid to place the images in a stack, one on top of another:

.gallery {
  display: grid;
}
.gallery > img {
  grid-area: 1 / 1;
  width: 160px;
  aspect-ratio: 1;
  object-fit: cover;
}

The animation

The logic for this slider is very similar to the circular slider from the first article. In fact, if you check the video above again, you can see that the images are placed in a way that creates a polygon. After a full rotation, it returns to the first image.

We relied on the CSS transform-origin and animation-delay properties for that first slider. The same animation is applied to all of the image elements, which rotate around the same point. Then, by using different delays, we correctly place all the images around a big circle.

The implementation will be a bit different for our 3D slider. Using transform-origin won’t work here because we’re working in 3D, so we will use transform instead to correctly place all the images, then rotate the container.

We’re reaching for Sass again so we can loop through the number of images and apply our transforms:

@for $i from 1 to ($n + 1) {
  .gallery > img:nth-child(#{$i}) {
     transform: 
       rotate(#{360*($i - 1) / $n}deg) /* 1 */
       translateY(50% / math.tan(180deg / $n)) /* 2 */ 
       rotateX(90deg); /* 3 */
  }
}

You might be wondering why we’re jumping straight into Sass. We started with a fixed number of images using vanilla CSS in the other articles before generalizing the code with Sass to account for any number (N) of images. Well, I think you get the idea now and we can cut out all that discovery work to get to the real implementation.

The transform property is taking three values, which I’ve illustrated here:

Showing the three phases of the image slider layout.

We first rotate all the images above each other. The angle of rotation depends on the number of images. For N images, we have an increment equal to 360deg/N. Then we translate all of the images by the same amount in a way that makes their center points meet on the sides.

Showing the stack of images arranged flat in a circle with a red line running through the center point of the images.

There’s some boring geometry that helps explain how all this works, but the distance is equal to 50%/tan(180deg/N). We dealt with a similar equation when making the circular slider ( transform-origin: 50% 50%/sin(180deg/N) ).

Finally, we rotate the images around the x-axis by 90deg to get the arrangement we want. Here is a video that illustrates what the last rotation is doing:

Now all we have to do is to rotate the whole container to create our infinite slider.

.gallery {
  transform-style: preserve-3d;
  --_t: perspective(280px) rotateX(-90deg);
  animation: r 12s cubic-bezier(.5, -0.2, .5, 1.2) infinite;
}
@keyframes r {
  0%, 3% {transform: var(--_t) rotate(0deg); }
  @for $i from 1 to $n {
    #{($i/$n)*100 - 2}%, 
    #{($i/$n)*100 + 3}% {
      transform: var(--_t) rotate(#{($i / $n) * -360}deg);
    }  
  }
  98%, 100% { transform: var(--_t) rotate(-360deg); }
}

That code might be hard to understand, so let’s actually step back a moment and revisit the animation we made for the circular slider. This is what we wrote in that first article:

.gallery {
  animation: m 12s cubic-bezier(.5, -0.2, .5, 1.2) infinite;
}
@keyframes m {
  0%, 3% { transform: rotate(0); }
  @for $i from 1 to $n {
    #{($i / $n) * 100 - 2}%,
    #{($i / $n) * 100 + 3}% { 
      transform: rotate(#{($i / $n) * -360}deg);
    }  
  }
  98%, 100% { transform: rotate(-360deg); }
}

The keyframes are almost identical. We have the same percentage values, the same loop, and the same rotation.

Why are both the same? Because their logic is the same. In both cases, the images are arranged around a circular shape and we need to rotate the whole thing to show each image. That’s how I was able to copy the keyframes from the circular slider and use that same code for our 3D slider. The only difference is that we need to rotate the container by -90deg along the x-axis to see the images since we have already rotated them by 90deg on the same axis. Then we add a touch of perspective to get the 3D effect.

That’s it! Our slider is done. Here is the full demo again. All you have to do is to add as many images as you want and update one variable to get it going.

Vertical 3D slider

Since we are playing in the 3D space, why not make a vertical version of the previous slider? The last one rotates along the z-axis, but we can also move along the x-axis if we want.

If you compare the code for both versions of this slider, you might not immediately spot the difference because it’s only one character! I replaced rotate() with rotateX() inside the keyframes and the image transform. That’s it!

It should be noted that rotate() is equivalent to rotateZ(), so by changing the axis from Z to X we transform the slider from the horizontal version into the vertical one.

Cube slider

We cannot talk about 3D in CSS without talking about cubes. And yes, that means we are going to make another version of the slider.

The idea behind this version of the slider is to create an actual cube shape with the images and rotate the full thing in around the different axis. Since it’s a cube, we’re dealing with six faces. We’ll use six images, one for each face of the cube. So, no Sass but back to vanilla CSS.

That animation is a little overwhelming, right? Where do you even start?

We have six faces, so we need to perform at least six rotations so that each image gets a turn. Well, actually, we need five rotations — the last one brings us back to the first image face. If you go grab a Rubik’s Cube — or some other cube-shaped object like dice — and rotate it with your hand, you’ll have a good idea of what we’re doing.

.gallery {
  --s: 250px; /* the size */

  transform-style: preserve-3d;
  --_p: perspective(calc(2.5*var(--s)));
  animation: r 9s infinite cubic-bezier(.5, -0.5, .5, 1.5);
}

@keyframes r {
  0%, 3%   { transform: var(--_p); }
  14%, 19% { transform: var(--_p) rotateX(90deg); }
  31%, 36% { transform: var(--_p) rotateX(90deg) rotateZ(90deg); }
  47%, 52% { transform: var(--_p) rotateX(90deg) rotateZ(90deg) rotateY(-90deg); }
  64%, 69% { transform: var(--_p) rotateX(90deg) rotateZ(90deg) rotateY(-90deg) rotateX(90deg); }
  81%, 86% { transform: var(--_p) rotateX(90deg) rotateZ(90deg) rotateY(-90deg) rotateX(90deg) rotateZ(90deg); }
  97%, 100%{ transform: var(--_p) rotateX(90deg) rotateZ(90deg) rotateY(-90deg) rotateX(90deg) rotateZ(90deg) rotateY(-90deg); }
}

The transform property starts with zero rotations and, on each state, we append a new rotation on a specific axis until we reach six rotations. Then we are back to the first image.

Let’s not forget the placement of our images. Each one is applied to a face of the cube using transform:

.gallery img {
  grid-area: 1 / 1;
  width: var(--s);
  aspect-ratio: 1;
  object-fit: cover;
  transform: var(--_t,) translateZ(calc(var(--s) / 2));
}
.gallery img:nth-child(2) { --_t: rotateX(-90deg); }
.gallery img:nth-child(3) { --_t: rotateY( 90deg) rotate(-90deg); }
.gallery img:nth-child(4) { --_t: rotateX(180deg) rotate( 90deg); }
.gallery img:nth-child(5) { --_t: rotateX( 90deg) rotate( 90deg); }
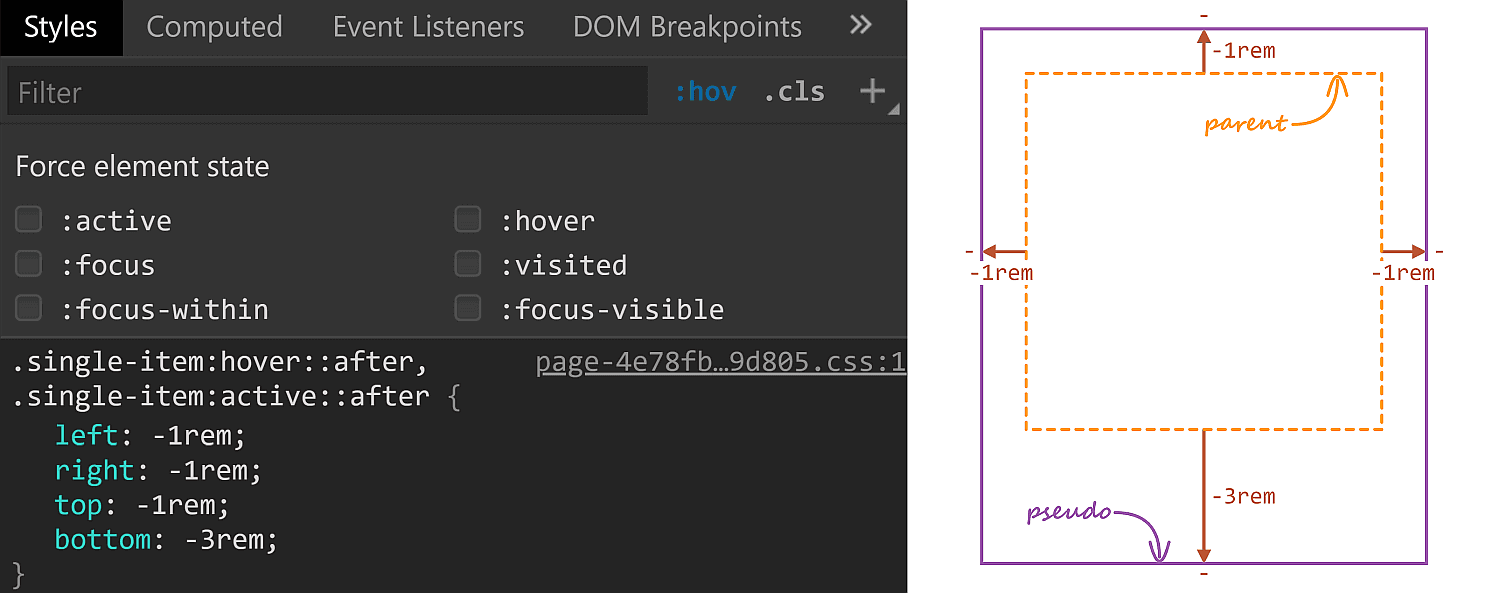
.gallery img:nth-child(6) { --_t: rotateY(-90deg); }

You are probably thinking there is weird complex logic behind the values I’m using there, right? Well, no. All I did was open DevTools and play with different rotation values for each image until I got it right. It may sound stupid but, hey, it works — especially since we have a fixed number of images and we are not looking for something that supports N images.

In fact, forget the values I’m using and try to do the placement on your own as an exercise. Start with all the images stacked on top of each other, open the DevTools, and go! You will probably end up with different code and that’s totally fine. There can be different ways to position the images.

What’s the trick with the comma inside the var()? Is it a typo?

It’s not a typo so don’t remove it! If you do remove it, you will notice that it affects the placement of the first image. You can see that in my code I defined --_t for all the images except the first one because I only need a translation for it. That comma makes the variable fall back to a null value. Without the comma, we won’t have a fallback and the whole value will be invalid.

From the specification:

Note: That is, var(--a,) is a valid function, specifying that if the --a custom property is invalid or missing, the var()` should be replaced with nothing.

Random cube slider

A little bit of randomness can be a nice enhancement for this sort of animation. So, rather than rotate the cube in sequential order, we can roll the dice so to speak, and let the cube roll however it will.

Cool right? I don’t know about you, but I like this version better! It’s more interesting and the transitions are satisfying to watch. And guess what? You can play with the values to create your own random cube slider!

The logic is actual not random at all — it just appears that way. You define a transform on each keyframe that allows you to show one face and… well, that’s really it! You can pick any order you want.

@keyframes r {
  0%, 3%   { transform: var(--_p) rotate3d( 0, 0, 0,  0deg); }
  14%,19%  { transform: var(--_p) rotate3d(-1, 1, 0,180deg); }
  31%,36%  { transform: var(--_p) rotate3d( 0,-1, 0, 90deg); }
  47%,52%  { transform: var(--_p) rotate3d( 1, 0, 0, 90deg); }
  64%,69%  { transform: var(--_p) rotate3d( 1, 0, 0,-90deg); }
  81%,86%  { transform: var(--_p) rotate3d( 0, 1, 0, 90deg); }
  97%,100% { transform: var(--_p) rotate3d( 0, 0, 0,  0deg); }
}

I am using rotate3d() this time but am still relying on DevTools to find the values that feel “right” to me. Don’t try to find a relationship between the keyframes because there simply isn’t one. I’m defining separate transforms and then watching the “random” result. Make sure the first image is the first and last frames, respectively, and show a different image on each of the other frames.

You are not obligated to use a rotate3d() transform as I did. You can also chain different rotations like we did in the previous example. Play around and see what you can come up with! I will be waiting for you to share your version with me in the comments section!

Wrapping up

I hope you enjoyed this little series. We built some fun (and funny) sliders while learning a lot about all kinds of CSS concepts along the way — from grid placement and stacking order, to animation delays and transforms. We even got to play with a dash of Sass to loop through an array of elements.

And we did it all with the exact same HTML for each and every slider we made. How cool is that? CSS is dang powerful and capable of accomplishing so much without the aid of JavaScript.


CSS Infinite 3D Sliders originally published on CSS-Tricks, which is part of the DigitalOcean family. You should get the newsletter.

Re-Creating the Porky Pig Animation from Looney Tunes in CSS

You know, Porky Pig coming out of those red rings announcing the end of a Looney Tunes cartoon. We’ll get there, but first we need to cover some CSS concepts.

Everything in CSS is a box, or rectangle. Rectangles stack, and can be displayed on top of, or below, other rectangles. Rectangles can contain other rectangles and you can style them such that the inner rectangle is visible outside the outer rectangle (so they overflow) or that they’re clipped by the outer rectangle (using overflow: hidden). So far, so good.

What if you want a rectangle to be visible outside its surrounding rectangle, but only on one side. That’s not possible, right?

The first rectangle contains an inner element that overflows both the top and bottom edges with the text "Possible" below it. The second rectangle clips the inner element on both sides, with "Also possible" below it. The third rectangle clips the inner element on the bottom, but shows it overflowing at the top, with the text "...Not possible" below it.

Perhaps, when you look at the image above, the wheels start turning: What if I copy the inner rectangle and clip half of it and then position it exactly?. But when it comes down to it, you can’t choose to have an element overflow at the top but clip at the bottom.

Or can you?

3D transforms

Using 3D transforms you can rotate, transform, and translate elements in 3D space. Here’s a group of practical examples I gathered showcasing some possibilities.

For 3D transforms to do their thing, you need two CSS properties:

  • perspective, using a value in pixels, to determine how pronounced the 3D effect is
  • transform-style: preserve-3d, to tell the browser to keep elements positioned in 3D space.

Even with the good support that 3D transforms have, you don’t see 3D transforms ‘in the wild’ all that much, sadly. Websites are still a “2D” thing, a flat page that scrolls. But as I started playing around with 3D transforms and scouting examples, I found one that was by far the most interesting as far as 3D transforms go:

Three planes floating above each other in 3D space

The image clearly shows three planes but this effect is achieved using a single <div>. The two other planes are the ::before and ::after pseudo-elements that are moved up and down respectively, using translate(), to stack on top of each other in 3D space. What is noticeable here is how the ::after element, that normally would be positioned on top of an element, is behind that element. The creator was able to achieve this by adding transform: translateZ(-1px);.

Even though this was one of many 3D transforms I had seen at this point, it was the first one that made me realize that I was actually positioning elements in 3D space. And if I can do that, I can also make elements intersect:

Two planes intersecting each other in 3D space

I couldn’t think of how this sort of thing would be useful, but then I saw the Porky Pig cartoon animation. He emerges from behind the bottom frame, but his face overlaps and stacks on top of the top edge of the same frame — the exact same sort of clipping situation we saw earlier. That’s when my wheels started turning. Could I replicate that effect using just CSS? And for extra credit, could I replicate it using a single <div>?

I started playing around and relatively quickly had this to show for it:

An orange rectangle that intersects through a blue frame. At the top of the image it's above the frame and at the bottom of the image it's below the blue frame.

Here we have a single <div> with its ::before and an ::after pseudo-elements. The div itself is transparent, the ::before has a blue border and the ::after has been rotated along the x-axis. Because the div has perspective, everything is positioned in 3D and, because of that, the ::after pseudo-element is above the border at the top edge of the frame and behind the border at the bottom edge of the frame.

Here’s that in code:

div {
  transform: perspective(3000px);
  transform-style: preserve-3d;
  position: relative;
  width: 200px;
  height: 200px;
}

div::before {
  content: "";
  width: 100%;
  height: 100%;
  border:10px solid darkblue;
}

div::after {
  content: "";
  position: absolute;
  background: orangered;
  width: 80%;
  height: 150%;
  display: block;
  left: 10%;
  bottom: -25%;
  transform: rotateX(-10deg);
}

With perspective, we can determine how far a viewer is from “z=0” which we can consider to be the “horizon” of our CSS 3D space. The larger the perspective, the less pronounced the 3D effect, and vice versa. For most 3D scenes, a perspective value between 500 and 1,000 pixels works best, though you can play around with it to get the exact effect you want. You can compare this with perspective drawing: If you draw two horizon points close together, you get a very strong perspective; but if they’re far apart, then things appear flatter.

From rectangles to cartoons

Rectangles are fun, but what I really wanted to build was something like this:

A film cell of Porky Pig coming out of a circle with the text "That's all folks."

I couldn‘t find or create a nicely cut-out version of Porky Pig from that image, but the Wikipedia page contains a nice alternative, so we’ll use that.

First, we need to split the image up into three parts:

  • <div>: the blue background behind Porky
  • ::after: all the red circles that form a sort of tunnel
  • ::before: Porky Pig himself in all his glory, set as a background image

We’ll start with the <div>. That will be the background as well as the base for the rest of the elements. It’ll also contain the perspective and transform-style properties I called out earlier, along with some sizes and the background color:

div {
  transform: perspective(3000px);
  transform-style:preserve-3d;
  position: relative;
  width: 200px;
  height: 200px;
  background: #4992AD;
}

Alright, next up, we‘ll move to the red circles. The element itself has to be transparent because that’s the opening where Porky emerges. So how shall we go about it? We can use a border just like the example earlier in this article, but we only have one border and that can have a solid color. We need a bunch of circles that can accept gradients. We can use box-shadow instead, chaining multiple shadows in the property values. This gets us all of the circles we need, and by using a blur radius value of 0 with a large spread radius, we can create the appearance of multiple “borders.”

box-shadow: <x-offset> <y-offset> <blur-radius> <spread-radius> <color>;

We‘ll use a border-radius that‘s as large as the <div> itself, making the ::before a circle. Then we’ll add the shadows. When we add a few red circles with a large spread and add blurry white, we get an effect that looks very similar to the Porky’s tunnel.

box-shadow: 0 0 20px   0px #fff, 0 0 0  30px #CF331F,
            0 0 20px  30px #fff, 0 0 0  60px #CF331F,
            0 0 20px  60px #fff, 0 0 0  90px #CF331F,
            0 0 20px  90px #fff, 0 0 0 120px #CF331F,
            0 0 20px 120px #fff, 0 0 0 150px #CF331F;

Here, we’re adding five circles, where each is 30px wide. Each circle has a solid red background. And, by using white shadows with a blur radius of 20px on top of that, we create the gradient effect.

The background and circles in pure CSS without Porky

With the background and the circles sorted, we’re now going to add Porky. Let’s start with adding him at the spot we want him to end up, for now above the circles.

div::before {
  position: absolute;
  content: "";
  width: 80%;
  height: 150%;
  display: block;
  left: 10%;
  bottom: -12%;
  background: url("Porky_Pig.svg") no-repeat center/contain;
}

You might have noticed that slash in “center/contain” for the background. That’s the syntax to set both the position (center) and size (contain) in the background shorthand CSS property. The slash syntax is also used in the font shorthand CSS property where it’s used to set the font-size and line-height like so: <font-size>/<line-height>.

The slash syntax will be used more in future versions of CSS. For example, the updated rgb() and hsl() color syntax can take a slash followed by a number to indicate the opacity, like so: rgb(0 0 0 / 0.5). That way, there’s not need to switch between rgb() and rgba(). This already works in all browsers, except Internet Explorer 11.

Porky Pig positioned above the circles

Both the size and positioning here is a little arbitrary, so play around with that as you see fit. We’re a lot closer to what we want, but now need to get it so the bottom portion of Porky is behind the red circles and his top half remains visible.

The trick

We need to transpose both the circles as well as Porky in 3D space. If we want to rotate Porky, there are a few requirements we need to meet:

  • He should not clip through the background.
  • We should not rotate him so far that the image distorts.
  • His lower body should be below the red circles and his upper body should be above them.

To make sure Porky doesn‘t clip through the background, we first move the circles in the Z direction to make them appear closer to the viewer. Because preserve-3d is applied it means they also zoom in a bit, but if we only move them a smidge, the zoom effect isn’t noticeable and we end up with enough space between the background and the circles:

transform: translateZ(20px);

Now Porky. We’re going to rotate him around the X-axis, causing his upper body to move closer to us, and the lower part to move away. We can do this with:

transform: rotateX(-10deg);

This looks pretty bad at first. Porky is partially hidden behind the blue background, and he’s also clipping through the circles in a weird way.

Porky Pig partially clipped by the background and the circles

We can solve this by moving Porky “closer” to us (like we did with the circles) using translateZ(), but a better solution is to change the position of our rotation point. Right now it happens from the center of the image, causing the lower half of the image to rotate away from us.

If we move the starting point of the rotation toward the bottom of the image, or even a little bit below that, then the entirety of the image rotates toward us. And because we already moved the circles closer to us, everything ends up looking as it should:

transform: rotateX(-10deg);
transform-origin: center 120%;
Porky Pig emerges from the circle, with his legs behind the circles but his head above them.

To get an idea of how everything works in 3D, click “show debug” in the following Pen:

Animation

If we keep things as they are — a static image — then we wouldn’t have needed to go through all this trouble. But when we animate things, we can reveal the layering and enhance the effect.

Here‘s the animation I’m going for: Porky starts out small at the bottom behind the circles, then zooms in, emerging from the blue background over the red circles. He stays there for a bit, then moves back out again.

We’ll use transform for the animation to get the best performance. And because we’re doing that, we need to make sure we keep the rotateX in there as well.

@keyframes zoom {
  0% {
    transform: rotateX(-10deg) scale(0.66);
  }
  40% {
    transform: rotateX(-10deg) scale(1);
  }
  60% {
    transform: rotateX(-10deg) scale(1);
  }
  100% {
    transform: rotateX(-10deg) scale(0.66);
  }
}

Soon, we’ll be able to directly set different transforms, as browsers have started implementing them as individual CSS properties. That means that repeating that rotateX(-10deg) will eventually be unnecessary; but for now, we have a little bit of duplication.

We zoom in and out using the scale() function and, because we’ve already set a transform-origin, scaling happens from the center-bottom of the image, which is precisely the effect we want! We’re animating the scale up to 60% of Porky’s actual size, we have the little break at the largest point, where he fully pops out of the circle frame.

The animation goes on the ::before pseudo-element. To make the animation look a little more natural, we’re using an ease-in-out timing function, which slows down the animation at the start and end.

div::before {
  animation-name: zoom;
  animation-duration: 4s;
  animation-iteration-count: infinite;
  animation-fill-mode:forwards;
  animation-timing-function: ease-in-out;
}

What about reduced motion?

Glad you asked! For people who are sensitive to animations and prefer reduced or no motion, we can reach for the prefers-reduced-motion media query. Instead of removing the full animation, we’ll target those who prefer reduced motion and use a more subtle fade effect rather than the full-blown animation.

@media (prefers-reduced-motion: reduce) {
   @keyframes zoom {
    0% {
      opacity:0;
    }
    100% {
      opacity: 1;
    }
  }

  div::before {
    animation-iteration-count: 1;
  }
}

By overwriting the @keyframes inside a media query, the browser will automatically pick it up. This way, we still accentuate the effect of Porky emerging from the circles. And by setting animation-iteration-count to 1, we still let people see the effect, but then stop to prevent continued motion.

Finishing touches

Two more things we can do to make this a bit more fun:

  • We can create more depth in the image by adding a shadow behind Porky that grows as he emerges and appears to zoom in closer to the view.
  • We can turn Porky as he moves, to embellish the pop-out effect even further.

That second part we can implement using rotateZ() in the same animation. Easy breezy.

But the first part requires an additional trick. Because we use an image for Porky, we can’t use box-shadow because that creates a shadow around the box of the ::before pseudo-element instead of around the shape of Porky Pig.

That’s where filter: drop-shadow() comes to the rescue. It looks at the opaque parts of the element and adds a shadow to that instead of around the box.

@keyframes zoom {
  0% {
    transform: rotateX(-10deg) scale(0.66);
    filter: drop-shadow(-5px 5px 5px rgba(0,0,0,0));
  }
  40% {
    transform: rotateZ(-10deg) rotateX(-10deg) scale(1);
    filter: drop-shadow(-10px 10px 10px rgba(0,0,0,0.5));
  }

  60% {
    transform: rotateZ(-10deg) rotateX(-10deg) scale(1);
    filter: drop-shadow(-10px 10px 10px rgba(0,0,0,0.5));
  }

  100% {
    transform: rotateX(-10deg) scale(0.66);
    filter: drop-shadow(-5px 5px 5px rgba(0,0,0,0));
  }
}

And that‘s how I re-created the Looney Tunes animation of Porky Pig. All I can say now is, “That’s all Folks!”


The post Re-Creating the Porky Pig Animation from Looney Tunes in CSS appeared first on CSS-Tricks.

You can support CSS-Tricks by being an MVP Supporter.

CSS Individual Transform Properties in Safari Technology Preview

In CSS, some properties have shorthand. One property that takes separated values. Syntactic sugar, as they say, to make authoring easier. Take transition, which might look something like:

.element {
  transition: border 0.2s ease-in-out;
}

We could have written it like this:

.element {
  transition-property: border;
  transition-duration: 0.2s;
  transition-timing-function: ease-in-out;
}

Every “part” of the shorthand value has its own property it maps to. But that’s not true for everything. Take box-shadow:

.element {
  box-shadow: 0 0 10px #333;
}

That’s not shorthand for other properties. There is no box-shadow-color or box-shadow-offset.

That’s where Custom Properties come to save us!

We could set it up like this:

:root {
  --box-shadow-offset-x: 10px;
  --box-shadow-offset-y: 2px;
  --box-shadow-blur: 5px;
  --box-shadow-spread: 0;
  --box-shadow-color: #333;
}

.element {
  box-shadow:
    var(--box-shadow-offset-x)
    var(--box-shadow-offset-y)
    var(--box-shadow-blur)
    var(--box-shadow-spread)
    var(--box-shadow-color);
}

A bit verbose, perhaps, but gets the job done.

Now that we’ve done that, remember we get some uniquely cool things:

  1. We can change individual values with JavaScript. Like:
    document.documentElement.style.setProperty("--box-shadow-color", "green");
  2. Use the cascade, if we need to. If we set --box-shadow-color: blue on any selector more specific than the :root, we’ll override that color.

Fallbacks are possible too, in case the variable isn’t set at all:

.element {
  box-shadow:
    var(--box-shadow-offset-x, 0)
    var(--box-shadow-offset-y, 0)
    var(--box-shadow-blur, 5px)
    var(--box-shadow-spread, 0)
    var(--box-shadow-color, black);
}

How about transforms? They are fun because they take a space-separated list of values, so each of them could be a custom property:

:root {
  --transform_1: scale(2);
  --transform_2: rotate(10deg);
}

.element{
  transform: var(--transform_1) var(--transform_2);
}

What about elements that do have individual properties for their shorthand, but also offer comma-separated multiple values? Another great use-case:

:root {
  --bgImage: url(basic_map.svg);
  --image_1_position: 50px 20px;
  --image_2_position: bottom right;
}

.element {
  background: 
    var(--bgImage) no-repeat var(--image_1_position),
    var(--bgImage) no-repeat var(--image_2_position);
}

Or transitions?

:root {
  --transition_1_property: border;
  --transition_1_duration: 0.2s;
  --transition_1_timing_function: ease;
  
  --transition_2_property: background;
  --transition_2_duration: 1s;
  --transition_2_timing_function: ease-in-out;
}

.element {
  transition: 
    var(--transition_1_property) 
    var(--transition_1_duration) 
    var(--transition_1_timing_function),
    var(--transition_2_property) 
    var(--transition_2_duration) 
    var(--transition_2_timing_function),
}

Dan Wilson recently used this kind of thing with animations to show how it’s possible to pause individual animations!


Here’s browser support:

This browser support data is from Caniuse, which has more detail. A number indicates that browser supports the feature at that version and up.

Desktop

ChromeFirefoxIEEdgeSafari
4931No169.1

Mobile / Tablet

Android ChromeAndroid FirefoxAndroidiOS Safari
8783819.3


The post CSS Individual Transform Properties in Safari Technology Preview appeared first on CSS-Tricks.

You can support CSS-Tricks by being an MVP Supporter.

How CSS Perspective Works

As someone who loves creating CSS animations, one of the more powerful tools I use is perspective. While the perspective property is not capable of 3D effects all by itself (since basic shapes can’t have depth), you can use the transform property to move and rotate objects in a 3D space (with the X, Y, and Z axes), then use perspective to control depth.

In this article, I’ll try to explain the concept of perspective, starting with the very basics, as we work up to a fully animated 3D cube.

The basics of perspective

We’ll start with a simple green square and and we’ll move it on all three axes.

While moving the object on the X and Y axes is pretty straightforward, if we’ll move it on the Z axis, it will look like the square stays exactly the same, and that’s because when the object is moving on the Z axis, the animation moves it closer to us and then further from us, but the size (and location) of the square remains the same. That’s where the CSS perspective property comes into play.

While perspective has no influence on the object when it’s moving on the X or Y axes, when the object is moving on the Z axis, perspective makes the square look bigger when it moves closer to us, and smaller when it moves further away. Yes, just like in “real” life.

The same effect occurs when we’re rotating the object:

Rotating the square on the Z axis looks like the regular rotation we all know and love, but when we rotate the square on the X or Y axes (without using perspective), it only looks like the square is getting smaller (or narrower) rather than rotating. But when we add perspective, we can see that when the square is rotating, the closer side of the square seems bigger, and the further side looks smaller, and the rotation looks as expected.

Note that when the rotation of the object on the X or Y axes is at 90° (or 270°, 450°, 630°, and so on) it will “disappear” from view. Again, this is happening because we can’t add depth to an object, and at this position the square’s width (or height) will actually be 0.

The perspective value

We need to set the perspective property with a value. This value sets the distance from the object’s plane, or in other words, the perspective’s strength. The bigger the value, the further you are from the object; the smaller the value, the more noticeable the perspective will be.

The perspective origin

The perspective-origin property determines the position from which you are “looking” at an object. If the origin is centered (which is the default) and the object is moved to the right, it will seem like you are looking at it from the left (and vice versa).

Alternatively, you can leave the object centered and move the perspective-origin. When the origin is set to the side, it’s like you are “looking” at the object from that side. The bigger the value, the further aside it will look.

The transformation

While perspective and perspective-origin are both set on an element’s parent container and determine the position of the vanishing point (i.e. the distance from the object’s plane from the position from which you are “looking” at the object), the object’s position and rotation is set using the transform property, which is declared on the object itself.

If you take a look at the code of the previous example, where I moved the square from one side to the other, you’ll see that I used the translateX() function — which makes sense since I wanted it to move along the X axis. But notice that it’s assigned to the transform property. The function is a type of transformation that is applied directly to the element we want to transform, but that behaves according to the perspective rules assigned to the parent element.

We can “chain” multiple functions to the transform property. But when using multiple transforms, there three very important things to consider:

  1. When rotating an object, its coordinate system is transformed along with the object.
  2. When translating an object, it moves relative to its own coordinate system (rather than its parent’s coordinates).
  3. The order in which these values are written can (and will) change the end result.

In order to get the effect I was looking for in the previous demo, I first needed to translate the square on the X axis. Only then I could rotate it. If this had been done the other way around (rotate first, then translate), then the result would have been completely different.

To underscore how important the order of values is to the transform property, let’s take a look at a couple of quick examples. First, a simple two-dimensional (2D) transformation of two squares that both have the same transform values, but declared in a different order:

It’s the same deal even if we’re rotating the squares on the Y axis:

It should be noted that while the order of values is important, we could simply change the values themselves to get the desired result instead of changing the order of the values. For example…

transform: translateX(100px) rotateY(90deg);

…will have the same effect as:

transform: rotateY(90deg) translate<strong>Z</strong>(100px);

That’s because in the first line we moved the object on the X axis before rotating it, but in the second line we rotated the object, changed its coordinates, then moved it on the Z axis. Same result, different values.

Let’s look at something more interesting

Sure, squares are a good way to explain the general concept of perspective, but we really start to see how perspective works when we break into three-dimensional (3D) shapes.

Let’s use everything we’ve covered so far to build a 3D cube.

The HTML

We’ll create a .container element that wraps around a .cube element that, in turn, consists of six elements that represent the sides of the cube.

<div class="container">
  <div class="cube">
    <div class="side front"></div>
    <div class="side back"></div>
    <div class="side left"></div>
    <div class="side right"></div>
    <div class="side top"></div>
    <div class="side bottom"></div>
  </div>
</div>

The general CSS

First, we’ll add some perspective to the parent .container element. Then we’ll sure the .cube element has 200px sides and respects 3D transformations. I’m adding a few presentational styles here, but the key properties are highlighted.

/* The parent container, with perspective */
.container {
  width: 400px;
  height: 400px;
  border: 2px solid white;
  border-radius: 4px;
  display: flex;
  justify-content: center;
  align-items: center;
  perspective: 800px;
  perspective-origin: top right;
}

/* The child element, with 3D tranforms preserved */
.cube {
  position: relative;
  width: 200px;
  height: 200px;
  transform-style: preserve-3d;
}

/* The sides of the cube, absolutely positioned */
.side {
  position: absolute;
  width: 100%;
  height: 100%;
  opacity: 0.9;
  border: 2px solid white;
}

/* Background colors for the cube's sides to help visualize the work */
.front { background-color: #d50000; }
.back { background-color: #aa00ff; }

.left { background-color: #304ffe; }
.right { background-color: #0091ea; }

.top { background-color: #00bfa5; }
.bottom { background-color: #64dd17; }

Transforming the sides

The front side is the easiest. We’ll move it forward by 100px:

.front {
  background-color: #d50000;
  transform: translateZ(100px);
}

We can move the back side of the cube backwards by adding translateZ(-100px). Another way to do it is by rotating the side 180deg then move it forward:

.back {
  background-color: #aa00ff;
  transform: translateZ(-100px);


  /* or */
  /* transform: rotateY(180deg) translateZ(100px); */
}

Like the back, there are a couple of ways we can transform the left and right sides:

.left {
  background-color: #304ffe;
  transform: rotateY(90deg) translateZ(100px);


  /* or */
  /* transform: translateX(100px) rotateY(90deg); */
}

.right {
  background-color: #0091ea;
  transform: rotateY(-90deg) translateZ(100px);


  /* or */
  /* transform: translateX(-100px) rotateY(90deg); */
}

The top and bottom are a little different. Instead of rotating them on the Y axis, we need to rotate them on the X axis. Again, it can be done in a  couple of different ways:

.top {
  background-color: #00Bfa5;
  transform: rotateX(90deg) translateZ(100px);


  /* or */
  /* transform: translateY(-100px) rotateX(90deg); */
}
 
.bottom {
  background-color: #64dd17;
  transform: rotateX(-90deg) translateZ(100px);


  /* or */
  /* transform: translateY(100px) rotateX(90deg); */
}

This gives us a 3D cube!

Feel free to play around with the different options for perspective and perspective-origin to see how they affect the cube.

Let’s talk about transform-style

We’re going to add some fancy animation to our cube, but let’s first talk about the transform-style property. I added it earlier in the general CSS, but didn’t really explain what it is or what it does.

The transform-style property has two values: 

  • flat (default)
  • preserve-3d

When we set the property to preserve-3d, it does two important things:

  1. It tells the sides of the cube (the child elements) to be positioned in the same 3D space as the cube. If it is not set to preserve-3d, the default value is set to flat , and the sides are flattened in the cube’s plane. preserve-3d “copies” the cube perspective to its children (the sides) and allows us to rotate just the cube, so we don’t need to animate each side separately.
  2. It displays the child elements according to their position in the 3D space, regardless of their place in the DOM.

There are three squares in this example — green, red, and blue. The green square has a translateZ value of 100px, meaning it’s in front of the other squares. The blue square has a translateZ of -100px, meaning is behind the other squares. 

But in the DOM, the order of the squares is: green, red, blue. Therefore, when transform-style is set to flat (or not set at all), the blue square will appear on top, and the green square will be in the back, because that is the order of the DOM. But if we set the transform-style to preserve-3d, it will render according to its position in the 3D space. As a result, the green square will be in front, and the blue square will be in the back.

Animation

Now, let’s animate the cube! And to make things more interesting, we’ll add the animation to all three axes. First, we’ll add the animation property to the .cube. It won’t do anything yet since we haven’t defined the animation keyframes, but it’s in place for when we do.

animation: cubeRotate 10s linear infinite;

Now the keyframes. We’re basically going to rotate the cube along each axis so that it appears to be rolling in space.

@keyframes cubeRotate {
  from { transform: rotateY(0deg) rotateX(720deg) rotateZ(0deg); }
  to { transform: rotateY(360deg) rotateX(0deg) rotateZ(360deg); }
}

The perspective property is really what gives the animation that depth, like we’re seeing the cube roll left and right, as well as forward and backward.

But before now, the value of the perspective property had been constant, and so was the perspective-origin. Let’s see how changing these values affects the appearance of the cube.

I’ve added three sliders to this example to help see how different values affect the cube’s perspective:

  • The left slider sets the value of the perspective property. Remember, this value sets the distance from the object’s plane, so the smaller the value is, the more noticeable the perspective effect will be.
  • The other two sliders refer to the perspective-origin property. The right slider sets the origin on the vertical axis, from top to bottom, and the bottom slider sets the origin on the horizontal axis, from right to left.

Note that while the animation is running, these changes may be less noticeable as the cube itself rotates, but you can easily turn off the animation by clicking the “Run animation” button.

Play around with these values and find out how they affect the appearance of the cube. There is no one “right” value, and these values vary from project to project, since they’re dependent on the animation, the size of the object, and the effect you want to achieve.

So what’s next?

Now that you’ve mastered the basics of the perspective property in CSS, you can use your imagination and creativity to create 3D objects in your own projects, adding depth and interest to your buttons, menus, inputs, and anything else you want to “bring to life.”

In the meanwhile, you can practice and enhance your skills by trying to create some complex structures and perspective-based animations like this, this, this, or even this.

I hope you enjoyed reading this article and learned something new in the process! Feel free to leave a comment to let me know what you think or drop me a line on Twitter if you have any questions about perspective or any other topic in this article.


The post How CSS Perspective Works appeared first on CSS-Tricks.

You can support CSS-Tricks by being an MVP Supporter.

The Mad Magazine Fold-In Effect in CSS

This was always my favorite thing in Mad magazine. One page (the inside of the back cover, I think) was covered in a zany illustration. You folded that page in thirds, covering up the middle-third of that image, and a new image would form because the illustration was designed to perfectly line up with those folds. The new image (and text!) was part of the joke.

Every one was a clever trick, so of course, I’m delighted to see that trick make it’s way to CSS, courtesy of Thomas Park.

I’m pretty surprised Thomas was able to do it with a single state (:hover / :active) . I would have bet a nickel that it would have needed @keyframes to adjust the 3D transforms into different positions during the animation, but it looks like multiple transitions happening (both parent and child) handle that.


If you’re in the mood for other cool CSS paper effects…

Here’s a new one from Lynn Fischer:

A classic from Mandy Michael:

And more folding from Mattia Astorino:

Direct Link to ArticlePermalink

The post The Mad Magazine Fold-In Effect in CSS appeared first on CSS-Tricks.

How to Re-Create a Nifty Netflix Animation in CSS

The design for Netflix’s browse page has remained pretty similar for a few years now. One mainstay component is the preview slider that allows users to scroll through content and hover on items to see a preview.

One unique characteristic of the UI is its hover behavior. When a show preview expands on hover, the cards next to it are pushed outward so that they don’t overlap. 

Like this:

It’s like Bill Murray and Brad Pitt are fighting for the spotlight.

We can do this in CSS! No JavaScript. No dependencies. Plain CSS. But before getting into any code, here’s exactly what we want to do:

  1. The card that is hovered over should expand while keeping its aspect ratio.
  2. When a card is hovered, the other cards should not change size and move outwards so that they don’t overlap one another.
  3. All the cards should remain vertically centered with one another.

Sound good? Now let’s get into the code.

HTML and flexible elements

Let’s set up a row of images that represents Netflix’s video previews. That includes:

  • A  .container parent element with several .item elements inside
  • Each .item element consisting of an image wrapped in an anchor tag
  • Turning .container into a flex container that aligns the items in a row
  • Setting the flex behavior for the .item class so they take up equal space in the row

Expanding an item on hover

Our next step is getting an item to expand when it is hovered. We could do this by animating the element’s width, but that would affect the flow of the document and cause the hovered item’s siblings to shrink – plus, animating the width property is known to be poor for performance in some cases.

To avoid squeezing the sibling of the hovered item, we are going to animate the transform property — specifically, its scale() function — instead. This won’t affect document flow the same way width does.

Moving siblings outward

Getting the siblings of a hovered item to move away from the hovered item is the tricky part of this whole thing. One CSS feature we have at our disposal is the general sibling combinator. This lets us select all of the sibling items that are positioned after the hovered item.

We’ll turn to the transform property’s translateX() function to move things around. Again, animating transform is much nicer than other properties that impact document flow, like margins and padding.

Since we’ve set an item to scale up 150% on hover, the translation should be set to 25%. That’s half of the additional space that is being occupied by the hovered item.

.item:hover ~ .item {
  transform: translateX(25%);
}

That handles moving things to the right, but how can we translate the items on the left? Since the general sibling combinator only applies to siblings positioned after a given selector (no going “backwards”), we’ll need another approach.

One way is to add an additional hover rule on the parent container itself. Here is the plan:

  • When hovering the parent container, shift all the items inside that container to the left.
  • Use the general sibling combinator to make the items positioned after the hovered item move to the right.
  • Get super specific so a hovered item isn’t translated like the rest of the items.

We’re making a big assumption that your document uses a left-to-right writing mode. If you want to use this effect in a right-to-left context, you will need to set all items inside the hovered outer container to move right and use the general sibling combinator to move all selected items left.

Demo time!

One little thing to note: this final version is using :focus and :focus-within pseudo-classes to support keyboard navigation. The Netflix example isn’t using it, but I think that’s a nice touch for accessibility.


There we have it! Yes, we could have used JavaScript event listeners instead of CSS hover rules., and that could possibly be better for maintainability and readability. But it’s sometimes fun to see just how far CSS can take us!

The post How to Re-Create a Nifty Netflix Animation in CSS appeared first on CSS-Tricks.

How They Fit Together: Transform, Translate, Rotate, Scale, and Offset

Firefox 72 was first out of the gate with “independent transforms.” That is, instead of having to combine transforms together, like:

.el {
  transform: translate(10px, 10px) scale(0.95) rotate(10deg);
}

…we can do:

.el {
  rotate: 10deg;
  scale: 0.95;
  translate: 10px 10px;
}

That’s extremely useful, as having to repeat other transforms when you change a single one, lest remove them, is tedious and prone to error.

But there is some nuance to know about here, and Dan Wilson digs in.

Little things to know:

  • Independent transforms happen first. The transform property happens last and stacks on top of what has already been done, which can get confusing¹.
  • They all share the same transform-origin.
  • The offset-* properties also effectively moves/rotates elements. Those happen after independent transforms and before transform.
  1. Claus Colloseus wrote in to fix some issues in this post and clarify just how confusing this can be. For example, rotate: 45deg; transform: rotate(-45deg); will do nothing as both of them will apply and effectively cancel each other out. So shouldn’t translate: 50px 0; rotate: 45deg; transform: translate(-50px, 0) rotate(-45deg); also all cancel out? No, because of the ordering, the end result is like translate(14.6447px, -35.3553px).

Direct Link to ArticlePermalink

The post How They Fit Together: Transform, Translate, Rotate, Scale, and Offset appeared first on CSS-Tricks.

Weaving a Line Through Text in CSS

Earlier this year, I came across this demo by Florin Pop, which makes a line go either over or under the letters of a single line heading. I thought this was a cool idea, but there were a few little things about the implementation I felt I could simplify and improve at the same time.

First off, the original demo duplicates the headline text, which I knew could be easily avoided. Then there's the fact that the length of the line going through the text is a magic number, which is not a very flexible approach. And finally, can't we get rid of the JavaScript?

So let's take a look into where I ended up taking this.

HTML structure

Florin puts the text into a heading element and then duplicates this heading, using Splitting.js to replace the text content of the duplicated heading with spans, each containing one letter of the original text.

Already having decided to do this without text duplication, using a library to split the text into characters and then put each into a span feels a bit like overkill, so we're doing it all with an HTML preprocessor.

- let text = 'We Love to Play';
- let arr = text.split('');

h1(role='image' aria-label=text)
  - arr.forEach(letter => {
    span.letter #{letter}
  - });

Since splitting text into multiple elements may not work nicely with screen readers, we've given the whole thing a role of image and an aria-label.

This generates the following HTML:

<h1 role="image" aria-label="We Love to Play">
  <span class="letter">W</span>
  <span class="letter">e</span>
  <span class="letter"> </span>
  <span class="letter">L</span>
  <span class="letter">o</span>
  <span class="letter">v</span>
  <span class="letter">e</span>
  <span class="letter"> </span>
  <span class="letter">t</span>
  <span class="letter">o</span>
  <span class="letter"> </span>
  <span class="letter">P</span>
  <span class="letter">l</span>
  <span class="letter">a</span>
  <span class="letter">y</span>
</h1>

Basic styles

We place the heading in the middle of its parent (the body in this case) by using a grid layout:

body {
  display: grid;
  place-content: center;
}
Screenshot of grid layout lines around the centrally placed heading when inspecting it with Firefox DevTools.
The heading doesn't stretch across its parent to cover its entire width, but is instead placed in the middle.

We may also add some prettifying touches, like a nice font or a background on the container.

Next, we create the line with an absolutely positioned ::after pseudo-element of thickness (height) $h:

$h: .125em;
$r: .5*$h;

h1 {
  position: relative;
  
  &::after {
    position: absolute;
    top: calc(50% - #{$r}); right: 0;
    height: $h;
    border-radius: 0 $r $r 0;
    background: crimson;
  }
}

The above code takes care of the positioning and height of the pseudo-element, but what about the width? How do we make it stretch from the left edge of the viewport to the right edge of the heading text?

Line length

Well, since we have a grid layout where the heading is middle-aligned horizontally, this means that the vertical midline of the viewport coincides with that of the heading, splitting both into two equal-width halves:

SVG illustration. Shows how the vertical midline of the viewport coincides with that of the heading and splits both into equal width halves.
The middle-aligned heading.

Consequently, the distance between the left edge of the viewport and the right edge of the heading is half the viewport width (50vw) plus half the heading width, which can be expressed as a % value when used in the computation of its pseudo-element's width.

So the width of our ::after pseudo-element is:

width: calc(50vw + 50%);

Making the line go over and under

So far, the result is just a crimson line crossing some black text:

What we want is for some of the letters to show up on top of the line. In order to get this effect, we give them (or we don't give them) a class of .over at random. This means slightly altering the Pug code:

- let text = 'We Love to Play';
- let arr = text.split('');

h1(role='image' aria-label=text)
  - arr.forEach(letter => {
    span.letter(class=Math.random() > .5 ? 'over' : null) #{letter}
  - });

We then relatively position the letters with a class of .over and give them a positive z-index.

.over {
  position: relative;
  z-index: 1;
}

My initial idea involved using translatez(1px) instead of z-index: 1, but then it hit me that using z-index has both better browser support and involves less effort.

The line passes over some letters, but underneath others:

Animate it!

Now that we got over the tricky part, we can also add in an animation to make the line enter in. This means having the crimson line shift to the left (in the negative direction of the x-axis, so the sign will be minus) by its full width (100%) at the beginning, only to then allow it to go back to its normal position.

@keyframes slide { 0% { transform: translate(-100%); } }

I opted to have a bit of time to breathe before the start of the animation. This meant adding in the 1s delay which, in turn, meant adding the backwards keyword for the animation-fill-mode, so that the line would stay in the state specified by the 0% keyframe before the start of the animation:

animation: slide 2s ease-out 1s backwards;

A 3D touch

Doing this gave me another idea, which was to make the line go through every single letter, that is, start above the letter, go through it and finish underneath (or the other way around).

This requires real 3D and a few small tweaks.

First off, we set transform-style to preserve-3d on the heading since we want all its children (and pseudo-elements) to a be part of the same 3D assembly, which will make them be ordered and intersect according to how they're positioned in 3D.

Next, we want to rotate each letter around its y-axis, with the direction of rotation depending on the presence of the randomly assigned class (whose name we change to .rev from "reverse" as "over" isn't really suggestive of what we're doing here anymore).

However, before we do this, we need to remember our span elements are still inline ones at this point and setting a transform on an inline element has absolutely no effect.

To get around this issue, we set display: flex on the heading. However, this creates a new issue and that's the fact that span elements that contain only a space (" ") get squished to zero width.

Screenshot showing how the span containing only a space gets squished to zero width when setting `display: flex` on its parent.
Inspecting a space only <span> in Firefox DevTools.

A simple fix for this is to set white-space: pre on our .letter spans.

Once we've done this, we can rotate our spans by an angle $a... in one direction or the other!

$a: 2deg;

.letter {
  white-space: pre;
  transform: rotatey($a);
}

.rev { transform: rotatey(-$a); }

Since rotation around the y-axis squishes our letters horizontally, we can scale them along the x-axis by a factor ($f) that's the inverse of the cosine of $a.

$a: 2deg;
$f: 1/cos($a)

.letter {
  white-space: pre;
  transform: rotatey($a) scalex($f)
}

.rev { transform: rotatey(-$a) scalex($f) }

If you wish to understand the why behind using this particular scaling factor, you can check out this older article where I explain it all in detail.

And that's it! We now have the 3D result we've been after! Do note however that the font used here was chosen so that our result looks good and another font may not work as well.

The post Weaving a Line Through Text in CSS appeared first on CSS-Tricks.

Various Methods for Expanding a Box While Preserving the Border Radius

I've recently noticed an interesting change on CodePen: on hovering the pens on the homepage, there's a rectangle with rounded corners expanding in the back.

Animated gif recording the CodePen expanding box effect on hover.
Expanding box effect on the CodePen homepage.

Being the curious creature that I am, I had to check how this works! Turns out, the rectangle in the back is an absolutely positioned ::after pseudo-element.

Collage. On the left side, there is a DevTools screenshot showing the initial styles applied on the ::after pseudo-element. The relevant ones are those making it absolutely positioned with an offset of 1rem from the top and left and with an offset of -1rem from the right and bottom. On the right side, we have an illustration of these styles, showing the parent element box, the ::after box and the offsets between their edges.
Initial ::after styles. A positive offset goes inwards from the parent's padding limit, while a negative one goes outwards.

On :hover, its offsets are overridden and, combined with the transition, we get the expanding box effect.

Collage. On the left side, there is a DevTools screenshot showing the :hover styles applied on the ::after pseudo-element. These are all offsets overriding the initial ones and making the boundary of the ::after shift outwards by 2rem in all directions except the right. On the right side, we have an illustration of these styles, showing the parent element box, the ::after box and the offsets between their edges.
The ::after styles on :hover.

The right property has the same value (-1rem) in both the initial and the :hover rule sets, so it's unnecessary to override it, but all the other offsets move by 2rem outwards (from 1rem to -1rem for the top and left offsets and from -1rem to -3rem for the bottom offset)

One thing to notice here is that the ::after pseudo-element has a border-radius of 10px which gets preserved as it expands. Which got me to think about what methods we have for expanding/shrinking (pseudo-) elements while preserving their border-radius. How many can you think of? Let me know if you have ideas that haven't been included below, where we take a look at a bunch of options and see which is best suited for what situation.

Changing offsets

This is the method used on CodePen and it works really well in this particular situation for a bunch of reasons. First off, it has great support. It also works when the expanding (pseudo-) element is responsive, with no fixed dimensions and, at the same time, the amount by which it expands is fixed (a rem value). It also works for expanding in more than two directions (top, bottom and left in this particular case).

There are however a couple of caveats we need to be aware of.

First, our expanding element cannot have position: static. This is not a problem in the context of the CodePen use case since the ::after pseudo-element needs to be absolutely positioned anyway in order to be placed underneath the rest of this parent's content.

Second, going overboard with offset animations (as well as, in general, animating any property that affects layout with box properties the way offsets, margins, border widths, paddings or dimensions do) can negatively impact performance. Again, this is not something of concern here, we only have a little transition on :hover, no big deal.

Changing dimensions

Instead of changing offsets, we could change dimensions instead. However, this is a method that works if we want our (pseudo-) element to expand in, at most, two directions. Otherwise, we need to change offsets as well. In order to better understand this, let's consider the CodePen situation where we want our ::after pseudo-elements to expand in three directions (top, bottom and left).

The relevant initial sizing info is the following:

.single-item::after {
  top: 1rem;
  right: -1rem;
  bottom: -1rem;
  left: 1rem;
}

Since opposing offsets (the top-bottom and left-right pairs) cancel each other (1rem - 1rem = 0), it results that the pseudo-element's dimensions are equal to those of its parent (or 100% of the parent's dimensions).

So we can re-write the above as:

.single-item::after {
  top: 1rem;
  right: -1rem;
  width: 100%;
  height: 100%;
}

On :hover, we increase the width by 2rem to the left and the height by 4rem, 2rem to the top and 2rem to the bottom. However, just writing:

.single-item::after {
  width: calc(100% + 2rem);
  height: calc(100% + 4rem);
}

...is not enough, as this makes the height increase the downward direction by 4rem instead of increasing it by 2rem up and 2rem down. The following demo illustrates this (put :focus on or hover over the items to see how the ::after pseudo-element expands):

See the Pen by thebabydino (@thebabydino) on CodePen.

We'd need to update the top property as well in order to get the desired effect:

.single-item::after {
  top: -1rem;
  width: calc(100% + 2rem);
  height: calc(100% + 4rem);
}

Which works, as it can be seen below:

See the Pen by thebabydino (@thebabydino) on CodePen.

But, to be honest, this feels less desirable than changing offsets alone.

However, changing dimensions is a good solution in a different kind of situation, like when we want to have some bars with rounded corners that expand/shrink in a single direction.

See the Pen by thebabydino (@thebabydino) on CodePen.

Note that, if we didn't have rounded corners to preserve, the better solution would be to use directional scaling via the transform property.

Changing padding/border-width

Similar to changing the dimensions, we can change the padding or border-width (for a border that's transparent). Note that, just like with changing the dimensions, we need to also update offsets if expanding the box in more than two dimensions:

See the Pen by thebabydino (@thebabydino) on CodePen.

In the demo above, the pinkish box represents the content-box of the ::after pseudo-element and you can see it stays the same size, which is important for this approach.

In order to understand why it is important, consider this other limitation: we also need to have the box dimensions defined by two offsets plus the width and the height instead of using all four offsets. This is because the padding/ border-width would only grow inwards if we were to use four offsets rather than two plus the width and the height.

See the Pen by thebabydino (@thebabydino) on CodePen.

For the same reason, we cannot have box-sizing: border-box on our ::after pseudo-element.

See the Pen by thebabydino (@thebabydino) on CodePen.

In spite of these limitations, this method can come in handy if our expanding (pseudo-) element has text content we don't want to see moving around on :hover as illustrated by the Pen below, where the first two examples change offsets/ dimensions, while the last two change paddings/ border widths:

See the Pen by thebabydino (@thebabydino) on CodePen.

Changing margin

Using this method, we first set the offsets to the :hover state values and a margin to compensate and give us the initial state sizing:

.single-item::after {
  top: -1rem;
  right: -1rem;
  bottom: -3rem;
  left: -1rem;
  margin: 2rem 0 2rem 2rem;
}

Then we zero this margin on :hover:

.single-item:hover::after { margin: 0 }

See the Pen by thebabydino (@thebabydino) on CodePen.

This is another approach that works great for the CodePen situation, though I cannot really think of other use cases. Also note that, just like changing offsets or dimensions, this method affects the size of the content-box, so any text content we may have gets moved and rearranged.

Changing font size

This is probably the trickiest one of all and has lots of limitations, the most important of which being we cannot have text content on the actual (pseudo-) element that expands/shrinks — but it's another method that would work well in the CodePen case.

Also, font-size on its own doesn't really do anything to make a box expand or shrink. We need to combine it with one of the previously discussed properties.

For example, we can set the font-size on ::after to be equal to 1rem, set the offsets to the expanded case and set em margins that would correspond to the difference between the expanded and the initial state.

.single-item::after {
  top: -1rem;
  right: -1rem;
  bottom: -3rem;
  left: -1rem;
  margin: 2em 0 2em 2em;
  font-size: 1rem;
}

Then, on :hover, we bring the font-size to 0:

.single-item:hover::after { font-size: 0 }

See the Pen by thebabydino (@thebabydino) on CodePen.

We can also use font-size with offsets, though it gets a bit more complicated:

.single-item::after {
  top: calc(2em - 1rem);
  right: -1rem;
  bottom: calc(2em - 3rem);
  left: calc(2em - 1rem);
  font-size: 1rem;
}

.single-item:hover::after { font-size: 0 }

Still, what's important is that it works, as it can be seen below:

See the Pen by thebabydino (@thebabydino) on CodePen.

Combining font-size with dimensions is even hairier, as we also need to change the vertical offset value on :hover on top of everything:

.single-item::after {
  top: 1rem;
  right: -1rem;
  width: calc(100% + 2em);
  height: calc(100% + 4em);
  font-size: 0;
}

.single-item:hover::after {
  top: -1rem;
  font-size: 1rem
}

Oh, well, at least it works:

See the Pen by thebabydino (@thebabydino) on CodePen.

Same thing goes for using font-size with padding/border-width:

.single-item::after {
  top: 1rem;
  right: -1rem;
  width: 100%;
  height: 100%;
  font-size: 0;
}

.single-item:nth-child(1)::after {
  padding: 2em 0 2em 2em;
}

.single-item:nth-child(2)::after {
  border: solid 0 transparent;
  border-width: 2em 0 2em 2em;
}

.single-item:hover::after {
  top: -1rem;
  font-size: 1rem;
}

See the Pen by thebabydino (@thebabydino) on CodePen.

Changing scale

If you've read pieces on animation performance, then you've probably read it's better to animate transforms instead of properties that impact layout, like offsets, margins, borders, paddings, dimensions — pretty much what we've used so far!

The first issue that stands out here is that scaling an element also scales its corner rounding, as illustrated below:

See the Pen by thebabydino (@thebabydino) on CodePen.

We can get around this by also scaling the border-radius the other way.

Let's say we scale an element by a factor $fx along the x axis and by a factor $fy along the y axis and we want to keep its border-radius at a constant value $r.

This means we also need to divide $r by the corresponding scaling factor along each axis.

border-radius: #{$r/$fx}/ #{$r/$fy};
transform: scale($fx, $fy)

See the Pen by thebabydino (@thebabydino) on CodePen.

However, note that with this method, we need to use scaling factors, not amounts by which we expand our (pseudo-) element in this or that direction. Getting the scaling factors from the dimensions and expansion amounts is possible, but only if they're expressed in units that have a certain fixed relation between them. While preprocessors can mix units like in or px due to the fact that 1in is always 96px, they cannot resolve how much 1em or 1% or 1vmin or 1ch is in px as they lack context. And calc() is not a solution either, as it doesn't allow us to divide a length value by another length value to get a unitless scale factor.

This is why scaling is not a solution in the CodePen case, where the ::after boxes have dimensions that depend on the viewport and, at the same time, expand by fixed rem amounts.

But if our scale amount is given or we can easily compute it, this is an option to consider, especially since making the scaling factors custom properties we then animate with a bit of Houdini magic can greatly simplify our code.

border-radius: calc(#{$r}/var(--fx))/ calc(#{$r}/var(--fy));
transform: scale(var(--fx), var(--fy))

Note that Houdini only works in Chromium browsers with the Experimental Web Platform features flag enabled.

For example, we can create this tile grid animation:

Looping tile grid animation (Demo, Chrome with flag only)

The square tiles have an edge length $l and with a corner rounding of $k*$l:

.tile {
  width: $l;
  height: $l;
  border-radius: calc(#{$r}/var(--fx))/ calc(#{$r}/var(--fy));
  transform: scale(var(--fx), var(--fy))
}

We register our two custom properties:

CSS.registerProperty({
  name: '--fx', 
  syntax: '<number>', 
  initialValue: 1, 
  inherits: false
});

CSS.registerProperty({
  name: '--fy', 
  syntax: '<number>', 
  initialValue: 1, 
  inherits: false
});

And we can then animate them:

.tile {
  /* same as before */
  animation: a $t infinite ease-in alternate;
  animation-name: fx, fy;
}

@keyframes fx {
  0%, 35% { --fx: 1 }
  50%, 100% { --fx: #{2*$k} }
}

@keyframes fy {
  0%, 35% { --fy: 1 }
  50%, 100% { --fy: #{2*$k} }
}

Finally, we add in a delay depending on the horizontal (--i) and vertical (--j) grid indices in order to create a staggered animation effect:

animation-delay: 
  calc((var(--i) + var(--m) - var(--j))*#{$t}/(2*var(--m)) - #{$t}), 
  calc((var(--i) + var(--m) - var(--j))*#{$t}/(2*var(--m)) - #{1.5*$t})

Another example is the following one, where the dots are created with the help of pseudo-elements:

Looping spikes animation (Demo, Chrome with flag only)

Since pseudo-elements get scaled together with their parents, we need to also reverse the scaling transform on them:

.spike {
  /* other spike styles */
  transform: var(--position) scalex(var(--fx));

  &::before, &::after {
    /* other pseudo styles */
    transform: scalex(calc(1/var(--fx)));
  }
}

Changing... clip-path?!

This is a method I really like, even though it cuts out pre-Chromium Edge and Internet Explorer support.

Pretty much every usage example of clip-path out there has either a polygon() value or an SVG reference value. However, if you've seen some of my previous articles, then you probably know there are other basic shapes we can use, like inset(), which works as illustrated below:

Illustration showing what the four values of the inset() function represent. The first one is the offset of the top edge of the clipping rectangle with respect to the top edge of the border-box. The second one is the offset of the right edge of the clipping rectangle with respect to the right edge of the border-box. The third one is the offset of the bottom edge of the clipping rectangle with respect to the bottom edge of the border-box. The fourth one is the offset of the left edge of the clipping rectangle with respect to the left edge of the border-box.
How the inset() function works. (Demo)

So, in order to reproduce the CodePen effect with this method, we set the ::after offsets to the expanded state values and then cut out what we don't want to see with the help of clip-path:

.single-item::after {
  top: -1rem;
  right: -1rem;
  bottom: -3em;
  left: -1em;
  clip-path: inset(2rem 0 2rem 2rem)
}

And then, in the :hover state, we zero all insets:

.single-item:hover::after {
  clip-path: inset(0)
}

This can be seen in action below:

See the Pen by thebabydino (@thebabydino) on CodePen.

Alright, this works, but we also need a corner rounding. Fortunately, inset() lets us specify that too as whatever border-radius value we may wish.

Here, a 10px one for all corners along both directions does it:

.single-item::after {
  /* same styles as before */
  clip-path: inset(2rem 0 2rem 2rem round 10px)
}

.single-item:hover::after {
  clip-path: inset(0 round 10px)
}

And this gives us exactly what we were going for:

See the Pen by thebabydino (@thebabydino) on CodePen.

Furthermore, it doesn't really break anything in non-supporting browsers, it just always stays in the expanded state.

However, while this is method that works great for a lot of situations — including the CodePen use case — it doesn't work when our expanding/shrinking elements have descendants that go outside their clipped parent's border-box, as it is the case for the last example given with the previously discussed scaling method.

The post Various Methods for Expanding a Box While Preserving the Border Radius appeared first on CSS-Tricks.