React is actually a bit of an outlier with state management. While it has first-class tools like useState and Context, you’re more own your own for reactive global state. Here’s David Ceddia with “React State Management Libraries and How to Choose” which does a good job of talking about the options. I say “outlier” because every other major JavaScript framework has its own blessed global state implementations.
To me, the concept of state is vital to front-end development. It’s like components in that way. It’s just shaking out that it’s a smart way to work on digital products. State is our own abstraction of what is happening on a site. It can be whether a sidebar is open or closed, a list of comments data, the details of logged-in users, or anything else that we need to draw and make functional UI.
That’s why it still feels surprising to me that native web components didn’t attempt to tackle the idea of state at all. I’m not informed enough to know why that is, but as an observer, I can see that developers are clamoring to find the best ways to make state work in and across web components. Most recently, I came across @vue/lit by Evan You. That is a microframework for web components that solves templating and re-rendering by using lit-html, and then incorporating reactive state with Vue’s reactivity. Looks pretty cool to me.
Evan’s idea takes the the combined weight of libraries in use to ~6kb. So how low can we go here? Krasimir Tsonev wrote “Using JavaScript module system for state management” where they use no libraries at all (arguably creating a small one of their own along the way). A state manager can just be a module we import and use that is essentially an Object with values, mutation functions, and listeners. That takes the overhead of state mangement down to just about nothing, at the cost of giving up the efficient re-rendering, better templating, and lifecycle stuff you’d get by using more robust libraries.
Speaking of not using any libraries at all, here’s Leo Bauza with “How does Viget JavaScript?” where they go into the vanilla pattern they use to add functionality on top of an HTML foundation. It looks like all functionality is applied via data-* attributes, and each data attribute has its own JavaScript module (Class) that handles that specific bit of functionality. It doesn’t look like the deal with global state here, but they do handle state rather manually within the modules.
I find all this stuff fascinating. In my own work, I bet I’m rather typical. If it’s a small baby thing, I might be up for a roll-my-own pattern. If it’s a medium-sized thing but sorta low-impact, I’d probably reach for the new-and-fancy — and maybe even experimental — takes. But the second I’m doing something big and high-impact, I find way more comfort in picking from the biggest players, even if that sometimes means heavier libraries. 😬
In my recent “Custom Properties as State” post, one of the things I mentioned was that theoretically, UI libraries, like React and Vue, could automatically map the state they manage over to CSS Custom Properties so we could use that state right there if we wanted.
Someone should make a useStateWithCustomProperties hook or something to do that. #freeidea
It works just like I had hoped. The hook returns a component that is the Custom Property “boundary” and any state you pass it is mapped to those custom properties. Basic demo:
This is clever and useful already, but I’m tellin’ ya, this will be extremely useful should the concept of higher level custom properties land. The idea is that you could flip one custom property and have a whole block of styling change, which is is what we already enjoy with media queries and you know how useful those are.
Here’s a fun idea from James Stanley: a CSS file (that presumably updates daily) containing CSS custom properties for “seasonal” colors (e.g. spring is greens, fall is oranges). You’d then use the values to theme your site, knowing that those colors change slightly from day to day.
I think it would be more fun if the CSS file provided was just the custom properties and not the opinionated other styles (like what sets the body background and such). That way you could implement the colors any way you choose without any side effects.
CSS as an API?
This makes me think that a CDN-hosted CSS file like this could have other useful stuff, like today’s date for usage in pseudo content, or other special time-sensitive stuff. Maybe the phase of the moon? Sports scores?! Soup of the day?!
/* <div class="soup">The soup of the day is: </div> */
.soup::after {
  content: var(--soupOfTheDay); /* lol kinda */
}
It’s almost like a data API that is tremendously easy to use. Pseudo content is even accessible content these days — but you can’t select the text of pseudo-elements, so don’t read this as an actual endorsement of using CSS as a content API.
Custom Property Flexibility
Will Boyd just blogged about what is possible to put in a custom property. They are tremendously flexible. Just about anything is a valid custom property value and then the usage tends to behave just how you think it will.
body {
  /* totally fine */
  --rgba: rgba(255, 0, 0, 0.1);
  background: var(--rgba);

  /* totally fine */
  --rgba: 255, 0, 0, 0.1;
  background: rgba(var(--rgba));

  /* totally fine */
  --rgb: 255 0 0;
  --a: 0.1;
  background: rgb(var(--rgb) / var(--a));
}

body::after {
  /* totally fine */
  --song: "I need quotes to be pseudo content \A and can't have line breaks without this weird hack \A but still fairly permissive (💧💧💧) ";
  content: var(--song);
  white-space: pre;
}
Bram Van Damme latched onto that flexiblity while covering Will’s article:
Add a couple of scoops of complexity and you get The Raven (media queries with custom properties).
I’d absolutely love to see something happen in CSS to make this easier. Using CSS custom properties for generic state would be amazing. We could apply arbitrary styles when the UI is in arbitrary states! Think of how useful media queries are now, or that container queries will be, but compounded because it’s arbitrary state, not just state that those things expose.
Will calls them “CSS variables” which is super common and understandable. You’ll read (and I have written) sentences often that are like “CSS variables (a.k.a CSS Custom Properties)” or “CSS Custom Properties (a.k.a CSS Variables.” Šime Vidas recently noted there is a rather correct way to refer to these things: --this-part is the custom property and var(--this-part) is the variable, which comes right from usage in the spec.
JavaScript Library State… Automatically?
I’m reminded of this Vue proposal. I’m not sure if it went anywhere, but the idea is that the state of a component would automatically be exposed as CSS custom properties.
By virtue of having color as part of the state of this component, then --color is available as state to the CSS of this component. I think that’s a great idea.
What if every time you used useState in React, CSS custom properties were put on the :root and were updated automatically. For example, if you did this:
Because the state automatically mapped itself to a custom property. Someone should make a useStateWithCustomProperties hook or something to do that. #freeidea
Libraries like React and Vue are for building UI. I think it makes a lot of sense that the state that they manage is automatically exposed to CSS.
Could browsers give us more page state as environment variables?
Speaking of state that CSS should know about, I’ve seen quite a few demos that do fun stuff by mapping over things, like the current mouse position or scroll position, over to CSS. I don’t think it’s entirely unreasonable to ask for that data to be natively exposed to CSS. We already have the concept of environment variables, like env(safe-area-inset-top), and I could see that being used to expose page state, like env(page-scroll-percentage) or env(mouseY).
State machines are typically expressed on the web in JavaScript and often through the popular XState library. But the concept of a state machine is adaptable to just about any language, including, amazingly, HTML and CSS. In this article, we’re going to do exactly that. I recently built a website that included a “no client JavaScript” constraint and I needed one particular unique interactive feature.
The key to all this is using <form> and <input type="radio"> elements to hold a state. That state is toggled or reset with another radio <input> or reset <button> that can be anywhere on the page because it is connected to the same <form> tag. I call this combination a radio reset controller, and it is explained in more detail at the end of the article. You can add more complex state with additional form/input pairs.
It’s a little bit like the Checkbox Hack in that, ultimately, the :checked selector in CSS will be doing the UI work, but this is logically more advanced. I end up using a templating language (Nunjucks) in this article to keep it manageable and configurable.
Traffic light state machine
Any state machine explanation must include the obligatory traffic light example. Below is a working traffic light that uses a state machine in HTML and CSS. Clicking “Next” advances the state. The code in this Pen is post processed from the state machine template to fit in a Pen. We’ll get into the code in a more readable fashion later on.
Hiding/Showing table information
Traffic lights aren’t the most practical every-day UI. How about a <table> instead?
There are two states (A and B) that are changed from two different places in the design that affect changes all over the UI. This is possible because the empty <form> elements and <input> elements that hold state are at the very top of the markup and thus their state can be deduced with general sibling selectors and the rest of the UI can be reached with descendent selectors. There is a loose coupling of UI and markup here, meaning we can change the state of almost anything on the page from anywhere on the page.
General four-state component
Diagram of a generic four-state finite state machine
The goal is a general purpose component to control the desired state of the page. “Page state” here refers to the desired state of the page and “machine state” refers to the internal state of the controller itself. The diagram above shows this generic state machine with four states(A, B, C and D). The full controller state machine for this is shown below. It is built using three of the radio reset controller bits. Adding three of these together forms a state machine that has eight internal machine states (three independent radio buttons that are either on or off).
Diagram of the controller’s internal states
The “machine states” are written as a combination of the three radio buttons (i.e. M001 or M101). To transition from the initial M111 to M011, the radio button for that bit is unset by clicking on another radio <input> in the same group. To transition back, the reset <button> for the <form> attached to that bit is clicked which restores the default checked state. Although this machine has eight total states, only certain transitions are possible. For instance, there is no way to go directly from M111 to M100 because it requires two bits to be flipped. But if we fold these eight states into four states so that each page state shares two machine states (i.e. A shares states M111 and M000) then there is a single transition from any page state to any other page state.
Reusable four-state component
For reusability, the component is built with Nunjucks template macros. This allows it to be dropped into any page to add a state machine with the desired valid states and transitions. There are four required sub-components:
Controller
CSS logic
Transition controls
State classes
Controller
The controller is built with three empty form tags and three radio buttons. Each of the radio buttons checked attribute is checked by default. Each button is connected to one of the forms and they are independent of each other with their own radio group name. These inputs are hidden with display: none because they are are not directly changed or seen. The states of these three inputs comprise the machine state and this controller is placed at the top of the page.
The logic that connects the controller above to the state of the page is written in CSS. The Checkbox Hack uses a similar technique to control sibling or descendant elements with a checkbox. The difference here is that the button controlling the state is not tightly coupled to the element it is selecting. The logic below selects based on the “checked” state of each of the three controller radio buttons and any descendant element with class .M000. This state machine hides any element with the .M000 class by setting display: none !important. The !important isn’t a vital part of the logic here and could be removed; it just prioritizes the hiding from being overridden by other CSS.
{%macro FSM4S_css()%}
<style>
  /* Hide M000 (A1) */
  input[data-rrc="Bx00"]:not(:checked)~input[data-rrc="B0x0"]:not(:checked)~input[data-rrc="B00x"]:not(:checked)~* .M000  {
    display: none !important;
  }

  /* one section for each of 8 Machine States */

</style>
{%endmacro%}
Transition control
Changing the state of the page requires a click or keystroke from the user. To change a single bit of the machine state, the user clicks on a radio button that is connected to the same form and radio group of one of the bits in the controller. To reset it, the user clicks on a reset button for the form connected to that same radio button. The radio button or the reset button is only shown depending on which state they are in. A transition macro for any valid transition is added to the HTML. There can be multiple transitions placed anywhere on the page. All transitions for states currently inactive will be hidden.
The three components above are sufficient. Any element that depends on state should have the classes applied to hide it during other states. This gets messy. The following macros are used to simplify that process. If a given element should be shown only in state A, the {{showA()}} macro adds the states to hide.
The markup for the traffic light example is shown below. The template macros are imported in the first line of the file. The CSS logic is added to the head and the controller is at the top of the body. The state classes are on each of the lights of the .traffic-light element. The lit signal has a {{showA()}} macro while the “off” version of signal has the machine states for the .M000 and .M111 classes to hide it in the A state. The state transition button is at the bottom of the page.
The state machine component here includes up to four states which is sufficient for many use cases, especially since it’s possible to use multiple independent state machines on one page.
That said, this technique can be used to build a state machine with more than four states. The table below shows how many page states can be built by adding additional bits. Notice that an even number of bits does not collapse efficiently, which is why three and four bits are both limited to four page states.
Bits (rrcs)
Machine states
Page states
1
2
2
2
4
2
3
8
4
4
16
4
5
32
6
Radio reset controller details
The trick to being able to show, hide, or control an HTML element anywhere on the page without JavaScript is what I call a radio reset controller. With three tags and one line of CSS, the controlling button and controlled element can be placed anywhere after this controller. The controlled side uses a hidden radio button that is checked by default. That radio button is connected to an empty <form> element by an ID. That form has a type="reset" button and another radio input that together make up the controller.
This shows a minimal implementation. The hidden radio button and the div it controls need to be siblings, but that input is hidden and never needs to be directly interacted with by the user. It is set by a default checked value, cleared by the other radio button, and reset by the form reset button.
Only two line of CSS are required to make this work. The :checked pseudo selector connects the hidden input to the sibling it is controlling. It adds the radio input and reset button that can be styled as a single toggle, which is shown in the following Pen:
Accessibility… should you do this?
This pattern works, but I am not suggesting it should be used everywhere for everything. In most cases, JavaScript is the right way to add interactivity to the web. I realize that posting this might get some heat from accessibility and semantic markup experts. I am not an accessibility expert, and implementing this pattern may create problems. Or it may not. A properly labelled button that does something to the page controlled by otherwise-hidden inputs might work out fine. Like anything else in accessibility land: testing is required.
Also, I have not seen anyone else write about how to do this and I think the knowledge is useful — even if it is only appropriate in rare or edge-case situations.
In the article, “State management in Corvid,” Shahar Talmi brings up a question about controlling app states in Velo. If you’re not familiar with Velo, it’s a development platform running on Wix that allows you to quickly and easily develop web applications.
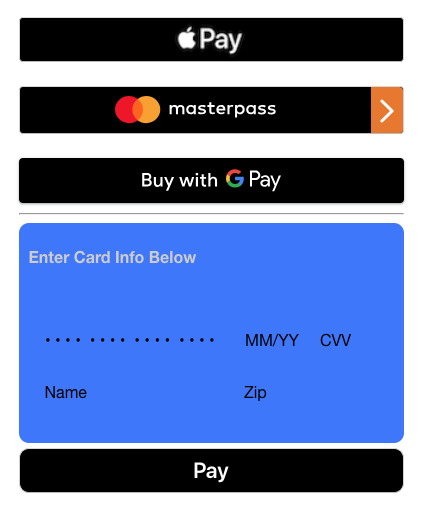
Create a Custom Payment Form Using React and Square
There are a lot of ways to accept payments online. Wouldn’t it be nice to implement a single form that could accept as many payment methods as we want? Let’s take a look at implementing a custom payment form using Square and React. This form will enable us to take credit cards online, and give us support for Apple Pay, Google Pay, and Masterpass in a single payment form.
In this post, we start looking into how the Ethereum platform executes transactions. We will learn transaction validity rules and why they exist. After that, we will deep-dive into transaction execution and understand the steps taken by nodes while processing a transaction.
This post is the fourth in the series Ethereum Yellow Paper Walkthrough. The goal of this series is to demystify the concepts in the paper, making it accessible to a broader audience. If you missed the previous posts, here they are!
Testing applications is crucially important to ensuring that the code is error-free and the logic requirements are met. However, writing tests manually is tedious and prone to human bias and error. Furthermore, maintenance can be a nightmare, especially when features are added or business logic is changed. We’ll learn how model-based testing can eliminate the need to manually write integration and end-to-end tests, by automatically generating full tests that keep up-to-date with an abstract model for any app.
From unit tests to integration tests, end-to-end tests, and more, there are many different testing methods that are important in the development of non-trivial software applications. They all share a common goal, but at different levels: ensure that when anyone uses the application, it behaves exactly as expected without any unintended states, bugs, or worse, crashes.
Testing Trophy showing importance of different types of tests
Kent C. Dodds describes the practical importance of writing these tests in his article, Write tests. Not too many. Mostly integration. Some tests, like static and unit tests, are easy to author, but don't completely ensure that every unit will work together. Other tests, like integration and end-to-end (E2E) tests, take more time to author, but give you much more confidence that the application will work as the user expects, since they replicate scenarios similar to how a user would use the application in real life.
So why are there never many integration nor E2E in applications nowadays, yet hundreds (if not thousands) of unit tests? The reasons range from not enough resources, not enough time, or not enough understanding of the importance of writing these tests. Furthermore, even if numerous integration/E2E tests are written, if one part of the application changes, most of those long and complicated tests need to be rewritten, and new tests need to be written. Under deadlines, this quickly becomes infeasible.
From Automated to Autogenerated
The status-quo of application testing is:
Manual testing, where no automated tests exist, and app features and user flows are tested manually
Writing automated tests, which are scripted tests that can be executed automatically by a program, instead of being manually tested by a human
Test automation, which is the strategy for executing these automated tests in the development cycle.
Needless to say, test automation saves a lot of time in executing the tests, but the tests still need to be manually written. It would sure be nice to tell some sort of tool: "Here is a description of how the application is supposed to behave. Now generate all the tests, even the edge cases."
Thankfully, this idea already exists (and has been researched for decades), and it's called model-based testing. Here's how it works:
An abstract "model" that describes the behavior of your application (in the form of a directed graph) is created
Test paths are generated from the directed graph
Each "step" in the test path is mapped to a test that can be executed on the application.
Each integration and E2E test is essentially a series of steps that alternate between:
Verify that the application looks correct (a state)
Simulate some action (to produce an event)
Verify that the application looks right after the action (another state)
If you’re familiar with the given-when-then style of behavioral testing, this will look familiar:
Given some initial state (precondition)
When some action occurs (behavior)
Then some new state is expected (postcondition).
A model can describe all the possible states and events, and automatically generate the "paths" needed to get from one state to another, just like Google Maps can generate the possible routes between one location and another. Just like a map route, each path is a collection of steps needed to get from point A to point B.
Integration Testing Without a Model
To better explain this, consider a simple "feedback" application. We can describe it like so:
A panel appears asking the user, "How was your experience?"
The user can click "Good" or "Bad"
When the user clicks "Good," a screen saying "Thanks for your feedback" appears.
When the user clicks "Bad," a form appears, asking for further information.
The user can optionally fill out the form and submit the feedback.
When the form is submitted, the thanks screen appears.
The user can click "Close" or press the Escape key to close the feedback app on any screen.
The @testing-library/react library makes it straightforward to render React apps in a testing environment with its render() function. This returns useful methods, such as:
getByText, which identifies DOM elements by the text contained inside of them
baseElement, which represents the root document.documentElement and will be used to trigger a keyDown event
queryByText, which will not throw an error if a DOM element containing the specified text is missing (so we can assert that nothing is rendered)
import { render, fireEvent, cleanup } from '@testing-library/react';

describe('feedback app', () => {
  afterEach(cleanup);

  it('should show the thanks screen when "Good" is clicked', () => {
    const { getByText } = render(<Feedback />);

    // The question screen should be visible at first
    assert.ok(getByText('How was your experience?'));

    // Click the "Good" button
    fireEvent.click(getByText('Good'));

    // Now the thanks screen should be visible
    assert.ok(getByText('Thanks for your feedback.'));
  });

  it('should show the form screen when "Bad" is clicked', () => {
    const { getByText } = render(<Feedback />);

    // The question screen should be visible at first
    assert.ok(getByText('How was your experience?'));

    // Click the "Bad" button
    fireEvent.click(getByText('Bad'));

    // Now the form screen should be visible
    assert.ok(getByText('Care to tell us why?'));
  });
});
Not too bad, but you'll notice that there's some repetition going on. At first, this isn't a big deal (tests shouldn't necessarily be DRY), but these tests can become less maintainable when:
Application behavior changes, such as adding a new steps or deleting steps
User interface elements change, in a way that might not even be a simple component change (such as trading a button for a keyboard shortcut or gesture)
Edge cases start occurring and need to be accounted for.
Furthermore, E2E tests will test the exact same behavior (albeit in a more realistic testing environment, such as a live browser with Puppeteer or Selenium), yet they cannot reuse the same tests since the code for executing the tests is incompatible with those environments.
The State Machine as an Abstract Model
Remember the informal description of our feedback app above? We can translate that into a model that represents the different states, events, and transitions between states the app can be in; in other words, a finite state machine. A finite state machine is a representation of:
The finite states in the app (e.g., question, form, thanks, closed)
An initial state (e.g., question)
The events that can occur in the app (e.g., CLICK_GOOD, CLICK_BAD for clicking the good/bad buttons, CLOSE for clicking the close button, and SUBMIT for submitting the form)
Transitions, or how one state transitions to another state due to an event (e.g., when in the question state and the CLICK_GOOD action is performed, the user is now in the thanks state)
Final states (e.g., closed), if applicable.
The feedback app's behavior can be represented with these states, events, and transitions in a finite state machine, and looks like this:
A visual representation can be generated from a JSON-like description of the state machine, using XState:
If you're interested in diving deeper into XState, you can read the XState docs, or read a great article about using XState with React by Jon Bellah. Note that this finite state machine is used only for testing, and not in our actual application — this is an important principle of model-based testing, because it represents how the user expects the app to behave, and not its actual implementation details. The app doesn’t necessarily need to be created with finite state machines in mind (although it’s a very helpful practice).
Creating a Test Model
The app's behavior is now described as a directed graph, where the nodes are states and the edges (or arrows) are events that denote the transitions between states. We can use that state machine (the abstract representation of the behavior) to create a test model. The @xstate/graph library contains a createModel function to do that:
This test model is an abstract model which represents the desired behavior of the system under test (SUT) — in this example, our app. With this testing model, test plans can be created which we can use to test that the SUT can reach each state in the model. A test plan describes the test paths that can be taken to reach a target state.
Verifying States
Right now, this model is a bit useless. It can generate test paths (as we’ll see in the next section) but to serve its purpose as a model for testing, we need to add a test for each of the states. The @xstate/test package will read these test functions from meta.test:
const feedbackMachine = Machine({
  id: 'feedback',
  initial: 'question',
  states: {
    question: {
      on: {
        CLICK_GOOD: 'thanks',
        CLICK_BAD: 'form',
        CLOSE: 'closed'
      },
      meta: {
        // getByTestId, etc. will be passed into path.test(...) later.
        test: ({ getByTestId }) => {
          assert.ok(getByTestId('question-screen'));
        }
      }
    },
    // ... etc.
  }
});
Notice that these are the same assertions from the manually written tests we’ve created previously with @testing-library/react. The purpose of these tests is to verify the precondition that the SUT is in the given state before executing an event.
Executing Events
To make our test model complete, we need to make each of the events, such as CLICK_GOOD or CLOSE, “real” and executable. That is, we have to map these events to actual actions that will be executed in the SUT. The execution functions for each of these events are specified in createModel(…).withEvents(…):
Notice that you can either specify each event as an execution function, or (in the case of SUBMIT) as an object with the execution function specified in exec and sample event cases specified in cases.
From Model To Test Paths
Take a look at the visualization again and follow the arrows, starting from the initial question state. You'll notice that there are many possible paths you can take to reach any other state. For example:
From the question state, the CLICK_GOOD event transitions to...
the form state, and then the SUBMIT event transitions to...
the thanks state, and then the CLOSE event transitions to...
the closed state.
Since the app's behavior is a directed graph, we can generate all the possible simple paths or shortest paths from the initial state. A simple path is a path where no node is repeated. That is, we're assuming the user isn't going to visit a state more than once (although that might be a valid thing to test for in the future). A shortest path is the shortest of these simple paths.
Rather than explaining algorithms for traversing graphs to find shortest paths (Vaidehi Joshi has great articles on graph traversal if you're interested in that), the test model we created with @xstate/test has a .getSimplePathPlans(…) method that generates test plans.
Each test plan represents a target state and simple paths from the initial state to that target state. Each test path represents a series of steps to get to that target state, with each step including a state (precondition) and an event (action) that is executed after verifying that the app is in the state.
For example, a single test plan can represent reaching the thanks state, and that test plan can have one or more paths for reaching that state, such as question -- CLICK_BAD → form -- SUBMIT → thanks, or question -- CLICK_GOOD → thanks:
We can then loop over these plans to describe each state. The plan.description is provided by @xstate/test, such as reaches state: "question":
// Get test plans to all states via simple paths
const testPlans = testModel.getSimplePathPlans();
And each path in plan.paths can be tested, also with a provided path.description like via CLICK_GOOD → CLOSE:
testPlans.forEach(plan => {
  describe(plan.description, () => {
    // Do any cleanup work after testing each path
    afterEach(cleanup);

    plan.paths.forEach(path => {
      it(path.description, async () => {
        // Test setup
        const rendered = render(<Feedback />);

        // Test execution
        await path.test(rendered);
      });
    });
  });
});
Testing a path with path.test(…) involves:
Verifying that the app is in some state of a path’s step
Executing the action associated with the event of a path’s step
Repeating 1. and 2. until there are no more steps
Finally, verifying that the app is in the target plan.state.
Finally, we want to ensure that each of the states in our test model were tested. When the tests are run, the test model keeps track of the tested states, and provides a testModel.testCoverage() function which will fail if not all states were covered:
This might seem like a bit of setup, but manually scripted integration tests need to have all of this setup anyway, in a much less abstracted way. One of the major advantages of model-based testing is that you only need to set this up once, whether you have 10 tests or 1,000 tests generated.
Running the Tests
In create-react-app, the tests are ran using Jest via the command npm test (or yarn test). When the tests are ran, assuming they all pass, the output will look something like this:
PASS  src/App.test.js
feedback app
  ✓ coverage
  reaches state: "question"
    ✓ via  (44ms)
  reaches state: "thanks"
    ✓ via CLICK_GOOD (17ms)
    ✓ via CLICK_BAD → SUBMIT ({"value":"something"}) (13ms)
  reaches state: "closed"
    ✓ via CLICK_GOOD → CLOSE (6ms)
    ✓ via CLICK_BAD → SUBMIT ({"value":"something"}) → CLOSE (11ms)
    ✓ via CLICK_BAD → CLOSE (10ms)
    ✓ via CLOSE (4ms)
  reaches state: "form"
    ✓ via CLICK_BAD (5ms)

Test Suites: 1 passed, 1 total
Tests:       9 passed, 9 total
Snapshots:   0 total
Time:        2.834s
That's nine tests automatically generated with our finite state machine model of the app! Every single one of those tests asserts that the app is in the correct state and that the proper actions are executed (and validated) to transition to the next state at each step, and finally asserts that the app is in the correct target state.
These tests can quickly grow as your app gets more complex; for instance, if you add a back button to each screen or add some validation logic to the form page (please don't; be thankful the user is even going through the feedback form in the first place) or add a loading state submitting the form, the number of possible paths will increase.
Advantages of Model-Based Testing
Model-based testing greatly simplifies the creation of integration and E2E tests by autogenerating them based on a model (like a finite state machine), as demonstrated above. Since manually writing full tests is eliminated from the test creation process, adding or removing new features no longer becomes a test maintenance burden. The abstract model only needs to be updated, without touching any other part of the testing code.
For example, if you want to add the feature that the form shows up whether the user clicks the "Good" or "Bad" button, it's a one-line change in the finite state machine:
All tests that are affected by the new behavior will be updated. Test maintenance is reduced to maintaining the model, which saves time and prevents errors that can be made in manually updating tests. This has been shown to improve efficiency in both developing and testing production applications, especially as used at Microsoft on recent customer projects — when new features were added or changes made, the autogenerated tests gave immediate feedback on which parts of the app logic were affected, without needing to manually regression test various flows.
Additionally, since the model is abstract and not tied to implementation details, the exact same model, as well as most of the testing code, can be used to author E2E tests. The only things that would change are the tests for verifying the state and the execution of the actions. For example, if you were using Puppeteer, you can update the state machine:
And then these tests can be run against a live Chromium browser instance:
The tests are autogenerated the same, and this cannot be overstated. Although it just seems like a fancy way to create DRY test code, it goes exponentially further than that — autogenerated tests can exhaustively represent paths that explore all the possible actions a user can do at all possible states in the app, which can readily expose edge-cases that you might not have even imagined.
The code for both the integration tests with @testing-library/react and the E2E tests with Puppeteer can be found in the the XState test demo repository.
Challenges to Model-Based Testing
Since model-based testing shifts the work from manually writing tests to manually writing models, there is a learning curve. Creating the model necessitates the understanding of finite state machines, and possibly even statecharts. Learning these are greatly beneficial for more reasons than just testing, since finite state machines are one of the core principles of computer science, and statecharts make state machines more flexible and scalable for complex app and software development. The World of Statecharts by Erik Mogensen is a great resource for understanding and learning how statecharts work.
Another issue is that the algorithm for traversing the finite state machine can generate exponentially many test paths. This can be considered a good problem to have, since every one of those paths represents a valid way that a user can potentially interact with an app. However, this can also be computationally expensive and result in semi-redundant tests that your team would rather skip to save testing time. There are also ways to limit these test paths, e.g., using shortest paths instead of simple paths, or by refactoring the model. Excessive tests can be a sign of an overly complex model (or even an overly complex app 😉).
Write Fewer Tests!
Modeling app behavior is not the easiest thing to do, but there are many benefits of representing your app as a declarative and abstract model, such as a finite state machine or a statechart. Even though the concept of model-based testing is over two decades old, it is still an evolving field. But with the above techniques, you can get started today and take advantage of generating integration and E2E tests instead of manually writing every single one of them.
More resources:
I gave a talk at React Rally 2019 demonstrating model-based testing in React apps:
Hi, Spring fans! In this installment of Spring Tips, we answer the question: "how do I propagate state across asynchronous, reactive execution pipelines?"