How to Change the Gravatar Image Size in WordPress

Do you want to change the Gravatar image size in WordPress?

Gravatar is a service that connects a user’s email address with a picture. WordPress themes show Gravatars at a set size, but you may prefer to make these images smaller or larger to better suit your website’s design.

In this article, we will show you how to change the size of Gravatar images in WordPress.

How to change the Gravatar image size in WordPress

Why Change the Gravatar Image Size in WordPress?

Gravatar stands for Globally Recognized Avatar. It’s a web service that allows you to create a profile and associate avatar images with your email address.

Most WordPress themes show a Gravatar next to the user’s comment. Some themes also display a Gravatar in the author bio box.

Even if a user doesn’t have a Gravatar account, then your site will still show one of the default WordPress Gravatars.

The default WordPress Gravatar

Sometimes you may want to change the size of your theme’s Gravatars. For example, you may want to make them bigger so that they stand out. This can draw the visitor’s attention to your site’s comment section and help you get more comments on your WordPress posts.

Having said that, let’s take a look at how you can change the Gravatar image size on your WordPress site. Simply use the quick links below to jump to the method you want to use.

Method 1: Change Gravatar Size Using the WordPress Full-Site Editor (Block Themes Only)

If you are using a block-based theme such as ThemeIsle Hestia Pro or Twenty Twenty-Three, then you can change the Gravatar size using the full-site editor.

This method doesn’t work with all themes, so if you are not using a block-enabled theme, then we recommend using method 2 instead.

In the WordPress dashboard, go to Appearance » Editor.

Opening the WordPress full-site editor (FSE)

In the left-hand menu, you can choose whether to edit a template or template part.

To change the Gravatar size for WordPress comments, you will typically select ‘Template Parts’ from the left-hand menu.

Template parts, in a WordPress block-enabled theme

After that, just click on ‘Comments.’

You can now click to select the Comments template part.

The 'comments' template part in the WordPress full site editor

This opens a new menu with settings you can use to customize the comments template part.

You can now go ahead and click on any of the Gravatars in the live preview.

Changing the Gravatar image size using the full site editor

In the right-hand menu, you can select the ‘Block’ tab if it isn’t already selected.

You can now make the Gravatars bigger or smaller by dragging the ‘Image Size’ slider.

Changing the size of a Gravatar using the full site editor (FSE) in WordPress

As you move the slider, all the Gravatars will update automatically, so you can try different sizes to see what looks the best.

When you are happy with the changes you have made, click on the ‘Save’ button.

Saving resized Gravatars using the full-site editor (FSE)

Now if you visit any comment section on your WordPress website, you will see the changes live.

Method 2: Change Gravatar Size for WordPress Comments (Works With All Themes)

If you are not using a block-enabled WordPress theme, then you can change the Gravatar size for WordPress comments using code.

This method requires you to edit theme files, so it’s not the most beginner-friendly option. However, this method should work for most WordPress themes.

If you edit your WordPress theme files directly, then those changes will disappear the next time you update your theme. With that being said, we recommend creating a child theme, as this allows you to update your WordPress theme without losing customization.

After creating a child theme, you will need to connect to your WordPress site using an FTP client such as FileZilla, or you can use the file manager of your WordPress hosting cPanel.

If you are a SiteGround customer, then you can use the Site Tools dashboard instead.

If this is your first time using FTP, then you can see our complete guide on how to connect to your site using FTP.

Once you are connected, you need to go to /wp-content/themes/ and open the folder for your current WordPress theme.

An example of an FTP client

Once here, open the comments.php file and look for a wp_list_comments function. Inside this function, you will find theavatar_size, which sets the size of the Gravatar.

Here’s an example of how this might look:

<?php
wp_list_comments(
    array(
        'avatar_size' => 60,
        'style'       => 'ol',
        'short_ping'  => true,
    )
);
?>

You can simply change the avatar_size to the size you want to use. In the code snippet above, this would mean changing 60 to another number.

Gravatars are square, so WordPress will use the same value for the image’s width and height. This means that you only need to type in one number.

After making this change, make sure to save and upload the file back to your WordPress hosting account. When you are finished, you can visit your WordPress blog to see the change in action.

If the Gravatar image hasn’t changed, then it may be due to the cache. To learn more, please see our guide on how to fix WordPress not updating right away.

If the Gravatar still doesn’t change, then your theme’s CSS could be overriding the settings in the comments.php file.

You can see whether this is the case using your browser’s Inspect tool. The steps will vary depending on which browser you are using, but on Chrome, you can simply right-click or Ctrl-click the Gravatar and then select ‘Inspect’.

Inspecting a WordPress Gravatar using Google Chrome

This will show the page’s HTML and CSS code in a new panel.

In this code, you need to look for the height and width values.

Editing a WordPress Gravatar using Chrome's Inspect tool

If the size is different from what you specified in the comments.php file, then this means your theme’s style.css file is overriding your changes.

If this is the case, then simply switch back to your FTP client. You can now open the theme’s folder and then open the style.css file.

Opening a WordPress theme's style.css file using an FTP client

Here, search for a block of code that has the word avatar.

You will typically find this in a comment-author .avatar CSS class, such as this:

.comment-author .avatar {
    height: 42px;
    position: relative;
    top: 0.25em;
    width: 42px;
}

You can now go ahead and change the width and height to the values you want for your Gravatars.

After that, simply save your changes. Now if you visit your WordPress blog or website, you will see your updated Gravatar images.

At this point, you may be wondering why we recommend trying to change the Gravatar size in the comments.php file before using the easier CSS method.

Firstly, CSS can sometimes make the Gravatars look blurry, especially if you make the avatars much larger than the original image. Secondly, changing the image size in comments.php often helps your site to load faster.

For more on this topic, see our ultimate guide to boost WordPress speed and performance.

Method 3: How to Change Gravatar Size for Author Bios

If you run a multi-author WordPress site, then an author box can help readers learn more about the post’s author.

If you want to add this feature to your website, then check out our guide on how to add an author info box in WordPress posts.

Many author bios show the writer’s Gravatar along with their bio. To change the default Gravatar size in your author bio boxes, you need to find the theme file that adds the bio.

Simply connect to your site using an FTP client such as FileZilla or the file manager of your WordPress hosting. Once you are connected, go to /wp-content/themes/ and open the folder for your current WordPress theme.

After that, you need to open the template-parts folder.

Editing template parts in a WordPress theme using an FTP client

You now need to find the file that contains the get_avatar code. You will often find this code in a template part file called author-bio.php, single.php file, functions.php file, or similar.

Here’s an example of how this code might look:

<div class="author-bio <?php echo get_option( 'show_avatars' ) ? 'show-avatars' : ''; ?>">
        <?php echo get_avatar( get_the_author_meta( 'ID' ), '85' ); ?>

In the snippet above, you can simply change the number 85 to the size you want to use.

In other themes, the code may look like this:

get_avatar( get_the_author_meta( 'user_email' ), 85);

You can simply replace the number with the value you want to use to make the Gravatar bigger or smaller.

After changing the size, don’t forget to save your changes. You can then visit your website to see the new author bio box in action.

If the Gravatars haven’t changed, then you will need to search for the avatar class in the style.css file by following the same process described above. Once you find this class, you can type in the new Gravatar height and width values.

We hope this tutorial helped you learn how to change the Gravatar image size in WordPress. You may also want to learn how to display round Gravatar images in WordPress or check out our list of the best landing page plugins.

If you liked this article, then please subscribe to our YouTube Channel for WordPress video tutorials. You can also find us on Twitter and Facebook.

The post How to Change the Gravatar Image Size in WordPress first appeared on WPBeginner.

How to Add WordPress Reaction Buttons to Boost Engagement

Are you looking to improve user engagement on your website?

Having reaction buttons on your WordPress site gives your readers a simple and easy way to leave feedback on your blog without having to type a comment.

In this article, we will show you how to add reaction buttons in WordPress.

How to Add WordPress Reaction Buttons to Boost Engagement

Why Add Reaction Buttons in WordPress?

Reaction buttons help you boost user engagement on your WordPress blog. because not all users have the time or confidence to leave a comment.

That’s why popular social media websites like Facebook use Like and other Reaction buttons to boost engagement. You can also add a Facebook Like button to your posts.

Facebook Lets Users React to Posts With the Like Button

You can encourage more interaction on your site by adding WordPress reaction buttons. These allow your users to engage with your post with just a click.

With that being said, let’s take a look at how to add this kind of reaction button to your WordPress site.

How to Add Reaction Buttons in WordPress

The first thing you need to do is install and activate the WP Reactions Lite plugin. For more details, see our step-by-step guide on how to install a WordPress plugin.

For this tutorial, we’ll use the free version of the plugin. There is also a premium version, WP Reactions, which adds additional features such as buttons for more social platforms.

Upon activation, head over to WP Reactions » Global Activation to configure the plugin. Once there, you need to toggle the ‘Reactions’ switch to the ON position.

Toggle the Reactions Switch to the ON Position

WordPress reaction buttons will now be displayed at the bottom of each post and page. You can customize various reaction options by clicking the ‘Customize Now’ button and using the WP Reactions setup wizard.

Customizing Your WordPress Reaction Buttons

The default settings of the WP Reactions plugin will work for most WordPress websites. However, there are still many ways to customize them to suit your needs.

First, you will see the 7 default emojis at the bottom of the screen. You can rearrange or replace the emojis by dragging and dropping them. When an emoji is highlighted blue, that means it’s already included.

Choose the Emojis to Add to Your Posts

When you are happy with your reaction button selection, click the ‘Next’ button at the bottom.

On the next page, you can choose the size of the emojis and whether to animate them. You can also choose the color of the badges that show how many times users have clicked on each reaction.

Pro users can disable these badges altogether.

Set Up Your Reaction Buttons

Now you can decide where to place the reaction buttons using the settings at the bottom of the screen. They can appear on posts, pages, or both, and you can display them before or after the content. You can also select if they will be left-, center-, or right-aligned.

When you are happy with your selections, just click the ‘Next’ button.

You can now choose the styling for the call to action (CTA), background, and border. By default, the words ‘What’s your Reaction?’ will appear above the buttons. You can change or hide this text, as well as adjust the font options.

Style Your Reaction Buttons

You can click the ‘Next’ button when you’re finished.

On the following page, you will configure the optional social share buttons. There are options to show buttons for Facebook, Twitter, Email, and Telegram. Pro users have even more options like LinkedIn and WhatsApp.

Set Up Social Share Buttons

By default, the plugin will show these social share buttons after the user clicks a reaction button. You can change or disable this setting under the ‘Button Behavior’ section.

As you scroll down the page, you will find options to customize the size and color of the social share buttons. Make sure you press the ‘Next’ button when you are ready.

Save Your Settings

Congratulations, you have now successfully configured your WordPress reaction buttons. Make sure you click the ‘Save & Exit’ button to store your settings.

Previewing Your WordPress Reaction Buttons

You can now visit any post on your website to see the reaction buttons in action. This is how it looks on our demo website using the default settings.

WordPress Reaction Buttons Preview

When you click one of the reaction buttons, its badge will be updated with a new total.

Notice that since we clicked an emoji, the social share buttons are now displayed under the WordPress reaction buttons.

WordPress Reaction Buttons Preview When Clicked

We hope this tutorial helped you learn how to add WordPress reaction buttons to boost engagement on your site. You may also want to learn how to add keywords and meta descriptions or check out our list of the best social media plugins for WordPress.

If you liked this article, then please subscribe to our YouTube Channel for WordPress video tutorials. You can also find us on Twitter and Facebook.

The post How to Add WordPress Reaction Buttons to Boost Engagement first appeared on WPBeginner.

How to Make Blog Post Comments Searchable in WordPress

Do you want to make blog post comments show up in WordPress search results?

By default, WordPress search doesn’t include comments. This can make it difficult for your visitors to find interesting conversations and engage with other users.

In this article, we will show you how you can make blog comments searchable on your WordPress website.

How to make blog post comments searchable in WordPress

Why Make Blog Post Comments Searchable in WordPress?

A lively and interesting comment section can keep people on your WordPress website longer and create a sense of community around your site.

Because of that, comments are valuable content, and you’ll want to do everything you can to get more comments on your WordPress blog posts.

However, since WordPress doesn’t include comments in its search results by default, visitors may struggle to find interesting discussions and connect with other users or revisit a specific comment thread on your WordPress blog.

You might even be using the comment section for your visitors to submit reviews or testimonials. Having searchable reviews can help to boost sales on your online store, since people will be more likely to find the exact product they’re searching for.

That being said, let’s see how you can fix these problems by making blog post comments searchable in WordPress.

How to Make Blog Post Comments Searchable in WordPress

The easiest way to make blog post comments searchable in WordPress is by using the SearchWP plugin.

SearchWP is the best custom search plugin for WordPress, used by over 30,000 websites. It’s easy to use and lets you improve the built-in WordPress search.

You can also easily configure the plugin to include custom post types in WordPress search results, as well as registered users.

To make your blog post comments searchable, you’ll need to install and activate SearchWP. If you need more details, please see our guide on how to install a WordPress plugin.

Upon activation, you will see a popup telling you that SearchWP has already created an engine for you to use. The first step is customizing this engine.

We’ll show you how to change the default engine in this guide, so you can go ahead and click on the ‘Close’ button to exit the popup.

SearchWP's welcome popup

You will now be taken to the SearchWP » Settings page automatically.

On this screen, click on the ‘License’ tab. You can now paste your key into the ‘License’ box.

The SearchWP advanced search WordPress plugin

You’ll find this information in the email you got when you purchased SearchWP and in your account on the SearchWP site.

Once you’ve pasted the license key, click on the ‘Activate’ button next to it.

Next, just click on the ‘Engines’ tab so that you can customize everything that the plugin will display in search results.

The SearchWP Engines tab

You will see here that by default, posts are searchable and are broken into title, content, slug, and excerpt.

To allow comments to be searchable on your site, you want to click on the ‘Sources & Settings’ button near the top-right part of the screen.

Configuring the SearchWP search plugin

A popup will appear in the middle of your screen. Under the ‘Sources’ heading, you’ll see all the different types of content that SearchWP is capable of searching.

By default, the plugin searches your site’s posts, pages, and media.

How to make your WordPress blog comments searchable

Go ahead and check the ‘Comments’ box. You can then click on ‘Done.’

This includes all comments in the search results on your site.

You can further customize how your blog comments are searched by scrolling to the bottom of the ‘Engines’ tab. You’ll see a new section where you can configure how your comments will be searched.

To get started, click on the ‘Add/Remove Attributes’ button.

Configuring your searchable WordPress comments

On this screen, you’ll see sections for the different parts of the comments that SearchWP includes in its search results, such as author name, email, and comment text itself.

SearchWP can search the comment’s author name and email address, plus the content of the comment itself.

In the following image, we’re telling SearchWP to look at the comment’s content by checking the ‘Comment’ box, as well as the name and email address of the person who posted it.

After making your selection, click on the ‘Done’ button.

Searching your WordPress comments

Whatever options you checked will now appear under the ‘Comments’ section of the ‘Engines’ tab.

For each one, SearchWP has an ‘Applicable Attribute Relevance’ scale. This is the weight that SearchWP will give to each attribute when searching the comments on your blog.

Configuring your searchable WordPress comments

Content that matches an attribute with high relevancy will appear higher in the search results. By contrast, content that matches an attribute that has less relevancy will appear lower in the user’s search results.

By default, all the attribute sliders are set to ‘low,’ but you can change that by simply dragging the slider to the right.

Every site is unique, so you may want to try different relevancy settings to see what gives you the most accurate and helpful search results.

Changing the SearchWP relevancy settings

If you decide later that want to remove an attribute from your search, you can simply repeat the steps above, but uncheck the box next to it.

Once you’re happy with how the search feature is set up, you can go ahead and click on the ‘Save Engines’ button.

Saving your WordPress custom search settings

After a few moments, SearchWP will show a message ‘The index needs to be rebuilt.’

If you do get this message, then go ahead and click on the ‘Rebuild Index’ button. This will add all of your site’s comments to the search index, so they appear in relevant results.

Rebuilding the SearchWP search index

Once you’ve done that, SearchWP will look at your WordPress site’s comments when creating its search results.

How to Change SearchWP Settings

Now that your blog post comments are searchable, you may want to enable some advanced settings that will make it easier for visitors to find what they’re looking for.

To take a look at these advanced search settings, click on the ‘Advanced’ tab.

SearchWP's advanced search settings

On this screen, you can change a lot of the plugin’s behavior such as making adjustments for misspellings.

For example, if someone makes a spelling mistake when typing in their search term, then SearchWP can show a ‘Did you mean?’ correction box with results that are similar to what the search query should have been.

The following image shows an example of how this might look on your website.

The SearchWP 'did you mean' feature

To use this feature in your searches, go ahead and check the ‘Automatic “Did you mean?” corrections’ box.

You’ll also need to check the ‘Partial matches (fuzzy when necessary)’ box, since the ‘Did You Mean?’ feature uses partial matches.

Enabling fuzzy search in SearchWP

For more tips on SearchWP’s advanced settings, please see our step-by-step guide on how to improve WordPress search with SearchWP.

We hope this article helped you learn how to make blog comments searchable in WordPress. You may also want to see our picks of the best live chat software for small businesses and the ultimate guide to creating a WordPress membership site.

If you liked this article, then please subscribe to our YouTube Channel for WordPress video tutorials. You can also find us on Twitter and Facebook.

The post How to Make Blog Post Comments Searchable in WordPress first appeared on WPBeginner.

16 Best Plugins to Improve WordPress Comments (2024)

Are you looking for the best plugins to improve WordPress comments?

Comments can help boost user engagement and build a community. The default WordPress commenting system is good, but it’s quite basic. Luckily, there are tons of plugins that can help you create a more engaging comment section.

In this article, we will show you some of the best WordPress comment plugins to improve the default comment section and get more interaction on your site.

Best Plugins to Improve WordPress Comments

Why Should You Use WordPress Comment Plugins?

On its own, the native WordPress comment system includes some basic functions for users to leave blog comments and reply to other people’s comments.

While this is helpful, there’s room for improvement. If you are a WordPress blogger looking to build an audience, then you will need additional tools to make commenting on your blog more fun, exciting, and user-friendly.

You may need tools to keep spam comments at bay and prevent malicious links from endangering your users. Or, you may want to redirect the commenter to a relevant page to keep them on your website for longer.

We tested these plugins: When choosing the plugins for this showcase, we installed each tool on our test site to explore its pros, cons, and features. This allowed us to recommend only the very best WordPress comment plugins.

With that in mind, let’s look at the best plugins to improve your WordPress comments and optimize the user experience.

1. Thrive Comments

The Thrive Comments WordPress plugin

Out of all the comment plugins we’ve tried, Thrive Comments by Thrive Themes is the best. It has everything you need to improve your comments, from an easy moderation feature to post-comment actions that can turn commenters into leads or customers.

Thrive Comments comes with a built-in, keyboard-controlled comment moderation dashboard. With this, you can quickly reply, delete, and even assign comments to other admins, a feature unavailable in the native WordPress commenting system.

When users leave a comment, you can redirect them to a specific URL, show them a related post, or display an email opt-in form using Thrive Leads. It’s a great way to improve your user engagement metrics.

Thrive Comments' post-comment actions

Pros of Thrive Comments:

  • Keyboard-controlled moderation feature for you to quickly manage comments and even assign them to other admins.
  • Post-comment actions to make users stay on your website for longer.
  • Comment engagement features like upvotes/downvotes, likes/dislikes, and reward badges.
  • Allows users to subscribe to a post’s comments in case they get replies.

Cons of Thrive Comments:

  • No free version available.

Why we chose Thrive Comments: If you are looking for the best, overall WordPress comment plugin, then look no further than Thrive Comments. It has all the features needed to build an engaged and interactive community on your WordPress site.

2. Comment Moderation Role by WPBeginner

Comment Moderation Role by WPBeginner plugin banner

Do you work in a team and want to let a specific user moderate comments in WordPress? Then check out Comment Moderation Role by WPBeginner. It’s a simple plugin that creates a new ‘WPB Comment Moderator’ user role in WordPress.

Any user with this role can log in to your WordPress website and moderate comments without accessing other areas of your admin.

This is perfect if you have a support team or staff members who are responsible for moderating comments, but these people don’t need unrestricted access to your entire WordPress admin area.

WPB Comment Moderator role in WordPress admin

Pros of Comment Moderation Role:

Cons of Comment Moderation Role:

  • This plugin has a very specific function, so it’s not suitable if you are looking for a comment plugin with lots of different features.

Why we chose Comment Moderation Role: If you want a no-frills plugin to add a specific user role for moderating comments, then this plugin is your best solution. Once installed, you can immediately change a user’s role to WPB Comment Moderator.

3. SearchWP

The SearchWP homepage

If your blog posts get tons of comment threads, then that’s great for your user engagement. But at times, users may want to look through these long comments to find the information they need.

Meet SearchWP, a WordPress search engine plugin that can make navigating your website much easier. Besides creating a search function to discover pages or posts, SearchWP can also make blog comments searchable.

How to make your WordPress blog comments searchable

SearchWP offers several ways to add a search form through the Modular Search Form add-on: your navigation menu, a Gutenberg block, or a shortcode. You can use the last two to add a search function right above the comment section in your single post template.

Pros of SearchWP:

  • Multiple ways to add the search engine: using a menu, Gutenberg block, or shortcode.
  • Multiple search engine support so that you can make one search engine for your entire website and another specifically for your blog post comments.
  • The applicable attribute relevance feature ensures accurate search results when visitors use the search engine.
  • Search analytics allows you to see which terms users look for the most when they use your search engine.

Cons of SearchWP:

  • While the Modular Search Form plugin is free, the SearchWP plugin itself is not.

Why we chose SearchWP: If you want to improve your comment section with a search feature, then SearchWP makes this super easy to do. As you get more blog comments, you may need to make them searchable so that users can easily find the right information.

4. Uncanny Automator

Uncanny Automator

You will find many plugins on this list that let you optimize your built-in comment section, but what happens after users leave comments? That’s what Uncanny Automator is for.

Maybe besides sending an email notification, you also want to send an SMS notification to users with their comment replies. Or maybe you want to send them a coupon to thank them for leaving comments.

With Uncanny Automator, you can easily create automated workflows for those scenarios on your WordPress site. These workflows can save you time and give the people who visit your website a better experience.

An example of creating a post-comment action with Uncanny Automator

Pros of Uncanny Automator:

  • Beginner-friendly drag-and-drop workflow builder, making it easy to design your automation.
  • Hundreds of customization options to tweak your workflow, with 620+ triggers, 430+ actions, and 60+ conditions.
  • 150+ plugin and app integrations so that you can create comment-related workflows for any purpose.
  • A free plugin is available.

Cons of Uncanny Automator:

  • If you use a paid Uncanny Automator plan, the cost increases after the first year, which could disadvantage long-term users.

Why we chose Uncanny Automator: We know how important it is to keep commenters coming back and engaging with your website. Uncanny Automator lets you set up automatic post-comment actions, turning occasional visitors into regular ones.

5. Better Notifications for WP

The homepage of Better Notifications for WordPress plugin

Do you want to send email notifications to your commenters about new replies? If so, then check out Better Notifications for WP.

By default, WordPress only sends comment notifications to site administrators and the article’s author. But with this plugin, you can change which type of notifications are sent out and who gets these comment notification emails.

For example, you can create a new notification for replies. As a result, users can come back and react to the latest responses to their comments, boosting engagement.

Pros of Better Notifications for WordPress:

  • Easy-to-use interface for setting up notifications and creating email content.
  • Customizable rules for who receives certain emails, which is great for site admins who want to avoid getting too many notifications.

Cons of Better Notifications for WordPress:

  • As with other WordPress email features, you may experience email deliverability issues.

Why we chose Better Notifications for WordPress: Notifying users of new replies is a great way to boost user engagement and get more comments, which is why we recommend this plugin. That said, you may also need an SMTP plugin to make sure your emails are received, which brings us to the next plugin.

6. WP Mail SMTP

WP Mail SMTP

The WordPress not sending emails issue is one of the most common problems WordPress users face. That’s why we don’t recommend using WordPress to send your email newsletter.

That said, there may be cases where you still use WordPress to send emails, like notifications about users’ comments. In this case, you will want to use WP Mail SMTP.

WP Mail SMTP is the best WordPress SMTP plugin that allows you to easily send WordPress emails using secure mail transfer protocol or SMTP. This helps ensure all your WordPress emails are delivered successfully, including comment notifications.

Pros of WP Mail SMTP:

  • The free version is enough to improve email deliverability.
  • Integrations with top mail service providers like SendLayer, Brevo, Gmail SMTP, and more.
  • One-click setup for Gmail SMTP, so you won’t need manual configuration, unlike other SMTP plugins.
  • Premium features to manage emails much more easily, like email resends, email failure alerts, and reports about opens and clicks.

Cons of WP Mail SMTP:

Why we chose WP Mail SMTP: This plugin can ensure that all comment-related emails actually get received and, in turn, your commenters can come back to engage more with your blog posts.

7. Akismet

Akismet's homepage

Trusted by 100+ million websites, Akismet is a popular WordPress anti-spam plugin.

The free plugin includes basic spam filtering and spam protection features. It can spot spammy comments off the bat so that they won’t show up in your comment section. You will also get detailed stats to see how much spam Akismet has blocked.

However, the free plugin includes limited API calls, so if you get many comments, then Akismet cannot check them all. We recommend upgrading to the premium version to get more API calls per month.

Pros of Akismet:

  • Easy to use plugin. Once activated, it will immediately work to mitigate spam.
  • Automatic spam deletion if you don’t review comments in 15 days, so you won’t have to manually remove them.
  • Handy analytics to see how much spam has been blocked and how accurately Akismet has spotted it.

Cons of Akismet:

  • At times, the plugin can mistake genuine comments as spam.

Why we chose Akismet: Spam comments are a common problem in WordPress, and sometimes, WordPress’ moderation feature isn’t enough. Akismet is one of the best comment plugins for easily combatting spam and maintaining a positive user experience.

You can read more about Akismet in our opinion piece on why you should use Akismet.

8. Comment Link Remove and Other Comment Tools

Comment Link Remove and Other Comment Tools plugin banner

Anti-spam tools like Akismet are great for filtering out comments left by automated spam bots. However, you can protect your site further by preventing users from inserting spammy or malicious links into their comments.

Comment Link Remove and Other Comment Tools can help prevent exactly that. It can remove the ‘Website URL’ field from the comment form, as well as the author’s website hyperlink.

This plugin also automatically removes hyperlinks from the existing comments on your WordPress website. So, the URLs will still be displayed in your comments, but they won’t be hyperlinked. This way, visitors can still benefit from any genuine and helpful links.

Pros of Comment Link Remove and Other Comment Tools:

Cons of Comment Link Remove and Other Comment Tools:

  • If your WordPress theme modifies the standard core comment functions, then the plugin may not be able to remove the Website URL field.

Why we chose Comment Link Remove and Other Comment Tools: If you are looking to remove the Website URL field and all existing links from your comments without any code, then this plugin can easily get the job done.

9. Comment Edit Core

Comment Edit Core's landing page for the free version of the plugin

Sometimes a user may submit a comment, only to immediately realize they have made a spelling mistake or some other grammatical error. This isn’t your website’s fault, but it is still a bad experience for your visitors.

Comment Edit Core solves this problem by letting users edit their own comments on your website.

You can use this plugin to specify how long visitors can edit or even delete a comment after posting it. This time limit is important, as it protects your website from spammers who might go back and try to add links to comments that you’ve already approved.

Pros of Comment Edit Core:

  • The timer can be in a Compact format (like 5:00) or a Words format (like 5 minutes). Feel free to choose the one that suits your website best.
  • Choose between Regular, Light, or Dark comment editor themes.
  • Pro features include a comment character limit, Cloudflare Turnstile, and the ability for commenters to choose a custom avatar.

Cons of Comment Edit Core:

  • Some users have reported poor forum support for the free plugin, but the premium version includes email and Slack support.

Why we chose Comment Edit Core: This plugin is simple to use and adds important functionality to improve your commenting experience. For more details on this plugin, check out our guide on how to allow users to edit comments in WordPress.

10. Comments Extra Fields

The landing page for the WordPress Comment Fields plugin

Depending on your website, you may want to add some extra custom fields to your comment form. For example, you might add an extra checkbox for commenters to sign up for your email newsletter.

Comments Extra Fields makes it easy to add custom fields to the standard WordPress comment form.

You can make the information entered in these fields invisible or visible to everyone. Furthermore, you can set rules for when these fields should appear in the comment section, which is great if your blog covers different topics.

Pros of Comment Extra Fields:

  • Beginner-friendly interface to add the custom fields and configure how they look and behave.
  • Multiple field options: single-line text, text area, checkbox, color picker, number, radio buttons, URL, file input, and so on.
  • 10-day money-back guarantee for the premium version.

Cons of Comment Extra Fields:

  • The free version’s field options are limited compared to the premium one.

Why we chose Comment Extra Fields: This plugin offers so many ways to customize your comment section, make it more exciting, and even turn commenters into leads. This can be beneficial if you want to make the most out of your comments.

11. wpDiscuz

wpDiscus 7's landing page

wpDiscuz is an AJAX-powered WordPress comment plugin.

It has a unique inline commenting feature. With this, you can add a handy button within your blog content to encourage discussion. Visitors can simply click on it to express their thoughts on that post’s particular section.

wpDiscuz also comes with live comment bubble notifications. It works like a real-time social proof notification on your website, letting visitors know about new comments as they are being posted and inviting them to join the conversation.

Pros of wpDiscuz:

  • Unique engagement features like real-time comment bubble notifications and inline commenting.
  • Built-in performance optimization features like Gravatar caching and lazy loading.
  • Various add-ons to install on top of the core plugin, like comment report and flagging and widgets to display top commenters.

Cons of wpDiscuz:

  • The live update feature, which automatically displays new comments when visitors are on the blog post, can slow your site down if you are on shared hosting.

Why we chose wpDiscuz: For a free WordPress comment plugin, wpDiscuz is pretty powerful and can be a good option for people looking for a free solution. Just make sure to monitor your site performance if you enable Ajax-powered features like live updates.

12. WP Reactions

WP Reactions' homepage

At times, users might want to react to your blog post but they hesitate to write a comment. Maybe they are not sure what exactly to say or they are just shy.

Ever since social media existed, users have become familiar with giving reactions to posts using emojis. That’s what WP Reactions is for: adding a reaction feature between your blog post content and your comment section.

This plugin offers over 200 emoji reactions to choose from and add to your comment section. As a result, users who are not used to commenting can easily engage with your blog content without typing a long message.

Pros of WP Reactions:

  • Easy drag-and-drop editor to arrange the emojis.
  • Animated emojis are available so the reaction buttons look more interactive than just regular icon images.
  • User-friendly dashboard analytics to collect user feedback based on their reactions.

Cons of WP Reactions:

  • The free version only comes with 14 emojis.

Why we chose WP Reactions: This WordPress plugin provides an easy way for users to engage with your blog post with just one simple click. If you want to learn more about using it, check out our article on how to engage readers with post reactions in WordPress.

13. Super Socializer

The Super Socializer plugin banner

Do you want to enable social login options in your WordPress comments section? If so, then check out Super Socializer. This feature is a great way to make posting comments faster and easier for users.

With this, users won’t need to manually insert their name and email to leave comments. They just need to click a few buttons and they are logged in to their social network. It also prevents users from using fake names in comments.

Other than that, the plugin includes a social commenting feature. This lets you add extra comment sections like Facebook comments. For Facebook users, this lets them skip the login step entirely and just leave a comment right away.

Pros of Super Socializer:

  • Multiple social features, like social logins, social commenting, and social sharing allow users to share blog posts on their accounts.
  • Plenty of social login options, from Facebook and X/Twitter to LinkedIn and Discord.
  • Customizable social network icons to suit your website design.

Cons of Super Socializer:

  • Some users reported that the plugin has made their websites slow, so be sure to use it with caution.

Why we chose Super Socializer: This plugin provides an easy way to enable social logins and make people less hesitant to leave comments. Our article on how to style the WordPress comment form can give you step-by-step instructions on how to use it.

14. YITH WooCommerce Advanced Reviews

YITH WooCommerce Advanced Reviews plugin page

If you are running an eCommerce website using WooCommerce, then your product pages’ comment sections will be changed to review/testimonial sections.

That said, the built-in review feature is basic. For example, customers can’t add photos to their reviews. Because of this, we recommend installing a WooCommerce review add-on like YITH WooCommerce Advanced Reviews.

With this WooCommerce plugin, customers can upload photos to their reviews to describe their experience with your product. Potential customers can also mark reviews as helpful to help fellow users make their purchase decisions.

Pros of YITH WooCommerce Advanced Reviews:

  • Review upvotes and downvotes to mark which reviews are most helpful.
  • Separate ‘Most Helpful Reviews’ tab to make it easier for users to find the most relevant testimonials.
  • Customizable review section, with settings to change the number of displayed reviews and the layout’s colors to suit your WooCommerce WordPress theme.

Cons of YITH WooCommerce Advanced Reviews:

  • It is dependent on other YITH plugins. For example, if you want to enable social logins, then you need to purchase a YITH plugin for that purpose, which can be costly.
  • No free version available, although there is a 30-day money-back guarantee.

Why we chose YITH WooCommerce Advanced Reviews: While this plugin comes at a cost, it offers all the essentials needed to optimize your product review section. You can think of it as an investment to gain more social proof and build your reputation.

15. Lazy Load for Comments

Lazy Load for Comments plugin banner

Have you been getting so many comments that your page load time has slowed way down? If so, then check out Lazy Load for Comments.

This simple plugin adds a lazy loading feature inside your WordPress Discussion Settings page (above the Avatars section). You can choose whether to load the comments upon scrolling or when the user clicks on it.

Lazy loading improves performance by only loading necessary elements when they’re needed, reducing the initial page load time.

Pros of Lazy Load for Comments:

  • Free and simple to use.
  • Supports popular WordPress themes like Genesis and Divi.
  • Translation ready.

Cons of Lazy Load for Comments:

  • Installing this plugin just for its lazy loading feature might feel excessive, especially since there are other comment plugins like Thrive Comments that offer this feature along with other benefits.

Why we chose Lazy Load for Comments: If you just want a simple plugin to lazy load your comments, then this plugin does a great job. However, if you want an all-in-one comment plugin with a lazy loading feature, then consider Thrive Comments instead.

16. Comment Hacks

Comment Hacks plugin banner

Moderating comments in WordPress can be a bit challenging, especially when there are many comment threads to review. If your readers are aware of and adhere to the commenting rules, then the process can become much simpler.

Comment Hacks is a WordPress comment plugin that lets you enable a comment policy for your website.

Users will have to go to the comment policy page and confirm they’ve read it before they can leave a comment. As a result, you can get more genuine and positive comments on your website.

Pros of Comment Hacks:

  • Comment policy feature to maintain a positive comment section.
  • The ability to set a minimum and maximum comment length, which can be great to prevent short, spammy comments.
  • Redirection feature that leads first-time commenters to a specific page, like a thank you page.

Cons of Comment Hacks:

  • The plugin only warns that the comment is too long after the user clicks ‘Post,’ not while they are typing. This could lead to unnecessary time spent editing long comments.

Why we chose Comment Hacks: This WordPress comment plugin is really helpful if you get lots of comments, want to keep things positive, and don’t want any spam. It makes your job easier by stopping bad comments before they show up.

What Is the Best WordPress Comment Plugin?

Out of all the plugins we’ve tested, the best WordPress comment plugin is Thrive Comments.

This plugin is a complete package, offering features to moderate your comment section, make it more interactive, and even convert commenters into leads or customers. While it’s a paid plugin, it’s a worthwhile investment for bloggers looking to build an engaged audience.

That said, many plugins on this list serve various purposes, so we encourage you to give them all a try and see which one is best for your needs.

Best Comment Plugins for WordPress: Frequently Asked Questions

Now that we’ve listed all of the best WordPress comment plugins, let’s answer some frequently asked questions.

Are comments important for SEO?

Yes, comments are important for SEO. They can function as signals telling search engines that people like your brand and engage with it. Other than that, the “free” content that comes from the commenters can add additional value to your articles.

Is it ok to disable your comment section?

If you run a blog and your goal is to build a following, then you should enable your comment section. Allowing comments is also good for increasing your user engagement metrics, which can be good for SEO.

Is the Disqus comment system good for SEO?

Any comment system is technically good for SEO, regardless of the platform.

However, in our experience, Disqus inserted affiliate links and sponsored comments without our permission. This can hurt your site’s SEO, as search engines don’t like it when websites don’t disclose their paid content.

For this reason, we did not include Disqus in our list. You can read more about our experience of why we switched away from Disqus.

Read More Guides to Improve Your WordPress Comments

We hope this article helped you find the best plugins to improve your WordPress comments. You may also want to see our guide on must-have WordPress plugins to grow your website and our ultimate list of blogging statistics, trends, and data.

If you liked this article, then please subscribe to our YouTube Channel for WordPress video tutorials. You can also find us on Twitter and Facebook.

The post 16 Best Plugins to Improve WordPress Comments (2024) first appeared on WPBeginner.

How to Allow Blog Users to Moderate Comments in WordPress

Do you want to allow blog users to moderate comments in WordPress?

If your site gets a lot of comments, then it can be difficult to moderate them all. One solution is creating a separate user role so that other people can manage the comments for you.

In this article, we will show you how to allow blog users to easily moderate comments on your WordPress blog.

How to allow blog users to moderate comments in WordPress

Why Allow Blog Users to Moderate Comments in WordPress?

Comment moderation can take a lot of time and effort, especially for big blogs that get lots of comments. If you are slow to approve comments or delete spam, then visitors may stop interacting with you.

By giving blog users the power to moderate comments, you can combat spam and deliver a better experience for your visitors.

These users might be members of your customer support team, your community manager, or even an active and trusted commenter on your WordPress blog.

By default, WordPress doesn’t let you create a user who is only responsible for moderating comments. With that being said, let’s see how you can easily allow blog users to moderate comments using a WordPress plugin.

Simply use the quick links below to jump straight to the method you want to use.

Method 1: Add a Comment Moderator Role to Specific Users

The Comment Moderation Role plugin allows you to quickly and easily give a comment moderator role to specific users. This plugin creates a new WPB Comment Moderator role that enables the user to approve, decline, or edit comments on any post without giving them access to other parts of the WordPress dashboard.

The first thing you need to do is install and activate the plugin. For more details, see our step-by-step guide on how to install a WordPress plugin.

Upon activation, you will have access to a new user role called ‘WPB Comment Moderator’.

To assign this role to an existing user, simply go to Users » All Users. Then, check the box next to that person’s username.

Editing user roles in WordPress

After that, simply open the ‘Change role to…’ dropdown menu and select the ‘WPB Comment Moderator’ role.

You can then go ahead and click on ‘Change’.

Editing the built-in user roles in WordPress

Now, this person will have access to the WordPress comment moderation panel.

You can also create a new user and assign them the comment moderator role. To do this, simply go to Users » Add New and enter the person’s information, such as their email address.

Creating a new comment moderator user role in WordPress

Next, you need to open the ‘Role’ dropdown and select ‘WPB Comment Moderator’.

When you are happy with the information you have entered, just click on the ‘Add New User’ button.

Adding a new comment moderator role in WordPress

Now, this person can log in to their account and see a comment moderation dashboard, similar to the image below.

As you can see, this person can only moderate comments and edit their profile. All other WordPress admin dashboard features are hidden.

Allowing users to moderate comments in WordPress

Method 2: Add Comment Moderation Capabilities to Any User Role

You can also add the comment moderation permission to a user role or even create a completely new user role for managing your site’s comments.

This is a great choice if you want to allow multiple people to moderate comments.

For example, you might create a comment moderation team or give your site’s Contributors permission to moderate comments. This makes it easy for guest bloggers to interact with their readers.

The easiest way to edit user permissions in WordPress is by using the Members plugin. This free plugin allows you to customize the permissions for every user role and even create completely new roles.

The first thing you need to do is install and activate Members. For more details, see our step-by-step guide on how to install a WordPress plugin.

Upon activation, go to the Members » Roles page to see all the different user roles on your WordPress website.

Editing WordPress member roles

To start, you can add the comment moderation permission to any existing user role.

To do that, simply hover over that role and then click on the ‘Edit’ link when it appears.

How to edit a user role in WordPress

The left column shows all the different types of content, such as reusable blocks and WooCommerce products. Simply click on a tab, and you will see all the permissions for that content type.

To allow users to moderate comments, you need to select the ‘General’ tab in the left-hand menu. Then, find ‘Moderate Comments’ and check the ‘Grant’ box.

Giving moderate comment permissions to a user role in WordPress

With that done, simply click on ‘Update’ to save your changes. Now, anyone with this user role can moderate your website’s comments.

Another option is to create a new user role by going to Members » Add New Role. You can now type in a title for the new role, such as Community Manager, Comment Moderator, or something similar.

How to add a new user role in WordPress

After that, you can add the comment moderator permission to this role by following the same process described above. To give this role additional permissions, simply check any of the other ‘Grant’ boxes.

For more details on user roles and permissions, please see our beginner’s guide to WordPress user roles and permissions.

When you are happy with how the user role is set up, don’t forget to click on ‘Add Role.’

Creating a community manager role to moderate comments in WordPress

Now, you can assign this role to anyone who needs the comment moderator permission. For step-by-step instructions, please see our guide on how to add new users and authors to your WordPress blog.

We hope this article helped you learn how to allow blog users to moderate comments in WordPress. You may also want to see our expert picks for the best email marketing services for small business and read our guide on how to allow user registration on your WordPress site.

If you liked this article, then please subscribe to our YouTube Channel for WordPress video tutorials. You can also find us on Twitter and Facebook.

The post How to Allow Blog Users to Moderate Comments in WordPress first appeared on WPBeginner.

My WordPress Comments Wishlist

A built-in commenting system is one of the reasons people reach for WordPress (and often stay there long-term). While I do think having a comment system is compelling (and as big of a fan of building on WordPress as I am), I find the comments system on WordPress quite crusty. It needs some love! There is so much more potential there! Here’s my list.

I don’t have any inside WordPress knowledge to inform me about how difficult any of these ideas would be, what other things they may affect, and what conversations have already been had around them. While I personally like these ideas, I’m fully aware that software decisions, particularly at this scale, are not lightly made. So all that said, this wishlist is almost like a design exercise and could be considered user feedback.

Comments should be user-owned and editable.

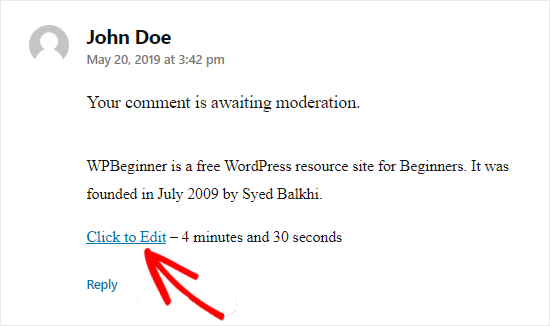
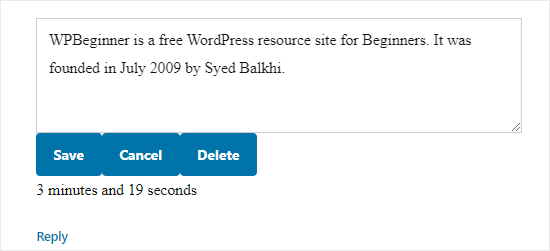
I find it highly weird that a logged-in user can leave a comment, but the comment isn’t “owned” by them. There doesn’t seem to be a direct connection between their account and the comment they just left. Seems like if you actually have an account, that would be an obvious thing to attach. People leave typos in comments all the time and it would be much less frustrating for them if they could just edit them. Maybe there could be a way to offer that edibility even without an account, like some editing timeout window.

As an admin user, I can edit comments in the admin area. This is what I’d expect a logged in user could do on their own comment.

Is this something BuddyPress does? I don’t know. I know with bbPress that users own (and thus can edit) their topics and replies (possibly time-limited), but that functionality doesn’t seem to extend to post comment threads.

There should be social auth for comments.

Having to manually type out your name and email address and all that to leave a comment feels like too much effort these days. I’d bet that alone detracts many would-be commenters. Commenting systems like Disqus make this quick and easy, and with social media I’m so used to being able to type a reply and respond immediately. On a WordPress comment form, I should be able to click a button to have the legwork of knowing my name and email and such taken care of for me. That might even be my ticket for editing it later.

Jetpack offers social media auth for comments, but if you turn that on, the UI for commenting is <iframe>d, so you have no design control or anything.

Also, the UI where it first shows up as a little narrow textarea block that you click into to expand into a comment area is also unchangeable and just doesn’t work that well with my style. I wouldn’t mind if this was Jetpack-powered functionality, I just want more control.

The login form you get from Jetpack, which is like WordPress.com

There should be a HTML tag whitelist.

I find when people type a <div>, they don’t expect to have to escape it lest it be stripped. They expect it to just show <div>. Even web developers.

I see people “screw up” (not entirely their fault) the HTML in comments like this a ton. Jetpack offers Markdown in comments, which is a massive improvement because it becomes so easy to use backticks. I think native WordPress should support that. But even then, not everyone knows Markdown, let alone how it deals with HTML (e.g. when does it escape HTML and when does it not).

I’ve been thinking about this for a decade and I’m still not sure the best solution, but a whitelist seems like it could help a lot. For example, you can use a <em> and it will make text italic, but a tag like <section> is not on the whitelist and is automatically escaped.

Comments should be previewable.

A preview gives people a chance to make sure their comment looks right, and probably just as importantly, one more chance to think before hitting the submit button.

Replies should generate email notifications.

Jetpack offers a feature that allows users to subscribe either to your blog itself (email notifications of newly published posts) or to comments on the particular post the user is commenting on.

In the case of new blog post emails, those come from WordPress.com, and you don’t have any control over them (e.g. design control or control over what kind of posts trigger them). It’s still kind of a cool feature, but if you’re serious about delivering new content to users, you might be better off with a more custom workflow.

Notifying users of new comments seems like a great feature for any commenting system. When I leave a comment, I feel invested, and there is a good chance I want to follow the continued conversation. Although, even more likely, I’d just want to hear about replies to my specific comment. WordPress already generates so many emails for things, this doesn’t feel out of scope.

Replies should show parent comment(s).

When looking at the site itself, replies are fairly obvious. They are nested under the parent comment they reply to. Context is always there. But there are other places where you can see a reply comment and be totally missing that context:

  1. Email notifications of reply comments don’t include the parent thread
  2. The comments area in the admin (or WordPress app)

The later includes a “In Reply To [Name]” link, but all it does is link to the front end of the site where that parent comment lives, it doesn’t do anything extra helpful like expand inline or show a popup preview.

Comment emails should be better looking.

I have a plugin on CSS-Tricks called Clean Notifications that hasn’t been updated in 13 years and it still works just fine. All it does is clean up the emails so there aren’t long gnarly URL’s in them, and instead, just have regular HTML links.

Default new comment emails: full of long gnarly URLs
With Clean Notifications on, things are cleaned up a little.

I’d vote that the default WordPress-generated emails could have a whole round of design love. Basic HTML email usage would allow link usage and basic typography that would make them all much nicer.

Look how nice and simple Lee Monroe’s HTML email template is.

There are links to Delete and Spam a comment, but they don’t actually do those things, they take you to a page where then you have to click another link to perform the action. If I’m auth’d, it should just do the action.

Ajax

Comment actions (particularly leaving a new comment) should be doable without requiring a full page refresh. Full page refreshes feel old in the same way that lacking quick social auth feels old.

Comment replies already have a special script that gets enqueued on WordPress themes. That script handles the job of manipulating the DOM and moving the comment form up next to comments when a “Reply” link is clicked (if you enable that feature). So there is a precedent for comment-specific JavaScript on arbitrary themes.

I would think it’s possible to write more JavaScript that would allow for Ajax submission of new comments and DOM manipulation to do whatever happens next (show the comment, show approval messaging, show errors, etc). There is precedent for this, as well as third-party plugins and blog posts about hand-rolled implementations. Personally, I just don’t want that technical debt, I just want it to work.

More comment actions

I’ve long run a plugin to help me “feature” or “bury” comments in a thread. It’s not particularly complex, as it just updates some metadata on individual comments, then lets me apply those states with a class and style them in CSS. I don’t know that all sites need this kind of thing, but… Jetpack offers the ability to add a button to “Like” a post like you can on WordPress.com. Why not comments too? If people could vote on comments, it could do useful things like allow the default sort of comments to be based on up-votes or likes rather than chronological order alone. I think people care far more about interesting comments than they do about seeing them in date-time order.

So perhaps additional comment actions could be…

  • Upvote
  • Downvote
  • Report as spam
  • Report as harmful (or a Code of Conduct violation)
  • Save / Pin

Speaking of voting, if comments were owned by users, and comments had data about quality, perhaps users with lots of good comments could be rewarded in various ways. Right now, you essentially have to choose to either moderate all comments or not, but it could be that you only moderate comments from people with low/bad/no quality scores. Not to mention calling out comments in threads from known-good commenters.

Sorting

Assuming we get some sort of voting system for comments, it makes sense for comments to be ordered by votes by default. Or at least an option for sorting in addition to the chronological order.

Front-end powers

I think it would be neat if you could do all the things you can do on the back end with a comment on the front end. For example, edit the comment, delete it, spam it, update metadata, etc.

Permissions role for comment moderator

On sites with thriving comment threads (like all sites would be if they had these awesome changes amiright?) it would be nice to be able to invite trusted community members to moderate comment threads. Not admins of the whole site. Not authors or editors. Just people who have permission to deal with comments and comments alone.

Not a real thing.

This was partially inspired by Jeremy Felt’s recent post and partially a continuation of my own thoughts. Jeremy mentions ideas like private comments (interesting, but not mega compelling to me) and Webmentions support (yes please!). Maybe this will go somewhere.


The post My WordPress Comments Wishlist appeared first on CSS-Tricks.

You can support CSS-Tricks by being an MVP Supporter.

How to Create a Commenting Engine with Next.js and Sanity

One of the arguments against the Jamstack approach for building websites is that developing features gets complex and often requires a number of other services. Take commenting, for example. To set up commenting for a Jamstack site, you often need a third-party solution such as Disqus, Facebook, or even just a separate database service. That third-party solution usually means your comments live disconnected from their content.

When we use third-party systems, we have to live with the trade-offs of using someone else’s code. We get a plug-and-play solution, but at what cost? Ads displayed to our users? Unnecessary JavaScript that we can’t optimize? The fact that the comments content is owned by someone else? These are definitely things worth considering.

Monolithic services, like WordPress, have solved this by having everything housed under the same application. What if we could house our comments in the same database and CMS as our content, query it in the same way we query our content, and display it with the same framework on the front end?

It would make this particular Jamstack application feel much more cohesive, both for our developers and our editors.

Let’s make our own commenting engine

In this article, we’ll use Next.js and Sanity.io to create a commenting engine that meets those needs. One unified platform for content, editors, commenters, and developers.

Why Next.js?

Next.js is a meta-framework for React, built by the team at Vercel. It has built-in functionality for serverless functions, static site generation, and server-side rendering.

For our work, we’ll mostly be using its built-in “API routes” for serverless functions and its static site generation capabilities. The API routes will simplify the project considerably, but if you’re deploying to something like Netlify, these can be converted to serverless functions or we can use Netlify’s next-on-netlify package.

It’s this intersection of static, server-rendered, and serverless functions that makes Next.js a great solution for a project like this.

Why Sanity?

Sanity.io is a flexible platform for structured content. At its core, it is a data store that encourages developers to think about content as structured data. It often comes paired with an open-source CMS solution called the Sanity Studio.

We’ll be using Sanity to keep the author’s content together with any user-generated content, like comments. In the end, Sanity is a content platform with a strong API and a configurable CMS that allows for the customization we need to tie these things together.

Setting up Sanity and Next.js

We’re not going to start from scratch on this project. We’ll begin by using the simple blog starter created by Vercel to get working with a Next.js and Sanity integration. Since the Vercel starter repository has the front end and Sanity Studio separate, I’ve created a simplified repository that includes both.

We’ll clone this repository, and use it to create our commenting base. Want to see the final code? This “Starter” will get you set up with the repository, Vercel project, and Sanity project all connected.

The starter repo comes in two parts: the front end powered by Next.js, and Sanity Studio. Before we go any further, we need to get these running locally.

To get started, we need to set up our content and our CMS for Next to consume the data. First, we need to install the dependencies required for running the Studio and connecting to the Sanity API.

# Install the Sanity CLI globally
npm install -g @sanity/cli
# Move into the Studio directory and install the Studio's dependencies
cd studio
npm install

Once these finish installing, from within the /studio directory, we can set up a new project with the CLI.

# If you're not logged into Sanity via the CLI already
sanity login
# Run init to set up a new project (or connect an existing project)
sanity init

The init command asks us a few questions to set everything up. Because the Studio code already has some configuration values, the CLI will ask us if we want to reconfigure it. We do.

From there, it will ask us which project to connect to, or if we want to configure a new project.

We’ll configure a new project with a descriptive project name. It will ask us to name the “dataset” we’re creating. This defaults to “production” which is perfectly fine, but can be overridden with whatever name makes sense for your project.

The CLI will modify the file ~/studio/sanity.json with the project’s ID and dataset name. These values will be important later, so keep this file handy.

For now, we’re ready to run the Studio locally.

# From within /studio
npm run start

After the Studio compiles, it can be opened in the browser at http://localhost:3333.

At this point, it makes sense to go into the admin and create some test content. To make the front end work properly, we’ll need at least one blog post and one author, but additional content is always nice to get a feel for things. Note that the content will be synced in real-time to the data store even when you’re working from the Studio on localhost. It will become instantly available to query. Don’t forget to push publish so that the content is publicly available.

Once we have some content, it’s time to get our Next.js project running.

Getting set up with Next.js

Most things needed for Next.js are already set up in the repository. The main thing we need to do is connect our Sanity project to Next.js. To do this, there’s an example set of environment variables set in /blog-frontent/.env.local.example. Remove .example from that file and then we’ll modify the environment variables with the proper values.

We need an API token from our Sanity project. To create this value, let’s head over to the Sanity dashboard. In the dashboard, locate the current project and navigate to the Settings → API area. From here, we can create new tokens to use in our project. In many projects, creating a read-only token is all we need. In our project, we’ll be posting data back to Sanity, so we’ll need to create a Read+Write token.

Showing a modal open in the Sanity dashboard with a Add New Token heading, a text field to set the token label with a value of Comment Engine, and three radio buttons that set if the token as read, write or deploy studio access where the write option is selected.
Adding a new read and write token in the Sanity dashboard

When clicking “Add New Token,” we receive a pop-up with the token value. Once it’s closed, we can’t retrieve the token again, so be sure to grab it!

This string goes in our .env.local file as the value for SANITY_API_TOKEN. Since we’re already logged into manage.sanity.io , we can also grab the project ID from the top of the project page and paste it as the value of NEXT_PUBLIC_SANITY_PROJECT_ID. The SANITY_PREVIEW_SECRET is important for when we want to run Next.js in “preview mode”, but for the purposes of this demo, we don’t need to fill that out.

We’re almost ready to run our Next front-end. While we still have our Sanity Dashboard open, we need to make one more change to our Settings → API view. We need to allow our Next.js localhost server to make requests.

In the CORS Origins, we’ll add a new origin and populate it with the current localhost port: http://localhost:3000. We don’t need to be able to send authenticated requests, so we can leave this off When this goes live, we’ll need to add an additional Origin with the production URL to allow the live site to make requests as well.

Our blog is now ready to run locally!

# From inside /blog-frontend
npm run dev

After running the command above, we now have a blog up and running on our computer with data pulling from the Sanity API. We can visit http://localhost:3000 to view the site.

Creating the schema for comments

To add comments to our database with a view in our Studio, we need to set up our schema for the data.

To add our schema, we’ll add a new file in our /studio/schemas directory named comment.js. This JavaScript file will export an object that will contain the definition of the overall data structure. This will tell the Studio how to display the data, as well as structuring the data that we will return to our frontend.

In the case of a comment, we’ll want what might be considered the “defaults” of the commenting world. We’ll have a field for a user’s name, their email, and a text area for a comment string. Along with those basics, we’ll also need a way of attaching the comment to a specific post. In Sanity’s API, the field type is a “reference” to another type of data.

If we wanted our site to get spammed, we could end there, but it would probably be a good idea to add an approval process. We can do that by adding a boolean field to our comment that will control whether or not to display a comment on our site.

export default {
  name: 'comment',
  type: 'document',
  title: 'Comment',
  fields: [
    {
      name: 'name',
      type: 'string',
    },
    {
      title: 'Approved',
      name: 'approved',
      type: 'boolean',
      description: "Comments won't show on the site without approval"
    },   
    {
      name: 'email',
      type: 'string',
    },
    {
      name: 'comment',
      type: 'text',
    },
    {
      name: 'post',
      type: 'reference',
      to: [
        {type: 'post'}
      ]
    }
  ],
}

After we add this document, we also need to add it to our /studio/schemas/schema.js file to register it as a new document type.

import createSchema from 'part:@sanity/base/schema-creator'
import schemaTypes from 'all:part:@sanity/base/schema-type'
import blockContent from './blockContent'
import category from './category'
import post from './post'
import author from './author'
import comment from './comment' // <- Import our new Schema
export default createSchema({
  name: 'default',
  types: schemaTypes.concat([
    post,
    author,
    category,
    comment, // <- Use our new Schema
    blockContent
  ])
})

Once these changes are made, when we look into our Studio again, we’ll see a comment section in our main content list. We can even go in and add our first comment for testing (since we haven’t built any UI for it in the front end yet).

An astute developer will notice that, after adding the comment, the preview our comments list view is not very helpful. Now that we have data, we can provide a custom preview for that list view.

Adding a CMS preview for comments in the list view

After the fields array, we can specify a preview object. The preview object will tell Sanity’s list views what data to display and in what configuration. We’ll add a property and a method to this object. The select property is an object that we can use to gather data from our schema. In this case, we’ll take the comment’s name, comment, and post.title values. We pass these new variables into our prepare() method and use that to return a title and subtitle for use in list views.

export default {
  // ... Fields information
  preview: {
      select: {
        name: 'name',
        comment: 'comment',
        post: 'post.title'
      },
      prepare({name, comment, post}) {
        return {
          title: `${name} on ${post}`,
          subtitle: comment
        }
      }
    }
  }

}

The title will display large and the subtitle will be smaller and more faded. In this preview, we’ll make the title a string that contains the comment author’s name and the comment’s post, with a subtitle of the comment body itself. You can configure the previews to match your needs.

The data now exists, and our CMS preview is ready, but it’s not yet pulling into our site. We need to modify our data fetch to pull our comments onto each post.

Displaying each post’s comments

In this repository, we have a file dedicated to functions we can use to interact with Sanity’s API. The /blog-frontend/lib/api.js file has specific exported functions for the use cases of various routes in our site. We need to update the getPostAndMorePosts function in this file, which pulls the data for each post. It returns the proper data for posts associated with the current page’s slug, as well as a selection of new posts to display alongside it.

In this function, there are two queries: one to grab the data for the current post and one for the additional posts. The request we need to modify is the first request.

Changing the returned data with a GROQ projection

The query is made in the open-source graph-based querying language GROQ, used by Sanity for pulling data out of the data store. The query comes in three parts:

  • The filter – what set of data to find and send back *[_type == "post" && slug.current == $slug]
  • An optional pipeline component — a modification to the data returned by the component to its left | order(_updatedAt desc)
  • An optional projection — the specific data elements to return for the query. In our case, everything between the brackets ({}).

In this example, we have a variable list of fields that most of our queries need, as well as the body data for the blog post. Directly following the body, we want to pull all the comments associated with this post.

In order to do this, we create a named property on the object returned called 'comments' and then run a new query to return the comments that contain the reference to the current post context.

The entire filter looks like this:

*[_type == "comment" && post._ref == ^._id && approved == true]

The filter matches all documents that meet the interior criteria of the square brackets ([]). In this case, we’ll find all documents of _type == "comment". We’ll then test if the current post’s _ref matches the comment’s _id. Finally, we check to see if the comment is approved == true.

Once we have that data, we select the data we want to return using an optional projection. Without the projection, we’d get all the data for each comment. Not important in this example, but a good habit to be in.

curClient.fetch(
    `*[_type == "post" && slug.current == $slug] | order(_updatedAt desc) {
        ${postFields}
        body,
        'comments': *[_type == "comment" && post._ref == ^._id && approved == true]{
            _id, 
            name, 
            email, 
            comment, 
            _createdAt
        }
    }`,
 { slug }
 )
 .then((res) => res?.[0]),

Sanity returns an array of data in the response. This can be helpful in many cases but, for us, we just need the first item in the array, so we’ll limit the response to just the zero position in the index.

Adding a Comment component to our post

Our individual posts are rendered using code found in the /blog-frontend/pages/posts/[slug].js file. The components in this file are already receiving the updated data in our API file. The main Post() function returns our layout. This is where we’ll add our new component.

Comments typically appear after the post’s content, so let’s add this immediately following the closing </article> tag.

// ... The rest of the component
</article>
// The comments list component with comments being passed in
<Comments comments={post?.comments} />

We now need to create our component file. The component files in this project live in the /blog-frontend/components directory. We’ll follow the standard pattern for the components. The main functionality of this component is to take the array passed to it and create an unordered list with proper markup.

Since we already have a <Date /> component, we can use that to format our date properly.

# /blog-frontend/components/comments.js

import Date from './date'

export default function Comments({ comments = [] }) {
  return (
    <>
     <h2 className="mt-10 mb-4 text-4xl lg:text-6xl leading-tight">Comments:</h2>
      <ul>
        {comments?.map(({ _id, _createdAt, name, email, comment }) => (
          <li key={_id} className="mb-5">
            <hr className="mb-5" />
            <h4 className="mb-2 leading-tight"><a href={`mailto:${email}`}>{name}</a> (<Date dateString={_createdAt}/>)</h4>
            <p>{comment}</p>
            <hr className="mt-5 mb-5" />
         </li>
        ))
      </ul>
    </>
  )
}

Back in our /blog-frontend/pages/posts/[slug].js file, we need to import this component at the top, and then we have a comment section displayed for posts that have comments.

import Comments from '../../components/comments'

We now have our manually-entered comment listed. That’s great, but not very interactive. Let’s add a form to the page to allow users to submit a comment to our dataset.

Adding a comment form to a blog post

For our comment form, why reinvent the wheel? We’re already in the React ecosystem with Next.js, so we might as well take advantage of it. We’ll use the react-hook-form package, but any form or form component will do.

First, we need to install our package.

npm install react-hook-form

While that installs, we can go ahead and set up our Form component. In the Post component, we can add a <Form /> component right after our new <Comments /> component.

// ... Rest of the component
<Comments comments={post.comments} />
<Form _id={post._id} />

Note that we’re passing the current post _id value into our new component. This is how we’ll tie our comment to our post.

As we did with our comment component, we need to create a file for this component at /blog-frontend/components/form.js.

export default function Form ({_id}) {

  // Sets up basic data state
  const [formData, setFormData] = useState() 
        
  // Sets up our form states 
  const [isSubmitting, setIsSubmitting] = useState(false)
  const [hasSubmitted, setHasSubmitted] = useState(false)
        
  // Prepares the functions from react-hook-form
  const { register, handleSubmit, watch, errors } = useForm()

  // Function for handling the form submission
  const onSubmit = async data => {
    // ... Submit handler
  }

  if (isSubmitting) {
    // Returns a "Submitting comment" state if being processed
    return <h3>Submitting comment…</h3>
  }
  if (hasSubmitted) {
    // Returns the data that the user submitted for them to preview after submission
    return (
      <>
        <h3>Thanks for your comment!</h3>
        <ul>
          <li>
            Name: {formData.name} <br />
            Email: {formData.email} <br />
            Comment: {formData.comment}
          </li>
        </ul>
      </>
    )
  }

  return (
    // Sets up the Form markup
  )
}

This code is primarily boilerplate for handling the various states of the form. The form itself will be the markup that we return.

// Sets up the Form markup
<form onSubmit={handleSubmit(onSubmit)} className="w-full max-w-lg" disabled>
  <input ref={register} type="hidden" name="_id" value={_id} />
									
  <label className="block mb-5">
    <span className="text-gray-700">Name</span>
    <input name="name" ref={register({required: true})} className="form-input mt-1 block w-full" placeholder="John Appleseed"/>
    </label>
																																																									
  <label className="block mb-5">
    <span className="text-gray-700">Email</span>
    <input name="email" type="email" ref={register({required: true})} className="form-input mt-1 block w-full" placeholder="your@email.com"/>
  </label>

  <label className="block mb-5">
    <span className="text-gray-700">Comment</span>
    <textarea ref={register({required: true})} name="comment" className="form-textarea mt-1 block w-full" rows="8" placeholder="Enter some long form content."></textarea>
  </label>
																																					
  {/* errors will return when field validation fails  */}
  {errors.exampleRequired && <span>This field is required</span>}
	
  <input type="submit" className="shadow bg-purple-500 hover:bg-purple-400 focus:shadow-outline focus:outline-none text-white font-bold py-2 px-4 rounded" />
</form>

In this markup, we’ve got a couple of special cases. First, our <form> element has an onSubmit attribute that accepts the handleSubmit() hook. That hook provided by our package takes the name of the function to handle the submission of our form.

The very first input in our comment form is a hidden field that contains the _id of our post. Any required form field will use the ref attribute to register with react-hook-form’s validation. When our form is submitted we need to do something with the data submitted. That’s what our onSubmit() function is for.

// Function for handling the form submission
const onSubmit = async data => {
  setIsSubmitting(true)
        
  setFormData(data)
        
  try {
    await fetch('/api/createComment', {
      method: 'POST',
     body: JSON.stringify(data),
     type: 'application/json'
    })  
    setIsSubmitting(false)
    setHasSubmitted(true)
  } catch (err) {
    setFormData(err)
  }
}

This function has two primary goals:

  1. Set state for the form through the process of submitting with the state we created earlier
  2. Submit the data to a serverless function via a fetch() request. Next.js comes with fetch() built in, so we don’t need to install an extra package.

We can take the data submitted from the form — the data argument for our form handler — and submit that to a serverless function that we need to create.

We could post this directly to the Sanity API, but that requires an API key with write access and you should protect that with environment variables outside of your front-end. A serverless function lets you run this logic without exposing the secret token to your visitors.

Submitting the comment to Sanity with a Next.js API route

In order to protect our credentials, we’ll write our form handler as a serverless function. In Next.js, we can use “API routes” to create serverless function. These live alongside our page routes in the /blog-frontent/pages directory in the api directory. We can create a new file here called createComment.js.

To write to the Sanity API, we first need to set up a client that has write permissions. Earlier in this demo, we set up a read+write token and put it in /blog-frontent/.env.local. This environment variable is already in use in a client object from /blog-frontend/lib/sanity.js. There’s a read+write client set up with the name previewClient that uses the token to fetch unpublished changes for preview mode.

At the top of our createClient file, we can import that object for use in our serverless function. A Next.js API route needs to export its handler as a default function with request and response arguments. Inside our function, we’ll destructure our form data from the request object’s body and use that to create a new document.

Sanity’s JavaScript client has a create() method which accepts a data object. The data object should have a _type that matches the type of document we wish to create along with any data we wish to store. In our example, we’ll pass it the name, email, and comment.

We need to do a little extra work to turn our post’s _id into a reference to the post in Sanity. We’ll define the post property as a reference and give the_id as the _ref property on this object. After we submit it to the API, we can return either a success status or an error status depending on our response from Sanity.

// This Next.js template already is configured to write with this Sanity Client
import {previewClient} from '../../lib/sanity'

export default async function createComment(req, res) {
  // Destructure the pieces of our request
  const { _id, name, email, comment} = JSON.parse(req.body)
  try {
    // Use our Client to create a new document in Sanity with an object  
    await previewClient.create({
      _type: 'comment',
      post: {
        _type: 'reference',
        _ref: _id,
      },
     name,
     email,
     comment
    })
  } catch (err) {
    console.error(err)
    return res.status(500).json({message: `Couldn't submit comment`, err})
  }
    
  return res.status(200).json({ message: 'Comment submitted' })
}

Once this serverless function is in place, we can navigate to our blog post and submit a comment via the form. Since we have an approval process in place, after we submit a comment, we can view it in the Sanity Studio and choose to approve it, deny it, or leave it as pending.

Take the commenting engine further

This gets us the basic functionality of a commenting system and it lives directly with our content. There is a lot of potential when you control both sides of this flow. Here are a few ideas for taking this commenting engine further.


The post How to Create a Commenting Engine with Next.js and Sanity appeared first on CSS-Tricks.

You can support CSS-Tricks by being an MVP Supporter.

How to Allow Users to Report Inappropriate Comments in WordPress

One of the best part about Facebook groups is that it allows users to report inappropriate comments.

This allows admins and moderators to easily remove offensive, rude, and hurtful comments from the group. Wouldn’t it be nice if WordPress had a solution that allowed users to report inappropriate comments?

In this article, we will show you how to crowdsource comment moderation by allowing users to report inappropriate comments in WordPress.

Why Allow Users to Report Inappropriate Comments in WordPress?

Despite having tools to combat comment spam in WordPress, trolls often find ways to get their negative comments on your posts.

Offensive, rude, and hurtful words appearing on your website can hurt your brand image and negatively impact your business.

If your website gets a lot of comments, then you’d have to read every comment to ensure that negative comments don’t slip through the cracks.

This is extremely difficult if you don’t have the resources.

By allowing users to report inappropriate comments, you can crowdsource this task to your readers similar to how many Facebook groups do.

Reporting inappropriate comment on Facebook

Let your users catch and report inappropriate comments for you to review and remove. If you allow users to report / flag comments, then you’ll be able to quickly respond to bad comments by deleting them.

This allows you to easily catch negative comments, and it give your users a sense of community along with a new way of participation on your site.

Let’s take a look at how you can easily allow users to report comments in WordPress.

Allowing Users to Report Inappropriate Comments in WordPress

First thing you need to do is to install and activate the Zeno Report Comments plugin. For more details, see our step by step guide on how to install a WordPress plugin.

Upon activation, you need to go to the Settings » Discussion page in your WordPress admin area and navigate to the ‘Allow comment flagging’ option.

Next, check the box next to ‘Allow your visitors to flag a comment as inappropriate’ option.

Allow Comment Flagging Option in WordPress Discussion Settings

Once done, you need to click on the Save button to save your settings.

After the settings are saved, you will see additional options below ‘Allow comment flagging’ option.

First, you will see a ‘Flagging threshold’ option. This basically lets you set a number of reports before a comment is flagged for manual review. We recommend having this number set to 1, but you can have it as high as you like.

Second, there is an ‘Administrator notifications’ option which lets you choose whether you would like to receive an email when a comment has been sent for manual moderation.

The third option also lets you enable or disable ‘Administrator notifications.’ You can check the box next to it if you want WordPress to send administrators an email each time a comment is reported as inappropriate.

Zeno Report Comments Plugin Settings WordPress

Depending on the number of comments your site gets, these notifications can become overwhelming. An easier solution is to disable email notifications and simply review your comments every day.

Once you are done configuring the settings, make sure to click the Save button.

To preview how the report a comment option looks on your blog, simply open a blog post on your website.

A link to ‘Report comment’ will start appearing below each comment on your site. Users can click on this link to report a negative comment.

Report Comment Option on WordPress Comments

When a user reports a comment, the plugin will display a quick AJAX feedback.

AJAX feedback after a Comment is Reported in WordPress

When a comment’s report count reaches the flagging threshold, it is pushed back to the moderation queue for a site administrator or editor to review. You have the option to delete or re-approve it.

Reported Comment for Moderation in WordPress

We hope this article helped you to learn how to allow users to report inappropriate comments in WordPress. You may also want to see our guide on how to allow users to edit their comments in WordPress and how to add reCAPTCHA to WordPress comment form.

If you liked this article, then please subscribe to our YouTube Channel for WordPress video tutorials. You can also find us on Twitter and Facebook.

The post How to Allow Users to Report Inappropriate Comments in WordPress appeared first on WPBeginner.

The Definitive Free WordPress Plugins List (2019)

Ever wondered if you can make your car fly? Perhaps, all you need is a set of wings, a new engine, a control stick, and air safety features. While I can’t guarantee that your car will fly after those upgrades, the right set of plugins can definitely skyrocket your WordPress site to new heights.

There are 54,000+ plugins available on WordPress.org repo alone. And they’re all either free or follow a freemium model. Either way, they’re free for you to use.

If you’re new to WordPress, this makes it extremely tough for you to find the perfect plugins for your website. Heck, I’m an experienced WordPress developer and even I struggle to find the right one sometimes!

To help with this, I’ve scoured the depths of WP.org’s repository to find these golden set of free WordPress plugins. And I’ve tested them all to make sure that they work as advertised and are updated constantly.

These plugins are arranged by category (rather than listed randomly) so that it’s easier for you to go through them. Some plugins may have overlapping features, but that’s fine. I trust you to use better judgement.

Your goal should be to install as few plugins on your website as possible. This ensures that your site’s performance isn’t affected by too many plugins. With that being said, let’s begin.

Form Plugins

Forminator

Forminator is the only free form maker plugin that allows you to create forms AND polls, submissions, quizzes, and order forms. Its drag-and-drop interface is a breeze to build the form exactly as you envision it. You can also submit blog posts from a form if you want.

Its powerful API can also be accessed for free to build your own custom extensions.

Forminator supports integrations with third-party apps such as Zapier, Google Sheets, Mailchimp, and many other email marketing apps. You can even collect payments with Stripe or PayPal through it.

There’s no free form plugin for WordPress that has these many features available for free. You really need to try it to believe it.

Get Forminator Here

SEO Plugins

SmartCrawl SEO

SmartCrawl boosts your site’s search engine optimization (SEO) with its one-click setup, automatic sitemaps, improved social sharing, a real-time keyword and content analyzer, scans, reports, and much more.

It is designed to increase your site’s traffic without making it hard for you. This gives you more time for concentrating on other areas of your website. As your website grows, SmartCrawl’s autopilot features help it grow along with you, making sure that it always has your back.

Get SmartCrawl SEO Here

Yoast SEO

The OG WordPress SEO plugin since 2008. It’s still going strong after a decade, having 5+ million active installations as of this writing. Though many worthy competitors have emerged recently, it’s still the go-to choice of many WordPress developers and designers.

Yoast SEO tries hard to do everything, and it succeeds in many ways to please both search engine spiders (bots) and visitors. As of now, it’s the #1 rated SEO plugin on WordPress.org’s repository.

It’s huge popularity has a downside though. With so many users out there, it’s hard for their team to give dedicated 24/7 support to all of them.

Get Yoast SEO Here

Speed & Optimization Plugins

Hummingbird

Google recommends that your site should load within about two seconds. Hummingbird makes sure that it does. Hummingbird scans your site and provides one-click fixes to speed it up. It does this through various performance-boosting techniques such as caching, minification, compression and merging.

With Hummingbird, you can see the overall score for your site’s speed, and if it’s lacking in some areas, it suggests you the most appropriate fixes for them. In no time your site will be running as fast as a Hummingbird flaps its wings. Faster load times mean higher search rankings and happier visitors, which further means even higher search rankings, and so on.

Get Hummingbird Here 

WP-Optimize

WP-Optimize is an all-in-one site optimization plugin that cleans your database, compresses your images, and caches your site. It’s simple, popular and highly effective to keep your website fast and thoroughly optimized.

Its minimal setup is easy for beginners to get used to, but if you’re looking for more features down the line, it’ll be a hassle to install a new plugin and set it up. Overall, WP-Optimize brings most optimization features together in a single lean and efficient plugin.

Get WP-Optimize Here

W3 Total Cache

Trusted by over 1+ million websites, W3 Total Cache improves the performance and user experience of your site by reducing load times. It uses features like caching, minification, CDN integration, and the latest best practices to get it done. And it does it all without you having to change your core files, theme, plugins, or how you produce your content.

W3 Total Cache is a web host agnostic Web Performance Optimization (WPO) framework for WordPress, which means that it works on all types of WordPress hosting setups. It’s no wonder that it’s trusted by millions of website owners and developers worldwide.

Get W3 Total Cache Here

WP Super Cache

WP Super Cache generates static HTML files from your dynamic WordPress site. After an HTML file is created, your web host will serve that file instead of processing the comparatively heavier WordPress PHP scripts.

As most of your visitors will be served static HTML files, this will decrease the load on your server. Thus, your users get to experience faster load times and performance. Its simple mode is easy to set up and makes your website load pretty fast. However, if you’re looking for more, there’s also an expert mode which gives you more options at the cost of complexity.

Get WP Super Cache Here

Media, Gallery & Slider Plugins

Smush

Smush is an award-winning image compression plugin. It has been benchmarked and tested to be the leader for speed and quality. Smush is the most popular image optimization plugin for WordPress, and also the most popular WPMU DEV plugin. I’m not exaggerating when I say that you need to add this to your must-have WordPress plugins list!

It not only compresses your images, but also meticulously scans every image you upload – and the ones you’ve already added to your library. Thus, all the unnecessary data is eliminated even before you even see it on your site. Your user’s data plan will also thank you for its exemplary service.

Get Smush Here

Photo Gallery by 10Web

Photo Gallery is a popular plugin for building beautiful, mobile-friendly galleries. Its simple interface makes it possible to create them in just a few minutes. Photo Gallery comes packed with amazing layout options, gallery and album views, multiple widgets, and a bunch of other extensions that.

It’s a great choice for photography and media-heavy blogs. If you have a site that needs robust image galleries with easy navigation, give Photo Gallery a try.

Get Photo Gallery by 10Web Here

Smart Slider 3

“Smart Slider 3 is a gift from the gods.” I heard one of our developers remark that in the chat recently, and they couldn’t be further from the truth. It’s the most powerful and intuitive slider plugin for WordPress. Its intuitive live slide editor makes creating slides fast, easy and efficient.

The sliders you create with it are fully responsive, SEO optimized, and work with almost any WordPress theme. Creating beautiful slides to tell your stories has never been this easier.

Get Smart Slider 3 Here

SVG Support

SVGs are the bomb! Scalable Vector Graphics (SVG) are becoming a rage in modern web design, but WordPress doesn’t support this file format out of the box yet. That’s where this plugin comes in.

SVGs allow you to embed vector images with small file sizes that are scalable to any size. And without losing quality. Apart from enabling SVG support, this plugin also adds features that allow you to add styling and animation to your SVG elements.

Get SVG Support Here

Security Plugins

Defender

Defender is layered security for WordPress. And it’s amazingly easy to setup. Defender scans your server and files, and then it adds all the hardening and security tweaks your site needs in just a matter of minutes, if not less. It’s highly efficient at blocking brute-force attacks without any noticeable impact on your website

It’s also one of the few free security plugins that support 2-Factor Authentication. The 2FA is also very simple to set up. Defender’s 2FA keeps you and your sites better protected than any simple IP blacklisting security plugin.

Get Defender Here

WordFence

With over 3 million active installs, WordFence is the most popular firewall and security scanner plugin for WordPress. Its firewall and malware scanner is built from the ground up to protect WordPress.

Wordfence constantly updates itself with the newest firewall rules, malware signatures, and malicious IP addresses. This keeps your website safe at all times. It’s perhaps the most comprehensive free WordPress security solution available.

Get Defender Here

iThemes Security

iThemes Security gives you 30+ ways to secure and protect your WordPress site. It works round the clock to lock down attacks on your WordPress site, fix common holes, stop automated attacks, and strengthen user credentials.

Experienced users also have access to advanced features which  they can use to harden their WordPress sites even better.

Get iThemes Security Here

Marketing Plugins

(Newsletter Signups, Popups, CRM, etc.)

HubSpot All-in-One Marketing

HubSpot’s All-in-One Marketing plugin is essentially a form and pop-up builder with an intuitive drag-and-drop interface. It also includes live chat and an integrated free contact database (CRM). This helps you can capture your visitors’ information easily.

HubSpot will collect submissions off any form you have on your WordPress website (even if it’s built with our free Forminator or Hustle plugins). It then automatically adds those new leads into your CRM.

You can also segment your contact database into lists and personalize your emails using any CRM property. And all of this for free! It then generates a report on your email’s overall success and let’s you see how each contact interacted with your email campaigns, all thanks to its built-in analytics.

Get HubSpot All-in-One Marketing Here

Hustle

Hustle is the ultimate marketing plugin to grow your business. It lets you easily grow your mailing list or display targeted ads across your site with pop-ups, slide-ins, lead generation forms, social media share bars, widgets, and shortcodes.

Since it’s made by the same awesome developers here at WPMU DEV, it integrates perfectly with the equally amazing form builder plugin Forminator. Thus, you can embed your forms, polls, and quizzes into popups and slide-ins for interactive lead generation. Grow your following faster and capture more leads with Hustle.

Get Hustle Here

Mailchimp for WordPress

This plugin does one thing better, and that’s it. It helps you grow your Mailchimp lists and write better newsletters. MailChimp for WordPress also allows you to create good looking opt-in forms easily.

It integrates with any existing forms on your site, including those created by Forminator. The developer has also made it easy to modify and extend its default features with various filter & action hooks.

Get Mailchimp for WordPress Here

Analytics Plugins

Google Tag Manager for WordPress

Google Tag Manager (GTM) is Google’s free tool for everyone to manage and deploy analytics and marketing tags. Currently, GTM is Google’s recommended method to add Google Analytics tag to your websites. This plugin helps you place the GTM container code snippets onto your wordpress website easily.

You can also insert multiple GTM containers with this plugin. It complements your GTM setup by pushing page meta data and user information to your DOM’s data layer. It also lets you add your Google Optimize container with the recommended code.

Get Google Tag Manager for WordPress Here

Google Analytics Dashboard by MonsterInsights

With 2+ million active installs, MonsterInsights is without a doubt the most popular Google Analytics plugin for WordPress. It’s the simplest way to properly connect your WordPress site with Google Analytics. MonsterInsights also allow you to enable all advanced Google analytics tracking features.

But the best part of MonsterInsights is its Google Analytics Dashboard widget for WordPress. It shows you actionable analytics reports right inside your dashboard. Thus, you can see exactly what’s working, what’s not, and take immediate action. No more juggling around!

Get Google Analytics Dashboard Here

Social Media Plugins

Social Media Share Buttons & Social Sharing Icons

This plugin lets you add share buttons and icons for over 200+ social media platforms. Some of the popular ones include RSS, Email, Facebook, Twitter, LinkedIn, Pinterest, Instagram, Youtube, and ‘Share. You can even upload custom share icons of your choice.

You can pick from several design options and make your icons ‘float’ or ‘sticky’. The plugin also scours the respective social media platform’s APIs to display the proper like/share numbers beside your social media buttons.

Get Social Media Share Buttons and Social Sharing Icons Here

Comment & Spam Reduction Plugins

Akismet Anti-Spam

I have just two words for you: get this! Akismet comes standard with most WordPress installations, and it’s for a reason. It checks your comments and contact form submissions against a global database of spam to prevent your site from publishing malicious content.

If any spam is detected, it’s sent to the review section under Comments in your dashboard. The more you help clear spam or identify false positives, the better Akismet gets at what it does best. Say no to spam!

Get Akismet Anti-Spam here

Disqus Conditional Load

Disqus is a great commenting system platform, but there’s one major drawback with it: it’s super bloated, especially so on WordPress.

Disqus Conditional Load is an advanced version of Disqus Commenting System, which boosts your page loading speed. This free plugin adds advanced features like lazy loading, shortcodes, comment widgets, script disabling, and more to your Disqus-powered website. And the best part, it uses pure JavaScript.

Get Disqus Conditional Load Here

Backup & Migration Plugins

UpDraftPlus

I can’t stress enough the importance of setting up automated backups of your website. Thankfully, we have free plugins like UpdraftPlus that make automatic site backups and restoration a child’s play. With 2+ million active installs, it’s the most popular scheduled backup plugin for WordPress.

With UpdraftPlus, you can backup your files and database into the cloud. You can also restore the backups with a single click. It supports backing up to popular cloud storage solutions like Dropbox, Google Drive, and Amazon S3.

Get UpdraftPlus Here

Duplicator

Duplicator enables you to move, migrate or clone your WordPress site between domains or hosts. And with zero downtime. It can also clone a live site to your localhost setup for development.

The most useful feature of Duplicator is to transfer a WordPress site from one host to another. You can perform a full WordPress migration without any messy import/export sql scripts.

If you’re planning to bundle up an entire WordPress site for easy reuse/distribution/backup, Duplicator also supports that.

Get Duplicator Here

All-in-One WP Migration

All-in-One WP Migration does what it suggests. It exports all the things in your WordPress website, including the plugins, database, media files, themes, and everything else.

Once exported, you can then upload it to a different WordPress installation. Do note that there’s a limit on the file size in the free version. If your site is more than 512MB, you need to look elsewhere. For smaller WP sites though, this plugin is perfect!

Get All-in-One WP Migration Here

Admin Management Plugins

User Role Editor

User Role Editor allows you to change user roles and their capabilities easily. Just select a user role and turn on/off the capabilities you wish to, and then update to save your changes. That’s it, no need to mess around with complex PHP scripts anymore!

You can also add new roles and customize its permissions according to your needs. Unnecessary roles with no users assigned can be deleted to keep things simple. The best part, Multi-site support is provided for free with this plugin.

Get User Role Editor Here

WP Reset

Ever messed around with your WordPress site so much that you wished you could reset it all and start over? That’s exactly what WP Reset does. It quickly resets your site’s database to the default installation values, without modifying any files.

If you’re testing out different plugins and themes, WP Reset is extremely helpful. It speeds up your testing and debugging greatly. WordPress developers will appreciate this plugin very much.

Get WP Reset Here

Duplicate Post

There are some plugins which you think you don’t need until you’ve used them. Duplicate Post is one of them.

It allows you to clone posts of any type quickly, or copy them to new drafts for further editing. That’s pretty much it. Give it a try, I’m sure you’ll love it!

Get Duplicate Post Here

Regenerate Thumbnails

This plugin helps you regenerate all thumbnail sizes for images in your Media Library. This is extremely useful if you’ve changed your theme or have added a new feature on your website which uses a different image size.

Regenerate Thumbnails also allows you to delete old, unused thumbnails to free up server space.

Get Regenerate Thumbnails Here

DIY Page Builder Plugins

Elementor

Elementor is the most popular free page builder for WordPress. As of now, it has 3+ million active installations and mostly 5-star reviews.

So, what makes it unique? It’s a live page builder that lets you create high-end page designs and advanced capabilities like never before, without touching a single line of code. You had to be a web developer or designer before to get these effects on your website: Box Shadows, Background Overlays, Hover Effects, Animations, Gradient Backgrounds, etc.

Not anymore. Elementor makes it easy for everyone to build websites. Yes, for everyone!

Get Elementor Here

Beaver Builder

Beaver Builder is like a mature, elder brother (or sister?) of Elementor. Likewise, it’s a flexible drag-and-drop page builder that works on your WordPress site’s front end. Beaver Builder grants you complete design freedom with no coding involved, and it is all fully responsive as well.

The best part of Beaver Builder is that it doesn’t output any confusing shortcodes or bloated HTML. With Beaver Builder, building beautiful, professional WordPress pages is as easy as connecting LEGOs. However, you should note that its free version isn’t as feature-rich as Elementor’s.

Get Beaver Builder Here

Bonus: Here’s a detailed list of the top page builders for WordPress.

Theme Customization Plugins

Custom Sidebars – Dynamic Widget Area Manager

Custom Sidebars plugin is a flexible widget area manager for WordPress. It allows you to dynamically display custom widgets on any page, post, post type, category, or archive page.

It is light and integrates well with any WordPress theme. Thus, Custom Sidebars plugin grants you tons of possibilities to customize your website even futher.

Get Custom Sidebars Here

Simple Custom CSS and JS

Adding custom CSS and JS code to your WordPress site is no more hassle with this plugin. These changes stay even if you update or change your theme.

Simple Custom CSS and JS features a text editor with syntax highlighting. Also, you can add your custom CSS or JS code to the frontend or the admin side, and you can add as many codes as you want.

Get Simple Custom CSS and JS Here

Ecommerce Plugins

WooCommerce

WooCommerce is a flexible, open-source eCommerce plugin for WordPress. If you want an eCommerce store on your WordPress website, look no further. It’s made by the same good folks who make WordPress.

Whether you’re launching a business, taking an old retail store online, or designing a site for your client, WooCommerce can help you build exactly the store you want.

Get WooCommerce Here

Booster for WooCommerce

WooCommerce is an amazing eCommerce plugin for WordPress and there’s no denying that. You can get most of the features you want in your online store with it.  However, it still misses the mark when it comes to some essential features. That’s what Booster for WooCommerce rectifies.

It supercharges your WooCommerce store with awesome powerful features (100+ modules) like PDF Invoicing, Bulk Price Converter, Wholesale Price, Crowdfunding, Upsells, Custom Payment Gateways, and a lot more.

Get Booster for WooCommerce Here

Easy Digital Downloads

If you’re looking to sell only digital goods on your WordPress site, Easy Digital Downloads is a better eCommerce solution for you. It provides a complete system for effortlessly selling your digital products.

Selling software, photos, ebooks, songs, videos, graphics, or any other digital file for that matter, is a breeze with this plugin. The core plugin supports PayPal Standard and Amazon Payments gateways, but almost all major payment gateways are supported through 3rd-party developers or premium extensions.

Get Easy Digital Downloads Here

Live Chat Plugins

LiveChat

Want to add live chat support to your WordPress website quickly and easily? LiveChat is the solution you’re looking for. It allows for instant communication with your site’s visitors and enables swift resolution to their questions and/or concerns.

You can use its built-in ticketing system to provide 24/7 customer service to your customers. Increase your sales and build better relationships with your customers with this fully functional live chat plugin.

Get LiveChat Here

Tawk.To

Tawk.To is a free live chat app for WordPress used by 250,000+ companies worldwide. You can use it to provide real time support and service to your customers.

With tawk.to, you never have to lose another lead or sale again. It lets you monitor and chat with your site’s visitors from anywhere, even your mobile. The best part is that its developer promises that “it’s truly free and always will be.”

Get Tawk.To Here

Membership & Forums Plugins

Go here for an extensive in-depth analysis of all the popular (and free) membership plugins.

bbPress

bbPress is a lean, mean, and feature-rich forum or bulletin board plugin for WordPress. It is focused on easy integration, simplicity, strict adherence to web standards, and speed.

It’s one of the first plugins which showcased the versatility of WordPress, and it’s still going strong! That’s quite an achievement. With bbPress installed, you can use WordPress to run an efficient and professional forum.

Get bbPress Here

BuddyPres

BuddyPress helps you set up a modern, robust, and sophisticated social network on your WordPress site. What WooCommerce did to setting up an eCommerce store on WordPress, BuddyPress does the same with setting up a social network or community-based forum.

Members can register and create user profiles, have private conversations with each other, create and participate in groups, and much more. It also works perfectly along with Akismet and bbPress. If you’re looking to build an online home for your school, company, a sports team, or any other niche community, BuddyPress is perfect for you.

Get BuddyPress Here

Jetpack

Sometimes, I ask myself, What exactly is Jetpack? It’s a security, performance, and site management plugin, all rolled into one. And it’s maintained by the same folks who lead WordPress.org’s development. They also happen to be the owners of WordPress.com platform, from where it picks up most of its features.

It has a lot of impressive functionality built in, like site stats, a high-speed CDN for images, showing related posts, downtime monitoring, brute-force attack protection, automated sharing to social media, sidebar customization, and so much more.

Jetpack has so many things going on that many consider it to be bloated, and for a good reason. If you could give up almost every plugin listed here and only make do with Jetpack, perhaps that would justify its use. It does however let you turn on or off its modules as per your requirements.

Get Jetpack Here

Free as in Freedom

WordPress’ main goal is to give you the freedom to build anything you want, and these free plugins are an extension of that goal. From hobby blogs to some of the biggest brands in the world, WordPress and its free plugins are used by everyone.

At WPMU DEV, we’re driven by the same philosophy. We build beautifully coded free and premium WordPress plugins that’ll make your WordPress sites fly.

Fasten your seatbelts. It’s now time for your site to take off!

New Experimental Plugin Brings the Block Editor to WordPress Comments

Block Comments is a new experimental plugin from Tom Nowell that replaces WordPress’ default comment form with a trimmed down version of the block editor. Nowell gave a presentation at WordCamp Europe 2019 about using blocks outside the editor, including on the frontend. Block Comments is one example he brought to life using the block list component along with some wrapper components.

The result is a comment form that offers the same UI as the WordPress editor but with a limited set of blocks appropriate for commenting and no block sidebar panel. This includes text-based and embed blocks, along with image upload via URL. It defaults to the paragraph block when the commenter clicks inside the form. Here is an example of using the block editor for a reply on the Twenty Nineteen theme:

For the most part, Block Comments should fit in with the style of the active theme, as shown below with an example using the Astrid theme. Nowell recommends users watch out for occasional clashes between the editor UI CSS and the theme’s CSS, since it is still early beta software.

Incorporating the block editor into commenting could make formatting easier for commenters with more options for expressing themselves. The plugin includes blocks for lists, quotes, code, embeds, headings, pre-formatted text, and other formats, all with Gutenberg’s built in preview. Commenters can immediately see how the comment will appear without having to struggle with using the correct format tags.

“I see it as a much more flexible form of those Tiny MCE visual comment forms,” Nowell said. “Except instead of just putting a toolbar on top and showing you bold and italic in-line, you can do more.”

Nowell said replies and threading work exactly the same with Block Comments enabled. The UI for the comment form is the only thing that changes, but the commenting system remains the same.

Bringing the block editor to comments is not yet on WordPress’ roadmap. The UI is different from the comment forms users have become accustomed to over the years of commenting on the internet. Some commenters may find it confusing if this is their first experience with WordPress’ block editor. For those who have used WordPress 5.0+ previously, the Gutenberg-powered comment form brings a little more unity to the front and backend posting experiences.

“It’s certainly not for every comment form, but I can see it being very useful in some situations, such as P2 blogs,” Nowell said. “As Gutenberg itself improves, it will too.”

Block Comments is currently available on GitHub where users can report any issues or conflicts. It is recommended to be used with the Gutenberg plugin installed for best results. It also doesn’t play well with the Classic Editor plugin, since that plugin removes the block editor hooks and styles.

I would not be surprised to see this experiment further developed for P2-powered blogs or even Jetpack comments , if the idea catches on. These avenues would provide a good testing ground for such a feature before it might be considered for WordPress core.

How to Allow Users to Edit their Comments in WordPress

Have you ever felt the need to edit a comment you just left on a website?

Maybe you want to correct a spelling or grammar or error, or maybe you accidentally hit the submit button before finishing your comment.

It happens to all of us. The problem is that most WordPress sites do not allow users to edit their comments once they are published.

If you receive a lot of comments on your website, then you may want to consider allowing users to edit their own comments for a short period of time.

In this article, we’ll show you how to allow users to easily edit their comments in WordPress for a short period of time.

How to Allow Users to Edit their Ccomment in WordPress

Why Allow Users to Edit or Delete their Comments

Most WordPress sites allow users to submit comments on their articles after providing their name and email address. However, users are not allowed to edit or delete their comment.

Sometimes, people want to make changes to their comment after clicking on the submit button.

The most common scenario is to fix their mistakes like a spelling or a grammatical error. Some users may want to modify their comments to add or remove something.

There can also be some rare cases where a user may think about deleting their comment because what they wrote was is completely out of context.

Whatever the case may be, the best solution can be to allow people to edit their comments for a short period of time, maybe for the first 5 or 10 minutes.

During that time, they’ll be allowed to modify or even delete their comments.

The reason for adding the time limit is to make sure that link builders and spammers don’t abuse the comment section by adding links to their approved comments.

That being said, let’s take a look at how to easily allow users to edit their comments in WordPress.

Allowing Users to Edit Comments in WordPress

First thing you need to do is install and activate the Simple Comment Editing plugin. You can see our step by step guide on how to install a WordPress plugin for detailed instructions.

Upon activation, the plugin will allow your users to make changes to their comments within the first 5 minutes.

After the first 5 minutes, users will not able to edit their comments.

You can change this time limit by going to Settings » Simple Comment Editing in your WordPress admin area.

Simple Comment Editing plugin settings

On the settings page, you can change the time in the text field to anything you like.

However, it is recommended to set the limit under 30 minutes since the purpose is to allow users to fix the errors right away.

Once you’ve changed the time, you need to click on the Save Options button to store the changes.

Next, we recommend leaving a test comment on any of your posts, so you can see the plugin in action.

WordPress comment click to edit option

Once you’ve submitted your comment, you’ll find the “Click to Edit” link and a countdown timer below the comment text. The timer is useful for indicating the time within which you can edit your comment.

To modify your comment, you need to click on the Click to Edit link.

This will allow you to make changes to your comment. However, you’ll not be allowed to change your name, email, or website URL.

Edit comment with countdown timer

Once you’re done, you need to click on the Save button to update the comment.

If you want to delete your comment, then you have to click on the Delete button. This will open an alert box asking you to confirm that you want to delete your comment.

Allow users to delete their comments

Go ahead to click on OK to complete the process.

That’s all! We hope that this article helped you to learn how to allow users to edit their own comments in WordPress for a short period of time.

You may also want to see our guide on how to style the comment form of your WordPress site.

If you liked this article, then please subscribe to our YouTube Channel for WordPress video tutorials. You can also find us on Twitter and Facebook.

The post How to Allow Users to Edit their Comments in WordPress appeared first on WPBeginner.

Should You Write Comments?

To comment or not to comment, that is the question. I had a little argument with some of my family members (who have also done some coding, although one of them is still in secondary school) about this subject. They had a quick look at some code I was writing at home and asked where my comments were. They were shocked at my reply when I told them I don't use them. So I'm going to write about some of the things I told them. When is it the right time to write them into your code, how helpful are they and what should they contain? These are the questions I want to answer.

I don't normally write comments into my code anymore, especially with the code I write at work. One of the first things I was told when I started working was to not write comments and, at first, I was a bit skeptical, but after a while, it made sense.

How to Paginate Comments in WordPress (Step by Step)

Have you noticed that your blog posts with a lot of comments load slower than other posts? That’s because loading so many comments increase server load which increases your average page load time.

Having a lot of comments is a good thing because it means that your users are engaged with your content. Your most commented posts are usually the most popular posts on your blog.

However if a lot of comments are slowing down your website, then it can hurt your SEO rankings. That’s when pagination for WordPress comments comes handy.

In this article, we will show you how to paginate comments in WordPress to speed up your post load time. The best part is that it comes as a default feature in WordPress, and it is very easy.

Paginate comments in WordPress

Why You Should Paginate Comments in WordPress

Comment pagination helps you improve your website speed which is an important factor in your website SEO rankings.

Many of our users have reported that sometimes posts with a lot of comments can cause their readers to see white screen of death because it exhausts their server’s memory.

Even when it doesn’t cause ‘white screen of death’, posts with a lot of comments tend to be really really slow.

Comment pagination reduces server load for your most commented posts by splitting comments into multiple pages.

Another reason to paginate your WordPress comments is to maintain the keyword density of your articles. Comments add a lot of content to your post’s page, and they may not always include your target keywords in a sufficient amount.

When keyword ratio to content decreases, search engines fail to index your post for the right keywords.

Comment pagination can also have a negative SEO impact if it is not used correctly. Basically, WordPress generates URLs for each new page of comments. Search engines may consider this as ‘duplicate content’.

This issue can be easily fixed by using the Yoast SEO plugin, which points search engines to the canonical URL of your article.

Now that we have discussed the pros and cons of comment pagination, let’s take a look at how to easily paginate comments in WordPress.

Paginating WordPress Comments in Two Steps

The first thing you need to do is login to your WordPress admin area and go to Settings » Discussions page.

Next, look for the ‘Break comments into pages’ option. From here you need to enter the number of comments you want on each page, and how you want to display them.

Break Comments into Pages in WordPress Posts

Don’t forget to click on the ‘Save Changes’ button to store your settings.

You can now visit any popular post on your website that has a lot of comments. You will notice the pagination links below the comments.

Depending on your theme’s styling, you will either see numeric pagination or ‘Previous / Next’ comment links.

Here is how comment pagination looks on our article 24 “Must Have” WordPress Plugins.

WordPress Comments Pagination in WPBeginner

Note: Just like comments, you can also paginate WordPress posts by splitting a long post into multiple pages.

We hope that this tutorial helped you paginate comments in WordPress. You might also want to see our guide on how to combat comment spam in WordPress.

If you liked this article, then please subscribe to our YouTube Channel for WordPress video tutorials. You can also find us on Twitter and Facebook.

The post How to Paginate Comments in WordPress (Step by Step) appeared first on WPBeginner.

How to Turn Off WordPress Comments for Good

For some of the websites you create, comments are completely unnecessary. Sometimes it’s a matter of not wanting people to comment on your pages.

Posts are fine, but why does WordPress even think that pages would need comments? Then there’s the fact that some comments present a security risk if they contain suspicious links that visitors unknowingly click on.

So, let’s keep this short and sweet. You want to get rid of comment functionality on your WordPress site? Here’s how to do it.

8 Ways to Disable Comments in WordPress

There are different reasons why you’d want to disable comments in WordPress and not every reason is going to lead you to the same solution. So, whether you want to disable comments for certain posts, disable comments on all pages, create tighter controls over who can comment, or just get rid of that pesky comment spam, there is a fix for you:

Method #1. Individual Page Controls

There may come a time when you want to block (or allow) comments on a specific page or post of your website. I’d say this is a pretty rare use case, but it’s still good to know that you have the option to control comments within each page.

Step 1

Navigate to the Page or Post in WordPress that you want to update this setting for.

Step 2

Scroll down to the bottom of the page until you see a box labeled Discussion. If you do not see that box, scroll back up to the top of the page and drop open the Screen Options in the top-right corner. Click Discussion and then scroll down again. It should be there now.

Step 3

To disable comments on this page, unclick the Allow comments box. You can also disable trackbacks and pingbacks here as well. (More on that in option #5 below.)

Discussion box in the Dashboard

Step 4

Save your changes.

If you want to disable comments for all pages on your site, scroll down to option #7.

Method #2. Disable All Future Post Comments

Now, if you decide that you want to shut off comments on your posts, you can set a universal control from the Settings within WordPress.

Step 1

In WordPress, go down to the Settings tab and select Discussion.

Step 2

At the top of this page, you’ll see a section called Default article settings. Uncheck Allow people to post comments on new articles if you want to disable this functionality.

Default article settings

As is noted beneath that checkbox, you can override that setting by changing the settings on individual posts. Just follow option #1’s steps above.

Step 3

Save your changes.

Take note that this setting only applies to new posts that you create on your WordPress site. You’ll need to enable #3 if you want to disable comments on older posts.

Method #3. Set Auto-Close on Comment Sections

Let’s say you’ve taken care of #2, but you want to remove comments from previous posts. You can do this through the same discussion settings in WordPress.

Step 1

In WordPress, go down to the Settings tab and select Discussion.

Step 2

In the Other comments settings section, check the Automatically close comments on articles older than [0] days. This will effectively remove the comment form and thread on all posts previously created.

Other comment settings

Step 3

Save your changes.

Method #4. Implement Stricter Comment Controls

If the issue you have is that you like some of the comments coming through but want better control over which ones actually publish to your site, you can set up those restrictions within WordPress’s settings as well.

Step 1

In WordPress, go down to the Settings tab and select Discussion.

Step 2

The amount of control you put over how comments are submitted, reviewed, and approved is up to you.

Comment settings

This page will allow you to do a number of things like:

  • Only allow registered users to submit a comment.
  • Receive an email whenever a comment comes through.
  • Require manual approval of all comments.
  • Give frequent commenters a free pass to comment without approval.
  • Put comments into a queue if they contain suspicious links.
  • Blacklist comments that contain certain words, links, etc.

Step 3

Save your changes.

Method #5. Kick out Trackbacks and Pingbacks

Trackbacks and pingbacks are comments that appear on your posts after someone has linked to your content on their own website. Since many of these are just spam, many WordPress users choose to disable them entirely.

Step 1

In WordPress, go down to the Settings tab and select Discussion.

Step 2

Under default article settings, uncheck Allow link notifications from other blogs (pingbacks and trackbacks) on new articles.

Trackbacks

You can also disable this on individual pages or posts by following option #1.

Step 3

Save your changes.

Method #6. Use the Akismet Plugin

The Akismet plugin is one of the most popular and well-reviewed WordPress plugins available, and for good reason. It sifts through all the comments that come into your site, instantly detecting whether or not they look like spam. The best thing about this plugin is that it’s pretty hands-off. You shouldn’t need to go into your Comments folder to clean out bad or other suspicious-looking comments. Akismet will put them aside for you.

Method #7. Use the Disable Comments Plugin

This is the WordPress plugin you’ll need if you want to completely disable comment functionality. This means that there will be no comments on pages or posts on your site. The Disable Comments also disables comments fields and sections throughout the WordPress admin so that users can’t override the universal settings. So, if you need a one-and-done comment disabler, this is it.

Method #8. Use the Disable Comments RB Plugin

Disable Comments RB plugin

No special skills or code modifications needed to disable comments on your website using Disable Comments RB. Just install the plugin and enable main functionality.

You can set comment controls for pages all at once without affecting your posts.

Key features of Disable Comments RB:

  • All comments links in admin menu are hidden
  • Hide Dashboard / Recent Comments section
  • Hide Dashboard / Discussion section
  • All comment links in admin bar are hidden
  • Disable all comments widgets
  • Discussion page settings turned off
  • Disabled RSS/Atom feeds
  • Turn off Pingback functionality in header
  • Pingbacks are disabled

A smart algorithm makes this plugin simple and powerful. While it allows global disabling of comments on all posts, pages, and attachments, it also permits selective enabling of comments anywhere on your website. Just edit this functionality in the desired sections of your WordPress site.

Wrapping Up

Well, there you have it: eight simple ways to enable, disable, and get a better handle on comments on your WordPress site. It might seem like overkill, but every WordPress site has different needs when it comes to comments and thus different solutions are required.

Editor’s Note: This post has been updated for accuracy and relevancy.
[Originally Published: 2013 / Revised: 2017, 2022]

Inform user about automatic comment closing time

To prevent spammers from flooding old articles with useless comments you can set WordPress to close comments after a certain number of days:
close-comments
It might be surprising for some users if the comments are closed automatically so it might be a good idea to inform them about the remaining time.

add_action( 'comment_form_top', 'topic_closes_in' );

function topic_closes_in() {
    global $post;
    if ($post->comment_status == 'open') {
        $close_comments_days_old = get_option( 'close_comments_days_old' );
        $expires = strtotime( "{$post->post_date_gmt} GMT" ) +  $close_comments_days_old * DAY_IN_SECONDS;
        printf( __( '(This topic will automatically close in %s. )', 'domain' ),  human_time_diff( $expires ));
    }
}

While the code should be almost self explanatory there is an interesting function not every WordPress developer might know: human_time_diff(). This function is hidden in the .../wp-includes/formatting.php file. It is originally planned to be used in themes to provide a more “human” touch to the date/time a post was written. Since the function does not care if the date is in the past or in the future we can use it for our needs.

close comment example