How to Automatically Add a Disclaimer in WordPress (Easy Way)

Do you want to automatically show disclaimers and important notices on your WordPress website?

A disclaimer helps protect your business from legal action and provides users with additional information. Usually, you’d have to enter disclaimers in your content manually.

In this article, we will show you how to automatically add a disclaimer in WordPress using an easy method.

Automatically add a disclaimer in WordPress

Why Show a Disclaimer in WordPress?

Adding a disclaimer to your WordPress website is a great way of communicating important notices and announcements to your visitors. It also protects your business from being legally liable for any claims a user makes.

There are many situations where you can show a disclaim on your website. For example, let’s say your site features product endorsements or has affiliate links. You can display an FTC disclosure stating how you may receive compensation from the companies whose products you feature on your website.

Similarly, if you operate in an industry that is governed by different regulations, then you can show legal disclaimers. This is really helpful if you’re offering medical or health advice, legal advice, or financial investment tips.

Let’s say you’re writing a blog post on General Data Protection Regulation (GDPR). You can show a disclaimer notifying users that they should get in touch with an internet law attorney to seek legal advice.

Legal disclosure example

On the other hand, if you have a WordPress blog where you share personal opinions, then adding a disclosure can safeguard you from any legal action.

That said, let’s look at how you can automatically add a disclaimer in WordPress. You can click the links below to jump to any sections of this post.

Creating Disclaimers in WordPress

You can add disclosures manually in WordPress using the content editor. Simply enter the disclaimer content in your blog posts or page. However, this is time-consuming since WordPress doesn’t offer an option to show these disclaimers automatically, and you’d have to edit every page.

An easy way to do that is by using WPCode. It is the best WordPress code snippet plugin that makes it very easy to manage and add custom code snippets.

What’s a Code Blocks Snippet?

WPCode offers a Custom Blocks Snippets feature that you can use to create disclaimers. What it does is it creates a custom WordPress block that you can automatically place anywhere on your site.

Usually, this would require editing code or building a reusable block. WPCode makes the process easier, and you don’t have to mess around with the website code or have to manually edit posts and pages.

Aside from creating disclaimers, you can also use this WPCode feature to make custom WordPress blocks for call-to-action boxes, display important notices, create interactive blocks that include forms or image sliders, and much more.

For this tutorial, we will be using the WPCode Pro version because it includes the Custom Blocks Snippets option. However, there is also WPCode free version you can use to get started.

First, you’ll need to install and activate the WPCode Pro plugin. If you need help, then please see our guide on how to install a WordPress plugin.

Upon activation, you can head to Code Snippets » Settings from the WordPress admin panel and enter the license key. You’ll find the license key in your WPCode account area.

Enter WPCode license key

Next, you can go to Code Snippets » + Add Snippet from the WordPress dashboard.

From here, you’ll need to select the ‘Add Your Custom Code (New Snippet)’ option.

Choose the Custom Code option in the WPCode library to insert an ad

After that, you can enter a name for your snippet, like ‘Disclaimer Notice.’

Next, you must click the Code Type dropdown menu and select the ‘Blocks Snippet’ option. When you’re done, simply click the ‘Save Snippet’ button.

Select blocks snippets and save

You can now edit your disclaimer notice using the WordPress content editor.

To do that, go ahead and click the ‘Edit with Block Editor’ button.

Next, you’ll be taken to the block editor in WordPress. Go ahead and enter the text for your disclaimer.

Enter the text for your disclaimer

You can further customize your disclaimer notice using the styling options in the block editor.

Simply switch to the ‘Style’ tab in the Settings panel on the right. From here, you can change the color of the text, background, and link. There are also options to edit the size of the text.

For this tutorial, we will add a background color for the disclaimer notice so that it stands out from the rest of the text. Don’t forget to click the ‘Update’ button.

Customize your disclaimer notice

After customizing your disclaimer notice, you can then click the ‘Return to WPCode Snippet’ button at the top.

Automatically Adding Disclaimers in WordPress

Once you’re on the WPCode Snippet screen, simply scroll down to the ‘Insertion’ section. Here, you can select when and where your disclaimer notice will appear.

You can keep the ‘Insert Method’ to Auto Insert. After that, go ahead and click the Location dropdown menu.

Select insertion method for code snippet

WPCode will now show multiple options. Go ahead and switch to the Page-Specific tab.

Next, you can choose where your site will display the disclaimer. For example, it can appear at the beginning of a post, after a few paragraphs, at the end of the post, and more.

For the sake of this tutorial, we will select the ‘Insert After Paragraph’ option. This way, the snippet will appear on all the pages after a certain number of paragraphs.

Select location for code snippet

WPCode will also let you select the number of paragraphs, after which the custom block snippet will appear.

For example, we want the disclaimer notice to automatically appear after the first 3 paragraphs on all the pages on our demo site.

Update and activate the snippet

Once you’re done, don’t forget to activate the blocks snippet and click the ‘Update’ button at the top.

Besides that, you can also insert the disclaimer notice on specific pages using shortcodes.

Simply switch to the Insert Method from Auto Insert to Shortcode.

Use shortcode to add blocks snippet

After that, you can copy the shortcode and add it anywhere on your website. For example, you can show the disclaimer on specific pages and posts.

WPCode also lets you schedule your disclaimer scripts. This is really useful if you have a time-sensitive notice to display on your website. You can simply select the start date and end date for scheduling the snippet.

Schedule your snippet

When you’re done, don’t forget to activate the snippet and click the ‘Update’ button.

You can now visit your website to see the disclaimer in action.

View disclaimer notice preview

We hope this article helped you learn about how to automatically add a disclaimer in WordPress. You may also want to see our list of must-have WordPress plugins and tools for business sites and how to create an email newsletter the right way.

If you liked this article, then please subscribe to our YouTube Channel for WordPress video tutorials. You can also find us on Twitter and Facebook.

The post How to Automatically Add a Disclaimer in WordPress (Easy Way) first appeared on WPBeginner.

Introducing WPCode – Easy WordPress Code Manager to Future-Proof Your Website Customizations

Have you ever wanted to reduce the number of WordPress plugins you’re using on your website?

Wouldn’t it be nice if there was an easy way that allowed you to add future-proof WordPress customizations through code snippets WITHOUT breaking your website?

If you’re like me and most other smart website owners, then you have at least wished for this solution a couple times in your WordPress journey.

Today, I’m excited to share the launch of my free WPCode plugin which will transform the way you think about WordPress customization.

We built this tool to help you save time and hassle when managing your website customizations. This is like the ultimate Swiss-Army knife tool that will help you replace dozens of existing WordPress plugins while making your website faster.

Introducing WPCode - WordPress Code Snippets Plugin

Background Story

In 2012, I created a free plugin called Insert Headers and Footers.

The goal of this plugin was to make it easy for me and other WPBeginner readers to add code to our WordPress site’s header and footer area without editing theme files!

This would include things like Google Analytics script, custom CSS code, Facebook Pixel, AdSense code, and more.

Over the last decade, this simple plugin grew to over 1 million active installs.

Enter tracking code in header

In the same time period, WordPress grew a lot too with tons of new features and plugins.

Every month, I would get requests from our users to add more functionality such as the ability to conditionally load scripts on certain pages, ability to add code snippets in other areas of the website, and so on.

After a lot of thought and consideration, we have decided to expand this free plugin and make it a full-featured code snippet management solution for WordPress with conditional logic, auto-insertion, and much more.

Using the new plugin you can:

  • Add tracking scripts / various webmaster tool verification meta details in your site with just a few clicks.
  • Add banner ads or other dynamic content elements after first paragraph of every blog post, at the end of each blog post, etc.
  • Remove WordPress features that you don’t want such as REST API, XML-RPC, Comments, etc.
  • Easily copy & paste code snippets from tutorials in your WordPress site without errors.
  • And really this is just scratching the surface.

All of these features are available to you for free!

If you’re a marketer, think of WPCode like a Google Tag Manager but inside WordPress.

If you’re a regular business owner, think of this as a swiss-army knife for your website. It will help you do what you want to do – nothing more, nothing less.

WPCode is by far the MOST POWERFUL plugin you’ll install on your WordPress site, and I’m not exaggerating.

Just give me 5 minutes of your attention, and I’ll show you — keep on reading.

What is WPCode?

WPCode is a powerful WordPress code snippet plugin that makes it easy for you to add custom WordPress features using code snippets without editing your theme’s functions.php file.

It comes with a built-in code snippets library where you can find some of my most popular WordPress code snippets that will help you eliminate the need of separate plugins.

WPCode WordPress Code Snippets Library

For example, there are ready-made snippets that will help you:

  • Disable XML-RPC – this is good for WordPress security
  • Allow SVG File Upload – eliminates the need for separate plugin
  • Disable Gutenberg – eliminates the need for separate plugin
  • Disable Comments – eliminates the need for separate plugin
  • Add Tracking Scripts for Google Analytics, Facebook, AdSense, and other platforms

And there are currently over two dozen other code snippets that you can use to add custom functionality while reducing the number of plugins on your site.

For an average website owner, this plugin will help you reduce at least 6 – 8 other plugins that you might be using right now with just the ready-made snippets that are there.

My plan is to continue to add more custom code snippets there to cover popular use-cases. If you have suggestions, please let us know by filling out the form here.

If you’re a WordPress developer / freelancer that wants to contribute code snippets, please send us your snippet using the form above.

Future-Proof Site Customization & Code Management

Most WordPress customization tutorials will ask you to add code snippets to your theme’s functions.php file. This old way simply makes managing code snippets messy, and it also prevents you from updating your theme.

If you ever update your theme or switch to another theme, then you will lose all custom code functions that you added in your functions.php file.

WPCode solves this by providing you an easy way to insert header and footer scripts along with other code snippets directly from your WordPress dashboard. These code snippets actually run as if they were in your theme’s functions.php file, but we make your customizations future-proof.

Create New Custom Snippet in WordPress

You can safely update themes or switch to another theme without ever losing your important website customizations.

Another problem with adding custom code snippets on your theme’s functions.php file was that even the smallest mistake can break your website and make it inaccessible.

So we created our smart code snippet validation. This helps you prevent common code errors to ensures you never break your website when adding code snippets or header and footer scripts.

You can manage all your header and footer scripts as well as other custom code snippets from a single screen. We even make it easy for you to organize code snippets using Tags and add reminder notes with each code snippet.

WPCode - WordPress Snippets Organized by Tags

Built-in WordPress Code Generators

Aside from our growing code snippets library, we also have WordPress code generators to help you quickly get ready-to-use custom code using the latest WordPress coding standards and API’s.

WPCode Generators for WordPress

Examples of Custom Code Generators with Admin UI include:

  • Custom Post Type Generator – Create custom code snippet for Post Types.
  • Custom Taxonomy Generator – Get custom code snippet for Taxonomies.
  • WP Query Generator – Get custom code snippet for WP_Query to load posts.
  • Custom Sidebar Generator – Create custom code snippet to register custom sidebars or widget-ready areas.
  • Custom Widget Generator – Custom code snippet to register custom widgets.
  • Navigation Menu Generator – Custom code snippet for registering new navigation menu locations in your theme.

Aside from the above, we also have code snippet generator for scheduling a cron job, registering scripts & stylesheets, adding custom post status, and more.

In the past, beginners and intermediate users would use WordPress plugins to create custom post types, taxonomies, etc with an admin UI. The problem is that those are one-time use plugins that in the background are just generating custom code snippets.

Now with WPCode free generators, you can cut out those plugins while still adding the custom functionality that you want with an admin UI.

This will be a huge time-saver for new WordPress developers and web professionals who’re building websites for clients.

Conditional Logic for Code Snippets + Auto Insertion Priority

My goal with WPCode was to create a WordPress code snippets plugin that’s both EASY and POWERFUL.

That’s why aside from our global header and footer scripts, we added advanced features like conditional logic for code snippets and made it easy.

Instead of learning WordPress conditional logic queries, you can use visual conditional logic to decide when a certain snippet would load.

WPCode Smart Conditional Logic

Examples use-cases of WPCode conditional logic:

  • Load code snippets for logged in users only
  • Load PHP code snippets for specific user roles
  • Load PHP code snippets only on specific page URLs
  • Insert header and footer pixel scripts on specific pages
  • Show code snippets based on type of page
  • Run code snippet only on certain post types
  • Load header and footer code snippet based on referrer source
  • and more…

We also added both automatic code insertion and manual output using shortcodes. This way you can add features using a custom shortcode, or simply automatically add certain features on area that you want.

WPCode Auto Insert PHP Code

Our Auto Insert feature allows you to run the code snippet everywhere or choose from custom options like:

  • Run code snippet only on frontend
  • Run code snippet only in WordPress admin area
  • Add header and footer scripts sitewide
  • Insert PHP code snippet before or after post content
  • Insert code snippet before or after specific paragraph
  • Insert code snippet on specific archive pages

Aside from that, we also added a visual code snippet priority system, so you can choose the order for your custom functions to avoid code conflict.

Add code description, tags, and priority in WPCode

What are Some Example Use Cases + Plugins You Can Replace?

WPCode is the one plugin that helps you get rid of dozens of other plugins without losing functionality.

Here are some of the top use-cases :

  • Insert Headers and Footers scripts
  • Insert Google Analytics Tracking Code in Header and Footer
  • Insert PHP Code Snippets or JavaScript code snippet without modifying theme’s functions.php file
  • Insert Facebook Pixels code, Google Conversion Pixels code, and other Advertising Conversion Pixel Scripts in WordPress header and footer with conditional logic
  • Insert Google AdSense Ads code, Amazon Native Contextual Ads code, and other Media Ads code
  • Insert Custom JavaScript, CSS, and HTML code
  • Insert Site Verification Meta tags for Social Media, Google Search Console, and other Domain verification in the header and footer of your site
  • Insert re-usable custom content blocks
  • Insert Ads code in content after specific paragraphs
  • Show or hide custom code snippets based on conditional logic
  • Disable XML-RPC, Disable Rest API, disable comments, allow SVG file uploads, disable Gutenberg and enable Classic Editor without adding extra plugins

Just with our current features and ready-made code snippets library, you can replace several popular plugins including:

WPCode comes with a ready-made code snippets library that allows you to replace several popular plugins including:

  • Disable Comment plugins
  • Disable XML-RPC plugins
  • Disable Rest API plugins
  • Disable Gutenberg plugins
  • Classic Editor plugin
  • Allow SVG File Upload plugins
  • Disable RSS feed plugins
  • Disable Search plugins
  • Disable Automatic Updates plugins
  • Disable Admin Bar plugins
  • Disable Widget Blocks plugin
  • Classic Widgets plugin
  • Remove WordPress Version Number plugins
  • Facebook Pixel plugins
  • Google AdSense plugins
  • Custom Post Types UI plugins
  • Other WordPress Generator plugins

On average, I believe you can easily replace 6 – 8 existing plugins on your website because a typical website often installs these one-off feature plugins.

Now you can remove those plugins, clean up your admin area, and simplify your website management.

What’s Coming Next in WPCode?

Since the Insert Headers and Footers plugin had over 1 million users, getting all these new features for free was a surprise for everyone.

I’m extremely pleased with the community response so far, as everyone is loving the new features.

We have an exciting roadmap ahead of us to make this plugin even more powerful. Some of the things that we’re working on:

  • A larger list of Code Snippet library that is vetted by our WordPress experts
  • Save custom snippets to cloud – this will be great for those creating & managing multiple websites as you can build your personalized snippet library inside the plugin
  • and much more

We’re truly building something special here. If you have ideas on how we can make the plugin more helpful to you, please send us your suggestions.

As always, I want to thank you for your continued support of WPBeginner, and we look forward to continue serving you for years to come.

Yours Truly,

Syed Balkhi
Founder of WPBeginner

P.S. Want us to acquire or invest in your WordPress business? Learn more about the WPBeginner Growth Fund.

The post Introducing WPCode – Easy WordPress Code Manager to Future-Proof Your Website Customizations first appeared on WPBeginner.

Pass a Parameter to All JVMs in A Machine at The Same Time

JAVA_TOOL_OPTIONS

Imagine a scenario where you need to change a JVM parameter, but you can’t or is not a good solution to changing the start script of your server(s).

One of the challenges we had, when we were working with containers, was a way to change a parameter to a JVM without building the docker image again.
The application at the start time should read a JVM parameter where a _user profile_was defined.
For specific reasons we sometimes need to change this profile, for instance, to use a more controlled user where we can debug an issue. In these situations, we want to stop the container/pod, change the profile and start again, or even start a different container with a different profile.

Introducing Netlify Analytics

You work a while on a side project. You think it's pretty cool! You decide to release it into the world. And then… it goes well. Or it doesn’t go well. Wait, is that right? You forgot to add analytics — it just didn’t cross your mind at the time. Now you’re pretty curious how many people have been visiting the site, but… you’re not sure. Enter Netlify Analytics.

There are so many times where I:

  • Forget to add analytics
  • Don’t want to incur the extra page weight, or
  • I'm concerned with privacy issues

I released a CSS Grid Generator last month and I forgot to add analytics. The release went well, but now it's a bit of a black box for me as far what happened there or if I need to adjust a release in the future. Now, however, I can enable Netlify Analytics and see into the past without having lost any information. Sweet.

Netlify Analytics doesn’t have a ton of bells and whistles — it’s not meant to be a replacement for super comprehensive marketing tools. But if you want to get some data about your site without adding a lot of scripts, it can be a handy tool.

One really nice thing about it is the accuracy. Since the data is coming from the server, you can have a clear picture of what the server actually served, rather than relying on a third party which might have varied reporting due to things like add blockers that can skew client-side reporting (15% of users are estimated to use tools like Ghostery, for instance), caching, and other factors.

The Analytics Dashboard

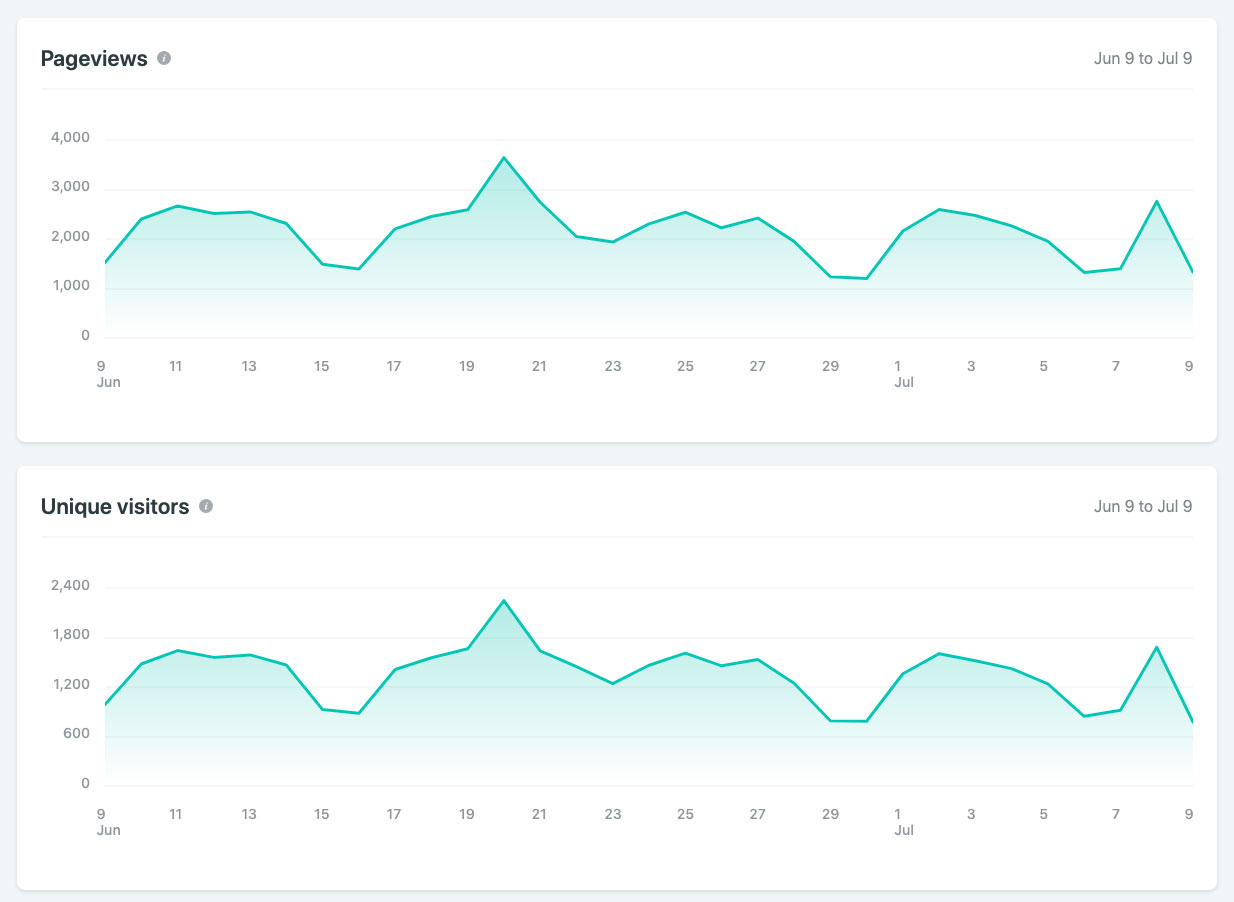
The dashboard for each site shows some “at a glance” information:

chart showing some of at a glance information

Then you can dive into more detailed information by specific date:

chart showing by date

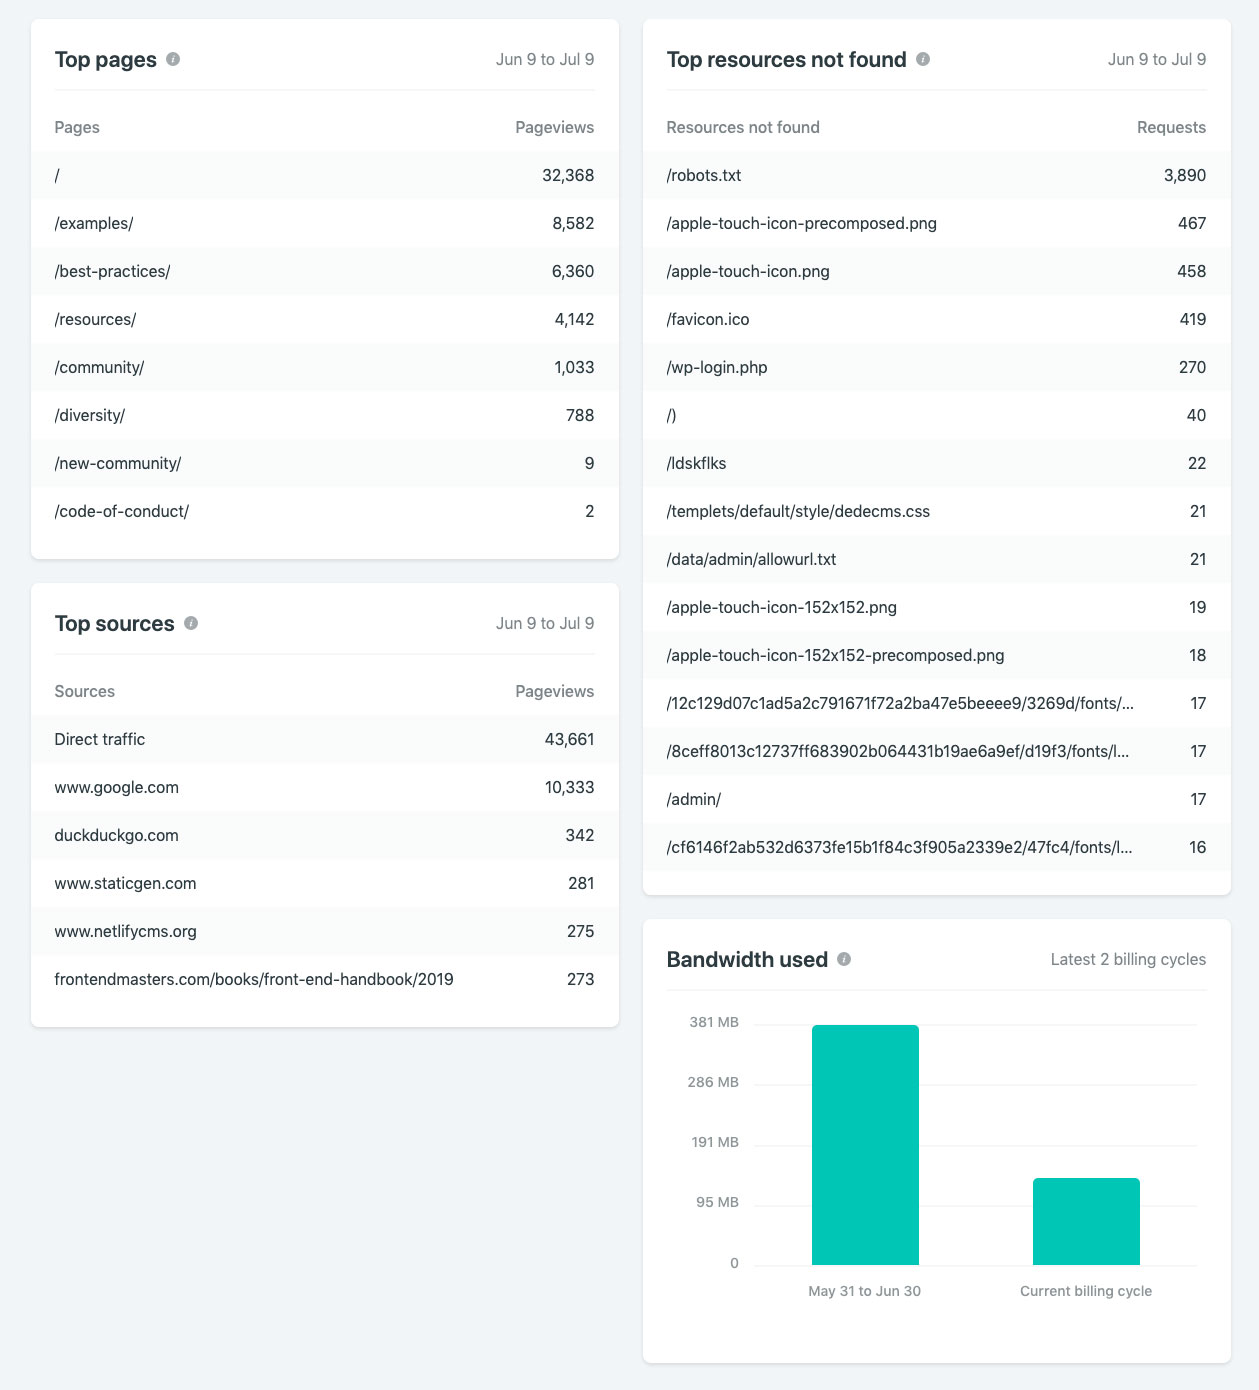
There’s a bit of information from top sources and top pages:

chart showing top sources

There's an area for "Top Resources Not Found", which shows any pages, images, anything that your visitors are trying and failing to retrieve from your site. When I enabled it on mine, I was able to fix a broken resource that I had long forgotten about.

It’s going to be awesome being able to check how some of my dev projects are doing. But I'm also really excited to take that extra implementation step out of my work. The caveats to keep in mind is that your site needs to be hosted by Netlify in order to use the Analytics tools, and it's a paid feature. Any site you enable will show up to 90 days (3 billing cycles) in the “Bandwidth used” chart, and up to 30 days in all other charts if it’s old enough, however it could take up to 2 days between when you enable analytics and when your dashboard is calculated and populated.

Under the hood

The analytics dashboard itself is built with React and Highcharts. Highcharts is a JavaScript charting library that includes responsive options and an accessibility module. All of the components consume data from our internal analytics API.

Before development began, we conducted an internal comparison survey of data visualization libraries in order to choose the best one for our needs. We landed on Highcharts over other popular options like d3.js, primarily because it means any engineer at Netlify with JavaScript experience can jump in and contribute, whether they have deep SVG and D3-specific knowledge or not.

While the charts themselves are rendered as SVG elements, Highcharts allows you to render any text inside the graph using HTML, simplifying and speeding our development time and allowing us to use CSS for advanced styling. The Highcharts docs are also top notch and offer a ton of customization options through their declarative API.

We used the Highcharts wrapper for React in order to create reusable React components for each type of graph. The "Top sources," "Top pages," and "Top resources not found" cards use a different component that displays a <table> using the data passed in as props.

One of the trickier challenges we encountered on the UI side while building these graphs was displaying dates along the X axis of the area charts in a way that wouldn't look overwhelming.

Highcharts offers an option to customize the format of an axis label using a JavaScript callback function, so we hooked into that to display every other date as a label. From there, we wrote an algorithm to capture the first date of each month that was being displayed and add the month name into the markup for the label, making the UI a bit cleaner and easier to digest.

Other Analytics Alternatives, with Snippets

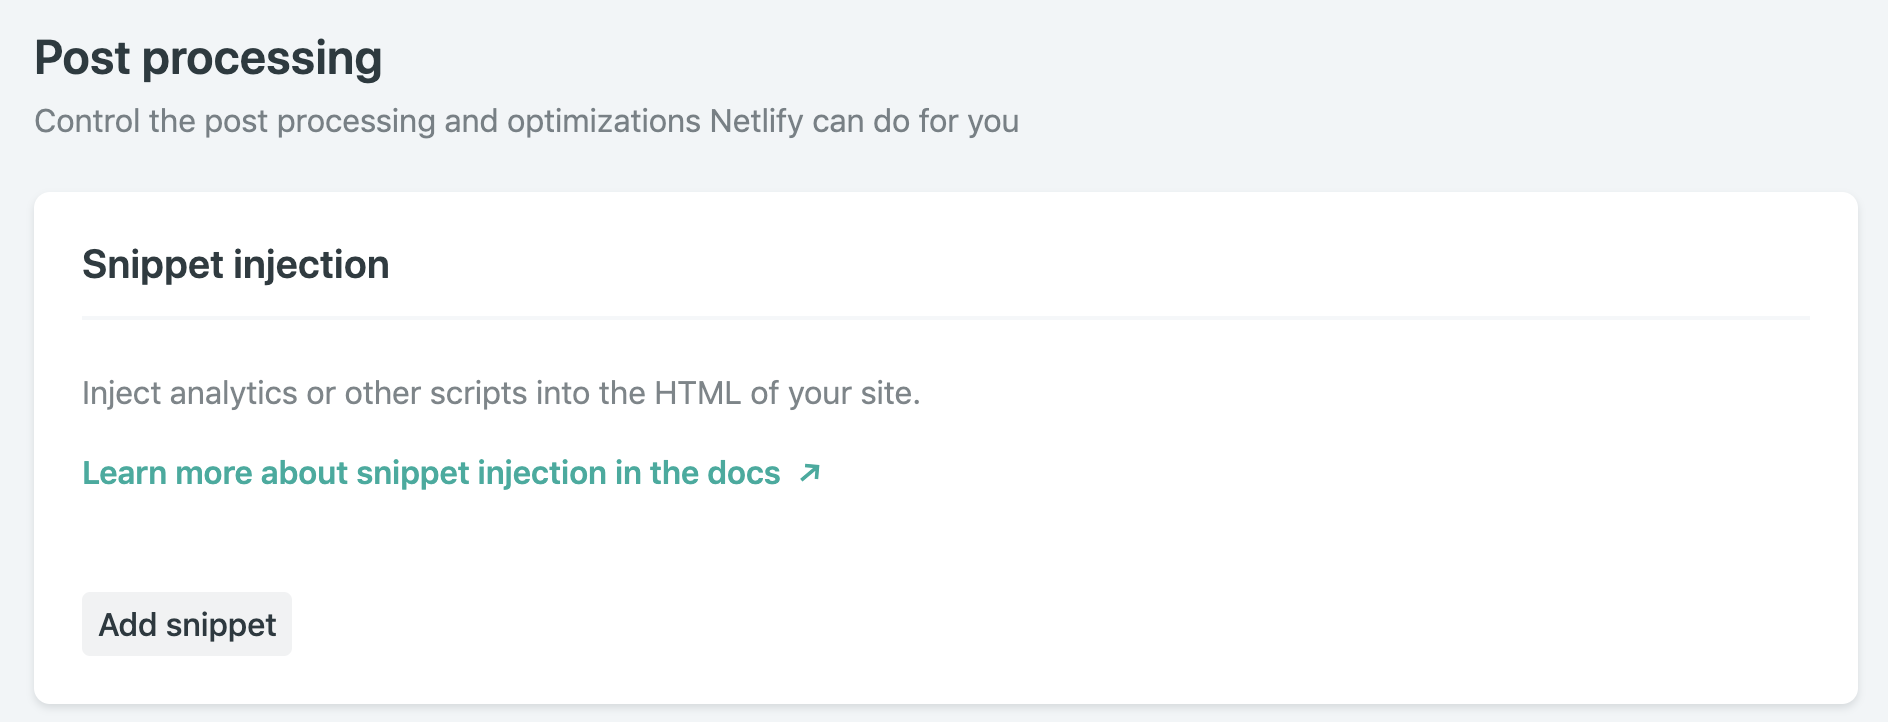
If you’d still like to run third-party scripts and other kind of analytics, Netlify has capabilities to add something globally to <head> or <body> tags. This is useful because, depending on how your site is set up, it can be a bit of a pain to add third-party scripts to every page. Plus, sometimes you want to give the ability to change these scripts to someone who doesn't have access to the repo. Go to the particular site in the dashboard, then SettingsBuild & DeployPost processing.

That's where you will find Snippet Injection:

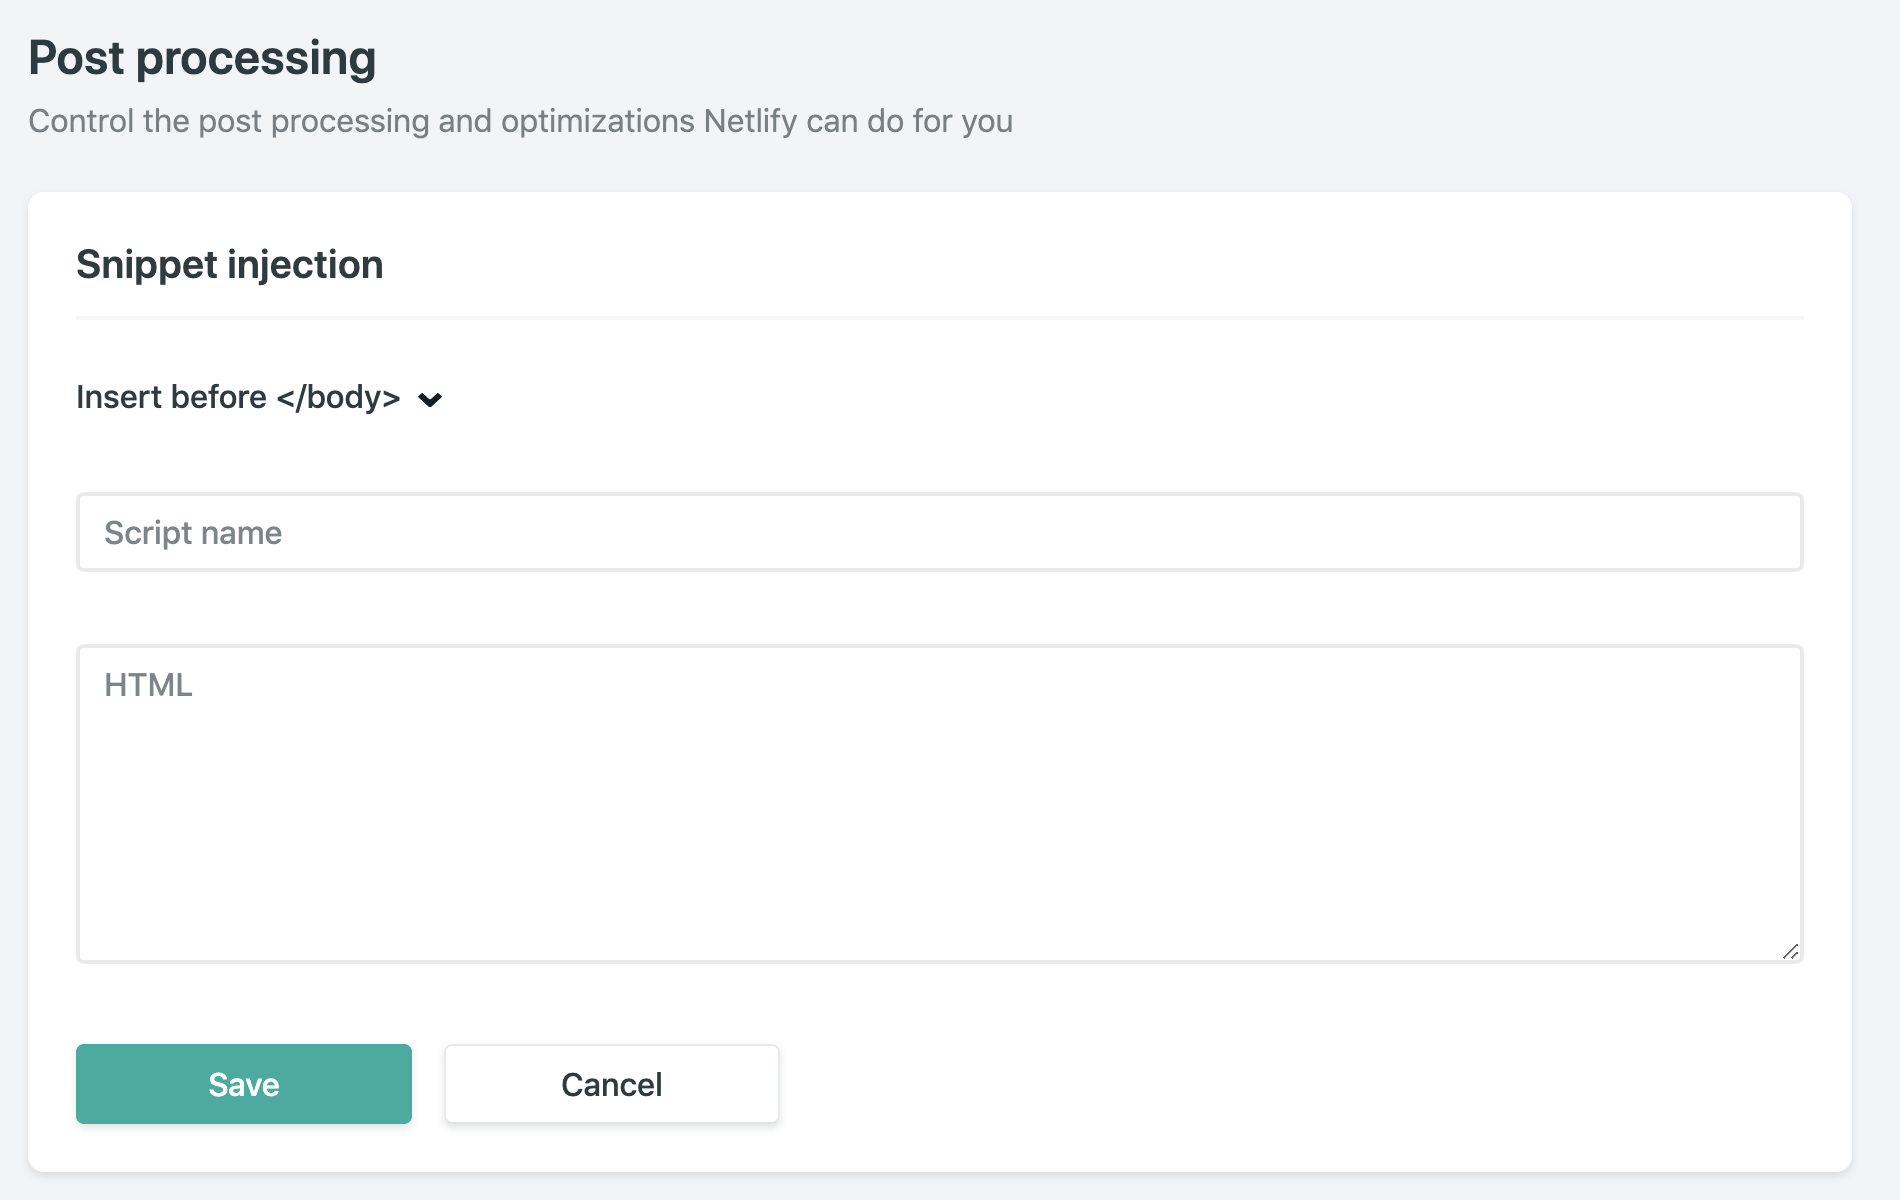
Click "Add snippet" and you’ll be able to select whether you want to add the third-party snippet to the <body> or the <head> tag, and you’ll have a change to post your code in HTML. For example, if you need to add Google Analytics, you’d wrap it in a script tag like this:

<script async src="https://www.googletagmanager.com/gtag/js?id=UA-68528-29"></script>
<script>
  window.dataLayer = window.dataLayer || [];
  function gtag(){dataLayer.push(arguments);}
  gtag('js', new Date());

  gtag('config', 'UA-XXXXX-XX');
</script>

You’ll also name it so that you can keep track of it. If you need to add more later, this is helpful.

That’s it!

You’re off and running with either the new Netlify Analytics offering that’s built-in or a more robust tool.

The post Introducing Netlify Analytics appeared first on CSS-Tricks.