How to Set Up WooCommerce Abandoned Cart Emails (+ 3 Alternatives)

Do you want to set up WooCommerce abandoned cart emails?

Around 70% of shopping carts are abandoned by the customers in your online store. By sending abandoned cart emails to these potential buyers, you can improve the customer experience and boost conversions.

In this article, we will show you how to easily set up abandoned cart emails in WooCommerce. We will also show you different ways to reach out to these customers and get their sales.

Set up WooCommerce abandoned cart emails

Why Send WooCommerce Abandoned Cart Emails to Customers?

When users visit your online store, they usually start adding products to their shopping carts but some of them abandon the items before finishing their purchases. This can happen due to multiple reasons, including high shipping costs, a slow checkout process, or needing to create an account on your website.

However, you can easily recover your abandoned cart sales by sending emails to these potential buyers. These abandoned cart emails will remind customers about the items in their cart and urge them to revisit your WooCommerce store to make a purchase.

It is a cost-effective marketing strategy that can improve your brand perception, strengthen your customer relationships, and increase your conversion rate by up to 30%.

Having said that, let’s see how to easily set up WooCommerce abandoned cart emails, step-by-step. We will also cover abandoned cart SMS, popups, and notifications, so you can use the quick links below to jump to the method you want to use:

Set Up WooCommerce Abandoned Cart Emails

You can easily set up automated WooCommerce abandoned cart emails using FunnelKit Automations.

It is the best marketing automation tool for WooCommerce stores that comes with a drag-and-drop builder and pre-built email sequences that you can set up in a few minutes. You can even design your own emails from scratch and design workflows without needing any code.

First, you need to install and activate the FunnelKit Automations plugin. For detailed instructions, see our beginner’s guide on how to install a WordPress plugin.

Note: FunnelKit Automations also has a free plan that you can use for this tutorial. However, upgrading to the paid plan will give you access to more features like smart delays, unlimited automation, SMS marketing, and more.

Upon activation, you need to visit the FunnelKit Automations » Settings page from the WordPress admin sidebar and switch to the ‘Cart’ tab in the left column.

Once you do that, check the ‘Enable Cart Tracking’ box. You will not be able to run an automated workflow for abandoned carts until you allow FunnelKit Automations to track the product carts on your website.

Check the box to set up cart tracking

You can also configure other settings here, including the waiting period to mark a cart as recoverable, blacklist emails, and GDPR consent.

After that, just click the ‘Save Settings’ button to store your changes.

Next, head to the FunnelKit Automations » Automations page from the WordPress dashboard.

Here, click the ‘Add New Automation’ button in the top right corner of the screen.

Click Add New Automation button

This will take you to the ‘Add Automation’ page, where you can select from premade templates that have abandoned cart email examples and workflows.

For this tutorial, we will choose the ‘Abandoned Cart Reminder’ workflow that will send users 3 abandoned cart emails over time.

Choose the abandoned cart reminder template

You will now be taken to a new screen where you can see the trigger, action, and delays for this workflow.

From here, click the ‘Import’ button at the top right corner of the screen to save this template.

Import abandoned cart workflow template

Once you do that, an ‘Add Automation’ prompt will open up on your screen.

Here, type in a name for the workflow according to your liking and click the ‘Create’ button.

Add an automated workflow name

FunnelKit will now open the template in its automation editor, where you can edit your workflow’s trigger, delay, and actions.

You can even add other actions and delays by clicking the ‘+’ button.

Here, the trigger has been set to ‘Cart Abandoned’, meaning that the automation will start once a customer abandons their cart.

Now, you must click on the ‘Delay’ action to configure its settings.

Configure workflow

This will open a prompt on the screen where you can configure the time for your first abandoned cart email.

For example, if you want to send the first email two days after the cart abandonment, then you can type ‘2’ and select ‘Days’ from the dropdown menu.

After that, click the ‘Save’ button to store your settings.

Add delay time for the action in the workflow

Next, move to the ‘Action’ step in the workflow and click on it to open the prompt.

From here, you can change the subject and text for the cart abandonment email you want to send to your users. You can also use merge tags to add dynamic content like the user’s name and the items in their cart.

Once you are done, click the ‘Save’ button to store your settings.

Add abandoned cart email content in the action prompt

Next, you can configure the second and third delays and action emails for cart abandonment in a similar way.

Finally, toggle the ‘Inactive’ switch to ‘Active’ to activate your automated workflow.

activate workflow

The potential customers who abandoned carts in your store will now be sent these emails after multiple delays.

Here is an automated abandoned cart email example from our testing site:

Abandoned cart email preview

Send WooCommerce Cart Abandonment SMS

Other than abandoned cart emails, it’s also a good idea to send cart abandonment SMS to users. This is because open rates for SMS messages are significantly higher than email marketing, so your messages are more likely to reach your potential customers.

Plus, sending SMS ensures that your messages will be seen instantly compared to other communication channels.

It is super easy to set up WooCommerce cart abandonment SMS with FunnelKit Automations.

First, you need to install and activate the FunnelKit Automations plugin. For details, see our guide on how to install a WordPress plugin.

Note: You will need the premium plan of the plugin to unlock the Twilio SMS feature and send automated messages to users.

Upon activation, visit the FunnelKit » Automations page from the WordPress dashboard and click the ‘Add New Automation’ button.

Click Add New Automation button

You will now be directed to the ‘Add Automation’ page, where you will see a list of premade automated workflow templates.

However, since FunnelKit Automations does not have a template for sending SMS messages, you need to click the ‘Start from Scratch’ button.

Choose the start from scratch option

This will open a prompt on the screen asking you to name your automation workflow.

Simply type in a title and click the ‘Create’ button.

Add SMS automation name

This will open the automation editor on the screen where you have to click the ‘Select Trigger’ button.

The ‘Select an Event’ prompt will now open on the screen. From here, switch to the ‘WooCommerce’ tab and select the ‘Cart Abandoned’ option as your trigger.

After that, click the ‘Done’ button.

Choose cart abandoned option as trigger

Now, click the ‘+’ button in the automation editor.

This will expand the ‘Add Step’ tab, where you must select the ‘Delay’ option.

Add delay as action

Once you do that, the ‘Delay’ prompt will open up on the screen. Here, you can configure the time for sending the abandoned cart SMS.

For example, if you want to send the cart abandonment message a week later, then you can select that option from the dropdown menu.

After that, click the ‘Save’ button to store your settings.

Add SMS delay time

Now click the ‘+’ button in the automation editor again to expand the tab and then choose the ‘Action’ option.

This will open another prompt on the screen where you have to select the ‘Send SMS’ option under the ‘Twilio’ section.

Note: The automation won’t work if you don’t have a Twilio account and phone number. For details on creating an account, you can see our tutorial on how to send Twilio SMS notifications from WooCommerce.

Choose send SMS as action

Once you select that option, you can start typing the text message that will be sent to the users once they abandon their carts.

You can also use merge tags to add dynamic content. After you are satisfied, just click the ‘Save’ button to store your settings.

Add SMS message

Finally, toggle the ‘Inactive’ switch at the top right corner to activate the automated workflow.

Now the users will be sent an SMS message a week after cart abandonment from your Twilio phone number.

Save workflow for sending cart abandonment SMS messages

Create WooCommerce Cart Abandonment Popups

Additionally, we recommend setting up abandoned cart popups on your website.

This method is a bit different from sending emails because cart abandonment popups will be immediately triggered when a visitor adds items to their cart and then attempts to leave your website.

Overall, opting for this method can encourage users to take immediate action and can be highly effective, as popups have a conversion rate of over 30%.

To create cart abandonment popups, you will need OptinMonster, which is the best WordPress lead generation and conversion optimization tool on the market.

It comes with a drag-and-drop builder and premade templates to create popups and banners for your website. OptinMonster even has Exit Intent technology that will only display the popup when a user is about to leave your website.

First, you must visit the OptinMonster website and sign up for an account by clicking the ‘Get OptinMonster Now’ button.

OptinMonster – The best WordPress popup plugin

Once you have done that, you must connect the account to your WordPress site using the OptinMonster plugin. For details, see our guide on how to install a WordPress plugin.

Upon activation, a welcome screen will open up on your website. Here, click the ‘Connect Your Existing Account’ button.

Connect your existing account

Once you have connected your WordPress site with OptinMonster, you will also have to connect it with WooCommerce.

To do this, visit the OptinMonster » Settings page from the WordPress dashboard and click the ‘Auto Generate Keys + Connect WooCommerce’ button.

The WooCommerce and OptinMonster plugins will then be connected to each other.

Auto generate keys and connect WooCommerce

Next, visit the OptinMonster » Templates page from the WordPress admin sidebar.

From here, you can select any of the premade templates to create a cart abandonment popup for your store.

Choose the abandoned cart template

Once you do that, a prompt will open up on the screen, asking you to name your campaign.

Simply type in a name and click the ‘Start Building’ button.

Add campaign name for the abandoned cart popup

This will open OptinMonster’s drag-and-drop builder, where you will notice a popup preview on the right with blocks in the left column.

Here, you can add images, videos, CTAs, dynamic content, social media buttons, and more by simply dragging and dropping blocks.

For more detailed instructions, you may want to see our tutorial on how to create a WooCommerce popup to increase sales.

Edit abandoned cart popup

Once you are satisfied, switch to the ‘Display Rules’ tab from the top and expand the ‘current URL path’ dropdown menu.

This will open up a list of different settings. Now, select the ‘Exit Intent’ option.

After that, you can select the type of device where the popup will be displayed and configure its sensitivity.

Choose the exit intent option as the display rule

Next, choose the ‘Page Targeting’ option from the second dropdown menu on the left. Then, pick the ‘exactly matches’ option from the menu in the middle.

Once you do that, you must add the URL of the product checkout page in the field on the left.

Add checkout page as the display rule

Now, the abandoned cart popup will only be displayed once the visitor starts leaving the checkout page.

Finally, switch to the ‘Publish’ tab from the top and click the ‘Publish’ button to store your settings.

Publish the abandoned cart popup

The exit intent popup will now be displayed when the visitor tries to leave your WordPress website.

Here is a preview of how the abandoned cart popup will look in your WooCommerce store.

Abandoned cart popup preview

Send WooCommerce Cart Abandonment Notifications

Finally, another way to reduce cart abandonment is to set up push notifications on your website. These messages will be displayed inside the browser for users who have already left your online store.

Unlike emails or popups, push notifications don’t require you to collect additional user data like email addresses or phone numbers. This means that users may be more likely to opt in to the notifications, but you won’t be able to ask for their contact details.

To send WooCommerce cart abandonment notifications, you can use PushEngage, which is the best push notification service on the market.

PushEngage has a custom-triggered campaigns feature that can send users abandoned cart push notifications. It also comes with powerful features like A/B testing, automatic drip campaigns, and smart opt-in reminders, and supports all devices and browsers.

First, you have to visit the PushEngage website and click the ‘Get Started For Free Now’ button.

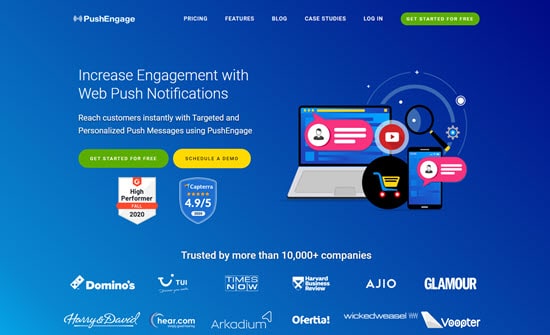
PushEngage

This will take you to the pricing page, where you have to select a plan for your online store. Keep in mind that the triggered campaign feature is only available in the Growth plan.

After that, create your PushEngage account and provide website details like your domain name, industry, company size, and more.

Provide website details to complete the signup process

Upon account creation, you will then be taken to the PushEngage dashboard, where you must provide your website URL and name.

You also have to add an image that will be used as a site icon in your push notifications.

Choose an icon image for push notifications

Once you do that, visit the Campaign » Triggered Campaign page from the PushEngage dashboard.

Here, you need to click the ‘+ Create New Triggered Campaign’ button.

Click the Create New Campaign button

This will open another screen where you will see a list of premade templates by PushEngage.

Go ahead and click the ‘Create’ button under the ‘Cart Abandonment’ template.

Choose the cart abandonment push notification template

You will now be taken to another page where you can start by adding a name for the triggered campaign that you are creating.

Once you do that, click the ‘>’ icon on the right to configure push notification settings.

Edit the cart abandonment push notification template

This will expand the tab and you can start by adding a notification title and message in the prompt.

You will notice that the ‘Notification URL’ and ‘Image URL’ fields will already have variables. We recommend leaving these settings as they are.

When the user sees this notification, they will also see an image of the product they added to their cart in the image section, while the notification URL will direct them to the checkout page.

Add the notification title and URL

Upon configuring these settings, switch to the ‘Trigger Settings’ tab from the top.

Here, you will see that the conditional logic for the campaign has already been configured. It will send a push notification to a user once they have added an item to the cart and left your website. The notification will stop displaying once the user is back on the checkout page.

Next, you have to click the ‘Activate Triggered Campaign’ button. After that, you also have to click the ‘Integration Code’ button.

Activate the Triggered campaign

This will open a prompt on the screen displaying multiple code snippets for your website, including the add-to-cart event, checkout event, and goal tracking.

Simply copy these snippets and paste them on your WordPress site. Keep in mind that you will need a developer to fill out these snippets with the variables used on your website.

If you don’t want to hire a developer, then you can also contact the PushEngage Customer Success team, and they will set up the campaign for you.

Copy the integration code

Finally, click the ‘Activate Autoresponder’ button to store your settings.

Now, the customers who abandon their carts will be sent a cart abandonment push notification.

Click the Activate Autoresponder button

Here is an example of a cart abandonment notification sent to a user.

As you can see, the notification has a photo of the product and a link to the checkout page.

Abandoned cart notification preview

You can also connect the PushEngage software with your WordPress site to create different kinds of push notifications, including sending notifications upon a sale, successful transactions, and more.

For details, see our tutorial on how to add web push notifications to your WordPress site.

Bonus: Use WooCommerce Automations to Increase Sales

Apart from sending cart abandonment emails, you can also use other automated workflows to increase your WooCommerce sales.

An automated workflow is a sequence of tasks that is executed once an event is triggered on your website. You simply set up the trigger and the action, and the automation will take care of the rest.

For example, you can send automated coupons to bring back users to your website or create personalized email marketing strategies.

You can do all of this using Uncanny Automator, which is the best WordPress automation plugin on the market.

It is super easy to use and can connect your WooCommerce store with over 150 tools like WPForms, Zoom Meetings, Facebook, Twilio, and WhatsApp to create automated workflows.

Uncanny Automator

With Uncanny Automator, you can send emails and SMS messages to users upon a failed transaction, product statuses, coupons, product reviews, and so much more.

You can also create, update, and delete users based on various triggers, like user registration or form submissions.

For detailed instructions, you can see our tutorial on how to create automated workflows in WordPress with Uncanny Automator.

We hope this article helped you learn how to use WooCommerce cart abandonment emails push notifications, SMS, and popups. You may also want to see our tutorial on how to customize the WooCommerce checkout page and our expert picks for the best WooCommerce plugins for your online store.

If you liked this article, then please subscribe to our YouTube Channel for WordPress video tutorials. You can also find us on Twitter and Facebook.

The post How to Set Up WooCommerce Abandoned Cart Emails (+ 3 Alternatives) first appeared on WPBeginner.

How to Drive 10,000 Extra Site Visitors a Month (Case Study)

Looking to drive tons of traffic to your site?

What if I told you that you can EASILY drive hundreds if not thousands of additional repeat visitors to your site… every month?

It might sound too good to be true, especially when ‘reliable’ traffic sources like SEO traffic are increasingly getting volatile… but it’s not!

A big problem with most traffic sources, like search engines and social media, is that you have no control over how their algorithms work.

If you want to drive loads of visitors to your site consistently, you’ll need to have full control over that traffic source.

Note: This article is part of our WPBeginner Insider series, where we talk about the methods we use to grow our business.

drive-10000-extra-site-visitors-a-month-in-post-

Get Full Control Over a Traffic Source (& Drive Tons of Traffic)

There are a few different ways to build a reliable traffic source for your site that you have full control over. Here are a few of them:

  • Build an email list
  • Build a mobile app
  • Build a subscriber list (such as push notifications)

Let’s examine the pros and cons of each strategy. We’ll explain why push notifications are the easiest method to drive traffic and how we use them on WPBeginner to drive around 10k additional website visitors a month.

1. Build an email list

Building an email list is probably the most common strategy for driving repeat visitors to your site. While some email marketing services, like Constant Contact, offer a 60-day free trial, eventually, you’ll have to pay at least $12 a month.

While we highly recommend building an email list, it may not be the best bet if you don’t have the budget or don’t prefer spending time on writing and sending emails every once in a while.

2. Build a mobile app

Unless you’re a juggernaut like Amazon or Facebook, chances are your website visitors won’t even use your app, let alone keep them on their phones for repeat visits.

Plus, building and managing a mobile app can take time and resources.

In case you need, here are 4 WordPress plugins that help you convert your site into an app.

3. Build a subscriber list (such as push notifications)

This is the easiest and the most cost-effective method to drive repeat traffic to your website.

Unlike building an email list, it’s cheap, and you don’t even have to worry about writing lengthy messages such as emails to your subscribers.

The winner: Push notifications are the easiest yet cost-effective solution for driving repeat traffic to your site. Since you have full control over your ‘list,’ there is no need to worry about traffic volatility.

What Are Push Notifications?

Push notifications are custom messages with links that you can send as notifications to users’ web browsers. Users can opt-in to receive these push notifications from a website.

For example, when your visitor lands on your site, you can ask them to subscribe to your push notifications with a modal popup. Once they subscribe, you can send them a short message with a link to your site as a push notification.

Push notification preview on desktop

If you’ve ever used a smartphone, you know what push notification looks like.

Push notification preview on mobile devices

It’s a tiny message on your screen prompting users to visit a website or an app. These notifications can be customized and personalized, which makes them highly effective in driving traffic.

To send these push notifications, you can sign up with a push notification service provider.

These platforms make it easy to manage subscriptions, send messages, and use automation and segmentation to personalize messages for your users.

Why Use Push Notifications to Grow Traffic?

Today, it is harder than ever for marketers to get their messages across. There is simply too much content out there competing for your audience’s attention.

Push notifications help you get the edge over the competition. They work across all platforms and devices. That’s why these targeted custom messages can be highly effective in bringing users back to your website.

Here are some of the main reasons to use push notifications on your WordPress website:

  1. Grow Subscribers Without Collecting Personal Info – Unlike email or SMS marketing, no personal info is collected when opting in to push notifications. This can help with addressing growing privacy concerns among internet users.
  2. Grow Your Subscribers Faster – With an average opt-in rate above 6%, push notifications boast a significantly higher engagement rate than other methods. This is especially true when you consider that the opt-in rate for email marketing sits at around 3%.
  3. Drive Repeat Traffic to Your Site – Because up to 95% of first-time visitors aren’t ready to purchase immediately, push notifications can nudge them towards repeat visits and closer to a purchasing decision.
  4. Higher Click-Through Rate Than Emails Push notifications have an average click rate of 28%, which is much higher than the 1-2% for emails. This is a more effective way to capture user attention and get people back to your website.
  5. Get an Instant Reaction – Users usually don’t respond to emails for at least 6.5 hours. By contrast, push notifications often get an immediate response, capturing the user’s attention on the spot.
  6. Easy to Setup and Manage – Simplicity is key with push notifications, making them an accessible tool for marketers without advanced technical know-how.
  7. The Most Affordable Marketing Method – Offering a cost-effective alternative to traditional methods, push notifications are an economical choice for businesses of all sizes.

That being said, let’s look at how we use push notifications on WPBeginner.

How We Use Push Notifications on WPBeginner

We use PushEngage. It is the best push notification software on the market that allows us to easily engage and retain website visitors even after they have left our website.

PushEngage website

Here are some of the reasons for using PushEngage:

  • It is straightforward to use and has an intuitive interface for creating and scheduling campaigns. That makes it suitable for both experts and beginners alike.
  • It offers powerful segmentation and personalization options. We can send the right message to the right user at the right time, making our push notification campaigns extremely effective.
  • PushEngage offers multiple campaign types, autoresponders, effective retargeting, and more. These tools make push notifications more engaging for the users.

Want to add it to your website? We have a step-by-step tutorial that you can follow to add push notifications to your WordPress website.

At WPBeginner, user experience is as important for us as getting more traffic. We also want our push notifications to reach more users.

To summarize, we want our notifications to be less intrusive and more efficient to ensure that we get better engagement and ROI (return on investment) while providing helpful information to our readers.

Here are the types of push notifications we use to achieve this.

Two-Step Optin Notifications

There are two kinds of optin boxes you can add for your notifications. First, there is the usual single-step optin, which is a good start but easily dismissed by many users.

Visitors see this so often from different sites that they become blind to it.

Single step optin

Major browsers like Safari and Chrome only show two options: Allow or Block. If users click Block, then you cannot show them the optin popup again unless they reset their site settings. Users rarely, if ever, do this.

Also, you cannot customize the browser-based optins, which makes them practically unusable.

The second type is the two-step optin. These optins require an additional step for users to opt in, but they are highly customizable.

We use a custom optin through PushEngage to get users’ attention and provide a better experience for them.

Safari style push notifcation optin

This kind of optin popup is much less intrusive. It allows users to decline politely and allows us to ask them again after some time.

It also enables users to choose segments they are interested in, making the notifications more beneficial. They can choose to receive notifications about WordPress SEO, eCommerce, or email marketing, for example, but not plugins and themes.

Once the user has chosen the kinds of notifications they want, they will be shown the traditional Allow or Block popup. Only then, they can choose to allow the notifications instead of blindly clicking the block button by default.

Drip Autoresponders for New Users

We also set up autoresponders to welcome new users with an onboarding series of drip notifications.

Unlike regular autoresponders, a drip setup lets you set up a sequence of notifications that will be automatically sent to users at pre-defined intervals.

Creating a drip sequence

We use this feature to send a series of onboarding notifications designed to point new subscribers to the right resources on our website.

Segmenting users during the opt-in process allows us to send more targeted personalized messages tailored to the user’s needs, making them more relevant and engaging.

These automated drip notifications help users uncover resources one message at a time. Sending them in intervals makes the information easier to consume.

We have a tutorial on how to set up automated drip notifications, where you can learn the whole process step-by-step.

Broadcast Notifications

To drive traffic, we send broadcast notifications every other day about the latest blog posts published on WPBeginner.

Broadcast notifications are manual notifications you can set up to share news from your website. We schedule them to match our editorial calendar for the week.

New push broadcast message

These notifications allow users to be notified about a new article that they would otherwise miss.

These notifications have a high CTR and consistently bring a significant number of return visitors to our website. They also make sure that our readers don’t miss out on the latest news and helpful information from our website.

Broadcast push notifications allow us to customize the messages we send users about new articles. They are not too frequent and are highly relevant to our users, making them both practical and beneficial for our audience.

Alternative Methods for Push Notifications

Not all websites are the same, so your site may have different goals and needs than WPBeginner.

Here are some other types of push notifications that we have used on our other sites.

RSS Auto-Push Campaigns

If setting up manual broadcasts sounds like too much extra work, then you can automate your push notifications with RSS Auto Push.

It allows you to send automatic notifications for new articles as soon as they are published by sourcing data from your RSS feed.

Users who opt to receive notifications are already interested in what you publish next. Getting updates from your site will help readers stay up to date. Otherwise, these users may have to check your site manually, which is a bit inconvenient.

Simply log in to your PushEngage account dashboard, go to the Campaign » RSS Auto Push page, and click the ‘Create New Campaign’ button.

New RSS Auto Push campaign

Next, you need to enter your blog’s RSS feed address and choose the time and interval when you want to send the message.

You can choose either ‘At Fixed Interval’ or ‘Specify Day and Time’.

Set up RSS auto push

Optionally, you can choose how many latest items from your feed to send and their intervals. Under the advanced options, you are able to customize the notification settings like character limit, image, large image, or more.

By using powerful headlines and engaging content, you can improve the click-through rate of these push messages.

Once finished, don’t forget to activate your Auto Push campaign.

Triggered Automated Push Notifications

Apart from drip and RSS feed, you also get access to a bunch of automation options with PushEngage.

These can be used to send automated but personalized custom messages based on the user activity on your website. This personalization makes them more relevant and engaging for your readers, leading to a more effective campaign.

You can find these automation options in your PushEngage dashboard by going to Campaign » Triggered Campaigns.

Triggered campaigns

For instance, if you run an online store, then you likely struggle with the issue of abandoned carts. According to our research, the average cart abandonment rate last year was a whopping 70.19%.

Luckily, you can use push notifications to get abandoning users back to your store to complete their purchases.

You just need to click ‘Create’ under the Cart Abandonment campaign. PushEngage will then automatically fill in important information like the product name, URL, image, and large image, using dynamic tags.

Cart abandonment push notification

You can then customize the notification message, choose when to send the notification, and more.

Related: Learn more ways to recover abandoned cart sales.

Push Notifications vs. Email Marketing – Which Do We Recommend?

At WPBeginner, we use both email marketing and push notifications to grow traffic and bring back users to our website.

In fact, in a previous WPBeginner Insider column, we showed all the methods we use to grow our email list.

As a marketer, both these tools provide different ways to reach your audience. Instead of just choosing one, we recommend using both of them together.

While email marketing works well for transactional content, push notifications outperform emails when it comes to easy subscriptions, urgency, higher click-through rates, and personalization options.

For a detailed discussion on this topic, you can see our comparison of push notifications vs. email with pros and cons and use-case scenarios for both platforms.

We hope this article helped you learn about the push notification techniques we use at WPBeginner. You may also want to see our tutorial on how to use email marketing automation or learn about creating automated workflows in WordPress for everyday website admin tasks.

If you liked this article, then please subscribe to our YouTube Channel for WordPress video tutorials. You can also find us on Twitter and Facebook.

The post How to Drive 10,000 Extra Site Visitors a Month (Case Study) first appeared on WPBeginner.

15 Best WooCommerce Automations to Increase Sales

Are you looking for easy and smart ways to automate tasks and increase sales in your WooCommerce store?

By automating tasks in your online store, you can save time and money while growing your business and increasing sales.

In this article, we will show you how to use WooCommerce automations to increase sales.

15 WooCommerce Automations to Increase Sales

Why Automate Your WooCommerce Store?

If you are running a WooCommerce store, then you probably spend a lot of your time performing repetitive tasks. These can be anything from sending marketing emails for your online store to processing customer invoices.

Wouldn’t it be nice if you could automate all of those tasks and focus on growing sales and your business instead?

Luckily, you can use the best WordPress automation tools and plugins to automate WooCommerce tasks. By doing this, you will save time, offer a better user experience to your customers, and ultimately increase sales.

With that being said, here are 15 WooCommerce automations to increase sales:

1. Use Automation to Personalize Your Email Marketing

Are you keeping in touch with your customers using an email newsletter? You may not be taking advantage of all the automation tools available in your email marketing software.

For example, the best email services like Constant Contact, Sendinblue, and Omnisend all have integrations with WooCommerce. They allow you to personalize your emails by adding the customer’s name and more.

They also let you set up a Welcome email series using a drip campaign. This is a sequence of automated emails that will go out automatically to new customers.

Choose an email automation

You can learn how to get started by scrolling down to the automated drip emails section of our guide on how to send automated emails in WordPress.

Additionally, if you are looking for a complete tool that offers WooCommerce email customization and automation, then we highly recommend using FunnelKit Automations.

Apart from letting you fully customize your WooCommerce emails, it also lets you set up smart, automated follow-up emails and workflows to boost your sales.

You can get started with FunnelKit Automations by selecting an automation from a library of handy templates.

Autonami Email Library for WooCommerce

For example, you can automatically send an email series to new customers, recover abandoned carts, send promotional emails to selected audiences, and more.

There is also an option to create your own WooCommerce automation from scratch. You will then see a visual email automation builder where you can make any customizations that you need.

Autonami Marketing Automation Email Analytics for WooCommerce

For example, the screenshot above shows the workflow for sending out a thank you email after a customer makes their first order. You can even see in-line analytics for each email.

You can learn more in our guide on how to customize WooCommerce emails. Make sure you scroll down to the section on FunnelKit Automations.

Tip: We recommend combining FunnelKit Automations with an SMTP service like WP Mail SMTP. This will make sure your emails are delivered to your customers and won’t get lost or end up in the spam folder.

2. Set Up an Automated Marketing Campaign With Push Notifications

You can also run an automated marketing campaign using push notifications instead of emails. These notifications go directly to the user’s web browser or mobile device. This means they have a much higher engagement rate, similar to SMS messages.

The easiest way to set up automated push notifications is with PushEngage. It is the best web push notification software for WordPress, and over 10,000 businesses use it to send targeted messages.

Create a new drip autoresponder

For each notification, you can change the title, message, URL, icon image, and more by expanding it.

There is also a preview of how your notifications will look in the browser.

Edit your push notifications

PushEngage also lets you choose when to send each notification. For example, you can immediately send the first notification and select a different time for the following one.

For more details, see our guide on how to set up automated drip notifications in WordPress.

3. Let Customers Track Orders With Automated Transactional Emails

WooCommerce will need to send different transactional emails to your customers. These help them get order confirmations, track their order status, get invoices, and find out more information about your online store.

You can customize and automate these emails using FunnelKit Automations, which is a popular WooCommerce plugin for marketing automation.

The FunnelKit Automations dashboard makes it easy to create a new automation. You can simply click on one of the plugin’s many templates.

Funnelkit Automations WooCommerce Automation Templates

You can filter the list to quickly find the WooCommerce automation you wish to use. For example, you might want to send automatic thank-you emails to repeat customers.

You can then customize the automation using the visual automation builder, including the content of the email.

Funnelkit Automations Workflow and Email Customization

For detailed instructions, please see the section about sending automated transactional emails with FunnelKit Automations in our guide on how to send automated emails.

4. Quickly Update Your Customers With Automated SMS Messages

Many customers prefer to receive text messages to notify them about their orders. Plugins like YITH WooCommerce SMS Notifications or FunnelKit Automations will automatically send SMS messages to your customers.

Yith SMS Notifications Plugin

SMS messages are an effective way to keep your customers up to date. They have a 98% average open rate, with 95% of messages being read in the first 3 minutes!

You can send automatic texts to your customers when their orders are dispatched or their status changes. You can automatically send SMS notifications to your customers or let them opt in at checkout.

Learn how by following our guide on how to send SMS messages to your WordPress users.

5. Automate All Invoicing and Payment Processes

As a business owner, there is a lot to manage. If you are still creating invoices manually, then you can switch to professional invoicing software that automates all invoicing and payment processes. Then, you will be free to focus on growing your business.

A plugin like WooCommerce PDF Invoices makes it easy to automatically generate invoices, collect orders, and manage your finances.

WooCommerce PDF Invoices

You can also save time by accepting recurring payments or adding subscriptions to WooCommerce. These WooCommerce automations will help automate the billing process and can save you time.

With automatic recurring payments, you don’t have to spend time manually sending invoices and waiting for payments from your customers.

Plus, adding subscription payments to your eCommerce business will give you a more consistent cash flow, fewer payment errors, and fewer payment delays.

Creating a recurring payment in WooCommerce

6. Use Automated Store Activity Notifications to Boost Sales

Automated FOMO and social proof notifications can also increase sales in your WooCommerce store.

FOMO, short for fear of missing out, is a marketing technique used to create excitement about a product. It uses psychology to encourage customers to make buying decisions faster.

Plus, social proof shows visitors that other customers have purchased your products. This can convince users that your online store is trustworthy.

The best way to add social proof to your website is by using TrustPulse. It is one of the best social proof plugins for WordPress on the market.

TrustPulse automatically monitors activity on your site. When potential customers are close to buying something, they will see a notification showing that another customer has just made a purchase.

By simply displaying social proof, you will give your visitors a small push to complete their purchase. To learn more, see Method 1 of our guide on how to use FOMO to increase conversions.

7. Automatically Display Your Best Product Reviews

Would you like to automatically display the best reviews of your products from across the internet? You could copy and paste them manually, but that is a lot of work. Plus, there would be a delay before they appear on your website.

Luckily, Smash Balloon has a Reviews Feed Pro plugin that lets you automatically show off your best reviews from platforms like Google Reviews, Yelp, TripAdvisor, and more.

Customer reviews, displayed on a WordPress website

It comes with pre-designed templates, so you can display your reviews in different layouts, including showcases, carousels, grids, and more.

The Reviews Feed automatically copies your website’s design so that the reviews look like a natural part of your website rather than content embedded from another platform.

You can follow our guide on how to show Google, Facebook, and Yelp reviews to set up your own automatic review feed in WooCommerce.

8. Use an Automated Sales Funnel to Boost Sales Conversions

A sales funnel is the path a user takes on your website to become a customer. It is made up of the specific pages a user may visit before making a purchase.

For example, a new visitor might land on a blog post, then view a product page, then go through your checkout flow.

Unfortunately, only 10% of shoppers, on average, will add anything to their carts. After they do, 60-80% of them abandon their carts without completing the purchase.

Luckily, you can use FunnelKit, the best WooCommerce sales funnel plugin, to change that. You can use the plugin to optimize each step, offer a better user experience, reduce distractions, and nudge users toward completing their purchases.

For example, it comes with a one-click Upsells feature, which allows users to add products to their carts on their way to the checkout.

WooFunnels One Click Upsell

FunnelKit also lets you customize the user journey with pre-checkout offers, custom checkout form layouts, beautiful templates, and more.

For instance, the FunnelKit Funnel Builder lets you add order bumps to boost profits if someone adds $X to their cart. You can also add one-click order bumps to your checkout page.

Edit design of your bump offer

To learn more, see our guide on how to make a high-converting sales funnel in WordPress.

9. Reduce Cart Abandonment With Popups and Push Notifications

As we said earlier, 60 to 80% of people who add items to their cart don’t actually buy them. This means if you have an online store, then you are losing out on a lot of sales.

Luckily, you can use automatic push notifications to reduce cart abandonment rates. For example, you can pop up a notification when a user is about to leave your website and offer a coupon or free shipping.

Or, if the customer already has discounted items in their cart, they may just need some reassurance that they are making the right decision. Push notifications like these can help you recover 3 to 8% of abandoning cart sales.

Smash Balloon exit intent popup

You can learn how to use OptinMonster to add exit-intent popups by following our guide on how to create a WooCommerce popup to increase sales.

But what if the customer leaves your site before they see the popup? Push notifications can also help you connect with your visitors after they leave your website. These messages will display in your subscriber’s browser even when they are not actively browsing your store.

Push notification abandoned cart example

The easiest way to do this is with PushEngage. It is the best web push notification software on the market, and it is used to send over 15 billion push messages every month.

For more details, see our guide on how to add web push notifications to WordPress.

You can also significantly reduce cart abandonment by simply improving your online store and checkout process. We share plenty of proven tips with real examples in our guide on how to recover WooCommerce abandoned cart sales.

10. Send Automated Coupons to Bring Back Customers

It costs 5 times more to get a new customer than to keep an old one. Over time, people may lose interest in your website, forget about your products, or start shopping with a competitor.

One way to bring those customers back is to automatically send them a coupon code via email. You can use automation tools to send a coupon to customers who have become disengaged, such as when they don’t place an order for 2 months or have stopped opening emails.

Scheduling an automated coupon code

You can learn how in our step-by-step guide on how to send automated coupons in WordPress to bring back customers.

Another good use for automated coupons is recognizing and rewarding customers when they engage with your online store. For example, you might send a coupon after a customer reviews one of your products.

This builds loyalty to your store and can get you more sales. It also encourages shoppers to review more products in the future.

You can also schedule coupons in advance so that they go out automatically on popular holidays like Black Friday, Christmas, New Year’s, Mother’s Day, and Valentine’s Day. This will leave you free to focus on promoting your offers and getting as many sales as possible.

See our guide on how to schedule coupons in WooCommerce for detailed instructions.

Additionally, as we mentioned earlier, you can also offer a coupon in a popup. Showing a coupon at the right time makes a huge difference in converting your website visitors into paying customers.

There are a few ways to do this, and we give you all the details in our step-by-step guide on how to create a coupon popup in WordPress.

11. Automate Your Social Media Channels

You can also use automation to post your online store content to your social channels. This lets you keep your social followers engaged with fresh content.

Uncanny Automator has integrations with all popular social platforms. It will let you publish new blog posts on Facebook, show off your latest product images on Instagram, advertise your sales on Twitter, and more.

Post a featured image to Instagram from WordPress

You can learn how to do this step-by-step by following our guides on how to automatically post to Facebook, Instagram, and Twitter.

12. Automatically Display Social Media Content in WooCommerce

Are you looking for ways to show fresh content without doing any extra work? One way to do that is to automatically display your latest social media activity in your WooCommerce store.

This can save you time and keep your website content fresh and engaging for visitors. Plus, it can boost social proof by displaying your social media followers, comments, and like counts.

Smash Balloon automates your website content by displaying your latest social media activity. It is a popular social media feed plugin for WordPress that is used by over 1.4 million websites.

For example, you can add a Facebook feed to WordPress, and new posts will automatically appear in real time. Your customers can also like, share, and comment on your WordPress posts, which is a great way to get more engagement on Facebook.

An example of an embedded Facebook feed, created using Smash Balloon

You can change the feed’s color scheme, design a custom header, add ‘like’ and ‘load more’ buttons, and much more.

If you are posting beautiful photos and engaging videos to Instagram, then it makes sense to post that content to WordPress too.

An Instagram photo feed, created using Smash Balloon

You can even show other people’s photos on your site by creating a hashtag feed or displaying the posts that other people have tagged your account in.

In the following image, you can see an example of an online store that uses a custom Instagram feed to show user-generated content.

An example of Instagram user-generated content

For details, please see our step-by-step guide on how to add your social media feeds to WordPress.

Tip: For more tips on how to use social channels to grow your online store and increase sales, you can see our complete social media cheat for WordPress.

13. Make Your Forms Smarter Using Automation

You can use form plugins like WPForms to collect all kinds of information from your customers.

For example, you can use a form plugin to display a contact form, create a questionnaire, gather testimonials, or build a survey form.

The best thing is that WPForms easily integrates with many other tools and plugins, so you can easily automate any action after someone fills out your form.

For example, when someone fills in an order form, you can use conditional logic to send an email notification to the correct department, depending on the product that was purchased.

WPForms Conditional Logic for Sending Notifications

You can also send a confirmation email to the customer who filled in the form to let them know you will be in contact soon. This a nice gesture that lets your users know that you have received their information.

In addition, by using the Google Sheets Addon, you can send any form fields you want to a spreadsheet. This will allow you to use spreadsheet features to analyze the data and collaborate with others in your team.

Using WPForms' Google Sheets Addon

To automate your forms further, Uncanny Automator will let you connect WPForms and other form plugins to 100+ third-party services without having to pay fees to services like Zapier.

For example, you can create an Uncanny Automator recipe to send customer form data to Airtable. Then, your team will be able to access and use the data easily.

Using Uncanny Automator to Send WPForms Data to Airtable

To learn more, see our guide on how to create automated workflows with Uncanny Automator.

14. Automate Live Chat Using Artificial Intelligence

Automated chatbots are the future of live chat software because they allow you to engage with your customers 24/7. They can free up time by automatically answering common customer questions, generating leads, improving user experience, and making more sales.

Chatbot.com is the best AI chatbot software for WordPress. It lets you easily automate live chat on your website by setting up your own chatbot using a drag-and-drop builder. You don’t need to do any coding or have any special technical skills.

ChatBot live chat

It even comes with pre-built templates that you can use as a starting point to quickly get your AI chatbot up and running. These templates include different scenarios like selling products, customer service, recruitment, bookings, and more.

For example, you can use the eCommerce bot template to walk your customers through the entire buying process. There are even templates for specific industries, including a coffee shopbot, recruitment bot, and restaurant bot.

If visitors want to communicate with a real person, then you can easily forward them to your customer support agent, phone support, or any of ChatBot’s live chat software integrations, such as LiveChat.

15. Use Uncanny Automator for Even More WooCommerce Automations

This article contains many specialist tools that do specific automation jobs very well. By contrast, Uncanny Automator is a Swiss army knife that allows you to create all types of automation workflows without having to write any code.

It acts as a bridge so that you can get different WordPress plugins talking to each other, as well as loads of third-party services.

You create automation by building Uncanny Automator recipes, consisting of triggers and actions. The action will be automatically run when a user or WooCommerce triggers an event.

Uncanny Automator Triggers and Actions for WooCommerce

Here are some of the WooCommerce triggers you can use to run a recipe:

  • A customer viewing a product
  • A customer adding a product to their cart
  • A customer paying for a product
  • A payment failing
  • A customer reviewing a product
  • And much more

Then the recipe can automatically run any of these WooCommerce actions:

  • Creating an order with a product
  • Changing the price of a product
  • Generating and emailing a coupon code
  • Giving an order a specific status

There are dozens of recipes that you can create, allowing you to save hundreds of hours while running your online store more efficiently.

For instance, you can use Uncanny Automator to automatically create a new customer account when someone submits a contact form on your website, or send notifications to Slack.

Bonus: Track Conversions to Learn How to Increase Sales

To use any marketing automation platform effectively, you will need easy-to-understand reports that tell you exactly what is working for your business and what isn’t.

MonsterInsights is the best Google Analytics plugin for WordPress. It lets you get a clear picture of what is happening on your site and what you can do to bring in more sales.

It comes with WooCommerce conversion tracking, form submissions, outbound link tracking, and user tracking.

Its Reports page has an ‘eCommerce’ tab that shows your most important conversion metrics, including the conversion rate, transactions, revenue, and average order value. Below that, you will see a list of your top products with quantity, sale percentage, and total revenue.

Ecommerce report in MonsterInsights

You will also see your top conversion sources. You can use this report to attract more customers and offer exclusive discounts for customers from specific sources.

For detailed instructions, see our guide on how to set up WooCommerce conversion tracking.

You can also connect Google Sheets with WooCommerce to easily record and manage your orders and customer data. Once the information is in a Google Sheet, you can easily filter it based on factors like the order total, the customer’s location, coupons used, and more.

You can then share this information with your team, even if they don’t have access to the WordPress dashboard. For example, you can easily send this data to your suppliers, marketing departments, or other team members.

You are even able to turn this data into charts and graphs. All of this makes it easier to analyze the information and then use these insights to fine-tune your business and get more sales.

We hope this tutorial helped you learn how to increase sales using WooCommerce automations. You may also want to see our guide on how to add wholesale pricing in WooCommerce or our expert picks for the best WooCommerce plugins for your store.

If you liked this article, then please subscribe to our YouTube Channel for WordPress video tutorials. You can also find us on Twitter and Facebook.

The post 15 Best WooCommerce Automations to Increase Sales first appeared on WPBeginner.

How to Start a Video Blog (Vlog) And Make Money in 2023

Do you want to start a video blog and make money?

Vlogging is a powerful way to connect with people and build a personal brand. However, if you simply upload vlogs to third-party platforms like YouTube, then you may struggle to grow your audience, make money, and become a successful vlogger.

In this article, we will show you how you can start a vlog and make money.

How to start a video blog (vlog) and make money

Which Is the Best Website Builder for Your Video Blog?

There are many website builders that can help you create a vlog site, but we recommend using WordPress and a separate video hosting platform.

To learn more about why WordPress is such a good choice, please see our complete WordPress review with pros and cons.

There are two types of WordPress software: WordPress.com and WordPress.org. We recommend using WordPress.org, also called ‘self-hosted WordPress.’ This will give you full ownership and control of your site.

Using WordPress.org allows you to install third-party plugins and themes, including plenty that are designed specifically for vloggers.

Also, while you can upload videos to WordPress, it’s far better to use a separate video hosting platform such as YouTube or Vimeo.

Videos take up a lot of your hosting resources, which will slow down your website. Instead, we recommend uploading your vlogs to a separate hosting platform such as YouTube or Vimeo, which has all the server resources you need.

After uploading your vlogs to one of these sites, you can then embed your vlog in a WordPress page or post by simply copying and pasting a link. WordPress has built-in support for most major video hosting platforms.

If you really want to save time and impress your viewers, then you can use a plugin like Smash Balloon to create a video feed that will update automatically every time you post a new vlog.

An embedded YouTube feed, created using Smash Balloon

If you don’t already have a video hosting platform in mind, then don’t worry. Later in this guide, we’ll help you find the perfect platform for your vlogs.

Step 1. Setting Up Your Video Blog Website

To create a video vlog, you’ll need a domain name and web hosting.

Although the WordPress software is free, hosting and domain names are where the costs can really start to add up.

A domain name typically costs $14.99/year and hosting costs start from $7.99/month. This is a lot for hobby vloggers, new creators, or anyone who is working with a tighter budget.

Thankfully, Bluehost has agreed to offer our users over 60% off on web hosting and a free SSL certificate as part of this deal. This is absolutely essential if you plan to sell premium videos and make money from your vlogs. You will also get a free domain name when you sign up!

Simply click the link below to create a vlogging website for as little as $2.75 per month.

Because you get a free domain when you sign up with Bluehost, you’ll need to be sure it’s the right fit for your video blog. For expert tips, check out our guide on how to choose the best domain name.

Once you’ve completed the purchase, you’ll get an email with instructions on how to log in to your web hosting control panel. This is your hosting account dashboard where you can manage your vlog, including setting up email notifications and asking for WordPress support if you need it.

It’s also where you’ll install the WordPress software, so let’s do that now.

Step 2. Install WordPress on Your Video Blog

When you sign up with Bluehost using our link, you’ll get access to a one-click WordPress installer. Simply log into your Bluehost account and click on ‘One Click Install.’

Installing the WordPress software

You can now follow the onscreen instructions to set up WordPress.

If you’re using a different WordPress website host like SiteGround, Hostinger, HostGator, or WP Engine, then you can see our complete guide on how to install WordPress for all the top hosting providers.

Once WordPress is set up, you’re ready to start customizing your vlog site.

Step 3. Select a Video Theme

WordPress themes are professionally designed templates that change how your vlog looks and acts.

There are lots of different premium and free WordPress business themes to choose from. You can generally categorize these as multipurpose WordPress themes, or niche industry themes. However, most WordPress themes are designed to show text.

Since we’re starting a vlog, we need a theme that’s designed specifically for videos.

A WordPress video theme

Even if you’re using a separate video hosting platform, embedded videos still take time to load. With that in mind, it’s important to find a lightweight theme that won’t slow down your website. Wherever possible, we also recommend using a theme that has built-in lazy loading.

On top of that, vlogs often need special features such as parallax scrolling, lightbox popups, and fullscreen video backgrounds.

An example of a WordPress vlog theme

That’s a lot to keep in mind, so you may want to look at our expert pick of the best WordPress video themes.

Another option is to use a landing page builder plugin such as SeedProd. SeedProd is the best drag-and-drop WordPress page builder and comes with more than 180 templates.

This includes an entire section of ‘Webinar’ templates that are designed specifically to show videos on your WordPress website.

SeedProd's professionally-designed vlog templates

SeedProd also has a ready-made ‘Video’ block that you can drag and drop onto any page.

For more information, please see our guide on how to create a landing page with WordPress.

The SeedProd page builder plugin

Once you’ve chosen a video theme, please see our step-by-step guide on how to install a WordPress theme.

After installing a theme, you may want to customize it by going to Appearance » Customize in the WordPress dashboard. This will launch the theme customizer where you can fine-tune the theme settings and see your changes in the live preview.

Customizing a WordPress video blog theme

If you’re using one of the newer full-site editing themes, then you’ll need to go to Appearance » Editor instead.

Here, you can fine-tune the theme using blocks.

Customizing a WordPress vlogging theme using the FSE

Just remember that you can customize your theme at any point. You can even completely change your WordPress theme, if you realize it doesn’t quite meet your needs.

This means you don’t need to finalize your site design now. In fact, it may be easier to fine-tune your vlog once you’ve added some content.

Step 4. Create a Custom Homepage

WordPress comes with two content types called posts and pages.

You’ll typically use posts to create articles and blogs, while pages are static “one-off” types of content. For example, you might publish an about page, a privacy policy, or a custom archive page.

There are a few different ways to show videos in WordPress. However, since we’re creating a video vlog you’ll typically embed one or more videos in a blog post.

By default, the WordPress homepage shows your posts in reverse chronological order, so your latest vlog appears at the top of the homepage.

A custom homepage on a WordPress vlog

However, you may want to move this blog list to another page, and use a custom homepage instead. This custom homepage can introduce your vlog to visitors and let them know what you have to offer.

You might even create a YouTube gallery of all your best videos, which is a great way to catch a visitor’s attention and make them want to watch more of your content.

Smash Balloon allows you to create all kinds of galleries, including showing a specific YouTube playlist or favorites feed, a single video, or even your latest live stream.

Adding a YouTube vlog feed to your WordPress website

For step-by-step instructions on how to create an attention-grabbing homepage for your video blog, please see our guide on how to create a custom homepage in WordPress.

Once you’re happy with the design, it’s time to set it as your homepage. To do this, go to Settings » Reading in the WordPress dashboard.

How to set a custom homepage in WordPress

Here, scroll to ‘Your homepage settings’ and select ‘A static page.’

Next, open the ‘Homepage’ dropdown and choose the page that you want to use.

Changing the homepage on a WordPress video blog

After that, simply scroll to the bottom of the screen and click on ‘Save Changes.’ Now, if you visit your website you’ll see the new homepage in action.

With that done, make sure you create a separate blog page to display your vlogs.

Step 5. Set Up Your Video Hosting Platform

Before you can start adding videos to your WordPress website, you’ll need to upload them to a separate video hosting platform. In this way, you can show countless high-resolution videos on your website without affecting its performance.

For more on this topic, see our post on why you should never upload a video to WordPress.

There are lots of different video hosting platforms that you can use, but we recommend YouTube as it’s the most popular choice.

It’s free to create a YouTube account and you can upload as many videos as you want.

Uploading videos to YouTube

YouTube even has a Partners Program that you can join to make money from your videos. This program also offers more benefits like analytics, longer videos, and editing tools.

Since it’s such a popular platform, there are lots of great WordPress plugins for YouTube. For example, you can use plugins to quickly and easily embed a YouTube playlist in WordPress.

Adding a YouTube playlist to a vlog using Smash Balloon

If you don’t want to use YouTube, then there are many other popular platforms including Vidyard, Wistia, and SproutVideo. For a closer look at all the top video sites, please see our expert pick of the best video hosting sites for bloggers.

After choosing a platform, you’ll need to create an account and upload all the vlogs that you want to show on your WordPress website.

For instructions on how to do this, check out the online documentation for your chosen video hosting platform.

Step 6. Create Your First Vlog

To create your first vlog, simply go to Posts » Add New in your WordPress dashboard.

WordPress has a block-based editor that allows you to create beautiful content layouts for your vlogs. Here, you can add text, images, audio clips, and more.

How to create a new vlog post

For an in-depth look at the editor, please see our WordPress block editor tutorial.

The easiest way to add vlogs to WordPress is by using the built-in auto-embed feature. If you’re using one of the big video hosting platforms, then you can simply paste the video’s URL into the WordPress content editor, and WordPress will handle the rest.

Just head over to your chosen video hosting platform and find the vlog that you want to show on your WordPress blog. You can then simply copy the video’s URL.

After that, switch back to the WordPress dashboard and paste the URL in the content area. If you paste it into a standard Paragraph block, WordPress will automatically try to place it in the correct block, such as the YouTube block.

Embedding a YouTube video in WordPress

Even if you don’t see the platform-specific block, it will use the Embed block and display the video inside the content editor.

For more information, please see our detailed guide on how to easily embed videos in WordPress blog posts.

How to show a YouTube vlog in WordPress

As you’re working on the vlog, you can see how it’ll look to visitors by clicking on ‘Preview.’

This will open the page in a new tab.

How to preview a vlog in WordPress

The WordPress post editor also has sections for Categories and Tags. You can use these to organize your vlogs so it’s easier for visitors to find interesting content. To learn more, please see our guide on how to add categories and tags in WordPress.

When you’re happy with how the vlog looks, go ahead and click on the ‘Publish’ button in the top-right corner of the screen.

To add more vlogs to your website, simply follow the same process described above.

Step 7. Add a Contact Form to Your Vlog

Some viewers might want to contact you directly. This may include affiliate marketers, sponsors, advertisers, and other brands who are looking to build relationships with creators, or other vloggers who want to collaborate.

These people could ring your phone number or send a message to your business email address, but we always recommend adding a contact form to your website.

This makes it easier for potential partners to contact you, so you don’t miss out on any opportunities to grow your brand and make money from your vlogs.

The easiest way to add a contact form to your WordPress website is by using the free WPForms plugin. WPForms comes with a built-in Simple Contact Form template that you can customize using the drag-and-drop editor.

Adding a contact form to a WordPress vlogging site

You can then add the form to any page, post, or widget-ready area using the ready-made WPForms block.

For detailed instructions, see our guide on how to create a contact form in WordPress.

Step 8. Help Visitors Find Interesting Vlogs

Once you’ve added some content to your vlog, it’s a good idea to add a navigation menu so visitors can find their way around the different videos.

Adding a navigation menu to a video blog (vlog)

The exact location of your menu will depend on your WordPress theme. Most themes have several options, so you can create multiple menus and then show them on different areas of your vlog.

Whether you create a single menu or multiple menus, it’s easy to add navigation to your vlog. For a complete guide, please see our post on how to add a navigation menu.

Adding a navigation menu to a WordPress vlog

Menus encourage people to explore your site, but sometimes visitors may want to search for a specific vlog. WordPress comes with a built-in search feature, but it’s quite basic and not very good at finding relevant content.

That’s why we recommend using SearchWP, which is the best search plugin for WordPress.

It is very easy to use and gives much more accurate search results. It allows visitors to search for a keyword in the post or page title, content, URL slug, categories, tags, taxonomies, WordPress excerpts, and even comments.

All of this can help visitors find interesting vlogs, fast.

How to improve WordPress search with SearchWP

For step-by-step instructions on SearchWP, please see our guide on how to improve WordPress search.

Step 9. Optimize Your Vlog for SEO

If you want to get more viewers, then you’ll need to optimize your vlog for SEO. This will help search engines understand your content and show it to people who are looking for videos just like yours.

WordPress SEO is a huge topic that can be confusing for new vloggers. With that in mind, we recommend using All in One SEO for WordPress (AIOSEO).

The AIOSEO SEO plugin

AIOSEO is the best WordPress SEO plugin on the market and has everything you need to get your vlogs onto the first page of Google, without having to learn any complicated SEO jargon.

AIOSEO comes with the easiest setup wizard that helps you choose the best SEO settings for your business. AIOSEO will even scan your vlogs and show an actionable checklist on how you can optimize that specific vlog.

An actionable checklist for improving SEO

Additionally, AIOSEO has a video sitemap feature that you can use to show search engines what’s the most important content to index.

To help you get started, please see our ultimate guide on how to set up All in One SEO for WordPress correctly.

Step 10. Notify Users About New Vlogs

Did you know that 70% of people who leave your site will never come back? Thankfully there are lots of ways to turn abandoning visitors into loyal viewers.

To start, it’s smart to create an email newsletter so people who enjoy your vlogs can subscribe. After that, you can email these subscribers every time you post a new vlog.

You can also keep them engaged with your brand by sending them fun surveys and polls, notifying them about any giveaways and contests you’re running, or even simply asking them for feedback on your latest vlog.

An example of an online giveaway or contest

All of this can help you create a sense of community and build a stronger relationship with your viewers.

If you do build an email list, then you’ll want to make sure your messages arrive safely in the subscriber’s inbox and not in their spam folder. With that in mind, we recommend using an SMTP service provider to improve your email deliverability rates.

Another option is to use push notifications with software like PushEngage to send targeted, personalized messages to viewers after they leave your vlog.

Push notifications are short, clickable notifications that appear as a popup on the user’s desktop or mobile devices. Some of the biggest websites in the world use push notifications to keep users engaged, including Facebook.

These notifications go directly to the user’s web browser or mobile device so they have a high chance of getting the person’s attention, which makes them perfect for notifying viewers when you post a new vlog.

To learn more, see our guide on how to add web push notifications to WordPress.

Step 11. How to Make Money From Your Video Vlogs

Creating lots of quality, engaging vlogs takes a lot of time and effort, so you may want to make money from your videos.

If you’ve created a contact form, then potential sponsors and partners already have a way to contact you, which is a great start. However, there are lots more ways to make money online with WordPress.

Here are some of the best ways to make money from your vlog.

  1. Google AdSense

There are many reasons why it’s smart to embed videos on your own website, rather than simply uploading them to platforms like YouTube.

One major benefit is that you can show Google AdSense ads next to your videos.

Google AdSense

When you sign up for Google AdSense, Google acts as a middleman between you and the advertiser. Instead of you having to find the right partners for your vlog, Google allows advertisers to bid for keywords matching your content. This allows you to get the best possible rates for the ads on your vlogging website.

For more details, please see our article on how to properly add Google AdSense to your WordPress blog.

  1. Affiliate marketing

Many vloggers make money by recommending products and services to their viewers. For example, many lifestyle vloggers film daily routine videos showing off their favorite skincare or fitness products.

By using affiliate links, you can earn money every time a viewer buys a product or service based on your recommendation.

For the best results, it’s a good idea to only recommend quality items that you already use and trust. If you encourage viewers to buy poor-quality or scammy products, then you’ll damage your band and almost certainly lose viewers.

There are plenty of affiliate marketing plugins and tools for WordPress that can help you make money by promoting affiliate products, but we highly recommend PrettyLinks or ThirstyAffiliates to all vloggers.

To get started, please see our step-by-step affiliate marketing guide for beginners.

  1. Ask for Tips and Donations

If you build a strong, positive relationship with your viewers then they may want to support your work as a vlogger. This is particularly true if you’re a hobby vlogger or someone who is just starting out.

Although they’re mostly used by non-profits, some vloggers use donation forms so that viewers can support their work. These forms are often presented as ‘buy me a coffee’ or ‘buy me a beer.’

An example of a donation form

To learn more, please see our guide on how to create a donate form in WordPress.

  1. Create a Membership Site

Most of the time, you’ll want your vlogs to be publicly available so you can get as many views as possible and build your audience.

However, some vloggers may want to create a video membership site in WordPress. This allows people to pay for different perks, such as early access to the latest vlogs, exclusive live streams, or premium members-only videos.

You can also offer perks that don’t involve videos, such as a members-only forum, blog posts, or the ability to chat with you directly on channels like Discord.

The easiest way to create a membership site is by using MemberPress. It is the best WordPress membership plugin on the market and allows you to accept payments, create unlimited subscription levels, restrict access to video pages based on levels, and more.

Creating video memberships with the MemberPress plugin
  1. Sell Your Videos as Digital Downloads

Depending on the kind of vlogs you create, you may decide to sell some of your premium videos as digital downloads. For example, if you’re a health and fitness vlogger then you might create videos teaching your followers different exercise routines.

For some niches, this can be a way to monetize the audience you’ve built from your vlogs.

Easy Digital Downloads is the best platform to easily sell digital products. You can get started in minutes and accept credit card payments with Stripe, PayPal, Google Pay, and Apple Pay.

The Easy Digital Downloads WordPress eCommerce plugin

With Easy Digital Downloads, you have complete control over how you distribute your videos. You can allow customers to download files as many times as they want or restrict file downloads by time or attempt.

To start selling your premium videos, please see our complete guide on how to sell digital downloads on WordPress.

We hope this tutorial helped you learn how to start a video vlog and make money. You may also want to learn how to increase your blog traffic or check out our list of the best email marketing services.

If you liked this article, then please subscribe to our YouTube Channel for WordPress video tutorials. You can also find us on Twitter and Facebook.

The post How to Start a Video Blog (Vlog) And Make Money in 2023 first appeared on WPBeginner.

Push Notifications vs Email: Which Is Better? (Pros and Cons)

Are you comparing push notifications vs email to figure out which is better?

Push notifications and email marketing are two of the most effective marketing tools to increase conversions and sales. But how are they different and which one should you focus on?

In this article, we will compare push notifications vs email marketing with pros and cons to find out which one is better.

Push Notifications vs Email: Which Is Better? (Pros and Cons)

Push Notifications vs Email: Which One is Better?

Push notifications and email marketing are two different marketing channels that each have their own advantages and disadvantages.

Both can help you achieve similar goals like increasing conversions, recovering cart abandonment, boosting sales, and getting more user engagement.

When used properly, they can help you significantly grow your online business.

Due to the difference in the delivery platform, one method could be better suited over the other. For instance, in some places email will be less effective than a push notification and vice versa.

That being said, let’s take a look at push notifications and email and see what are their pros and cons and when one of them is more effective than the other.

Email Marketing – Pros and Cons Explained

Email Marketing Stats

Email marketing is the most effective marketing tool available on the market. However, what most people are unclear about is what makes email so effective and when they are using it wrong.

Pros of Email Marketing

Following are some of the advantages of using email marketing in your business strategy.

1. High ROI with Low Costs

As a business, one factor in your decision-making is the costs and what kind of return you should expect.

For every $1 spent on email marketing, $44 is made in return. That’s an ROI of 4400% (source). 

Email marketing has a very high ROI due to low-cost email marketing platforms. These services allow you to send thousands of emails to your customers for a very low cost.

2. Wider Availability to All Customers

Most internet users today have 24/7 access to their email inbox via a variety of devices laptops, mobile, and even smartwatches.

An average internet user checks their email several times a day and due to cheaper unlimited storage, many people don’t bother deleting emails.

This increases the chances of your subject line and a snippet been seen by users even if they don’t open the email.

3. Perfect for Longer Content

Emails can be as long as you need, so you have plenty of room to create an effective copy for your email.

We generally do recommend keeping it short and sweet. However, sometimes you may need to add more information to your email.

You can place multiple calls to action if needed, add several products, provide users instructions on how to do something on the website, and more.

4. Emails Are More Customizable

Emails can be in plain text, or you can use HTML and CSS to create beautiful newsletter templates. You can also add images, link to YouTube videos, create buttons, and more.

Emails are more customizable

Most email service providers allow you to use smart tags to personalize your emails. Plus, you can segment your email list into different user groups.

For instance, you can segment your email list into users who have already made at least one purchase and users who have never bought from you.

You can also set up automated drip notifications that send a sequence of emails with a set frequency to users.

All of this allows you to make your emails look more personalized, professional, and persuasive.

5. Email Isn’t Time Limited

Unlike push notifications, which demand the user’s urgent attention, emails are more relaxed and users can decide to read them later.

Once the email arrives in a user’s inbox, it will sit there until the user takes an action.

Most users check email several times a day, so even if they don’t open it right away, they will scan through your subject line multiple times.

Cons of Email Marketing

Email is cheap and highly effective. There is no doubt that it will remain one of the most efficient marketing tools for businesses in the future.

However, there are certain areas where email puts you at a slight disadvantage.

1. Too Frequent Blog Post Emails

Sending users an email for every blog post doesn’t work very well. Specially if you publish daily or several times a day.

Longer emails

That’s why you see a ton of blogs (including WPBeginner) sending weekly emails with a recap of all the blog posts they published this week.

2. Competition in Your Customer’s Inbox

An average internet user gets a lot of marketing emails each day. Each one of them tries to come up with a creative subject line to get their attention.

You are competing with many other businesses for users’ attention, and this affects your open rates. You have to learn how to write better emails that users actually open and take action.

3. Email Apps like Gmail Assigning Low Priority Labels

Marketing emails

Due to huge volume of marketing emails, popular email clients like Gmail may not display any notification for new emails to your users.

Your email may be labeled low priority promotional email among hundreds of other marketing emails. This may reduce the visibility, open rates, and CTR for your email campaigns.

Push Notifications – Pros and Cons Explained

Push notifications pros and cons

Push notifications are a highly effective marketing tool with higher click-through and open rates. Let’s compare how they stack up against email marketing.

Pros of using Push Notifications

Following are some of the advantages of using push notifications over emails in your marketing strategy.

1. Easy to Subscribe

Push notifications are very easy to subscribe to. Users simply need to click a button to subscribe for notifications.

Whereas in a traditional email sign-up forms, users will have to first go through popups and opt-in forms to fill in their email address, submit the form, and then confirm their subscription via double opt-in.

This easy subscription option in push notification works very well for users as it instantly gets out of their way once they click subscribe. Most push notification software offer 1-click subscription options.

2. Messages Are Delivered to Users Instantly

Push notifications appear on users’ screens as soon as they receive them. Unlike emails, they don’t need to open them separately.

They work on all platforms and are particularly more effective on mobile phones. Basically, users will get the message instantly as a notification regardless of which device they are using.

This increases the visibility of push notifications and makes them much more effective than email marketing.

3. Push Notifications Add Urgency and FOMO

Push notifications appear as mobile notifications, which adds urgency to them.

Users feel that they will not see the notification if they dismiss it, so they don’t want to miss out on anything important.

Urgency example

4. Users Cannot Provide Fake Signup

Push notifications work on users’ browsers, so users cannot provide fake sign-up information.

This is far more effective when comparing to email sign-ups. Many users now enter disposable email addresses that they have made particularly for subscriptions.

Users may also provide wrong email addresses or makeup fake ones to signup. As marketers, this affects the open and CTR rates of your email campaigns.

5. Highly Effective Personalization

Push notifications can be customized for individual users and triggered based on user activity.

You can do this with emails too. However, it becomes more effective when combined with the urgency and FOMO effects of push notifications.

For instance, a user added a product to the cart, you can use push notifications to nudge them into completing the purchase.

You can also add drip push notifications which work very well for blog post alerts and many publishers / bloggers send targeted push notifications based on user’s interest.

Cons of Using Push Notifications

Push notifications work great for most websites. However, to avoid misusing them, you need to keep in mind the following disadvantages.

1. No Lengthy Content

Push notifications have a character limit which varies on different platforms and browsers.

For instance, you can use 30-70 characters for titles and 65 to 200 characters for descriptions.

You’ll have to keep your messages short and persuasive with in these limits.

2. Limited Media Options

Platforms like PushEngage allow you to create rich push notifications with hero images, Gifs, videos, and emojis.

There is still a limit on what you can use to make your notifications more interactive.

3. Can Easily Get Excessive

Push notifications have a much higher CTR, which may compel some website owners to use them more frequently.

This could ruin user experience as they may start getting more than usual notifications.

On the other hand, if the user has signed up for too many notifications, their notification panels may get too many messages from different websites which may affect how they feel about web push notifications.

Which is Better, Push Notifications vs Email?

Push notifications are better than email due to the higher click-through rates, urgency, personalization, and easy subscription options.

However, email is still highly effective for transactional emails, upsells, newsletters, and other campaigns.

We believe that they are two separate tools. While one of them can be more efficient in particular scenarios, the other one may excel in other areas.

Combining email and push notifications is ultimately the best win-win strategy for most businesses.

This is why we use both push notifications and email marketing in our business to get maximum results.

How to Get Started with Push Notifications

To send push notifications, you’ll need to sign up for a push notification service.

We recommend PushEngage because it is the best push notification service on the market.

PushEngage

PushEngage comes with powerful customization options, triggered notifications, automatic drip campaigns, A/B testing, and more features to grow your business.

Plus, it is extremely beginner friendly and much easier to set up without any special technical skills.

For more details, see our tutorial on adding web push notifications to your WordPress site.

How to Get Started with Email Marketing

You’ll need to sign up for an email marketing service to get started.

We recommend using Constant Contact, which is the best email marketing service for small businesses and bloggers.

Constant Contact website

Constant Contact comes with easier setup, beautiful email templates for every type of campaign, engagement reporting, and dynamic personalization.

For more detailed instructions, see our article on how to start an email newsletter in WordPress.

We hope this article helpes you compare push noticiations vs email and which one is better for your business. You may also want to see our practical tips to grow your email list quickly or see our complete conversion tracking guide.

If you liked this article, then please subscribe to our YouTube Channel for WordPress video tutorials. You can also find us on Twitter and Facebook.

The post Push Notifications vs Email: Which Is Better? (Pros and Cons) first appeared on WPBeginner.

How to Set Up Automated Drip Notifications in WordPress

Do you want to send a series of automated drip notifications to your subscribers?

Automated drip campaigns are great for welcoming new users and boosting engagement on your WordPress site. You can use them to guide your users along a specific journey.

In this article, we will show you how to set up automated drip notifications in WordPress using both push notifications and email notifications.

Setup drip notifications in WordPress

When Should You Use Automated Drip Notifications in WordPress?

Drip notifications are automated messages that are sent to your subscribers, usually in the form of a push notification or an email.

These messages are part of a series, and they are automatically triggered to send at a predefined interval. In other words, they are ‘dripped’ to your subscribers over time rather than ‘poured out’ all at once.

You can use drip campaigns to promote a product, get more pageviews on your WordPress blog, build a relationship with your users, increase sales, and even teach a course over a specific period of time.

Here are a few use cases to get the most out of automated drip campaigns in WordPress:

  • You can send an automatic welcome drip notification to new subscribers and customers. This way, you can educate users about your products and services and build brand trust.
  • If you are running an eCommerce store, then having automated drip notifications setup can help upsell and cross-sell different products upon purchase.
  • You can promote your most important content and get people to revisit your website.
  • Using drip notifications, you can show targeted messages to people from different regions. This helps get more conversions based on geographic segmentation.
  • You can get people to register for your webinars and upcoming events using automated drip notifications.

In this guide, we will cover push notifications and email drip campaigns. You can click the links below jump to your preferred method :

How to Set Up an Automated Push Notification Drip Campaign

The easiest way to set up automated push notifications is with PushEngage. It’s the best web push notification software for WordPress, and over 10,000 businesses use it to send targeted messages.

First, you will need to visit the PushEngage website and click the ‘Get Started for Free Now’ button.

The PushEngage push notification software

Next, you will need to select a pricing plan that meets your needs. PushEngage offers a free plan that includes 30 campaigns and up to 200 subscribers.

After selecting a pricing plan, you can create an account or register with a Google account.

Create an account on PushEngage

Upon signing in to your account, you will see the PushEngage dashboard.

The tool will then take you to Site Settings » Site Details and ask you to enter your website details, like your site name, domain name, site icon, and more.

Enter website details

If you scroll down further in the ‘Site Details’ section, you can generate the API key for connecting PushEngage with different platforms, select a time zone, and enable geolocation.

There is also an option to remove the ‘Powered by PushEngage’ branding.

Copy the API key

Next, you will need to connect your WordPress website with PushEngage.

First, you’ll need to install and activate the PushEngage WordPress plugin. If you need help, then please see our guide on how to install a WordPress plugin.

Upon activation, you will see the PushEngage setup wizard. Go ahead and click the ‘Connect Your Existing Account’ button.

PushEngage setup wizard

A new popup window will now open.

You can then select your website from the dropdown menu and click the ‘Let’s Get Started’ button.

Connect your existing site

Next, you will see a success message that PushEngage is connected to your website.

You can go ahead and select the ‘PushEngage Dashboard’ option to close the setup wizard.

View PushEngage success message

You can follow our detailed guide on how to add web push notifications to your WordPress site for more details.

Next, you can set up automated drip notifications using PushEngage. For this example, we will create a welcome campaign for new subscribers.

To start, you can head to PushEngage » Drip from the WordPress dashboard. After that, click the ‘Add New’ button.

Add new drip responder

After that, you can add different push notifications and edit the content you want to display.

Go ahead and click the arrow at the end of the notification to see more options.

For each notification, you can change the notification title, message, URL, icon image, and more by expanding each notification. There’s also a preview of how your notifications will look in the browser.

Edit your push notifications

If you scroll down, then you’ll find more options, like showing multi-action notifications. Here, you can show call-to-action buttons on the push notifications and edit their text.

There is also an option to enable notification duration. This allows you to set an expiration time for your notification.

Enable multi action and notification duration

PushEngage also lets you choose when to send each notification. For example, you can send the first notification immediately and select a different time for the following notification.

To select when you’d like to send the push notification, simply click the ‘Send notification’ dropdown menu.

Select when to send the notification

To add another notification to the drip campaign, simply click the ‘Add New Notification’ button at the bottom.

Once you’ve added all the notifications, simply click the ‘Drip Settings’ button.

Edit drip settings

Next, you can choose whether you’d like to send the notifications to all your subscribers or a specific audience group that you create.

PushEngage lets you segment your subscribers and create different groups. For this tutorial, we choose the ‘Send to All Subscribers’ option.

Select user segment and activate autoresponder

After that, you can simply click the ‘Activate Autoresponder’ button to enable automated push notifications for your WordPress website.

You can then go to PushEngage » Drip from your PushEngage dashboard and see the drip notifications as ‘Active’.

See your welcome campaign active

That’s it! You have set up an automated push notification drip campaign for your site.

Now you will be able to get detailed stats on its performance in the Analytics section of your PushEngage account.

PushEngage analytics overview

Set Up Automated Drip Notifications Using an Email Marketing Tool

Another way you can create automated drip notifications in WordPress is by using an email marketing tool.

We recommend using Constant Contact because it’s the best email marketing service on the market. It’s super easy to use and offers a drag-and-drop email builder.

However, the drip email notification functionality exists in all major email marketing platforms, including Brevo (formerly Sendinblue), HubSpot, and others.

You can set up email automation in just a few clicks and send email series to your subscribers with ease. Plus, Constant Contact integrates with WordPress plugins like WPForms and OptinMonster.

It even works with eCommerce platforms like WooCommerce and Shopify, so you can automate emails for new customers or help recover abandoned carts.

To start, you can visit the Constant Contact website and create an account. The best thing about using this software is that you get a 60-day free trial. This way, you can try out the tool before committing to a premium plan.

Constant Contact Website

If you use our Constant Contact coupon code, then you can also get 20% off by purchasing upfront.

After creating an account, you can visit the Constant Contact dashboard to create a contact list.

Constant Contact will have already created a default list for you. However, you can create your own list by going to the ‘Contacts’ tab in the top menu and then clicking the ‘Create List’ button.

Create a list in constant contact

Next, a popup window will appear where you will need to enter a name for your list.

Simply click the ‘Save’ button after entering a name.

Enter a name for contact list

After that, you can add contacts to your email list.

You can manually add contacts by going to the ‘Contacts’ tab and clicking the ‘Add Contacts’ button.

Add contacts to list

A popup window will open with multiple options for adding new contacts.

You can connect your WordPress newsletter form with Constant Contact and start building an email list. For more details, see our guide on how to add email subscriptions to your WordPress blog.

Alternatively, you can manually create new contacts, upload a spreadsheet or CSV file, or integrate with lots of other platforms to import saved email addresses.

Add a new contact

Now that you’ve added subscribers to your Constant Contact list, the next step is to create an automated drip campaign.

To do that, head over to the ‘Marketing campaigns’ tab and then click the ‘Create’ button.

Create a new marketing campaign

Next, Constant Contact will show you multiple options for creating a campaign.

Go ahead and select the ‘Automations’ campaign.

Choose a campaign type

From here, Constant Contact will show you multiple templates to choose from.

You can select a pre-built template and customize it according to your requirements or create an automation path from scratch.

Select automation template

For this tutorial, we will select the ‘Create custom path’ template option.

After that, you will need to select when your contact starts the path. Constant Contact will show different options.

You can go ahead and choose the ‘Subscribes for email’ option and then click the ‘Next’ button.

Create custom path

Next, you will have to enter a name for your custom path.

Once that’s done, simply click the ‘Create path’ button.

Enter a name for new path

This will launch the Path Builder, where you can create an automated workflow.

By default, you will see the Trigger for your path. In this case, it’s when someone subscribes to any list.

However, you can simply drag actions and rules from the menu on the left onto the path. For instance, you add different actions like sending an email or sending an SMS to your workflow.

There are also different rules that help you customize your automation. You can add a time delay and specify when the next email should be sent. Similarly, there is a conditional split option that lets you set up Yes and No conditions and split the path.

Create an automated workflow

You can also edit each action in the automated workflow. Simply click the 3 dots icon and select the ‘Edit’ option. For example, let’s edit the Send an email action.

Next, a popup window will open where you create a new email or copy an existing email.

Since we are creating the workflow for the first time, go ahead and select the ‘Create a new email’ option, enter a name for your email, and click the ‘Continue’ button.

Name your new email

After that, Constant Contact will show you multiple email templates.

You can also search for a template based on the occasion or use a blank template to create an email from scratch.

Choose an email template

Once you select a template, the email editor will launch.

You can add different blocks to the template, edit existing text, customize the design, and more.

Customize your email design

When you are done, simply click the ‘Save & Close’ button at the top.

You will now return to the Path Builder in Constant Contact. Go ahead and finish your automation path by adding as many actions and rules to your path and editing each one of them.

Activate your path

After creating an automated workflow, you can simply click the ‘Activate’ button at the top.

That’s it! You’ve now successfully launched an automated drip notification campaign using an email marketing tool.

Bonus: Grow Your Email List in WordPress

In the second method of this tutorial, we showed you how to set up email drip notifications. But before you can send out your emails, you will need a list of subscribers.

Here are a few tips to grow your email list:

For more ideas, you can see our complete guide on how to grow your email list. You may also want to read our article on how to start an email newsletter to help you design better email campaigns.

We hope this article helped you learn how to set up automated drip notifications in WordPress. You may also want to check out our expert pick of the best WordPress plugins to grow your business and our ultimate WordPress SEO guide to improve your SEO rankings and get more traffic.

If you liked this article, then please subscribe to our YouTube Channel for WordPress video tutorials. You can also find us on Twitter and Facebook.

The post How to Set Up Automated Drip Notifications in WordPress first appeared on WPBeginner.

How to Share Your Blog Posts With Readers (4 Ways)

Are you looking for proven ways to share your blog posts with blog readers to grow your traffic?

Most people who read your blog won’t come back to see if you’ve published new posts. By sharing your new posts with readers, you can get them to come back to your website and potentially convert into customers.

In this article, we’ll show you how you can share new blog posts you’ve recently published with your readers.

How to share your blog posts with readers (4 ways)

Why Share Your Blog Posts with Readers?

Nearly 70% visitors leaving your website will never come back to visit again. As a website owner, you need to give them a reason to come back.

One of the best ways to do this is by sharing your new blog posts with them. If your blog posts are packed with value, then you’re helping your readers succeed by encouraging them to read your new content.

If you run an online store, then sharing your posts will deepen the relationship and turn subscribers into customers. Those running affiliate or review websites will get more views on their content, which means more clicks and commissions.

With that said, let’s take a look at a few different ways you can share your blog posts with your readers. Simply use the quick links below to go straight to the method you want to use to share your blog posts.

1. Share Your Blog Posts with Push Notification Subscribers

One of the easiest and most effective ways to share new blog posts with your readers is by using push notifications.

A push notification is a popup message that goes out to your subscribers across desktop and mobile devices.

These can be very effective because they show up instantly no matter where your visitors happen to be. You don’t have to wait until they check their email or social media accounts for them to see your notification.

Here’s an example of what a blog post notification can look like:

PushEngage blog post notification

The easiest way to add push notifications to your WordPress blog is by using PushEngage. It’s the best push notification software in the market used by over 10,000 businesses.

PushEngage

For more details on setting up and sending push notifications, see our guide on how to add web push notifications to your WordPress site.

After you activate and set up the plugin, push notifications for new blog posts will automatically be enabled on your site.

The moment you publish a new post, your notification will send out to all of your subscribers.

The push notification will include the title of your blog post and the featured image. Once they click the notification, they’ll be taken to the post on your website.

2. Share Your Blog Posts with Your Email List

Your email list is one of most valuable assets in your business and one of the best ways to stay in touch with your readers.

Email subscribers who have joined your list have already verified their identity and are very interested in what you have to offer, which makes them more likely to open your emails and return to your website.

Haven’t started to build your email list yet? The first thing you need to do is get a high quality email marketing service provider.

We recommend using Constant Contact since it’s one of the best email marketing services for small businesses.

Constant Contact

Constant Contact offers tools that make it easy to manage your email list, like simple tracking and reporting, unlimited emails, segmentation, an image library, and more.

For more details on setting up your email list and sending emails, see our guide on how to create an email newsletter the right way.

Once your email list is set up, you can start sharing your blog posts with your email list.

Constant Contact has all the tools you need to start sending your blog posts to readers, including an option to embed posts directly into your email.

Constant Contact send blog post

If you’re looking for creative ways to get more email subscribers, then consider adding a yes/no optin, using content upgrades, or getting started with coupon code popups on your website.

Looking for a Constant Contact alternative?

There are dozens of other email marketing services that you can use too including HubSpot, Sendinblue, and ConvertKit.

3. Share Your Blog Posts with Your Social Media Followers

Social media platforms are a great place to tap into a network of billions of people, build a following, and send traffic back to your site.

To build a loyal following, you need to engage with your users by interacting with them, posting updates, and sharing your content.

We regularly share our latest blog posts with our audience on Twitter and Facebook.

WPBeginner Facebook share example

However, the big issue with manually sharing your blog posts on social media is that posting can be very time consuming.

Luckily, you can automate your WordPress website so that the moment you publish a new post, it’ll automatically share to social media.

The easiest way to do this is by using Uncanny Automator. It’s the best WordPress automation plugin that lets you create automated workflows without writing any code.

Uncanny Automator

It connects with over 50 different plugins, tools, and applications, including popular social media networks like Facebook, Twitter, and Instagram.

If you want to share your blog posts to Facebook, then see our guide on how to automatically post to Facebook from WordPress. For Twitter, see our guide on how to automatically tweet when you publish a new post in WordPress.

With your automations all set up, the moment you publish a new blog post, it’ll automatically share your blog posts with your social media followers.

4. Share Your Blog Posts with Your SMS Subscribers

Sending SMS messages can be a great way to share your new posts with your readers. Not only do text messages have a very high open rate, but people will check their text messages almost instantly.

The first thing you need to send SMS messages to your subscribers is an SMS marketing provider.

We recommend using Sendinblue since it’s one of the best email marketing providers that also allows you to send SMS messages.

Sendinblue

For more details, see our guide on how to send SMS messages to your WordPress users.

Once your account is set up, you can share your blog posts with your readers via SMS. You’ll have full control over the recipients, message, sending time, and more.

SMS message example

We hope this article helped you learn how to share your blog posts with readers. You may also want to see our comparison of the best domain name registrars, and our expert picks of the best AI chatbots software for your website.

If you liked this article, then please subscribe to our YouTube Channel for WordPress video tutorials. You can also find us on Twitter and Facebook.

The post How to Share Your Blog Posts With Readers (4 Ways) appeared first on WPBeginner.

How to See Who Is Following My WordPress Site (4 Quick & Easy Ways)

Do you want to see who is following your WordPress site?

Seeing who follows your website lets you better understand your audience and improve your website to suit their needs, so you can grow your traffic and get even more followers.

In this article, we’ll show you how you can easily see who is following your WordPress site.

How to see who is following your WordPress site (4 quick & easy ways)

Why See Who is Following Your WordPress Site?

By analyzing who is following your WordPress website, you can better understand your website visitors and the people who enjoy your content.

Here are just a few things you can learn from your website followers:

  • How many people are following you across different platforms
  • Which devices and web browsers your visitors use
  • What pages on your site visitors like the most
  • Where in the world your visitors are located

This information will help you make more informed decisions about your website, which will help you create a better user experience, get more traffic, and make more sales.

That being said, let’s take a look at how you can see who is following your WordPress site using a few different methods. You can use the quick links below to jump straight to the method you want to use to find your followers.

1. View Your Website Analytics Data in WordPress

Your website analytics data can give you a lot of different information about who is visiting your website. The easiest way to view that data is by using Google Analytics.

Google Analytics shows you where your visitors are coming from and gives you overall demographic data about who they are. However, setting up Google Analytics the right way can be difficult for beginners.

This is why we recommend using MonsterInsights. It’s the best analytics solution for WordPress and lets you add analytics to your website in a couple of clicks.

MonsterInsights

For more details, see our guide on how to install Google Analytics in WordPress for complete setup instructions.

Note: It will take some time to start gathering the data before it can be displayed in your dashboard.

After you activate and set up the plugin, you can view your Google Analytics stats directly in your WordPress dashboard.

To get a detailed breakdown of your visitors, simply go to Insights » Reports.

This brings you to a screen where you can view all of your website analytics data in depth. First, you’ll see a breakdown of your traffic levels and engagement metrics.

MonsterInsights traffic data

As you scroll down the page, you’ll see more reports on what devices visitors use to view your site, the countries they’re from, what sources send you the most traffic, and more.

MonsterInsights follower data

You can also get a detailed breakdown of the pages on your website that bring you the most traffic, the top pages that visitors exit on, scroll depth, and other reports.

For the full report, simply click on the ‘Publishers’ tab at the top of the page.

MonsterInsights top pages

All of this visitor data helps you to better understand your visitors and how they use your website.

2. View Your Email List Subscribers

Your email list is an incredible way to make money online, plus it’s a great source of information about who is following your WordPress site.

Haven’t started an email list yet? The most important thing you need to get started is an email marketing service provider.

We recommend using Constant Contact since it’s one of the best email marketing services for small businesses.

Constant Contact

For more details on setting up your email list, see our guide on how to create an email newsletter the right way.

Once your email list is set up, you can view your subscriber data. First thing you need to do is log in to your Constant Contact account.

Then, click on the ‘Contacts’ menu option and click the ‘Contacts’ tab. This will give you a detailed breakdown of the size of your email list and your subscriber information.

Constant Contact subscribers example

Once you start to send emails, it will give you data about how engaged your subscribers are. Engaged subscribers are those who open, click, and reply to your emails more often.

The process is similar on other email marketing services like HubSpot, ConvertKit, Drip, etc.

3. View Your Social Media Followers in WordPress

Viewing your social media followers is easy, since you can see your follower count directly from your profile on most social media accounts.

For example, you can view your Instagram followers by simply going to your profile and clicking on the ‘followers’ link.

Click Instagram followers

This brings up a popup that shows your followers.

You can scroll through and click to open their profiles to learn more.

View Instagram followers

Other networks like Facebook give you page insights data, where you can get a more detailed breakdown of your followers’ ages, genders, countries, languages, and more.

To find this information, open up your Facebook Business Page Insights account, click on the ‘Insights’ menu icon, and then click on ‘Audience’.

Facebook audience insights follower information

This brings up any available data on your Facebook page followers.

One great way to use your social media follower information is to display your social media feeds and follower counts in WordPress. Doing this can help to boost social proof and visitor engagement.

The best way to add your social media feeds to WordPress is by using Smash Balloon. It’s a collection 4 different WordPress plugins that let you add social feeds from Facebook, Instagram, Twitter, and YouTube to your website.

Social media feed and followers example

For more details, see our step by step guide on how to add your social media feeds to WordPress.

4. View Your Web Push Notification Followers in WordPress

Another way people can follow your WordPress website is by subscribing to push notifications. These notifications let you send messages to visitors on mobile and desktop, even when they aren’t on your website.

On most websites, about 70% of people who leave the site will never come back. Adding push notifications lets you easily get these visitors to come back again and again.

Here’s an example of what it looks like:

PushEngage example notification

With push notifications, you can reach your followers immediately without waiting until they decide to check their inbox, which makes push notifications extremely valuable.

The easiest way to add push notifications to WordPress is by using PushEngage. It’s the best push notification software in the market used by over 10,000 businesses.

PushEngage

For more details, see our guide on how to add web push notification to your WordPress site.

After you activate and set up the plugin, you’ll be able to view your push notification follower stats. This shows you who’s signed up to receive push notifications, their location, device used, and more.

To find your push notification followers go to your dashboard on the PushEngage website, and then navigate to Analytics » Subscriber Statistics.

PushEngage follower stats example

You can also view your list of subscribers by clicking on the ‘Summary’ tab.

Note about WordPress.com Followers

The methods above are a great way to see who is following your WordPress blog. However, if you’re using WordPress.com, then you can view follower stats directly in your WordPress dashboard.

To learn the difference between the two, see our comparison of WordPress.com and WordPress.org.

To view your followers, simply navigate to your admin dashboard, click on ‘Stats’, and then click on the ‘Insights’ tab.

Navigate to WordPress.com stats and insights

As you scroll down the page, you’ll see ‘Follower totals’ and ‘Followers’ sections.

This shows you how many followers you have, along with their username and how long they’ve been following.

WordPress.com follower totals

If you want to switch your website to the self-hosted version of WordPress, then see our guide on how to move your site from WordPress.com to WordPress.org.

We hope this article helped you learn how to see who is following your WordPress site. You may also want to see our guide on how to get a free business email address and our expert pick of must-have WordPress plugins for small business.

If you liked this article, then please subscribe to our YouTube Channel for WordPress video tutorials. You can also find us on Twitter and Facebook.

The post How to See Who Is Following My WordPress Site (4 Quick & Easy Ways) appeared first on WPBeginner.

12 Best WordPress Automation Tools and Plugins Compared (2021)

Are you looking for the best WordPress automation tools and plugins?

By automating tasks on your WordPress website, you can save time and money while growing your website traffic and business.

In this article, we’ll share the best WordPress automation tools and plugins to help you speed up your workflows.

12 best WordPress automation tools and plugins

Why Use WordPress Automation Tools and Plugins?

When you’re running a WordPress website, there are many repetitive tasks that can take up a lot of your time.

By using WordPress automation tools and plugins, you can free up your time to spend on more productive tasks. They help to automate tasks like marketing, lead generation, social media, customer support, and much more.

For example, you can create an AI chatbot to automate basic customer support, or use an email autoresponder to welcome new subscribers.

That being said, let’s take a look at some of the best WordPress automation plugins and tools you can use to automate your WordPress site.

1. Uncanny Automator

Uncanny Automator

Uncanny Automator is the best WordPress automation plugin in the market. It lets you create powerful workflows to save time and reduce errors without writing any code.

Uncanny Automator seamlessly integrates with all the most popular WordPress plugins and third-party tools in the market. This makes it easy to set up your own custom automations in a couple of clicks.

Think of it like Zapier, but for WordPress websites.

For example, you can connect WordPress with Google Sheets, integrate Slack and WordPress, create buttons that trigger actions, and so much more.

There’s support for 70 different WordPress plugins and third-party apps to help you create endless automations and run your WordPress blog more efficiently.

You can get started with the free version of the plugin, which supports all kinds of WordPress plugins and actions.

2. Constant Contact

Constant Contact

Constant Contact is the best email marketing service for small businesses.

Constant Contact lets you stay in touch with your visitors after they leave your website. You can use it create automated email sequences to build customer relationships, sell products, and more.

Plus, it’s very easy to set up and create your own email newsletters. You can use the drag and drop email creator and bundled email templates to quickly create beautiful emails to send to your subscribers.

It also integrates with popular lead generation tools like WPForms and OptinMonster to fully automate your lead generation and follow-up process.

You can use our Constant Contact coupon code to get 20% off your monthly plan.

Alternatives: SendinBlue, HubSpot, and Drip are great alternatives for email marketing automation.

3. OptinMonster

OptinMonster

OptinMonster is the best conversion optimization software and WordPress popup plugin in the market. It lets you automate your lead generation and convert website visitors into new email subscribers and customers.

OptinMonster includes a library of high-converting templates you can use to create location based popups, announcement bars, slide-ins, gamified spin wheels, and more to capture your user’s attention.

Spin the wheel popup example

All of the templates can be fully customized with the drag and drop builder.

There are also advanced targeting features so that each campaign will display based on the rules you decide. For example, you can have popups display for visitors in a certain location, or show targeted messages for different pages on your website.

Note: You can get a free version of OptinMonster to get started.

4. WPForms

WPForms

WPForms is the best contact form plugin in the market used by over 4 million websites. It’s very beginner friendly and lets you create forms that make it easy for your visitors to get in touch with you.

The drag and drop form builder lets you quickly create a nearly endless amount of forms like contact forms, order forms, email subscription forms, survey forms, and more.

Beyond beginner-friendly form creation tools, you’ll find advanced features like conversational forms, geolocation tracking, login forms, and much more.

WPForms easily integrates with a ton of other tools and plugins so you can easily automate any action after someone fills out your form.

For example, you could automatically send the data to a Google Sheet, register new users on your membership site, get an SMS message from your form, and much more.

The free version of WPForms lets you create simple contact forms, but for the more advanced form creation features, you’ll need to update to WPForms pro.

5. Chatbot

ChatBot

Chatbot.com is the best AI chatbot software for WordPress. It lets you easily automate live chat on your website by setting up your own chatbot.

It comes with an easy to use chatbot builder and template library, so you can quickly create your own chatbot without any coding or technical skills.

The templates include different scenarios where a user might reach out to live chat, including customer support, bookings, selling products, and more.

Plus, it integrates with popular live chat software like LiveChat, so you can have a live agent jump in if the user needs extra help.

6. HubSpot

HubSpot CRM

HubSpot is one of the best CRM software for small businesses. It allows you to manage your leads better and automate aspects of your online marketing.

With HubSpot, you can easily manage your marketing, sales, and customer service together in one place. All of your customer data will be updated automatically.

You can view detailed performance reports to help you improve your sales and lead generation process.

Plus, it integrates easily with all the top email marketing and lead generation plugins and tools.

You can get access to the core features of the CRM for free, but to get even more features and advanced tools, you can upgrade to one of the paid plans.

7. TrustPulse

TrustPulse

TrustPulse is the best social proof plugin for WordPress that lets you set up automatic notifications to improve website conversions and make more sales.

TrustPulse automatically monitors activity on your site. When potential customers are close to buying something on your site, they will see a notification from other customers who have just made a purchase.

By simply displaying social proof, you’ll give your visitors a nudge to complete their purchase.

TrustPulse example

TrustPulse can be installed on any website without any code and customized to easily match your website’s design.

Plus, there are advanced targeting options so you can choose which products and pages you want your social proof notifications to display on.

For more details, see our guide on how to use FOMO to increase conversions.

8. Smash Balloon

Smash Balloon

Smash Balloon is a collection of 4 different WordPress social media plugins that let you add social feeds from Facebook, Instagram, Twitter, and YouTube to your website.

It’s the most popular social media feed plugins for WordPress, used by over 1.4 million websites.

Smash Balloon automates your website content by displaying your latest social media activity. This can save you time and keep your website content fresh, while keeping visitors engaged on your site.

Plus, it can boost your social proof by displaying your social media followers, comments, and like counts.

There are a lot of different ways you can customize how your social media feeds display.

For example, you can customize the design to match your brand, choose from a handful of pre-designed templates, and even add Instagram shoppable feeds to make more money.

Smash Balloon Instagram example

All of your feeds will be automatically updated when you post new content to your connected social media accounts.

You can choose to add individual social media feeds to WordPress, or use the Smash Balloon Social Wall plugin to display all of your social media feeds in one place.

There are also free versions of Smash Balloon available to let you try before you buy.

9. RafflePress

RafflePress

RafflePress is the best WordPress giveaway and contest plugin in the market that lets you grow your email list, traffic, and social media followers with giveaways and contests.

It has a drag and drop builder, so you can easily create successful giveaways using proven templates that will attract your visitor’s attention.

To enter your giveaway, your visitors will need to enter their email address, so you can automatically gain new email newsletter subscribers.

Plus, you can connect other tools you’re using like your WordPress form plugins, WordPress CRM, marketing automation tools, and more.

There is a free version of RafflePress available. If you want more powerful features to skyrocket and automate your growth, then you need to get RafflePress pro.

10. MonsterInsights

MonsterInsights

MonsterInsights is the best analytics solution for WordPress used by over 3 million websites.

It helps you automate tracking on your website with Google Analytics, without having to modify your tracking code. For more details, see our beginner’s guide on how to install Google Analytics in WordPress.

Plus, you can view these stats directly inside your WordPress dashboard. You’ll get a quick overview of your traffic sources, most popular pages, and more.

MonsterInsights stats

You can optimize your website to get more traffic, revenue, and email subscribers when you know this information.

MonsterInsights has a free version available, but to unlock the tool’s true power, you’ll want to upgrade to the premium version.

11. SeedProd

SeedProd

SeedProd is the best drag and drop WordPress page builder in the market used by over 1 million websites.

With SeedProd, you can create beautiful landing pages to automate things like product sales, webinar signups, newsletter subscriptions, and more.

SeedProd templates

There are built-in blocks that let you add things like countdown timers, optin forms, and more to build urgency and get your visitors to take action.

Plus, you can integrate your landing page with your email marketing service to send an automated email after they sign up.

The lite version of SeedProd lets you create simple maintenance mode pages, but for advanced page building features, smart blocks, and the library of templates, you can sign up for the pro version.

12. PushEngage

PushEngage

PushEngage is the best push notification software for WordPress. It lets you send automated push messages to your visitors after they leave your website.

You can set it up to automatically send out new blog post notifications, or use it to send custom messages.

Thank you push notification

It comes with all kinds of advanced marketing features like automatic drip campaigns, opt-in reminders, interactive messages, and more.

Your campaigns can be customized to work with your online store so you can increase revenue and reduce abandoned carts.

The level of personalization and targeting available will greatly help to improve your website conversions. For more details, see our guide on how to add web push notifications to WordPress.

We hope this article helped you find the best WordPress automation tools and plugins. You may also want to see our guide on how to get a free SSL certificate and our expert picks on the best HR payroll software for small businesses.

If you liked this article, then please subscribe to our YouTube Channel for WordPress video tutorials. You can also find us on Twitter and Facebook.

The post 12 Best WordPress Automation Tools and Plugins Compared (2021) appeared first on WPBeginner.

14 Best WooCommerce Sales Funnel Plugins to Boost Your Conversions

Are you looking for the best WooCommerce sales funnel plugins to boost your conversions?

There are many WooCommerce plugins out there to help you optimize your sales funnel, so you can make more money from your existing traffic.

In this article, we’ve hand picked some of the best WooCommerce sales funnel plugins you can use to increase conversions.

14 best WooCommerce sales funnel plugins to boost your conversions

Why Use WooCommerce Sales Funnel Plugins?

WooCommerce makes it easy to create an online store, but the default features and settings aren’t built to help you sell more products.

On average, only 10% of shoppers will add anything to their carts. After they do, 60-80% of them abandon their carts without finishing the purchase.

Luckily, there are all kinds of WooCommerce plugins to help you boost conversions, so you can make more sales from your existing traffic. Using WooCommerce sales funnel plugins can help your store in a lot of ways.

  • Recover sales from users abandoning their carts
  • Stay in touch with customers via email marketing
  • Create store pages to promote best-selling products
  • Offer coupon codes to bring in more sales
  • And much more

With that said, let’s look at some of the best WooCommerce sales funnel plugins that you can use with your WooCommerce store.

1. SeedProd

SeedProd

SeedProd is the best drag and drop WordPress page builder in the market used by over 1 million websites.

It’s very easy to use and has a collection of pre-made templates and blocks that will help you customize your WooCommerce product pages, checkout pages, and more.

SeedProd WooCommerce blocks

By creating custom pages for your WooCommerce store, you can improve conversions, promote popular and related products, and make more money.

Plus, it works with any WooCommerce theme, so you can create custom product pages, checkout pages, and more, without any limitations.

There is a free version of Seedprod you can use to create beautiful landing pages. However, the WooCommerce blocks are only available in the pro version of the plugin.

2. OptinMonster

OptinMonster

OptinMonster is the best WordPress popup plugin and lead generation tool in the market used by over 1 million websites.

It helps you convert your abandoning website visitors into new customers and email subscribers.

You can use OptinMonster to boost your conversions, reduce shopping cart abandonment, show targeted website messages, grow your email list, and much more.

OptinMonster has a ton of built-in popup features that can help you boost sales easily.

For example, you can create floating header or footer bars perfect for announcing ongoing sales, free shipping, sale countdown timers, and other special offers.

Floating header bar

Plus, every popup can be customized to display based on the rules you decide. For example, you could set your countdown timer to only appear during checkout, or only show a sales banner on a certain product category.

You can even create popups that will display based upon the visitor’s location. Plus, you can gamify popups with the spin the wheel feature, and much more.

Spin the wheel popup example

For more details, see our guide on how to create a WooCommerce popup to increase sales.

Note: You can get a free version of OptinMonster to get started through WordPress.

3. MonsterInsights

MonsterInsights

MonsterInsights is the best analytics solution for WooCommerce stores.

It’s incredibly easy to set up and comes with enhanced eCommerce tracking, which gives you more insights you can use to optimize your funnel and make more sales.

Plus, all of this information is displayed directly in your WordPress dashboard. You don’t need to sort through the complex Google Analytics reports to find what you’re looking for.

WooCommerce analytics report

You can also get a detailed breakdown of your shopping cart activity, the total number of purchases, top performing products, and more.

This helps you make data-driven decisions to grow your business and quickly see if the changes you’re making are helping to improve your store’s conversions.

WooCommerce cart report

For more details, see our step by step guide on how to setup WooCommerce conversion tracking.

4. WooFunnels

WooFunnels

WooFunnels is an easy to use WooCommerce sales funnel builder. It lets you create lead pages, checkout pages, order bump pages, upsells, downsells, and more.

It has dozens of different templates you can use to create your sales funnel pages in a couple of clicks.

You can easily customize every page of your funnel with the drag and drop builder. WooFunnels also includes built in customer reporting, so you can track customer and order data.

5. TrustPulse

TrustPulse

TrustPulse is the best social proof plugin for WooCommerce that helps you improve conversions and get more sales.

When potential customers are close to making a purchase, they’ll see a notification from other customers who have just made a purchase. By adding social proof, you give your visitors a nudge to complete their purchase.

TrustPulse example

TrustPulse makes setting up this kind of notification incredibly easy. You can install it on any WordPress website without code and customize the notifications to match your brand and website design.

There are advanced targeting options, so you choose the products and pages to run the campaign.

For more details, see our guide on how to use FOMO to increase conversions.

6. CartFlows

CartFlows

CartFlows is a feature rich WooCommerce sales funnel builder that helps you optimize your WooCommerce checkout process.

It includes a variety of templates and lets you create custom pages for every part of the sales process, including thank you pages, checkout pages, and more.

Once you activate the plugin, it’ll automatically replace the default WooCommerce checkout with a checkout process optimized for conversions.

Plus, it integrates with most popular WordPress page builders like Divi, Beaver Builder, etc to easily customize the templates and pages.

7. LiveChat

LiveChat

LiveChat is the best live chat support software in the market. It lets you easily add live chat to your WooCommerce store and instantly respond to questions.

This makes it easy to help your visitors move forward with their purchase and avoid abandoned carts. Plus, the chat window can be fully customized to match your brand.

It also integrates with top email marketing, WooCommerce CRM, and customer support tools.

The live chat apps work across mobile, tablet, and desktop devices, so you can answer questions on the go, without having to login to your WordPress dashboard.

For more details, see our guide on how to add LiveChat to your WooCommerce store.

Alternative: If you’re looking for chatbot software, then check out ChatBot.com to fully automate your WooCommerce live chat.

8. Nextiva

Nextiva

Nextiva is the best business phone service in the market that works seamlessly with WooCommerce.

Adding a business phone number to your online store will help improve credibility and trust, while boosting your store conversions.

Since it’s a virtual business phone app, you can use it to receive calls on your mobile phone, tablet, and desktop computer.

It offers advanced enterprise level features at an affordable price like call routing, auto-attendant, and more.

Once you’ve set up your business VOIP, you can add a free click-to-call button to your store, so customers can reach your team with a single click.

Alternative: RingCentral and Ooma are good business phone alternatives.

9. WP Mail SMTP

WP Mail SMTP

WP Mail SMTP is the best WordPress SMTP plugin in the market used by over 2 million websites. It helps to ensure that all of your WooCommerce emails are delivered to your customer’s email inboxes.

WooCommerce will send email notifications to the store owner and customers when certain actions are taken in your store.

But, many WordPress hosting companies haven’t set up the email function correctly, and some even block it from happening. In this case, your store emails will not send.

WP Mail SMTP fixes this problem and uses an SMTP service provider to send emails. This ensures your emails will actually be delivered to your user’s inbox and not go to the spam folder.

The free version of WP Mail SMTP will work for most WooCommerce stores. The premium version, WP Mail SMTP Pro, gives you access to premium support, a white glove set up service, and even more features.

10. Advanced Coupons

Advanced Coupons

Advanced Coupons is the best WooCommerce coupon code plugin in the market. It expands the default WooCommerce coupon functionality and helps you boost sales by offering attractive coupons for your visitors.

It easily integrates perfectly with WooCommerce and lets you create BOGO offers (Buy One Get One), scheduled coupons, auto apply coupons, shipping coupons, and more.

You can even get started with the free version of the plugin to test out different coupon offers and see how it impacts your online store.

For more details, see our guide on how to create smart coupons in WooCommerce.

11. Easy Affiliate

Easy Affiliate

Easy Affiliate is the best affiliate tracking and management plugin for WooCommerce.

It lets you easily create an affiliate program for your online store, so your customers can promote your products.

When someone joins your affiliate program, they’ll get a unique link and will earn a commission whenever a sale is made through their link.

It’s fully customizable, and you can control who is allowed to join your affiliate program and the payment options you want to offer.

Easy Affiliate also includes reporting, so you can track sales, payments, link clicks, and more.

For more details, see our guide on how to add an affiliate program in WooCommerce.

12. WPForms

WPForms

WPForms is the best contact form builder in the market used by over 4 million websites. It’s very beginner friendly and lets you create contact forms to answer your customer’s questions and resolve issues.

You can choose from the collection of 100+ prebuilt templates to quickly create the exact kind of form you need.

WPForms templates

You’ll find templates for user feedback forms, polls, surveys, and more. Then, you can simply customize the form with the easy to use drag and drop builder.

The free version of WPForms lets you create simple contact forms, but if you want to create more advanced forms, then you’ll need the premium version of WPForms.

13. PushEngage

PushEngage

PushEngage is the best web push notification software in the market used to send over 9 billion push messages every month.

It lets you connect with your visitors and customers after leaving your online store with targeted push messages. These are messages that will display in your subscriber’s browser even when they’re not browsing your store.

For example, if a customer adds items to their cart and leaves before making a purchase, then you can send an abandoned cart notification to improve conversions.

You can also send out information about product webinars, flash sales, coupons, and much more.

There’s also a free version of the plugin that lets you send messages to up to 500 subscribers.

For more details, see our guide on how to add web push notifications to WordPress.

14. Constant Contact

Constant Contact

Constant Contact is the best email marketing service for WooCommerce businesses. It’s packed with features while still being beginner friendly, so you can easily add it to your store and start building your email list.

With this tool, you can easily manage your email subscribers and deepen your relationship with your customers.

Every plan gives you access to unlimited emails, tracking and reporting, list segmentation, and much more.

It has dozens of professionally designed email templates built for specific niches, so you can quickly start creating your own email campaigns.

WPBeginner readers can use our Constant Contact coupon code to get 20% off your plan.

Alternative: HubSpot, SendinBlue, and Drip are great alternatives for WooCommerce email marketing.

15. Bonus: Uncanny Automator

Uncanny Automator

Uncanny Automator is the best automation plugin for WooCommerce. It acts as a connector between your WooCommerce store and other apps, so they can talk to each other without you writing any code.

It’s very easy to use and comes with all kinds of automated workflows you can set up in a couple of clicks.

With Uncanny Automator, you can automate many WooCommerce tasks to save time and offer your customers a better user experience.

For example, you can automatically send SMS notifications to your customers and send order data to Google Sheets for better customer tracking.

There are dozens of other automations you can create to help you run your online store more efficiently.

We hope this article helped you find the best WooCommerce sales funnel plugins to boost your conversions. You may also want to see our guide to creating a free business email address and creating an email newsletter the right way.

If you liked this article, then please subscribe to our YouTube Channel for WordPress video tutorials. You can also find us on Twitter and Facebook.

The post 14 Best WooCommerce Sales Funnel Plugins to Boost Your Conversions appeared first on WPBeginner.

7 Best Web Push Notification Software in 2020 (Compared)

Are you looking for the best push notification software for your website?

Web push notifications are a powerful tool that allows you to connect with visitors after they leave your website. You can send targeted messages to your users which leads to more traffic, conversions, and sales.

In this article, we’ll share our pick of the best web push notification software for your website.

The best push notification software compared

Why Push Notifications Are a Powerful Marketing Tool

Push notifications allow you to engage and retain visitors after they leave your website.

You can send targeted personalized messages to users and bring them back to your website. This could be blog post notifications, product announcements, abandoned cart reminders, and more.

An example push notifiation from PushEngage

Push notifications go directly to the user’s web browser or mobile device which means it has a much higher engagement rate.

Many big sites like Facebook use push notifications. However, most small businesses haven’t yet realized how powerful they are. On WPBeginner website, push notifications are consistently a top 5 traffic source.

If you’re not using push notifications, then now is a great time to start, so you can get ahead of your competition.

With that said, here’s our comparison of the best push notification tools that you can try. All of them are fully compatible with WordPress which is the most popular website builder in the world.

1. PushEngage

PushEngage

PushEngage is the best push notification tool on the market. It allows you to connect with visitors after they leave your site with targeted push messages.

You can set it up to automatically send your new blog post notifications, or use it to manually send custom messages.

It is super easy to set up and is a perfect solution for both beginners as well as advanced users. It works on both HTTP and HTTPs websites, and they support all devices / browsers.

PushEngage comes with powerful features such as A/B testing, automatic drip campaigns, smart opt-in reminders, custom triggered campaigns, and more.

Their triggered campaign feature lets you automatically create abandoned cart notification, schedule messages, send price drop alerts, and more.

Plus, you can track the performance of each campaign and even calculate the revenue generated from them using goal tracking.

PushEngage’s dynamic segmentation helps you send more targeted messages based on users’ actions. For example, you can segment visitors who added products to the cart, bought something, viewed a specific page, and more.

This level of personalization helps you get maximum results, so you get more traffic and sales.

Over 10,000+ companies use PushEngage, including big name brands like Dominos, TUI, Harvard Business Review, and of course WPBeginner.

Price:

PushEngage costs from $25/month, which gives you 5,000 subscribers and unlimited notifications.

There’s also a limited free plan, which gives you up to 2,500 subscribers and 120 notifications/month.

Editor’s note:

Our founder, Syed Balkhi, fell in love with this platform because of the impact it had on our business. In October 2020, we acquired PushEngage, and it’s now part of WPBeginner’s family of products.

2. OneSignal

OneSignal

OneSignal is a popular push notification tool. It has similar features to PushEngage. You can use it to create automatic push notifications, announcements, abandoned cart notifications, and more.

You can easily set your push prompt to display after a certain number of page views and/or seconds. This means you don’t need to display the push prompt the moment someone arrives on your site.

Along with offering push notifications, OneSignal lets you create in-app messages and emails. Like PushEngage, OneSignal offers A/B testing and useful analytics. You can also segment your audience for better targeting.

One key drawback to OneSignal is that it gets expensive as you need more features. It also has fewer automation, personalization, and customization options than PushEngage.

Price:

At the time of writing this article, OneSignal’s paid plans started at $99/month. They have introduced a Growth plan which will be available in November at $9 per month.

However, this plan is still limited, and you will need their Professional plan at $99/month to get the most features. There’s also a free plan available with up to 10,000 subscribers.

3. VWO Engage (PushCrew)

VWO Engage

VWO Engage, which used to be called PushCrew, has a web push notifications tool that works on both desktop and mobile.

It’s designed to let you create push notification campaigns, which have entry and exit triggers. That means the campaign can automatically start based on the user’s actions, such as clicking a particular link.

Users can also be automatically opted out of the campaign when they take a set action, such as clicking a button or filling out a form.

VWO Engage offers segmentation, analytics, personalized notifications, and A/B testing. However, their segmentation tools and engagement campaigns are quite limited.

Price:

VWO Engage costs from $99/month. This gives you up to 10,000 subscribers and unlimited notifications.

There’s no free plan available. However, you can take a free trial for 30 days, with no credit card required.

4. iZooto

iZooto

iZooto offers real-time push notifications, recurring notifications, and scheduled notifications.

Like the other tools we’ve featured, iZooto allows you to personalize push notifications. You can also set up segmentation for more targeted messaging.

It includes A/B testing, Timezone based notifications, capture key user attributes and interests, and more.

Your initial push prompt can appear when the user scrolls down, after a certain length of time, or after a button click. This can help you increase the percentage of site visitors signing up for push notifications.

The iZooto customer success team will help you transfer over your subscribers if you’re already using a different push notification tool.

iZooto only works with https websites, which means your site needs to be using an SSL certificate.

Price:

iZooto costs from $85/month, which gives you up to 30,000 subscribers and unlimited notifications.

There’s no free plan available. However, you can take a 14-day free trial (no credit card required).

5. Webpushr

Webpushr

Webpushr is a straightforward web notifications platform that supports all popular browsers. It offers a range of different prompt templates that you can customize.

Webpushr makes it easy to transfer subscribers from another platform. It includes features like user segmentation, automatic web push, and HTTP support. Plus, it’s designed to integrate seamlessly with both WordPress and WooCommerce.

Webpushr gives you unlimited team members and unlimited segments for your subscribers. It also supports large images, action buttons, emoji, and custom branding.

Unlike most push notification plugins, Webpushr gives you all features on all plans. This includes their free plan. The only difference is how many subscribers you can have.

Price:

Webpushr costs from $19/month for up to 100,000 subscribers and unlimited notifications.

There’s also a free plan available. This gives you up to 60,000 subscribers and unlimited notifications.

6. PushAssist

PushAssist

PushAssist is a push notification tool that supports Chrome, Firefox, and Safari browsers. It’s easy to set up, and works on both desktop and mobile.

With PushAssist, you get audience segmentation, personalization, scheduling tools, and insights into your customer data.

You also have the option to monetize your push traffic by letting advertisers send out push notifications to your audience. This could help you make money online.

You can use PushAssist with an HTTP or HTTPs website. However, you cannot remove the PushAssist branding unless you’re using the Business plan or higher.

Price:

PushAssist costs from $9/month for up to 3,500 subscribers.

There’s also a free plan available. This gives you up to 3,000 subscribers and unlimited notifications.

7. WonderPush

WonderPush

WonderPush works in a similar way to most other push notification plugins. It lets you segment your subscribers, automate notifications based on behavior or time, access real-time analytics, and more.

WonderPush lets you create various types of notification. These include eCommerce push notifications, such as automated abandoned cart notifications.

You get all the features however much you’re paying. This includes unlimited staff members, unlimited notifications, A/B testing, personalization, and more.

Price:

WonderPush has a different pricing model from the other tools we’ve featured. It costs from €1 per month for up to 1,000 subscribers, then it’s an extra €1 for every 1,000 subscribers after that.

There’s no free plan, but you can take a 14-day free trial. This doesn’t require a credit card.

Which is the Best Push Notification Software?

PushEngage is the best push notification software on the market. It’s beginner-friendly and easy to get started with, yet it also offers lots of powerful features.

Their free plan is suitable for small businesses and blogs. Their pricing is the most competitive as it scales which is a big reason why many large businesses use PushEngage. Their platform is robust and the support team is top-notch.

OneSignal can be a good fit too. However, their free plan is quite limited and even the paid plans have fewer features and customization options.

We hope this article helped you learn about the best push notification software for websites. You might also like our article on the best email marketing services, and the best business phone services for your small business.

If you liked this article, then please subscribe to our YouTube Channel for WordPress video tutorials. You can also find us on Twitter and Facebook.

The post 7 Best Web Push Notification Software in 2020 (Compared) appeared first on WPBeginner.

Welcome PushEngage to the WPBeginner Family of Products

Today, I’m extremely excited to share that PushEngage has joined Awesome Motive, and it is now part of the WPBeginner family of products.

PushEngage is a leading push notification software with over 10,000+ customers in 150+ countries who use the platform to reliably send over 9 billion notifications each month.

Welcome PushEngage to WPBeginner Family of Products

PushEngage & Push Notification Overview

PushEngage is a popular web push notification software for publishers and store owners. It helps you increase your website traffic, boost user engagement, and increase overall revenue.

Basically you can use it to send targeted personalized messages to users and bring them back to your website.

This can include new blog post notifications, product announcements, abandoned cart reminders, and more.

Push notifications go directly to the user’s web browser or mobile device which means it has a much higher engagement rate.

Web Push Notifications on Both Mobile and Desktop

For more details, see our guide on how to add push notifications to WordPress.

I first started using push notifications over 3 years ago and quickly realized that the click rate, engagement, and opt-in rate is significantly higher than my email newsletter or any other engagement channel.

Today our push subscriber list is larger than our email newsletter list, and push notifications consistently make the top 5 traffic sources on WPBeginner.

After seeing these results, I had all our companies start implementing push notifications, and they too have seen amazing success.

To make it easy for WPBeginner users to get started, we’re offering a forever free plan on PushEngage.

Grow Your Traffic with PushEngage for Free »

Background Story – Why PushEngage?

If you’ve been reading WPBeginner for a while, then you know that I’m obsessed with optimization.

Once I find something that works, then I want to improve it to get even better results.

This is a lot harder to do when you have no influence on the development team that’s building the actual software.

While some push notification software have developer APIs, they’re often unreliable and aren’t flexible enough to do the level of customization that I want for our businesses.

Furthermore, almost all of them have a really terrible integration with WordPress.

Since we use WordPress on all our sites, I needed a deeply integrated solution that can do automatic subscriber segmentation based on blog categories, seamless integration with our various eCommerce platforms for cart abandonment reminders, and an easy setup wizard that our team can use to add push notifications our new brands.

Since no other software had 100% of what I wanted, we started building an internal solution beginning of July.

Then 3 weeks later, completely randomly, I got an email from a friend, Andrew, who told me that I should chat with Ravi from PushEngage about a potential acquisition.

I was first introduced to Ravi by another friend, Harsh Agrawal, from ShoutMeLoud in 2017. That was when I first started using push notifications. I tried to invest in PushEngage but the timing wasn’t right.

But as soon as Ravi and I started chatting again, we knew that this was the right time for both of us.

Ravi has built an amazing team and a reputable brand at PushEngage. We share a similar vision and commitment to helping customers succeed online.

We talked and quickly came to an agreement where the entire PushEngage team would join Awesome Motive, so we can build the most user friendly push notification solution for WordPress and beyond.

I’m super excited about this acquisition and am looking forward to sharing our product development & business growth playbooks with the PushEngage team to bring more amazing features to the WordPress community (even faster, since we don’t have to build from scratch anymore).

What’s Coming Next?

Our work is just starting.

We will be leveraging the scale and knowledge of the Awesome Motive team to build more innovative solutions to help you maximize the full power of push notifications.

As part of this, we’ll build deeper integration with other Awesome Motive products, and popular platforms like WordPress, WooCommerce, Shopify, MemberPress, and others.

In the coming months, you can expect to see easier workflows to set up highly personalized push notifications campaigns that’s proven to drive results, improved opt-in technology that’ll help you get even more subscribers, and introduction of new message channels that you can use to expand your reach.

We have a lot to cover, but we’re up for the challenge. We have an exciting 12-month roadmap, and I know you’re going to love it.

If you have suggestions on features you’d like to see in the PushEngage platform, then please let us know by sending us a message via WPBeginner contact form.

In the meantime, I highly recommend you to take advantage of our free plan on PushEngage to start building your push subscribers list, so you can grow your traffic and revenue.

As always, I want to thank you for your continued support of WPBeginner. We look forward to bringing you more amazing solutions to help you grow your business.

Yours Truly,

Syed Balkhi
Founder of WPBeginner

The post Welcome PushEngage to the WPBeginner Family of Products appeared first on WPBeginner.

How to Add Web Push Notifications to Your WordPress Site

Are you wondering how to add push notifications to your WordPress site?

Push notifications let you send messages to users even when they are not on your website. This helps you bring back users to your website, increase traffic, and make more money.

In this article, we will show you how to easily add web push notifications to your WordPress site.

Add web push notifications to your WordPress site

We will cover everything you need to know about sending push notifications in our tutorial, and you can use the quick links below to jump to different sections:

What Are Push Notifications?

Push notifications are short, clickable notification messages that appear as a popup on users’ desktop or mobile devices.

They display on top of the desktop or in the notification area on a mobile device. The best thing is that they can be shown even when the user’s browser is not open.

Here’s an example of a push notification.

Web Push Notification desktop preview

Push notifications let you reach users across devices with your latest updates and offers, making them an effective way to convert website visitors into loyal followers and customers.

Why Add Web Push Notifications to Your WordPress Site?

Did you know that 70% of people who leave your website will never come back? This is why you need to convert those WordPress website visitors into subscribers and customers.

You can do this by using multiple channels at once. These can include email marketing, social media, mobile or SMS marketing, and web push notifications.

Email lists are still the most powerful marketing tools available, with 51% of consumers preferring to be contacted by businesses via email. However, we are finding that push notifications are also very effective.

On the WPBeginner site, push notifications are consistently one of the top 5 traffic sources.

Here are just some of the reasons that make push notifications a great marketing tool:

  • Users need to give their explicit permission to receive push notifications. This means they are already interested in what you have to offer and are more likely to engage with notifications.
  • Push notifications are shorter and demand less attention than email or social media updates.
  • There is no algorithm like on social media to limit your reach. Nearly 100% of messages are delivered.
  • Users can control how their devices display notifications. They can snooze them or turn them off entirely.
  • Not as many companies are using push notifications.

Popular sites, including Facebook, Pinterest, LinkedIn, and many others, understand the importance and are already using web push notifications as a marketing strategy.

Push notifications have a 10X higher open rate than email and a 14X higher click rate. They are more engaging than SMS, email marketing, and social media platforms.

Having said that, let’s take a look at how to easily add web push notifications to a WordPress website.

Setting Up Web Push Notifications in WordPress With PushEngage

PushEngage is the best push notification service on the market that allows you to easily add push notifications to your WordPress site.

This helps you connect with visitors even after they leave your site with targeted push messages.

Step 1: Creating Your PushEngage Account

First, you need to go to the PushEngage website and click the ‘Get Started For Free Now’ button.

PushEngage

The free plan covers you for up to 200 subscribers and 30 notification campaigns each month. You will have to upgrade as you get more subscribers and need to send more campaigns.

After selecting a pricing plan, you will need to create a PushEngage account. You can use your existing Google account to register or create a new account.

Register for a PushEngage account

Once you do that, you will be taken to the ‘Setup Your Account’ page, where you have to add your website domain, industry, and company size.

Your subdomain will automatically be generated according to this information. After that, you will also need to provide your credit card details here.

Provide website details to complete the signup process

Upon signing up, you will be taken to your PushEngage dashboard.

Keep in mind that if you signed up using your Google account, then this is where you will need to provide your website details.

Once you have done that, just visit the Site Settings » Site Details page from the left column in the PushEngage dashboard.

From here, you can edit your site name and URL if you want. After that, you myst upload an image that will be used as a site icon for your web push notifications.

To do this, click the ‘Choose Image’ button.

Choose an icon image for push notifications

This will open up a prompt on your screen where you can upload an image from your computer.

You can also add an image using its URL. Once you have selected an image, just click the ‘Use’ button.

After that, don’t forget to click the ‘Save Changes’ button to store your settings.

Upload an image from the computer

Remember that your image needs to be in PNG or JPG file format, and the recommended size is 192×192.

You have now completed the key information for your PushEngage account.

Step 2: Connecting Your WordPress Site With PushEngage

The next step is to connect your WordPress website to PushEngage.

To do this, you need to install and activate the PushEngage WordPress plugin. For more details, you can see our step-by-step guide on how to install a WordPress plugin.

Upon activation, the ‘Welcome to PushEngage Setup Wizard!’ prompt will open up on your screen, where you have to click the ‘Connect Your Existing Account’ button.

Click Connect to your existing account button

This will open the ‘Add Your Site to PushEngage’ prompt in a new window. Here, you have to make sure that the site registered with PushEngage is the same one that you are using now.

After that, just click the ‘Let’s Get Started’ button.

Connect PushEngage account to WordPress

Once your PushEngage account is connected with WordPress, a setup wizard will be launched on your screen that you can configure according to your liking.

After you are done, just click the ‘PushEngage Dashboard’ button to be redirected to your WordPress dashboard.

Click the PushEngage dashboard button in the setup wizard

Now it’s time for you to start creating a web push notification for your WordPress blog or website.

Step 3: Setting Up Your Push Notification Messages

To create a push notification, head over to the PushEngage » Campaigns page and click the ‘Add New’ button.

This will direct you to the ‘Create New Push Broadcast’ screen in your WordPress dashboard.

Create a new push engage campaign by clicking the Add New button

From here, you can start by typing a name for your push notification in the ‘Notification Title’ field. Then, type the message that you want to display in the push notification in the ‘Message’ field.

Next, you need to add your website URL to the ‘Notification URL’ field.

Upon adding the title and message, you will be able to see the preview of your push notification in the right corner of the screen.

Type the title, message, and URL for the push notification

Next, scroll down to the ‘Show Large Image’ section and toggle the switch to active if you want to add an image to your push notification.

This image will be displayed at the top of your notification and will not disturb the alignment of the notification title and message.

Add image to the push notification

Next, you need to scroll down to the ‘Notification Duration’ section and toggle the switch to active.

Once you do that, you can now check the ‘Keep notification open until interaction’ option. This means that the notification will be constantly displayed unless the user interacts with it.

You can also customize your push notification duration from the dropdown menus. This setting controls how long the push notification will be displayed for.

Keep in mind that these features only work for Chrome 47 and above versions and not other browsers.

After configuring the settings, just click the ‘Save & Select Audience’ button at the top.

Add duration for push notification

This will direct you to the next step, where you must select the audience that you want to send push notifications to.

Here, we will be choosing the ‘Send to All Subscribers’ option so that our push notification will be displayed to all our subscribers.

Next, click the ‘Send/Schedule’ button at the top to move forward.

Choose an audience to send push notifications

In the next step, you need to schedule your web push notification timing.

For example, if you want to start sending your push notifications immediately, then you can select the ‘Begin sending immediately’ option. However, you can also schedule your notification to be sent at a particular time or be turned into a recurring push notification.

Although, keep in mind that you will need a paid plan from PushEngage to access these two features.

Schedule and send your notification to your users

Finally, click the ‘Send Notification Now’ button to save your campaign and start sending your web push notifications.

Once you have set up push notifications, it’s best practice to check that they are working as you expected.

To test your push notifications, open your website on your computer or phone. Here, you should immediately see the web push notification that you just created.

Here’s ours on a desktop computer:

Push notification preview

However, keep in mind that this web push notification will only be displayed to users who are part of your PushEngage subscriber list.

Create a Subscribers List With PushEngage

If you don’t already have a subscribers list with PushEngage, then you must visit the PushEngage » Design page from the WordPress admin sidebar.

Once you are there, simply toggle the switch to active for a popup template that you like. Then, click the ‘Edit Popup’ button.

Choose popup template

This will open the PushEngage website dashboard on a new page.

From here, you can configure the layout, message, and subscription rules for your popup.

Once you are done, don’t forget to click the ‘Save & Choose Display Options’ button at the top.

Configure popup design

This will now show you the display options, where you can choose the cookie duration, enable the subscription trigger, and more.

Finally, click the ‘Save and Enable Popup’ button to store your settings and activate the popup.

Save and enable popup

Now, you need to visit your website using another Google account. Here, you will see a popup at the top of your website asking users to allow it to show notifications.

Now once the users will click the ‘Allow’ button, they will automatically become a part of your PushEngage subscribers’ list.

Allow notification preview

Send Push Notifications to Subscribers Every Time You Publish a New Post on WordPress

With PushEngage, you can also send push notifications to subscribers every time you publish a blog post in WordPress.

To do this, visit the PushEngage » Settings page from the WordPress dashboard and switch to the ‘Auto Push Settings’ tab. From here, toggle the ‘Auto Push’ switch to active.

After that, you need to choose if you want to display the post’s featured image in the push notification and enable multi-action buttons.

Toggle auto push switch

With multi-action buttons, you can allow users to interact with your push notifications in multiple ways, like visiting your blog post, subscribing to your YouTube channel, and signing up for your email newsletter.

You can also use the blog post’s featured image or the site icon as the notification icon image.

Finally, click the ‘Save Changes’ button to store your settings.

Now create a new post in the WordPress block editor and scroll down to the ‘PushEngage Push Notifications Settings’ section.

From here, you can add a title and message for your web push notification and even select an audience for it.

Add title and message for blog post push notification

Once you are done, simply click the ‘Publish’ button to save your changes and make your post live.

Now your subscribers will receive a notification for the new blog post on your website.

Preview for push notifications for blog post publications

We hope this article helped you learn how to add web push notifications to your WordPress site. You may also want to see our beginner’s guide on how to build an email list and our expert picks for the best email marketing services for small business.

If you liked this article, then please subscribe to our YouTube Channel for WordPress video tutorials. You can also find us on Twitter and Facebook.

The post How to Add Web Push Notifications to Your WordPress Site first appeared on WPBeginner.