7 Best Managed WordPress Web Hosts Compared Read More →
7 Best Managed WordPress Web Hosts Compared

Are your websites not as fast and efficient as you feel they should be? Do you want more out of …


Tips, Expertise, Articles and Advice from the Pro's for Your Website or Blog to Succeed
7 Best Managed WordPress Web Hosts Compared Read More →
How To Make Cloudways Faster For Your WordPress Website Read More →
Does Your Choice Of Web Host Impact Your Site’s Security? Read More →
If you are looking to host your NextGen web app safely, Firebase from Google can put you at ease by providing fast, reliable, and secure static hosting for your web app. Offering production-grade web content hosting, Google Firebase enables you to effortlessly deploy web apps and static web page content and connect to a CDN (content-delivery network) with a single command.
Furthermore, with Firebase as an all-in-one hosting solution, you are exempt from sizing up various available cloud-based hosting service providers.
Are you running an online store? With WordPress and an eCommerce plugin like WooCommerce, we can easily manage, properly run our online shop. Well, before going to host your blog, you might want to choose the best WooCommerce optimized hosting. There are a lot of WordPress hosting companies available, but not that many specialized in […]
The post WooCart Review: Is It The #1 WordPress Hosting For WooCommerce Stores? appeared first on WPArena.
The Tavern was provided access to test GoDaddy’s onboarding process, which is a part of its managed WordPress hosting service. The company has revamped its system since we covered it in 2016. The web host has had time to garner feedback since then and build an easy-to-use, headache-free way to launch WordPress sites.
GoDaddy has been making waves in the WordPress community over the past few years and is quickly becoming one of the most dominant businesses in the ecosystem. Several of the company’s free WordPress themes consistently rank in the theme directory’s popular list. Most of them are child themes of their popular Primer theme, which boasts 40,000+ active installs when not counting child theme installs. The real count should be north of 200,000.
GoDaddy provided access to its Pro 5+ tier, which is its highest level of managed WordPress hosting. They have three lower tiers, each at different price points and with fewer features. Regular pricing for the tiers range between $9.99 and $34.99 per month. All levels include automatic backups, security scans, caching, and a slew of other features that are not always easy to figure out for new users.
Aaron Campbell , GoDaddy’s head of WordPress Ecosystem & Community, said that their hosting service is growing quickly. “We were among the largest WordPress hosts when we launched our Managed WordPress Hosting in 2014,” he said. “Within 2 years our offering became the largest Managed WordPress platform in the world and remains so to this day.”
GoDaddy launched its basic onboarding process later in 2014. They iterated on that version through 2018. “When Gutenberg went into core in WordPress 5.0 we saw an opportunity to redefine the WordPress onboarding and imagine what a ‘Gutenberg native’ experience would look like,” said Campbell. “Meaning, do what Gutenberg uniquely enables us to do over what was possible before–things that couldn’t be done by making existing themes Gutenberg ‘compatible’ we had to build from the ground up.”
Based on my experience with the product, I would have no qualms about recommending it to new or even more experienced users. Even those with no experience running WordPress can create a new site without trouble in far less time than it’d take to go through the normal, more complex process.
One of the hardest things to know prior to signing up for a service and handing over your credit card number is how the service works. For this reason, I snagged a few screenshots and will do a quick walk-through of the process.
Once you are ready to build your new website, the service provides a “Set up” link that sends you to GoDaddy’s onboarding screen. There are three paths to choose from. The first and most prominent is to view the available templates, which is the path that new users would choose. You can also manually set up WordPress or migrate an existing site.

When selecting to view templates, the service presents over 50 options to choose from. The templates are further grouped by category based on the type of site a user might want to create. I chose the “Beckah J.” option because it worked for my idea of creating a life-wellness site.
Each of the templates are created from GoDaddy’s new Go WordPress theme, which is currently available via GitHub and awaiting review for placement in the official WordPress theme directory.

After selecting a template, the process moves to a preview screen, which has buttons to switch between desktop, tablet, and mobile views. From that point, you can choose to use the template or go back and select another.
This was the first point of the process that felt like it needed polishing. The preview frame was too small to get a feel for what the site would look like on desktop or tablet. This is a fixable problem. There’s plenty of screen real estate GoDaddy could use to make the preview nicer.

The next screen allows users to enter information about what type of site they want to run. Depending on which of the following checkboxes are ticked, GoDaddy will set up the site differently.

After completing the final form, GoDaddy begins creating the site. The host sets up the site with one or more of several plugins based on the choices made in the previous form.
The site installation process was slower than I had expected. We live in a fast-paced world where users expect things to happen nearly instantly. I admit I was antsy while waiting for the process to complete, in part because everything else happened so quickly. I wondered if I had time to grab a sandwich. In reality, it was much faster than manually setting up a WordPress install, but the setup did take a few minutes of waiting. My experience may have been an anomaly too. Sometimes these things take time.

Out of the box, my newly-created site had five custom pages ready based on my choices during the onboarding process.
It was nice to see WooCommerce ready and a contact form set up with my email (handled by the CoBlocks plugin). I would rather have seen contact, account, and cart page slugs for their respective pages, but that’s a personal preference.
The site came with seven plugins installed, five of which were activated.
CoBlocks along with theme integration for the block editor is what made the process of working with the website a breeze. GoDaddy acquired the CoBlocks plugin in April. At the time, the plugin had 30,000+ active installs. It has since grown to 80,000+ in the few months since GoDaddy has taken over.
I’ve been critical of GoDaddy over the years. I am a customer of one of their other hosting products that launched years ago. That particular site is stuck on PHP 5.6, which has given me the feeling that the company is not focused on its older projects. However, Campbell said they are in the process of moving users on legacy hosting products to a newer platform.
I’ve been cautiously optimistic about the work GoDaddy has been doing within the WordPress community. They’ve more than shown their commitment to the WordPress platform over the past few years.
Despite a couple of minor hiccups, the onboarding process the hosting giant has built is one of the best experiences I have ever had launching a WordPress site. Even as an old pro, I’d consider using it for future projects, particularly when setting up sites for less tech-savvy family and friends.
Liquid Web is one of the high-end web hosting services available today, with a reputation for flexibility and variety. With approximately 30K customers worldwide, the company has spent the last 20 years building its specialized web hosting empire. If you own a business, then you must know that businesses require an excellent web hosting services […]
The post Liquid web hosting review appeared first on WPArena.
WordPress can be a complex beast for those not yet initiated… luckily a fellow WP dummy (who also happens to be a blog contributor) is on hand to explain WordPress to you in a way that anyone can understand… in 10 minutes max!
This is really hard for me, but I have to do it…
Full disclosure:
Hello everyone, my name is Rick Crawshaw, and I… am a WordPress dummy.
It’s kind of embarrassing, but It’s true.
I’m telling you this because, if you consider yourself a beginner…
Or if you’re new to the juggernaut that is WordPress…
You’re not alone!
And this article (and the video below) are for you.
Plus also for anyone who wants to start a website or blog with WordPress and doesn’t have the slightest clue of where to begin.
But the question begs:
Now although I’m definitely a “newb” when it comes to WordPress, from the day I started writing for WPMU DEV, I’ve continued to learn more and more about this popular platform.
I’ve also taken it upon myself to learn as much as I can about WP so I can succeed in my new role.
And I think that’s why I’m the perfect candidate to give you an introduction to the basics of the platform, and hopefully explain it in a way that ANYONE can understand.
After all I’ve been in your shoes and the basics are still fresh in my mind.
By acknowledging the amazing Lisa Sabin-Wilson and her range of “WordPress For Dummies” publications (not an affiliate link fyi) so we don’t get in trouble for using the coined term.
In all seriousness, these books are fantastic resources for getting to know more about WordPress if you’re just starting out.
Okay, now that’s out of the way, let’s jump into our own WordPress article for dummies, brought to you by a real life WP dummy!
Starting with the obvious question:

In simple terms, WordPress is a popular piece of software you can use to create your own website or blog.
In fact, if you want to know just how popular WordPress is, here’s a fun fact for ya:
To put this into perspective, you might’ve heard of other popular website platforms like Squarespace and Shopify etc…
Well, they host a mere 1.6% and 1.7% respectively, check it out below:

It also means that one in four websites on the entire internet are powered by WordPress!
Yes, I know it kind of defeats the purpose of this article…
But don’t worry, if I can get it, so can you.
WordPress is also what’s known as an “open-source content management system (CMS).”
Allow me to break this definition down a little further:
“Open-source” essentially means that anyone can use or modify WordPress’ software for free.
And a “CMS” is a tool that makes managing the content of your website easy for people who know nothing about programming or coding (score!).
WordPress was created back in 2003 by Matt Mullenweg and Mike Little, and was originally meant to be nothing more than a platform for bloggers.

Of course, since that time WordPress has evolved into a full-blown CMS with thousands of plugins, widgets, and themes for users to access (which we’ll get to later).
As we’ve already touched on, WordPress is also open-source, so rather than two people, as it was at the beginning – nowadays WordPress is updated and improved by a massive community of developers and contributors.
It’s also for this reason that WordPress continues to get better and remains the most popular website platform available for users in 2019.
So why are 34% of all websites online powered by WordPress? And what makes WordPress superior to the other website or CMS platforms out there?
Here are a few reasons that might help explain why:
It’s open source – As mentioned earlier, WordPress is open source and worked on and improved by a community of thousands of developers and experts from around the globe.
It’s free! (well kind of) – You can install WordPress right now and it won’t set you back a cent… of course, you will need hosting and a domain, but that ain’t WP’s problem!
It’s easy to use – WP is highly accessible and prides itself on being user-friendly. As mentioned earlier, the great thing about this platform is that you don’t have to know how to write code to be able to create your own website. It can also be used by those with impaired vision.
It gives you access to all the latest and greatest developments – Because WordPress is a staple in the website and development world, you can be sure that any of the latest software or plugin initiatives are being crafted with WordPress in mind.
It’s highly flexible – No matter what type of website you’re trying to set up… whether it’s a personal blog or a high end e-commerce store – you can most likely create it in WordPress.
It’s customizable – It’s easy to add new features and functionality to your website with WP themes and plugins. Think of these as handy apps or add-ons for your website.
It can be accessed on all devices – You’re free to use WordPress on devices of all shapes and sizes, and you can access your website whether you’re on your desktop, laptop, or phone.
Before we press on, I should also mention that when I talk about “WordPress” in this article I am referring to “WordPress.org.”
Take it from me, it can be easy to get WordPress.org and WordPress.com mixed up, or to not even realise there are two different WordPress platforms.
“WordPress.org” which is known as the “self-hosted” WordPress – is a free open-source software you can install on your own hosting and create a website that you 100% own.
“WordPress.com” on the other hand, is a for-profit piece of software that is powered by WordPress.org.
It’s simple to use, it’s free, however, the website is hosted by WordPress, as opposed to being your own site.
This means you can’t have your own domain name, and your URL will be something along the lines of: “http://examplewebsite.wordpress.com.”
You also have limited access to themes and plugins, so the changes you can make to your website are limited.
In general, if you’re chatting with someone about WordPress, they’ll more than likely be talking about WordPress.org.
Alrighty, now that we know some more about what WordPress (.org!) is… let’s get into some basics of setting up and actually using the software.
Before we can get started with WordPress itself, you’ll need to sort out a few minor details first.
Starting with securing your domain and hosting:
Before you set up your website or blog you’re going to need a domain name – the address of your website essentially.
You can purchase domains from a range of different Domain Registrars, and your domain can be separate from your hosting provider (which we’ll get into in a moment).
Your Domain Registrar may also be local, if you’d prefer your site address to be national (.co.nz) instead of international (.com).
Domain costs can vary, but in general a domain should set you back no more than $10 – $15.
Like domains, there are a number of different hosting provider options out there.
But before you select a provider, you’ll also want to choose the TYPE of hosting that best suits your website.
Here’s a quick run down of some different hosting types:
Shared Hosting – With shared hosting the service provider can serve multiple websites from a single web server. This is usually the least expensive option and can be a good choice for smaller websites and blogs.
Virtual Private Server (VPS) – A VPS means you have your own resources set aside for you on a shared server. This basically means that your website will not be affected by any other sites on your server when it comes to security and performance. This is a great option if your websites are starting to gain more traffic.
Managed WordPress Hosting – If you need the power of a VPS, but you could use more assistance from your provider – managed WordPress hosting could be the way to go. This type of hosting gives you all that a VPS does, along with the added advantage of ongoing support and guidance.
A Dedicated Server – These types of servers are ideal for larger companies that have massive amounts of traffic to pouring into their site. With a dedicated server you have access to the full resources of an entire server. If you only care about performance this option might be the way to go. Just be aware this power comes at a hefty cost.
Cloud Hosting – Cloud hosting works by spreading your website content throughout multiple servers, which helps to improve your site’s “uptime”. However, the increased uptime and security can be costly, but this is a great option for those who want to make sure their site is live for users 99.999% of the time.
Okay, once you’ve chosen the type of hosting, now you’re free to select a provider.
There’s no right or wrong answer when it comes to selecting a provider, as mentioned earlier, it could largely depend on your budget and the type of hosting you require.
Once you’ve decided on a host, you’ll just need to decide on the hosting package for you.
Most hosting providers will also include a free domain in their plan, otherwise you’ll be given the option to integrate from your Domain Registrar.
Install WordPress With “One Click”
Once you’re in a with a hosting provider and you have a domain, you’ll usually be able to install WordPress in “one click” via your host homepage as below:

You’ll then be given some prompts which vary from company to company, but the set up should be fairly simple and straightforward.
Or Try The Famous WordPress 5 Minute Install…
Another option is also installing WordPress manually through the process famously known as the: “5 minute WordPress Install.”
Check out the video below to see the 5 minute install in action:
Once you’re all ready to go and you have WordPress installed, you can now start to familiarise yourself with the platform.
Once you’ve logged in you’ll be greeted with the main administration screen, which is commonly known as the dashboard.

It’s here you can organize and put together your site. It’s where all of the magic happens basically.
At the top of your screen you’ll also see the toolbar. Here you can click on your site name and you’ll be taken directly to your website or blog.

Back to the dashboard… you’ll notice straight away it shows you the recent activity of your website.
It keeps you in the loop with insights, information, and news, courtesy of a number of different WordPress sources.

When you’re first starting out, you’ll also notice WordPress gives you prompts to help you get started creating your site:

You can choose to ignore these, or often they can be quite handy if you’re stuck on where to start.
To the left side of your dashboard you’ll see the main navigation menu which gives you access to a number of different administration functions.

Under each menu item, sub-menus will also appear for each.
Let’s briefly go over each menu item and how it functions…
First up we have posts:
Mosts website owners (especially blogs) know how important posting regular content can be.
Both from an SEO (search engine optimisation) and an audience standpoint (providing relevant and interesting content).
Through the posts menu item you can start writing and adding new posts, as well as editing posts that have already been published, or drafts that still require some work.

Writing and editing a post is done through the newly introduced Gutenberg WordPress editor.
This editor works as a simple drag and drop, making it nice and easy for non-techies and developers.

Once you’re done writing and editing your post, be sure to preview it first… once you’re happy, click publish and the post will go live!
The media menu item allows you to upload new files, as well as view all of the media files you’ve uploaded to your WordPress site.

This includes images, audio files, video files and more.
You can also upload, manage, and edit all of your individual images and videos via this built-in media uploader.
Much like the posts, pages allows you to draft and publish static pages for your website.
You can edit and delete already published pages, you can also apply custom page templates to your pages.

Editing and publishing pages is also done using the Gutenberg editor, however, if needed you can also choose to use the classic editor by going to formatting and then selecting classic editor.

You can also download the classic editor plugin if all else fails (not sure what plugins are yet? We talk about them below!).
The comments menu item lets you view, edit, and delete all of the comments posted to your website.
As well as this, you can also view and manage comments that may require some moderation.

For example, based on your settings this could be comments that contain certain words that you deem inappropriate.
You can also choose to blacklist certain URLs or users that may have spammed you with comments in the past.
The Appearance menu lets you manage your WordPress themes, allowing you to view, activate and edit them using the Theme Editor.

In a nutshell, themes are what give your website it’s overall look as well as providing it with specific functionalities.
Not happy with the way your website looks? Pick a new theme!
You can download and choose from a vast collection of free themes you’ll find on WordPress.
Or, if you can’t find what you’re looking for, you can always go off-site to find more premium themes from sites like ThemeForest.

As well as themes, the appearance menu allows you to directly customize what your site looks like, along with managing the menus of your site and how they work together.

You can also manage your widgets, which are little features that add more functionality to your pages or posts.

These could be things like a search field, a “recent posts” section, or editing what displays on the sidebar of your blog post page.
Ah good old plugins… now these are a set of tools you’ll be using A LOT.
Plugins are pretty much extra features you can add to your website that your current theme or widgets do not have.
This could be anything from a contact form plugin, to a plugin that helps with SEO for your site.

Through WordPress you instantly have access to thousands of different plugins made by a community of other users and developers, available at WordPress.org and via the ‘Plugins’ menu.
Through this menu item you have the option of adding new plugins, as well as managing your existing plugins. As often you’ll find that new updates will be available for your plugins regularly.
The users menu allows you to manage your users and subscribers, as well as edit your own profile.
If you’re the only one posting or editing your website then you’ll only need to worry about your own profile.
However, if you have a team, or maybe you have people contributing to your blog, it’s here that you can provide them with their own profile.

You can also provide users with different levels of accessibility.
For example, for someone contributing to the blog, you’ll only want to give them access to the post editor, rather than access to the design or coding of the rest of your site.
Using the tools menu item you can import data from another content management platform, or you might choose to export your current site data into a backup file if you choose.

You can also check on the health of your website, which is handy for making sure any plugins you have installed are free from viruses or hacking.
And you can also import or export personal data if you choose.
Finally we have the settings, where (as you guessed) you can manage the general options and preferences of your website.
Here’s a quick breakdown of what you can adjust and change:
General settings – Here you can adjust things like the title of your site, the address and the timezone.
Reading settings – Adjust the readability of your website, for example, what your homepage displays, how many blog pages to show, and whether or not you want search engines to see your posts.
Writing settings – Change the default post category, the post format, and your email if you want to post to WordPress via email.
Discussion settings – As touched on above, using these settings can help you manage and filter any comments you might receive or your website or posts.
Media settings – Set some defaults for the sizes of your images as well as how you’d like to organise the media files in your library.
Permalinks – This is slightly techie… but basically adjusting the permalink settings will adjust how the URLs of your posts and pages are displayed in the address bar.
Privacy – Finally, you can edit or preview your privacy policy page. As a website owner there are some national and international privacy laws you’ll have to ensure you adhere to. WordPress automatically sets you up with a page you can edit, but you also have the option of creating your own privacy policy.
A basic breakdown of what WordPress is and the basics you need to know about using the popular software… as told by a fellow WP dummy.
But even after this beginners explanation, if you’re still having trouble understanding WordPress…
Never fear!
If you’re still having problems working out WordPress there are plenty of help forums, video tutorials, and documentation available in the WordPress community that can point you in the right direction.

Here at WPMU DEV we also have plenty of WordPress documentation and tutorials you can tap into, and our highly rated support team are on hand 24/7 to help you with any problems you might be having.

All this aside, learning WordPress is all about… using WordPress!
So if you consider yourself a WordPress dummy like myself, start using the platform and have a go at all of the items mentioned in this article.
Create your first page, publish your first post, activate your first plugin…
And I promise you eventually using and navigating WordPress will feel like second nature.
Most people would think a fight between WordPress and Blogger is just plain unfair… But you might be surprised at just how close it is. In fact, what if I told you that Blogger actually manages to steal a couple of rounds? Stick around to see how the fight goes down.
While pretty much anybody can set up a website or blog in 2019, it does come with its challenges.
One of the most challenging aspects usually occurs before you write or publish a single word…
I’m talking about choosing which platform to use.
Although there are many fantastic and unique blogging options out there… all with their own advantages (Gator, Tumblr, Squarespace, Medium, Ghost, etc.).
Today we’re pegging two of the heavyweights of the blogosphere against each other.
The idea being that after these two blogging heavyweights go head to head, you’ll hopefully have a better sense of which platform is the best choice for you.
Now to start with, I’m going to assume most of you are familiar with WordPress, but for those who haven’t been introduced to Blogger (or had no idea it still existed!)…
Blogger is a platform owned by Google that lets anyone start their own blog or website for free in a couple of clicks.

The good thing about Blogger’s association with Google is that your website or blog is hosted by the conglomerate and everything is taken care of for you.
However, as you’ll soon find out, as good as this association may be, it does come with its drawbacks.
In any case, if you’ve finished listening to the referee’s instructions…touch gloves, and…

Ding ding!
Okay, this first round might be a tad unfair, but you did this to yourself WP…
Blogger has the upper hand clearly because it’s a completely free platform. There is an option to connect your own domain (domains can cost around $10), but it’s entirely up to you.
The only downside is if you don’t register your own domain, your default URL will always be: “http://(websitename).blogspot.com/”
But as mentioned, the option for a custom domain name is there if you want it.
As for WordPress, although the software itself is free to use there are some costs involved.
You’ll need to set your site up with a domain name, which as mentioned could cost you around $10. And you’ll also need hosting which can cost anywhere from $50 – $500+ per year.
As well as this, although they aren’t always needed, premium WordPress plugins and themes also come at a cost.
But if you’re just starting out the free themes and plugins available will usually be enough.
Of course, what you’re willing to spend will depend on the type of blog or website you’re setting up.
With all that said, I’m going to have to declare the winner of round 1…
Winner Of Round 1: Blogger!
Once you’ve got your blog set up, it’s time to have a look around and start posting.
For this round, we’ll look at the functionality of each platform and how easy it is to publish a simple page and adjust a few settings.
Starting with Blogger:
Although visitors only ever get to see the front end of your website, the real action happens behind the curtain.
It all starts with the dashboard:

You’ll also notice a number of different menu items which will enable you to customize your blog or website:

If you head to the settings section, you can change the title and description of your blog:

You can also play around with other settings such as changing the URL, as well as adding blog authors and adjusting the privacy settings of your blog (below).

It’s also simple to publish pages and posts on your website. This could be evergreen pages like an about page or a contact page.
On that note, let’s see how easy it is to whip up a simple “about page.”
Start by clicking pages on the sidebar menu. Next click “new page” to create your page.

The Blogger interface is much what you’d expect from this kind of platform. Simply enter your content using the WYSIWYG editor.

You can also see a preview your page before you publish it, which gives you an idea of how the page is going to look when it goes live.

Once you’re ready click publish and your page will be out there in all its glory.
When it comes to publishing posts, it’s pretty much the same process. You can also manage your pages and posts from your dashboard:

Okay now let’s see how WordPress stacks up…
Once you’ve installed WordPress you’ll be greeted with the following dashboard, where you can manage your website and create content.

Creating posts and pages in WordPress is similar to the way it’s done in Blogger, the big difference being there are a lot more settings and options available to you.
For example, in Blogger you only have the option of labeling your posts… whereas WordPress lets you add tags and categories to your posts so they can be grouped into appropriate sections and digested by the right audience.
When it comes to the actual editor, you’ll find that the layouts and functionality of these to be relatively similar.
However, WordPress recently introduced the new Gutenberg editor. Although there are options to switch back to the classic style of editing.

Like Blogger, you can create a draft post, preview it, and then hit publish when it’s ready to go live.

Changes to the title and tagline of your site also happens in the settings like it does in Blogger. However, WordPress does offer some additional settings.

For instance, WordPress allows you to grant users different levels of access to your website.
So you might create an account which only allows a user to create new posts, as opposed to making changes to how the site looks and operates.

Okay, I think this round we have a clear winner…
Winner Of Round 2: WordPress!
Because Blogger was bought by Google back in 2003 your website is hosted on Google and covered by their security blanket.
This essentially means you don’t have to worry about managing server resources, creating backups, and your blog’s security.
And although Google isn’t going anywhere anytime soon, the company does have a history of axing underperforming platforms (ahem Google+).
Of course, when it comes to WordPress YOU are solely responsible for the security of your website.
There are plenty of great WordPress plugins for security and backing up…
But if the user fails to stay on top of things and continue to update, what’s the point?
Hmmm, this is a hard round to call…
But I’m going to have to give it to:
Winner Of Round 3: Blogger!
That could have gone either way, but I gave it to Blogger – mainly because big brother Google was involved…
Now it’s WordPress’ turn to have an unfair advantage… you did this to yourself, Blogger.
Because when it comes to customization and variety of options, WordPress certainly floors Blogger.
Not only this, things that are relatively simple in WordPress somehow become frustratingly complicated in Blogger.
For example, if you’re looking to create a website with multiple pages and a separate blog section, it’s way easier to do on WordPress.

But WordPress really stamps its authority when it comes to themes and plugins.
Although Blogger’s theme selection is decent (and free) and you can access some third party templates if needed…
It’s nothing compared to the THOUSANDS of designs and themes you can choose from with WordPress.

You also have an endless selection of free and premium themes which can be added to your site to give it a makeover and more functionality.

And then you have over 50,000 plugins to choose from… all with their own unique ways to help your website or blog perform at its peak.

Whether it’s a plugin to help optimize the images on your blog, or an email pop-up plugin to help capture leads on your website…
You’ll find it all in the WordPress plugin directory, as well as in off-site market places like CodeCanyon.

No surprises this round…
Winner Of Round 4: WordPress!
It’s 2-2 going into the final round!
Who’s going to take it out?
Let’s find out:
When it comes to the amount of support available to users Blogger appears to be much more limited.
You do have access to documentation and a blog forum. However, in terms of direct support, it’s certainly not extensive.

WordPress, on the other hand, has a more active support network.
Like Blogger, there’s plenty of documentation and community forums … as well as an internet relay chat (IRC) chat room, where you can seek help from experienced WordPress experts.
In terms of a user community, again and unfortunately, Blogger cannot compete with WordPress.
In fact, Blogger’s community doesn’t extend much further than its help forums and documentation…

Whereas the WordPress community is always active with WordCamp events and meetups constantly being held around the world.

There are also huge amounts of blogs, articles, tutorials and new developments coming out of the WordPress community everyday.
On that note, I think we know who takes this round, and the fight…
Winner Of Round 5: WordPress!
Was that closer than you were expecting?
Blogger put up a good fight, but it was always facing an uphill battle.
Having said that, just because WordPress won this particular fight, it’s not to say that Blogger doesn’t have its place.
If you just want a basic blog that serves its purpose, and you’re not worried about extensive features, plugins, or a cutting edge design – Blogger could be the solution for you.
It’s also free and comes with no start-up costs.
On the other hand, if a blog is the first step on your way to conquering the world, then maybe WordPress is the one for you.
In order to grow your website or blog, you’re going to need access to the extra plugins and themes WordPress has on offer.
This is especially relevant if your blog or website is going to be used as part of a business venture.
Yes, it may set you back a bit of cash.
Yes, it requires a little more effort to set up and there is a learning curve.
But the sheer amount of customization and flexibility available to you is comprehensive and will enable you to create an amazing statement piece.
In our opinion, WordPress scores the TKO.
We’ll leave it up to you to decide who wins in your world.
We’ve reached the 7th edition of our Quarterly Roadmap Roundup, and it’s crazy to see the massive growth we’ve experienced in just two short years since launching the public-facing roadmap.
Of course, you can view the progress we are making on your favorite plugins and services at any time, but we stop to look ahead, share the highlights, and get your feedback each quarter.
“Why?” you ask.
So, before we look at what we have planned for Q3, let’s see how we delivered on our Q2 goals. We didn’t just hit our goals; we went flying past them:
And this is where our devs crushed it:
When you installed your first WPMU DEV plugin, opened your first support ticket, or synced your first website to The Hub, you knew it would make it better… but I bet you didn’t realize it would *keep* getting better.
All of these updates are available now! So…if you’re not a member yet, get started now, your first 30-days are free.
I’m not a fortune teller, but as you can see, the Roadmap Roundup has been 110% accurate lately. Here’s what we hope to share with you over the next few months.

We don’t really have semantic versioning for our hosting. But as you already know, we are confident our hosting experience is more than ready for both your business and client sites.
It combines our years of enterprise hosting, speed optimization, security hardening, growth, and maintenance automation to our dedicated servers, customized for WordPress.
But we’ve been collecting your feedback, and the final touches are on there way including simplified email forwarding, better live stats, bulk plans built with agencies in mind, and continued polishing…followed by a huge marketing push.
Active Unlimited members currently get 3 sites included with their membership as long as they stay a member. But that is not going to last forever, so lock it in while you can.
If you’ve already tried hosting, tell us what you love and what we can add to take it to the next level in the comments.

Besides image optimization, caching is the single best way to improve site speed. That’s why we’re making the best cache plugin for WordPress even better.
We’re adding support for OPcache, Varnish, and other popular cache tools. We’re adding page cache pre-load, so users get the speed benefits on every visit. And we’re adding the ability to serve compressed cache files for even more speed.
But that’s not all. Set Cache to work the way you want it to. Exclude cookies from being cached and turn off mobile caching. Plus automatically clear the cache on a post when someone leaves a comment.
Make sure users are always getting the latest updates with global asset cache flush from the Hub and schedule automatic clearing on a schedule.
Speed up any site on any host including SiteGround and WP Engine. Hummingbird is queen when it comes to performance optimization for WordPress.

If you’re not familiar with Branda, it is the ultimate white label tool for customizing the WordPress login screen, quickly setting-up coming soon and maintenance pages and branding the dashboard.
This upgrade is all about user permissions for both single sites and Multisite networks. With 3.2, it’s not just administrators with Branda access. Set which roles can access and manage Branda’s modules.
Branda has always worked with Multisite, but now you’ll be able to manage modules on every subsite separately and import/export subsite settings to back up or quickly move settings around your network. Create a template and add custom branding to every site in seconds.

Great SEO is about following best practices, and SmartCrawl adds everything you need to easily do professional-grade SEO on your WordPress site, including recommendations and automation.
In this version of SmartCrawl, we’re adding the ability to quickly edit your robots.txt file so you can make it easier for search engines to crawl and share your most important content.

Our products are used on sites around the globe and translated into over 50 languages. That is great news.
But managing the language settings for each of your plugins and themes can be quite time-consuming. We are making language selection for our products a one-click setting that can be synced across all our plugins on your website. Set your language of choice and your plugins and themes will be updated automatically.
No more jumping from settings page to settings page sorting out translations.

Moving a site from host-to-host has never been easier with Shipper. It syncs your servers and automates the whole process. But with so many configurations and slooowww 3rd-party servers to contend with, we are adding more simple migration options.
Shipper will soon allow you to package your site into a .zip file and provide you with an installer.php. All you gotta do is download both files, upload them to your destination server via FTP/SFTP, and run the installer.php file to complete the migration.
But what if you don’t want to move your full site? Shipper will soon allow users to filter out files, folders, DB tables and much more.
Finally, we’re adding a white label tool for customizing the successful and failed notification migration emails. Perfect for when you’re working on client sites and want to send something a little more, *ahem* professional.

Information is power! So it’s no wonder Google Analytics+ has consistently performed in our top 10 plugins for over a decade.
We’re planning an overhaul of our crowd favorite, including a hero makeover and faster leaner code. And while Google Analytics is pretty great by itself, when paired with other data, it is incredible.
Be on the lookout for our newest Superhero upgrade with more data, a cleaner interface, and all the bells and whistles you need for tracking and analyzing information about your website.
Did we miss anything? Browse the Roadmap and let us know if there’s something we can do to make setting up, running, hosting, or managing your WordPress sites easier.
Who knows, maybe you have the next big idea for WPMU DEV?
Not a member yet, your free 30-day-trial is waiting. Get started now and tell us what you think in the comments below.
In September 2018, I was just a few months into my journey of learning web development. As I'm sure is the case with many new developers, it was a big task for me to learn not only the basic skills required, but also keeping current with the fast-moving industry. Just as I was getting to the level where it felt as though I could build a simple website, I started to realize that it was only the first step.
Opening up a few HTML pages stored locally on my laptop felt like a million miles away from being able to say to someone, "Hey, check out my website, live on the actual internet!"
But I did it! And the best part is that it wasn't as scary, difficult or expensive as it first felt like it'd be.
It all started with me sending Chris an email, which he used to write an awesome article explaining everything in plain English.
At this point, I didn't have a fully coded website — just an idea for a basic site that I was using to teach myself as I went along. I used the ongoing progress of my site as a push to learn how to get a live website quicker. But I'm sure you could do the whole thing with an HTML document that just says "Hello, world!"
I built my site using Gatsby, a static site generator powered by React. Building a website with these tools in a modular way felt really natural to me. The concept of reusable parts is something I’m familiar with in my career as a physical product designer and mechanical design engineer. It means that you can build in stages, like Lego, brick-by-brick, until you eventually have a life-sized castle you can invite your friends to visit!
This isn't a guide. It's my personal experience in the process of getting a website from my laptop to being live on the internet. Hopefully it'll give you some hope that it's possible and achievable, even by someone who has no formal training in web development and who has only been doing it for 12 months!
Before I ever bought a domain, it seemed like a pretty serious thing to do. Owning a domain means being responsible for it. People will go to that address and eventually see content that you've put there.
I don’t know if everyone has the same experience, but I spent weeks deciding on a domain name before going for it. It almost became an obsession of mine for a while, searching online for acronym generators to try and be clever, spending hours on dictionary.com trying to find synonyms that were cool. In the end, I settled for my name and what I do: joshlong.design. I still smile a little when I see my name in the address bar.
Since reading Chris' article, I've actually bought two domains from two different providers: a .com and a .design. I realize that I went against Chris' advice of consolidating domain names at a single registrar, but I needed to shop around a bit to get a good deal on my .design domain. I only own two domain names — and one of them I don't actually have any plans for just yet — so keeping on top of where I bought them isn't a task. In fact, I don't remember the last time I needed to login and manage the domain I use on a daily basis!
Buying a domain name was as simple as any other online shopping transaction. Nothing really huge or scary about it. I bought my .com through Namecheap, and my .design through Google Domains, and the process was pretty similar for both. All they needed was my name, address and payment details. Pretty standard stuff!
I don't remember Google trying to sell me a load of extra packages. They seemed happy with me just buying a domain, though they did offer me free WHOIS protection which I snapped up because I didn’t want my contact details freely available for anyone who’s feeling nosey. However, as Chris warned might happen, the other registrar I went through tried really hard to sell me some extras like hosting, email, a VPN (whatever that is!) and SSL certificates.
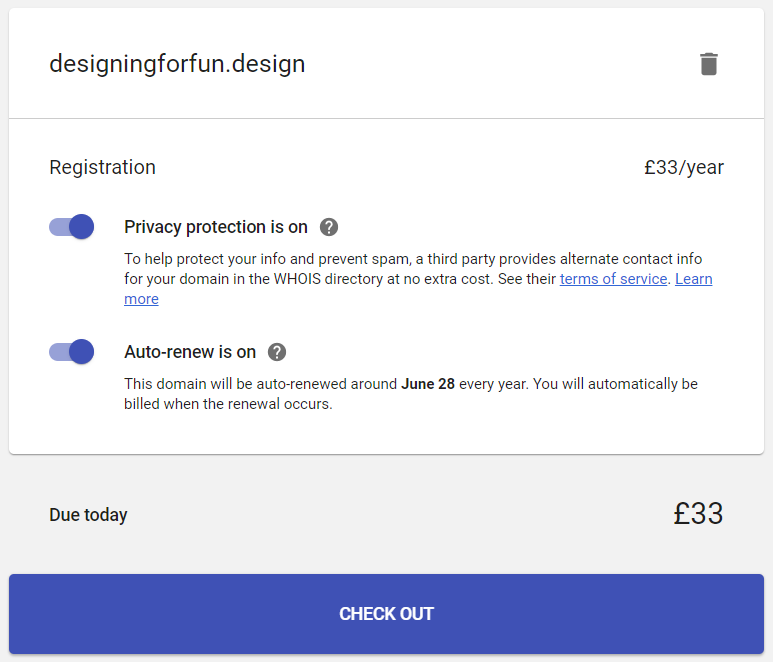
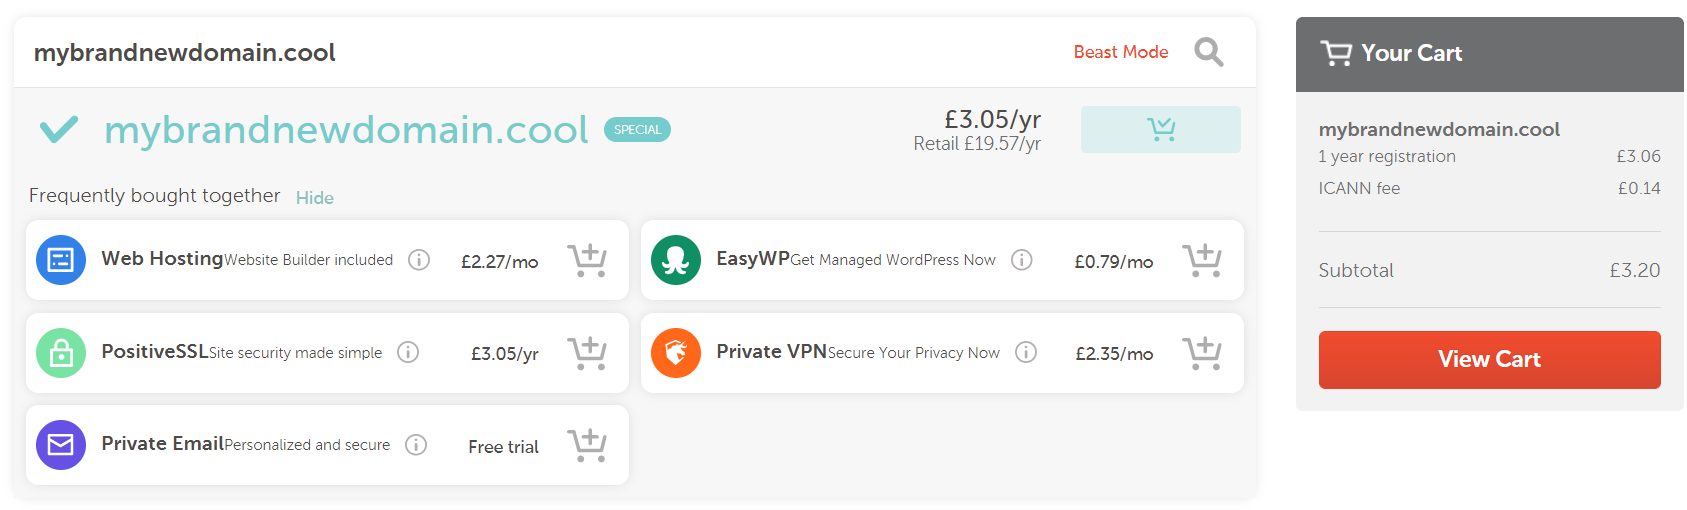
I didn't go for any of those extras. I already had a hosting plan, and you can use an alias through Gmail to "fake" having a me@mycoolsite.com email address. I honestly have no idea why I'd need a VPN, and the hosting I was going to go for gave me a free SSL certificate through Let's Encrypt. So just the domain name, please!
As Chris suggested it would be, choosing a host was a tad trickier than choosing and buying a domain name. But in the end, the web technology I used to build my site kind of guided me in a particular direction.
My site is built with Gatsby, which means it outputs straight-up static assets, basically as HTML and JavaScript files. That means that I didn't need a host that offered a server (in my most super smart authoritative voice), especially for WordPress with a MySQL database and Apache server, 6 cores @ 3.6 Ghz, 4GB RAM, 5TB bandwidth, 5 IP Addresses and 500GB SSD Storage, etc.
All that jargon goes straight over my head. All I wanted to do was upload my files to the internet and go to my domain to see them all compiled and shiny. Should be easy, right?
Well it turns out that it actually was that easy. As there's been so much hype around it recently, I thought I'd take a look at Netlify.
Netlify is recommended by Gatsby. They have really good documentation, and for my uses I felt as though I could comfortably stay within the free tier that they offer. In fact, at the moment I'm using 0.08% a month of the total bandwidth the free tier offers. Winning! Although maybe that means I’m not doing enough to get people to my site...
A quick aside about GitHub: I'm no expert at it and I don't really know any of the etiquette it entails. All I did was sign up, create a new repository and follow the instructions that they give you. After that, every time I made a change to my site, I used the buttons in my code editor (VS Code) to commit and push my changes. It works, but I have no idea if it's the correct or best practice way of doing it! I'm starting now, though, to understand how to use Git through the command line. I had no idea at all how to do it when I started, but I still muddled through it — and you can too!
Back to Netlify.
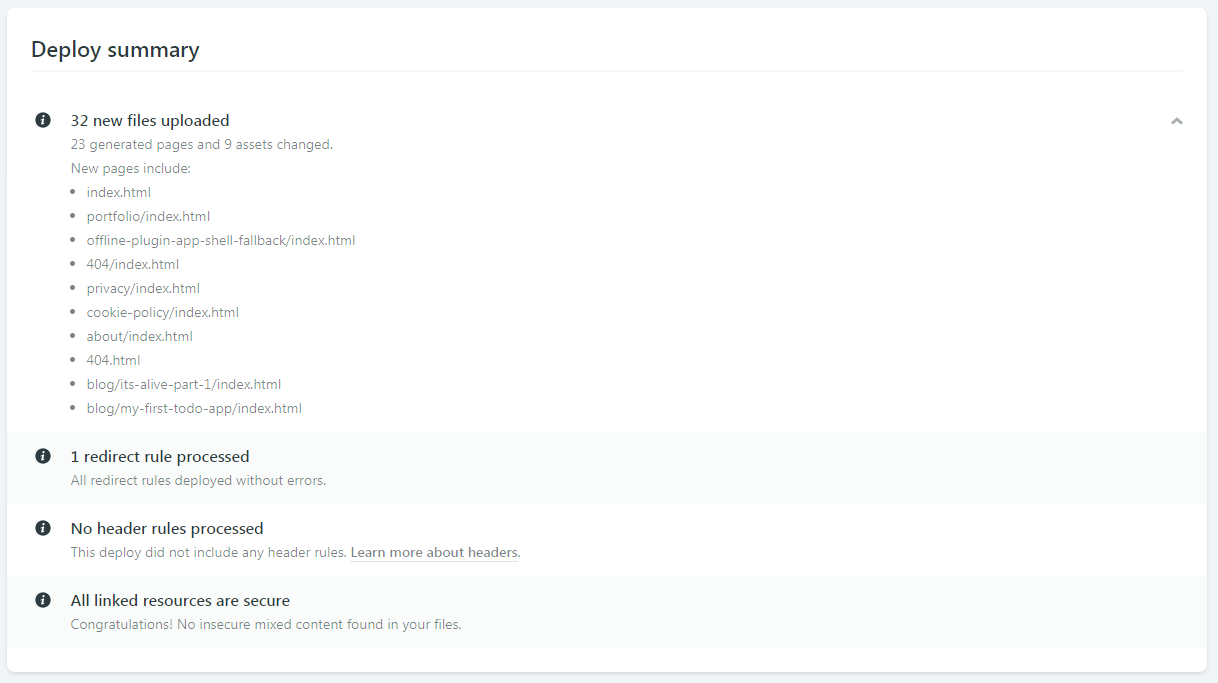
I signed up for an account (no credit card details required) and added a new site to Netlify by telling it about the GitHub repository where it was stored. When you’ve connected your repository, you can watch Netlify doing its thing deploying your site.

After my site was deployed to the randomly generated URL Netlify gives you, I followed their instructions for adding a domain I had registered elsewhere. They make it so easy!
I assume the instructions will be different for different hosts, but basically, Netlify gave me some server addresses which I then had to go back to my domain registrar to enter them in. These addresses are referred to as nameservers, so look out for that word!
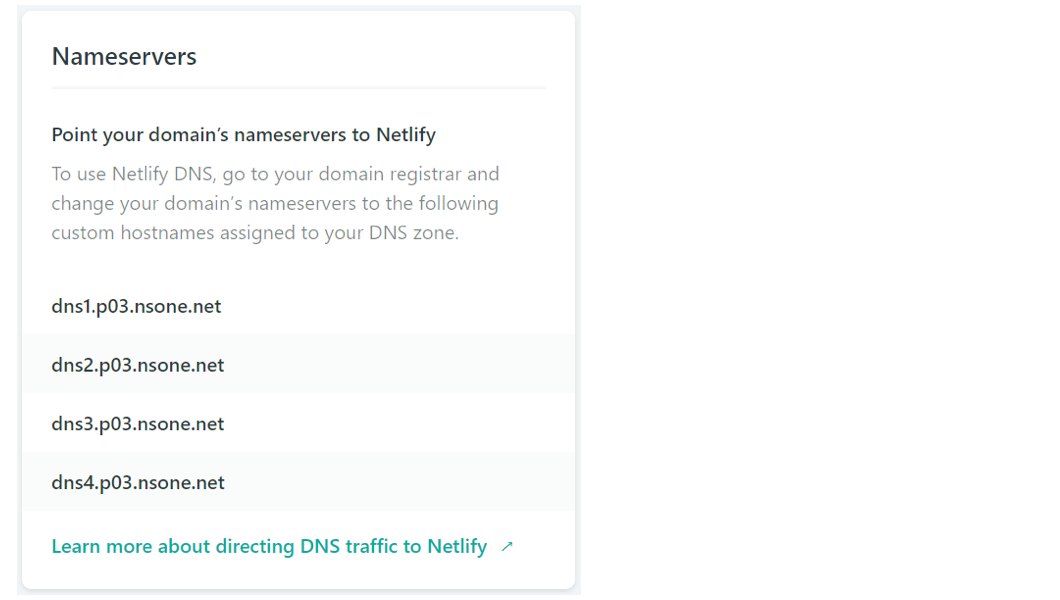
Once I entered my Netlify nameservers into Google Domains, Google knew where to look to send people who type my domain name into their browser’s address bar. All I had to do after that was wait for some internet magics to happen in the background. That took around three hours for me but can take anywhere from 10 minutes to 24 hours from what I hear.
After that was done, I could type my shiny new domain name into the address bar and — just like that — I'm looking at my own site, hosted live on the internet!
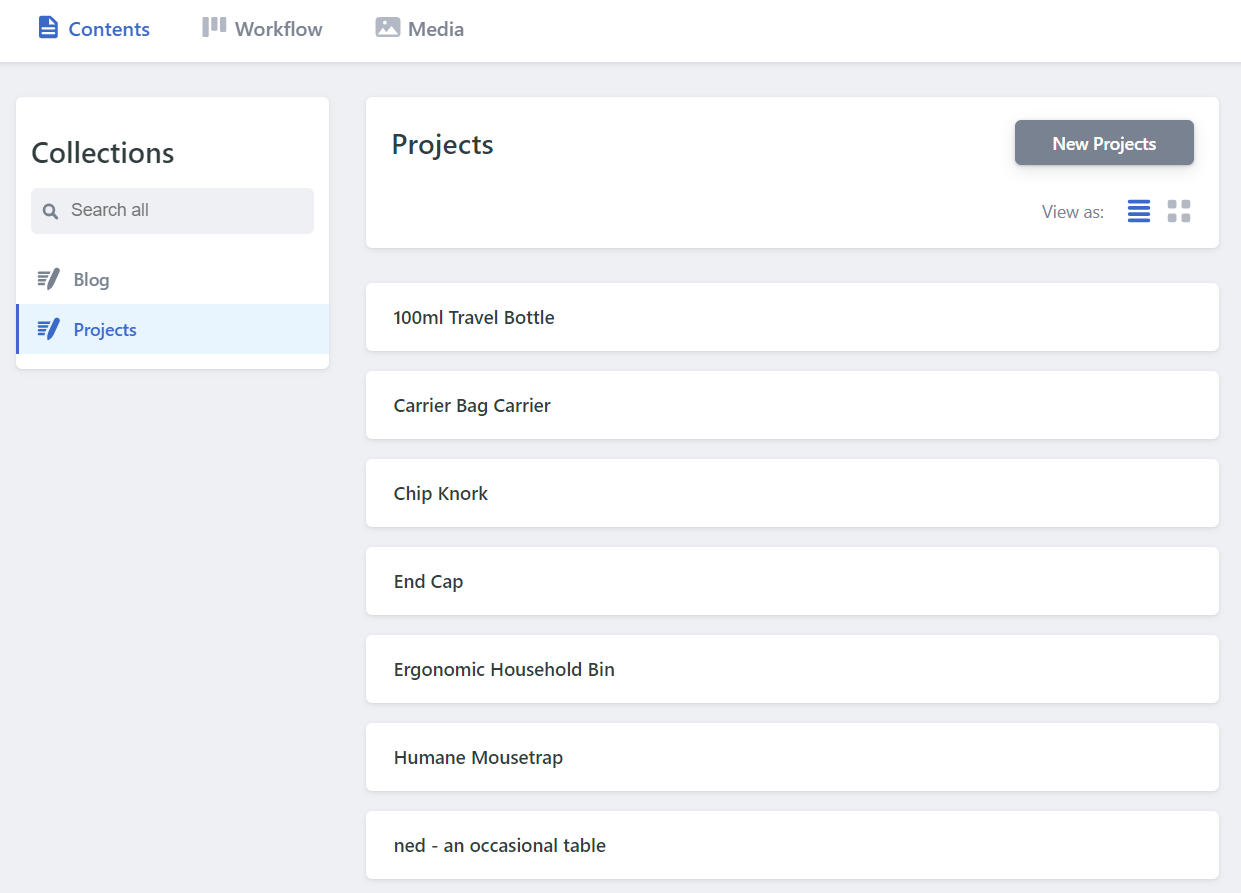
The world of Content Management Systems (CMS) is vast, and confusing, but it can also be completely irrelevant to you if you want it to be. I felt so liberated when I realized you don't have to worry about it. It was one less thing in my list of things to do.
My Gatsby site posts and pages (my content) was just a directory of markdown files and my CMS was my text editor. Chris and Dave talked about the idea of this in a recent episode of ShopTalk Show.

Because I wanted to have a standard structure for different types of posts and pages, I eventually started using NetlifyCMS which is an open-source CMS which can be included in your site real fast. (Chris also did a video recently about NetlifyCMS for his confer-reference site... see what I did there?!) Now I can create blog posts and drafts from anywhere in the world, straight from my website, as long as I have an internet connection!
A Content Delivery Network (CDN), as Chris explained in his article, is basically somewhere on the internet where you store the files you need for your website to run, HTML, CSS, images, etc. When your website needs them, it goes to the CDN and grabs the files for your site to use.
From what I've read, it's good practice to use a CDN, and because of the hosting decision I made, it's not something I have to worry about - it's included by Netlify as standard, for free!
Netlify has it's own CDN where all of the files for your website are stored. When someone goes to your website, Netlify goes to its CDN and grabs the files. It's amazingly quick, and makes your site feel so much smoother to navigate.
There was a point, before I set off on the journey of getting my website live, where I tried to convince myself that it's fine to just have local websites, as my career isn’t in web development. The reason for that was because the path felt like it would be difficult, long and expensive.
In fact, it was none of those things! You could get a website live on the internet for £0.99 (~$1.25 for you Americans) or less if you find a deal on a domain name. The domain name was my only expense because for the path I took for hosting, asset management and content management.
At a super basic level, the path looks like this..
Code > Buy Domain > Find/Buy Hosting > Update Nameservers > Upload Code > Live!If you happen to use the same vendor to buy your domain name and your hosting, you can skip the nameserver step. (Netlify sells domains too!)
It's definitely possible for anyone to get their website live on the internet. There's a process that you need to follow, but if you take your time, it can be relatively straightforward. It's a really wonderful feeling, getting a thing you built in front of people, and it's honestly something that I thought I'd never be able to do. But it's certainly within everyone's reach!
Something I've come to really admire over this process (and thousands of Google searches) is the willingness of everyone in the web community to collaborate and help, accepting me and my questions as I tried to learn what I was doing. It's something that I wish was more common in my own industry.
I'd love to hear other people's experiences getting their first website live. What were your pitfalls and triumphs? Was it as scary as it first seemed?
The post A Beginner’s Journey to Launching a Website appeared first on CSS-Tricks.
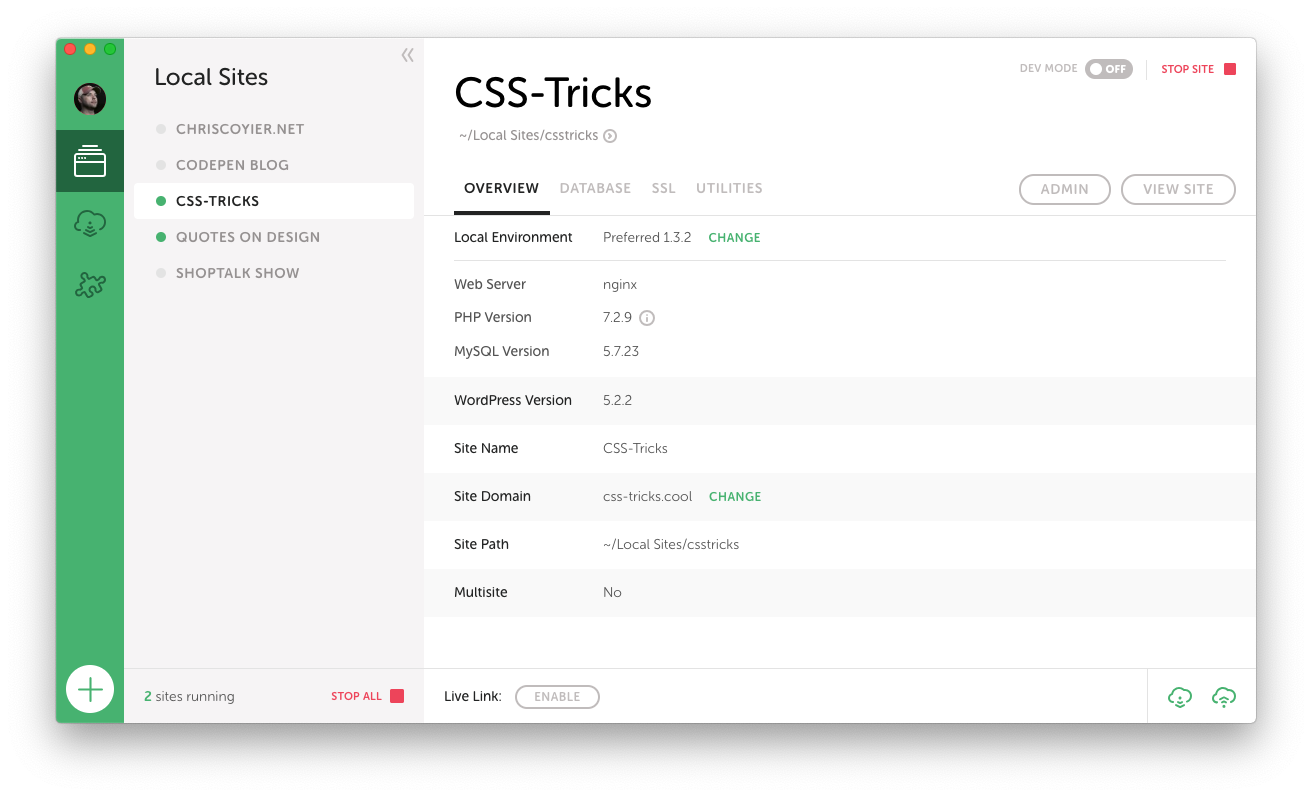
I first heard of Flywheel through their product Local, which is a native app for working on WordPress sites. If you ask around for what people use for that kind of work, you'll get all sorts of answers, but an awful lot of very strong recommendations for Local. I've become one of them! We ultimately did a sponsored post for Local, but that's based on the fact that now 100% of my local WordPress development work is done using it and I'm very happy with it.
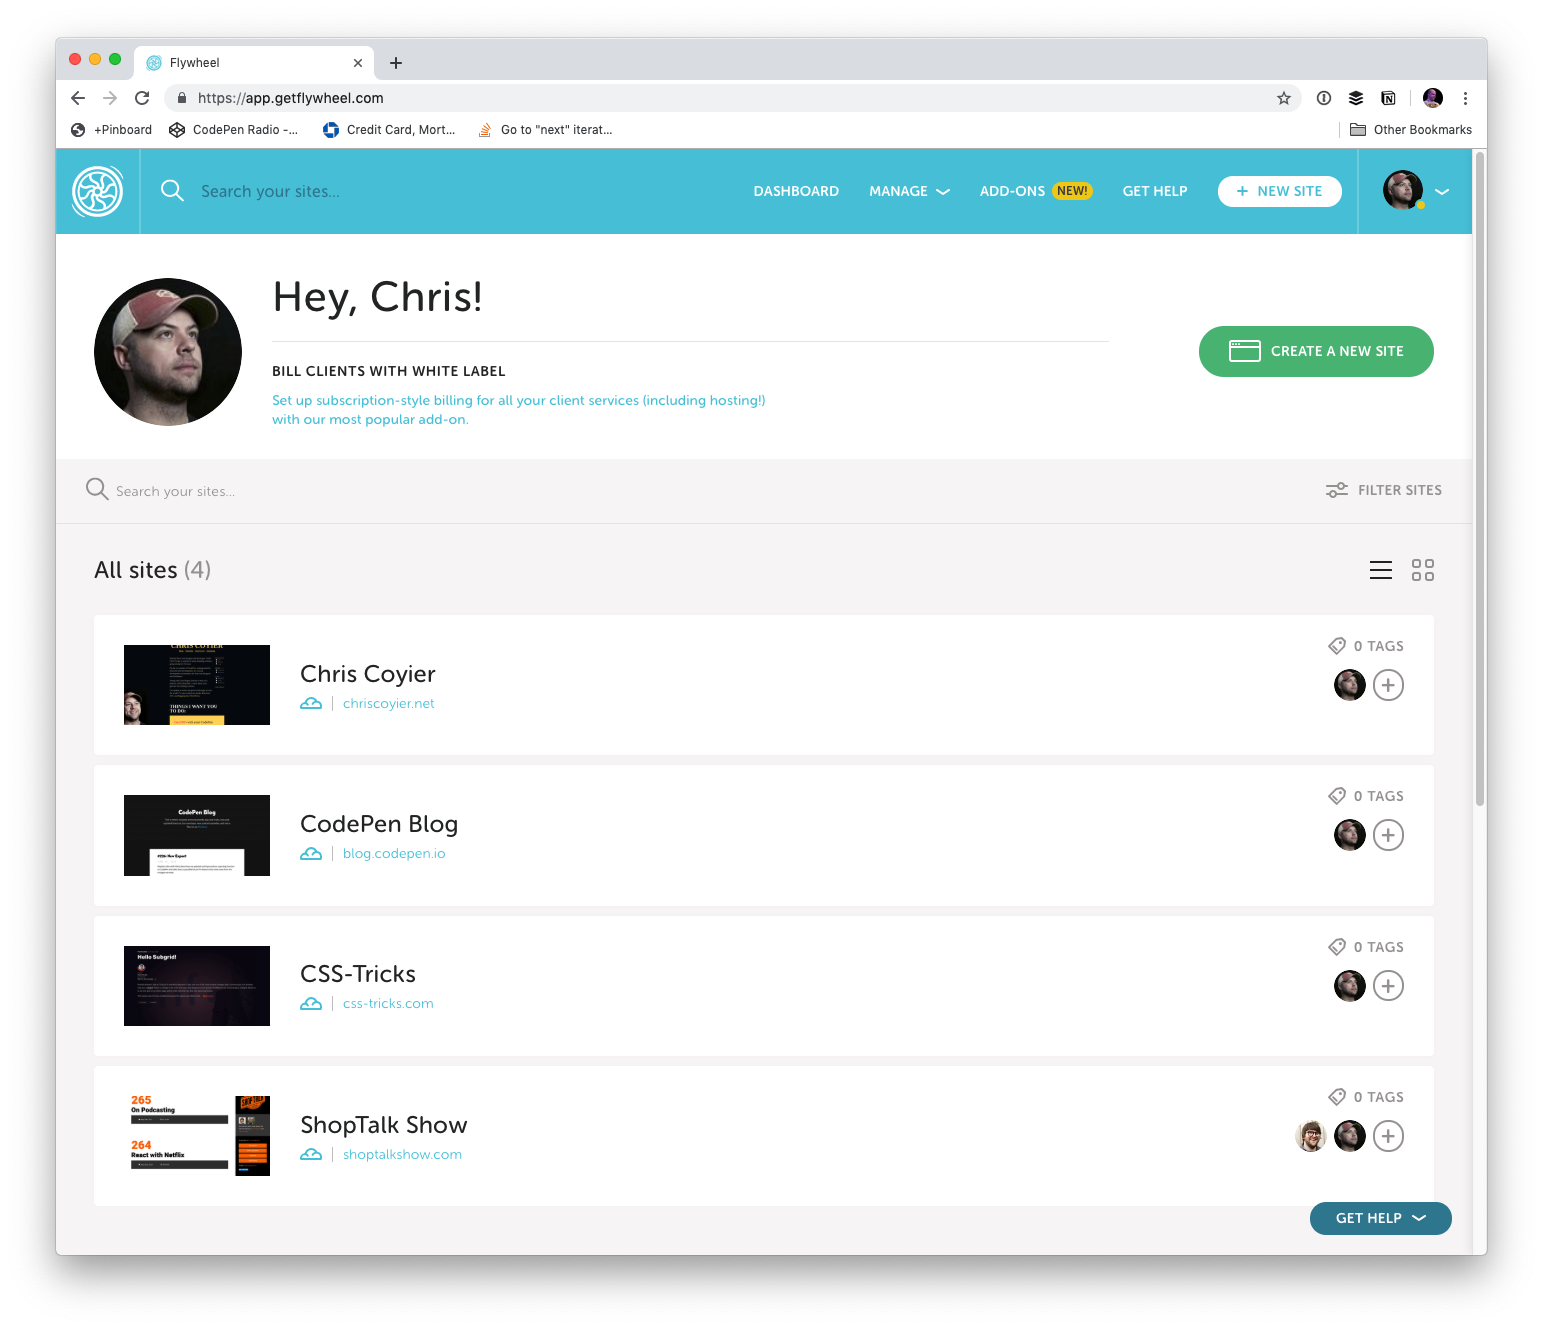
Now I've taken the next step and moved all my production sites to Flywheel hosting!
Full disclosure here, Flywheel is now a sponsor of CSS-Tricks. I've been wanting to work with them for a while. I've been out to visit them in Omaha! (👋 at Jamie, Christi, Karissa, and everybody I've worked with over there.) Part of our deal includes the hosting. But I was a paying customer and user of Flywheel before this on some sites, and my good experiences there are what made me want to get this sponsorship partnership cooking! There has been big recent news that Flywheel was acquired by WP Engine. I'm also a fan of WP Engine, being also a premium WordPress host that has done innovative things with hosting, so I'm optimistic that a real WordPress hosting powerhouse is being formed and I've got my sites in the right place.
It feels like a breath of fresh air to me, as running all the dev dependencies for WordPress has forever been a bit of a pain in the butt. Sometimes you have it going fine, but then something breaks in the most inscrutable possible way and it takes forever to get going again. Whatever, you know what I mean. At this point, I've been running Local for over a year and have had almost no issues with it.
There are all kinds of features worth checking out here. Here's one that is very likely useful to bigger teams. Say you have a Flywheel account with a bunch of production sites on it. Then a new person starts working with you and they have their own computer. You connect Local to Flywheel, and you can pull down the site and have it ready to work on. That's pretty sweet.
Local doesn't lock you into anything either. You can use Local for local development and literally use nothing else. Local can push a site up to Flywheel hosting too, which I've found to be mighty useful particularly for that first deployment of a new site, but you don't have to use that if you don't want. I'll cover more about workflow below.
Other features that I find worthy of note:
I love the simple UI of Local, and I really like how that same design and spirit carries over into the Flywheel hosting dashboard.
There are so many things the dashboard makes easy:
It's a big deal when everything is simple and works. It means you aren't burning hours fighting with tools and you can use them doing work that pushes you forward.
When I set up my new CSS-Tricks workflow, I had Flywheel move the site for me (thanks gang!) (no special treatment either, they'll do that for anybody).
I've got Local already, so my local development process is the same. But I needed to update my deployment workflow for the new hosting. Local can push a site up to Flywheel hosting, but it just zips everything up and sends it all up. Great for first deployment but not perfect for tiny little changes like 95% of the work I do. There is a new Local for Teams feature, which uses what they call MagicSync for deployment, which only deploys changed files. That's very cool, but I like working with a Git-based system, where ultimately merges to master are what trigger deployment of the changed files.
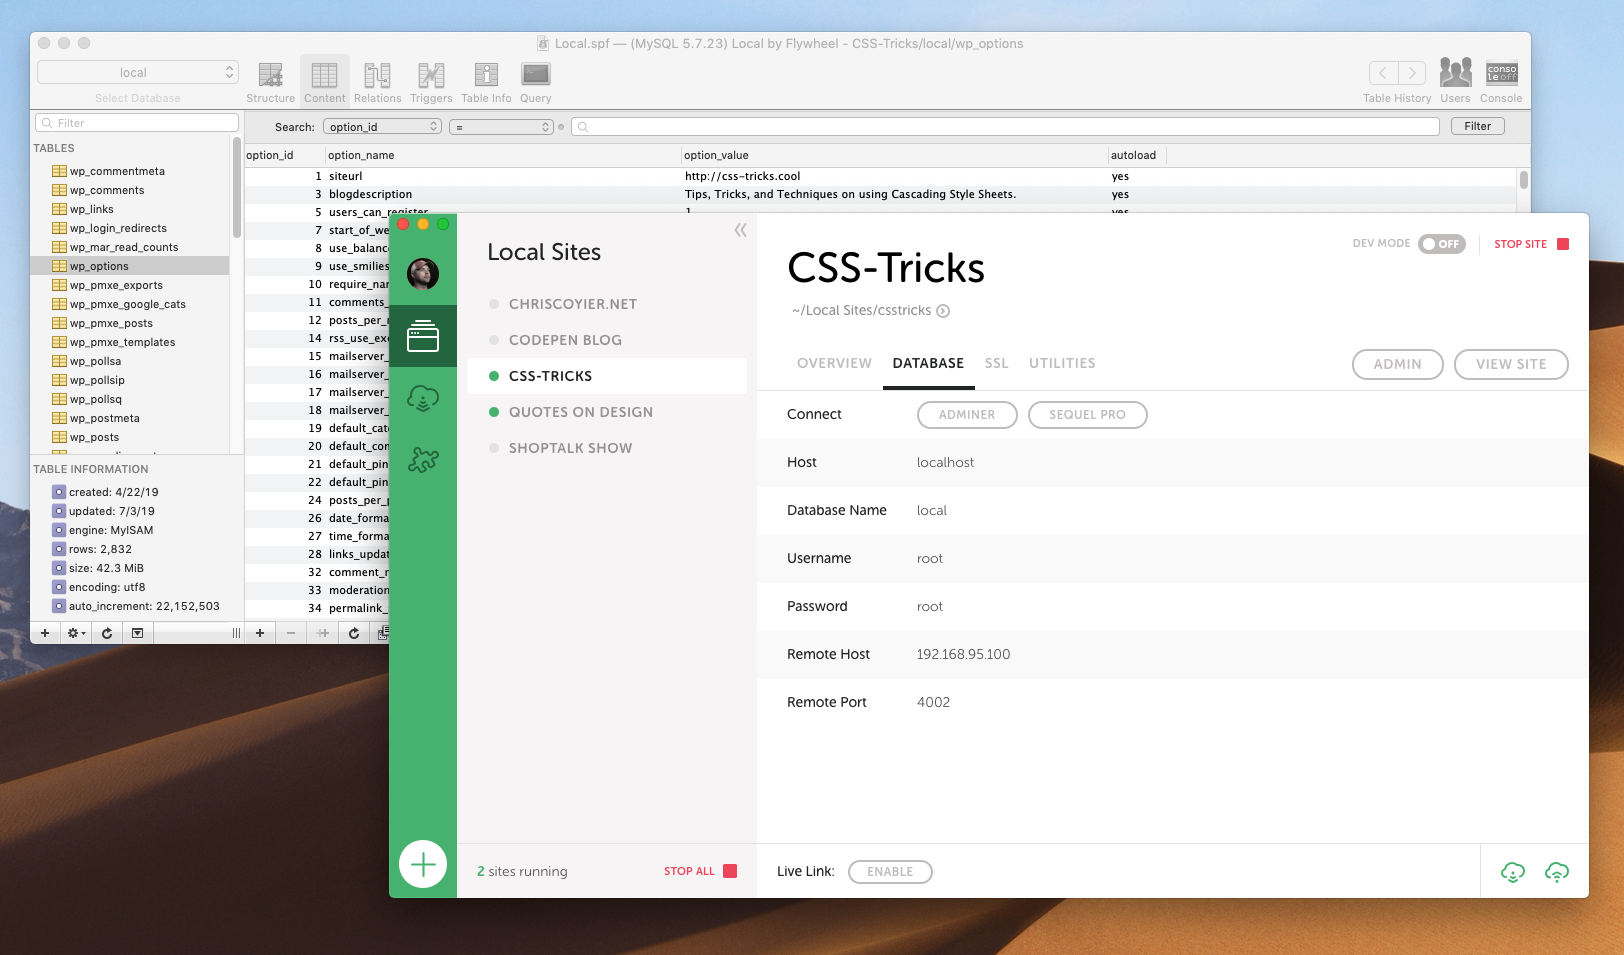
For years I've used Beanstalk for Git-based deployment over SFTP. I still am using Beanstalk for many sites and think it's a great choice, but Beanstalk has the limitation that the Git-repo is basically a private Git repo hosted by Beanstalk itself.
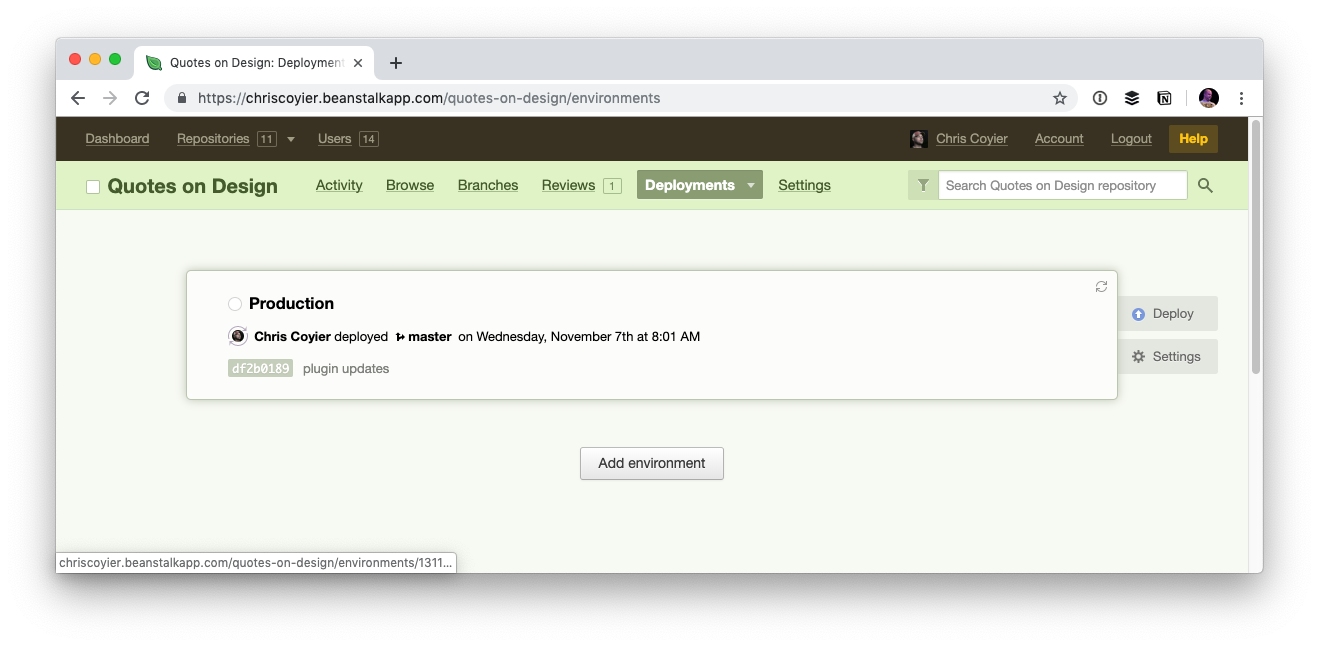
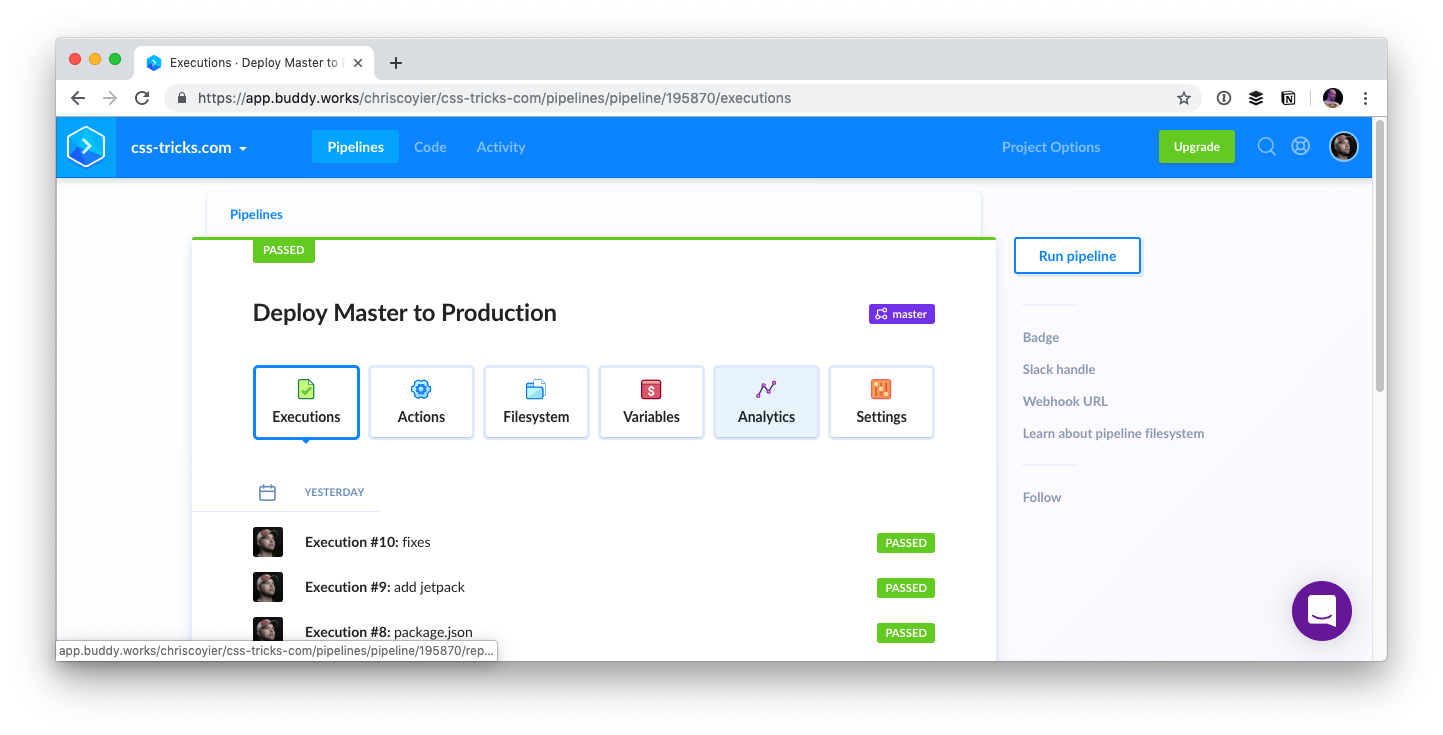
During this change, I needed to switch up what the root of the repo is (more on that in a second) so I wanted to create a new repo. I figured rather than doing that on Beanstalk, I'd make a private GitHub repo and set up deployment from there. There are services like DeployHQ and DeployBot that will work well for that, but I went with Buddy, which has a really really nice UI for managing all this stuff, and is capable of much more than just deployment should I ultimately need that.
Regarding the repo itself, one thing that I've always done with my WordPress sites is just make the repo the whole damn thing starting at the root. I think it's just a legacy/comfort thing. I had some files at the root I wanted to deploy along with everything else and that seemed like the easiest way. In WordPress-land, this isn't usually how it's done. It's more common to have the /wp-content/ folder be the root of the repo, as those are essentially the only files unique to your installation. I can imagine setups where even down to individual themes are repos and deployed alone.
I figured I'd get on board with a more scoped deployment, but also, I didn't have much of a choice. Flywheel literally locks down all WordPress core files, so if your deployment system tries to override them, it will just fail. That actually sounds great to me. There is no reason anyone from the outside should alter those files, might as well totally remove it as an attack vector. Flywheel itself keeps the WordPress version up to date. So I made a new repo with /wp-content/ at the root, and I figured I'd make it on GitHub instead just because that's such an obvious hub of developer activity and keeps my options wide open for deployment choices.

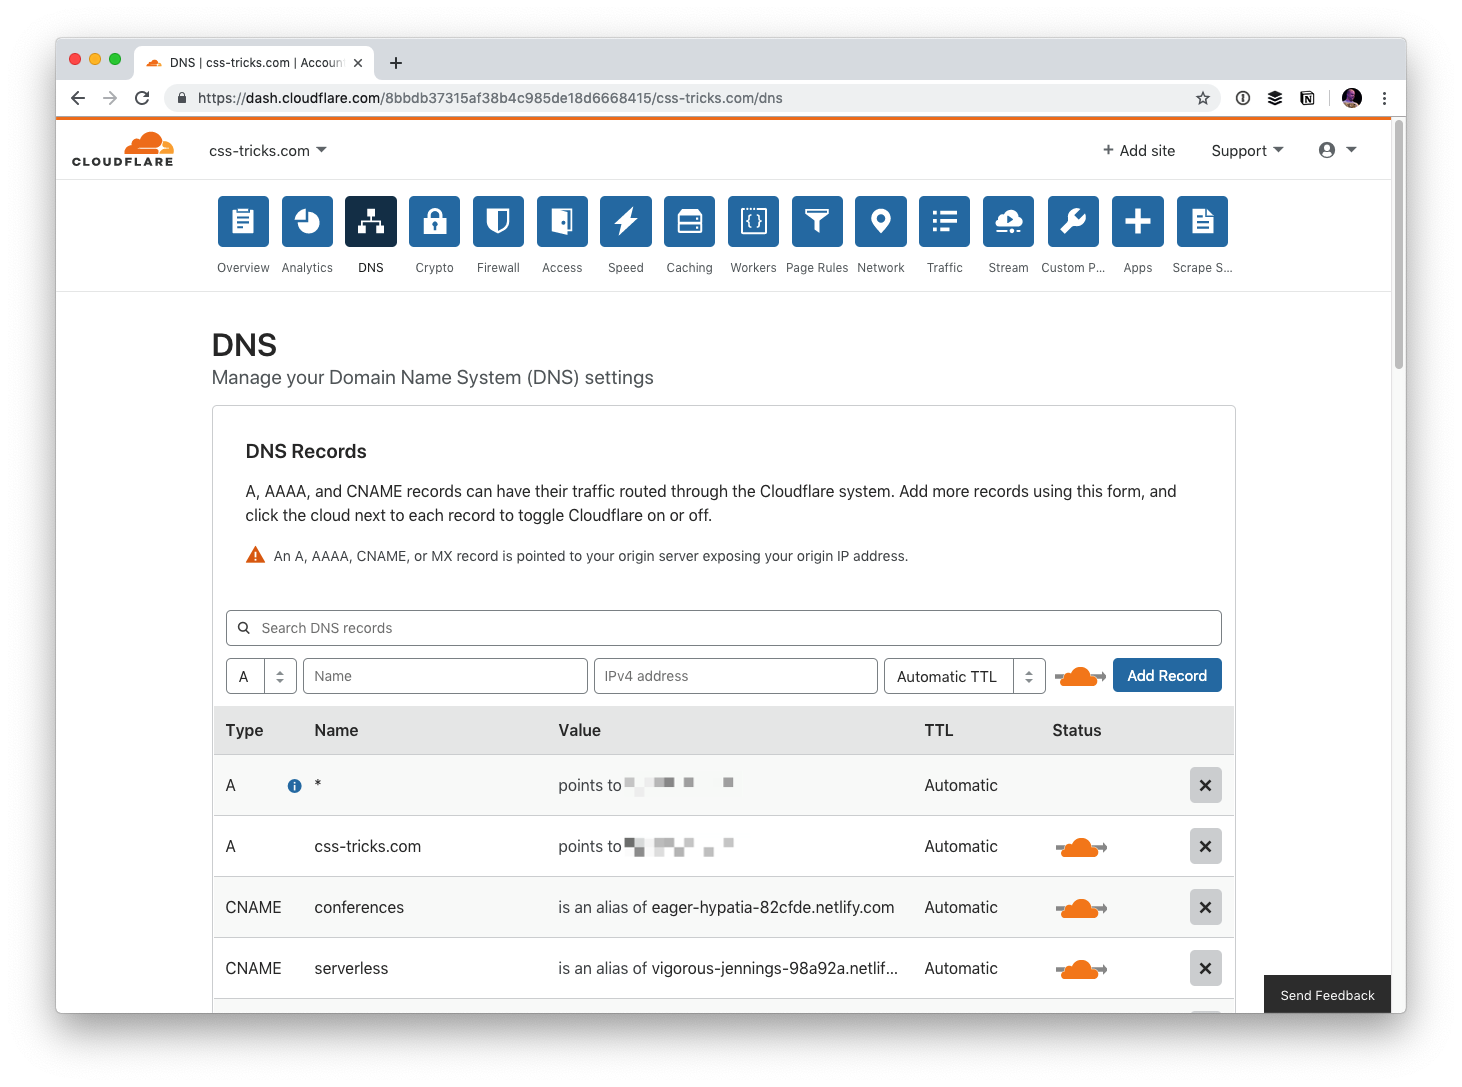
For the same kind of spiritual reasons, during the the move, I moved the DNS over to Cloudflare. This gives me control over DNS from a third-party so it's easy for me to point things where I need them. Kind of a decentralization of concerns. That's not for everyone, but it's great for me on this project. While now I might suffer from Cloudflare outages (rare, but it literally just happened), I benefit from all sorts of additional security and performance that Cloudflare can provide.
So the workflow is Local > GitHub > Buddy > Flywheel.
And the hosting is Cloudflare > Flywheel with image assets on Cloudinary.
And I've got backups from both Flywheel and Jetpack/VaultPress.
The post CSS-Tricks on Flywheel appeared first on CSS-Tricks.
Harry Roberts digs into why hosting assets on someone else’s servers (including CDNs) is not such a great idea if we want our websites to be lightning fast.
Harry writes:
One of the quickest wins—and one of the first things I recommend my clients do—to make websites faster can at first seem counter-intuitive: you should self-host all of your static assets, forgoing others’ CDNs/infrastructure.
I think perhaps the most shocking example Harry shows is this one:
...on a reasonably fast connection, hosting these static assets off-site is 311ms, or 1.65×, slower than hosting them ourselves.
By linking to three different origins in order to serve static assets, we cumulatively lose a needless 805ms to network negotiation. Full test. Okay, so not exactly terrifying, but Trainline, a client of mine, found that by reducing latency by 300ms, customers spent an extra £8m a year. This is a pretty quick way to make eight mill.
It’s clear from Harry’s example (as well as the rest of the examples on WPO stats) every millisecond counts when it comes to performance. And, if we can alleviate even a third of a second of latency by moving our assets around, we should probably go do that.
Direct Link to Article — Permalink
The post Self-Host Your Static Assets appeared first on CSS-Tricks.
HostCamp is a small, semi-informal, invitation-only, event with an unconference style that is bringing leaders together from within the hosting industry to discuss and share ideas on how to advance the WordPress infrastructure across the web.
The organizing team is comprised of, Jonathan Wold, Ecosystem Consultant, Formerly VP of Strategy at XWP, Mile Rosu, Co-founder and CEO of Presslabs, Mihai Grescenko, Head of Design at Desero, Anna Maria Radu, Event producer for DigiTales, and Andreea Oproiu, Communication and PR specialist for DigiTales.
Speakers will present on a variety of topics including, malware, ethics in WordPress hosting, PHP versions, portability, and more. Betahaus, a network and co-working facility in Berlin, Germany, is hosting the event.

Rosu describes the unconference as, “A launchpad for innovations in the hosting industry where opportunities in WordPress infrastructure are encouraged and promoted.”
If you’re interested in attending, there is an application form near the bottom of the HostCamp site that is available until June 1st. Tickets are on sale now for €200 or $223.47. Refunds are available if you contact the organizing team 30 days prior to the event.
It should be noted that WordCamp EU is taking place in Berlin, Germany, as well and begins a day after HostCamp.
If you are in the market for a web hosting company then we have a treat for you. They are called CometNine. Never heard of them? You’re not alone as they are pretty small but don’t let that scare you off as we have found them to be a breath of fresh air. I will Read More →
The post CometNine Review – A lesser known web host with great features appeared first on WPArena.