Are you wondering how to claim a Google knowledge panel?
When you are looking at a search engine results page (SERP), Google often displays informational panels about people, organizations, and products with the most important facts in one convenient place. This is known as a Google knowledge panel.
In this article, we will show you what a Google knowledge panel is and how to claim it for your business with WordPress.

What Is Google Knowledge Panel?
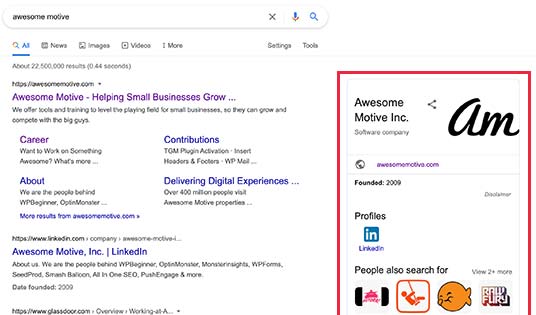
Sometimes, when you are searching for information on Google, you will see a panel containing relevant information on the right side of the screen. This is called a Google knowledge panel.
It is designed to quickly summarize information about a topic to help users understand more about what they are searching for.
These panels are created on the fly using information from Google Knowledge Graph. This is a giant collection of information that Google scrapes from the web, similar to an encyclopedia.
Knowledge panels about organizations show the company’s name and logo and a quick summary of the company taken from Wikipedia.

You can also find a link to the company’s website, contact details, some historical and financial information, and a list of their popular products.
Knowledge panels about people are similar. They have a link to the person’s website, a quick biographical summary, as well as a list of important facts.

If a knowledge graph hasn’t been claimed yet, then you will see a ‘Claim this knowledge panel’ button at the bottom. We will show you how to claim your knowledge panel later in this article.
If Google Knowledge Graph contains a lot of information about a person, then there may be an additional knowledge panel at the top of the page.

There are also knowledge panels for products. These can’t be claimed by one organization because they feature a variety of online stores that are selling the product.
They show an overall rating for the product, buttons to pop up Details, Reviews, and Stores, and a shopping section that offers a price range and links to different stores.

Google knowledge panels are helpful to the user because they provide relevant information that is presented in an easy-to-use way. They are also useful for website owners.
How Do Google Knowledge Panels Help Website Owners?
Google knowledge panels are very visible in the search results and can display a lot of useful information about your business. They make it much more likely that users will click on a link and visit your website. This is great for your website’s SEO.
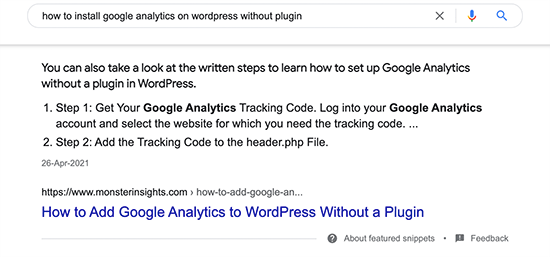
Like Google answer boxes and featured snippets, knowledge panels make your website stand out on search engine results pages (SERPs) and are likely to be the first thing users look at.
You can claim your business’s knowledge panel to verify that it belongs to you. This gives you some benefits, such as being able to choose a featured image and suggest edits to Google.
If you have an online store, then it’s also worth trying to be featured in product knowledge panels. This allows users to compare your prices and click on a link to your store.
Google knowledge panels are also great for brand visibility. Since these panels contain a business’s logo and other branding elements, they can introduce your brand to more people.
With that said, let’s take a look at how to claim a Google knowledge panel with WordPress.
How to Claim a Person or Organization Knowledge Panel
Google allows you to claim a knowledge panel about a person or organization. However, you can’t claim a product knowledge panel.
To be featured in a product knowledge panel, you will need to add your products to Google Knowledge Graph using product schema, which we will show you how to do in the next section.
For now, let’s take a look at how to claim a person or organization knowledge panel.
Claiming a Person or Organization Knowledge Panel
First, you need to sign in to a Google account to claim your knowledge panel. You should use the account you use for your business needs, such as your Google Business account or business email address.
Now, you can search for your business name (or your own name) and look for the knowledge panel on the right. Make sure that the panel isn’t about a different business or person with a similar name.

You should notice a button near the bottom of the panel that says, ‘Claim this knowledge panel’. Go ahead and click the button now.
Note: If you don’t see a knowledge panel for your business, then it may not have made it to Google Knowledge Graph yet. You should see the next section on how to add your website content to Google Knowledge Graph.
You will be taken to a page that describes how you can enhance your presence on Google. You need to click the ‘Get Verified’ button to verify that you are the owner of the business.

This will take you to the ‘Get verified on Google’ form. You will be asked to confirm the name of the business or person you are trying to claim.
After that, you will be asked a series of questions that demonstrate you have the right to claim the knowledge panel for that business or person.

Google may ask you to upload a photo of yourself holding a valid ID. It may also ask you to provide screenshots of your online profiles, such as LinkedIn, Facebook, Twitter, and YouTube.
Once you have finished, you will need to check the box next to the agreement at the bottom of the page and then click the ‘Submit’ button.

On the final page, you will be thanked for the submission and told that Google will get back to you soon. You can expect to receive a confirmation email in several hours or the next day.
Suggesting Edits to a Person or Organization Knowledge Panel
Once you have claimed your Google knowledge panel, you can choose a featured image and hide personal information that you don’t want to be displayed, such as your date of birth or marital status.
You can’t change the content of the knowledge panel, but you can suggest edits.
Simply make sure you are logged into the Google account that claimed the knowledge panel, and then you can click the ‘Suggest edits’ link at the top or bottom of the panel.
However, before you suggest an edit, remember that Google found the information somewhere else on the web. It’s much better to find the source of the information and ask that source to change it. If you are unsuccessful, then you can suggest an edit to your knowledge panel.
How to Add Your Website Content to Google Knowledge Graph
The information contained in knowledge panels is automatically created using information from Google Knowledge Graph. While you can’t pick what content is displayed, you can make sure that Google can find and understand information from your WordPress website.
The best way to do that is to use schema markup to structure your website. This is a special type of HTML code that gives search engines more information about your website and its pages.
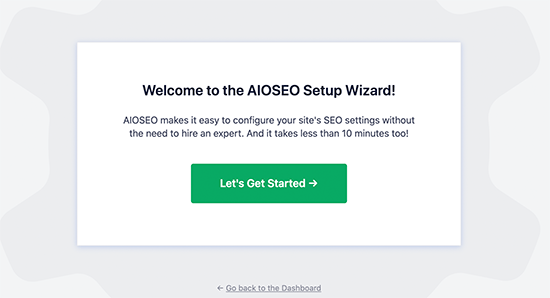
You can easily add schema to your site and individual pages using All in One SEO (AIOSEO), which is the best WordPress SEO plugin on the market. It automatically adds schema support to your site and offers many ways to optimize your content for higher search engine rankings.
Note: For this tutorial, we will use the free version of AIOSEO since it lets us add schema markup. However, there is also AIOSEO Pro that offers many extra features to help your website rank higher.
You can learn how to install and configure the plugin in our complete guide on how to install and set up All in One SEO for WordPress.
Adding Knowledge Graph Schema to Your Website
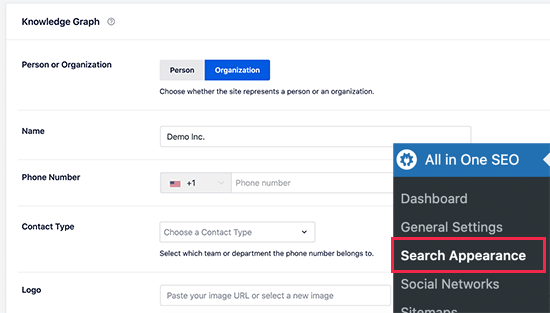
You need to go to the All in One SEO » Search Appearance page and scroll down to the ‘Knowledge Graph’ section. This is where you can let search engines know some basic information about yourself or your business.
First, you need to add the name of your website. This can simply be the name of your business or something more specific, such as ‘My Awesome Business Blog’. Optionally, you can type an alternate name for your website, like an acronym.

In the next section, you need to click on the button to choose whether the website is for a person or organization. This will determine the type of knowledge graph your website information will be displayed in.
Next, you can type your organization name and phone number. You can also select the phone number’s team or department from a dropdown menu.

Finally, you can add the logo you would like displayed on the knowledge panel. Make sure the image is no larger than 112 x 112 pixels in size.
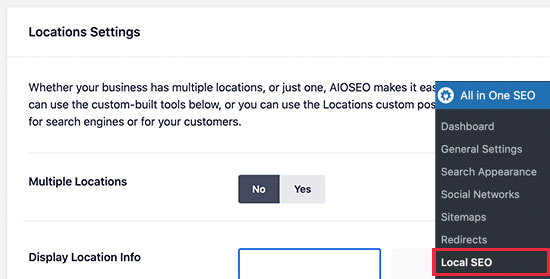
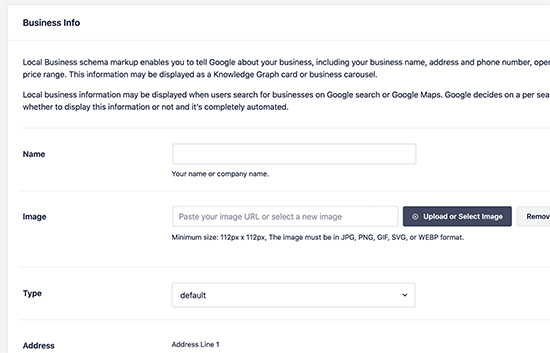
There is also a button you can click to add local SEO settings. For more details, see the local business SEO setup section of our guide on how to set up All in One SEO.

Once you have finished, make sure you click the ‘Save Changes’ button at the bottom of the screen to store your settings.
Adding Product Schema to Your Online Store
You can’t claim your products to make them appear in product knowledge panels. Instead, you need to add the right schema markup so that Google can consider your online store when displaying places to purchase different products.
Luckily, All in One SEO supports Merchant Listing schema markup, which will give Google the information it needs to include you.
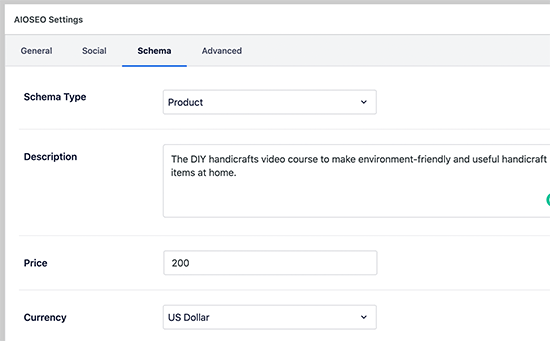
When you edit any product in WooCommerce, you will notice that All in One SEO has automatically added a new ‘AIOSEO Settings’ area below the product editor.

You can use this section to customize the way your product title and description will appear on search results pages. You can see a preview next to ‘Snippet Preview’.
Now you should switch to the ‘Schema’ tab, and you will notice that AIOSEO has already added Product schema for you.

You can add more information about your product by clicking the ‘Edit Schema’ pencil icon.
If you like, you can autogenerate fields based on the product data from WooCommerce. Now, you should fill in as much information as possible for each product, including the brand, material, identifiers, and more.

This product information will be added to Google Knowledge Graph so that Google has the option of adding it to product knowledge panels.
For detailed instructions, you can see the optimizing WooCommerce SEO section of our guide on how to set up All in One SEO.
Adding an About Page in WordPress
Google may also look at your About page when displaying information about your business in a Google knowledge panel.
You will want to make sure your website has an About page and add it to your navigation menu.
The page can let users know about the purpose, mission, and values of your business, and it’s also a good place to introduce your team.

You can learn more in our guide on important pages that every WordPress blog should have.
Bonus Tips for Getting Your Business Information Into Google Knowledge Graph
Of course, your website is only one source of information about your business that Google can use in its knowledge panels.
Here are a few more ways you can get the word out about your business and increase the chances of that information being added to Google Knowledge Graph.
Optimizing Your Social Media Presence
Google scrapes social media platforms for information it can use in knowledge panels.
That means it is essential to set up social media profiles for your business on major platforms like Facebook, Twitter, Instagram, Pinterest, and more. You might also consider adding your business to Wikidata.org.
After creating your social profiles, you need to navigate to All in One SEO » Social Networks. Here, you can paste the URLs to the profiles that you created.

This will let search engines know about the social profiles that are associated with your website, and they may be included in your Google knowledge panel.
For step-by-step directions, you can see the section on setting up social media optimization in our social media cheat sheet for WordPress.
Become Featured on Wikipedia and Wikidata
Google also scrapes authoritative websites like Wikipedia to use the information in knowledge panels. That makes being featured on Wikipedia very valuable.
Wikipedia’s rules prevent you from creating a Wikipedia entry about yourself or your business. That is to make sure that all entries are unbiased.
However, you can add your business information to Wikidata.org. Google Knowledge Graph draws information from this source, and it is also a source of useful information commonly used by Wikipedia authors.
Make sure you link to any third-party sources that can verify the information you add. This adds credibility to the facts you claim about your business.
Get Your Business Featured on Other People’s Websites
You might also be able to place information about your business on other websites. One of the best ways to do that is to look for blogs that accept guest posts.
Writing guest posts on other people’s websites can help you get valuable backlinks to your website, boosting your SEO. It can also give you the opportunity to talk about the history of your business or the products and services you offer.
You can also use websites like Help a Reporter Out (HARO). This is a website where reporters ask for information on a topic, and they may choose to publish your answer along with a link to your website.
You could also interview other people in your industry and post them on your website. Those people may then link to the interview on your site. Other ideas include being a guest on a podcast, writing an expert roundup that covers your industry, and speaking at events.
FAQs About Google Knowledge Panels
Here are some of the questions our readers ask us most often about Google knowledge panels.
What is a knowledge panel in Google?
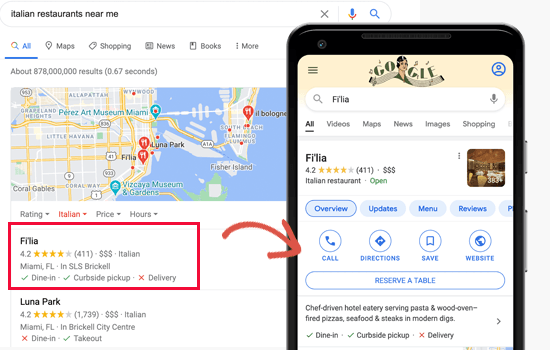
A Google knowledge panel is a useful summary of information displayed on the right side of a Google search results page. This panel may be about a person, organization, product, or location.
The information is automatically pulled from Google Knowledge Graph. People and organizations can claim their knowledge panels.
How do I get a Google knowledge panel?
A Google knowledge panel is displayed automatically when someone searches for your business, as long as the Google Knowledge Graph contains information about your business.
If a knowledge panel isn’t displayed after searching for your business, then the best thing to do is add schema markup to your site to make it easier for Google to understand.
If a Google knowledge panel is displayed about yourself or your business, then you can follow our tutorial to claim it.
What does claiming a Google knowledge panel do?
There are a few benefits to claiming your Google knowledge panel. It will show Google that the business is yours, allow you to choose a featured image, and allow you to suggest changes to the content.
How much does a Google knowledge panel cost?
Google knowledge panels don’t cost anything. Google creates them automatically when it knows something about your business. Even claiming your Google knowledge panel is free.
Can I create my own Google knowledge panel?
No, Google knowledge panels are generated automatically, and you cannot make your own. However, the knowledge panels contain information found on the internet.
That means you can influence the contents of your knowledge panel by adding useful information to your website using schema markup and by claiming your knowledge panel and suggesting edits.
You can also influence its content by adding information about your business to social media platforms and third-party websites.
Why don’t I have a Google Knowledge panel?
If a knowledge panel isn’t displayed when performing a Google search on your business, then most likely, there isn’t enough information about your business in the Google Knowledge Graph.
You can help Google learn about your business by using schema markup on your website, being active on social media, and getting your business featured on other people’s websites.
We hope this tutorial helped you learn how to claim your Google knowledge panel with WordPress. You may also want to see our guide on how to track website visitors or our expert picks for the best social media plugins for WordPress to grow your audience.
If you liked this article, then please subscribe to our YouTube Channel for WordPress video tutorials. You can also find us on Twitter and Facebook.
The post What Is Google Knowledge Panel + How to Claim It With WordPress first appeared on WPBeginner.


