Are you seeing the ERR_CONNECTION_REFUSED error when trying to access a website or when viewing a website resource using your browser’s inspect tool?
This error message appears when your browser is unable to connect to the website you’ve requested. You might also see it in your browser’s inspect tool when you are exploring why a certain resource on the website won’t load.
In this article, we’ll show you how to fix the ERR_CONNECTION_REFUSED error in Chrome.

What Is the ‘ERR_CONNECTION_REFUSED’ Error in Chrome?
The ERR_CONNECTION_REFUSED message is displayed in Google Chrome when it is trying to open a web page or website resource but is unable to do so. This error code is usually included inside an error message such as:
- ‘This site can’t be reached’
- ‘Failed to load resource’
There are lots of common WordPress errors, but this error may stop you from visiting your own website and logging in to the WordPress admin area. You’ll typically want to solve this problem as quickly as possible.
Often when you see this error message, your WordPress website is still working, but something is stopping the browser from accessing it. In many cases, you will only need to fix a problem with your own browser or internet connection.
With that being said, let’s take a look at how to fix the ERR_CONNECTION_REFUSED error in Chrome. First, we’ll look at how to fix the error when you can’t access an entire website, then we’ll show the solution for when you can’t access a specific file or resource on a website.
How to Fix the ‘This Site Can’t Be Reached’ Error
Usually, this message is displayed when you can’t access an entire website.
You will see the Chrome error message ‘This site can’t be reached’ along with the ERR_CONNECTION_REFUSED error code. The message may even suggest a few things to try to fix the error, such as checking the connection, proxy, firewall, and DNS configuration.

Other browsers will display similar messages, such as:
- ‘Unable to connect’
- ‘Hmmm…can’t reach this page’
There are many things that can interfere with your connection to the website, and you will need to follow some troubleshooting steps to identify and fix the problem.
We’ll briefly cover the steps you should take below. For detailed instructions, see our guide on how to easily fix the ‘This site can’t be reached’ error in WordPress.
Check Your Internet Connection
The simplest fix is to check that you’re connected to the internet and restart your modem and router. Resetting your internet connection may be all it takes to reconnect to your website.
If not, you should check to see whether your website is working. Simply visit the Website Uptime Status Checker website, then enter the URL of your own site.

If your site is down, then you should contact your WordPress hosting provider to let them know your website is down.
Clear Your Browser Cache
Your web browser stores files and data from the websites you visit, so it doesn’t have to download them again. However, this can cause problems if the cached files become outdated or corrupt.
You can easily clear the browser cache in Google Chrome by clicking on the three-dotted icon in the upper-right corner and then selecting ‘More Tools,’ followed by ‘Clear Browsing Data…’

In the popup that appears, check the box next to ‘Cached images and files’ and then click the ‘Clear data’ button.
Now try revisiting the website to check whether you can access it.
Troubleshoot the Software on Your Computer
Some of the security and networking software you run on your computer may be interfering with your connection to the website. This can include your firewall, antivirus software, VPN, and proxy server.
We offer detailed instructions on how to troubleshoot each of these in our guide on how to fix the ‘This site can’t be reached’ error.
Troubleshoot Your DNS Settings
Similar to the browser cache, your computer stores the IP addresses of all the websites you visit. This means the browser doesn’t have to look up the same IP address multiple times.
By flushing your DNS cache, you’ll get the very latest information about a website, including its new domain name or address.
To help you out, we’ve created a complete guide on how to clear your DNS cache for Mac, Windows, and Google Chrome.
If you still can’t access the website after doing this, then you can try changing your DNS server as well. You can follow the detailed instructions in the change the DNS server step of our guide on how to fix the ‘This site can’t be reached’ error.

Reset the TCP/IP Settings
Finally, if there’s a problem with how your internet connection is configured, then renewing your TCP and IP protocol will return the connection to its default settings, which may solve the problem.
You can learn how to do this step-by-step in the reset the TCP/IP settings section of our guide on how to fix the ‘This site can’t be reached’ error.

How To Fix the ‘Failed To Load Resource’ Error
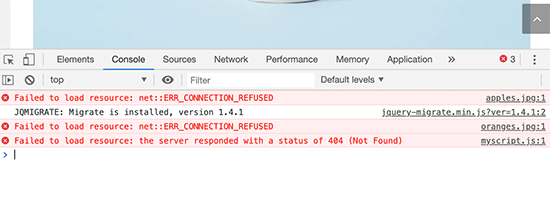
You might notice that, while your website loads, a certain resource or file doesn’t. This file could be an image or other media file, JavaScript, or a CSS stylesheet. A missing resource can cause your website to misbehave or not function properly.
When that happens, the browser will add a notice in the error console for debugging purposes.
In most cases, you would see this error in your browser’s error console when using the Inspect tool. You might see the error message Failed to load resource: net::ERR_CONNECTION_REFUSED.

This error message happens when your website’s code mentions the file, but your browser is unable to download it. This can happen when there is a problem with the file itself, or the URL that points to it.
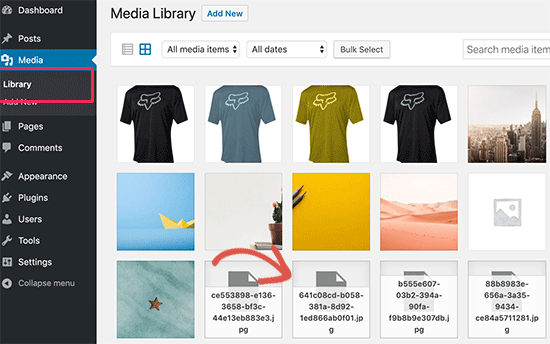
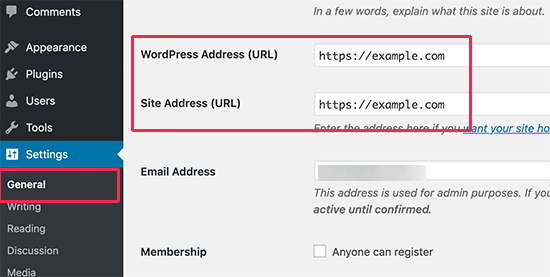
To fix the problem, you will need to either replace the resource in question or fix the URL. We offer detailed instructions for both of these in our guide on how to fix the ‘Failed to load resource’ error in WordPress.
We hope this tutorial helped you learn how to fix the ERR_CONNECTION_REFUSED error in Chrome. You may also want to see our ultimate WordPress security guide, or check out our list of easy ways to increase your blog traffic.
If you liked this article, then please subscribe to our YouTube Channel for WordPress video tutorials. You can also find us on Twitter and Facebook.
The post How to Fix the ERR_CONNECTION_REFUSED Error in Chrome first appeared on WPBeginner.


