Are you having trouble logging into your WordPress admin area?
This can be caused by a lot of different reasons, which makes it tricky for beginners to troubleshoot.
In this article, we will show you what to do when you are locked out of WordPress admin (wp-admin) so you can regain access to your site.

Why Are You Locked Out of Your Own WordPress Site?
We often hear from users who are locked out of the WordPress admin area. This is frustrating and can bring your productivity to a standstill. You can’t write posts, respond to comments, or do any work on your WordPress website.
If you’re having trouble logging in to someone else’s site, then you should contact the site owner or admin to let them know. They can explain why you don’t have access, or work with you to solve the problem.
If you are the site owner, then you can follow our troubleshooting steps below.
There are few reasons why you could be locked out of WordPress admin, so let’s take a look at each of them one by one. Hopefully, through this process of elimination, you will be able to figure out the solution to your problem.
You can also refer to our WordPress troubleshooting guide to find out what’s causing the issue and how to fix it. You might also find a solution in our list of the 50 most common WordPress errors and how to fix them.
With that being said, let’s have a look at some steps you can take when you are locked out of WordPress admin. You can use the links below to quickly navigate to the error message you see.
- Error Establishing Database Connection
- 500 Internal Server Error
- 404 ‘Not Found’ Error
- 403 Forbidden Error
- 401 Unauthorized Error
- Limited Logins
- White Screen of Death
- Incorrect Password Issue
- Problems with Plugins
- Lost Admin Privileges
- Hacked WordPress Site
- Login Page Refreshing and Redirecting
- ‘This Has Been Disabled’ Error
- ‘Briefly Unavailable for Scheduled Maintenance’ Error
- PHP Syntax Errors
Error Establishing Database Connection

Are you seeing the ‘Error establishing database connection’ warning on every page of your site? This message is shown for various reasons, such as a corrupt database or issues with your web hosting server.
If you’re seeing this error when trying to log in, then please refer to our guide on how to fix the error establishing a database connection in WordPress.
500 Internal Server Error

Another WordPress error that a beginner may come across is “Internal Server Error”, or sometimes “500 Internal Server Error”. This error is displayed when there is something wrong but the server is unable to identify where the problem is.
If you see this message when trying to log in to WordPress, then follow the steps in our guide on how to fix the 500 internal server error in WordPress.
404 ‘Not Found’ Error
Sometimes users make a mistake when changing the WordPress address and site address in their WordPress settings. The next time they try to log in to their admin area, they get the error ‘Error 404 – Not Found’.

If this is happening to you, then check our guide on how to change your WordPress site URLs. You won’t be able to use Method 1 because you can’t log in, but the other methods should get you out of trouble.
Note: If you can log in to your site but see the 404 error when viewing one of your posts, then you have a different problem. You can learn how to fix the issue in our guide on how to fix WordPress posts returning 404 error.
403 Forbidden Error

Some users report seeing the “HTTP Error 403 – Forbidden” error when trying to log in to wp-admin. This error can be caused by incorrect file permissions, poorly coded security plugins, or your server configuration.
If you’re seeing this error, then our guide on how to fix the 403 Forbidden Error in WordPress will help you track down and fix the problem.
401 Unauthorized Error

Another message you can see when you’re locked out of your WordPress site is the 401 error. This error is sometimes accompanied by a message ‘Access is denied due to invalid credentials’ or ‘Authorization required’.
You can see this message if you’ve password-protected your WordPress admin folder. It can also be caused by a WordPress security plugin or security measures taken by your hosting company.
Please refer to our guide on how to fix the 401 Error in WordPress to learn six solutions that will help you regain access to your website.
Limited Logins

By default, WordPress allows users to enter passwords as many times as they want. Hackers may try to exploit this by using scripts that enter different combinations until your website cracks.
To prevent this, we recommend that you limit the number of failed login attempts per user. However, this might mean that you find yourself locked out of your own website when you enter the wrong password too many times.
If you’re in that situation, then you should follow the steps in our guide on how to unblock Limit Login Attempts in WordPress.
White Screen of Death

Are you seeing a white screen on your WordPress admin? This issue is often referred to as the WordPress white screen of death.
This happens when you exhaust the memory limit. It could be caused by a poorly coded plugin or theme, or by unreliable web hosting.
If you are seeing this error, then please refer to our guide on how to fix the WordPress white screen of death.
Incorrect Password Issue

There’s nothing more frustrating than being told you’ve used the wrong password when you’re sure you haven’t, and you even checked that your caps lock isn’t on.
This can happen if you were a victim of a hack, or you might just be making an honest mistake.
Worse still, when you try to change your password, you never receive the email because it goes to an address you no longer have access to.
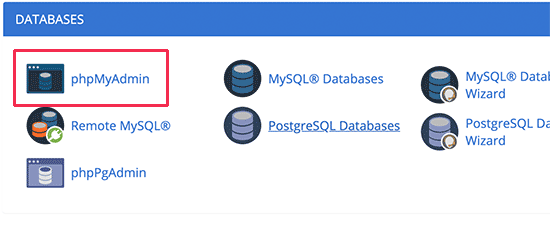
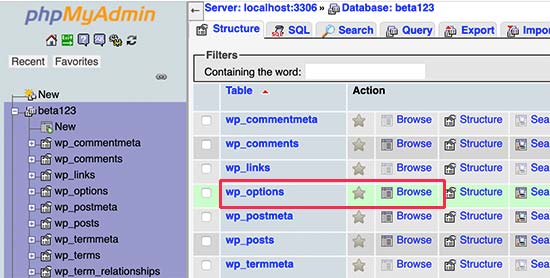
Luckily, there’s another way, and you can reset your WordPress password from phpMyAdmin. This method can be a bit overwhelming for new users, but it’s your best hope for regaining access to your admin area.
Problems with Plugins
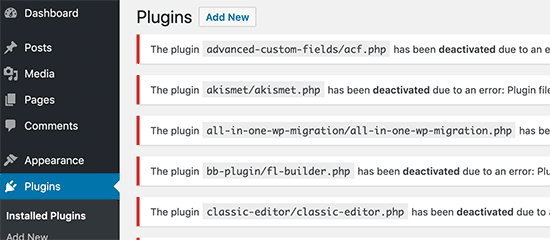
You may be locked out of your WordPress site due to a faulty plugin or theme. This may be the case if you can’t log in to WordPress admin after installing a new plugin, or if the error message mentions ‘wp-content/plugins/’.

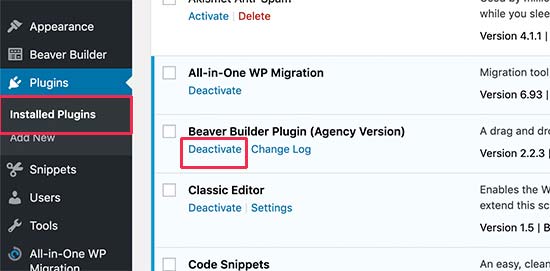
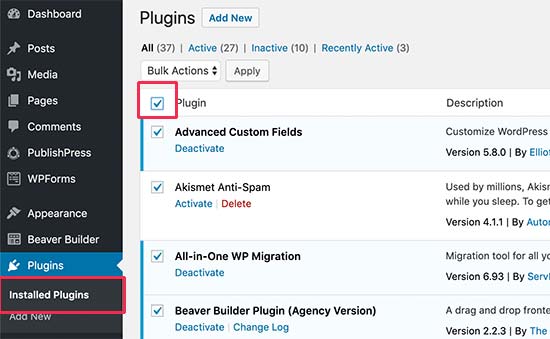
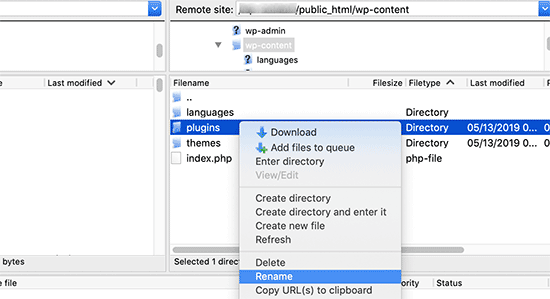
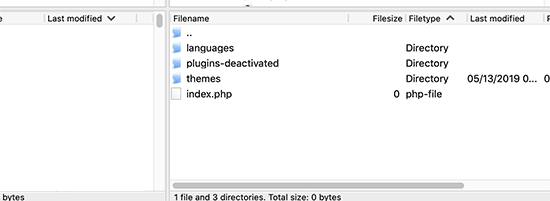
To regain access to your site you’ll have to temporarily disable your plugins. You can do that using FTP or phpMyAdmin by following our step by step guide on how to deactivate all plugins when not able to access wp-admin.
Lost Admin Privileges
Sometimes, you may be able to login to your WordPress admin, but you don’t see any of the admin functionality. For example, you don’t have access to your themes or plugins.
This can happen if your user permissions were modified. It could be that hackers have infected your site and then deleted your admin privileges.
In this case, you should add an admin user to the WordPress database via MySQL (phpMyAdmin).

Hacked WordPress Site
If you do suspect that your site has been hacked, then there are other steps you may need to take.
A hacked website may look different, display different content, or automatically play music or other media. Worse still, it may be infecting your visitors with viruses, so you need to act quickly.
Start with our beginner’s guide on how to fix your hacked WordPress site. We’ll show you how to identify the hack, restore your site from a backup, and remove any malware.
After that, you should protect your site from future attacks. We show you how to do that in our ultimate WordPress security guide .
Login Page Refreshing and Redirecting

Another type of login error is when your WordPress login page keeps refreshing and redirecting it back to the login screen.
This can happen because of incorrect values for the site URL and home URL fields in the WordPress options table. It can also be caused by poorly configured permalink settings or redirects setup in the .htaccess file.
To fix this problem, check our guide on how to fix WordPress Login Page refreshing and redirecting issue.
‘This Has Been Disabled’ Error
When you try to log into your WordPress admin area, do you see the error ‘This has been disabled’? This message is displayed when you have gone to the wrong admin address.
A common WordPress security practice is to change the default admin login URL (domain.com/wp-admin) to something custom. This can help prevent hackers and bots from hammering your login URL trying to gain access.
If you forget that the URL has been changed and go to the old one, then you’ll see this error message. If you’ve forgotten the correct address, then you should check our beginner’s guide on how to find your WordPress Login URL.
‘Briefly Unavailable for Scheduled Maintenance’ Error

Are you seeing the ‘Briefly unavailable for scheduled maintenance’ error in WordPress? This error usually appears while updating WordPress core, plugins, or themes.
But if your WordPress site fails to finish the update, then you are left stuck in maintenance mode.
To fix the problem, you should check our guide on how to fix the Briefly Unavailable for Scheduled Maintenance error in WordPress. The guide will also explain why the error happens and how to avoid it in the future.
PHP Syntax Errors

PHP errors can happen after you paste a code snippet from a WordPress tutorial or website. The wrong code can stop your website from working properly so that you can’t log in.
Often beginners use the built-in WordPress editor from their dashboard. That feature is handy, but can lead to disaster if you don’t know what you are doing.
That’s why we wrote our beginner’s guide to pasting snippets from the web into WordPress.
If you’re locked out of your WordPress admin because of a code snippet, then you’ll have to fix the problem manually using an FTP program to access your files. If you’re not familiar with FTP, then check our beginner’s guide on FTP.
After you connect to your WordPress site using the FTP software, you should follow our guide on how to fix syntax errors in WordPress to correct or remove the code that you added.
We hope this tutorial helped you log into your WordPress admin area. You may also want to learn how to choose the best WordPress hosting, or check out list of must have plugins to grow your website.
If you liked this guide, then please consider subscribing to our YouTube Channel for WordPress video tutorials. You can also find us on Twitter and Facebook.
The post What To Do When You Are Locked Out of WordPress Admin (wp-admin) appeared first on WPBeginner.


