CSS in TypeScript with vanilla-extract

vanilla-extract is a new framework-agnostic CSS-in-TypeScript library. It’s a lightweight, robust, and intuitive way to write your styles. vanilla-extract isn’t a prescriptive CSS framework, but a flexible piece of developer tooling. CSS tooling has been a relatively stable space over the last few years with PostCSS, Sass, CSS Modules, and styled-components all coming out before 2017 (some long before that) and they remain popular today. Tailwind is one of a few tools that has shaken things up in CSS tooling over the last few years.

vanilla-extract aims to shake things up again. It was released this year and has the benefit of being able to leverage some recent trends, including:

  • JavaScript developers switching to TypeScript
  • Browser support for CSS custom properties
  • Utility-first styling

There are a whole bunch of clever innovations in vanilla-extract that I think make it a big deal.

Zero runtime

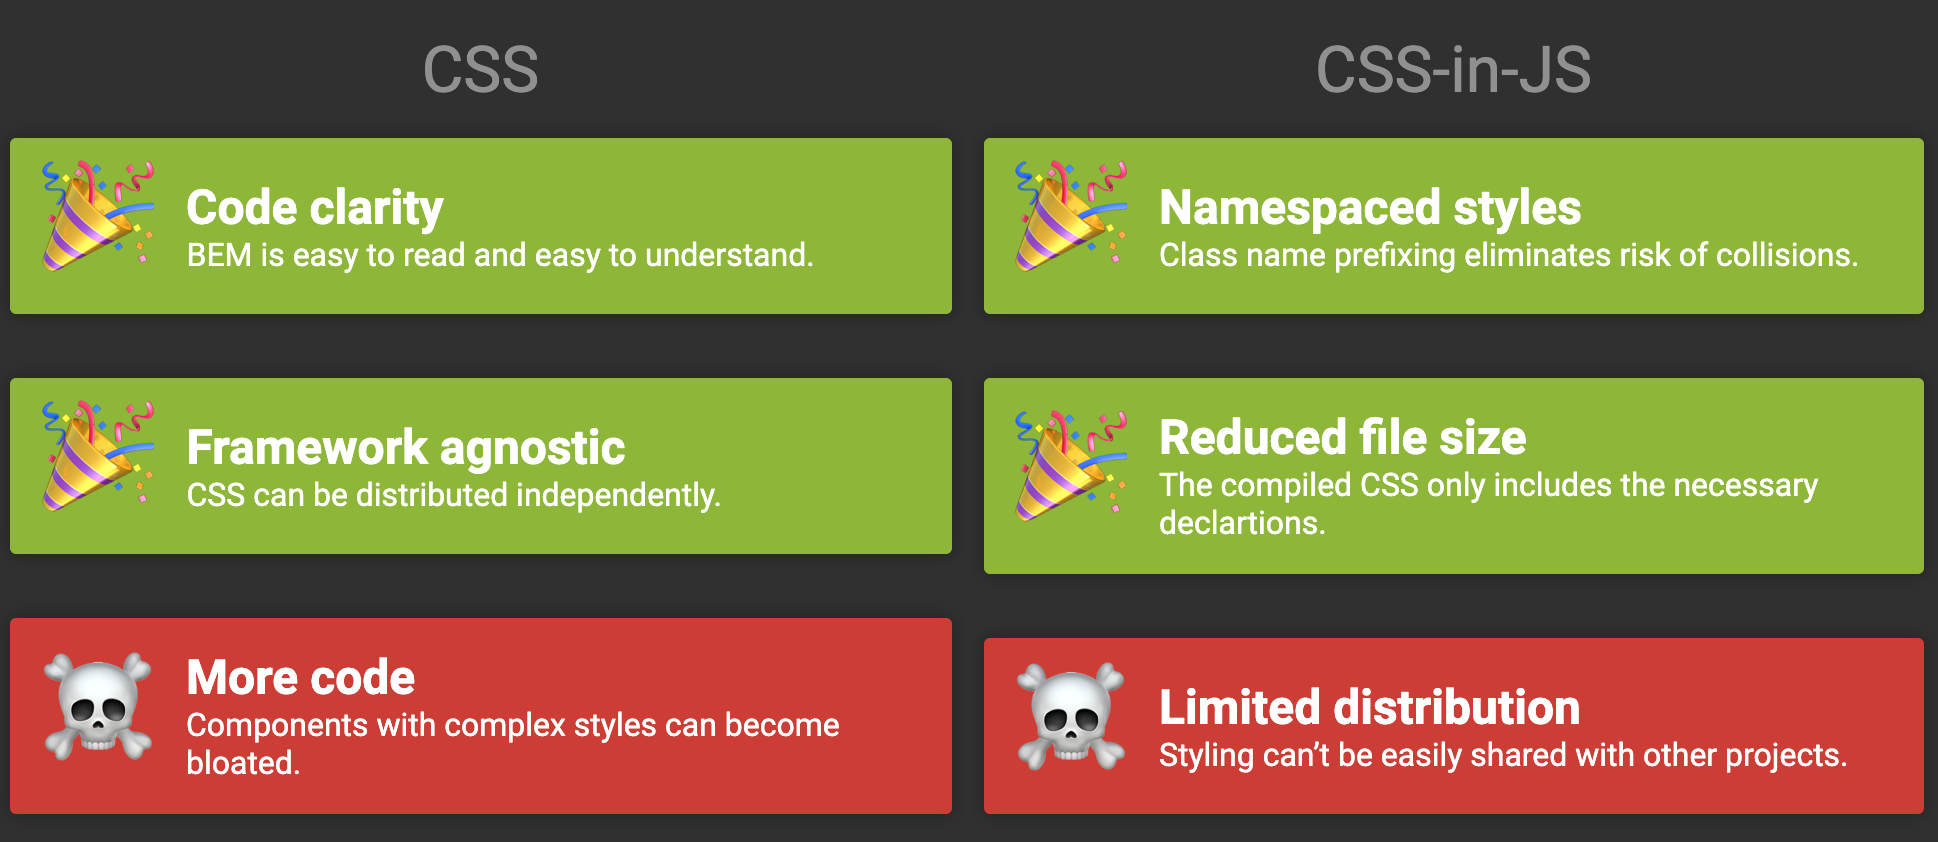
CSS-in-JS libraries usually inject styles into the document at runtime. This has benefits, including critical CSS extraction and dynamic styling.

But as a general rule of thumb, a separate CSS file is going to be more performant. That’s because JavaScript code needs to go through more expensive parsing/compilation, whereas a separate CSS file can be cached while the HTTP2 protocol lowers the cost of the extra request. Also, custom properties can now provide a lot of dynamic styling for free.

So, instead of injecting styles at runtime, vanilla-extract takes after Linaria and astroturf. These libraries let you author styles using JavaScript functions that get ripped out at build time and used to construct a CSS file. Although you write vanilla-extract in TypeScript, it doesn’t affect the overall size of your production JavaScript bundle.

TypeScript

A big vanilla-extract value proposition is that you get typing. If it’s important enough to keep the rest of your codebase type-safe, then why not do the same with your styles?

TypeScript provides a number of benefits. First, there’s autocomplete. If you type “fo” then, in a TypeScript-friendly editor, you get a list of font options in a drop down — fontFamily, fontKerning, fontWeight, or whatever else matches — to choose from. This makes CSS properties discoverable from the comfort of your editor. If you can’t remember the name of fontVariant but know it’s going to start with the word “font” you type it and scroll through the options. In VS Code, you don’t need to download any additional tooling to get this to happen.

This really speeds up the authoring of styles:

It also means your editor is watching over your shoulder to make sure you aren’t making any spelling mistakes that could cause frustrating bugs.

vanilla-extract types also provide an explanation of the syntax in their type definition and a link to the MDN documentation for the CSS property you’re editing. This removes a step of frantically Googling when styles are behaving unexpectedly.

Image of VSCode with cursor hovering over fontKerning property and a pop up describing what the property does with a link to the Mozilla documentation for the property

Writing in TypeScript means you’re using camel-case names for CSS properties, like backgroundColor. This might be a bit of a change for developers who are used regular CSS syntax, like background-color.

Integrations

vanilla-extract provides first-class integrations for all the newest bundlers. Here’s a full list of integrations it currently supports:

  • webpack
  • esbuild
  • Vite
  • Snowpack
  • NextJS
  • Gatsby

It’s also completely framework-agnostic. All you need to do is import class names from vanilla-Extract, which get converted into a string at build time.

Usage

To use vanilla-Extract, you write up a .css.ts file that your components can import. Calls to these functions get converted to hashed and scoped class name strings in the build step. This might sound similar to CSS Modules, and this isn’t by coincidence: the creator of vanilla-Extract, Mark Dalgleish, is also co-creator of CSS Modules.

style()

You can create an automatically scoped CSS class using the style() function. You pass in the element’s styles, then export the returned value. Import this value somewhere in your user code, and it’s converted into a scoped class name.

// title.css.ts
import {style} from "@vanilla-extract/css";

export const titleStyle = style({
  backgroundColor: "hsl(210deg,30%,90%)",
  fontFamily: "helvetica, Sans-Serif",
  color: "hsl(210deg,60%,25%)",
  padding: 30,
  borderRadius: 20,
});
// title.ts
import {titleStyle} from "./title.css";

document.getElementById("root").innerHTML = `<h1 class="${titleStyle}">Vanilla Extract</h1>`;

Media queries and pseudo selectors can be included inside style declarations, too:

// title.css.ts
backgroundColor: "hsl(210deg,30%,90%)",
fontFamily: "helvetica, Sans-Serif",
color: "hsl(210deg,60%,25%)",
padding: 30,
borderRadius: 20,
"@media": {
  "screen and (max-width: 700px)": {
    padding: 10
  }
},
":hover":{
  backgroundColor: "hsl(210deg,70%,80%)"
}

These style function calls are a thin abstraction over CSS — all of the property names and values map to the CSS properties and values you’re familiar with. One change to get used to is that values can sometimes be declared as a number (e.g. padding: 30) which defaults to a pixel unit value, while some values need to be declared as a string (e.g. padding: "10px 20px 15px 15px").

The properties that go inside the style function can only affect a single HTML node. This means you can’t use nesting to declare styles for the children of an element — something you might be used to in Sass or PostCSS. Instead, you need to style children separately. If a child element needs different styles based on the parent, you can use the selectors property to add styles that are dependent on the parent:

// title.css.ts
export const innerSpan = style({
  selectors:{[`${titleStyle} &`]:{
    color: "hsl(190deg,90%,25%)",
    fontStyle: "italic",
    textDecoration: "underline"
  }}
});
// title.ts
import {titleStyle,innerSpan} from "./title.css";
document.getElementById("root").innerHTML = 
`<h1 class="${titleStyle}">Vanilla <span class="${innerSpan}">Extract</span></h1>
<span class="${innerSpan}">Unstyled</span>`;

Or you can also use the Theming API (which we’ll get to next) to create custom properties in the parent element that are consumed by the child nodes. This might sound restrictive, but it’s intentionally been left this way to increase maintainability in larger codebases. It means that you’ll know exactly where the styles have been declared for each element in your project.

Theming

You can use the createTheme function to build out variables in a TypeScript object:

// title.css.ts
import {style,createTheme } from "@vanilla-extract/css";

// Creating the theme
export const [mainTheme,vars] = createTheme({
  color:{
    text: "hsl(210deg,60%,25%)",
    background: "hsl(210deg,30%,90%)"
  },
  lengths:{
    mediumGap: "30px"
  }
})

// Using the theme
export const titleStyle = style({
  backgroundColor:vars.color.background,
  color: vars.color.text,
  fontFamily: "helvetica, Sans-Serif",
  padding: vars.lengths.mediumGap,
  borderRadius: 20,
});

Then vanilla-extract allows you to make a variant of your theme. TypeScript helps it ensure that your variant uses all the same property names, so you get a warning if you forget to add the background property to the theme.

Image of VS Code where showing a theme being declared but missing the background property causing a large amount of red squiggly lines to warn that the property’s been forgotten

This is how you might create a regular theme and a dark mode:

// title.css.ts
import {style,createTheme } from "@vanilla-extract/css";

export const [mainTheme,vars] = createTheme({
  color:{
    text: "hsl(210deg,60%,25%)",
    background: "hsl(210deg,30%,90%)"
  },
  lengths:{
    mediumGap: "30px"
  }
})
// Theme variant - note this part does not use the array syntax
export const darkMode = createTheme(vars,{
  color:{
    text:"hsl(210deg,60%,80%)",
    background: "hsl(210deg,30%,7%)",
  },
  lengths:{
    mediumGap: "30px"
  }
})
// Consuming the theme 
export const titleStyle = style({
  backgroundColor: vars.color.background,
  color: vars.color.text,
  fontFamily: "helvetica, Sans-Serif",
  padding: vars.lengths.mediumGap,
  borderRadius: 20,
});

Then, using JavaScript, you can dynamically apply the class names returned by vanilla-extract to switch themes:

// title.ts
import {titleStyle,mainTheme,darkMode} from "./title.css";

document.getElementById("root").innerHTML = 
`<div class="${mainTheme}" id="wrapper">
  <h1 class="${titleStyle}">Vanilla Extract</h1>
  <button onClick="document.getElementById('wrapper').className='${darkMode}'">Dark mode</button>
</div>`

How does this work under the hood? The objects you declare in the createTheme function are turned into CSS custom properties attached to the element’s class. These custom properties are hashed to prevent conflicts. The output CSS for our mainTheme example looks like this:

.src__ohrzop0 {
  --color-brand__ohrzop1: hsl(210deg,80%,25%);
  --color-text__ohrzop2: hsl(210deg,60%,25%);
  --color-background__ohrzop3: hsl(210deg,30%,90%);
  --lengths-mediumGap__ohrzop4: 30px;
}

And the CSS output of our darkMode theme looks like this:

.src__ohrzop5 {
  --color-brand__ohrzop1: hsl(210deg,80%,60%);
  --color-text__ohrzop2: hsl(210deg,60%,80%);
  --color-background__ohrzop3: hsl(210deg,30%,10%);
  --lengths-mediumGap__ohrzop4: 30px;
}

So, all we need to change in our user code is the class name. Apply the darkmode class name to the parent element, and the mainTheme custom properties get swapped out for darkMode ones.

Recipes API

The style and createTheme functions provide enough power to style a website on their own, but vanilla-extract provides a few extra APIs to promote reusability. The Recipes API allows you to create a bunch of variants for an element, which you can choose from in your markup or user code.

First, it needs to be separately installed:

npm install @vanilla-extract/recipes

Here’s how it works. You import the recipe function and pass in an object with the properties base and variants:

// button.css.ts
import { recipe } from '@vanilla-extract/recipes';

export const buttonStyles = recipe({
  base:{
    // Styles that get applied to ALL buttons go in here
  },
  variants:{
    // Styles that we choose from go in here
  }
});

Inside base, you can declare the styles that will be applied to all variants. Inside variants, you can provide different ways to customize the element:

// button.css.ts
import { recipe } from '@vanilla-extract/recipes';
export const buttonStyles = recipe({
  base: {
    fontWeight: "bold",
  },
  variants: {
    color: {
      normal: {
        backgroundColor: "hsl(210deg,30%,90%)",
      },
      callToAction: {
        backgroundColor: "hsl(210deg,80%,65%)",
      },
    },
    size: {
      large: {
        padding: 30,
      },
      medium: {
        padding: 15,
      },
    },
  },
});

Then you can declare which variant you want to use in the markup:

// button.ts
import { buttonStyles } from "./button.css";

<button class=`${buttonStyles({color: "normal",size: "medium",})}`>Click me</button>

And vanilla-extract leverages TypeScript giving autocomplete for your own variant names!

You can name your variants whatever you like, and put whatever properties you want in them, like so:

// button.css.ts
export const buttonStyles = recipe({
  variants: {
    animal: {
      dog: {
        backgroundImage: 'url("./dog.png")',
      },
      cat: {
        backgroundImage: 'url("./cat.png")',
      },
      rabbit: {
        backgroundImage: 'url("./rabbit.png")',
      },
    },
  },
});

You can see how this would be incredibly useful for building a design system, as you can create reusable components and control the ways they vary. These variations become easily discoverable with TypeScript — all you need to type is CMD/CTRL + Space (on most editors) and you get a dropdown list of the different ways to customize your component.

Utility-first with Sprinkles

Sprinkles is a utility-first framework built on top of vanilla-extract. This is how the vanilla-extract docs describe it:

Basically, it’s like building your own zero-runtime, type-safe version of Tailwind, Styled System, etc.

So if you’re not a fan of naming things (we all have nightmares of creating an outer-wrapper div then realising we need to wrap it with an . . . outer-outer-wrapper ) Sprinkles might be your preferred way to use vanilla-extract.

The Sprinkles API also needs to be separately installed:

npm install @vanilla-extract/sprinkles

Now we can create some building blocks for our utility functions to use. Let’s create a list of colors and lengths by declaring a couple of objects. The JavaScript key names can be whatever we want. The values will need to be valid CSS values for the CSS properties we plan to use them for:

// sprinkles.css.ts
const colors = {
  blue100: "hsl(210deg,70%,15%)",
  blue200: "hsl(210deg,60%,25%)",
  blue300: "hsl(210deg,55%,35%)",
  blue400: "hsl(210deg,50%,45%)",
  blue500: "hsl(210deg,45%,55%)",
  blue600: "hsl(210deg,50%,65%)",
  blue700: "hsl(207deg,55%,75%)",
  blue800: "hsl(205deg,60%,80%)",
  blue900: "hsl(203deg,70%,85%)",
};

const lengths = {
  small: "4px",
  medium: "8px",
  large: "16px",
  humungous: "64px"
};

We can declare which CSS properties these values are going to apply to by using the defineProperties function:

  • Pass it an object with a properties property.
  • In properties, we declare an object where the keys are the CSS properties the user can set (these need to be valid CSS properties) and the values are the objects we created earlier (our lists of colors and lengths).
// sprinkles.css.ts
import { defineProperties } from "@vanilla-extract/sprinkles";

const colors = {
  blue100: "hsl(210deg,70%,15%)"
  // etc.
}

const lengths = {
  small: "4px",
  // etc.
}

const properties = defineProperties({
  properties: {
    // The keys of this object need to be valid CSS properties
    // The values are the options we provide the user
    color: colors,
    backgroundColor: colors,
    padding: lengths,
  },
});

Then the final step is to pass the return value of defineProperties to the createSprinkles function, and export the returned value:

// sprinkles.css.ts
import { defineProperties, createSprinkles } from "@vanilla-extract/sprinkles";

const colors = {
  blue100: "hsl(210deg,70%,15%)"
  // etc.
}

const lengths = {
  small: "4px",
  // etc. 
}

const properties = defineProperties({
  properties: {
    color: colors,
    // etc. 
  },
});
export const sprinkles = createSprinkles(properties);

Then we can start styling inside our components inline by calling the sprinkles function in the class attribute and choosing which options we want for each element.

// index.ts
import { sprinkles } from "./sprinkles.css";
document.getElementById("root").innerHTML = `<button class="${sprinkles({
  color: "blue200",
  backgroundColor: "blue800",
  padding: "large",
})}">Click me</button>
</div>`;

The JavaScript output holds a class name string for each style property. These class names match a single rule in the output CSS file.

<button class="src_color_blue200__ohrzop1 src_backgroundColor_blue800__ohrzopg src_padding_large__ohrzopk">Click me</button>

As you can see, this API allows you to style elements inside your markup using a set of pre-defined constraints. You also avoid the difficult task of coming up with names of classes for every element. The result is something that feels a lot like Tailwind, but also benefits from all the infrastructure that has been built around TypeScript.

The Sprinkles API also allows you to write conditions and shorthands to create responsive styles using utility classes.

Wrapping up

vanilla-extract feels like a big new step in CSS tooling. A lot of thought has been put into building it into an intuitive, robust solution for styling that utilizes all of the power that static typing provides.

Further reading


The post CSS in TypeScript with vanilla-extract appeared first on CSS-Tricks. You can support CSS-Tricks by being an MVP Supporter.

Demystifying styled-components

 Joshua Comeau digs into how styled-components works by re-building the basics. A fun and useful journey.

styled-components seems like the biggest player in the CSS-in-React market. Despite being in that world, I haven’t yet been fully compelled by it. I’m a big fan of the basics: scoped styles by way of unique class names. I also like that it works with hot module reloading as it all happens in JavaScript. But I get those through css-modules, and I like the file-separation and Sass support I get through css-modules. There are a few things I’m starting to come around on though (a little):

  • Even with css-modules, you still have to think of names. Even if it’s just like .root or whatever. With styled-components you attach the styles right to the component and don’t really name anything.
  • With css-modules, you’re applying the styles directly to an HTML element only. With styled-components you can apply the styles to custom components and it will slap the styles on by way of spreading props later.
  • Because the styles are literally in the JavaScript files, you get JavaScript stuff you can use—ternaries, prop access, fancy math, etc.

Direct Link to ArticlePermalink


The post Demystifying styled-components appeared first on CSS-Tricks. You can support CSS-Tricks by being an MVP Supporter.

A Thorough Analysis of CSS-in-JS

Wondering what’s even more challenging than choosing a JavaScript framework? You guessed it: choosing a CSS-in-JS solution. Why? Because there are more than 50 libraries out there, each of them offering a unique set of features.

We tested 10 different libraries, which are listed here in no particular order: Styled JSX, styled-components, Emotion, Treat, TypeStyle, Fela, Stitches, JSS, Goober, and Compiled. We found that, although each library provides a diverse set of features, many of those features are actually commonly shared between most other libraries.

So instead of reviewing each library individually, we’ll analyse the features that stand out the most. This will help us to better understand which one fits best for a specific use case.

Note: We assume that if you’re here, you’re already familiar with CSS-in-JS. If you’re looking for a more elementary post, you can check out “An Introduction to CSS-in-JS.”

Common CSS-in-JS features

Most actively maintained libraries that tackle CSS-in-JS support all the following features, so we can consider them de-facto.

Scoped CSS

All CSS-in-JS libraries generate unique CSS class names, a technique pioneered by CSS modules. All styles are scoped to their respective component, providing encapsulation without affecting any styling defined outside the component.

With this feature built-in, we never have to worry about CSS class name collisions, specificity wars, or wasted time spent coming up with unique class names across the entire codebase.

This feature is invaluable for component-based development.

SSR (Server-Side Rendering)

When considering Single Page Apps (SPAs) — where the HTTP server only delivers an initial empty HTML page and all rendering is performed in the browser — Server-Side Rendering (SSR) might not be very useful. However, any website or application that needs to be parsed and indexed by search engines must have SSR pages and styles need to be generated on the server as well.

The same principle applies to Static Site Generators (SSG), where pages along with any CSS code are pre-generated as static HTML files at build time.

The good news is that all libraries we’ve tested support SSR, making them eligible for basically any type of project.

Automatic vendor prefixes

Because of the complex CSS standardization process, it might take years for any new CSS feature to become available in all popular browsers. One approach aimed at providing early access to experimental features is to ship non-standard CSS syntax under a vendor prefix:

/* WebKit browsers: Chrome, Safari, most iOS browsers, etc */
-webkit-transition: all 1s ease;

/* Firefox */
-moz-transition: all 1s ease;

/* Internet Explorer and Microsoft Edge */
-ms-transition: all 1s ease;

/* old pre-WebKit versions of Opera */
-o-transition: all 1s ease;

/* standard */
transition: all 1s ease; 

However, it turns out that vendor prefixes are problematic and the CSS Working Group intends to stop using them in the future. If we want to fully support older browsers that don’t implement the standard specification, we’ll need to know which features require a vendor prefix.

Fortunately, there are tools that allow us to use the standard syntax in our source code, generating the required vendor prefixed CSS properties automatically. All CSS-in-JS libraries also provide this feature out-of-the-box.

No inline styles

There are some CSS-in-JS libraries, like Radium or Glamor, that output all style definitions as inline styles. This technique has a huge limitation, because it’s impossible to define pseudo classes, pseudo-elements, or media queries using inline styles. So, these libraries had to hack these features by adding DOM event listeners and triggering style updates from JavaScript,  essentially reinventing native CSS features like :hover, :focus and many more.

It’s also generally accepted that inline styles are less performant than class names. It’s usually a discouraged practice to use them as a primary approach for styling components.

All current CSS-in-JS libraries have stepped away from using inline styles, adopting CSS class names to apply style definitions.

Full CSS support

A consequence of using CSS classes instead of inline styles is that there’s no limitation regarding what CSS properties we can and can’t use. During our analysis we were specifically interested in:

  • pseudo classes and elements;
  • media queries;
  • keyframe animations.

All the libraries we’ve analyzed offer full support for all CSS properties.

Differentiating features

This is where it gets even more interesting. Almost every library offers a unique set of features that can highly influence our decision when choosing the appropriate solution for a particular project. Some libraries pioneered a specific feature, while others chose to borrow or even improve certain features.

React-specific or framework-agnostic?

It’s not a secret that CSS-in-JS is more prevalent within the React ecosystem. That’s why some libraries are specifically built for React: Styled JSX, styled-components, and Stitches.

However, there are plenty of libraries that are framework-agnostic, making them applicable to any project: Emotion, Treat, TypeStyle, Fela, JSS or Goober.

If we need to support vanilla JavaScript code or frameworks other than React, the decision is simple: we should choose a framework-agnostic library. But when dealing with a React application, we have a much wider range of options which ultimately makes the decision more difficult. So let’s explore other criteria.

Styles/Component co-location

The ability to define styles along with their components is a very convenient feature, removing the need to switch back-and-forth between two different files: the .css or .less/.scss file containing the styles and the component file containing the markup and behavior.

React Native StyleSheets, Vue.js SFCs, or Angular Components support co-location of styles by default, which proves to be a real benefit during both the development and the maintenance phases. We always have the option to extract the styles into a separate file, in case we feel that they’re obscuring the rest of the code.

Almost all CSS-in-JS libraries support co-location of styles. The only exception we encountered was Treat, which requires us to define the styles in a separate .treat.ts file, similarly to how CSS Modules work.

Styles definition syntax

There are two different methods we can use to define our styles. Some libraries support only one method, while others are quite flexible and support both of them.

Tagged Templates syntax

The Tagged Templates syntax allows us to define styles as a string of plain CSS code inside a standard ES Template Literal:

// consider "css" being the API of a generic CSS-in-JS library
const heading = css`
  font-size: 2em;
  color: ${myTheme.color};
`;

We can see that:

  • CSS properties are written in kebab case just like regular CSS;
  • JavaScript values can be interpolated;
  • we can easily migrate existing CSS code without rewriting it.

Some things to keep in mind:

  • In order to get syntax highlight and code suggestions, an additional editor plugin is required; but this plugin is usually available for popular editors like VSCode, WebStorm, and others.
  • Since the final code must be eventually executed in JavaScript, the style definitions need to be parsed and converted to JavaScript code. This can be done either at runtime, or at build time, incurring a small overhead in bundle size, or computation.
Object Styles syntax

The Object Styles syntax allows us to define styles as regular JavaScript Objects:

// consider "css" being the API of a generic CSS-in-JS library
const heading = css({
  fontSize: "2em",
  color: myTheme.color,
});

We can see that:

  • CSS properties are written in camelCase and string values must be wrapped in quotes;
  • JavaScript values can be referenced as expected;
  • it doesn’t feel like writing CSS, as instead we define styles using a slightly different syntax but with the same property names and values available in CSS (don’t feel intimidated by this, you’ll get used to it in no time);
  • migrating existing CSS would require a rewrite in this new syntax.

Some things to keep in mind:

  • Syntax highlighting comes out-of-the-box, because we’re actually writing JavaScript code.
  • To get code completion, the library must ship CSS types definitions, most of them extending the popular CSSType package.
  • Since the styles are already written in JavaScript, there’s no additional parsing or conversion required.
LibraryTagged templateObject styles
styled-components
Emotion
Goober
Compiled
Fela🟠
JSS🟠
Treat
TypeStyle
Stitches
Styled JSX

✅  Full support         🟠  Requires plugin          ❌  Unsupported

Styles applying method

Now that we know what options are available for style definition, let’s have a look at how to apply them to our components and elements.

Using a class attribute / className prop

The easiest and most intuitive way to apply the styles is to simply attach them as classnames. Libraries that support this approach provide an API that returns a string which will output the generated unique classnames:

// consider "css" being the API of a generic CSS-in-JS library
const heading_style = css({
  color: "blue"
});

Next, we can take the heading_style, which contains a string of generated CSS class names, and apply it to our HTML element:

// Vanilla DOM usage
const heading = `<h1 class="${heading_style}">Title</h1>`;

// React-specific JSX usage
function Heading() {
  return <h1 className={heading_style}>Title</h1>;
}

As we can see, this method pretty much resembles the traditional styling: first we define the styles, then we attach the styles where we need them. The learning curve is low for anyone who has written CSS before.

Using a <Styled /> component

Another popular method, that was first introduced by the styled-components library (and named after it), takes a different approach.

// consider "styled" being the API for a generic CSS-in-JS library
const Heading = styled("h1")({
  color: "blue"
});

Instead of defining the styles separately and attaching them to existing components or HTML elements, we use a special API by specifying what type of element we want to create and the styles we want to attach to it.

The API will return a new component, having classname(s) already applied, that we can render like any other component in our application. This basically removes the mapping between the component and its styles.

Using the css prop

A newer method, introduced by Emotion, allows us to pass the styles to a special prop, usually named css. This API is available only for JSX-based syntax.

// React-specific JSX syntax
function Heading() {
  return <h1 css={{ color: "blue" }}>Title</h1>;
}

This approach has a certain ergonomic benefit, because we don’t have to import and use any special API from the library itself. We can simply pass the styles to this css prop, similarly to how we would use inline styles.

Note that this custom css prop is not a standard HTML attribute, and needs to be enabled and supported via a separate Babel plugin provided by the library.

LibraryclassName<Styled />css prop
styled-components
Emotion
Goober🟠 2
Compiled🟠 1
Fela
JSS🟠 2
Treat
TypeStyle
Stitches🟠 1
Styled JSX

✅  Full support          🟠 1  Limited support          🟠 2  Requires plugin          ❌  Unsupported

Styles output

There are two mutually exclusive methods to generate and ship styles to the browser. Both methods have benefits and downsides, so let’s analyze them in detail.

<style>-injected DOM styles

Most CSS-in-JS libraries inject styles into the DOM at runtime, using either one or more <style> tags, or using the CSSStyleSheet API to manage styles directly within the CSSOM. During SSR, styles are always appended as a <style> tag inside the <head> of the rendered HTML page.

There are a few key advantages and preferred use cases for this approach:

  1. Inlining the styles during SSR provides an increase in page loading performance metrics such as FCP (First Contentful Paint), because rendering is not blocked by fetching a separate .css file from the server.
  2. It provides out-of-the-box critical CSS extraction during SSR by inlining only the styles required to render the initial HTML page. It also removes any dynamic styles, thus further improving loading time by downloading less code.
  3. Dynamic styling is usually easier to implement, as this approach appears to be more suited for highly interactive user interfaces and Single-Page Applications (SPA), where most components are client-side rendered.

The drawbacks are generally related to the total bundle size:

  • an additional runtime library is required for handling dynamic styling in the browser;
  • the inlined SSR styles won’t be cached out-of-the-box and they will need to be shipped to the browser upon each request since they’re part of the .html file rendered by the server;
  • the SSR styles that are inlined in the .html page will be sent to the browser again as JavaScript resources during the rehydration process.
Static .css file extraction

There’s a very small number of libraries that take a totally different approach. Instead of injecting the styles in the DOM, they generate static .css files. From a loading performance point of view, we get the same advantages and drawbacks that come with writing plain CSS files.

  1. The total amount of shipped code is much smaller, since there is no need for additional runtime code or rehydration overhead.
  2. Static .css files benefit from out-of-the-box caching inside the browser, so subsequent requests to the same page won’t fetch the styles again.
  3. This approach seems to be more appealing when dealing with SSR pages or Static Generated pages since they benefit from default caching mechanisms.

However, there are some important drawbacks we need to take note of:

  • The first visit to a page, with an empty cache, will usually have a longer FCP when using this method compared to the one mentioned previously; so deciding if we want to optimize for first-time users or returning visitors could play a crucial role when choosing this approach.
  • All dynamic styles that can be used on the page will be included in the pre-generated bundle, potentially leading to larger .css resources that need to be loaded up front.

Almost all the libraries that we tested implement the first method, injecting the styles into the DOM. The only tested library which supports static .css file extraction is Treat. There are other libraries that support this feature, like Astroturf, Linaria, and style9, which were not included in our final analysis.

Atomic CSS

Some libraries took optimizations one step further, implementing a technique called atomic CSS-in-JS, inspired by frameworks such as Tachyons or Tailwind.

Instead of generating CSS classes containing all the properties that were defined for a specific element, they generate a unique CSS class for each unique CSS property/value combination.

/* classic, non-atomic CSS class */
._wqdGktJ {
  color: blue;
  display: block;
  padding: 1em 2em;
}

/* atomic CSS classes */
._ktJqdG { color: blue; }
._garIHZ { display: block; }
/* short-hand properties are usually expanded */
._kZbibd { padding-right: 2em; }
._jcgYzk { padding-left: 2em; }
._ekAjen { padding-bottom: 1em; }
._ibmHGN { padding-top: 1em; }

This enables a high degree of reusability because each of these individual CSS classes can be reused anywhere in the code base.

In theory, this works really great in the case of large applications. Why? Because there’s a finite number of unique CSS properties that are needed for an entire application. Thus, the scaling factor is not linear, but rather logarithmic, resulting in less CSS output compared to non-atomic CSS.

But there is a catch: individual class names must be applied to each element that requires them, resulting in slightly larger HTML files:

<!-- with classic, non-atomic CSS classes -->
<h1 class="_wqdGktJ">...</h1>

<!-- with atomic CSS classes -->
<h1 class="_ktJqdG _garIHZ _kZbibd _jcgYzk _ekAjen _ibmHGN">...</h1>

So basically, we’re moving code from CSS to HTML. The resulting difference in size depends on too many aspects for us to draw a definite conclusion, but generally speaking, it should decrease the total amount of bytes shipped to the browser.

Conclusion

CSS-in-JS will dramatically change the way we author CSS, providing many benefits and improving our overall development experience.

However, choosing which library to adopt is not straightforward and all choices come with many technical compromises. In order to identify the library that is best suited for our needs, we have to understand the project requirements and its use cases:

  • Are we using React or not? React applications have a wider range of options, while non-React solutions have to use a framework agnostic library.
  • Are we dealing with a highly interactive application, with client-side rendering? In this case, we probably aren’t very concerned about the overhead of rehydration, or care that much about extracting static .css files.
  • Are we building a dynamic website with SSR pages? Then, extracting static .css files may probably be a better option, as it would allow us to benefit from caching.
  • Do we need to migrate existing CSS code? Using a library that supports Tagged Templates would make the migration easier and faster.
  • Do we want to optimize for first-time users or returning visitors? Static .css files offer the best experience for returning visitors by caching the resources, but the first visit requires an additional HTTP request that blocks page rendering.
  • Do we update our styles frequently? All cached .css files are worthless if we frequently update our styles, thus invalidating any cache.
  • Do we re-use a lot of styles and components? Atomic CSS shines if we reuse a lot of CSS properties in our codebase.

Answering the above questions will help us decide what features to look for when choosing a CSS-in-JS solution, allowing us to make more educated decisions.


The post A Thorough Analysis of CSS-in-JS appeared first on CSS-Tricks.

You can support CSS-Tricks by being an MVP Supporter.

Comparing Styling Methods in 2020

Over on Smashing, Adebiyi Adedotun Lukman covers all these styling methods. It’s in the context of Next.js, which is somewhat important as Next.js has some specific ways you work with these tools, is React and, thus, is a components-based architecture. But the styling methods talked about transcend Next.js, and can apply broadly to lots of websites.

Here are my hot takes on the whole table-of-contents of styling possibilities these days.

  • Regular CSS. If you can, do. No build tooling is refreshing. It will age well. The only thing I really miss without any other tooling is nesting media queries.
  • Sass. Sass has been around the block and is still a hugely popular CSS preprocessor. Sass is built into tons of other tools, so choosing Sass doesn’t always mean the same thing. A simple Sass integration might be as easy as a sass --watch src/style.scss dist/style.css npm script. Then, once you’ve come to terms with the fact that you have a build process, you can start concatenating files, minifying, busting cache, and all this stuff that you’re probably going to end up doing somehow anyway.
  • Less & Stylus. I’m surprised they aren’t more popular since they’ve always been Node and work great with the proliferation of Node-powered build processes. Not to mention they are nice feature-rich preprocessors. I have nothing against either, but Sass is more ubiquitous, more actively developed, and canonical Sass now works fine in Node-land,
  • PostCSS. I’m not compelled by PostCSS because I don’t love having to cobble together the processing features that I want. That also has the bad side effect of making the process of writing CSS different across projects. Plus, I don’t like the idea of preprocessing away modern features, some of which can’t really be preprocessed (e.g. custom properties cannot be preprocessed). But I did love Autoprefixer when we really needed that, which is based on PostCSS.
  • CSS Modules. If you’re working with components in any technology, CSS modules give you the ability to scope CSS to that component, which is an incredibly great idea. I like this approach wherever I can get it. Your module CSS can be Sass too, so we can get the best of both worlds there.
  • CSS-in-JS. Let’s be real, this means “CSS-in-React.” If you’re writing Vue, you’re writing styles the way Vue helps you do it. Same with Svelte. Same with Angular. React is the un-opinionated one, leaving you to choose between things like styled-components, styled-jsx, Emotion… there are a lot of them. I have projects in React and I just use Sass+CSS Modules and think that’s fine, but a lot of people like CSS-inJS approaches too. I get it. You get the scoping automatically and can do fancy stuff like incorporate props into styling decisions. Could be awesome for a design system.
  • All-in on utility styles: Big advantages: small CSS files, consistent yet flexible styles. Big disadvantage: you’ve got a zillion classes all commingled in your markup, making it annoying to read and refactor. I’m not compelled by it, but I get it, the advantages are there.

If you want to hear some other hot takes on this spectrum, the Syntax FM fellas sounded off on this recently.


The post Comparing Styling Methods in 2020 appeared first on CSS-Tricks.

You can support CSS-Tricks by being an MVP Supporter.

style9: build-time CSS-in-JS

In April of last year, Facebook revealed its big new redesign. An ambitious project, it was a rebuild of a large site with a massive amount of users. To accomplish this, they used several technologies they have created and open-sourced, such as React, GraphQL, Relay, and a new CSS-in-JS library called stylex.

This new library is internal to Facebook, but they have shared enough information about it to make an open-source implementation, style9, possible.

Why another CIJ library?

There are already plenty of CSS-in-JS (CIJ) libraries, so it might not be obvious why another one is needed. style9 has the same benefits as all other CIJ solutions, as articulated by Christopher Chedeau, including scoped selectors, dead code elimination, deterministic resolution, and the ability to share values between CSS and JavaScript.

There are, however, a couple of things that make style9 unique.

Minimal runtime

Although the styles are defined in JavaScript, they are extracted by the compiler into a regular CSS file. That means that no styles are shipped in your final JavaScript file. The only things that remain are the final class names, which the minimal runtime will conditionally apply, just like you would normally do. This results in smaller code bundles, a reduction in memory usage, and faster rendering.

Since the values are extracted at compile time, truly dynamic values can’t be used. These are thankfully not very common and since they are unique, don’t suffer from being defined inline. What’s more common is conditionally applying styles, which of course is supported. So are local constants and mathematical expressions, thanks to babel’s path.evaluate.

Atomic output

Because of how style9 works, every property declaration can be made into its own class with a single property. So, for example, if we use opacity: 0 in several places in our code, it will only exist in the generated CSS once. The benefit of this is that the CSS file grows with the number of unique declarations, not with the total amount of declarations. Since most properties are used many times, this can lead to dramatically smaller CSS files. For example, Facebook’s old homepage used 413 KB of gzipped CSS. The redesign uses 74 KB for all pages. Again, smaller file size leads to better performance.

Slide from Building the New Facebook with React and Relay by Frank Yan, at 13:23 showing the logarithmic scale of atomic CSS.

Some may complain about this, that the generated class names are not semantic, that they are opaque and are ignoring the cascade. This is true. We are treating CSS as a compilation target. But for good reason. By questioning previously assumed best practices, we can improve both the user and developer experience.

In addition, style9 has many other great features, including: typed styles using TypeScript, unused style elimination, the ability to use JavaScript variables, and support for media queries, pseudo-selectors and keyframes.

Here’s how to use it

First, install it like usual:

npm install style9

style9 has plugins for Rollup, Webpack, Gatsby, and Next.js, which are all based on a Babel plugin. Instructions on how to use them are available in the repository. Here, we’ll use the webpack plugin.

const Style9Plugin = require('style9/webpack');
const MiniCssExtractPlugin = require('mini-css-extract-plugin');

module.exports = {
  module: {
    rules: [
      // This will transform the style9 calls
      {
        test: /\.(tsx|ts|js|mjs|jsx)$/,
        use: Style9Plugin.loader
      },
      // This is part of the normal Webpack CSS extraction
      {
        test: /\.css$/i,
        use: [MiniCssExtractPlugin.loader, 'css-loader']
      }
    ]
  },
  plugins: [
    // This will sort and remove duplicate declarations in the final CSS file
    new Style9Plugin(),
    // This is part of the normal Webpack CSS extraction
    new MiniCssExtractPlugin()
  ]
};

Defining styles

The syntax for creating styles closely resembles other libraries. We start by calling style9.create with objects of styles:

import style9 from 'style9';

const styles = style9.create({
  button: {
    padding: 0,
    color: 'rebeccapurple'
  },
  padding: {
    padding: 12
  },
  icon: {
    width: 24,
    height: 24
  }
});

Because all declarations will result in atomic classes, shorthands such as flex: 1 and background: blue won’t work, as they set multiple properties. Properties that can be can be expanded, such as padding, margin, overflow, etc. will be automatically converted to their longhand variants. If you use TypeScript, you will get an error when using unsupported properties.

Resolving styles

To generate a class name, we can now call the function returned by style9.create. It accepts as arguments the keys of the styles we want to use:

const className = styles('button');

The function works in such a way that styles on the right take precedence and will be merged with the styles on the left, like Object.assign. The following would result in an element with a padding of 12px and with rebeccapurple text.

const className = styles('button', 'padding');

We can conditionally apply styles using any of the following formats:

// logical AND
styles('button', hasPadding && 'padding');
// ternary
styles('button', isGreen ? 'green' : 'red');
// object of booleans
styles({
  button: true,
  green: isGreen,
  padding: hasPadding
});

These function calls will be removed during compilation and replaced with direct string concatenation. The first line in the code above will be replaced with something like 'c1r9f2e5 ' + hasPadding ? 'cu2kwdz ' : ''. No runtime is left behind.

Combining styles

We can extend a style object by accessing it with a property name and passing it to style9.

const styles = style9.create({ blue: { color: 'blue; } });
const otherStyles = style9.create({ red: { color: 'red; } });

// will be red
const className = style9(styles.blue, otherStyles.red);

Just like with the function call, the styles on the right take precedence. In this case, however, the class name can’t be statically resolved. Instead the property values will be replaced by classes and will be joined at runtime. The properties gets added to the CSS file just like before.

Summary

The benefits of CSS-in-JS are very much real. That said, we are imposing a performance cost when embedding styles in our code. By extracting the values during build-time we can have the best of both worlds. We benefit from co-locating our styles with our markup and the ability to use existing JavaScript infrastructure, while also being able to generate optimal stylesheets.

If style9 sounds interesting to you, have a look a the repo and try it out. And if you have any questions, feel free to open an issue or get in touch.

Acknowledgements

Thanks to Giuseppe Gurgone for his work on style-sheet and dss, Nicolas Gallagher for react-native-web, Satyajit Sahoo and everyone at Callstack for linaria, Christopher Chedeau, Sebastian McKenzie, Frank Yan, Ashley Watkins, Naman Goel, and everyone else who worked on stylex at Facebook for being kind enough to share their lessons publicly. And anyone else I have missed.

Links


The post style9: build-time CSS-in-JS appeared first on CSS-Tricks.

You can support CSS-Tricks by being an MVP Supporter.

CSS2JS

To add inline styles on an element in JSX, you have to do it in this object syntax, like:

<div style={{
  fontSize: 16,
  marginBottom: "1rem"
}}>
  Content
</div>

That might look a little weird to us folks who are so used to the CSS syntax, where it is font-size (not fontSize), margin-bottom (not marginBottom), and semi-colons (not commas).

That's not JSX (or React or whatever) being weird — that's just how styles are in JavaScript. If you wanted to set the font-size from any other JavaScript, you'd have to do:

div.style.fontSize = "16px";

I say that, but other APIs do want you to use the CSS syntax, like:

window.getComputedStyle(document.body)
  .getPropertyValue("font-size");

There are also lots of CSS-in-JS libraries that either require or optionally support setting styles in this object format. I've even heard that with libraries that support both the CSS format (via template literals) and the object format (e.g. Emotion), that some people prefer the object syntax over the CSS syntax because it feels more at home in the surrounding JavaScript and is a bit less verbose when doing stuff like logic or injecting variables.

Anyway, the actual reason for the post is this little website I came across that converts the CSS format to the object format. CSS2JS:

Definitely handy if you had a big block of styles to convert.

Direct Link to ArticlePermalink

The post CSS2JS appeared first on CSS-Tricks.

Two Steps Forward, One Step Back

Brent Jackson says CSS utility libraries failed somewhat:

Eventually, you'll need to add one-off styles that just aren't covered by the library you're using, and there isn't always a clear way to extend what you're working with. Without a clear way to handle things like this, developers tend to add inconsistent hacks and append-only styles.

I have a feeling Tailwind people would disagree. I have no particular opinion here, I'm just noting that Tailwind seems to have a more fervent fanbase than those early days of Basscss/Tachyons.

Brent goes on to say that CSS-in-JS solves the same problem, but in a better way:

CSS-in-JS libraries help solve a lot of the same issues Utility-based CSS methodologies were focused on (and more) in a much better way. They connect styles directly to elements without needing to name things or create abstractions in class selectors. They avoid append-only stylesheets with encapsulation and hashed classnames. These libraries work with existing build tools, allowing for code splitting, lazy loading, and dead code elimination with virtually zero effort, and they don't require additional tools like Sass or PostCSS. Many libraries also include CSS performance optimizations, such as critical CSS, enabled by default so that developers don't need additional tooling or even need to think about them.

No wonder people have been raving about this.

The one-step-back refers to the fact that CSS-in-JS is more open-ended and doesn't encourage consistency as much. I'm not sure about that. Seems like if you're building in a component-based way already, consistency kind of comes along for the ride, even before using design tokens and the like — which a CSS-in-JS approach also encourages.

Direct Link to ArticlePermalink

The post Two Steps Forward, One Step Back appeared first on CSS-Tricks.

What I Like About Writing Styles with Svelte

There’s been a lot of well-deserved hype around Svelte recently, with the project accumulating over 24,000 GitHub stars. Arguably the simplest JavaScript framework out there, Svelte was written by Rich Harris, the developer behind Rollup. There’s a lot to like about Svelte (performance, built-in state management, writing proper markup rather than JSX), but the big draw for me has been its approach to CSS.

Single file components

​​

React does not have an opinion about how styles are defined
—React Documentation

​​​​

A UI framework that doesn't have a built-in way to add styles to your components is unfinished.
—Rich Harris, creator of Svelte

In Svelte, you can write CSS in a stylesheet like you normally would on a typical project. You can also use CSS-in-JS solutions, like styled-components and Emotion, if you'd like. It’s become increasingly common to divide code into components, rather than by file type. React, for example, allows for the collocation of a components markup and JavaScript. In Svelte, this is taken one logical step further: the Javascript, markup and styling for a component can all exist together in a single `.svelte`​ file. If you’ve ever used single file components in Vue, then Svelte will look familiar.

// button.svelte
<style>
  button {
    border-radius: 0;
    background-color: aqua;
  }
</style>

<button>
  <slot/>
</button>

Styles are scoped by default

By default, styles defined within a Svelte file are scoped. Like CSS-in-JS libraries or CSS Modules, Svelte generates unique class names when it compiles to make sure the styles for one element never conflict with styles from another.

That means you can use simple element selectors like div and button in a Svelte component file without needing to work with class names. If we go back to the button styles in our earlier example, we know that a ruleset for <button> will only be applied to our <Button> component — not to any other HTML button elements within the page. If you were to have multiple buttons within a component and wanted to style them differently, you'd still need classes. Classes will also be scoped by Svelte.

The classes that Svelte generates look like gibberish because they are based on a hash of the component styles (e.g. svelte-433xyz). This is far easier than a naming convention like BEM. Admittedly though, the experience of looking at styles in DevTools is slightly worse as the class names lack meaning.

The markup of a Svelte component in DevTools.

It’s not an either/or situation. You can use Svelte’s scoped styling along with a regular stylesheet. I personally write component specific styles within .svelte files, but make use of utility classes defined in a stylesheet. For global styles to be available across an entire app — CSS custom properties, reusable CSS animations, utility classes, any ‘reset’ styles, or a CSS framework like Bootstrap — I suggest putting them in a stylesheet linked in the head of your HTML document.

It lets us create global styles

As we've just seen, you can use a regular stylesheet to define global styles. Should you need to define any global styles from within a Svelte component, you can do that too by using :global. This is essentially a way to opt out of scoping when and where you need to.

For example, a modal component may want to toggle a class to style the body element:

<style>
:global(.noscroll) {
  overflow: hidden;
}
</style>

Unused styles are flagged

Another benefit of Svelte is that it will alert you about any unused styles during compilation. In other words, it searches for places where styles are defined but never used in the markup.

Conditional classes are terse and effortless

If the JavaScript variable name and the class name is the same, the syntax is incredibly terse. In this example, I’m creating modifier props for a full-width button and a ghost button.

<script>
  export let big = false;
  export let ghost = false;
</script>

<style>
  .big {
    font-size: 20px;
    display: block;
    width: 100%;
  }
  
  .ghost {
    background-color: transparent;
    border: solid currentColor 2px;
  }
</style>    
    
<button class:big class:ghost>
  <slot/>
</button>

A class of ghost will be applied to the element when a ghost prop is used, and a class of big is applied when a big prop is used.

<script>
  import Button from './Button.svelte';
</script>

<Button big ghost>Click Me</Button>

Svelte doesn’t require class names and prop names to be identical.

<script>
  export let primary = false;
  export let secondary = false;
</script>

<button
  class:c-btn--primary={primary}
  class:c-btn--secondary={secondary}
  class="c-btn">
  <slot></slot>
</button>

The above button component will always have a c-btn class but will include modifier classes only when the relevant prop is passed in, like this:

<Button primary>Click Me</Button>

That will generate this markup:

<button class="c-btn c-btn--primary">Click Me</button>

Any number of arbitrary classes can be passed to a component with a single prop:

<script>
let class_name = '';
export { class_name as class };
</script>

<button class="c-btn {class_name}">
  <slot />
</button>

Then, classes can be used much the same way you would with HTML markup:

<Button class="mt40">Click Me</Button>

From BEM to Svelte

Let's see how much easier Svelte makes writing styles compared to a standard CSS naming convention. Here's a simple component coded up using BEM.

.c-card {
  border-radius: 3px;
  border: solid 2px;
}

.c-card__title {
  text-transform: uppercase;
}

.c-card__text {
  color: gray;
}

.c-card--featured {
  border-color: gold;
}

Using BEM, classes get long and ugly. In Svelte, things are a lot simpler.

<style>
div {
  border-radius: 3px;
  border: solid 2px;
}

h2 {
  text-transform: uppercase;
}

p {
  color: gray;
}

.featured {
  border-color: gold;
}
</style>

<div class:featured>
  <h2>{title}</h2>
  <p>
    <slot />
  </p>
</div>

It plays well with preprocessors

CSS preprocessors feels a lot less necessary when working with Svelte, but they can work perfectly alongside one another by making use of a package called Svelte Preprocess. Support is available for Less, Stylus and PostCSS, but here we'll look at Sass. The first thing we need to do is to install some dependencies:

npm install -D svelte-preprocess node-sass

Then we need to import autoPreprocess in rollup.config.js at the top of the file.

import autoPreprocess from 'svelte-preprocess';

Next, let’s find the plugins array and add preprocess: autoPreprocess() to Svelte:

export default {
  plugins: [
    svelte({
      preprocess: autoPreprocess(),
      ...other stuff

Then all we need to do is specify that we’re using Sass when we’re working in a component file, using type="text/scss" or lang="scss" to the style tag.

<style type="text/scss">
  $pink: rgb(200, 0, 220);
  p {
    color: black;
    span {
      color: $pink;
    }
  }
</style>

Dynamic values without a runtime

We’ve seen that Svelte comes with most of the benefits of CSS-in-JS out-of-the-box — but without external dependencies! However, there’s one thing that third-party libraries can do that Svelte simply can’t: use JavaScript variables in CSS.

The following code is not valid and will not work:

<script>
  export let cols = 4;
</script>

<style>
  ul {
    display: grid;
    width: 100%;
    grid-column-gap: 16px;
    grid-row-gap: 16px;
    grid-template-columns: repeat({cols}, 1fr);
  }
</style>

<ul>
  <slot />
</ul>

We can, however, achieve similar functionality by using CSS variables.

<script>
  export let cols = 4;
</script>

<style>
  ul {
    display: grid;
    width: 100%;
    grid-column-gap: 16px;
    grid-row-gap: 16px;
    grid-template-columns: repeat(var(--columns), 1fr);
  }
</style>

<ul style="--columns:{cols}">
  <slot />
</ul>

I’ve written CSS in all kinds of different ways over the years: Sass, Shadow DOM, CSS-in-JS, BEM, atomic CSS and PostCSS. Svelte offers the most intuitive, approachable and user-friendly styling API. If you want to read more about this topic then check out the aptly titled The Zen of Just Writing CSS by Rich Harris.

The post What I Like About Writing Styles with Svelte appeared first on CSS-Tricks.

The Differing Perspectives on CSS-in-JS

Some people outright hate the idea of CSS-in-JS. Just that name is offensive. Hard no. Styling doesn't belong in JavaScript, it belongs in CSS, a thing that already exists and that browsers are optimized to use. Separation of concerns. Anything else is a laughable misstep, a sign of not learning from the mistakes of the past (like the <font> tag and such.)

Some people outright love the idea of CSS-in-JS. The co-location of templates and functionality, à la most JavaScript frameworks, has proven successful to them, so wrapping in styles seems like a natural fit. Vue's single file components are an archetype here.

(Here's a video on CSS-in-JS I did with Dustin Schau if you need a primer.)

Brent Jackson thinks you should definitely learn it, but also offers some pragmatic points on what it does and doesn't do:

What does CSS-in-JS do?

  • Let you author CSS in JavaScript syntax
  • Colocate styles with components
  • Take advantage of native JS syntax features
  • Take advantage of anything from the JS ecosystem

What does CSS-in-JS not rid you of needing to understand:

  • How styles are applied to the DOM
  • How inheritance works
  • How CSS properties work
  • How CSS layout works

CSS-in-JS doesn't absolve you of learning CSS. Mostly, anyway.

I've heard lots of pushback on CSS-in-JS in the vein of "you people are reaching for CSS-in-JS because you don't understand CSS" or "You're doing this because you're afraid of the cascade. I already know how to scope CSS." I find that stuff to be more poking across the isles that isn't particularly helpful.

Laura buns has a wonderfully two-sided article titled "The web without the web" part of which is about React and CSS-in-JS:

I hate React because CSS-in-JS approaches by default encourage you to write completely self-contained one off components rather than trying to build a website UI up as a whole.

You don't need to use CSS-in-JS just because you use React, but it is popular, and that's a very interesting and fair criticism. If you scope everything, aren't you putting yourself at higher risk of inconsistency?

I've been, so far, a fan of CSS modules in that it's about as light as you get when it comes to CSS-in-JS, only handling scoping and co-location and that's about it. I use it with Sass so we have access to mixins and variables that help consistency, but I could see how it could allow a slide into dangerous too-many-one-offs territory.

And yet, they would be disposable one-offs. Code-splittable one-offs. Everything exists in balance.

Laura goes on to say she likes CSS-in-JS approaches for some of the power and flexibility it offers:

I like the way CSS-in-JS gives you enough abstraction to still use tricks like blind owl selectors while also giving you the full power of using JS to do stuff like container queries.

Martin Hofmann created a site comparing BEM vs. Emotion that looks at one little "alert" component. I like how it's an emotionless (literally, not referencing the library) comparison that looks at syntax. BEM has some advantages, notably, requiring no tooling and is easily sharable to any web project. But the Emotion approach is cleaner in many ways and looks easier to handle.

I'd like to see more emotionless comparisons of the technologies. Choice A does these three things well but is painful here and here, while choice B does these other things well and solves a few other pain points.

We recently linked up Scott Jehl's post that looks into loading CSS asynchronously. Scott's opening line:

One of the most impactful things we can do to improve page performance and resilience is to load CSS in a way that does not delay page rendering.

It's notable that an all-in CSS-in-JS approach gets this ability naturally, as styling is bundled into JavaScript. It's bundled at a cost. A cost to performance. But we get some of that cost back if we're eliminating other render-blocking things. That's interesting stuff worthy of more data, at least.

I might get my butt kicked for this, but I'm a bit less interested in conversations that try to blame CSS-in-JS for raising the barrier to entry in the industry. That's a massive thing to consider, but we aren't talking about shutting down CSS here and forcing everyone to some other language. We're talking about niche libraries for certain types of projects at certain scales.

I think it's worth taking a look at CSS-in-JS ideas if...

  • You're working on a component-heavy JavaScript project anyway.
  • You're already co-locating templates, functionality, and data queries.
  • You think you can leverage it without harming user experience, like gaining speed back elsewhere.
  • Your team is comfortable with the required tech, as in, you aren't pushing away talent.

Max Stoiber is an unabashed fan. His post on the topic talks about the confidence this style brings him and the time he saves in finding what he needs, both things I've found to be true. But he also thinks the approach is specifically for JavaScript framework apps.

If you are using a JavaScript framework to build a web app with components, CSS-in-JS is probably a good fit. Especially if you are part of a team where everybody understands basic JavaScript.

I'd love to hear y'all thoughts on this in the comments. Have you worked out your feelings on all this? Madly in love? Seething with dislike? I'd be most interested in hearing success stories or failure stories on real projects.

The post The Differing Perspectives on CSS-in-JS appeared first on CSS-Tricks.

The Many Ways to Include CSS in JavaScript Applications

Welcome to an incredibly controversial topic in the land of front-end development! I’m sure that a majority of you reading this have encountered your fair share of #hotdrama surrounding how CSS should be handled within a JavaScript application.

I want to preface this post with a disclaimer: There is no hard and fast rule that establishes one method of handling CSS in a React, or Vue, or Angular application as superior. Every project is different, and every method has its merits! That may seem ambiguous, but what I do know is that the development community we exist in is full of people who are continuously seeking new information, and looking to push the web forward in meaningful ways.

Preconceived notions about this topic aside, let’s take a look at the fascinating world of CSS architecture!

Let us count the ways

Simply Googling "How to add CSS to [insert framework here]" yields a flurry of strongly held beliefs and opinions about how styles should be applied to a project. To try to help cut through some of the noise, let’s examine a few of the more commonly utilized methods at a high level, along with their purpose.

Option 1: A dang ol’ stylesheet

We’ll start off with what is a familiar approach: a dang ol’ stylesheet. We absolutely are able to <link> to an external stylesheet within our application and call it a day.

<link rel="stylesheet" href="styles.css">

We can write normal CSS that we’re used to and move on with our lives. Nothing wrong with that at all, but as an application gets larger, and more complex, it becomes harder and harder to maintain a single stylesheet. Parsing thousands of lines of CSS that are responsible for styling your entire application becomes a pain for any developer working on the project. The cascade is also a beautiful thing, but it also becomes tough to manage in the sense that some styles you — or other devs on the project — write will introduce regressions into other parts of the application. We’ve experienced these issues before, and things like Sass (and PostCSS more recently) have been introduced to help us handle these issues

We could continue down this path and utilize the awesome power of PostCSS to write very modular CSS partials that are strung together via @import rules. This requires a little bit of work within a webpack config to be properly set up, but something you can handle for sure!

No matter what compiler you decide to use (or not use) at the end of the day, you’ll be serving one CSS file that houses all of the styles for your application via a <link> tag in the header. Depending on the complexity of that application, this file has the potential to get pretty bloated, hard to load asynchronously, and render-blocking for the rest of your application. (Sure, render-blocking isn’t always a bad thing, but for all intents and purposes, we’ll generalize a bit here and avoid render blocking scripts and styles wherever we can.)

That’s not to say that this method doesn’t have its merits. For a small application, or an application built by a team with less of a focus on the front end, a single stylesheet may be a good call. It provides clear separation between business logic and application styles, and because it’s not generated by our application, is fully within our control to ensure exactly what we write is exactly what is output. Additionally, a single CSS file is fairly easy for the browser to cache, so that returning users don’t have to re-download the entire file on their next visit.

But let’s say that we’re looking for a bit more of a robust CSS architecture that allows us to leverage the power of tooling. Something to help us manage an application that requires a bit more of a nuanced approach. Enter CSS Modules.

Option 2: CSS Modules

One fairly large problem within a single stylesheet is the risk of regression. Writing CSS that utilizes a fairly non-specific selector could end up altering another component in a completely different area of your application. This is where an approach called "scoped styles" comes in handy.

Scoped styles allow us to programmatically generate class names specific to a component. Thus scoping those styles to that specific component, ensuring that their class names will be unique. This leads to auto-generated class names like header__2lexd. The bit at the end is a hashed selector that is unique, so even if you had another component named header, you could apply a header class to it, and our scoped styles would generate a new hashed suffix like so: header__15qy_.

CSS Modules offer ways, depending on implementation, to control the generated class name, but I’ll leave that up to the CSS Modules documentation to cover that.

Once all is said and done, we are still generating a single CSS file that is delivered to the browser via a <link> tag in the header. This comes with the same potential drawbacks (render blocking, file size bloat, etc.) and some of the benefits (caching, mostly) that we covered above. But this method, because of its purpose of scoping styles, comes with another caveat: the removal of the global scope — at least initially.

Imagine you want to employ the use of a .screen-reader-text global class that can be applied to any component within your application. If using CSS Modules, you’d have to reach for the :global pseudo selector that explicitly defines the CSS within it as something that is allowed to be globally accessed by other components in the app. As long as you import the stylesheet that includes your :global declaration block into your component’s stylesheet, you’ll have the use of that global selector. Not a huge drawback, but something that takes getting used to.

Here’s an example of the :global pseudo selector in action:

// typography.css
:global {
  .aligncenter {
    text-align: center;
  }
  .alignright {
    text-align: right;
  }
  .alignleft {
    text-align: left;
  }
}

You may run the risk of dropping a whole bunch of global selectors for typography, forms, and just general elements that most sites have into one single :global selector. Luckily, through the magic of things like PostCSS Nested or Sass, you can import partials directly into the selector to make things a bit more clean:

// main.scss
:global {
  @import "typography";
  @import "forms";
}

This way, you can write your partials without the :global selector, and just import them directly into your main stylesheet.

Another bit that takes some getting used to is how class names are referenced within DOM nodes. I’ll let the individual docs for Vue, React, and Angular speak for themselves there. I’ll also leave you with a little example of what those class references look like utilized within a React component:

// ./css/Button.css

.btn {
  background-color: blanchedalmond;
  font-size: 1.4rem;
  padding: 1rem 2rem;
  text-transform: uppercase;
  transition: background-color ease 300ms, border-color ease 300ms;

  &:hover {
    background-color: #000;
    color: #fff;
  }
}

// ./Button.js

import styles from "./css/Button.css";

const Button = () => (
  <button className={styles.btn}>
    Click me!
  </button>
);

export default Button;

The CSS Modules method, again, has some great use cases. For applications looking to take advantage of scoped styles while maintaining the performance benefits of a static, but compiled stylesheet, then CSS Modules may be the right fit for you!

It’s worth noting here as well that CSS Modules can be combined with your favorite flavor of CSS preprocessing. Sass, Less, PostCSS, etc. are all able to be integrated into the build process utilizing CSS Modules.

But let’s say your application could benefit from being included within your JavaScript. Perhaps gaining access to the various states of your components, and reacting based off of the changing state, would be beneficial as well. Let’s say you want to easily incorporate critical CSS into your application as well! Enter CSS-in-JS.

Option 3: CSS-in-JS

CSS-in-JS is a fairly broad topic. There are several packages that work to make writing CSS-in-JS as painless as possible. Frameworks like JSS, Emotion, and Styled Components are just a few of the many packages that comprise this topic.

As a broad strokes explanation for most of these frameworks, CSS-in-JS is largely operates the same way. You write CSS associated with your individual component and your build process compiles the application. When this happens, most CSS-in-JS frameworks will output the associated CSS of only the components that are rendered on the page at any given time. CSS-in-JS frameworks do this by outputting that CSS within a <style> tag in the <head> of your application. This gives you a critical CSS loading strategy out of the box! Additionally, much like CSS Modules, the styles are scoped, and the class names are hashed.

As you navigate around your application, the components that are unmounted will have their styles removed from the <head> and your incoming components that are mounted will have their styles appended in their place. This provides opportunity for performance benefits on your application. It removes an HTTP request, it is not render blocking, and it ensures that your users are only downloading what they need to view the page at any given time.

Another interesting opportunity CSS-in-JS provides is the ability to reference various component states and functions in order to render different CSS. This could be as simple as replicating a class toggle based on some state change, or be as complex as something like theming.

Because CSS-in-JS is a fairly #hotdrama topic, I realized that there are a lot of different ways that folks are trying to go about this. Now, I share the feelings of many other people who hold CSS in high regard, especially when it comes to leveraging JavaScript to write CSS. My initial reactions to this approach were fairly negative. I did not like the idea of cross-contaminating the two. But I wanted to keep an open mind. Let’s look at some of the features that we as front-end-focused developers would need in order to even consider this approach.

  • If we’re writing CSS-in-JS we have to write real CSS. Several packages offer ways to write template-literal CSS, but require you to camel-case your properties — i.e. padding-left becomes paddingLeft. That’s not something I’m personally willing to sacrifice.
  • Some CSS-in-JS solutions require you to write your styles inline on the element you’re attempting to style. The syntax for that, especially within complex components, starts to get very hectic, and again is not something I’m willing to sacrifice.
  • The use of CSS-in-JS has to provide me with powerful tools that are otherwise super difficult to accomplish with CSS Modules or a dang ol’ stylesheet.
  • We have to be able to leverage forward-thinking CSS like nesting and variables. We also have to be able to incorporate things like Autoprefixer, and other add-ons to enhance the developer experience.

It’s a lot to ask of a framework, but for those of us who have spent most of our lives studying and implementing solutions around a language that we love, we have to make sure that we’re able to continue writing that same language as best we can.

Here’s a quick peek at what a React component using Styled Components could look like:

// ./Button.js
import styled from 'styled-components';

const StyledButton= styled.button`
  background-color: blanchedalmond;
  font-size: 1.4rem;
  padding: 1rem 2rem;
  text-transform: uppercase;
  transition: background-color ease 300ms, border-color ease 300ms;

  &:hover {
    background-color: #000;
    color: #fff;
  }
`;

const Button = () => (
  <StyledButton>
    Click Me!
  </StyledButton>
);

export default Button;

We also need to address the potential downsides of a CSS-in-JS solution — and definitely not as an attempt to spark more drama. With a method like this, it’s incredibly easy for us to fall into a trap that leads us to a bloated JavaScript file with potentially hundreds of lines of CSS — and that all comes before the developer will even see any of the component’s methods or its HTML structure. We can, however, look at this as an opportunity to very closely examine how and why we are building components the way they are. In thinking a bit more deeply about this, we can potentially use it to our advantage and write leaner code, with more reusable components.

Additionally, this method absolutely blurs the line between business logic and application styles. However, with a well-documented and well-thought architecture, other developers on the project can be eased into this idea without feeling overwhelmed.

TL;DR

There are several ways to handle the beast that is CSS architecture on any project and do so while using any framework. The fact that we, as developers, have so many choices is both super exciting, and incredibly overwhelming. However, the overarching theme that I think continues to get lost in super short social media conversations that we end up having, is that each solution has its own merits, and its own inefficiencies. It’s all about how we carefully and thoughtfully implement a system that makes our future selves, and/or other developers who may touch the code, thank us for taking the time to establish that structure.

The post The Many Ways to Include CSS in JavaScript Applications appeared first on CSS-Tricks.

Responsible JavaScript

We just made a note about this article by Jeremy Wagner in our newsletter but it’s so good that I think it’s worth linking to again as Jeremy writes about how our obsession with JavaScript can lead to accessibility and performance issues:

What we tend to forget is that the environment websites and web apps occupy is one and the same. Both are subject to the same environmental pressures that the large gradient of networks and devices impose. Those constraints don’t suddenly vanish when we decide to call what we build “apps”, nor do our users’ phones gain magical new powers when we do so.

It’s our responsibility to evaluate who uses what we make, and accept that the conditions under which they access the internet can be different than what we’ve assumed. We need to know the purpose we’re trying to serve, and only then can we build something that admirably serves that purpose—even if it isn’t exciting to build.

That last part is especially interesting because it's in the same vein as what Chris wrote just the other day about embracing simplicity in our work. But it’s also interesting because I've overheard a lot of engineers at work asking how we might use CSS-in-JS tools like Emotion or Styled Components, both of which are totally neat in and of themselves. But my worry is about jumping to a cool tool before we understand the problem that we want to tackle first.

Jumping on a bandwagon because a Twitter celebrity told us to do so, or because Netflix uses tool X, Y or Z is not a proper response to complex problems. And this connects to what Jeremy says here:

This is not to say that inaccessible patterns occur only when frameworks are used, but rather that a sole preference for JavaScript will eventually surface gaps in our understanding of HTML and CSS. These knowledge gaps will often result in mistakes we may not even be aware of. Frameworks can be useful tools that increase our productivity, but continuing education in core web technologies is essential to creating usable experiences, no matter what tools we choose to use.

Just – yikes. This makes me very excited for the upcoming articles in the series.

Direct Link to ArticlePermalink

The post Responsible JavaScript appeared first on CSS-Tricks.

Web Standards Meet User-Land: Using CSS-in-JS to Style Custom Elements

The popularity of CSS-in-JS has mostly come from the React community, and indeed many CSS-in-JS libraries are React-specific. However, Emotion, the most popular library in terms of npm downloads, is framework agnostic.

Using the shadow DOM is common when creating custom elements, but there’s no requirement to do so. Not all use cases require that level of encapsulation. While it’s also possible to style custom elements with CSS in a regular stylesheet, we’re going to look at using Emotion.

We start with an install:

npm i emotion

Emotion offers the css function:

import {css} from 'emotion';

css is a tagged template literal. It accepts standard CSS syntax but adds support for Sass-style nesting.

const buttonStyles = css`
  color: white;
  font-size: 16px;
  background-color: blue;

  &:hover {
    background-color: purple;
  }
`

Once some styles have been defined, they need to be applied. Working with custom elements can be somewhat cumbersome. Libraries — like Stencil and LitElement — compile to web components, but offer a friendlier API than what we’d get right out of the box.

So, we’re going to define styles with Emotion and take advantage of both Stencil and LitElement to make working with web components a little easier.

Applying styles for Stencil

Stencil makes use of the bleeding-edge JavaScript decorators feature. An @Component decorator is used to provide metadata about the component. By default, Stencil won’t use shadow DOM, but I like to be explicit by setting shadow: false inside the @Component decorator:

@Component({
  tag: 'fancy-button',
  shadow: false
})

Stencil uses JSX, so the styles are applied with a curly bracket ({}) syntax:

export class Button {
  render() {
    return <div><button class={buttonStyles}><slot/></button></div>
  }
}

Here’s how a simple example component would look in Stencil:

import { css, injectGlobal } from 'emotion';
import {Component} from '@stencil/core';

const buttonStyles = css`
  color: white;
  font-size: 16px;
  background-color: blue;
  &:hover {
    background-color: purple;
  }
`
@Component({
  tag: 'fancy-button',
  shadow: false
})
export class Button {
  render() {
    return <div><button class={buttonStyles}><slot/></button></div>
  }
}

Applying styles for LitElement

LitElement, on the other hand, use shadow DOM by default. When creating a custom element with LitElement, the LitElement class is extended. LitElement has a createRenderRoot() method, which creates and opens a shadow DOM:

createRenderRoot()  {
  return this.attachShadow({mode: 'open'});
}

Don’t want to make use of shadow DOM? That requires re-implementing this method inside the component class:

class Button extends LitElement {
  createRenderRoot() {
      return this;
  }
}

Inside the render function, we can reference the styles we defined using a template literal:

render() {
  return html`<button class=${buttonStyles}>hello world!</button>`
}

It’s worth noting that when using LitElement, we can only use a slot element when also using shadow DOM (Stencil does not have this problem).

Put together, we end up with:

import {LitElement, html} from 'lit-element';
import {css, injectGlobal} from 'emotion';
const buttonStyles = css`
  color: white;
  font-size: 16px;
  background-color: blue;
  &:hover {
    background-color: purple;
  }
`

class Button extends LitElement {
  createRenderRoot() {
    return this;
  }
  render() {
    return html`<button class=${buttonStyles}>hello world!</button>`
  }
}

customElements.define('fancy-button', Button);

Understanding Emotion

We don’t have to stress over naming our button — a random class name will be generated by Emotion.

We could make use of CSS nesting and attach a class only to a parent element. Alternatively, we can define styles as separate tagged template literals:

const styles = {
  heading: css`
    font-size: 24px;
  `,
  para: css`
    color: pink;
  `
} 

And then apply them separately to different HTML elements (this example uses JSX):

render() {
  return <div>
    <h2 class={styles.heading}>lorem ipsum</h2>
    <p class={styles.para}>lorem ipsum</p>
  </div>
}

Styling the container

So far, we’ve styled the inner contents of the custom element. To style the container itself, we need another import from Emotion.

import {css, injectGlobal} from 'emotion';

injectGlobal injects styles into the “global scope” (like writing regular CSS in a traditional stylesheet — rather than generating a random class name). Custom elements are display: inline by default (a somewhat odd decision from spec authors). In almost all cases, I change this default with a style applied to all instances of the component. Below are the buttonStyles which is how we can change that up, making use of injectGlobal:

injectGlobal`
fancy-button {
  display: block;
}
`

Why not just use shadow DOM?

If a component could end up in any codebase, then shadow DOM may well be a good option. It’s ideal for third party widgets — any CSS that's applied to the page simply won't break the the component, thanks to the isolated nature of shadow DOM. That’s why it’s used by Twitter embeds, to take one example. However, the vast majority of us make components for for a particular site or app and nowhere else. In that situation, shadow DOM can arguably add complexity with limited benefit.

The post Web Standards Meet User-Land: Using CSS-in-JS to Style Custom Elements appeared first on CSS-Tricks.

Why I Write CSS in JavaScript

I'm never going to tell you that writing your CSS in CSS (or some syntactic preprocessor) is a bad idea. I think you can be perfectly productive and performant without any tooling at all. But, I also think writing CSS in JavaScript is a good idea for component-based styles in codebases that build all their components with JavaScript anyway.

In this article, Max Stoiber focuses on why to write CSS in JavaScript rather than how to do it. There is one reason that resonates strongly with me, and that's confidence. This is what styling confidence means to me.

  • Anyone on a team can work on styling a component without any fear of unintended side effects.
  • There is no pressure to come up with perfect names that will work now and forever.
  • There is no worry about the styles needing to be extremely re-usable or that they play friendly with anything else. These styles will only be used when needed and not any other time.
  • There is an obvious standard to where styles are placed in the codebase.
  • CSS in JavaScript isn't the only answer to those things, but as Max connects to other posts on the topic, it can lead to situations where good choices happen naturally.

    There are some reasons why I don't buy into it. Performance is one of them, like choosing CSS-in-JS is some automatic performance win. Part of the problem (and I'm guilty of doing it right here) is that CSS-in-JS is a wide scope of solutions. I've generally found there is no big performance wins in CSS-in-JS (more likely the opposite), but that's irrelevant if we're talking about something like CSS modules with the styles extracted and linked up like any other CSS.

    Direct Link to ArticlePermalink

    The post Why I Write CSS in JavaScript appeared first on CSS-Tricks.

    Regarding CSS’s Global Scope

    html {
      font-family: Roboto, sans-serif;
    }

    With the except of some form elements, you've just set a font on every bit of text on a site! Nice! That's probably what you were trying to do, because of the probably hundreds of elements all over your site, setting that font-family every time would be tedious and error-prone.

    CSS is global by nature. On purpose!

    I like how David Khourshid put it:

    You ever stop and think about why CSS has a global scope? Maybe we want to use consistent typography, colors, sizing, spacing, layout, transitions, etc. and have our websites & apps feel like one cohesive unit?

    Love the cascade, the cascade is your friend.

    And yet. The global nature of CSS is perhaps the most-pointed-at anti-feature of CSS. Some people really don't like it. We all know it's very easy to write a single CSS rule that has implications all over a site, breaking things you really didn't want to break.

    There are whole new categories of testing to assist with these problems.

    Scoped styles aren't the only reason there is such interest and adoption in the landscape of tools that is CSS-in-JS, but it's a big one. There are loads of sites that don't directly author any CSS at all — even preprocessed styles — and go for a JavaScript library instead where styles are authored quite literally in JavaScript. There is a playground demonstrating the syntax of the various options. Here's how styled-components works:

    import React from 'react';
    import styled from 'styled-components';
    
    const Container = styled.main`
      display: flex;
      flex-direction: column;
      min-height: 100%;
      width: 100%;
      background-color: #f6f9fc;
    `;
    
    export default function Login() {
      return (
        <Container>
          ... Some stuff ....
        </Container>
      );
    }

    There are literally dozens of options, each doing things a bit differently while offering slightly different syntaxes and features. Vue even offers scoped CSS directly in .vue files:

    <style scoped>
    .example {
      color: red;
    }
    </style>
    
    <template>
      <div class="example">hi</div>
    </template>

    Unfortunately, <style scoped> never quite made it as a native web platform feature. There is shadow DOM, though, where a style block can be injected in a template and those styles will be isolated from the rest of the page:

    let myElement = document.querySelector('.my-element');
    
    let shadow = myElement.attachShadow({
      mode: 'closed'
    });
    shadow.innerHTML = `
      <style>
        p { 
          color: red;
        }
      </style>
    
      <p>Element with Shadow DOM</p>
    `;

    No styles will leak into or out of that shadow DOM boundary. That's pretty cool for people seeking this kind of isolation, but it could be tricky. You'd likely have to architect the CSS to have certain global styles that can be imported with the shadow DOM'd web component so it can achieve some styling cohesion in your site. Personally, I wish it was possible to make the shadow DOM one-way permeable: styles can leak in, but styles defined inside can't leak out.

    CSS-in-JS stuff is only one way to scope styles. There are actually two sides to the spectrum. You could call CSS-in-JS total isolation, whereas you could author CSS directly with total abstraction:

    Total abstraction might come from a project, like Tachyons, that gives you a fixed set of class names to use for styling (Tailwind is like a configurable version of that), or a programmatic tool (like Atomizer) that turns specially named HTML class attributes into a stylesheet with exactly what it needs.

    Even adhering 100% to BEM across your entire site could be considered total CSS isolation, solving the problems that the global scope may bring.

    Personally, I'd like to see us move to this kind of future:

    When we write styles, we will always make a choice. Is this a global style? Am I, on purpose, leaking this style across the entire site? Or, am I writing CSS that is specific to this component? CSS will be split in half between these two. Component-specific styles will be scoped and bundled with the component and used as needed.

    Best of both worlds, that.

    Anyway, it's tricky.

    Maybe this will be the hottest CSS topic in 2019.

    The post Regarding CSS’s Global Scope appeared first on CSS-Tricks.

    The Fragmented, But Evolving State of CSS-in-JS

    TLDR: The CSS-in-JS community has converged on a consistent API.

    Not so long ago, a Facebook engineer compiled a list of the available CSS-in-JS methodologies. It wasn’t short:

    aphrodite, babel-plugin-css-in-js, babel-plugin-pre-style, bloody-react-styled, classy, csjs, css-constructor, css-light, css-loader, css-ns, cssobj, cssx-loader, cxs, electron-css, emotion, es-css-modules, freestyler, glamor, glamorous, hiccup-css, hyperstyles, i-css, j2c, jsxstyle, linaria, nano-css, pre-style, radium, react-css-builder, react-css-components, react-css-modules, react-cssom, react-fela, react-free-style, react-inline-css, react-inline-style, react-inline, react-jss, react-look, react-native-web, react-statics-styles, react-styl, react-style, react-styleable, react-stylematic, react-theme, react-vstyle, reactcss, restyles, scope-styles, smart-css, stile-react-media-queries, stilr, stylable, style-it, styled-components, styled-jsx, styletron-react, styling, superstyle, typestyle, uranium

    Such a fragmented ecosystem was far from appealing. Which one should you pick, (if any)?

    Contributing to Javascript fatigue — you need at most one. Also feel free to not learn any.

    GitHub stars are one useful metric:

    However, GitHub stars say nothing about a project’s trajectory — perhaps they were accumulated long ago and the repo has since fallen out of favor or is no longer maintained. Glamor has plenty of open issues, and hasn’t seen a commit in over a year. Its author advises:

    ...it mostly works, I'm not going to do any major changes… if you need something more modern, I'd recommend emotion, it mostly matches glamor's api, and is actively maintained.

    The similarly named Glamorous was recently deprecated with its author also recommending users switch to Emotion:

    At the time, Emotion had some features that Styled Components didn’t. Since then, Styled Components has made some big announcements.

    Styled Components sells itself as the CSS-in-JS library for people that *like* CSS. Styled Components gained popularity by utilizing tagged template literals — allowing developers to *just write CSS* in the same syntax they already know, but inside JavaScript files. While this has proven popular, some developers prefer to [write styles as JavaScript objects. Emotion offered flexibility — developers could choose how to write their styles. Styled Components eventually followed suit.

    Emotion also offers a css prop, which Styled Components didn’t have, until…

    The rival CSS-in-JS libraries have stolen from each other until landing upon the same feature set and the same syntax — Emotion and Styled Components have an almost identical API. What once felt like a total mess of competing methodologies and libraries now feels somewhat stable. Even if CSS-in-JS hasn’t standardized on a dependency, it now has standardized a way of doing things — they’re just implemented differently:

    Styled Components is by far the most popular CSS-in-JS library, but Emotion has seen a rapid increase in usage.

    Both are used by some major companies. Styled Components are utilized by plenty of large companies, including Bloomberg, Atlassian, Reddit, Target, BBC News, The Huffington Post, Coinbase, Patreon, Vogue, Ticketmaster, Lego, InVision and Autodesk just to name a few.

    Emotion boasts fewer recognizable names, but has been recently adopted by the New York Times.


    While these libraries certainly do seem to be most popular amongst React users, they can be used with other frameworks. While they seem to have converged on the same features at last, it’s difficult to say whether this is the end point of CSS-in-JS, or whether we’ll see a continued evolution from here.

    The post The Fragmented, But Evolving State of CSS-in-JS appeared first on CSS-Tricks.