Creating a ZIP file is one of the best ways to compress large amounts of data into an easily shareable format. The format was originally developed in 1989 for use by PKWARE Inc.’s PKZIP utility and was quickly picked and implemented by other software utilities, such as Microsoft and Apple. Since then, the term “zipping a file” has become synonymous with file compression.
There are many advantages to zipping files, with the most obvious reason being to optimize file storage. If you have an abundance of infrequently used files, they can be archived into a single, easily located ZIP file. Other advantages of zipping files include the ability to securely email a previously unmanageable amount of information to a client, as well as the easy transference to USB flash drives.
Compressing is awesome, making something smaller than the original size sounds like magic but it is possible. We know it from our WinRar, 7Zip or other tools. Even Elasticsearch has a property to compress the data which will be tossed between the nodes and the clients, this could be very useful to reduce network latency when handling huge responses from Elasticsearch. Within this article we will cover the following topics:
Enable HTTP/TCP compression
Handling compressed responses
Elasticsearch 7.7 and below
Elasticsearch 7.8 and upwards
Future Elasticsearch release 7.9 and 8.0
Most of us are already familiar with Elasticsearch from Elastic when working with application logs, but a-lot of people never heard about. Below is a short summary:
This article is about my experience using Brotli at production scale. Despite being really expensive and a truly unfeasible method for on-the-fly compression at higher compression levels, Brotli is actually very economical and saves cost on many fronts, especially when compared with gzip or lower compression levels of Brotli.
Brotli’s Beginning…
In 2015, Google published a blog post announcing Brotli and released its source code on GitHub. The pair of developers who created Brotli also created Google's Zopfli compression two years earlier. But where Zopfli leveraged existing compression techniques, Brotli was written from the ground-up and squarely focused on text compression to benefit static web assets, like HTML, CSS, JavaScript, and even web fonts.
At that time, I was working as a freelance website performance consultant. I was really excited for the 20-26% improvement Brotli promised over Zopfli. Zopfli in itself is a dense implementation of the deflate compressor compared with zlib's standard implementation, so the claim of up to 26% was quite impressive. And what's zlib? It's essentially the same as gzip.
The HBO sitcom Silicon Valley hilariously followed Pied Piper, a team of developers with startup dreams to create a compression algorithm so powerful that high-quality streaming and file storage concerns would become a thing of the past.
In the show, Google is portrayed by the fictional company Hooli, which is after Pied Piper’s intellectual property. The funny thing is that, while being far from a startup, Google does indeed have a powerful compression engine in real life called Brotli.
This article is about my experience using Brotli at production scale. Despite being really expensive and a truly unfeasible method for on-the-fly compression, Brotli is actually very economical and saves cost on many fronts, especially when compared with gzip or lower compression levels of Brotli (which we’ll get into).
Brotli’s beginning…
In 2015, Google published a blog post announcing Brotli and released its source code on GitHub. The pair of developers who created Brotli also created Google’s Zopfli compression two years earlier. But where Zopfli leveraged existing compression techniques, Brotli was written from the ground-up and squarely focused on text compression to benefit static web assets, like HTML, CSS, JavaScript and even web fonts.
At that time, I was working as a freelance website performance consultant. I was really excited for the 20-26% improvement Brotli promised over Zopfli. Zopfli in itself is a dense implementation of the deflate compressor compared with zlib’s standard implementation, so the claim of up to 26% was quite impressive. And what’s zlib? It’s essentially the same as gzip.
So what we’re looking at is the next generation of Zopfli, which is an offshoot of zlib, which is essentially gzip.
A story of disappointment
It took a few months for major CDN players to support Brotli, but meanwhile it was seeing widespread adoption in tools, services, browsers and servers. However, the 26% dense compression that Brotli promised was never reflected in production. Some CDNs set a lower compression level internally while others supported Brotli at origin so that they only support it if it was enabled manually at the origin.
Server support for Brotli was pretty good, but to achieve high compression levels, it required rolling your own pre-compression code or using a server module to do it for you — which is not always an option, especially in the case of shared hosting services.
This was really disappointing for me. I wanted to compress every last possible byte for my clients’ websites in a drive to make them faster, but using pre-compression and allowing clients to update files on demand simultaneously was not always easy.
Taking matters into my own hands
I started building my own performance optimization service for my clients.
I had several tricks that could significantly speed up websites. The service categorized all the optimizations in three groups consisting of several “Content,” “Delivery,” and “Cache” optimizations. I had Brotli in mind for the content optimization part of the service for compressible resources.
Like other compression formats, Brotli comes in different levels of power. Brotli’s max level is exactly like the max volume of the guitar amps in This is Spinal Tap: it goes to 11.
Brotli:11, or Brotli compression level 11, can offer significant reduction in the size of compressible files, but has a substantial trade-off: it is painfully slow and not feasible for on demand compression the same way gzip is capable of doing it. It costs significantly more in terms of CPU time.
In my benchmarks, Brotli:11 takes several hundred milliseconds to compress a single minified jQuery file. So, the only way to offer Brotli:11 to my clients was to use it for pre-compression, leaving me to figure out a way to cache files at the server level. Luckily we already had that in place. The only problem was the fear that Brotli could kill all our processing resources.
Maybe that’s why Pied Piper had to continue rigging its servers for more power.
I put my fears aside and built Brotli:11 as a configurable server option. This way, clients could decide whether enabling it was worth the computing cost.
It’s slow, but gradually pays off
Among several other optimizations, the service for my clients also offers geographic content delivery; in other words, it has a built-in CDN.
Of the several tricks I tried when taking matters into my own hands, one was to combine public CDN (or open-source CDN) and private CDN on a single host so that websites can enjoy the benefits of shared browser cache of public resources without incurring separate DNS lookup and connection cost for that public host. I wanted to avoid this extra connection cost because it has significant impact for mobile users. Also, combining more and more resources on a single host can help get the most of HTTP/2 features, like multiplexing.
I enabled the public CDN and turned on Brotli:11 pre-compression for all compressible resources, including CSS, JavaScript, SVG, and TTF, among other types of files. The overhead of compression did indeed increase on first request of each resource — but after that, everything seemed to run smoothly. Brotli has over 90% browser support and pretty much all the requests hitting my service now use Brotli.
I was happy. Clients were happy. But I didn’t have numbers. I started analyzing the impact of enabling this high density compression on public resources. For this, I recorded file transfer sizes of several popular libraries — including jQuery, Bootstrap, React, and other frameworks — that used common compression methods implemented by other CDNs and found that Brotli:11 compression was saving around 21% compared to other compression formats.
It’s important to note that some of the other public CDNs I compared were already using Brotli, but at lower compression levels. So, the 21% extra compression was really satisfying for me. This number is based on a very small subset of libraries but is not incorrect by a big margin as I was seeing this much gain on all of the websites that I tested.
Here is a graphical representation of the savings.
You can see the raw data below..Note that the savings for CSS is much more prominent than what JavaScript gets.
Library
Original
Avg. of Common Compression (A)
Brotli:11 (B)
(A) / (B) – 1
Ant Design
1,938.99 KB
438.24 KB
362.82 KB
20.79%
Bootstrap
152.11 KB
24.20 KB
17.30 KB
39.88%
Bulma
186.13 KB
23.40 KB
19.30 KB
21.24%
D3.js
236.82 KB
74.51 KB
65.75 KB
13.32%
Font Awesome
1,104.04 KB
422.56 KB
331.12 KB
27.62%
jQuery
86.08 KB
30.31 KB
27.65 KB
9.62%
React
105.47 KB
33.33 KB
30.28 KB
10.07%
Semantic UI
613.78 KB
91.93 KB
78.25 KB
17.48%
three.js
562.75 KB
134.01 KB
114.44 KB
17.10%
Vue.js
91.48 KB
33.17 KB
30.58 KB
8.47%
The results are great, which is what I expected. But what about the overall impact of using Brotli:11 at scale? Turns out that using Brotli:11 for all public resources reduces cost all around:
The smaller file sizes are expected to result in lower TLS overhead. That said, it is not easily measurable, nor is it significant for my service because modern CPUs are very fast at encryption. Still, I believe there is some tiny and repeated saving on account of encryption for every request as smaller files encrypt faster.
It reduces the bandwidth cost. The 21% savings I got across the board is the case in point. And, remember, savings are not a one-time thing. Each request counts as cost, so the 21% savings is repeated time and again, creating a snowball savings for the cost of bandwidth.
We only cache hot files in memory at edge servers. Due to the widespread browser support for Brotli, these hot files are mostly encoded by Brotli and their small size lets us fit more of them in available memory.
Visitors, especially those on mobile devices, enjoy reduced data transfer. This results in less battery use and savings on data charges. That’s a huge win that gets passed on to the users of our clients!
This is all so good. The cost we save per request is not significant, but considering we have a near zero cache miss rate for public resources, we can easily amortize the initial high cost of compression in next several hundred requests. After that, we’re looking at a lifetime benefit of reduced overhead.
It doesn’t end there
With the mix of public and private CDNs that we introduced as part of our performance optimization service, we wanted to make sure that clients could set lower compression levels for resources that frequently change over time (like custom CSS and JavaScript) on the private CDN and automatically switch to the public CDN for open-source resources that change less often and have pre-configured Brotli:11. This way, our clients can still get a high compression ratio on resources that change less often while still enjoying good compression ratios with instant purge and updates for compressible resources.
This all is done smoothly and seamlessly using our integration tools. The added benefit of this approach for clients is that the bandwidth on the public CDN is totally free with unprecedented performance levels.
Try it yourself!
Testing on a common website, using aggressive compression can easily shave around 50 KB off the page load. If you want to play with the free public CDN and enjoy smaller CSS and JavaScript, you are welcome to use our PageCDN service. Here are some of the most used libraries for your use:
Our PHP library automatic switches between private and public CDN if you need it to. The same feature is implemented seamlessly in our WordPress plugin that automatically loads public resources over Public CDN. Both of these tools allow full access to the free public CDN. Libraries for JavaScript, Python. and Ruby are not yet available. If you contribute any such library to our Public CDN, I will be happy to list it in our docs.
Additionally, you can use our search tool to immediately find a corresponding resource on the public CDN by supplying a URL of a resource on your website. If none of these tools work for you, then you can check the relevant library page and pick the URLs you want.
Looking toward the future
We started by hosting only the most popular libraries in order to prevent malware spread. However, things are changing rapidly and we add new libraries as our users suggest them to us. You are welcome to suggest your favorite ones, too. If you still want to link to a public or private Github repo that is not yet available on our public CDN, you can use our private CDN to connect to a repo and import all new releases as they appear on GitHub and then apply your own aggressive optimizations before delivery.
What do you think?
Everything we covered here is solely based on my personal experience working with Brotli compression at CDN scale. It just happens to be an introduction to my public CDN as well. We are still a small service and our client websites are only in the hundreds. Still, at this scale the aggressive compression seems to pay off.
I achieved high quality results for my clients and now you can use this free service for your websites as well. And, if you like it, please leave feedback at my email and recommend it to others.
If you draw your own SVG files or if you download them from the internet, tools like this SVG-Editor or SVGOMG are your friends. Compressing the files with those tools takes only few seconds and reduces your file size a lot. But if you need to use your SVG inline to animate or interact with the code, there’s still a lot you can do about code legibility.
Reusing content with SVG’s <use> is not always an option, but when it is, you won’t regret taking a few extra minutes to put it in practice.
In this article, I’ll show an example where I was able to take a lot of advantage of this element — not only for keeping the file size down, but also a clearer markup that became more legible and easy to maintain.
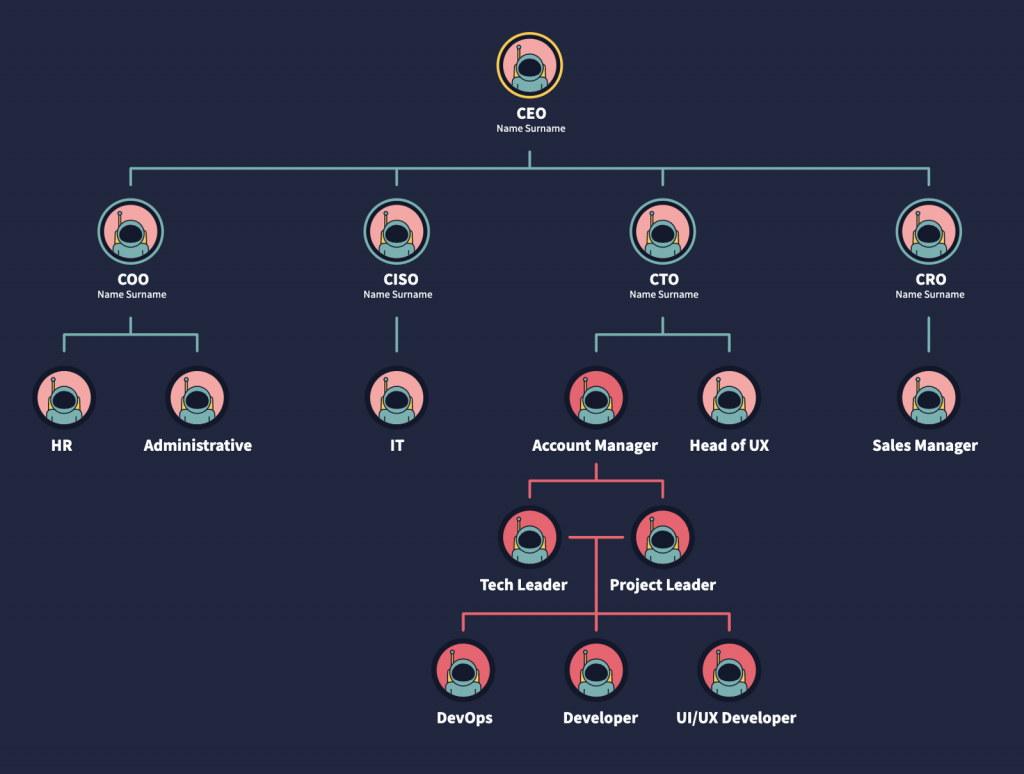
This is the first design that I needed to work with. It was originally created in Illustrator:
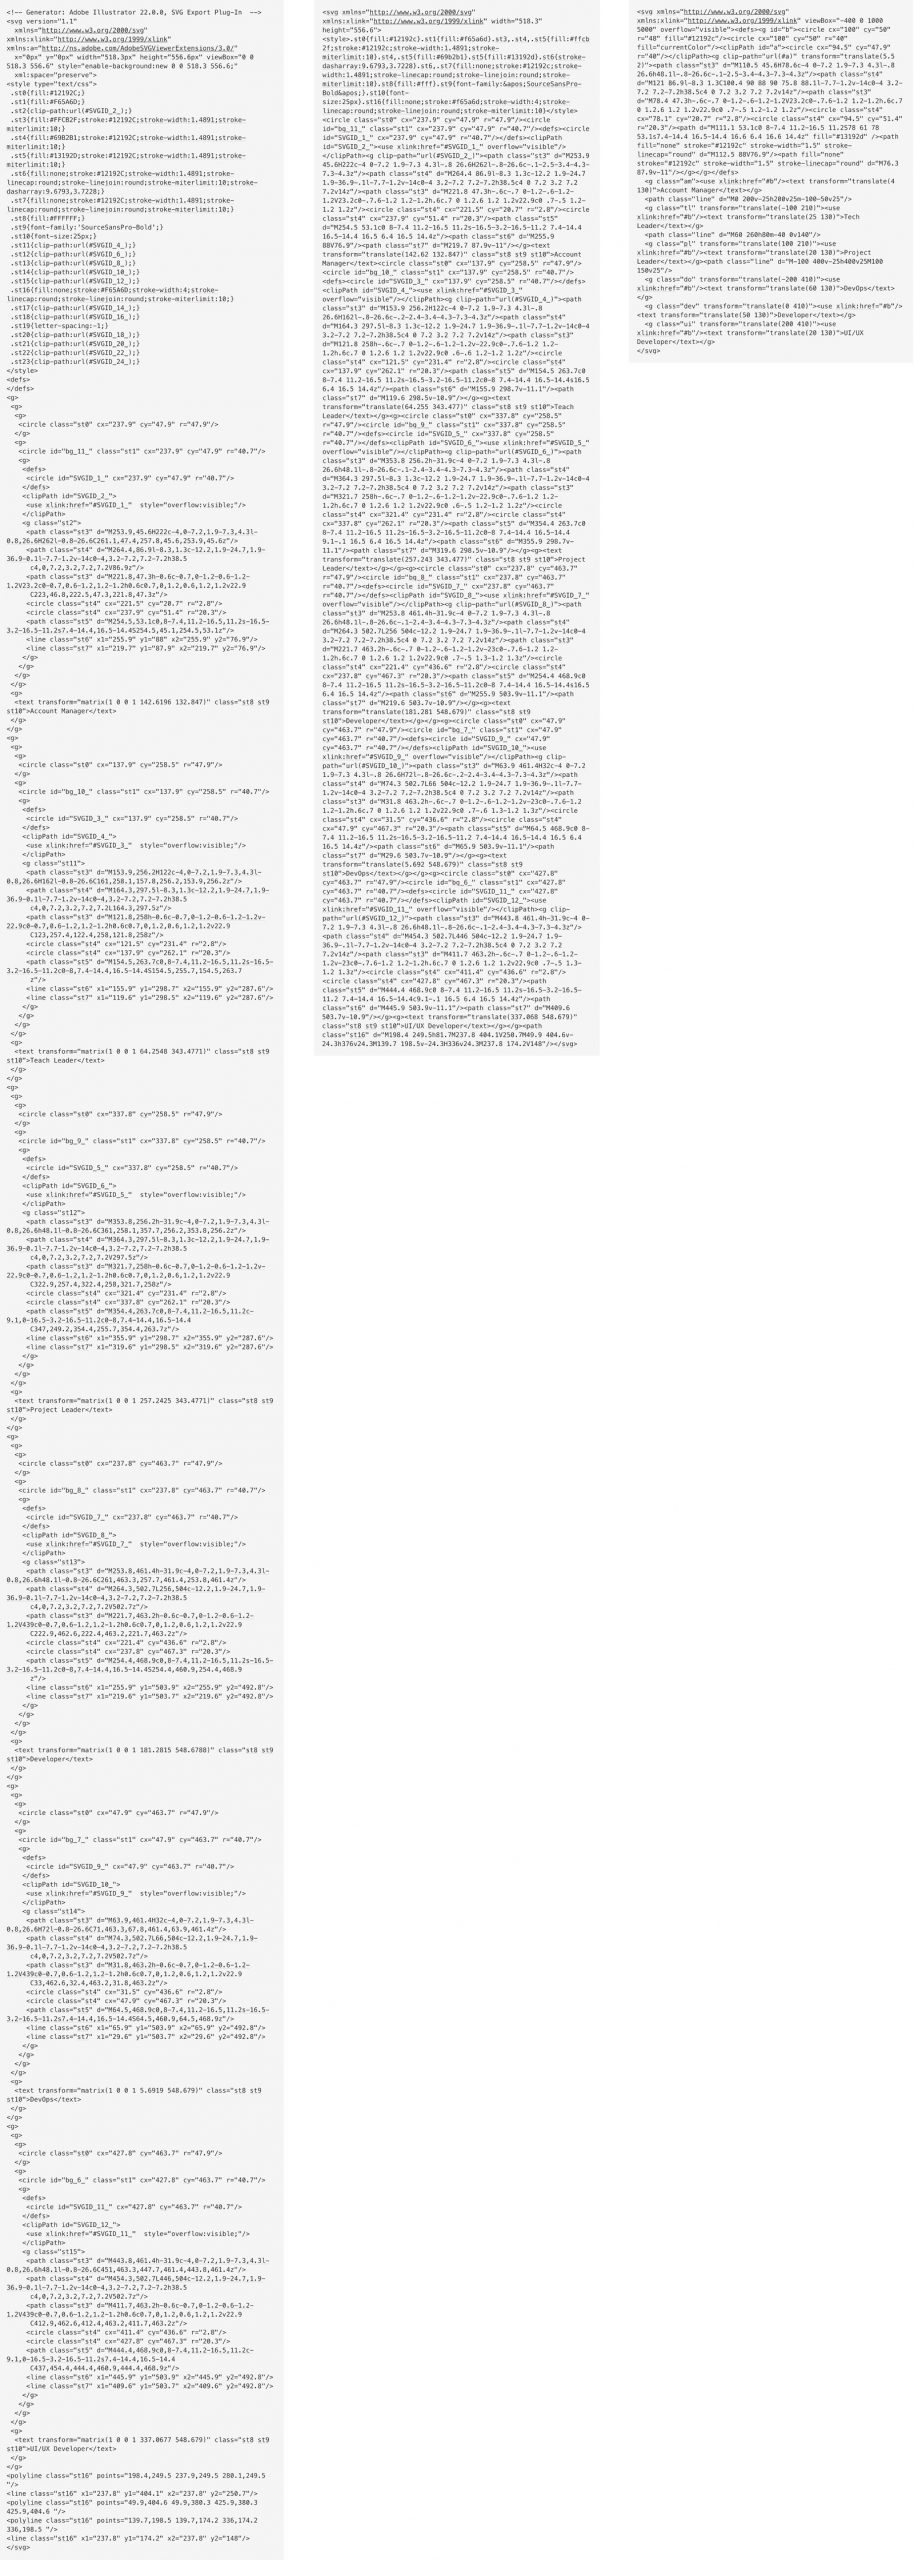
Take a look at the following code, this is the original file exported directly from the software, weighs 2.05kb:
It’s not a heavy file at all. However, open it and you’ll find there are lots of empty tags, deprecated namespaces, unnecessary white space, commas and extra information applied by the software. This makes the code hard to work with, annoying to scan and creates a big scroll for those hundreds of lines in your document.
You’ll also notice that the file is indeed using <use> and <defs> elements, but not in the best way it could. And that’s not the software’s fault! Each astronaut illustration in the original file has a clipping mask: an invisible circle that acts like a window through which we can see our character. Without it, the suit of the astronaut would be flooding outside the circle. There are a few ways to avoid this in Illustrator, like cropping those extra parts with a pathfinder option. That way we would gain a few bytes and avoid using an extra circle only for clipping information of the graphic that we won’t show. The compression of the file starts in the software. Still, there are a lot of things we’ll be able to improve on the code in case we don’t want to edit the original file.
Compressing the SVG with SVGOMG and keeping the default options won’t take any effort and you’ll get a file that weighs 1.46kb. That is a reduction of 30% compared to the original size and the graphic will look exactly the same.
Reusing content
This will require going through the SVG and making some adjustments. I know this option takes more time regarding the previous example, but it’s not as hard as it seems.
We have one repeated element, which is the astronaut inside the circle. That’s the one we’ll compress on SVGOMG. The result will look something like this:
Move the <style> content to the CSS file (assuming you can use your SVG inline and that you have a stylesheet linked in your document).
Rename the IDs with something that makes sense to you.
Round those complicated numbers, like stroke-width="1.489" to stroke-width="1.5". This is something that could happen if you resize your vectors in Illustrator with the option of scaling borders checked.
Remove the stroke-miterlimit="10" as we don’t need it since our stroke-linejoin is round.
This code will be our astronaut template. We need to wrap everything in a group, add an ID to that group and place it inside a <defs> tag. Notice that we already have a <defs> element with a circle inside it. We can remove that one as it will be part of a bigger <defs> tag.
Notice that the first two circles are filled shapes with different radius and color. We can keep the smaller one and add a stroke big enough to achieve the same effect — again, something that we could avoid using a circle with border in Illustrator in the first place.
Another important thing is that our current viewBox is too small for what we want to build. Let’s make it bigger and add some negative space on the X axis so we can start cloning our astronaut from the middle.
To learn more about viewBox, check out this beautiful guide to scaling SVG by Amelia Wattenberger.
What goes inside the <defs> won’t render anywhere. To start cloning our astronaut, we need to link its ID inside a <use> element like this:
<use xlink:href="#astronaut"/>
xlink:href is deprecated since SVG2, but is better to use it for compatibility purposes. You can use href in modern browsers, but I tested it on Safari and it wasn’t working as of this writing. If you usexlink:href,make sure you include this namespace in your SVG tag: xmlns:xlink="http://www.w3.org/1999/xlink (you won’t need it if you decide to use href).
Now we can add the corresponding text to this first figure and align it with the transform attribute. We better place both elements inside a group so in the future instances we’ll be able to translate the whole group to the position we want:
The connecting lines are simple shapes that can be drawn directly with <path>. Paths looks scary but, for rect lines, there is not much to worry about. I’ll explain this code:
<path class="line" d="M-4 200v-25h200"/>
d="" is for data and that’s where we’ll place our commands. M is to move our hand to the place where we’ll start drawing (but it’s not drawing anything). -4 200 means we place our pencil four units to the left and 200 to the bottom of our viewBox (following the orientation of the SVG coordinate system). v is the command to start drawing a vertical line that will go from this place to -25 units up. h is for horizontal, so we’re drawing a line from there to 200 to the right. It feels like logo writer.
I separated the lines in three paths, but we can use just one with the M value after a series of commands to move our hand and start drawing from a new point in the coordinate system.
Take a look at the final document. Now the file weighs 779 bytes and has 12 lines of legible and scalable code:
If we declare any value in the attributes we defined in the <defs> then it won’t be possible to change it in their clones because of the nature of the <use> element. That’s why in the example above the fill of the main circle was replaced with a value of currentColor to have control of the backgrounds of all the replications. currentColor will inherit the CSS color value of the element (or any element above it). In the SVG, I’m adding a class to some replicated astronauts and adding a color value in CSS to those classes. This way, I’ll be able to change all instances of the <use> element with that class. To understand more about <use> and how to style its content, this post by Sara Soueidan has everything you need to know.
With this code ready, we’ll be able to scale the graphic to something like this much more easily:
We are using the Nginx web server for the Oracle ADF WorkBetter demo hosted on the DigitalOcean cloud server. Nginx helps to serve web application content fast and offer improved performance. One of the important tuning options — content compression; Nginx does this job well and is simple to set up.
Content compression doesn't provide direct runtime performance; a browser would run the same code, doesn't matter it was compressed or not. But it brings improved perceived performance (which is very important), and network time is way faster because of reduced content size. Oracle ADF is a server-side framework, each request would bring content from the server — the faster this content comes, it means better application performance.